
Появившаяся ошибка 0хС1900101 на этапе Second Boot при установке последних обновлений от Windows 10, свидетельствует о том, что при загрузке новой версии возникли проблемы, поэтому ПК возвращен к предустановочному состоянию. Если с первого раза не удалось обновить Виндовс, нужно повторить попытку еще раз. Желательно перед началом установки отключить от ПК внешнее оборудование, деактивировать брандмауэр и сторонний антивирус.
Что вызывает ошибку 0xC1900101 на Windows 10
На этапе установки Second Boot в момент операции Boot при попытке обновить Win 10 (через «Центр обновлений» или утилиту Media Creation Tool) на экране ПК может появиться сообщение об ошибке 0хС1900101. Подобного рода проблема возникает и при переходе от старой версии Виндовс к более новой.

Причины появления сообщения об ошибке:
- компьютерный сбой;
- активность вирусов;
- блокировка антивирусом или брандмауэром;
- повреждены установочные или системные файлы;
- не хватает свободного места на накопителе;
- устаревшие драйверы оборудования.
Важно! Гарантированно избежать сообщения об ошибке поможет только чистая установка Win 10 с флешки или диска. Правда, во время такой операции удалится предыдущая версия ОС.
Методы решения проблемы
Есть несколько простых способов, помогающих быстро снять блокировку и нормально установить обновление Win 10. Для устранения ошибки нужно использовать возможности Виндовса. Решить проблему удастся, не заходя в систему.
Дело в том, что в БИОС есть функция «Secure boot» («Безопасная загрузка»), блокирующая запуск ПО, а иногда и обновлений. Ее можно отключить, то есть зайти в момент запуска ПК в BIOS, отыскать раздел «BOOT» и выставить значение «Disabled».

Повторный запуск установки
При внезапной остановке приема обновлений можно перезагрузить ПК и повторно установить пакет нового ПО от «Майкрософт». Предварительно рекомендуется проверить остаток свободного места на накопителе С. Желательно убрать с главного диска созданные системой папки с неустановленным обновлением. Ведь ошибка может возникнуть из-за дефицита свободного места на накопителе С (должно остаться минимум 15 Гб).
Как повторно запустить установку обновлений Win 10, прерванную из-за ошибки:
- зайти в ОС;
- интернет-связь не включать;
- вызвать инструмент «Выполнить»;
- ввести слово: «cleanmgr»;

- появится окошко «Очистка диска С»;
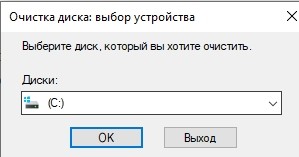
- очистить накопитель от системного мусора;
- удалить временные файлы;
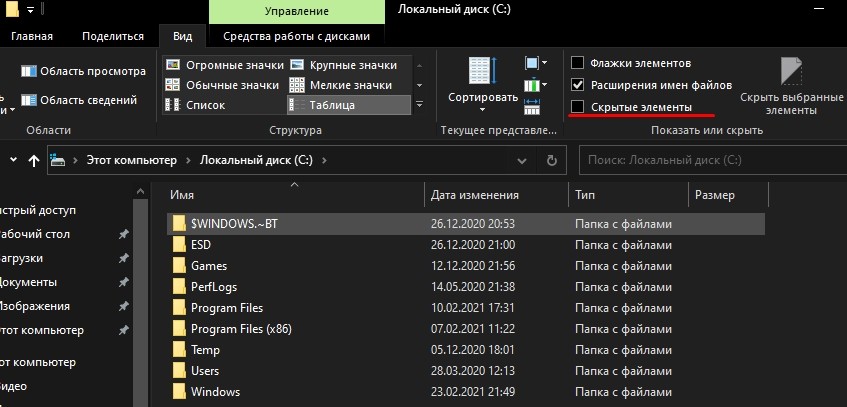
- перейти в «Локальный диск С» (через консоль «Этот компьютер»);
- включить показ скрытых папок в проводнике Виндовса;
- через поисковик найти и удалить две недавно созданные папки с не до конца установленными на ПК обновлениями: $WINDOWS.~BT и $Windows.~WS;
- перезагрузить ПК;
- подключить интернет;
- повторно запустить установку обновлений из Центра.
Как обойти блокировку, используя образ ISO с Win 10 для обновления:
- скачать с сайта «Майкрософт» приложение Media Creation Tool;

- запустить скачанную утилиту на своем ПК;
- откроется «Программа установки Виндовс 10»;
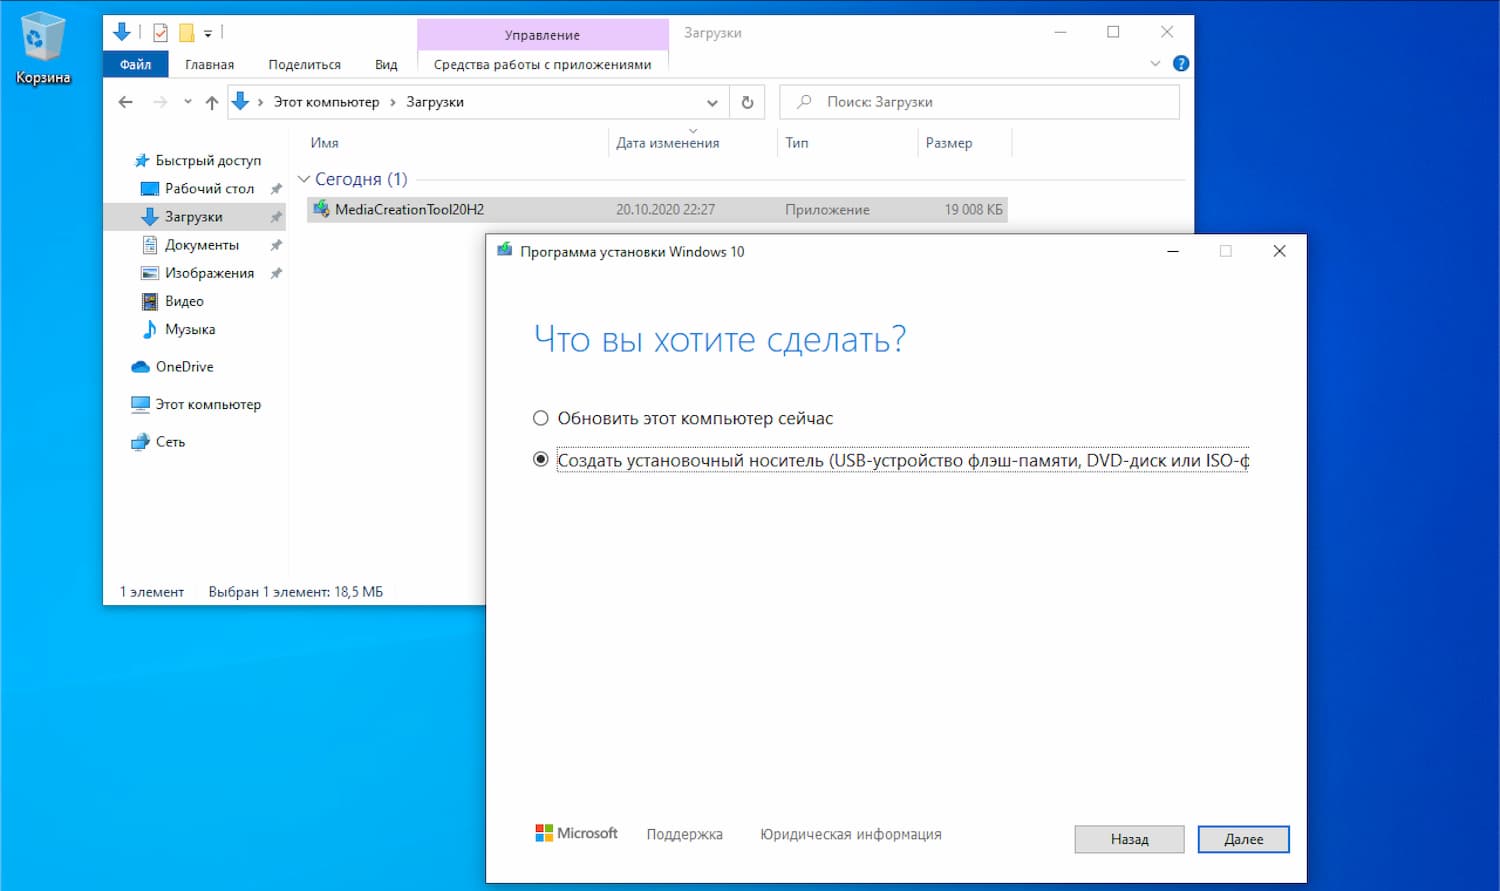
- активировать «Создать установочный носитель»;
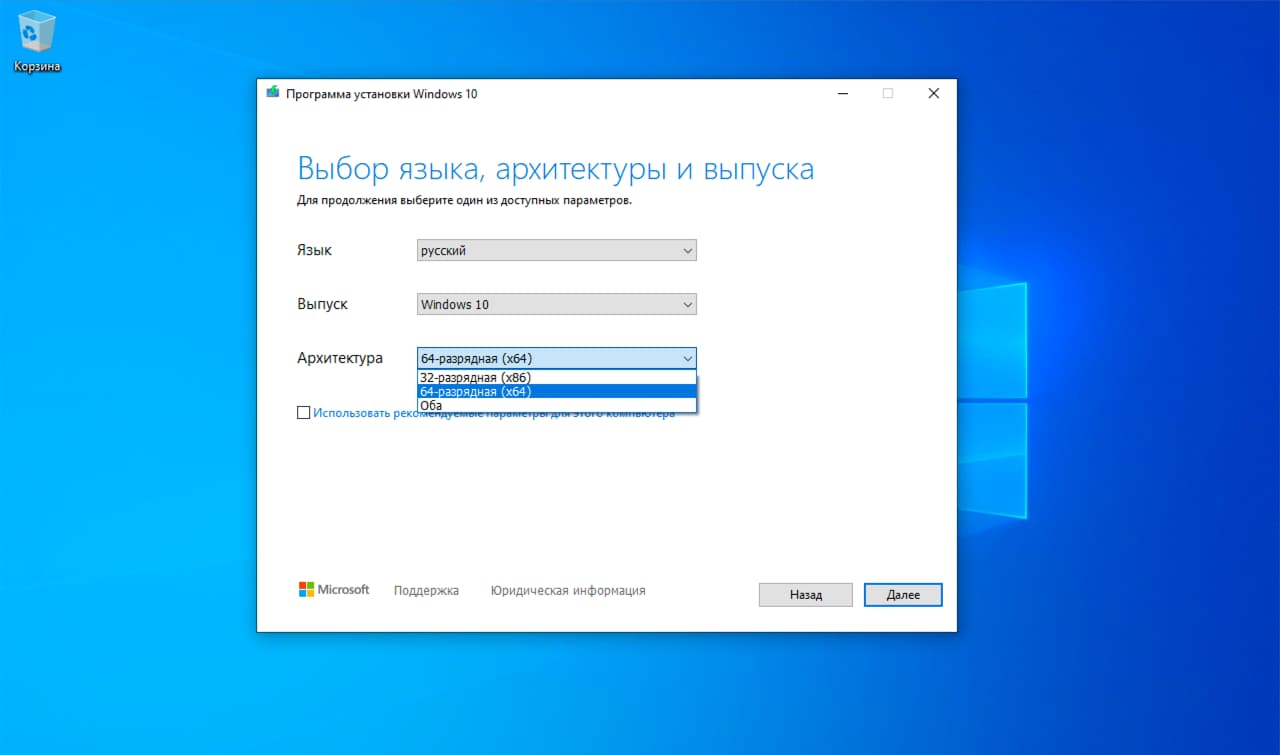
- выбрать версию и указать нужные параметры;
- выбрать носитель (ISO-файл);

- указать место сохранения образа (диск С);
- дождаться загрузки ISO-образа на ПК;
- отключить интернет;
- запустить файл «setup.exe» с ISO-образа и обновить систему.

Отключение брандмауэра Windows
Способ деактивации брандмауэра для разблокирования установки обновлений:
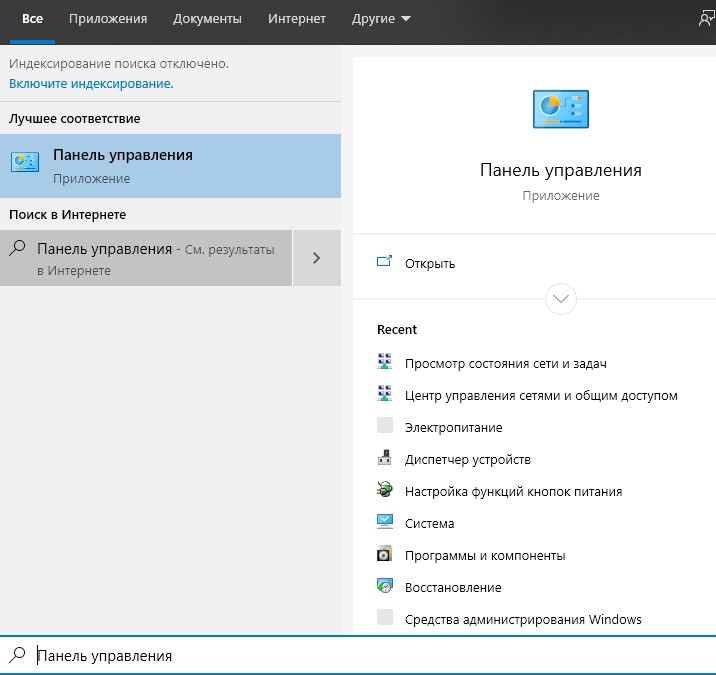
- в поисковике написать: «брандмауэр Защитника Windows»;
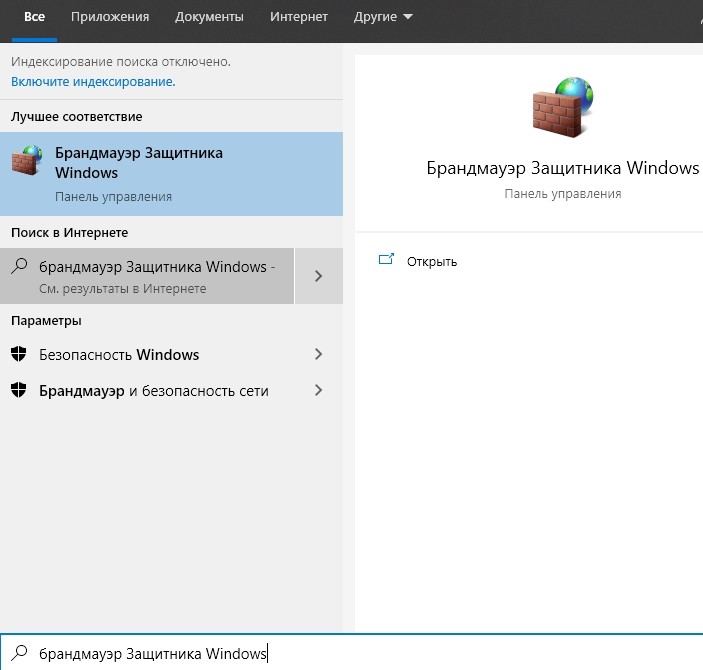
- откроется «Панель управления»;

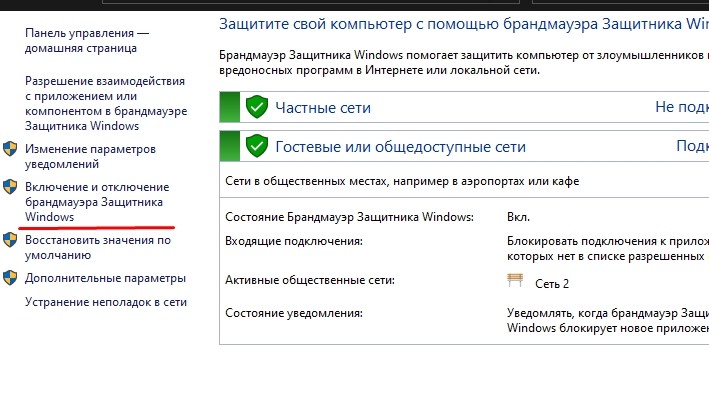
- выбрать: «Включение и отключение брандмауэра Защитника Windows»;
- активировать: «Отключить брандмауэр Защитника Windows (для всех типов сети)»;
- повторно обновить ОС.

Отключение внешних устройств
Как правильно установить на ПК обновления из Центра:
- подключить интернет;
- отключить от компьютера все внешние накопители и устройства (флешку, принтер);
- обновить ОС.
Важно! В момент запуска обновлений желательно отключить от ноутбука все внешние устройства. Иногда небольшой компьютерный сбой может привести к проблеме с установкой Win Updates.

Отключение антивируса
Как отключить стороннее антивирусное приложение, блокирующее обновление Win 10:
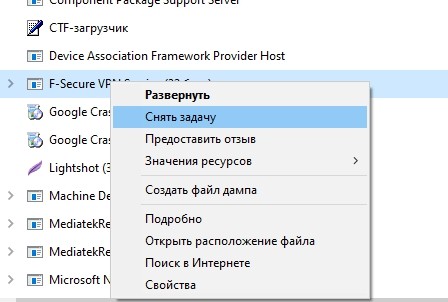
- вызвать «Диспетчер задач»;
- перейти во вкладку «Процессы»;
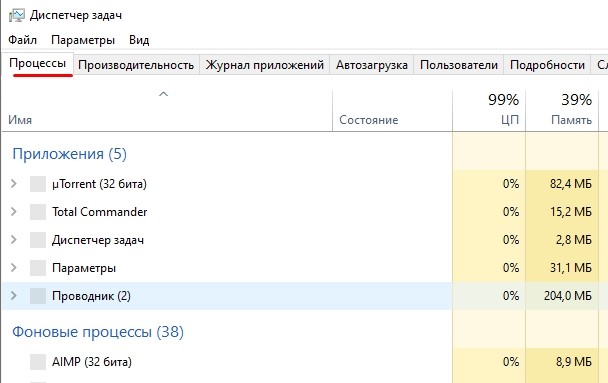
- найти сторонний антивирус;
- завершить (отключить) его процесс.
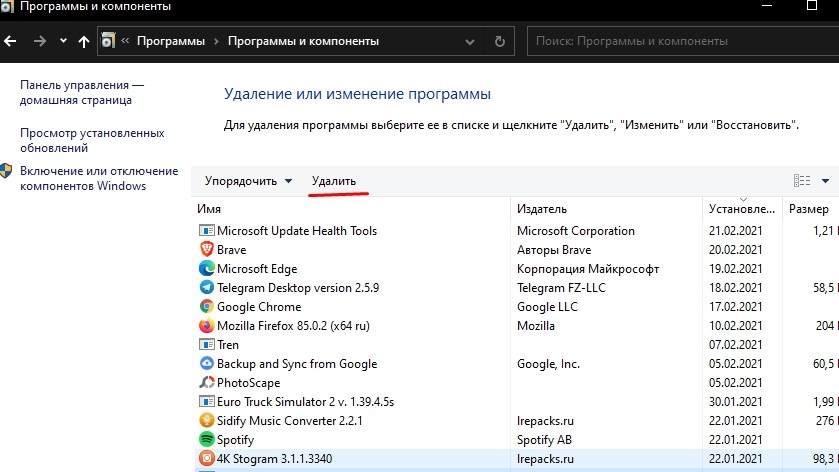
Как удалить сторонний антивирус, препятствующий установке Win 10:
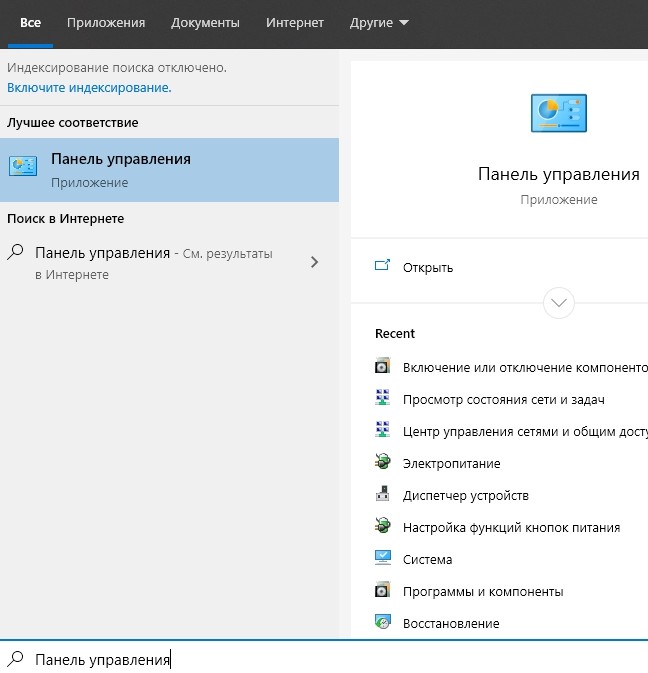
- активировать «Панель управления»;
- перейти в «Программы»;

- найти «Удаление или изменение программы»;
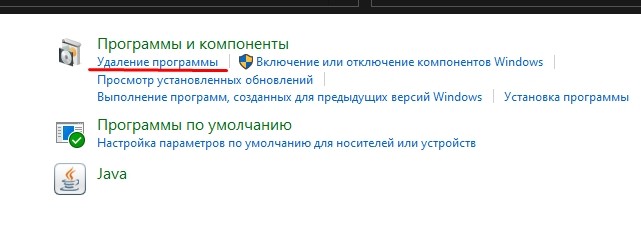
- выбрать антивирус и удалить его.
Как на время (до следующей перезагрузки ПК) деактивировать встроенный Защитник Виндовс:
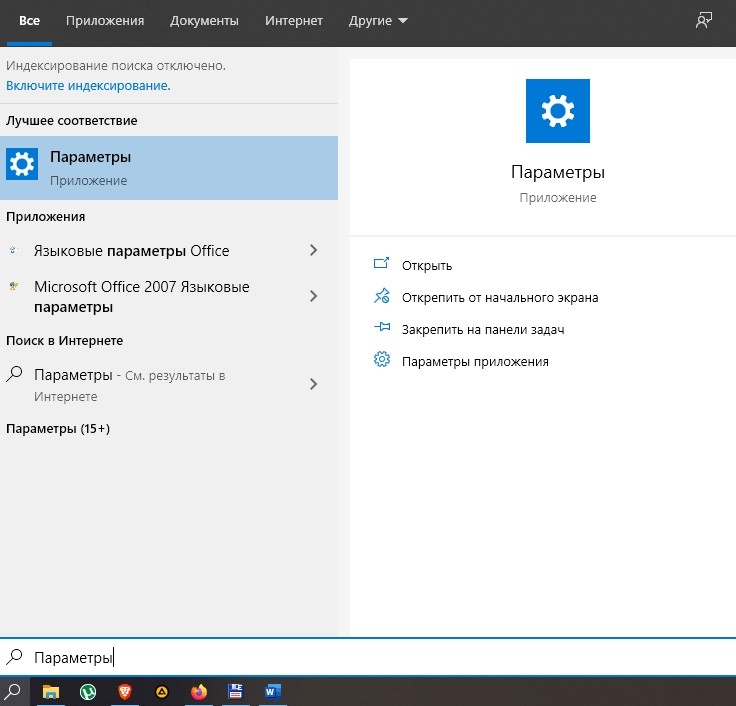
- активировать «Параметры»;
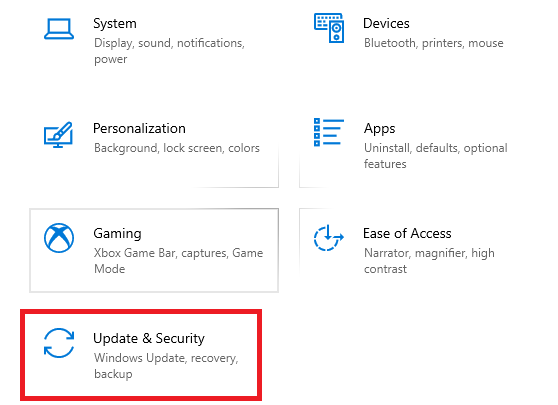
- выбрать «Обновление и безопасность»;

- перейти в «Безопасность Виндовс»;
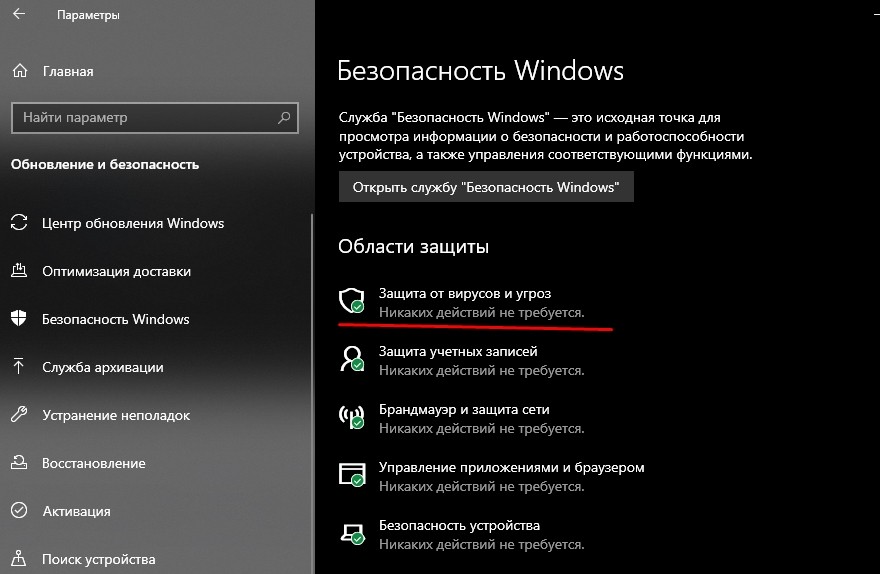
- найти «Защита от вирусов и угроз»;
- выключить «Защиту в режиме реального времени».

Важно! Кроме антивируса, блокировать установку виндовских обновлений могут различные утилиты по очистке диска и реестра, работающие в автоматическом режиме. Такие приложения тоже рекомендуется на время деактивировать или удалить с ПК.
Обновление драйверов
Простой способ исправления ошибки (с помощью обновления устаревших драйверов):
- активировать инструмент «Выполнить»;
- ввести слово: «devmgmt.msc»;
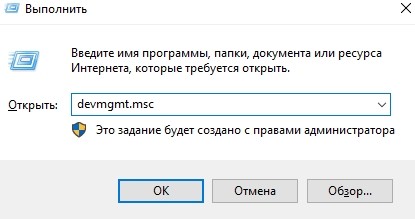
- откроется «Диспетчер устройств»;
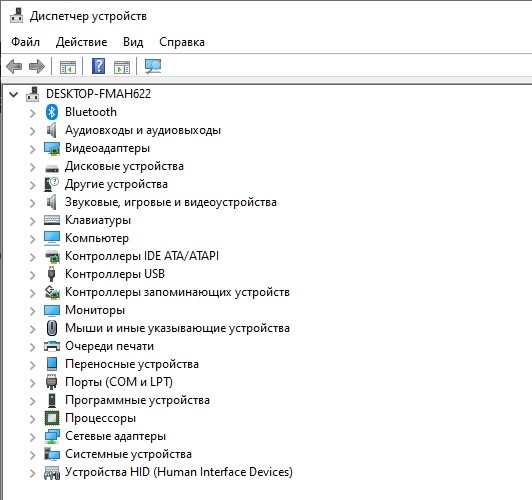
- найти «Видеоадаптеры»;
- развернуть ветку;
- выбрать видеокарту и обновить ее драйвер (через автоматический поиск).

Освобождение дополнительного места на диске
Если на главном диске не хватает свободного места, нужно:
- активировать «Панель управления»;
- выбрать «Программы»;

- перейти в «Удаление и изменение программ»;
- удалить лишние приложения.
Как очистить диск от мусора:
- в поисковике написать: «Очистка диска»;
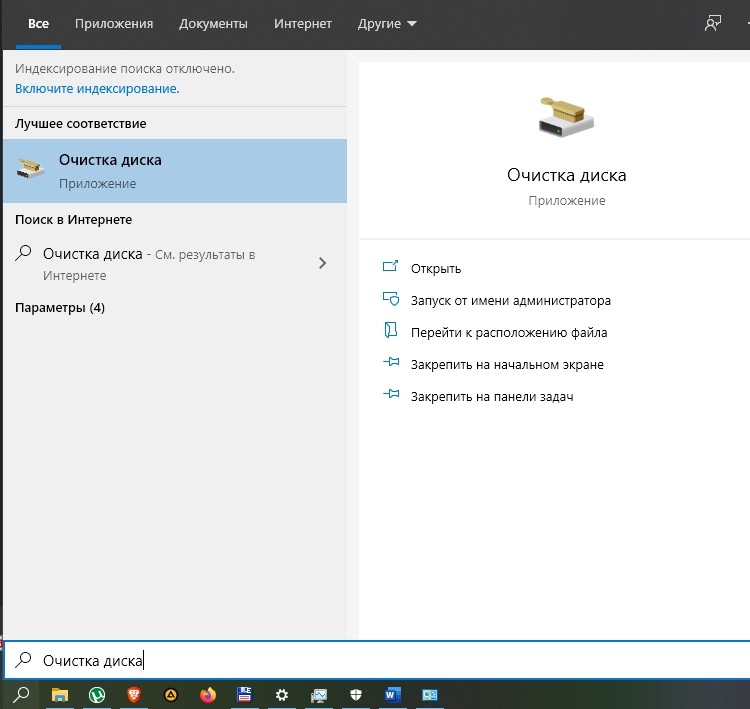
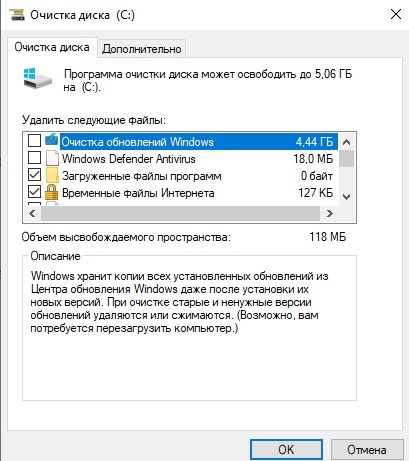
- откроется окошко, позволяющее выполнить очистку диска С;
- выбрать временные файлы на удаление;
- очистить диск от мусора.
Важно! На главном диске С должно быть минимум 15 Гб свободного места. Хранящиеся на Рабочем столе фотографии и документы лучше переместить на другой накопитель. Ненужные файлы можно отправить в корзину.
Чистая загрузка ОС
Как обойти блокировку, избежав автозагрузки сторонних приложений, и установить проблемное обновление на ПК:
- зайти в систему с правами Администратора;
- активировать инструмент «Выполнить»;
- ввести слово: «msconfig»;
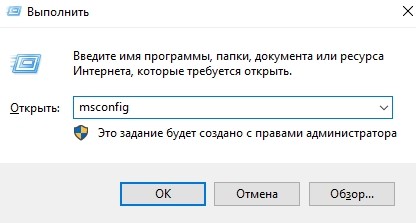
- появится окошко «Конфигурация системы»;
- открыть вкладку «Общие»;

- выбрать «Вариант запуска»: «Выборочный запуск»;
- отметить галочкой «Загружать системные службы»;
- снять галочку «Загружать элементы автозагрузки»;

- открыть вкладку «Службы»;
- отметить галочкой «Не отображать службы Майкрософт»;
- «Отключить все» сторонние службы;

- открыть вкладку «Автозагрузка»;
- перейти из этой вкладки в «Диспетчер задач»;
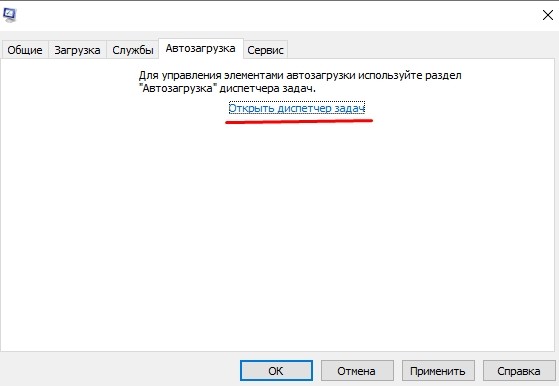
- открыть вкладку «Автозагрузка» в «Диспетчере задач»;
- отключить все активные процессы;

- выйти из «Диспетчера задач»;
- нажать на «ОК» в окошке «Конфигурация системы»;
- перезагрузить ПК (в процессе перезапуска выполнится чистая загрузка ОС);
- установить проблемное обновление Win
Важно! После установки проблемного обновления Win 10 в режиме чистой загрузки рекомендуется вернуть на ПК обычную загрузку ОС. Для этого нужно все ранее сделанные изменения возвратить в исходное состояние.
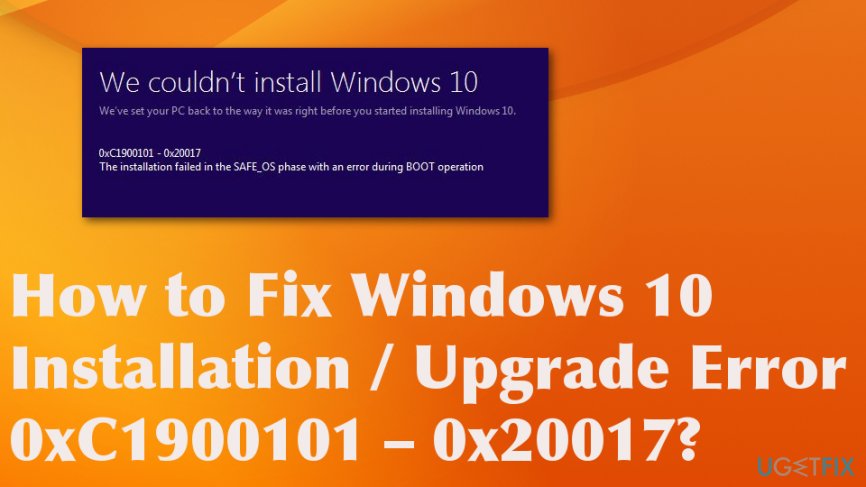
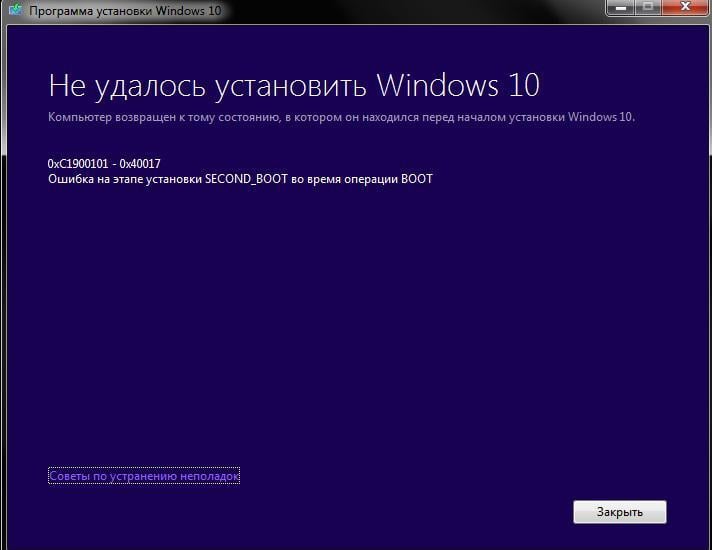
Ошибка под номером 0xC1900101 – 0x40017 может возникнуть в процессе инсталляции (апдейта до) ОС Windows 10. В ошибке говорится вот что:
Компьютер возвращен к тому состоянию, в котором он находится перед началом установки Windows 10.
0xC1900101 – 0x40017
Ошибка на этапе установки SECOND_BOOT во время операции BOOT
Майкрософт выпустила фиск от подобных ошибок, тем не менее он работает не в каждом случае — иногда приходится задействовать особые методы.
Что может вызывать 0xC1900101 – 0x40017?
- Антивирус от сторонних разработчиков.
- Устаревшие драйвера для различных устройств.
- Внешний жесткий диск/твердотельный накопитель.
- Брандмауэр Windows.
Решение №1 Повторный запуск установки
А вы пробовали запустить процесс установки Windows 10 еще раз? В некоторых случаях ошибку 0xC1900101 – 0x40017 удается обойти именно таким способом. Также вы можете попробовать перезагрузить свой ПК и запустить установку еще раз.
Решение №2 Отключение Брандмауэра Windows
Большинство пользователей утверждают, что у них ошибка 0xC1900101 – 0x40017 возникала из-за работающего Брандмауэра Windows. По какой-то причине тот может мешать процессу установки/обновлению до Windows 10, препятствуя загрузке необходимых файлов. Деактивировать Брандмауэр Windows можно вот так:
- нажмите Windows+I, чтобы открыть окошко с параметрами системы;
- пропишите в поисковую строку «Брандмауэр Защитника Windows» и выберите найденный результат;
- кликните на ссылку «Включение и отключение брандмауэра Защитника Windows»;
- отметьте опции «Отключить брандмауэра Защитника Windows (не рекомендуется)» для всех типов сетей;
- сохраните изменения.
Запустите установку ОС Windows 10 еще раз и посмотрите, исчезла ли ошибка 0xC1900101 – 0x40017.
Решение №3 Отключение внешних устройств
Подобную проблему могут вызывать некоторые внешние устройства. USB-накопители, внешние HDD/SSD, игровые контроллеры, смартфоны и прочие гаджеты — отключите от своего ПК всё ненужное, а затем повторно запустите установку Windows 10.
Решение №4 Отключение антивируса
Используете на своем компьютере антивирусное ПО от сторонних разработчиков? Знайте, что как раз оно и может вызывать появление ошибки 0xC1900101 – 0x40017. Отключите активную защиту своего антивируса, после чего попытайтесь установить Windows 10 еще раз.
Решение №5 Обновление драйверов
Устаревшие драйвера могут послужить причиной за появлением 0xC1900101 – 0x40017. Вам нужно найти проблематичные драйвера в своей системе и заняться их обновлением. Апдейт драйверов можно произвести следующим образом:
- нажмите Win+R и выполните значение devmgmt.msc;
- раскройте, например, раздел «Видеоадаптеры»;
- нажмите ПКМ на свою видеокарту и выберите «Обновить драйвер»;
- кликните на опцию «Автоматический поиск обновленных драйверов»;
- следуйте дальнейшим инструкциям на экране для обновления драйвера.
Выполните вышеуказанные действия со всем оборудованием в своей системе, после чего перезагрузите компьютер и запустите установку Windows 10.
Решение №6 Освобождение дополнительного места на диске
Знайте, что установка Windows 10 требует наличия свободного места на диске. Возможно, вы пытаетесь перейти на «десятку» с забитым до самых краев диском. Почистите свой SSD/HDD от ненужных файлов, например, фильмов или видеоигр. Если никакой ошибки при установке Win10 не возникло, значит вам действительно просто не хватало свободного места.
Решение №7 Чистая загрузка системы
Некоторые службы и программы от сторонних разработчиков могут препятствовать установке Windows 10. Чтобы это проверить, вам нужно проделать так называемую «Чистую загрузку». Вот что вам нужно сделать:
- нажмите Win+R и выполните msconfig;
- пройдите в «Службы»;
- поставьте галочку возле опции «Не отображать службы Майкрософт»;
- нажмите на кнопку «Отключить все»;
- пройдите в «Автозагрузка»;
- кликните на ссылку «Открыть диспетчер задач»;
- отключите все программы, которые будут находиться в списке автозагрузки;
- перезагрузите компьютер.
Начните установку Windows 10 и проверьте, покажется ли 0xC1900101 – 0x40017. Если все пройдет гладко, то проблема действительно заключалась в одной из отключенных служб или программ. Вернитесь в конфигурацию системы (и диспетчер задач) и включите все ранее деактивированные элементы.
Решение №8 Обновление BIOS
Некоторые владельцы ноутбуков Dell утверждают, что им справиться с 0xC1900101 – 0x40017 помогло обновление BIOS. У вас такой же ноутбук? Воспользуйтесь вот этим материалом от компании Dell, чтобы обновить BIOS на своем ноутбуке.
12.03.2016
Просмотров: 34269
Если на этапе чистой установки или обновления Windows 10, вы столкнулись с ошибкой Second Boot, значит, запуск новой операционной системы был выполнен некорректно. Чтобы её исправить, стоит установить точную причину сбоя установки.
Читайте также: Как избавиться от ошибки 0x1900101-0x40017 при обновлении до Windows 10?
Способы решения проблемы установки Windows 10 на этапе Second Boot
Разработчики Windows 10 для решения ошибки Second Boot рекомендуют перед установкой или обновлением системы выполнить следующие действия:
- Отключаем все службы, кроме тех, что принадлежат Microsoft;
- Удаляем антивирус и все программы-шифровальщики, которые препятствуют установке ОС;
- Удаляем софт NVIDIA;
- Чистим систему от мусора и удаляем программы для очистки диска.
- Запускаем Windows 10 Installation Media Creation Tool в соответствии с версией и разрядностью предыдущей системы. В начальном окне выбираем «Обновить этот компьютер сейчас».

- Принимаем условия лицензии и жмём «Далее».

- В следующем окне выбираем «Установить Windows 10…» и «Сохранить файлы…».

- Компьютер будет перезагружен несколько раз, после чего система загрузится в привычном рабочем режиме.


Если эти методы не помогли решить проблему, стоит воспользоваться рекомендациями с видео:
During the Windows update, «the installation failed in the SECOND_BOOT phase with an error during MIGRATE_DATA operation» error will appear. So, this article from MiniTool Partition Wizard shows you what it is and how to fix it.
Here is what the user says:
I’ve been trying to update my Windows 10 1809 to 1909, and having tried a lot of things I’m totally stuck. It gets to about 91% complete in the second boot phase, but then always rolls back the update. The last thing I tried was an installation from an ISO image on a USB stick, which gave me the following error: 0x8007042b – 0x4000D The installation failed in the SECOND_BOOT phase with an error during MIGRATE_DATA operation.https://answers.microsoft.com/en-us/windows/forum/all/0x8007042b-0x4000d-the-installation-failed-in-the/a828f302-35d9-4720-90df-190dd76656db
Then, do you know what is it and how to fix this error? Please keep reading below.
What Is Error 0xC1900101 – 0x4000D?
The error 0xC1900101 – 0x4000D prevents users from installing the latest version, which usually occurs during the second boot phase when data migration happens to leave your computer vulnerable. Simply put, this error occurs when the upgrade process fails to migrate data to the new operating system.
There are several reasons that can cause this issue, such as missing system files, insufficient disk space, a corrupt Windows Image, or a pending XML file. Sometimes Windows 10 errors on the second startup can also occur due to the presence of third-party applications or services.
You can do a preliminary quick fix before applying the methods below:
- Make sure that the Date & Time settings are correct.
- Disconnect all external USB drives & SD cards.
- Disable the hard drive encryption.
- Install the latest drivers for all the devices on your system, especially for the Ethernet & the Wireless adapter (if any).
If this doesn’t help you fix the error, try the following methods.
Method 1: Run Windows Update Troubleshooter
Troubleshooting Windows Update can often fix the error or let you know why the problem occurred. Please follow the guidelines below:
Step 1: Press the Win + I key to open Settings, and navigate to the Update & Security > Troubleshoot option.
Step 2: Under the Get up and running section, click the Windows Update option and select the Run the troubleshooter option from the extended pane.
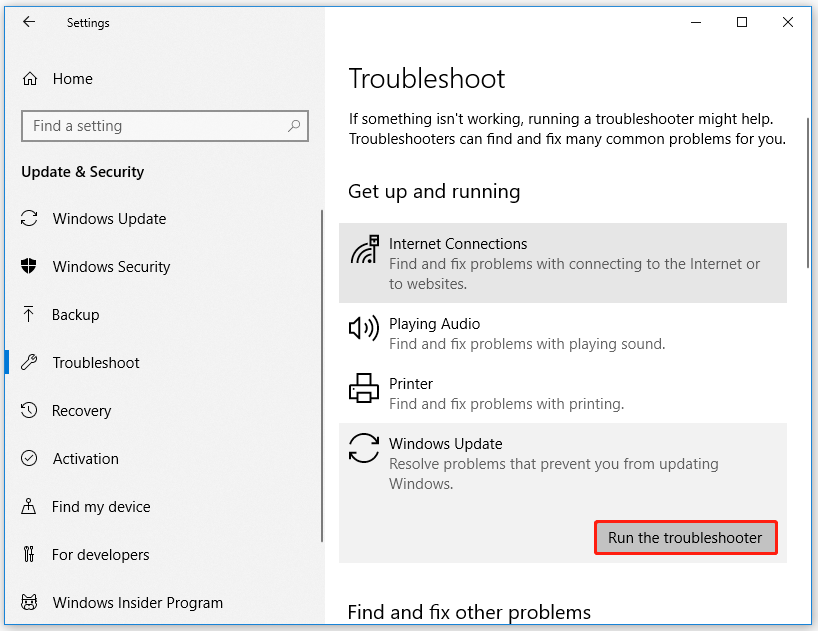
Step 3: Follow the on-screen instructions. And when you see the Apply this fix option in the window, click it to fix this error.
Step 4: Restart your computer.
Method 2: Fix Corrupted System Files – SFC & DISM
The presence of corrupted system files or a “Windows image” can also trigger 0x8007042B – 0x4000D errors when you try to install a new operating system. To fix this, you need to use SFC and DISM tools to fix corruption in core system files.
Here’s how to perform these scans:
Step 1: Open the Command Prompts as administrator.
Step 2: In the Command Prompt window, type the following path in the Command Prompt: sfc /scannow and press Enter.
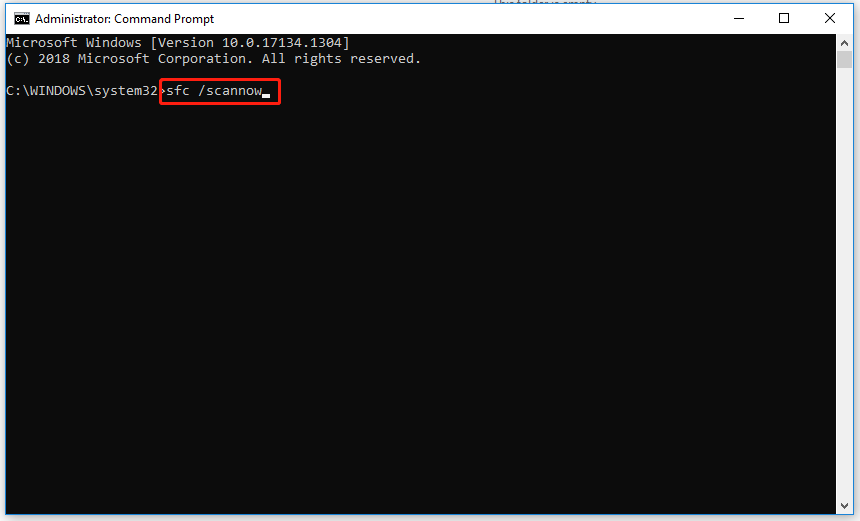
Step 3: After the scanning process is complete, if it describes that the corruption is resolved, close Command Prompt and restart Windows 10.
Step 4: If SFC fails, type DISM.exe /Online /Cleanup-image /Restorehealth. Then press Enter.
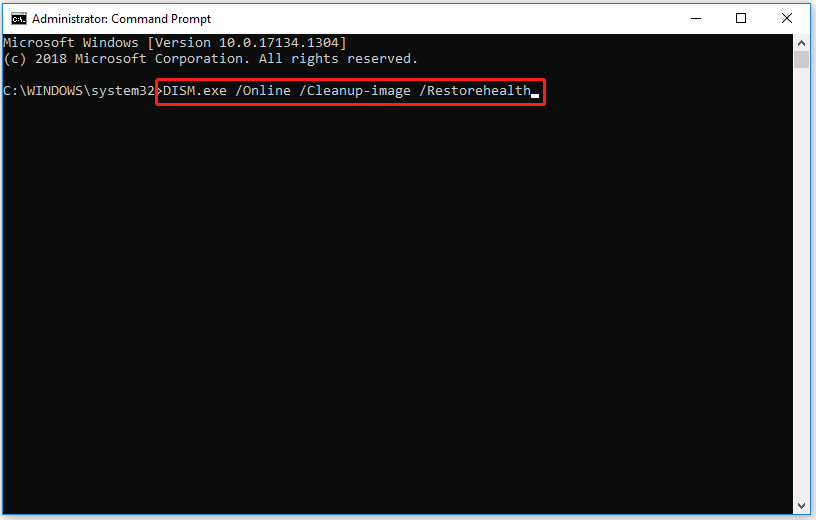
Step 5: After the scanning process is complete, restart your computer to check if the error has been solved.
Method 3: Free up Space to Upgrade
Windows 10 requires at least 32 GB of free space to upgrade. So, you have to make sure you have enough free space to upgrade to Windows 10. There are two options to free up space. One is to remove unnecessary files, and the other is to directly expand the partition size.
Option 1: Use Disk Cleanup
Step 1: Open the Run dialog and type cleanmgr, and then press Enter.
Step 2: A small box will pop up and ask you to select a drive to run the cleanup on. Then click OK.
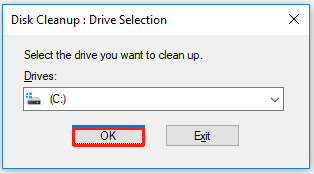
Step 3: In a new window, select the files you want to delete and then click OK.
Note: If you delete important files by mistake, you can recover deleted/lost files by using MiniTool Partition Wizard.
Option 2: Use MiniTool Partition Wizard
If your disk is filled with important files, using the Extend Partition feature of MiniTool Partition Wizard is a better option. MiniTool Partition Wizard is a professional partition manager, which can help you recover missing data, scan bad sectors, fix file system errors, etc.
To free up space, here is the guide:
MiniTool Partition Wizard FreeClick to Download100%Clean & Safe
Note: A partition cannot be extended without additional partitions or unallocated space. If the two partitions are not on one hard drive, you cannot extend a partition by taking up space from the other.
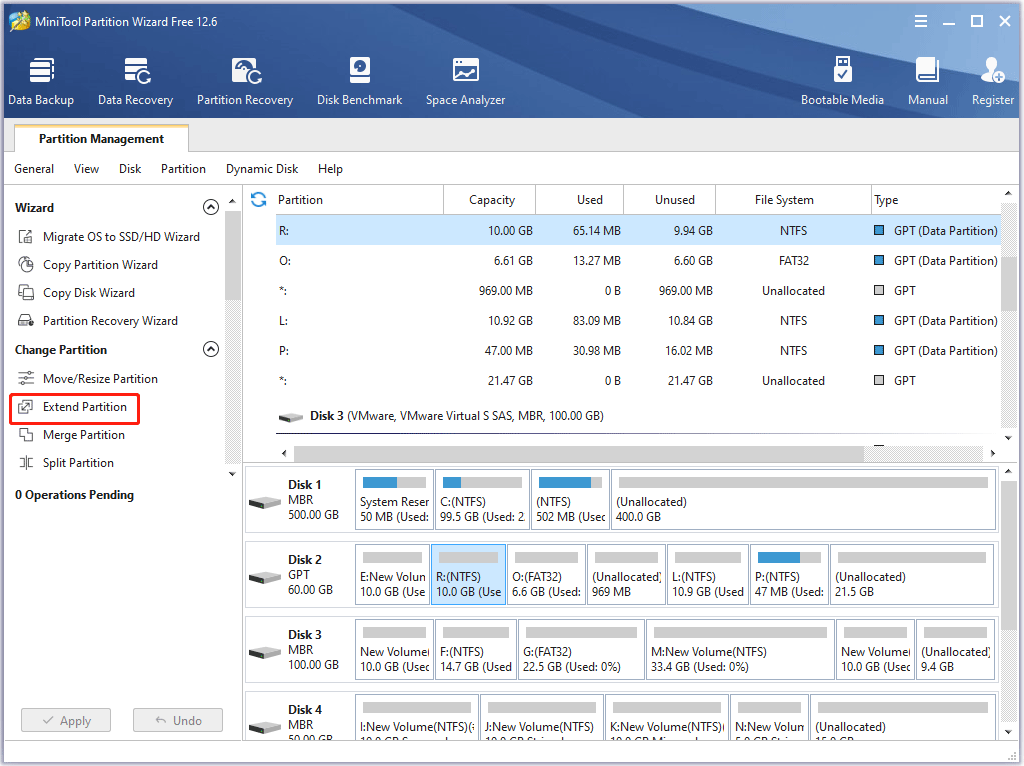
Step 1: Launch MiniTool Partition Wizard and enter its main interface.
Step 2: Select the drive you want to extend and click Extend Partition on the left operation panel.
Step 3: In the drop-down menu, select where to take free space. Then drag the light blue block to decide how much free space you want to take. Finally, click the OK button.
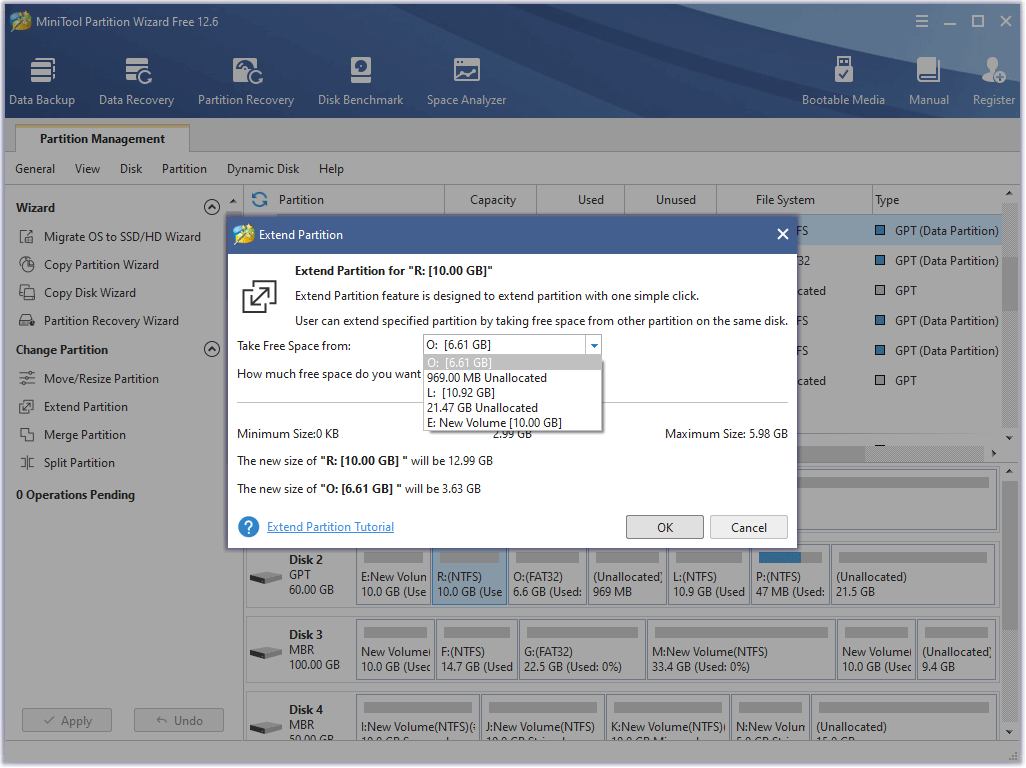
Step 4: Click the Apply button to execute the operation.
Method 4: Delete or Rename the SoftwareDistribution Folder
The 0x8007042B – 0x4000D error can occur if any update-related services are disabled or if old update files in the SoftwareDistribution and Catroot2 folders are corrupted. So, you need to delete and rename SoftwareDistribution file. Here is the guide:
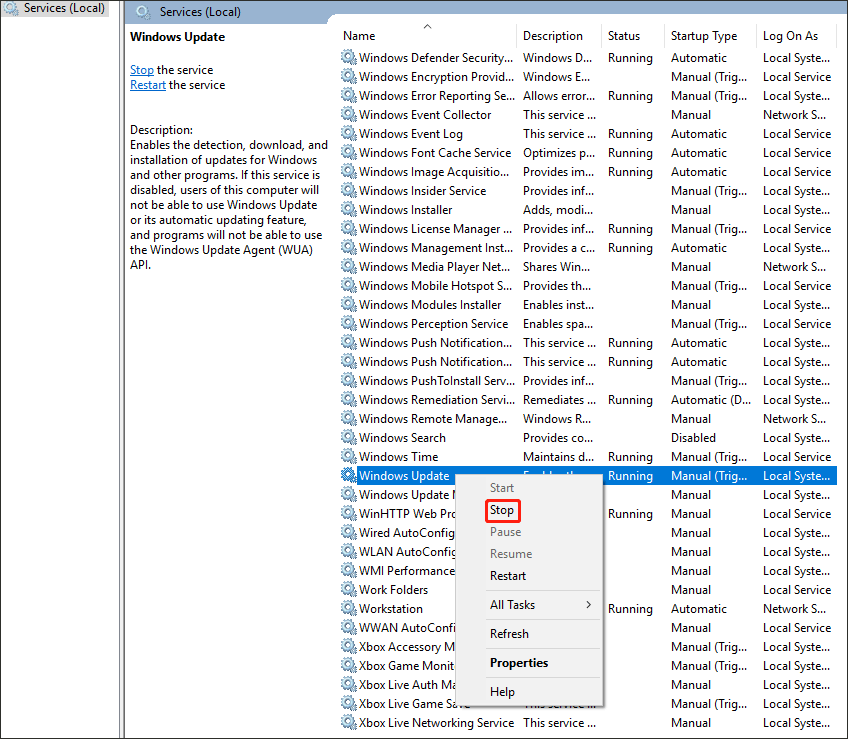
Step 1: Stop Windows Update Service.
- 1: Press the Win + R key to open the Run Then type services.msc in the search box and click OK.
- 2: In the Services window, find the Windows Update service and right-click it. Then select Stop.
Step 2: Delete the SoftwareDistribution Folder
- Open Windows File Explorer and navigate to C: Windows folder.
- Find the SoftwareDistribution folder and right-click it to Delete or Rename
Step 3: Start the Windows Update Service.
- Open the Windows Services control panel.
- Right-click the Windows Update service and select Start.
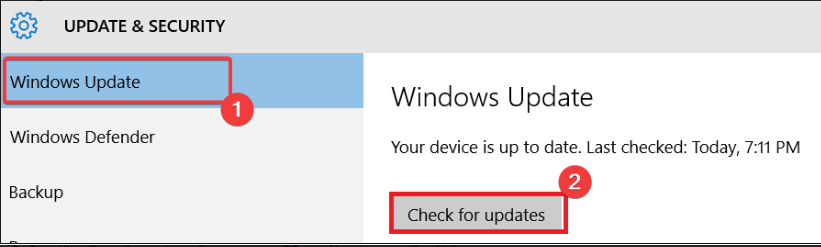
Step 4: Check and Install Windows 10 Update
- Open Settings and navigate to the Update & Security > Windows Update
- Click Check for Updates.
Method 5: Perform a Clean Boot
Some third-party apps or services often conflict with built-in apps or services. This can hinder the update process and trigger 0x8007042B – 0x4000D errors during installation. So, you can use the following steps to perform a clean boot in Windows 10.
Step 1: Type msconfig in the search box on the taskbar and select System Configuration from the search.
Step 2: In the System Configuration window, click the Services tab and select Hide all Microsoft services. Then click Disable all.

Step 3: Now click the Startup tab of the System Configuration window and select Open Task Manager.
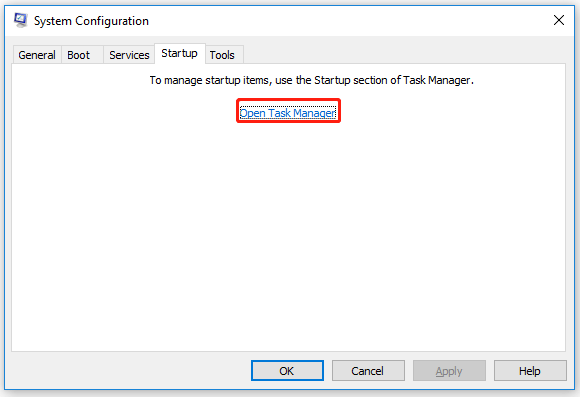
Step 4: Once the Task Manager window opens, right-click on each startup item and select Disable.
Step 5: Close the Task Manager and go back to the System Configuration window.
Step 6: Click OK on the Startup tab of System Configuration.
After that, restart your computer and try to install the Windows 10 update.
Method 6: Disable Third-party Antimalware Software
There is a high chance of conflicts between third-party antivirus software and updated files. To get rid of this 0x8007042B – 0x4000D error, you need to temporarily uninstall installed third-party security programs. If you successfully installed the latest Windows after doing so, you can reinstall the application again.
To uninstall third-party antivirus software, proceed as follows:
Step 1: Press the Win + R key to open the Run dialog. Then type appwiz.cpl in the search box and press Enter.
Step 2: In the Programs and Features window, find the antimalware software installed on your computer. Then right-click it and select the Uninstall option.
Step 3: Follow on-screen instructions to complete the uninstallation process.
Method 7: Clear Pending .XML File
The presence of the pending .xml file may also prevent the installation of a new OS on your device. To solve this error, you need to clear the pending .xml file. The steps are as follows:
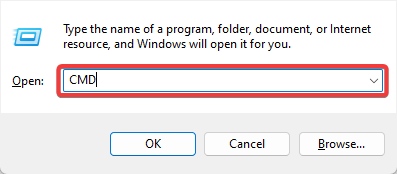
Step 1: Press the Win + R key to open the Run dialog. Then type cmd.exe in the search box and click OK.
Step 2: Enter the following command and press Enter:
Ren NC:Windowswins shows pending.XML pending.old
After that, the pending.xml file renames to pending.old.
Method 8: Check Windows Update Log File
If you still cannot install Windows 10/11 due to errors 0x8007042b – 0x4000D, check the Windows Update log files.
You can find this file in the following path: C:WindowsWindowsUpdate.log. This log basically contains all the information about the upgrade failed error. If there are too many error codes in this file, just delete the entire file.
After successfully deleting this file, restart your PC and retry installing the update.
Method 9: Upgrade Windows 10 Using an ISO File
The next way to fix the Windows 10 update “the installation failed in the SECOND_BOOT phase with an error during MIGRATE_DATA operation” error is to update Windows 10 from a Windows ISO file. Proceed as follows:
Step 1: Download Windows 10 in an ISO file.
- Navigate to Windows 10 download page and download the Media Creation Tool.
- Run the Media Creation Tool as administrator and click Accept on the first screen.
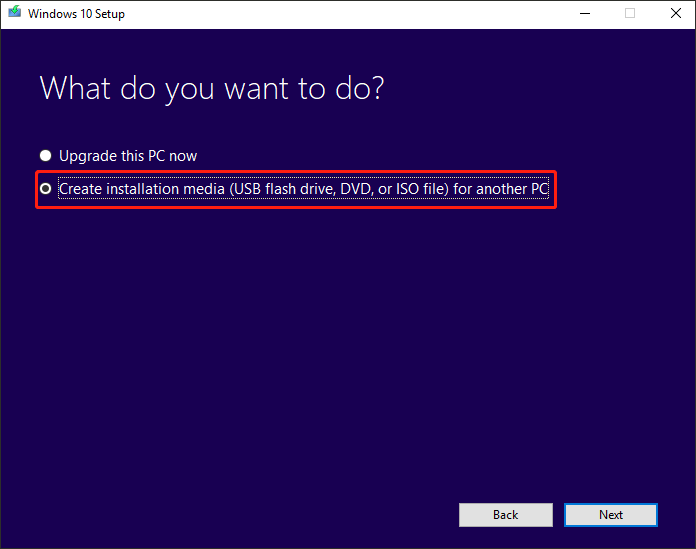
- On the What do you want to do page, select Create installation media (USB flash drive, DVD, or ISO file) for another PC.
- Select the Language, Windows Edition, and Architecture to use to create the installation media. Once selected, click Next to continue.
- Select ISO file and click Next.
- Click Save to put the Windows.iso file on your desktop.
- The Media Creation Tool starts to download the latest Windows 10 installation files in an ISO format.
Step 2: Update Windows 10 from ISO file
- Disconnect your computer from the Internet.
- Right click the Windows.iso file (on your desktop) and click Mount.
- Double click the Settings.
- On a new pop-up screen, select Not now and click Next.
- Follow the on-screen instructions to update your system.
Method 10: Clean Install Windows 10
If none of the above methods helped you, you can perform a clean install of Windows 10 to check if the error can be solved.
Note: A clean Windows 10 installation means all your files and settings will be lost during the installation process. Therefore, please back up all important files and settings to an external USB drive before proceeding.
To perform a clean install of Windows 10, read the instructions in this article: How to do a clean install of Windows 10
Here are 10 methods to solve “the installation failed in the SECOND_BOOT phase with an error during MIGRATE_DATA operation” error in Windows 10. I have fixed this error with one of the methods above. Share with you all!Click to Tweet
Bottom Line
With the methods introduced in this article, you can easily fix the “the installation failed in the SECOND_BOOT phase with an error during MIGRATE_DATA operation” error.
If you have any questions while trying the methods above or if you have other better methods, you can leave a message in the following comment zone. If you need any help when using MiniTool Partition Wizard, you are welcome to send us an email at [email protected].
Easy steps to get you through the upgrade error
by Milan Stanojevic
Milan has been enthusiastic about technology ever since his childhood days, and this led him to take interest in all PC-related technologies. He’s a PC enthusiast and he… read more
Updated on
- A Windows 10 error in the second boot usually happens if an upgrade is unsuccessful, especially when you have bad system files.
- The Welcome to Windows 10 screen is displayed at the second boot phase, but this error guarantees you do not get that far.
XINSTALL BY CLICKING THE DOWNLOAD
FILE
The installation failed in the second boot phase usually happens if an upgrade is unsuccessful, so it is helpful to understand at what point the error occurred during the upgrade.
This article reviews all the essential elements and recommends the best solutions for this OS installation error.
Note that some error codes during the upgrade phase take the form of 0xC1900101 (result code), with an extend code of 0x4000D. These are not the same as the second boot phase error.
Why does Installation failed in the second boot phase message appear?
There are different stages of the OS upgrade process. Users have pointed out that the major triggers are as follows:
How we test, review and rate?
We have worked for the past 6 months on building a new review system on how we produce content. Using it, we have subsequently redone most of our articles to provide actual hands-on expertise on the guides we made.
For more details you can read how we test, review, and rate at WindowsReport.
- Bad installation files – These are files missing some essential elements or have been corrupted before use.
- Hard drive issues – The most common hard drive issues that will trigger this problem are bad sectors or insufficient space
- Hardware failures – You will experience failure if you have a faulty hard drive or memory module, often triggering the installation failed in the second boot phase error.
- Driver-related issues – Drivers are an essential link between software and hardware. You may expect errors if they are bad, corrupt, or incompatible.
- Viruses – You may expect a few complications, especially on systems without an antivirus, including this installation error.
That said, we will now cover the best solution on Windows 10.
How can I fix Installation failed in the second boot phase error?
Before going into any of our recommended solutions, there are a few preliminary steps you should try:
- Detach peripherals – Remove external hardware, such as docks and USB devices.
- Create space – Make sure you delete all unnecessary files from your storage
1. Run hard drive scans
1.1 How to run the chkdsk scan
- Press Windows + R, type CMD and hit Ctrl + Shift + Enter.

- Type the command below and hit Enter (make sure to use the drive alphabet in place of C):
chkdsk C: /f - Wait for the command to complete.
1.2 How to run a health check and SFC
- Press Windows + R, type CMD and hit Ctrl + Shift + Enter.
- Type the command below and hit Enter.
DISM /Online /Cleanup-Image /RestoreHealth - When it executes, run the script below:
sfc /scannow
2. Update Windows
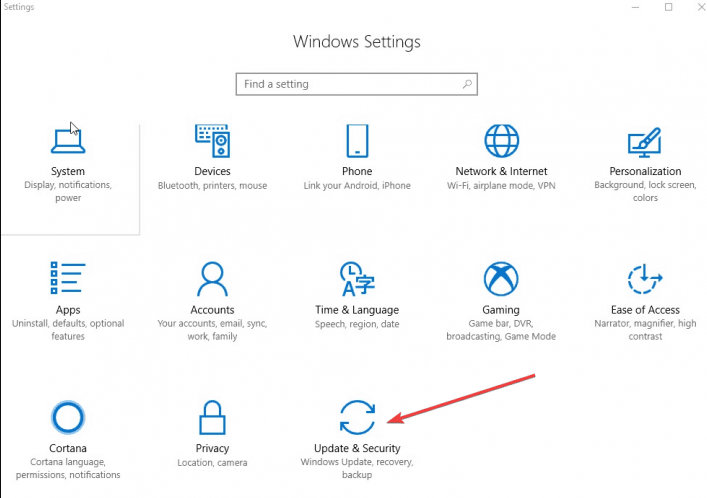
- Press Windows + I to open the system Settings.
- Click on Update & Security.

- Select Windows update from the left pane and choose Check for updates.

An update is an important step before an upgrade. It guarantees all essential files, so you do not have errors during the process.
3. Update drivers
Since there may be many drivers to update, we suggest you perform this process automatically. The best solution is Outbyte Driver Updater. You can fix driver issues with a few clicks and get the latest updates.
You usually must go to the manufacturer’s website and download drivers. This process is stressful because you must do this for every driver you need, one at a time. The software saves you time. It also ensures you do not download the wrong drivers.
⇒ Get Outbyte Driver Updater
4. Perform a System Reset
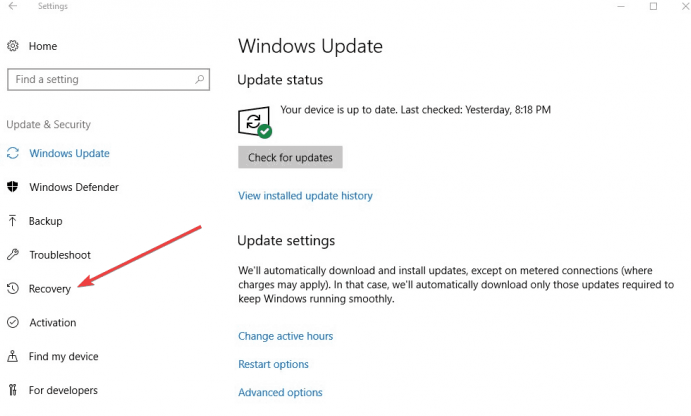
- Press Windows + I to open the Settings app.
- Click Update & Security.

- Click Recovery on the left pane.

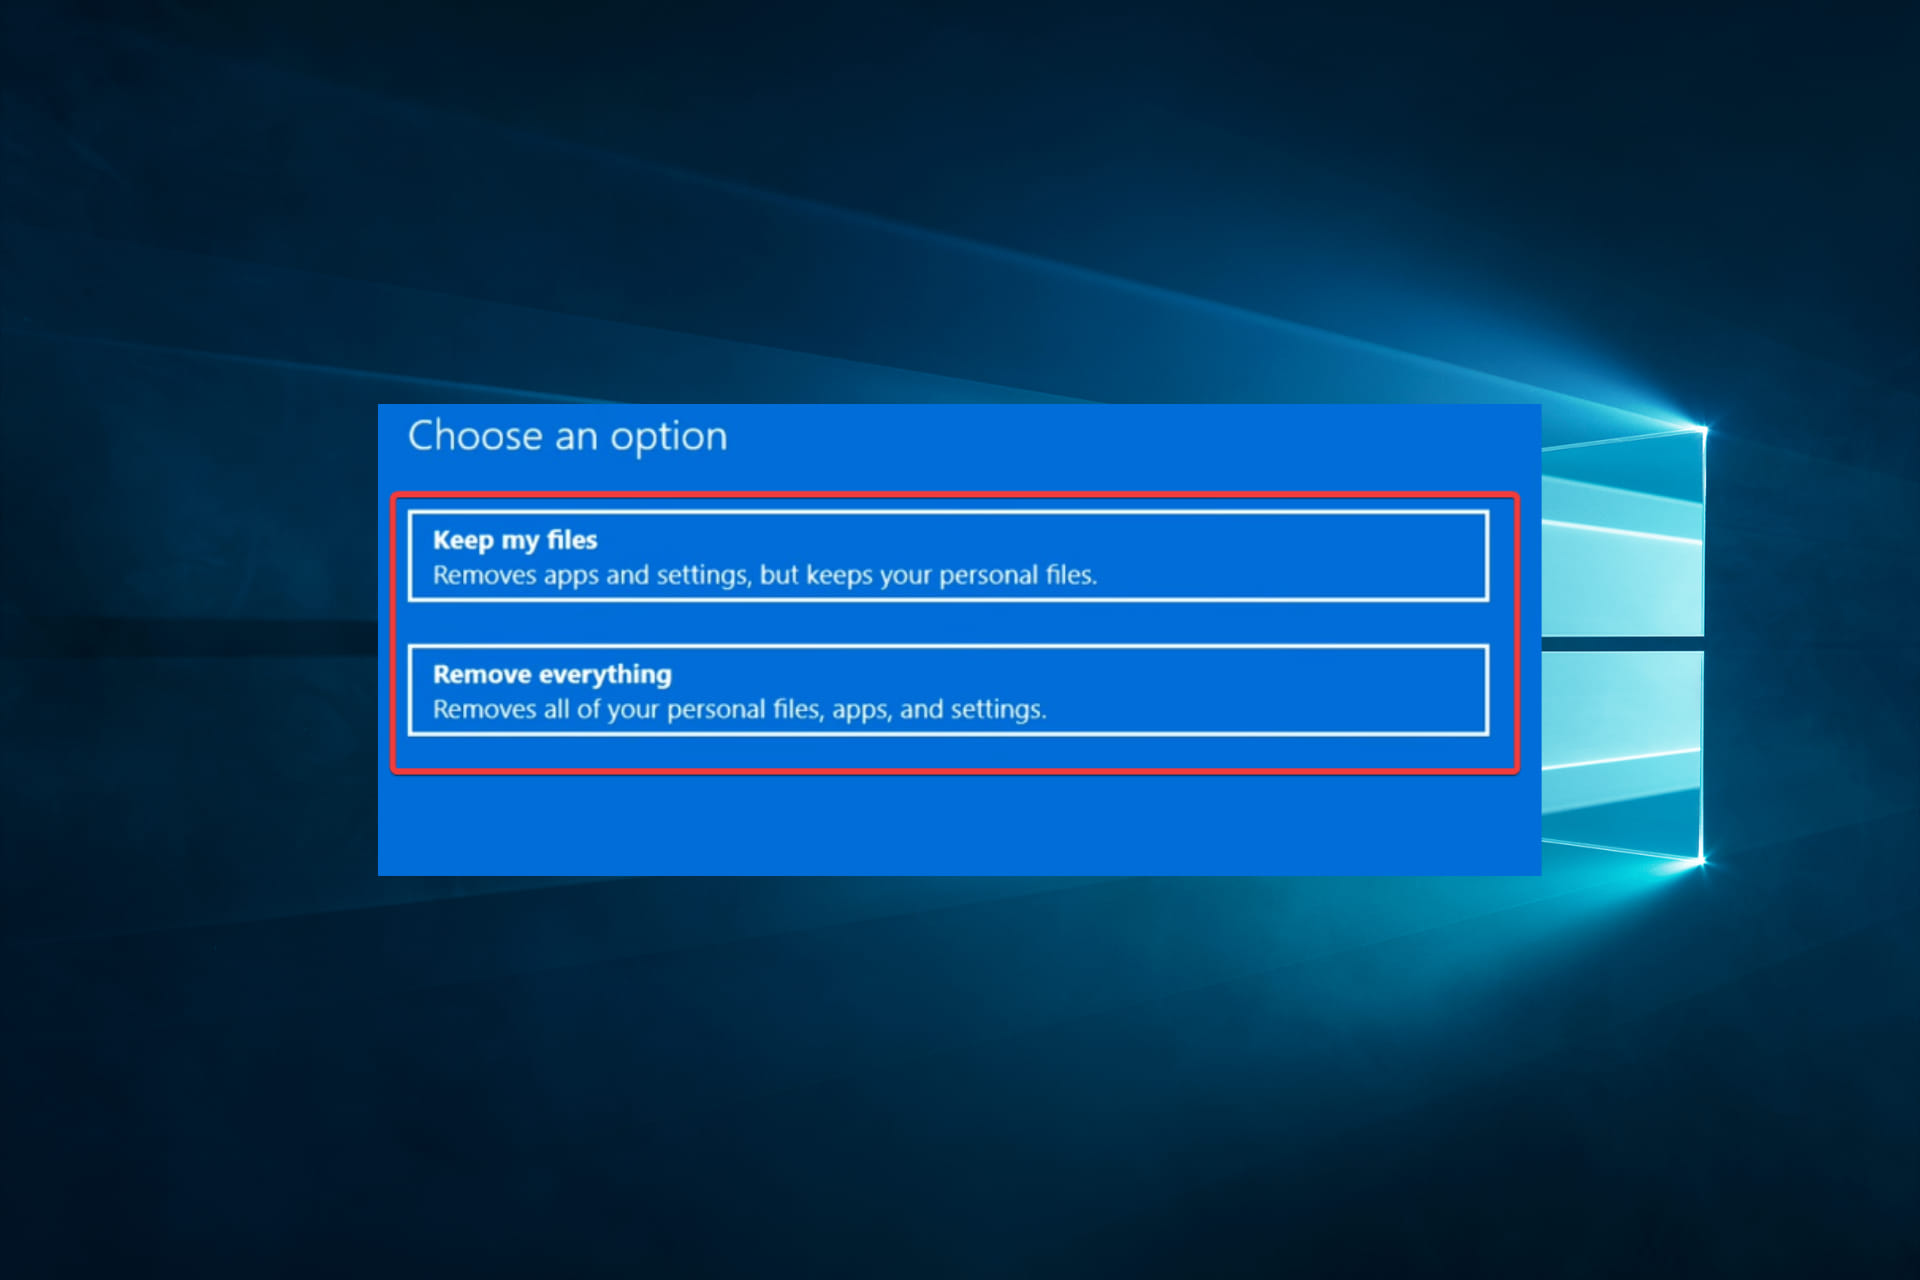
- Select Reset this PC.

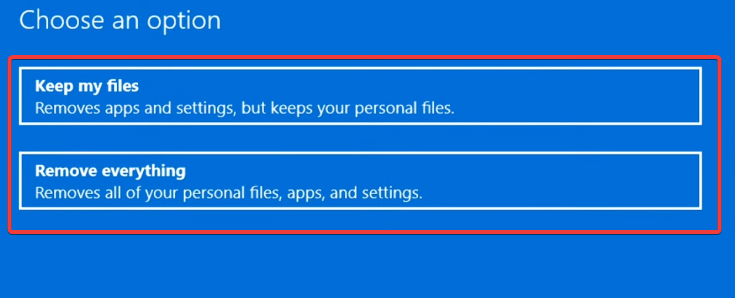
- Click Get Started and choose an option to Keep my files, or Remove everything.


- Fix: Error 0x8007042B in Windows Update [Windows 10 & 11]
- Security Settings Blocked Self-signed Application [Fix]
- PC Always Boots Twice? 5 Ways to Permanently Stop it
- NTLDR is Missing: 5 Ways to Safely Fix it
- 0xc00000ba Boot Error: 4 Ways to Quickly Fix it
5. Upgrade using Windows 10 ISO file
- Download the official ISO media for Windows 10 from Microsoft.
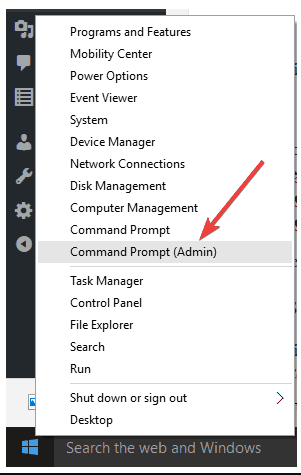
- Right-click Start and select Command Prompt (Admin).

- Stop BITS, Cryptographic, MSI Installer, and Windows Update Services by typing these commands. Press Enter after each one:
net stop wuauservnet stop cryptSvcnet stop bitsnet stop msiserver - Rename the SoftwareDistribution and Catroot2 using the following commands. Remember to hit Enter after each command.
ren C:\Windows\SoftwareDistribution SoftwareDistribution.oldren C:\Windows\System32\catroot2 Catroot2.old - Restart the BITS, Cryptographic, MSI Installer, and Windows Update Services by running the following commands:
net start wuauservnet start cryptSvcnet start bitsnet start msiserver - Exit the Command Prompt and restart your computer.
After doing all this, uninstall your security software and activate Microsoft Defender (Microsoft’s default virus protection) so that your computer is not vulnerable to attacks from the internet.
That is as much as we will cover in its guide. You would find success using any of these solutions. Since we have not written them in any particular order, we encourage you to try what seems the most appropriate.
Let us know which solutions worked for you by commenting in the section below.
![]()