Содержание
- Видео инструкция
- Причины ошибки и способы её устранения
- Способ 1: Проверка на вирусы
- Способ 2: Настройка подключения к WEB
- Способ 3: Запуск служб
- Способ 4: Восстановление файлов системы
- Вопросы и ответы
Регулярные обновления операционной системы помогают ликвидировать уязвимости и гарантируют поддержку ею актуальных технологий. Но во время процедуры установки обновлений могут появляться различные проблемы. Одной из наиболее частых из них является ошибка 80244019. Давайте узнаем, какими способами можно устранить указанную неисправность в Windows 7.
Читайте также: Устранение ошибки 0x80070005 в Виндовс 7
Видео инструкция
Причины ошибки и способы её устранения
Причинами ошибки 80244019 могут быть как вирусы, так и различные сбои внутреннего характера, которые привели к изменению настроек или к повреждению системных файлов, принимающих участие в загрузке и установке обновлений. Соответственно, и методы решения проблемы зависят от источника её возникновения. Ниже мы разберем конкретные варианты устранения изучаемой неполадки.
Способ 1: Проверка на вирусы
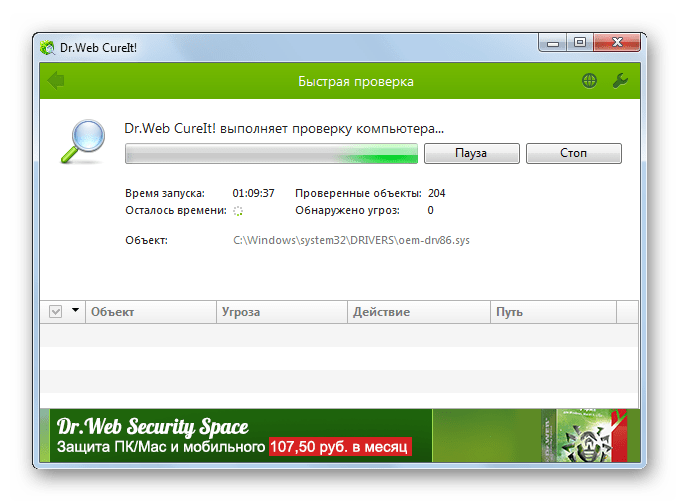
Одной из главных причин возникновения ошибки 80244019 является вирусное заражение. Поэтому, как только возникла данная неполадка, нужно обязательно просканировать компьютер на наличие вирусов. Даже если причина заключается в другом факторе, проверка не повредит, но если потерять время, то вредоносный код может нанести ещё больший ущерб.
Сканирование нужно выполнять не штатным антивирусом, а с помощью специальных лечащих утилит, которые не требуют установки. При этом лучше всего осуществлять процедуру или со стороннего незараженного ПК, или при помощи LiveCD/USB. Но если по каким-либо причинам вы это не можете сделать, то выполните сканирование в «Безопасном режиме». При обнаружении вируса придерживайтесь тех рекомендаций, которые появятся в окне антивирусного инструмента.
К сожалению, даже если вирус будет обнаружен и устранен, это ещё не гарантирует исчезновения ошибки, так как вредоносный код мог внести в систему изменения, которые нужно исправить. Проблема состоит в том, что мы не знаем, какие конкретно параметры следует проверить и отрегулировать, поэтому используйте все описанные ниже способы поочередно до тех пор, пока не установите, что ошибка 80244019 пропала.
Способ 2: Настройка подключения к WEB
Прежде всего, нужно удостовериться в правильности настройки подключения к web-сети. Этот вариант действий подойдет и тогда, когда первопричиной проблемы оказался не вирус, а сбой.
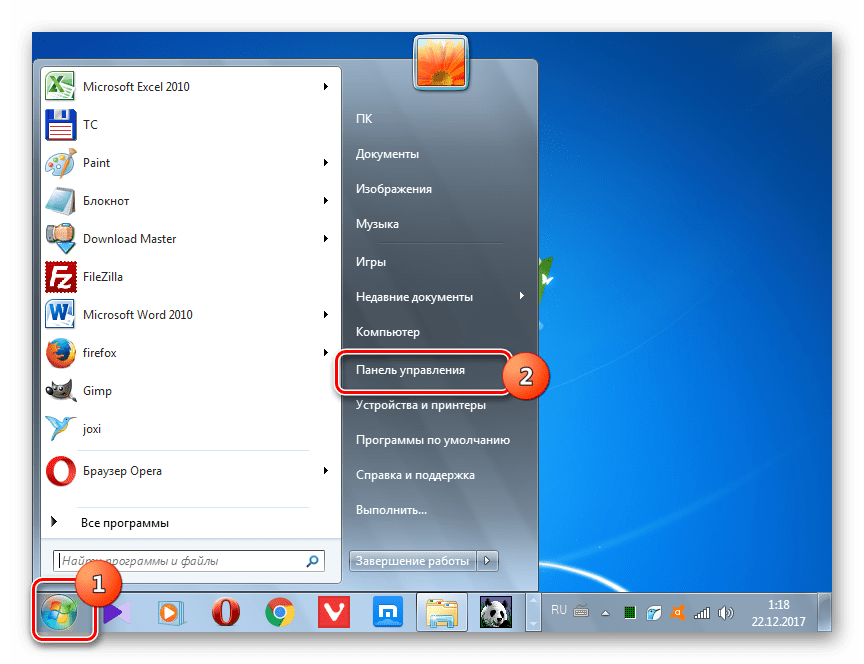
- Щелкайте «Пуск». Заходите в «Панель управления».
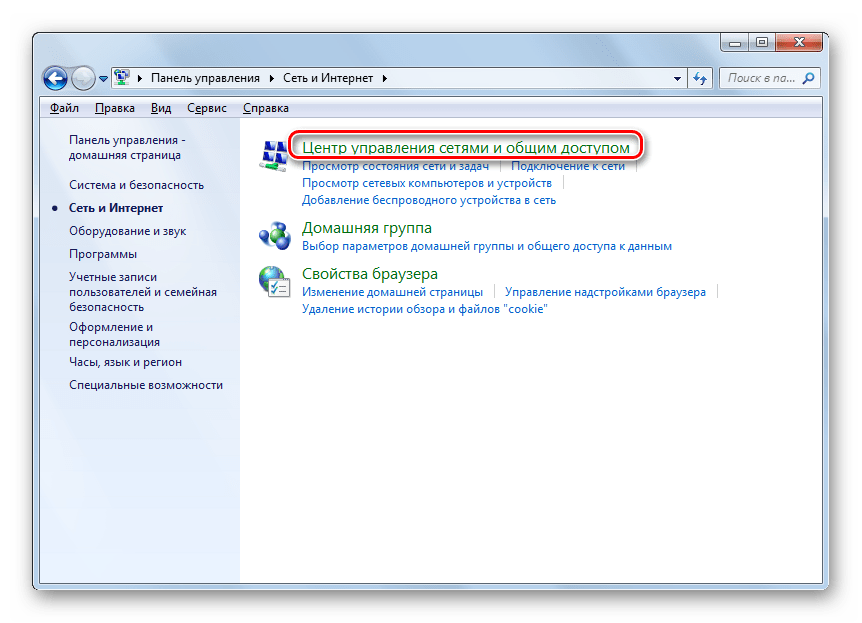
- Далее щелкайте «Сеть и интернет».
- Выберите «Центр управления сетями…».
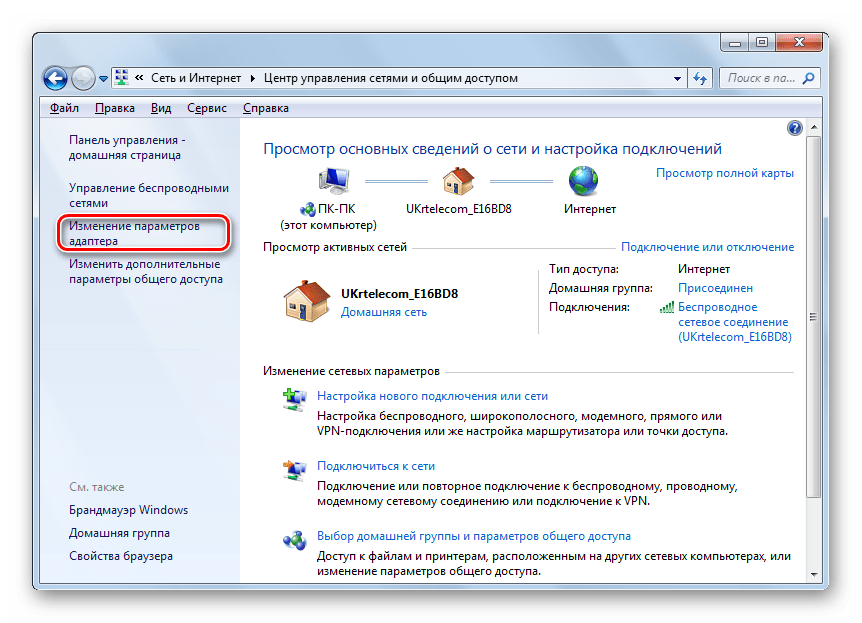
- В левой части окна выбирайте «Изменение параметров адаптера».
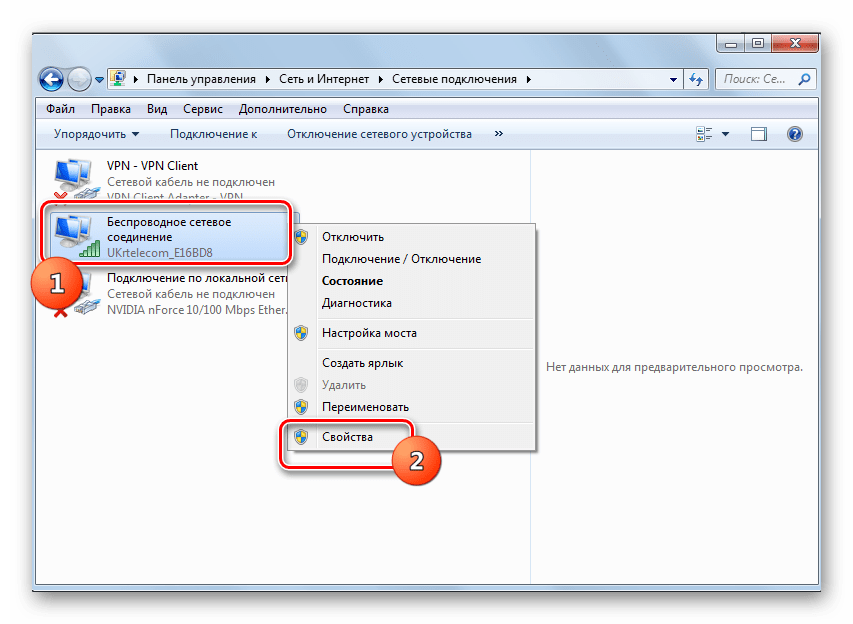
- Из списка подключений (если их несколько) в появившемся окошке выбирайте актуальный вариант, с помощью которого вы регулярно соединяетесь со всемирной паутиной. Щелкните по нему правой кнопкой мышки (ПКМ). В перечне выберите «Свойства».
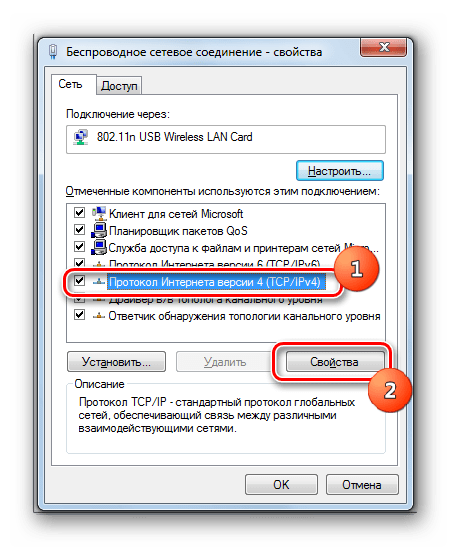
- Открывается оболочка свойств соединения. Во вкладке «Сеть» выбирайте вариант «Протокол Интернета версии 4» и выделите его. Жмите «Свойства».
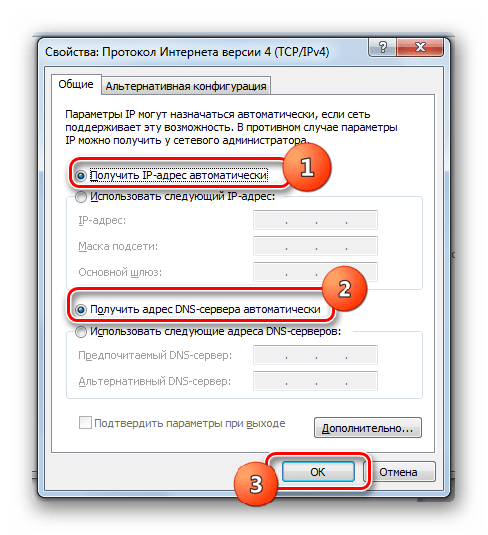
- Если в появившейся оболочке в полях введены IP-адреса, то удостоверьтесь, что они соответствуют тем, которые выдает ваш провайдер. Если же он не выдает отдельные IP-адреса, то переставьте все радиокнопки в верхнее активное положение и жмите «OK». Это значит, что теперь вы будете получать адреса в автоматическом режиме.

После выполнения указанных выше манипуляций можно проверять, возникает ли ошибка при обновлении снова или её удалось окончательно устранить.
Способ 3: Запуск служб
Одной из причин ошибки 80244019 является также отключение некоторых служб, которое может быть вызвано как вирусами, так и другими факторами. В этом случае необходимо включить деактивированные службы, а также настроить их автоматический запуск в будущем.
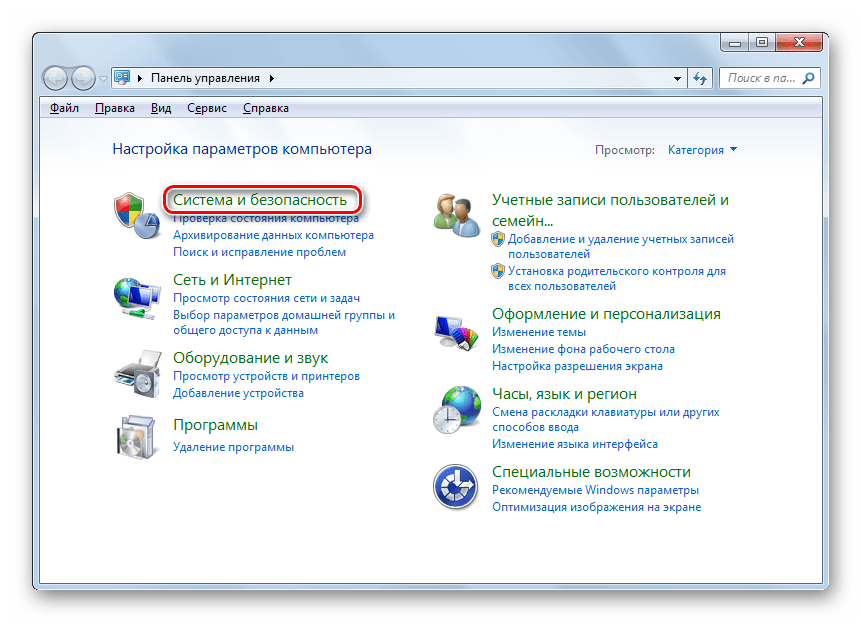
- Перейдя в «Панель управления» через меню «Пуск», щелкайте «Система и безопасность».
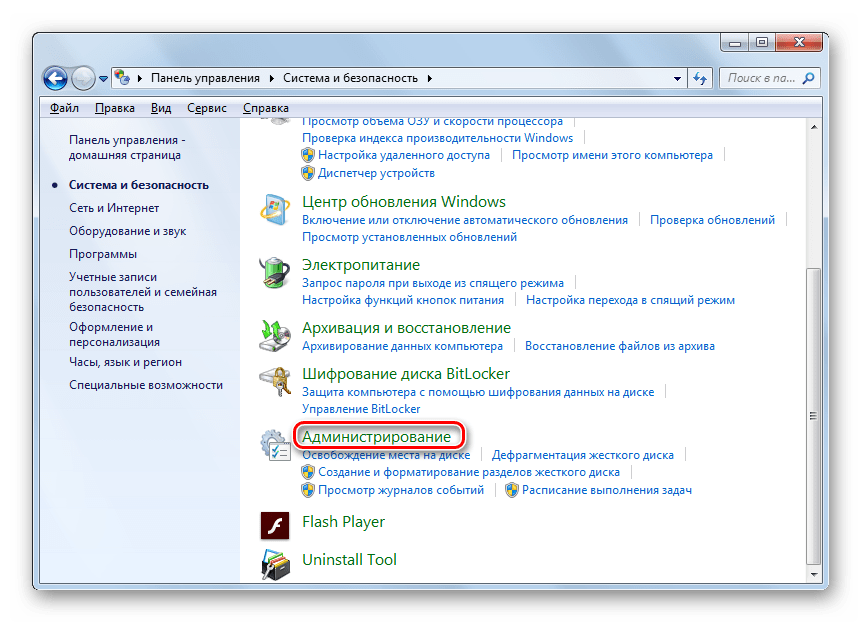
- Далее выберите вариант «Администрирование».
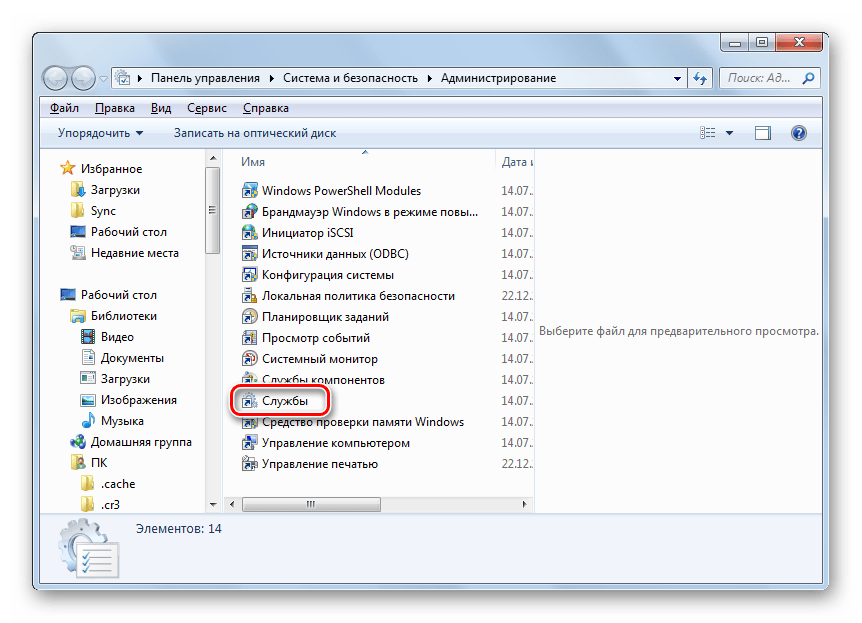
- В отобразившемся перечне переходите по надписи «Службы».
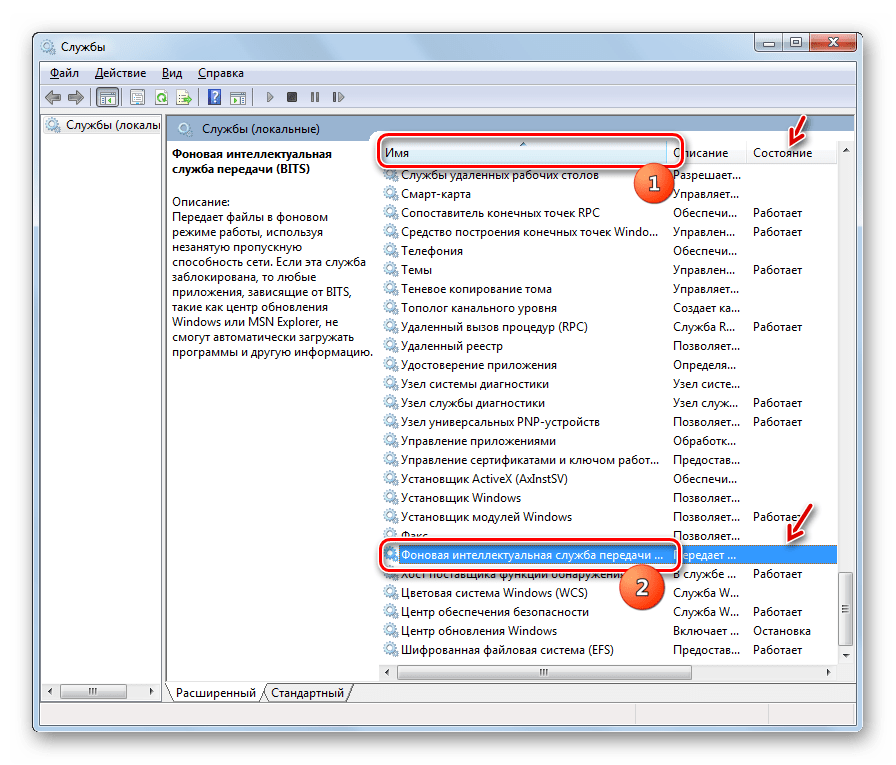
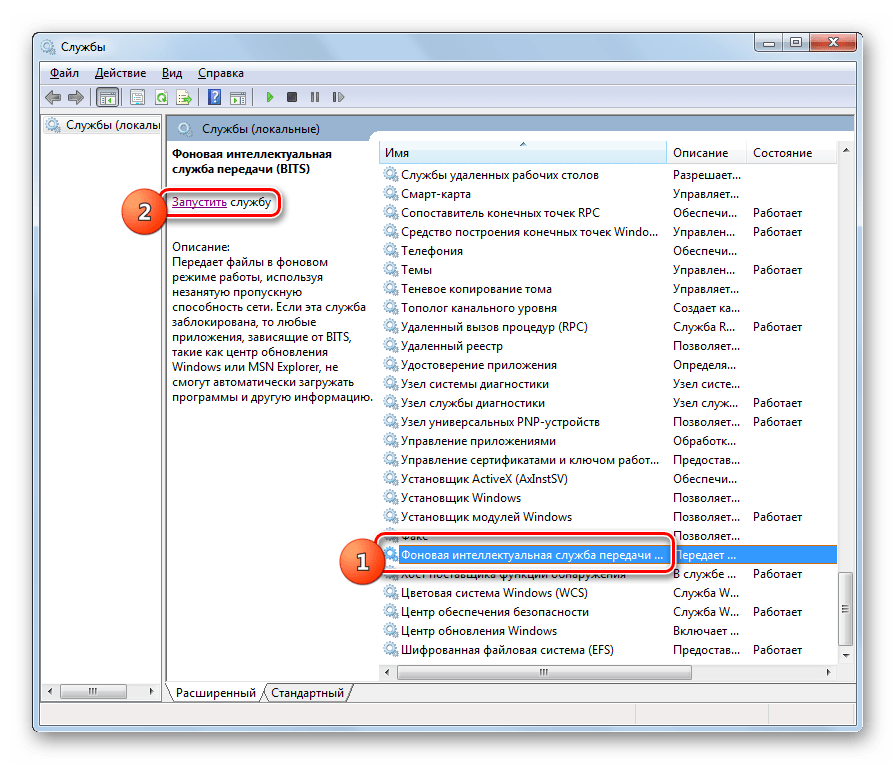
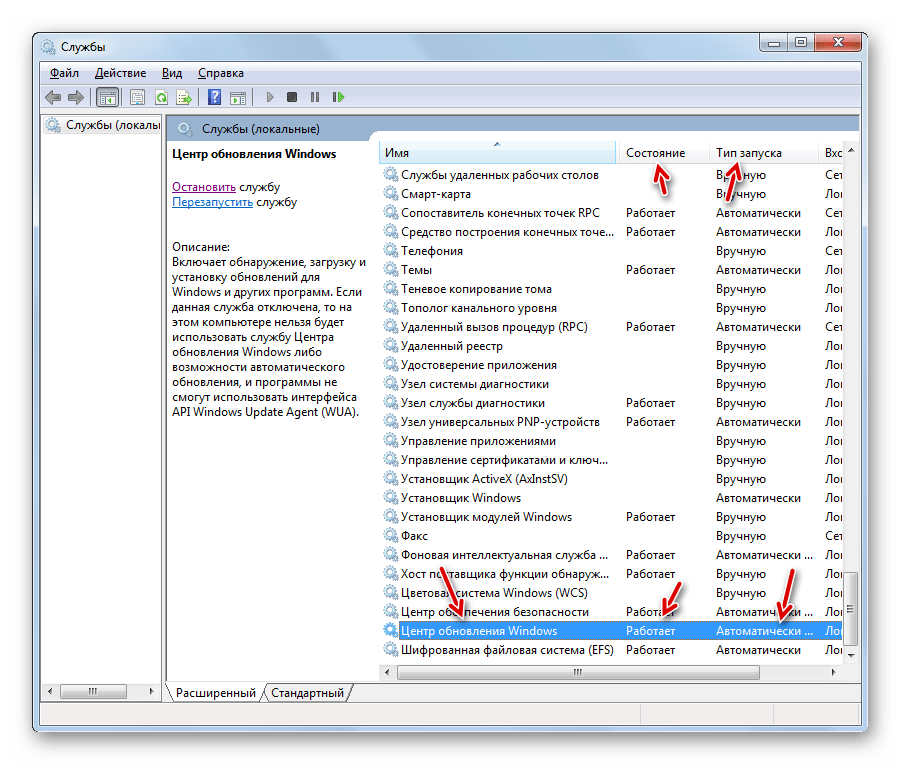
- Открывается оболочка «Диспетчера служб». В перечне элементов ищите вариант «Фоновая интеллектуальная служба…». Для облегчения поиска можете произвести выстраивание объектов в порядке расположения алфавита, щелкнув по названию столбца «Имя». Взгляните на статус службы в колонке «Состояние». Если там указано «Работает», значит, с этим элементом все в порядке и нужно переходить к следующему. Но если в этой колонке ничего не указано, то щелкните левой кнопкой мышки дважды по вышеуказанному объекту.
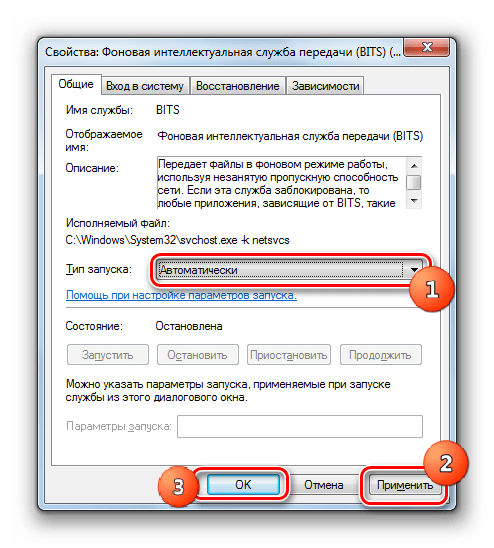
- В открывшемся окне изменения свойств в поле «Тип запуска» из раскрывающегося перечня выберите пункт «Вручную» или «Автоматически». Далее жмите «Применить» и «OK».
- Вернувшись в «Диспетчер», снова выделите название элемента и жмите «Запустить».
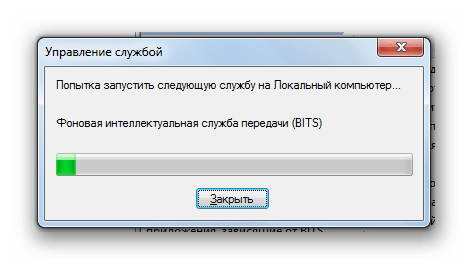
- Будет выполнена процедура запуска выбранной службы.
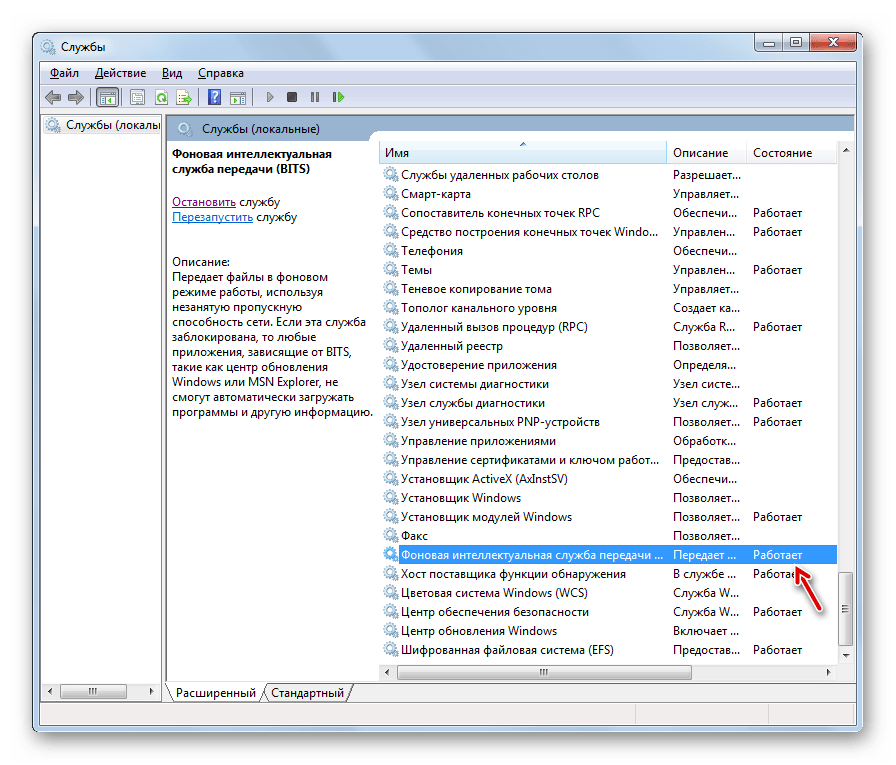
- После её успешного завершения напротив указанного элемента должен отобразиться статус «Работает».
- Также проверьте, чтобы в столбце «Состояние» был указан статус «Работает», а в колонке «Тип запуска» стоял статус «Автоматически» у служб «Журнал событий Windows» и «Центр обновления Windows». Если там установлены значения, отличающиеся от вышеуказанных, то в таком случае произведите те же самые манипуляции по активации объектов, которые были описаны выше.
После этого можно возобновить попытку обновления Windows. Если проблема заключалась в отключенных службах, то ошибка снова появляться теперь не должна.
Способ 4: Восстановление файлов системы
С указанной выше ошибкой пользователи Виндовс 7 могут столкнуться и в том случае, если на их компьютере по каким-либо причинам были повреждены системные файлы. Поэтому есть смысл выполнить соответствующую проверку и при необходимости произвести процедуру восстановления.
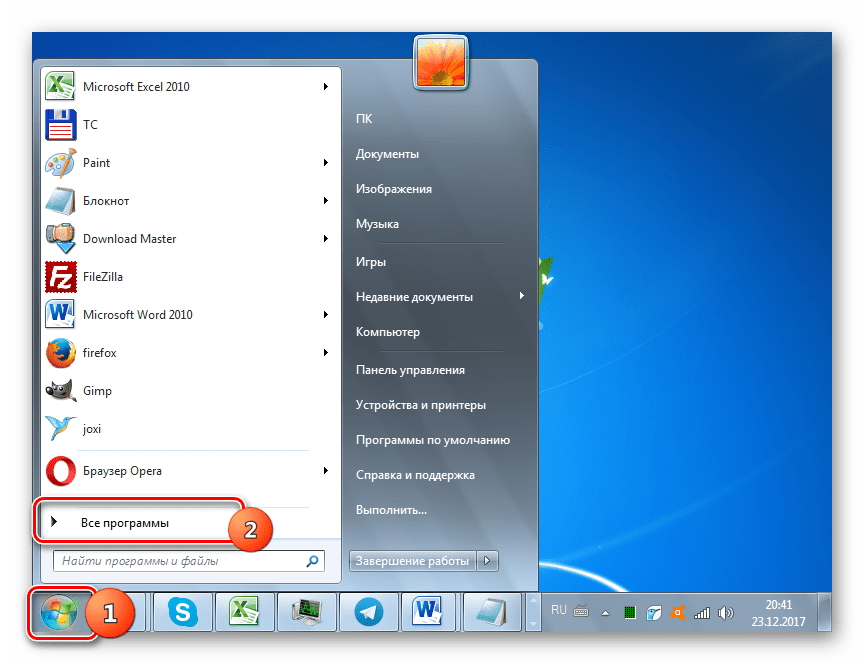
- Щелкайте «Пуск». Заходите во «Все программы».
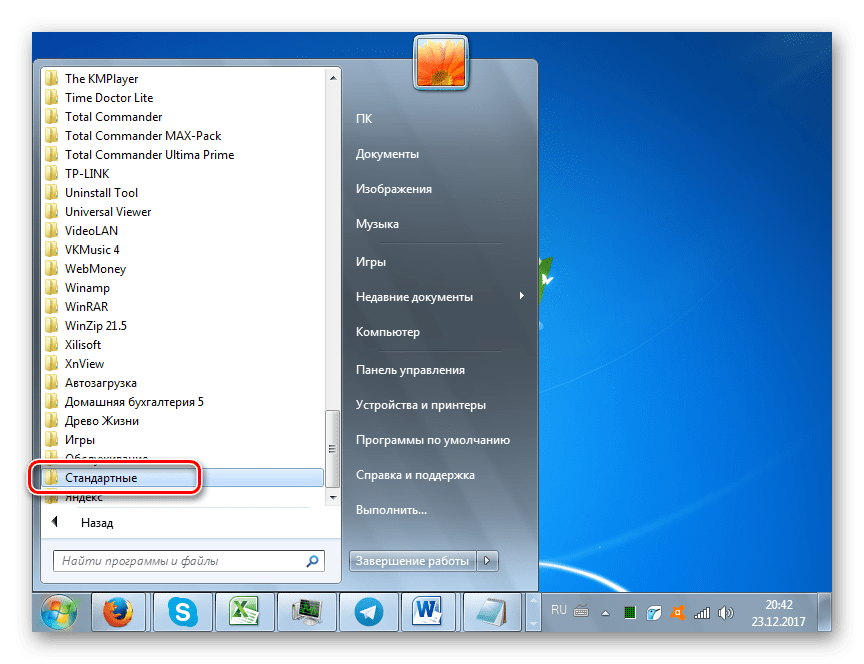
- Войдите в «Стандартные».
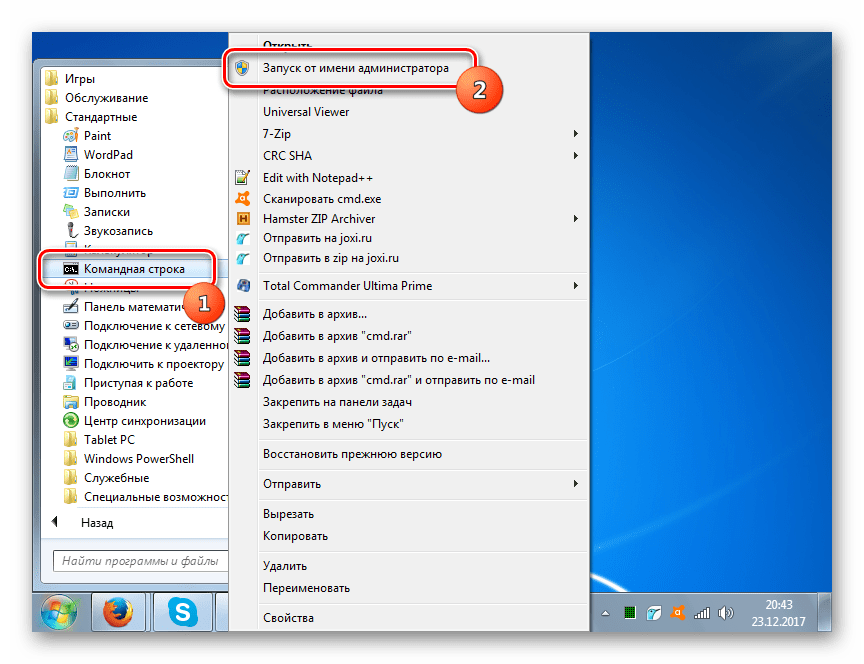
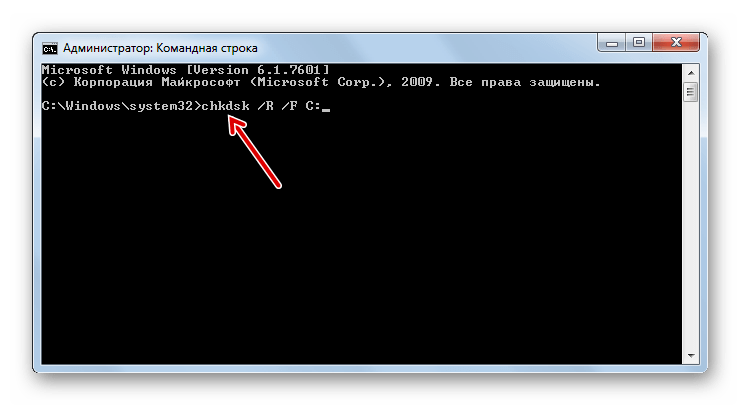
- В перечне найдите «Командная строка» и щелкните ПКМ по указанному наименованию. В появившемся списке выбирайте «Запуск от имени администратора».
- Открывается «Командная строка». Тут нам нужно будет ввести специальную команду для запуска утилиты «CheckDisk», которая и проведет сканирование и восстановление проблемных файлов. Введите:
chkdsk /R /F C:Кликните Enter.
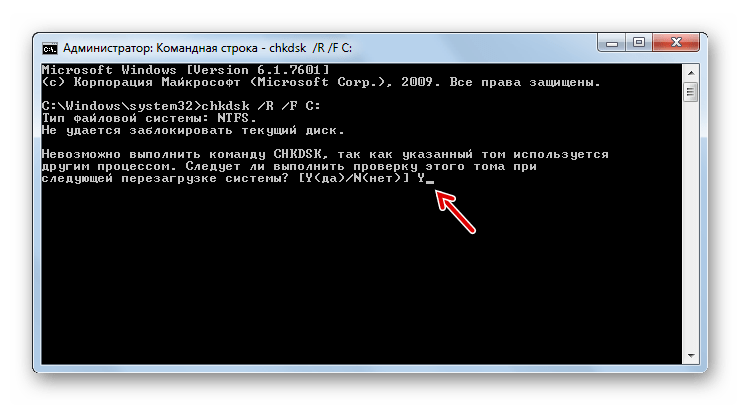
- Если после этого отобразится сообщение о невозможности выполнения указанной команды, так как выбранный том используется, то в этом случае введите символ «Y», щелкните Enter и перезагрузите компьютер. После перезагрузки будет выполнено сканирование системы на предмет наличия поврежденных системных файлов. В случае выявления таких проблем поврежденные элементы будут восстановлены.
Теперь можно будет повторить попытку обновления системы.
Урок: Проверка целостности файлов ОС в Виндовс 7
Как видим, несмотря на то, что основной причиной ошибки 80244019 является вирусное заражение, её могут вызвать и другие факторы. Кроме того, даже при устранении вируса довольно часто необходимо производить процедуру настройки отдельных элементов, которые он поразил. В любом случае, при появлении вышеуказанной проблемы рекомендуется, прежде всего, выполнить сканирование ПК антивирусной утилитой, а уже далее, если неисправность не исчезнет, производить попытки её устранения другими описанными в данной статье способами.
- Remove From My Forums
-
Вопрос
-
История такая. Было 3 сервера, 1- ADDS, DNS, файлопомойка. 2 — adds, dns, dhcp. 3 — прокси, wsus. Везде Win Server 2008 R2 Std. Было решение принято по апгрейду и оптимизации серверов. 1 — остался без изменений, 2 — стал чисто прокси(с
заменой адресов). 3 — Поставили чистую Windows Server 2012 R2 Standart, накатили в HYPER-V виртуалку на том же Windows Server 2012 R2 Standart. На виртулку добавили ad ds, dns, dhcp. На физическую машину с 2012ым сервером как
раз добавили wsus. Настраивали по инструкции микрософта, с внутренней базой. В политиках поменяли сервер wsus (пробовал и c портом указывать 8530, 8531, 80). Продукты и классы выбраны, wsus с центром обновлений микрософта синхронизирован.
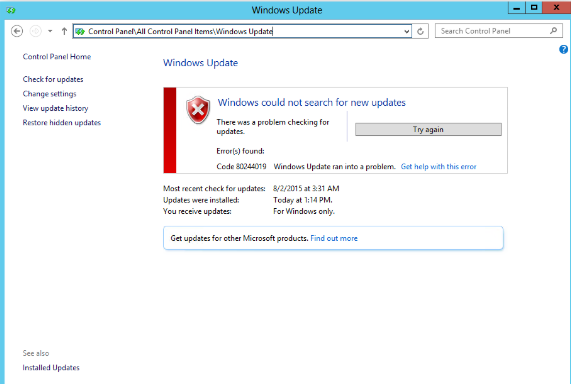
Брандмауэр в интересах настройки отключен. Но, wsus говорит, что ни один клиент не обращался за обновлениями, а на всех клиентах при поиске обновлений с wsusа вылазит ошибка: не удалось выполнить поиск обновлений, 80244019. Читал статьи похожие
и здесь и с других источников…но как-то никак…Может кто что дельного подскажет.-
Изменено
5 ноября 2014 г. 10:48
-
Изменено
Ответы
-
Адрес WSUS сервера на клиенте указан с использованием IP адреса, а не имени —
http://192.168.1.2
Значит настройки где WSUS указан как http://ServLib.lihbel.ru:8530 — не применились.Проверьте применение настроек к клиентам.
После того как в WindowsUpdate.log будет фиксироваться адрес WSUS как
http://ServLib.lihbel.ru:8530 и проблема не исправится, можно будет продолжить диагностику дальше. Скорее всего проблема в адресе сервера, который используют клиенты.-
Помечено в качестве ответа
DmitriyIM
7 ноября 2014 г. 13:07
-
Помечено в качестве ответа
-
Вопрос решён. Дело оказалось в том, что адрес сервера wsus
http://192.168.1.2 был задан в политике по умолчанию, а объект политики wsus, в котором задан верный адрес сервера обновлений(http://ServLib.lihbel.ru:8530) не был
связан с доменом.После этого
gpupdate /force
wuauclt.exe /detectnow
и всё хорошо) стал искать, и понемногу стали появляться клиенты из домена в панели wsus
Спасибо за правильные вопросы)
-
Помечено в качестве ответа
DmitriyIM
7 ноября 2014 г. 13:17
-
Помечено в качестве ответа
Здравствуйте, обновили лицензию со стандартной до расширенной и стала доступна функция закрытия уязвимостей.
Попробовал позакрывать и что-то действительно закрылось, но при этом всплыло несколько шибок при установке, может кто-то объяснить в чем у них проблема:
- “Обновление Google Chrome 84.0.4147.105 не установлено, так как в параметрах задачи не разрешена установка новых основных версий программного обеспечения.”
- Обновлений установлено: 0 из 2. Ошибка агента обновлений Windows 80244019 («HTTP 404 — the server cannot find the requested URI (Uniform Resource Identifier).»)
В описании первого обновления видно такую надпись “не назначено к установке (новая версия) на: 2”. Насколько я понял первая ошибка намекает что она может устанавливать только обновление, но не новую версию. Я пробовал отдельную задачу по установке делать и тоже не устанавливается. Я поискал в параметрах задачи “так как в параметрах задачи не разрешена установка новых основных” такой параметр, но ничего не нашел! Это было с Chrome, Mozilla, Java.
Про вторую ошибку непонятно кто именно не может скачать и откуда, 404 указывает что якобы в источнике этого нет.
Кто-то сталкивался с этим, может по-человечески объяснить куда смотреть?
Easy fixes to get the latest updates
by Madalina Dinita
Madalina has been a Windows fan ever since she got her hands on her first Windows XP computer. She is interested in all things technology, especially emerging technologies… read more
Updated on
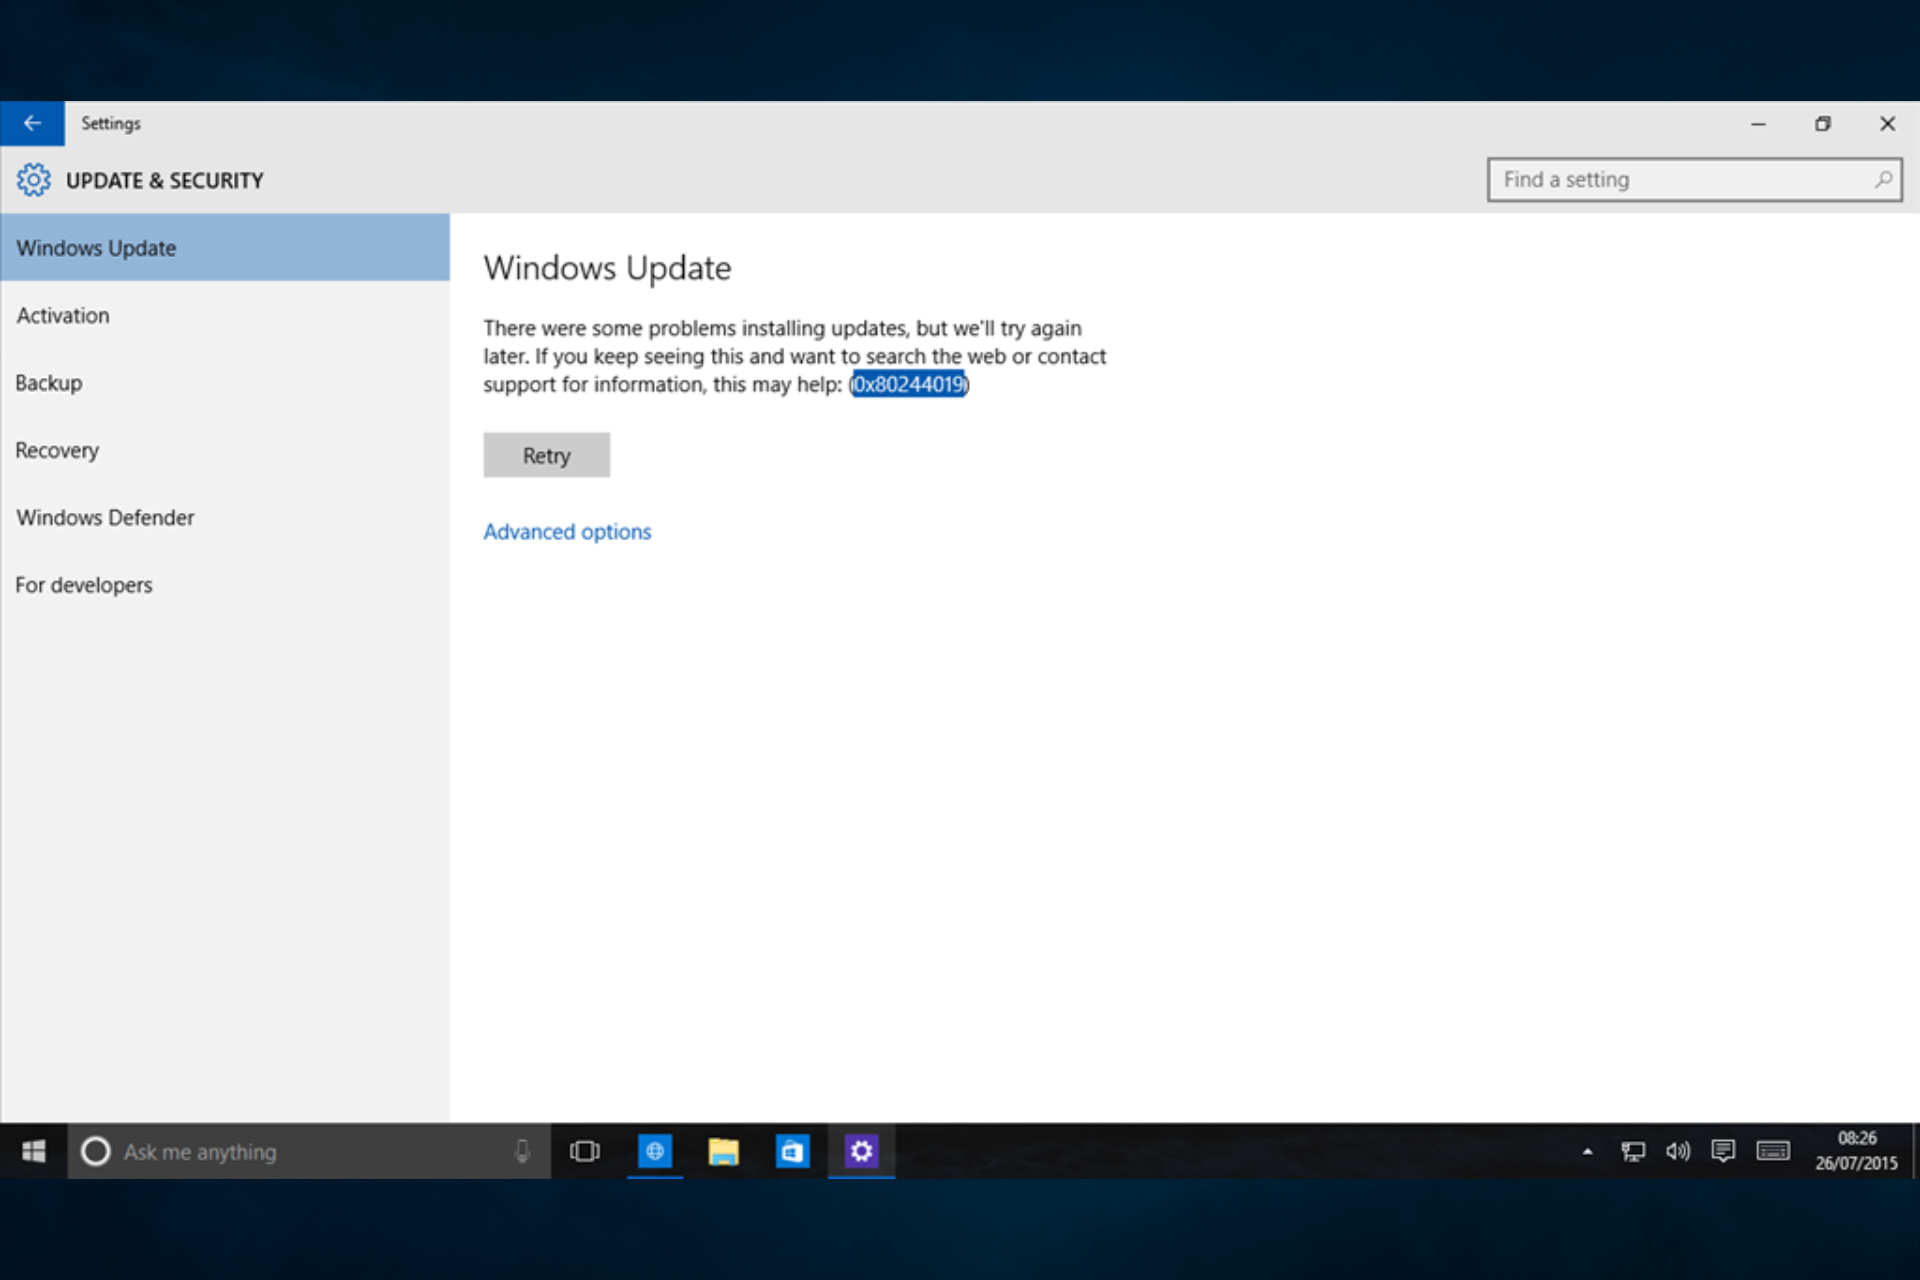
- Update errors are not uncommon on Windows devices, and error 0x80244019 is one a few users may face.
- In many cases, running the Windows Update troubleshooter should be enough to fix the problem.
Keeping Windows and your apps up-to-date is critical for your system’s security. An infinite number of threats circulate on the internet, many of which cause irreparable damage to your computer.
Unfortunately, many errors can occur during the update process. In this article, we’ll focus on the Windows Update error 0x80244019 and show you how to fix it.
Note that users have also experienced this error in Windows 7.
How can I fix the Windows Update error 0x80244019?
- How can I fix the Windows Update error 0x80244019?
- 1. Run the Windows Update troubleshooter
- 2. Change Windows update options
- 3. Check your antivirus
- 4. Reset Windows Update components
- 5. Perform a clean boot
- 6. Disconnect all USB devices
- 7. Install the update manually
- 8. Install optional updates
- 9. Perform an in-place upgrade
1. Run the Windows Update troubleshooter
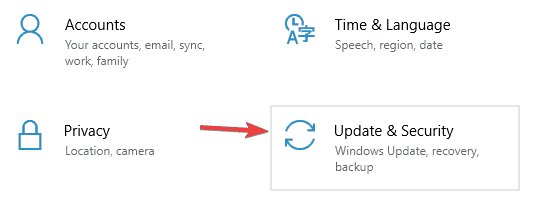
- Press Windows Key + I to open the Settings app.
- When Settings app opens, go to Update & Security section.

- Select Troubleshoot from the left pane. In the right pane select Windows Update and click Run the troubleshooter button.

- Follow the instructions on the screen to complete the troubleshooter.
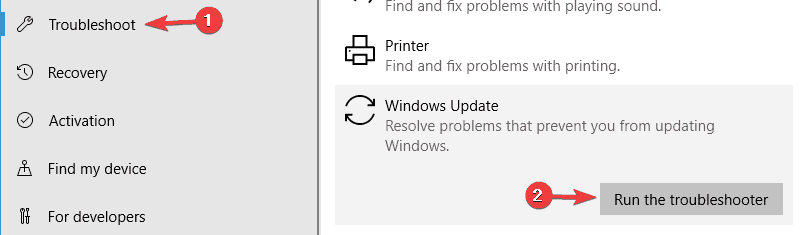
According to users, sometimes you might be able to fix this problem simply by running Windows Update troubleshooter.
As you know, Windows 10 has a wide range of troubleshooters available, and they are specially designed to automatically fix common problems.
If you’re having error 0x80244019 on your PC, you just need to run the Windows Update troubleshooter by following the above steps.
Once the troubleshooter is finished, check if the problem is still there.
2. Change Windows update options
- Open the Settings app and navigate to Update & Security section.
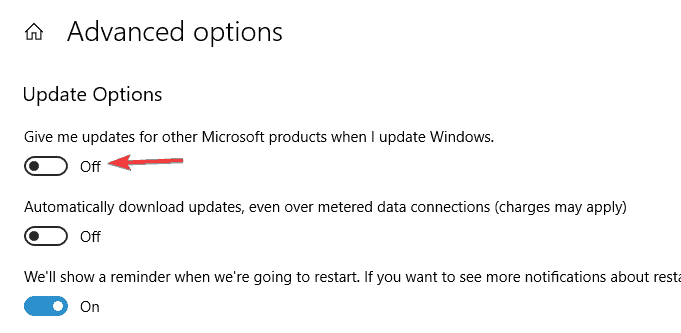
- When Windows Update window opens, click on Advanced options.

- Now turn off Give me updates for other Microsoft products when I update Windows.

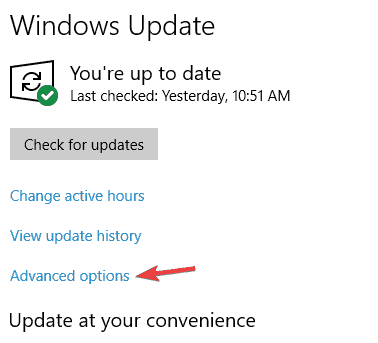
According to users, sometimes your options can cause error 0x80244019 to appear.
If you can’t update your PC due to this error, you might have to change your settings a bit. You can do that by following these steps from above.
After turning off this option, the issue should be resolved and you’ll be able to update Windows without any issues.
3. Check your antivirus
According to users, sometimes your antivirus can interfere with your system and cause error 0x80244019 to appear.
How we test, review and rate?
We have worked for the past 6 months on building a new review system on how we produce content. Using it, we have subsequently redone most of our articles to provide actual hands-on expertise on the guides we made.
For more details you can read how we test, review, and rate at WindowsReport.
To fix the problem, it’s recommended to disable certain antivirus features and check if that solves the issue.
If that doesn’t work, your next step would be to completely disable your antivirus. In the worst-case scenario, you might have to uninstall your antivirus and check if that solves the issue.
If removing the antivirus solves the problem, you should consider switching to different antivirus software.
4. Reset Windows Update components
- Press Windows Key + X to open Win + X menu. Now select Command Prompt (Admin) or Powershell (Admin) from the list.

- When Command Prompt opens, run the following commands:

- net stop wuauserv
- net stop cryptSvc
- net stop bits
- net stop msiserver
- ren C:WindowsSoftwareDistribution SoftwareDistribution.old
- ren C:WindowsSystem32catroot2 Catroot2.old
- net start wuauserv
- net start cryptSvc
- net start bits
- net start msiserver
In order to download the updates, certain Windows Update components need to be running. If these components aren’t running, you might encounter error 0x80244019.
However, you can fix this problem simply by resetting these components. To do that, you just need to follow these steps describe in the lines above.
After running these commands the necessary components will be reset and the issue should be resolved.
If you don’t want to run these commands manually, you can always create a Windows Update reset script that will automatically reset the necessary components for you.
5. Perform a clean boot
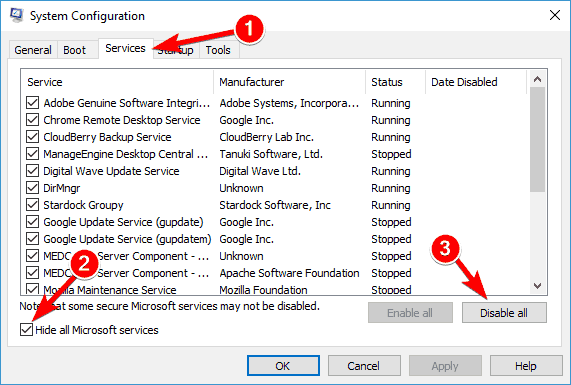
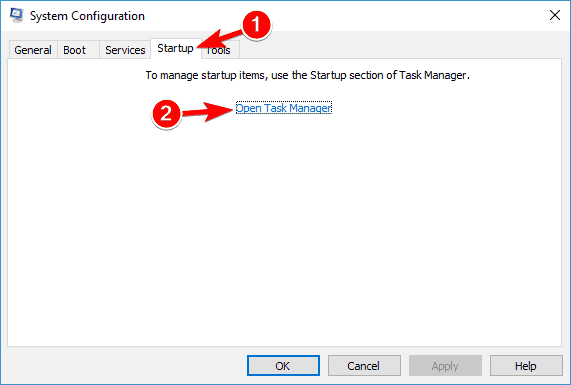
- Press Windows Key + R and enter msconfig. Now press Enter or click OK.

- On the Services tab select the Hide all Microsoft services check box > click Disable all.

- On the Startup tab > click Open Task Manager.
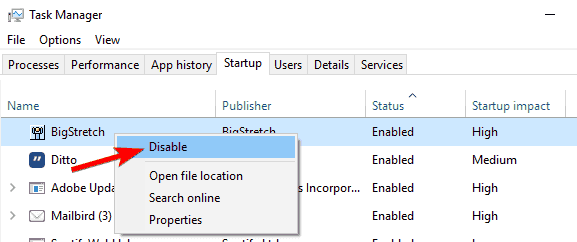
- Right-click each startup item and then click Disable.

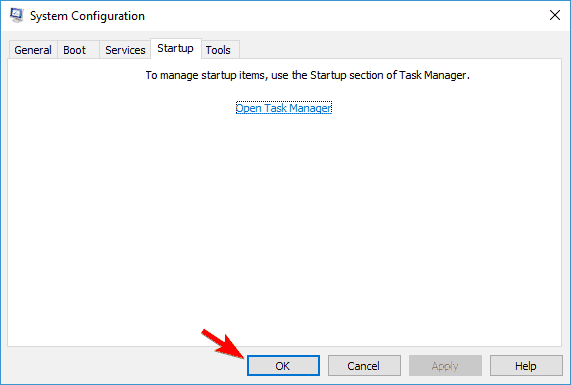
- Close Task Manager > click OK > restart the computer.
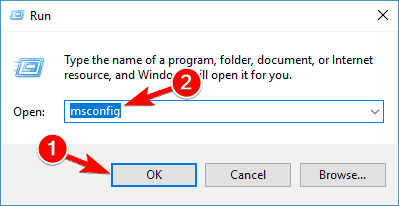
Third-party applications can sometimes interfere with your system and cause error 0x80244019 and other update errors to appear. To fix the problem, it’s advised to perform a Clean boot.
If you’re not familiar, in Clean boot state your PC will start without any third-party applications or services.
This is a great feature, especially if you’re concerned that a third-party application is interfering with your system. To perform a clean boot, perform the steps that were described a bit earlier.
After disabling all startup applications and services, try to install the update again and check if the issue is still there.
6. Disconnect all USB devices
In some rare cases, your USB devices can cause error 0x80244019 to appear. If you’re having this problem, it’s advised to disconnect all your USB devices from your PC.
This includes external hard drives, USB flash drives, gamepads, printers, etc.
Basically, you need to disconnect all devices except your keyboard and mouse. After doing that, try to install the update again and check if the problem is still there.
7. Install the update manually
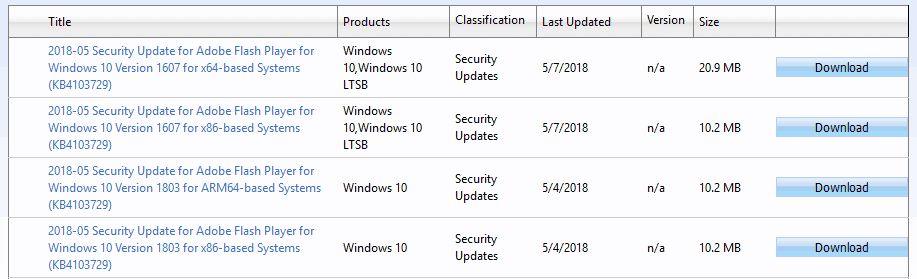
- Go to Windows Update Catalog website.
- Enter the KB number in the search field.
- List of matching updates will now appear. Select the update that matches your system architecture and download it.

If you can’t download the latest updates due to error 0x80244019, you might want to try installing the update manually.
This isn’t that hard, and in order to do it, first you need to find the KB number of the update. To do that, visit the Windows Update section and look for the KB number of the update.
Once you find the KB number, you need to do perform the steps from above.
Once you download the update, install it and check if that solves the issue.
Keep in mind that this method won’t fix the core problem, instead, you’ll just avoid the error message by downloading and installing the update on your own.
8. Install optional updates
Windows 10 installs updates automatically, but sometimes you might encounter a problematic update. In order to prevent the update from installing, you need to block it with a special tool.
If you want to know more about blocking Windows Updates, we wrote a special article about it, so you should check it out.
Although blocking updates can help you with certain problems, several users reported that hiding optional updates can cause this problem to appear.
Therefore, if you have any optional updates hidden, be sure to unblock and install them.
After doing that, this problem should be resolved and you’ll be able to install the updates without any problems.
9. Perform an in-place upgrade
- Download Media Creation Tool and run it.
- Select Upgrade this PC now and click Next.
- Wait while the setup downloads the necessary files.
- Select Download and install updates (recommended).
- Wait while setup downloads the updates.
- Follow the instructions on the screen until you reach Ready to install screen. Click on Change what to keep.
- Make sure that Keep personal files and apps is selected. Now click Next.
- Follow the instructions on the screen to complete the setup.
To fix this problem you might have to perform an in-place upgrade.
By doing so, you’ll install the latest version of Windows, with all current updates, while keeping your files and applications intact.
This process is relatively simple, and you can perform it by following the steps from above.
Once the setup is finished, you’ll have the latest version of Windows installed and the issue should be resolved.
- The Windows 11’s weather widget now offers a detailed weather forecast
- Windows 11 adds more apps to the share links feature
Update error 0x80244019 can be problematic since it can leave your system vulnerable. Speaking of this error message, here are some related issues that users reported:
- 0x80244019 Windows Server 2016 – This issue can affect Windows Server 2016, and if you have this problem, you might be able to fix it using one of our solutions.
- Windows 7 update error 0x80244019 – Many users reported this issue on older versions of Windows. Even if you don’t use Windows 10, you should know that most of our solutions can b applied to older versions of Windows as well.
We hope the solutions listed above helped you fix Windows 10 update error 0x80244019.
If you’ve come across other workarounds to fix this problem, you can list the troubleshooting steps in the comment section below.
![]()
Windows updates are essential to keep your system up to date. Each update brings something new to users, which often includes security patches, feature introductions, and performance optimization. It’s easy to see how running into errors when updating can be a huge setback for all Windows users.
In this article, we’ll be going over a Windows Update error, specifically error code 80244019. If you want to know why this error happens and how to fix it, make sure to continue reading.

Common causes for Windows Update Error 80244019
There’s no exact cause for this error to appear, however, using user reports we were able to find some common things that trigger code 80244019.
- Corrupted system files
- Windows Update service not functioning properly
- An app or service is interfering with your Windows Update download
There are only some of the common occurrences that lead users to get the Windows Update error code 80244019. Your case might be unique — however, our guides below will talk you through the steps to ensure this error doesn’t appear again on your device.
If you can’t update Windows to the latest version because of this error, don’t panic. Such errors can be easily fixed by following our detailed guides below.
Note: You might be required to have access to an administrator account to perform all of the steps described below. If the account you’re currently using doesn’t have administrative permissions, make sure to change this in your settings.
Method 1: Repair corrupted system files
The DISM tool allows you to identify and fix corruption issues with your system by simply running commands in the Command Prompt application. It checks for corruption system-wide and automatically attempts to restore damaged or missing files.
- Press the Windows + R keys on your keyboard. This is going to bring up the Run utility.
- Type in “cmd” and press the Ctrl + Shift + Enter keys on your keyboard. Doing so, you’re launching the Command Prompt with administrative permissions.
- If prompted, click Yes to allow the Command Prompt to make changes on your device.
- Once in the Command Prompt, you need to start the DISM scan which will run and look for issues system-wide. Type in the following command and press Enter to execute it: DISM.exe /Online /Cleanup-image /Scanhealth
- Next, you need to execute a command to fix any issues found on your system. Simply type in the following line and press Enter again:DISM.exe /Online /Cleanup-image /Restorehealth
- Wait for the process to finish. Upon completion, close the Command Prompt window and restart your device. Check if the Windows Update error still comes up now.
Method 2: Run the System File Checker

The System File Checker is a tool available in Windows 10 by default. It’s also called an “SFC scan,” and it’s your quickest way to automatically fix corrupted system files and other issues.
Some users have reported that running this scan fixed their issues with Windows Update failing, getting stuck, or not starting.
- Press the Windows + R keys on your keyboard. This is going to bring up the Run utility.
- Type in “cmd” and press the Ctrl + Shift + Enter keys on your keyboard. Doing so, you’re launching the Command Prompt with administrative permissions.
- If prompted, click Yes to allow the Command Prompt to make changes on your device.
- Once in the Command Prompt, type in the following command and press Enter to execute it: sfc /scannow
- Wait for the SFC scan to finish scanning your computer and repairing corrupt files. This may take a long time; ensure that you don’t close the Command Prompt or shut your computer down.
- Restart your device after the scan is complete. Check if you’re able to update Windows after the restart has finished.
Method 3: Restart the Windows Update Service

There’s a possibility that your Windows won’t update because the update service isn’t running properly. To check and fix this, simply follow the steps below.
- Press the Windows + R keys on your keyboard. This is going to bring up the Run utility.
- Type in “services.msc” and click the OK button to launch Services. This might take a moment to fully load.
- Scroll down until you find the Windows Update service. Right-click on it and select the “Stop” option.
- Wait for 30 seconds.
- Right-click on the Windows Update service again and select “Start.” This should fully restart the service.
- Attempt performing a Windows update again.
Method 4: Turn on Data Execution Prevention

Turning on the Data Execution Prevention (DEP) feature has solved this error code for many Windows users. What this does is limit the ability of other processes to ensure Windows Update doesn’t get interrupted.
- Press the Windows + R keys on your keyboard. This is going to bring up the Run utility.
- Type in “sysdm.cpl” and click the OK button. This will open up a window called System Properties.
- Click on the Advanced tab, then Settings, and Data Execution Protection.
- Select the “Turn on DEP for Essential Windows Programs and Services only” option.
- Click Apply.
- Restart your system and attempt to perform a Windows update again.
Method 5: Use the Windows Update Troubleshooter
Microsoft themselves have issued a designated tool to help fix issues with Windows updates. This tool is free and available for download to anyone, even without a Microsoft Account. All you have to do is simply run the tool and see if it’s able to identify and fix any errors.
- Download the Windows Update Troubleshooter. This download link is directly from Microsoft’s website, which is verified as trustworthy and entirely safe.
- Open the WindowsUpdate.diagcab file you just downloaded by double-clicking on it. This will launch the troubleshooter window.
- Follow the on-screen instructions. If the troubleshooter is able to identify any issues, simply click on them to automatically apply a fix or get more information on your issue.
Note that the Windows Update Troubleshooter is not perfect. Even if it’s unable to find any errors on its own, you should continue with our methods until you find something that works to fix the Windows Update failing error.
Method 6: Manually install the failing update
If all else fails, you can try manually downloading the update that keeps producing the same error on your computer.
- Press the Windows + R keys on your keyboard. This is going to bring up the Run utility.
- Type in “control” and click the OK button. This will open up the Control Panel (not to be confused with Windows 10’s Settings panel.)
- Search for Windows Update in the Control Panel, then click View Update History.
- Copy the number of your update and search it on the internet. You should be able to find an official Microsoft download link that allows you to install the update manually.
We hope that this guide was able to help you troubleshoot the Windows Update Error 80244019 on your Windows system.
If you notice in the future that your system is experiencing similar issues, feel free to return to our article and apply some other fixes. If nothing works, we recommend turning to either Microsoft’s customer support team or looking for an IT specialist in regard to your PC’s health.