Ошибка
При установке или обновлении Adobe Acrobat/Adobe Acrobat Reader любым из следующих методов:
- С помощью пункта меню «Справка» > «Обновления»
- Установка с помощью приложения Creative Cloud для ПК
- Ручная загрузка и установка обновления
Происходит сбой установки и появляется следующее сообщение об ошибке:
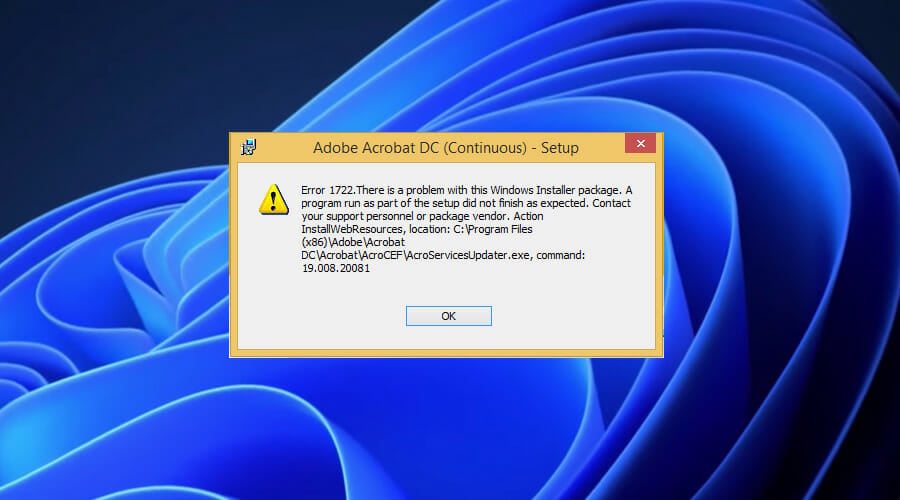
«Ошибка 1722. Возникла проблема с пакетом программы установки для Windows. Выполнение программы в составе пакета настройки не завершилось должным образом.Обратитесь в службу поддержки или к поставщику пакета». Действие InstallWebResources, расположение: <Product Install Path>\AcroCEF\RdrServicesUpdater.exe».
Ошибка при использовании пункта меню Справка > Обновление рабочего процесса
Ошибка при установке Acrobat с помощью приложения Creative Cloud для ПК
Ошибка при загрузке программы установки и обновления вручную
Ошибка при установке Acrobat Reader вручную из Центра загрузки Reader (https://get.adobe.com/reader)
Решение
Ошибка появляется из-за отсутствия обновления для универсальной среды выполнения C для Windows. Установите обновление одним из следующих способов:
Решение 1
Загрузите обновление вручную из Центра загрузок Microsoft.
Установив требуемое обновление, попробуйте установить Acrobat/Acrobat Reader.
Необходимо иметь Windows 7 с пакетом обновлений 1 (SP1) или более новой версии, чтобы установить обновление.
Решение 2
С помощью Центра обновления Windows обновляйте ОС автоматически.
Попытайтесь снова установить Acrobat/Acrobat Reader, как только будут установлены все доступные обновления Windows.
Решение 3
-
Если используется компьютер с 64-разрядной ОС, перейдите в папку C:\Windows\SysWOW64\, а если используется 32-разрядная версия, перейдите в папку C:\Windows\System32.
Примечание. Если папка C:\Windows\SysWOW64 существует, значит, используется компьютер с 64-разрядной операционной системой.
-
Найдите файлы msvcr120.dll и msvcp120.dll и переименуйте оба из них.
Не удаляйте эти файлы. Если не удастся установить пакет Visual C++ (vcredist_x86.exe), вы сможете вернуть файлам исходные имена. -
Чтобы установить загруженный распространяемый пакет Visual C++ (vcredist_x86.exe), дважды щелкните его. После завершения установки проверьте, установлены ли снова файлы msvcr120.dll и msvcp120.dll. Если да, можно удалить файлы, которые были переименованы на шаге 3.
Не удаляйте последние версии установленных файлов msvcr120.dll и msvcp120.dll. -
Установите Acrobat/Acrobat Reader.
Sometimes, you can encounter the “There is a problem with this Windows Installer package” error while trying to install an application through an MSI installer. This error occurs if your system can’t run a script, program, or DLL file necessary for such operations. You will also encounter corresponding error messages in each case:
- Error 1720: There is a problem with this Windows Installer package. A script required for this install to complete could not be run.
- Error 1721: There is a problem with this Windows Installer package. A program required for this install to complete could not be run.
- Error 1722: There is a problem with this Windows Installer package. A program run as part of the setup did not finish as expected.
- Error 1723: There is a problem with this Windows Installer package. A DLL required for this install to complete could not be run.
Even if they are different errors, you need similar solutions to resolve all of them. First, make sure to log in with an admin account and run the program as an administrator. Some installers require admin privileges to run properly. Also, make sure that there is enough space to install the application.
Table of Contents
Re-register Windows Installer
Windows uses the MSIExec engine to run the MSI installer. If the registration of this engine becomes corrupt, you can’t run such installers. To resolve this issue, you need to unregister and then re-register the engine.
- Open Run.
- Type
cmdand press Ctrl + Shift + Enter to open the Elevated Command Prompt. - Enter the following commands:
MSIExec /unregisterMSIExec /regserver

Restart Windows Installer Service
You will also get this error if the Windows Installer service is not running properly or another instance of the installer engine is already running. We recommend checking for both issues at the same time.
- Open Run by pressing Win + R.
- Type
msconfigand press Enter to launch the System Configuration. - Go to the Services tab and search for Windows Installer.
- Make sure the box next to it is checked and press OK.

- Now, press Ctrl + Shift + Esc to open the Task Manager.
- Go to the Details tab.
- Look for
msiexec.exe. If it’s there, select it and click End Task.
- Then, open Run again.
- Type
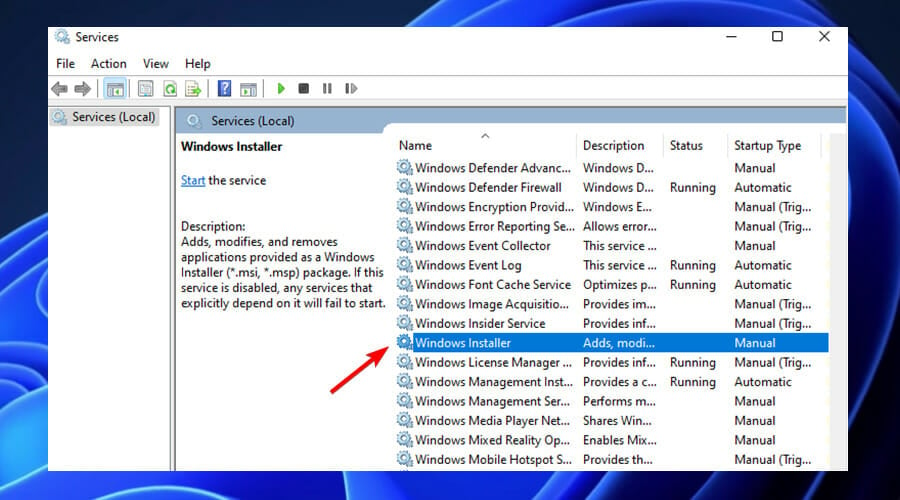
services.mscand press Enter to open Window Services. - Look for Windows Installer and check its Startup Type.

- If it shows Disabled, double-click on it and set the Startup type drop-down list to Manual.
- Click on Start if the Service status indicates Stopped. Otherwise, click Stop and then Start to restart the service.


Restart your computer and check if the issue persists.
Re-register Some DLL Files
Like with the MSIExec engine, your system uses many DLL files while running the MSI installers. You can similarly re-register them to resolve any potential registration issues.
- Open the Elevated Command Prompt.
- Enter the following commands:
regsvr32 Actxprxy.dllregsvr32 Browseui.dllregsvr32 Mshtml.dllregsvr32 ole32.dllregsvr32 Oleaut32.dllregsvr32 Scrrun.dllregsvr32 Shdocvw.dllregsvr32 Shell32.dllregsvr32 urlmon.dll
- Don’t worry if you get a “The module was loaded but the entry point DllRegisterServer was not found” error, simply move on to the next command.

Troubleshoot Compatibility
If the error has the code 1721, it might be because the installer is for a previous version of Windows and therefore is not compatible with your current system. In such cases, you need to troubleshoot for program compatibility.
- Right-click on the installer and select Troubleshoot Compatibility or Show more options > Troubleshoot Compatibility.

- Select Try Recommended Settings.
- Then, click on Test the program.

- If the error doesn’t occur this time, go back to the Troubleshooter and select Next > Yes, save these settings for this program.


Install Necessary Windows Features and Updates
The installation of several programs on your system requires certain supporting software components and features. We recommend installing all such programs to prevent suffering from different installation errors. Even if you already have these components, they might have become corrupt, so it’s worth reinstalling them.
- All available Microsoft Visual C++ Runtime Packages
- Windows Management Framework
- Latest .NET Framework
You should also make sure to have the latest version of your Operating System. The newer applications require the most updated OS versions to be able to provide better features.
- Open Run.
- Type
ms-settings:windowsupdateand press Enter to open Windows Update Settings. - Click on Check for Updates to scan for and download available updates or Install now if your computer has already downloaded them.


Re-download the Installer
It is also possible that the installer you downloaded or transferred is not complete. You can check for such issues by checking its properties.
Select the installer and press Alt + Enter to open its Properties and compare the Size and Size on the disk from the General tab. If the Size on disk is much lower than the Size, the file is not complete.
In such cases, you need to download it again. Also, we recommend you ensure that the installer you download matches the system architecture of your computer while doing so.
Take Ownership of the Temp Folder
Many programs including installers make use of the Temp folder inside AppData to store temporary files. By default, each user accounts have the ownership and permissions of the Temp folder for that account. However, if this setting gets changed somehow, you will encounter many issues, including the above.
In such a scenario, you should see the error code 1723 in the error message, so it’s easier to recognize. You need to take ownership and provide permissions to this folder to resolve the issue.
- Open the Elevated Command Prompt.
- Enter the following commands:
takeown /F %Temp%icacls %Temp% /Grant %userdomain%\%username%:F

Uninstall Application Before Reinstalling
Sometimes the previous software of an application can also interfere with the new installation. In such cases, you need to uninstall the previous application first.
- Open Run.
- Type
appwiz.cpland press Enter to open Programs and Features. - Look for and select your application.
- Click on Uninstall or Uninstall/Change > Uninstall.

- Confirm with Yes and follow the on-screen instructions.

Then, update/reinstall the app again by launching a complete installer. If you can’t uninstall the applications, there may be some app-specific reasons causing such errors. You need to check official websites for what to do in such scenarios.
Remove Pending Installations Using Registry Editor
You will also get this error if you try running an installer when another one is already running on your system. Windows will usually warn you if something like this happens, but it can’t do so if the previous instance of installers is stuck. In such a case, you need to remove all pending installations first.
- Open Run.
- Type
regeditand press Enter to open the Registry Editor. - Navigate to
Computer\HKEY_LOCAL_MACHINE\Software\Microsoft\Windows\CurrentVersion\Installer
- If the InProgress key is present, delete all the entries inside it.
- Then go to Computer
HKEY_LOCAL_MACHINE\System\CurrentControlSet\Control\Session Manager - If PendingFileRenameOperations is there, delete all of its entries as well.

Install a Different Version of Application
Sometimes, the latest version of the application or its installer may have some bugs that are responsible for such issues. In such cases, you will only encounter the above error while trying to install one application but can successfully install other programs through MSI installers. You need to try installing a previous or different version of the app instead to resolve the issue.
Ошибки в процессе установки, обновления софта или его удаления – нередкое явление. Одна из таких появляется с кодом 1722 и сообщением о том, что в ходе процедуры возникла проблема с программным компонентом – установщиком Windows, в результате чего задача не может быть выполнена. Неисправность пакета установщика в системе не позволяет производить такие действия как установка и обновление Acrobat Reader или других поддерживаемых программ. Рассмотрим подробнее, почему возникает проблема, и разберём способы её решения.

Причины ошибки 1722
Для решения проблемы потребуется устранить источник неприятности, а поскольку сбои во время выполнения могут быть спровоцированы рядом факторов, выявить его сразу непросто. Поэтому задача заключается в последовательном выполнении действий, направленных на устранение вероятных причин неисправности.

Ошибка 1722 возникает при установке или обновлении Acrobat Reader по следующим причинам:
- установщик деактивирован в системных настройках;
- незавершённая загрузка, неполная установка пакета Windows Installer;
- ошибки системного реестра, отсутствующие или повреждённые записи, которые спровоцированы недавним изменением ПО, связанного с Установщиком;
- воздействие вредоносного софта, повредившего системные файлы или компоненты программы-установщика;
- файл ошибочно удалён другим приложением, конфликт программы с Windows Installer;
- проблемы с разрешением на выполнение скриптов.

Как исправить ошибку Windows Installer 1722
Сбой при инсталляции, обновлении Adobe Acrobat Reader DC происходит по разным причинам независимо от метода установки софта, так что и решений будет несколько. Проблема может возникать при следующих условиях:
- ошибка при использовании пункта меню «Справка» – «Обновление рабочего процесса»;
- ошибка при установке Acrobat Reader DC с помощью приложения Creative Cloud для ПК;
- ошибка при загрузке программы установки и обновления вручную;
- ошибка при установке AcrobatReader DC вручную из Центра загрузки Reader (https://get.adobe.com/reader/).
Сбой с кодом 1722 и сообщением с прочими сведениями может быть устранён путём использования различных вариантов решения.
Проверка функционирования службы Установщика Windows
Для начала стоит проверить, запущен ли сервис. Сделать это просто:
Проверка компьютера на вирусы
Прежде чем переходить к другим способам устранения проблемы, если она не была решена путём активации службы, следует проверить компьютер на вирусы с помощью установленного или штатного защитного софта. Также желательно использовать специальные утилиты, такие как Dr.Web Cure It! или др.

Чистая загрузка Windows
Выполнение чистой загрузки избавит от конфликтов с другим софтом, возникающих в процессе инсталляции и вызывающих ошибку. Старт системы будет выполнен с минимальным набором драйверов и прочего необходимого для функционирования ПО. Для этого, войдя в систему как администратор, выполняем следующие действия:
Проверка системных файлов
Средствами системы можно устранить различные сбои, в том числе просканировать системные файлы на наличие некорректных изменений, повреждений и восстановить их, если таковые имеются. Для этой цели используется штатная утилита SFC, которую необходимо запустить от имени администратора. Запустить проверку просто:
Установка обновления Acrobat DC/Acrobat Reader DC вручную
Данный способ предполагает загрузку обновления из Центра загрузок Microsoft с учётом разрядности системы (актуально для ОС Windows 7 с пакетом SP1 и версий новее), после чего можно снова попробовать установить Acrobat DC/Acrobat Reader DC.

Обновление Windows
Microsoft регулярно выпускает пакеты обновлений для Windows, позволяющие улучшить систему и исправить ошибки. Обновить ОС можно, используя оснастку Центр обновления, – при наличии доступных обновлений устанавливаем их нажатием соответствующей кнопки. Так, в некоторых случаях ошибка 1722 Установщика Windows устраняется и Acrobat DC/Acrobat Reader DC можно установить.
Загрузка Microsoft Visual C++
Если предыдущие способы не сработали, можно загрузить пакеты Visual C++ следующим образом:
Восстановление Windows
Ещё один способ, позволяющий устранять системные ошибки разного характера, в том числе и с кодом 1722, подразумевает возврат системы в то состояние, когда сбоя ещё не существовало и всё исправно работало. При этом пользовательские данные не будут затронуты, опция предусмотрена только для восстановления системы.
Чтобы применить данную возможность, нужно, чтобы на компьютере создавались точки восстановления. Они могут создаваться пользователем или системой автоматически, но если эту опцию вы убрали, то способ не подойдёт для решения рассматриваемой проблемы.
Для восстановления потребуется выполнить следующее:
Повторная регистрация службы Windows Installer
Ошибка Установщика Windows может быть исправлена также путём перерегистрации инсталлера в ОС. Сделать это можно таким образом:
- открываем Командную строку (из меню «Пуск» или используем консоль «Выполнить» и команду cmd);
- для 32-битных систем последовательно вводим команды:
msiexec /unregister
 msiexec /register
- для 64-битных систем последовательно вводим команды:
%windir%\system32\ msiexec.exe / unregister
 %windir%\system32\msiexec.exe / register
 %windir%\syswow64\msiexec.exe / unregister
 %windir%\syswow64\msiexec.exe / register
- перезагружаем компьютер.


После каждой команды жмём клавишу Enter.
Исправление реестра
Редактирование системного реестра – задача для специалиста, поскольку даже незначительные правки, внесённые неопытным пользователем, могут привести к потере работоспособности ОС. Мы не рекомендуем без должных навыков править записи. Чтобы восстановить рабочие параметры, лучше воспользоваться специальным инструментом, таким как WinThruster, функционал которого позволяет безопасно очистить и исправить реестр.

На устранение ошибок, связанных с Установщиком Windows, потребуется некоторое время, поскольку не всегда очевидно, что послужило причиной появления сбоя, а подходящий метод исправления не всегда находится с первого раза.
Download Windows Speedup Tool to fix errors and make PC run faster
The MSI file format used by Windows Installer (MSI) is used specifically for installation – this differs from the EXE format sometimes used to run installers, which are simple executable files that can be programmed to run any number of tasks.
The InstallShield Error code 1722 appears when Windows Installer fails to install a package on your Windows 10 device. When you click OK on the error prompt, the installation process gets rolled back and then the installation fails. You may encounter this error with any software or driver installation. In this post, we will identify the potential causes, as well as offer the most suitable solutions.

Depending on the software you’re trying to install, when you encounter this issue, you’ll receive an error message similar to the following;
Error 1722. There is a problem with this Windows Installer package. A program run as part of the setup did not finish as expected. Contact your support personnel or package vendor.
In addition to the error message in focus, you may encounter the following during software installation as well;
MSI Error 1722: ‘There is a problem with the Windows Installer Package’ during installation/uninstallation.
Error 1722: There is a problem with this Window Installer package. A program run as part of this package did not finish as expected.
Error 1722 – The Windows Installer Service could not be accessed.
Error 1722 – Windows Installer Service couldn’t be started.
Error 1722 – Could not start the Windows Installer service on Local Com Error 5: Access is denied.
Below are the known potential culprits of this error:
- Missing dependent System Files like dll files, ocx files, sys files, etc.
- Invalid Registry Entries that are conflicting with Installer.
- Antivirus removes malicious files recently but left damages as well.
- Installer Service is stopped.
- Incomplete installation.
The error may also occur if some MSI packages are not properly removed from the Programs & Features applet in Windows 10. The remnants of the corrupted installation can sometimes prevent the installation and uninstallation of the software.
If you’re faced with this issue, you can try our recommended solutions below in no particular order and see if that helps to resolve the issue.
- Run the Program Install and Uninstall Troubleshooter
- Uninstall the software using a third-party software uninstaller
- Ensure Windows Installer service is enabled
- Unregister and re-register Windows Installer Service
- Perform a Clean Boot and install software
- Repair Windows Registry
Let’s take a look at the description of the process involved concerning each of the listed solutions.
1] Run the Program Install and Uninstall Troubleshooter
This solution requires you to run the Program Install and Uninstall Troubleshooter from Microsoft and see if the InstallShield Error code 1722 while installing MSI program issue is resolved. The Program Install and Uninstall troubleshooter helps you automatically repair issues when you’re blocked from installing or removing programs. It also fixes corrupted registry keys.
2] Uninstall the software using third-party software uninstaller
The Windows 10 Programs and Features applet sometimes can be inefficient in removing software from your device – in some cases even though the software has been successfully uninstalled, there are still residual files, dependencies that are leftover on your machine and these can cause conflicts. In cases like this, it’s better to use a third-party software uninstaller as they do a thorough job of removing software from a Windows 10 computer.
After you uninstall the program, download a fresh installer setup in a different folder location, then close all programs and run the setup file.
3] Ensure Windows Installer service is enabled
These software are dependent on the Windows Installer Service. So, if you’re having an issue installing any software, it’s likely that the MSI service is not enabled. In this case, ensure that the Windows Installer Service is enabled.
4] Unregister and re-register Windows Installer Service
Do the following:
- Press Windows key + R to invoke the Run dialog.
- In the Run dialog box, type
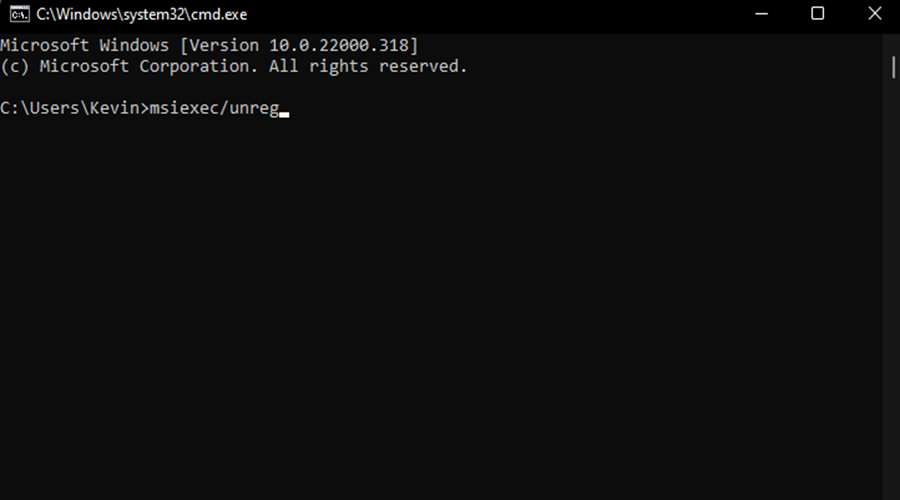
cmdand then press CTRL + SHIFT + ENTER to open Command Prompt in admin mode. - In the command prompt window, type the command below and hit Enter to temporarily unregister the Windows Installer service:
msiexec /unreg
- Once the command is processed successfully and you get the success message, input the following command and hit Enter to register the Windows Installer once again:
msiexec /regserver
After the second command is processed successfully, restart your computer once again, and try installing the software again. If the install/uninstall error persists, try the next solution.
5] Perform a Clean Boot and install software
Performing a Clean Boot can remove any conflicts that occur during your software installation – this means starting your Windows 10 computer with minimum required drivers and programs.
6] Repair Windows Registry
Invalid/corrupted registry entries from a recent software change i.e install or uninstall that is related to Windows installer, can also trigger this error. In this case, you can repair the registry, then try the software installation again.
Related posts:
- Fix InstallShield Error Codes 1607 or 1628
- 1152: Error extracting files to the temporary location – InstallShield error.
Obinna has completed B.Tech in Information & Communication Technology. He has worked as a System Support Engineer, primarily on User Endpoint Administration, as well as a Technical Analyst, primarily on Server/System Administration. He also has experience as a Network and Communications Officer. He has been a Windows Insider MVP (2020) and currently owns and runs a Computer Clinic.
by Radu Tyrsina
Radu Tyrsina has been a Windows fan ever since he got his first PC, a Pentium III (a monster at that time). For most of the kids of… read more
Updated on
- You may encounter Error 1722 (Windows Installer package error) while trying to install or remove a program from your device.
- The issue is caused by installing a program incorrectly or when a program running as part of the setup did not finish as expected.
- You can use Safe Mode to install applications or update the software to resolve this problem.

XINSTALL BY CLICKING THE DOWNLOAD
FILE
When you use Windows 11, the built-in Windows Installer handles the installation, maintenance, and removal of software on your PC.
If your Installer is faulty, you might encounter errors while trying to install or remove a software program. A typical one is Error Code 1722. An error may also appear due to issues with your computer system in the following format:
Error 1722. There is a problem with this Windows Installer package. A program run as part of the setup did not finish as expected. Contact your support personnel or package vendor.
It is worth noting that you are likely to experience the error when you are trying to install:
- Java
- Security software
- Drivers
- Games
- Microsoft products
What causes the Windows Installer 1722 Error in Windows 11?
When installing new software on your computer, errors do occur. Sometimes, this is due to the fact that the program needs a component that is no longer available on your PC or because there is a conflict with another software that’s already installed.
This can also be caused by an incorrect installation of another application because they leave traces behind and sometimes make changes in the registry.
The registry holds all settings for them on your computer. When making changes here, they can cause errors in other programs.
When you use different kinds of software that make changes in the same area of the registry it can lead to conflicts between them. These conflicts can prevent your software from working correctly.
What can I do about the Windows Installer 177 Error in Cisco VPN client?
Error 1722 Windows Installer is one of the common errors you might come across while installing Cisco VPN Client in Windows 11.
There may be different reasons for this error but the most common one could be the incompatibility of the files with the OS version, bad sectors on the disk, or damaged registry entries. That’s why our below fixes will do the trick in no time.
What causes the Error 1722 with Windows Installer Package of Acrobat DC?
Error 1722 is a common error message in Windows operating system. It usually occurs when we try to install a software program or driver using the .exe file.
Do note that it also occurs when we try to open some programs, for example, Adobe Acrobat DC. The error message appears as:
How we test, review and rate?
We have worked for the past 6 months on building a new review system on how we produce content. Using it, we have subsequently redone most of our articles to provide actual hands-on expertise on the guides we made.
For more details you can read how we test, review, and rate at WindowsReport.
It is not a critical error and it only means that the application failed to start correctly, due to some corrupt files or missing files. You can usually correct that by reinstalling the application or the program with which you are trying to open it.
Are there multiple Windows Installer 1722 Error variations?
Windows Installer 1722 Errors in Windows 11 often occur when trying to install, reinstall, or update one of Microsoft’s programs.
These complications are usually caused by minor issues that can be fixed in a few minutes. Here are some of the main variations that you may encounter:
- Error in Application: Windows Installer Error 1722
- Windows Installer Error 1722 is not a valid Win32 application
- Windows Installer Error 1722 has encountered a problem and needs to close. We are sorry for the inconvenience.
- Windows Installer Error 1722 can’t be located
- Windows Installer Error 1722 can’t be found
- Error starting program: Windows Installer Error 1722
- Windows Installer Error 1722 is not running
- Windows Installer Error 1722 quit
- Faulty Program Path: Windows Installer Error 1722
It’s important to know how to troubleshoot Error 1722 in order to get things back to normal. In this particular guide, we will help you learn how to bypass this issue. Do not fret!
How can I fix the Error 1722 Windows Installer in Windows 11?
1. Run a PC repairing software
In order to specifically detect the potential errors in your PC, a practical answer that can really solve the error is Fortect.
This Windows repairing tool behaves as a restoring software that will deep scan your PC in order to find issues regarding privacy, crashing applications, broken registry files, or junk files.
Afterward, you will get the Scan Summary and then you’ll be able to visualize and fix every single error in your operating system.
Ultimately, Fortect is completely safe and automatically repairs damaged system files using its 25,000,000 files repository.
⇒ Get Fortect
2. Restart your device
In an attempt to quickly resolve this issue, you need to restart your PC. The simplest way to do this is by pressing the power button for a few seconds until the computer turns off.
When the PC is turned on again, the error should be gone. If it doesn’t work, repeat the process until the error disappears.
3. Use Safe Mode to remove unnecessary programs
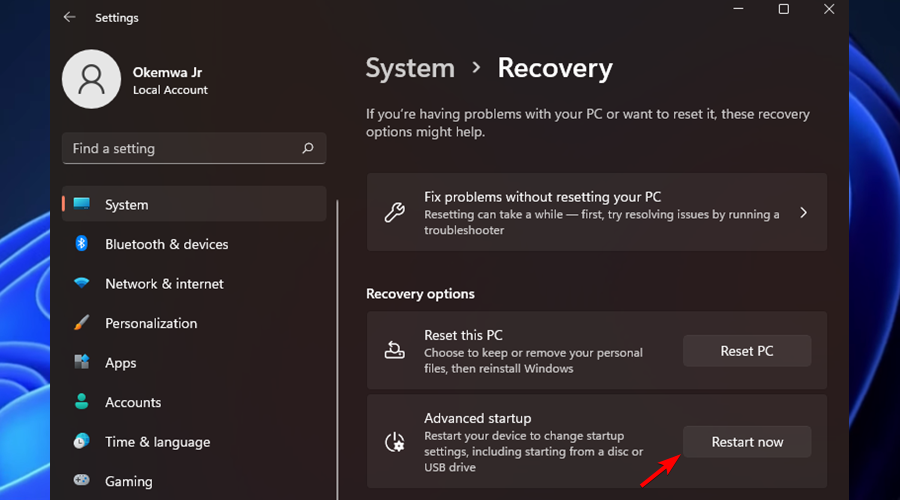
- Click on the Windows Start Menu, then select Settings.

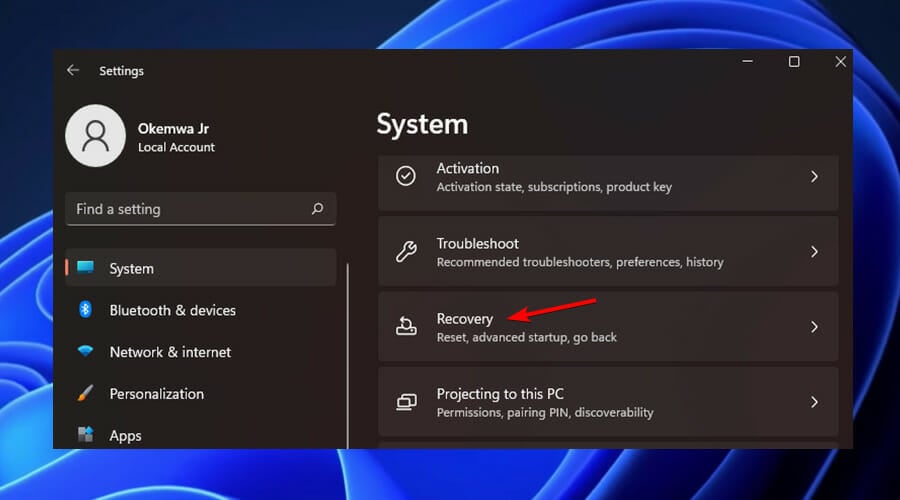
- Then, select the Recovery option on the left side of the window.
- Scroll down to the Advanced Startup option, and click on the Restart Now button.
- Your device will restart in the Recovery Environment.
To fix Error 1722, you’ll need to open your system in Safe Mode and then remove any unnecessary applications and services from your computer.
If you’re still receiving this error even after performing these steps, try uninstalling the software that is causing the conflict and then reinstall the program again.
Rest assured that you can certainly find the best uninstaller software that fits your budget and specific needs. Although the guide talks about Windows 10, the software can also be used in Windows 11.
Therefore, if you continue to receive Error 1722 after uninstalling the software, make sure that your antivirus software isn’t blocking the installation, and then try installing the program again.
In that regard, make sure you use one of the best antivirus solutions perfectly compatible with Windows 11 to protect your computer.
4. How to fix Error 1722 using cmd
Windows Installer Error 1722 can occur due to issues with the registry entries or broken files in your Windows 11 PC. Therefore, running the SFC and DISM scans in Command Prompt can help solve the error.
1. Press the Windows Key + R key, then type cmd in the Run dialog box.
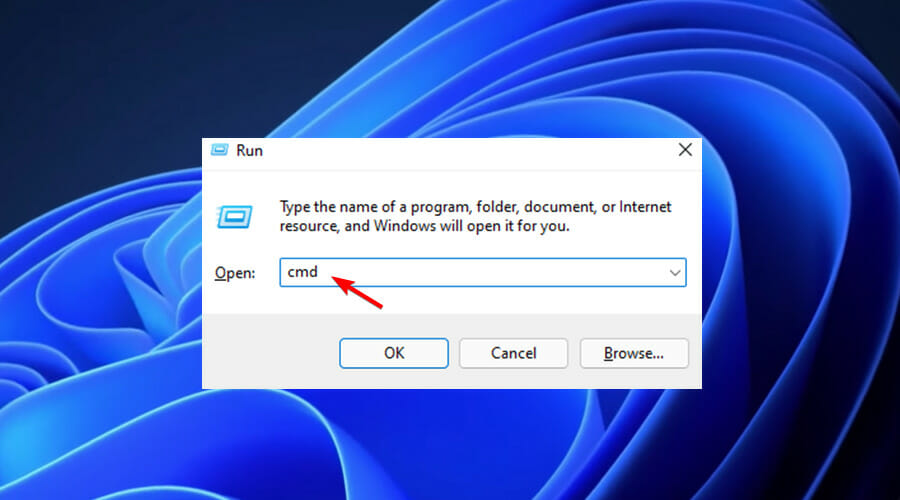
2. Press Ctrl + Shift + Enter to open the Command Prompt.
3. Type the following command and then press Enter: DISM /Online /Cleanup-Image /ScanHealth
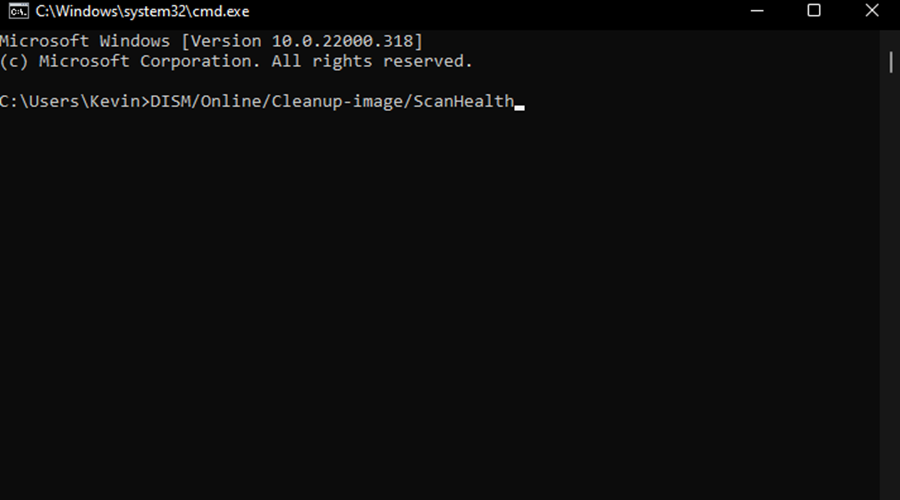
4. Then, type this command and press Enter: DISM /Online /Cleanup-Image /RestoreHealth

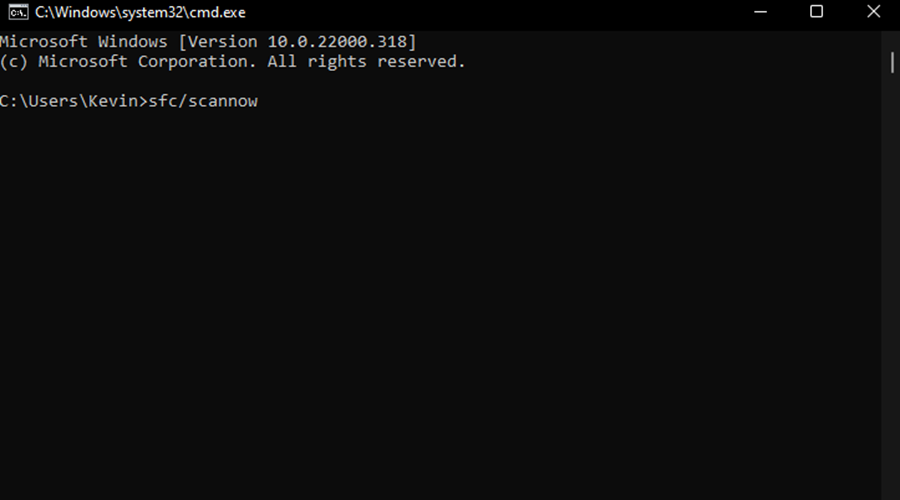
5. Wait for the scan to complete, and then restart your device.
6. Finally, input the following command and hit Enter:sfc /scannow
5. Turn on the Windows Installer
- Press the Windows key + R key to open the Run command dialog box.
- Key in the following command, then press Enter:
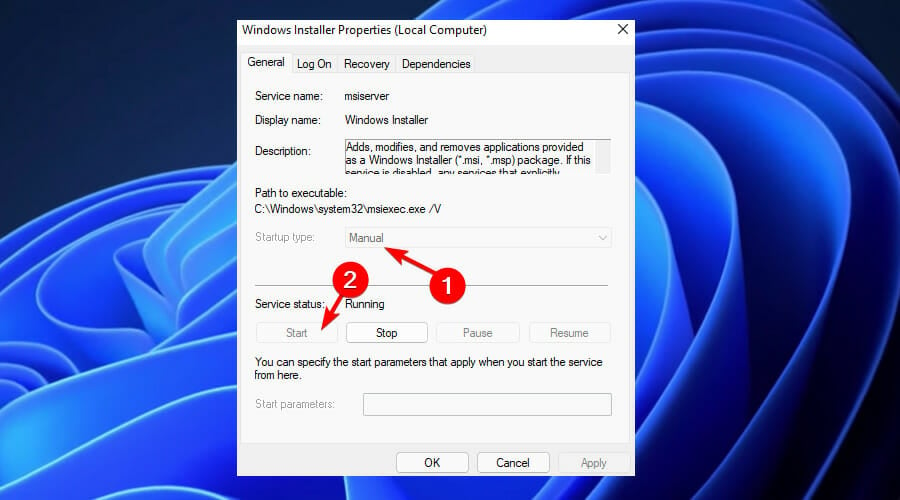
services.msc - On the window, scroll down and double-click the Windows Installer option.
- Then, set the Windows Installer Startup type to Manual. Click the Start button to enable the service.
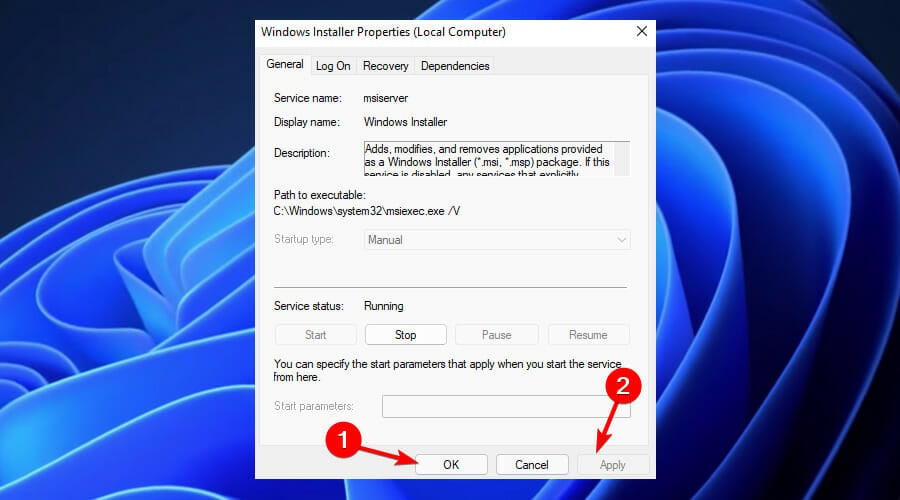
- Finally, select Apply and then OK to save these changes.

6. Unregister and re-register the Windows Installer
- Press the Windows key + R key to open the Run command dialog box.
- Type cmd and then press Ctrl + Shift + Enter to open the Command Prompt.
- To temporarily unregister the Windows Installer, type the following command and press Enter:
msiexec /unreg - When this process is complete, you can now re-register the Windows Installer. To do this, type the following command and hit Enter:
msiexec /regserver - Finally, restart your device to save these changes.

7. Enable Windows Script Host
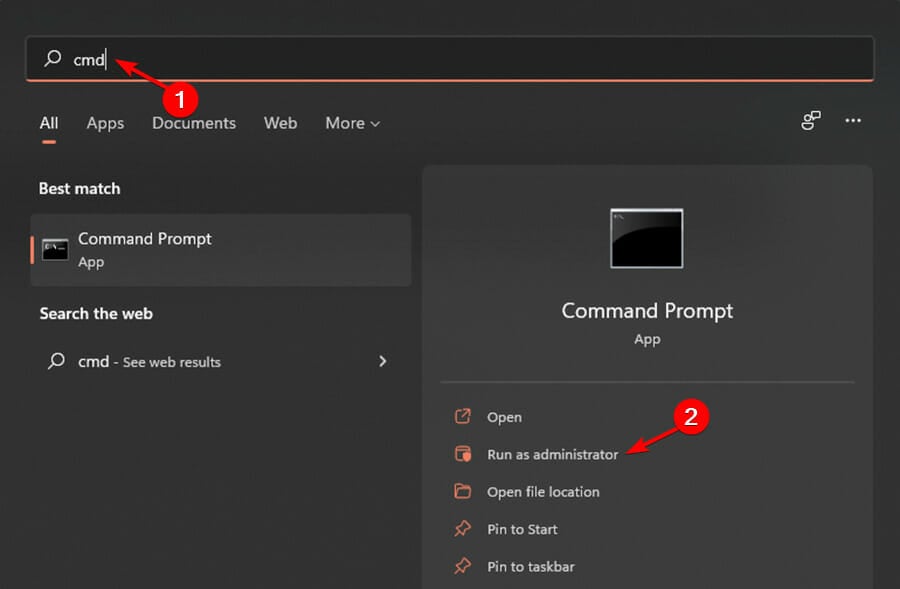
- Type cmd in the Search bar, right-click Command Prompt, and choose Run as administrator.

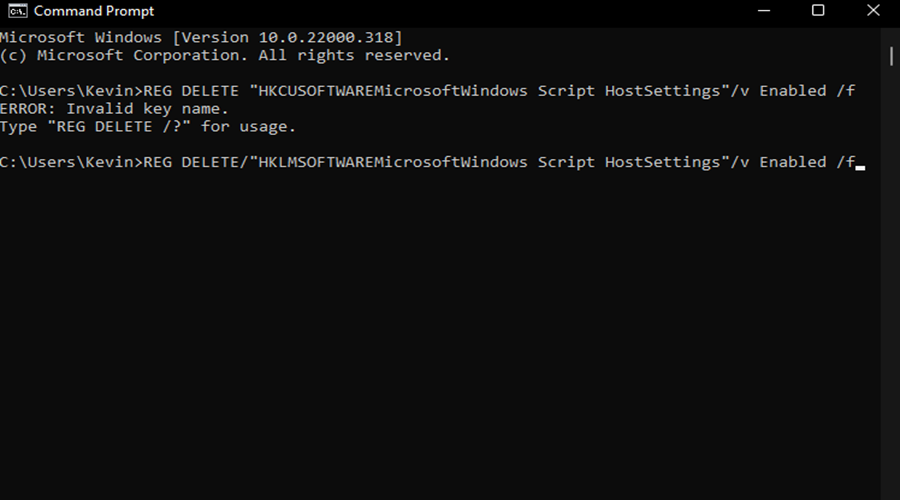
- Key in the following commands and press Enter after each one:
REG DELETE /“HKCUSOFTWAREMicrosoftWindows Script HostSettings” /v Enabled /f
REG DELETE /“HKLMSOFTWAREMicrosoftWindows Script HostSettings” /v Enabled /f
8. Perform a system restore
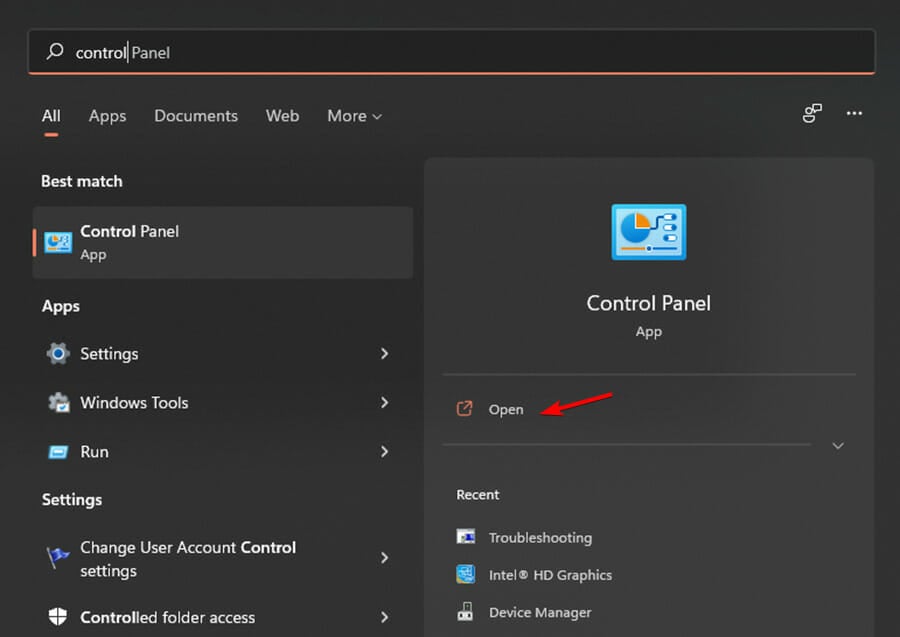
- Click on the Start Menu and click on the Control Panel.

- Type in Recovery in the search box of the Control Panel and then tap into it.

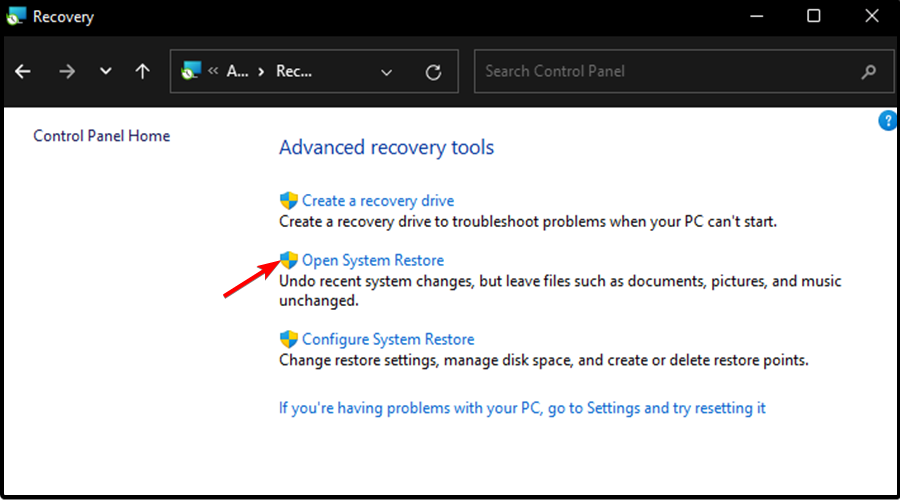
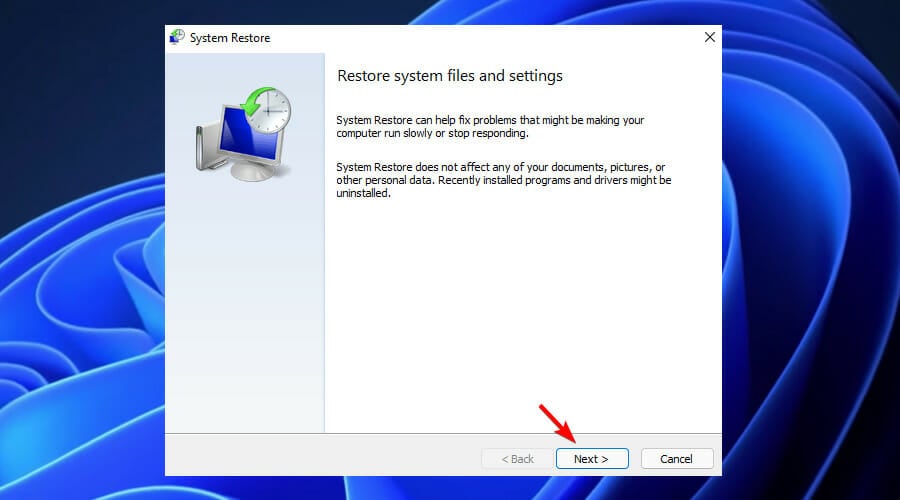
- Select Open System Restore.
- Then, click on Next.
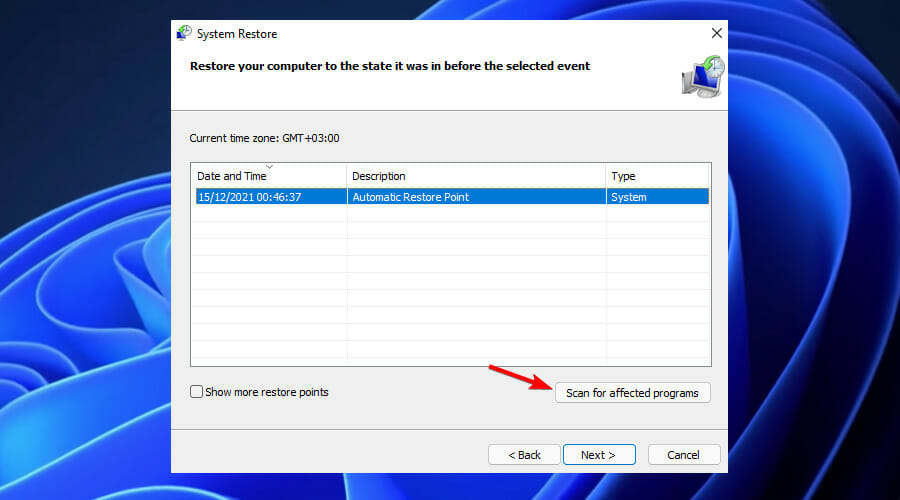
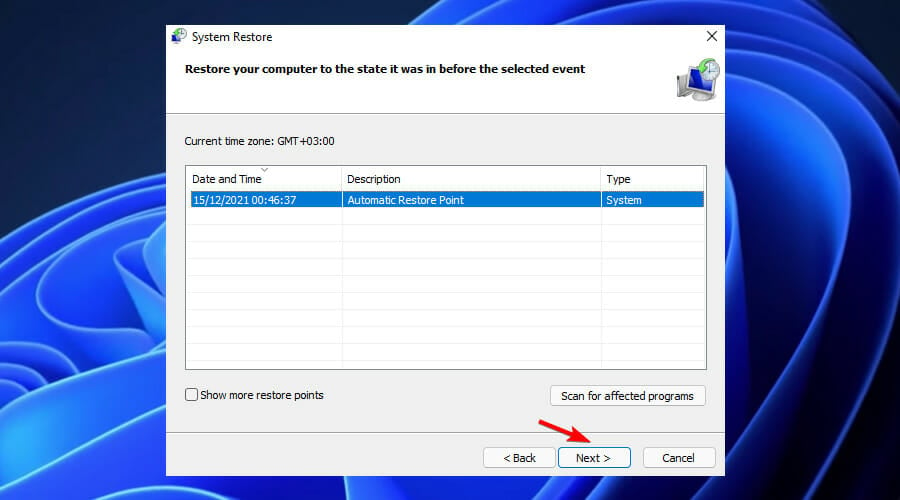
- On the list shown, choose the most recent driver or update and then click Scan for affected programs.
- You’ll be shown a list of items that will be deleted. If you’re OK with that, click Next and then Finish otherwise select another update from the list.

Can resetting an application resolve the Windows Installer 1722 Error?
When you’re trying to install an application on Microsoft Windows, you might receive an error message that reads:
Error 1722. There is a problem with this Windows Installer package. A program required for this install to complete could not be run.
This error message is usually caused by a corrupted file in the installer program, but there are also instances where the problem lies elsewhere. If you’re receiving Error 1722, try resetting your application, then installing it again.
Flight Simulator X installation Error 1722 is one that can occasionally occur as well. Take a look at our detailed guide on Flight Simulator X Error 1722 to resolve the issue and forget all about this error message:
Error 1722 Windows Installer Package FSX. A program run as part of the setup did not finish as expected. Contact your support personnel or package vendor.
Were you able to fix this error using our detailed procedures? Do not hesitate to let us know in the comments section below.
![]()