System Center 2012 Endpoint Protection Forefront Endpoint Protection 2010 Еще…Меньше
Симптомы
Появляется сообщение об ошибке 0x80248014 при попытке обновления определений защиты от вредоносных программ на компьютере с Forefront Endpoint Protection 2010 (FEP 2010) вручную или установки System Center 2012 защиты конечной точки (SCEP 2012).
Причина
Обновления определений для FEP 2010 и SCEP 2012 будут распространяться через несколько источников. Эта проблема возникает, если источник, используемый обновления Майкрософт (MU) и согласие на использование Центра обновления Майкрософт не установлен компьютер.
Решение
Чтобы устранить эту проблему, установите клиентский компьютер для применения обновлений корпорации Майкрософт.
Как вручную согласие на использование Центра обновления Майкрософт:
-
Откройте панель управления.
-
Выберите пункт Система и безопасность.
-
Щелкните Центр обновления Windows.
-
Нажмите кнопку Изменить параметры.
-
Установите флажок предоставить обновления для других продуктов Майкрософт, при обновлении Windows .
-
Нажмите кнопку ОК.
Как программно согласие на использование Центра обновления Майкрософт
-
Сохраните следующий текст в файл, имя которого имеет расширение «.vbs» (например, OptinMU.vbs):
Set ServiceManager = CreateObject("Microsoft.Update.ServiceManager")ServiceManager.ClientApplicationID = "My App"
'add the Microsoft Update Service, GUID
Set NewUpdateService = ServiceManager.AddService2("7971f918-a847-4430-9279-4a52d1efe18d",7,"") -
В командной строке с повышенными привилегиями выполните следующую команду:
cscript optinMU.vbs
Для получения дополнительных сведений обратитесь к следующей статье:
Согласиться на Центр обновления Майкрософт
Дополнительные сведения
Настройка обновления определений для защиты от конечной точки в ConfigurationManager (SCEP)
Настройка обновления определений (FEP2010)
Нужна дополнительная помощь?
Нужны дополнительные параметры?
Изучите преимущества подписки, просмотрите учебные курсы, узнайте, как защитить свое устройство и т. д.
В сообществах можно задавать вопросы и отвечать на них, отправлять отзывы и консультироваться с экспертами разных профилей.
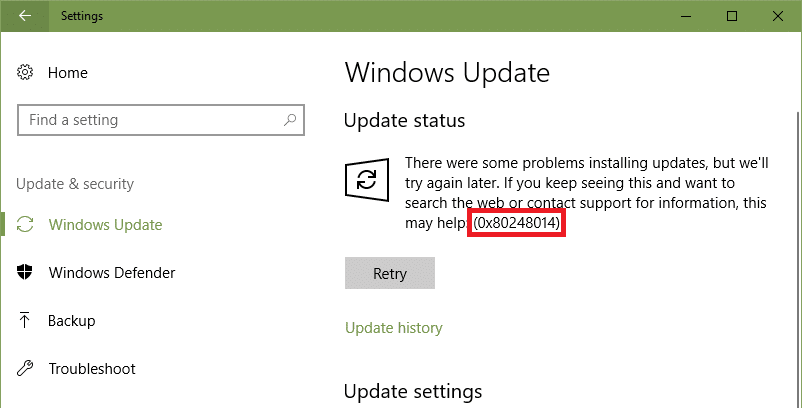
Ошибка 0x80248014 может побеспокоить пользователей операционной системы Windows 10, если те попытаются обновить ее в Центре обновления. Также вы можете найти в сети упоминания о случаях появления ошибки и на ОС Windows 8.1, однако, большинство ее проявлений происходит все же на Windows 10.
Помимо Центра обновления Windows, код ошибки 0x80248014 можно увидеть еще при запуске или использования системного антивируса: Защитник Windows. Однако, мы в данной статье будем рассматривать случаи появления ошибки именно в Центре обновления Windows 10, которые являются наиболее частыми и вероятными.
Разумеется, что у данной ошибки существуют свои причины для появления. Ошибка 0x80248014, например, может появиться вследствие повреждений файловой системы, повреждений файлов обновлений, компонентов Центра обновления Windows и прочее. Также отмечается, что проблема может возникать из-за неправильных настроек даты и времени.
Отлично, мы разобрались с ошибкой 0x80248014, где она появляется и при каких условиях(по крайне мере, потенциальных). Теперь пришло время перейти к части статьи, в которой мы будем рассматривать методы решения для этой ошибки. Мы рекомендуем вам не пропускать какие-то из методов!
Как решить ошибку 0x80248014?
Метод №1 Применение средства устранения неполадок Центра обновления
Код ошибки 0x80248014, конечно же, является достаточно разочаровывающей картиной, когда вы пытайтесь обновить свою операционную систему, но переживать не стоит, так как у вас в распоряжении есть специализированная, системная программа по ликвидации подобных проблем.
Все верно, вы можете воспользоваться встроенной утилитой по устранению неполадок в систему, чтобы попытаться избавиться от ошибки 0x80248014. Для этого вам нужно нажать ЛКМ на Пуск и кликнуть на значок шестеренки, чтобы открыть Параметры компьютера.
Открыв окошко Параметров, кликните на раздел «Обновление и безопасность». Далее вам потребуется перейти во вкладку «Устранение неполадок». В данной вкладке нужно найти раздел «Запустить и работать». В этом разделе кликните на пункт «Центр обновления Windows», а затем сделайте еще один клик по кнопке «Запустить средство устранения неполадок».
Запуститься процесс устранения неполадок с Центром обновления Windows 10, который может продлиться некоторое время, а по его окончанию вам укажут на найденные проблемы и решение для них. Примените исправления в средстве, а затем перезагрузите свой компьютер.
Войдя повторно в операционную систему, пройдите в Центр обновления Windows и попробуйте обновиться, чтобы определить, появится ли ошибка 0x80248014 или нет. Если она все еще там присутствует, то мы можем вам также порекомендовать попробовать использовать стороннее средство устранения неполадок с официального сайта Майкрософт. Просто загрузите его на компьютер и запустите, а затем следуйте инструкциям на экране.
Метод №2 Отключение Firewall и антивируса
Если вы давно пользуетесь ПК, то должны знать, что такое защитное программное обеспечение, как Firewall и антивирус способны препятствовать нормальной работе операционной системы. Мы рекомендуем вам попробовать отключить установленные Firewall и антивирусы на вашем ПК, а затем проверить наличие ошибки 0x80248014.
Если же у вас нет стороннего сетевого экрана и антивируса, то знайте, что даже без них в системе продолжают функционировать системные варианты: Брандмауэр Windows и Защитник Windows. Чтобы проверить их причастность к возникшей проблеме в Центре обновления, вам точно также нужно отключить их.
Деактивация Защитника Windows: Win+S→Центр безопасности защитника Windows→Защита от вирусов и угроз→Параметры защиты от вирусов и других угроз→Отключить.
Деактивация Брандмауэра Windows: Win+S→Брандмауэр Windows→Включение и отключение брандмауэра Windows→Отключить брандмауэр Windows(для обеих типов сетей).
Итак, воспользуйтесь вышеуказанной инструкцией, чтобы отключить Брандмауэр Windows и Защитник Windows, а затем зайдите в Центр обновления, чтобы проверить наличие ошибки с кодом 0x80248014.
Метод №3 Исправление настроек времени и даты
Еще одной причиной появления ошибки 0x80248014 в Центре обновления Windows 10 могут быть неправильные настройки времени и даты. Знайте, что некорректные настройки даты и времени могут помешать установке соединения с сервером Майкрософт для проверки наличия и загрузки обновлений для вашей системы.
Нажмите левой кнопкой мыши на Пуск и кликните на значок шестеренки, чтобы открыть Параметры. Далее кликните на раздел «Время и язык» и перейдите во вкладку «Дата и время». Выставьте корректные для вашего региона настройки и сохраните их. Также мы рекомендуем вам использовать опции по выставлению настроек даты и времени согласно сети. Выставив настройки, снова пройдите в Центр обновления и проверьте, была ли устранена ошибка 0x80248014.
Метод №4 Изменение имени папки Software Distribution
Переименование папки Software Distribution зарекомендовало себя наилучшим методом для решения ошибки 0x80248014. Папка Software Distribution содержит в себе загруженные файлы обновлений с серверов Майкрософт, которые напрямую участвуют в обновлении вашей операционной системы. Существует вероятность, что некоторые из этих файлов могут быть повреждены или входить в конфликт с другим обновлением.
Пройдите посредством Проводника Windows в директорию C:\Windows\SoftwareDistribution. Переименуйте эту папку в SoftwareDistribution.old. Теперь снова попробуйте зайти в Центр обновления Windows и убедитесь, что проблема в виде кода 0x80248014 была исправлена.
Как альтернатива, вы можете также можете попросту удалить папку SoftwareDistribution, тем самым избавившись от балласта в виде установочных файлов обновлений. Система автоматически создаст новую, пустую папку SoftwareDistribution.
Метод №5 Выполнение Чистой загрузки
Чистая загрузка — это очень удобная процедура, которая позволит вам определить службу или программное обеспечение в операционной системе, способное входить в конфликт с процессом обновления. Выполнение этой процедуры является достаточно комплексным процессом, но мы сейчас попытаемся вместить его несколько шагов. Итак, чтобы выполнить Чистую загрузку, вам потребуется следовать следующим шагам:
- Нажмите Win+R.
- Напишите msconfig и нажмите Enter.
- Перейдите во вкладку «Службы».
- Поставьте галочку напротив опции «Не отображать службы Майкрософт».
- Нажмите на кнопку «Отключить все».
- Перейдите во вкладку «Автозагрузка».
- Кликните на ссылку «Открыть диспетчер задач».
- Отключите все программы, которые будут находиться в списке перед вами(нажимаем ПКМ на программу и выбираем «Отключить»).
- Перезагружаем ПК.
Если вы выполнили все вышеуказанные шаги, то вы начисто загрузите свою операционную систему. Что это означает? В данный момент, в вашей системе работают только эссенциальные для нее службы и программы, без которых она не сможет стабильно функционировать.
Теперь пройдите в Центр обновления Windows и проверьте наличие ошибки 0x80248014. Если она исчезла, то это означает, что в системе работала какая служба или утилита, которая препятствовала нормальному процессу обновления. Вам нужно включать все друг за другом, чтобы определить, что именно из них вызывало ошибку 0x80248014.
Find out what worked for other users
by Ivan Jenic
Passionate about all elements related to Windows and combined with his innate curiosity, Ivan has delved deep into understanding this operating system, with a specialization in drivers and… read more
Updated on
- Windows Updates automatically installs fresh updates as they become available. However, Windows 10 lets you decide when and how to get the latest updates.
- Users often describe getting the 0x80248014 error when they’re unable to check for updates.
- Fixing this problem is simple, and in most cases, resetting Network components will do the trick.
- However, this issue is also related to Microsoft Store purchases.
Users have reported that the download error 0x80248014 errors appear in two cases – when they’re unable to check for updates and when they cannot complete a purchase in Microsoft Store.
We have solutions for both problems, so just follow the instructions from this article.
How can I fix the download error 0x80248014?
- How can I fix the download error 0x80248014?
- 1. Reset Network components
- 2. Delete the Software Distribution folder
- 3. Run the Troubleshooter
- 4. Run the SFC scan
- 5. Run the DISM
- 6. Flush DNS
- How can I fix error code 0x80248014 in Microsoft Store?
- 1. Run the Troubleshooter
- 2. Disable UAC
1. Reset Network components
There’s a simple solution for error code 0x80248014 which prevents you from checking for updates.
Just follow these steps to solve error code 0x80248014, so you can check for updates normally again:
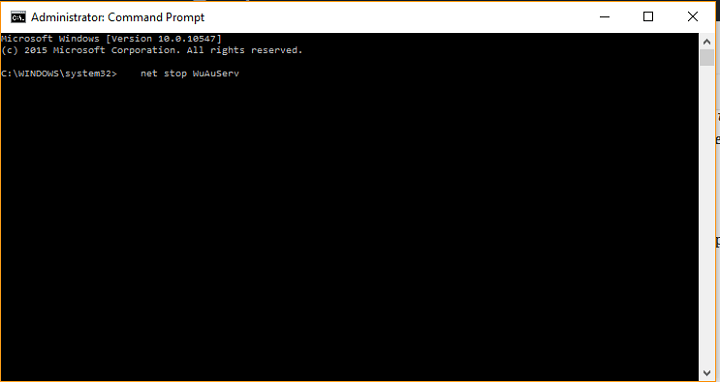
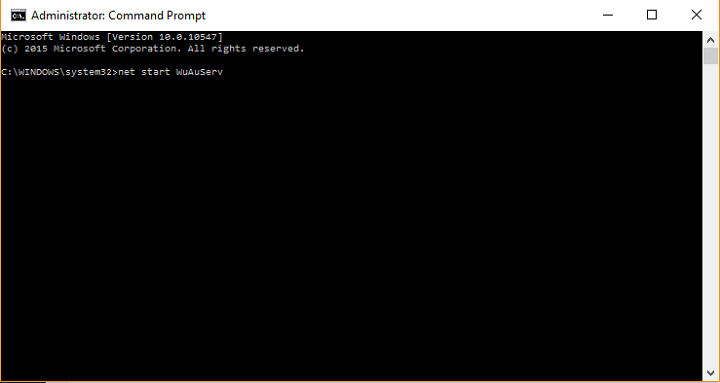
- Right-click on the Start Menu button, and choose Command Prompt (Admin).
- Enter the following command and press Enter: net stop WuAuServ

- Now, past the following into Search and press Enter: %windir%
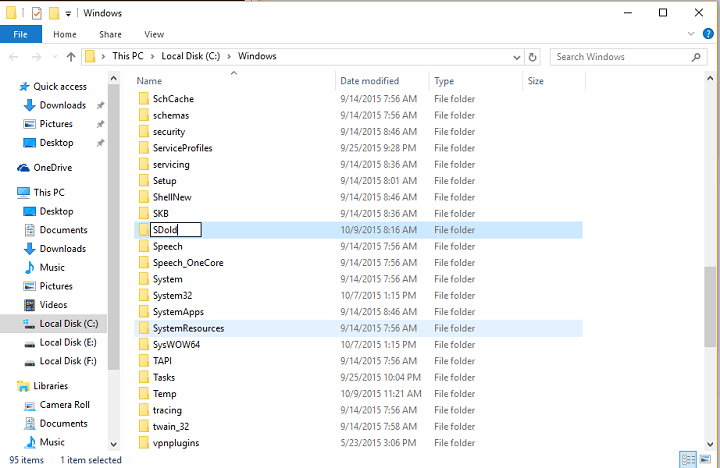
- In Windows folder, find SoftwareDistribution folder, and rename it to SDold.

- Open Command Prompt (Admin) again, and enter the following command: net start WuAuServ

- Try to check for updates again
This error probably occurred because of the corrupted update file, which we removed by renaming the SoftwareDistribution folder.
Most users have reported that removing the Software Distribution folder helped them to solve error code 0x80248014, and I hope it will help you, as well.
2. Delete the Software Distribution folder
Software Distribution folder is the most important Windows folder for updates. Namely, all updates files and data are stored in this folder.
How we test, review and rate?
We have worked for the past 6 months on building a new review system on how we produce content. Using it, we have subsequently redone most of our articles to provide actual hands-on expertise on the guides we made.
For more details you can read how we test, review, and rate at WindowsReport.
So, if there’s some corruption inside it, you’ll likely have problems installing updates. So, we’re going to reset this folder, in order to resolve the problem.
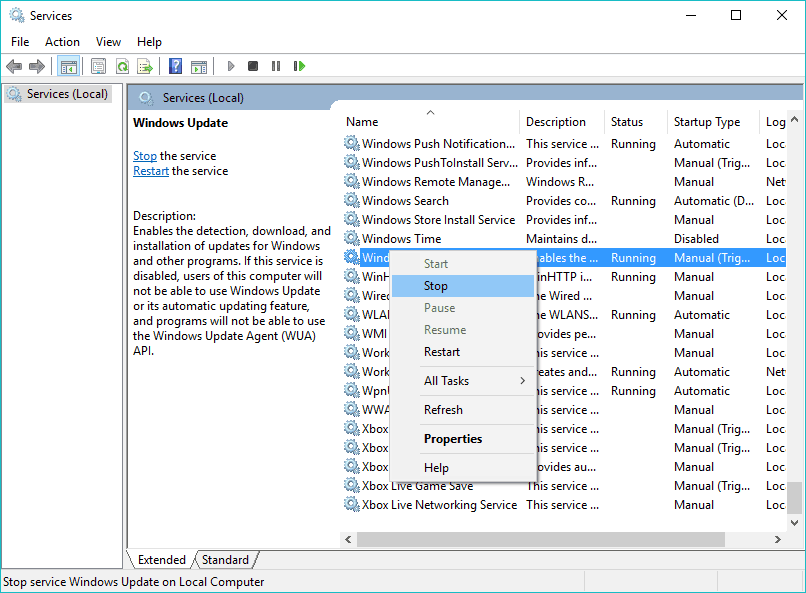
But before we reset the Software Distribution folder, we need to stop the Windows Update service:
- Go to Search, type services.msc, and go to Services.
- In the Services list, search for Windows Update.
- Right-click and go to Properties, then choose Disable.

- Restart your computer.
Now that the Windows Update service is disabled, let’s go and delete (rename) the SoftwareDistribution folder:
- Navigate to C:Windows and find the SoftwareDistribution folder.
- Rename folder to SoftwareDistribution.OLD (you can delete it, but it’s safer if we just leave it there).
- Restart your computer.
Once you do that, go and re-enable the Windows Update service:
- Once again navigate to Services and find Windows Update and, in Properties, change from Disabled to Manual.
- Restart your computer once again.
- Check for updates.
3. Run the Troubleshooter
If you’re still experiencing this update error, you can also try the new Troubleshooter in Windows 10.
This troubleshooter deals with a wide range of system issues, including update errors. But it’s only available in Windows 10 Creators Update or later.
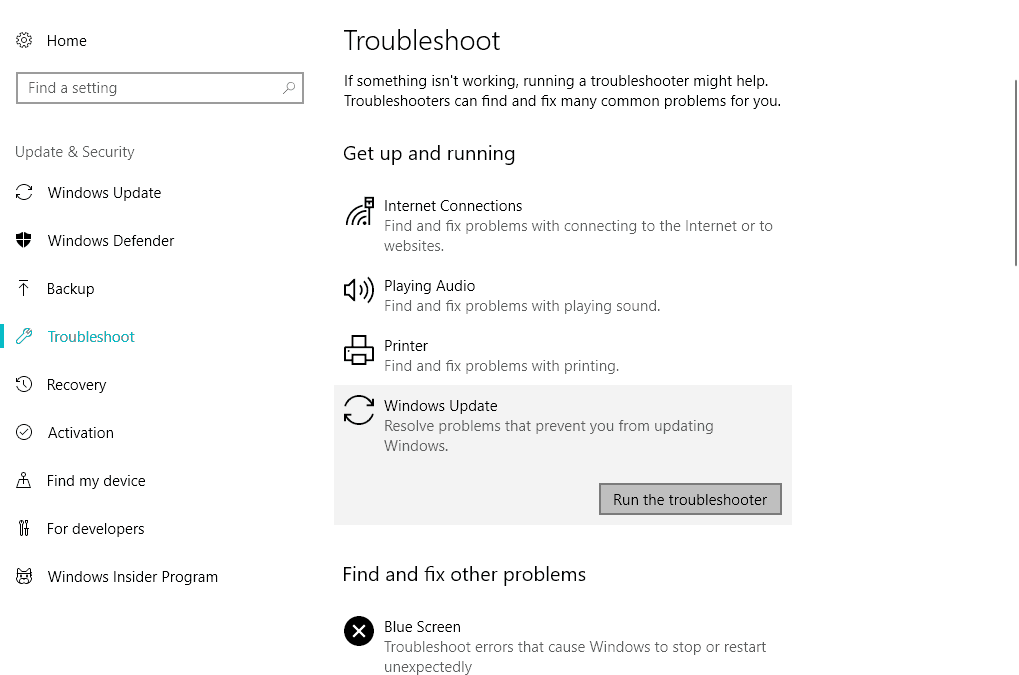
Here’s how to use the Windows 10 Troubleshooter:
- Go to Settings.
- Head over to Updates & Security > Troubleshoot.

- Now, click Windows Update, and choose Run the troubleshooter.
- Follow further on-screen instructions.
Alternatively, you can use a third-party troubleshooting tool. Choose one from our great list.
- The Windows 11’s weather widget now offers a detailed weather forecast
- Windows 11 adds more apps to the share links feature
- The latest Windows 11 Dev build made Microsoft Store faster
4. Run the SFC scan
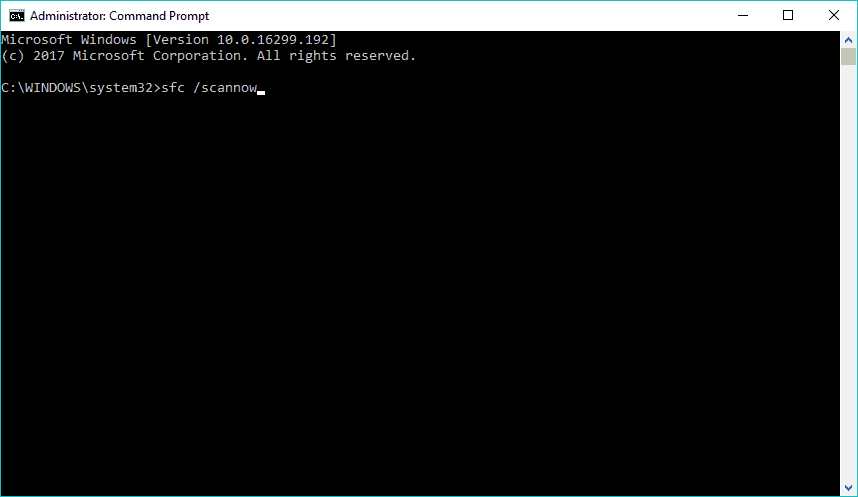
Another troubleshooter you can try is the SFC scan. This is a universal tool that also deals with various system errors. Here’s how to run the SFC scan in Windows 10:
- Go to Search, type cmd in the Search box, and then right-click on Command Prompt.
- Click on Run as administrator. (If you are prompted for an administrator password or for a confirmation, type the password, or click Allow).
- At the Command Prompt, type the following command, and then press ENTER: sfc /scannow

5. Run the DISM
And finally, the last troubleshooter I’m going to mention in this article is also the most powerful one – Deployment Image Servicing and Management (DISM).
So, if the previous two troubleshooters failed to resolve the problem, you can as well try with this one.
Here’s how to run DISM in Windows 10:
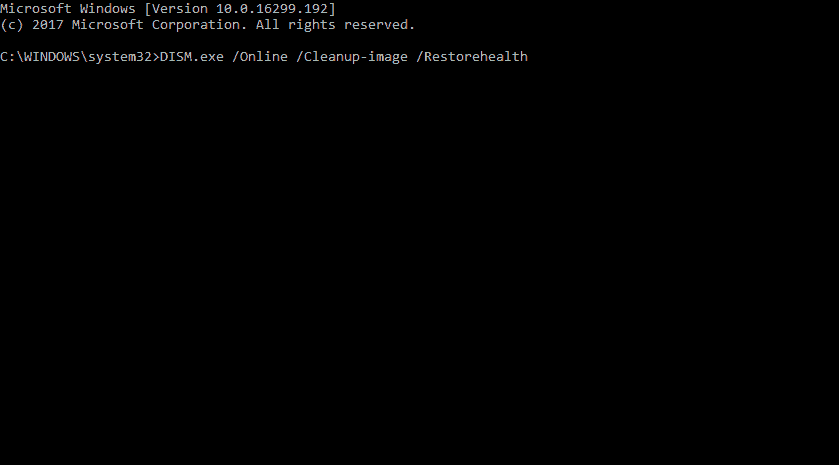
- Open the Command Prompt as shown above.
- Enter the following command and press Enter: DISM.exe /Online /Cleanup-image /Restorehealth

- Wait for the process to finish.
- Restart your computer.
- In case the DISM can’t obtain files online, try using your installation USB or DVD. Insert media and type following command: DISM.exe /Online /Cleanup-Image /RestoreHealth /Source:C:RepairSourceWindows /LimitAccess
- Make sure to replace the C:RepairSourceWindows path of your DVD or USB.
- Follow further on-screen instructions.
Learn everything there is to know about DISM from our comprehensive guide!
6. Flush DNS
And finally, if none of the previous solutions worked the last thing we’re going to try is flushing the DNS. Here’s how to do that:
- Start Command Prompt as administrator. To do that press Windows Key + X and choose Command Prompt (Admin) from the menu.
- When Command Prompt opens, enter the following lines before closing Command Prompt and restarting your PC:
- ipconfig /release
- ipconfig /flushdns
- and ipconfig /renew
How can I fix error code 0x80248014 in Microsoft Store?
1. Run the Troubleshooter
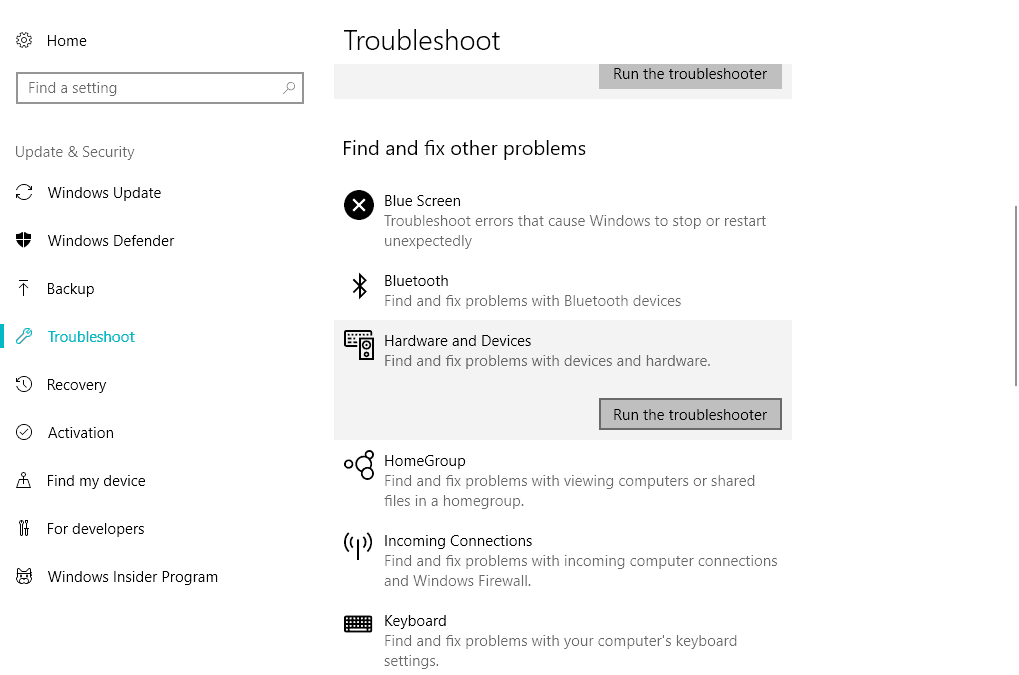
We’re going to run the Troubleshooter once again, but this time, we’ll be checking the hardware:
- Go to Settings.
- Head over to Updates & Security > Troubleshoot.
- Now, click Hardware & devices, and choose Run the troubleshooter.
- Follow further on-screen instructions.
An error occurred while loading the troubleshooter? Don’t panic! Check out our guide to solve the problem!
2. Disable UAC
And finally, let’s try with disabling the User Account Control, as well:
- Go to Search and type user account. Choose User Account Control from the menu.
- User Account Control Settings window will appear. Move the slider all the way down to Never notify and click OK to save changes.
We hope you managed to fix the Windows Update error 0x80248014, as well as the error with the same name that appears on Microsoft Store.
Let us know how it went in the comments section below.
![]()
The problem we are going to discuss here can occur when upgrading by any method whether through Update assistant, automatic mode, or Media creation tool. Moreover, sometimes this will trouble when you try to install or update applications from Microsoft Store by causing the process to fail and showing a message. However, we have covered this issue earlier in – How to Fix 0x80248014 Windows 10 Update error WU_E_DS_UNKNOWNSERVICE but it needs more attention.
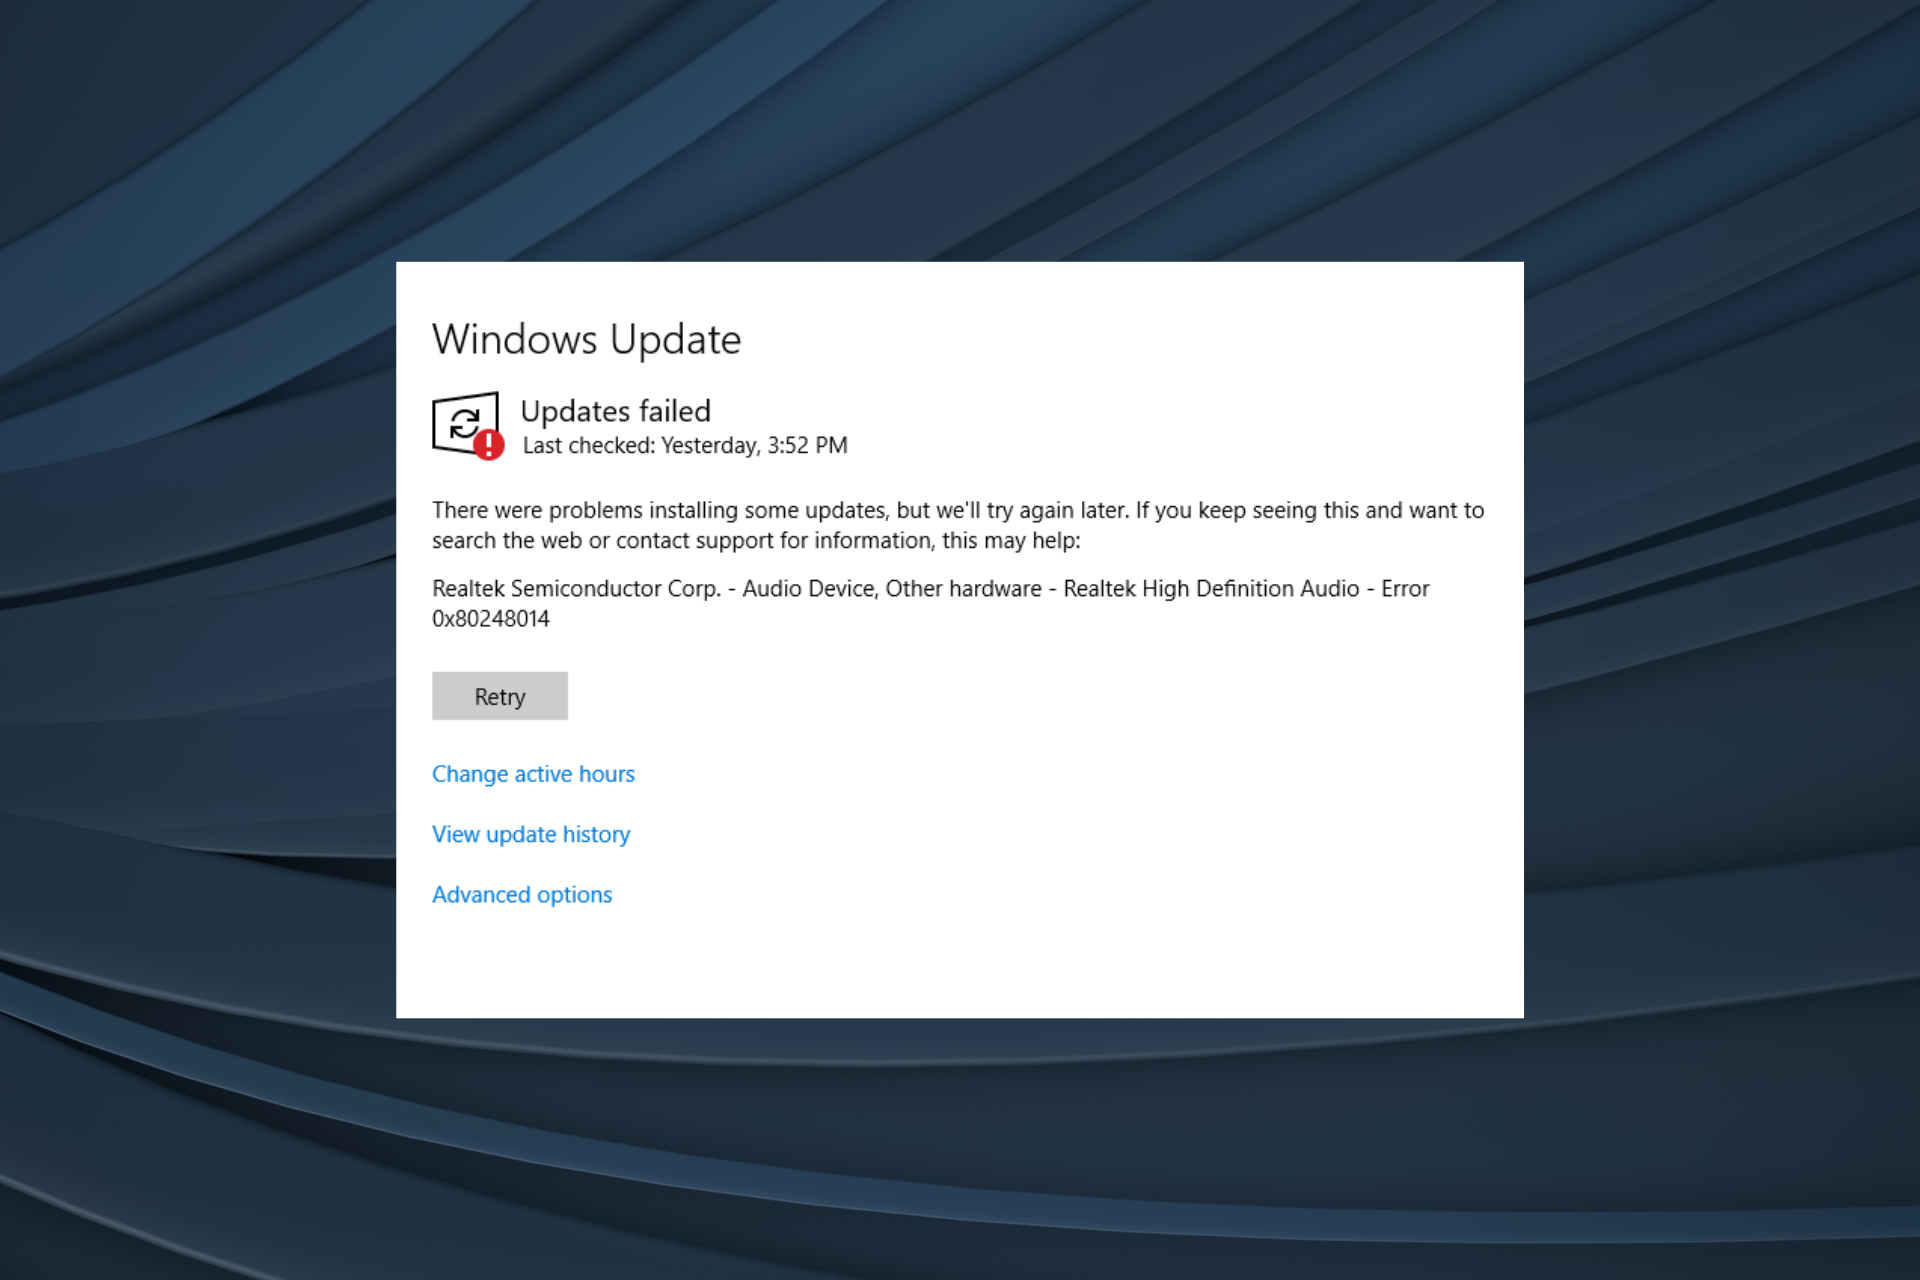
Error 0x80248014 generally shows up because of malfunctions in components or missing the associated files. The message that will come across during this occurrence in Windows 11 or 10 is “Error 0x8024801, There were some problems installing updates, but we”ll try again later.” Windows Update failures occur due to a variety of factors, including insufficient disk space, problems with internet connectivity, damaged Windows Update Components, etc.
Here is how to fix error 0x80248014 in Windows 11 or 10 –
Way-1: Launch the Windows Update Troubleshooter
Windows Update Troubleshooter is a built-in program that detects problems and restores the related settings to default. Running this tool will likely solve 0x80248014 error automatically.
- Click on Start.
- Type – Control Panel.
- Press – “Enter”.
- Change the “View By” setting to “Large icons“. See – How to Make Windows 10 Control Panel Icon Size Bigger.
- Click – Troubleshooting.
- Choose the option Fix problems with Windows Update from the right pane.
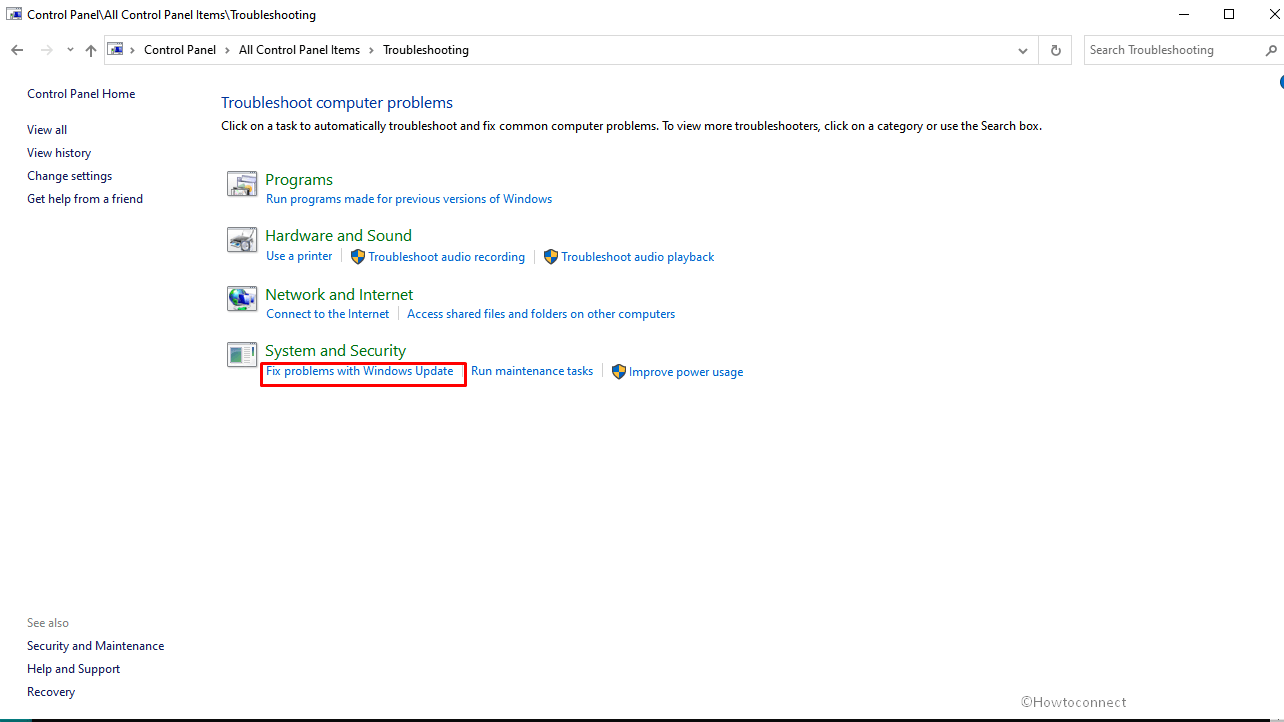
- Troubleshooter window will appear; select – Next.
- Close the ‘Troubleshooter’ then restart your system.
Way-2: Reset the Windows Update Component
Windows Update Component is a crucial element of the process that includes the associated services and SoftwareDistribution having deciding folders. A faulty component may be a culprit for any errors you see while updating Windows. Luckily, you can reset the Windows Update Component using manual method or PowerShell script without any risks and hazards. This post elaborates the same – How to Reset Windows Update to Default in Windows 10. Let’s see an easier way aka using PowerShell script –
- Press Window and R.
- Type – cmd.
- Hit – Ctrl + Shift + Enter.
- Select Yes on the confirmation prompt.
- On the command prompt copy-paste below lines one by one, and press Enter each time –
net stop wuauserv
net stop cryptSvc
net stop bits
net stop msiserver
ren C:\Windows\SoftwareDistribution SoftwareDistribution.old
net start wuauserv
net start cryptSvc
net start bits
net start msiserver
ren C:\Windows\System32\catroot2 Catroot2.old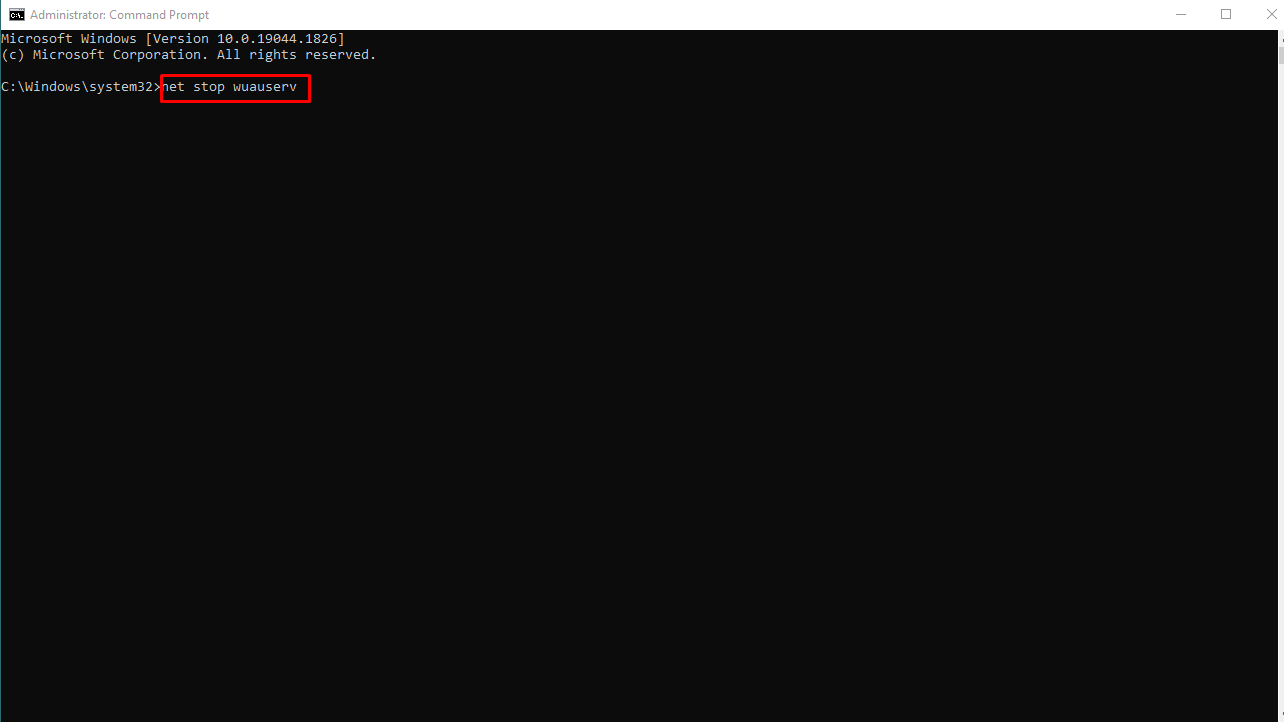
- Restart the system and check if the error 0x80248014 is solved.
Way-3: Reset Windows Store Cache
Store error 0x80248014 is also prevalent in addition to the same code with Windows update so it also needs remediation. Because Reset store cache is all-in-one solution to problems with the application this single method has the ability to fix this message appearing when installing or updating apps. Follow the steps –
- Click on Search from the Taskbar.
- Type – WSReset.exe.
- Select the same command from result.
- Allow the syntax to complete its task through Command prompt and Windows Store open.
See – 5 Ways to Reset Microsoft Store in Windows 10.
Way-4: Verify the status of Windows Update Services
Access the Services tool and verify that the services associated with Windows Update, for example, “Windows Update Medic”, “Windows Update”, “Update Orchestrator Service”, etc., are not disabled:
- Right click on Taskbar.
- Select Run.
- Type – services.msc.
- Hit Enter to launch the Services tool.
- Set the services Startup types as given below –
1] Manual – Windows Update Service or wuauserv (Triggered).
2] Services for Windows Update Medic or WaaSMedicSvc – Manual.
3] Automatic Cryptographic Service or CryptSvc.
4] Manual – Background Intelligent Transfer Service or BITS.
5] Automatic – DCOM Server Process Launcher or DcomLaunch.
6] Automatic – RPC Endpoint Mapper or RpcEptMapper.
7] Manual – Windows Installer or msiserver.
Way-5: Manually Install the Windows Update
This is one of the best methods to fix Error 0x80248014 in Windows 11 or 10. Using KB number, conduct a search for the patch on Update Catalog website and grab the standalone copy of installer. Now manually apply the patch by following the instructions –
- Start with knowing the patch number of the updates from Settings > “Update & Security > View update history”.
- Now navigate to Microsoft update catalog.
- Type the KB number in the search box.
- Hit Enter to have the results in front.
- Locate the file having architecture identical to the architecture of your CPU.
- Click on Download.
- Go to the location where the standalone file is kept and double-click on it.
- Click on Yes if prompted.
Way-6: Run a Virus Check
Use a Full scan to look for and eliminate any viruses or dangerous programs that could be running on your system. Several malicious codes can not only interfere with Windows update installing process but also steal your data. Move with the steps under and remove them –
- Click on Start.
- Type “Security”.
- Hit Enter to launch Windows Security app.
- Choose the option ‘Virus & threat protection.
- Select the link Scan options.
- Check the – ‘Full scan’.
- Finally, click on – Scan now.
- In case, you have already third-party anti-malware run a thorough scan using that.
- When finished reboot the device and check if the error is resolved.
Way-7: Rebuild or Recreate the Software Distribution Folder
Windows 11 or 10 stores its Updates in the SoftwareDistribution folder (aka “C:\Windows\SoftwareDistribution\Download“). In order to download and install updates from scratch, this folder may occasionally become corrupted, and you will need to recreate it. Follow these steps to recreate or rebuild the “SoftwareDistribution”:
- Press – Win+R.
- Type – services.msc.
- Click – OK
- Right click on – Windows Update service.
- Select – Stop from the Context menu.
- Then, open Windows Explorer (Win+E) and go to: C:/Windows/.
- Locate the SoftwareDistribution folder and remove it.
- Restart your computer.
- Go to “Windows Update Settings” and click on Check for updates.
Way-8: Clear the Catroots2 folders’ Contents
You might want to try emptying the catroot and catroot2 contents to see if it helps. These folders contain files and ‘folders’ having signature of Windows Update package.
- Go to “C:\Windows\System32\catroot2” and ‘delete’ all items there.
- Similarly access “C:\Windows\System32\catroot2”. Select all the files and folders in the directory and press Delete.
- Restart your computer and recheck for updates.
Way-9: Restart Windows PC
To ensure maximum performance, you should reboot the Windows 10/11 device once a week at least. Some users inform that only restarting the system has solved error 0x80248014 in Windows 11 or 10 for them so you can give an attempt to it
Way-10: Remove Unnecessary Temp Files
A built-in function in Windows 10 and Windows 11 following their predecessors allows users to delete temporary files. To remove any superfluous transient files go with the instructions below.
- Click on – Search.
- Type – cleanmgr.
- Press – Enter.
- On Disk cleanup small pop-up, click on OK.
- Select Clean up system files on the next window.
- Again choose OK
- Check all the boxes under “Files to delete” section.
- Click on OK and then on Delete Files.
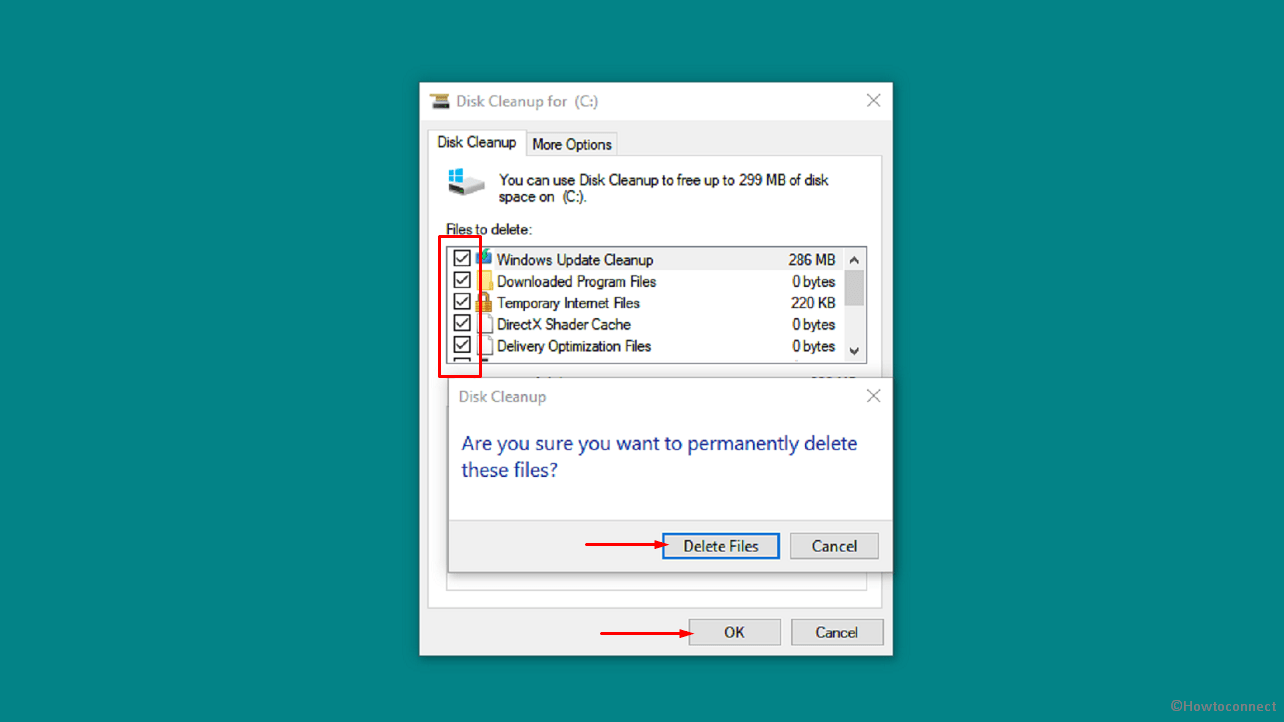
- Restart the PC and check if Error 0x80248014 no longer occurs.
Methods:
Way-1: Launch the Windows Update Troubleshooter
Way-2: Reset the Windows Update Component
Way-3: Reset Windows Store Cache
Way-4: Verify the status of Windows Update Services
Way-5: Manually Install the Windows Update
Way-6: Run a Virus Check
Way-7: Rebuild or Recreate the Software Distribution Folder
Way-8: Clear the Catroots2 folders’ Contents
Way-9: Restart Windows PC
Way-10: Remove Unnecessary Temp Files
That’s all!!
Repair any Windows problems such as Blue/Black Screen, DLL, Exe, application, Regisrty error and quickly recover system from issues using Reimage.

- Remove From My Forums
-
Question
-
Hi, I have the error above
It is a clean installation of Win10TP Ent 9926
Any ideas?
Thanks
Answers
-
I figured out the solution for the update error
My Store was disabled in the GPO
Once enabled, there was no problem with the update…
-
Marked as answer by
threeeye
Wednesday, April 22, 2015 3:39 PM
-
Marked as answer by
All replies
-
Try restart your Pc and run update again.
Open start and search for Action Center and open it and under troubleshoot, run Windows Update troubleshooter.
-
Try restart your Pc and run update again.
Open start and search for Action Center and open it and under troubleshoot, run Windows Update troubleshooter.
OK, so restart didn’t help, and the troubleshooter didn’t find anything wrong with the update…
-
See if the first answer in this thread helps:
http://answers.microsoft.com/en-us/protect/forum/mse-protect_start/error-code-0x80248014-while-trying-to-upgrade/4ac3c200-0c4b-42ee-b4fb-8626b5e8c91e
Jerry
-
See if the first answer in this thread helps:
http://answers.microsoft.com/en-us/protect/forum/mse-protect_start/error-code-0x80248014-while-trying-to-upgrade/4ac3c200-0c4b-42ee-b4fb-8626b5e8c91e
Jerry
That didn’t help,I also had a problem with the «Start» menu not opening, and AVG Internet Security not updating…
I tried «Refresh your PC» with no luck…
I reinstalled Win10TP, and everything worked fine UNTIL I connected to my domain, then the Update error 0x80248014 returned…
Any suggestions?
-
Have you manually refreshing the SoftwareDistribution folder using the following sequence of commands?
net stop wuauserv
cd %windir%
ren SoftwareDistribution SDold
net start wuauserv
Edit: Another suggestion, though maybe a simple one, is to verify that your time and date is accurate.
Brandon
Windows Outreach Team- IT Pro
Windows for IT Pros on TechNet-
Edited by
Brandon RecordsModerator
Tuesday, March 3, 2015 9:43 PM
-
Edited by
-
Have you manually refreshing the SoftwareDistribution folder using the following sequence of commands?
net stop wuauserv
cd %windir%
ren SoftwareDistribution SDold
net start wuauserv
Edit: Another suggestion, though maybe a simple one, is to verify that your time and date is accurate.
Brandon
Windows Outreach Team- IT Pro
Windows for IT Pros on TechNetThanks for the reply.
After doing the commands, the update hangs at «Checking for updates…» for about 10-20min
then stops with an error «There were some problems installing updates, but we’ll try again later.» Error 0x800705b4
-
OK, so I reinstalled my PC
The update was fine until I joined my Domain
Then the 0x80248014 returned
Yes, my user IS a Domain Admin
Win build = 9926
Any fix for that ?
-
I figured out the solution for the update error
My Store was disabled in the GPO
Once enabled, there was no problem with the update…
-
Marked as answer by
threeeye
Wednesday, April 22, 2015 3:39 PM
-
Marked as answer by