Download Windows Speedup Tool to fix errors and make PC run faster
At times while trying to update Windows, the process might get stuck and return the error code 0x80070032. If you encounter the Windows Update error 0x80070032, then read through this article for the resolution.

We’re having trouble restarting to finish the install (0x80070032)
The error is caused when a specific Windows update is stuck, and you need to pass through it. To resolve Windows Update error 0x80070032, try the following solutions sequentially:
- Restart the computer
- Uninstall the latest update
- Reset Windows Update components
- Run the Windows Update troubleshooter
1] Restart the computer
The first approach the solving this problem should be to simply restart the computer. If this helps, it could save you a lot of time.
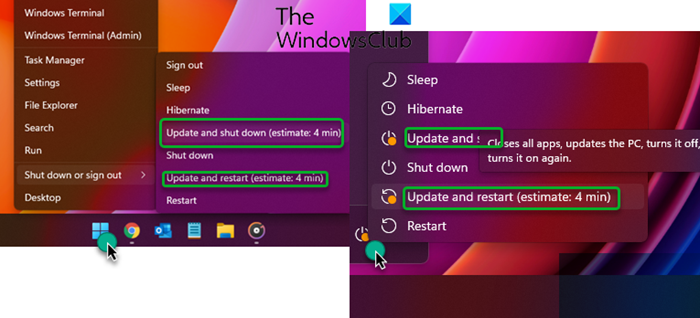
You could use the Restart button that you see in Settings or use the Update and shut down or Update and restart options from the WinX Menu or the Start Menu.
2] Uninstall the latest update
In case the latest update is problematic, or the file is corrupt, it will cause the Windows Update error 0x80070032. To resolve this error, simply uninstalling the current update will be helpful for most users. The procedure to uninstall updates on Windows 11 is as follows:
- Right-click on the Start button and select Settings.
- In the Settings window, go to the Windows Update tab on the list on the left-hand side.
- In the right pane, click on Update history. The Update history page will show the list of recent updates.
- If you scroll down a little, you will find the option to Uninstall updates.
- Click on it to open the page to open the Installed updates page in the Control Panel.
- Simply right-click on the latest updates and select uninstall.
3] Reset Windows Update components
If uninstalling the latest update doesn’t work, then you can consider resetting Windows Update components. Doing so will change the settings related to Windows Updates to default.
4] Run the Windows Update troubleshooter
The Windows Update troubleshooter is an excellent tool for diagnosing issues related to Windows Updates and resolving them if possible. The procedure to run the Windows update troubleshooter in Windows 11 is as follows:
- Right-click on the Start button and select Settings.
- In the Settings window, go to the System tab on the list on the left-hand side.
- In the right pane, scroll down and select Troubleshoot. In the next window, select Other troubleshooters.
- This will open the list of built-in troubleshooters for Windows 11.
- From the list, click on Run corresponding to the Windows Update troubleshooter.
The troubleshooter will start detecting problems and resolve them if in scope.
Please let us know if this helped you in the comment section.
NOTE: Error 0x80070032 can also be seen for – WslRegisterDistribution failed | Microsoft Store | When copying files | Windows Backup.
How do I fix Windows Update failed to install?
If Windows Update fails to install or will not download on Windows PC, then first, run the System File Checker and DISM tool, delete temporary files, use Windows Update troubleshooter, and try again. If that doesn’t help in any way, reset the Catroot folder, delete the SoftwareDistribution folder, and set the Windows Update service to Automatic or Manual, Background Intelligence Transfer Service to Manual, etc.
What is 0x80070032 file history?
Error 0x80070032 for File History occurs when you try to turn on the Automatic backup my files option. So, if you receive this error and want to fix the 0x80070032 backup error on your Windows PC, then delete the old backups, and then try again. You may also need to reset or delete all backup settings and reconfigure the File History backup to fix this error.
Hope this is helpful.
Anand Khanse is the Admin of TheWindowsClub.com, a 10-year Microsoft MVP (2006-16) & a Windows Insider MVP (2016-2022). Please read the entire post & the comments first, create a System Restore Point before making any changes to your system & be careful about any 3rd-party offers while installing freeware.
Также в случае других причин, можно попробовать решить проблему следующими способами.
1. Не загружается обновление.
- Отключаем антивирус и VPN.
- Пробуем снова запустить обновление.
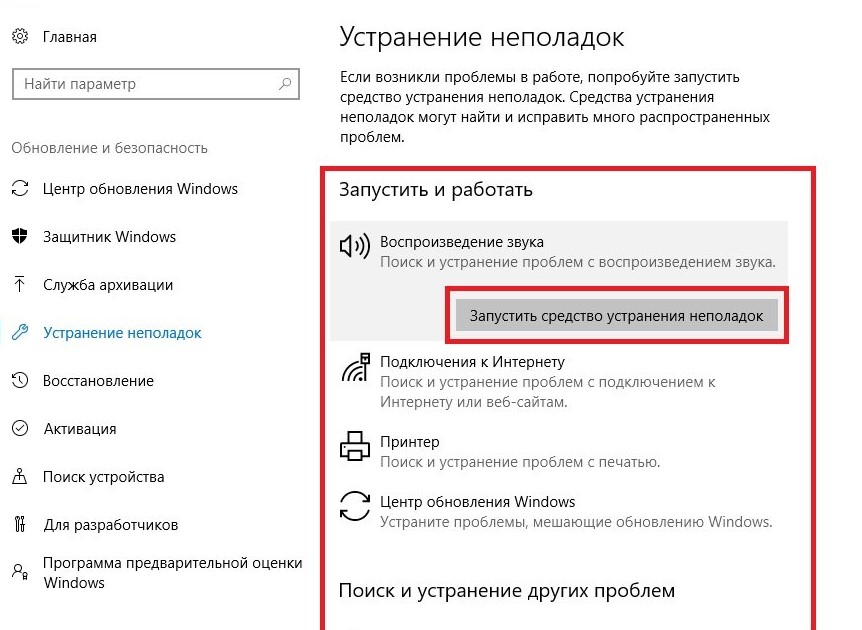
- В случае возникновения ошибки, можно воспользоваться встроенными инструментами системы. Для этого необходимо нажать комбинацию клавиш Win+I, открыть «Параметры», зайти в пункт «Обновление и безопасность» и найти «Устранение неполадок». Далее выбираем «Центр обновления Windows» и нажимаем «Запустить средство устранения неполадок».
Есть и специальная утилита, которая позволяет решить проблему — Windows 10 Update Troubleshooter.
2. Обновление зависает на стадии до 95%.
В этом случае сбоят файлы обновления. Чтобы устранить причину, в папке Download пользователю необходимо удалить все загруженные файлы, перезапустить компьютер и возобновить процедуру обновления.
Если не поможет, пробуем следующее решение:
- Переходим в «Пуск»;
- Выбираем «Службы» и ищем пункт «Оптимизация доставки»;
- Далее нажимаем «Свойства», устанавливаем ручной тип запуска.
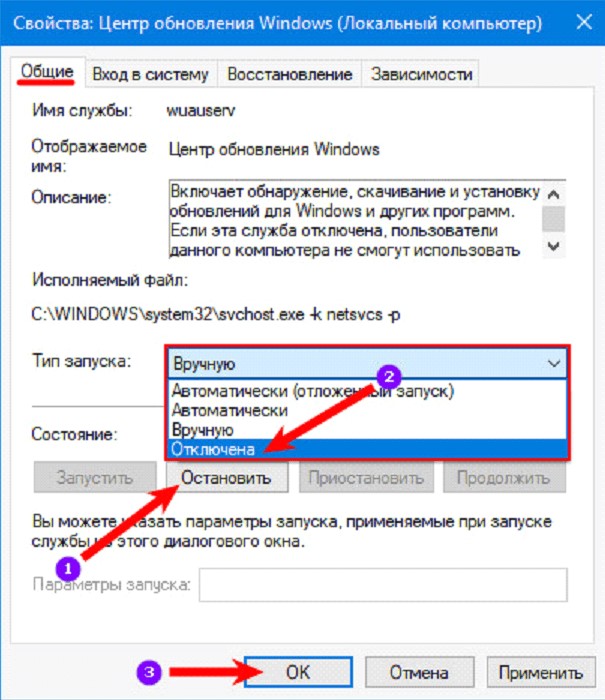
Затем необходимо перезагрузить ПК и попробовать обновить систему заново. Если сбой сохраняется, «Тип запуска» меняем на «Автоматический (отложенный запуск)» и останавливаем службу «Центр обновления Windows»:
- «Пуск»;
- «Службы»;
- «Центр обновления Windows» — «Остановить».
Далее снова перезагружаем компьютер и запускаем обновление, загрузка должна пойти в нормальном режиме.
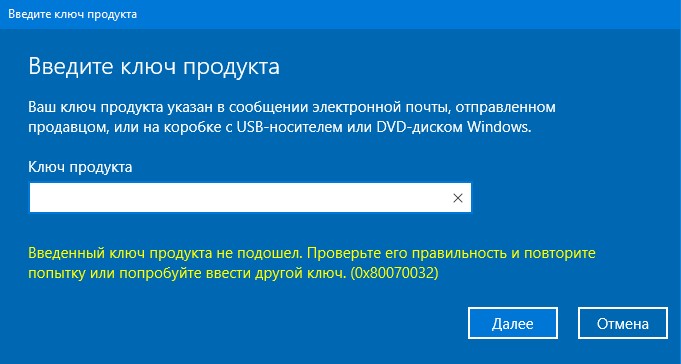
3. Ошибка 0x80070032 при установке Windows 10.
Во время установки ОС также может возникнуть код ошибки 0x80070032. Например, проблема может возникнуть на этапе подготовки к настройке Windows. Что делать в этом случае?
- Выключаем ПК, удерживая кнопку питания;
- Включаем компьютер и активируем безопасный режим;
- При необходимости заходим в свою учетную запись.
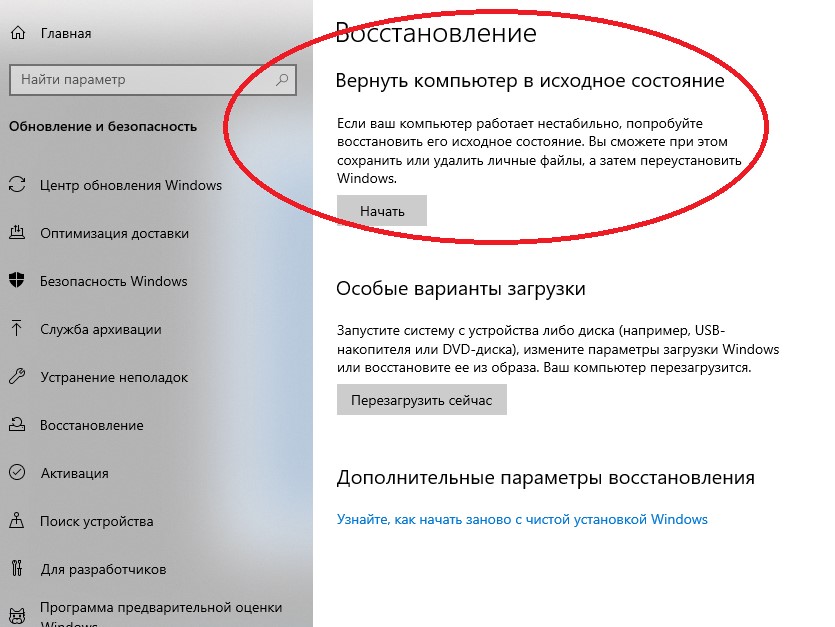
Далее пользователю необходимо зайти в меню «Пуск», «Восстановление» и нажать «Запуск восстановления системы». Предварительно нужно убедиться, что сканеры антивирусных программ отключены.
Выбираем одну из ранних точек восстановления системы и нажимаем «Далее». Затем выполняем пошаговые инструкции для процесса восстановления системы.
Указанные действия в большинстве случаев устраняют ошибку зависания установки Windows, даже если восстановление системы не будет завершено успешно. После входа в учетную запись, отключаем антивирусы и запускаем процесс обновления операционной системы.
Другие сбои установки или обновления Windows и методы решения
В некоторых случаях при попытке установить или обновить ОС ошибка 0x80070032 может вызывать синий «экран смерти». В этом случае проблема может быть более серьезная, и пользователю стоит просто удалить проблемное обновление с системного диска и повторить процедуру с более корректными файлами.
В некоторых ситуациях пользователю Windows 10 бывает проще всего временно приостановить обновление системы. Для этого в Центре обновления действует опция Приостановить обновление на 7 дней. Она затрагивает в том числе и пакеты безопасности. Операционная система перестанет выполнять проверку и установку дополнений на протяжении недели. В крайности, пользователь может и вовсе отключить обновления.
Отличным подспорьем в диагностике сбоев Windows являются команды DISM (управление компонентами ОС). На всякий случай перед работой с ними необходимо создать точку восстановления.
Так, команда CheckHealth позволяет обнаруживать потенциальные повреждения. Данная команда используется только для поиска повреждений, но не выполняет операций исправления проблем.
Windows 10 attracts users in large numbers because of its amazing GUI and prominent features. Although there’s no doubt when it comes to its popularity; however, it is not the best version of Windows.
This version comes with various flaws, such as error 0x80070032, which are worth noting by Microsoft. Microsoft claims that Windows 10 will revolutionize the Operating System world.
However, most users are unable to take this. This is because users experience problems with Windows 10 in some way or another.
What Is Error 0x80070032? How Does It Happen?
After you install Windows 10, the PIN sometimes stops working, showing an error 0x80070032. If it occurs, you cannot log in to Windows using your PIN passcode and don’t know what to do. Keep on reading further.
Windows 10 OS comes with a feature called Windows Hello for the sake of protection. It is an access control and biometric identity which enables logging into Windows through fingerprint, facial recognition, iris, or PIN passcode.
Unfortunately, Hello is not available for Windows 10 users. Older devices, which do not have the necessary hardware elements, like iris or fingerprint scanners, have to buy biometric USB iris/fingerprint scanners or forget about Windows Hello.
Normally, iris, facial, or fingerprint recognition login is accompanied by PIN passcodes. This is the most protected way to sign in to Windows 10 as a PIN passcode is simpler to memorize, while the facial contours, fingerprint, or iris of the user are very hard to counterfeit.
On Windows Hello, users come across problems like PIN passwords or fingerprints that would not work. The most common login error is the PIN 0x80070032 error. Most users claim that this issue occurred after they installed Windows 10 Fall Creators Update when compromised fingerprint or PIN login.
The most common issue with Windows 10 is “Apps won’t sync in Windows 10“, which shows up along with the error 0x80070032 code.
It even flashes a message which says, “We can’t sync at the moment. But you may find more info about this error code at www.windowsphone.com.”
The most affected application by this error code is Windows 10 Mail application. As per records, users cannot synchronize their accounts using the Mail application as this app turns non-operational. Here, you will get to learn how to resolve this issue.
Microsoft has investigated the error 0x80070032, but they have not announced the official approval of this bug or its patch. There are various reasons why your PIN stops working while flashing the error 0x80070032.
It shows up on your computer screen as “Something went wrong. Try again later. Error code: 0x80070032.” So, look at various solutions to eliminate this annoying error code.

PS: Regarding the Windows Update Error 0x80070020, here are your top solutions.
Reasons Why the Error Code 0x80070032 Occurs
Microsoft servers are the main reason for initiating this issue with the Mail application. Here, the accounts of users do not sync with servers properly.
Besides, here is the full review of Unsecapp.exe for the WMI Client Application for your reference.
Remove the NGC Folder’s Content to Eliminate 0x80070032
If you cannot log into Windows 10 using your PIN, try signing into your account and removing the NGC folder’s content.
Before you do that, you need to take the folder’s ownership. To perform this action, go through the instructions listed below.
Steps to get rid of the error 0x80070032:
- 1: First, you must log into Windows 10 with your password.
- 2: Tap Windows + X keys and choose ‘File Explorer.’
- 3: Now, go to C:\Windows\ServiceProfiles\LocalService\AppData\Local\Microsoft.
- 4: Next, right-tap on the folder NGC and choose ‘Properties.’
- 5: Navigate to the tab ‘Security,’ select ‘Advanced,’ and then look for the section ‘Owner.’

- 6: Tap on the link ‘Change‘ and type in the user or administrator and object names.
- 7: Choose ‘Check Names‘ and hit ‘O.K.’
- 8: Check against the option ‘Replace Owner on subcontainers and Objects,’ After this, select ‘Apply‘ and press O.K. to save the changes.
- 9: Next, see if you can access this NGC folder. Mark all the stored files in the folder if you can and remove those files.
- 10: Tap Windows + I keys to open Settings.
- 11: Now, open the ‘Account Settings‘ tab and choose ‘Sign-in Options.’
- 12: Select ‘Add a PIN‘ by following the on-screen instructions to set a PIN.
Resolve the 0x80070032 Error Using ‘I Forgot My PIN.’
Another method to eliminate the error 0x80070032 is by choosing the option ‘I forgot my PIN.’ To perform this action, you have to follow the following procedure.
Steps to eliminate the error 0x80070032:
- 1: Tap Windows + I keys to open Settings on your system.
- 2: Select the section ‘Accounts‘ and then choose ‘Sign-in options.’
- 3: Find the ‘PIN‘ tab and tap on ‘I forgot my PIN.’

- 4: Tap on ‘Continue‘ to confirm your action.
- 5: Now, you need to type in a new PIN. Once you have entered the passcode, press O.K.
- 6: You could be asked to type your Microsoft account passcode. In that case, change the account type from Microsoft to Local and try all the steps again.
Resolve the Error 0x80070032 Through PIN Recreation
This is another effective way to get rid of the error code 0x80070032. It is performed by recreating the PIN.
By the way, if you are facing an issue with ERR_CERT_DATE_INVALID, click to read more.
Steps to get rid of the error 0x80070032:
- 1: Tap Windows + I keys to open Settings.
- 2: Go to the section ‘Accounts‘ and then ‘Sign-in Options.’
- 3: Navigate to the PIN section and choose ‘Remove.’

- 4: Tap on ‘Remove‘ to confirm your action.
- 5: Type in your account’s password and hit O.K.
- 6: Once done, tap on ‘Add‘ and enter a new PIN.
- 7: Tap O.K. to save it and see if the issue persists or not;
Note: If you are a Dell user facing the error 0x80070032 on your system, try eliminating the security tools from Dell Data Protection. Also, remove their leftovers or temporary files through Windows Registry or Reimage.
Solutions for Fixing the Error 0x80070032 on Mail
Here are various fixes that can assist you in resolving the issue with the Mail application on Windows 10 systems.
Method 1: Switch to Microsoft from a Local Account
This method is great for resolving the error code problem on Windows. Follow the instructions to get rid of this annoying Error.
1: Firstly, you have to switch from Microsoft to a local account. To do so, visit ‘Settings‘ with the help of Cortana. Within the ‘Settings‘ tab, look for ‘Accounts‘ to open the settings associated with the user accounts.

2: Next, you have to choose ‘Sign in with a local account‘ instead, which you will find under the account’s right-pane window. After that, enter the password of the present Microsoft account. Tap on ‘Next‘ to create a new local account.

3: Type in the local account’s details, such as username and passcode. Next, tap on the tab ‘Next‘ again. In the next tab, you will see a button branded as ‘Sign out and finish.’ Select this button to sign out of your Microsoft account.

4: Next, repeat the steps. Visit ‘Settings‘ and choose ‘Accounts.’ Then, select ‘Sign in‘ with a Microsoft account instead. Type in the local account’s password, along with the username and password of the Microsoft account, for signing in again. See if you could check Mail by syncing the account.

Method 2: Reinstall Mail
Try this one out if the primary method cannot offer you a proper fix to the error code problem. Here, you have to reinstall Mail to fix the syncing problem. To perform this action, follow some simple steps listed below.
1: Visit PowerShell from the search results once you have searched for it. Right-tap on this tab and choose ‘Run as Administrator.’ Please note that opening this tab as an administrator is significant, or you will face an error.

2: Within the PowerShell tab, type the command.
Get-appxprovisionedpackage – online | where-object {$ .packagename – like “*windowscommunicationsapps*”} |remove – appxprovisionedpackage – online

Once you have executed this command, close PowerShell and install the Mail application again from Windows Store.
After you have installed this application, run the same, and check whether the error 0x80070032 has been resolved.
In addition, chart your course to liberation with our roadmap on how to unlock a keyboard on your Dell laptop, converting a challenging scenario into a quick fix.
FAQs
Q1: Can I ignore Error 0x80070032?
A1: Ignoring the error could lead to more serious system issues over time. It’s recommended to resolve it as soon as possible.
Q2: Is error 0x80070032 a virus?
A2: No, it’s a system error, not a virus. However, some viruses might cause similar errors.
Q3: Can I prevent error 0x80070032?
A3: Regular system updates and checks can help prevent this error.
Q4: What if the methods mentioned don’t work?
A4: If the issue persists, consider contacting Windows support or a professional technician.
Q5: Does error 0x80070032 affect all Windows versions?
A5: This error can occur in different versions of Windows, although the causes might vary.
Conclusion
Here, we have tried our best to offer the best solutions to fix this annoying error code 0x80070032. Users can fix this issue using the solutions mentioned here.
Automatic software is best if you do not like to struggle with repair techniques. There are lots of repair tools available online for fixing Windows-related errors.
So, choose the best one and eliminate your issue. However, it is recommended to use the above-listed methods to fix the Error.
Hi all,
I’m hoping someone can steer me in the right direction. I’m upgrading Windows 10 Enterprise version 1703 to 1809 in my company. I have about 900 PCs left. Its being pushed through Ivanti. Success rate example, if I push out to 10 machines, 3-5 may fail with the same error. Using the SetupDiag tool, this is the error I receive almost 99% of the time:
Error: SetupDiag reports abrupt down-level failure.
Last Operation: Finalize
Error: 0x80070032 — 0x50015
CSetupPlatform::Initialize: Disk provisioning is not available; hr = 0x80070032
The only other info that matches this in setuperr.log is:
DU::CDUSession::BuildSearchCriteria: Caller profile search criterion is not supported. hr = 0x80070032
Error DU DU::CDUSession::Search: Failed to build the search criteria. hr = 0x80070032
The only information I’ve found officially from the not so helpful Microsoft’s Docs Opens a new window is:
0x00000032 | The request is not supported.
I currently don’t suspect Ivanti UEM to be the issue, as I’ve been able to replicate the problem by running the update manually. Weird thing is for these failing machines, eventually after many attempts, the upgrade takes.
I’ve run SFC scans, and sometimes this helps, but its not enough. What else should I do?
Ошибка 0x80070032 может возникнуть при попытке установки обновления операционной системы Windows 10. Эта ошибка указывает на наличие проблем в процессе обновления, которые могут быть вызваны различными причинами. Исправление ошибки 0x80070032 может быть не таким простым, но существует несколько методов, которые могут помочь вам решить эту проблему.
Одной из возможных причин ошибки 0x80070032 является неполадка в службе Windows Update. Проверьте состояние службы Windows Update и убедитесь, что она работает корректно. Если служба не работает, попробуйте перезапустить службу Windows Update и выполнить обновление еще раз.
Еще одной возможной причиной ошибки 0x80070032 является наличие поврежденных или отсутствующих файлов системы. В этом случае вы можете воспользоваться инструментом «Системный файловый проверятор» (SFC) для исправления этих проблем. Запустите командную строку от имени администратора и выполните команду «sfc /scannow», чтобы проверить и восстановить поврежденные файлы системы.
Если вы все еще сталкиваетесь с ошибкой 0x80070032 при установке обновления Windows 10, может быть полезно отключить антивирусное программное обеспечение или любое другое программное обеспечение, которое может препятствовать установке обновлений. В некоторых случаях антивирусные программы могут блокировать процесс обновления и вызывать ошибку. Попробуйте временно отключить антивирусное программное обеспечение и выполнить обновление повторно.
Содержание
- Ошибка 0x80070032 при установке обновления Windows 10
- Причины ошибки 0x80070032
- Возможные решения проблемы
- Как исправить ошибку 0x80070032
Ошибка 0x80070032 при установке обновления Windows 10
Ошибка 0x80070032 может возникнуть при попытке установить обновление операционной системы Windows 10. Эта ошибка обычно указывает на проблемы с доступом к системным файлам или папкам, которые необходимы для корректного выполнения процесса обновления.
Вот некоторые из возможных причин ошибки 0x80070032:
- Недостаточно места на жестком диске
- Неправильные права доступа к системным файлам или папкам
- Проблемы с файловой системой диска
- Ошибки в системных службах Windows
Как решить проблему ошибки 0x80070032 при установке обновления Windows 10:
- Освободите место на жестком диске, если оно заканчивается. Удалите ненужные файлы, программы или временные файлы. Можно использовать программы для очистки диска или вручную удалить ненужные файлы и папки.
- Проверьте права доступа к системным файлам и папкам. Убедитесь, что у вас есть административные права на установку обновлений. Если нет, то зайдите в «Панель управления» -> «Учетные записи пользователей» и добавьте себя в группу администраторов.
- Проверьте и исправьте возможные проблемы с файловой системой диска. Для этого откройте командную строку от имени администратора и выполните команду «sfc /scannow». Эта команда проверит целостность системных файлов и попытается восстановить их в случае обнаружения ошибок.
- Проверьте службы Windows на наличие ошибок. Для этого откройте командную строку от имени администратора и выполните команду «net start». Эта команда отобразит список запущенных служб Windows. Если видно ошибки, попробуйте перезапустить службы или выполнить ремонт системных служб.
Если ни одно из этих решений не помогло решить проблему, возможно, вам потребуется обратиться за помощью к специалисту или обратиться в службу поддержки Microsoft для получения дополнительных рекомендаций или вариантов решения проблемы.
Причины ошибки 0x80070032
Ошибка 0x80070032 при установке обновления Windows 10 может возникнуть по разным причинам. Рассмотрим основные из них:
- Недостаток свободного места на жестком диске
- Проблемы с файловой системой
- Ошибка в системном реестре
- Коррупция системных файлов
- Вмешательство сторонних программ
- Проблемы с обновлениями
Недостаток свободного места на жестком диске
Одной из частых причин ошибки 0x80070032 является недостаток свободного места на жестком диске. Установка обновления требует определенного объема места, и если его недостаточно, то установка не может быть выполнена. Рекомендуется очистить диск от ненужных файлов или переместить их на другой носитель.
Проблемы с файловой системой
Ошибка 0x80070032 может возникнуть из-за проблем с файловой системой на жестком диске. В этом случае рекомендуется выполнить проверку диска на наличие ошибок и исправить их. Для этого можно воспользоваться встроенной утилитой CHKDSK.
Ошибка в системном реестре
Другой возможной причиной ошибки 0x80070032 может быть наличие ошибок в системном реестре. Рекомендуется выполнить сканирование реестра с помощью специального программного обеспечения для определения и исправления ошибок. Также можно попробовать восстановить систему до предыдущей точки восстановления, когда ошибок еще не было.
Коррупция системных файлов
Если системные файлы Windows были повреждены или испорчены, то возможна ошибка 0x80070032 при установке обновления. Для исправления этой проблемы можно воспользоваться командной строкой и выполнить сканирование и восстановление системных файлов.
Вмешательство сторонних программ
Некоторые сторонние программы и антивирусные программы могут привести к возникновению ошибки 0x80070032 при установке обновления. В этом случае рекомендуется отключить или удалить эти программы временно и повторить установку обновления.
Проблемы с обновлениями
Иногда сама система обновлений Windows может быть повреждена или неправильно настроена, что приводит к ошибке 0x80070032. В этом случае можно воспользоваться инструментом для устранения неполадок Windows Update или вручную удалить и повторно установить некоторые компоненты обновлений.
В случае возникновения ошибки 0x80070032 рекомендуется попробовать все перечисленные выше решения. В большинстве случаев одно из них помогает исправить ошибку и выполнить успешную установку обновления Windows 10.
Возможные решения проблемы
Ошибка 0x80070032 при установке обновления Windows 10 может быть вызвана различными причинами. Вот некоторые возможные решения проблемы:
- Проверка подключения к интернету: убедитесь, что ваше устройство имеет стабильное подключение к интернету. Попробуйте перезагрузить маршрутизатор и обновить драйверы сетевой карты.
- Очистка временных файлов: некорректные или поврежденные временные файлы могут привести к ошибке 0x80070032. Запустите встроенную утилиту очистки диска, чтобы удалить временные файлы и освободить место на диске.
- Отключение антивирусного программного обеспечения: временно отключите любое антивирусное программное обеспечение на вашем устройстве, так как оно может блокировать установку обновлений.
- Переустановка службы обновления Windows: иногда проблема может возникнуть из-за повреждений в службе обновления Windows. Попробуйте переустановить службу, следуя официальной инструкции от Microsoft.
- Использование инструмента «Отладка Windows»: инструмент «Отладка Windows» может помочь идентифицировать и исправить проблемы, связанные с обновлениями Windows. Запустите инструмент и выполните рекомендуемые действия.
- Удаление недостаточного места на диске: убедитесь, что на вашем устройстве достаточно свободного места на диске. Если места не хватает, попробуйте освободить его, удалив ненужные файлы или переместив их на другой диск.
- Использование инструмента «Инструмент проверки обновлений Windows»: запустите встроенный инструмент проверки обновлений Windows, чтобы найти и установить доступные обновления. Это может помочь исправить проблемы с установкой обновлений.
- Обратитесь в службу поддержки Microsoft: если все вышеперечисленные решения не помогли, рекомендуется обратиться в службу поддержки Microsoft для получения дальнейшей помощи и инструкций.
Выполняя эти рекомендации, вы повышаете шансы на успешное устранение ошибки 0x80070032 при установке обновления Windows 10.
Как исправить ошибку 0x80070032
Ошибка 0x80070032 может возникать при установке обновления операционной системы Windows 10 и может быть вызвана разными причинами. В этой статье мы рассмотрим несколько способов исправления этой ошибки.
1. Перезапустите службы Windows Update
- Нажмите комбинацию клавиш Win + X и выберите «Командная строка (администратор)».
- В командной строке введите следующие команды и нажмите Enter после каждой:
net stop wuauservnet stop cryptSvcnet stop bitsnet stop msiserver
- После выполнения этих команд введите следующие команды для запуска соответствующих служб:
net start wuauservnet start cryptSvcnet start bitsnet start msiserver
- Попробуйте установить обновление операционной системы снова.
2. Очистите папку загрузки обновлений
- Нажмите комбинацию клавиш Win + R для вызова окна «Выполнить».
- Введите «services.msc» и нажмите Enter, чтобы открыть окно «Службы».
- В окне «Службы» найдите службу «Windows Update» и щелкните по ней правой кнопкой мыши.
- Выберите «Остановить» и подтвердите действие. Затем закройте окно «Службы».
- Откройте проводник и перейдите по следующему пути: C:\Windows\SoftwareDistribution\Download.
- Удалите все файлы и папки из папки «Download».
- Вернитесь в окно «Службы» и запустите службу «Windows Update» снова.
- Попробуйте установить обновление операционной системы снова.
3. Используйте инструмент устранения неполадок Windows Update
- Откройте параметры Windows, выберите «Обновление и безопасность» и перейдите на вкладку «Устранение неполадок».
- Нажмите на кнопку «Запустить устранение неполадок» под разделом «Проблемы с обновлением».
- Следуйте инструкциям на экране и дождитесь завершения процесса.
- После завершения процесса попробуйте установить обновление операционной системы снова.
Эти способы помогут исправить ошибку 0x80070032 при установке обновления Windows 10. Если проблема остается, рекомендуется обратиться за помощью к специалистам или использовать другие методы исправления ошибки.