Ошибка 0x80070026 не является новой проблемой в ОС от Майкрософт, но пользователи Windows 10 с недавнего времени снова начали ощущать на себе данную проблему. Итак, для начала давайте разберемся, что собой представляет эта ошибка.
0x80070026 — это ошибка, возникающая во время очередного обновления операционной системы Windows 10. Причиной этой проблемы являются повреждения системных файлов, но также не исключены и иные причины.
Способы решения 0x80070026 в Windows 10
Способ №1 Запуск утилиты SFC
SFC — это отличная утилита ОС Windows для проверки и исправления системных файлов. Если ваши системные файлы были повреждены, что вероятней всего при ошибке 0x80070026, то применение утилиты SFC — это здравомыслящий шаг. Она просканирует вашу систему на наличие поврежденных файлов и исправит их, но только если это будет возможно. Итак, для запуска SFC нужно сделать следующее:
- Кликните ПКМ на Пуск и выберете «Командная строка(администратор)».
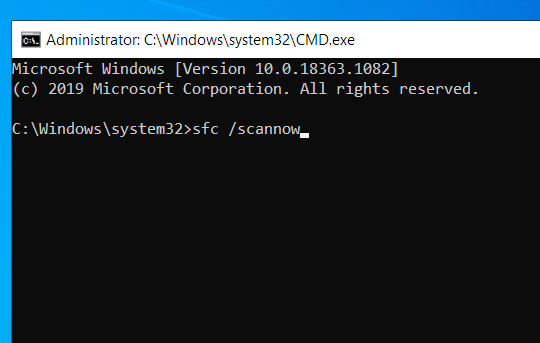
- Впишите в нее команду sfc /scannow и нажмите Enter для запуска работы утилиты.
Вот, собственно, и все. После нажатия на Enter, утилита SFC запустит сканирование вашего компьютера для проверки целостности системных файлов. Если она найдет какие-то повреждения, то она попытается устранить их.
Способ №2 Запуск утилиты DISM
Если проблема в виде ошибки 0x80070026 все еще присутствует при попытках обновить Windows 10, то вы можете попробовать запустить другую системную утилиту — DISM или же система обслуживания образов развертывания и управления. Для ее запуска сделайте следующее:
- Откройте Командную строку точно также, как это было показано в предыдущем пункте.
- Открыв командную строку с повышенными правами, вписывайте в нее следующие команды, при этом нажимая Enter после каждой из них:
- dism /Online /Cleanup-Image /CheckHealth
- dism /Online /Cleanup-Image /ScanHealth
- dism /Online /Cleanup-Image /RestoreHealth
Перезагрузите свой компьютер и попробуйте снова попробовать запустить обновление Windows 10. Возможно, что вы все-таки смогли устранить ошибку 0x80070026.
Если же у вас так и не получилось исправить эту неприятную ошибку, то можно посоветовать еще несколько действий в этой ситуации:
- Проверьте свою систему на наличие вирусов в ней, так как некоторые особо вредоносные образцы могут блокировать некоторые функции ОС.
- Проверьте, не устанавливали ли вы недавно каких-то сомнительных утилит, которые могли бы создавать проблемы при обновлении. Например, некоторые программы по уборке компьютера от мусорных или временных файлов могут стать причиной ошибки 0x80070026.
- Убедитесь, что ваше Интернет-соединение вполне стабильно для загрузки обновления в Центре обновления Windows.
- Можете воспользоваться удобным для вас способом Восстановления системы. Рекомендуем для начала использовать точку восстановления.
This post suggests ways to fix error 0x80070026 for Windows Update or System Restore. Several users have faced this issue that when they try to update Windows or perform a System Restore – the process doesn’t complete and they receive this 0x80070026 error.
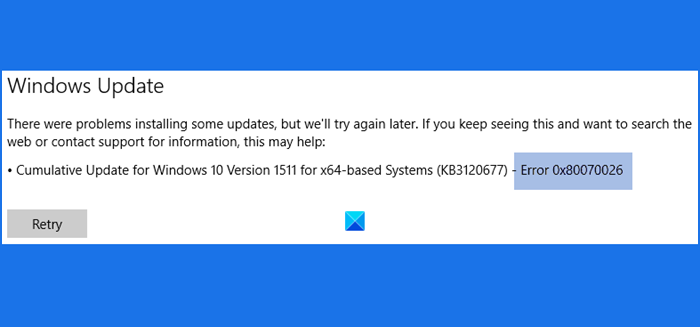
This Windows Update error code 0x800700 normally appears when users try to install a cumulative update for Windows 10. The entire error message looks like this:
There were problems installing some updates, but we’ll try again later. If you keep seeing this and want to search the web or contact support for information, this may help – Error 0x80070026
Let’s check the fixes that might come in handy:
- Run Windows Update Troubleshooter
- Clear contents of SoftwareDistribution folder
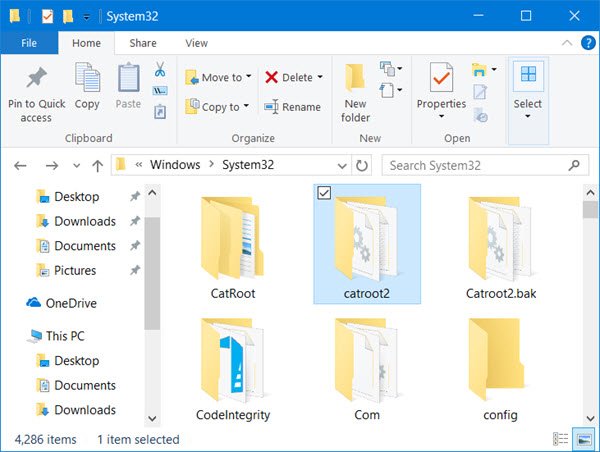
- Clear contents of catroot2 folder
- Manually download and install the Update via the Microsoft Catalog website.
1] Run Windows Update Troubleshooter
Here are the steps:
- Press Win+I to open the Settings app
- Click on Update & Security category
- Access the Troubleshoot page using the left section
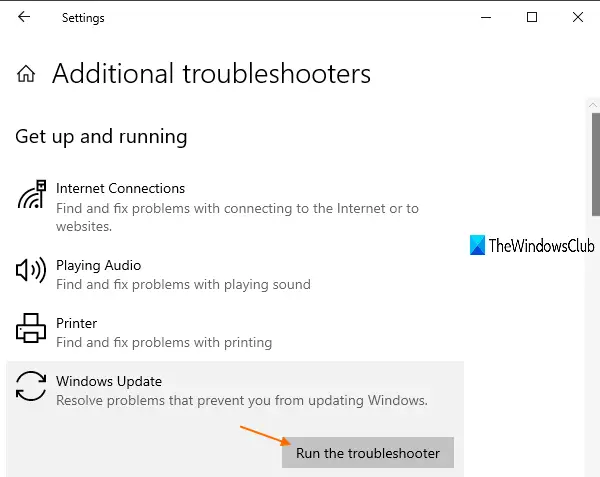
- Click on the Additional troubleshooters‘ option visible on the right part
- Click on the Windows Update option
- Hit the Run the troubleshooter button.
Now it will start detecting problems (by checking registry keys, pending restart, diagnosing other issues, etc.) and provide you the fixes.
2] Clear contents of SoftwareDistribution folder
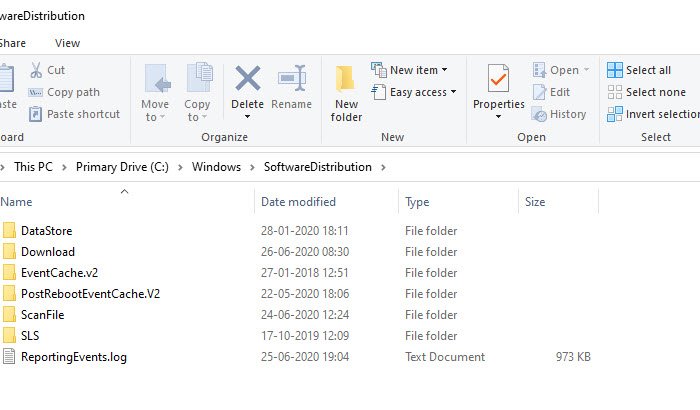
SoftwareDistribution folder is present in the Windows directory which temporarily stores files and folders that are needed to install new updates. If for some reason, such files are corrupt, then removing all such content from the Software Distribution folder might help to get Windows updates and install them. So, simply clear the contents of the SoftwareDistribution folder. The steps are:
- Press Win+E hotkey to open File Explorer
- Access SoftwareDistribution folder. The path is:
C:\Windows\SoftwareDistribution
- Press Ctrl+A hotkey to select all the items present in that folder
- Use the Delete key to clear all the content.
If you want, you can also simply delete the SoftwareDistribution folder too. It is recreated automatically. After that, try to install updates. It might work.
3] Clear contents of catroot2 folder
catroot2 is a system folder that is needed for the Windows update process. There are chances that the contents of that folder are corrupted.
So, in that case, you need to reset the catroot2 folder by deleting or clearing its contents. After that, check if Windows Update works fine.
4] Manually download & install Update via the Microsoft Update Catalog website
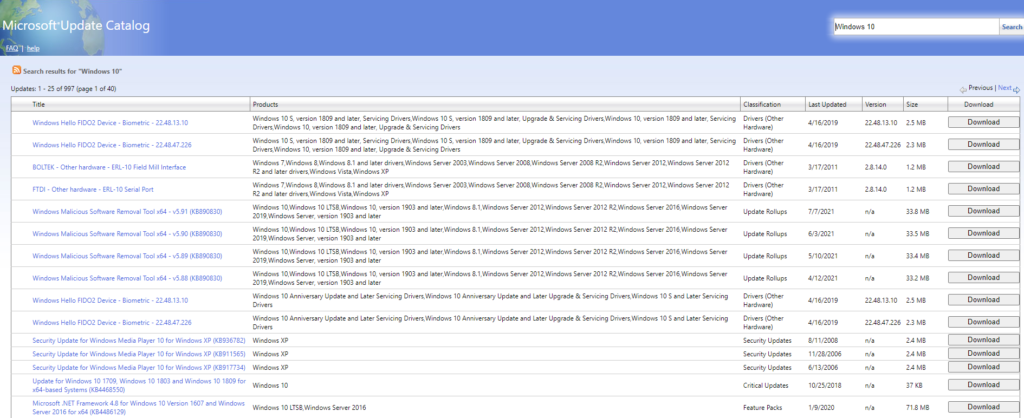
If the above options don’t work, then you have to access the Microsoft Update Catalog website and download the required update. Use the search option on that website, enter the update name, click on the Download button, and install the update.
TIP: More suggestions here if Windows Cumulative Update not installing or fails to install.
Error 0x80070026 for System Restore
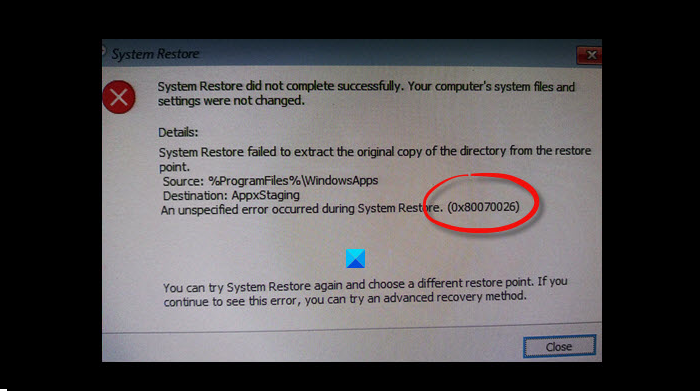
Users have experienced the same error code 0x80070026 for the system restore process. The whole error message goes like this:
System Restore did not complete successfully. Your computer’s system files and settings were not changed.
Details:
System Restore failed to extract the original copy of the directory from the restore point.
Source: %ProgramFiles%\WindowsApps
Destination: AppxStaging
An unspecified error occurred during System Restore: (0x80070026)
You can try System Restore again and choose a different restore point. If you continue to see this error, you can try an advanced recovery method.
Here are a couple of fixes that might be useful:
- Temporarily disable antivirus or firewall and try
- Boot in Clean Boot State, Advanced Startup Options, or Safe Mode
- Troubleshoot in Clean Boot State to identify the offender.
1] Temporarily disable antivirus or firewall
It might be possible that Windows Defender Antivirus or some other 3rd party antivirus software is interfering with the system restore process. The same can also happen with Windows Firewall or other firewall software installed on your computer.
In such a case, disable the antivirus or firewall that you’re using and try the system restore process. If the system restore is completed successfully, then your security tool was causing the issue.
2] Boot in Clean Boot State, Advanced Startup Options, or Safe Mode
If the first option doesn’t work, then you should boot your computer in Clean Boot State, access Advanced Startup Options, or boot Windows in Safe Mode and then try to perform a system restore. This might work.
3] Troubleshoot in Clean Boot State to identify the offender
Clean Boot is a native feature of Windows 10 that helps in identifying the service or application that is causing some issue.
So, troubleshoot in Clean Boot State, and check if you are able to complete your system restore process.
If yes, then there would be some background program that was causing the error. You need to find that program and then remove/disable it.
TIP: More suggestions here to fix System Restore problems.
Hope something will work.
Не удалось ли обновить Windows 10 из-за кода ошибки 0x80070026 на вашем устройстве? Если да, то не беспокойтесь, поскольку мы придумали пять рабочих способов, которые наверняка устранят основные причины, лежащие в основе этого.
Поврежденные или отсутствующие системные файлы, поврежденный образ Windows 10, накопленный огромный кеш – вот некоторые из основных причин, которые могут вызвать эту проблему на вашем компьютере. Чтобы преодолеть эту ошибку, запустите средство устранения неполадок Центра обновления Windows, выполните сканирование SFC / DISM или сбросьте компоненты обновления. Если проблема не устраняется даже после применения вышеуказанных решений, загрузите и установите обновления на свой компьютер вручную. Давайте узнаем возможные способы исправить код ошибки 0x80070026 в Windows 10 –
Чтобы решить проблему с обновлением Windows 10 с кодом ошибки 0x80070026, попробуйте применить эти обходные пути один за другим –
1]Устранение неполадок Центра обновления Windows
Устранение неполадок Центра обновления Windows – лучший способ найти и устранить основные причины любых проблем, связанных с обновлением, в Windows 10. Даже если это не решит проблему, вы получите представление о том, как устранить ошибку 0x80070026 на вашем компьютере. Вот полное руководство по устранению неполадок Центра обновления Windows –
- Прежде всего, нажмите Win + I , чтобы запустить приложение “Настройки”.
- Введите «Устранение неполадок» в строке поиска и нажмите Enter.
- Прокрутите вниз и найдите параметр – Найти и исправить проблемы с Центром обновления Windows.
- Когда найдете, щелкните по нему.
- Затем нажмите, чтобы развернуть Центр обновления Windows, и нажмите Запустить средство устранения неполадок.
- Затем следуйте инструкциям на экране, чтобы выполнить оставшиеся шаги.
Когда вы завершите устранение неполадок вашего компьютера, посмотрите, действительно ли он решает проблему 0x80070026 или нет.
2]Исправить повреждение системного файла
Ошибка 0x80070026 также может возникать из-за наличия поврежденных или отсутствующих системных файлов. Чтобы исправить основные файлы Windows, вы должны выполнить сканирование SFC на вашем устройстве. Вот как выполнить эту задачу –
- Запустите командную строку от имени администратора.
- Когда появится окно UAC, нажмите Да, чтобы разрешить доступ.
- В открывшейся консоли введите «sfc / scannow» и нажмите Enter.
- Этот инструмент немедленно начнет сканирование всего ПК на наличие поврежденных файлов и их восстановление.
- Обычно это занимает 15-20 минут, однако время может увеличиваться в зависимости от уровня повреждения вашего ПК.
- После завершения процесса сканирования / восстановления перезапустите Windows 10.
Проверьте, разрешится ли ошибка при следующем входе в систему.
3]Проверьте и исправьте поврежденный образ Windows
Иногда поврежденный образ Windows также может препятствовать получению обновлений на вашем компьютере. Таким образом, вы должны проверить и убедиться, что в самой операционной системе нет повреждений, используя DISM. Чтобы запустить эту служебную программу, выполните следующие действия:
- Щелкните правой кнопкой мыши значок Windows и выберите «Выполнить».
- Введите «cmd» и одновременно нажмите Ctrl + Shift + Enter, чтобы запустить командную строку от имени администратора.
- Когда UAC предложит, нажмите Да.
- На консоли с повышенными правами выполните следующие коды один за другим. Первые два кода будут сканировать на наличие проблем на компьютере, а третий восстановит работоспособность ПК (если возможно).
Dism / Online / Cleanup-Image / CheckHealth
Dism / Online / Cleanup-Image / ScanHealth
DISM / Онлайн / Очистка-Образ / RestoreHealth
- Подобно сканированию SFC, это тоже занимает примерно 15-20 минут, так что подождите терпеливо.
- После завершения проверки посмотрите, можете ли вы теперь устанавливать обновления Windows 10 или все еще нет.
4]Сбросить компоненты обновления
Иногда вы не можете обновить Windows 10 только из-за накопленного кеша внутри папок Cache. Есть две основные папки, которые содержат всю информацию, относящуюся к любому обновлению, которое вы когда-либо выполняли на своем ПК. Это папки SoftwareDistribution и Catroot2.
Если это действительно так, вам необходимо сбросить компоненты обновления до состояния по умолчанию. Чтобы узнать больше, прочитайте, как очистить папки кэша обновлений в Windows 10.
5]Установка обновлений вручную
В Windows 10 ошибки обновления не проходят так просто. Итак, если вы все еще испытываете проблемы с установкой новых обновлений на свой компьютер, вам лучше выбрать ручной вариант.
Каждый раз, когда для пользователей выпускается новое обновление, Microsoft также загружает соответствующий автономный пакет на Обновить каталог сайт. Когда у вас есть необходимые установочные файлы, следуйте этому руководству о том, как вручную установить ожидающие обновления Windows 10.
6]Чистая установка Windows 10
Хотя код ошибки 0x80070026 должен быть устранен к настоящему времени, есть случаи, когда проблема повторяется во время следующего обновления. В таком сценарии вы можете либо повторно применить шаги, описанные в методе № 5, либо просто выбрать вариант – чистая установка Windows 10.
Я надеюсь, что вы найдете эту статью полезной для решения кода ошибки 0x80070026 в Windows 10. Если у вас есть какие-либо вопросы или предложения, напишите нам в поле для комментариев.
Contents
- What Is the Error Code 0x80070026 in Windows 10?
- What Causes the Windows Update Error Code 0x80070026?
- How to Fix the Update Error 0x80070026 on a Windows 10 PC
- Solution 1: Temporarily Disable Your Antivirus
- Solution 2: Run the Windows Update Troubleshooter
- Solution 3: Empty the Contents of the Temp Folder
- Solution 4: Run the SFC and DISM Tools
- Solution 5: Reset Windows Update Components
- Solution 6: Try Using the Windows Media Creation Tool
- Solution 7: Try Installing the Updates Manually
- Solution 8: Temporarily Disable Your Proxy Connection
- Solution 9: Reset Your PC

Sometimes, when trying to update Windows 10, you may come across the update error code 0x80070026. It’s a fairly common error on Windows 10 PCs, and our post today highlights some of the solutions on how to fix the Windows Update error code 0x80070026.
What Is the Error Code 0x80070026 in Windows 10?
First, let’s try to understand what the error code 0x80070026 means and why you’re encountering it on your PC. On Windows 10, unlike on older versions of Windows, whenever updates are available, the update feature automatically downloads and installs them.
However, sometimes, you may want to manually check for updates by launching the Windows Update service. That’s when the error occurs. It reads in full:
“There were problems installing some updates, but we’ll try again later”. If you keep seeing this and want to search the web or contact support for information, this may help:
- Cumulative Update for Windows 10 Version 1511 for X64-based system (KB3120677) – Error 0x80070026.”
You’ll notice that the updates are being downloaded, but then they fail.
What Causes the Windows Update Error Code 0x80070026?
Various reasons could be responsible for the error code 0x80070026 when installing Windows 10 updates, the main one being damaged system files. This can be a result of malware infection or file corruption.
Another cause of this error is if Windows Update fails to function properly. Since this feature is directly responsible for downloading and installing Windows updates, if it ceases to work as required, you’re likely to encounter errors when installing updates.
Other causes include the following:
- Your antivirus blocking the installation of updates
- A failure to communicate with Microsoft servers
How to Fix the Update Error 0x80070026 on a Windows 10 PC
Solution 1: Temporarily Disable Your Antivirus
Your antivirus software could be preventing the updates from being installed on your computer. Third-party antivirus programs are notorious for blocking downloads from external servers, and this may be the case in your situation.
You can try temporarily disabling your antivirus tool to see if this gets rid of the error. Depending on your antivirus, the steps to disable it will vary. Once you’re done, try running the installation again. If the error persists, you may have to completely uninstall the app.
If this doesn’t work, you may try disabling the firewall temporarily. If you’re using Windows Defender as your primary security program, follow these steps:
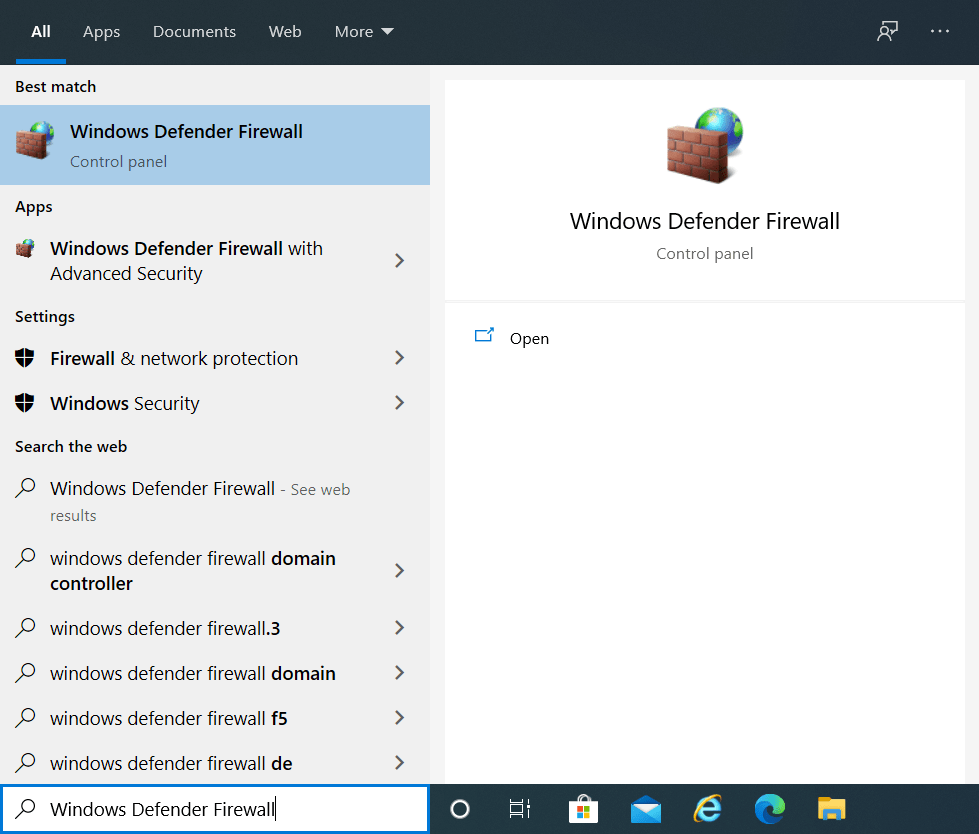
- Press the Windows logo on your keyboard, type “Windows Defender Firewall” (without quotes), and hit “Enter”.
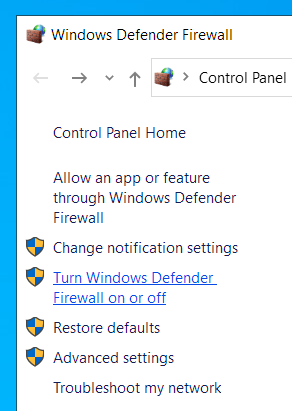
- On the “Windows Defender Firewall” screen, select “Turn Windows Defender Firewall on or off” in the left sidebar.
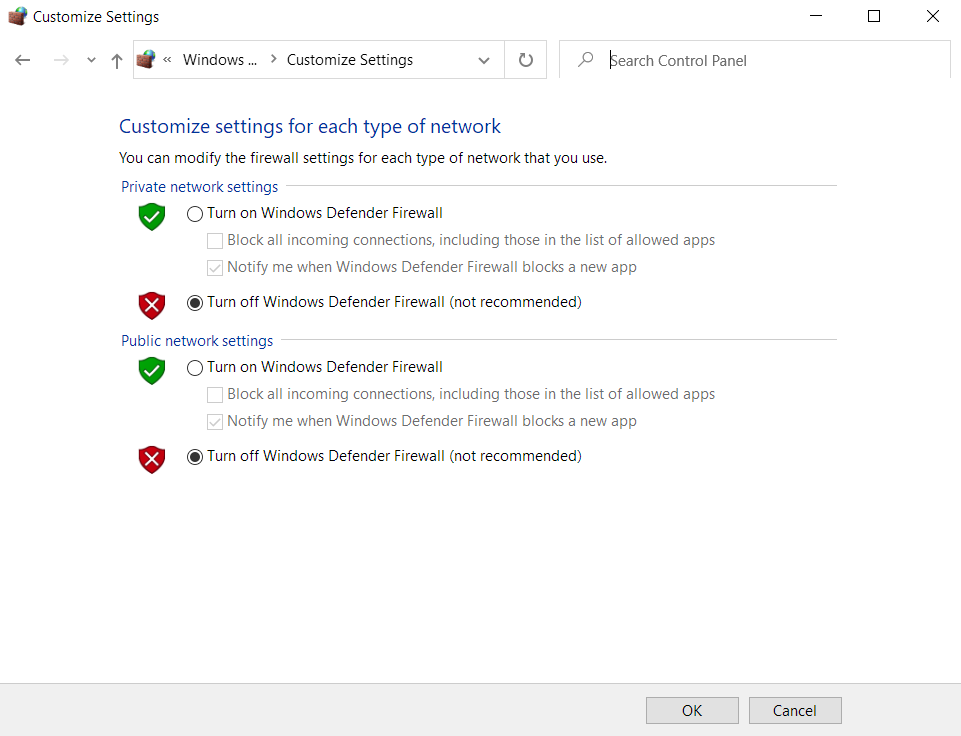
- Click on the “Turn off Windows Defender Firewall (not recommended)” radio buttons for both the “Private network settings” and “Public network settings” options.
- Click on “OK” to apply these settings and exit the Control Panel.
- Now, try installing Windows 10 updates to see if you run into the Windows Update error 0x80070026.
Solution 2: Run the Windows Update Troubleshooter
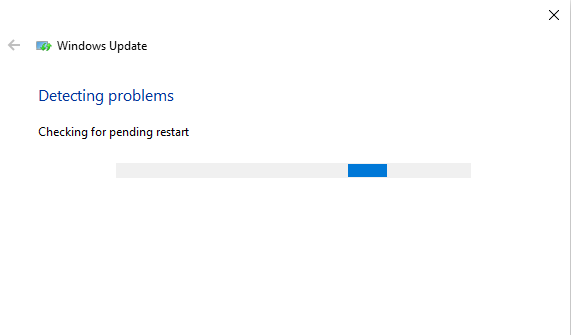
Before you start applying more sophisticated solutions, try running the built-in Windows Update troubleshooter to check if this resolves your issue. This tool can be useful when trying to fix update errors whose origin you can’t pinpoint.
Here are the guidelines on how to run the Windows Update troubleshooter:
- Press the Win + I keyboard shortcut to launch the Windows Settings app.
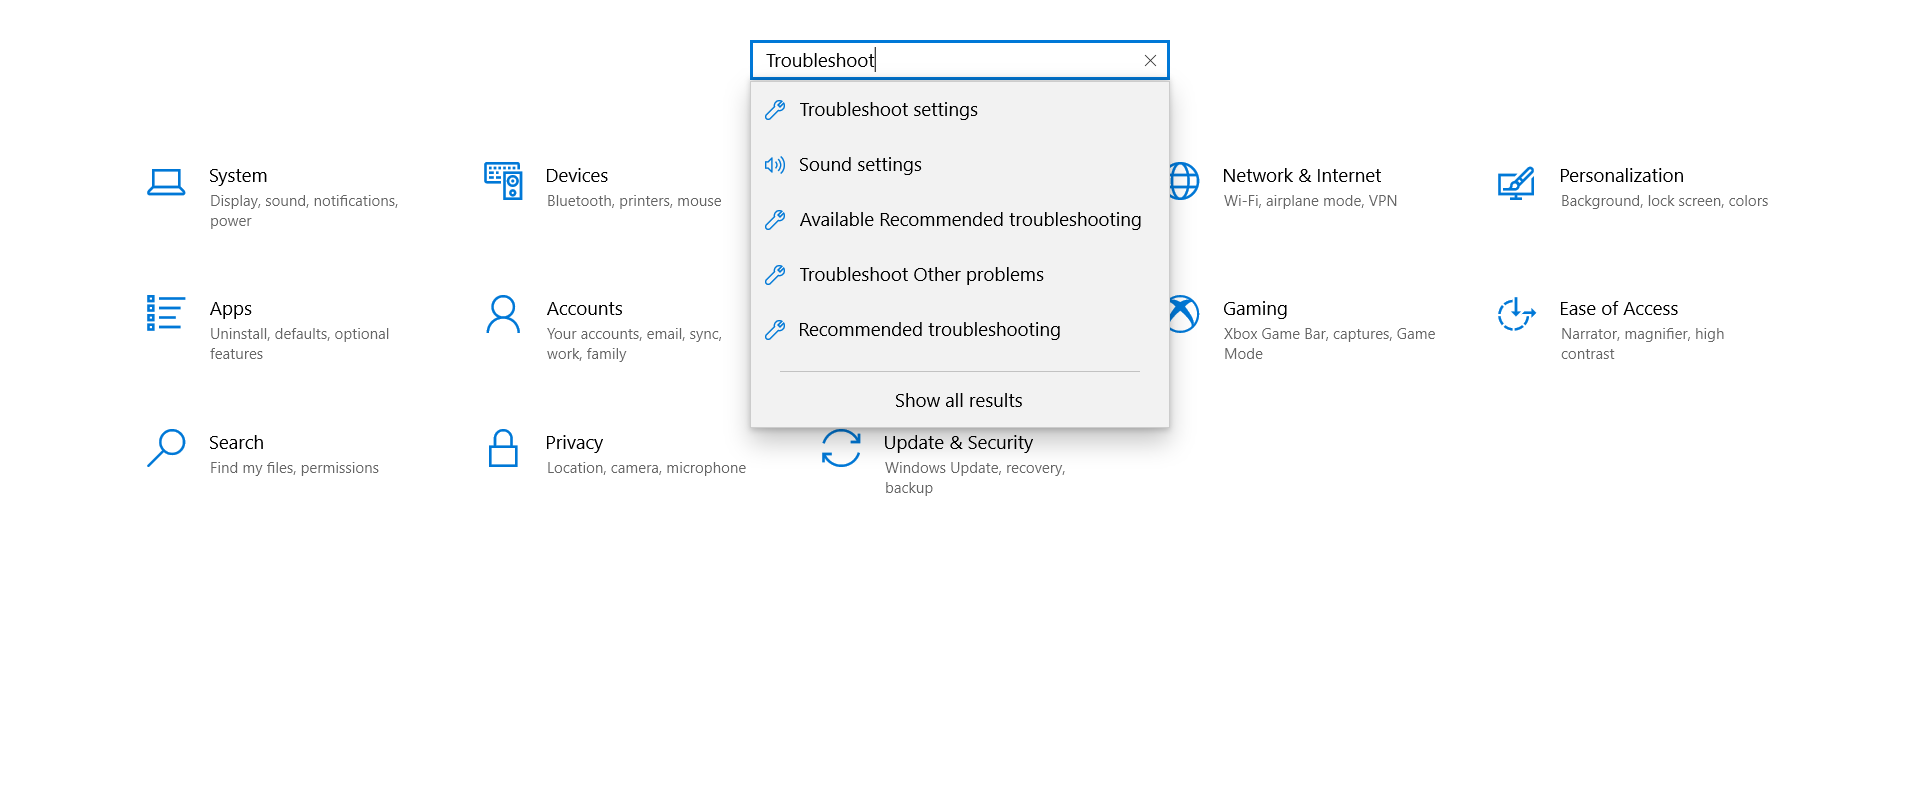
- In the “Find a setting” text box, type “Troubleshoot” (without quotes), and select “Troubleshoot other problems”.
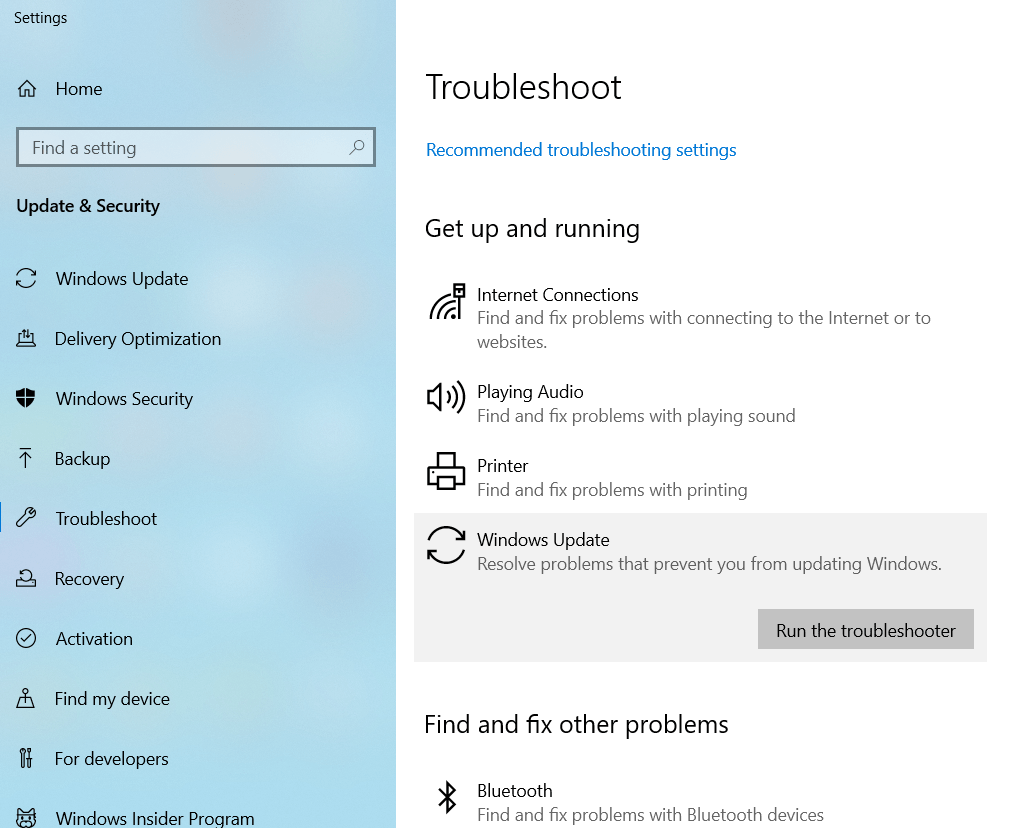
- On the next page, find “Windows Update” and click on it once to reveal the “Run the troubleshooter” button.
- Click this button to initiate the troubleshooting process. If Windows detects any errors, it will attempt to fix them. Apply any suggestions displayed.
Solution 3: Empty the Contents of the Temp Folder
The temporary folder is where Windows stores temporary files when you run various processes. These files are useful and may help programs load faster the next time you want to access them.
Despite their usefulness, temporary files can get corrupted and end up interfering with the running processes, including the installation of Windows updates. To prevent this from happening, it’s advisable to clear the temp folder on your PC.
Here’s how:
- Restart your computer and log in using your administrator account.
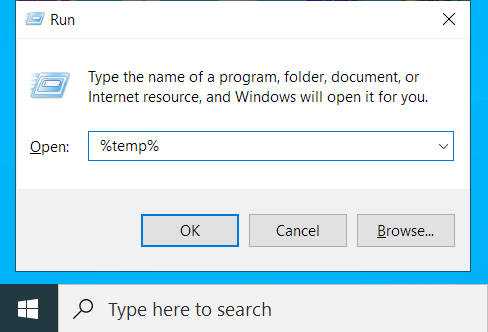
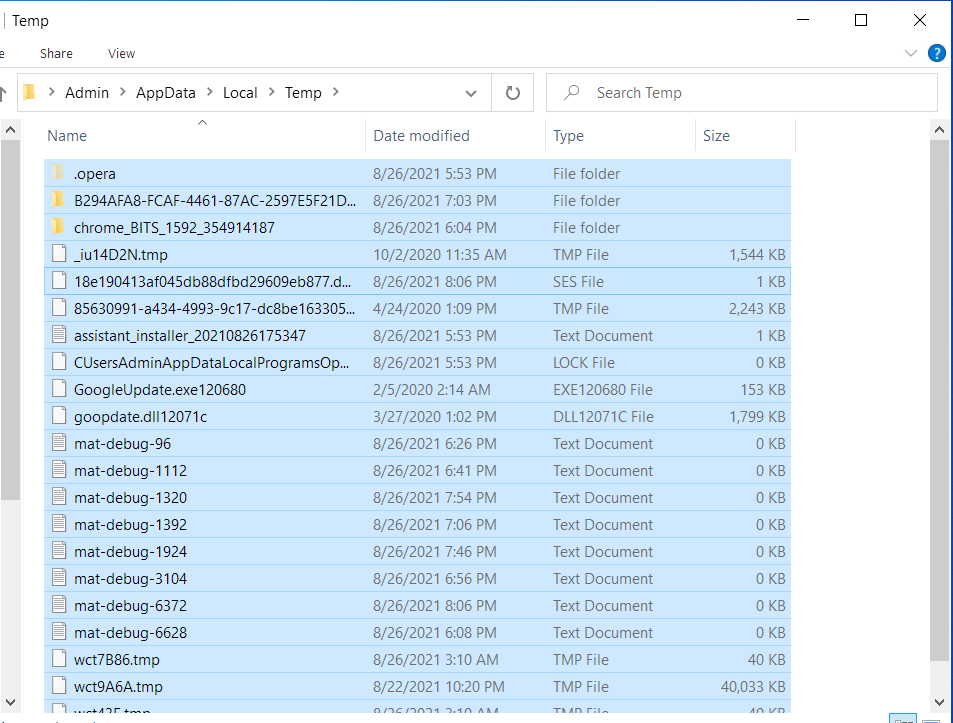
- Press the Win + R keyboard shortcut, type %temp% into the “Run” dialog box, and hit “Enter”.
- Select everything in this folder using the Ctrl + A shortcut and hit the “Delete” button.
Now, go back to “Settings” and try updating your Windows 10 PC to check if the error has been resolved.
A faster and safer way of clearing the temp folder, along with removing PC junk, is to use reliable PC optimization software like Auslogics BoostSpeed. This program scans your system, detects all speed-reducing and error-causing issues, and attempts to fix them.
BoostSpeed offers you more than a dozen PC optimization tools, including Registry Cleaner, Disk Defrag, Duplicate File Finder, Internet Optimizer, Empty Folder Cleaner, and Deep Disk Cleaner, to name but a few.
The Delete Temp Files option is accessible via the Clean Up tab. All you have to do is click the Deep Disk Cleaner button to view a list of system and application temporary files that have accumulated on your drives. You can easily select the files you want to be removed from your system as they are conveniently categorized into five groups, namely Web Cache, System Files, Application Files, Temporary Files, and Advanced. Once selected, click on the “Clean up” button. You’ll also find the option to back up the changes, just in case you need to restore some files.
You can also run the Registry Cleaner tool to eliminate corrupted or outdated registry entries to fix and prevent random freezes and crashes and other system errors. Running Auslogics BoostSpeed regularly ensures your system’s overall stability and improved performance.
Solution 4: Run the SFC and DISM Tools
Another solution to the Windows Update error code 0x80070026 is to fix corruption in your system files. For this, we’ll use built-in Windows tools such as System File Checker (SFC) and Deployment Image Servicing and Management (DISM).
The SFC utility scans for corrupted system files and attempts to restore them with a cached copy. To use this tool to fix the error 0x80070026, follow these steps:
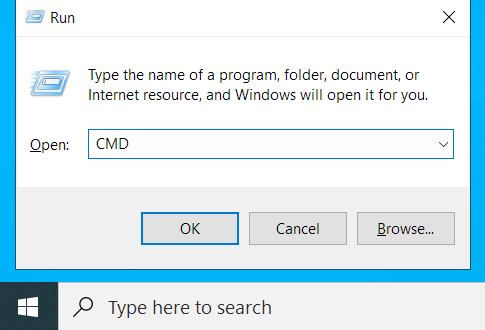
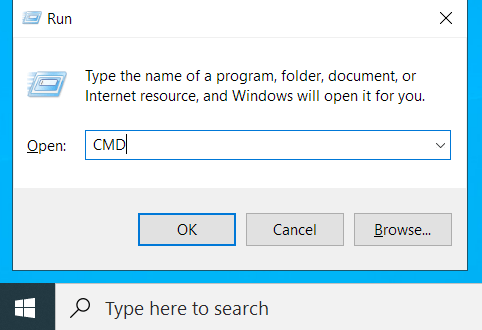
- Run the Command Prompt as an administrator. To do that, press the Win + R shortcut, type CMD into the “Run” text box, and press the Ctrl + Shift + Enter shortcut.
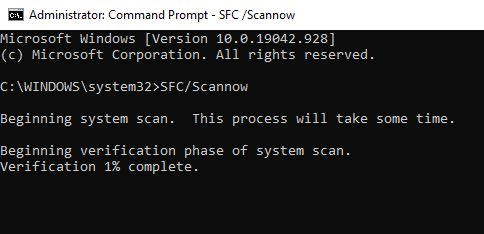
- In the elevated Command Prompt, type or paste the command sfc /scannow and press “Enter”. Wait for the scan to be completed so that the damaged files can be fixed.
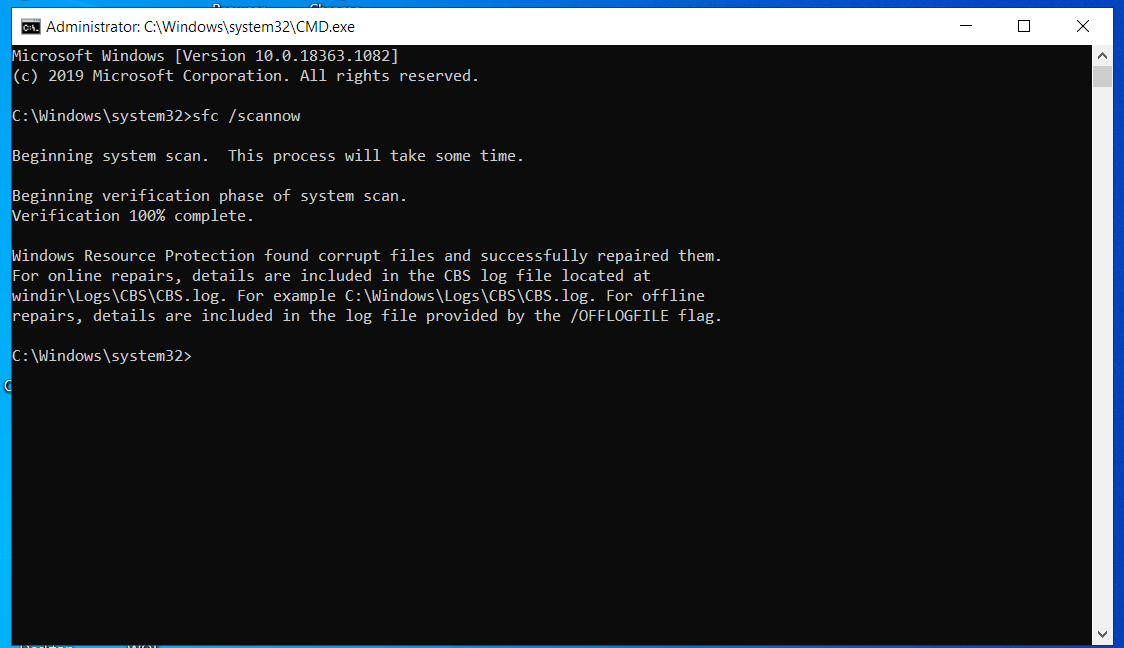
- If the process is successful, you’ll see the notification “Windows Resource Protection found corrupt files and successfully repaired them”.
- Reboot your Windows 10 PC and try running Windows Update again to check if the error still shows up.
If it does, you should run the DISM utility. This tool manages Windows Update files, and it can be useful in this scenario. Here is how to use the tool:
- Open an elevated Command Prompt as outlined in step 1 above.
- Type or paste the following command lines and press “Enter” after each one:
- Reboot your PC and check if the Windows updates will now install without fail.
Solution 5: Reset Windows Update Components
Like we mentioned earlier, the Windows Update service should be functioning properly for Windows to install all updates successfully. If something’s wrong with this feature, then it might explain why you’re getting the Windows Update error code 0x80070026.
There are two main folders that contain all the information related to the updates you perform on your Windows 10 PC. These are the SoftwareDistribution and Catroot2 folders, and you will need to rename them. You will also need to restart certain Windows Update services.
Here is what you should do:
- Launch the Command Prompt as an admin as shown above.
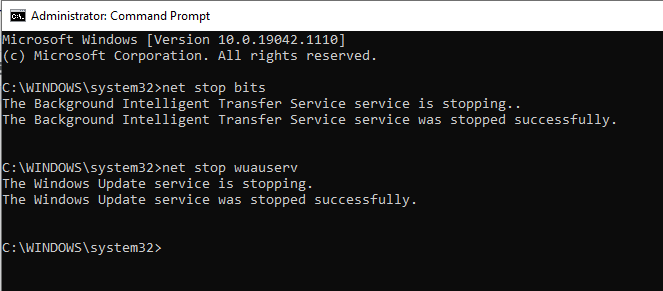
- Type the following commands, hitting “Enter” after each one:
- Next, rename the Catroot2 and SoftwareDistribution folders. To do that, copy and paste the commands ren C:\\Windows\\System32\\catroot2 Catroot2.old and ren C:\\Windows\\SoftwareDistribution SoftwareDistribution.old, and hit “Enter” after each one.
- Finalize the process by restarting MSI Installer, Windows Update, Cryptographic Service, and BITS. To do so, copy and paste the commands below one after the other, hitting the “Enter” key after each one:
- net start wuauserv
- net start cryptSvc
- net start bits
- net start msiserver
- Exit the Command Prompt and try installing the updates to check if the error code 0x80070026 has been rectified.
Solution 6: Try Using the Windows Media Creation Tool
Sometimes, when having trouble installing Windows updates, the Windows Media Creation Tool might come in handy. Here is how to use it:
- Go to the official Microsoft website to download Windows 10 installation media.
- Select “Run”. You need to be an administrator to use this tool.
- On the “What do you want to do?” page, choose “Upgrade this PC now” and select “Next”.
- Wait for the necessary files to be downloaded and the upgrade process to complete.
- Lastly, restart your PC.
This solution should fix the Windows Update error code 0x80070026.
Solution 7: Try Installing the Updates Manually
If you’re still getting the error code 0x80070026 when trying to update Windows 10, you can try installing the latest Windows patches by going to Microsoft’s Update Catalog page. Once on this page, enter the KB numbers of the updates you want to install and click the “Download” button.
Likewise, if you want to install the latest driver updates, visit the manufacturers’ websites and download the updates from there.
Solution 8: Temporarily Disable Your Proxy Connection
If you’re using a proxy connection on your Windows 10 PC, it may be the culprit behind the error code 0x80070026. Try disabling it to check if this fixes the problem. Here’s how:
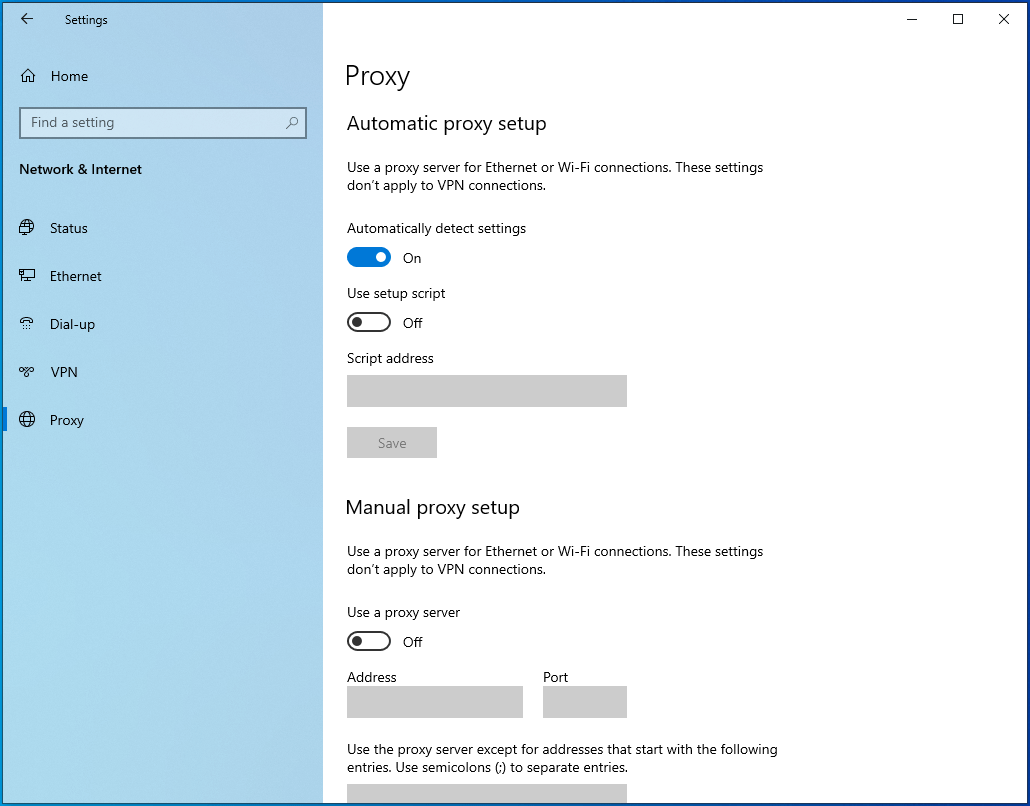
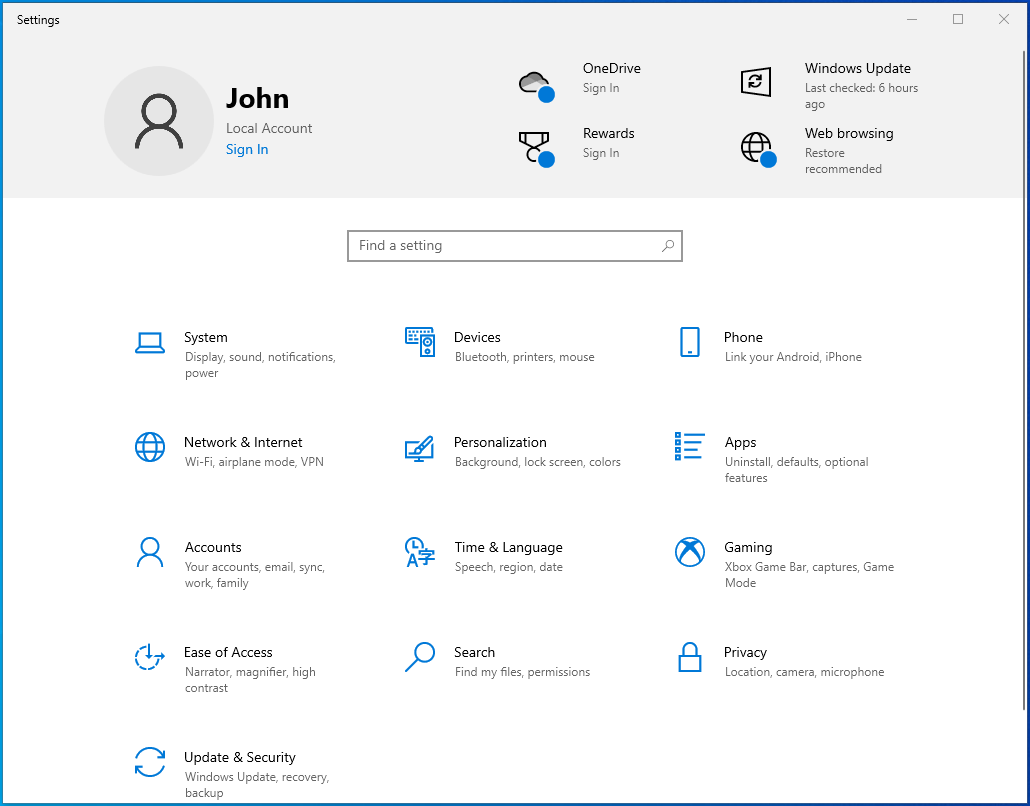
- Open Windows Settings and select “Network & Internet”.
- Click on “Proxy” in the left sidebar.
- On the right sidebar, toggle the “Automatically detect settings” to “On”.
- Under “Manual proxy setup”, toggle the “Use a proxy server” button to “Off”.
- Now, try running Windows Update again to see if it works this time around.
If you don’t use a proxy, skip this solution.
Solution 9: Reset Your PC
If none of the solutions above are fruitful in fixing the Windows Update error code 0x80070026, you may have to reset your PC. Be sure to back up important data before you proceed since resetting your PC may delete some files. It’s advisable to back up the files to an external hard drive. Once you’re done, follow these instructions:
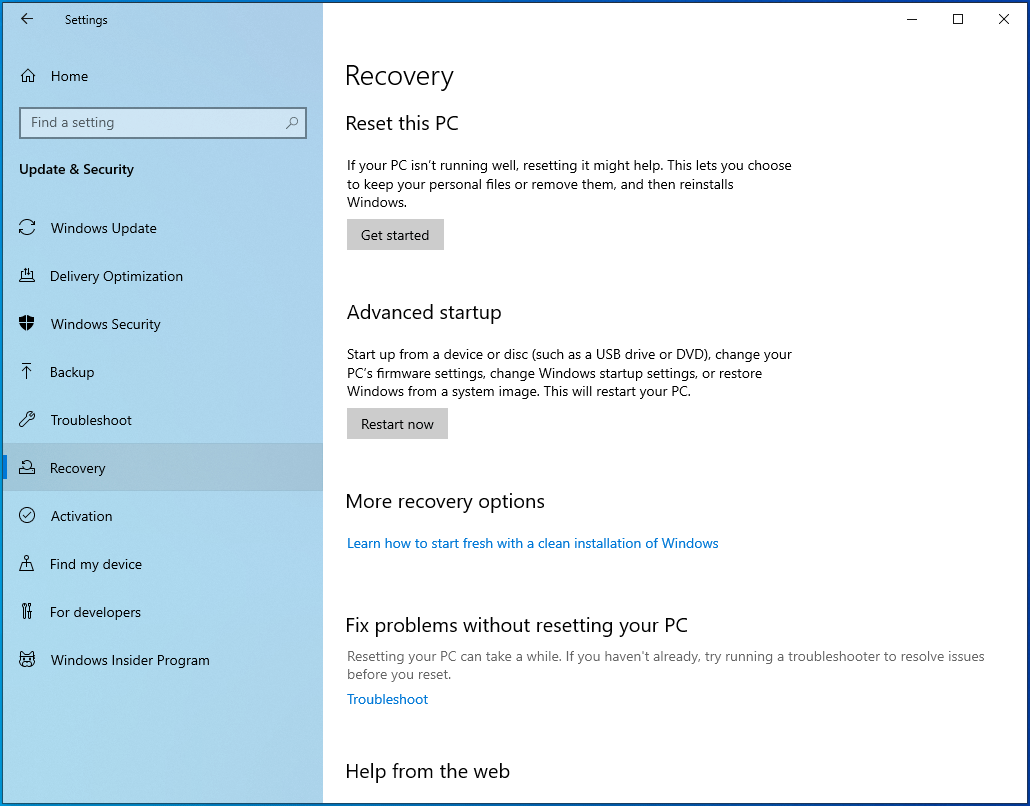
- Open your “Settings” app using the Win + I shortcut.
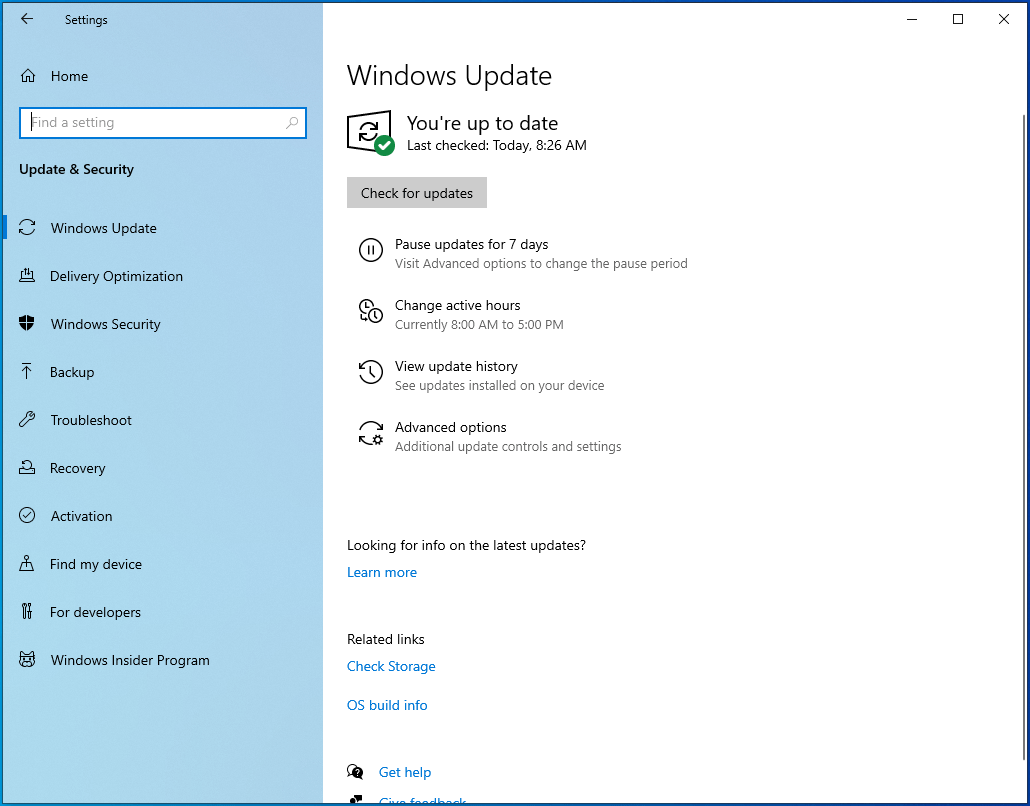
- Go to Update & Security > Recovery.
- Under “Reset this PC”, click on the “Get started” button to initiate the reset process. Follow the on-screen prompts to finalize resetting Windows.
- Once you are done, check if the Windows Update feature is functioning as expected. If it does, you should no longer encounter the update error code 0x80070026.
We hope the solutions in this post work for you. If you have additional information regarding the error code 0x80070026, feel free to contribute by commenting below.
If you’re encountering error 0x80070026 on your Windows system, particularly during Windows update or System Restore, you’re not alone. This guide offers solutions to help resolve this error and get your system back on track.
The Error 0x80070026 for Windows Update or System Restore mostly appears in Windows 10/11 computers. One possible reason why you’re getting this error code is the fact that the default C: Users folder was switched to another directory, such as F:Users, causing potential system errors with the Windows Update feature.
A lot of users have come across the Windows Update error 0x80070026, especially when installing the latest update. The dialog shows that the files are being downloaded, then the process suddenly fails. This problem is common with the Windows Creators Edition, but earlier versions of Windows 10/11 were plagued by this issue as well.
This is the error message that pops up when this trouble is encountered. It reads:
There were problems installing some updates, but we’ll try again later. If you keep seeing this and want to search the web or contact support for information, this may help:
(The Name of the Update) – Error 0x80070026
As per the error message, there isn’t that much information that can be gleaned from it, except that Windows ran into some problems while trying to install the update. The issue might be the result of many other problems, such as corrupted system files or missing Windows update services. Therefore, there is no exact formula to fix the 0x80070026 error.
Nevertheless, there are several solutions you can try when the system fails to install updates. Resetting Windows Update Components should help if there are issues with the WU component. It is also recommended to disable your antivirus temporarily when running Windows Update. You should also give the Windows Update Troubleshooter a try to see if it works.
Fortunately, there are quite a few easy methods to resolve error code 80070026 so you can get back to your everyday life. Simply follow the steps outlined below in the order they are given and you’ll have your computer up and running in no time.
Reasons Why You’re Getting Error 0x80070026 on Windows
Before we try to troubleshoot this error, it is important to understand first what might be triggering it. As mentioned above, there are several factors that come into play when this error message pops up, and they can be any one of the items listed below:
- Interrupted or failed internet communication with Microsoft update servers
- Corrupt Windows system files that need repair or reinstallation
- C:/Users/ directory settings have been changed
- Third-party antivirus blocking the update download
- Malware or other malicious programs
- Broken or missing Windows Update components
It can be hard to figure out what’s causing the error, especially when it’s a combination of two or more factors. Hence, we recommend going through the solutions in the order given below to see which one works for you.
How to Fix Error 0x80070026 on Windows
If you are getting error 0x80070026 on Windows when installing updates on your computer, here are some basic troubleshooting steps you need to do first:
- Restart your PC and try to run Windows Update once again.
- Update your drivers using Driver Updater.
- Make sure you have enough storage for the updates to be downloaded and installed.
- Switch to a wired or stable internet connection to prevent disruptions.
If these steps are not enough to deal with the error, then try the solutions below:
Solution #1: Run the Windows Update Troubleshooter.
This method is for those computers running Windows versions that do not have the Defer Upgrades option, particularly Windows Home users. The troubleshooter is designed to fix common Windows Update errors, including the error code 0x80070026.
The Windows Update troubleshooter checks your internet connectivity, network adapter functionality, and the Windows Update service. To run the troubleshooter, follow the instructions below:
- In the search box beside the Start menu, type in troubleshoot, then click Troubleshoot settings from the search results.
- From the left menu, click Troubleshoot.
- Click Windows Update from the right window to scan for Windows Update errors.
- Click the Run the troubleshooter button.
The troubleshooter will automatically scan your computer for problems related to Windows Update and resolve them if possible.
Solution #2: Restart BITS and other Windows Update Components Manually.
The Background Intelligent Transfer Services or BITS, Windows Update service, and Cryptographic service, are the components that manage the downloading and installation of Windows updates. Any error encountered by any of these components can lead to an update failure.
There are two ways to reset these components. Your first option is to open the Services window through the Run dialog. Press Windows key + R, then type in services.msc in the dialog box. Look for the BITS, Windows Update, and Cryptographic services in the list and restart them one by one.
The second option requires using the Command Prompt. Type in Command Prompt in the search box beside the Start button. Right-click on Command Prompt from the search results and choose Run as administrator. In the Command Prompt window, type in the following commands, followed by Enter after each line:
- net stop bits
- net stop wuauserv
- net stop appidsvc
- net stop cryptsvc
You might also need to delete cache files from your computer by running these commands one at a time:
- Del “%ALLUSERSPROFILE%\Application Data\Microsoft\Network\Downloader\*.*”
- rmdir %systemroot%\SoftwareDistribution /S /Q
- rmdir %systemroot%\system32\catroot2 /S /Q
While you’re at it, reset your network configurations as well to ensure that your internet is not the problem. Run the commands below:
- netsh winsock reset
- netsh winsock reset proxy
Once everything is ready, restart the BITS, Windows Update, and Cryptographic services by entering the command lines below:
- net start bits
- net start wuauserv
- net start appidsvc
- net start cryptsvc
Restart your computer to see if this solution worked.
Solution #3: Clear the SoftwareDistribution Folder.
Every Windows 10/11 operating system has a Software Distribution folder located in the Windows directory. This is where files required to install Windows Updates are temporarily stored.
In this solution, you may have to delete the contents of this folder and retry the update process.
Here’s how to clear the files:
- Click the Start menu.
- Into the search field, input cmd and right-click on the most relevant search result. Select Run as Administrator.
- Once the Command Prompt opens, input this command into the command line: net stop wuauserv.
- Hit Enter.
- Next, input this command to stop the Background Intelligent Transfer Service: net stop bits.
- Hit Enter.
- Now, use the Windows + R keys to launch the Run utility.
- Browse this path: C:Windows\SoftwareDistribution.
- Select all the contents and hit the Delete button to remove them.
- Go back to the Command Prompt and input this command: net start wuauserv.
- Hit Enter.
- And then, start the Background Intelligent Transfer Service by entering this command: net start bits.
- Hit Enter.
At this point, you should have successfully cleared the contents of the SoftwareDistribution folder.
Solution #4: Perform SFC and DISM Scans.
Both DISM (Deployment Image Servicing and Management) and SFC (System File Checker) are built-in utilities capable of repairing system files. The only difference is they do it in different ways.
Here’s a quick guide on running an SFC and DISM scan from an elevated Command Prompt:
- Press Windows key + R to open up a Run dialog box.
- Then, type cmd inside the text box and press Ctrl + Shift + Enter to open up an elevated Command Prompt.
- When you’re prompted by the UAC (User Account Control), click on Yes to grant administrative privileges.
- Type in the following command and press Enter immediately to start the SFC scan: sfc /scannow
When the procedure is complete, you can safely close the elevated command prompt and restart your computer to see if the issue has been resolved at the next system startup.
If the same issue is still occurring even after you’ve performed the SFC scan, perform a DISM scan this time using this command: DISM /Online /Cleanup-Image /RestoreHealth
Once the scan is finished, perform one final restart and check if the issue has been resolved once the next startup sequence is complete.
Solution #5: Delete the Pending.Xml File.
Oftentimes, a stuck pending.xml file could be the culprit behind the Windows Update error code 0x80073712. So, you might want to remove it.
Here’s how to remove the pending .xml file on your Windows 10/11 device:
- First, boot your computer into Safe Mode.
- And then, go to the Windows SxS folder.
- In this folder, locate the xml file and right-click on it. Rename it or delete it.
- Hit Enter. At this point, the Windows Update utility should delete all pending tasks and build a fresh new update. Wait for the process to complete.
- Restart your computer and check if the error persists.
Solution #6: Perform a Clean Boot.
A clean boot is often performed to run Windows with only a minimal set of startup applications and drivers. This will allow you to easily identify any software conflicts that may have occurred after installing an update.
Here’s how to perform a clean boot on your Windows 10/11 PC:
- Make sure you are signed in to your PC as an administrator. If you don’t have an admin account, you need to create one.
- Into the search field, enter msconfig.
- From the search results, select System Configuration.
- Navigate to the Services tab.
- Tick the Hide all Microsoft Services option.
- Choose Disable all.
- Next, go to the Startup tab.
- Choose Open Task Manager.
- Go to Startup.
- Click on every startup item and hit Disable.
- Exit the Task Manager.
- Now, go to the Startup tab again and hit OK.
Solution #7: Download and Install the Update Manually.
If you cannot install the update because of the error 8024a112, you can resolve the problem by manually downloading the update from the official Microsoft Update Catalog. But for you to be able to do that, you have to know the update code of the Windows update you wish to download.
Usually, the update code begins with KB. It is then followed by a combination of numbers. After you find this code, download it by following these instructions:
- Go to the official Microsoft Update Catalog website.
- Type the update code into the search field.
- A list of all matching updates will show. Find the most relevant one that is compatible with your system architecture.
- Hit the Download button next to it.
- Next, run the setup file and follow the installation wizard.
- Restart your computer to fix the problem.
Solution #8: Perform an In-Place Upgrade.
If the solutions above don’t work, your last option is to perform an in-place upgrade to help resolve your system troubles. To do this:
- Download the Media Creation Tool from Microsoft’s website.
- After downloading, you’ll be asked what to do with the file. Click Run.
- Click Yes once the confirmation message appears, then accept the Terms.
- Tick off Upgrade this PC Now > Next.
- Click Install.
What’s Next?
The error 0x80070026 for Windows Update or System Restore can be troublesome and cause a lot of stress since your computer won’t be able to perform at its 100% without resolving it. If you’re getting this error while trying to install a Windows update, you can check out the solutions above by trying them one by one until you find one that works for you. If nothing works, you can try performing an in-place Windows 10/11.
Give us some love and rate our post!
