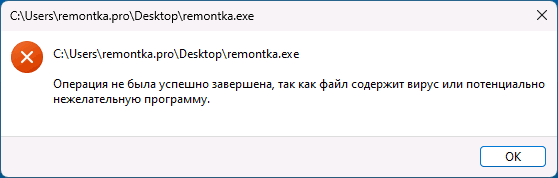
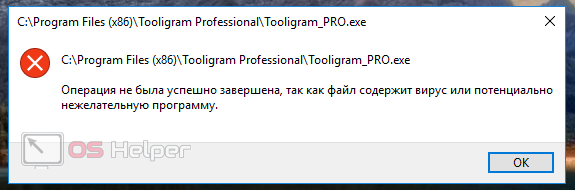
Операция не была успешно завершена, так как файл содержит вирус — почему и что делать?
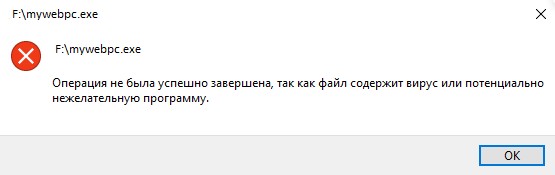
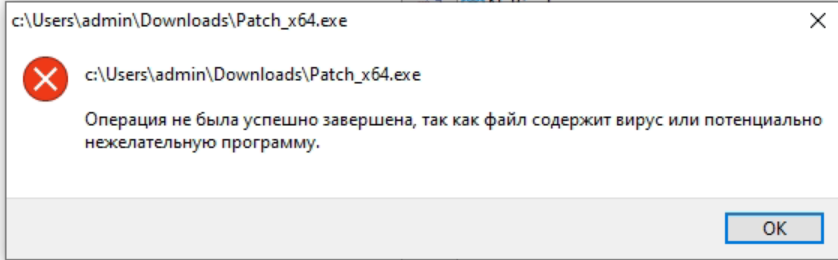
 При запуске некоторых программ или утилит в Windows вы можете получить сообщение об ошибке «Операция не была успешно завершена, так как файл содержит вирус или потенциально нежелательную программу», после чего программа не запускается, а иногда и удаляется автоматически. Та же ошибка может появляться и при действиях с файлами: перемещении, копировании или удалении.
В этой инструкции о том, почему это происходит и как запустить такую программу, либо произвести действия с файлами, если это действительно требуется, а вы уверены в безопасности соответствующего ПО или файлов.
Почему блокируется запуск файла с сообщением «Операция не была успешно завершена» и как запустить его
Причина появления сообщения «Операция не была успешно завершена, так как файл содержит вирус или потенциально нежелательную программу» при запуске программ — тот факт, что с точки зрения встроенного антивируса Microsoft Defender он не является безопасным, причем это может происходить по разным причинам:
- Запускаемая программа действительно содержит вирус
- Программа служит или может служить для взлома других программ или операционной системы
- Программа представляет собой или может дополнительно устанавливать нежелательное ПО — меняющее настройки сети, показывающее рекламу, скачивающее дополнительное, ненужное пользователю ПО или выполняющее другие нежелательные действия.
Подводя итог, блокировка осуществляется встроенным антивирусом Windows 11 и Windows 10 — Microsoft Defender и обычно, помимо рассматриваемого сообщения также появляется уведомление о том, что обнаружены угрозы от «Безопасность Windows».
Отключение защиты в реальном времени
Если вы уверены в том, что хотите запустить эту программу, действия для этого будут следующими:
- Откройте окно «Безопасность Windows», для чего можно использовать значок в области уведомлений, либо поиск в панели задач.
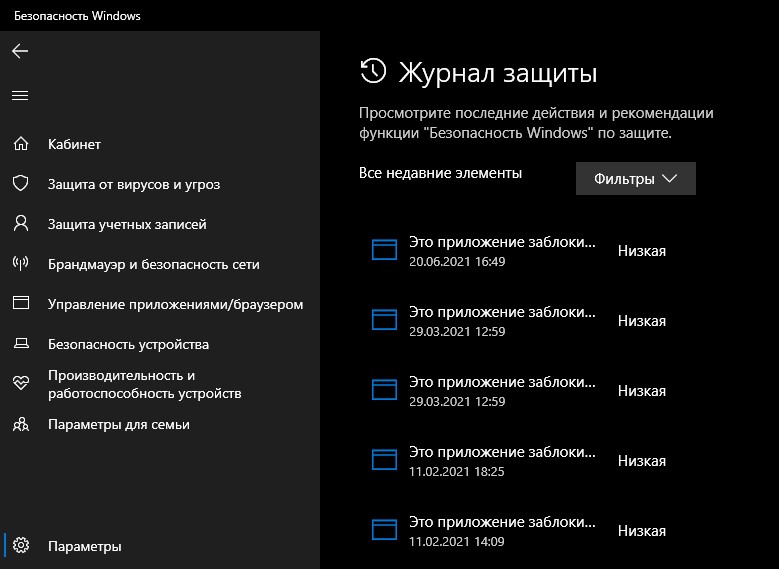
- Нажмите «Защита от вирусов и угроз», а затем — «Журнал защиты».

- Просмотрите какие угрозы были заблокированы (для одного файла может быть несколько разных уведомлений, действия стоит произвести с каждым) и, если «угроза была перемещена в карантин» — восстановите файл, нажав по кнопке «Действия», если сообщение будет выглядеть как «Обнаружена угроза: требуется принять меры» также нажмите «Действия» — «Разрешить на устройстве».

- Если файл был удален Microsoft Defender, но восстановить его не получается, заново скачайте или извлеките его из архива после 6-го шага.
- Вернитесь в окно «Защита от вирусов и угроз» и нажмите «Управление настройками» в разделе «Параметры защиты от вирусов и других угроз».
- Отключите опцию «Защита в реальном времени» (она отключается не навсегда и через какое-то время будет включена снова автоматически).

- Запустите файл, для которого появлялась ошибка «Операция не была успешно завершена, так как файл содержит вирус» — обычно после проделанных выше действий файл запускается и работает.


Добавление исключений Microsoft Defender
Ещё одна возможность — добавить в исключения антивируса файл или всю папку (может быть полезным, если программа при работе использует другие файлы из папки, которые могут блокироваться), содержащую запускаемый файл, а если это — какой-либо установщик, то и папку, в которую осуществляется установка. Для этого:
- Зайдите в Безопасность Windows — Защита от вирусов и угроз — Параметры защиты от вирусов и угроз.
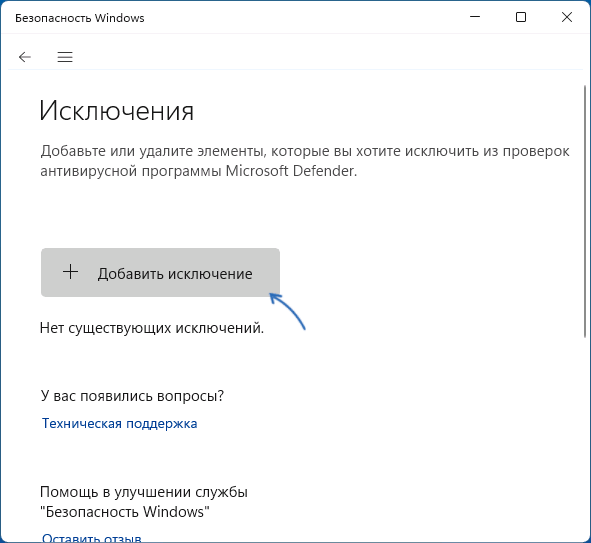
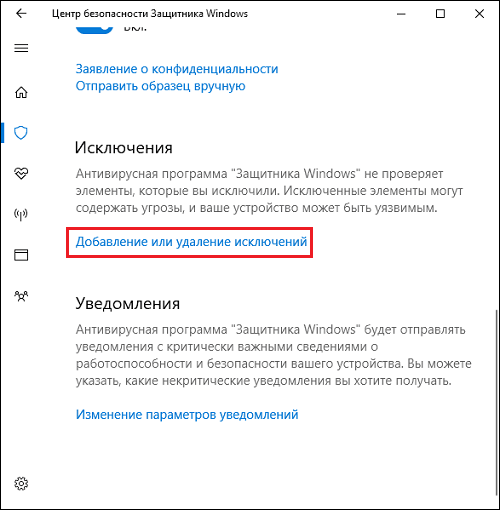
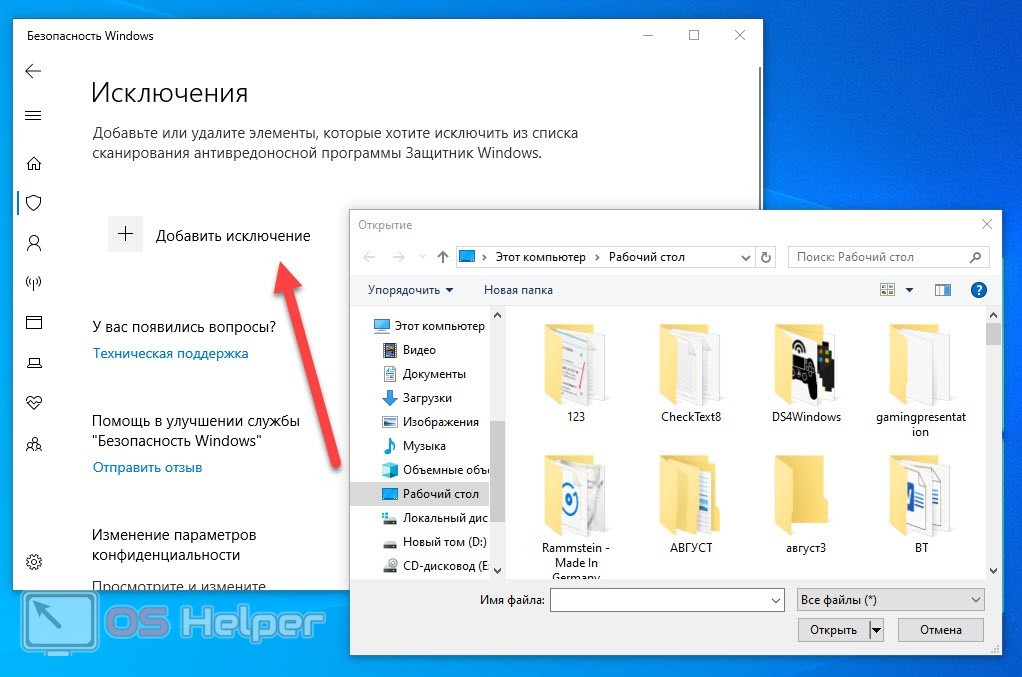
- В разделе «Исключения» нажмите «Добавление или удаление исключений».
- Нажмите кнопку «Добавить исключение» и добавьте соответствующий файл или папку в исключения.

Подробнее об этом в статье: Как добавить исключения в Microsoft Defender. В крайнем случае вы можете отключить встроенный антивирус Windows, но я бы этого делать не рекомендовал.
По некоторым сведениям, в редких случаях ошибка может быть вызвана повреждением системных файлов Windows 11 или Windows 10, в частности, файлов Проводника. Выполнить проверку и восстановление системных файлов вы можете следующим образом:
- Запустите командную строку от имени Администратора (как это сделать).
- Введите команду sfc /scannow и нажмите Enter, после чего дождитесь завершения проверки.
Есть и другие возможности для проверки и восстановления системных файлов, например, использование WinPE.
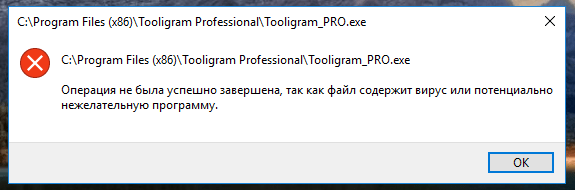
Операция не была успешно завершена, так как файл содержит вирус или потенциально нежелательную программу
При работе с какими-либо файлами пользователь может столкнуться с сообщением «Операция не была успешно завершена, так как файл содержит вирус или потенциально нежелательную программу», после чего запуск указанного файла оказывается заблокирован. Причиной блокировки является системный антивирус (обычно это «Защитник Windows»), ограничивший пользовательский доступ к подозрительному файлу. Ниже разберём суть данной дисфункции и методы её решения.
- Причины сбоя, при котором операция не завершена успешно
- Как исправить дисфункцию «Файл содержит вирус или нежелательную программу»
- Заключение
Причины сбоя, при котором операция не завершена успешно
Корпорация Майкрософт уделяет повышенное внимание борьбе с вредоносными вирусными программами. Вследствие чего современная Виндовс 10 обзавелась встроенным антивирусом, известным под названием «Защитник Виндовс».
По умолчанию Защитник Виндовс активирован, и постоянно проверяет пользовательский софт на наличие потенциально опасных программ. При нахождении такой программы доступ к ней блокируется, а сама вредоносная программа может быть помещена в карантин. В таком случае пользователь получает уже упомянутое сообщение, а запуск указанного файла становится невозможен.
Под подобную блокировку может попасть как вирусный файл, так и вполне безопасный софт, используемый на протяжении многих лет. В последнем случае это доставляет ряд неудобств, так как мы не можем воспользоваться проверенным софтом, необходимым нам для различных задач.

Как исправить дисфункцию «Файл содержит вирус или нежелательную программу»
Наиболее простым и очевидным решением в данной ситуации является отключение защитника Виндовс. Но спешить с подобным отключением я бы не советовал, особенно в ситуации, когда на вашем ПК отсутствует постоянно работающий антивирус. В этом случае вы рискуете сделать вашу систему уязвимой для вирусных программ, что приведёт к её потенциальному выходу из строя.
Потому рекомендую выполнить следующее:
Проверьте запускаемый файл на вируса
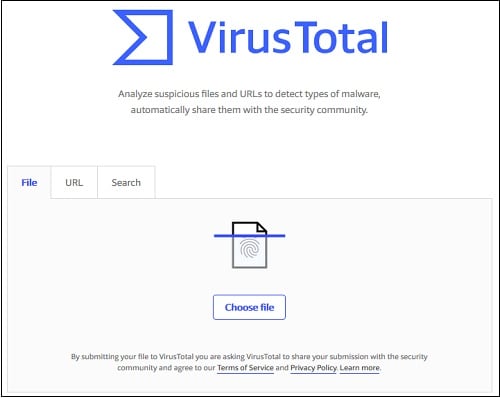
Первым делом для исправления «Операция не была успешно завершена, так как файл содержит вирус» рекомендую проверить запускаемый файл на вирусы с целью убедиться, что Защитник Виндовс «ругается» на файл зря. Для этого можно использовать как альтернативные антивирусные программы уровня «ДокторВеб Кюрейт», так и загрузить файл на специализированный проверочный ресурс уровня virustotal.com для проверки.
Добавьте проблемный файл в исключения антивируса
Если файл оказался чист, стоит добавить его в исключения «Защитника Виндовс» или установленного на вашем ПК антивируса. В случае Защитника рекомендуется нажать на «Пуск», выбрать там «Параметры», далее «Обновление и безопасность», потом «Защитник Виндовс», и затем «Открыть Центр безопасности защитника Виндовс».
Далее выберите слева «Параметры защиты от вирусов..», и внизу «Добавление или удаление исключений».
Добавьте проблемный файл в исключения
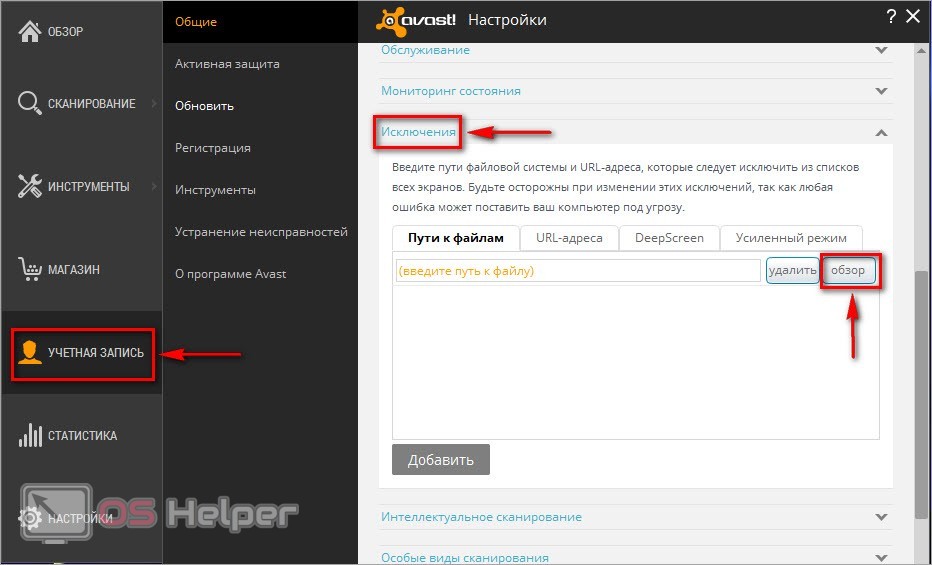
Аналогичную опцию исключений можно найти и в настройках других антивирусов.
Временно отключите ваш антивирус
Довольно эффективным способом решения проблемы «Операция не была успешно завершена» является временная деактивация антивируса. В случае Защитника Виндовс это делается следующим образом:
- В панели задач нажмите на кнопку поиска (с лупой), в строке запроса пишем «защита», кликаем вверху на найденную опцию «Защита от вирусов и угроз»;
- В открывшемся окне находим «Параметры защиты от вирусов и других угроз» и также кликаем на неё.
- В очередном открывшемся окне находим опцию «Защита в режиме реального времени» и деактивируем её.
Какое-то время Защитник будет деактивирован, но позже может опять включится самостоятельно (под действием очередного обновления системы). Чтобы он не включался, мы можем отключить его с помощью системного реестра.
Выполните следующее:
- Нажмите на Win+R, введите там regedit и нажмите на ввод;
- Перейдите по пути
![]()
- Наведите курсор на пустую панель справа, щёлкните правой клавишей мышки, и выберите «Создать» — «Параметр DWORD 32 бита», дайте ему имя «DisableAntiSpyware» и нажмите ввод;

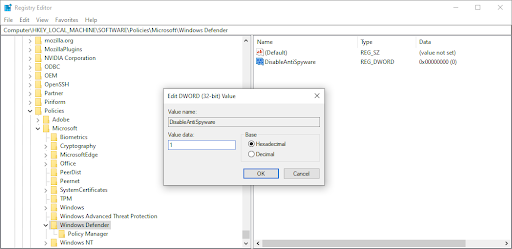
- Дважды кликните на данном параметре, и дайте ему значение «1», после чего нажмите на «Ок». Защитник будет отключён.


Обновите проблемный софт
Если антивирусное ПО продолжает сигнализировать о неблагонадёжности вашего софта, попробуйте скачать и установить его самую свежую версию. В некоторых случаях это позволяет избавиться от ошибки «Операция не была успешно завершена» на вашем ПК.
Восстановите работоспособность Эксплорера
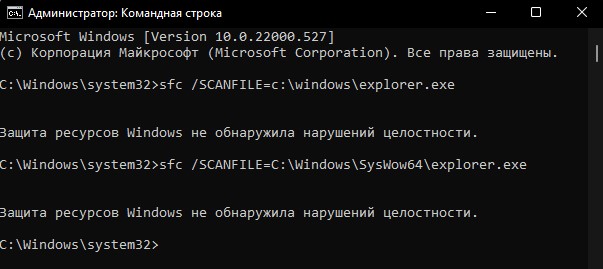
В ряде случаев проблемы с файлом explorer.exe могут вызывать рассматриваемую в статье дисфункцию. Запустите командную строку от админа, и в ней последовательно наберите, не забывая нажимать на ввод после каждой команды:
sfc /SCANFILE=c:windowsexplorer.exe
sfc /SCANFILE=C:WindowsSysWow64explorer.exe
Выполнение данных команд может устранить ошибку «файл содержит вирус» на вашем компьютере.
Заключение
Появление сообщения «Операция не была успешно завершена, так как файл содержит вирус или потенциально нежелательную программу» сигнализирует о нахождении антивирусом (обычно это «Защитник Виндовс») потенциально небезопасного файла. Оптимальным решением в данном случае является занесение проблемного файла в исключения антивируса при условии, что пользователь уверен в чистоте данного файла. Отключать антивирус полностью не рекомендуется – это может стать причиной проникновения на пользовательских ПК потенциально опасных программ.
Операция не была успешно завершена, так как файл содержит вирус
Ошибка Операция не была успешно завершена, так как файл содержит вирус или потенциально нежелательную программу возникает, когда вы скачиваете программы или игры с интернета с недостоверных источников, особенно с торрентов, где может содержаться вирус. Это касается и легитимных программ, которые скачиваются с других сайтов, а не официальных.
Встроенный Защитник Windows 11/10 или сторонний антивирус блокирует процесс установки программы, игры или копирования файлов, тем самым не дает заразиться вашему компьютеру вирусом или не желательной программой к которой у Microsoft нет доверия.
В данной инструкции разберем, что делать и как исправить ошибку в Windows 11/10, когда операция не была завершена успешно, так как в файле содержится вирус или нежелательное ПО.
1. Отключить Антивирус
- Откройте Безопасность Windows
- Перейдите в Защита от вирусов и угроз
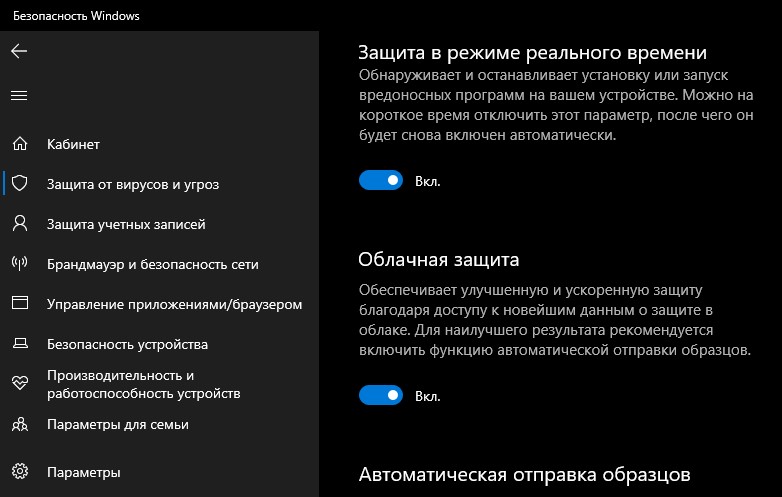
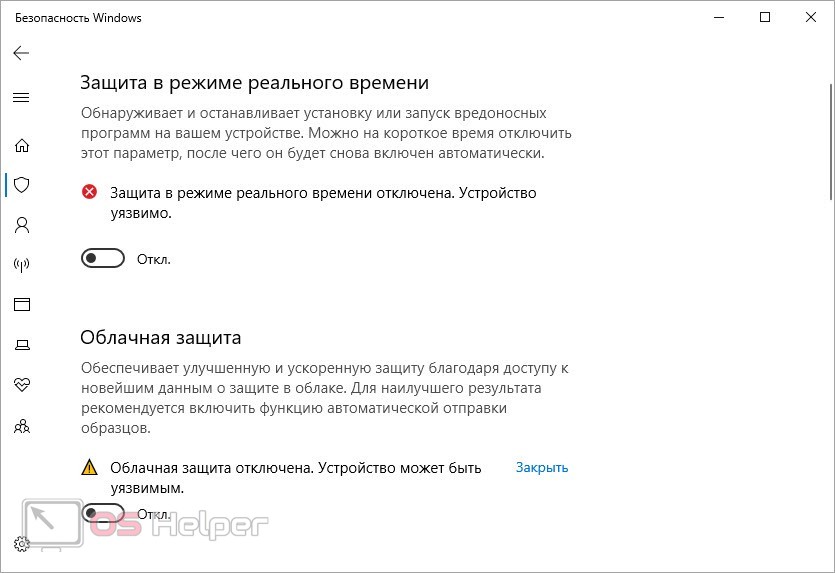
- Нажмите на Управление настройками
- Отключите Защиту в реальном времени и Облачную защиту
Если вы используете сторонний антивирус, то в настройках отключите его или удалите полностью.
2. Исключение антивируса
Если файл заблокирован антивирусом, то он не будет и в дальнейшем выполняться и выдавать все время ошибку неудачной операции с содержанием в файле вируса. По этой причине, нужно восстановить файл из заблокированных и добавить его в исключение антивируса.
- Антивирус должен быть отключен, как в способе 1
- Откройте Безопасность Windows или сторонний антивирус
- Перейдите Защита от вирусов и угроз
- Справа нажмите по Журнал защиты
- Посмотрите имеется ли название файла, если да, то восстановите данный файл
- Далее перейдите Защита от вирусов и угроз
- Справа нажмите по Управление настройками
- Прокрутите в самый низ и нажмите на Добавление и удаление исключений
- Добавьте файл, папку или процесс в исключения

3. Восстановить проводник
Если ошибка возникает с вирусным файлом при открытии в проводнике или имеются проблемы с самим проводником, то нужно восстановить exporer.exe. Для этого, запустите командную строку от имени администратора и введите команды ниже:
sfc /SCANFILE=c:windowsexplorer.exesfc /SCANFILE=C:WindowsSysWow64explorer.exe
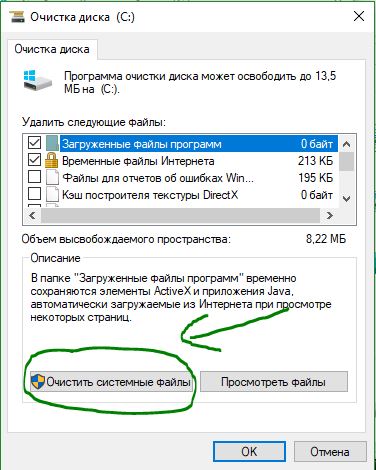
4. Очистка диска от ненужных файлов
Старые временные файлы могут содержать в себе вирус или со временем заразиться. В данном случае ошибка может возникать при резервном копировании самой системы. В этом случае, нужно очистить диск от ненужных файлов.
- Нажмите Win+R и введите cleanmgr
- Выберите диск C
- Выделите все галочками и нажмите снизу Очистить системные файлы
- В новом окне обратно выделите всё галочками и нажмите OK
Смотрите еще:
- csrss.exe: Что это за процесс и является ли он вирусом в Windows?
- На флешке не видны файлы и папки Windows 10
- Восстановление Windows 10 с флешки
- Не удается получить доступ к службе установщика Windows
- Ошибка 0x800700e1 резервного копирования Windows 10
[ Telegram | Поддержать ]

Skip to content
- ТВикинариум
- Форум
- Поддержка
- PRO
- Войти
ФорумXpucT2022-08-18T02:06:35+03:00
Вы должны войти, чтобы создавать сообщения и темы.
Ошибка в win 11 [Решено]

Цитата: ustushka от 31.01.2022, 00:24
Ошибка
System.IO.IOException: Операция не была успешно завершена, так как файл содержит вирус или потенциально нежелательную программу.
в System.IO.__Error.WinIOError(Int32 errorCode, String maybeFullPath)
в System.IO.FileStream.Init(String path, FileMode mode, FileAccess access, Int32 rights, Boolean useRights, FileShare share, Int32 bufferSize, FileOptions options, SECURITY_ATTRIBUTES secAttrs, String msgPath, Boolean bFromProxy, Boolean useLongPath, Boolean checkHost)
в System.IO.FileStream..ctor(String path, FileMode mode, FileAccess access, FileShare share, Int32 bufferSize, FileOptions options, String msgPath, Boolean bFromProxy, Boolean useLongPath, Boolean checkHost)
в System.IO.StreamReader..ctor(String path, Encoding encoding, Boolean detectEncodingFromByteOrderMarks, Int32 bufferSize, Boolean checkHost)
в System.IO.File.InternalReadAllText(String path, Encoding encoding, Boolean checkHost)
в .()
в Win_10_Tweaker.Form1.<>c__DisplayClass166_0.<CheckBoxesChecker>b__0()
в System.Threading.Tasks.Task.Execute()
— Конец трассировка стека из предыдущего расположения, где возникло исключение —
в System.Runtime.ExceptionServices.ExceptionDispatchInfo.Throw()
в Win_10_Tweaker.Form1.<CheckBoxesChecker>d__166.MoveNext()
— Конец трассировка стека из предыдущего расположения, где возникло исключение —
в System.Runtime.ExceptionServices.ExceptionDispatchInfo.Throw()
Голосуйте — палец вниз.0Голосуйте — палец вверх.0

Цитата: ЯR от 31.01.2022, 00:39
Доброй ночи.
У нас здороваются.Отключайте полностью Защитник Windows в Параметрах.
Удалите Win 10 Tweaker и скачайте снова — [beta]
Запустите W10T »»» категория «Система» »»» выделите первые четыре галочки »»» [button]Применить[/button]
Доброй ночи.
У нас здороваются.
Отключайте полностью Защитник Windows в Параметрах.
Удалите Win 10 Tweaker и скачайте снова —
Win 10 Tweaker Beta
Запустите W10T »»» категория «Система» »»» выделите первые четыре галочки »»» Применить
Голосуйте — палец вниз.0Голосуйте — палец вверх.0
Лучший способ помочь себе — помогать другим.
Цитата: ustushka от 31.01.2022, 00:57
Прошу прощение, пока делал «спойлер» потерял приветственный текст, спасибо за оперативны ответ
Прошу прощение, пока делал «спойлер» потерял приветственный текст, спасибо за оперативны ответ
Голосуйте — палец вниз.0Голосуйте — палец вверх.1
На чтение 4 мин Просмотров 45.6к. Опубликовано 22.08.2019
![]() Большинство пользователей защищают свои компьютеры не только с помощью стандартных средств Windows, но и сторонними антивирусами. Если защитная утилита посчитает, что используемый файл или программа является вредоносным, то заблокирует его или вовсе удалит. Все было бы хорошо, если бы антивирусы периодически не реагировали на полностью безопасные файлы. Из-за попытки использования таких компонентов на Windows 10 возникает ошибка «Операция не была успешно завершена, так как файл содержит вирус».
Большинство пользователей защищают свои компьютеры не только с помощью стандартных средств Windows, но и сторонними антивирусами. Если защитная утилита посчитает, что используемый файл или программа является вредоносным, то заблокирует его или вовсе удалит. Все было бы хорошо, если бы антивирусы периодически не реагировали на полностью безопасные файлы. Из-за попытки использования таких компонентов на Windows 10 возникает ошибка «Операция не была успешно завершена, так как файл содержит вирус».
Подобная проблема может возникнуть на любой операционной системе Windows. Пользователям «Семерки» и «Восьмерки» также пригодится наше руководство.
Содержание
- Причина ошибки
- Проверка файла
- Отключение антивируса
- Отключение защитника Windows
- Видеоинструкция
- Заключение
Причина ошибки
Сначала немного поговорим о возможных причинах ошибки. В тексте уведомления говорится о вирусе или нежелательной программе. Но подобная ошибка может возникнуть и при попытке запуска утилит, которые исправно работали ранее. В чем же тогда причина?
Антивирус и защитник Windows могут некорректно воспринимать и проверять файлы. Этому способствуют сбои в системе, «криво» установленные обновления антивирусной программы и многое другое. Чтобы защита не блокировала деятельность файла или приложения, нужно отключить антивирус или добавить проблемный компонент в список исключений.
Мнение эксперта
Василий
Руководитель проекта, эксперт по модерированию комментариев.
Задать вопрос
Если ошибка появилась при первом запуске, то сначала следует убедиться, действительно ли компонент безопасен для вашего компьютера.
Проверка файла
Поскольку ваш антивирус и защитник ОС «ругаются» на файл, необходимо проверить его другими средствами, чтобы опровергнуть или подтвердить опасения софта на компьютере. Например, вы можете воспользоваться сервисом Virustotal, который доступен по представленной ссылке. Нажмите на кнопку Choose File, выберите проблемный файл и дождитесь окончания анализа. Сервис проверит уровень безопасности по многим базам. Если файл полностью безопасен, то вы увидите зеленые галочки и 0 в индикаторе угроз.
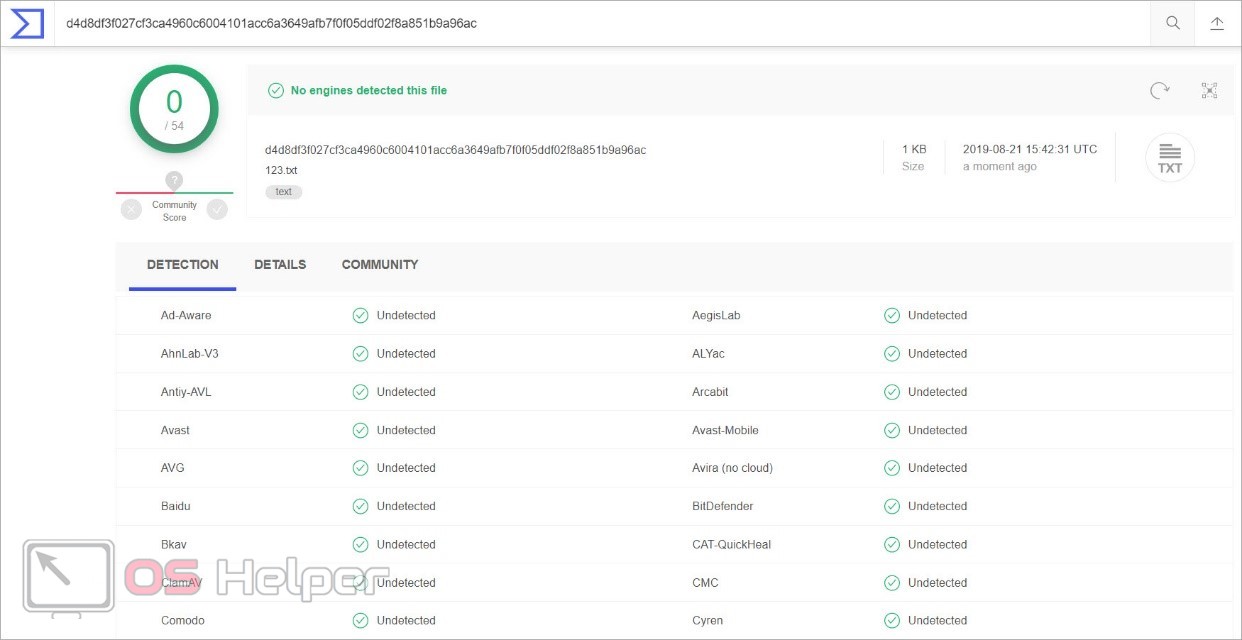
Теперь можно переходить к решению проблемы запуска на компьютере с Windows 10.
Отключение антивируса
Итак, сначала попробуем отключить сторонний антивирус, который следит за состоянием вашего компьютер в режиме реального времени. У всех защитных утилит разное меню и интерфейс, но принцип отключения защиты везде одинаковый. Сделать это можно через контекстное меню или главное окно программы.
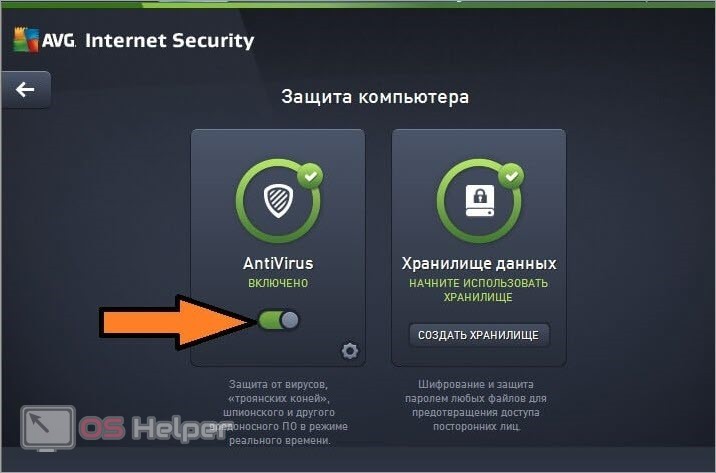
Антивирус может быть настроен на автоматическое добавление подозрительных файлов в список карантина. Поэтому вам придется проверить данный раздел и извлечь файл, необходимый для корректной работы программы. Чтобы при следующем включении антивирус снова не заблокировал приложение, добавьте файл из текста ошибки в список исключений.
Теперь антивирусный софт будет игнорировать любую деятельность добавленного файла. Можно добавить в список исключений всю папку с установленной программой.
Отключение защитника Windows
Стандартный защитник Windows также может стать виновником. С ним необходимо проделать все те же процедуры, что и со сторонним антивирусом. Через параметры зайдите в «Обновление и безопасность». Откройте службу безопасности Windows и перейдите к настройкам защиты от вирусов и других угроз. Здесь необходимо переключить все функции в положение «Откл.».
Теперь пролистайте список настроек вниз и нажмите на «Добавление и удаление исключений». Добавьте в данный раздел файл, с которым у вас возникли проблемы при использовании или запуске.
Видеоинструкция
По представленной видеоинструкции проще всего разобраться в проблеме и путях устранения ошибки.
Заключение
Мы рассмотрели все способы устранения ошибки. Самый оптимальный вариант – это занесение проблемного файла в список исключений антивируса и защитника ОС. Рекомендуется делать это в том случае, если вы уверены в безопасности запускаемой программы. А отключение защиты нужно выполнить только для проверки – обязательно запустите антивирус после решения проблемы!
Пишите нам о том, как у вас получилось решить проблему с блокировкой файлов антивирусом. Если возникнут трудности при использовании инструкции, задавайте вопросы нашим специалистам.
Can’t open a file because Windows 10 detects a virus in the file location? Learn here how to solve the “Operation did not complete successfully” error with 7 easy methods.
Let’s get started!

If you’ve been on the internet for a while now, you probably downloaded something from a shady website. Maybe you wanted to get an application for free to try it before committing to a purchase, or just clicked on a misleading link. Whether or not the download is legitimate, Windows 10 may flag it as an infected file.
This error shows up when Windows 10’s built-in antivirus application, Windows Defender, detects a file as dangerous. The file may contain a false positive, or actual malware. In this article, we’ll explore methods to remove malware from a downloaded file, or bypass the warning if it falsely detects a safe file.
What Causes the “Operation Did Not Complete Successfully” Error Message?
Depending on your situation, the error message could come up for a few different reasons.
- You downloaded a genuine file, but Windows Defender detects a virus. If you downloaded something from a genuine website, it’s possible that Windows Defender detected a false positive. This is a general issue with all antivirus software — if code or behavior matches a known malware, Windows Defender may flag the file as dangerous.
- You downloaded an infected file. Typically, misleading links and malicious users spread files that appear genuine, but contain malware. If this happens, Windows Defender gives you the warning after protecting your computer.
The methods below will guide you to open a file and bypass the “Operation did not complete successfully because the file contains a virus” message.
How to Fix Operation Did Not Complete Successfully Because the File Contains a Virus
Before proceeding, keep in mind that your computer may be in danger. If the file does contain malware, it may be too dangerous to open the file. If you’re not certain that the file you downloaded is genuine, run an antivirus scan and find a new, legitimate download.
Method 1. Temporarily Disable Windows Defender
If you believe that the file you downloaded is genuine, you can bypass the “Operation did not complete successfully because the file contains a virus” warning. To do this, you’ll have to temporarily disable Windows Defender, and open the file while it’s turned off.
Option 1. Disable Windows Defender in Settings
The fastest way of disabling the built-in antivirus is going to the Settings menu.
- Click on the Windows icon in the bottom left of your screen to bring up the Start menu.
- Choose Settings, or alternatively use the Windows + I shortcut.

- Click on the Update & Security tile. This is where you can find most of your security settings.

- Here, switch to the Windows Security tab, and then click on Virus & threat protection.

- First, click on the Manage settings link under the Virus & threat protection settings header. You’ll be redirected to a new page. Here, click on the Real-time protection toggle to turn off Windows Defender.

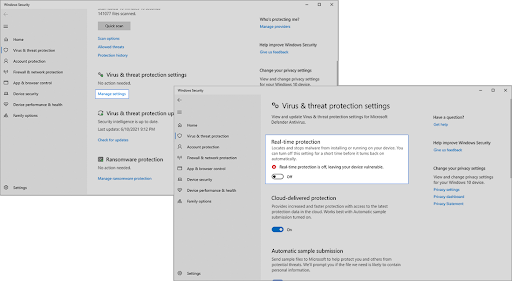
Try opening the file again. If you still get an error, perform the same steps and turn off Cloud-delivered protection as well. If you’re still unable to bypass the warning, you may have to disable Windows Defender using the Registry.
Option 2. Disable Windows Defender in the Registry
Some users may not be successful in disabling Windows Defender antivirus software the traditional way. If you can’t perform the method above, try and turn off the application using the Registry Editor.
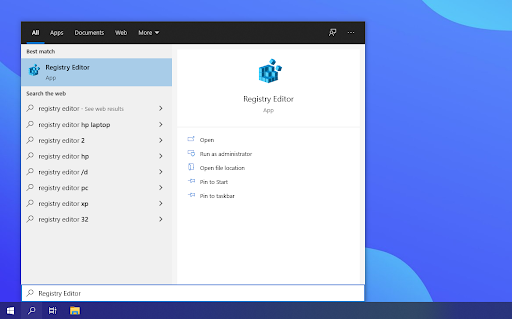
- Open the search bar in your taskbar by clicking on the magnifying glass icon. You can also bring it up with the Windows + S keyboard shortcut.
- Type Registry Editor in the search box and click on the first matching search result.
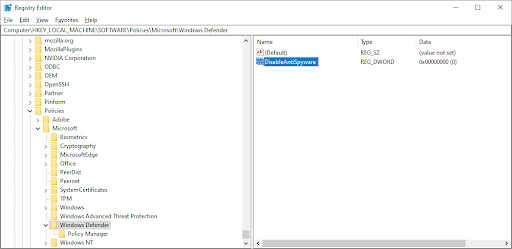
- Navigate to the following key, or copy-paste it in the address bar of the Registry Editor: HKEY_LOCAL_MACHINESOFTWAREPoliciesMicrosoftWindows Defender
- Locate a registry entry named DisableAntiSpyware, then double click on it.

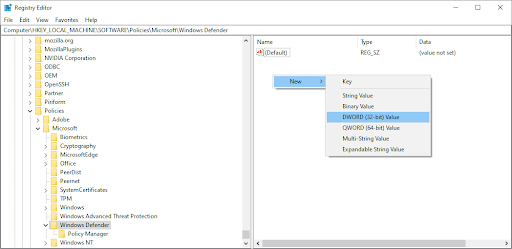
- If you don’t see this key, right-click on any empty space and choose New → DWORD (32-bit) Value. Name the key DisableAntiSpyware, and then double-click on it to open its properties.
- Set the Value data to 1 in order to disable Windows Defender and Antimalware Service Executable (MsMpEng.exe) in Windows 10.
- Exit the Registry Editor and restart your computer. You may notice improvements with your device’s performance.
Once again, let us remind you that it’s risky to operate your device without having an antivirus application installed. You may become vulnerable to malware, hackers, and other types of cyberattacks. We highly recommend using Malwarebytes if you need a free and lightweight solution. We also offer Malwarebytes Premium for the best market price.
Method 2. Turn Off Third-Party Antivirus Program
Antivirus applications are known to cause issues on computers by blocking apps and services from running properly. You can test if the antivirus program you’re using at the moment is causing the error by temporarily disabling it.
Note: This method is not recommended as it is unsafe to use your computer without protection. Only proceed if you’re aware of the possible risks and have a backup of your system to revert any damage that may happen.
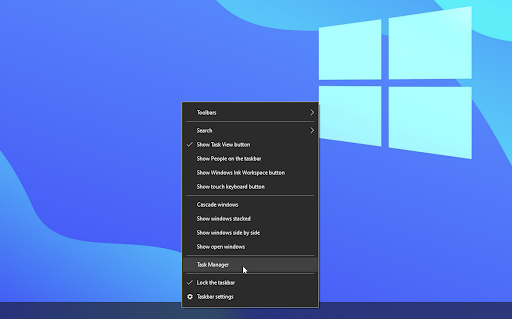
- Right-click on an empty space in your taskbar and choose Task Manager. If the Task Manager launches in compact mode, make sure to expand details by clicking on the “Mode details” button.
- Switch to the Start-up tab using the header menu located at the top of the window. Find your antivirus application from the list and select it by clicking on it once.

- Click on the Disable button now visible in the bottom-right of the window. This will disable the application from launching when you start your device.
- Restart your computer.

Method 3. Add the File or Folder to the Exclusions List
If you want to bypass the warning without having to turn off Windows Defender or your third-party antivirus, you can. Simply add the file itself, or the entire folder containing it to the exclusions list. By doing so, Defender won’t look for any suspicious files in that specific directory.
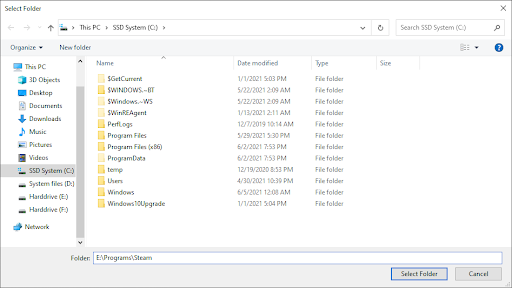
- Open the File Explorer and navigate to the file’s location. Click on the address bar and copy the full file path to the file with the Ctrl + C keyboard combination.
- Open the search bar in your taskbar by clicking on the magnifying glass icon. You can also bring it up with the Windows + S keyboard shortcut.
- Type in Windows Security and launch it from the search results.
- Switch to the Virus & Threat Protection tab using the home screen or the menu in the left-side pane. Here, click on the Manage settings link under Virus & threat protection settings.

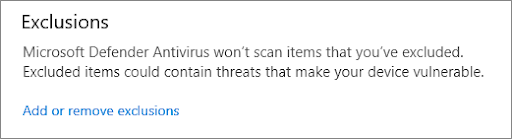
- Under Exclusions, click the Add or remove exclusions link. You’ll be redirected to a new page.

- Click the Add an exclusion button. From the drop-down menu, select File or Folder, depending on what you want to open.
- Paste the path you copied from the address bar by pressing the Ctrl + V keys. Click the Select Folder button when you’re done.


After adding the file as an exclusion, you’ll be able to open it. We recommend running an antivirus scan afterward to ensure no real malware was in the file.
Method 4. Repair the File Explorer
It’s possible that the “Operation did not complete successfully because the file contains a virus” error message shows up because of a File Explorer problem. In this case, follow the steps below to repair the File Explorer.
- Open the search bar in your taskbar by clicking on the magnifying glass icon. You can also bring it up with the Windows + S keyboard shortcut.
- Type Command Prompt in the search box. When you see it in the results, right-click on it and choose Run as Administrator. If you need help, check out our How to make a local user an administrator in Windows 10 guide.
- When prompted by the User Account Control (UAC), click Yes to allow the app to launch with administrative permissions.
- Once the Command Prompt window is open, type in the following commands and press Enter after each line to execute them:
- sfc /SCANFILE=c:windowsexplorer.exe
- sfc /SCANFILE=C:WindowsSysWow64explorer.exe

- After both commands have been executed, restart your computer and see if you’re able to open the file.

Method 5. Fix Windows Backup
In some cases, the error message shows up because of temporary Internet files and cache being stored in your backups. You can easily fix this by performing the next steps.
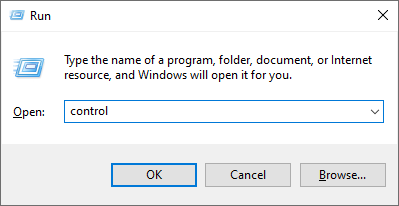
- Press the Windows + R keys on your keyboard. This is going to bring up the Run utility.
- Type in “control” without the quotation marks and press the Enter key on your keyboard. This will launch the Control Panel application.

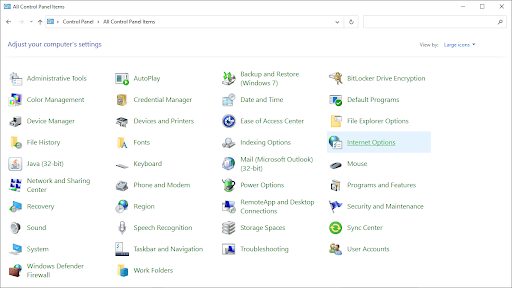
- Change the view mode to Large icons, and then click on the Internet Options button.

- Stay on the General tab. Click on the Delete… button under the Browsing history heading. A new window will open.

- Uncheck the Preserve Favorites website data option.

- Next, check the following options, and then click on the Delete button:
- Temporary Internet files and website files
- Cookies and website data
- History
- Download History
- Restart your computer and see if you’re able to open the file without a warning message. If not, you can try resetting your browser and clearing browser data, cookies, and browsing history.


Method 6. Run the Disk Cleanup Utility
Windows 10 often creates temporary files and folders. If they accumulate, it can affect your computer and may cause misleading errors. Delete junk files using the Disk Cleanup utility to save space and fix computer problems.
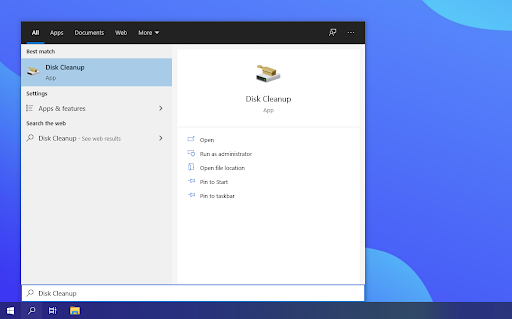
- Open the search bar in your taskbar by clicking on the magnifying glass icon. You can also bring it up with the Windows + S keyboard shortcut.
- Type in Disk Cleanup and click on the first search result.
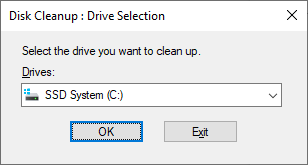
- Select the Windows 10 system drive, and then click the OK button. Usually, the system is installed on disk C:.

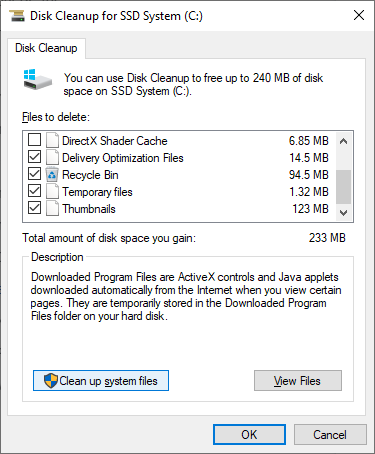
- In the new window, you’ll see all space taken by temporary files. Make sure that Temporary Internet Files and Temporary Files are selected. You may also delete other junk files, such as Thumbnails or DirectX Shader Cache. When you’re done selecting what you want to remove, click OK.

- Click on the Delete Files button in the dialog box that pops up. The removal process will start and free up space on your device.


Method 7. Run an Antivirus Scan
We recommend running a security scan to ensure that you don’t have a malicious file. It can also detect if your system is not currently infected by malware. We’ll be using the built-in Windows Defender to perform a system scan, however, a more focused third-party solution may work better.
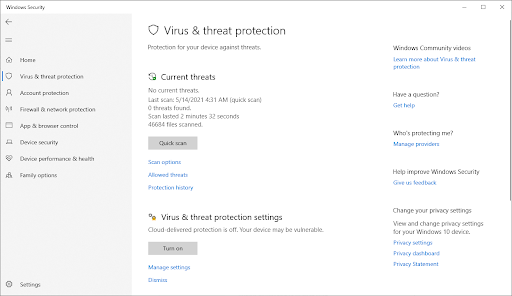
- Open the search bar with the Windows + S keyboard shortcut. Type Windows Security and launch it from the search results.
- Switch to the Virus & Threat Protection tab using the home screen or the menu in the left-side pane. Click on the Scan Options link.
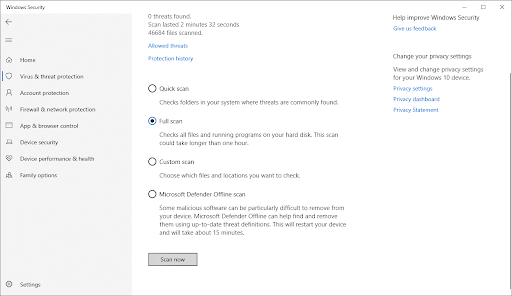
- Select the Full scan option. This is going to check every single file on all of your drives to ensure no threats can hide. Take note that this scan may last over 1-2 hours, depending on how many files you have on your system.
- Click on the Scan now button to begin the scan. If a threat is detected, Windows 10 will automatically quarantine or remove it entirely. You can review the scan results afterwards.
After completing these steps, you may be able to successfully open the problematic file. If the file has been removed by Windows Defender, it’s likely that the file was unsafe and misleading to begin with. In this case, finding a different download is your best bet.
Final Thoughts
That wraps up the guide to opening a file even if Windows 10 detects a virus in the file directory. We hope this helps.
In the future, be careful with what you download from the internet. Unofficial websites often hide malware and potentially unwanted programs (PUPs) in their downloads. Avoid these websites to lower the possibility of this error from happening again.
Our Help Center offers hundreds of guides to assist you if you’re in need of further help. Return to us for more informative articles, or get in touch with our experts for immediate assistance.
One More Thing
Would you like to receive promotions, deals, and discounts to get our products for the best price? Don’t forget to subscribe to our newsletter by entering your email address below! Be the first to receive the latest news in your inbox.
You May Also Like
» How To Fix System Service Exception Error In Windows 10
» Fixed: DirectX Encountered an Unrecoverable Error
» Slow Internet on Windows 10? Here’s How To Solve It
Can’t open a file because Windows 10 detects a virus in the file location? Learn here how to solve the “Operation did not complete successfully” error with 7 easy methods.
Let’s get started!
If you’ve been on the internet for a while now, you probably downloaded something from a shady website. Maybe you wanted to get an application for free to try it before committing to a purchase, or just clicked on a misleading link. Whether or not the download is legitimate, Windows 10 may flag it as an infected file.
This error shows up when Windows 10’s built-in antivirus application, Windows Defender, detects a file as dangerous. The file may contain a false positive, or actual malware. In this article, we’ll explore methods to remove malware from a downloaded file, or bypass the warning if it falsely detects a safe file.
What Causes the “Operation Did Not Complete Successfully” Error Message?
Depending on your situation, the error message could come up for a few different reasons.
- You downloaded a genuine file, but Windows Defender detects a virus. If you downloaded something from a genuine website, it’s possible that Windows Defender detected a false positive. This is a general issue with all antivirus software — if code or behavior matches a known malware, Windows Defender may flag the file as dangerous.
- You downloaded an infected file. Typically, misleading links and malicious users spread files that appear genuine, but contain malware. If this happens, Windows Defender gives you the warning after protecting your computer.
The methods below will guide you to open a file and bypass the “Operation did not complete successfully because the file contains a virus” message.
How to Fix Operation Did Not Complete Successfully Because the File Contains a Virus
Before proceeding, keep in mind that your computer may be in danger. If the file does contain malware, it may be too dangerous to open the file. If you’re not certain that the file you downloaded is genuine, run an antivirus scan and find a new, legitimate download.
Method 1. Temporarily Disable Windows Defender
If you believe that the file you downloaded is genuine, you can bypass the “Operation did not complete successfully because the file contains a virus” warning. To do this, you’ll have to temporarily disable Windows Defender, and open the file while it’s turned off.
Option 1. Disable Windows Defender in Settings
The fastest way of disabling the built-in antivirus is going to the Settings menu.
- Click on the Windows icon in the bottom left of your screen to bring up the Start menu.
- Choose Settings, or alternatively use the Windows + I shortcut.
- Click on the Update & Security tile. This is where you can find most of your security settings.
- Here, switch to the Windows Security tab, and then click on Virus & threat protection.
- First, click on the Manage settings link under the Virus & threat protection settings header. You’ll be redirected to a new page. Here, click on the Real-time protection toggle to turn off Windows Defender.
Try opening the file again. If you still get an error, perform the same steps and turn off Cloud-delivered protection as well. If you’re still unable to bypass the warning, you may have to disable Windows Defender using the Registry.
Option 2. Disable Windows Defender in the Registry
Some users may not be successful in disabling Windows Defender antivirus software the traditional way. If you can’t perform the method above, try and turn off the application using the Registry Editor.
- Open the search bar in your taskbar by clicking on the magnifying glass icon. You can also bring it up with the Windows + S keyboard shortcut.
- Type Registry Editor in the search box and click on the first matching search result.
- Navigate to the following key, or copy-paste it in the address bar of the Registry Editor: HKEY_LOCAL_MACHINESOFTWAREPoliciesMicrosoftWindows Defender
- Locate a registry entry named DisableAntiSpyware, then double click on it.
- If you don’t see this key, right-click on any empty space and choose New → DWORD (32-bit) Value. Name the key DisableAntiSpyware, and then double-click on it to open its properties.
- Set the Value data to 1 in order to disable Windows Defender and Antimalware Service Executable (MsMpEng.exe) in Windows 10.
- Exit the Registry Editor and restart your computer. You may notice improvements with your device’s performance.
Once again, let us remind you that it’s risky to operate your device without having an antivirus application installed. You may become vulnerable to malware, hackers, and other types of cyberattacks. We highly recommend using Malwarebytes if you need a free and lightweight solution. We also offer Malwarebytes Premium for the best market price.
Method 2. Turn Off Third-Party Antivirus Program
Antivirus applications are known to cause issues on computers by blocking apps and services from running properly. You can test if the antivirus program you’re using at the moment is causing the error by temporarily disabling it.
Note: This method is not recommended as it is unsafe to use your computer without protection. Only proceed if you’re aware of the possible risks and have a backup of your system to revert any damage that may happen.
- Right-click on an empty space in your taskbar and choose Task Manager. If the Task Manager launches in compact mode, make sure to expand details by clicking on the “Mode details” button.
- Switch to the Start-up tab using the header menu located at the top of the window. Find your antivirus application from the list and select it by clicking on it once.
- Click on the Disable button now visible in the bottom-right of the window. This will disable the application from launching when you start your device.
- Restart your computer.
Method 3. Add the File or Folder to the Exclusions List
If you want to bypass the warning without having to turn off Windows Defender or your third-party antivirus, you can. Simply add the file itself, or the entire folder containing it to the exclusions list. By doing so, Defender won’t look for any suspicious files in that specific directory.
- Open the File Explorer and navigate to the file’s location. Click on the address bar and copy the full file path to the file with the Ctrl + C keyboard combination.
- Open the search bar in your taskbar by clicking on the magnifying glass icon. You can also bring it up with the Windows + S keyboard shortcut.
- Type in Windows Security and launch it from the search results.
- Switch to the Virus & Threat Protection tab using the home screen or the menu in the left-side pane. Here, click on the Manage settings link under Virus & threat protection settings.
- Under Exclusions, click the Add or remove exclusions link. You’ll be redirected to a new page.
- Click the Add an exclusion button. From the drop-down menu, select File or Folder, depending on what you want to open.
- Paste the path you copied from the address bar by pressing the Ctrl + V keys. Click the Select Folder button when you’re done.
After adding the file as an exclusion, you’ll be able to open it. We recommend running an antivirus scan afterward to ensure no real malware was in the file.
Method 4. Repair the File Explorer
It’s possible that the “Operation did not complete successfully because the file contains a virus” error message shows up because of a File Explorer problem. In this case, follow the steps below to repair the File Explorer.
- Open the search bar in your taskbar by clicking on the magnifying glass icon. You can also bring it up with the Windows + S keyboard shortcut.
- Type Command Prompt in the search box. When you see it in the results, right-click on it and choose Run as Administrator. If you need help, check out our How to make a local user an administrator in Windows 10 guide.
- When prompted by the User Account Control (UAC), click Yes to allow the app to launch with administrative permissions.
- Once the Command Prompt window is open, type in the following commands and press Enter after each line to execute them:
- sfc /SCANFILE=c:windowsexplorer.exe
- sfc /SCANFILE=C:WindowsSysWow64explorer.exe
- After both commands have been executed, restart your computer and see if you’re able to open the file.
Method 5. Fix Windows Backup
In some cases, the error message shows up because of temporary Internet files and cache being stored in your backups. You can easily fix this by performing the next steps.
- Press the Windows + R keys on your keyboard. This is going to bring up the Run utility.
- Type in “control” without the quotation marks and press the Enter key on your keyboard. This will launch the Control Panel application.
- Change the view mode to Large icons, and then click on the Internet Options button.
- Stay on the General tab. Click on the Delete… button under the Browsing history heading. A new window will open.
- Uncheck the Preserve Favorites website data option.
- Next, check the following options, and then click on the Delete button:
- Temporary Internet files and website files
- Cookies and website data
- History
- Download History
- Restart your computer and see if you’re able to open the file without a warning message. If not, you can try resetting your browser and clearing browser data, cookies, and browsing history.
Method 6. Run the Disk Cleanup Utility
Windows 10 often creates temporary files and folders. If they accumulate, it can affect your computer and may cause misleading errors. Delete junk files using the Disk Cleanup utility to save space and fix computer problems.
- Open the search bar in your taskbar by clicking on the magnifying glass icon. You can also bring it up with the Windows + S keyboard shortcut.
- Type in Disk Cleanup and click on the first search result.
- Select the Windows 10 system drive, and then click the OK button. Usually, the system is installed on disk C:.
- In the new window, you’ll see all space taken by temporary files. Make sure that Temporary Internet Files and Temporary Files are selected. You may also delete other junk files, such as Thumbnails or DirectX Shader Cache. When you’re done selecting what you want to remove, click OK.
- Click on the Delete Files button in the dialog box that pops up. The removal process will start and free up space on your device.
Method 7. Run an Antivirus Scan
We recommend running a security scan to ensure that you don’t have a malicious file. It can also detect if your system is not currently infected by malware. We’ll be using the built-in Windows Defender to perform a system scan, however, a more focused third-party solution may work better.
- Open the search bar with the Windows + S keyboard shortcut. Type Windows Security and launch it from the search results.
- Switch to the Virus & Threat Protection tab using the home screen or the menu in the left-side pane. Click on the Scan Options link.
- Select the Full scan option. This is going to check every single file on all of your drives to ensure no threats can hide. Take note that this scan may last over 1-2 hours, depending on how many files you have on your system.
- Click on the Scan now button to begin the scan. If a threat is detected, Windows 10 will automatically quarantine or remove it entirely. You can review the scan results afterwards.
After completing these steps, you may be able to successfully open the problematic file. If the file has been removed by Windows Defender, it’s likely that the file was unsafe and misleading to begin with. In this case, finding a different download is your best bet.
Final Thoughts
That wraps up the guide to opening a file even if Windows 10 detects a virus in the file directory. We hope this helps.
In the future, be careful with what you download from the internet. Unofficial websites often hide malware and potentially unwanted programs (PUPs) in their downloads. Avoid these websites to lower the possibility of this error from happening again.
Our Help Center offers hundreds of guides to assist you if you’re in need of further help. Return to us for more informative articles, or get in touch with our experts for immediate assistance.
One More Thing
Would you like to receive promotions, deals, and discounts to get our products for the best price? Don’t forget to subscribe to our newsletter by entering your email address below! Be the first to receive the latest news in your inbox.
You May Also Like
» How To Fix System Service Exception Error In Windows 10
» Fixed: DirectX Encountered an Unrecoverable Error
» Slow Internet on Windows 10? Here’s How To Solve It
Если вы активируете файлы, содержащие вирусы, они заразят систему. Таким образом, большинство антивирусных программ, включая Защитник Windows, не позволит открыть файл или запустить любую связанную программу, если они подозревают, что файл / программа может вызвать вирусную атаку. В таком случае вы столкнетесь с ошибкой — Операция не завершена успешно, поскольку файл содержит вирус.

Возможно, это сообщение может появиться даже для известных программ. В этом случае это может быть ложная тревога. Антивирусные программные продукты рассматривают каждый непроверенный внешний файл как угрозу. Итак, давайте посмотрим на возможные решения, чтобы исправить это.
Операция не завершена успешно, поскольку файл содержит вирус.
Если вы уверены, что файл / программа, о которых идет речь, подлинны, вы можете выполнить следующие действия, чтобы обойти эту ошибку и выполнить операцию:
- Временно отключить антивирусную программу Защитника Windows / стороннюю антивирусную программу
- Добавить исключение в Защитнике Windows / сторонней антивирусной программе
- Восстановить проводник
- Запустите средство очистки диска.
Я написал этот пост, предполагая, что Защитник Windows является антивирусным решением по умолчанию. Реализуйте решения, подходящие для вашей антивирусной программы по умолчанию.
1]Отключить Защитник Windows / стороннюю антивирусную программу
Хотя эта ошибка может возникнуть с любой антивирусной программой по умолчанию, она чаще встречается в Защитнике Windows. Чтобы обойти ошибку, вы можете временно отключить Защитник Windows после оценки рисков.
Нажмите кнопку «Пуск» и выберите «Настройки»> «Обновления и безопасность»> «Безопасность Windows». Выберите Open Windows Security на правой панели.
Теперь нажмите Защита от вирусов и угроз.
В разделе «Настройки защиты от вирусов и угроз» нажмите «Управление настройками».
Выключите переключатель для защиты в реальном времени и защиты с помощью облака.
Перезагрузите систему и попробуйте запустить программу.
2]Добавьте исключение в Защитник Windows / Стороннюю антивирусную программу
Отключение антивируса — временное решение. Убедившись в правильности программы, вы должны добавить программу или исполняемый файл в список исключений.
Перейдите на страницу управления настройками Защитника Windows, как описано выше. Прокрутите вниз до исключения и нажмите Добавить или удалить исключения.
Выберите Добавить исключение и добавьте файл / папку в исключение.
Попробуйте запустить файл / программу после добавления исключения и проверьте, работает ли оно.
После успешного запуска файла обязательно включите антивирус.
3]Восстановить проводник
В случае, если проблема связана с файлом, который вы пытались получить доступ к проводнику, или проблема возникает при использовании самого проводника, вы можете попробовать следующую команду SFC для восстановления одного файла.
Ищи Командная строка в строке поиска Windows. Щелкните правой кнопкой мыши параметр и выберите Запуск от имени администратора. Последовательно введите следующую команду и нажимайте Enter после каждой команды:
sfc /SCANFILE=c:windowsexplorer.exesfc /SCANFILE=C:WindowsSysWow64explorer.exe
Если эти команды решат проблему, вы получите сообщение об успешном выполнении «Защита ресурсов Windows обнаружила поврежденные файлы и успешно их восстановила. » Перезагрузите систему.
Эта опция SFC сканирует и восстанавливает файл, расположенный по указанному полному пути. В нашем случае мы попытались исправить сам проводник.
4]Запустите средство очистки диска.
Многие сообщения на форумах предполагают, что некоторые временные файлы тоже вызывают эту ошибку. Эту проблему можно решить, запустив средство очистки диска.
Как отключить операцию, которая не завершилась успешно из-за того, что файл содержит вирус?
Чтобы отключить операцию, которая не завершилась успешно из-за того, что файл содержит вирус, временно отключите Защитник Windows. Если вы полностью уверены, что загруженный файл является подлинным и не содержит вирусов, вы можете обойти предупреждение «Операция не завершена успешно, поскольку файл содержит вирус». Для этого вам необходимо временно отключить Защитник Windows и открыть файл, пока он выключен.
Мы надеемся, что одно из этих исправлений обеспечило запуск вашей программы. Дайте нам знать об этом в комментариях.
.
Операция не была успешно завершена, так как файл содержит вирус?
Сообщение «Операция не была успешно завершена, так как файл содержит вирус» может появляться на разных версиях Windows при запуске тех или иных приложений. Повторный запуск приложения, как правило, ни к чему не приводит. Более того, запускаемое приложение может быть и вовсе удалено системными инструментами в автоматическом режиме.
Операция не была успешно завершена, так как файл содержит вирус — действительно ли это так?
И теперь самое главное: нет, появление данного сообщения не всегда означает, что в ОС пользователя поселился недоброжелательный сосед. Просто Защитнику Windows, системному антивирусу, что-то не понравилось в запускаемом приложении, вследствие чего тот решил приостановить его работу либо полностью удалить с диска (крайне редко, но бывает). Радикальные меры, ничего не скажешь, но что есть, то есть.
Что могло взбесить Защитник Windows? На это есть несколько причин:
- пользователь запустил нелицензированную версию программы
- программа имеет ряд функций, позволяющих тем или иным образом воздействовать на систему и менять ее настройки, например, без спроса устанавливать ПО, задействовать для своей работы сетевой трафик и прочие, не самые приятные «фичи» — maleware, одним словом;
- запускаемая программа действительно имеет в себе вирус.
Как избавиться от ошибки и запустить приложение?
Понятное дело, если вы подозреваете, что словили вирус, дайте Защитнику Windows заниматься своим делом. Лучше найдите другую программу (или ее версию) с какого-то более проверенного источника. Но если вы точно знаете, что приложение абсолютно безопасно и было заблокировано по ошибке, то это обязательно нужно исправить.
Деактивация системного Защитника Windows
Деактивируем системный антивирус, и дело в шляпе! Выполняется эта процедура следующим образом:
- нажмите WIN+S для вызова поисковика системы;
- вбейте запрос «Безопасность Windows» и выберите найденный результат;
- перейдите в подраздел «Защита от вирус и угроз»;
- кликните на пункт «Журнал защиты» (карантин, простым словом);
- найдите в списке журнала заблокированный элемент и убедитесь, что это именно он;
- нажмите на ниспадающее меню «Действия» и выберите опцию «Восстановить»;
- вернитесь назад к разделу «Защита от вирусов и угроз» и перейдите управление настройками для параметров защиты антивируса;
- выставьте ползунок под опцией «Защиты в реальном времени» в положение «Откл.».
Теперь никаких проблем с запуском приложения не будет, ранее заблокированный элемент останется в нужном месте.
Добавление приложения (или файла) в исключения антивируса
Держать систему с отключенным антивирусом — это не слишком хорошая идея. А поэтому рекомендуем добавить ранее заблокированное приложение (отдельный файл либо все его элементы) в список исключений Защитника Windows. Таким образом вы сможете не только решить проблему, но и защитить свою ОС от вредоносных элементов извне. Вот что вам нужно сделать:
- откройте раздел «Параметры защиты от вирусов и угроз», как это было продемонстрировано выше;
- кликните на кнопку «Добавить исключение» в соответствующем разделе;
- укажите расположение файла или папки приложения (будьте внимательны!);
- закройте все окошки и проверьте, запустится ли нужное приложение без проблем на сей раз.
Что делать, если ошибка «Операция не была успешно завершена» все равно не исчезла?
Крайне странно, если ничего из вышеуказанного не помогло вам в решении проблемы. Возможно, неполадка заключается в поврежденных системных файлах и образе Windows в целом. Плюс не стоит исключать ошибку файловой системы используемого диска. SFC, DISM и CHKDSK — тройка встроенных утилит, способных восстановить работоспособность ОС.
- Нажмите WIN+R для вызова диалогового окошка «Выполнить»;
- пропишите в пустой строке CMD и прожмите комбинацию CTRL+ALT+ENTER;
- поочередно выполните к консоли следующий набор команд, попутно перезагружая ПК между каждой из утилит:
- sfc /scannow
- DISM /Online /Cleanup-Image /CheckHealth
- DISM /Online /Cleanup-Image /ScanHealth
- DISM /Online /Cleanup-Image /RestoreHealth
- chkdsk C: /f /r /x
Ошибка «Операция не была успешно завершена, так как файл содержит вирус» несомненно является серьезной проблемой, но только в том случае, если пользователь имеет дело с настоящим вирусом.
Can’t open a file because Windows 10 detects a virus in the file location? Learn here how to solve the “Operation did not complete successfully” error with 7 easy methods.
If you’ve been on the internet for a while now, you probably downloaded something from a shady website. Maybe you wanted to get an application for free to try it before committing to a purchase or just clicked on a misleading link. Whether or not the download is legitimate, Windows 10 may flag it as an infected file.
This error shows up when Windows 10’s built-in antivirus application, Windows Defender, detects a file as dangerous. The file may contain a false positive or actual malware. In this article, we’ll explore methods to remove malware from a downloaded file, or bypass the warning if it falsely detects a safe file.
Let’s get started!
Jump To:
- How to Fix Operation Did Not Complete Successfully Because the File Contains a Virus
- Method 1. Temporarily Disable Windows Defender
- Method 2. Turn Off Third-Party Antivirus Program
- Method 3. Add the File or Folder to the Exclusions List
- Method 4. Repair the File Explorer
- Method 5. Fix Windows Backup
- Method 6. Run the Disk Cleanup Utility
- Method 7. Run an Antivirus Scan
What Causes the “Operation Did Not Complete Successfully” Error Message?
Depending on your situation, the error message could come up for a few different reasons.
- You downloaded a genuine file, but Windows Defender detects a virus. If you downloaded something from a genuine website, it’s possible that Windows Defender detected a false positive. This is a general issue with all antivirus software — if code or behavior matches a known malware, Windows Defender may flag the file as dangerous.
- You downloaded an infected file. Typically, misleading links and malicious users spread files that appear genuine but contain malware. If this happens, Windows Defender gives you a warning after protecting your computer.
The methods below will guide you to open a file and bypass the “Operation did not complete successfully because the file contains a virus” message.
How to Fix Operation Did Not Complete Successfully Because the File Contains a Virus
Before proceeding, keep in mind that your computer may be in danger. If the file does contain malware, it may be too dangerous to open the file. If you’re not certain that the file you downloaded is genuine, run an antivirus scan and find a new, legitimate download.
Method 1. Temporarily Disable Windows Defender
If you believe that the file you downloaded is genuine, you can bypass the “Operation did not complete successfully because the file contains a virus” warning. To do this, you’ll have to temporarily disable Windows Defender, and open the file while it’s turned off.
Option 1. Disable Windows Defender in Settings
The fastest way of disabling the built-in antivirus is going to the Settings menu.
- Click on the Windows icon in the bottom left of your screen to bring up the Start menu.
- Choose Settings, or alternatively use the Windows + I shortcut.
- Click on the Update & Security tile. This is where you can find most of your security settings.
- Here, switch to the Windows Security tab, and then click on Virus & threat protection.
- First, click on the Manage settings link under the Virus & threat protection settings header. You’ll be redirected to a new page. Here, click on the Real-time protection toggle to turn off Windows Defender.
Try opening the file again. If you still get an error, perform the same steps and turn off Cloud-delivered protection as well. If you’re still unable to bypass the warning, you may have to disable Windows Defender using the Registry.
Option 2. Disable Windows Defender in the Registry
Some users may not be successful in disabling Windows Defender antivirus software the traditional way. If you can’t perform the method above, try and turn off the application using the Registry Editor.
- Open the search bar in your taskbar by clicking on the magnifying glass icon. You can also bring it up with the Windows + S keyboard shortcut.
- Type Registry Editor in the search box and click on the first matching search result.
- Navigate to the following key, or copy-paste it in the address bar of the Registry Editor: HKEY_LOCAL_MACHINE\SOFTWARE\Policies\Microsoft\Windows Defender
- Locate a registry entry named DisableAntiSpyware, then double click on it.
- If you don’t see this key, right-click on any empty space and choose New → DWORD (32-bit) Value. Name the key DisableAntiSpyware, and then double-click on it to open its properties.
- Set the Value data to 1 in order to disable Windows Defender and Antimalware Service Executable (MsMpEng.exe) in Windows 10.
- Exit the Registry Editor and restart your computer. You may notice improvements with your device’s performance.
Once again, let us remind you that it’s risky to operate your device without having an antivirus application installed. You may become vulnerable to malware, hackers, and other types of cyberattacks. We highly recommend using Malwarebytes if you need a free and lightweight solution. We also offer Malwarebytes Premium for the best market price.
Method 2. Turn Off Third-Party Antivirus Program
Antivirus applications are known to cause issues on computers by blocking apps and services from running properly. You can test if the antivirus program you’re using at the moment is causing the error by temporarily disabling it.
Note: This method is not recommended as it is unsafe to use your computer without protection. Only proceed if you’re aware of the possible risks and have a backup of your system to revert any damage that may happen.
- Right-click on an empty space in your taskbar and choose Task Manager. If the Task Manager launches in compact mode, make sure to expand details by clicking on the “Mode details” button.
- Switch to the Start-up tab using the header menu located at the top of the window. Find your antivirus application from the list and select it by clicking on it once.
- Click on the Disable button now visible in the bottom-right of the window. This will disable the application from launching when you start your device.
- Restart your computer.
Method 3. Add the File or Folder to the Exclusions List
If you want to bypass the warning without having to turn off Windows Defender or your third-party antivirus, you can. Simply add the file itself, or the entire folder containing it to the exclusions list. By doing so, Defender won’t look for any suspicious files in that specific directory.
- Open the File Explorer and navigate to the file’s location. Click on the address bar and copy the full file path to the file with the Ctrl + C keyboard combination.
- Open the search bar in your taskbar by clicking on the magnifying glass icon. You can also bring it up with the Windows + S keyboard shortcut.
- Type in Windows Security and launch it from the search results.
- Switch to the Virus & Threat Protection tab using the home screen or the menu in the left-side pane. Here, click on the Manage settings link under Virus & threat protection settings.
- Under Exclusions, click the Add or remove exclusions link. You’ll be redirected to a new page.
- Click the Add an exclusion button. From the drop-down menu, select File or Folder, depending on what you want to open.
- Paste the path you copied from the address bar by pressing the Ctrl + V keys. Click the Select Folder button when you’re done.
After adding the file as an exclusion, you’ll be able to open it. We recommend running an antivirus scan afterward to ensure no real malware was in the file.
Method 4. Repair the File Explorer
It’s possible that the “Operation did not complete successfully because the file contains a virus” error message shows up because of a File Explorer problem. In this case, follow the steps below to repair the File Explorer.
- Open the search bar in your taskbar by clicking on the magnifying glass icon. You can also bring it up with the Windows + S keyboard shortcut.
- Type Command Prompt in the search box. When you see it in the results, right-click on it and choose Run as Administrator. If you need help, check out our How to make a local user an administrator in Windows 10 guide.
- When prompted by the User Account Control (UAC), click Yes to allow the app to launch with administrative permissions.
- Once the Command Prompt window is open, type in the following commands and press Enter after each line to execute them:
- sfc /SCANFILE=c:\windows\explorer.exe
- sfc /SCANFILE=C:\Windows\SysWow64\explorer.exe
- After both commands have been executed, restart your computer and see if you’re able to open the file.
Method 5. Fix Windows Backup
In some cases, the error message shows up because of temporary Internet files and cache being stored in your backups. You can easily fix this by performing the next steps.
- Press the Windows + R keys on your keyboard. This is going to bring up the Run utility.
- Type in “control” without the quotation marks and press the Enter key on your keyboard. This will launch the Control Panel application.
- Change the view mode to Large icons, and then click on the Internet Options button.
- Stay on the General tab. Click on the Delete… button under the Browsing history heading. A new window will open.
- Uncheck the Preserve Favorites website data option.
- Next, check the following options, and then click on the Delete button:
- Temporary Internet files and website files
- Cookies and website data
- History
- Download History
- Restart your computer and see if you’re able to open the file without a warning message. If not, you can try resetting your browser and clearing browser data, cookies, and browsing history.
Method 6. Run the Disk Cleanup Utility
Windows 10 often creates temporary files and folders. If they accumulate, it can affect your computer and may cause misleading errors. Delete junk files using the Disk Cleanup utility to save space and fix computer problems.
- Open the search bar in your taskbar by clicking on the magnifying glass icon. You can also bring it up with the Windows + S keyboard shortcut.
- Type in Disk Cleanup and click on the first search result.
- Select the Windows 10 system drive, and then click the OK button. Usually, the system is installed on disk C:.
- In the new window, you’ll see all space taken by temporary files. Make sure that Temporary Internet Files and Temporary Files are selected. You may also delete other junk files, such as Thumbnails or DirectX Shader Cache. When you’re done selecting what you want to remove, click OK.
- Click on the Delete Files button in the dialog box that pops up. The removal process will start and free up space on your device.
Method 7. Run an Antivirus Scan
We recommend running a security scan to ensure that you don’t have a malicious file. It can also detect if your system is not currently infected by malware. We’ll be using the built-in Windows Defender to perform a system scan, however, a more focused third-party solution may work better.
- Open the search bar with the Windows + S keyboard shortcut. Type Windows Security and launch it from the search results.
- Switch to the Virus & Threat Protection tab using the home screen or the menu in the left-side pane. Click on the Scan Options link.
- Select the Full scan option. This is going to check every single file on all of your drives to ensure no threats can hide. Take note that this scan may last over 1-2 hours, depending on how many files you have on your system.
- Click on the Scan now button to begin the scan. If a threat is detected, Windows 10 will automatically quarantine or remove it entirely. You can review the scan results afterwards.
After completing these steps, you may be able to successfully open the problematic file. If the file has been removed by Windows Defender, it’s likely that the file was unsafe and misleading to begin with. In this case, finding a different download is your best bet.
Final Thoughts
That wraps up the guide to opening a file even if Windows 10 detects a virus in the file directory. We hope this helps.
In the future, be careful with what you download from the internet. Unofficial websites often hide malware and potentially unwanted programs (PUPs) in their downloads. Avoid these websites to lower the possibility of this error from happening again.
Our Help Center offers hundreds of guides to assist you if you’re in need of further help. Return to us for more informative articles, or get in touch with our experts for immediate assistance.
One More Thing
Would you like to receive promotions, deals, and discounts to get our products for the best price? Don’t forget to subscribe to our newsletter by entering your email address below! Be the first to receive the latest news in your inbox.
You May Also Like
» How To Fix System Service Exception Error In Windows 10
» Fixed: DirectX Encountered an Unrecoverable Error
» Slow Internet on Windows 10? Here’s How To Solve It