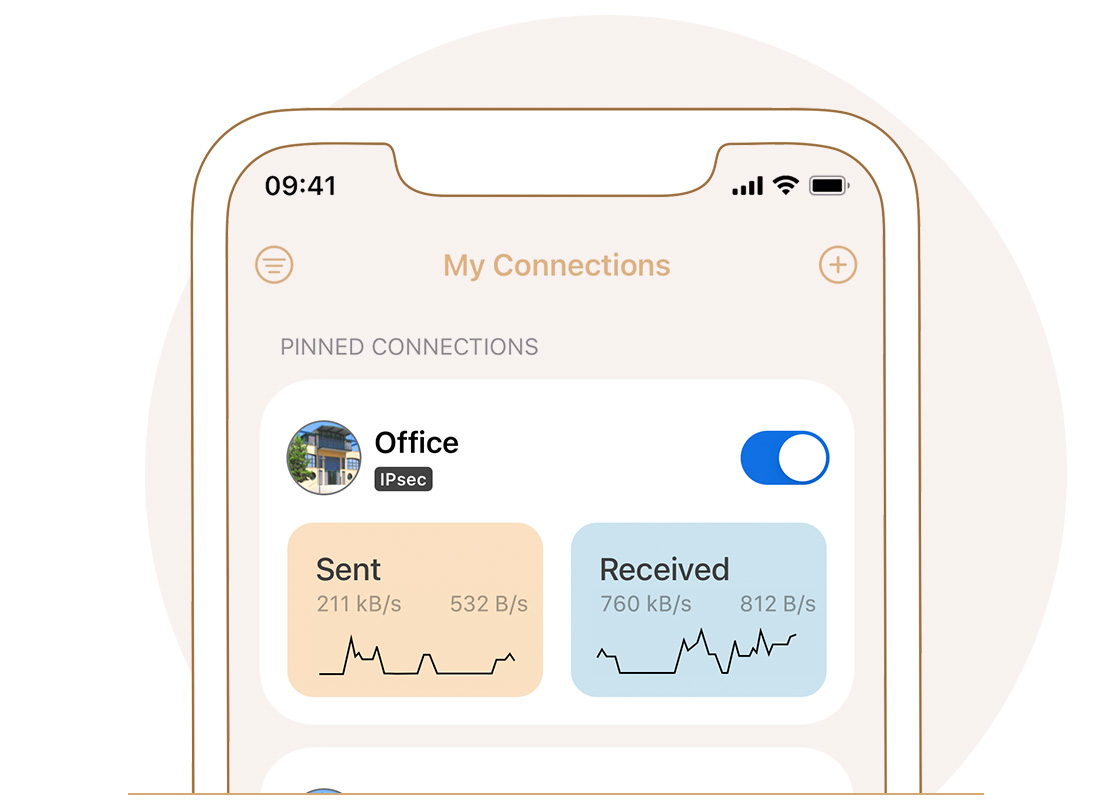
OpenVPN is a free VPN (virtual private network) service that allows you to remotely access your Home network from anywhere with an open internet service. OpenVPN is a multiplatform service that works with both Android and iOS operating systems, allowing you to access devices and services in use through your router.
This article will take you through the steps needed to create and establish an OpenVPN connection with your TP-Link router.
*Note:
Verify router/modem has a public WAN IP address that is not bounded by ISP; if it’s a private IP address, that means the router/modem is behind a NAT, please open the ports for the router/modem on the NAT.
But for the CG-NAT ISP: Comporium and Direct link — radio service, provide the customer a private IP, that will cause you can’t use the OpenVPN and affect the NAT Type. You can contact the ISP and ask them to offer a Statis IP address.
Setting Up OpenVPN on a TP-Link Router
(This example uses the Archer C5400)
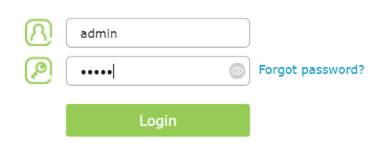
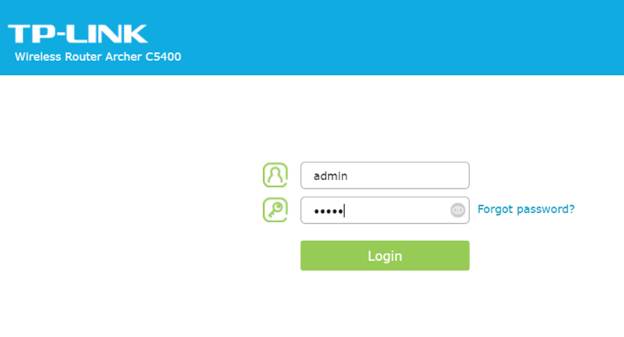
Step 1: Log into your router at tplinkwifi.net. The default username and password are admin.
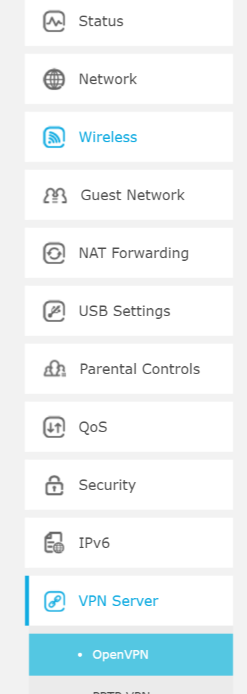
Step 2: Click Advanced on the top navigation bar.

Step 3: Click VPN Server, then OpenVPN.
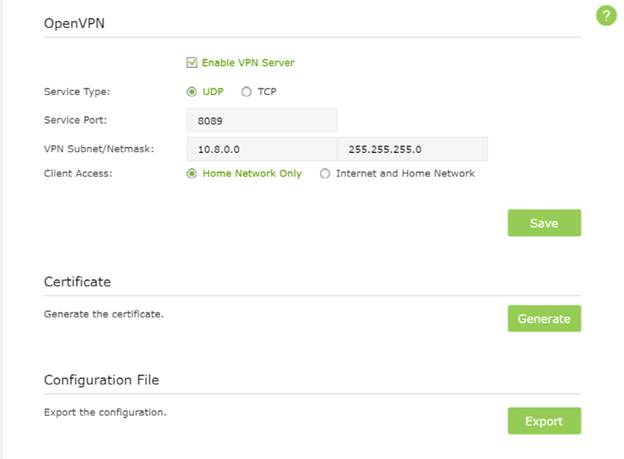
Step 4: Click Certificate to generate a certificate.
Note: This step must be completed before enabling OpenVPN.
Step 5: Check the Enable VPN Server box, then fill in the following information as prompted. Click Save.
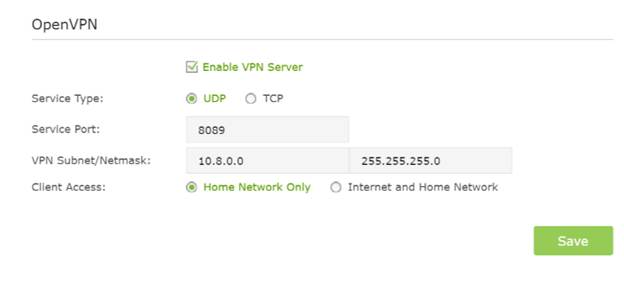
Note: What you select for Client Access will determine the content you are able to view over the VPN. Internet and Home Network will allow you to use your home internet service as well as access to your network shares. Home Network Only solely grants access to your network’s shared files and drives without home internet service accessibility.
Step 6: Click Export to download the configuration file to your computer.
Connecting OpenVPN (PC)
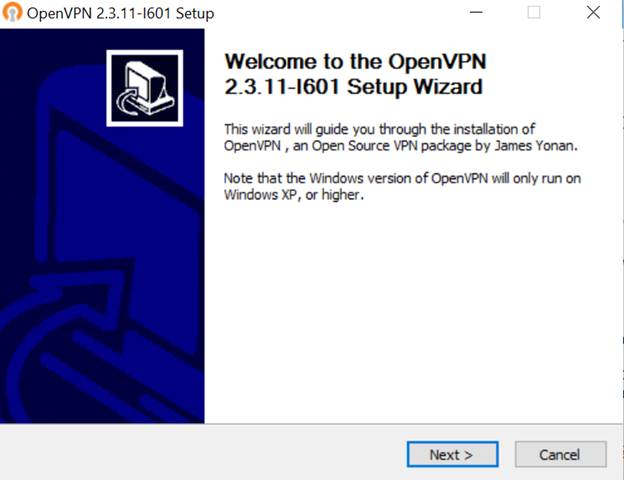
Step 1: Open your browser and navigate to https://openvpn.net/community-downloads/.


Step 2: Click Downloads, then click the link corresponding your Windows version.
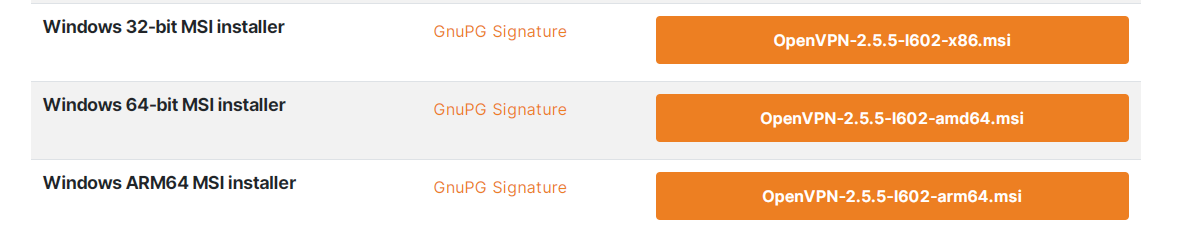
Step 3: Download and run the installer.
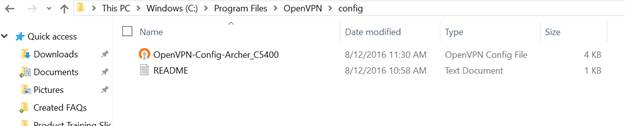
Step 4: Find the Certificate in your download folder and copy the file.

Note: The file name may differ for each router.
Step 5: Paste the config file into the config folder located in the OpenVPN directory.
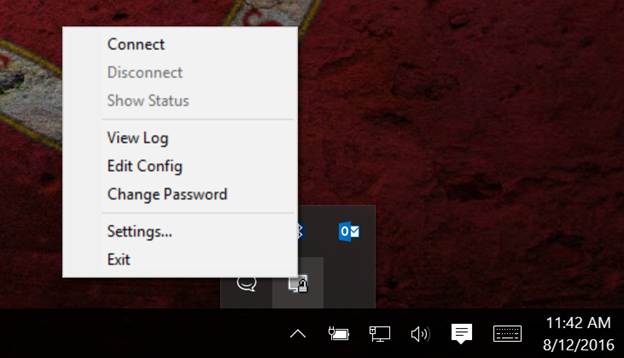
Step 6: Launch the program. A Quick launch icon will appear in your taskbar. Right-click the icon and select Connect.
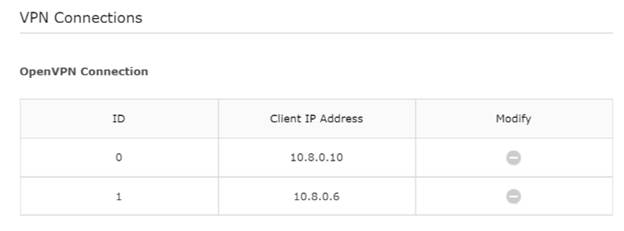
Step 7: If connection is successful, you will see the following message.

You are now connected to your home network via VPN. To verify, you can visit the VPN connections window in your router settings.

Был ли этот FAQ полезен?
Ваш отзыв поможет нам улучшить работу сайта.
Что вам не понравилось в этой статье?
- Недоволен продуктом
- Слишком сложно
- Неверный заголовок
- Не относится к моей проблеме
- Слишком туманное объяснение
- Другое
Как мы можем это улучшить?
Спасибо
Спасибо за обращение
Нажмите здесь, чтобы связаться с технической поддержкой TP-Link.
Имеется клиент, который пользуется 3G интернетом, соответственно NAT и серый IP адрес. Имеется необходимость туда попадать на сервер терминалов и IP камеры. Я решил сделать подключение к уже имеющемуся серверу OpenVPN. И оттуда прокинуть порты на камеры и сервер. У клиента используется 3G роутер TP-Link TL-MR3020.
На него залил прошивку OpenWRT Attitude Adjustment Beta 2.
Прошивку берем тут и прошиваем из вебморды стоковой прошивки роутера, как при обычном обновлении.
Так как на борту флеш объемом всего 4Мб, то пришлось поставить туда усб хаб и флешку. Но чтобы увиделась флешка сначала нужно доустановить пакеты.
opkg install kmod-usb-uhci kmod-usb-storage block-mount kmod-fs-ext4
insmod usb-ohci
Cоздаем точку подключения:
mkdir /mnt/sda1
Я флешку на компе заранее отформатировал в ext4, маунтим ее:
mount -t ext4 /dev/sda1 /mnt/sda1 -o rw,sync
Сначала была еще мысль создать на флешке раздел под swap, но потом передумал, вдруг мало ли сдохнет флешка от постоянной перезаписи.
Копируем туда установленные пакеты:
tar -C /overlay -cvf - . | tar -C /mnt/sda1 -xvf –
Немного правим конфиг:
vi /etc/config/fstab
чтобы выглядело вот так:
config 'mount'
option target /overlay
option device /dev/sda1
option fstype ext4
option options rw,sync
option enabled 1
option enabled_fsck 1
затем перезагружаем роутер
reboot
Теперь мы не ограничены исходным размером flash роутера. И можем себе позволить поставить практически все 
Смотрим свободное место:
df -h
Filesystem Size Used Available Use% Mounted on
rootfs 504.4M 25.0M 453.8M 5% /
/dev/root 2.0M 2.0M 0 100% /rom
tmpfs 14.3M 168.0K 14.1M 1% /tmp
tmpfs 512.0K 0 512.0K 0% /dev
/dev/sda1 504.4M 25.0M 453.8M 5% /overlay
overlayfs:/overlay 504.4M 25.0M 453.8M 5% /
Устанавливаем необходимые нам пакеты:
opkg install openvpn nano mc luci-i18n-russian
Для нормальной работы mc нужно выполнить две строчки:
export TERMINFO=/usr/share/terminfo
export TERM=xterm
И чтобы каждый раз их не выполнять руками нужно их добавить в /etc/profile:
nano /etc/profile
Затем копируем на роутер в /etc/openvpn/ ключи и сертификаты созданные на сервере openvpn:
ca.crt
dh1024.pem
client.crt
client.key
ta.key
Правим конфиг
nano /etc/config/openvpn
package openvpn
config openvpn client
option enabled 1
option client 1
option dev tun
option proto udp
list remote "remote.server.ip 1194"
option resolv_retry infinite
option nobind 1
option persist_key 1
option persist_tun 1
option ca /etc/openvpn/ca.crt
option cert /etc/openvpn/client.crt
option key /etc/openvpn/client.key
option dh /etc/openvpn/dh1024.pem
option ns_cert_type server
option tls_auth "/etc/openvpn/ta.key 1"
option comp_lzo 1
option verb 0
затем запускаем openvpn
/etc/init.d/openvpn start
/etc/init.d/openvpn enable
Теперь настраиваем 3g. Устанавливаем пакеты:
opkg install kmod-usb-serial kmod-usb-serial-option
Добавляем в /etc/config/network
nano /etc/config/network
config 'interface' 'wan'
option 'ifname' 'ppp0'
#option 'pincode' '1234'; у кого включена проверка pin кода раскомментировать строчку
option 'device' '/dev/ttyUSB0': может быть другим, проверяйте с помощью dmesg
option 'apn' 'home.beeline.ru'; указываем свою apn
option 'service' 'umts'
option ‘proto’ ‘3g’
#option 'username' 'yourusername'; у некоторых ОПСОСов требуется
#option 'password' 'yourpassword'; авторизация при подключении
Перезагружаем роутер и проверяем:
ping 192.168.254.1 -c 5
PING 192.168.254.1 (192.168.254.1): 56 data bytes
64 bytes from 192.168.254.1: seq=0 ttl=64 time=947.409 ms
64 bytes from 192.168.254.1: seq=1 ttl=64 time=606.373 ms
64 bytes from 192.168.254.1: seq=2 ttl=64 time=576.448 ms
64 bytes from 192.168.254.1: seq=3 ttl=64 time=554.852 ms
64 bytes from 192.168.254.1: seq=4 ttl=64 time=503.695 ms
--- 192.168.254.1 ping statistics ---
5 packets transmitted, 5 packets received, 0% packet loss
round-trip min/avg/max = 503.695/637.755/947.409 ms
ifconfig
3g-wan Link encap:Point-to-Point Protocol
inet addr:172.20.17.132 P-t-P:10.64.64.64 Mask:255.255.255.255
UP POINTOPOINT RUNNING NOARP MULTICAST MTU:1500 Metric:1
RX packets:220 errors:0 dropped:0 overruns:0 frame:0
TX packets:234 errors:0 dropped:0 overruns:0 carrier:0
collisions:0 txqueuelen:3
RX bytes:25248 (24.6 KiB) TX bytes:23382 (22.8 KiB)
tun0 Link encap:UNSPEC HWaddr 00-00-00-00-00-00-00-00-00-00-00-00-00-00-00-00
inet addr:192.168.254.105 P-t-P: 192.168.254.106 Mask:255.255.255.255
UP POINTOPOINT RUNNING NOARP MULTICAST MTU:1500 Metric:1
RX packets:10 errors:0 dropped:0 overruns:0 frame:0
TX packets:10 errors:0 dropped:0 overruns:0 carrier:0
collisions:0 txqueuelen:100
RX bytes:840 (840.0 B) TX bytes:840 (840.0 B)
Все отлично работает, несмотря на задержки. Другого интернета нет, так как здание находится далековато от всего, и подключить человеческий интернет стоит слишком дорого, то приходится довольствоваться этим. 3g модем Huawei e150, у кторого принудительно включен режим только модем, с другими модемами придется возможно поплясать.
Подробнее про подключение флешки и размещению пакетов почитать можно тут, про openvpn тут
В этой статье речь пойдет о настройке OpenVPN на маршрутизаторы в качестве VPN клиента.
Большинство недорогих роутеров таких как TP Link не поддерживают технологию OpenVPN и могут работать только по PPTP VPN, который считается недостаточно надежным.
Благодаря установке прошивки OpenWRT, роутер сможет работать как OpenVPN клиент и обеспечить надежное шифрование всех данных работающих по Wi—Fi или подключенных по кабелю.
Для настройки VPN по технологии OpenVPN на роутер автор использовал TP-Link TL-WR1043ND с версией ПО v3, но можно использовать и более дешевые модели роутеров, на который есть прошивка OpenWRT.
В качестве VPN сервиса выбран VPN Monster, так как в отличие от других сервисов, данные конфигурации и сертификатов находятся в одном файле .ovpn, что избавит от редактирования файла конфигурации вручную и от возможных проблем при этом.
Автор не может гарантировать того, что выполнив данную инструкцию все будет работать, как написано, так как не бывает одинаковых задач и в каждом случае бывают разные условия: модель роутера, версия ПО роутера, тип подключения интернет провайдера и много других условий. Выполняя инструкцию у вас должен быть хотя бы минимальный опыт работы с OS Linux и с железом.
Установка OpenVPN на роутер можно разделить на два этапа – это установка прошивки OpenWRT и настройка OpenVPN на нем.
Приступим.
Установка прошивки OpenWRT на роутер TP-Link
ВНИМАНИЕ! Перепрошивка роутера снимает его с гарантии, неправильные и непоследовательные действия с прошивкой могут привести к выходу из строя вашего устройства. Только на свой страх и риск можете приступать к выполнению данной инструкции. Автор статьи и прошивки не несет ответственности за ваши действия.
![]()
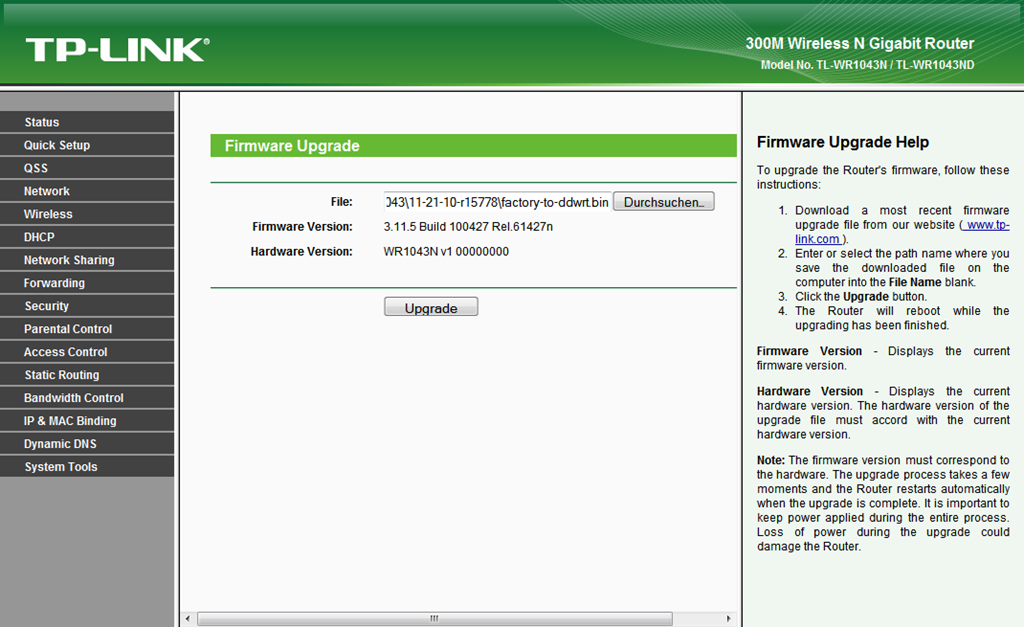
Заходим на сайт OpenWRT и качаем 2 прошивки для вашей модели роутера. Выбираем прошивку в соответствии с версией роутера и версией программного обеспечения раутера. Первая прошивка должна заканчиваться на factory.bin вторая на sysupgrade.bin. Первой прошивкой мы будем прошивать роутер из веб интерфейса старой прошивки, второй будем обновлять прошивку уже из прошивки с новым интерфейсом.
Заходим в веб-интерфейс роутера по адресу 192.168.0.1 или 192.168.1.1 и переходим в раздел системные инструменты далее обновление ПО. Еще раз убеждаемся, что версия ПО совпадает с версией ПО новой прошивки, (в противном случае роутер может выйти из строя) и обновляем прошивку новой прошивкой с окончанием factory.bin. Ждем несколько минут, не обновляя страницу и не выключая питание роутера. Прошивка готова.
Подключаем роутер к кабелю интернета, активируем интернет, перейдя на любой сайт.
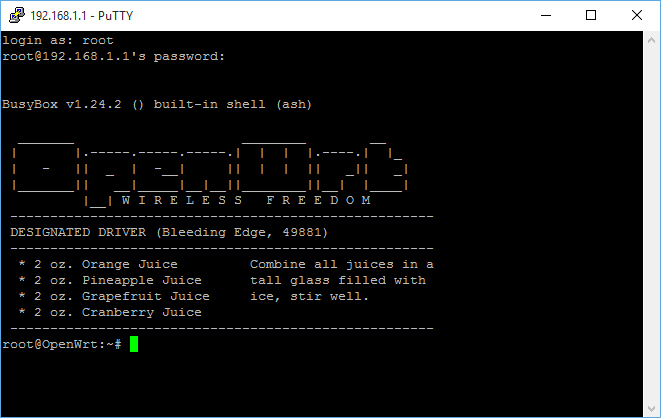
Заходим на роутер по протоколу SSH, для этого качаем программу PuTTY или любой другой SSH клиент, введя IP адрес роутера и стандартный порт 22. Пользователь root, пароль пустой или тоже root. Если войти не получается, перезагружаем роутер.
Выполняем следующую команду в SSH клиенте: opkg update для обновления системы и команду opkg install luci для установки веб сервера для веб-интерфейса.
Если не удается установить luci по причине отсутствия интернета на роутере, установите все пакеты вручную локально.
Заходим по адресу 192.168.1.1 в браузере в веб интерфейс. Логин и пароль root.
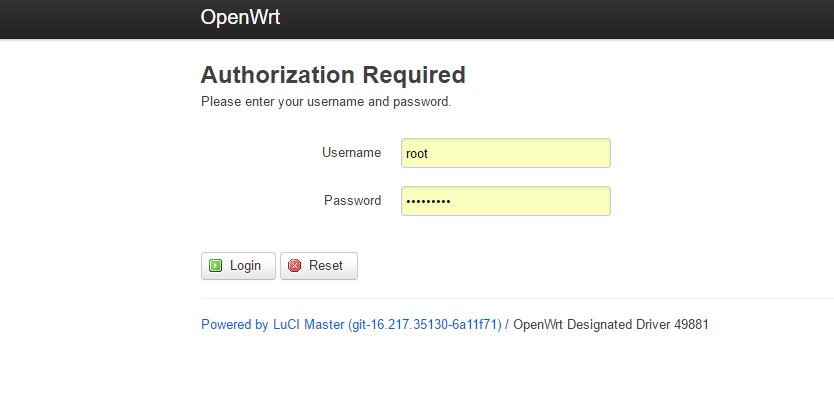
При первом входе система будет предлагать сменить пароль, меняем его.
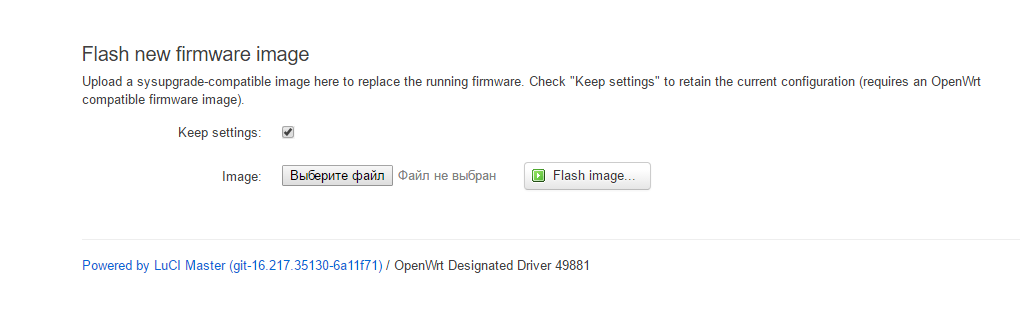
Далее заходим в раздел System подраздел Backup Flash Firmware и обновляем роутер второй прошивкой в разделе Flash new firmware image указываем путь к прошивке с окончанием sysupgrade.bin и подтверждаем.
На этом прошивка роутера завершена, приступаем к установке OpenVPN.
Установка OpenVPN на прошивку OpenWRT
Смотрите обновленную инструкцию https://vpnmonster.ru/blog/?p=2855
Если прошивка OpenWRT уже установлена, значит основная работа уже выполнена.
Заходим в роутер через PuTTY терминал введя адрес 192.168.1.1, логин root и ваш пароль.
Выполняем команду opkg update
Далее opkg install openvpn
Последнюю команду можно выполнить через веб интерфейс роутера. Для этого зайдем в веб интерфейс далее в раздел “System” и подраздел “Software”.
Нажимаем кнопку «update lists»
В Filter указываем openvpn нажимаем «найти пакет» переходим в раздел Available packages (openvpn). Возможно немного придется подождать, пока пакеты обновятся. Из всех пакетов выбираем openvpn-openssl и устанавливаем его. Если будете работать с VPN через веб интерфейс, понадобится еще luci-app-openvpn, тоже можно его установить.
Далее приобретаем лицензию VPN Monster, скачиваем файлы конфигурации в разделе «для других устройств» по своему секретному коду активации. Распаковываем архив и выбираем тот сервер который вам нужно, можно выбрать сервер с окончанием UDP, если уверены, что ваш провайдер не запрещает этот трафик.
Теперь понадобится еще одна программа для доступа к роутеру по протоколу SCP для этого хорошо подойдет программа WinSCP.
С помощью WinSCP заходим на роутер по адресу 192.168.1.1 введя логин root и свой пароль. Не забудьте, что необходимо выставить протокол подключения SCP.
В раздел root копируем файл конфигурации с выбранным сервером. Для удобства можно переименовать его, например на vpn.ovpn
Далее через терминал PuTTY выполняем команду openvpn --config vpn.ovpn, ждем подключения и если все в порядке в конце увидим такое сообщение «nitialization Sequence Completed «.
Если не получается, убедитесь, что имя файла ovpn соответствует указанному, а также попробуйте выбрать сервер с протоколом TCP или другой сервер.
На этом этапе OpenVPN подключен и работает.
Далее вам необходимо настроить фаервол, чтобы VPN смотрел в интернет.
Сделать это можно из командной строки по iptables, но я расскажу как это сделать через веб-интерфейс.
Заходим в браузере на 192.168.1.1
Далее Network -> Interfaces -> Add
Name of new interface: VPN
Protocol of new interface: Unmanaged
Cover of following interface: tun0
Submit.
Добавить в Firewall зону VPN c интерфейсом tun0 и разрешить с него доступ на LAN, разрешить доступ с LAN на VPN.
Пробуем зайти на сайт vpnmonster.ru и проверить свой IP адрес.
Если Вы видите IP VPN сервера, значит вы настроили фаервол правильно. Если не удалось зайти на сайт, значит фаервол настроен неправильно но VPN работает.
Добавляем OpenVPN и автоподключение к серверу в автозагрузку.
Для этого заходим на роутер по протоколу SCP через программу WinSCP находим файл /etc/rc.local и вписываем в него такие строки:
openvpn --config /root/vpn.ovpn &
exit 0
Перезагружаем роутер, после загрузки и подключению к интернету проверяем IP.
Если необходимо выбрать другой сервер, просто заменяем файл /root/vpn.ovpn на другой с таким же именем.
Не лишним будет сразу же поменять DNS сервер.
Для этого переходим в Network > Interfaces > WAN > Advanced Settings.
Снимаем галочку Use DNS servers advertised by peer.
В поле Use custom DNS servers указываем адрес DNS сервера, можно два.
Если все это сложно, можно просто купить готовый роутер с прошивкой OpenWRT и лицензией VPN Monster, для этого обратитесь в поддержку.
OpenVPN® Client Setup on TP-Link TL-WR841N Router with OpenWrt 19.07 Firmware
for KeepSolid VPN Unlimited® users
This tutorial provides a detailed walkthrough on how to configure the OpenVPN® client on OpenWrt router. To get more information about the OpenVPN® protocol, check out our detailed article What is OpenVPN® protocol. TP-Link TL-WR841N router with OpenWrt 19.07 firmware was taken as an example.
How to set up the VPN Unlimited app for OpenWrt router? How to configure OpenVPN® client? Let’s check it out!
I. Set up the OpenVPN® client on your OpenWrt 19.07 router
II. Generate OpenVPN® client settings in your User Office
III. Configure OpenVPN® connection on OpenWrt 19.07 router
IV. Add OpenVPN® interface and configure DNS settings
I. Set up the OpenVPN® client on your OpenWrt 19.07 router
Open your OpenWrt web interface by printing the IP-address of the admin panel in the address line of your browser.
If you don’t know how to access your router control panel, check out our instruction on how to find your router IP.
1. Go to the System > Software and click Update lists.
2. Wait until the operation is completed and press Dismiss.
3. Type openvpn-openssl in the Download and install package field and press OK.
4. Press Install, and wait until the package is downloaded. Then press Dismiss.
5. Type luci-app-openvpn in the Filter field and click Install.
Then type luci-i18n-openvpn-en in the Filter field and click Install.
6. Check the Overwrite files from other package(s) option and press Install.
7. Wait until both packages are installed and press Dismiss.
8. Make sure that all packages were successfully installed. To do this, select the Installed tab and type openvpn in the Filter field.
9. To apply the changes, go to the Status tab and reboot your router.
II. Generate OpenVPN® client settings in your User Office
You need to generate the manual configuration settings in your KeepSolid User Office. There you will get the .ovpn configuration file, VPN server domain name and other settings for your OpenVPN® connection setup.
Follow a few simple steps described in the tutorial How to manually create VPN configurations and you’ll easily get all the required information.
III. Configure OpenVPN® connection on OpenWrt 19.07 router
There are two methods to configure OpenVPN® connection on your OpenWrt router. Choose any of them and then go to step IV of this instruction.
Method 1. Upload the .ovpn configuration file
Method 2. Configure OpenVPN® connection by yourself
Method 1. Upload the .ovpn configuration file
1. Go to the VPN tab > OpenVPN.
2. Find the OVPN configuration field, specify it’s custom name, for example KeepSolidVPN, and choose the .ovpn file that was automatically downloaded from your User Office. Then press Upload.
Method 2. Configure OpenVPN® connection by yourself
1. Open the configuration file that was automatically downloaded to your device with any text editor and create separate text files — ca.key, cert.key, key.key. Paste the appropriate data from the .ovpn file to the corresponding text file.
- ca.key – paste strings between <ca> and </ca>, including ——BEGIN CERTIFICATE—— and ——END CERTIFICATE——
- cert.key – paste strings between <cert> and </cert>, including ——BEGIN CERTIFICATE—— and ——END CERTIFICATE——
- key.key – paste strings between <key> and </key>, including ——BEGIN CERTIFICATE—— and ——END CERTIFICATE——
2. Navigate to the VPN tab > OpenVPN.
3. Type KeepSolidVPN in the Configuration name field, select Client configuration for an ethernet bridge VPN and click Add.
4. Press Edit > Switch to advanced configuration.
Note: If you don’t see the required parameters, select them in the dropdown menu at the bottom of the page, and click Add.
5. Navigate to the Networking tab and configure the following parameters:
- port: 1194
- float: unchecked
- nobind: checked
- dev: tun0
- dev_type: tun
- ifconfig: this field should be blank
- comp-lzo: no
- keepalive: 5 30
- persist-tun: checked
- persist-key: checked
Click Save.
6. Navigate to the VPN tab and enter the following settings:
- client: checked
- remote: paste the Domain name from your User Office and press +
- remote-random: checked
- proto: udp
Click Save.
7. Go to the Cryptography tab.
Click right to ca parameter > choose the previously created ca.key file > press Upload file.
Click right to cert parameter > choose the previously created cert.key file > press Upload file.
Click right to key parameter > choose the previously created key.key file > press Upload file.
8. Configure the following parameters:
- auth: SHA512
- cipher: AES-256-CBC
- keysize: 256
- tls_cipher: DHE-RSA-AES-256-SHA
- ns-cert-type: server
- remote-cert-tis: server
Click Save & Apply.
IV. Add OpenVPN® interface and configure DNS settings
1. Go to Network > Interfaces. Click the Add new interface… button.
2. Enter the following data and click Submit:
- Name: VPN_U
- Protocol: Unmanaged
- Interface: Custom Interface: tun0
Click Create Interface.
3. Enable the Bring up on boot parameter.
4. Go to the Advanced Settings tab and disable Use built-in IPv6-management.
5. Click Save.
6. Navigate to WAN > Edit > Advanced Settings. Uncheck the Use DNS servers advertised by peer parameter and set 10.200.0.1 value for Use custom DNS server. Press + button.
7. Go to the Firewall Settings tab.
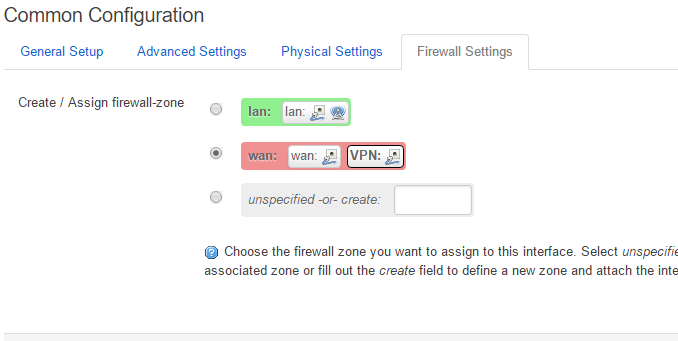
8. In the Create / Assign firewall-zone field enter VPNU_FW.
9. Click Save.
11. Go to Network > Firewall, select VPNU_FW and click Edit.
12. In the General Settings tab, configure the following settings:
- Input: reject
- Output: accept
- Forward: reject
- Masquerading: checked
- MSS clamping: checked
- Covered networks: checked VPN_U
- Allow forward from source zones: check lan
Click Save.
13. Go to VPN > OpenVPN.
14. Mark checkbox Enabled for KeepSolidVPN and press Save & Apply.
15. Wait for a minute and click Start.
Great! You’ve successfully set up and configured the OpenVPN® client on your TP-Link TL-WR841N with OpenWrt 19.07 firmware.
If you need to set up VPN on any other devices, check our Manuals page. If you have other questions or comments, feel free to contact our customer support via [email protected].
“OpenVPN” is a registered trademark of OpenVPN Inc.
Get VPN Unlimited right now!
Select you perfect subscription plan (like VPN Lifetime plan) and get a 30-day money-back guarantee.
DevicesRoutersTP-Link
By September 8, 2023September 12th, 2023No Comments
TP-Link Archer WiFi routers are a great choice for home office and small business users alike. With impressive WiFi performance and full support for OpenVPN connections, setting up VPN for your home or office network has never been easier.
In this guide, we take you through the key technical specification of one of the most popular models, the TP-Link Archer A9 and show you how to configure an OpenVPN connection on your TP-Link Archer WiFi router and connect on Mac, iPhone and iPad.
Tech specs
Series: TP-Link Archer WiFi Routers
Model: A9 (AC1900)
Supported VPN protocols: OpenVPN, PPTP
Suitable for: Home Office users
WiFi capability: Dual-Band
WiFi speed: 5 GHz: 1300 Mbps (802.11ac), 2.4 GHz: 600 Mbps (802.11n)

Set up OpenVPN on a TP-Link Archer Router
Setting up an OpenVPN server on your TP-Link Archer router is simple and can be completed in three steps.
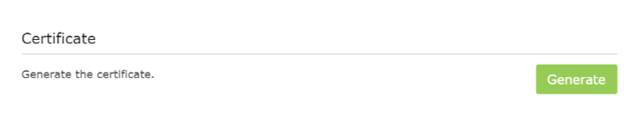
Step one: Generate OpenVPN certificate
To get started, log into the web interface of your TP-Link Archer router. Then, switch to the Advanced tab and go to VPN Server > OpenVPN. Here you will see your OpenVPN configuration options.
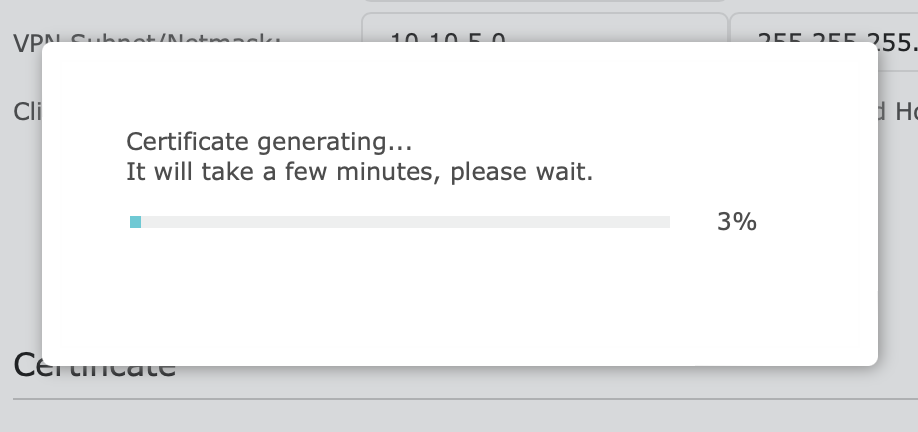
The first step is to generate the certificate for the OpenVPN server. Go to the section Certificate and click Generate:

Generate the OpenVPN certificate
After a few minutes, your certificate will be generated and you can enable the OpenVPN server.
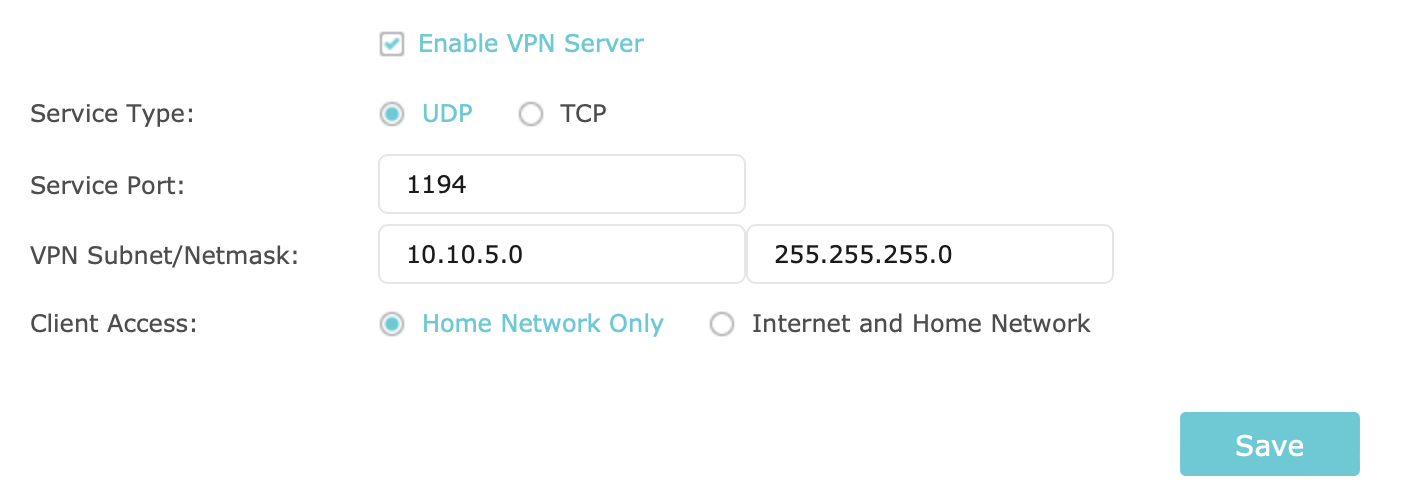
Step two: Enable OpenVPN server
Check the box Enable VPN server and fill in the settings as shown in the screenshot, making sure to provide the subnet you are using for the VPN.
Click to save your settings:
Step three: Export your configuration
Finally, go to the section Configuration File, where you can export your OpenVPN connection with all your settings, ready to connect in the VPN client:

Step four (optional): Set up Dynamic DNS
If you don’t have a permanent, static IP address from your ISP (internet service provider), we recommend setting up Dynamic DNS (DDNS).
What is Dynamic DNS?
DDNS is a service that automatically updates DNS records whenever your dynamic IP address updates. For many (e.g. home or small business users), it’s a convenient alternative to registering for a fixed IP address, which can often be expensive.
Especially when setting up a VPN server, it’s a low-effort way to ensure your IP address will always be updated, meaning you don’t have to manually update the connection whenever your IP address changes – which can be anything from every few days to every few months. Learn more →
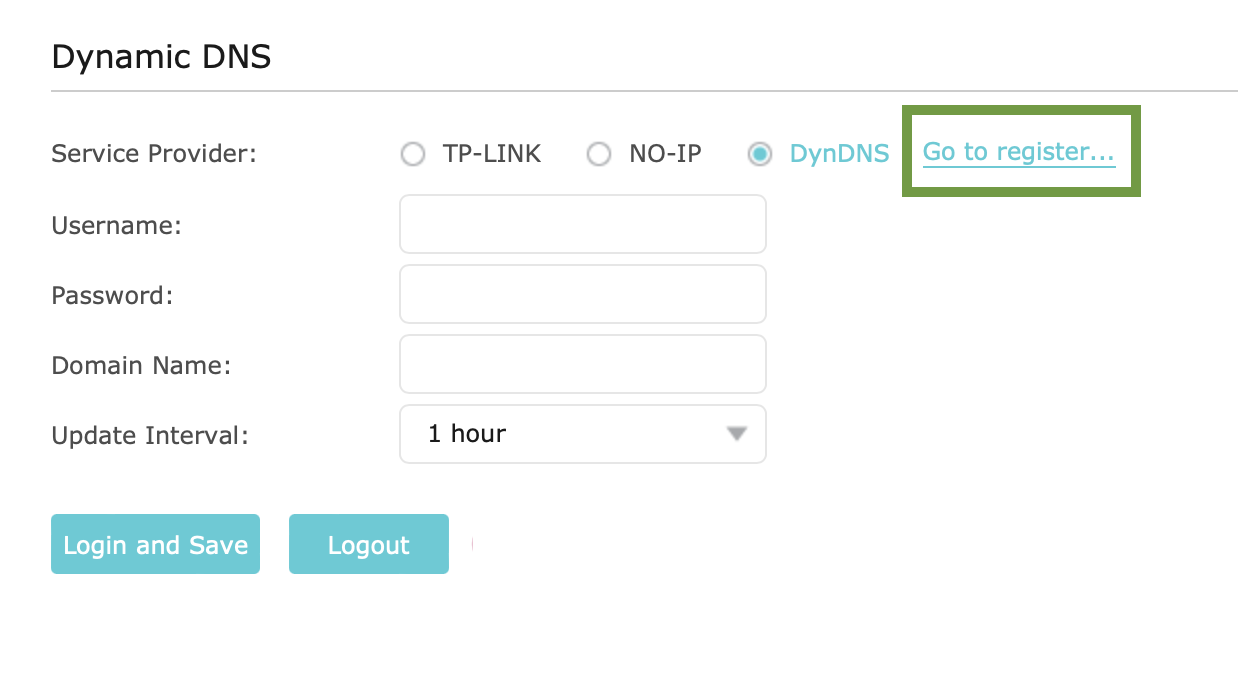
To configure DDNS on your TP-Link Archer, stay in the Advanced tab and go to Network > Dynamic DNS.
Here you will see the DDNS services supported by your router (e.g. NO-IP or DynDNS), you also have the opportunity to use TP-Link’s own Dynamic DNS service. If you already have an account, enter your login details in this view:
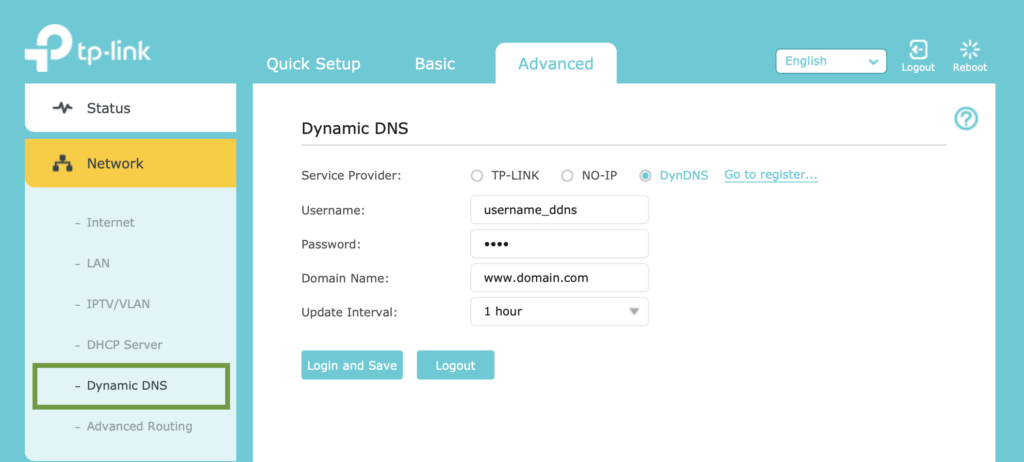
Log in with your DDNS credentials
Alternatively, click the link to set up an account with one of the supported providers:
Once you have completed the VPN setup on your TP-Link Archer router, you can go ahead and get connected on your Mac, iPhone or iPad.
Connect to your TP-Link Archer Router on Mac, iPhone, iPad
In order to connect to your TP-Link via OpenVPN, you will need a VPN client. VPN Tracker is the best VPN client for Mac, iPhone and iPad and fully supports OpenVPN connections to TP-Link Archer devices – get connected in seconds.
Carry out the following steps:
- Open the VPN Tracker connection creator for TP-Link Archer
- Upload the OpenVPN configuration file you created on your device to import your connection settings
- Save your connection in your VPN Tracker account using secure end-to-end encryption for easy access on Mac, iPhone or iPad

Upload your .ovpn configuration file to import your connection settings
Your VPN Tracker benefits
- Secure remote access to your company network, home office, and Smart Home — all in one app
- Use your own VPN gateway
-
Ready-made profiles for 300+ VPN devices
- Configuration wizard for a smooth and fast setup
- For Mac, iPhone, iPad
- Discover all features