OpenVPN GUI

Installation Instructions for OpenVPN GUI for Windows
OpenVPN-GUI has been bundled with OpenVPN installers for a long time, so there
is rarely a need to install it separately. Bleeding-edge
versions of OpenVPN-GUI are available in OpenVPN snapshot
installers based on Git master
branch. OpenVPN-GUI gets installed by default in all OpenVPN installers.
Installation using the official OpenVPN installers
- Download an OpenVPN installer
- If you have a previous version of OpenVPN GUI running, shut it down.
Make sure it’s closed by ALL logged on users. - Run the OpenVPN installer
Manual installation of OpenVPN GUI
- First install OpenVPN using an official installer as described above.
- Build your own version of OpenVPN GUI from source. See BUILD.rst
for build instructions. From the build tree copy openvpn-gui.exe,
libopenvpn_plap.dll, openvpn-plap-install.reg and openvpn-plap-uninstall.reg
to OpenVPN’s bin folder.
Default is C:\Program Files\OpenVPN\bin\. You must put it in this folder
because OpenVPN GUI depends on the OpenSSL DLLs installed in this folder by
OpenVPN.
Configuring OpenVPN GUI to start on Windows logon
OpenVPN GUI can be configured to start automatically on logon to Windows from
its setting menu. This is default behavior for all users if OpenVPN GUI was
installed by an OpenVPN 2.4 installer using default installer options.
Adding an OpenVPN configuration file
To launch a VPN connections using OpenVPN GUI you need to add an OpenVPN
configuration file with .ovpn suffix. Any text editor (e.g. notepad.exe) can be
used to create a OpenVPN configuration files. Note that log and log-append
options are ignored as OpenVPN GUI redirects the normal output to a log file
itself. There are sample config files in the sample-config folder. Please
refer to the OpenVPN How To for more
information regarding creating the configuration file.
Once the configuration file is ready, you need to let OpenVPN GUI know about it.
There are three ways to do this:
- Place the file into the system-wide location, usually
C:\Program Files\OpenVPN\config\, or any of its immediate
subdirectories. This VPN connection will be visible for all users of the
system. - Place the file into C:\Users\username\OpenVPN\config\, or any of its
immediate subdirectories. The configuration file is only visible for the
user in question. If the user is not a member of the built-in «Administrators»
group or «OpenVPN Administrators» group and tries to launch such a connection,
OpenVPN GUI pops up a UAC, offering to create the latter group (if missing)
and to add the user to it. This will only work if admin-level credentials are
available. - Use the «Import file» function in OpenVPN GUI itself
- See the section on Persistent or Pre-started connections
for how to use OpenVPN GUI to conftrol configurations in
C:\Program Files\OpenVPN\config-auto\ that are started by the automatic service.
Using OpenVPN GUI
When OpenVPN GUI is started your OpenVPN config folders
(C:\Users\username\OpenVPN\config and
C:\Program Files\OpenVPN\config) will be scanned for .ovpn files and the
OpenVPN GUI icon will appear in the system tray. Each OpenVPN configuration
file shows up as a separate menu item in the OpenVPN GUI tray, allowing you to
selectively connect to and disconnect to your VPNs. The config dir will be
re-scanned for new config files every time you open the OpenVPN GUI menu by
right-clicking the icon.
When you choose to connect to a site OpenVPN GUI will launch openvpn with
the specified config file. If you use a passphrase protected key you will be
prompted for the passphrase.
If you want OpenVPN GUI to start a connection automatically when it’s started,
you can use the —connect cmd-line option. The extension of the config file
may be optionally included. Example:
openvpn-gui --connect office.ovpn
OR
openvpn-gui --connect office
Starting version 11.34, any connections active when OpenVPN GUI exits or the user
logs out are automatically reconnected when OpenVPN GUI is restarted.
To get help with OpenVPN GUI please use one of the official OpenVPN support
channels.
Running OpenVPN GUI
Run OpenVPN-GUI as normal user by double clicking on the icon. No
administrative privileges or runas-administrator options are required.
It just works as limited user with the help of Interactive Service which
is enabled by default.
Persistent or Pre-started connections
Starting release 2.5.8 (GUI version 11.30), OpenVPN GUI can
control connections started by the «automatic service»
(OpenVPNService) — also referred to as persistent connections.
OpenVPNService, if running, starts all connection profiles
listed in the config-auto directory in the installation path.
By default, such connections are scanned for, and attempt is
made to attach to their management interfaces if available.
User can then view the status of these connections, and disconnect,
reconnect, detach or re-attach them using the menu items.
It requires that such connections be started with
—management 127.0.0.1 port [pw-file] option in their config file.
pw-file containing a password is optional, but highly recommended.
The password should be a single line of text, preferably shorter than 128
characters of plain ascii.
Further, if —auth-user-pass or any such options requiring
interactive user input are present, the config file must also
contain —management-query-passwords.
This feature may be controlled by changing the Persistent Connections
setting in the General tab of the Settings menu: choose auto
for the default behaviour described above, manual to enumerate
and list such connections but not auto-attach, or disable to not scan
auto-started connection profiles.
Interactively starting connections before logon
Starting release 2.6 (GUI version 11.30), «Start Before Logon»
aka Pre-Logon Access Provider is supported. This feature is not
enabled by default. It may be enabled during installation or
through the General Settings menu of the GUI via the
Start Before Logon check mark.
Only persistent connection profiles described in the previous
section will be listed on the login screen. Ensure that
connections that may be interactively started from login
screen are setup in the config-auto folder, OpenVPNService
is running, and these connections are visible and controllable
from the GUI.
Once those pre-requisites are satisfied, the login screen will
display an icon for Pre-Logon Access Providers, clicking which
will bring up a list of OpenVPN connection profiles available, and
allow connecting or disconnecting them interactively.
Run Connect/Disconnect/Preconnect Scripts
There are three different scripts that OpenVPN GUI can execute to help
with different tasks like mapping network drives.
- Preconnect If a file named «xxx_pre.bat» exist in the config folder
- where xxx is the same as your OpenVPN config file name,
this will be executed BEFORE the OpenVPN tunnel is established. - Connect If a file named «xxx_up.bat» exist in the config folder
- where xxx is the same as your OpenVPN config file name,
this will be executed AFTER the OpenVPN tunnel is established. - Disconnect If a file named «xxx_down.bat» exist in the config folder
- where xxx is the same as your OpenVPN config file name,
this will be executed BEFORE the OpenVPN tunnel is closed.
The outputs of these scripts are redirected to «xxx_pre.log»,
«xxx_up.log» and «xxx_down.log» respectively. These log
files are created in the log_dir and over-written during
each evocation.
Send Commands to a Running Instance of OpenVPN GUI
When an instance of the GUI is running, certain commands may be sent to
it using the command line interface using the following syntax:
openvpn-gui.exe --command *cmd* [*args*]
Currently supported cmds are
- connect
config-name - Connect the configuration named config-name (excluding the
extension .ovpn). If already connected, show the status window. - disconnect
config-name - Disconnect the configuration named config-name if connected.
- reconnect
config-name - Disconnect and then reconnect the configuration named config-name
if connected. - disconnect_all
- Disconnect all active connections.
- silent_connection 0 | 1
- Set the silent connection flag on (1) or off (0)
- exit
- Disconnect all active connections and terminate the GUI process
- rescan
- Rescan the config folders for changes
- import
path - Import the config file pointed to by
path.
If no running instance of the GUI is found, these commands do nothing
except for —command connect config-name which gets interpreted
as —connect config-name
Registry Values affecting the OpenVPN GUI operation
Parameters taken from the global registry values in
HKEY_LOCAL_MACHINE\SOFTWARE\OpenVPN\ key
- (Default)
- The installation directory of openvpn (e.g., C:\Program Files\OpenVPN).
This value must be present. - config_dir
- The global configuration file directory. Defaults to
C:\Program Files\OpenVPN\config - exe_path
- path to openvpn.exe, defaults to C:\Program Files\OpenVPN\bin\openvpn.exe
- priority
-
the windows priority class for each instantiated OpenVPN process,
can be one of:- IDLE_PRIORITY_CLASS
- BELOW_NORMAL_PRIORITY_CLASS
- NORMAL_PRIORITY_CLASS (default)
- ABOVE_NORMAL_PRIORITY_CLASS
- HIGH_PRIORITY_CLASS
- ovpn_admin_group
- The windows group whose membership allows the user to start any configuration file
in their profile (not just those installed by the administrator in the global
config directory). Default: «OpenVPN Administrators». - disable_save_passwords
- Set to a nonzero value to disable the password save feature.
Default: 0 - auto_config_dir
- If persistent connection support is enabled and the so-called automatic
service (OpenVPNService) is running, any config files in this folder are
scanned and listed in the list of connection profiles.
User Preferences
All other OpenVPN GUI registry values are located below the
HKEY_CURRENT_USER\SOFTWARE\OpenVPN-GUI\ key. In a fresh
installation none of these values are present and are not
required for the operation of the program. These keys are only
used for persisting user’s preferences, and the key names
and their values are subject to change.
The user is not expected to edit any of these values directly.
Instead, edit all preferences using the settings menu.
- config_dir
- The user-specific configuration file directory: defaults to
C:\Users\username\OpenVPN\config.
The GUI parses this directory for configuration files before
parsing the global config_dir. - config_ext
- file extension on configuration files, defaults to ovpn
- connectscript_timeout
- Time in seconds to wait for the connect script to finish. If set to 0
the exitcode of the script is not checked. - disconnectscript_timeout
- Time in seconds to wait for the disconnect script to finish. Must be a
value between 1-99. - preconnectscript_timeout
- Time in seconds to wait for the preconnect script to finish. Must be a
value between 1-99. - log_dir
- log file directory, defaults to C:\Users\username\OpenVPN\log
- log_append
- if set to «0», the log file will be truncated every time you start a
connection. If set to «1», the log will be appended to the log file. - silent_connection
- If set to «1», the status window with the OpenVPN log output will
not be shown while connecting. Warnings such as interactive service
not started or multiple config files with same name are also suppressed. - show_balloon
-
0: Never show any connected balloon
1: Show balloon after initial connection is established
2: Show balloon even after re-connects
- config_menu_view
-
0: Use a hierarchical (nested) display of config menu reflecting the directory sturcture of config files if the number of configs exceed 25, else use a flat display
1: Force flat menu
2: Force nested menu
- disable_popup_messages
- If set to 1 echo messages are ignored
- popup_mute_interval
- Amount of time in hours for which repeated echo messages are not displayed.
Defaults to 24 hours. - management_port_offset
- The management interface port is chosen as this offset plus a connection specific index.
Allowed values: 1 to 61000, defaults to 25340.
All of these registry options are also available as cmd-line options.
Use «openvpn-gui —help» for more info about cmd-line options.
Building OpenVPN GUI from source
See BUILD.rst for build instructions.
В последнее время популярности набирает клиент OpenVPN. После подключения к бесплатным VPN серверам в пользователей появляется возможность использования Интернета без ограничений. Все VPN программы и сервисы позволяют с лёгкостью открывать заблокированные сайты. OpenVPN является одним из самых безопасных VPN-протоколов, доступных на сегодняшний день.
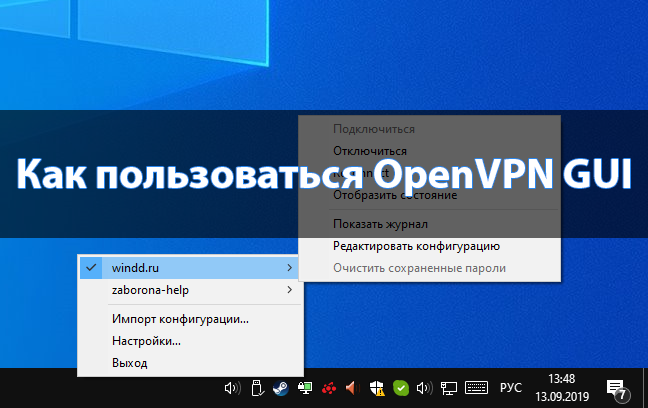
Эта статья собственно и расскажет, как пользоваться OpenVPN GUI. Будем настраивать подключение OpenVPN на примере операционной системы Windows 10. Большинство поставщиков VPN-услуг и экспертов по безопасности действительно рекомендуют OpenVPN. Благодаря открытому исходному коду любой пользователь может его проверить или улучшить.
Как настроить OpenVPN на Windows 10
Как работает OpenVPN
Протокол OpenVPN отвечает за поддержание коммуникации между клиентом и сервером. Как правило, он используется для создания защищённого туннеля между VPN-клиентом и сервером.
Для шифрования и аутентификации OpenVPN использует библиотеку OpenSSL. Кроме того, для передачи данных OpenVPN могут использоваться протоколы UDP или TCP.
- TCP требует отклика от клиента, которому доставлен пакет данных, подтверждения доставки, и для этого ему необходимо установленное заранее соединение. Протокол TCP исключает потери данных, дублирование и перемешивание пакетов, задержки.
- UDP всё это допускает, и соединение для работы ему не требуется. Протокол UDP доставляет пакеты данных гораздо быстрее, потому лучше подходит для приложений, которые рассчитаны на широкую пропускную способность и быстрый обмен.
Как установить OpenVPN
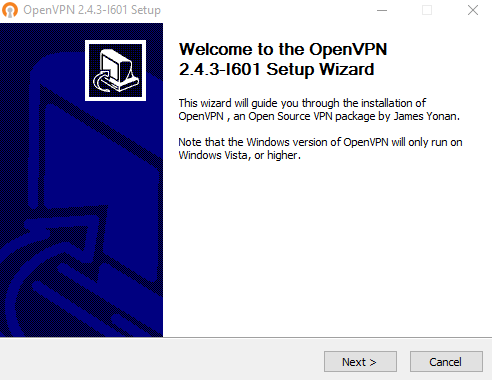
На официальном сайте производителя выберите версию программы для своей операционной системы. Существуют клиенты под все популярные операционные системы: Windows, Linux, MacOS, Android, iOS. Если же Вы загружали установщик с официального сайта, тогда проблем с установкой не возникнет. Запустите установочный файл и следуйте шагам мастера установки.
Как подключиться OpenVPN
Перед подключением нужно выбрать бесплатный VPN сервер, загрузив на компьютер файл конфигурации определённого сервера. Его стоит выбирать исходя из расположения, качества линии, пропускной способности и пинга.
Много разных сайтов содержат бесплатные сервера ретрансляции. Рекомендуем перейти на сайт vpngate.net и выбрать подходящий сервер загрузив файл конфигурации для OpenVPN.
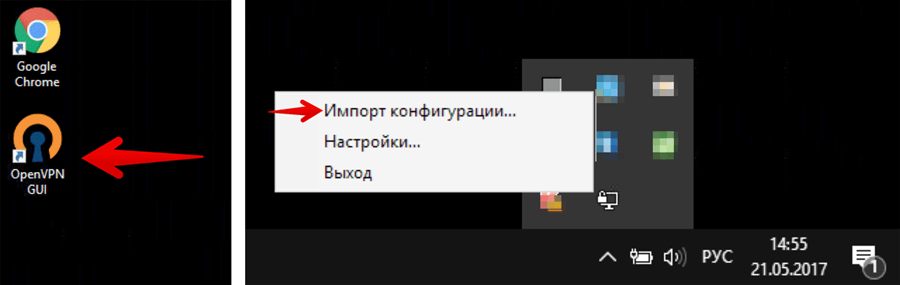
Теперь запустите программу OpenVPN GUI от имени администратора в Windows 10. В противоположном случае просто не удастся подключиться к выбранному серверу.
- На панели задач в контекстном меню OpenVPN выберите Импорт конфигурации… В открывшемся окне проводника укажите расположение ранее загруженной конфигурации.

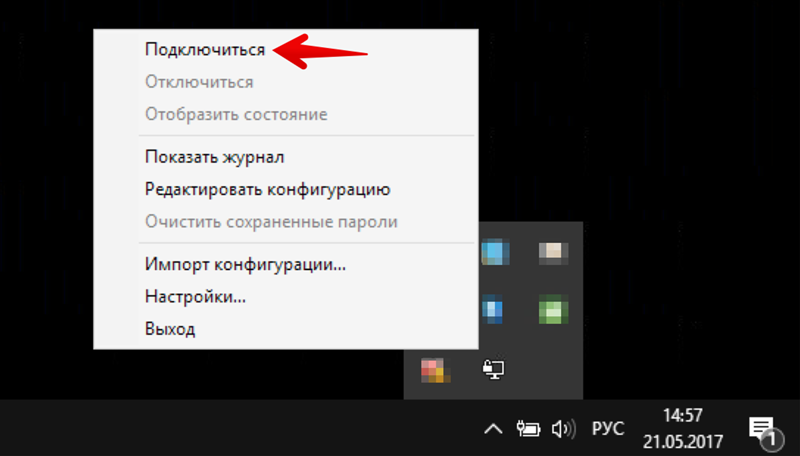
- После импорта можно смело выбирать пункт Подключиться. При необходимости можно импортировать несколько конфигураций. В таком случае подключений будет два или три.

Рекомендуем импортировать несколько разных конфигураций, после чего перейти к их тестированию. Для тестирования можно воспользоваться сервисами проверки скорости Интернета на компьютере Windows 10.
Если же перейти в расположение: C:\ Пользователи\ Имя_пользователя\ OpenVPN\ config, то можно увидеть, и при необходимости удалить, папки с ранее добавленными конфигурациями.
После подключения к определённому серверу весь трафик пользователя будет проходить через VPN. Таким образом, можно будет играть в игры или посещать сайты, заблокированные в регионе. Скорость — далеко не его сильная сторона, но если у Вас скоростной Интернет, то скорость будет приемлемой. Как правило, скорость интернета падает из-за сильного уровня шифрования в OpenVPN.
Заключение
При необходимости для работы сами используем OpenVPN. На данный момент OpenVPN считается лучшим VPN-протоколом. На практике все наши высказывания подтверждаются. После первого использования, даже бесплатных серверов, сложно использовать другие VPN-клиенты. В принципе и без дополнительного программного обеспечения можно настроить VPN соединение на Windows 10.
(3 оценок, среднее: 4,33 из 5)
Администратор и основатель проекта Windd.pro. Интересуюсь всеми новыми технологиями. Знаю толк в правильной сборке ПК. Участник программы предварительной оценки Windows Insider Preview. Могу с лёгкостью подобрать комплектующие с учётом соотношения цены — качества. Мой Компьютер: AMD Ryzen 5 3600 | MSI B450 Gaming Plus MAX | ASUS STRIX RX580 8GB GAMING | V-COLOR 16GB Skywalker PRISM RGB (2х8GB).
На чтение 5 мин Опубликовано Обновлено
OpenVPN GUI – это графический интерфейс для управления OpenVPN, открытым программным обеспечением, используемым для создания виртуальных частных сетей (VPN). OpenVPN позволяет защищенно подключаться к локальной сети или интернету через шифрование данных. Несмотря на то, что OpenVPN поддерживает различные операционные системы, OpenVPN GUI для Windows предоставляет удобный способ использования OpenVPN на компьютерах под управлением Windows.
С помощью OpenVPN GUI для Windows вы можете создать безопасное соединение между вашим компьютером и удаленной сетью, пропуская все данные через шифрование SSL/TLS. Это особенно полезно, если вы работаете с конфиденциальными данными, часто пользуетесь открытыми Wi-Fi сетями или просто хотите обеспечить безопасность своего интернет-соединения.
OpenVPN GUI для Windows обеспечивает простоту в использовании и настройке VPN соединения. Он имеет интуитивно понятный интерфейс, который позволяет легко добавлять, удалять и изменять конфигурации VPN. Вы можете выбрать, какой сервер OpenVPN использовать, настроить параметры подключения, а также включить и отключить VPN соединение одним щелчком мыши.
Открытость и бесплатность OpenVPN в сочетании с удобством использования OpenVPN GUI для Windows делают его одним из самых популярных выборов для создания защищенной VPN сети.
Если вы хотите обеспечить свою приватность и безопасность в интернете, а также получить доступ к заблокированным ресурсам, то OpenVPN GUI для Windows – отличное решение для вас. Используйте его для установки VPN соединения на вашем компьютере под управлением Windows и наслаждайтесь защищенным и свободным интернетом.
Содержание
- Openvpn gui for windows: основные преимущества и способы использования
- Установка Openvpn gui for windows
- Настройка Openvpn gui for windows: подключение к серверу
- Основные функции Openvpn gui for windows
Openvpn gui for windows: основные преимущества и способы использования
Основные преимущества OpenVPN GUI для Windows:
- Простота использования: OpenVPN GUI обладает простым и интуитивно понятным интерфейсом, что позволяет даже неопытным пользователям легко настраивать и управлять VPN-соединениями.
- Кросс-платформенность: OpenVPN GUI доступен для использования на различных операционных системах, включая Windows, Linux, macOS и Android.
- Безопасность и шифрование данных: OpenVPN GUI использует современные криптографические алгоритмы для обеспечения безопасности данных и защиты от несанкционированного доступа.
- Поддержка различных типов соединений: OpenVPN GUI позволяет настраивать как клиент-серверные VPN-соединения, так и межсетевые VPN-соединения.
- Расширенные возможности настройки: OpenVPN GUI предлагает широкий набор параметров и настроек, которые позволяют пользователю полностью контролировать и настраивать VPN-соединение согласно своим потребностям и требованиям.
Способы использования OpenVPN GUI для Windows:
- Загрузите и установите OpenVPN GUI на ваш компьютер с операционной системой Windows.
- Запустите приложение и настройте параметры соединения с помощью файлов конфигурации или вручную введя необходимые данные.
- Сохраните настройки и подключитесь к VPN-серверу.
- После успешного подключения вы сможете безопасно обмениваться данными с удаленной сетью или использовать интернет через VPN-соединение.
- По завершении работы с VPN, отключите соединение и закройте приложение.
Использование OpenVPN GUI для Windows позволяет обеспечить безопасное и защищенное интернет-соединение, скрыть ваш IP-адрес и обеспечить конфиденциальность при передаче данных.
Установка Openvpn gui for windows
Для установки Openvpn gui для Windows следуйте инструкциям ниже:
- Перейдите на официальный сайт Openvpn и скачайте последнюю версию Openvpn gui для Windows.
- Запустите инсталляционный файл и следуйте указаниям мастера установки.
- После завершения установки запустите Openvpn gui.
- На панели задач найдите иконку Openvpn gui, щелкните правой кнопкой мыши и выберите «Connect». Если иконка не отображается на панели задач, откройте меню «Пуск» и найдите программу Openvpn gui в списке установленных программ.
- Выберите сервер, с которым хотите установить соединение, и введите свои учетные данные, если это необходимо.
- Нажмите «Connect», чтобы установить соединение с выбранным сервером.
- После успешного подключения иконка Openvpn gui должна измениться на зеленую и отобразить текущий статус подключения.
- Теперь вы можете использовать Openvpn gui для Windows и наслаждаться безопасным интернет-соединением.
Не забудьте настроить свои сетевые настройки и проверьте, что ваш антивирусный и файрволл не блокируют подключение Openvpn.
Настройка Openvpn gui for windows: подключение к серверу
- Скачайте и установите Openvpn gui for windows с официального сайта разработчика.
- Установите на компьютере сертификаты и файлы конфигурации, предоставленные администратором сервера.
- Откройте Openvpn gui for windows.
- Щелкните правой кнопкой мыши по значку Openvpn в системном трее и выберите «Подключиться к серверу».
- Выберите конфигурацию, которую вы хотите использовать для подключения.
- Введите свои учетные данные для авторизации на сервере (если требуется).
- Нажмите кнопку «Подключиться».
После выполнения этих шагов вы будете подключены к удаленному серверу по протоколу OpenVPN и сможете использовать его ресурсы. Если у вас возникнут проблемы с подключением, обратитесь к администратору сервера для получения дополнительной помощи.
Основные функции Openvpn gui for windows
Вот основные функции, которые предоставляет Openvpn gui for windows:
- Установка и настройка VPN-сервера: OpenVPN GUI обеспечивает простой способ установить и настроить сервер VPN для подключения к локальной сети или VPN-сети.
- Настройка клиента VPN: Пользователь может настроить клиентское VPN-подключение, указав параметры сервера, сертификаты и ключи, а также другие настройки безопасности.
- Управление подключениями: OpenVPN GUI позволяет легко управлять подключениями VPN, включая подключение и отключение сервиса, а также отображение текущего статуса подключения.
- Уведомления и логи: Приложение предоставляет уведомления о состоянии подключения, а также возможность просмотра логов для отслеживания событий и ошибок.
- Безопасность и шифрование: OpenVPN GUI поддерживает различные протоколы шифрования, включая AES-256, чтобы обеспечить безопасность и конфиденциальность данных во время VPN-подключения.
- Автоматическое подключение: OpenVPN GUI позволяет настроить автоматическое подключение при запуске операционной системы или при подключении к определенной сети.
- Гибкость и настраиваемость: OpenVPN GUI предлагает различные настройки и опции, которые пользователь может настроить под свои потребности, включая выбор протокола, портов и других параметров.
В целом, Openvpn gui for windows обеспечивает простой и удобный способ настройки и управления VPN-подключениями на компьютере под управлением Windows, обеспечивая безопасность и конфиденциальность данных при работе в сети.
It is designed for DevOps 🧞♂️
If you are a DevOps engineer, you will love our development stack.

Pure Go
Ansible Semaphore is written in pure Go. Porting to any platform takes just a few minutes.
Docker
Docker used at every stage of Ansible Semaphore development. The result is a fully tested image on Docker Hubnorth_east.
MySQL, Postgres or BoltDB
You can opt for the database that aligns with your preferences, eliminating the necessity to uphold an additional database.

VPN, or Virtual Private Network, is a tool that can safeguard your digital identity against cybercrime and online surveillance. Hence, it is crucial to employ one if you’re a concerned user. VPN service providers offer their services via a user-facing client. However, not all VPN clients are equal. While there are dozens of service providers in the market, only a select few stands apart. Then there is also the issue of money, as VPNs are costly to run. That’s where OpenVPN comes into play. The client is not only free to use but also of quality build. Hence, the following article will detail everything regarding OpenVPN installation, configuration, and more.
What is OpenVPN GUI?
Before we delve further into the topic, let us first examine what OpenVPN is and why its GUI is such a big deal for VPN lovers. OpenVPN is an SSL VPN that offers all the features necessary for a VPN client. It implements the OS layer 2 or 3 network extension to secure connections. Furthermore, the VPN client employs the market standard SSL/TLS protocol that supports various authentication methods, making it highly secure. These authentication methods are based on certificates, smart cards, and usernames/passwords. And last but not least, the client can also handle multiple users/servers. Hence, it is scalable. And with the latest update, OpenVPN now supports IPv6 and PolarSSL.
Now coming back to the GUI issue, well it stands for a Graphical User Interface. Thus, it is an interface where users interact with the machine via graphics such as icons, images, menus, visual indicators, representations, etc. A GUI is more liberating than a standard text-based interface where input and output are restricted to only single-line texts.
The steps to install OpenVPN is different on different platforms. Based on the operating system you are using, follow these steps –
If you need detailed step-by-step instructions, please have a look at our OpenVPN installation guide.
Linux
First, we will start by demonstrating OpenVPN installation on a Linux distro but using an RPM package. These distros include SuSE, Fedora, Redhat, etc. Although it is beneficial to find an existing RPM file for the relevant distro, users can always custom-make their own files.
Step 1. First, start the process by creating the file:
rpmbuild -tb openvpn-[version].tar.gzStep 2. After creating the RPM file, install it by using the command:
rpm -ivh openvpn-[details].rpmStep 3. Users can also upgrade an existing installation by using the following command:
rpm -Uvh openvpn-[details].rpmIt is not necessary that everyone should be running an RPM package distro. Hence, those without an RPM package can follow the steps to install OpenVPN.
Those with a Debian, Gentoo, or any Non-RPM based distro can use the apt-get mechanism or emerge. Then there is the universal ./configure method. The steps are:
Step 1. Start by extracting the .tar.gz file.
tar xfz openvpn-[version].tar.gzStep 2. Now cd to the top-level directory and type the following commands:
./configure
make
make install
Windows
Now, OpenVPN offers an exclusive .exe file for Windows, thus installation is pretty straightforward. The steps are as follows:
- First, go to the OpenVPN download page and download the .exe file for Windows.
- Then, locate the file from your Download folder and double-click on the MSI installer for OpenVPN.
- Let the installation Wizard run and click on I Agree to proceed.
- After that, indicate the location for the program files to be installed.
- Then, click on install to initiate the process.
- However, ensure that you have checked the TAP Virtual Ethernet Adapter and OpenVPN GUI boxes.
- Finally, restart the PC to enjoy OpenVPN GUI on your system.
macOS
Tunnelblick is the OpenVPN GUI for macOS. The following steps are suitable for macOS Mojave and higher.
- First, Open the Terminal App on your macOS device. Go to Applications and the Utilities.
- Then, type the following command: curl –output ~/Desktop/Tunnelblick.dmg –location
- Go to the Tunnelblick download page, find the appropriate download package, and copy the download link.
- After that, go back to the Terminal window and paste the link using Command-V.
- Press the Return key and wait for the download to complete.
- Double-click the Tunnelblick disk image on your Desktop to launch the Tunnelblick, and then install the program following the steps.
- Doing so will install the file into your system.
OpenVPN GUI Configuration
Once you have installed the OpenVPN GUI, it’s time to configure it. The following example is based on Windows OS. Here’s how:
Locate the OpenVPN GUI icon
The first step should be locating the OpenVPN GUI icon. Try to find it on the Windows Tray. If not, click the Windows Hidden Icon to draw the hidden apps and find the OpenVPN GUI there.
Preparing the installation for use
- If the installation is not done right, users can encounter the following error – “No readable connection profiles found.” Having a correct config file can resolve this. You can download an OpenVPN config file.
- If it shows this error – “There already exists a config file named…”, You have to rename the file. OpenVPN searches the entire directory of the following location: \Program Files\OpenVPN\config or \Users\$USERNAME\OpenVPN\config. Ensure all files have a unique name.
Importing the first config file
- Right-click the OpenVPN GUI icon and click on Import.
- Then, click on Import File.
- Now, select config.ovpn.
- You will see a message upon successful import.
Different OpenVPN GUI menus
- If you have successfully imported a file, then right-click the OpenVPN GUI icon.
- You will find the Connect option. Below you can find Disconnect and Reconnect and Show Status.
- Further down, users will find the View Log option and Edit Config.
- We suggest not touching the Edit Config option as it can render the OpenVPN GUI useless and users would have to find a new config file.
Username/Password
When you right-click on the icon and click on the Connect tab, you will be prompted for authentication. Most single-user OpenVPN GUI requires a set of credentials such as a username and Password.
Simply enter the correct username and password and connect to the VPN.
This website uses cookies to serve you better. By continuing to use this website, you agree to our cookie and Privacy Policy.