v9.2.2.0p1-Beta
This is a beta-release (non-production ready)
This release includes:
-
Security Fixes:
- Upgrade to LibreSSL 3.7.2. Please refer to https://ftp.openbsd.org/pub/OpenBSD/LibreSSL/libressl-3.7.2-relnotes.txt
- MSI: change inbound firewall rule that opens port 22 to apply to Private networks only
-
Non-Security Fixes:
- Add U2F/Fido2 keys to the agent from other clients: #1961 — thanks @ddrown!
- Fix output codepage after executing scp/sftp/ssh/ssh-keygen command: #2027 — thanks @kemaruya!
- Fix early EOF termination when running git fetch over ssh: #2012 — thanks @cwgreene!
- Revert mark-of-the-web for SCP/SFTP file downloads: #2029
v9.2.0.0p1-Beta
This is a beta-release (non-production ready)
This release includes:
-
Upstream changes from OpenSSH 9.2, which fixes a number of security bugs.
-
Breaking changes — see upstream release notes for more information:
- adds EnableEscapeCommandline to ssh_config, a new option, that controls whether the client-side ~C escape sequence that provides a command-line is available. EnableEscapeCommandline defaults to «no», which disables the ~C escape sequence that was previously enabled by default.
-
Security:
- The sftp server will not attempt to add the Mark-of-the-Web (MOTW) for files uploaded from sftp clients, which reverts the behavior added in 9.1. This is on par with scp behavior for file uploads. File download behavior via scp and sftp remains the same as 9.1, with a best effort attempt to add the MOTW. This change was prompted by Community feedback, as discussed in #2029.
-
Fixes for #2018 and #2019.
v9.1.0.0p1-Beta
This is a beta-release (non-production ready)
This release includes:
-
Upstream changes from OpenSSH 9.0 & OpenSSH 9.1.
-
Breaking changes — see upstream release notes for more information:
- Switches scp from using the legacy scp/rcp protocol to using the sftp protocol by default.
- SetEnv directives in ssh_config and sshd_config are now first-match-wins to match other directives. Previously if an environment variable was multiply specified the last set value would have been used.
- ssh-keygen -A (generate all default host key types) will no longer generate DSA keys.
-
Security Fixes:
- adds Mark of the Web (MOTW) to scp/sftp file transfers, when possible.
-
Fixes for various reliability issues listed here.
-
LibFido2 upgrade to version 1.12.0.
-
LibreSSL upgrade to version 3.6.1.
-
ZLib upgrade to version 1.2.13.
V8.9.1.0p1-Beta
This release includes
-
Security fixes
- Upgrade to LibreSSL 3.4.3. Please refer to #1917
-
Non-security fixes
- [FIDO] PIN is asked twice with keys generated with -O verify-required. #1918
- SSH-Agent installed through MSI is missing required privileges. #1914
- install-sshd.ps1 to allow silent installation #1916
V8.9.0.0p1-Beta
This release includes
-
Upstream changes from OpenSSH 8.9. Please note this release doesn’t have ssh-agent restriction feature. This is tracked as part of #1902.
-
Breaking change
- This release disables RSA signatures using the SHA-1 hash algorithm by default. For more information, refer to «Potentially-incompatible changes» here.
-
Security fixes
- Validate the ACLs of $env:programdata\ssh folder, it’s contents. This is not applicable for windows 10+ / windows server 2019+. For more information, refer to #1900
-
Non-security fixes
- FIDO/U2F hardware authenticators support to Win32-OpenSSH. Thanks to @martelletto, @akshayku.
- PKCS11 support to ssh-agent. Thanks to @yan4321.
- MSI installation package. Thanks to @tmeckel, @heaths.
- Fixes for various reliability issues listed here.
V8.6.0.0p1-Beta
This release includes
-
Upstream changes from OpenSSH 8.6. Please note this release doesn’t have FIDO support.
-
Breaking change
- SSH askpass requires
SSH_ASKPASS_REQUIREenvironment variable to be set as «prefer» (or) «force».
- SSH askpass requires
-
Security fixes
- For non en-us OS, enforce authorized keys for admin users are read from
$env:programdata\ssh\administrators_authorized_keys(#1757) - Ensure only admin users have access to modify the registry entries like DefaultShell (#1754)
- Use
$env:programdata\ssh\ssh_configonly if it has correct file permissions (non-admin users shouldn’t have write permissions)
(#1753)
- For non en-us OS, enforce authorized keys for admin users are read from
-
Non-security fixes
- Allow
authorizedKeysCommandto work with the System user. Thanks to @bkatyl, @NoMoreFood. - Add moduli support.
- Allow support to configure the custom shell arguments.
- Allow SSH connection when the machine name is the same as the user name. Thanks to @oldium.
- For downlevel OS (win10 below), fix the scrolling issue after reaching the end of the screen.
- Write non-English characters to ETW / logfile.
- X11 related bugs . Thanks to @riverar.
- Fixes for various reliability issues listed here.
- Allow
v8.1.0.0p1-Beta
This release includes
- Upstream changes from OpenSSH 8.1
- Added ZLIB compression
- Upgraded LibreSSL to version 2.9.2.1
- Added support for AuthorizedKeysCommand and AuthorizedPrincipalsCommand.
- Read the VTSequence using the console win32 APIs.
- Added support for windows long paths. Thanks to @NoMoreFood.
- Fixes for various reliability issues listed here.
v8.0.0.0p1-Beta
v7.9.0.0p1-Beta
v7.7.2.0p1-Beta
This is a pre-release (non-production ready)
UPDATE -We have updated ssh-shellhost.exe binary (fix for #1222) in V7.7.2.0 payload on 8/4/2018.
This release includes
- Support for auto updating known_hosts via ssh and ssh-keygen
- Optimized group membership resolution that results in vast performance improvement in processing simple user/group configuration rules.
- Fixed descriptor leaks in win32 fstat implementation(#1209) by @cbookg
- Support for handling user resolution in absence of explicit UPN (#1213) by @NoMoreFood
- Various other fixes listed here
Source — https://github.com/PowerShell/openssh-portable/releases/tag/v7.7.2.0
В современных версиях Windows уже есть встроенный SSH сервер на базе пакета OpenSSH. В этой статье мы покажем, как установить и настроить OpenSSH сервер в Windows 10/11 и Windows Server 2022/2019 и подключиться к нему удаленно по защищенному SSH протоколу (как к Linux).
Содержание:
- Установка сервера OpenSSH в Windows
- Настройка SSH сервера в Windows
- Sshd_config: Конфигурационный файл сервера OpenSSH
- Подключение по SSH к Windows компьютеру
- Логи SSH подключений в Windows
Установка сервера OpenSSH в Windows
Пакет OpenSSH Server включен в современные версии Windows 10 (начиная с 1803), Windows 11 и Windows Server 2022/2019 в виде Feature on Demand (FoD). Для установки сервера OpenSSH достаточно выполнить PowerShell команду:
Get-WindowsCapability -Online | Where-Object Name -like ‘OpenSSH.Server*’ | Add-WindowsCapability –Online
Или при помощи команды DISM:
dism /Online /Add-Capability /CapabilityName:OpenSSH.Server~~~~0.0.1.0
Если ваш компьютер подключен к интернету, пакет OpenSSH.Server будет скачан и установлен в Windows.
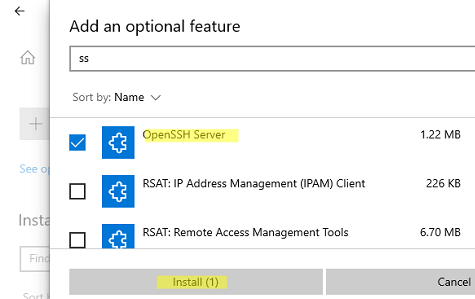
Также вы можете установить сервер OpenSSH в Windows через современную панель Параметры (Settings -> Apps and features -> Optional features -> Add a feature, Приложения -> Управление дополнительными компонентами -> Добавить компонент. Найдите в списке OpenSSH Server и нажмите кнопку Install).
На изолированных от интернета компьютерах вы можете установить компонент с ISO образа Features On Demand (доступен в личном кабинете на сайте Microsoft: MSDN или my.visualstudio.com). Скачайте диск, извлеките его содержимое в папку c:\FOD (достаточно распаковать извлечь файл
OpenSSH-Server-Package~31bf3856ad364e35~amd64~~.cab
), выполните установку из локального репозитория:
Add-WindowsCapability -Name OpenSSH.Server~~~~0.0.1.0 -Online -Source c:\FOD
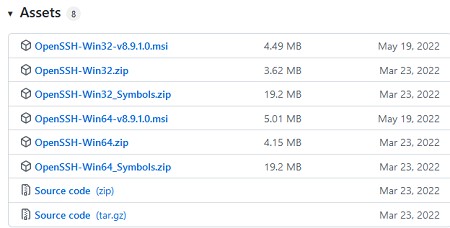
Также доступен MSI установщик OpenSSH для Windows в официальном репозитории Microsoft на GitHub (https://github.com/PowerShell/Win32-OpenSSH/releases/). Например, для Windows 10 x64 нужно скачать и установить пакет OpenSSH-Win64-v8.9.1.0.msi. Следующая PowerShell команда скачает MSI файл и установит клиент и сервер OpenSSH:
Invoke-WebRequest https://github.com/PowerShell/Win32-OpenSSH/releases/download/v8.9.1.0p1-Beta/OpenSSH-Win64-v8.9.1.0.msi -OutFile $HOME\Downloads\OpenSSH-Win64-v8.9.1.0.msi -UseBasicParsing
msiexec /i c:\users\root\downloads\OpenSSH-Win64-v8.9.1.0.msi
Также вы можете вручную установить OpenSSH сервер в предыдущих версиях Windows (Windows 8.1, Windows Server 2016/2012R2). Пример установки Win32-OpenSSH есть в статье “Настройка SFTP сервера (SSH FTP) в Windows”.
Чтобы проверить, что OpenSSH сервер установлен, выполните:
Get-WindowsCapability -Online | ? Name -like 'OpenSSH.Ser*'
State : Installed

Настройка SSH сервера в Windows
После установки сервера OpenSSH в Windows добавляются две службы:
- ssh-agent (OpenSSH Authentication Agent) – можно использовать для управления закрытыми ключами если вы настроили SSH аутентификацию по ключам;
- sshd (OpenSSH SSH Server) – собственно сам SSH сервер.
Вам нужно изменить тип запуска службы sshd на автоматический и запустить службу с помощью PowerShell:
Set-Service -Name sshd -StartupType 'Automatic'
Start-Service sshd

С помощью nestat убедитесь, что теперь в системе запущен SSH сервер и ждет подключений на порту TCP:22 :
netstat -na| find ":22"

Проверьте, что включено правило брандмауэра (Windows Defender Firewall), разрешающее входящие подключения к Windows по порту TCP/22.
Get-NetFirewallRule -Name *OpenSSH-Server* |select Name, DisplayName, Description, Enabled
Name DisplayName Description Enabled
---- ----------- ----------- -------
OpenSSH-Server-In-TCP OpenSSH SSH Server (sshd) Inbound rule for OpenSSH SSH Server (sshd) True

Если правило отключено (состоянии Enabled=False) или отсутствует, вы можете создать новое входящее правило командой New-NetFirewallRule:
New-NetFirewallRule -Name sshd -DisplayName 'OpenSSH Server (sshd)' -Enabled True -Direction Inbound -Protocol TCP -Action Allow -LocalPort 22
Рассмотрим, где храниться основные компоненты OpenSSH:
- Исполняемые файлы OpenSSH Server находятся в каталоге
C:\Windows\System32\OpenSSH\
(sshd.exe, ssh.exe, ssh-keygen.exe, sftp.exe и т.д.) - Конфигурационный файл sshd_config (создается после первого запуска службы):
C:\ProgramData\ssh - Файлы authorized_keys и ssh ключи можно хранить в профиле пользователей:
%USERPROFILE%\.ssh\
Sshd_config: Конфигурационный файл сервера OpenSSH
Настройки сервере OpenSSH хранятся в конфигурационном файле %programdata%\ssh\sshd_config. Это обычный текстовый файл с набором директив. Для редактирования можно использовать любой текстовый редактор (я предпочитаю notepad++). Можно открыть с помощью обычного блокнота:
start-process notepad C:\Programdata\ssh\sshd_config
Например, чтобы запретить SSH подключение для определенного доменного пользователя (и всех пользователей указанного домена), добавьте в конце файле директивы:
DenyUsers winitpro\[email protected]
DenyUsers corp\*
Чтобы разрешить подключение только для определенной доменной группы:
AllowGroups winitpro\sshadmins
Либо можете разрешить доступ для локальной группы:
AllowGroups sshadmins
По умолчанию могут к openssh могут подключаться все пользователи Windows. Директивы обрабатываются в следующем порядке: DenyUsers, AllowUsers, DenyGroups,AllowGroups.
Можно запретить вход под учетными записями с правами администратора, в этом случае для выполнения привилегированных действий в SSH сессии нужно делать runas.
DenyGroups Administrators
Следующие директивы разрешают SSH доступ по ключам (SSH аутентификации в Windows с помощью ключей описана в отдельной статье) и по паролю:
PubkeyAuthentication yes
PasswordAuthentication yes
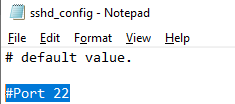
Вы можете изменить стандартный SSH порт TCP/22, на котором принимает подключения OpenSSH в конфигурационном файле sshd_config в директиве Port.
После любых изменений в конфигурационном файле sshd_config нужно перезапускать службу sshd:
restart-service sshd
Подключение по SSH к Windows компьютеру
Теперь вы можете попробовать подключиться к своей Windows 10 через SSH клиент (в этом примере я использую putty).
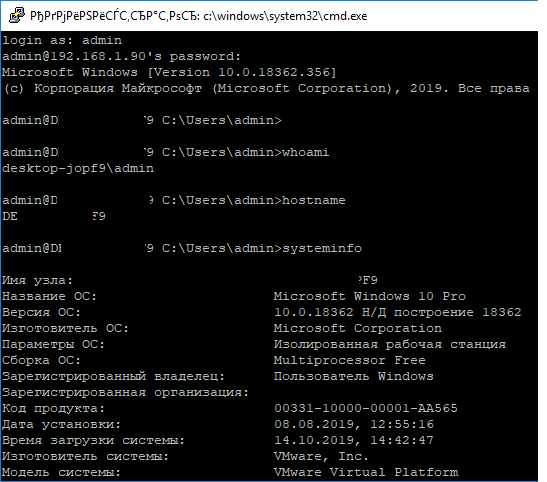
Вы можете использовать встроенный SSH клиентом Windows для подключения к удаленному хосту. Для этого нужно в командной строке выполнить команду:
ssh [email protected]
В этом примере
alexbel
– имя пользователя на удаленном Windows компьютере, и 192.168.31.102 – IP адрес или DNS имя компьютера.
Обратите внимание что можно использовать следующие форматы имен пользователей Windows при подключении через SSH:
-
alex@server1
– локальный пользователь Windows -
[email protected]@server1
–пользователь Active Directory (в виде UPN) или аккаунт Microsoft/ Azure(Microsoft 365) -
winitpro\alex@server1
– NetBIOS формат имени
В домене Active Directory можно использовать Kerberos аутентификацию в SSH. Для этого в sshd_config нужно включить параметр:
GSSAPIAuthentication yes
После этого можно прозрачно подключать к SSH сервер с Windows компьютера в домене из сессии доменного подключается. В этом случае пароль пользователя не указывается и выполняется SSO аутентификация через Kerberos:
ssh -K server1
При первом подключении появится стандартный запрос на добавление узла в список известных SSH хостов.
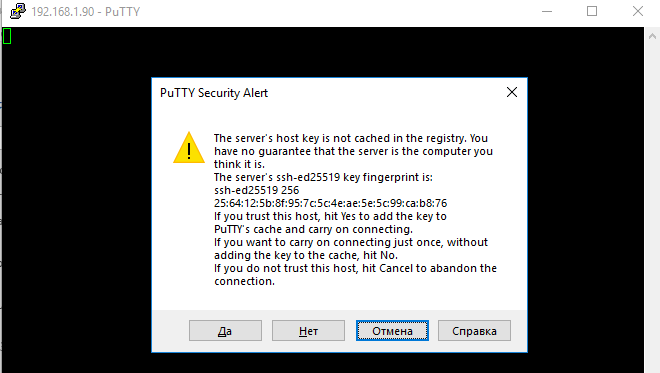
Нажимаем Да, и в открывшееся окне авторизуемся под пользователем Windows.
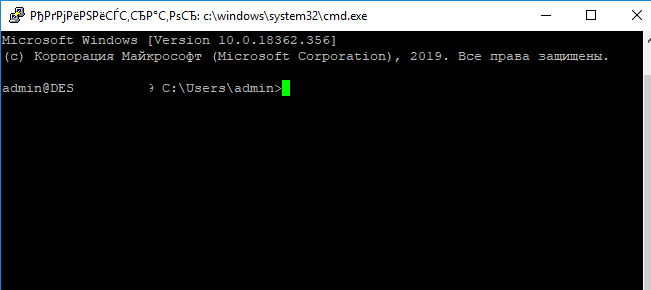
При успешном подключении запускается командная оболочка cmd.exe со строкой-приглашением.
admin@win10tst C:\Users\admin>
В командной строке вы можете выполнять различные команды, запускать скрипты и программы.
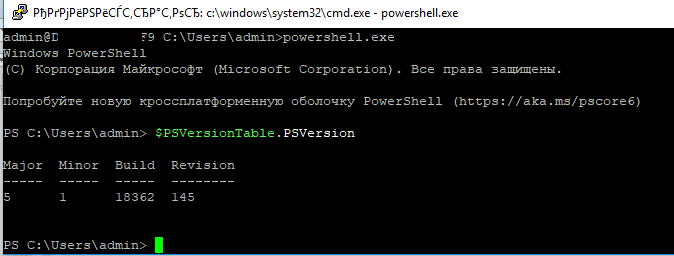
Я предпочитаю работать в командной строке PowerShell. Чтобы запустить интерпретатор PowerShell, выполните:
powershell.exe
Чтобы изменить командную оболочку (Shell) по умолчанию в OpenSSH с cmd.exe на PowerShell, внесите изменение в реестр такой командой:
New-ItemProperty -Path "HKLM:\SOFTWARE\OpenSSH" -Name DefaultShell -Value "C:\Windows\System32\WindowsPowerShell\v1.0\powershell.exe" -PropertyType String –Force
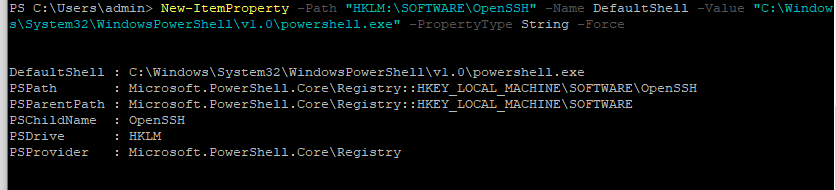
Осталось перезапустить SSH подключение и убедиться, что при подключении используется командный интерпретатор PowerShell (об этом свидетельствует приглашение
PS C:\Users\admin>
).
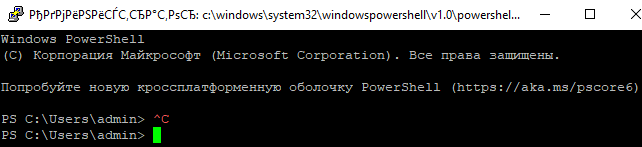
В SSH сессии запустилась командная строка PowerShell, в которой работают привычные функции: авто дополнение, раскраска модулем PSReadLine, история команд и т.д. Если текущий пользователь входит в группу локальных администраторов, то все команды в его сессии выполняются с повышенными правами даже при включенном UAC.
Логи SSH подключений в Windows
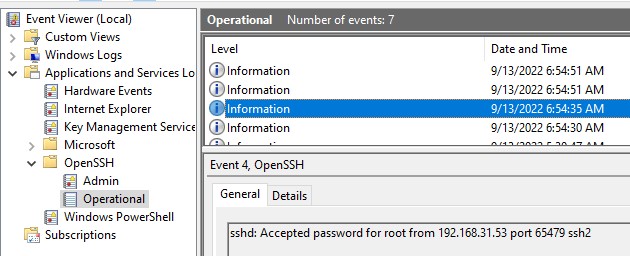
В Windows логи подключений к SSH серверу по-умолчанию пишутся не в текстовые файлы, а в отдельный журнал событий через Event Tracing for Windows (ETW). Откройте консоль Event Viewer (
eventvwr.msc
>) и перейдите в раздел Application and services logs -> OpenSSH -> Operational.
При успешном подключении с помощью к SSH серверу с помощью пароля в журнале появится событие:
EventID: 4
sshd: Accepted password for root from 192.168.31.53 port 65479 ssh2
Если была выполнена аутентификация с помощью SSH ключа, событие будет выглядеть так:
sshd: Accepted publickey for locadm from 192.168.31.53 port 55772 ssh2: ED25519 SHA256:FEHDEC/J72Fb2zC2oJNb45678967kghH43h3bBl31ldPs
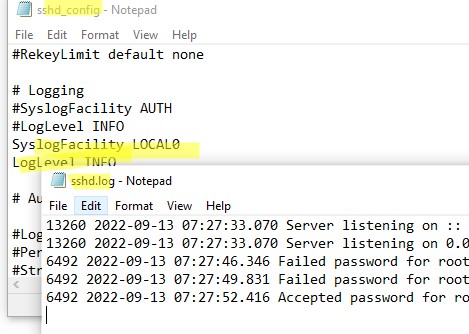
Если вы хотите, чтобы логи писались в локальный текстовый файл, нужно в файле sshd_config включить параметры:
SyslogFacility LOCAL0
LogLevel INFO
Перезапустите службу sshd и провеьте, что теперь логи SSH сервера пишутся в файл C:\ProgramData\ssh\logs\sshd.log
Установка сервера OpenSSH в Windows
Пакет OpenSSH Server включен в современные версии Windows 10 (начиная с 1803), Windows 11 и Windows Server 2022/2019 в виде Feature on Demand (FoD). Для установки сервера OpenSSH достаточно выполнить PowerShell команду:
Get-WindowsCapability -Online | Where-Object Name -like ‘OpenSSH.Server*’ | Add-WindowsCapability –Online
Или при помощи команды DISM:
dism /Online /Add-Capability /CapabilityName:OpenSSH.Server~~~~0.0.1.0
Если ваш компьютер подключен к интернету, пакет OpenSSH.Server будет скачан и установлен в Windows.
Также вы можете установить сервер OpenSSH в Windows через современную панель Параметры (Settings -> Apps and features -> Optional features -> Add a feature, Приложения -> Управление дополнительными компонентами -> Добавить компонент. Найдите в списке OpenSSH Server и нажмите кнопку Install).

Здесь также можно установить набор инструментов администратора Remote Server Administration Tools (RSAT).
На изолированных от интернета компьютерах вы можете установить компонент с ISO образа Features On Demand (доступен в личном кабинете на сайте Microsoft: MSDN или my.visualstudio.com). Скачайте диск, извлеките его содержимое в папку c:\FOD (достаточно распаковать извлечь файл OpenSSH-Server-Package~31bf3856ad364e35~amd64~~.cab ), выполните установку из локального репозитория:
Add-WindowsCapability -Name OpenSSH.Server~~~~0.0.1.0 -Online -Source c:\FOD
Также доступен MSI установщик OpenSSH для Windows в официальном репозитории Microsoft на GitHub (https://github.com/PowerShell/Win32-OpenSSH/releases/). Например, для Windows 10 x64 нужно скачать и установить пакет OpenSSH-Win64-v8.9.1.0.msi. Следующая PowerShell команда скачает MSI файл и установит клиент и сервер OpenSSH:
Invoke-WebRequest https://github.com/PowerShell/Win32-OpenSSH/releases/download/v8.9.1.0p1-Beta/OpenSSH-Win64-v8.9.1.0.msi -OutFile $HOME\Downloads\OpenSSH-Win64-v8.9.1.0.msi -UseBasicParsingmsiexec /i c:\users\root\downloads\OpenSSH-Win64-v8.9.1.0.msi

Также вы можете вручную установить OpenSSH сервер в предыдущих версиях Windows (Windows 8.1, Windows Server 2016/2012R2). Пример установки Win32-OpenSSH есть в статье “Настройка SFTP сервера (SSH FTP) в Windows”.
Чтобы проверить, что OpenSSH сервер установлен, выполните:
Get-WindowsCapability -Online | ? Name -like 'OpenSSH.Ser*'
State : Installed

После установки сервера OpenSSH в Windows добавляются две службы:
- ssh-agent (OpenSSH Authentication Agent) – можно использовать для управления закрытыми ключами если вы настроили SSH аутентификацию по ключам;
- sshd (OpenSSH SSH Server) – собственно сам SSH сервер.
Вам нужно изменить тип запуска службы sshd на автоматический и запустить службу с помощью PowerShell:
Set-Service -Name sshd -StartupType 'Automatic'
Start-Service sshd

С помощью nestat убедитесь, что теперь в системе запущен SSH сервер и ждет подключений на порту TCP:22 :
netstat -na| find ":22"

Проверьте, что включено правило брандмауэра (Windows Defender Firewall), разрешающее входящие подключения к Windows по порту TCP/22.
Get-NetFirewallRule -Name *OpenSSH-Server* |select Name, DisplayName, Description, Enabled
Name DisplayName Description Enabled
---- ----------- ----------- -------
OpenSSH-Server-In-TCP OpenSSH SSH Server (sshd) Inbound rule for OpenSSH SSH Server (sshd) True

Если правило отключено (состоянии Enabled=False) или отсутствует, вы можете создать новое входящее правило командой New-NetFirewallRule:
New-NetFirewallRule -Name sshd -DisplayName 'OpenSSH Server (sshd)' -Enabled True -Direction Inbound -Protocol TCP -Action Allow -LocalPort 22
Рассмотрим, где храниться основные компоненты OpenSSH:
- Исполняемые файлы OpenSSH Server находятся в каталоге
C:\Windows\System32\OpenSSH\(sshd.exe, ssh.exe, ssh-keygen.exe, sftp.exe и т.д.) - Конфигурационный файл sshd_config (создается после первого запуска службы):
C:\ProgramData\ssh - Файлы authorized_keys и ssh ключи можно хранить в профиле пользователей:
%USERPROFILE%\.ssh\
Sshd_config: Конфигурационный файл сервера OpenSSH
Настройки сервере OpenSSH хранятся в конфигурационном файле %programdata%\ssh\sshd_config. Это обычный текстовый файл с набором директив. Для редактирования можно использовать любой текстовый редактор (я предпочитаю notepad++). Можно открыть с помощью обычного блокнота:
start-process notepad C:\Programdata\ssh\sshd_config
Например, чтобы запретить SSH подключение для определенного доменного пользователя (и всех пользователей указанного домена), добавьте в конце файле директивы:
DenyUsers winitpro\admin@192.168.1.10
DenyUsers corp\*
Чтобы разрешить подключение только для определенной доменной группы:
AllowGroups winitpro\sshadmins
Либо можете разрешить доступ для локальной группы:
AllowGroups sshadmins
По умолчанию могут к openssh могут подключаться все пользователи Windows. Директивы обрабатываются в следующем порядке: DenyUsers, AllowUsers, DenyGroups,AllowGroups.
Можно запретить вход под учетными записями с правами администратора, в этом случае для выполнения привилегированных действий в SSH сессии нужно делать runas.
DenyGroups Administrators
Следующие директивы разрешают SSH доступ по ключам (SSH аутентификации в Windows с помощью ключей описана в отдельной статье) и по паролю:
PubkeyAuthentication yes
PasswordAuthentication yes
Вы можете изменить стандартный SSH порт TCP/22, на котором принимает подключения OpenSSH в конфигурационном файле sshd_config в директиве Port.

После любых изменений в конфигурационном файле sshd_config нужно перезапускать службу sshd:
restart-service sshd
Подключение по SSH к Windows компьютеру
Теперь вы можете попробовать подключиться к своей Windows 10 через SSH клиент (в этом примере я использую putty).
Вы можете использовать встроенный SSH клиентом Windows для подключения к удаленному хосту. Для этого нужно в командной строке выполнить команду:
ssh alexbel@192.168.31.102
В этом примере alexbel – имя пользователя на удаленном Windows компьютере, и 192.168.31.102 – IP адрес или DNS имя компьютера.
Обратите внимание что можно использовать следующие форматы имен пользователей Windows при подключении через SSH:
-
alex@server1– локальный пользователь Windows -
alex@winitpro.ru@server1–пользователь Active Directory (в виде UPN) или аккаунт Microsoft/ Azure(Microsoft 365) -
winitpro\alex@server1– NetBIOS формат имени
В домене Active Directory можно использовать Kerberos аутентификацию в SSH. Для этого в sshd_config нужно включить параметр:
GSSAPIAuthentication yes
После этого можно прозрачно подключать к SSH сервер с Windows компьютера в домене из сессии доменного подключается. В этом случае пароль пользователя не указывается и выполняется SSO аутентификация через Kerberos:
ssh -K server1
При первом подключении появится стандартный запрос на добавление узла в список известных SSH хостов.

Нажимаем Да, и в открывшееся окне авторизуемся под пользователем Windows.

При успешном подключении запускается командная оболочка cmd.exe со строкой-приглашением.
admin@win10tst C:\Users\admin>
В командной строке вы можете выполнять различные команды, запускать скрипты и программы.

Я предпочитаю работать в командной строке PowerShell. Чтобы запустить интерпретатор PowerShell, выполните:
powershell.exe

Чтобы изменить командную оболочку (Shell) по умолчанию в OpenSSH с cmd.exe на PowerShell, внесите изменение в реестр такой командой:
New-ItemProperty -Path "HKLM:\SOFTWARE\OpenSSH" -Name DefaultShell -Value "C:\Windows\System32\WindowsPowerShell\v1.0\powershell.exe" -PropertyType String –Force

Осталось перезапустить SSH подключение и убедиться, что при подключении используется командный интерпретатор PowerShell (об этом свидетельствует приглашение PS C:\Users\admin> ).

В SSH сессии запустилась командная строка PowerShell, в которой работают привычные функции: авто дополнение, раскраска модулем PSReadLine, история команд и т.д. Если текущий пользователь входит в группу локальных администраторов, то все команды в его сессии выполняются с повышенными правами даже при включенном UAC.
OpenSSH сервер в Windows можно использовать в различных сценариях SSH туннелирования.
Логи SSH подключений в Windows
В Windows логи подключений к SSH серверу по-умолчанию пишутся не в текстовые файлы, а в отдельный журнал событий через Event Tracing for Windows (ETW). Откройте консоль Event Viewer ( eventvwr.msc >) и перейдите в раздел Application and services logs -> OpenSSH -> Operational.
При успешном подключении с помощью к SSH серверу с помощью пароля в журнале появится событие:
EventID: 4
sshd: Accepted password for root from 192.168.31.53 port 65479 ssh2

Если была выполнена аутентификация с помощью SSH ключа, событие будет выглядеть так:
sshd: Accepted publickey for locadm from 192.168.31.53 port 55772 ssh2: ED25519 SHA256:FEHDEC/J72Fb2zC2oJNb45678967kghH43h3bBl31ldPs
Если вы хотите, чтобы логи писались в локальный текстовый файл, нужно в файле sshd_config включить параметры:
SyslogFacility LOCAL0
LogLevel INFO
Перезапустите службу sshd и провеьте, что теперь логи SSH сервера пишутся в файл C:\ProgramData\ssh\logs\sshd.log

Documentation » Using WinSCP » Guides » Other »
Microsoft maintains a port of OpenSSH for Windows. You can use the package to set up an SFTP/SSH server on Windows.
- Installing SFTP/SSH Server
- On Windows 11 and Windows 10
- On earlier versions of Windows
- Configuring SSH server
- Setting up SSH public key authentication
- Connecting to the server
- Finding Host Key
- Connecting
- Further reading
Advertisement
Installing SFTP/SSH Server
On Windows 11 and Windows 10
- On Windows 11:
- Go to Settings > Apps > Optional features and click on View features.
- Locate “OpenSSH server” feature, select it, click Next, and then click Install.
- On Windows 10 (version 1803 and newer):
- Go to Settings > Apps > Apps & features > Optional features and click on Add a feature.
- Locate “OpenSSH server” feature, expand it, and select Install.
Binaries are installed to %WINDIR%\System32\OpenSSH. Configuration file (sshd_config) and host keys are installed to %ProgramData%\ssh (only after the server is started for the first time).
You may still want to use the following manual installation if you want to install a newer version of OpenSSH than the one built into Windows.
On earlier versions of Windows
- Download the latest OpenSSH for Windows binaries (package
OpenSSH-Win64.ziporOpenSSH-Win32.zip) - As the Administrator, extract the package to
C:\Program Files\OpenSSH - As the Administrator, install sshd and ssh-agent services:
powershell.exe -ExecutionPolicy Bypass -File install-sshd.ps1
Configuring SSH server
- Allow incoming connections to SSH server in Windows Firewall:
- When installed as an optional feature, the firewall rule “OpenSSH SSH Server (sshd)” should have been created automatically. If not, proceed to create and enable the rule as follows.
- Either run the following PowerShell command as the Administrator:
New-NetFirewallRule -Name sshd -DisplayName 'OpenSSH SSH Server' -Enabled True -Direction Inbound -Protocol TCP -Action Allow -LocalPort 22 -Program "C:\Windows\System32\OpenSSH\sshd.exe"
Replace
C:\Windows\System32\OpenSSH\sshd.exewith the actual path to thesshd.exe(C:\Program Files\OpenSSH\ssh.exe, had you followed the manual installation instructions above). - or go to Windows Security > Firewall & network protection1 > Advanced Settings > Inbound Rules and add a new rule for port 22.
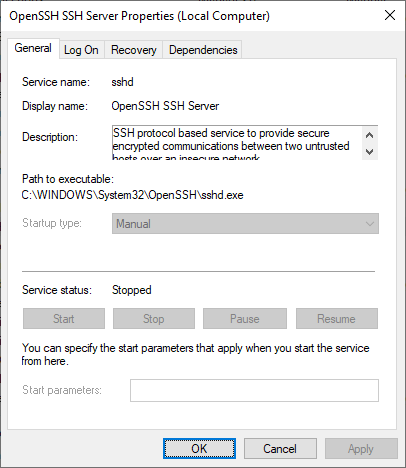
- Start the service and/or configure automatic start:
- Go to Control Panel > System and Security > Administrative Tools and open Services. Locate OpenSSH SSH Server service.
- If you want the server to start automatically when your machine is started: Go to Action > Properties (or just double-click the service). In the Properties dialog, change Startup type to Automatic and confirm.
- Start the OpenSSH SSH Server service by clicking the Start the service link or Action > Start in the menu.
Advertisement
These instructions are partially based on the official deployment instructions.
Setting up SSH public key authentication
Follow a generic guide for Setting up SSH public key authentication in *nix OpenSSH server, with the following difference:
- Create the
.sshfolder (for theauthorized_keysfile) in your Windows account profile folder (typically inC:\Users\username\.ssh).2 - For permissions to the
.sshfolder and theauthorized_keysfile, what matters are Windows ACL permissions, not simple *nix permissions. Set the ACL so that the respective Windows account is the owner of the folder and the file and is the only account that has a write access to them. The account that runs OpenSSH SSH Server service (typicallySYSTEMorsshd) needs to have read access to the file. - Though, with the default Win32-OpenSSH configuration there is an exception set in
sshd_configfor accounts inAdministratorsgroup. For these, the server uses a different location for the authorized keys file:%ALLUSERSPROFILE%\ssh\administrators_authorized_keys(i.e. typicallyC:\ProgramData\ssh\administrators_authorized_keys).
Connecting to the server
Finding Host Key
Before the first connection, find out the fingerprint of the server’s host key by using ssh-keygen.exe for each file.
In Windows command-prompt (run as Administrator), use:
for %f in (%ProgramData%\ssh\ssh_host_*_key) do @%WINDIR%\System32\OpenSSH\ssh-keygen.exe -l -f "%f"
Replace %WINDIR%\System32 with %ProgramFiles%, if appropriate.
In PowerShell (run as Administrator), use:
Get-ChildItem $env:ProgramData\ssh\ssh_host_*_key | ForEach-Object { . $env:WINDIR\System32\OpenSSH\ssh-keygen.exe -l -f $_ }
Replace $env:WINDIR\System32 with $env:ProgramFiles, if appropriate.
You will get an output like this:
C:\Windows\System32\OpenSSH>for %f in (%ProgramData%\ssh\ssh_host_*_key) do @%WINDIR%\System32\OpenSSH\ssh-keygen.exe -l -f "%f"
1024 SHA256:K1kYcE7GHAqHLNPBaGVLOYBQif04VLOQN9kDbiLW/eE martin@example (DSA)
256 SHA256:7pFXY/Ad3itb6+fLlNwU3zc6X6o/ZmV3/mfyRnE46xg martin@example (ECDSA)
256 SHA256:KFi18tCRGsQmxMPioKvg0flaFI9aI/ebXfIDIOgIVGU martin@example (ED25519)
2048 SHA256:z6YYzqGiAb1FN55jOf/f4fqR1IJvpXlKxaZXRtP2mX8 martin@example (RSA)
Connecting
Start WinSCP. Login dialog will appear. On the dialog:
- Make sure New site node is selected.
- On New site node, make sure the SFTP protocol is selected.
- Enter your machine/server IP address (or a hostname) into the Host name box.
- Enter your Windows account name to the User name box. It might have to be entered in the format
user@domainif running on a domain. - For a public key authentication:
- Press the Advanced button to open Advanced site settings dialog and go to SSH > Authentication page.
- In Private key file box select your private key file.
- Submit Advanced site settings dialog with the OK button.
- For a password authentication:
- Enter your Windows account password to the Password box.
- If your Windows account does not have a password, you cannot authenticate with the password authentication (i.e. with an empty password), you need to use the public key authentication.
- Save your site settings using the Save button.
- Login using Login button.
- Verify the host key by comparing fingerprints with those collected before (see above).
Advertisement
If you cannot authenticate to the server and use Windows 10 Developer mode, make sure that your OpenSSH server does not conflict with an internal SSH server used by the Developer mode. You may need to turn off the SSH Server Broker and SSH Server Proxy Windows services. Or run your OpenSSH server on a different port than 22.
Further reading
- Guide to Installing Secure FTP Server on Windows using IIS;
- Guide to uploading files to SFTP server;
- Guide to automating operations (including upload).
Last modified: by martin
OpenSSH is an ideal and secure way of performing remote maintenance & administration on your servers. Even on Windows Server!  Microsoft have released their OpenSSH port for Windows Server and Windows 10 back in 2015. Here is how to install the OpenSSH Server on Windows Server 2022, 2019 and 2016.
In this small tutorial, I’ll show you how to manually install OpenSSH in Windows Server (all versions). You’ll notice I’m not using PowerShell’s Add-WindowsCapability cmdlet, because it errors out on unsupported platforms. And I want to be able to customize the sshd installation directory. If you follow this post, you can install Microsoft OpenSSH Server on Windows Server 2022 through even Windows Server 2012 R2, in a destination folder of your choosing. Sweet
Please note that a lot has changed in recent years, like Microsoft releasing .msi Windows Installer installation files, and you no longer have to depend on PowerShell Add-WindowsCapability or .zip files. Wherever possible, use the OpenSSH .msi installation option.
Want to know how to extract files from an MSI package file?
Prerequisites
In order to be able to install OpenSSH on Windows, you need the software. Doh!
- Download the latest release from GitHub: https://github.com/PowerShell/Win32-OpenSSH/releases (OpenSSH-Win64.zip for example).
Install “Windows for OpenSSH” using PowerShell
- Unblock the downloaded OpenSSH archive if necessary:
Unblock-File .\Downloads\OpenSSH-Win64.zip - Extract the archive:
Expand-Archive .\Downloads\OpenSSH-Win64.zip -DestinationPath . - Copy the OpenSSH-Win64 folder to your desired location, e.g c:
Copy-Item -Recurse .\OpenSSH-Win64\ 'C:\' - The libcrypto.dll file has to be accessible for all users:
&icacls C:\OpenSSH-Win64\libcrypto.dll /grant Everyone:RX - Run
install-sshd.ps1to create the OpenSSH Authentication Agent and OpenSSH SSH Server services. It also sets some permissions and registers an Event Tracing (ETW) provider. - Change the service startup to Automatic. The OpenSSH SSH Server service is set to Manual startup, not automatic:
&sc.exe config sshd start= auto,&sc.exe config ssh-agent start= auto - Start the OpenSSH Authentication Agent and SSH Server services:
&sc.exe start sshd,&sc.exe start ssh-agent - Make sure your Windows Defender Firewall is open for port 22, rule OpenSSH-Server-In-TCP must be enabled. If this rule is not available, manually create it:
New-NetFirewallRule
  -Name sshd
  -DisplayName 'OpenSSH SSH Server'
  -Enabled True
  -Direction Inbound
  -Protocol TCP
  -Action Allow
  -LocalPort 22
  -Program "C:\Windows\System32\OpenSSH\sshd.exe"
Replace C:\Windows\System32\OpenSSH\sshd.exe with the actual path to the sshd.exe (C:\OpenSSH\sshd.exe, if you followed this instruction). Or go to Control Panel > System and Security > Windows Firewall > Advanced Settings > Inbound Rules and add a new rule for port 22.
![]()
Let’s connect!
PS C:\> ssh -l janreilink localhost 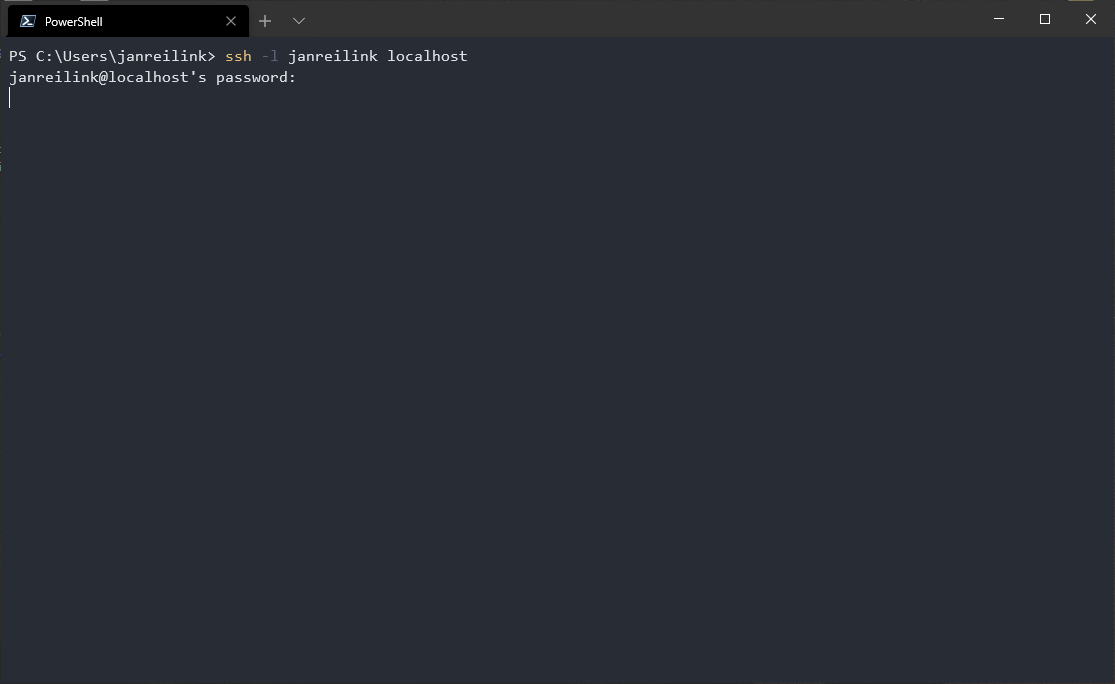
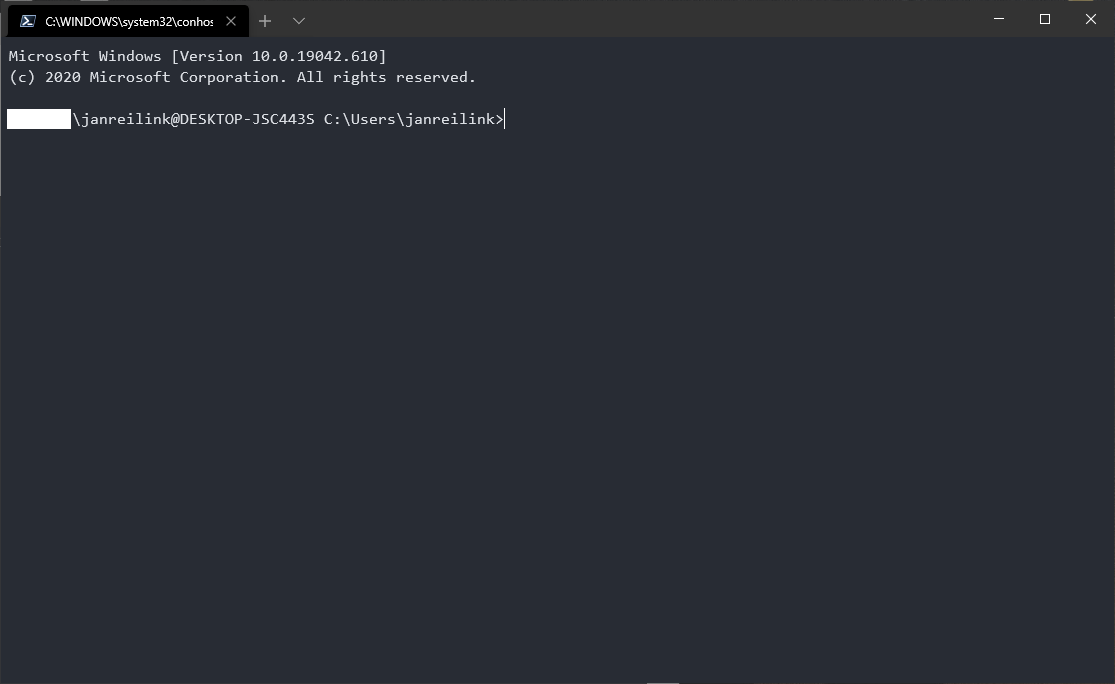
Install Win32-OpenSSH Server using MSI Installer
If you have downloaded the .msi Windows Installer MSI-file of Microsoft OpenSSH (OpenSSH-Win64-v8.9.1.0.msi for example), you can install OpenSSH server and client easily. The following command installs both OpenSSH Server and OpenSSH Client:
msiexec /i path to OpenSSH-Win64-v8.9.1.0.msiThis, however installs OpenSSH in the location C:\Program Files\OpenSSH, and doesn’t update your $env:path environment variable. There are some other caveats. You can follow my guide “install Microsoft OpenSSH Client properly in Windows 11 and Windows 10 to support FIDO/U2F security keys” on Windows Server 2022 / 2019 to install and configure OpenSSH Server and Client using .msi installer files.
sshd_config
Often you not only need to install OpenSSH, you also need to configure it. For this, OpenSSH on Windows uses an mechanism where the default sshd_config (called “sshd_config_default“) is located in the directory to where you’ve unpacked the OpenSSH-Win64.zip archive. When you start the service, the file is copied to C:\ProgramData\ssh\sshd_config.
In Windows, sshd reads configuration data from %programdata%\ssh\sshd_config by default, or a different configuration file may be specified by launching sshd.exe with the -f parameter. If the file is absent, sshd generates one with the default configuration when the service is started.
https://docs.microsoft.com/en-us/windows-server/administration/openssh/openssh_server_configuration#windows-configurations-in-sshd_config
So you can either make you configuration in the sshd_config_default file, that is copied when you start the service for the first time, or you start and stop OpenSSH, edit C:\ProgramData\ssh\sshd_config and restart OpenSSH again.
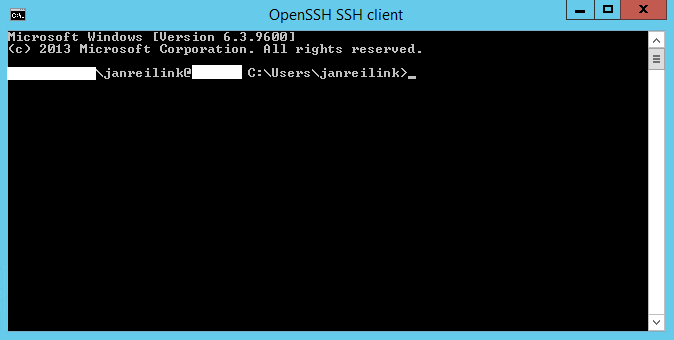
Install OpenSSH on Windows Server 2012
OpenSSH Server on Windows Server 2012 R2, you said? Yes, you can use the same method to install OpenSSH in Windows Server 2012 R2 (version 6.3.9600). Here is a screenshot of connecting to sshd on Windows version 6.3.9600:
Conclusion and giveaway
In this post I showed you how you can install OpenSSH server in various Windows Server versions, using the downloaded .zip file archive and PowerShell. You can use this approach to customize and streamline your Microsoft OpenSSH Server environment. This goes very well with SSH keys stored in Active Directory. If you want to use FIFO/U2F security keys like YubiKey in Windows OpenSSH, follow that guide.
In an other post I’ll show you how to install OpenSSH Client in Windows 11 and Windows 10. Using the OpenSSH-Win64-v8.9.1.0.msi file.