Одна из самых популярных таких программ — Classic Shell, которая продолжает работать в последних версиях Windows 10, но её разработка и обновление больше не ведутся. Однако, автор этой утилиты открыл исходный код и на его базе появились новая программа, продолжающая обновляться — Open Shell (ранее называлась Classic Start и NeoClassic-UI), именно о ней и пойдет речь в этом обзоре.
Использование Open-Shell для возврата стандартного меню Пуск в Windows 10
Если вы знакомы с утилитой Classic Shell, то и проблем с использованием Open Shell у вас, вероятнее всего, не возникнет, более того, программа может автоматически импортировать настройки из первой утилиты.
Процесс установки и запуска программы очень простой:
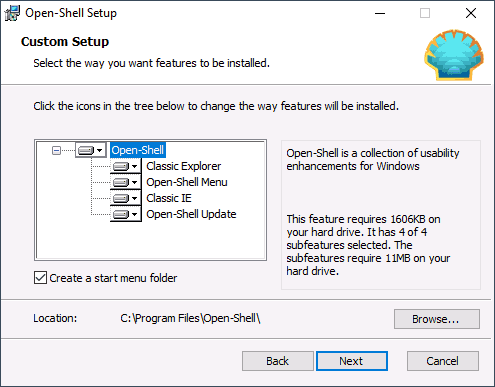
- Установка выполняется на английском языке. Все, что потребуется сделать на этом этапе — выбрать требуемые компоненты: Classic Explorer (меняет меню в проводнике), Open-Shell Menu (классическое меню Пуск), Classic IE (настройка меню и строки состояния Internet Explorer), Open-Shell Update (автоматическая проверка доступных обновлений).
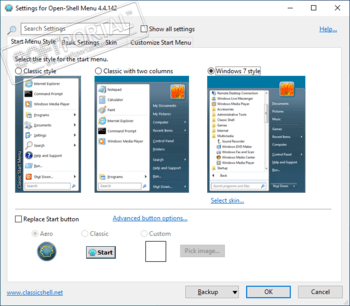
- Сразу после установки запустится окно настройки Open-Shell Menu. Настройки запускаются на английском языке, однако, само меню работает на русском. Если же и меню отображается не на том языке — отметьте пункт «Show All Settings», а затем выберите нужный язык на вкладке «Language».
- На главной странице настроек Open-Shell Menu вы можете выбрать внешний вид меню пуск, при необходимости — заменить кнопку «Пуск» своей кнопкой (по умолчанию отображается стандартная кнопка Windows 10).
- Нажав «Select Skin» под выбранным внешним видом меню Пуск вы можете выбрать тему оформления, а также настроить размеры иконок, текста, прозрачности с помощью соответствующих отметок (набор доступных отметок может отличаться в зависимости от выбранной темы).
- На вкладке Basic Settings можно настроить поведение различных кликов и нажатия клавиши Windows в меню Open Shell, включить или отключить автоматический запуск классического меню после перезапуска компьютера, отображение раздела «Все программы» и часто используемых программ.
- Вкладка Customize Start Menu позволяет включить или отключить отображение пунктов в меню пуск.
- По умолчанию быстро зайти в настройки Open Shell Menu вы можете, нажав правой кнопкой мыши по кнопке «Пуск» и выбрав пункт «Настройка».
- Если вы хотите вернуть обычное меню по правому клику (то, которое стандартно появляется в Windows 10), в настройках программы отметьте Show All Settings, а затем на вкладке «Controls» отметьте пункт «Right click opens Win+X menu».
В целом, всё сравнительно удобно и работает исправно, если не считать отсутствия русского интерфейса настроек, что может оказаться проблемой для некоторых пользователей. Если же проблем с этим нет, рекомендую отметить пункт Show all settings в утилите настроек Open-Shell Menu и пройтись по всем вкладкам: не исключено, что вы сможете найти что-то полезное для себя.
Ниже — пара примеров классического меню Пуск в Windows 10 с помощью Open-Shell Menu.
Скачать последнюю версию Open Shell вы можете с официальной страницы разработчика https://github.com/Open-Shell/Open-Shell-Menu/releases
A collection of utilities bringing back classic features to Windows.
Originally Classic Shell by Ivo Beltchev


Features
- Classic style Start menu for Windows 7, 8, 8.1, 10, 11
- Toolbar for Windows Explorer
- Explorer status bar with file size and disk space
- Classic copy UI (Windows 7 only)
- Title bar and status bar for Internet Explorer
Download
You can find the latest stable version here:
You can find the latest nightly build here:
Get Help
- Report an issue
- Ask in Discussions
- Post in Gitter room
- Join our Discord
Temporary Translation/Language Solution
- Download language DLL
- Place it either in the Open-Shell’s install folder or in the
%ALLUSERSPROFILE%\Open-Shell\Languagesfolder.
For archival reasons, we have a mirror of www.classicshell.net here.
How To Skin a Start Menu
Classic Shell: Custom Start Buttons
Skip to content
Search code, repositories, users, issues, pull requests…
Provide feedback
Saved searches
Use saved searches to filter your results more quickly
Sign up
Open-Shell Menu
для Windows
Open-Shell Menu — замена утилиты Classic Shell, разработка которой прекращена, для включения классического варианта оформления меню «Пуск» в Windows.
Данная программа позволяет пользователю выбрать внешний вид меню Пуск, тему оформления, настраивать размеры иконок, текста и прозрачности, заменить кнопку «Пуск», включать или отключать автоматический запуск классического меню после перезапуска ПК и многое другое.
Ключевые особенности программы Open-Shell Menu:
- Выбор внешнего вида меню Пуск.
- Возможность изменить вид кнопки Пуск.
- Возможность смены оформления при помощи скинов.
- Настройка размеров иконок, текста и прозрачности.
- Включение/отключение автоматического запуска классического меню после перезапуска ПК, отображение раздела «Все программы» и часто используемых программ.
- Включение/отключение отображения пунктов в меню Пуск.
- Расширенные возможности настройки внешнего вида и функциональности.
ТОП-сегодня раздела «Расширения»
Defender Control 2.1
С помощью небольшой программки Defender Control вы в один клик сможете отключать, включать и…
TaskbarX 1.7.8.0
Небольшая портативная программа, которая позволяет настроить панель задач Windows 10,…
MiniBin 6.6.0.0
MiniBin — небольшая утилита, которая дополнит Вашу панель уведомлений (системный трей) иконкой Корзины…
Отзывы о программе Open-Shell Menu
Владимир про Open-Shell Menu 4.4.190 [28-08-2023]
Для настроек программы русского нет, а Меню да на русском , так как папки в Главном Меню мы оформляем на своем родном.
2 | 2 | Ответить
Владимир про Open-Shell Menu 4.4.190 [28-08-2023]
Главное меню и все , что в ней есть на русском , но настройки на английском.
2 | 2 | Ответить
xXxBReeZExXx про Open-Shell Menu 4.4.170 [23-08-2022]
Нет в программе русского языка… За каким хреном писать, что он там есть?
3 | 3 | Ответить
Vasya в ответ xXxBReeZExXx про Open-Shell Menu 4.4.170 [12-06-2023]
ЕСТЬ русский, За каким хреном писать что его нету?
2 | 2 | Ответить

1Windows 11 is great out-of-the-box, and what makes it even better is that you can customize it. However, there are limits as to how much you can tweak it. For example, if you loved the Windows 10 Start Menu, there’s no way to make the one on Windows 11 look and behave like it.
Luckily, there’s a program called Open-Shell, and it allows you to restore classic Start Menus, among other things. With it, you can improve your Windows 11 user experience by personalizing it to your liking.
Here’s an intensive guide on how to use Open-Shell on Windows 11.
Does Open-Shell Still Work on Windows 11?
Before there was Open-Shell, there was Classic Shell, which allowed users to customize their Windows 7, 8, 8.1, and 10 machines by tweaking the Start Menu, Taskbar, and File Explorer. But in December 2017, the team behind the tool stopped actively developing it. Another team picked up the project and called it Open-Shell, which is why its tagline is “Classic Shell Reborn.”
If you’re curious about what Open-Shell was before, we have a guide on how to customize Windows 10 with Classic Shell. And although the official Open-Shell repository on GitHub doesn’t list Windows 11 as a supported system, it still works on the OS.
How to Download Open-Shell
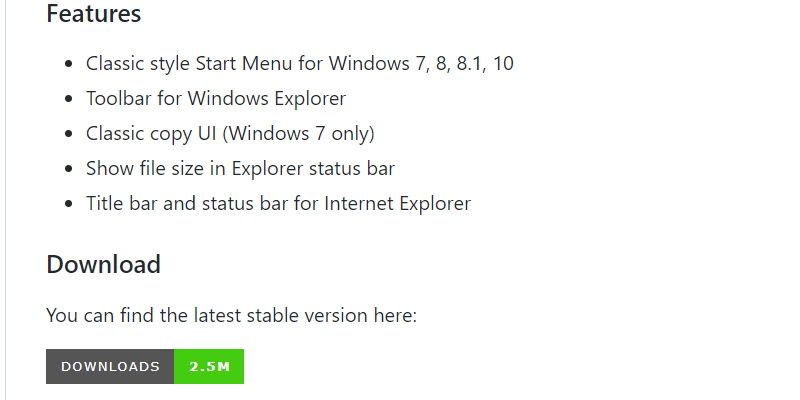
You can download the tool by going to the Open-Shell GitHub repository, scrolling down, and clicking the Downloads button.
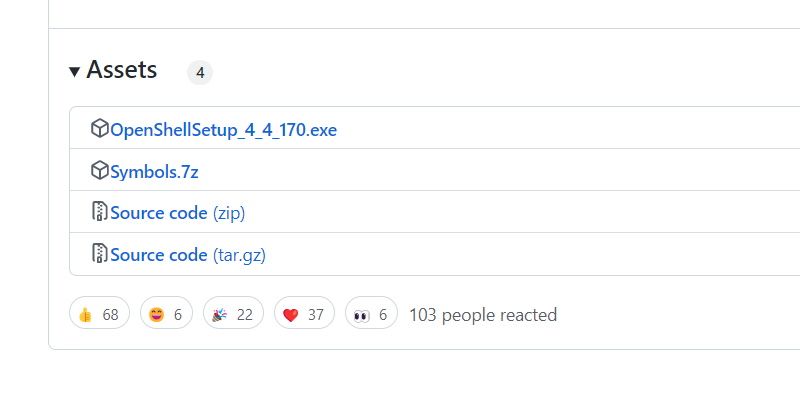
You will then arrive at the download page of the latest release. Scroll down to the Assets section and click on the setup file to download it. In our example, this is OpenShellSetup_4_4_170.exe.
Once you’ve downloaded the setup file, go to the folder where it’s located and double-click it to launch the installer. Then, follow the instructions in the installation wizard to install Open-Shell onto your Windows 11 PC.
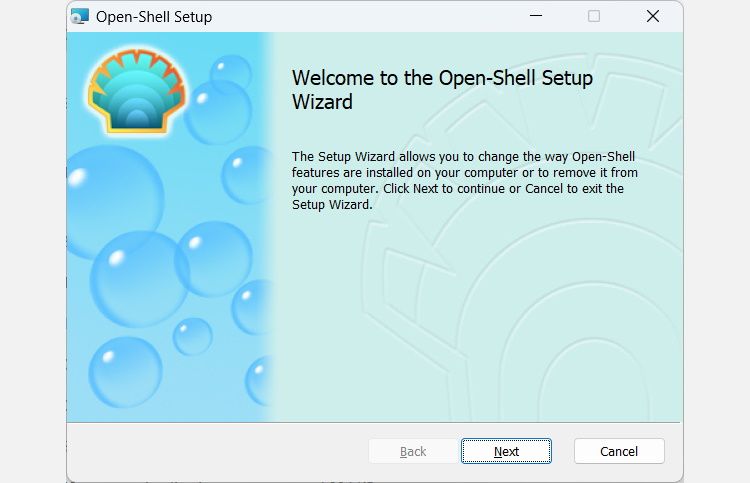
Now you’re ready to launch Open-Shell.
How to Launch Open-Shell on Windows 11 and Reveal All Tabs
To launch Open-Shell on Windows 11, start by pressing Win + S to bring up Windows Search. In the search box, type open shell and then click on Open-Shell Settings in the search results.
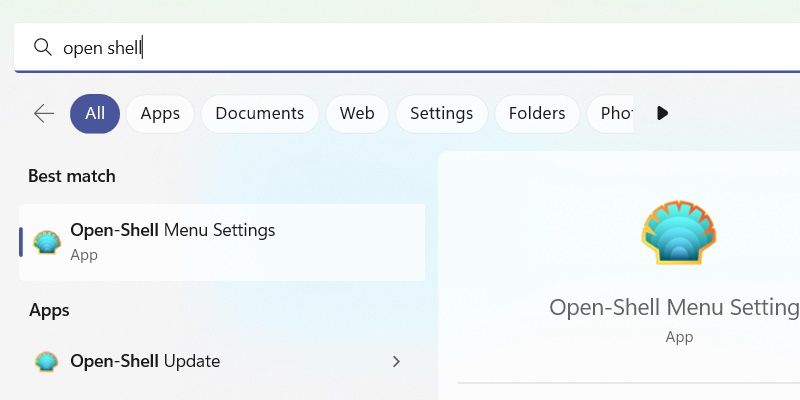
Once you’ve opened Open-Shell, tick the Show all settings checkbox at the top.
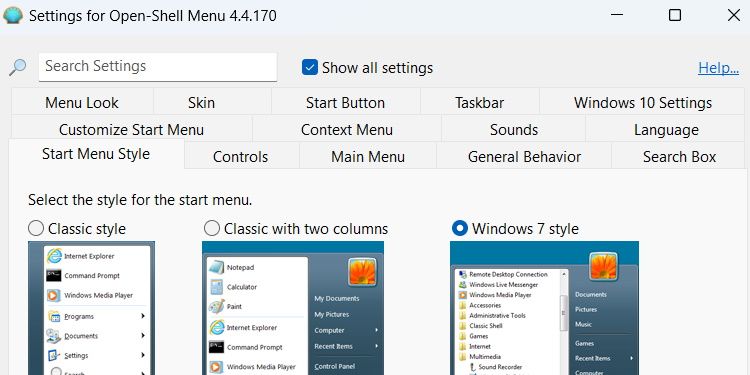
This will reveal all the tabs you can use to customize Windows 11 with Open-Shell.
How to Use Open-Shell on Windows 11
Below, will go through the most important Open-Shell tabs to get you started with Windows 11 customization using this program.
To begin with, click the Start Menu Style tab. Here, you’ll be able to restore Start Menus from Windows of old, and you can choose between Classic style, Classic with two columns, and Windows 7 style. Check the radio button for the one you want to use.
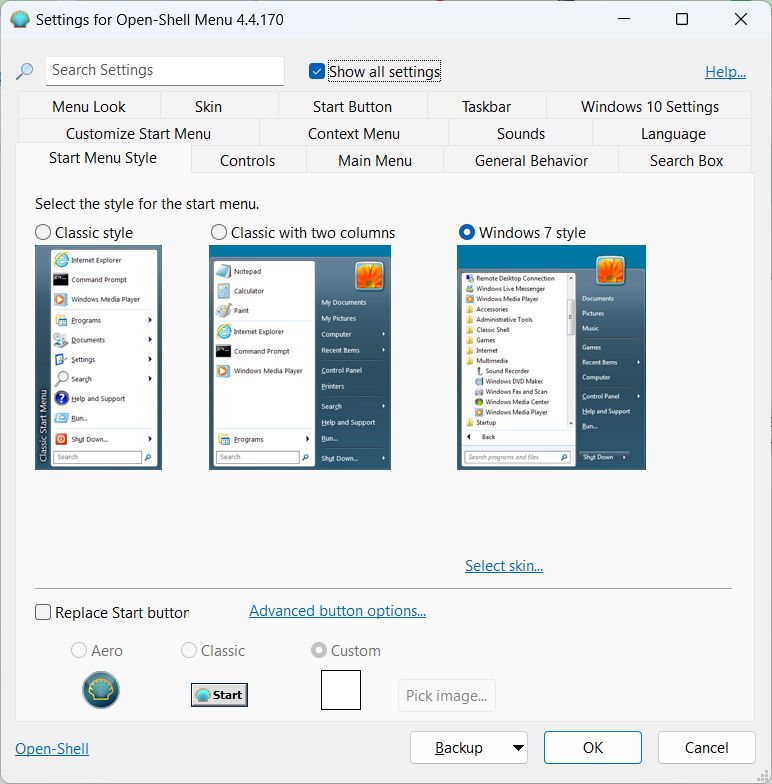
Once you’ve picked the style, scroll down and tick the Replace Start button checkbox to display the Start button on the left side of the Taskbar. You can choose the button’s icon by selecting Aero, Classic, or Custom.
If you are going for Custom, click Pick image next to it and select a PNG image to use for the Start Menu icon.
Depending on the Start button style you’ve picked, it may appear over the widget, which is also on the left side of the Taskbar. This can make it look a bit awkward. If it bothers you, and you still want to use the Start button there, read our guide on how to disable Widgets on Windows 11.
In the Start Menu Style tab, you can also click on the Advance buttons options link. This will take you to the Start Button tab, where you can further customize the Start button.
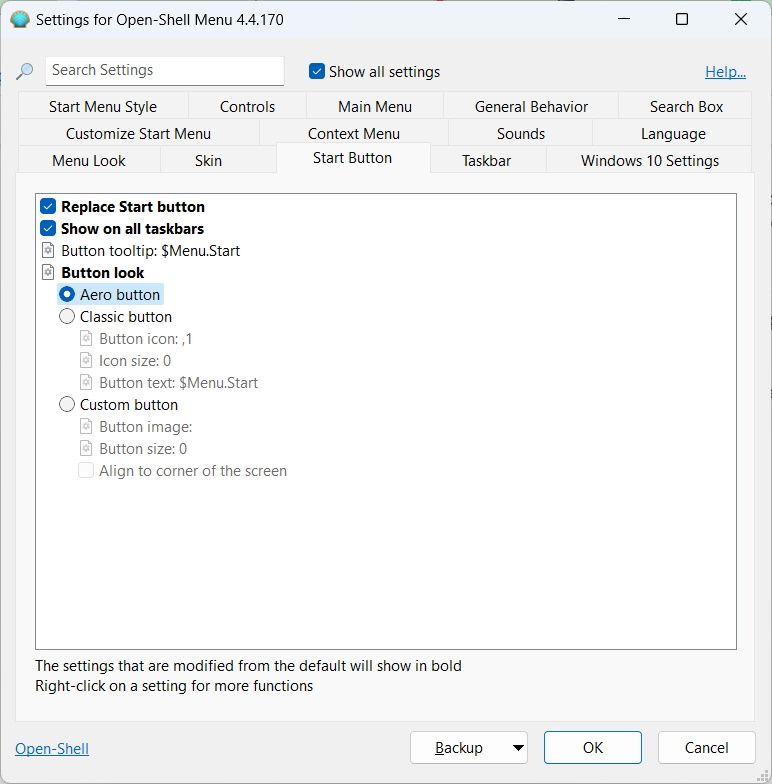
After setting up the new Start button, you can use that instead of the default one.
2. How to Customize the Taskbar With Open-Shell on Windows
To customize the Taskbar, click on the Taskbar tab, and then tick the Customize taskbar checkbox to enable the options below it.
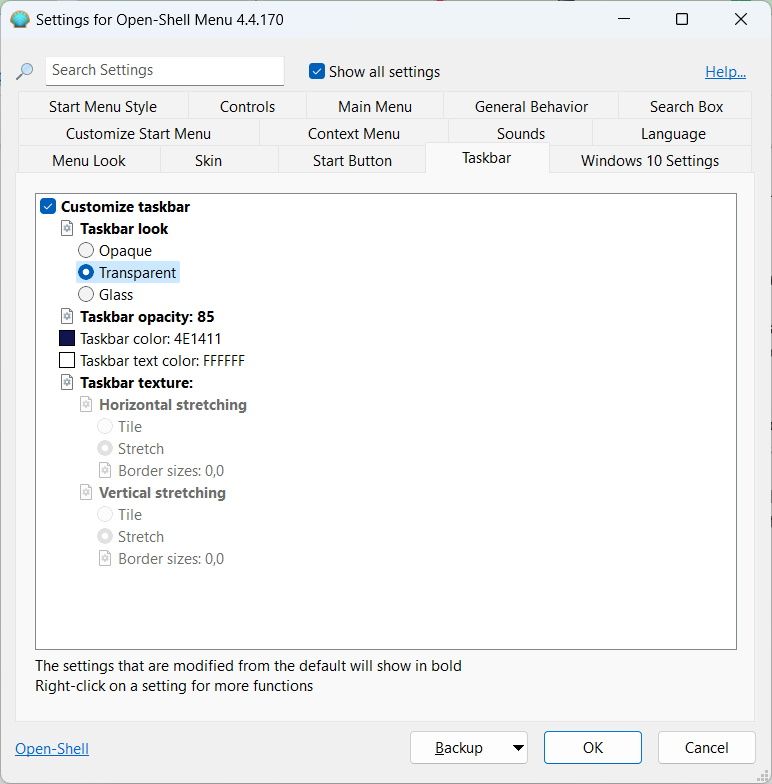
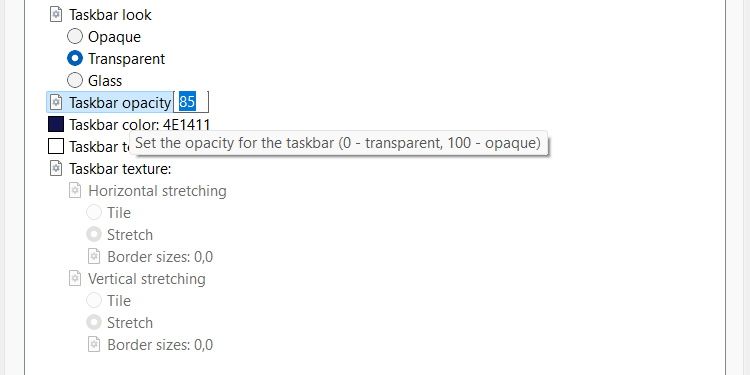
You can then tweak Taskbar look by ticking the Opaque, Transparent, or Glass radio button. If you picked Transparent, you can set the Taskbar’s transparency level by clicking Taskbar opacity and entering a number between 0 (completely transparent) and 100 (completely opaque) in the text box on the right.
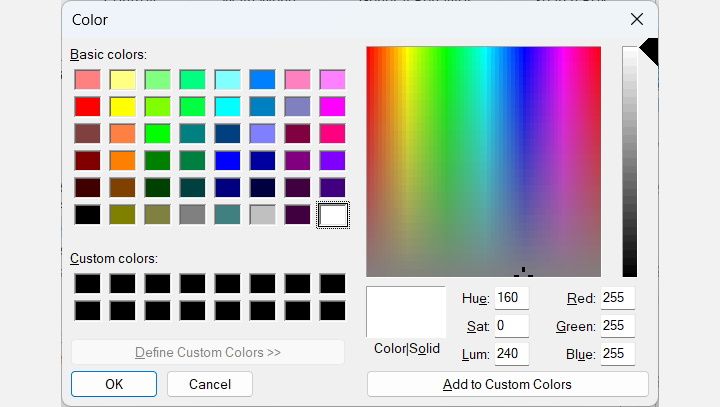
You can set Taskbar color and Taskbar text color by clicking on either of these options and entering a hexadecimal color value in their respective text boxes. If you don’t have a value in mind, you can click the three horizontal dots next to the text box and pick a color from the palette menu that appears.
You can use an image as a background by clicking Taskbar texture and entering the file path to the image you want to use in the text box next to it. You can also click the three horizontal dots next to the text box, navigate to the folder with the image you want to use, and select it.
Once you pick the picture, you can set its Horizontal stretching and Vertical stretching to Tile or Stretch by ticking the appropriate radio button.
How to Update Open-Shell on Windows 11
You don’t need to download and install Open-Shell again when a new version comes out. The program’s installation also comes with a utility to update it.
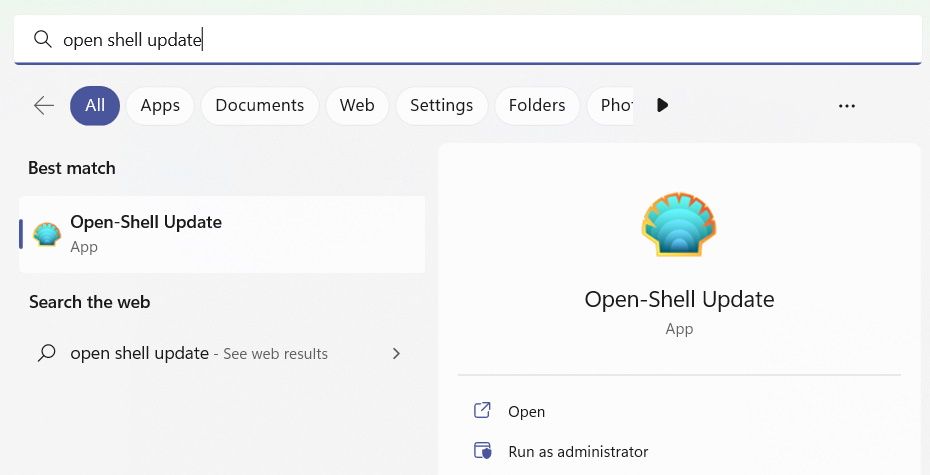
To use it, connect your Windows PC to the internet and press Win + S to bring up Windows search. Then, type open shell update in the search box and click on Open-Shell Update in the search results.
Click on Check now to see if there’s an update available.
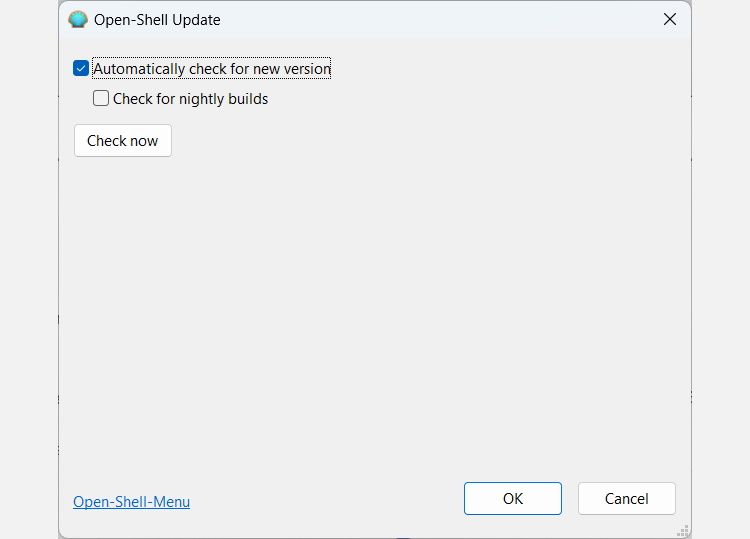
The program will then check for available updates. If you’re already running the latest version of Open-Shell on Windows 11, you will get a message saying “Your version of Open-Shell is up-to-date.” If not, the updater will download and install the new update.
Time to Enhance Windows 11 With Open-Shell
There are various ways to change the appearance and functionality of Windows 11. But if you’re looking for a quick and user-friendly way of going about it, you can’t go wrong with Open-Shell.
We’ve only shown you how to enable the classic Start Menu and customize the appearance of the Taskbar in this guide. However, you have enough knowledge to explore the other Open-Shell tabs for more customization options,
