NVIDIA GeForce для Windows 7
|
|
|
| Версия | Платформа | Язык | Размер | Формат | Загрузка |
|---|---|---|---|---|---|
|
NVIDIA GeForce Win 7/8 x86 |
Windows 7 |
Русский | 323.46MB | .exe |
Скачать бесплатно |
|
NVIDIA GeForce Win 7/8 x64 |
Windows | Русский | 398.51MB | .exe |
Скачать бесплатно |
|
NVIDIA GeForce Win 10 x86 |
Windows | Русский | 342.37MB | .exe |
Скачать бесплатно |
|
NVIDIA GeForce Win 10 x64 |
Windows | Русский | 440.49MB | .exe |
Скачать бесплатно |
|
NVIDIA GeForce последняя версия |
Windows | Русский | 341.46MB | .exe |
Скачать бесплатно |
|
NVIDIA GeForce русская версия |
Windows | Русский | 337.46MB | .exe |
Скачать бесплатно |
|
NVIDIA GeForce x64 |
Windows | Русский | 348.46MB | .exe |
Скачать бесплатно |
|
NVIDIA GeForce x32 |
Windows | Русский | 344.46MB | .exe |
Скачать бесплатно |
|
NVIDIA GeForce x86 |
Windows | Русский | 355.46MB | .exe |
Скачать бесплатно |
|
NVIDIA GeForce 2022 |
Windows | Русский | 351.46MB | .exe |
Скачать бесплатно |
|
NVIDIA GeForce 2021 |
Windows | Русский | 331.46MB | .exe |
Скачать бесплатно |
|
NVIDIA GeForce 2020 |
Windows | Русский | 342.46MB | .exe |
Скачать бесплатно |
Обзор NVIDIA GeForce
NVIDIA GeForce (драйвера энвидео джефорсе) драйвера – программное обеспечение, служащее для повышения графических возможностей компьютера. ПО улучшает динамику и качество отображенных картинок, позволяет смотреть 3D видео и запускать трехмерные игры. Драйвера совместимы с 32- и 64-битными платформами Windows, от ХР до версии 10.
Читать Далее »
NVIDIA GeForce скачать бесплатно для windows
Чтобы установить или обновить программное обеспечения для вашей видеокарты, вначале скачайте последнюю версию драйвера. Важно устанавливать именно последнюю версию, так как это позволяет наиболее полноценно работать видеоадаптеру и даёт большую гарантию благополучного исхода процесса установки. Перед скачиванием драйвера обратите особое внимание — поддерживает ли версия драйвера вашу модель видеокарты и операционную систему. Это всегда указано на странице загрузки.
Итак, по ссылке, приведенной выше, вы скачали установочный файл, который может выглядеть примерно следующим образом:

Перед началом установки или обновления драйвера необходимо закрыть все запущенные программы и приложения. Теперь запускаем скачанный файл. Для этого необходимо кликнуть по значку правой кнопкой мыши и в выпавшем меню выбрать «Запуск от имени администратора».

В результате может появиться промежуточное окно, сообщающее о том, в какую папку будет распакован архив с драйвером. Если вас не устраивает автоматический выбор, то вы можете изменить его. Если же этот момент вам не понятен или не важен — просто нажимаем «ОК».

После распаковки архива запустится окно установки драйвера и автоматически будет произведена проверка совместимости системы. Если всё в порядке, откроется окно с лицензионным соглашением NVIDIA, которое вы должны принять для продолжения процесса установки.

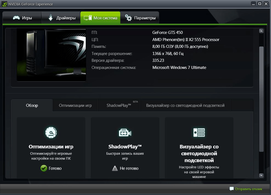
Далее вам будет предложено на выбор два параметра: «Экспресс» и «Выборочная установка». При первом варианте все необходимые для работы вашей видеокарты программы будут установлены автоматически. Если вы не являетесь «продвинутым» пользователем, выбирайте первый вариант и нажимайте кнопку «ДАЛЕЕ». На ваш компьютер установится непосредственно сам графический драйвер, а также необходимое программное обеспечение, включая GeForce Experience. Наряду с этим могут быть установлены и другие отсутствующие, но необходимые дополнения.

Если же вы хорошо понимаете, для чего нужна «Выборочная установка», можете воспользоваться этим вариантом. В данном случае вам будет предложено самостоятельно выбрать, что из загруженного пакета нужно установить. Обращаем ваше внимание, что при выборе второго варианта вы сможете также выполнить чистую установку драйвера. При этом удалятся все установленные на вашем компьютере программы от NVIDIA и записи компьютерного реестра. Чистая установка бывает необходима в случае возникновения ошибок при использовании параметра «Экспресс», и может помочь решить возникающие проблемы несоответствия нового программного обеспечения со старыми драйверами. Для активаций указанной опции поставьте соответствующую галочку, как показано на рисунке.

При выборе любого из предложенных выше способов, после нажатия кнопки «ДАЛЕЕ» начнется процесс установки или обновления драйвера видеокарты. В это время может мерцать или кратковременно гаснуть экран монитора. Это вполне естественное явление. При благополучном завершении вы увидите окно с соответствующей информацией. Для окончательного завершения процесса возможно будет предложена перезагрузка системы, что и необходимо сделать.

1. В начале статьи мы говорили о том, что при загрузке новой версии драйвера важно обращать внимание — поддерживает ли он вашу модель видеоадаптера. Например, программное обеспечение для видеокарты стационарного компьютера не подойдет для видеокарты ноутбука. И если после запуска скачанного драйвера и проверки вашей системы возникла ошибка, как показано на картинке ниже, значит либо вы ошиблись версией драйвера, либо возникла какая-то конфликтная ситуация.

В первом случае на странице загрузки драйвера необходимо ещё раз внимательно проверить — поддерживает ли он модель вашей видеокарты GeForce и совместим ли он с операционной системой, установленной на ваш компьютер или ноутбук. Проверьте модель видеокарты (например, GeForce GTX 1050 Ti), версию вашей «операционки» (Windows 7, 8, 10), её разрядность (64 или 32 бита), и скачайте необходимый драйвер.
Во втором случае иногда помогает полное удаление с вашего компьютера драйверов видеокарты NVIDIA, а также всего программного обеспечения от этого производителя. Но! Предпринимайте эти действия, если вы хорошо понимаете, что делаете и разбираетесь в самом процессе.
2. При возникновении других ошибок, попробуйте выполнить чистую установку драйвера. Как это сделать — сказано немного выше.
![]()
Download Article
3 easy ways to update your Nvidia drivers on Windows or Ubuntu
![]()
Download Article
- Manually Updating
- Using the GeForce Experience
- Updating Ubuntu Drivers
- Video
- Expert Q&A
|
|
|
|
Do you need to update your Nvidia graphics card drivers? Nvidia is constantly updating and patching the underlying software that controls Nvidia graphics cards. Updated drivers are often released every few weeks. Installing the latest drivers will ensure that you get the best performance out of your hardware. You can update your Nvidia drivers manually or using the GeForece Experience. If you are using Ubuntu, you can install and update the Nvidia graphics drivers using the Additional Drivers app. This wikiHow article teaches you how to update your Nvidia drivers.
Things You Should Know
- Update your drivers manually by going to the Nvidia website and downloading the appropriate driver and installing it.
- Download and use the GeForce Experience application to automatically download the appropriate drivers when you download updates.
- To download Ubuntu drivers, open «Additional Drivers» app and select the Nvidia driver. Then click «Apply Changes.»
-

1
Visit the Nvidia GeForce website. You can download the latest drivers from the GeForce website. Navigate to https://www.nvidia.com/ in a web browser.[1]
- You’ll need to know what model your Nvidia graphics card is. If you do not know, you can find out what graphics card you have using Device Manager on Windows.
-
2
Click the Drivers tab. It’s in the upper-right corner of the Nvidia website.
Advertisement
-
3
Select your graphics card. Use the drop-down menus at the top of the page to select your graphics card. The drop-down menus are as follows:
- Product Type: Use this drop-down menu to select your product type (i.e, GeForce, TITAN, Nvidia RTX, GRID, ION, Legacy, etc).
- Product Series: Use this drop-down menu to select your product series, (i.e, GeForce RTX 40 series, GeForce MX500 series, GeForce 10 series, etc),
- Product: Use this drop-down menu to select your exact graphics card model (i.e, GeForce RTX 4090, GeForce 1080 TI, etc).
-
Operating System: Use this drop-down menu to select your operating system (i.e, Windows 11, Windows 10 64-bit, Linux 64-bit). Click Show all operating systems if your operating system is not listed (macOS is no longer supported). [2]
- Download Type: You can choose one of two download types. «Game Ready Drivers» prioritize support for day-of-launch games, patches, and DLC for gamers. «Studio Drivers» prioritize quality and stability for video editing, graphic design, animation, and live streaming.
- Language: Use this drop-down menu to select your language.
-
4
Click Search. It’s the green button below the drop-down menus. This searches for a graphics card driver for your operating system.
-
5
Download the driver installer. To do so, click the green button below the graphics driver information. Then click Download on the next page. You should always download the latest version unless you specifically need an older one. The latest version will often give the best performance.
-
6
Run the installer. Double-click the installation file in your web browser or Downloads folder to run the installation file. The installer will automatically remove the old drivers and install the updated ones.
- You will be given the option to do an «Express» installation or a «Custom» installation. Most users can choose the «Express» option during installation.
- Your screen may flicker or go black for a short time during the installation.
-
7
Use System Restore if the new driver causes problems. When the driver update is installed, a system restore point will be created automatically. This will allow you to roll your system back to before the driver was installed.


Advertisement
-
1
Download and install the GeForce Experience program. This is an Nvidia program that manages your Nvidia drivers and game settings. The installer will scan your system for supported hardware. You will likely encounter an error during installation if you don’t have an Nvidia graphics card installed or are using an older product.[3]
Use the following steps to download and install GeForce Experience:- Go to https://www.nvidia.com/en-us/geforce/geforce-experience/ in a web browser.
- Click Download now.
- Double-click the installation file in your web browser or Downloads folder.
- Click Yes if prompted.
- Click Agree and Install.
-
2
Launch the program after the installation has been completed. Once the installation is complete, GeForce Experience should launch automatically. If it doesn’t, you can click the GeForce Experience launcher in the Windows Start menu.
-
3
Allow GeForce Experience to update. When you start GeForce Experience, it will check for any available updates. If GeForce Experience needs to update, allow a few minutes for it to do so.
-
4
Click the Driver tab. It’s in the upper-left corner. Any available driver updates will be displayed. Click the «Check for updates» button if GeForce Experience hasn’t checked recently.
- Once you have the application installed, you’ll be automatically notified when new drivers are released.[4]
- Once you have the application installed, you’ll be automatically notified when new drivers are released.[4]
-
5
Click the Download button if an update is available. It’s the green button at the top of the page, next to the latest driver version.[5]
-
6
Click the Express Installation button. It’s the green button that appears when the download is complete. The Express Installation option should be fine for most users. Advanced users can choose the Custom option.
- The custom installation will allow you to choose which of the drivers you want to install.
-
7
Wait for the driver to install. GeForce Experience will handle all of the installation work. Your screen may flicker or shut off for a moment during installation.
-
8
Use System Restore if the new driver causes problems. When the driver update is installed, a system restore point will be created automatically. This will allow you to roll your system back to before the driver was installed.


Advertisement
-
1
Click the Dash
. It’s the icon with 9 tiny squares. It is in the dock that is on the left side by default.
- If you are using another version of Linux you’ll need to download the appropriate driver for your Linux distribution and install it using the Terminal.
-
2
Type drivers in the search bar. The search bar is at the top of the Dash windows.
-
3
Click Additional Drivers. It has an icon that resembles a circuit board. This opens the Additional Drivers window.
-
4
Wait for the list of available drivers to load. This may take a few moments.
-
5
Select the latest driver from the list. Click the radio option next to the Nvidia drivers. Make sure it is the driver from Nvidia, and not the «Nouveau» driver. Select the driver to begin downloading the files.
-
6
Click the Apply Changes button. It’s below the window that lists all the available drivers. The Nvidia driver will be installed. Your screen may flicker or shut off during the installation process.
-
7
Reboot your computer. Reboot your computer to complete the installation process.[6]


Advertisement
Add New Question
-
Question
What can I do if I can’t update my Nvidia driver on Windows 10?

Stan Kats is a Professional Technologist and the COO and Chief Technologist for The STG IT Consulting Group in West Hollywood, California. Stan provides comprehensive technology solutions to businesses through managed IT services, and for individuals through his consumer service business, Stan’s Tech Garage. Stan holds a BA in International Relations from The University of Southern California. He began his career working in the Fortune 500 IT world. Stan founded his companies to offer an enterprise-level of expertise for small businesses and individuals.
Professional Technologist
Expert Answer
You can always go to Nvidia’s website and download the drivers directly from them. If Windows isn’t letting you update the driver though, it’s probably because it’s already up to date. There simply may not be an update you need.
-
Question
What is GeForce Experience? Can I uninstall it?
Stan Kats is a Professional Technologist and the COO and Chief Technologist for The STG IT Consulting Group in West Hollywood, California. Stan provides comprehensive technology solutions to businesses through managed IT services, and for individuals through his consumer service business, Stan’s Tech Garage. Stan holds a BA in International Relations from The University of Southern California. He began his career working in the Fortune 500 IT world. Stan founded his companies to offer an enterprise-level of expertise for small businesses and individuals.
Professional Technologist
Expert Answer
It’s definitely optional, so feel free to uninstall it if you’d like. It’s a program that offers a bunch of customization options. It’s helpful to have if you do any kind of PC gaming, but your drivers will be fine if you uninstall it.
-
Question
How do I turn off the GeForce notifications?
Stan Kats is a Professional Technologist and the COO and Chief Technologist for The STG IT Consulting Group in West Hollywood, California. Stan provides comprehensive technology solutions to businesses through managed IT services, and for individuals through his consumer service business, Stan’s Tech Garage. Stan holds a BA in International Relations from The University of Southern California. He began his career working in the Fortune 500 IT world. Stan founded his companies to offer an enterprise-level of expertise for small businesses and individuals.
Professional Technologist
Expert Answer
You should be able to do that in the program’s settings, but if GeForce Experience is causing notifications to pop up, they’re worth looking at. They may be letting you know your graphics settings aren’t optimized, or they may be letting you know there’s an update you need.

See more answers
Ask a Question
200 characters left
Include your email address to get a message when this question is answered.
Submit
Advertisement
Video
About This Article
Article SummaryX
1. Open the Windows search bar.
2. Type dxdiag and press Enter.
3. Click Display and write down your ″chip type.″
4. Go to geforce.com in a web browser.
5. Click Drivers.
6. Search for your drivers.
7. Download the drivers.
8. Run the downloaded file to update.
Did this summary help you?
Thanks to all authors for creating a page that has been read 875,522 times.