Установив на свой ПК новые графические драйверы от Нвидиа, мы можем столкнуться с всплывающим на рабочем столе сообщением. Оно звучит как «Не найдена Панель управления Nvidia», появляется в Windows 10, и не все знают, как убрать уведомление. Фактором дисфункции часто выступает некорректная работа новых драйверов DCH для графических систем, из-за чего Панель управления может работать некорректно. Ниже рассмотрим сущность данной проблемы, а также опишем способы, позволяющие скрыть его на вашем ПК.
- Что значит «Не найдена Панель управления NVIDIA» в Виндовс 10?
- Отключение службы «NVIDIA Display Container LS», чтобы убрать уведомление
- Установка Панели Управления из Microsoft Store
- Каким образом скачать драйвера Game Ready, если не найдено управление NVIDIA
- Перезапуск всех служб видеокарты, чтобы скрыть уведомление
- Запуск Панели управления видеокартой вручную
- Возврат управления Нвидиа на экран в Windows 10
Что значит «Не найдена Панель управления NVIDIA» в Виндовс 10?
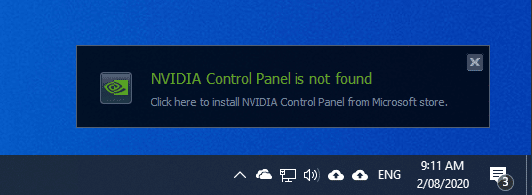
Обычно проблема возникает после обновления (установки) графических драйверов в системе. Справа внизу рабочего стола с регулярной частотой появляется сообщение «Не найдена Панель управления NVIDIA».
Компания «Nvidia» пока воздерживается от официальных комментариев по сути рассматриваемой проблемы. Существует гипотеза, что дисфункция связана с не корректной работой модерных драйверов DCH (Declarative Componentized Hardware) для графических карт «Nvidia». Такие драйвера разрабатываются в соответствии со спецификациями «Microsoft», и после их установки Панель Управления видеокарты может пропасть.
В соответствии с заявлениями разработчиков после установки драйверов Нвидиа Панель управления должна автоматически подтягиваться из Виндовс Store. Но как это обычно бывает, указанного «подтягивания» не происходит, потому будет необходимо самостоятельно установить её из Microsoft Store.
Итак, каким же образом можно убрать уведомление о том, что не найдена Панель управления видеокарты NVIDIA в операционной системе Windows 10? Читайте далее.
Читайте также: Панель управления NVIDIA: Доступ запрещен – что предпринять.
Отключение службы «NVIDIA Display Container LS», чтобы убрать уведомление
Наиболее простым способом убрать уведомление в ОС Виндовс 10 является отключение службы «NVIDIA Display Container LS», ответственной за демонстрацию указанного сообщения.
Осуществите следующее:
- Нажмите на клавиши Win+R;
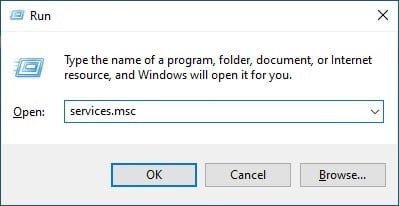
- В возникшем окошке «Выполнить» введите services.msc и нажмите на клавишу Энтер;
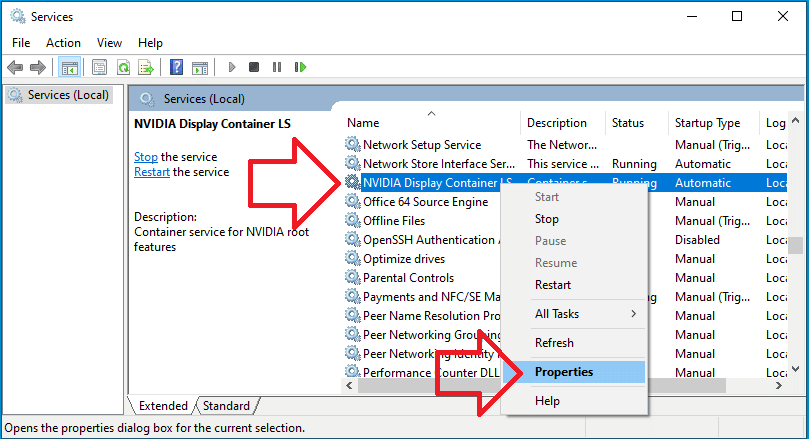
- Откроется окно служб. Найдите там ответственную службу «Nvidia Display Container LS» и дважды кликните по ней;
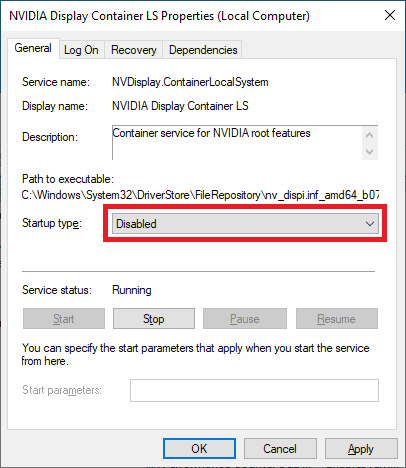
В перечне служб найдите указанную нами службу - Откроется окно данной службы. Установите значение опции «Тип запуска» на «Отключена», а потом внизу нажмите на «Применить»;
Установите тип запуска службы «Отключена» - Перезагрузите ваш PC для вступления изменений в силу
Установка Панели Управления из Microsoft Store
В ряде случаев избавиться от сообщения «Не найдена Панель управления NVIDIA» может помочь установка Панели Нвидиа из магазина Майкрософт. Понадобится перейти на microsoft.com, и нажать там на «Получить».
Эффективность данного способа обычно не высока, но обязательна для «джентельменского» набора советов по решению возникшей проблемы.
Каким образом скачать драйвера Game Ready, если не найдено управление NVIDIA
Решить рассматриваемую проблему может помочь загрузка драйверов Game Ready с сайта Нвидиа. Используйте расширенную форму поиска драйверов с помощью специализированной формы на сайте nvidia.com. Укажите в форме поиска на сайте вашу видеокарту, скачайте драйвера «Game Ready» и установите их на ваш ПК. Обычно там содержится и Панель Управления Нвидиа. После её установки уведомление должно быть убрано.
Перезапуск всех служб видеокарты, чтобы скрыть уведомление
Если ни один из перечисленных выше способов не помог исправить ошибку с Панелью управления, рекомендуем перезапустить службы Нвидиа в ОС Windows 10.
Выполните следующее:
- Нажмите на клавиши Win+R;
- В возникшем окошке «Выполнить» введите services.msc и нажмите на клавишу Энтер. Откроется окно служб;
- Найдите в перечне службы от Nvidia, и, кликнув на каждую, нажмите вверху слева на «Перезапустить»;
Перезапустите работающие на PC службы Нвидиа - Выполните перезапуск каждой службы Nvidia.
Если во время перезапуска система выдаст вам ошибку 14109, тогда перейдите в Диспетчер устройств, и обновите драйвер вашей карты Нвидиа. Затем перезагрузите ваш PC.
Запуск Панели управления видеокартой вручную
Вы можете попытаться запустить Панель управления вручную.
Выполните следующее:
- Откройте папку «Мой компьютер»;
- Перейдите на диск С и найдите там папку Program Files;
- В папке Program Files вы найдете NVIDIA Corporations (если её там нет, ищите её в папке Program Files x86);
- Войдя в данную папку, откройте папку «Control Panel Client»;
- В данной папке найдите файл nvcplui. Кликните на нём правой клавишей мыши, и выберите «Запуск от имени администратора».
Возврат управления Нвидиа на экран в Windows 10
В ряде случаев (особенно после обновления) Панель управления может быть скрыта.
Для её возврата выполните следующее:
- Запустите Панель управления ОС Виндовс;
- Справа сверху в опции «Просмотр» выберите «Крупные значки»;
Выберите «Крупные значки» - Дважды кликните на «Панель управления Нвидиа»;
Нажмите на «Панель управления Нвидиа» - Найдите меню «Рабочий стол» или «Вид» и кликните на нём;
- В раскрывающемся списке выберите пункт «Добавить контекстное меню рабочего стола» установив рядом галочку;
Установите соответствующую галочку - Перейдите на рабочий стол вашего PC и посмотрите, появляется ли панель видеокарты в контекстном меню рабочего стола.
Это полезно знать: Панель управления Нвидиа не открывается — как исправить.
Видео инструкция
В ниже приведённом видео описан способ убрать уведомление, которое звучит как «Не найдена Панель управления NVIDIA» в операционной системе Windows 10 с официального сайта nvidia.com.
Has the Nvidia Control Panel gone missing on your computer after you upgraded your Windows or updated your graphics driver? According to users, they have come across this error after upgrading their Windows version from Windows 10.
Also, when the graphics driver software is not updated properly, then also many users have encountered this error.
Nvidia Control Panel provides users with useful features to control the properties of Nvidia Graphics Card. Sometimes, the users find that the Nvidia display settings are not available, or the Nvidia Control Panel goes missing from the Desktop Context menu, Start menu, or from the Desktop.
Preliminary reasons behind this could be faulty graphics card drivers after updating them or missing registry subkeys and values. Some random troubles might also be responsible for the missing Nvidia Control Panel error.
So, here we are with a tutorial on how to fix the Nvidia control panel missing on Windows 10 problem.
NVIDIA Control Panel Not Showing In Windows 10 – Use Bit Driver Updater to Fix it (Experts Recommended)
The major reason behind ‘Can’t locate NVIDIA Control Panel’ and other PC snags is out-of-date or damaged Windows drivers. The best way to resolve such problems is to use a powerful free driver update utility, i.e., Bit Driver Updater. This program effortlessly takes care of all driver-related problems that are causing trouble to the functioning of your hardware devices.
To download and install the latest Nvidia graphics drivers for free, click the button below!

How To Fix Nvidia Control Panel Missing On Windows 10?
Let us now dig deeper to understand the methods of solving the problem of the Nvidia Control Panel not opening error.
1. Restart Nvidia Services
When you are unable to spot the Nvidia Control panel on your Windows 10 system then restarting the Nvidia services can help you significantly solve the error. Here are the steps to restart the Nvidia services:
- Open the Run dialog box by pressing the Windows key + R key together.
- You then need to open the Services window by typing ‘services.msc’ in the Run dialog box followed by pressing Enter.
- Try to locate the Nvidia related services.
- Click right on the Nvidia service and then hit the Restart button appearing on the pop-up menu.
- If you see that a particular Nvidia service is not running then right click on the service to select the Start option from the context menu.
Once you are done with this, after that open the Nvidia Control Panel and see if the issue is resolved, otherwise try the subsequent methods.
Read More: How to Update Nvidia Drivers on Windows 10
2. Unhide The Nvidia Control Panel
When the Nvidia graphics card software is updated then sometimes the Nvidia Control Panel may not show up on the Desktop Context Menu or Start Menu.
Now if restarting the Nvidia services did not help you find the Nvidia Control panel, then you can unhide the Nvidia Control Panel in the following way to see if that helps to fix the Nvidia Control Panel missing error.
- Go to the system Control Panel and then double-click to open the Nvidia Control Panel option. (Ensure that you are viewing the items by Large Icons in the system Control Panel.)
- Find the Desktop or View menu to choose the Add Desktop Context Menu option from the dropdown menu.

Once you have selected the above-mentioned option, then head back to the system’s Desktop and see if you are able to now find the Nvidia Control Panel automatically on your PC Desktop screen.
3. Manually Launch Nvidia Control Panel
Until and unless you are able to find a permanent solution to resolve the Nvidia Control Panel not opening error, till then you can access the Nvidia Control Panel by manually launching it.
Here is how you can do so easily:
- Navigate to the C Drive folder from My Computer.
- Find the Program Files folder here.
- Then, go to the Nvidia Corporation folder and search for the same in the Program Files (x86) folder.
- When you are finally in the Nvidia Corporation folder, then open the Control Panel Client.
- Identify the nvcplui file here.

- Right-click on the nvcplui file and Run it as an administrator.
- Create a Desktop Shortcut also by clicking right on the nvcplui file.
Read More: How to Upgrade Your Graphics Drivers in Windows 10
4. Update Graphics Driver With A Driver Updater Tool
The majority of the issues are due to the faulty drivers in the system. When you encounter the issue of Nvidia Control Panel missing, then it could have risen due to some incomplete or faulty driver update.
Under this circumstance, the best approach is to update or download the latest Nvidia graphics card driver with the best driver updater tool.
If you’re wondering about which is the best driver updater software for your system, then you may consider installing the Bit Driver Updater program.

Key Features of Bit Driver Updater:
- Instantaneously detects broken, out-of-date, and missing drivers.
- Downloads genuine driver versions that could be installed in a single click.
- Offers round the clock technical assistance.
- Boosts system performance rapidly.
- Offers a database with more than 160000 device drivers.
- The WHQL testing process by Microsoft has been passed by this tool.
You can install this amazing driver update tool and let it scan your system thoroughly to detect old and faulty drivers. Once the scanning process is complete, you can then install the correct versions of the graphics drivers with a single click and access the Nvidia Control Panel on your desktop.
Steps To Update Nvidia Graphics Drivers Using The Bit Driver Updater Tool
- After installing the Bit Driver Updater application on your system, let it scan your system automatically.
- Now, wait for a while. In no time, you’ll get the list of all missing, out-of-date, or mismatched drivers on your system.
- In the list, go to the Nvidia driver and select the ‘Update Now’ option placed alongside it to download and install its latest, manufacturer-recommended version automatically.
5. Reinstall Graphics Driver
If the driver update method did not solve the problem of missing the Geforce Control Panel, then you can reinstall the graphics driver to fix this issue.
First of all, you need to uninstall the graphics driver and clear all files.
- You can do this by going to the Device Manager and expanding the Display Adapters section.
- Here right click on the Nvidia graphics card driver and choose the option of “Uninstall device.”
- Once the uninstallation process completes, then restart your system.
You can then reinstall the Nvidia graphics driver in the following way.
Via Windows Update:
- Either go to the Windows Settings and go to Update & Security.
- Under the Update & Security section, go to the Windows Update.
- Here, click the “Check for Updates” button to let Windows download the Nvidia graphics driver.

From Manufacturer’s website:
- First, check the version of your graphic card driver via device manager.
- Go to the manufacturer’s website, search for the exact version of the graphics card driver and install it.
Read More: Windows 10 100% Disk Usage in Task Manager [Fixed]
6. Permanent Solution as Per Nvidia Support
According to the Nvidia support, there is a permanent way to get rid of the Nvidia display settings not available error.
- Go to My Computer and then to the Program Files (x86).
- Find Nvidia Corporation and then go to the Display.NvContainer.

- In this location, find the Display.NvContainer file and right click on it to choose the option of Copy.
- Finally, open the Startup Folder by typing shell:startup in the Run dialog box followed by pressing Enter.
- Once the Startup folder opens, you can then paste the Display.NvContainer file here.
- Now right-click on this file and choose the Properties option.
- Navigate to the Compatibility tab in the Properties window.
- Check the box which says Run this program as administrator.

- Further, click “OK” to implement the new settings.
- Finally, restart the PC to find the Nvidia Control Panel on your Desktop context menu and Start menu.
Is The Nvidia Control Panel Now Available?
Among the various solutions stated above, the last method as per Nvidia Support and the graphic driver update method are the most potential one’s to troubleshoot the Nvidia Control Panel missing error.
Ultimately, if you are still unable to fix the error, then you can get in touch with the Nvidia support team.
Problem
By default Windows 10 will install the software (drivers) required to run a NVIDIA video card – it however doesn’t install the ‘NVIDIA Control Panel’ – which is completely optional and not required for everyday use.
Further more – it has terrible reviews on the Microsoft Store – currently 1.5 stars !
Despite this – Windows will display a prompt every time you turn on the computer which reads
NVIDIA Control Panel is not found

Click here to install NVIDIA Control Panel from Microsoft store.
Solution
These steps show how to disable the ‘NVIDIA Control Panel is not found’ prompt in Windows 10.
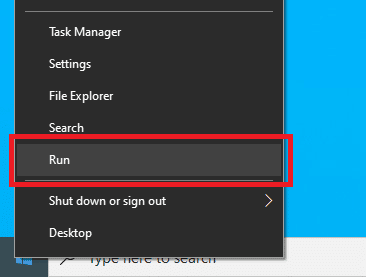
- Right-click on the Start menu and click ‘Run’ (or on the keyboard, press Windows + R)

- In the ‘Open:’ box, type ‘services.msc’ and click ‘OK’

- Locate ‘NVIDIA Display Container LS’
- Right-click on it and choose ‘Properties’

- Change ‘Startup type’ to ‘Disabled’

- Click ‘OK’ and close the Services window
- The prompt will no longer appear when you turn on the computer.
Be it for an avid gamer or a normal computer user, the NVIDIA graphics card always holds a special place. This GPU application was developed and launched by NVIDIA corporation, a leading tech product manufacturer in the world. Generally, an NVIDIA GPU is added to your system to experience high performance and powerful graphics. Here, NVIDIA Control Panel app enables you to control and access the settings, properties, and functioning of the graphics card. But what happens when you are unable to open or even find the NVIDIA control panel app out of the blue? It leaves you worried. Roll up the sleeves everybody who is struggling with this issue! This article will guide you to fix the NVIDIA control panel missing Windows 10 problem. So, continue reading to fix NVIDIA control panel display settings missing issue.

Table of Contents
Various reasons can be listed for missing NVIDIA Control Panel app in Windows 10. But note these reasons are not the direct cause of the issue which means only the possible outcomes or scenarios that led to this issue are compiled together.
- Presence of outdated, corrupted, or incompatible driver cause errors in your graphics card.
- The recent Windows 10 update might not be compatible with the NVIDIA Driver. Thus, you need to roll it back to the earlier version.
- When the files get damaged in the NVIDIA Control Panel application, it gets corrupt.
- Other common bugs and errors may cause trouble with this particular issue.
Before proceeding further, ensure to check if you have an NVIDIA chip installed on your PC. Implement the steps given below to check the presence of the NVIDIA Control Panel Windows 10 app via task manager service.
1. Press the Ctrl + Shift + Esc keys together to open Task Manager.
2. On the Task Manager window, switch to the Performance tab and select GPU 0 or GPU 1 on the left pane.

3. On the right pane of GPU, see the graphics card model name present at the top right corner of the page. If it starts with NVIDIA, then the NVIDIA Control Panel should be available on your computer.

After the check, if the NVIDIA driver graces you with its presence and only the NVIDIA Control Panel is missing then you can follow the troubleshooting methods mentioned below to fix this issue.
Method 1: Roll Back Windows Update
The eye to updating your Windows 10 operating system is an appreciative effort. But sometimes it is possible that your graphics driver might not be compatible with the latest release or upgraded version of Windows. Thus, revert your latest windows update from your system to resolve the NVIDIA control panel missing Windows 10 issue.
1. Press the Windows + I keys to launch Settings.
2. Select Update & Security.

3. Select Recovery from the left pane.
4. Click on Get started button.

5. Follow the on-screen instruction and your Windows will roll back to the previous version.
Method 2: Unhide NVIDIA Control Panel
Unknowingly sometimes if you hide the NVIDIA Control Panel, it goes missing. Rarely, it is also possible that your Windows 10 or a third-party application hide the icon. Thus, it might look like it’s missing. Perform the steps given below and unhide the NVIDIA Control Panel.
1. Press Windows key, type control panel and click on Open.

2. Here, set View by as Large icons, then select NVIDIA Control Panel from the list of items.
3. Select the Desktop menu present at the top.

4. Under the Desktop menu, ensure Add Desktop Context Menu and Show Notification Tray Icon options are enabled. If not, check to mark it.
![]()
5. Finally, close the NVIDIA Control Panel application and try opening it via Desktop or system tray.
Also Read: Fix NVIDIA Control Panel Not Opening
Method 3: Restart NVIDIA Services
Various services are running constantly in the background to make other apps run smoothly. Therefore, restart all the NIVIDIA-related services to make its control panel appear again. Here is how to do it and resolve the NVIDIA control panel display settings missing issue.
1. Press the Windows + R keys together to launch the Run dialog box.

2. Type services.msc and press Enter key to open the Services window.

3. On the Services windows, locate services that start with the name NVIDIA. Right-click each such service and select Restart from the context menu.

4. If the service is not running, then right-click it once again and click on Start.

5. Repeat steps 3 and 4 for restarting the following services as well:
- NVIDIA LocalSystem Container
- NVIDIA NetworkService Container
- NVIDIA Telemetry Container

Check if this method brings back the NVIDIA Control Panel app. If not, don’t lose hope yet. Try the next solution to rectify the NVIDIA control panel missing Windows 10 problem.
Method 4: Update NVIDIA Graphics Driver
The graphic driver is an essential feature of any online game or computer itself. The GPU manufacturers often release updates and features. Also, to avoid any kind of technical problems like flickering screen, improper display working, screen on/off, and so forth, it is necessary to update the graphic driver as they are responsible for the efficiency and performance of the computer. So, update the graphic driver and see if this update works out. Read our guide on 4 ways to update graphic drivers in Windows 10.

Also Read: How to Disable or Uninstall NVIDIA GeForce Experience
Method 5: Manually Open NVIDIA Control Panel
You can force the NVIDIA Control Panel to appear by launching it manually. To do so, follow the steps given below.
1. Press the Windows + E keys simultaneously to launch File Explorer.

2. Navigate to the following location path.
C:\Program Files\NVIDIA Corporation
Note: The location may vary as per your installation.

3. Double-click and open the Control Panel Client folder. Locate and right-click the nvcplui.exe file. Then, select Run as administrator from the context menu.
Check if the NVIDIA Control Panel missing Windows 10 is found again.
Method 6: Do Not Overclock GPU
Overclocking GPU removes the limitation of the graphics card and enables it to carry out above its safety limit. Thus, this process may cause an error sometimes. Therefore, it is necessary not to cross the limit. This is because going forward the limitation might stop the functioning of your graphics card. And this overclocked GPU could be the reason behind the missing NVIDIA Control Panel. Though the direct cause is not found, many users disclosed that reducing GPU overclock enabled the NVIDIA Control Panel to be visible again.
Also Read: What is NVIDIA Virtual Audio Device Wave Extensible?
Method 7: Modify Compatibility Settings
If the error repeats often even after rectifying it, then NVIDIA Support provided us with a permanent solution. Follow the steps given below to modify compatibility settings and fix NVIDIA control panel display settings missing issue.
1. Press the Windows + E keys together to open File Explorer.

2. Navigate to the following location.
C:\Program Files\NVIDIA Corporation\Display.NvContainer

3. On the Display.NvContainer folder, locate the file Display.NvContainer. Right-click on it and select Copy from the context menu.
4. Press Windows + R keys together to launch the Run dialog box.

5. Type shell:startup and hit Enter key to launch the Startup folder.

6. On the folder, press Ctrl + V keys simultaneously to paste the copied folder.
7. Then, right-click the copied Display.NvContainer folder and select Properties from the context menu.
8. On the Properties window, go to the Compatibility tab. Now, check the Run this program as administrator box under the Settings section. Select Apply and then click OK to save the changes made.

Check if the NVIDIA control panel display settings missing in your Windows 10 are fixed.
Method 8: Reinstall NVIDIA Graphics Driver
None of the above solutions worked out? Do not worry. You have one final method to work out. It is to try and reinstall the NVIDIA Control Panel application. Here is how to uninstall and reinstall the application.
1. Hit the Windows key, type device manager, and click on Open.

2. Double-click on Display adapters to expand the driver.

3. Here, right-click the NVIDIA graphics driver or adapter and select Uninstall device in the context menu.

4. Follow the on-screen instructions to uninstall the driver and restart the PC.
5. Go to the NVIDIA drivers download page and fill up the NVIDIA adapter model details and select Search.

6. On the new page, click Download to download the installation wizard.

7. Once downloaded, run the setup file and install the driver on your system.
8. Finally, reboot your PC and see if you can find NVIDIA Control Panel on the desktop or system tray.
Also Read: How to Disable or Uninstall NVIDIA GeForce Experience
Pro Tip: How to Install NVIDIA Control Panel App
To install NVIDIA Control App from Microsoft Store, implement the steps given below:
1. Go to the NVIDIA Control Panel Microsoft store page.
Note: Ensure all the system requirements are met.

2. Select the Get button to install the application.

Check if the NVIDIA control panel missing Windows 10 issue still exists.
Recommended:
- How to Tell If Your Phone is Tapped
- Fix NVIDIA Container High CPU Usage on Windows 10
- How to Fix WOW Error #134 Fatal Condition
- Fix steam_api64.dll Missing on Windows 10
We hope this guide was helpful and you were able to fix NVIDIA control panel missing in Windows 10. Let us know which method worked the best. Please feel free to reach out to us for any queries or suggestions via the comment section given below. Also, let us know what you want to learn next.
Sometimes, while using the Nvidia graphics card, you can get the “Nvidia control panel missing” error. The control panel for the Nvidia graphics card allows its users to change or alter the properties of this device. If the Nvidia graphics card has some kind of internal issue, then also this problem might occur.
Thus, if you are encountering the same issue, then it’s better to check out the causes and solutions described in the below section to overcome this problem easily.
Reasons for the Nvidia Control Panel Missing Windows 10 Issue:
There are multiple reasons for the occurrence of this issue. Some of the common causes of why you can’t find the Nvidia control panel are as follows.
- If the Nvidia services do not execute properly, then you might encounter this error.
- When the graphics card driver is not up to date, this error can crop up then.
- If the Nvidia control panel has been hidden due to some reason, then even this problem can come up.
- When the program files of the Nvidia Control Panel application got corrupted, even then this issue can occur.
Solutions to Resolve the Nvidia Control Panel Windows 10 Problem:
Here, you will get plenty of methods that will surely help you to resolve this Nvidia control panel missing issue in no time.
Start the Nvidia Services Once Again
If the Nvidia services do not start or work normally, then there is a possibility for you to get this error. The one and only way to fix this issue is to restart all the Nvidia services. To do that, follow the steps stated below.
- First, press both the ‘Windows + R’ keys together to launch the Run dialog box.
- In this dialog box, type the text ‘services.msc’ on the blank area beside the ‘Open:’ label and tap on the ‘Enter’ key.
- As soon as you do that, then a new window having the name ‘Services’ will come up. Inside that window, you will get all the services of the installed applications and devices on a list.
- From that list, locate a service that starts with ‘Nvidia’ and right-click on it. Then from the popup menu, choose the ‘Restart’ option.
- Repeat the above step to restart all the remaining Nvidia services.
- Once all the restart processes are complete, then close the ‘Services’ window and reboot the machine.
- Finally, see whether the Nvidia Control Panel option comes back or not.
Install the Nvidia Control Panel Application Once Again
If some core components of the Nvidia Control Panel application gets corrupted or deleted, then you might face this Geforce control panel missing issue. The most feasible solution to get rid of this problem is to install the said application once again. Here are steps to do it efficiently.
- First, click the Windows logo to open the Start menu. Within that menu, go to the left panel and choose the ‘Gear’ icon. This will open a new window with the title ‘Settings’.
- Now, inside that window, locate the ‘Apps’ setting category and choose it. This action will launch a new page. There navigate to the left pane and select the ‘Apps & features’ option.
- Next, move to the right side of that page and type ‘Nvidia Control Panel’ on the search area. Then press the ‘Enter’ button.
- From the search result page, choose the ‘Nvidia Control Panel’ and then click on the ‘Uninstall’ button.
- Once the uninstallation process of the said application is complete, next go to the ‘Microsoft Store’ and install the Nvidia Control Panel software.
Update the Nvidia Graphics Driver
If the Nvidia graphics driver is not up to date, then also this problem might occur. The best solution to resolve this glitch is to perform an update of the Nvidia graphics card. Here is how can you do this.
- Hit the following keys ‘Windows + X’ together to open the ‘Options menu’. In this menu, locate and click on the ‘Device Manager’ option.
- As you click on that option, then a new ‘Device Manager’ window will come up. Within this window, you will get several devices along with their drivers on a list and sublist respectively.
- From the list, locate the ‘Display adapters’ device and double-click on it. This will open a sublist with the graphics card driver that is installed within the computer.
- Now, from that sublist, locate the “Nvidia graphics driver” and right-click on the same. Next, from the popup menu that appears, choose the ‘Update driver’ option.
- At this moment, a new dialog box will appear with two specific links. Among those two links, select the one that says ‘Search automatically for updated driver software’
- When you choose that option, the Windows OS will automatically search for any updates to the Nvidia graphics card. If an update is available, then those will be downloaded and installed automatically.
- Once the update process of the Nvidia graphics card is over, then restart the computer.
Reveal the Nvidia Control Panel
If the Nvidia Control Panel gets hidden due to some internal issues, then you may get this problem. Here is how to open the Nvidia control panel or unhide the Nvidia Control Panel. For that, follow the steps cited below.
- Press both the keys ‘Windows + S’ simultaneously to open the default search area of the OS.
- Inside that area, type in the following text ‘control panel’ and hit the ‘OK’ button. As you click on that button, then a new window having the name ‘Control Panel’ will come up.
- Inside that window, go to the ‘View by:’ field on the upper-right corner and choose the ‘Large icons’ from the drop-down menu.
- Next, locate and double-click on the option ‘Nvidia Control Panel’ from the page. This action will open a new window that has the title ‘Nvidia Control Panel’. There click on the ‘Desktop’ or ‘View’ menu.
- After that, from the drop-down list that appears, choose the ‘Add Desktop Context Menu’ option.
- Finally, close this window and see if the ‘Nvidia Control Panel’ shows up on the Desktop Context Menu.
Launch the Nvidia Control Panel Manually
To bypass the Nvidia control panel missing Windows 10 error, you can manually launch the ‘Nvidia Control Panel’ application. Here are the steps to manually launch the Nvidia Control Panel.
- Launch the ‘File Explorer’ directory window. Then go to the left pane and choose the ‘This PC’ item.’
- Next, move to the right side of that window and double-click on every sub-folder present in the following path – “This PC – > OS (C:) -> Program Files -> NVIDIA Corporation -> Control Panel Client. ” If you cannot get the ‘NVIDIA Corporation’ on the ‘Program Files’ folder, then locate the same on the ‘Program Files (x86)’
- Once you are in the ‘Control Panel Client’ folder, next locate the “nvcplui” file and right-click on it. Then, from the popup menu that appears, click on the ‘Run as administrator’ option.
Solution Provided by Official Nvidia Support Team:
If all the methods here fail to rectify the “can’t find Nvidia control panel” issue, then try out the steps provided by the Nvidia Support below.
- First, double-click on the ‘This PC’ icon to open a folder with all the disk partitions and optical drives.
- In that folder, open the disk partition with Windows OS i.e (C:) drive and follow the path to launch the sub-folders – “C:\Program Files (x86)\NVIDIA Corporation\Display.NvContainer”.
If the NVIDIA sub-folder is not present in the ‘Program Files (x86) directory, then locate that sub-directory within the ‘Program Files’ folder.
- Next, within the ‘Display.NvContainer’ sub-folder, locate the ‘NVDisplay.Container’ file and right-click on it. Now, from the popup menu that appears, choose the ‘Copy’ option.
- Go to the Windows logo and right-click on the same to launch the ‘Options menu’. From that menu, click on the Run option.
- This action will open the ‘Run’ dialog box. Within that dialog box, enter the following text “shell:startup” and then click on ‘OK’.
- Once you see a Startup folder, next paste the ‘NVDisplay.Container’ file that was copied earlier. Now, right-click on that file and choose ‘Properties’ option.
- Inside the new ‘Properties’ dialog box, select the ‘Compatibility’ tab. Under this tab, locate the ‘Run this program as an administrator’ and put a checkmark on the same.
- At last, click on the ‘Apply’ and ‘OK’ buttons respectively.