
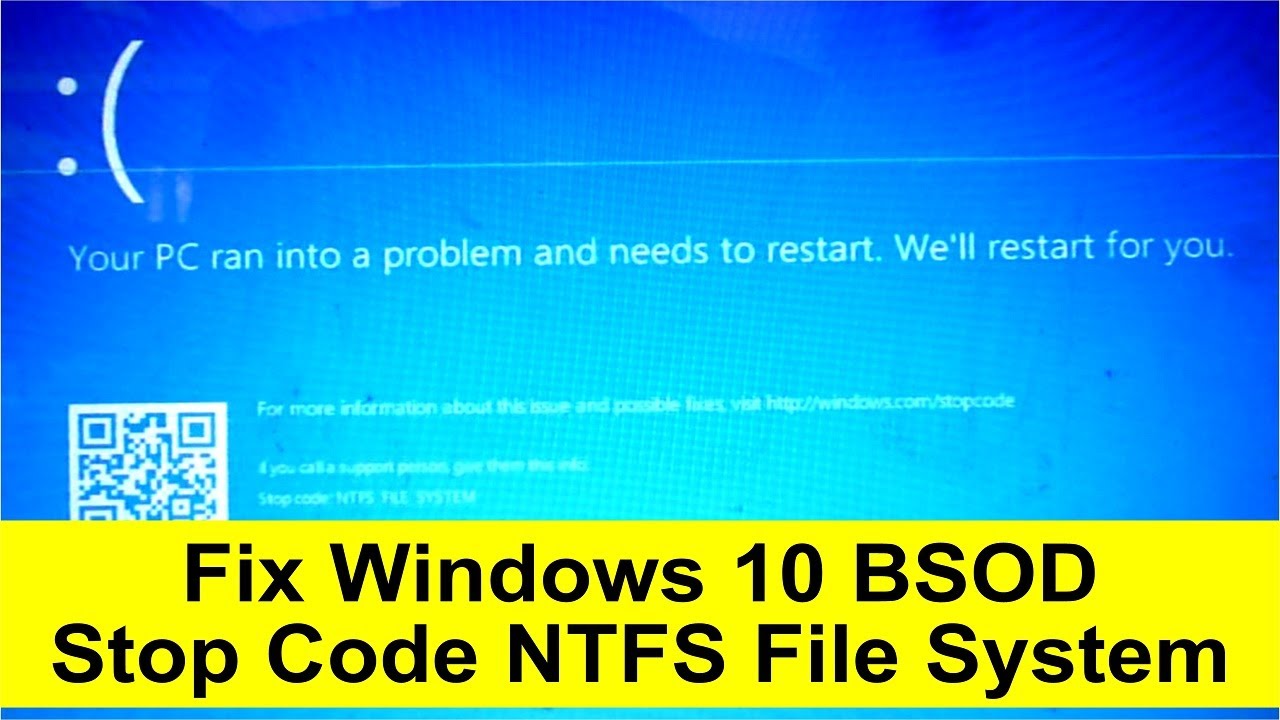
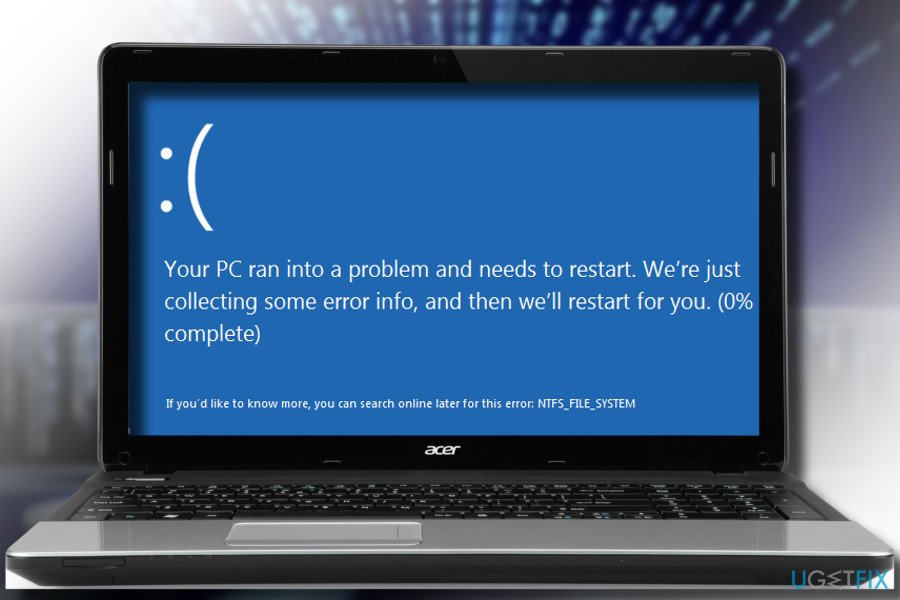
Ошибка чтения файла NTFS.sys и следующий за ней синий экран на Windows 10 свидетельствует о наличии проблем в состоянии накопителей: жестких дисков и твердотельных накопителей. Иногда причина ее проявления может быть вызвана программным сбоем, тогда ее можно будет исправить, а иногда – ошибка свидетельствует о физической неисправности. В таком случае решить проблему можно будет только посредством ремонта или замены комплектующих.
Причины ошибки NTFS_FILE_SYSTEM
Чаще всего ошибка чтения файла NTFS.sys появляется после установки нового накопителя в компьютер, на котором уже есть операционная система. В такой ситуации достаточно обновить или установить отдельный драйвер, предназначенный специально для нового накопителя.
Однако ошибка невозможности чтения файла NTFS.sys, также обозначающаяся кодом 0x00000024, может свидетельствовать и о других программных и аппаратных проблемах. К первым относятся:
- нарушение целостности системных файлов ОС;
- сбой базовых настроек операционной системы;
- повреждение, неправильная установка или отсутствие драйверов для работы с накопителями данных;
- последствия заражения ПК вирусами.

В список аппаратных проблем можно включить:
- повреждение разъемов подключения на накопителях или на материнской плате;
- повреждение кабеля SATA или IDE;
- повреждение кабеля питания накопителя;
- вышедшие из строя комплектующие жесткого диска;
- деградация чипов памяти на твердотельном накопителе и прочие.
Методы решения проблемы
Решить проблему чтения файла NTFS.sys, вызывающую БСОД (с англ. «Blue Screed of Death», что дословно переводится как «синий экран смерти»), удается не всегда. Если причиной ее появления является аппаратная неисправность, то устранить проблему никаким другим способом, кроме починки накопителя, что возможно далеко не всегда, не удастся.
Однако, в любом случае, стоит попробовать следующие манипуляции: проверить секторы накопителя на предмет ошибок, восстановить поврежденный файл или переустановить драйвера устройства.
Если причина возникновения ошибки вызвана программными сбоями, системными ошибками или отсутствием подходящих драйверов, то после проделанных манипуляций пользователю удастся восстановить стабильную работу накопителя.
Проверка диска
Если на экране BSOD появился код остановки работы систем 0х00000024, то можно попробовать решить проблему посредством проверки секторов накопителя на ошибки. Если после сбора информации о проблеме система запустилась, то это можно сделать следующим образом:
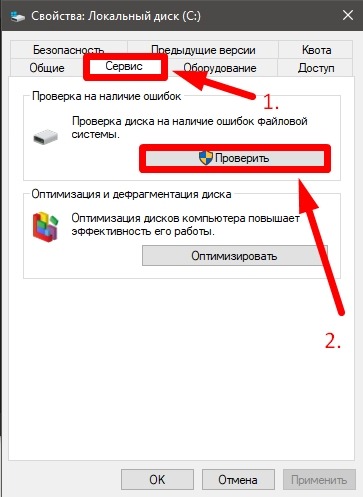
- Открыть «Компьютер».
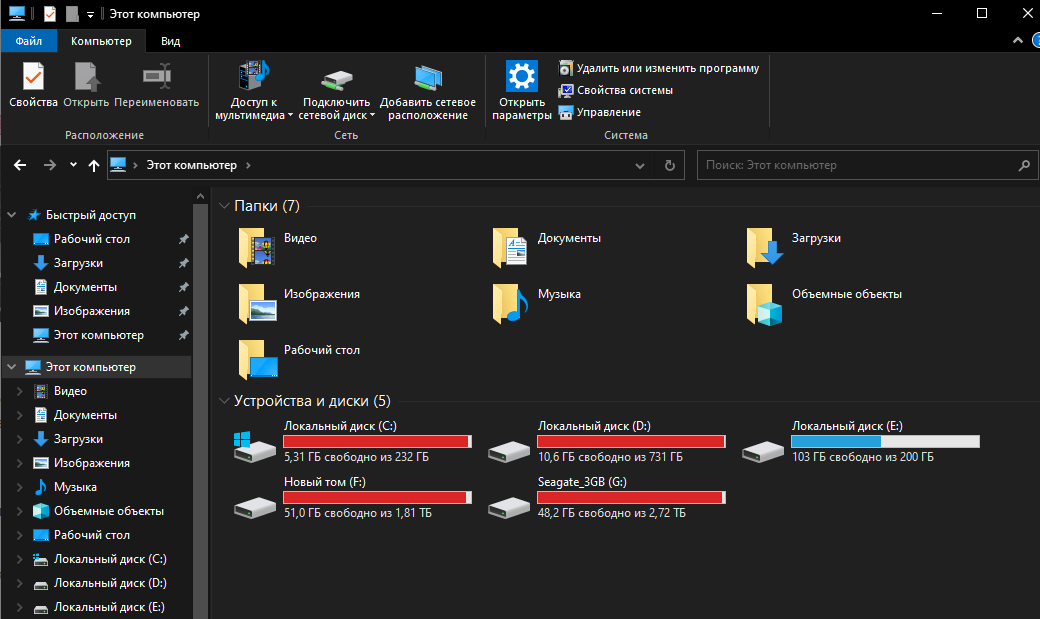
- Нажать правой клавишей на раздел «С» и выбрать вариант «Свойства».
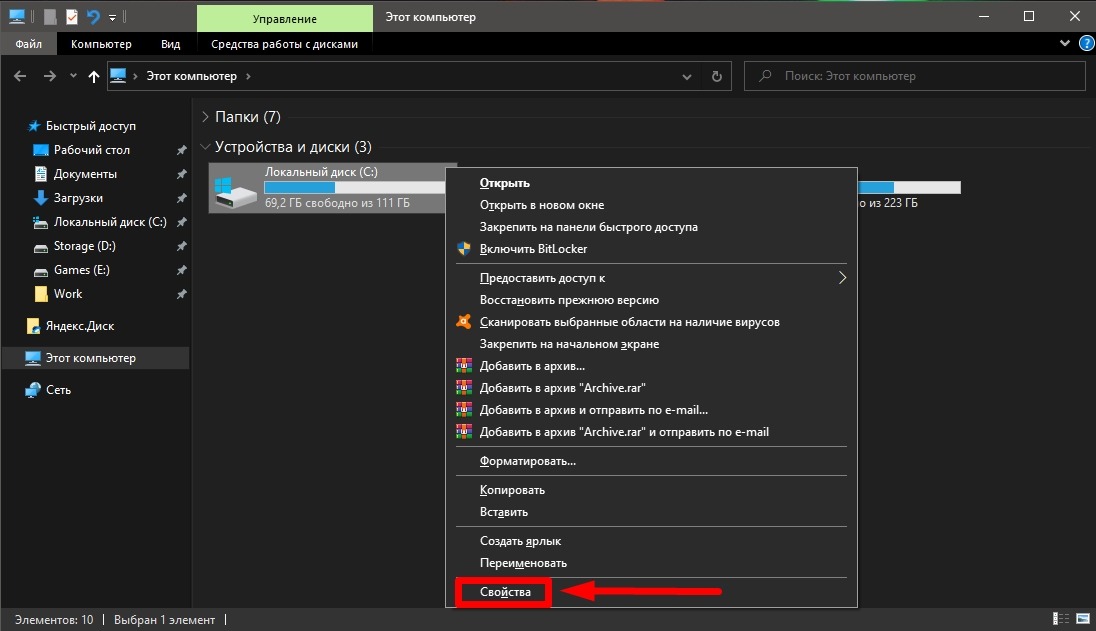
- Перейти в раздел «Сервис» и запустить проверку диска, предварительно проставив все галочки (в поздних версиях Windows 10 настройка дополнительных параметров перед запуском проверки не требуется).
Если запуск системы был неудачен, то перед пользователем появится окно восстановления. Тогда следует:
- Перейти в раздел дополнительных параметров.
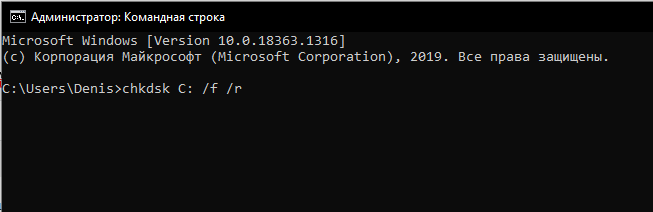
- Выбрать вариант «Командная строка».
- Ввести команду без кавычек «chkdsk C: /f /r» и нажать клавишу «Enter».
- Дождаться завершения проверки и попытаться запустить систему.
Восстановление системного файла
Второй вариант как можно исправить ошибку с файлом NTFS.sys – это восстановление. Операция выполняется через Командную строку. Запустить процесс можно следующим образом:
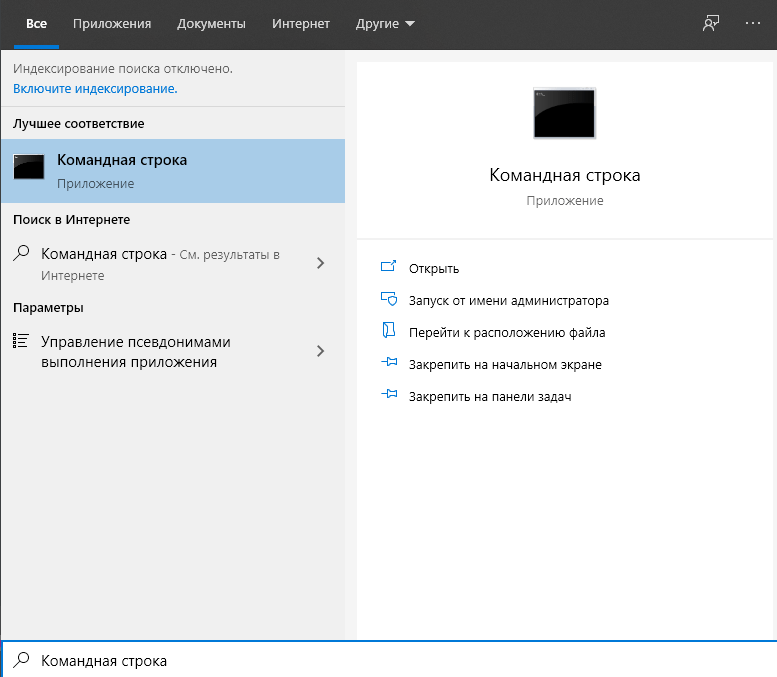
- Открыть консоль:
- если доступ в систему есть, то это можно сделать, набрав в поиске CMD.exe и выбрав вариант запуска с правами Администратора;
- если доступа в систему нет, то это можно сделать на экране восстановления, перейдя в раздел дополнительных параметров и выбрав пункт «Командная строка».

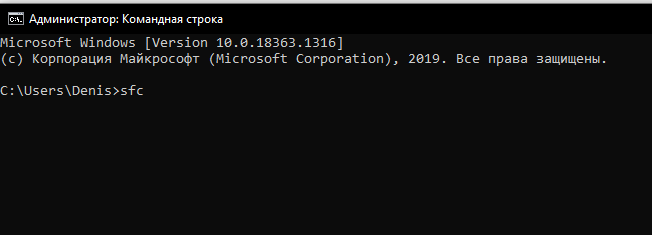
- Поочередно ввести команды без кавычек «>sfc», затем «/scannow».
- Дождаться завершения процедуры и перезагрузить/запустить операционную систему.
Удаление устройства
Способ удаления устройства для чистой установки драйверов поможет только в том случае, если ошибка появилась после установки нового накопителя (HDD, Sata SSD или M2SSD). При таких обстоятельствах после синего экрана ПК, в любом случае, запустится до Рабочего стола.
При выполнении всех операций важно не обращаться к новому накопителю (не открывать его в компьютере, не копировать туда файлы).
Для восстановления драйвера потребуется:
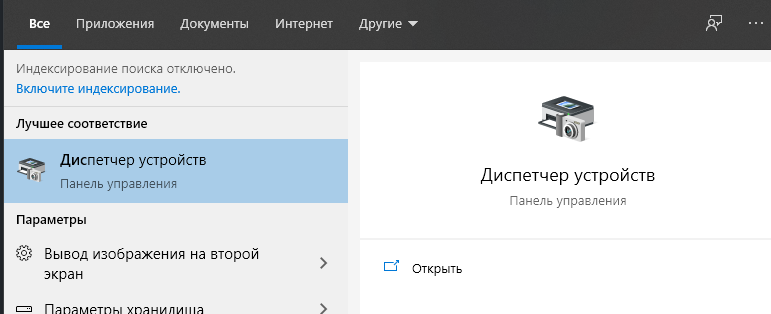
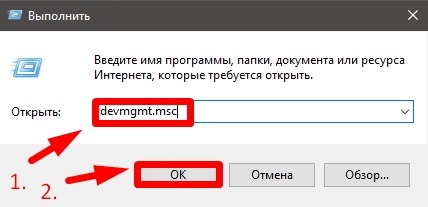
- Открыть Диспетчер устройств. Открыть меню Выполнить («Win+R»), ввести без кавычек «devmgmt.msc» и нажать клавишу «Enter».
- Развернуть список «Контроллеры IDE ATA/ATAPI» и для каждого пункта нажать правую клавишу мыши и выбрать вариант удаления устройства.
- Перезагрузить ПК. Система сама в автоматическом режиме установит новые драйверы.

На заметку: если после перезагрузки в Диспетчере устройств напротив контроллеров стоит восклицательный знак или же в списке появится неизвестное устройство, при этом доступа к накопителю в компьютере не будет, то пользователю придется самостоятельно загрузить и установить драйвер с официального сайта производителя накопителя.
Summary: Failed NTFS.SYS is a Blue Screen of Death (BSOD) error, which may appear with the stop code — System_Service_Exception. This error may lead your Windows PC to a malfunction or crash, resulting in total data loss. To fix this issue, try some of the most recommended methods shared in this blog. You may also download the trial version of Windows Data Recovery Tool to recover your data lost due to this error.


-Source
If you encounter NTFS.SYS blue screen error on your system, it is probably because of corrupt NTFS, bad sectors on the hard drive, or incompatible device drivers. Sometimes, depletion of non-paged pool memory, malware attack on your PC, and corrupt system files may also induce this error. You may see this error showing up with the stop code – System_Service_Exception (See Image 1).

Due to this error, your system may shut down abruptly, get stuck at a booting loop, or even crash, making you lose access to your data. Read this guide to learn some popular methods to fix NTFS.sys problem on your own.
Recover data lost due to Ntfs.sys crash with a professional Windows Data Recovery Tool.
Fix Failed NTFS.SYS (System_Service_Exception) in Windows 10
Enable the safe mode with networking before performing any methods to make sure you don’t face any interruption/problem while trying to solve this error.
Follow the given steps to Enable Safe Mode with Networking:
a. If you see this blue screen error on your system, turn it off.
b. Reboot it and as it starts showing up Windows logo on the screen, turn it off with the power button.
c. Repeat this step thrice and then allow your PC to restart.
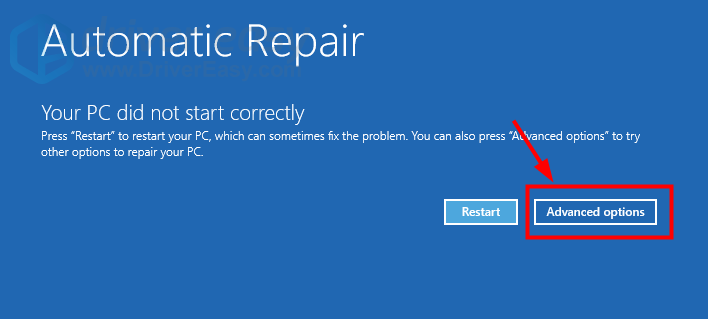
d. After this, choose Advanced options from the Automatic Repair environment. (See Image 2)

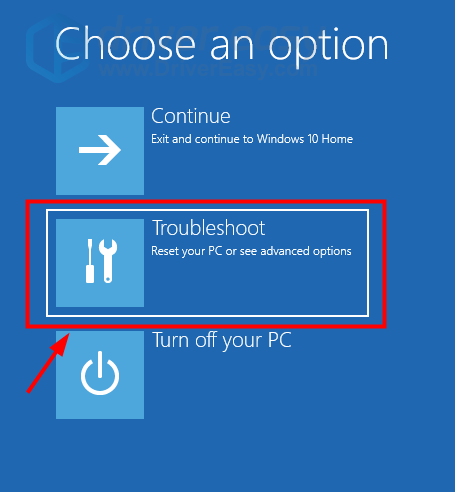
e. On the Choose an option screen, click Troubleshoot. (See Image 3)

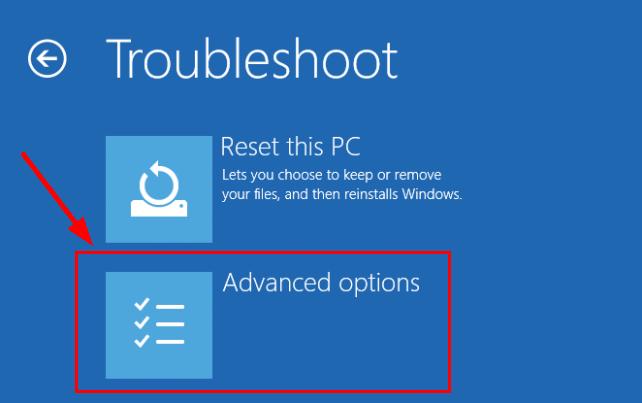
f. Next, on the Troubleshoot screen, choose Advanced options. (See Image 4)

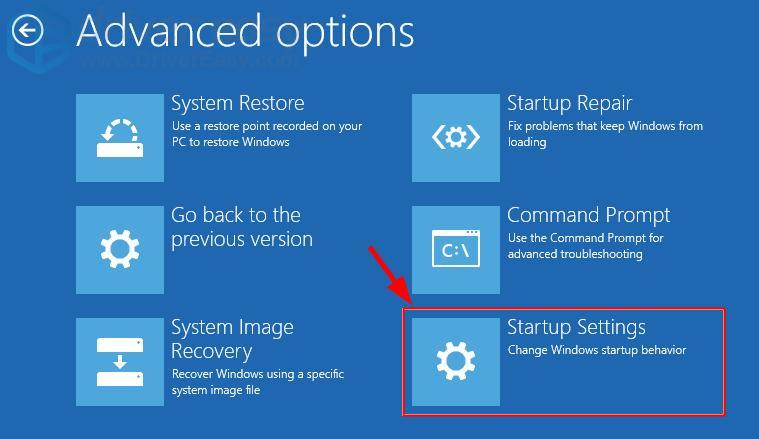
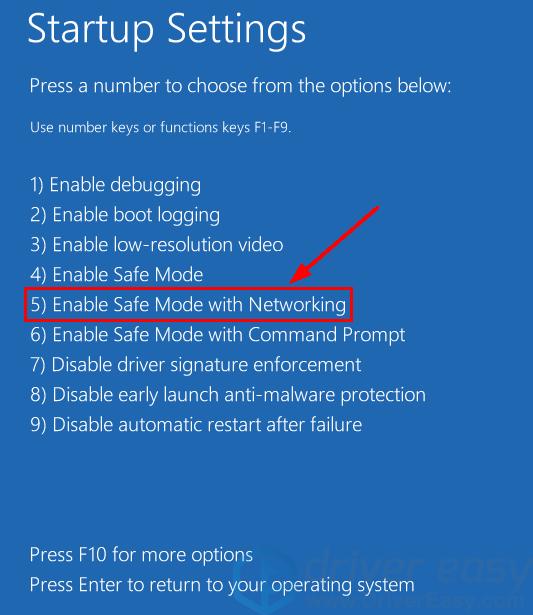
g. On the Advanced options screen, click Startup Settings. (See Image 5)

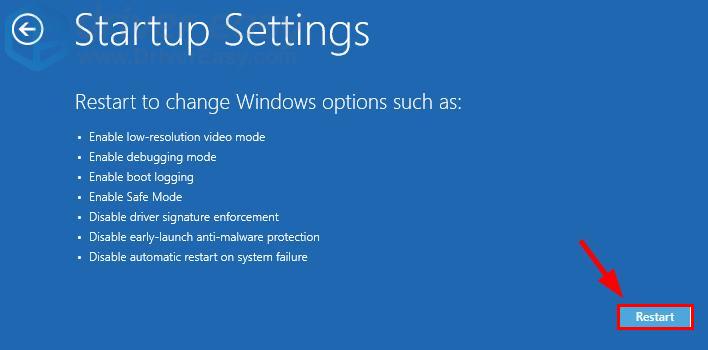
h. Afterward, click Restart on the Startup Settings screen. (See Image 6)

i. Once the PC restarts, choose option 5 from the list or press F5 for enabling safe mode with networking.
j. After enabling the Safe Mode, you may start performing the following fixes to solve error- Ntfs.sys system service exception on windows 10.
Method 1: Update Device Driver
Sometimes, the outdated, incompatible, or corrupt device drivers may cause this blue screen of death error. You may download and install updated device drivers by following the given steps:
a. Open Device Manager and navigate to Display Adapters. (See Image 7)

b. Expand Display Adapters and select the problematic driver.
c. Right-click on the driver and select Update driver from the available options. (See Image 8)

d. On the next prompt, click ‘Search automatically for drivers.’ (See Image 9)

e. Windows starts searching for an updated version of the drivers. You may install the latest driver software to fix the error ‘System Service Exception Windows 10.’
You may also update the driver through Windows Update. Follow the given steps to do so:
a. Open System Settings and follow Update & Security > Windows Update.
b. Check for the latest updates available. If the updates are available, click ‘Install now’ and then restart your system. (See Image 10)

c. Reboot your PC and check whether the error is resolved.
Method 2: Scan your computer for computer viruses
If the system is affected by a virus or malware, you may encounter this error. You may scan for malware ‘Windows Security’ utility. To do so, follow the given steps:
a. Open System Settings and go to Update & Security. (See Image 11)

b. Navigate to Windows Security and open it. (See Image 12)

c. Move to the Virus & threat protection on the right panel. (See Image 13)

d. Follow the given instructions on the screen to check malware and get rid of it.
Method 3: Remove BitDefender and/or Webroot
Some of the third-party antivirus programs may lead Windows to malfunction and cause NTFS.SYS BSOD error with stop code ‘System Service Exception’. You may fix this by removing BitDefender or Webroot using the following steps:
a. Open System Settings and go to Apps. (See Image 14)

b. Find if you have BitDefender or Webroot installed on your system.
c. If it is installed in your PC, right-click on it to Uninstall. (See Image 15)

d. Restart the system to see if the stop code system service exception persists.
Method 4: Run SFC Scan
This error may also occur due to missing or corrupt system files. You may run SFC (System File Checker) utility to check for any system files’ corruption and fix it. Follow the below-given steps:
a. Type cmd in Windows’ search box to open Command Prompt and run it as an administrator. (See Image 16)

b. Click ‘Yes’ to open Command Prompt.
c. On Command Prompt screen, type sfc/scannow and hit Enter. (See Image 17)

d. The process will take time to check the corrupt system files and fix it to resolve the error code: System Service Exception in Windows 10.
Method 5: Run CHKDSK Command
Sometimes, this problem may occur if the hard drive is faulty or consists of bad sectors. You may check your hard disk for errors and fix it by running the CHKDSK command. Follow the below-said steps:
a. Open Command Prompt, run it as administrator and type chkdsk f: /f and press Enter. (See Image 18)

b. Wait until the process is completed and then exit the Command Prompt.
c. Restart the system and check if you have fixed the issue.
[Caution: Running the CHKDSK command can fix the hard drive corruption. However, you will end up losing your data after performing this method as it scans the drive and marks down the bad sectors on it, helping Windows understand not to read or store data from bad sectors.]
It is suggested to use a powerful data recovery tool such as Stellar Data Recovery Professional to recover lost data after using the CHKDSK command. This do-it-yourself (DIY) software can efficiently extract multiple kinds of data simultaneously. Be it your favorite pictures and videos or your essential official documents, emails, files, etc. you may recover them quickly using this software. The software facilitates data recovery from formatted, corrupted, or missing drive partitions and storage devices. It features ‘Create Recovery Drive’ utility. Using this utility, you may create a bootable media to restore data from unbootable, dead, crashed, or BSOD affected systems. Check out this video:
Method 6: Run Memory Diagnostic Tool
Non-paged pool memory may be another cause of the error- System Service Exception Windows 10. The non-paged pool, containing the virtual memory addresses, always remains in the physical memory as long as the corresponding kernel objects are allocated. It can never be paged out into pagefile when the system runs out of the free physical memory.
If you encounter stop code- system_service_exception on your system, the depletion of non-paged pool memory may be the reason. Other related reasons could be as following:
- Low amount of available non-paged pool memory during the indexing process
- Another kernel-mode driver requiring this memory
To resolve the depletion of non-paged pool memory, you may add new physical memory to the system to improve the non-paged pool memory available to the kernel. Also, you may try running the Windows Memory Diagnostic Tool to check and fix the stop code System Service Exception. Follow the below-mentioned steps:
a. Type Windows Memory Diagnostic in Windows’ search bar and hit Enter to open it. (See Image 19)

b. On the Windows Memory Diagnostic screen, select ‘Restart now and check for problems (recommended.) (See Image 20)

c. The Windows Memory Diagnostic tool screen will display on the screen.
d. Let the test begin and wait until it is done. (See Image 21)

e. When the test is completed, the system will restart automatically and return to the Windows desktop.
f. You may check the test results and see if the error is fixed.
Wrapping up
The System_Service_Exception error may occur without any warning and make you lose access to your PC and data stored on it. There could be several reasons behind this error, as explained above. To fix this error, try methods such as CHKDSK command, SFC Scan, Windows update, etc. However, if you’ve lost your data due to this Ntfs.sys error, try using an efficient data recovery tool such as Stellar Data Recovery Professional. This software can get back your data from Windows PCs and storage devices such as HDD, SSD, USB and SD card, etc.
Also read – Fixed: Critical Process Died BSOD Error in Windows 10
About The Author
Mansi Verma
Mansi Verma is a Senior Technology Writer at Stellar®. She is a Tech enthusiast, holding over 8 years of experience in Data Recovery, IoT, Artificial Intelligence, and the Robotics technology domain. She loves researching and providing DIY solutions to solve Windows technical issues. In her spare time, she likes reading novels, and poetry. She also enjoys Travelling, Rafting, Trekking, etc.
If you get a Ntfs.sys blue screen of death error on your computer, don’t worry. It’s often not hard to fix at all…
Here are five fixes that have helped other users resolve the Ntfs.sys BSOD issue. You may not have to try them all; just work your way down the list until you find the one that works for you.
If you CANNOT log into your computer system, please start from Fix 1; If you CAN log into your computer system properly however, please start from Fix 2.
- Enter Safe Mode With Networking
- Update the device drivers
- Remove BitDefender and/or Webroot
- Repair system files
- Check for RAM issues
Fix 1: Enter Safe Mode With Networking
- Make sure your computer is off.
- Press the power button to turn on your PC. Then when Windows displays a login screen (i.e. Windows has fully booted), long press the power button to turn it off.
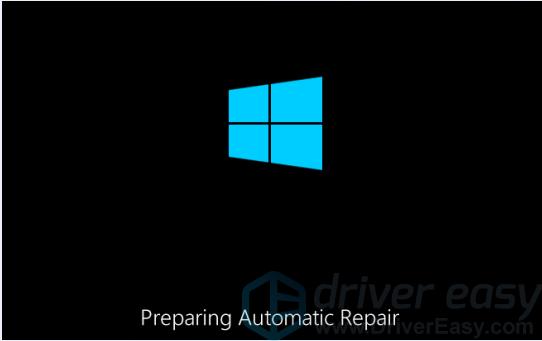
- Repeat 1) and 2) until the screen says Preparing Automatic Repair.

- Wait for Windows to finish diagnosing your PC, and click Advanced options.

- Click Troubleshoot.

- Click Advanced options.

- Click Startup settings.

- Click Restart.

- On your keyboard, press 5 to enable Safe Mode with Networking.

- Now you’ve successfully booted up in Safe Mode with Networking, continue with Fix 2 to troubleshoot the blue screen problem.
Fix 2: Update the device drivers
This problem may occur if you’re using the wrong or outdated device drivers. So you should update all the drivers available to see if it fixes the problem. If you don’t have the time, patience or computer skills to update these drivers, you can instead, do it with Driver Easy.
Driver Easy will automatically recognize your system and find the correct drivers for it. You don’t need to know exactly what system your computer is running, you don’t need to risk downloading and installing the wrong driver, and you don’t need to worry about making a mistake when installing. Driver Easy handles it all.
You can update your drivers automatically with either the FREE or the Pro version of Driver Easy. But with the Pro version it takes just 2 clicks (and you get full support and a 30-day money back guarantee):
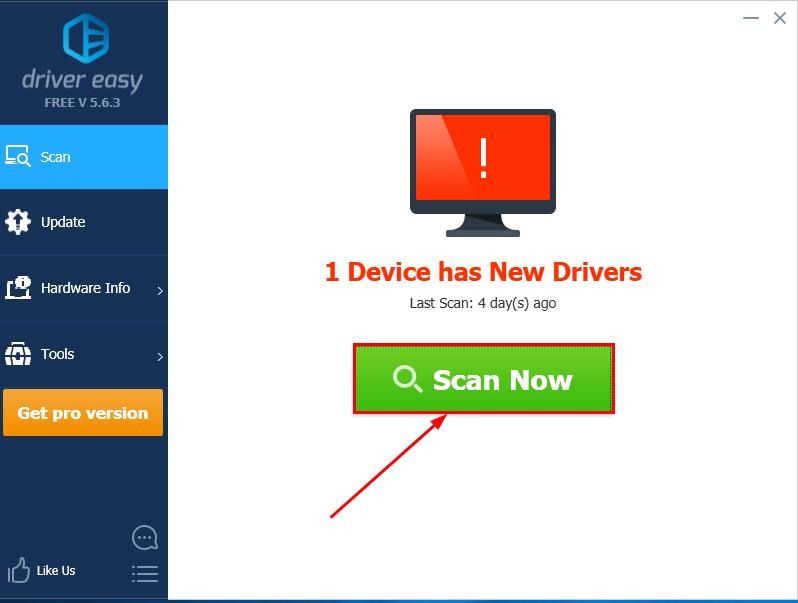
- Download and install Driver Easy.
- Run Driver Easy and click the Scan Now button. Driver Easy will then scan your computer and detect any problem drivers.

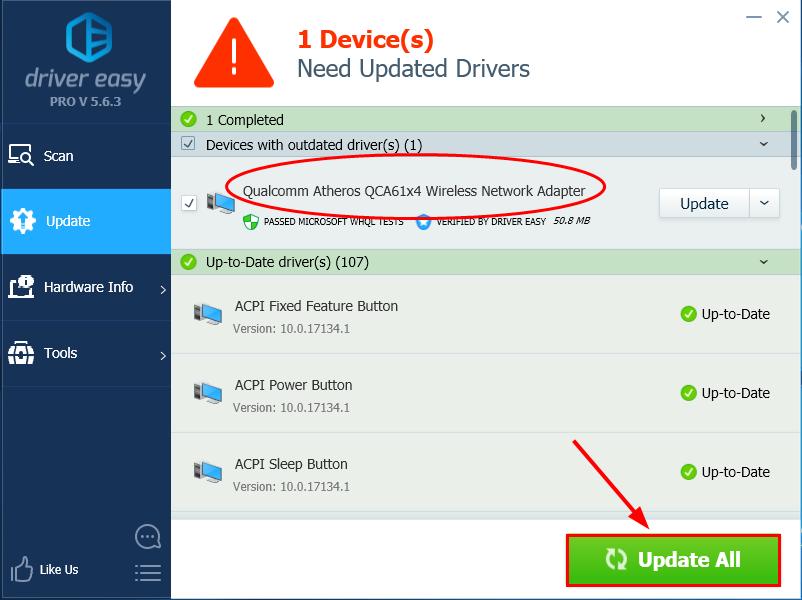
- Click Update All to automatically download and install the correct version of ALL the drivers that are missing or out of date on your system (this requires the Pro version – you’ll be prompted to upgrade when you click Update All).

You can also click Update to do it for free if you like, but it’s partly manual. - Restart your computer for the changes to take effect.
- Check to see if the Ntfs.sys blue screen error has been resolved. If yes, then great! If the issue remains, please move on to Fix 3, below.
Fix 3: Remove BitDefender and/or Webroot
Turns out some third-party anti-malwares cannot do well with our OS, hence this ntfs.sys failed problem with BitDefender and Webroot being the most nasty ones. So we might have to check if we have them installed unknowingly and remove them.
To do so:
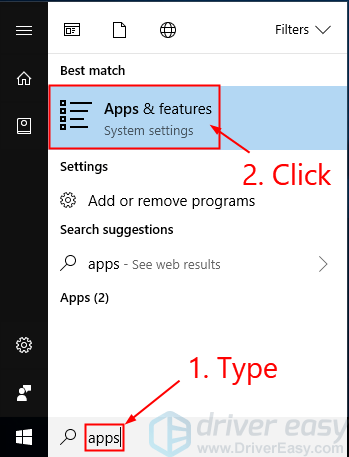
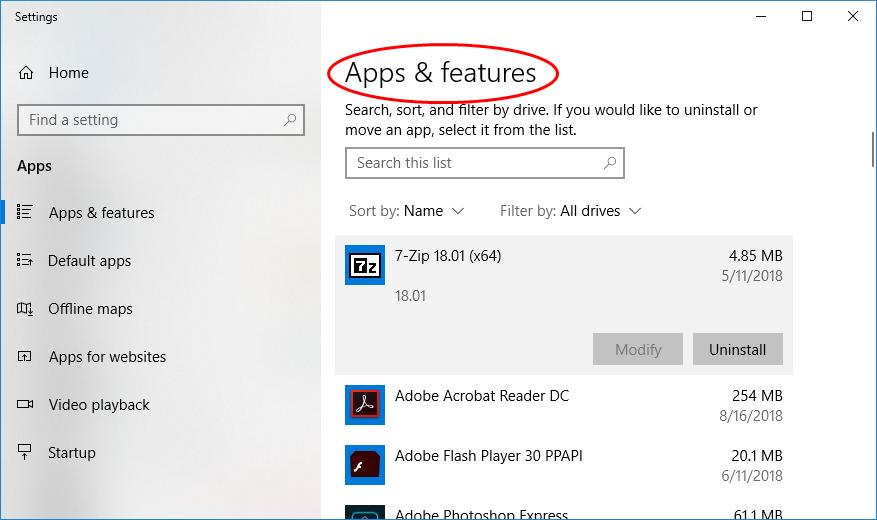
- On your keyboard, press the Windows logo key , and type apps. Click Apps & features.
- Browse through the apps & features list and see if you have BitDefender or Webroot. If yes, uninstall BOTH of them.

- Restart your computer for the changes to take effect.
- Check to see if the ntfs.sys BSOD problem still occurs. If not, then congrats – you have solved the issue successfully! If the issue persists, please try Fix 4, below.
Fix 4: Repair system files
The blue screen of death issue could be caused by missing, corrupt or damaged system files on your computer. There are two ways you can repair possible issues with your system files:
- Repair & replace corrupt system files with Fortect
- Run SFC scan
Repair & replace corrupt system files with Fortect
Fortect is a tool specializing in Windows repair. With Fortect, the preliminary will scan your computer’s operating system for viruses, malware, and missing, damaged, or corrupt files, then it removes all problematic files found and replaces them with new healthy files. It’s like a clean reinstall of your operating system, except that you won’t lose any user data, and all programs, and settings are exactly as they are before the repair.
Here’s how to use Fortect to run a Windows repair:
1) Download and install Fortect.
2) Open Fortect and run a scan on your PC. The process might take a couple of minutes.
3) Once the scan finishes, you will get a summary of the issues found on your computer. 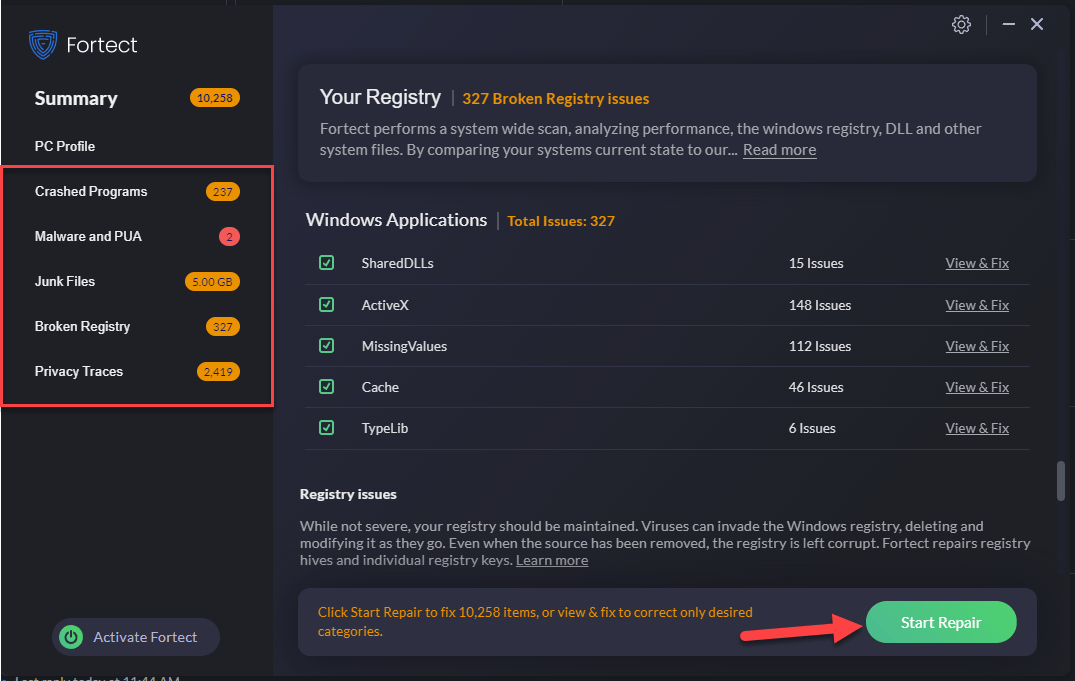
If you need to proceed with the repair function, you’ll be required to purchase the full version.
4) Restart your computer for the changes to take effect.
5) Check your computer to see if the ntfs.sys BSOD issue has been fixed.
The full version of Fortect comes with a 60-day money-back guarantee and full custom support. If you run into any problems while using Fortect, or if it doesn’t work for you, don’t hesitate to contact their support team.
Run SFC scan
System File Checker (SFC) is a handy feature in Windows that helps scan your system files and repair missing or corrupted system files(including those related to BSOD). To run the SFC scan:
1) On your keyboard, press the Windows logo key and type cmd. Then right click on Command Prompt and click Run as administrator.
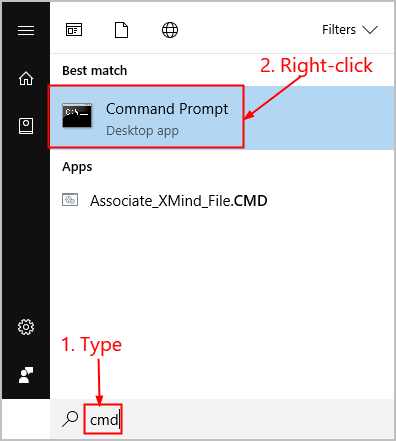
2) Click Yes when prompted to confirm.
3) In the command prompt window, type sfc /scannow and press Enter.
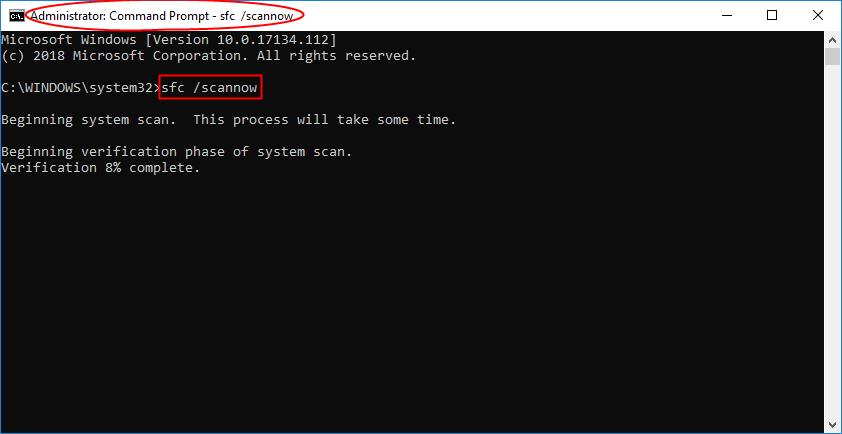
It’ll take some time for the SFC to replace the corrupted system files with new ones if it detects any, so please be patient.
4) Restart your computer for the changes to take effect.
5) Check your computer to see if the ntfs.sys BSOD has been fixed. If yes, then congrats! If the issue still persists, please move on to Fix 5, below.
Fix 5: Check for RAM issues
Faulty or incorrect set up RAM can also be the reason behind this ntfs.sys system crashing issue. So we might have to check if everything works just fine on our hardwares. To do do:
- Check your hardwares. Turn off and unplug your PC, then remove all of your RAM sticks. Try to power your computer back on with the sticks, ONE BY ONE. If your computer fails to boot with a specific RAM, you know that one is to blame.
- Check the timings and frequency of the RAM. Go to your RAM’s manufacturer’s official website and find out the default & recommended values. If they don’t match, you might have to overlock/underlock the RAM. Be sure to leave your PC with professional hands if you’re not familiar with the BIOS modding stuff.
Hopefully you have successfully resolved the ntfs.sys Blue Screen of Death issue by now. If you have any questions, ideas or suggestions, please let me know in the comments. Thanks for reading!
8
8 people found this helpful
Available in other languages
In diesem Beitrag zeigen wir Ihnen, was Sie tun können, um den Bluescreen-Fehler mit der Fehlerursache Ntfs.sys zu beheben.
Download Windows Speedup Tool to fix errors and make PC run faster
NTFS (New Technology File System), was introduced by Microsoft with the release of Windows NT 3.1; and till now NTFS is still the major file system format used in Windows systems.
The NTFS_FILE_SYSTEM bug check has a value of 0x00000024. This indicates a problem occurred in ntfs.sys, the driver file that allows the system to read and write to NTFS drives.

Some Windows 11/10 users have reported seeing this error after updating their Windows. Another possible cause of this bug check is disk corruption. Corruption in the NTFS file system or bad blocks (sectors) on the hard disk can induce this error. Corrupted hard drive (SATA/IDE) drivers can also adversely affect the system’s ability to read and write to disk, thus causing the error.
There could be other potential causes too:
- Virus or malware infection.
- System memory is running out of space.
- Driver issues.
- Damaged or removed system files.
- Damaged hard drive.
Fix NTFS_FILE_SYSTEM Blue Screen
If you’re faced with this issue, you can try our recommended solutions below in no particular order and see if that helps to resolve the issue.
- Run CHKDSK
- Run the Blue Screen Online Troubleshooter
- Run antivirus scan
- Run Driver Verifier
- Perform Startup Repair
- Rebuild Boot Manager
- Update Hard Drive driver
- Run SFC scan
- Run DISM scan
- Replace Hard Drive.
Let’s take a look at the description of the process involved concerning each of the listed solutions. Before you begin, update your Windows 10, as Microsoft has released a fix for this. If it helps, good; else read on.
NOTE: If you can log in normally, good; else you will have to boot into Safe Mode, enter the Advanced Startup options screen, or use the Installation Media to boot to be able to carry out these instructions.
1] Run CHKDSK
Using CHKDSK is one solution that has proved to be most effective to fix this BSOD error.
To run CHKDSK, do the following:
- Press Windows key + R to invoke the Run dialog.
- In the Run dialog box, type
cmdand then press CTRL + SHIFT + ENTER to open Command Prompt in elevated mode. - In the command prompt window, type the command below and hit Enter.
chkdsk /x /f /r
You will receive the following message:
CHKDSK cannot run because the volume is in use by another process. Would you like to schedule this volume to be checked the next time the system restarts? (Y/N).
- Press the Y key on the keyboard and then reboot your computer to let CHKDSK to check and fix the errors on the computer hard drive.
After CHKDSK completes, check to see if the issue is resolved.
This should normally fix your issue. If it doesn’t, try the other suggestions.
2] Run the Blue Screen Online Troubleshooter
The Blue Screen Online Troubleshooter from Microsoft more often than not will fix BSOD errors.
3] Run antivirus scan
This solution requires you to run a full system antivirus scan with Windows Defender or any reputable third-party AV product. Also, in severe cases, you can run perform Windows Defender Offline Scan at boot time or use bootable AntiVirus Rescue Media to recover your system.
4] Run Driver Verifier
Run Driver Verifier on your Windows 10 device. You will get a message about the status of each driver – follow the onscreen instructions to fix the problem.
5] Perform Startup Repair
Perform Windows 10 Startup Repair and see if that helps
6] Rebuild Boot Manager
Maybe you could rebuild the Boot Configuration Data (BCD) and see if that works for you.
7] Update Hard Drive driver
Corrupted hard disk drivers could be the culprit for the NTFS_FILE_SYSTEM Blue Screen error. In this case, you can either update your drivers manually via the Device Manager, or you can get the driver updates on the Optional Updates section under Windows Update. You may also automatically update your drivers or you can download the latest version of the driver from the hard disk manufacturer’s website.
8] Run SFC scan
This solution requires you to run an SFC scan and see if that helps.
9] Run DISM scan
You can run the DISM scan and see if that helps.
10] Replace Hard Drive
As a last option, you may need to replace your hard drive and clean install Windows 10. But before you do, you need to determine if the hard drive has failed or disk failure is imminent by running a S.M.A.R.T check.
Any of these solutions should work for you!
Related: Fix Ntfs.sys Failed BSOD Error.
Obinna has completed B.Tech in Information & Communication Technology. He has worked as a System Support Engineer, primarily on User Endpoint Administration, as well as a Technical Analyst, primarily on Server/System Administration. He also has experience as a Network and Communications Officer. He has been a Windows Insider MVP (2020) and currently owns and runs a Computer Clinic.
NTFS_FILE_SYSTEM — это синий экран смерти, который способен появляться на всех версиях операционной системы Windows. Как правило, причиной, стоящей за этим критическим сбоем, являются проблемы с файловой системой жесткого диска, на котором располагается ОС Windows. Чуть реже, причиной BSoD NTFS_FILE_SYSTEM может быть какой-то драйвер в системе, который выводит ее из стабильного состояния.
Обычно, решается данный синий экран смерти с помощью такой системной утилиты, как Check Disk. Эта утилита встроена в вашу операционную систему, так что искать ее или загружать со сторонних ресурсов вам не понадобится. Применить Check Disk можно с помощью системной консоли Windows. Именно этим мы с вами и займемся в данной статье.
Устраняем NTFS_FILE_SYSTEM на Windows 10
Не каждый синий экран смерти намертво блокирует компьютер пользователя. Если вам удалось обойти NTFS_FILE_SYSTEM и войти в операционную систему, то считайте себя везунчиком, так как устранить критический сбой, вероятно, вам удастся куда быстрее. Все дело в том, что применить программу Check Disk можно только в Командной строке, доступ к которой можно получить в двух местах: ОС и Windows RE(среда восстановления).
Если же синий экран смерти NTFS_FILE_SYSTEM заблокировал вашу систему, то, к сожалению, вам придется воспользоваться Средой Восстановления, доступ к которой можно получить с помощью установочного носителя Windows.
Если есть доступ к системе:
- нажмите правой кнопкой мыши на Пуск;
- выберите в контекстном меню пункт «Командная строка(администратор)»;
- впишите в консоль команду chkdsk /f /r и нажмите Enter;
- дождитесь окончания процедуры, а затем перезагрузите компьютер.
Если доступа к системе нет(NTFS_FILE_SYSTEM блокирует доступ):
- создайте установочный носитель Windows 10(USB-носитель или CD);
- загрузитесь через него и доберитесь до окна с кнопкой «Установить»;
- нажмите на кнопку «Восстановление системы»;
- выберите раздел «Поиск и устранение неисправностей»;
- далее откройте «Дополнительные параметры»;
- далее кликните на инструмент «Командная строка»;
- введите в консоль команду chkdsk /f /r и нажмите Enter;
- на запрос о выполнение проверки при следующей загрузке системы — нажмите «Y»;
- перезагрузитесь и подождите, пока завершиться процесс проверки вашего жесткого диска.
Обычно, использования программы Check Disk достаточно, чтобы разрешить проблему с синим экраном смерти NTFS_FILE_SYSTEM. Тем не менее бывают случаи, когда вышеуказанный метод не срабатывает. Что же, в таком случае, мы рекомендуем вам попробовать войти в Среду Восстановления Windows и испробовать некоторые опции: восстановление при загрузке и восстановление системы с помощью точки восстановления. Если и это не поможет, то можете воспользоваться опцией «Вернуть компьютер в предыдущее состояние», что, по-сути, эквивалентно переустановке Windows 10.