Notice: We have started full time work on Runtime, the successor to NVM for Windows.
Complete this form to provide your thoughts and sign up for progress updates
NVM for Windows
The Microsoft/npm/Google recommended Node.js version manager for Windows.
This is not the same thing as nvm! (expand for details)
The original nvm is a completely separate project for Mac/Linux only. This project uses an entirely different philosophy and is not just a clone of nvm. Details are listed in Why another version manager? and what’s the big difference?.

Sponsors
Seeking Feedback:
We’re working on Runtime (rt), the successor to NVM For Windows. Please contribute by taking a minute to complete this form. Thank you!
Overview
Manage multiple installations of node.js on a Windows computer.
tl;dr Similar (not identical) to nvm, but for Windows. Has an installer. Download Now!
This has always been a node version manager, not an io.js manager, so there is no back-support for io.js. Node 4+ is supported. Remember when running nvm install or nvm use, Windows usually requires administrative rights (to create symlinks).

There are situations where the ability to switch between different versions of Node.js can be very useful. For example, if you want to test a module you’re developing with the latest bleeding edge version without uninstalling the stable version of node, this utility can help.

Installation & Upgrades
⭐ ⭐ Uninstall any pre-existing Node installations!! ⭐ ⭐
The simplest (recommended) way to get NVM for Windows running properly is to uninstall any prior Node installation before installing NVM for Windows. It avoids all of the pitfalls listed below. However; you may not wish to nuke your Node installation if you’ve highly customized it. NVM for Windows can assume management of an existing installation, but there are nuances to this (dependent entirely on the permissions of the user running the installation). If you have an administrative account, it’s relatively safe to install NVM for Windows before uninstalling the original Node version. If you are working in a closed environment, such as a corporate Active Directory environment where installations/uninstallations are controlled by group policy, you should really consider removing the original version of Node before installing NVM4W.
Permission Problems
For security reasons, Windows will not allow an application from one vendor to «uninstall» an application from a different vendor. The official NVM4W installer will attempt assume management of an existing installation of Node., but it cannot actually uninstall the original Node.js version. To work around this, NVM for Windows installter attempts to copy the original Node.js installation files to the NVM root. This includes global npm modules and configurations. Once this process is complete, the original Node.js installation can be uninstalled without losing data.
PATH Installation Problems
If you attempt to configure the NVM_SYMLINK to use an existing directory (like C:\Program Files\nodejs), it will fail because a symlink cannot overwrite a physical directory. This is not a problem if you choose a different symlink path (such as C:\nvm\node).
PATH Conflicts
If you do not uninstall the original version, running nvm use may appear to do nothing at all. Running node -v will always show the original installation version. This is due to a PATH conflict that presents when the same application is installed multiple times. In NVM4W 1.1.11+, run nvm debug to determine if you have a PATH conflict.
For simpliciy, we recommend uninstalling any existing versions of Node.js before using NVM for Windows. Delete any existing Node.js installation directories (e.g., %ProgramFiles%\nodejs) that might remain. NVM’s generated symlink will not overwrite an existing (even empty) installation directory.
👀 Backup any global npmrc config 👀
(e.g. %AppData%\npm\etc\npmrc)
Alternatively, copy the settings to the user config %UserProfile%\.npmrc. Delete the existing npm install location (e.g. %AppData%\npm) to prevent global module conflicts.
Install nvm-windows
Use the latest installer (comes with an uninstaller). Alternatively, follow the manual installation guide.
If NVM4W doesn’t appear to work immediately after installation, restart the terminal/powershell (not the whole computer).

Reinstall any global utilities
After install, reinstalling global utilities (e.g. yarn) will have to be done for each installed version of node:
nvm use 14.0.0
npm install -g yarn
nvm use 12.0.1
npm install -g yarn
Upgrading nvm-windows
💡 As of v1.1.8, there is an upgrade utility that will automate the upgrade process.
To upgrade nvm-windows, run the new installer. It will safely overwrite the files it needs to update without touching your node.js installations. Make sure you use the same installation and symlink folder. If you originally installed to the default locations, you just need to click «next» on each window until it finishes.
Usage
nvm-windows runs in an Admin shell. You’ll need to start powershell or Command Prompt as Administrator to use nvm-windows
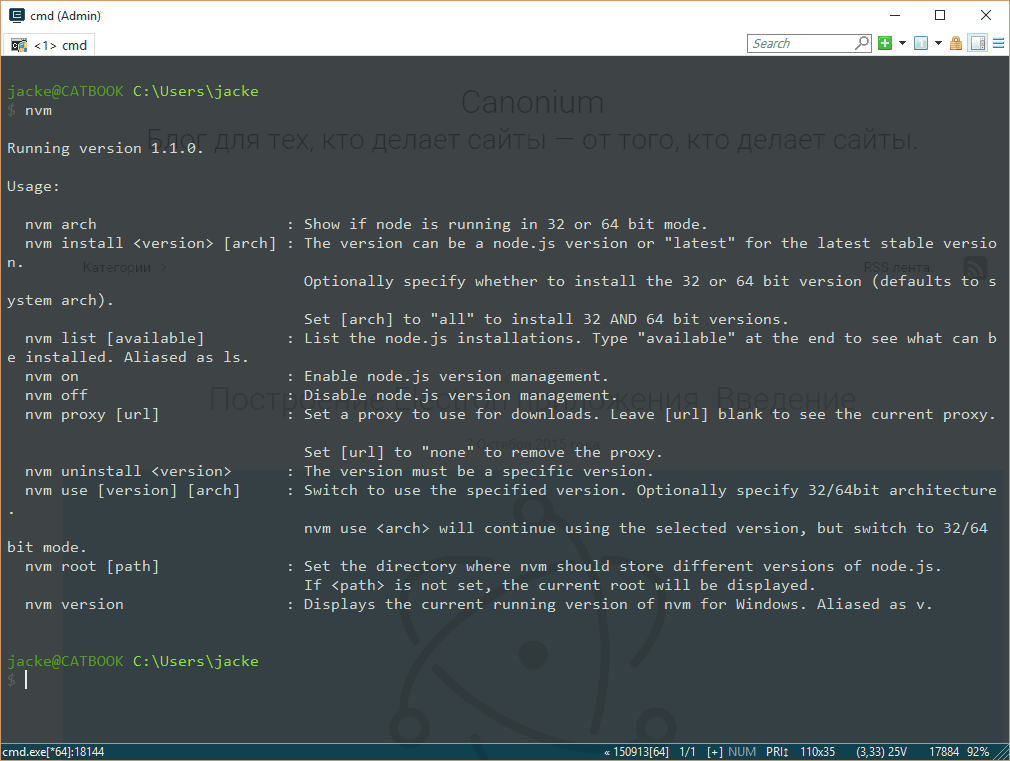
NVM for Windows is a command line tool. Simply type nvm in the console for help. The basic commands are:
nvm arch [32|64]: Show if node is running in 32 or 64 bit mode. Specify 32 or 64 to override the default architecture.nvm check: Check the NVM4W process for known problems.nvm current: Display active version.nvm install <version> [arch]: The version can be a specific version, «latest» for the latest current version, or «lts» for the most recent LTS version. Optionally specify whether to install the 32 or 64 bit version (defaults to system arch). Set [arch] to «all» to install 32 AND 64 bit versions. Add--insecureto the end of this command to bypass SSL validation of the remote download server.nvm list [available]: List the node.js installations. Typeavailableat the end to show a list of versions available for download.nvm on: Enable node.js version management.nvm off: Disable node.js version management (does not uninstall anything).nvm proxy [url]: Set a proxy to use for downloads. Leave[url]blank to see the current proxy. Set[url]to «none» to remove the proxy.nvm uninstall <version>: Uninstall a specific version.nvm use <version> [arch]: Switch to use the specified version. Optionally uselatest,lts, ornewest.newestis the latest installed version. Optionally specify 32/64bit architecture.nvm use <arch>will continue using the selected version, but switch to 32/64 bit mode. For information about usingusein a specific directory (or using.nvmrc), please refer to issue #16.nvm root <path>: Set the directory where nvm should store different versions of node.js. If<path>is not set, the current root will be displayed.nvm version: Displays the current running version of NVM for Windows.nvm node_mirror <node_mirror_url>: Set the node mirror.People in China can use https://npmmirror.com/mirrors/node/nvm npm_mirror <npm_mirror_url>: Set the npm mirror.People in China can use https://npmmirror.com/mirrors/npm/
⚠️ Gotcha!
Please note that any global npm modules you may have installed are not shared between the various versions of node.js you have installed. Additionally, some npm modules may not be supported in the version of node you’re using, so be aware of your environment as you work.
📛 Antivirus
Users have reported some problems using antivirus, specifically McAfee. It appears the antivirus software is manipulating access to the VBScript engine. See issue #133 for details and resolution.
v1.1.8 is not code signed, but all other versions are signed by Ecor Ventures LLC/Author.io. This should help prevent false positives with most antivirus software.
v1.1.8+ was not code signed due to an expired certificate (see the release notes for reasons). v1.1.9 is code signed thanks to ajyong, who sponsored the new certificate.
Using Yarn
tldr; npm i -g yarn
See the wiki for details.
Build from source
- Install go from http://golang.org
- Download source / Git Clone the repo
- Change GOARCH to amd64 in build.bat if you feel like building a 64-bit executable
- Fire up a Windows command prompt and change directory to project dir
- Execute
go get github.com/blang/semver - Execute
go get github.com/olekukonko/tablewriter - Execute
build.bat - Check the
distdirectory for generated setup program.
💡 Why another version manager?
There are several version managers for node.js. Tools like nvm and n
only run on Mac OSX and Linux. Windows users are left in the cold? No. nvmw and nodist
are both designed for Windows. So, why another version manager for Windows?
The architecture of most node version managers for Windows rely on .bat files, which do some clever tricks to set or mimic environment variables. Some of them use node itself (once it’s downloaded), which is admirable, but prone to problems. Right around node 0.10.30, the installation structure changed a little, causing some of these to just stop working with anything new.
Additionally, some users struggle to install these modules since it requires a little more knowledge of node’s installation structure. I believe if it were easier for people to switch between versions, people might take the time to test their code on back and future versions… which is just good practice.
💡 What’s the big difference?
First and foremost, this version of nvm has no dependency on node. It’s written in Go, which is a much more structured approach than hacking around a limited .bat file. It does not rely on having an existing node installation. Go offers the ability to create a Mac/Linux version on the same code base. In fact, this is already underway.
The control mechanism is also quite different. There are two general ways to support multiple node installations with hot switching capabilities. The first is to modify the system PATH any time you switch versions, or bypass it by using a .bat file to mimic the node executable and redirect accordingly. This always seemed a little hackish to me, and there are some quirks as a result of this implementation.
The second option is to use a symlink. This concept requires putting the symlink in the system PATH, then updating its target to the node installation directory you want to use. This is a straightforward approach, and seems to be what people recommend…. until they realize just how much of a pain symlinks are on Windows. This is why it hasn’t happened before.
In order to create/modify a symlink, you must be running as an admin, and you must get around Windows UAC (that annoying prompt). Luckily, this is a challenge I already solved with some helper scripts in node-windows. As a result, NVM for Windows maintains a single symlink that is put in the system PATH during installation only. Switching to different versions of node is a matter of switching the symlink target. As a result, this utility does not require you to run nvm use x.x.x every time you open a console window. When you do run nvm use x.x.x, the active version of node is automatically updated across all open console windows. It also persists between system reboots, so you only need to use nvm when you want to make a change.
NVM for Windows comes with an installer, courtesy of a byproduct of my work on Fenix Web Server.
Overall, this project brings together some ideas, a few battle-hardened pieces of other modules, and support for newer versions of node.
NVM for Windows recognizes the «latest» versions using a list provided by the Node project. Version 1.1.1+ use this list. Before this list existed, I was scraping releases and serving it as a standalone data feed. This list was used in versions 1.1.0 and prior, but is now deprecated.
Motivation
I needed it, plain and simple. Additionally, it’s apparent that support for multiple versions is not coming to node core. It was also an excuse to play with Go.
Why Go? Why not Node?
I chose Go because it is cross-platform, felt like less overhead than Java, has been around longer than most people think. Plus, I wanted to experiment with it. I’ve been asked why I didn’t write it with Node. Trying to write a tool with the tool you’re trying to install doesn’t make sense to me. As a result, my project requirements for this were simple… something that’s not Node. Node will continue to evolve and change. If you need a reminder of that, remember io.js, Ayo, all the breaking changes between 4.x.x and 6.x.x, and the shift to ES Modules in 12+. Change is inevitable in the world of software. JavaScript is extremely dynamic.
🙏 Thanks
Thanks to everyone who has submitted issues on and off Github, made suggestions, and generally helped make this a better project. Special thanks to
- @vkbansal, who provided significant early feedback throughout the early releases.
- @rainabba and @sullivanpt for getting Node v4 support integrated.
- @s-h-a-d-o-w who resolved the longstanding space escaping issue in path names (#355).
- ajyong who sponsored the code signing certificate in late 2021.
In this article, I’ll explain how you can install NVM, or Node Version Manager, on Windows, Linux, and Mac.
What is NVM?
Node Version Manager (NVM), as the name implies, is a tool for managing Node versions on your device.
Different projects on your device may be using different versions of Node. Using only one version (the one installed by npm) for these different projects may not give you accurate execution results.
For example, if you use a Node version of 10.0.0 for a project that uses 12.0.0, you may get some errors. And if you update the Node version to 12.0.0 with npm, and you use it for a project that uses 10.0.0, you may not get the expected experience.
In fact, you would most likely get a warning that says:
This project requires Node version X
Instead of using npm to install and uninstall Node versions for your different projects, you can use nvm, which helps you effectively manage your node versions for each project.
NVM allows you to install different versions of Node, and switch between these versions depending on the project that you’re working on via the command line.
In the next sections, I’ll show you how to install NVM on your Windows, Linux, or Mac device.
Before proceeding, I also recommend that you uninstall Node.js if you have it installed already so that you do not have any conflicts with Node.js and nvm.
How to Install NVM on Windows
NVM is mostly supported on Linux and Mac. It doesn’t have support for Windows. But there’s a similar tool created by coreybutler to provide an nvm experience in Windows called nvm-windows.
nvm-windows provides a management utility for managing Node.js versions in Windows. Here’s how to install it:
1. Click on «Download Now»
In the nvm-windows repository Readme, click on «Download Now!»:
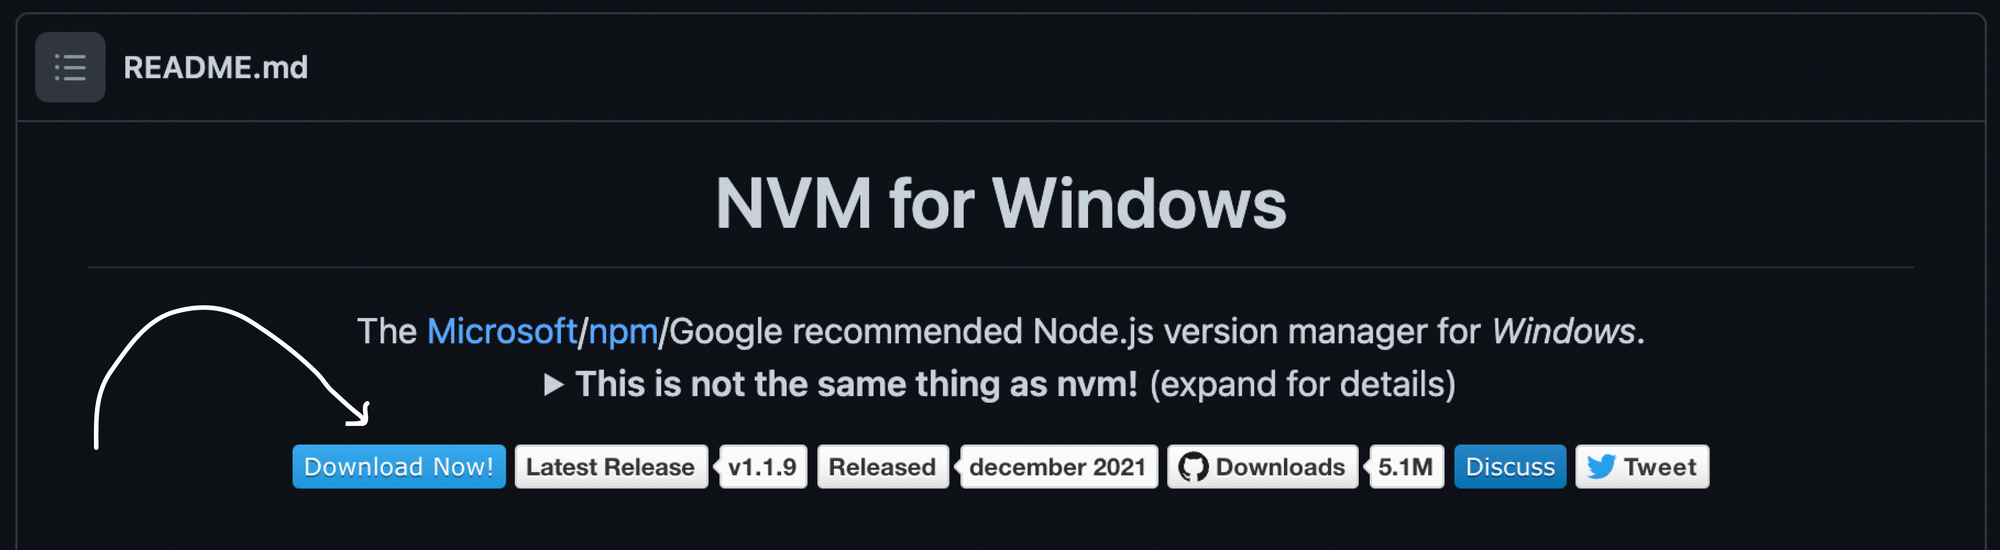
This will open a page showing different NVM releases.
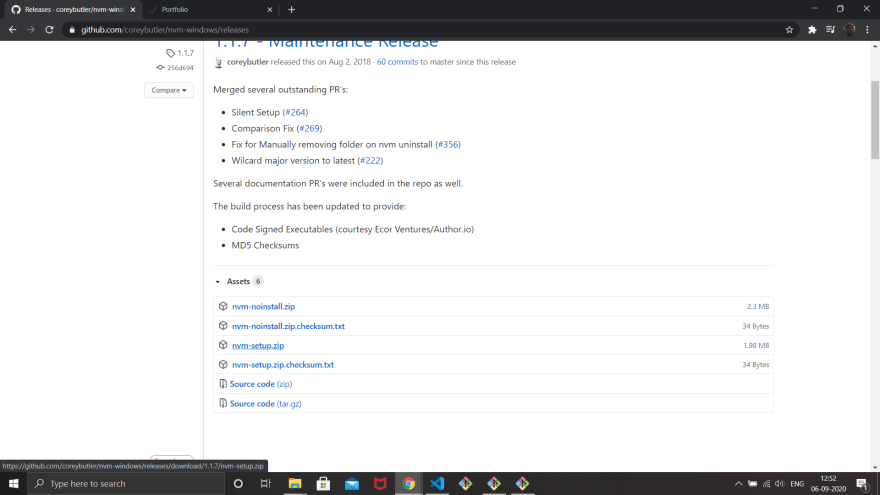
2. Install the .exe file of the latest release
In the latest release (which as of the time of writing this is 1.1.9), you’ll find different assets. Click on the nvm-setup.exe asset which is the installation file for the tool:

3. Complete the Installation Wizard
Open the file that you have downloaded, and complete the installation wizard.
When done, you can confirm that nvm has been installed by running:
nvm -v
If nvm was installed correctly, this command will show you the nvm version installed.
How to Install NVM on Linux and Mac
Since Linux and Mac have some similarities (they are both UNIX-based OSes), you can install nvm on them in similar ways.
1. Run the nvm installer
In your terminal, run the nvm installer like this:
curl -o- https://raw.githubusercontent.com/nvm-sh/nvm/v0.39.1/install.sh | bash

# or

wget -qO- https://raw.githubusercontent.com/nvm-sh/nvm/v0.39.1/install.sh | bash
You can use curl or bash depending on the command available on your device.
These commands will clone the nvm repository to a ~/.nvm directory on your device.
2. Update your profile configuration
The installation process from step 1 should also automatically add the nvm configuration to your profile. If you’re using zsh, that would be ~/.zshrc. If you’re using bash, that would be ~/.bash_profile…or some other profile.
If it doesn’t automatically add nvm configuration, you can add it yourself to your profile file:
export NVM_DIR="$([ -z "${XDG_CONFIG_HOME-}" ] && printf %s "${HOME}/.nvm" || printf %s "${XDG_CONFIG_HOME}/nvm")"
[ -s "$NVM_DIR/nvm.sh" ] && \. "$NVM_DIR/nvm.sh"
This command above loads nvm for use.
3. Reload the shell configuration
With your profile configuration updated, now you will reload the configuration for your terminal to use:
source ~/.bashrc
With this command executed, nvm is ready for you to use. You can confirm that nvm is installed correctly by running:
nvm -v
This should show the version of nvm installed.
Wrapping up
With nvm installed, you can now install, uninstall, and switch between different Node versions in your Windows, Linux, or Mac device.
You can install Node versions like this:
nvm install latest
This command will install the last version of Node:
nvm install vX.Y.Z
This will install the X.Y.Z Node version.
You can also make a version your default by running:
nvm alias default vX.Y.Z
And if you want to use a specific version at any point, you can run the following in your terminal:
nvm use vA.B.C
NVM makes it easier to manage multiple versions of Node.js across different projects that require different versions.
Learn to code for free. freeCodeCamp’s open source curriculum has helped more than 40,000 people get jobs as developers. Get started
Вопрос экономии времени и удобства окружения разработчика — штука сложная. Работая с Node.js, иногда приходится тестировать своё приложение не только в той версии, которую используете вы, но и в тех, что были выпущены до неё или даже после. В большинстве своём, это касается пакетов (библиотек), которые распространяются через npm. Разумеется, вы можете использовать для этих целей Travis CI, но этот инструмент создан не для этого.
Наиболее простым способом устанавливать и переключать версии Node.js на Linux является использование утилиты nvm. Для разработчиков, которые «сидят» на Windows, существует порт этой утилиты, хотя и менее продвинутый. Разбираемся в управлении версиями Node.js через консоль в Windows.
nvm (Node Version Manager) — это довольно простой скрипт, который позволяет устанавливать, переключать и удалять версии Node.js на лету. Проще говоря, nvm даёт вам возможность держать на одной машине любое количество версий Node.js. При установке новой версии для неё создаётся отдельная директория, например, 5.0.0 или 4.2.2. При переключении версий скрипт подменяет путь до Node.js в PATH.
При этом нужно помнить, что глобальные пакеты для каждой версии свои и никак не пересекаются. Это значит, что если вы глобально установили пакет, используя Node.js версии 4.2.2 и переключились на версию 5.1.0, то этот же пакет вам придётся устанавливать повторно уже для этой версии.
Установка nvm
Напомню, что речь сейчас идёт про Windows, и установить nvm здесь так же «сложно», как и любую другую программу или игру. Для этого вам придётся перейти в репозиторий nvm-windows и загрузить установочный пакет. Далее процедура полностью стандартна, как и для любого другого установочного файла в Windows: выбираете директорию установки и несколько раз кликаете на «Далее».
Установка Node.js
Теперь, когда у вас установлен nvm, пришло время добавить новую версию Node.js. Для этого потребуется прочитать справку, которую можно вызвать, используя команду nvm.
Сначала посмотрим на список доступных для установки версий Node.js, который можно открыть командой $ nvm list available. В этом списке доступны как стабильные, так и нестабильные релизы.
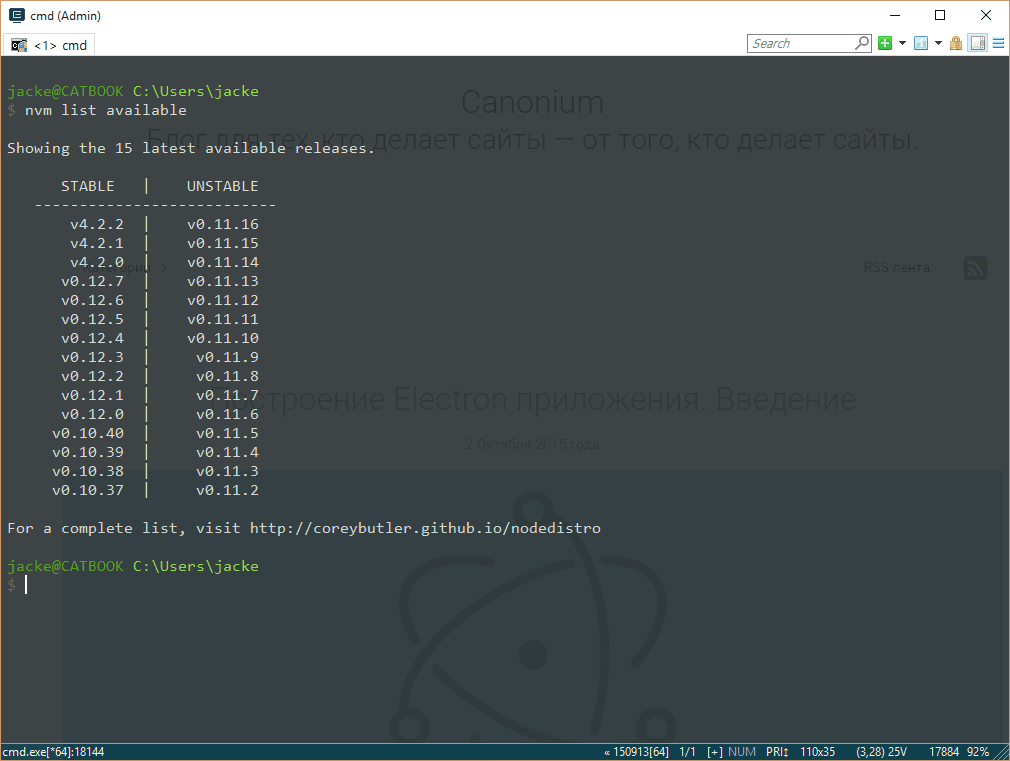
Обратите внимание, что здесь не хватает 5-ой версии Node.js. Дело в том, что создатель nvm для Windows ещё не подготовил новый релиз, добавляющий 5-ую версию Node.js в этот список.
Итак, установим последнюю версию Node.js четвертой ветки. Для этого, к сожалению, потребуется полностью прописать версию Node.js, хотя в версии под Linux и OSX можно просто указывать мажорную цифру (4 или 5).
$ nvm install 4.2.2
Тоже самое можно проделать с пятой веткой:
$ nvm install 5.1.0
Помимо версии, при установке есть возможность указать разрядность, например, для установки Node.js 5.1.0 32-битной разрядности следует выполнить
$ nvm install 5.1.0 32
Переключение версий
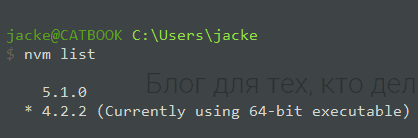
Посмотрим на список уже установленных версий Node.js на вашей машине, выполнив в консоли команду $ nvm list:

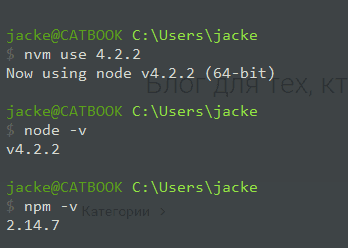
Для того, чтобы начать использовать Node.js версии 4.2.2, нужно прописать в консоли $ nvm use 4.2.2. После этого из консоли станет доступна именно эта версия Node.js и поставляемая вместе с ней версия npm:
Соответственно, чтобы переключиться на Node.js версии 5.1.0, нужно выполнить команду:
$ nvm use 5.1.0
Теперь, когда вы выполняете команду $ nvm list, в выводе будет присутствовать указатель текущей версии:
Создание синонимов
Я вынужден был создать этот заголовок в виду того, что «настоящий» nvm позволяет назначать установленным версиям Node.js синонимы. К сожалению, пока что nvm для Windows не умеет этого.
Немного про глобальные пакеты
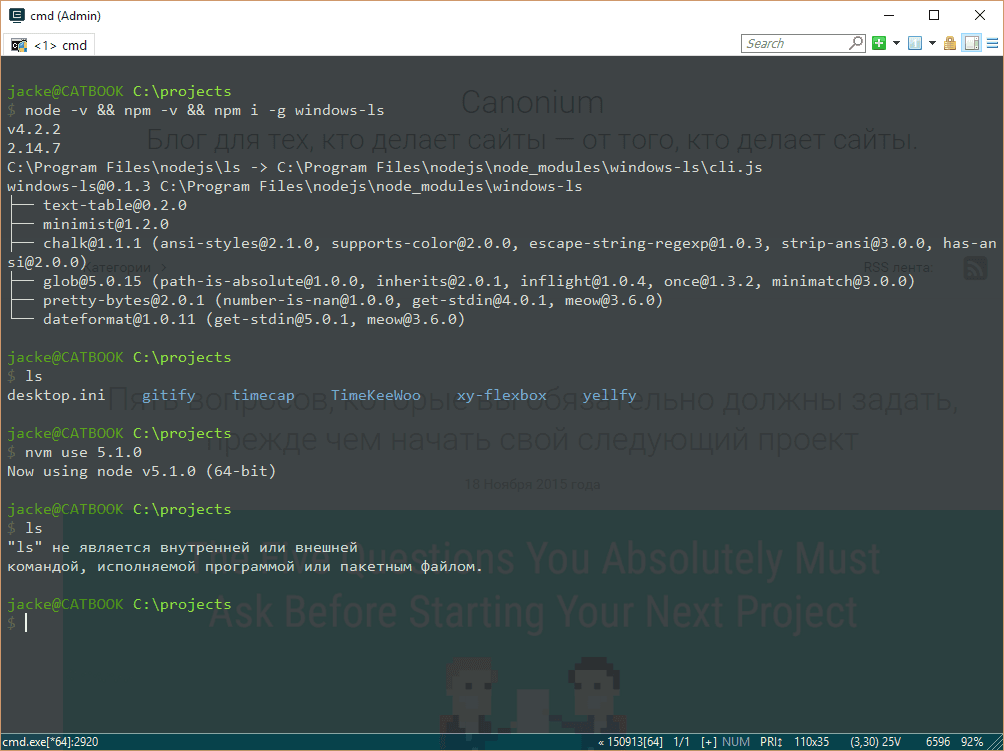
Как я уже говорил в начале, nvm разделяет версии Node.js по директориям, и, из-за этого, устанавливаемые глобально пакеты доступны лишь в той версии, в которой они были установлены.
Для примера я установлю свой же пакет windows-ls в версии 4.2.2 и попытаюсь использовать его в версии 5.1.0. В итоге я получаю ошибку, говорящую о том, что такого пакета нет.
Итоги
Все мы знаем, что Windows — это не та платформа, на которую ориентированы разработчики инструментов, которые нужны веб-разработчикам. Примеров, отображающих эту ситуацию довольно много и для каждого они свои, поэтому приводить я их здесь не буду. Рассмотренная в этой статье утилита делает жизнь разработчикам на Windows чуточку лучше, позволяя сконцентрироваться на работе, а не загрузке, установке и удалении различных версий Node.js.
-
Главная
-
Инструкции
-
Node.js
-
Как установить Node.js на Windows: пошаговая инструкция
На JavaScript выполняется большая часть интерактивных элементов на сайтах и в мобильных приложениях. JavaScript отлично работает с HTML/CSS и интегрирован основные браузеры на рынке. Чистый JavaScript используется в вебе, а для общего применения JavaScript разработчики используют различные среды выполнения, например, Node.js.
Node.js — это среда выполнения кода JavaScript. Она позволяет использовать JavaScript как язык программирования общего назначения: создавать на нем серверную часть и писать полноценные десктопные приложения.
Основа Node.js — движок V8. Этот движок был разработан Google и используется в браузере Google Chrome. Он компилирует код JavaScript в машинный код, который понимает процессор. Однако, чтобы сделать из JavaScript язык общего назначения, одного движка недостаточно. Так, например, для создания серверной части нужно, чтобы язык умел работать с файлами, сетью и т.п. Для решения этой проблемы разработчики добавили к V8 дополнительные возможности, с помощью своего кода и сторонних библиотек. В итоге у них получился инструмент, который превращает JavaScript в язык общего назначения.
Node.js стала популярна среди разработчиков благодаря возможности создавать серверную и клиентскую часть на одном языке, скорости работы и NPM. В этом материале мы расскажем, как правильно установить Node.js на Windows 10.
Удаление старых версий
Перед установкой необходимо удалить старые версии среды выполнения, если они были ранее установлены. Наличие предыдущих версий может привести к возникновению конфликтов.
Проверим систему на наличие версий Node.js. Для этого в cmd (чтобы ее запустить, нажмите Win+R, введите cmd и нажмите Enter) выполняем команду nvm list:
C:\Users\Timeweb>nvm list
    18.9.0
    18.8.0
    16.17.0
Как видим, у нас установлено несколько версий. Удалим их:
- Выполняем команду
npm cache clean --force. - В «Установка и удаление программ» удаляем Node.js.
- Перезагружаем компьютер.
- Удаляем следующие каталоги. Некоторые из них могут существовать, а некоторые, наоборот, отсутствовать:
- C:\Program Files (x86)\Nodejs
- C:\Program Files\Nodejs
- C:\Users\{User}\AppData\Roaming\npm
- C:\Users\{User}\AppData\Roaming\npm-cache
- C:\Users\{User}\.npmrc
- C:\Users\{User}\AppData\Local\Temp\npm-*
- Возвращаемся в командную строку и выполняем
nvm uninstallк каждой версии, полученной с помощьюnvm list:
C:\Users\Timeweb>nvm uninstall 18.9.0
Uninstalling node v18.9.0... doneC:\Users\Timeweb>nvm uninstall 18.8.0
Uninstalling node v18.9.0... done
C:\Users\Timeweb>nvm uninstall 16.17.0
Uninstalling node v18.9.0... done
Дополнительно проверим, что версии удалены:
C:\Users\Timeweb>nvm list
No installations recognized.C:\Users\Timeweb>where node
ИНФОРМАЦИЯ: не удается найти файлы по заданным шаблонам.
C:\Users\Timeweb>where npm
ИНФОРМАЦИЯ: не удается найти файлы по заданным шаблонам.
С помощью nvm-windows
Node Version Manager или сокращенно NVM — это диспетчер версий Node.js. Возможно, во время работы вам придется использовать различные версии Node и переключаться между ними. Версии часто меняются, поэтому при работе рекомендуется использовать диспетчер версий.
NVM — самый распространенный диспетчер версий, но, к сожалению, в Windows он не доступен, и вместо него используется адаптированный вариант nvm-windows.
- Зайдите в репозиторий nvm-windows на github.
- Загрузите установщик
nvm-setup.exeпоследней версии диспетчера. - После загрузки осуществите установку.
- По окончании работы установщика откройте PowerShell от имени администратора и проверьте работоспособность NVM:
PS C:\Windows\system32 > nvm list
No installations recognized.
Теперь нужно выбрать версию Node.js, которую вы будете устанавливать на свой компьютер. Команда nvm list available покажет частичный список доступных для загрузки версий:
Если для вашего проекта не требуется определенная версия, то рекомендуется выбрать последний LTS-выпуск. Риск возникновения проблем при работе с такой версией минимален. Если же вы хотите протестировать нововведения и улучшенные возможности, то вы можете загрузить последнюю версию. При этом не стоит забывать, что риск возникновения проблем с новейшей версией выше.
Установим последний LTS. Возьмем номер версии из результата nvm list available и установим его с помощью nvm install:
PS C:\Windows\system32> nvm install 16.17.0
Downloading node.js version 16.17.0 (64-bit)...
Extracting...
Complete
Creating C:\Users\Timeweb\AppData\Roaming\nvm\tempDownloading npm version 8.15.0… Complete
Installing npm v8.15.0…
Installation complete. If you want to use this version, type
nvm use 16.17.0
Установка завершена. В ряде случаев при установке nvm-windows может возникнуть проблема: nvm не загрузит диспетчер пакетов NPM. В этом случае рекомендуем воспользоваться следующим способом установки.
Как установить node.js с помощью официального установщика
- Зайдите на официальный сайт nodejs.org в раздел «Загрузка».
- Выберите и загрузите нужную версию.
- По завершению загрузки откройте файл, после чего начнется установка.
- Следуйте инструкциям установщика.
Установка node.js в WSL2
Если вы хотите использовать Node.js вместе с Docker, планируете работать с командной строке Bash или просто любите Linux, то имеет смысл задуматься об установке среды выполнения в WSL2.
WSL (Windows Subsystem for Linux) — это программная прослойка для запуска приложений, созданных под Linux-системы, на ОС Windows. Возможно, вам уже приходилось работать в WSL с приложениями, у которых нет Windows-версий. Ранее мы уже рассматривали установку Node.js на Ubuntu 20.04. Поэтому в этом разделе будет размещена инструкция по установке WSL 2 — об установке Node.js на Ubuntu читайте в статье «Как установить Node.js в Ubuntu 20.04».
Алгоритм установки WSL2 в Windows 10 зависит от версии операционной системы. Чтобы её узнать, нажмите Win+R и введите winver. После этого откроется такое окно:
Алгоритм для версий старше 2004
В PowerShell от имени администратора выполняем следующие команды:
wsl --install
wsl --set-version Ubuntu 2
Для проверки результата воспользуемся командой wsl.exe -l -v:
PS C:\WINDOWS\system32> wsl.exe -l -v
  NAME      STATE           VERSION
* Ubuntu    Stopped         2
Алгоритм для версий младше 2004 (как минимум потребуется ОС версии 1903)
В PowerShell (от имени администратора) активируем подсистему Windows для Linux.
dism.exe /online /enable-feature /featurename:Microsoft-Windows-Subsystem-Linux /all /norestartЗатем активируем функцию виртуальной машины:
dism.exe /online /enable-feature /featurename: VirtualMachinePlatform /all /norestart После выполнения этих действий нужно перезагрузить компьютер.
Когда компьютера запустится, скачиваем и устанавливаем пакет обновлений ядра Linux. Загрузить его можно по здесь.
В PowerShell выберем 2 версию WSL в качестве основной:
wsl --set-default-version 2Теперь скачаем какую-нибудь операционную систему на Linux. Сделать это можно прямо магазине приложений Microsoft Store:
По окончании установки вы сможете зайти в консоль установленной системы через меню поиска:
Заключение
Node.js — это популярная среда разработки, которая используется множеством крупных компаний: PayPal, Yahoo, Ebay, General Electric, Microsoft и Uber. В рамках этого материала мы рассмотрели способы как установить Node.js на Windows 10.

Introduction
I had recently purchased a Windows 10 laptop and I wanted to install Node.js. I usually prefer to use a Node Version Manager to install Node.js.
The reason I choose to do that is because I usually have to work with multiple applications that need require different Node.js versions, and using a node version manager (NVM) it is very easy to switch versions.
This article is more of a user guide for folks who are interested to install a Node Version Manager for Windows 10 Operating System.
A Quick Look at the Key Terminologies
I wanted to mention the following terminologies for absolute beginners. So, feel free, to skip this section, if you are already familiar.
-
nvm — Node Version Manager. It is a tool that allows you to download and install Node.js. It allows you to pick and choose the Node.js version that you wish to use.
-
Node.js — It is a platform for running JavaScript applications.
-
npm — Node Package Manager. It is a tool that allows you to install JavaScript packages. npm comes along with Node.js. So, if you have installed Node.js, you’ll have npm installed as well.
Installing NVM for Windows 10
Go to the nvm-windows Git Repository
-
Using your browser navigate to the Git repository for nvm-windows located over here.
-
Click on the ‘nvm-setup.zip’ link from the ‘assets’ table as shown in the image below.
Locate the Zip File & Extract
- The Zip file should have been downloaded to your Downloads folder (or where ever you have configured your downloads to be saved).

- Unzip/Extract the contents to the same folder.


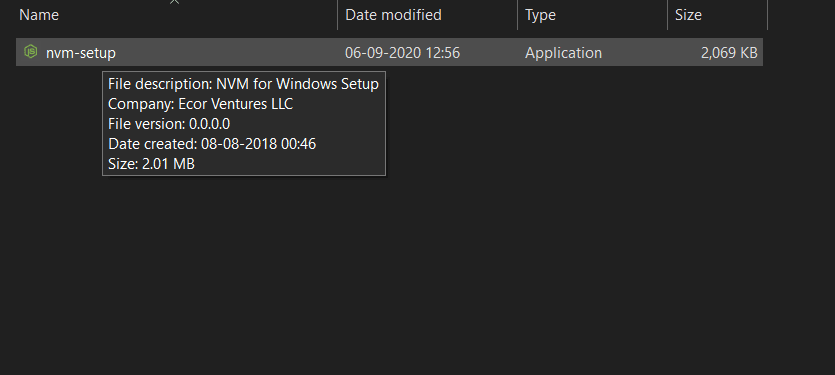
- You should have the file nvm-setup.exe extracted in the same folder.
Install NVM
-
Double-Click on the executable file to launch the installer.
-
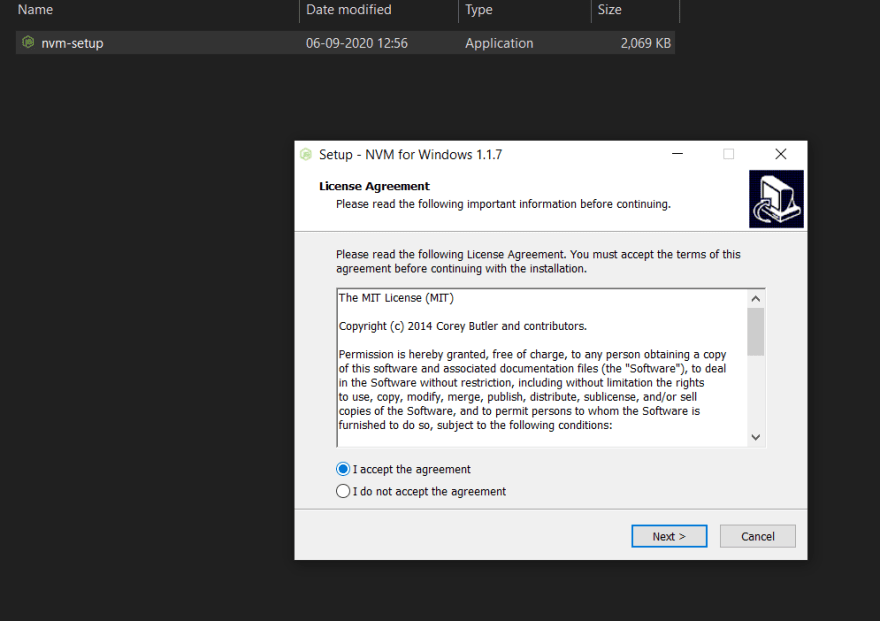
Choose ‘I accept the agreement’ option.
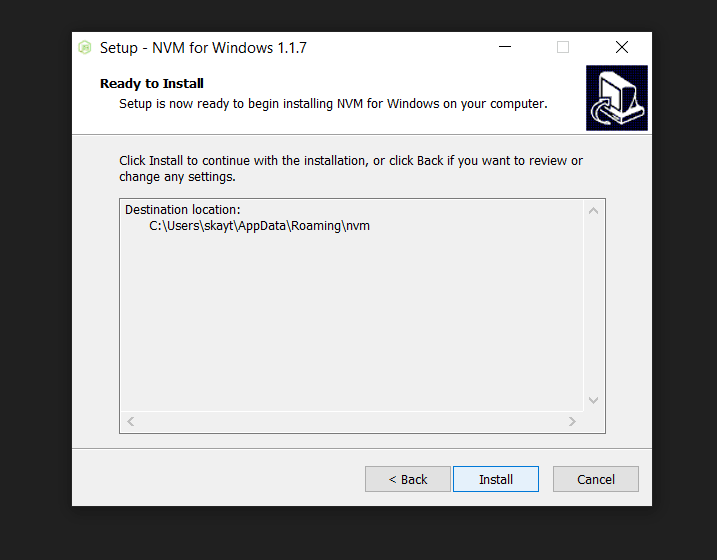
- Select destination to install.

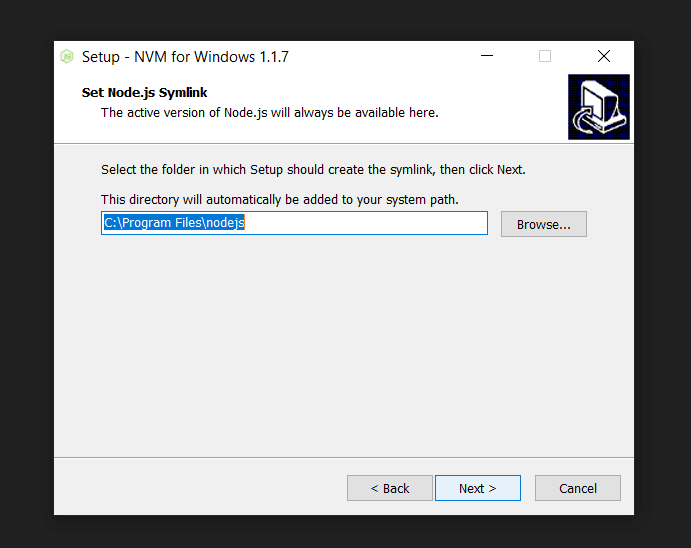
- Select Symlink for Node.js.
- Click on Install & once it completes, click on the ‘Finish’ button.

Confirm that the ‘NVM’ successfully installed
-
Open your command line terminal
-
Type the below command to verify if your nvm installation was successful.
$ nvm --version
Enter fullscreen mode
Exit fullscreen mode

Install npm
- You can now install ‘npm’ using the following command.
  $ nvm install latest
  //installs the latest version of npm

  $ nvm install <<version number>>
  //e.g. nvm install 12.6.8 to install a specific npm version
Enter fullscreen mode
Exit fullscreen mode
- Let us install the latest version of npm. (As of Sep 2020)

Specify the version of npm that you choose to use
- Using the below command to specify the version of npm that you wish to use. In our case, since we have only one version installed. Let’s go with that.
$ nvm use 14.9.0
Enter fullscreen mode
Exit fullscreen mode

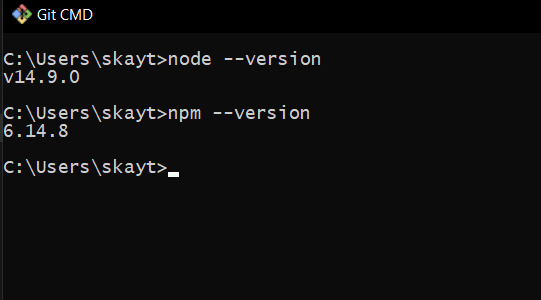
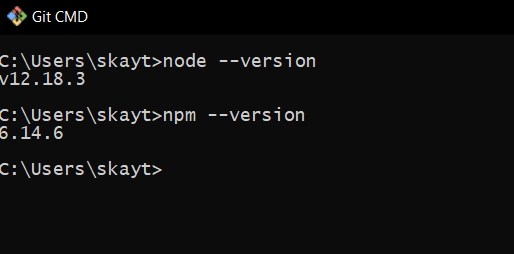
Check npm & nodejs versions
- You can confirm the nodejs and npm versions through the commands below.
//Check Node.js version
$ node --version

//Check npm version
$ npm --version
Enter fullscreen mode
Exit fullscreen mode
Install Another npm Version
- Repeat the above steps

- Install Completed & Select the version using the ‘nvm use’ command

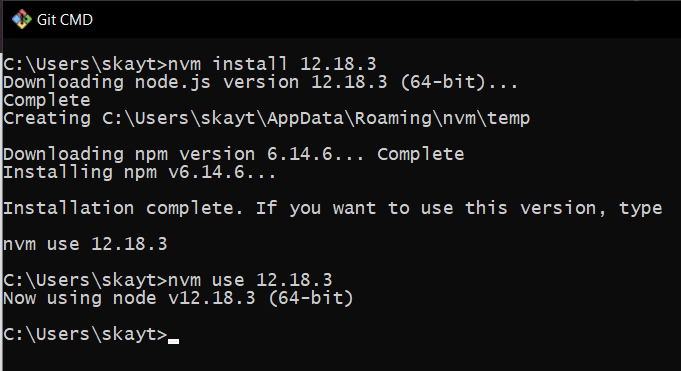
- Confirm that the environment now points to the new Node.js and npm versions
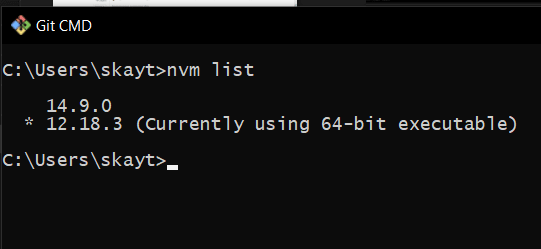
List all Versions
- You can use the nvm list command to list all the npm and Node.js versions installed.
$ nvm list
Enter fullscreen mode
Exit fullscreen mode
Conclusion
I hope the detailed user-guide helped you setup the Node Version Manager (nvm) in your Windows 10 machine. Thank you for reading the article and do share it if you found it useful.
Cover Photo by Christina @ wocintechchat.com on Unsplash
You may also like:
- IIFE — Immediately Invoked Function Expressions
- ES6 — Spread Operator
- A Basic Introduction to Webpack
- ES6 => Arrow Functions
- ES6 — Understanding Destructuring
- Why do you want to work for us?
- Understanding Closures
- What is ‘this’ in JavaScript
- Docker Fundamentals