While Windows’ handy dandy Task Manager has been a best friend to many users when an app crashed or became unresponsive, the app itself had seen only a few changes before Microsoft came out with the latest version of its Windows 11 OS. The Redmond giant did a major overhaul to the Task Manager app with the recent Windows 11 22H2 update, giving it a brand new design, a few new features, and some under-the-hood updates. So, if you want to know everything about the new and redesigned Task Manager app on Windows 11, including how to enable it, read this article till the end.
New Task Manager on Windows 11: Everything You Need to Know!
The Task Manager is essentially a nifty system tool that shows every other detail of a Windows device, including the CPU/ GPU usage, live apps, background processes, and many other things in real time. For years, the Task Manager app on Windows remained more or less the same until the release of Windows 11 build 22557.
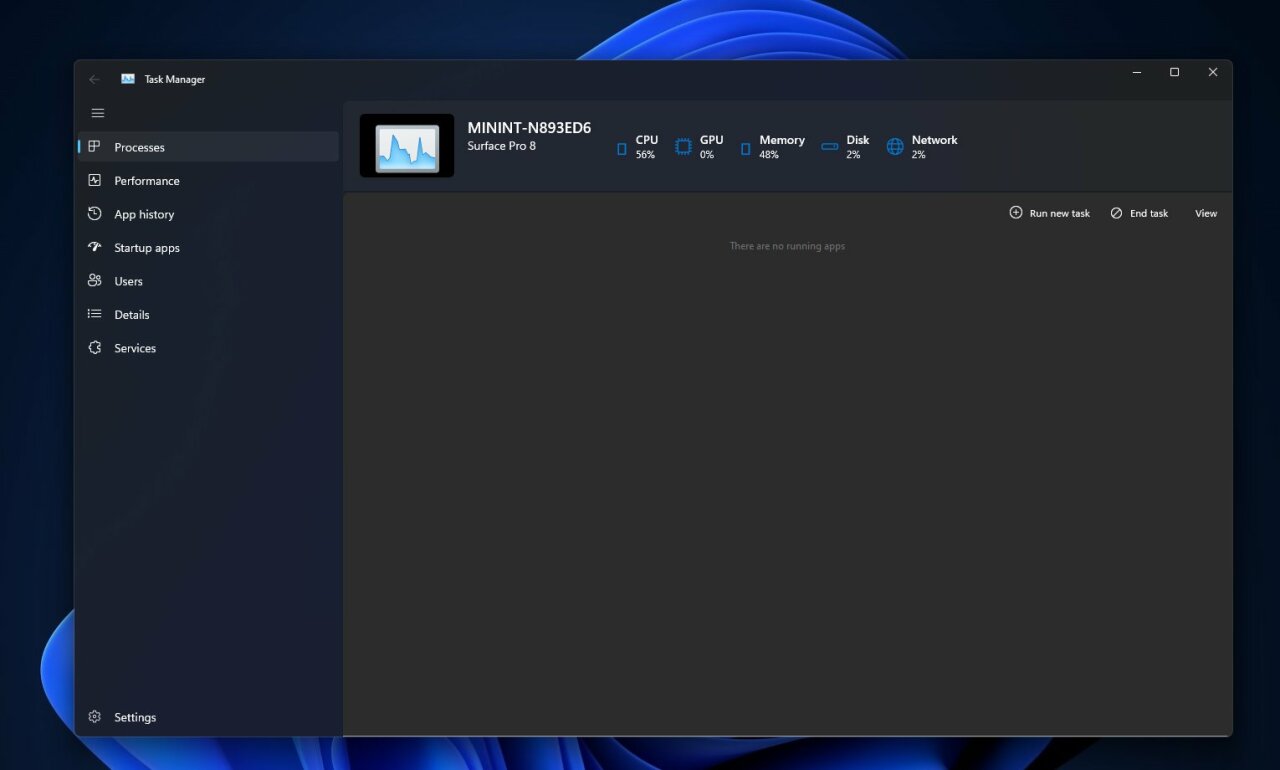
With this build, Microsoft introduced a brand new Task Manager app for Windows 11 users that is better than its predecessor in every way possible. The new Task Manager has a modern and sleek design that matches the overall design language of Windows 11. It features Microsoft’s new Mica UI material, rounded corners, new icons, and new features.
However, before you can enjoy all the cool new things about the new Task Manager on Windows 11, you need to update your device to enable it. You can find the steps to enable the new Task Manager on Windows 11 right below.
How to Enable the New Task Manager In Windows 11
To enable the new Task Manager, you need to update your Windows 11 device to the latest 22H2 version, if you have not done it already. To do this:
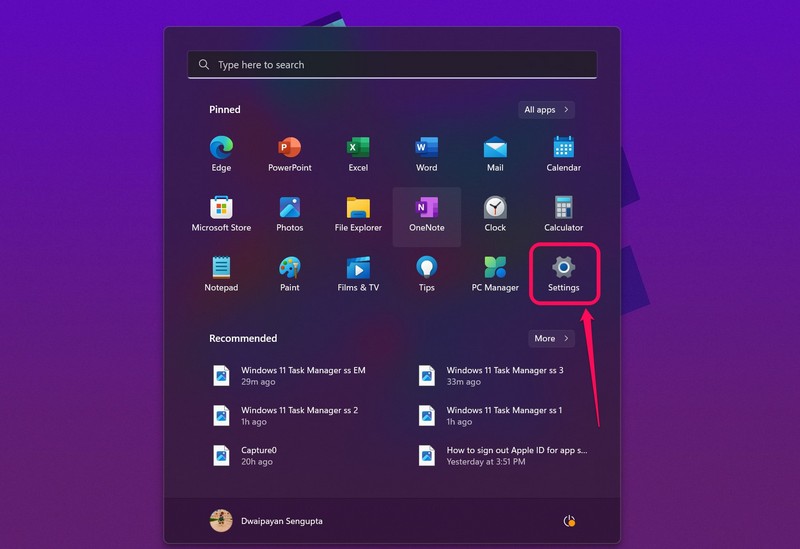
1. Go to the Start Menu on your Windows device.
2. Click on the Settings icon to open the app.
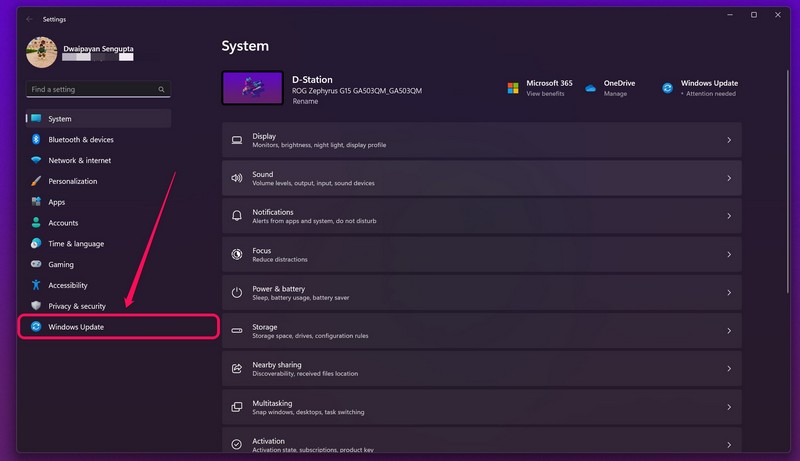
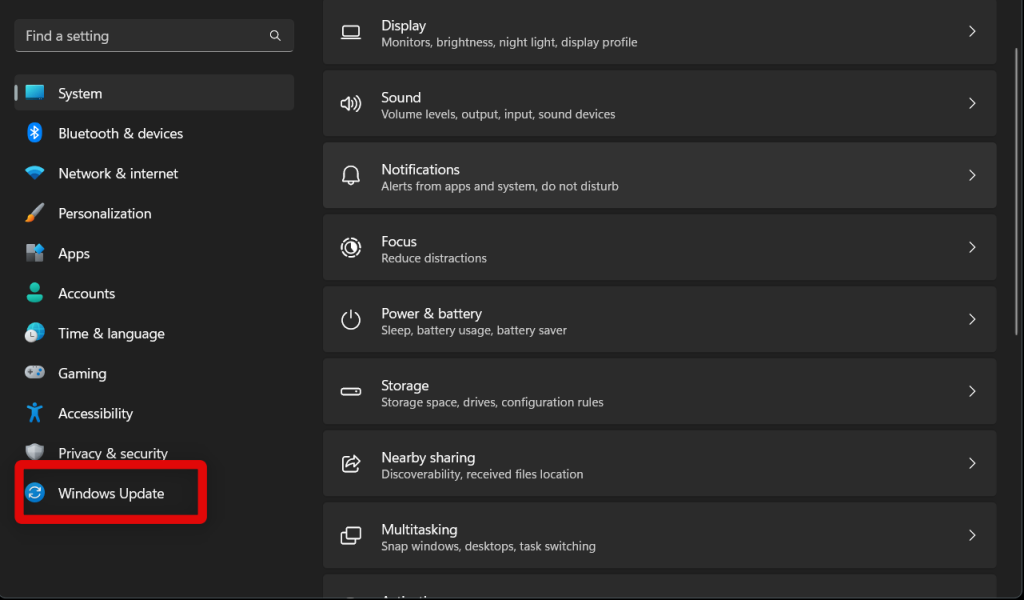
3. On the side-navigation bar, click on the “Windows Update” tab at the bottom.
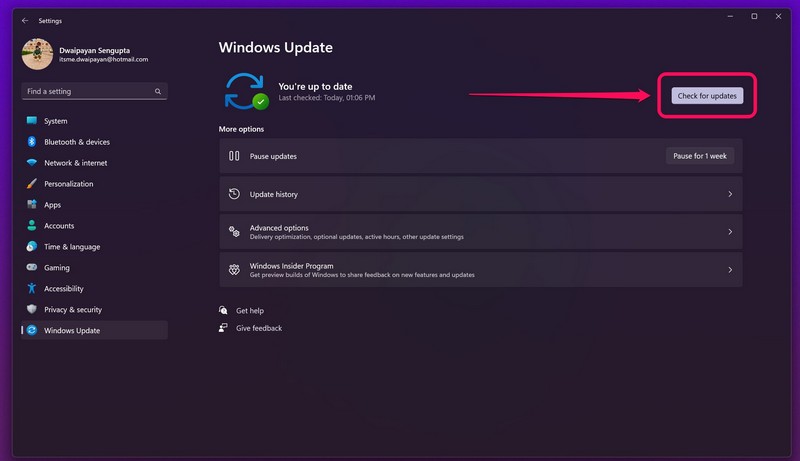
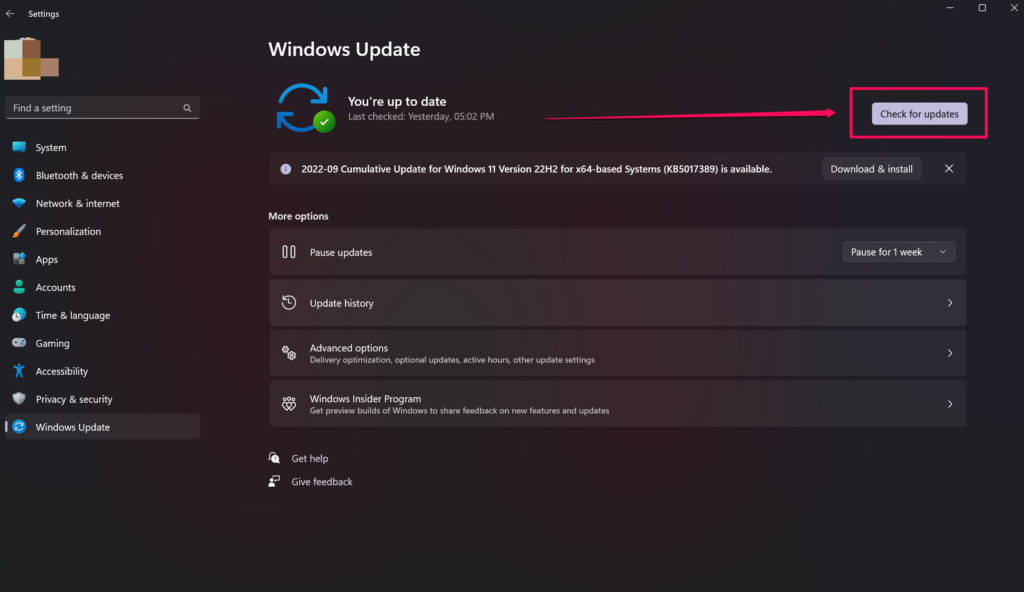
4. Click the “Check for Updates” button if you do not see any new updates ready to download and install.
5. Download the install the necessary updates, and restart your device.
Following the restart, your device should be updated to the latest Windows 11 22H2 version, bringing all the new features, including the new Task Manager app, for you to enjoy.
New Features of Task Manager on Windows 11
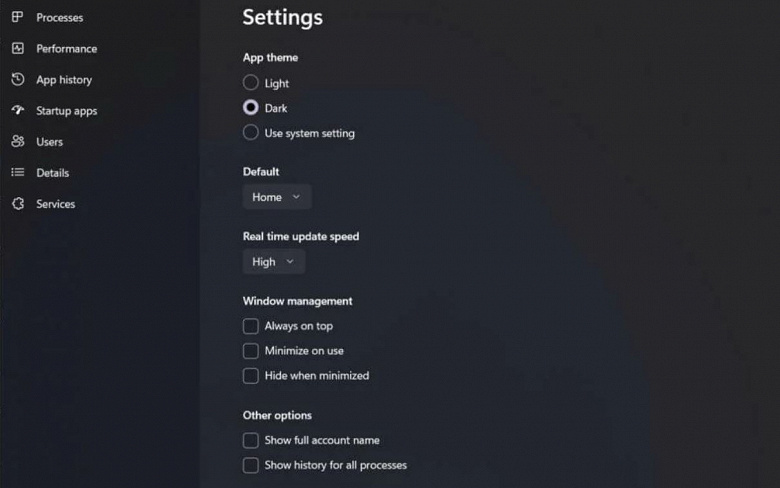
Now that you have enabled the new Task Manager app on your Windows 11 device, let me tell you the new features of the redesigned app. Firstly, the new Task Manager app can now automatically switch between light and dark themes based on the system-wide theme. Thank you, Microsoft!
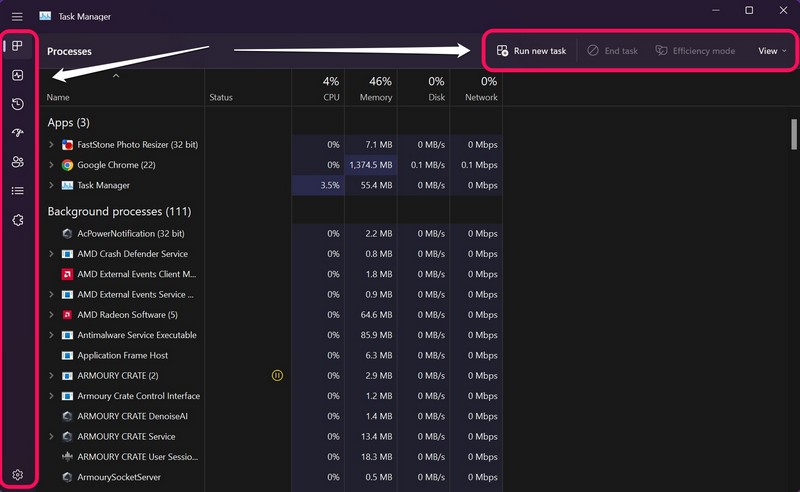
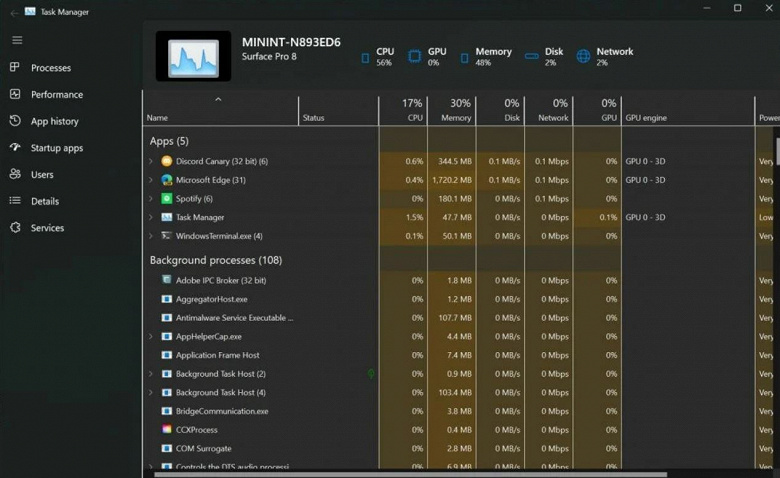
Secondly, all the tabs, including Processes, Performance, App History, Startup, and others, have now been moved to a sleek and collapsible side-navigation bar. The tabs now also have their own icons that match their names. They also make it easier to find specific tabs when the side-nav bar is collapsed (screenshot below).
Furthermore, you can now put any demanding app or background process in “Efficiency Mode” to prevent them from using too much of your CPU or GPU power. It uses the EcoQoS to limit the process resource usage and reduce the process priority.
Hence, if the priority of a process is reduced, the apps that are dependent on the process do not terminate. Instead, they keep running in the background and allow other important apps or processes to run efficiently using the CPU. You will also see a new Efficiency Mode icon with a green leaf on the status bar of the new Task Manager app for a process for which you have enabled the same.
![]()
How to Enable “Efficiency Mode” in the new Task Manager app
To enable “Efficiency Mode” for apps and processes in the new Task Manager on Windows 11:
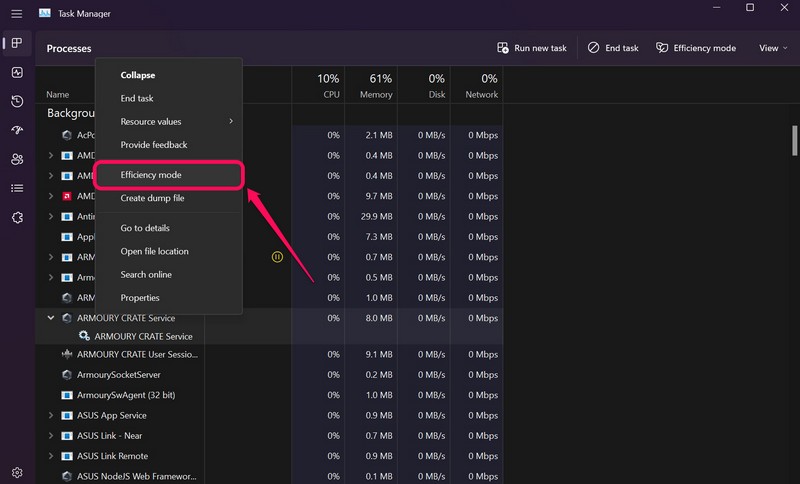
1. Open the Task Manager app.
2. Select a live app or a background process for which you want to enable “Efficiency Mode.”
3. Right-click on it to open the context menu.
4. Now, click the “Efficiency Mode” option.
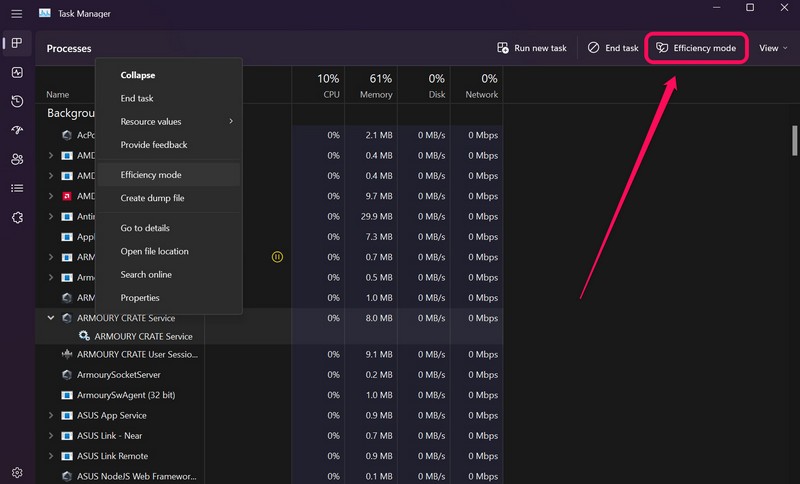
5. Alternatively, you can also click the dedicated “Efficiency Mode” button for the selected app or process at the top right to enable the mode instantly.
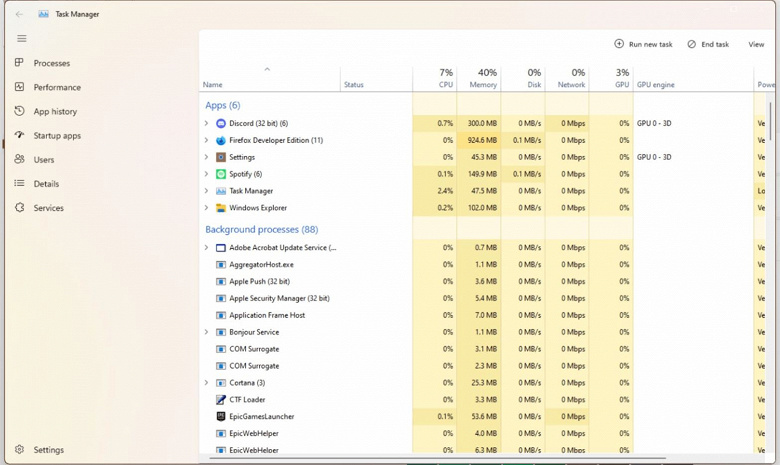
Moreover, on the new Task Manager app, Microsoft has moved common action buttons like Run New Task, End Task, the aforementioned Efficiency Mode button, and others to the top. These action buttons also change when you switch between different tabs in the Task Manager app.
Lastly, Microsoft is currently working on a new search bar for the Task Manager on Windows 11. Although it is currently not available for any user, be it a Windows Insider or a regular one, the feature is reportedly in development. However, nothing has been confirmed by Microsoft yet. So, I’d suggest you take this information with a grain of salt.
Wrapping Up
So, this was all about the new Task Manager App on Windows 11. If you have not updated your Windows device to the latest 22H2 version already, I’d suggest you do that using the above steps right now.
The new Task Manager and all the other new features and apps of the Windows 11 22H2 version are truly game-changers and will change how you use your Windows device. Let us know your thoughts on the new Task Manager app on Windows 11 in the comments below. Until next time.
Microsoft has been focusing a lot on Windows 11 lately, and the company has issued numerous updates to improve and new features to the popular desktop OS. Microsoft recently issued the feature update Windows 11 22H2, which brings along numerous new additions like new Start menu layouts, FancyZones updates, Start menu folders, a new Taskbar overflow menu, and much more.
Among these new changes is the new and improved Task Manager. Task Manager has been a long-standing process management solution since the early days of Windows. It allows you to manage running processes, services, apps, programs, and much more from a single app. So if you’re wondering how you can enable and get the new Task Manager on your Windows 11 PC, then this is the perfect post for you.
You can get the new Task Manager in two ways on Windows 11; you can either choose to update to Windows 11 22H2 from your PC or decide to use ViveTool to activate it on older versions of Windows 11. So use either of the sections below depending on your preferred method to get and use the new Task Manager on Windows 11.
1. Update to Windows 11 22H2
To install the new Windows update, you can use the Settings app on your PC. Use these steps to install Windows 11 22H2 on your PC.
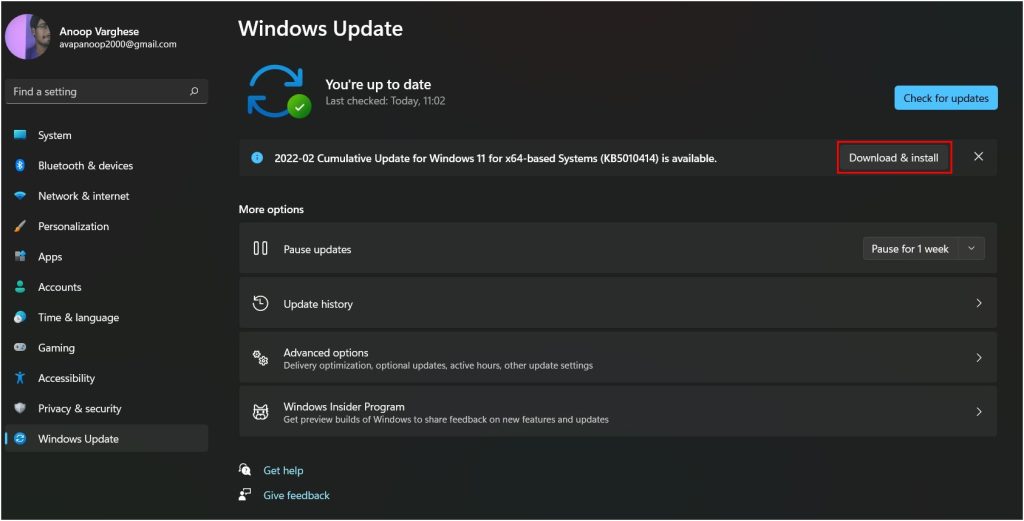
1. Open the Settings app and click on Windows Update. This section allows you to manage Windows Update settings and install available updates for your Windows 11 System.
2. You will now have access to the Windows Update settings page. You can manage and access advanced Windows update settings from here. For now, click Check for updates in the top right corner of the screen. Windows will then use your connection to check for available updates for your system.
3. When any available updates show up, they should automatically install on your PC. However, if you’re on a metered connection, you will have to click Download and Install to install the necessary updates on your system.
4. You will be prompted to restart your PC once Windows 11 22H2 is installed on your system. If you have been avoiding Windows updates for your system for a while, Windows might install a few previous builds before showing and installing Windows 11 22H2 on your system. If that happens to be the case, simply update and restart your system until Windows 11 22H2 shows up and is installed on your system.
You will now have updated your Windows 11 PC to Windows 11 22H2. You can now use the subsections below to access, use and familiarize yourself with the new Task Manager.
2. Get New Task Manager On Older Versions Of Windows 11
If you haven’t been a fan of the new Windows 11 22H2 update and have decided to stay with the older install of Windows 11, then you can use the open-source program named ViveTool to enable the new Task Manager on your Windows 11 PC. Here’s how you can use ViveTool to enable the new Task Manager on your computer.
Requirements:
Ensure that you’re running the following Windows 11 build or higher. Additionally, use the link below to download ViveTool beforehand on your Windows 11 PC.
- Windows 11 build 22557 or higher
- ViveTool Download Link
Here’s how you can enable the new Task Manager on your Windows 11 PC using ViveTool.
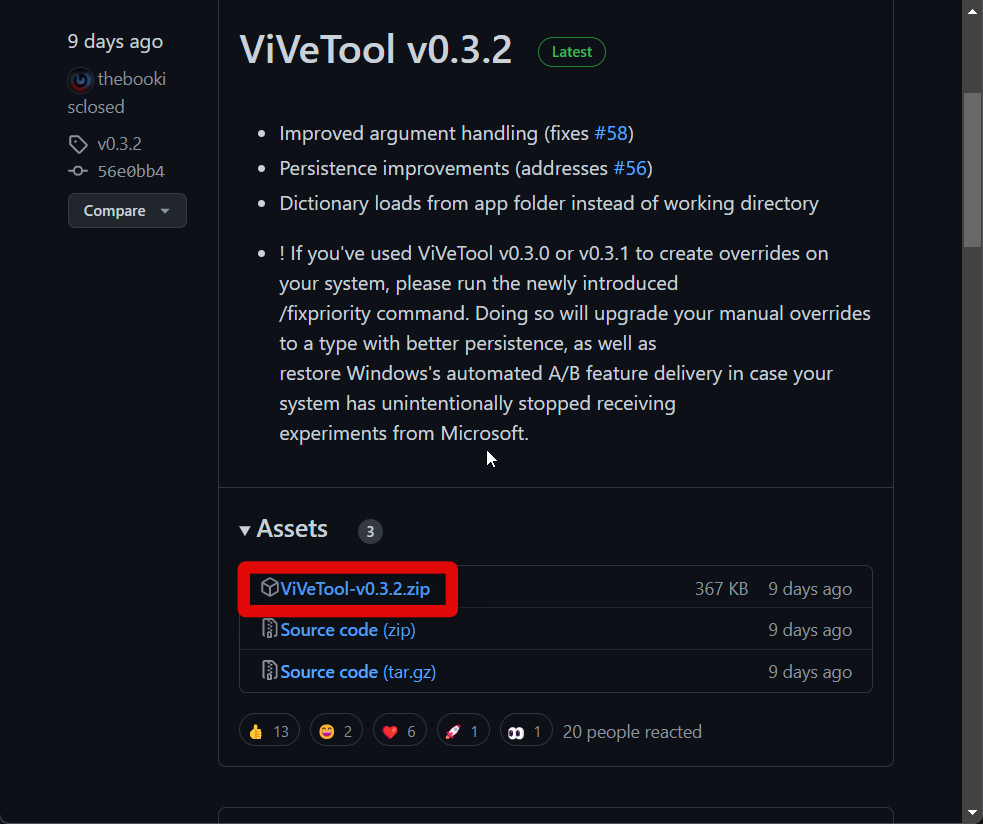
1. Start by downloading the latest version of ViveTool on your PC by visiting the link above. Click and download the latest ZIP file linked under the latest release. You will always find the latest release linked under the top post on the Releases page for ViveTool on GitHub.
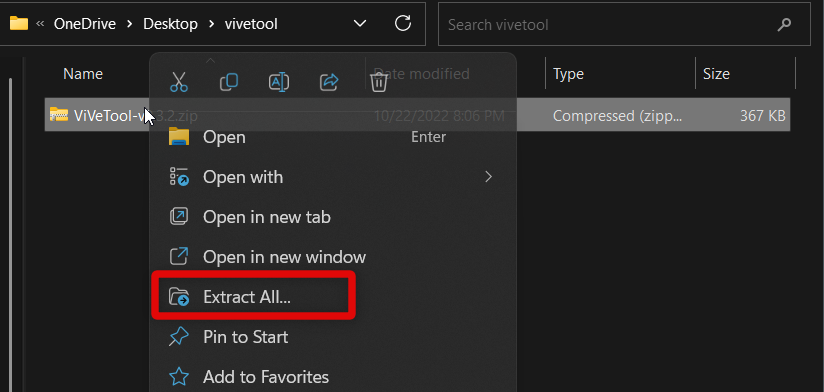
2. Once the file is downloaded, extract the ZIP archive using your favorite unarchiver. If you don’t use a third-party unarchiver, then right-click the file and click Extract All. You can also click on Extract All in the ribbon menu in File Explorer.
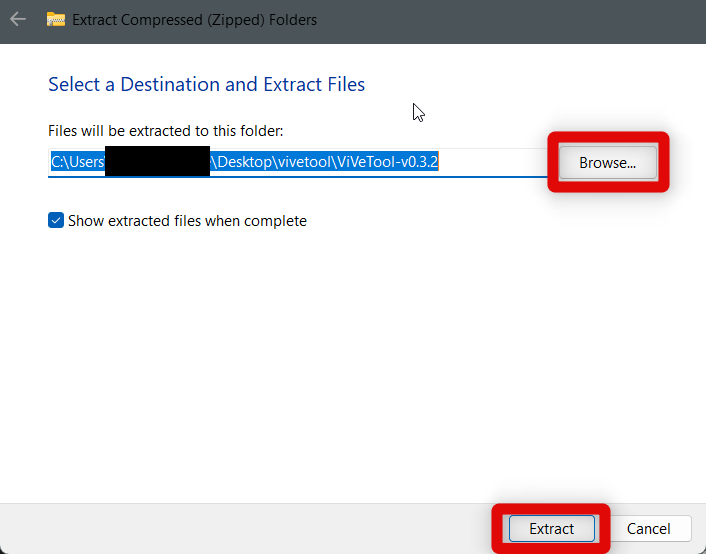
3. Now click Extract to extract ViveTool in the same location. You can also choose to extract it in a different location. Click Browse… at the top and choose your preferred location. Once you’re done, click Extract at the bottom.
4. Now click on the address bar at the top and press Ctrl + C on your keyboard to copy the path of the current location to your clipboard. This will help us open a CMD window where we extracted ViveTool.

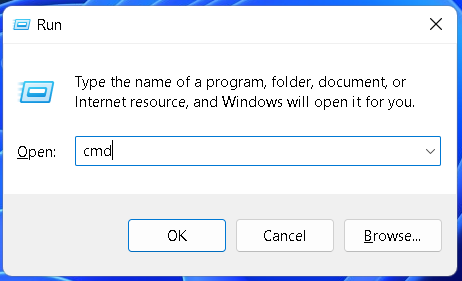
5. Launch the Run app on your PC. You can search for the app in the Start menu or choose to use the Windows + R keyboard shortcut, depending on your preferences.
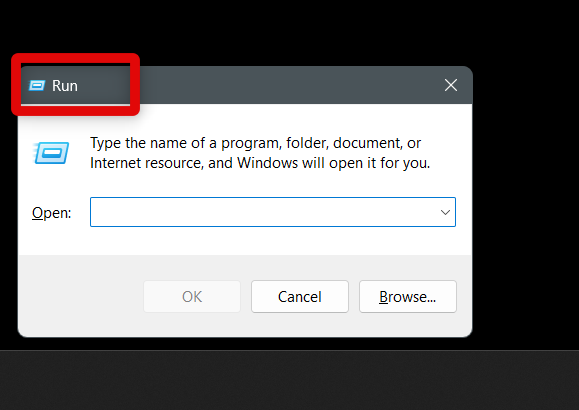
6. Once the Run app is launched, type in cmd and press Ctrl + Shift + Enter on your keyboard. This will help us launch CMD on your Windows 11 PC as an administrator.
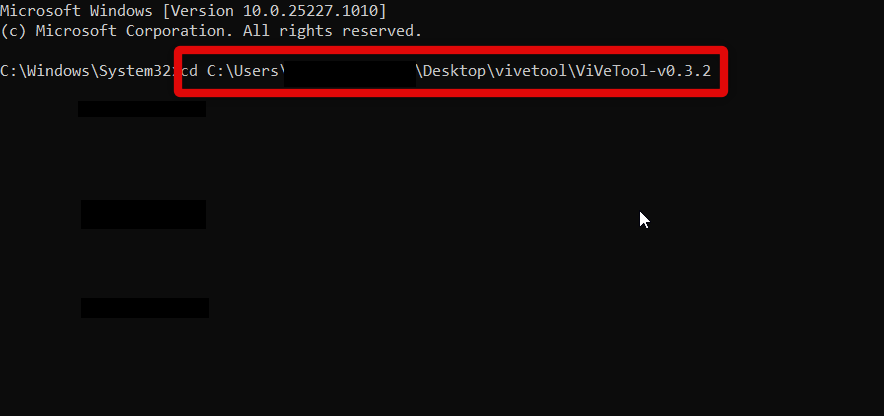
7. Once CMD is launched as an administrator on your PC, type in cd and paste the path we had copied to your clipboard. Press Enter once you have pasted the path.
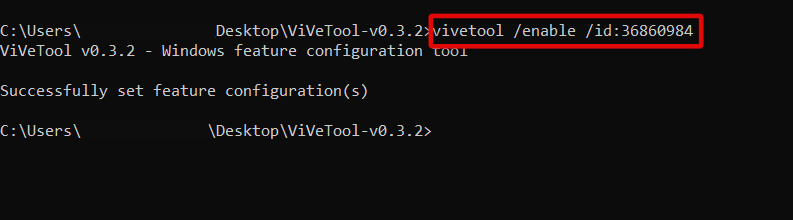
8. Now use this command vivetool /enable /id:36860984 to execute ViveTool and enable the new Task Manager on your Windows 11 PC. You should see a successful message once the command has been executed successfully.
9. Now use the exit command to close CMD on your PC.
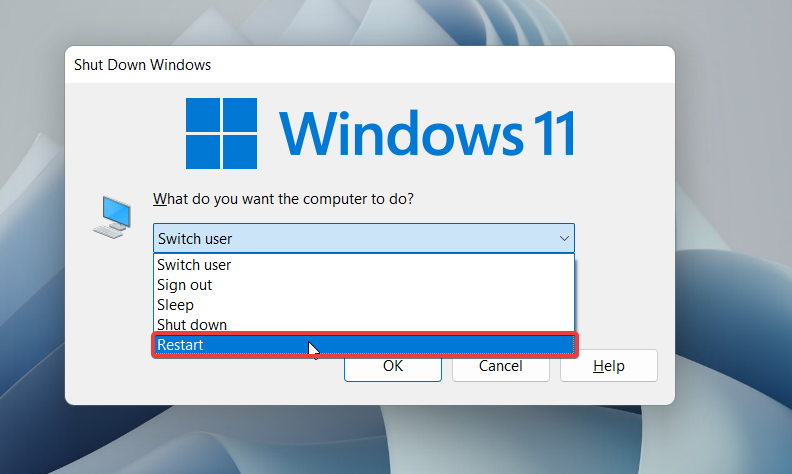
10. Lastly, go ahead and restart your PC using your preferred method.
11. Once your PC restarts, the new Task Manager will be enabled on your Windows PC. You can now use the subsections below to use the new Task Manager.
Final Words
The new Task Manager has been a great addition to Windows 11 with the 22H2 update. Not only does it introduce a more seamless aesthetic to match the overall look of Windows 11, but the easy-to-access UI also ensures that new users can intuitively use the Task Manager.
The added ability to use the efficiency mode also makes it a must-have for users with under specced and low-powered PCs. We hope the post above helped you quickly enable and get the new Task Manager on your Windows 11 PC.
Но главное тут, конечно же, переработанный интерфейс
Microsoft уже обновила свои канонические приложения «Блокнот» и Paint для Windows 11, а сейчас дошёл черед и до Диспетчера задач. Он, как и многие другие приложения в новой ОС, получил закруглённые уголки, но это далеко не самое главное.

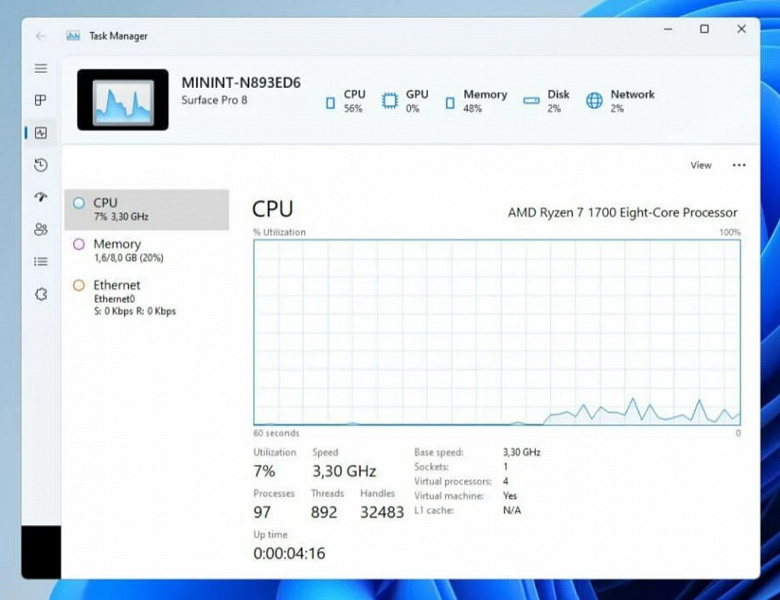
Главное — кардинально переработанный интерфейс. Вкладки, характерные для диспетчера задач Windows 10, исчезли. Теперь основное меню слева, а вся остальная область отдана диспетчеру процессов. Пункт меню «Производительность» выглядит несколько иначе, чем в Windows 10. В настройках приложения можно выбрать тёмную тему оформления, которая уже доступна даже для Блокнота.
К сожалению, новый диспетчер задач пока доступен только в Windows 11 Insider Preview 22538, причём его ещё нужно активировать при помощи ViveTools. Когда же он появится в пользовательской версии Windows 11, пока непонятно. Возможно, он войдёт в состав крупного обновления Windows 11 22H2 (Sun Valley 2), выпуск которого ожидается летом.
20 января 2022 в 14:04
| Теги: Windows, Microsoft
| Источник: WinFuture
On Windows 11, you can now enable an early preview of the new Task Manager that brings a new design using rounded corners, mica material, and new iconography that matches the new design language we have seen across the latest version of the OS available through the Windows Insider Program.
The redesigned app has been announced with the release of Windows 11 build 22557, but since a number of users have been reporting Task Manager rolling back to the classic version, you can use a third-party tool known as “ViVeTool” created by Rafael Rivera and Lucas on GitHub to enable the new experience on your device.
This guide will teach you the steps to turn on the new Task Manager hidden in the latest insider preview of Windows 11 from the Dev channel.
To enable the new Task Manager on Windows 11, use these steps:
-
Open this GitHub website.
-
Download the ViveTool-vx.x.x.zip file to enable the new Task Manager.
-
Double-click the zip folder to open it with File Explorer.
-
Click the Extract all button.

-
Click the Extract button.
-
Copy the path to the folder.
-
Open Start menu.
-
Search for Command Prompt, right-click the top result, and select the Run as administrator option.
-
Type the following command to navigate to the ViveTool folder and press Enter:
cd C:\FOLDER\PATH\ViveTool-v0.2.1
In the command, remember to change the path to the folder with your path.
-
Type the following command to enable the new Task Manager design on Windows 11 and press Enter:
vivetool addconfig 35908098 2

-
Restart the computer.


Once you complete the steps, the resigned Task Manager experience will be available on your installation of Windows 11.
In the case you don’t have the Windows 11 build 22557 on your computer, you need to enroll in the Dev Channel using the “Windows Insider Program” settings from the “Windows Update” section. Once you enroll the device in the program, you can download build 22557 from the “Windows Update” settings by clicking the Check for Updates button, and then you can follow the steps outlined above.
If you change your mind, you can revert the changes with the same instructions, but on step No. 10, make sure to use these commands: vivetool delconfig 35908098 2 and then restart the device.
We may earn commission for purchases using our links to help keep offering the free content. Privacy policy info.
All content on this site is provided with no warranties, express or implied. Use any information at your own risk. Always backup of your device and files before making any changes. Privacy policy info.
Несколько часов назад Microsoft выпустила новую инсайдерскую сборку Windows 11 под номером 22538 для канала Dev, которая принесла с собой довольно большое количество исправлений и улучшений. Впрочем, в сборке присутствует ещё одно довольно интересное изменение, которое в настоящее время скрыто от посторонних глаз.
Речь идёт об обновлённом «Диспетчере задач» в стиле Fluent Design и с поддержкой тёмной темы оформления. Стоит отметить, что приложение находится на стадии разработки, так что его внешний вид пока оставляет желать лучшего. По этой же причине в нём пока не работают некоторые функции, да и со стабильностью могут быть проблемы. Зато уже сейчас понятно, в каком направлении работает Microsoft.
По всей видимости, обновлённый «Диспетчер задач» создаётся с использованием технологии XAML Islands, которая позволяет использовать современные элементы управления WinUI в устаревших приложениях. В итоге инструмент получил новый заголовок окна, новое навигационное меню, новый раздел настроек, но в области контента выводится привычные разделы из старого «Диспетчера задач».
Если вы хотите самостоятельно оценить обновлённый «Диспетчер задач», то воспользуйтесь следующей инструкцией. Ещё раз обращаем ваше внимание, что приложение находится на стадии разработки и может работать нестабильно.
Инструкция
- Скачайте утилиту ViVeTool по этой ссылке.
- Распакуйте скачанный архив в любое место на вашем компьютере (например, можно создать папку ViVeTool в корне диска C и поместить файлы туда).
- Откройте командную строку от имени администратора (например, набрав CMD в поиске и выбрав соответствующий пункт).
- В командной строке перейдите в папку с ViVeTool с помощью команды cd /d <путь к папке>, после чего нажмите Enter. Например:
cd /d "C:\ViVeTool" - По очереди введите следующие команды, нажимая после каждой клавишу Enter. Убедитесь, что после каждой команды появляется сообщение «Successfully set feature configuration».
vivetool addconfig 35908098 2
vivetool addconfig 36898195 2
vivetool addconfig 37204171 2
Примечание: при использовании PowerShell перед vivetool необходимо прописать
.\. Например,.\vivetool addconfig 35908098 2- Также существуют ещё два экспериментальных флага, после включения которых в «Диспетчере задач» пропадает какой-либо контент. По всей видимости, эти изменения пока не готовы, но не исключено, что мы увидим их в будущих сборках. Команды для включения:
vivetool addconfig 15681380 2
vivetool addconfig 8749962 2
- Также существуют ещё два экспериментальных флага, после включения которых в «Диспетчере задач» пропадает какой-либо контент. По всей видимости, эти изменения пока не готовы, но не исключено, что мы увидим их в будущих сборках. Команды для включения:
- Перезагрузите компьютер или перезапустите explorer.exe.
Если вы хотите вернуться к старому варианту, то воспользуйтесь той же инструкцией, но на шаге 5 вводите следующие команды:
vivetool delconfig 35908098 2
vivetool delconfig 36898195 2
vivetool delconfig 37204171 2
vivetool delconfig 15681380 2
vivetool delconfig 8749962 2