
В этой статье я расскажу вам какими способами можно устранить возможно пугающую вас ошибку связанную с файлом hal.dll
Руководство по устранению неполадок в Windows XP
Содержание
- Самостоятельное исправление ошибки Hal.dll
- Исправление ошибок Hal.dll в Windows 7, 8 и Vista
- Устранение ошибки Hal.dll в Windows 7, 8 и Vista
Синий экран Hal.dll отсутствует
Ошибка «отсутствует или поврежден hal.dll» может появляться в нескольких вариациях, вот самые распространенные из них:
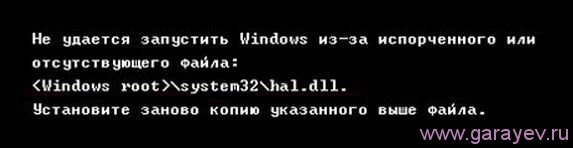
- «Не удается запустить Windows, поскольку следующий файл отсутствует или поврежден:
Windows root\system32\hal.dll.Установите заново копию указанного выше файла.» - «Winnt_root»\System32\Hal.dll отсутствует или поврежден:
Установите заново копию указанного выше файла.» - «Не удается найти \Windows\System32\hal.dll»
- «Не удается найти hal.dll»
Ошибка hal.dll отображается вскоре после включения компьютера. Windows XP еще не успевает загрузиться полностью как появляется такое сообщение.
Причины Hal.dll
Причиной ошибки «windows root system32 hal dll» является — повреждение, удаление или перемещение с предполагаемого местонахождения файла hal.dll.
Дополнительные причины:
Повреждение файла boot.ini или, возможно, физическое повреждение жесткого диска.
Так же если вы видите надпись hall dll (с двумя ll), то причиной может являться вирус. В данном случае просто просканируйте систему антивирусной программой, и проблема может быть решена.

Данная проблема иногда возникает с ошибкой отсутствия Msvcr110.dll
Как самостоятельно исправить ошибку «отсутствует Hal.dll»?
- Перезагрузите компьютер. Возможно, что ошибка hal.dll появилась случайно.
Примечание: поскольку ошибки hal.dll появляются перед полной загрузкой Windows XP, вы не сможете правильно перезагрузить компьютер. Вместо этого, нужно будет сделать это принудительно. На системном блоке, вы увидите кнопку принудительной перезагрузки.

- Проверьте правильность порядка загрузки в BIOS. Ошибка hal.dll может появляться, если нарушен порядок загрузки в BIOS: обратите внимание на то, какой жесткий диск стоит первый.
- Запустите восстановления системы Windows XP из командной строки. Если это решение не помогло, и вы продолжаете видеть синий экран и hal.dll ошибку на нем, переходим к следующему шагу.
- Исправить или заменить файл boot.ini. Это вам поможет, если причиной на самом деле был boot.ini-файл, а не hal.dll-файл, который чаще является виновником ошибки.
Примечание: если восстановление boot.ini не исправило ошибку hal.dll, и она появляется снова после перезагрузки, и вы недавно установили Internet Explorer 8(IE8) в Windows XP, удалите его. В этом конкретном случае, IE8 может быть первопричиной ошибки hal.dll.
- Создать новый загрузочный сектор в Windows XP. Если загрузочный сектор поврежден или не правильно настроен, появляется ошибка dll.
- Восстановление данных с поврежденных секторов на жестком диске. Если физическая часть вашего жесткого диска, хранящая какую-либо долю файла hal.dll была повреждена, то вы вероятнее всего увидите ошибку system32 hal.dll.
- Восстановить hal.dll файл с компакт-диска Windows XP. Если hal.dll файл является причиной проблемы, его восстановление с оригинального компакт-диска Windows XP решит вопрос.
- Выполните установку Windows ХР путем восстановления. Этот тип установки заменит отсутствующие или поврежденные файлы. Продолжите поиск неисправностей, если это не поможет устранить проблему.
- Выполните чистую установку Windows XP. Этот тип установки полностью сотрет вашу Windows XP с компьютера и установит ее заново.
Примечание: Хотя, это почти 100% способ решить любые hal.dll ошибки, этот процесс очень трудоемкий, в связи с тем, что все ваши данные должны быть закреплены и потом восстановлены.
- Проверьте жесткий диск. Если все предыдущие варианты исправления ошибки hal.dll не помогли, в том числе установка чистой Windows XP, то проблема, скорее всего, заключается в жестком диске. Протестируйте его на ошибки, что бы убедиться.
Если жесткий диск не прошел не один из тестов, замените его и затем установите новую Windows XP на ваш компьютер.

Если вы недавно изменили порядок загрузки или подключали внешние или дополнительные винчестеры, это может являться причиной вашей проблемы.
Важно: Если вы не можете получить доступ к вашим файлам для их резервного копирования, вы должны понимать, что потеряете их полностью, в случае установки чистой Windows XP.
Эта проблема относится к Windows XP, включая Windows XP Professional и Windows XP Home Edition.
В других операционных системах, такие как Windows 8, Windows 7, Windows Vista, ошибка hal.dll тоже может возникать, но причины ее настолько различны, что оно представляет собой совершенно другое руководство по устранению неполадок (см. ниже).
Как исправить Hal.dll ошибки в Windows 7, 8 и Vista
Руководство по устранению ошибки «отсутствующего Hal.dll» в Windows 8, 7 и Vista
Сообщение об ошибке Hal.dll
Поскольку выше мы уже разобрали ошибку hal.dll в Windows ХР, вкратце напомню вам, в каком виде может появиться данные ошибки в Windows 7, Windows 8 и Windows Vista которые возникают в середине загрузки системы:
- «Не удается запустить Windows, поскольку следующий файл отсутствует или поврежден:
C:\Windows\system32\hal.dll.Установите заново копию указанного выше файла.» - «Не удается найти \Windows\System32\hal.dll»
- «C:\Windows\System32\Hal.dll отсутствует или поврежден:
Установите заново копию указанного выше файла.»
Причины Hal.dll
Причиной ошибки » windows root system32 hal dll» является — повреждение, удаление или перемещение с предполагаемого местонахождения файла hal.dll.
Другой возможной причиной является поврежденный жесткий диск, но в большинстве случаев в Windows 8, Windows 7 и Windows она появляется из-за проблем с основным загрузочным кодом.
Так же если вы видите надпись hall dll (с двумя ll), то причиной может быть вирус. В данном случае просто просканируйте систему антивирусной программой, и проблема будет решена.
Как исправить ошибку Hal.dll в Windows 7, 8, Vista
- Перезагрузите компьютер. Начните с этого. Маловероятно, но ошибка hal.dll может быть вызвана временной проблемой, с которой справиться перезагрузка компьютера.
Примечание: поскольку ошибки hal.dll появляются перед полной загрузкой Windows, в этом случае нет возможности правильно перезагрузить компьютер. Вместо этого, вы должны сделать это принудительно. На системном блоке, вы можете найти кнопку принудительной перезагрузки.
- Проверьте последовательность загрузки в BIOS. Ошибка будет появляться, если BIOS настроен так, что во время загрузки первым списки жесткий диск другой, чем с обычно используемым копии Windows, установленной на нем.
- Выполните восстановление системы. Запуск процесса восстановления в Windows 7 и Vista является автоматизированной загрузкой Windows fix, этот инструмент в большинстве случаев исправит ошибку hal.dll, связанную с повреждением или отсутствием файла hal.dll.
- Обновите загрузочный код, по использованию BOOTMGR. Если объем загрузочного кода поврежден или настроен для другого менеджера загрузки кроме BOOTMGR, тогда вы будите наблюдать ошибку «hal.dll отсутствует».
Примечание: проблема с объемом загрузочного кода является наиболее распространенной причиной ошибки hal.dll в Windows 7, 8 или Vista.
Я описываю его четвертым шагом, поскольку первые являются наиболее простыми в исполнении. Однако если вы уверенно работаете с advanced tools в Windows, не стесняйтесь сделать этот шаг первым.
- Тест жесткого диска. Есть вероятность, что проблемой является повреждение жесткого диска. Замените жесткий диск, если по результатам теста, в нем обнаружилась проблема и затем снова установите Windows 8, 7 или Vista на Новый Диск.
- Выполнить чистую установку Windows. Этот вид установки Windows, полностью сотрет все ваши данные (включая ошибки) и загрузит вам новую систему.
Примечание: если вы недавно устанавливали внутренний или подключали внешний жесткий диск, вносили изменения в BIOS или видели мелькнувший BIOS, это может быть причиной вашей проблемы.
Важно: чистая установка, устранит любые программные причины ошибки hal.dll, но выполняя этот пункт, вы должны быть уверенны, что ваш жесткий диск работает должным образом, и вы испробовали все другие способы устранения неисправностей.
![]() Различные ошибки, связанные с библиотекой hal.dll, встречаются практически во всех версиях Windows: Windows XP, Windows Vista, Windows 7 и Windows 8. Текст самой ошибки может отличаться: «отсутствует hal.dll», «Запуск Windows невозможен, файл hal.dll отсутствует или поврежден», «Не найден файл \Windows\System32\hal.dll — наиболее распространенные варианты, но случаются и другие. Ошибки с файлом hal.dll всегда появляются непосредственно перед полной загрузкой Windows.
Различные ошибки, связанные с библиотекой hal.dll, встречаются практически во всех версиях Windows: Windows XP, Windows Vista, Windows 7 и Windows 8. Текст самой ошибки может отличаться: «отсутствует hal.dll», «Запуск Windows невозможен, файл hal.dll отсутствует или поврежден», «Не найден файл \Windows\System32\hal.dll — наиболее распространенные варианты, но случаются и другие. Ошибки с файлом hal.dll всегда появляются непосредственно перед полной загрузкой Windows.
Ошибка hal.dll в Windows 7 и Windows 8
Сначала поговорим о том, как исправить ошибку hal.dll в последних версиях операционной системы: дело в том, что в Windows XP причины возникновения ошибки могут несколько отличаться и о них речь пойдет ниже в этой статье.
Причина ошибки — та или иная проблема с файлом hal.dll, однако не стоит спешить искать «скачать hal.dll» в Интернете и пытаться установить этот файл в систему — скорее, всего, это не приведет к желаемому результату. Да, один из вариантов возникновения проблемы — удаление или повреждение этого файла, а также повреждение жесткого диска компьютера. Однако, в подавляющем большинстве случаев, ошибки hal.dll в Windows 8 и Windows 7 возникают из-за проблем с главной загрузочной записью (MBR) системного жесткого диска.
Итак, как исправить ошибку (каждый пункт — отдельный вариант решения):
- Если проблема появилась один раз, попробуйте просто перезагрузить компьютер — скорее всего, это не поможет, но попробовать стоит.
- Проверьте порядок загрузки в BIOS. Убедитесь, что в качестве первого устройства для загрузки установлен жесткий диск с установленной операционной системой. Если непосредственно перед появлением ошибки hal.dll Вы подключали флешки, жесткие диски, делали изменения настроек BIOS или перепрошивку BIOS, обязательно выполните этот пункт.
- Выполните исправление загрузки Windows с помощью установочного диска или загрузочной флешки Windows 7 или Windows 8. Если проблема вызвана именно повреждением или удалением файла hal.dll, этот способ с большой вероятностью Вам поможет.
- Исправьте загрузочную область жесткого диска. Для этого нужно сделать все те же действия, что и для исправления ошибки BOOTMGR IS MISSING, о чем подробно написано здесь. Это наиболее часто встречающийся вариант в Windows 7 и Windows 8.
- Ничего не помогло — попробуйте установить Windows (воспользовавшись «чистой установкой».
Стоит отметить, что последний вариант, а именно переустановка Windows (с флешки или диска), исправит любые программные ошибки, но не аппаратные. Так что, если несмотря на то, что Вы заново установили Windows ошибка hal.dll остается, стоит поискать причину в аппаратной части компьютера — в первую очередь, в жестком диске.
Как исправить ошибку hal.dll отсутствует или поврежден в Windows XP

Теперь поговорим о способах исправления ошибки, если на Вашем компьютере установлен Windows XP. В данном случае эти способы будут несколько отличаться (под каждым отдельным номером — отдельный способ. Если он не помог, можно переходить к следующему):
- Проверьте очередность загрузки в BIOS, убедитесь, что жесткий диск с Windows является первым устройством загрузки.
- Загрузитесь в безопасном режиме с поддержкой командной строки, введите команду C:\windows\system32\restore\rstrui.exe, нажмите Enter и следуйте инструкциям на экране.
- Исправьте или замените файл boot.ini — очень часто это срабатывает при ошибке hal.dll в Windows XP. (Если это помогло, а после перезагрузки проблема снова появилось и если Вы недавно устанавливали новую версию Internet Explorer, то Вам придется ее удалить, чтобы проблема не появлялась в дальнейшем).
- Попробуйте восстановить файл hal.dll с установочного диска или флешки Windows XP.
- Попробуйте исправить загрузочную запись системного жесткого диска.
- Переустановите Windows XP.
Вот и все советы по исправлению данной ошибки. Следует отметить, что в рамках этой инструкции я не могу подробно описать некоторые пункты, например номер 5 в части про Windows XP, тем не менее, где искать решение обрисовал достаточно подробно. Надеюсь, руководство окажется полезным для Вас.
Если вы пытаетесь включить компьютер, а у вас появляется ошибка «Не удаётся запустить Windows из-за испорченного или отсутствующего файла: Windows root — system32 — hal.dll установите заново копию указанного выше файла» значит у вас нарушена связь между программным обеспечением и железом компьютера.
Исправление ошибки
Если у вас нету загрузочного установочного диска этой системы то лучше всего установить систему заново. Но если у вас есть этот загрузочный установочный диск вашей системы то можно восстановить файл hal.dll с этого диска. Вставляем установочный диск в дисковод и перезагружаем компьютер. Как увидите надпись «Press any key to boot from CD» жмите на клавиатуре клавишу «Enter». Через некоторое время откроется окно «Параметры восстановления системы».

Выберите в ней пункт «Командная строка». Откроется командная строка. Сначала вводим команду copy c:\windows\system32\hal.dll С:\windows\system32\hal.dll.bak и нажимаем на клавиатуре Enter. Затем вводим следующую команду expand буква CD диска:\i386\hal.dl_ С:\windows\system32 и нажимаем Enter. Теперь можно вынуть диск из дисковода и перезагрузить компьютер. Компьютер должен загрузиться и не выдавать этой ошибки hal.dll отсутствует или поврежден.
Если вы потеряли установочный диск, а новую систему не хотите ставить тогда нужно файл hal.dll восстановить, для этого нужно с другого компьютера из system32 hal.dll скачать на флешку и ещё сделать загрузочный диск, например на CD диск записать Acronis True Image Home. Вставляете флешку и CD диск в свой дисковод и и включаете компьютер и как увидите надпись «Press any key to boot from CD» жмите «Enter». После того как загрузится Acronis True Image Home нужно открыть флешку и скопировать файл hal.dll который отсутствует на вашем компьютере.

Скачать файл hal dll
С помощью утилиты Acronis True Image Home открываете системный диск где стоит операционная система и ищете папку Windows в ней ищете папку System 32 и устанавливаем в неё файл hal.dll. В 64 битных операционных системах файл hal.dll дополнительно вставляем в папку SysWOW64 пройдя по пути Локальный диск С — Windows — SysWOW64. После этого вытаскиваем диск из дисковода и перезагружаем компьютер. Компьютер должен загрузиться без ошибки отсутствует файл hal.dll.
Видео
В этом видео ролике показано как исправить ошибку hal.dll в Windows XP.
Get the fix for the error HAL.dll is missing or corrupt on Windows XP, Windows Vista and Windows 7.
About “HAL.dll is missing or corrupt”
The following information on this error has been compiled by NeoSmart Technologies, based on the information gathered and reported by our global network of engineers, developers, and technicians or partner organizations.
Description and Symptoms
The error messages, alerts, warnings, and symptoms below are tied to this error.
Symptom 1: “HAL is missing, or corrupt” error screen on startup
The HAL(Hardware Abstraction Layer) serves as an interface between a system’s hardware and software, providing a consistent hardware platform on which to run applications. When a HAL is employed, applications do not access hardware directly but access the abstract layer provided by the HAL. For example, responding to an interrupt is quite different on a machine with an Advanced Programmable Interrupt Controller (APIC) than on one without. The HAL provides a single function for this purpose that works with all kinds of interrupts by various chipsets, so that other components need not be concerned with the differences. In Windows, HAL is implemented in hal.dll, and when this file is either missing on corrupt, the boot process halts, and a error screen is displayed.
Here is an example of “HAL is missing or corrupt” error screen for Windows XP:

Windows could not start because the following file is missing or corrupt:
<Windows root>\system32\hal.dll.
Please re-install a copy of the above file.
And here is an example of “HAL is missing or corrupt” error screen for Windows Vista and Windows 7:

Windows Boot Manager

Windows failed to start. A recent hardware or software change might be the
cause. To fix the problem:

   1. Insert your Windows installation disc and restart your computer.
   2. Choose your language settings, and then click "Next."
   3. Click "Repair your computer."

If you do not have this disc, contact your system administrator or computer
manufacturer for assistance

     File: \Windows\system32\hal.dll
     Status: 0xc0000221
     Info: Windows failed to load because the HAL is missing, or corrupt.
The “Status” 0x code and the “Info” text may differ, but the file in question is always \Windows\system32\hal.dll
Causes of this Error
This error has been known to occur as a result of one of the following causes:
Cause 1: Invalid BOOT.INI file configuration
On Windows XP and other operating systems using the NTLDR bootloader, the boot.ini file configuration could be either changed or become incorrect. This consequently means the ARC paths in the [operating systems] section or the default entry in BOOT.INI are incorrect. This can happen if boot.ini is modified (inadvertently or maliciously), if the BIOS settings have changed, or if hardware (especially IDE, SATA, or SCSI disk drives) have been added or removed.
Cause 2: BCD configuration is incorrect
Invalid data in BOOTMGR’s boot configuration data file (BCD) can cause this error to be present on Windows Vista and Windows 7. Hal.dll is required for the Windows kernel to communicate with the underlying hardware in a platform-agnostic fashion. Incorrect data in the BCD will cause BOOTMGR to load Windows with the wrong system root set, and hal.dll will not be found. This will cause the “HAL is missing or corrupt” error to appear.
Cause 3: The hal.dll file is in fact corrupted or missing
Failed Windows Updates or Automatic Updates to Windows that involve an upgrade of critical system files (especially service pack installations) that update hal.dll may result in this error. If hal.dll is not written to the disk correctly, or an incompatible version of hal.dll is used, then “HAL is missing or corrupt” error may appear.
Cause 4: File system integrity compromised
The hard drive’s file system may become damaged because of disk write errors, power outages or virus attacks. If that’s the case, the operating system cannot find hal.dll to boot properly and the loading process is halted.
Fixing “Hal.dll is missing or corrupt” on Windows
Windows Setup CD/DVD Required!
Some of the solutions below require the use of the Microsoft Windows setup CD or DVD. If your PC did not come with a Windows installation disc or if you no longer have your Windows setup media, you can use Easy Recovery Essentials for Windows instead. EasyRE will automatically find and fix many problems, and can also be used to solve this problem with the directions below.
Fix #1: Rebuild boot.ini or BCD with Easy Recovery Essentials
Easy Recovery Essentials’ one-click automated system repair corrects issues caused by missing or misconfigured boot.ini and BCD by recreating them from scratch on the active bootable partition for Windows. This is done automatically as part of the automated repair process, and requires no manual action or user intervention.
Easy Recovery Essentials is guaranteed to fix the “Hal.dll is missing or corrupt” error automatically using its built-in Automated Repair option. EasyRE is currently available for Windows XP, Vista, 7, 8, Windows 10, and Windows 11 and can be downloaded and created on any PC.
- Download Easy Recovery Essentials. Make sure to note your Windows version (XP, Vista, 7, 8, 10, or Windows 11) before you download EasyRE. This guide can help you identify what version of Windows you have installed.
- Burn the image. Follow these instructions on how to burn the bootable ISO image very carefully, as making a bootable CD can be tricky! Alternatively, these instructions explain how to create a bootable EasyRE recovery USB stick/drive.
- Boot up your PC from the Easy Recovery Essentials CD or USB you created.
- Once EasyRE is running, choose the “Automated Repair” option and click Continue.

Choose “Automated Repair” in Easy Recovery Essentials
- After EasyRE scans your computer’s drives, identify and select the drive letter for your Windows installation from the list, and then click on the Automated Repair button to begin.
Choose the drive associated with the Windows installation you’re trying to repair.
- Easy Recovery Essentials will start analyzing the selected drive for problems. EasyRE will test for and attempt to automatically correct errors with the disk, partition, bootsector, filesystem, bootloader, and registry. No intervention is required, as EasyRE’s repair is fully automated:
Easy Recovery Essentials searches for errors and makes corrections to the selected Windows installation.
- Once the process is complete, EasyRE will report its findings. Click on the Restart button to reboot your PC and test the changes.
- The “Hal.dll is missing or corrupt” error should now be fixed as your PC begins to load:


You can download Easy Recovery Essentials from here.
Fix #2: Manually attempt rebuild of boot.ini
A boot.ini file is used by Windows to configure and display its operating system options. Instructions on manually recreating the boot.ini file are also available, but require a moderate level of computer expertise. The instructions below will guide you on recreating boot.ini automatically from the Windows XP setup CD.
Unable to boot into the Windows setup CD?
See our guide on setting up a PC to boot from the CD or DVD for troubleshooting and more detailed instructions.
- Insert your Windows XP CD and restart your computer.
- Press a key to boot into the CD when you see the “Press any key to boot from CD” message.
- When you arrive at the “Welcome to Setup” message, press R to start the Recovery Console.
- Type in your Administrator password; hit Enter
- The next command you need to write is below; hit Enter afterwards:
bootcfg /rebuild
The above command, bootcfg /rebuild, will scan your computer for installed Windows copies. If you have Windows XP, here are the next steps:
- Press Y if the command prompt shows a message similar to the one below:
Total Identified Windows Installs: 1

[1] C:\Windows
Add installation to boot list? (Yes/No/All)
- When you receive a message like this:
Enter Load Identifier
You are being asked to provide a name to be assigned and shown in the boot menu for the installation you picked in the previous step. Examples:
Enter Load Identifier: Windows XP Professional (Recovered)
- (Optional) When you receive a message like this:
Enter OS Load options
Type in
/fastdetectfollowed by Enter - Restart your computer.
Here is an example of what the PC’s console output should look like once the boot.ini file is properly restored:

Fixing Boot.ini file
Fix #3: Replace hal.dll
Windows Setup CD/DVD Required!
Some of the solutions below require the use of the Microsoft Windows setup CD or DVD. If your PC did not come with a Windows installation disc or if you no longer have your Windows setup media, you can use Easy Recovery Essentials for Windows instead. EasyRE will automatically find and fix many problems, and can also be used to solve this problem with the directions below.
If hal.dll is in fact missing or corrupt, you can restore the original hal.dll file back from your Windows XP installation disc.
Unable to boot into the Windows setup CD?
See our guide on setting up a PC to boot from the CD or DVD for troubleshooting and more detailed instructions.
- Insert your XP CD into the computer.
- Restart your computer.
- Press any key to boot into the CD when you see the “Press any key to boot from CD” message.
- Press R to start Recovery Console when the Options screen appears.
- Type in your Administrator password followed by the Enter key to submit it.
- You’ll reach the Command Prompt now, type the following command, where
D:\is your CD’s drive letter andC:\is the letter of the drive you installed Windows to:expand D:\i386\hal.dl_ C:\Windows\system32\
- Press Y when you are asked if you want to overwrite this file and then hit Enter to submit the command.
- Restart your computer.
Here is an example of what the PC’s console output should look like once the hal.dll file is properly restored:

Replacing the hal.dll file
Fix #4: Use Startup Repair to attempt HAL replacement
On Windows Vista and Windows 7, Startup Repair can be used to scan the system for damaged or missing system files to replace the hal.dll file if it is corrupt or missing.
Windows Setup CD/DVD Required!
Some of the solutions below require the use of the Microsoft Windows setup CD or DVD. If your PC did not come with a Windows installation disc or if you no longer have your Windows setup media, you can use Easy Recovery Essentials for Windows instead. EasyRE will automatically find and fix many problems, and can also be used to solve this problem with the directions below.
Startup Repair is an automated diagnosis and repair tool that is available from the Windows setup disc and can be used to find and repair some common problems. More information about how Startup Repair operates and what it does can be found in our knowledgebase. The following steps will initiate Startup Repair from the Windows setup disc:
Unable to boot into the Windows setup CD?
See our guide on setting up a PC to boot from the CD or DVD for troubleshooting and more detailed instructions.
- Insert your Windows installation DVD into your PC’s CD-ROM drive,
- Fully power down your PC, and make sure it has fully shut off,
- Power up your PC,
- Press any key when you see “Press any key to boot from CD or DVD..”
- Click the link titled “Repair your computer” in the bottom-lefthand corner, after first selecting your language and keyboard options.

- Wait for Startup Repair to scan your PC for Windows installations, then select your install from the list it shows:

- Choose “Startup Repair” from the list of available recovery options to begin:

- Startup Repair will begin scanning your installation for known issues and will attempt a repair, if possible.


Here is an example of what the PC’s startup repair should look like once the hal.dll file is properly restored:

Hal.dll restored by Windows 7 Startup Repair
Fix #5: Repair corrupted system files with the SFC command
On Windows Vista and Windows 7, it is possible to use the built-in Windows SFC(system file checker) tool to automatically scan a computer’s system files and repair them if necessary.
Here are the steps to run SFC:
- Boot from your Windows install disc
- Click on Repair your computer after selecting proper language, time and keyboard input.
- Select the Windows installation drive, which is usually
C:\, and click Next - Choose Command Prompt when the System Recovery Options box appears
- Write the following command and press Enter afterwards:
sfc /scannow /offbootdir=D:\ /offwindir=D:\Windows\
Replace D: with the letter of the driver where Windows is installed, and D:\Windows with the Windows folder location.
Here is an example of what the PC’s console output should look like once the sfc.exe scan is complete and missing files are successfully restored:

Hal.dll restored by the SFC utility
Fix #6: Check the hard drive with CHKDSK utility
If the hard drive has its file integrity compromised, it is possible to use built-in Windows CHKDSK utility to scan the disk and fix the file system errors.
Here are the steps to run CHKDSK:
- Boot from your Windows install disc
- Click on Repair your computer after selecting proper language, time and keyboard input.
- Select the Windows installation drive, which is usually
C:\, and click Next - Choose Command Prompt when the System Recovery Options box appears
- Write the following command and press Enter afterwards:
chkdsk C: /f
Replace C: with the letter of the driver where Windows is installed.
Here is an example of what the PC’s console output should look like once the chkdsk.exe is complete:

Chkdsk utility results screen
More Information
Linked Entries
- bootcfg
Support Links
- Easy Recovery Essentials for Windows – our repair and recovery disk.
It’s an easy-to-use and automated diagnostics disk. It’s available for Windows 8, Windows 7 and Windows Vista. It’s also available for Windows XP and Windows Server.
Read more at Windows Recovery Disks.
- The NeoSmart Support Forums, member-to-member technical support and troubleshooting.
- Get a discounted price on replacement setup and installation discs: Windows XP, Windows Vista, Windows 7.
Applicable Systems
This Windows-related knowledgebase article applies to the following operating systems:
- Windows XP (all editions)
- Windows Vista (all editions)
- Windows 7 (all editions)
Propose an edit