
If System Restore isn’t working on your Windows 11 PC, you’ll need to troubleshoot the problem. This guide explains how.
Windows has a built-in feature called System Restore that allows you to restore your PC to an earlier state if something goes wrong. However, if the failsafe isn’t working, you’ll want to fix System Restore not working on Windows.
Creating a System Restore point is important before significant events like installing hardware drivers or installing a Windows feature update. But if it isn’t working as intended, there are several ways to fix it.
Whether it displays an error or not, if System Restore isn’t working correctly on your Windows PC, this guide will show you how to return its functionality.
How to Check if System Restore is Enabled
The System Restore utility is built into your Windows operating system but isn’t enabled by default. The first thing you’ll need to do is verify that System Restore is turned on. If it isn’t, you’ll need to switch it on.
To enable System Restore:
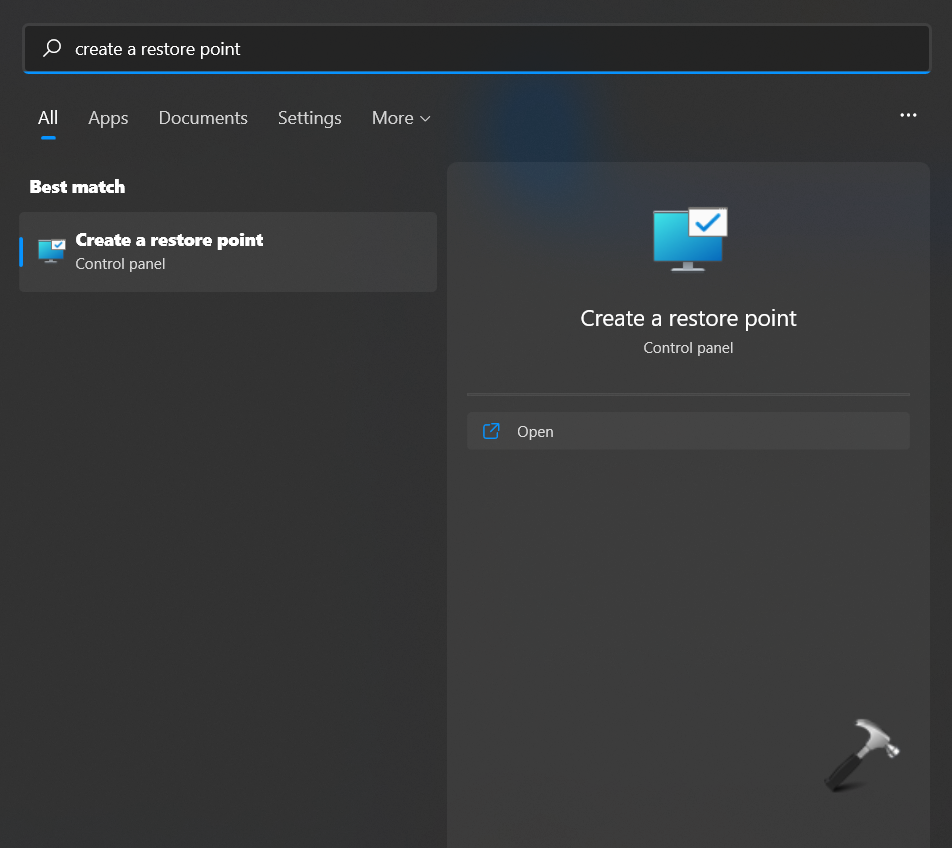
- Press the Windows key.
- Type Restore and select the Create a restore point option from the menu.

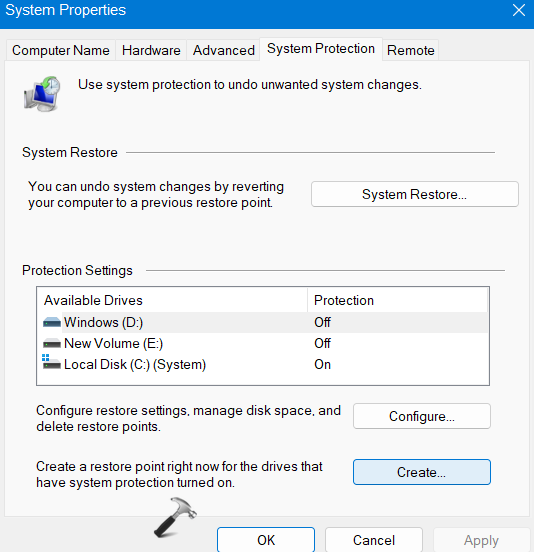
- Under the System Protection tab, click the Configure button.

- Ensure the Turn on system protection button is selected.


Restart the Volume Shadow Copy Service
Once you confirm the System Restore tool is turned on, you need to check that its associated service is enabled.
The Volume Shadow Copy service allows System Restore to take snapshots of files to create restore points. If it isn’t running or set incorrectly, you’ll need to verify that it’s turned on and restart the service.
To restart the Volume Shadow Copy service:
- Press Windows key + R to launch the Run dialog window.
- Type services.msc and click OK or press Enter.

- Double-click the Volume Shadow Copy service.

- Set the Startup type to Automatic, click the Start button, and click Apply and OK.


Double-Check Group Policy Settings
If System Restore is enabled and the Volume Shadow Copy service is running, another good place to check is your Group Policy settings.
If you’ve recently changed user settings via Group Policy, it’s easy to disable the ones you need inadvertently.
To double-check Group Policy settings for System Restore:
- Press Windows key + R.
- Type gpedit.msc and click OK.

- When the Local Group Policy Editor opens, navigate to the following section:
Computer Configuration > Administrative Templates > System > System Restore

- Double-click the Turn off Configuration and Turn off System Restore settings.

- Ensure that each one is set to Not Configured.
- Click Apply and OK if you need to change the policy setting.


Check Restore Point Drive Space
For System Restore to work properly, you must ensure it has enough storage space to store the snapshots it creates. So, if there isn’t enough allocated drive space, it won’t work. Luckily you can adjust the disk space it uses through settings.
To check and change Restore Point drive space:
- Press the Windows key to launch the Start
- Type Restore and select the Create a restore point under the best match.
- Under the System Protection tab, click the Configure button.
- Adjust the Max Usage slider under the Disk Space Usage section to allow more drive space for backups.
- Click Apply and OK to confirm the new setting.


It’s also important to note that you can lower the usage here to make System Restore use less drive space on Windows. In addition, if you are getting low on drive space, you can delete old Restore Points. If your PC has a low-capacity drive, you’ll need to find other ways to free up disk space so System Restore has enough to run.
Fix Corrupt System Files
Another reason System Restore isn’t working is due to corrupt system files. Thankfully, Windows includes two utilities that will check for corrupt files and fix them.
Running an SFC and DISM scan from the command line checks the core system files and fixes them if they’re corrupt or damaged.
To run SFC and DISM scans:
- Press the Windows key.
- Type PowerShell and select the Run as Administrator option on the right.

- When the Windows terminal launches, type the following command and press Enter:
sfc /scannow

- After the SFC scan runs, with PowerShell still open as Administrator, run the DISM scan:
DISM /Online /Cleanup-Image /RestoreHealth


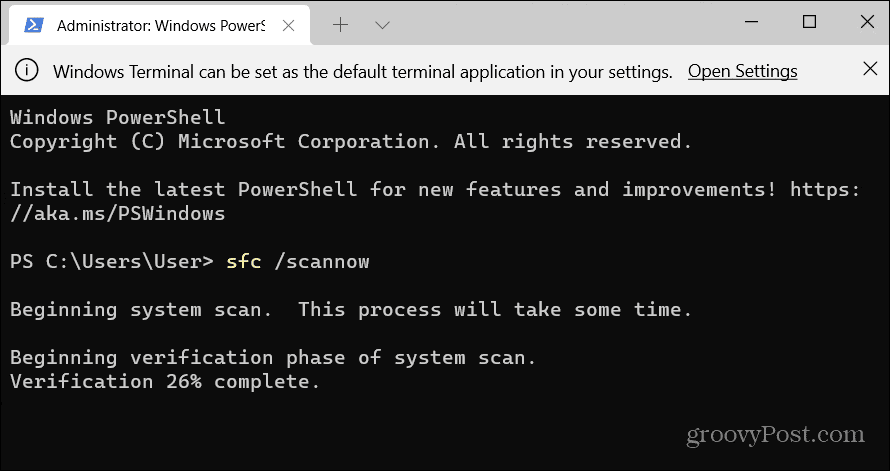

Note that these scans can take a while to complete, and the time varies between PCs. Once the scans are complete, check if System Restore works.
If it still isn’t working, you can use a few last-resort options. For example, you can use the reset your PC feature to return it to factory settings. Note that a reset gives you a choice of keeping your files.
If that doesn’t work, you can always do a clean install of Windows. Just remember, before using a reset or clean install option, create a full system backup to use the image to restore your PC.
Fixing Windows Errors
If System Restore isn’t working on your PC, using the above troubleshooting solutions should get you back in business. It is helpful to restore your PC to a working state in many situations, and you need System Restore to work as it should.
There are other core features in Windows you may need to address. For example, you might need to fix a Windows cannot find the specified device error or get the Windows key + Shift + S Snipping Tool working.
Also, if you are archiving files and folders, you may need to fix a Zip error on Windows 11. And if you are getting a specific error code, check out how to fix a 0x8007045d error on Windows. Blue screen errors can be particularly jarring, and one you may need to fix is Clock_Watchdog_Timeout.
![]()
System Restore is the life savior for users facing serious issues. But when it fails to restore, nothing seems right. Here’s how to fix the system restore not working.
Stuck while restoring your PC to a previous working condition? Every year, thousands of Windows users face system restore not working issues that sometimes corrupt the entire hard disk. You might not realize it unless you are a victim.
The PC creates restore points to keep system files and data safe. These points help roll back your PC to the last known stable state. But when the System Restore crashes, things get complicated. If you are facing an issue restoring your Windows 10 PC, this blog is definitely for you!
In this article, we will be discussing ways to fix system restore not working on your PC.
What is System Restore?
It is the key to Windows PC recovery and can be used to restore the system to its last stable state in case of any unexpected crash. The feature is handy as it keeps your preferred settings safe during any malware attack.
From Windows 7 to the latest Windows 11, System Restore has been a part of all Windows operating systems. The functionality that it adds to the PC is remarkable. Moreover, if any recent application has slowed your PC, you can restore it to the last known stable version.
Best Ways to Fix System Restore Not Working
If you have encountered any error while performing your System Restore, there might be something wrong with the restore points created. There are multiple ways you can handle the situation. Check them out!
1. Use a Different Restore Point
If there’s an issue with the current restore point, try choosing a different restore point.
If your last point is not letting you initiate the restore, chances are that it is corrupt. Avoiding it is the best you can do. To know details on the restore points available to you, follow the steps below –
- Press Windows + R to open Run
- Type rstrui and press enter
- You will find a pop-up with the list of restore points available.

- You might have multiple points available ( not shown in the picture above). Select a different restore point and click next.
- This will initiate the process again. Ideally, it should solve your problem.
While a different restore point can help you fix system restore not working on Windows 10, you might lose some program files and registries created between the two restore points as it is not the latest one.
2. Try Running Restore in Safe Mode Without Networking
There are instances when your computer cannot function properly while connected to the network. If you have run System Restore on your PC directly from the menu and have faced an error, try running it in safe mode. Here’s what you have to do –
- Go to Settings> Updates & Recovery> Advanced Startup. You will find a Restart Now button. Click on that to reboot your system to advanced options of starting your PC.
- In the advanced options, follow the path – Troubleshoot > Advanced options > Startup Settings > Restart. This will restart your PC.
- While restarting your system, press F4 to boot in safe mode.
- Initiate the process of System Restore in Safe Mode configuration.
Safe mode on any operating system is helpful when you want to isolate your PC from any third-party interference. If you have come across system restore not working on windows, this step can help you.
3. Expand Allotted Storage for Restore Points
There’s a set storage limit dedicated to restoring point creation. If the restore point image exceeds that limit, your point is either not created or previous ones are deleted. If you believe something like this might be causing the issue, you can allot more storage to the System Restore disk usage.
- Type “Create Restore Point” in the start menu search bar and open the available option.

- This will take you to the system properties popup. Click on Configure.

- In the Configure menu, you will find a slider that you can use to expand the disk space. Set it as per your requirements, and you will be ready.

- Click on Apply and restart your PC to check whether the System Restore is working properly.
Using the above steps and performing system repair and deleting old system restore files, you can fix the System Restore not working issue.
How to delete Old System Restore Points in Windows 8, 8.1, and 10
- Press Windows + S, and type disk clean in the Start menu bar. Right-click and select Run as administrator.
- Select C: as it is the Windows drive you want to clean, press OK. Disk Clean-up will calculate the amount of space available for cleaning.
- Click the More Options tab. Under System Restore and Shadow Copies, select Clean-up.
- Press Delete if you want to proceed.
This method keeps your last System Restore point in place, whereas pressing the Delete key will clean all the points.
This is how you can fix the issue. However, if you want to keep your PC optimized and clean and avoid facing these issues, keeping it optimized is suggested.
Writer’s Tip
If you are looking for a way to clean junk files and duplicates, keep drivers updated and perform other operations that will help tune up your PC, we suggest using Advanced System Optimizer. It is an advanced PC cleanup tool that offers 25+ tools, all of which help in tweaking the computer. The tool helps enhance your PC’s performance, optimize disk, and more. To use it follow these steps:
- Download and install the software on your PC. It hardly takes a few minutes as the process is super smooth.

See? No complicated commands and steps to optimize the PC.
System Restore An Essential Feature
Keeping your system files backed up has become a basic necessity for any user. Windows offer System Restore for that. However, it often causes issues making you lose your important data in times of a mishap.
We, as users, usually do not pay attention to these issues until it’s too late, which is nothing but our careless nature. After reading this blog, check the status of your System Restore points. If they are working fine, keep checking on them frequently to stay assured.
If your PC faces System Restore not working on Windows 10, troubleshoot the issue with the mentioned techniques. You can also download Advanced System Optimizer to ensure your PC is always in an optimal working state.
Choose your restore option wisely! Good Luck!
Recommended-
- How To Identify and Remove Bloatware?
- How to Uninstall OneDrive on Windows 10 – OneDrive Uninstaller
- Windows 11 Keeps Crashing? How To Fix It
- How to Free Up Space in Windows 11,10
All Windows OS users encounter system crashes, bugs, or malware attacks at some point. In contrast to having a professional take care of our system or buying malware removal software, System Restore is free.
The System Restore feature in Windows allows us to create backup points that one can use when the need arises. In simple terms, these restore points act as time machines. But what if the system restore doesn’t work? This guide will explain what to do if System Restore is not working on Windows 11/10.
What makes a system restore points so important
It is recommended to create a system restore point before installing third-party software from unknown sources. An installation of a new application may cause the PC to crash or become unstable. To counter this, we can use the system restore point to restore the PC to its previous state.
This truly doesn’t help when the System Restore corrupts itself or doesn’t work. Check out this article to learn how to find a way around it.
Try the following methods if system restore is not working on your computer –
1] Make sure System Restore is enabled
If the System Restore is not working on your computer, the first solution we suggest you open Group Policy Editor and make sure system restore is enabled. To do this, follow the below steps:
- Click on Start, type “
gpedit” and click on the top result i.e. Local Group Policy. - On the subsequent screen, navigate to the following –
Computer Configuration > Administrative Templates > System > System Restore
![[Solved] System Restore on Windows 10](https://www.howtoedge.com/wp-content/uploads/2021/05/Solved-System-Restore-on-Windows-10.png)
- Move to the right pane and double-click on the Turn off Configuration option.
- On the next page, check on Not Configured.
- Now click OK to save the changes.
2] Check your disk space usage
If changing group policy doesn’t fix the issue, make sure your disk space usage is at least 300MB. Follow the below steps to do so –
- Open Control Panel.
- Now scroll down and select Recovery > Open System Restore > Next.
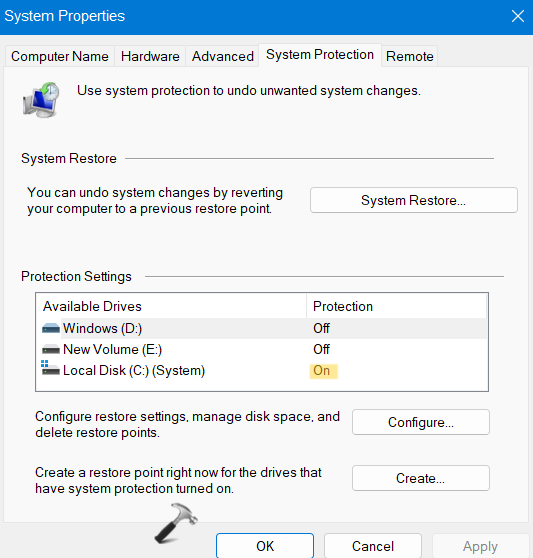
- From the result, click create a restore point.
- And then click the Configure button on the pop-up System Properties window.
![[Solved] System Restore not working](https://www.howtoedge.com/wp-content/uploads/2021/05/Solved-System-Restore-not-working.png)
- Next, move the slider in order to adjust the max usage of your disk space to at least 300MB.
- Click OK to save the changes.
3] Run System Restore in safe mode
Sometimes using the restore point simply circles back and no matter how many times you try it, it always fails. Well, in such cases, you may boot your device into Safe mode and do the following –
- Click on Start, type System Configuration, and select the result from the top of the list.

- Go to the Boot tab, then tick the box left of Safe boot and click OK.
- Click Restart if your system asked by System Configuration.
- Your computer will access Windows 11/10 safe mode.
- Now run system restore.
4] Disable antivirus software
If you’re still dealing with the same issue, chances are that your security software has blocked the System Restore. To fix this problem we suggest you turn off your Antivirus application temporarily and see if it works. Here is how to do it:
- Open the Settings app using the Windows +I keys.
- Now select Update & Security > Windows Security > Virus & threat protection.
- Under the Virus & threat protection tab, click on the Manage settings option.
- Now turn off the Real-time protection toggle switch.

5] Run System File Checker
Sometimes missing or corrupted system files also cause system restore not to work. In order to repair missing or damaged files on your computer, run an Sfc scan and see if it works.
- Click on the Start button and search for the command prompt.
- Right-click on the search result and select Run as administrator.
- If prompted by User Account Control, click Yes.
- Now type the following command and press Enter key –
sfc /scannow

- Wait until it completes the process successfully.
Hope this post helped you solve this issue. If you have any queries or proposals related to this post, feel free to let us know in the comment box.
Read Next –
- Fix: System Restore Error 0x81000203 on Windows 11/10
- How to Fix System Restore Error 0x800700b7 in Windows 10
On Windows 11/10 PC, System Restore is quite a useful characteristic. At times, this feature could be a real life-saver. However, you may come across issues while trying to use this feature. So, how to fix System Restore not working in Windows 11/10?
In this post, learn how to fix this annoying issue. So, here are some troubleshooting steps that you can follow if you are unable to restore your Windows system.
Page Contents
Fix: System Restore not working in Windows 11/10
Fix 1 – By disabling security software temporarily
Before you move on, it is suggested that you disable the security software or antivirus on your system. Once you have disabled the antivirus program, try creating a system restore point. If this fix does not work for you, keep reading on.
Fix 2 – By creating a system restore point manually
1. In the first place, open the Windows Start menu and search Create a restore point. Once done, click on Open.
2. After that, go to the System Protection tab and click on Create.
3. Next, provide it a name and click on Create again for confirmation.
4. Now, you have successfully created a restore point. Lastly, check if the issue has been resolved.
Fix 3 – By running Check Disk
1. Open Command Prompt with admin privileges.
2. In the elevated Command Prompt, execute the following command:
chkdsk /f /r
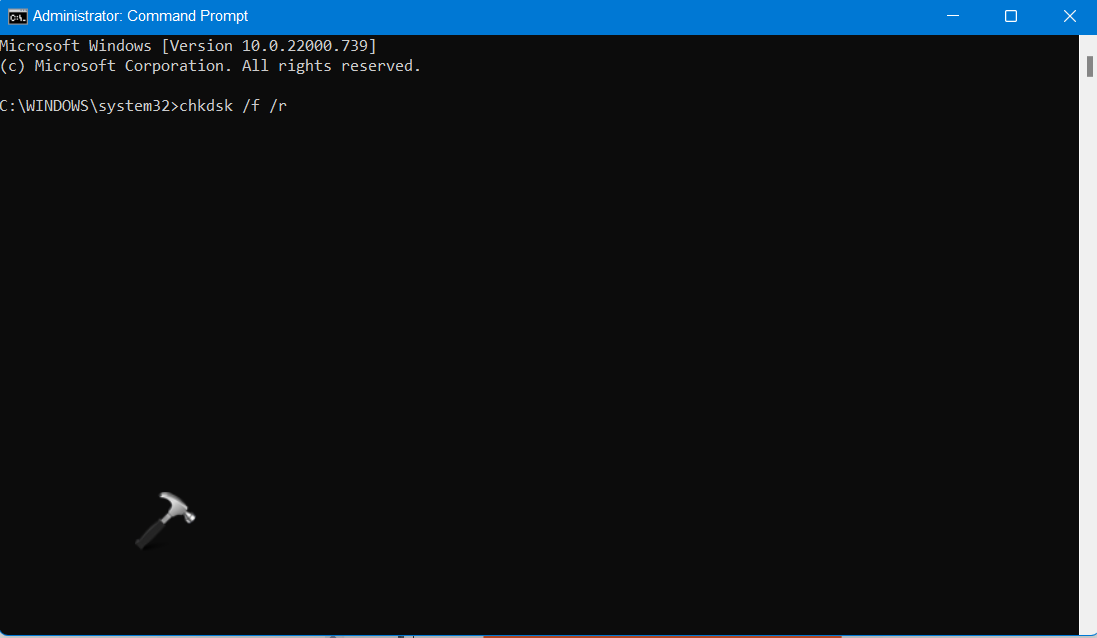
3. Once executed, try creating a system restore point.
Fix 4 – By running System File Checker
1. Open Command Prompt with admin privileges.
2. In the elevated Command Prompt, execute the following command:
sfc /scannow
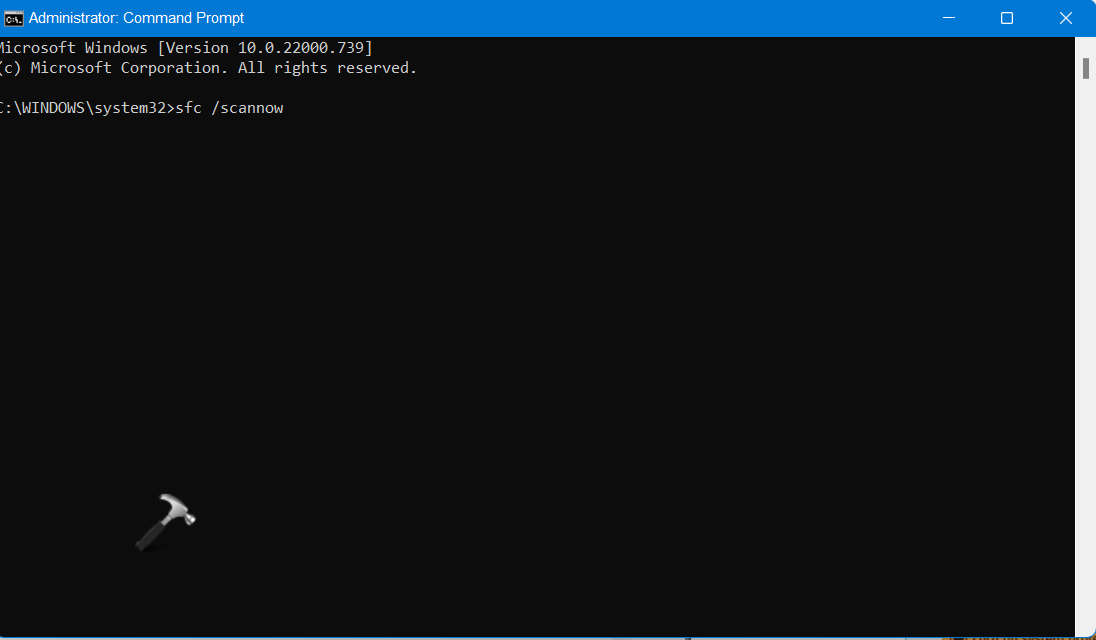
3. Once executed, reboot your system and try now.
Fix 5 – By ensuring that System Restore is enabled
1. Open Control Panel and go to System and Security. After that, click on the System tab.
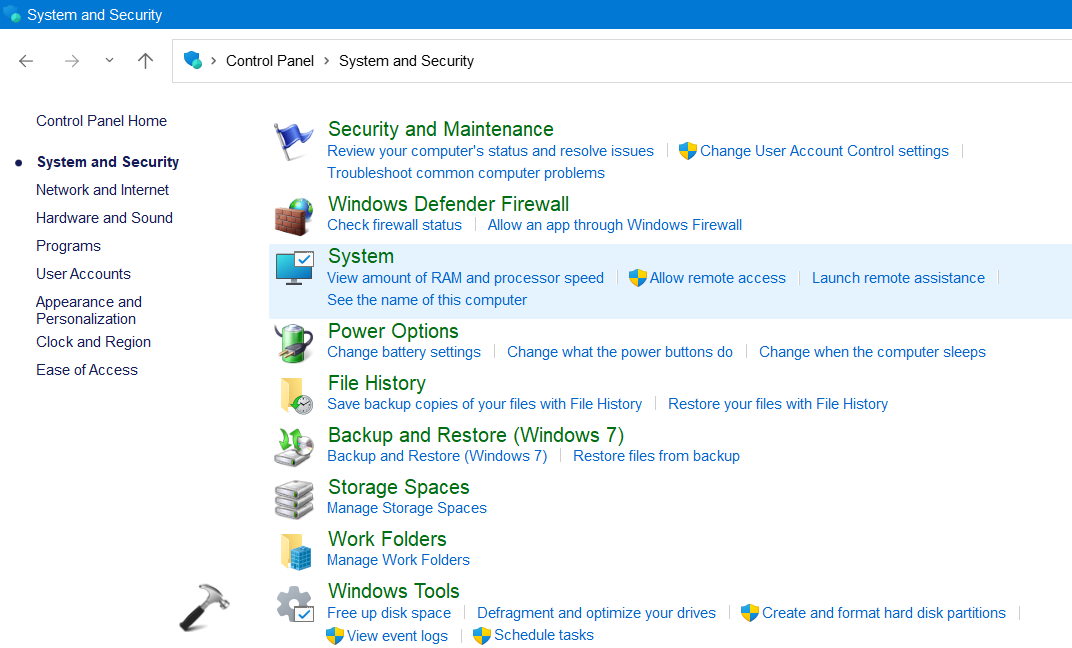
2. After that, click on the System Protection link.
3. In the System Protection tab, check if the System Restore is enabled.
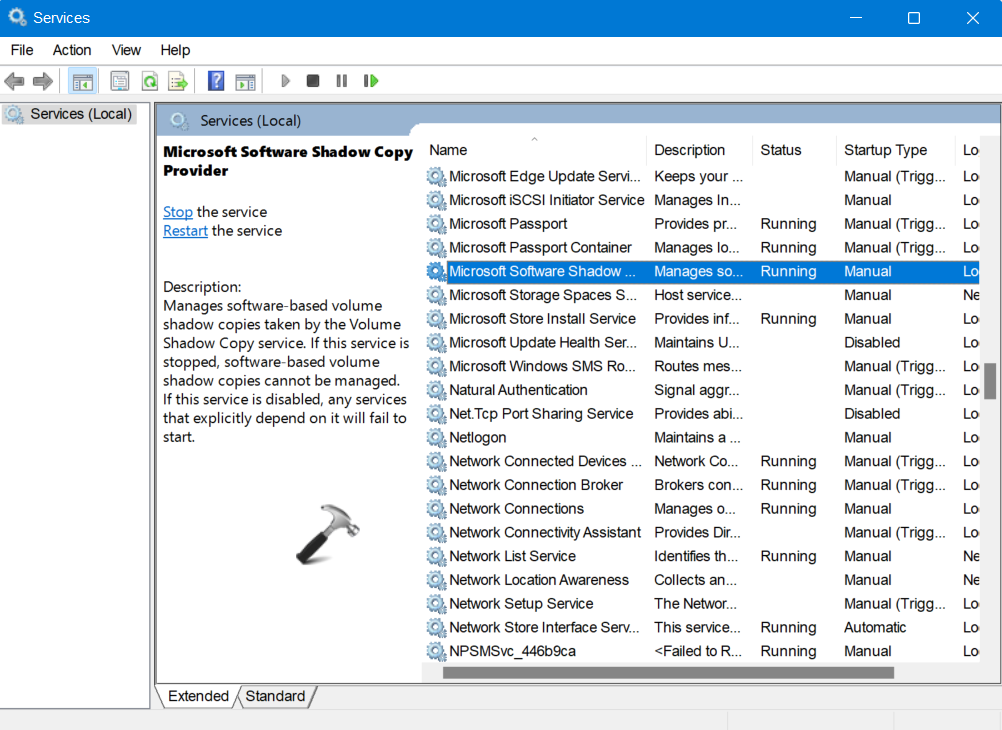
Fix 6 – By checking the status of Services
1. Open Run and search services.msc to open the Services tab.
2. Now, check if the following services are running:
- Volume Shadow Copy (Startup type – Manual)
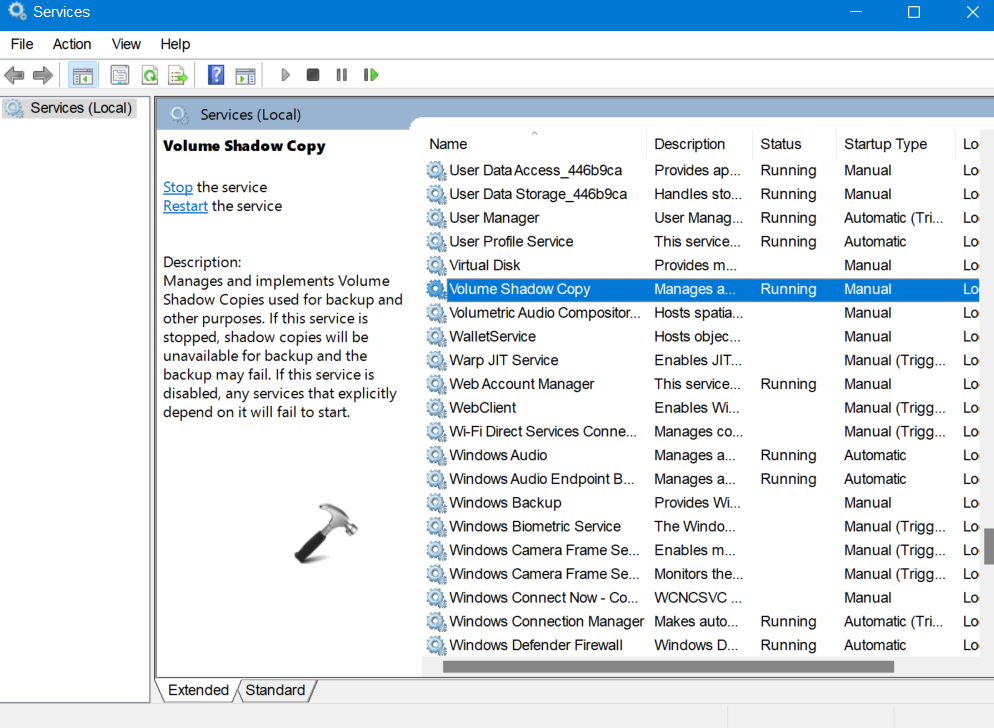
- Task Scheduler (Startup type – Automatic)
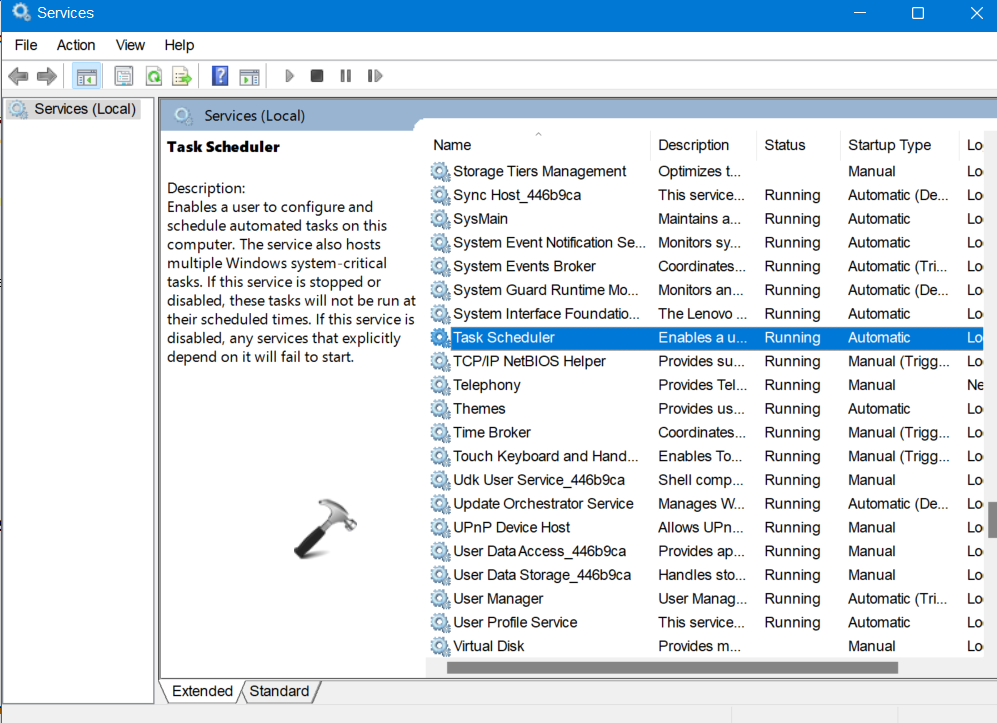
- Microsoft Software Shadow Copy Provider Service (Startup type – Manual)
So, this is how to fix System Restore not working in Windows 11/10 in different ways.
Related: The System Restore Is Still In Progress Or Did Not Complete.
READ THESE ARTICLES NEXT
- How to change language for Widgets on Windows 11
- Fix: Can’t turn on Memory Integrity in Windows 11
- Enable or disable Dynamic Lighting on Windows 11
- Reset network settings in Windows 11
- Create a password reset disk in Windows 11
- How to start or stop Automatic Maintenance in Windows 11
- Switch to local account in Windows 11
- Fix: Camera doesn’t work in Windows 11
- Fix: Turn Windows Features on or off not working
- Login using Voice access in Windows 11