Используя удаленный рабочий стол, нередко появляется потребность воспроизводить и передавать звук с удаленного рабочего стола на локальный компьютер, с которого вы производите подключение к столу. Многие пользователи сталкиваются с тем, что стандартные настройки системы Windows Server не включают данную опцию при установке системы и могут подумать, что прослушивать музыку или воспроизводить видео со звуком на удаленном рабочем столе невозможно. Но это не так.
Давайте же рассмотрим на примере системы Windows Server 2022, как включить звук на удаленном рабочем столе и полноценно работать с сервисом.
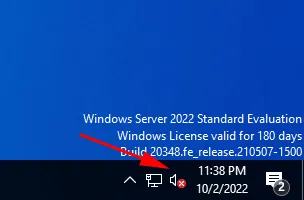
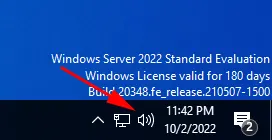
Для начала вам необходимо подключиться к удаленному рабочему столу, с которого мы будем передавать звук. Сразу после подключения мы можем увидеть, что иконка параметров звука отображается с красным крестиком, что означает отключенную службу звука.
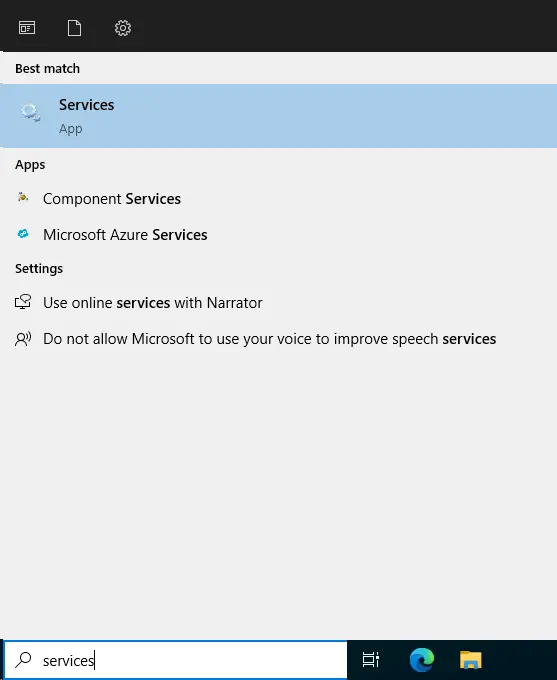
Далее, вписав “services” в быстрый поиск приложений, найдите менеджер сервисов Windows.
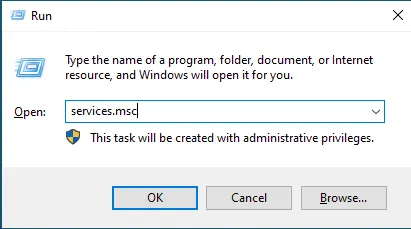
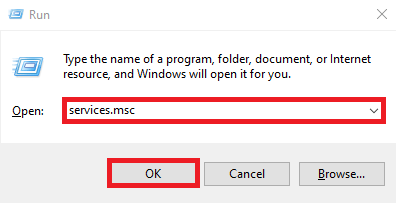
Либо используя комбинацию клавиш Win+R вызовите компонент Выполнить и впишите название менеджера «services.msc«. После чего нажмите OK.
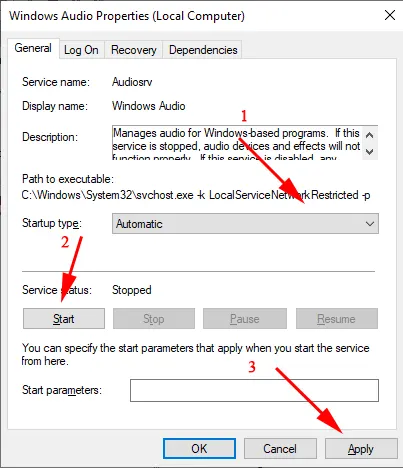
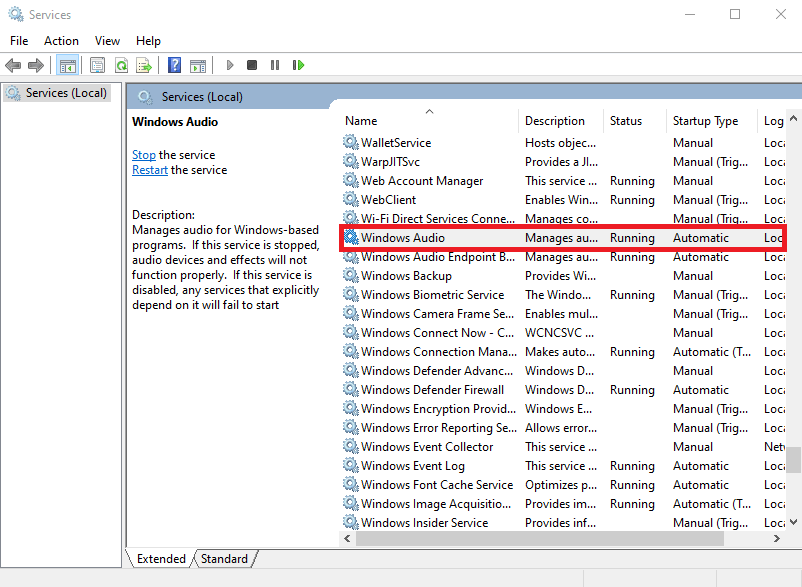
В новом открытом окне списка всех сервисов системы Windows, найдите сервис Windows Audio и нажмите по нему два раза для перехода в редактирование его параметров.
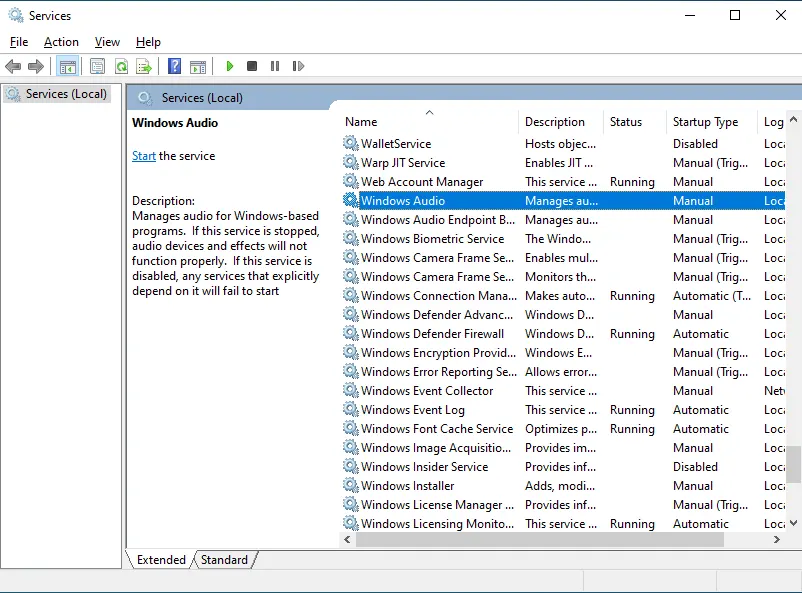
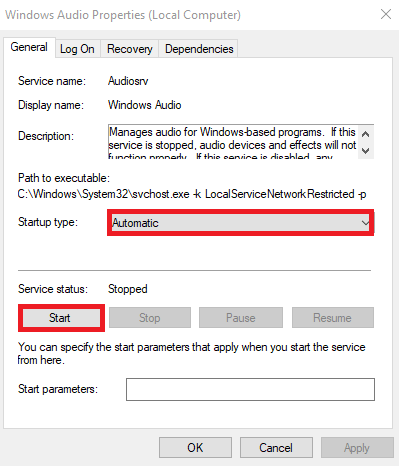
Измените значение запуска сервиса на Automatic, запустите сервис и подтвердите изменения нажав на Apply.
Готово! Теперь на панеле задач мы можем видеть, что иконка звука поменяла свой вид и звук на удаленном рабочем столе теперь воспроизводится у нас в колонках.
В некоторых случаях бывает такая ситуация, что вы произвели описанные выше процедуры, но звук так и не появился у вас в колонках на локальном компьютере. Это может быть связано с тем, что у вас может быть не включена передача потока аудио в клиенте подключения к удаленному рабочему столу. Для проверки данного момента вам необходимо открыть параметры подключения в клиенте Подключение к удаленному рабочему столу и перейти в раздел Local Resources.
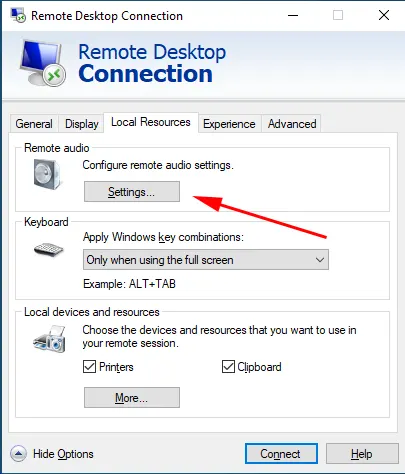
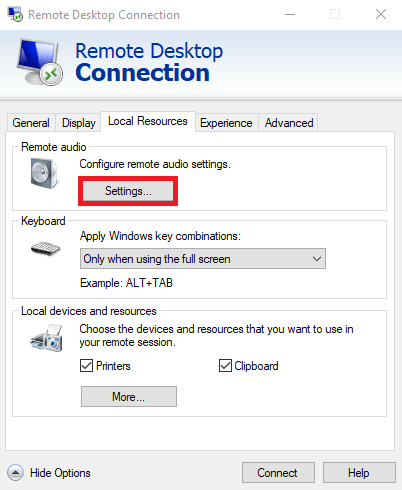
Теперь нажмите на параметры в графе Remote audio.
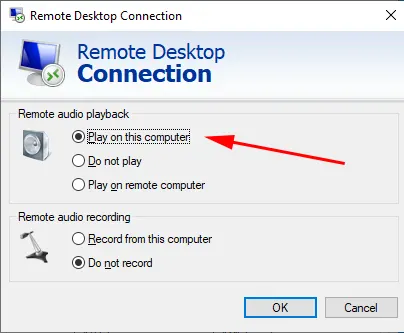
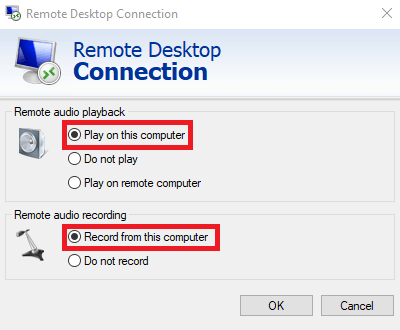
Убедитесь, что в настройках включено проигрывание звука на локальном компьютере.
Если же вы подключаетесь через сторонний RDP клиент, то вам необходимо найти аналогичные параметры передачи и воспроизведения звука в настройках подключения к удаленному рабочему столу.
Мы надеемся, что данная статья поможет вам в решении вопроса передачи звука с удаленного рабочего стола и будет очень полезной!
Отдельно хотим заметить, что мы предоставляем наш удаленный рабочий стол со звуком и в случае возникновения вопросов — всегда рады помочь в их решении!
https://finerdp.com/ru/rdp-server
By on 1 Aug 2023 0 Categories / RDP, Windows
If your Voice over Internet Protocol (VoIP) application is failing to detect your microphone input or audio output while using Remote Desktop Protocol (RDP), fret not!in this article we learn How to enable audio on Windows Server 2019? We shall delve into the intricacies of RDP client settings to address this issue and optimize your communication experience. Follow the steps below to unlock the full potential of your audio peripherals during remote sessions.
Step By Step How do I enable audio on Windows Server 2019?
Is your Windows Server missing sound, microphone, or printer functionality? Fret not! I’m here to provide you with a comprehensive, step-by-step guide to unlock these essential features and make your server more versatile. Follow these instructions, and you’ll have your sound, microphone, and printer up and running in no time.
Step 1 – Access Advanced RDP Settings
To embark on this quest, open your Remote Desktop Connection window and unveil the hidden treasures of advanced settings. Simply click on “Show Options” to access the portal of possibilities.

Step 2 – Unveil Remote Audio Settings
Within the realm of “Local Resources” lies the gateway to remote audio settings.
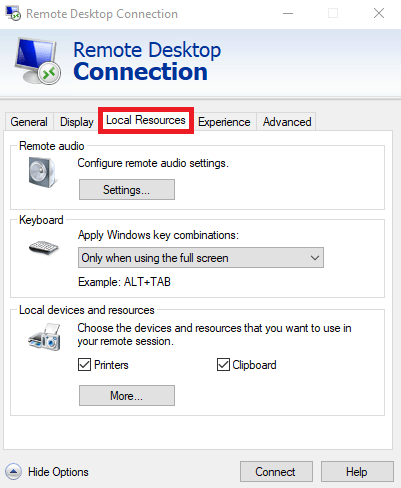
Journey forth and locate the option under the banner of the “Remote audio” heading. But lo! Fear not the sub-text that whispers, “Configure remote audio settings.” Embrace it and press the mystical “Settings…” button to progress.
Step 3 – Embrace the Recording Power
Amidst the arcane settings, thou shall find a checkbox labeled “Record from this computer.” Make sure to give it thy blessing with a mark. While thou art at it, thou must also ensure that “Play on this computer” is equally blessed. Bestow thy approval upon it and press “OK” to proceed. Now, take a moment to assess thy VoIP application and witness if the ‘Remote Output’ input and output devices have been unshackled from their binds. If thou findest them still ensnared, fear not, for we shall venture forth.
Step 4 – Infuse Thy Server with Roles and Features
In the realm of Server Manager, thou must seek out the path to greatness known as “Add roles and features.”
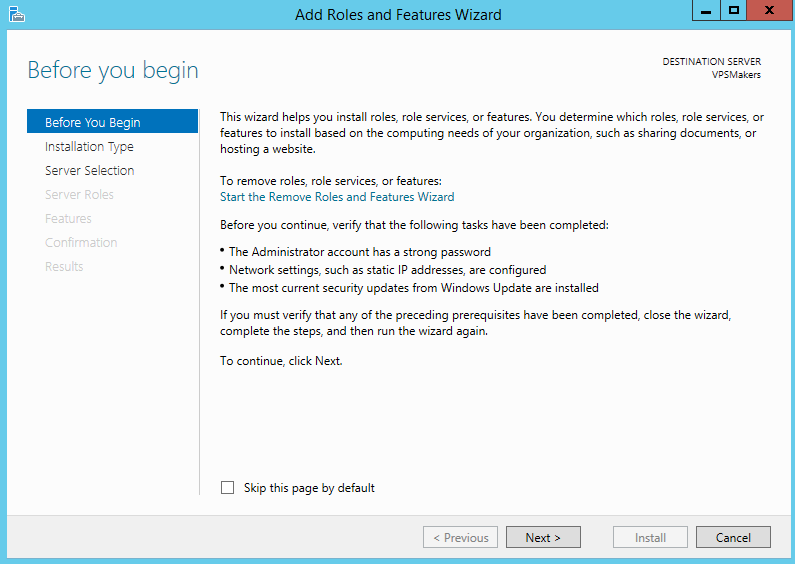
It resides beneath the majestic banner “Configure this local server.” Embrace this opportunity and embark on the journey of enhancement.
Step 5 – Unleash the Power of Remote Desktop Services
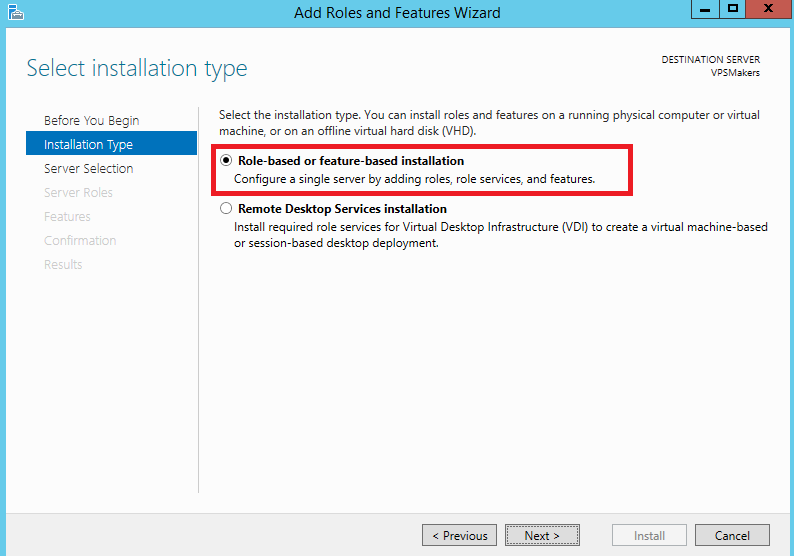
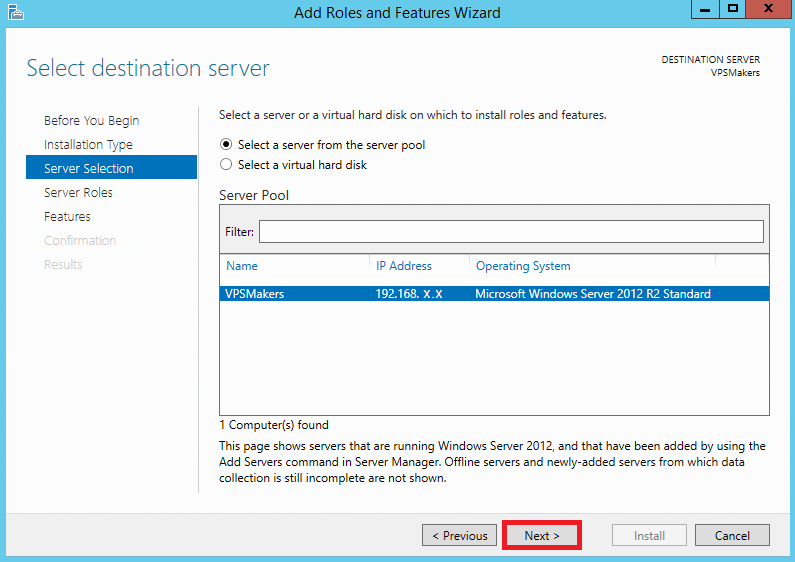
As thou traverse the Roles and features wizard, thou must select “Role-based” or “feature-based installation” and declare thy chosen server.
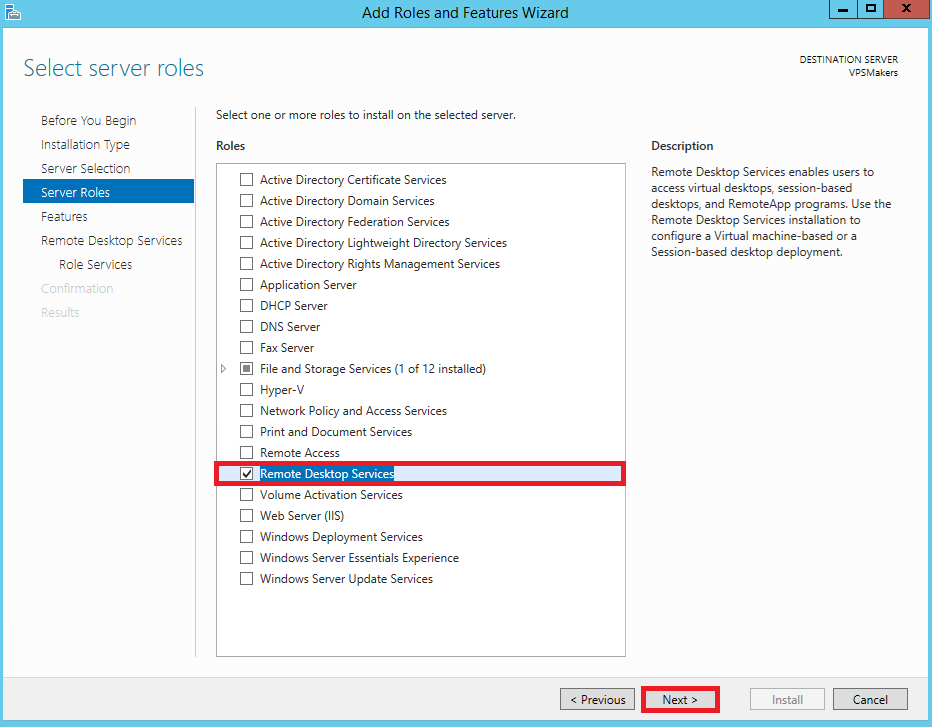
Lo and behold! The coveted treasure known as “Remote Desktop Services” shall be revealed to thee. Bestow thy trust upon it and press “Next” thrice.

Step 6 – Choose Wisely the Remote Desktop Service Roles
Select the remote desktop services option then press “Next”
To ensure the harmonious symphony of thy microphone and audio devices, we recommend bestowing thy favor upon Remote Desktop Connection Broker, Remote Desktop Gateway, Remote Desktop Session Host, and Remote Desktop Web Access.
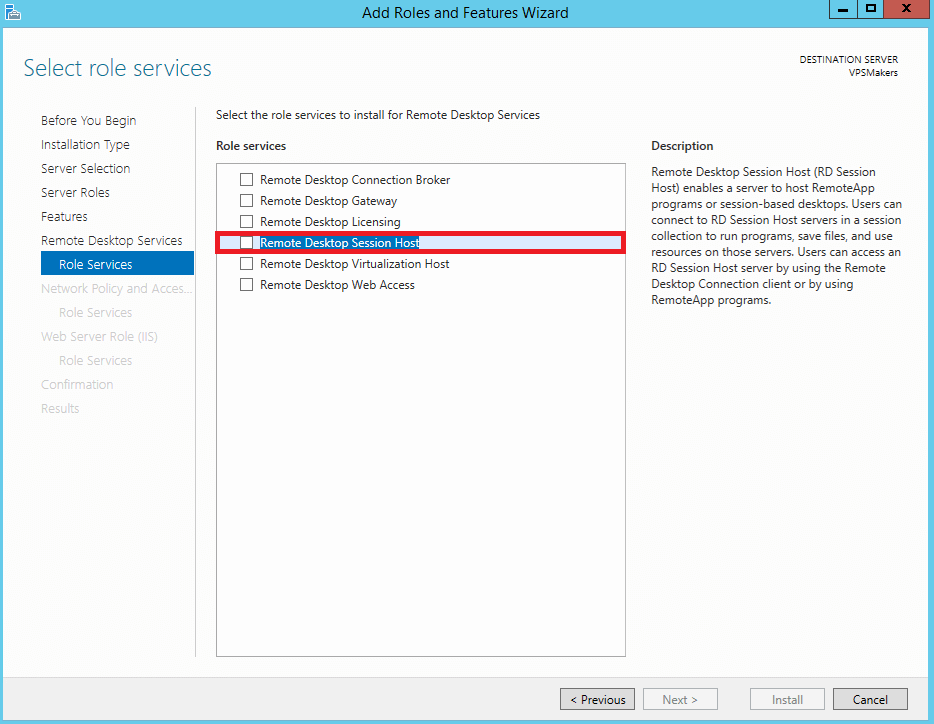
As thou proceedest, thou shalt be granted the honor of pressing the “Install” button. Afterward, a restful slumber for thy server is necessary for the changes to take root.
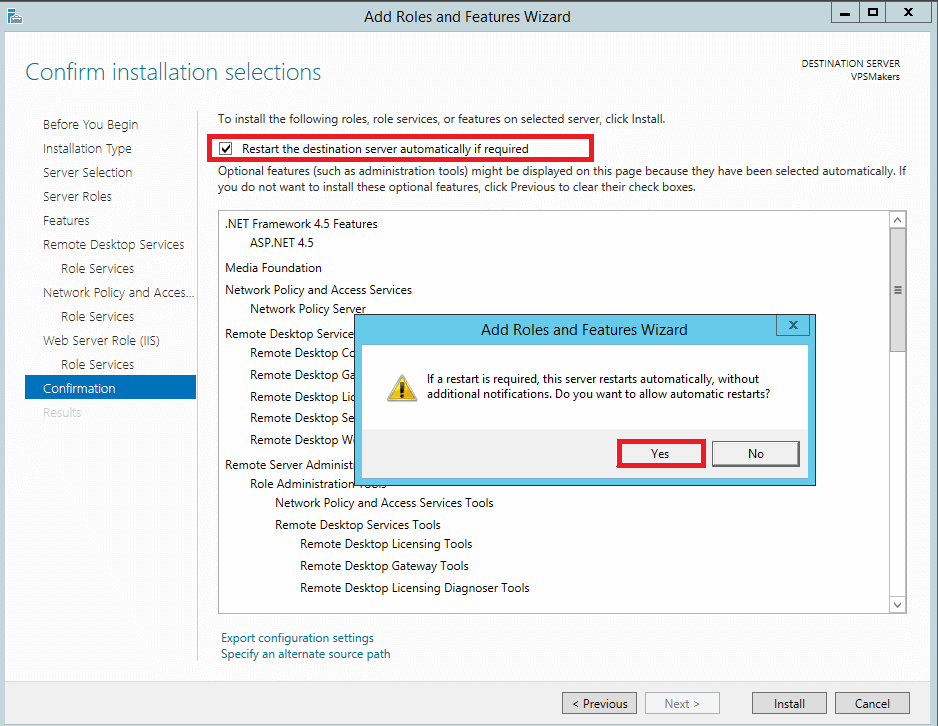
Step 7 – Revive the Windows Audio Service
Should the sound icon upon thy taskbar bear the crimson mark of a cross, do not despair. With a righteous right-click, a mystical notification shall appear, inquiring if thou desirest to enable the Windows Audio Service. Thou shall not hesitate to proclaim a resounding “Yes!”
How to enable audio on Windows Server 2019?
We can do this with the execution method through the services.
Step 1 – open Run
First, open Services by pressing Win+ R and typing services.msc
Step 2 – Scroll down to Windows audio
In Services, scroll down to double-click Windows Audio, and then open it.
Step 3 – startup type
In Windows Audio Service Properties, set the Startup type to Automatic, and then click Start under Service Status. When finished, click OK.
Conclusion
Thus, with these magical incantations and esoteric maneuvers, thou shalt unlock the true potential of thy local audio and microphone, allowing them to seamlessly join thee on thy wondrous Remote Desktop Connection escapades. Fear no longer the shackles of monotony, for perplexity and burstiness shall now grace thy communication endeavors. Rejoice!
List of content you will read in this article:
- 1. Enable Audio on a Windows Server 2003
- 2. Enable Audio on a Windows Server 2008
- 3. Enable Audio on a Windows Server 2012 and upwards
- 4. Wrapping up
Virtual Server is suitable for running the web-based applications that need to be kept running always. In specific situations, we need to enable an Audio card that is not enabled by default. The following instructions will help you to enable an Audio card on a Windows VPS Server.
In this tutorial, we will cover the steps on how to enable Audio in:
- Windows Server 2003
- Windows Server 2008
- Windows Server 2012, 2016 and 2019
Enable Audio on a Windows Server 2003
You can Enable Audio on a Windows Server 2003 in easy five steps.
- Click Start, point to Administrative Tools and then click Terminal Services Configuration.
- Double-click on “RDP-TCP.”
- Select the “Client Settings” tab
- Clear the “Audio Mapping” check box and hit ok
- Reboot the server
Enable Audio on a Windows Server 2008
One of the benefits of using Windows Server 2008 is that you can use it as an upload and download server. In this case, you need to use neither an Audio card nor a Graphic card. But, in certain situations, we need to enable an Audio card. Here’s how to enable audio on your Windows server 2008:
- First login to your Windows Server 2008
- Move the mouse pointer to the lower left-hand corner of the screen until the Windows Start button appears, then right-click on it and choose Run.
- Type services.msc and hit Enter.
- Scroll down through the list of services until you see Windows Audio.
- Right-click on Windows Audio and then click on start
- Right-click Windows Audio and select Properties
- In the General tab, Startup type section, select Automatic
- Click Control Panel in the Start menu
- If using the Modern View, click Sound in the Hardware and Sound category.
- If you are using the Classic View, double-click the Sound icon.
- Select your default playback device and click Properties.
- Now go to the advanced tab and uncheck Give exclusive mode application priority.
- Save the settings by clicking OK twice!
Enable Audio on a Windows Server 2012 and upwards
The following steps can be used to:
- enable audio Windows Server 2012
- enable audio Windows Server 2012 R2
- enable audio Windows Server 2016
- enable audio Windows Server 2019
Let’s get started!
- First login to your Windows Server (2012, 2012 R2, 2016 or 2019)
- Move the mouse pointer to the lower left-hand corner of the screen until the Windows Start button appears, then right-click on it and choose Run.
- Type services.msc and hit Enter.
- Scroll down through the list of services until you see Windows Audio.
- Right-click on Windows Audio and then click on start
- Right-click Windows Audio and select Properties
- In the General tab, Startup type section, select Automatic
- Click Ok to finish the setup.

Now you have audio enabled!
Wrapping up
This tutorial taught us how to enable audio on Windows Server VPS and dedicated servers. We covered the different steps for all the Windows server versions from 2003 to 2019. We hope this tutorial helped you, and if so, let us know in the comment section below.
If you will come across any difficulties, be sure to let us know! We will get back to you as soon as possible.
People also read:
- What is RDP client software
- How to fix the copy/paste issue in the Windows server
- How to change the Windows Server password
- SSH terminals for Windows
По умолчанию на виртуальных серверах Hostwinds Windows Cloud не включен звук. Это руководство продемонстрирует, насколько просто включить эту функцию, чтобы вы могли слышать звук, воспроизводимый на вашем сервере.
Если вам требуется вход в сервер Windows, см. наше руководство по подключению с использованием протокола удаленного рабочего стола (RDP).
Первый шаг: Пуск меню, выберите Панель управления или начните вводить слова «Панель управления», чтобы найти его в вашей системе.
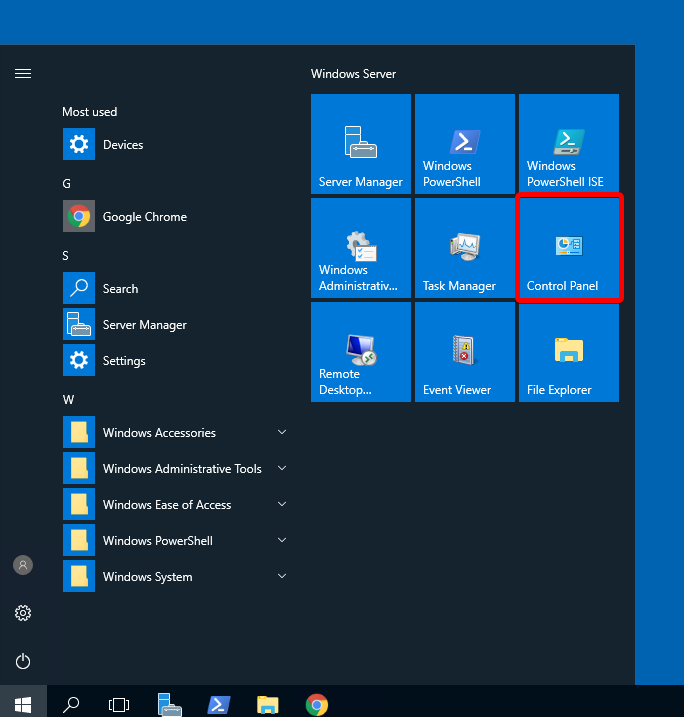
Шаг второй: На Панели управления выберите раздел Система и безопасность.
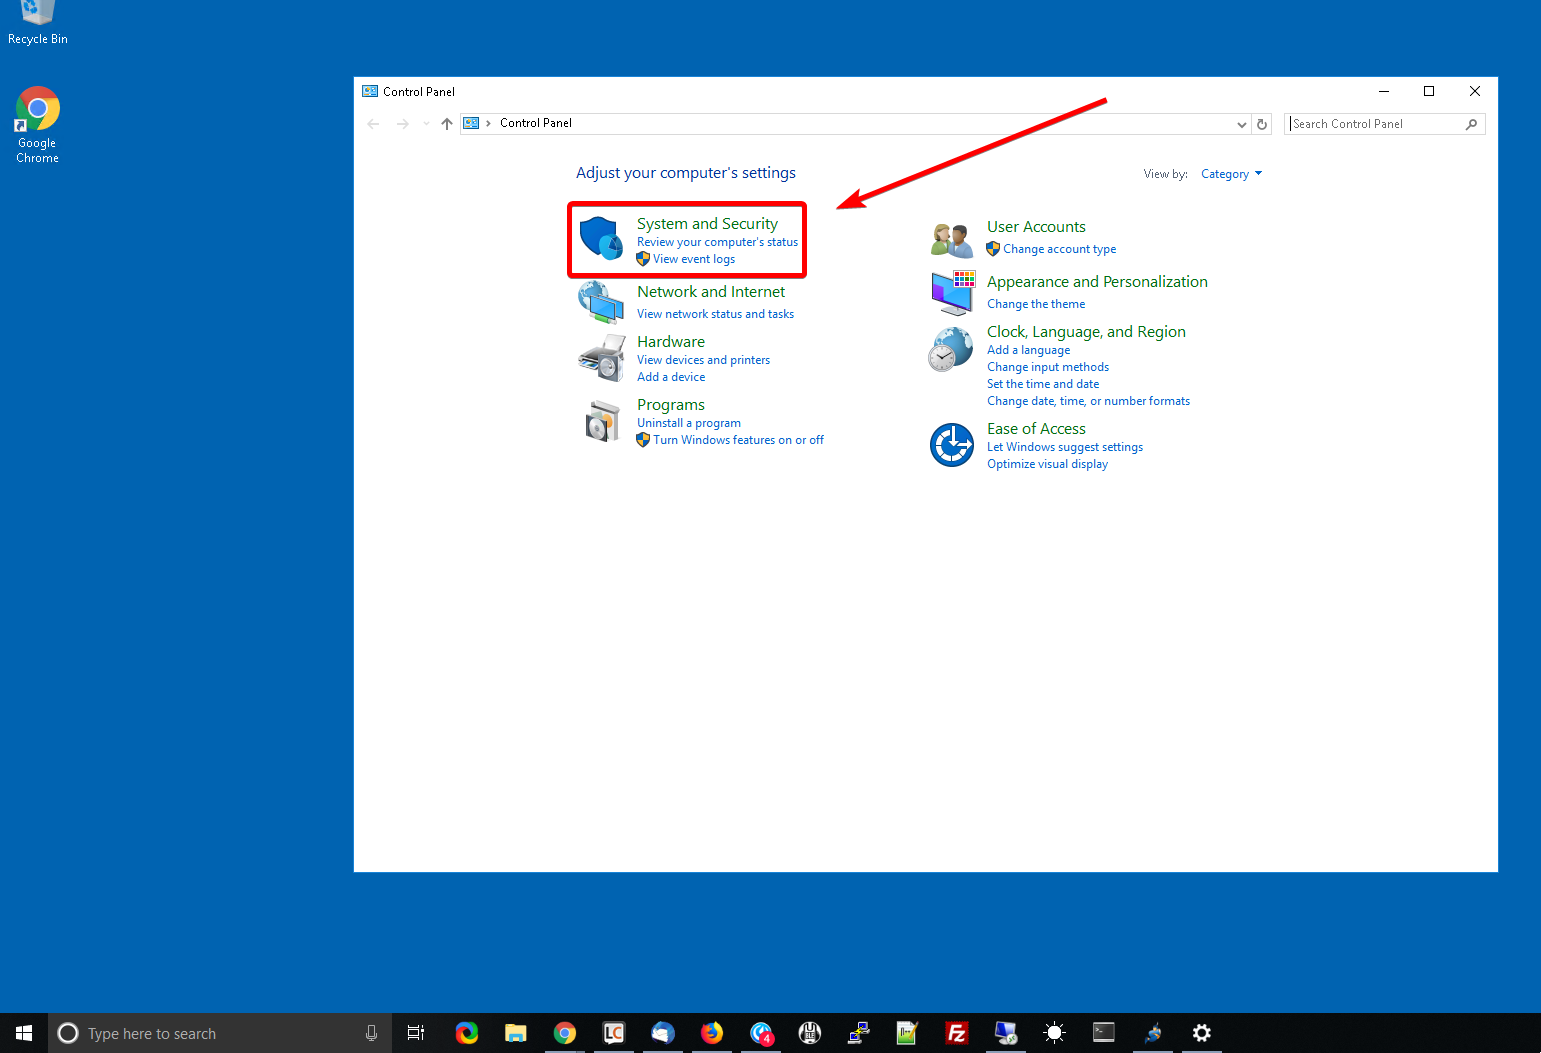
Шаг третий: В разделе «Система и безопасность» выберите «Администрирование».

Шаг четвертый: Выберите «Службы» в разделе «Администрирование», чтобы отобразить список работающих служб.
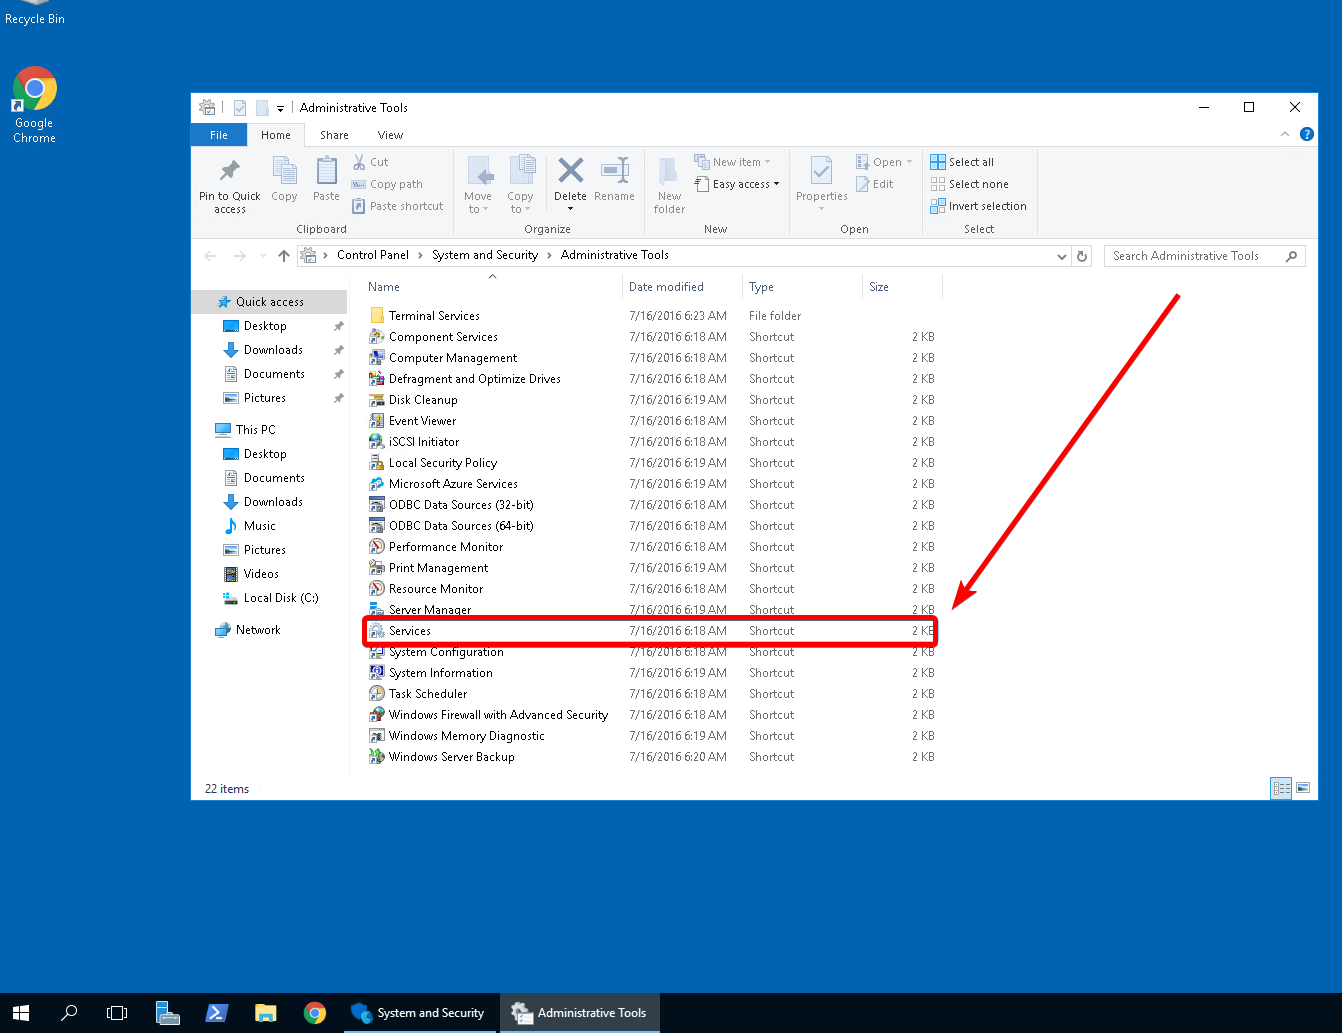
Шаг пятый: Из этого списка услуг ищите Windows Audio и Windows Audio Endpoint Builder. Вам нужно будет включить и начать оба этих сервиса, показанные на следующих двух шагах.
Вы должны сначала запустить сервис Audio Contpoint Windows Audio Endpoint. Иначе, вы можете получить «ошибку 1068» при попытке запустить аудио службу Windows.
Шаг Шесть: Выберите сервис для Windows Audio Endpoint Builder.Щелкните правой кнопкой мыши на нем, а затем выберите Свойства.С этого экрана вы выберете автоматические в раскрывающемся меню, затем нажмите «Применить».Затем нажмите кнопку «Пуск», чтобы начать службу.

Шаг седьмой: Теперь вы можете закрыть окно для сервисов, которые оба Windows Audio, так и Windows Audio EndPoint были настроены на автоматическую.
Когда обе эти службы запущены, у вас должна быть поддержка звука через подключение удаленного рабочего стола к серверу.
Написано Hostwinds Team / апреля 15, 2019
Иногда, у вас может возникнуть необходимость слышать удалённый сервер. Когда речь идёт об удалённом, и более того, виртуальном сервере самым простым решением является передача звука через сеанс RDP и воспроизведение его на компьютере-клиенте (т.е. на том откуда вы подключаетесь). Однако, настоятельно рекомендуем вам, использовать такую передачу звука только для решения служебных задач, т.к. качество звука и скорость его передачи не подходят, например, для просмотра фильмов или воспроизведения музыки.
Настройка звука производится в два этапа:
- Включение службы звука на сервере
- Настройка RDP клиента на вашем компьютере
Включение службы звука на сервере
По умолчанию шаблон операционной системы Windows Server разворачивается с отключенной службой звука. Чтобы включить её можно воспользоваться приведенными ниже способами. Включить через графический интерфейс, либо через командную строку.
Настройка звука через графический интерфейс
1. Перейти в оснастку «Службы». Для этого нажмите кнопку «Пуск», в поисковой строке начните вводить `services`, затем в результатах нажмите «Службы»

2. В списке служб найдите службу `Windows Audio`, и двойным кликом или нажав правой кнопкой мыши перейдите в `Свойства`
3. Выберите тип запуска `Автоматически` и нажмите кнопку `Запустить`, затем `Применить`
Настрйока звука через командную строку
- Откройте командную строку
- Наберите `sc config audiosrv start= auto`, нажмите ВВОД
- Наберите `sc start audiosrv`, нажмите ВВОД
После того как служба будет включена — завершите ваш удалённый сеанс нажав `Пуск` — `Administrator` — `Выйти` и произведите настройку вашего RDP-клиента.

**Внимание: нужно именно завершить удалённый сеанс, чтобы при следующем подключении профиль пользователя загрузился заново, иначе звуковое устройство не будет добавлено.**
Настройка RDP-клиента для передачи звука
Настройка стандартного RDP-клиента Microsoft
1. Откройте приложение `Подключение к удаленному рабочему столу`
2. Нажмите `Показать параметры`

3. Перейдите во вкладку `Локальные ресурсы`,нажмите `Параметры` в поле Звук удалённого рабочего стола. В появившемся окне выберите `Проигрывать на этом компьютере` и нажмите `Ок`

Настройка Remmina
1. Для того чтобы звук передавался в Remmina необходимо нажать правой кнопкой мыши на подключение и перейти в `Редактировать`

2. Перейти во вкладку `Дополнительно` и установить параметр `Звук` на `Локальный — среднее качество` и нажать `Сохранить`

После этого звук удалённого сервера будет транслироваться через Remmina