In this guide, we will show you various methods to fix the Nvidia GeForce Experience not working issue on your Windows 11 PC. If your PC or laptop boasts of a GeForce GTX graphics card, then GeForce Experience is absolutely a must-have application. It automatically updates the drivers in the background and optimizes the game settings as per the requirement. However, many users have voiced their concern that the app isn’t working along the expected lines on the latest iteration of the OS.
As far as the plausible reasons for this issue is concerned, there could be quite a few ones. These include the likes of issues with the Nvidia Processes and its Services, Nvidia Telemetry’s inability to interact with the desktop, outdated GPU drivers, issues with the network adapter, or the corrupt app data. Keeping all these points in mind, this guide will show you eight different methods to fix the Nvidia GeForce Experience not working issue on your Windows 11 PC. So without any further ado, let’s get started.
Do note that there’s no universal fix as such. You will have to try out each of the below-mentioned workarounds and then check which one spells out success for you.
FIX 1: Restart Nvidia Processes
If the background processes are facing an issue or two, then its repercussions are bound to be faced with its associated app. Therefore, you should consider restarting all the Nvidia processes, which could be done as follows:
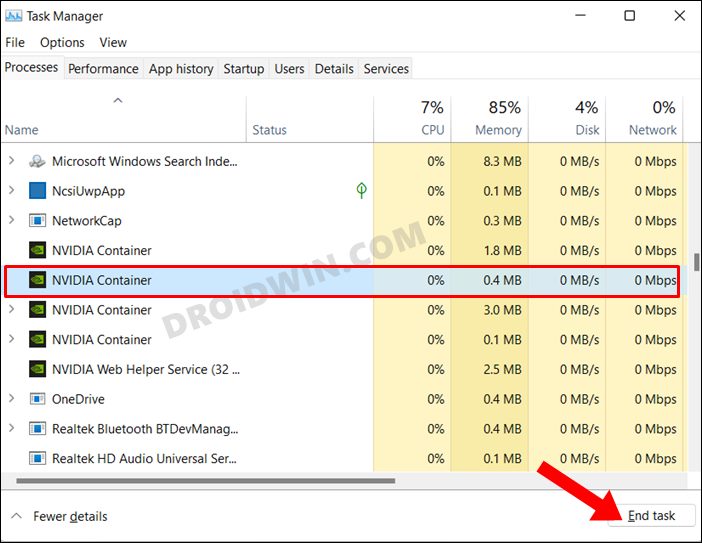
- Use the Ctrl+Shift+Esc shortcut keys to open Task Manager.
- Then select all the Nvidia processes, one at a time, and hit the End Task button.

- Once done, restart your PC. It shall restart all the Nvidia processes as well.
- Once that happens, verify if the Nvidia GeForce Experience not working in Windows 11 has been fixed or not.
FIX 2: Restart Nvidia Services
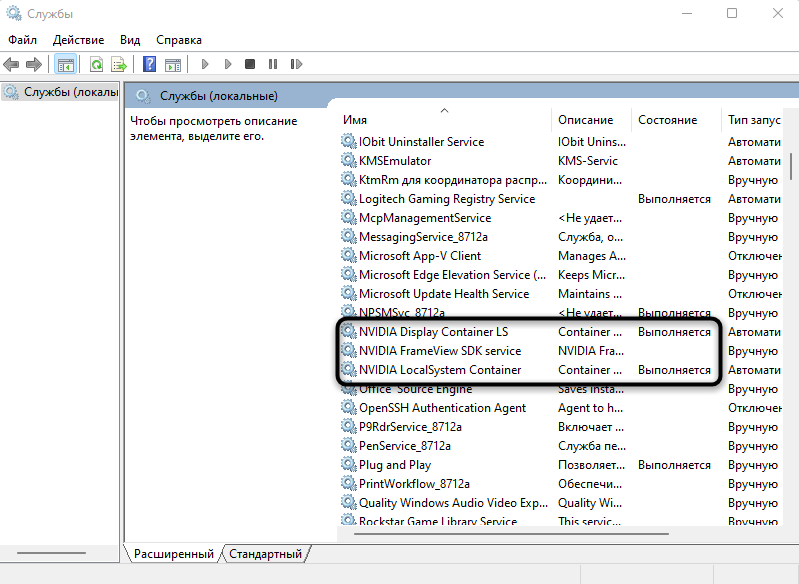
Nvidia’s services files are responsible for handling its core features and keeping a check on its configurational settings. In this regard, Nvidia Display Container LS, Nvidia Display Service, Nvidia Local System Container, Nvidia Network Service Container are four of its most important services that bind the app together. Issues with any one of them and its effect will be felt across the app as a whole. So your best course of action should be to restart all these four services, which could be done as follows:
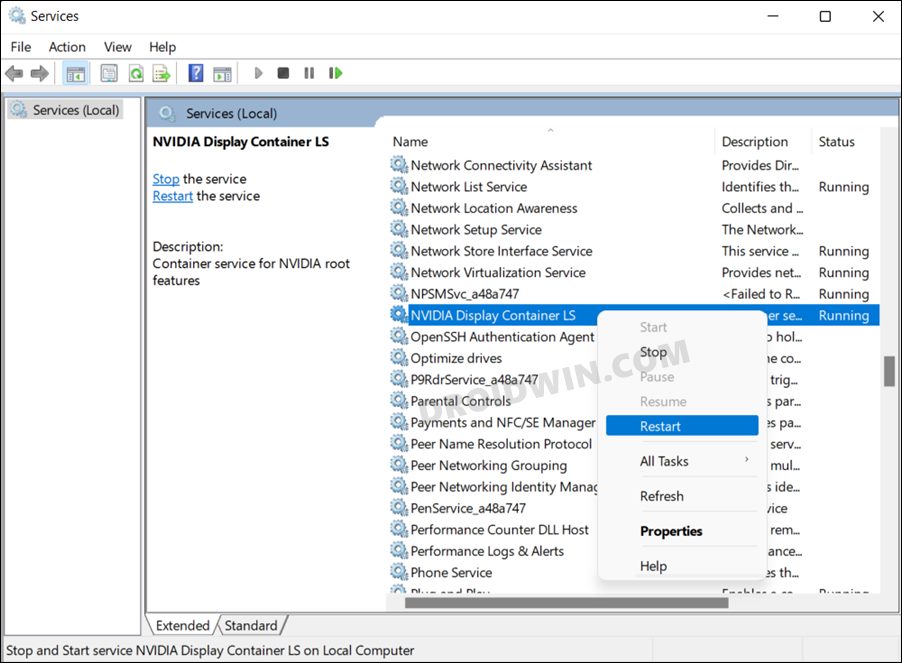
- Head over to the Start Menu, search Services, and launch it.
- Then scroll to the Nvidia Display Container LS service, right-click on it and select Restart.

- Likewise, do the same for the other three, namely Nvidia Display Service, Nvidia Local System Container, and Nvidia Network Service Container.
- Once all the four services have been restarted, check if it manages to fix the issue of Nvidia GeForce Experience not working in Windows 11
FIX 3: Let Nvidia Telemetry interact with Desktop
The Telemetry service is majorly responsible for managing all the UI/UX elements in the foreground. If it isn’t allowed to interact with the desktop elements, then the app wouldn’t be able to function on your PC. So should consider enabling this functionality, which could be done as follows:
- To begin with, bring up the Run dialog box via Windows+R shortcut keys.
- Then type in the below command and hit Enter to open the Services menu.
services.msc
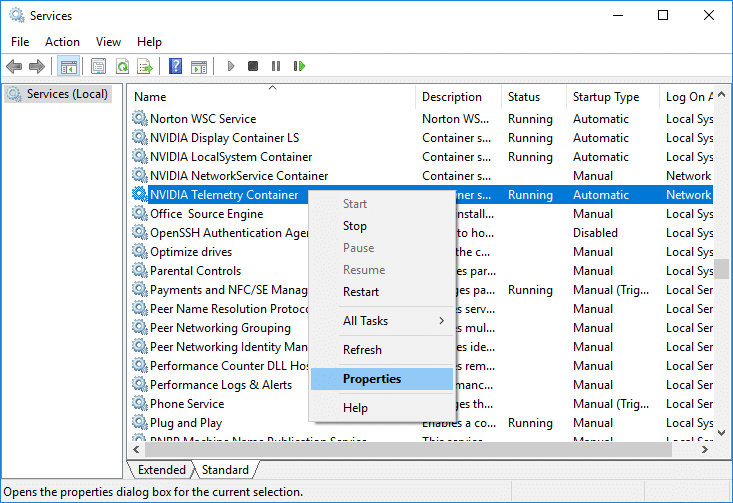
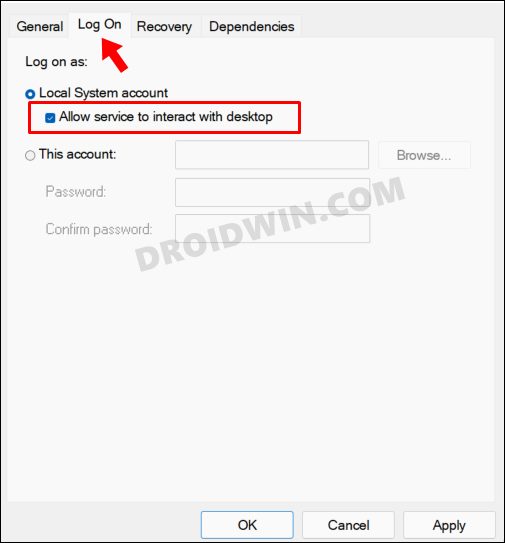
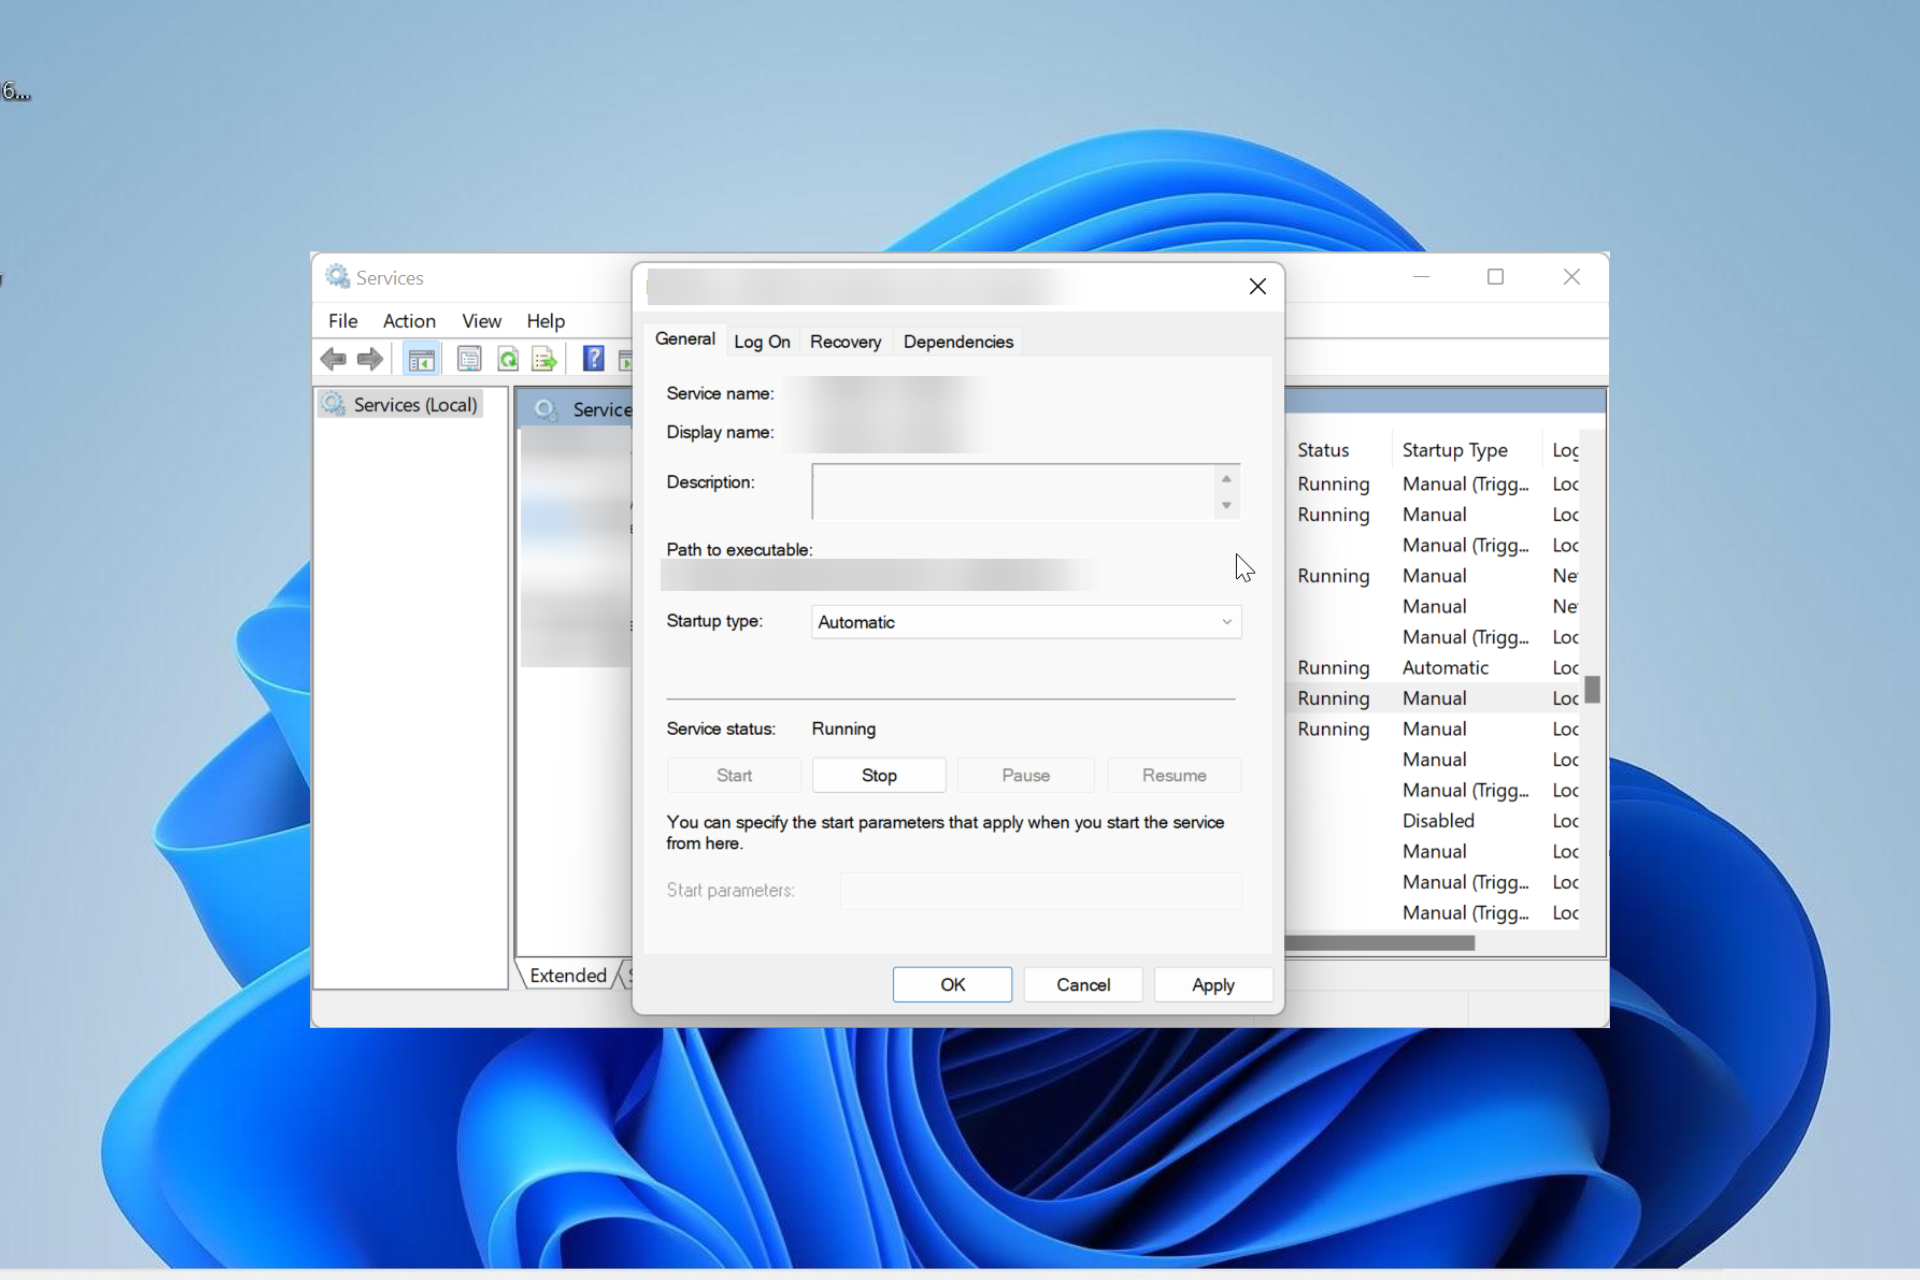
- Now scroll to the Nividia Telemetry Container and double click to open it (or right-click and select Properties).

- After that, switch over to the Log On tab and select Allow service to interact with desktop.

- Finally, click Apply > OK to save the changes and then check if it fixes the Nvidia GeForce Experience not working in Windows 11.
FIX 4: Update GPU Drivers
If you are using old or outdated graphics drivers, then it might create a few conflicts with the GeForce app. Therefore, consider updating it to the latest build, using the instructions listed below:
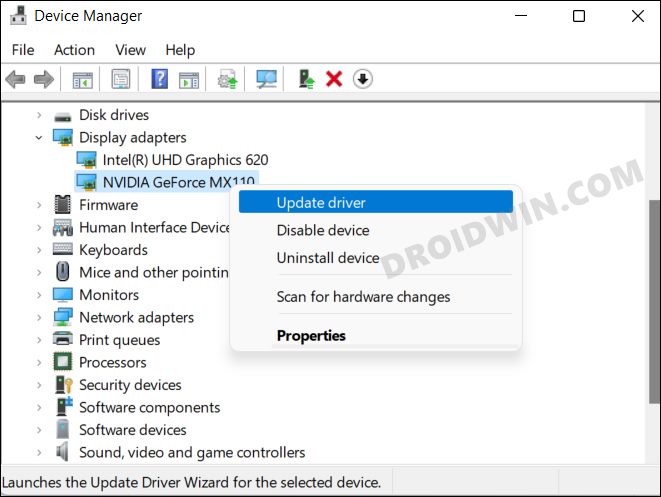
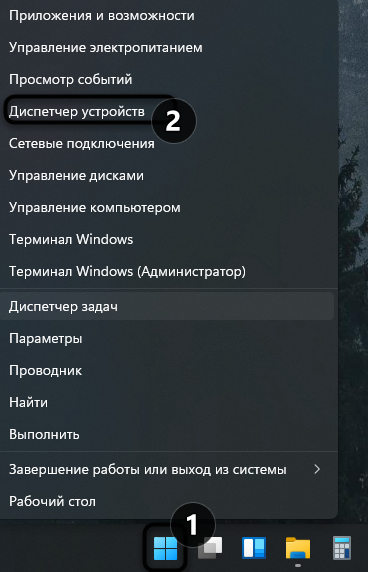
- Right-click on the Start menu and select Device Manager.
- Then expand the Display Adapter sections.
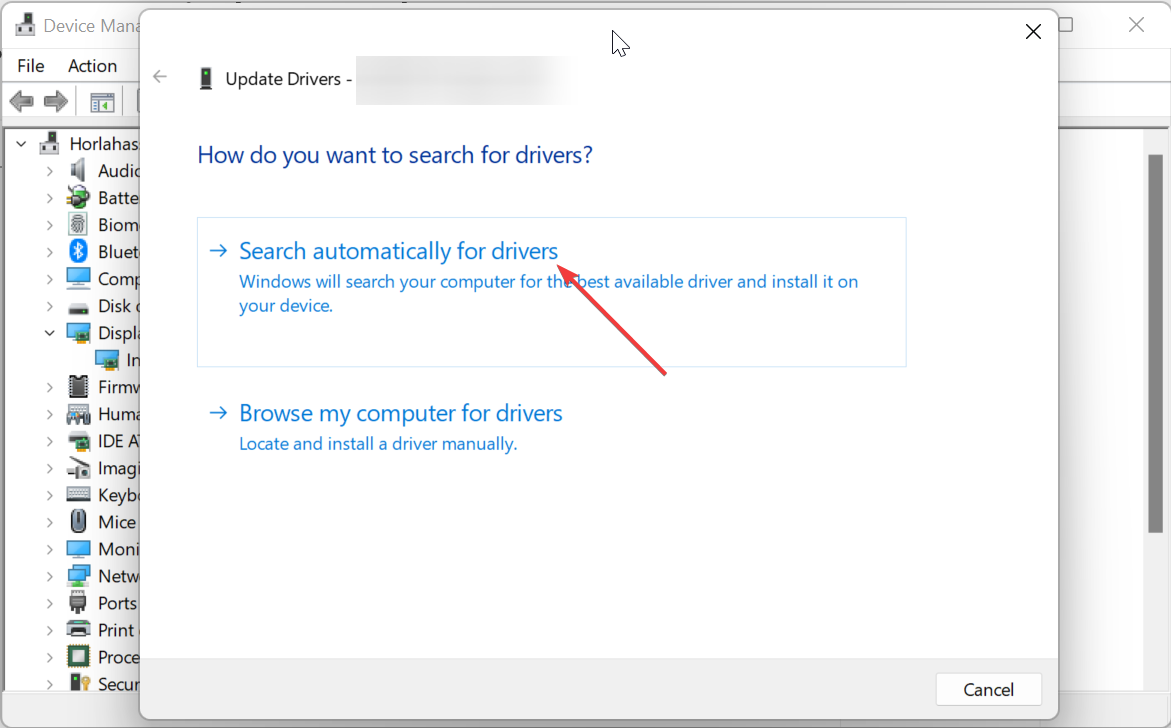
- Now right-click on your graphics card and select Update Drivers.

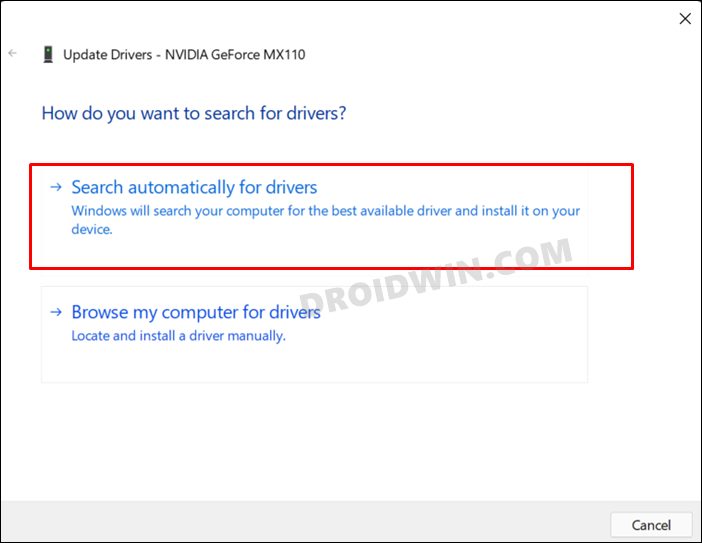
- After that, select Search automatically for updated drivers.
- Windows will now search for the latest drivers and would subsequently install them.
- Once done, restart your PC and then verify if the Nvidia GeForce Experience not working in Windows 11 has been fixed or not.
FIX 5: Disable Firewall
In some instances, the Firewall might become overprotective and might block the safe data packets from being exchanged with the servers. As a result, the GeForce Experience might not be able to establish a successful connection with the internet. To rectify it, you should consider temporarily disabling the firewall app, which could be done as follows:
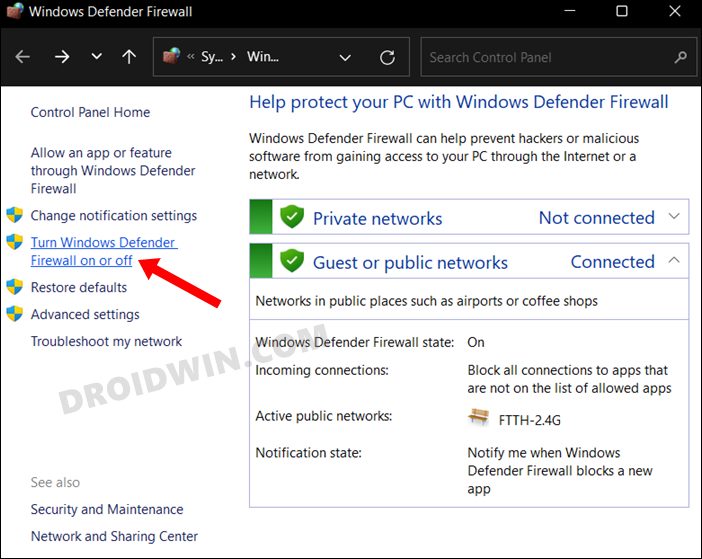
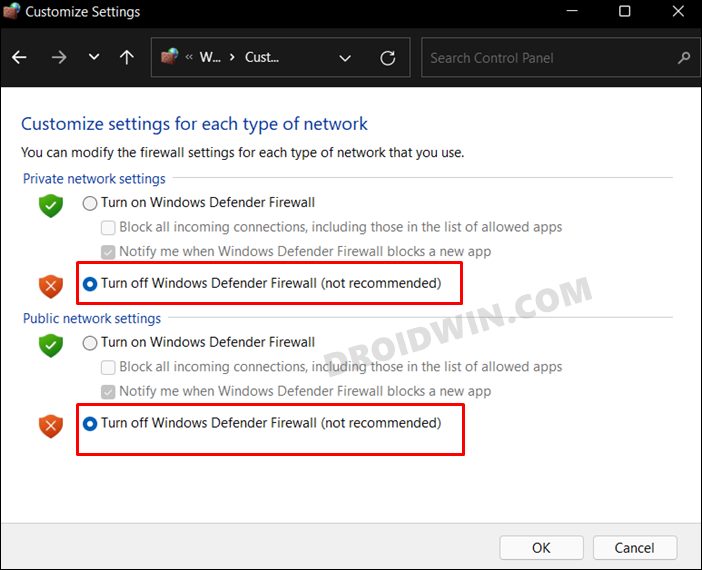
- Head over to the Start Menu, search Windows Defender Firewall, and open it.
- Then click on Turn Windows Defender Firewall On or Off from the left menu bar.

- Now select Turn off Windows Defender under both the Public and Private Network.

- Finally, click OK to save the setting and then verify if it fixes the Nvidia GeForce Experience not working in Windows 11 issue.
FIX 6: Reinstall GPU Drivers
if the GPU Drivers files have got corrupted, then simply updating it to the latest build might not prove to be sufficient. In such cases, you will have to uninstall the drivers and then let Windows install the latest build. Here’s how it could be done:
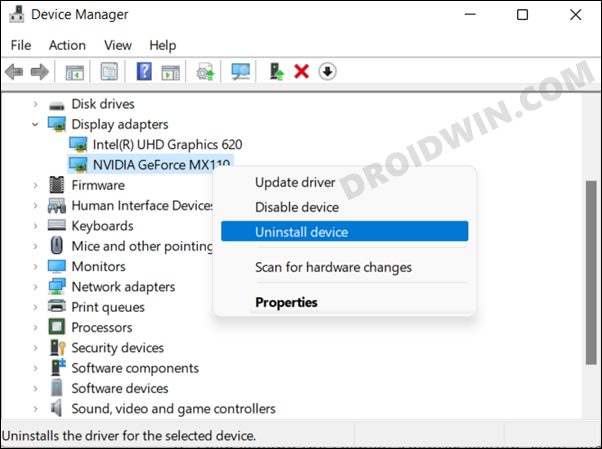
- Use the Windows+X shortcut keys and select Device Manager from the menu that appears.
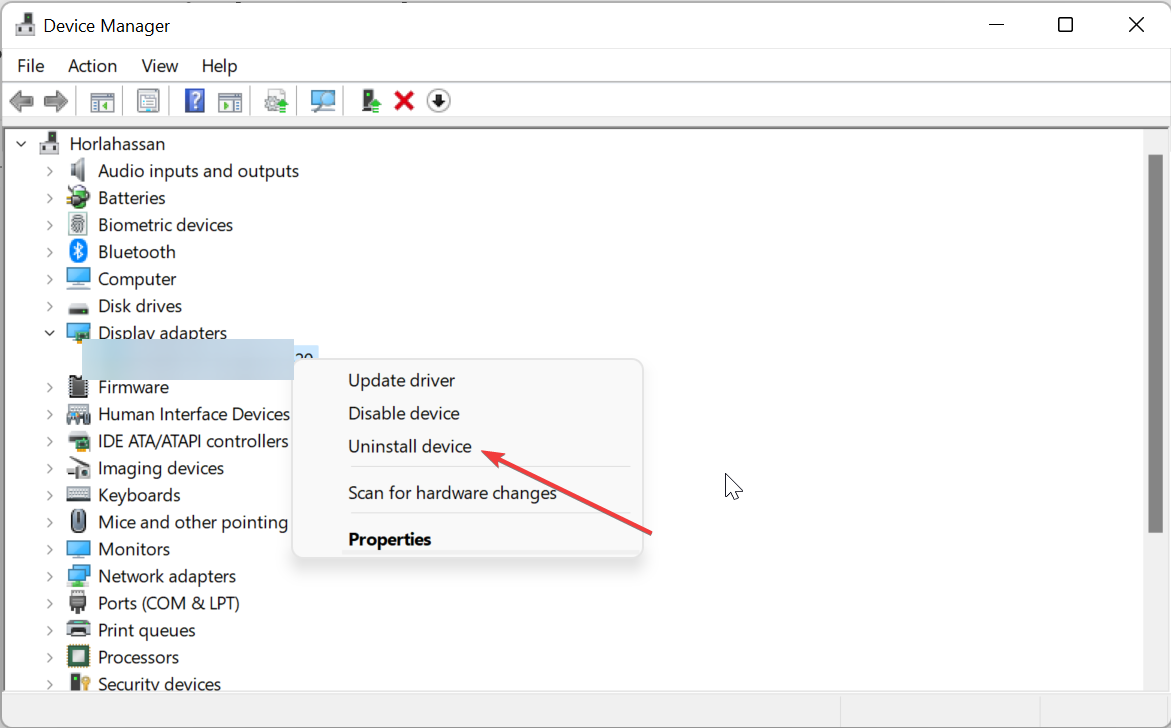
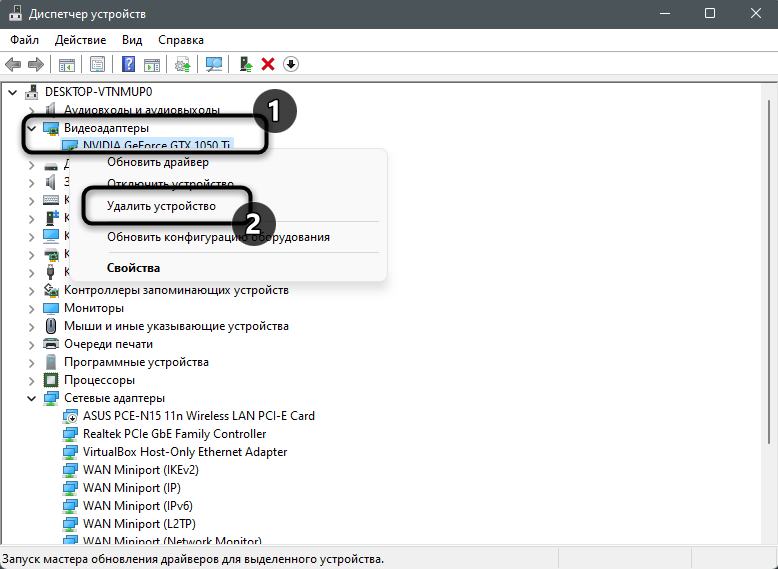
- Then expand the Display Adapter section, right-click on the drivers, and select Uninstall Device.

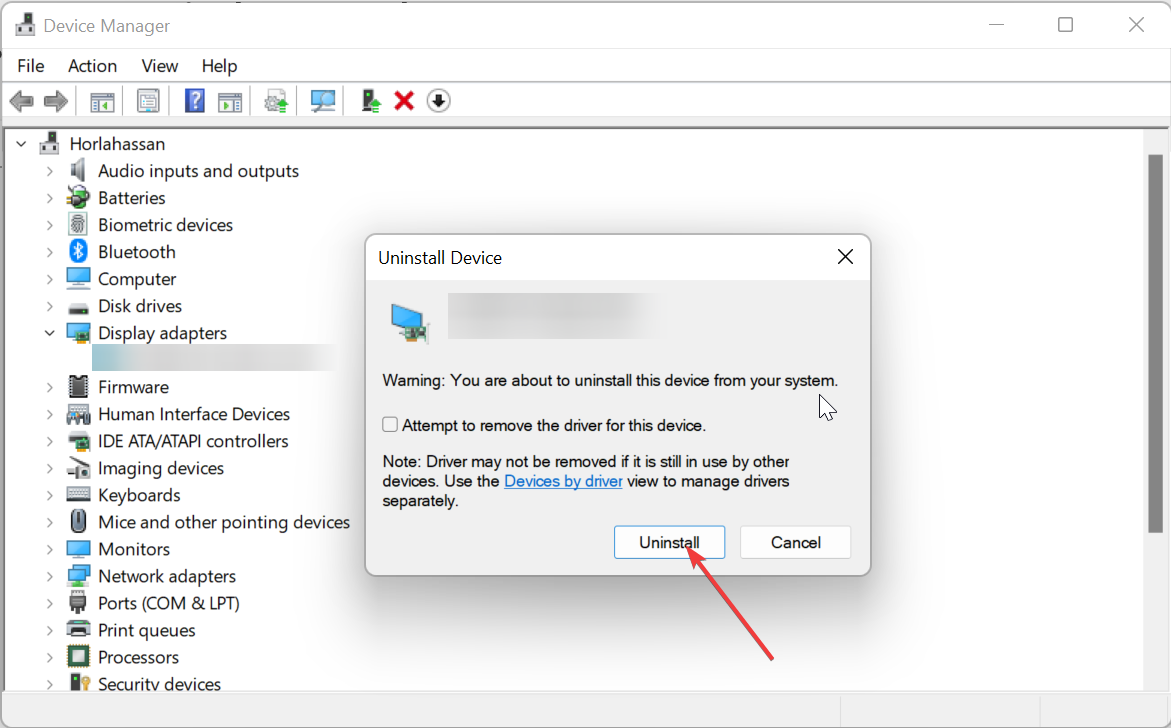
- Then click YES in the confirmation dialog box. Now restart your PC.. Once it boots up, Windows will automatically install the GPU drivers.
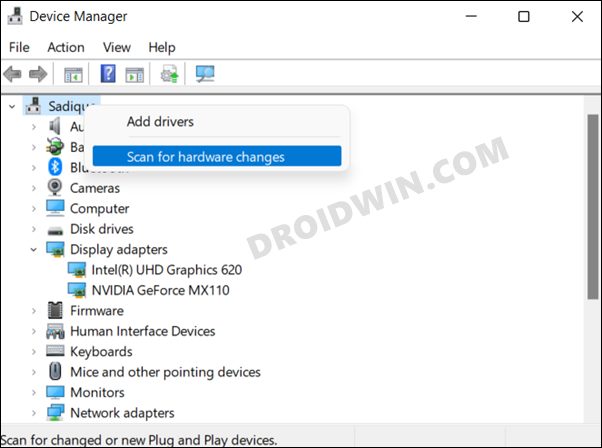
- If that doesn’t happen, then open Device Manager, right-click on the PC name situated at the top, and select Scan for Hardware Changes.

- Windows will now recheck for the missing drivers, which in this case is the graphics drivers, and would subsequently install them.
- Once done, restart your PC and then check if the Nvidia GeForce Experience not working in Windows 11 issue has been fixed or not.
FIX 7: Reset Network Adapter
Windows Socket is another name for network data, which is used by various apps and programs installed on your PC to establish an online connection. If this Winsock Catalog data gets corrupted, then none of the apps will be able to connect to the internet. So the only way out is to reset this data and let Windows repopulate them from scratch. Here’s how:
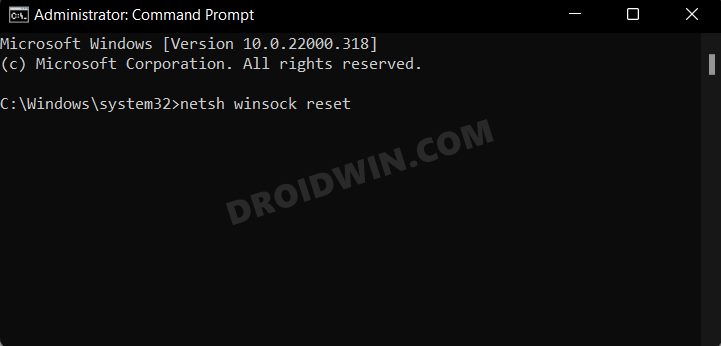
- Head over to the Start Menu, search Command Prompt, and launch it as an administrator.
- Now copy-paste the below command in this CMD window and hit Enter:
netsh winsock reset

- All the Windows Socket data will bow be reset. Once done, reboot your PC.
- Verify if this manages to fix the Nvidia GeForce Experience not working in Windows 11 issue.
FIX 8: Reinstall GeForce Experience
If none of the aforementioned methods managed to spell out success, then you should consider taking the nuclear route of uninstalling the app and then performing a fresh install. However, this app is notoriously infamous for leaving a few files behind after the uninstallation process. So right after the app has been removed from your PC, we will manually delete its file from the C drive and then remove its registry keys as well. All this has been explained below, follow along.
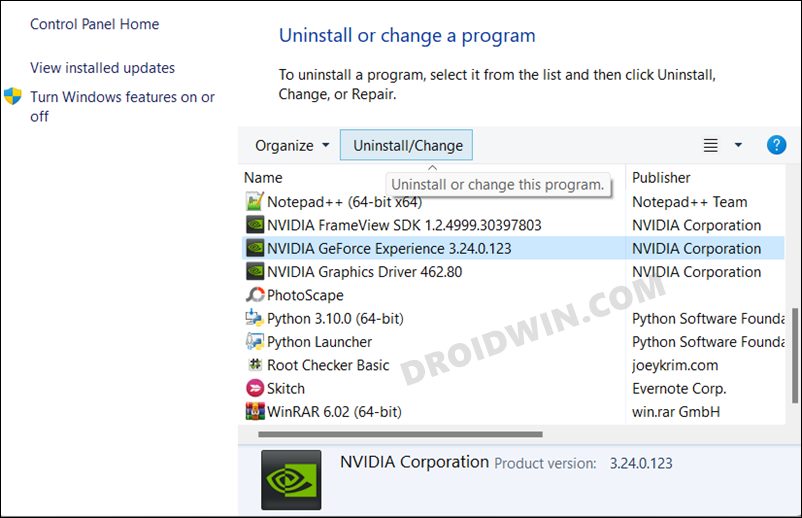
- Search GeForce Experience from the Start menu and then click on Uninstall.
- Then select GeForce Experience from the app list and click on the Uninstall button situated at the top right.

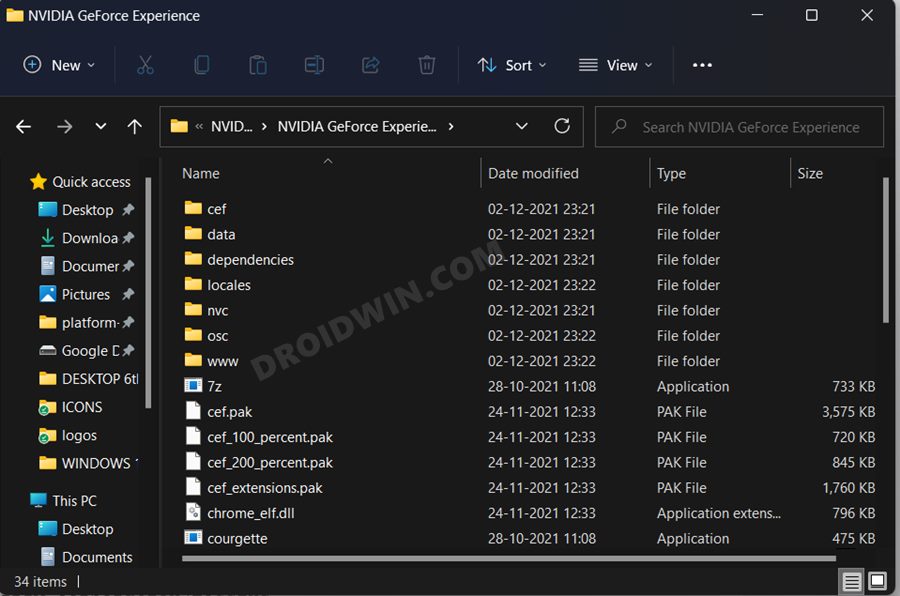
- Once the app has been uninstalled, open File Explorer via Windows+E shortcut keys.
- Then navigate to the following directories, and if you find any traces of the Nvidia files, then delete them right away (you may take a backup beforehand if you prefer):
C:\Windows\System32\DriverStore\FileRepository\nvdsp.in
C:\Windows\System32\DriverStore\FileRepository\nv_lh
C:\Windows\System32\DriverStore\FileRepository\nvoclock
C:\Program Files\NVIDIA Corporation
C:\Program Files(x86)\NVIDIA Corporation

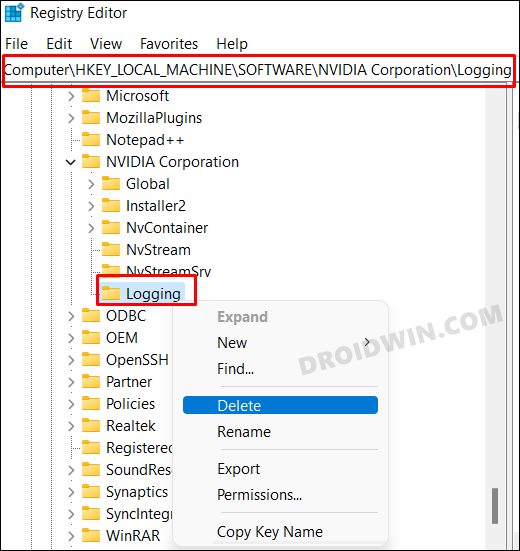
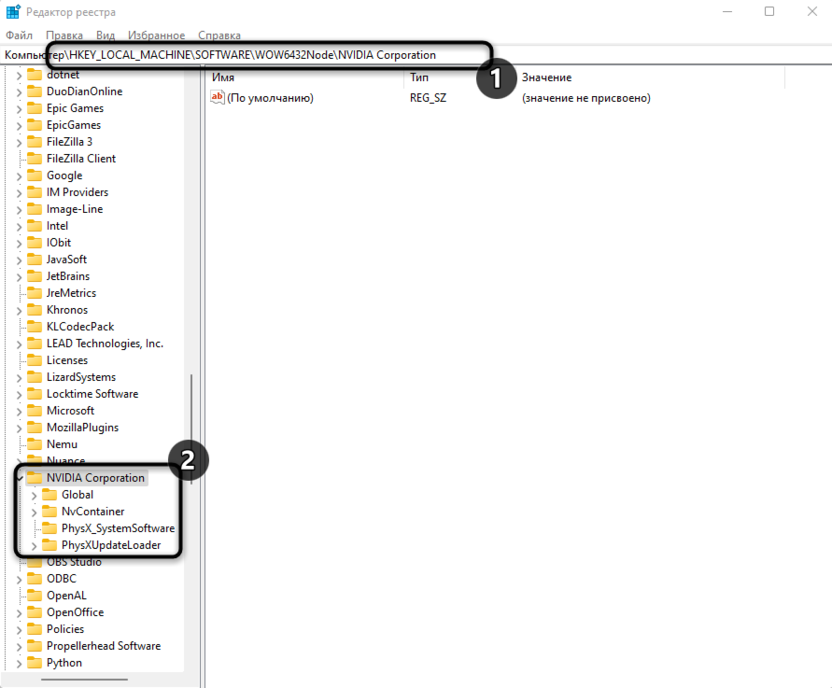
- After that, launch Registry Editor from the Start Menu. Then copy-paste the below location in its address bar:
HKEY_LOCAL_MACHINE\SOFTWARE\NVIDIA Corporation\Logging

- If the Logging folder is present there, then right-click on it and select Delete (you may take backup of this folder by right-clicking and selecting the Export option),
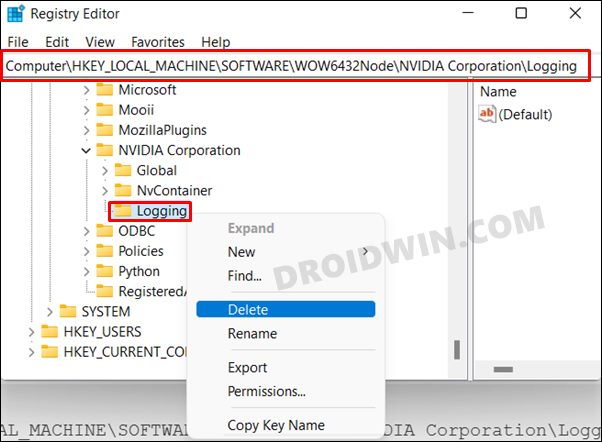
- After that, head over to the below location
HKEY_LOCAL_MACHINE\SOFTWARE\Wow6432Node\NVIDIA Corporation\Logging

- As before, if you find the Logging folder, then right-click on it and select Delete (optional-take a backup beforehand via the Export option).
- Once all the files and registry keys have been deleted, download the latest version of the GeForce Experience App.

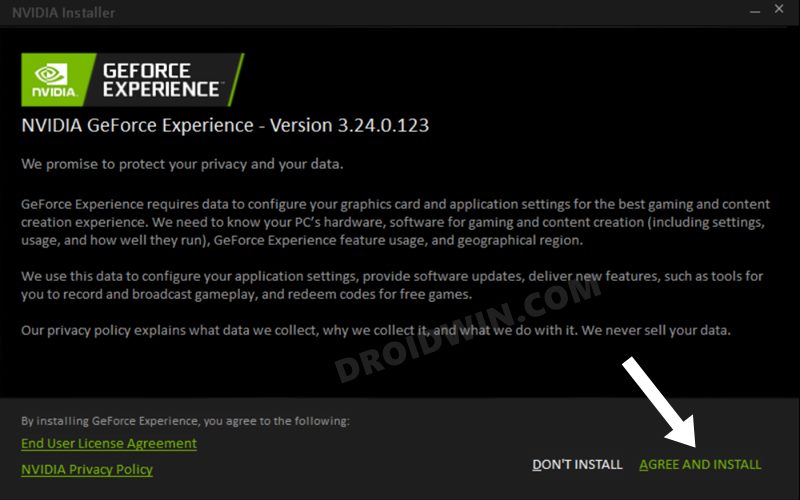
- Once downloaded, launch the setup and proceed with the on-screen instructions to install it. Now launch it and you wouldn’t face any issues this time around.
So with this, we round off the guide on how you could fix the issue of Nvidia GeForce Experience not working in Windows 11. We have listed eight different fixes for the same. Do let us know in the comments section which one worked out in your favor. Likewise, all your queries are welcomed in the comments section below.
- How to Install Windows 11 Built-In Graphics Tool
- How to Increase/Improve Internet Speed in Windows 11
- Windows 11 Screen Lags/Stutters/Freezes: How to Fix
- How to Fix Windows 11 High CPU and Disk Usage
About Chief Editor

Sadique Hassan
administrator
A technical geek by birth, he always has a keen interest in the Android platform right since the birth of the HTC Dream. The open-source environment always seems to intrigue him with the plethora of options available at his fingertips. “MBA by profession, blogger by choice!”
NVIDIA GeForce Experience is a software suite for Nvidia Graphics card, If you are an Nvidia Graphics card user then there is a strong chance that you use either the Nvidia Control panel or Nvidia GeForce Experience. Both software suites are the same, you can use these software to control and modify different graphics settings, to update the drivers and you can do the other performance tweaks. NVIDIA GeForce Experience is better than the Nvidia control panel, it has a lot of features like, you can tweak performance and configurations for games, automatic driver updates for your GPU, Nvidia shadowplay for live streaming, integrated game filters, and many more options. By default, you’ll get the following features in Nvidia GeForce Experience.
- Automatic game optimization
- Record and create automatic gameplay highlights using Nvidia ShadowPlay
- Broadcast gameplay live from GeForce Experience to Facebook, Twitch, and YouTube
- Capture and filter screenshots
- Update Nvidia GPU drivers automatically
- Stream games to Nvidia Shield devices
Sometimes this app won’t launch properly or it will get stuck, if you a facing any issue with the Nvidia GeForce Experience then this article will guide you to fix Unable to Open NVIDIA GeForce Experience in Windows 11/10.
Recently few users reported that they are not able to open the GeForce Experience, and sometimes they faced an issue like the share feature option is not able to open. If you are facing a similar issue, then follow the recommended solutions.
Solution 1: Open NVIDIA GeForce Experience in elevated mode:
If you are unable to launch the GeForce in normal mode, try to open the app in elevated mode, right-click on the NVIDIA GeForce Experience and choose Run as Administrator.

If the app opened then modify app compatibility settings, right-click on the GeForce Experience and Choose properties, under the Compatibility tab check the Run this program as an administrator.

Click on Apply and OK. Now open the Program and check it’s launching or not.
Solution 2: Check the GeForce Experience Service Stopped:
Open Run command by pressing Windows + R and type services.msc and hit enter, this command will open the Service Management Console.
Now look for the NVIDIA GeForce Experience Service and make sure the service is running. If not just start the service.
Find the “Nvidia Telemetry Container” service, right-click on it and choose Start the service.

Or choose the Properties and change the startup type from manual to automatic.
Once the steps are done, just re-open the program and check its opening or not.
Solution 3: Reinstall GeForce Experience:
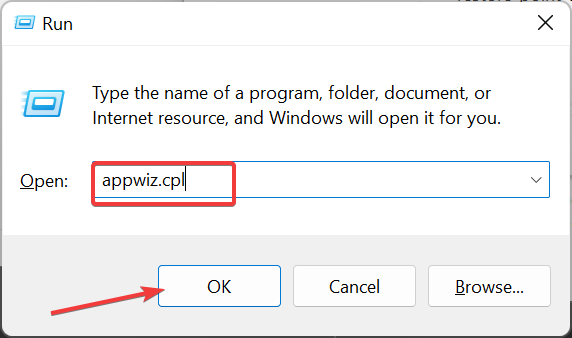
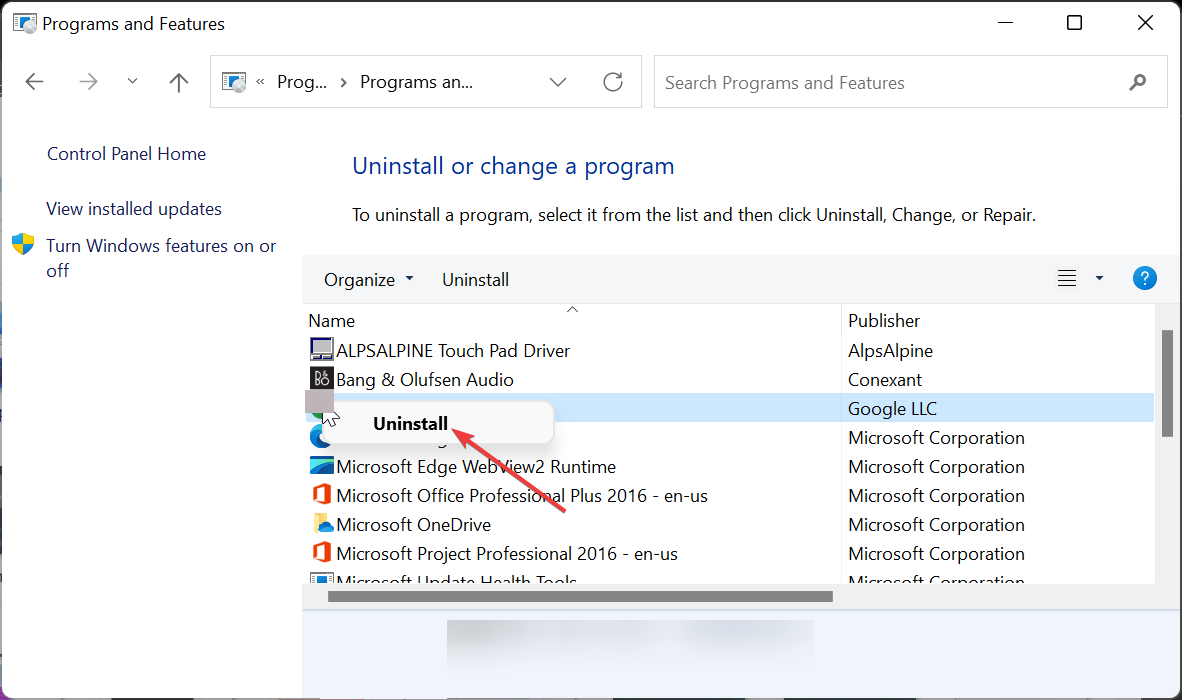
Open Run command by pressing Windows + R and type appwiz.cpl, this command will open the Programs and features.
Find “Nvidia GeForce Experience” program and choose Uninstall. Complete the Uninstallation.

Once the uninstallation is done, go to the official NVIDIA website and download the installer again. And install it on your system.
After the installation, just open the program, mostly this will fix the issue.
Solution 4: Update the Graphics Driver:
Sometimes you’ll receive this kind of error if there is any issue with the Graphics card driver, so reinstall the NVIDIA graphics card driver.
Open Device Manager and look for the Display adapters, Expand it and right-click on the Nvidia GeForce card, and choose Uninstall.

Complete the uninstallation by following the uninstallation wizard. Once the uninstallation is completed, restart your system once.
Now go to the official Nvidia site and download the suitable drivers for your Graphics card and install it. Mostly this will fix the issue.
Solution 5: Disable the Antivirus:
If you are using any third-party antivirus, Disable it once and check, follow the instructions as per your antivirus guidelines. If you are using windows 10 default built-in Windows Defender Antivirus. Then follow the below-mentioned steps to disable the Real-time protection.
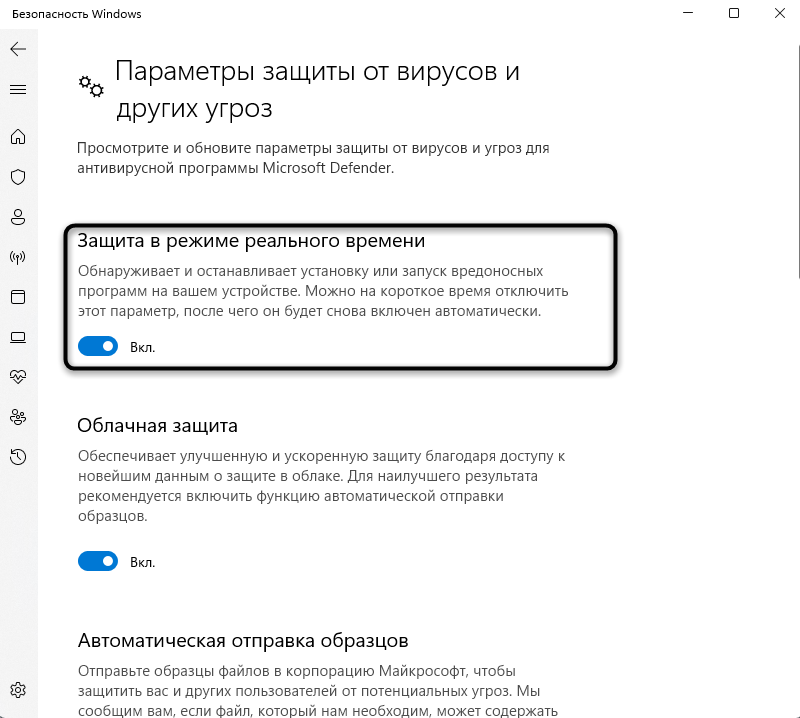
Open Start and search for Windows Security and Click on Windows Security. From the Left-hand side click on Virus & threat protection.
Under Virus & threat protection settings from the right-hand side click on the Manage settings.
Turn Off the Real-time Protection toggle switch to disable Windows Defender temporarily.
Related: Stuck on Preparing to Launch in Steam on Windows 10
Nvidia GeForce Experience — популярный инструмент, который обеспечивает оптимальную настройку и обновление драйверов графических карт. Однако, после обновления операционной системы до Windows 11, некоторые пользователи сталкиваются с проблемами, связанными с неработоспособностью программы. Если у вас возникла данная проблема, не отчаивайтесь — мы предлагаем несколько решений, которые помогут вам восстановить работоспособность Nvidia GeForce Experience.
Прежде всего, убедитесь, что у вас установлена последняя версия Nvidia GeForce Experience, совместимая с Windows 11. Проверить это можно, перейдя на официальный сайт Nvidia и загрузив последнюю версию программы. После установки обязательно перезагрузите систему.
Если после обновления до последней версии Nvidia GeForce Experience проблема не исчезла, возможно, проблема связана с конфликтом программы с другими приложениями или утилитами. Попробуйте временно отключить антивирусное программное обеспечение, фаервол или другие приложения, которые могут мешать нормальной работе Nvidia GeForce Experience. Если после этого программа заработала, скорее всего, проблема действительно была связана с конфликтом.
Если вы все еще испытываете проблемы с Nvidia GeForce Experience после перечисленных выше действий, воспользуйтесь функцией «Отключение Службы Windows» для временного отключения службы Nvidia. После этого перезапустите компьютер и снова включите службу Nvidia. Это может помочь в устранении ошибок, связанных с неправильной инициализацией программы.
Важно отметить, что проблема с Nvidia GeForce Experience на Windows 11 является достаточно распространенной и вызвана неполной совместимостью программы с новой операционной системой. Разработчики Nvidia активно работают над решением данной проблемы и планируют выпустить обновление, которое исправит существующие ошибки и обеспечит полную совместимость с Windows 11.
В заключение, если вы столкнулись с проблемой неработоспособности Nvidia GeForce Experience на Windows 11, стоит попробовать описанные выше решения. В большинстве случаев одно из них помогает восстановить работу программы. Если же ни одно из решений не помогло, рекомендуется связаться с технической поддержкой Nvidia или ожидать официального обновления, которое исправит данную проблему.
Содержание
- Возможные причины неработоспособности nvidia geforce experience на windows 11
- Обновление операционной системы
- Конфликт с другими программами
- Отсутствие установленных драйверов
- Неправильные настройки программы
Возможные причины неработоспособности nvidia geforce experience на windows 11
| 1. Несовместимость с операционной системой | Одной из вероятных причин неработы NVIDIA GeForce Experience на Windows 11 может быть несовместимость программы с новой операционной системой. В таком случае рекомендуется проверить наличие обновлений для программы или обратиться в службу поддержки NVIDIA для получения актуальной информации. |
| 2. Устаревший драйвер видеокарты | Если драйвер видеокарты устарел или несовместим с Windows 11, то это может стать причиной неработоспособности NVIDIA GeForce Experience. Рекомендуется обновить драйвер до последней версии, совместимой с вашей операционной системой. |
| 3. Проблемы с установкой или обновлением программы | Если установка или обновление NVIDIA GeForce Experience были прерваны или завершились неудачно, возможно, это привело к неработоспособности программы. В этом случае рекомендуется удалить программу полностью и повторно установить ее с официального сайта NVIDIA. |
| 4. Вирусные атаки или проблемы с антивирусным ПО | Наличие вирусов или конфликты с антивирусным ПО могут привести к неработоспособности NVIDIA GeForce Experience. Рекомендуется запустить антивирусное сканирование системы и проверить, нет ли конфликтов с антивирусным ПО. |
| 5. Неправильные настройки системы или программы | Причиной неработы NVIDIA GeForce Experience также может быть наличие неправильных настроек системы или программы. Рекомендуется проверить настройки программы, а также конфликты с другими установленными приложениями или программами. |
Если вы столкнулись с неработоспособностью NVIDIA GeForce Experience на Windows 11, рекомендуется применить вышеуказанные рекомендации для устранения проблемы. Если ничто из перечисленного не помогло, то рекомендуется обратиться в службу поддержки NVIDIA для получения дополнительной помощи.
Обновление операционной системы
Windows 11 является последней версией операционной системы от Microsoft. Это означает, что некоторые приложения и драйверы, разработанные для предыдущих версий Windows, могут не работать должным образом на Windows 11.
Если у вас установлена старая версия Nvidia GeForce Experience, обновление операционной системы до Windows 11 может привести к неполадкам и ошибкам. В таком случае вам необходимо обновить программное обеспечение до последней версии, которая совместима с Windows 11.
Чтобы обновить Nvidia GeForce Experience, вы можете посетить официальный веб-сайт Nvidia и загрузить последнюю версию программы, соответствующую операционной системе Windows 11. После установки новой версии вам может потребоваться перезагрузить компьютер, чтобы изменения вступили в силу.
Кроме того, рекомендуется обновить драйверы графической карты до последней версии, совместимой с Windows 11. Это можно сделать через меню управления устройствами или с помощью инструментов обновления драйверов, предоставляемых производителем графической карты.
Обновление операционной системы и драйверов до совместимых с Windows 11 версий может помочь решить проблему с работой Nvidia GeForce Experience на вашем компьютере.
Конфликт с другими программами
Одной из причин неработоспособности Nvidia GeForce Experience на Windows 11 может быть конфликт с другими программами, установленными на вашем компьютере. Возможно, некоторые другие программы или драйверы захватывают ресурсы, необходимые для работы GeForce Experience, что приводит к его неправильной работе или полному отказу.
Чтобы решить эту проблему, вам необходимо выявить и удалить конфликтующие программы или обновить драйверы. Важно проверить список программ, установленных на вашем компьютере, и определить, есть ли там какие-либо приложения, которые могут конфликтовать с GeForce Experience.
Используйте таблицу ниже для оценки и анализа программ, которые вызывают конфликты:
| Программа | Возможные причины конфликта | Рекомендуемые действия |
|---|---|---|
| Программа X | Захват ресурсов, требуемых GeForce Experience | Удалите программу или отключите ее перед запуском GeForce Experience |
| Драйвер Y | Конфликт драйверов с драйверами GeForce | Обновите драйверы до последней версии или удалите и установите их заново |
| Программа Z | Подключение картах видео к другим приложениям | Настройте программу или отключите ее во время работы с GeForce Experience |
После идентификации конфликтующих программ вам необходимо предпринять соответствующие действия. В случае удаления программы убедитесь, что это не повлияет на работу других важных приложений или драйверов. Если же требуется обновление драйверов, загрузите последнюю версию с официального сайта производителя и установите ее. Также убедитесь, что во время работы с Nvidia GeForce Experience нет других активных программ, которые могут вызывать конфликты.
Отсутствие установленных драйверов
Если у вас есть видеокарта Nvidia, должны быть установлены соответствующие драйверы для ее правильной работы. Если драйверы не установлены или установлены неправильные драйверы, это может привести к неполадкам в работе Nvidia GeForce Experience.
Чтобы установить драйверы для вашей видеокарты, вы можете посетить официальный сайт Nvidia и найти раздел «Скачать драйверы». Вам потребуется знать модель вашей видеокарты, чтобы найти соответствующие драйверы. После того, как вы скачаете драйверы, следуйте инструкциям на экране, чтобы установить их на ваш компьютер.
После установки драйверов перезагрузите компьютер и запустите Nvidia GeForce Experience снова. Вероятнее всего, после этого программа должна работать исправно. Если проблема не устранена, возможно, у вас есть другие причины, по которым Nvidia GeForce Experience не работает на Windows 11.
Неправильные настройки программы
Если у вас возникают проблемы с работой Nvidia GeForce Experience на Windows 11, возможно, причина кроется в неправильных настройках программы. Некоторые настройки могут быть изменены без вашего ведома или могут стать несовместимыми с новой операционной системой.
Возможное решение проблемы — проверить и изменить настройки программы. Для этого выполните следующие шаги:
- Запустите программу Nvidia GeForce Experience. Если она не запускается, возможно, она не установлена или установлена неправильно. В этом случае необходимо переустановить программу.
- Откройте настройки программы. Обычно кнопка с настройками находится в правом верхнем углу окна программы.
- Проверьте настройки видеокарты. В разделе настроек программы найдите раздел, отвечающий за видеокарту. Убедитесь, что выбрана правильная видеокарта и что настройки соответствуют вашей системе.
- Проверьте настройки игр. Если проблема возникает только при запуске конкретных игр, проверьте настройки игр в программе Nvidia GeForce Experience. Убедитесь, что игры находятся в списке поддерживаемых игр и что для них выбраны правильные настройки.
- Попробуйте сбросить настройки программы. Если вы не уверены, какие именно настройки вызывают проблему, попробуйте сбросить все настройки программы по умолчанию. Обычно для этого существует отдельная опция в разделе настроек программы.
- Перезапустите компьютер. После внесения любых изменений в настройки программы, рекомендуется перезапустить компьютер, чтобы изменения вступили в силу.
Если после проверки и изменения настроек проблема все еще не решена, возможно, причина кроется в другом месте, и вам следует обратиться за помощью к специалистам или на официальные форумы поддержки Nvidia.
Discover surefire fixes to get NVIDIA GeForce Experience working
by Ola-Hassan Bolaji
A Computer Engineering graduate, he has spent most of his life reading and writing about computers. He finds joy in simplifying complex topics into simple solutions for PC… read more
Updated on
- If NVIDIA GeForce Experience is not starting with Windows 10 or 11, it might be because of some disabled services.
- You can fix this issue quickly by restarting some crucial services and processes.
- Another effective solution is to update your display drivers.
XINSTALL BY CLICKING THE DOWNLOAD
FILE
The GeForce Experience app is one of the many apps that start with your PC b by default. However, some users are complaining that the NVIDIA GeForce Experience is not starting with Windows 10 and 11 for some reason.
This takes away the ease of managing your graphics card settings. If you are also troubled by this issue, the solutions in this guide will help you resolve it quickly.
Why is NVIDIA GeForce Experience not starting on Windows?
There are various reasons NVIDIA GeForce Experience might not be starting on your Windows PC. Below are some of the prominent ones:
- Faulty driver: In some cases, GeForce Experience might not be opening because of issues with your graphics driver. The solution to this is to reinstall or update your driver to the latest version.
- Antivirus interference: Your third-party antivirus software might be blocking the GeForce Experience software from starting on startup. You can fix this by disabling your antivirus temporarily.
- Faulty software installation: At times, the issue can be due to faulty software installation. You need to reinstall the app from official sources to resolve it.
How do I get my NVIDIA GeForce Experience to start on Startup on Windows?
1. Restart the required services
- Press the Windows key + R, type services.msc, and click OK.

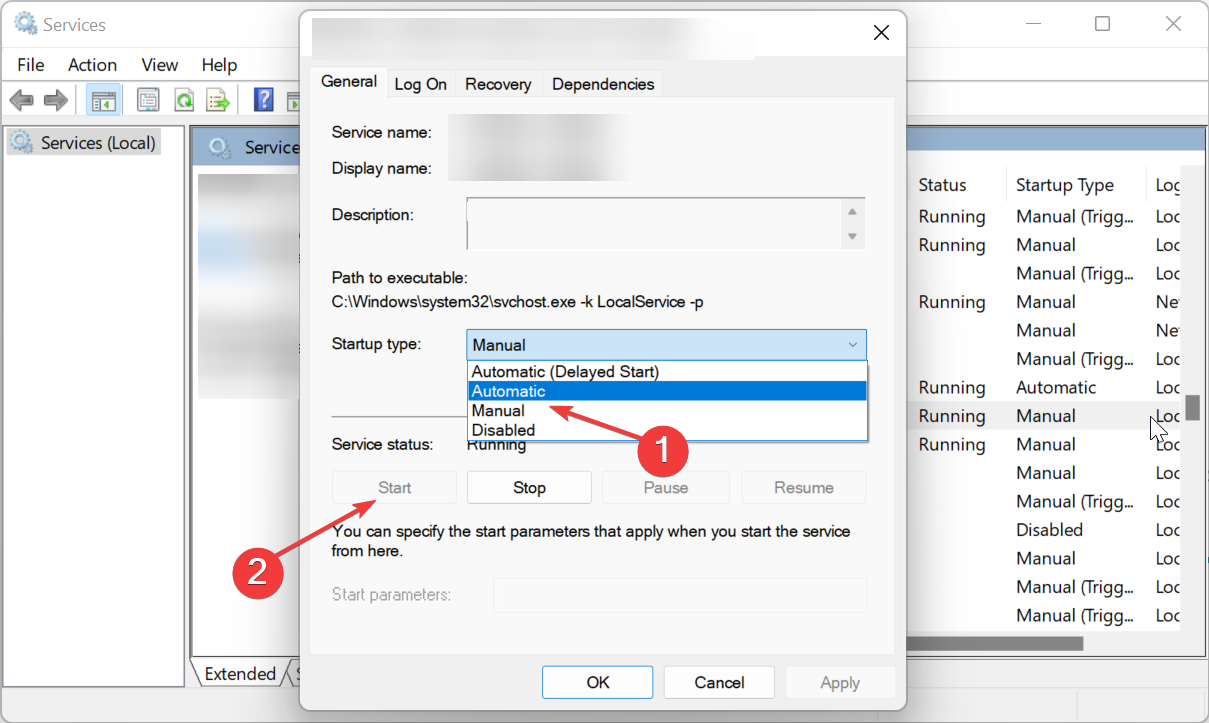
- Double-click the NVIDIA GeForce Experience Service to open its properties.
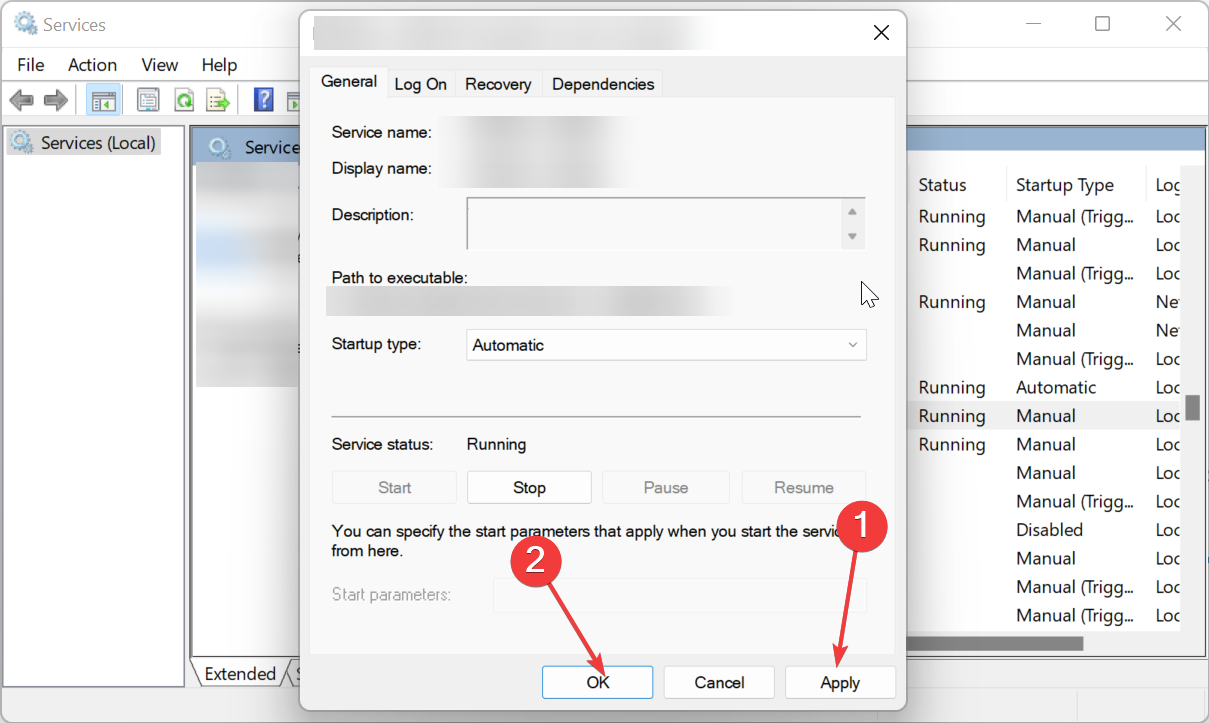
- Now, set the Startup type to Automatic and click the Start button.

- Click the Apply button followed by OK.
- Next, locate the following and repeat Steps 2 to 4:
- Nvidia Telemetry Container
- Nvidia Geforce Experience Backend Service
- Finally, close the Services window and restart your PC.

Oftentimes, NVIDIA GeForce Experience might not be starting with Windows because some of its important services are disabled. Enabling or restarting these services should restore normalcy in this case.
How we test, review and rate?
We have worked for the past 6 months on building a new review system on how we produce content. Using it, we have subsequently redone most of our articles to provide actual hands-on expertise on the guides we made.
For more details you can read how we test, review, and rate at WindowsReport.
2. Disable antivirus temporarily
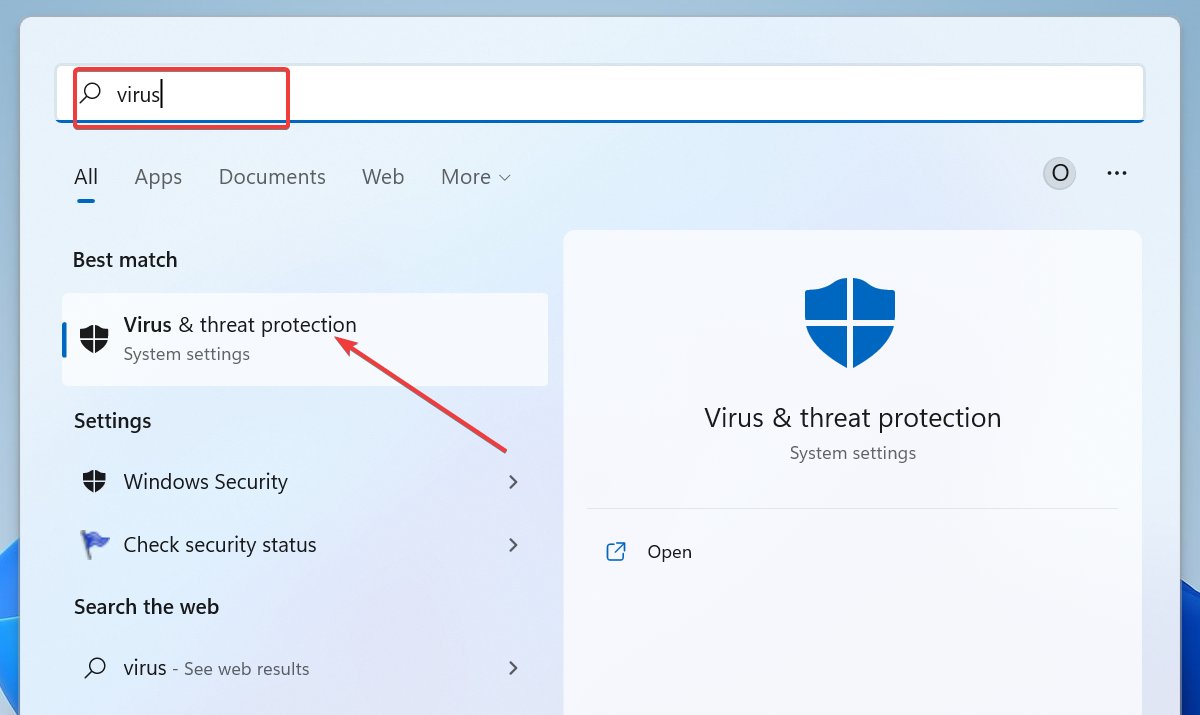
- Press the Windows key, type virus, and select Virus & threat protection.

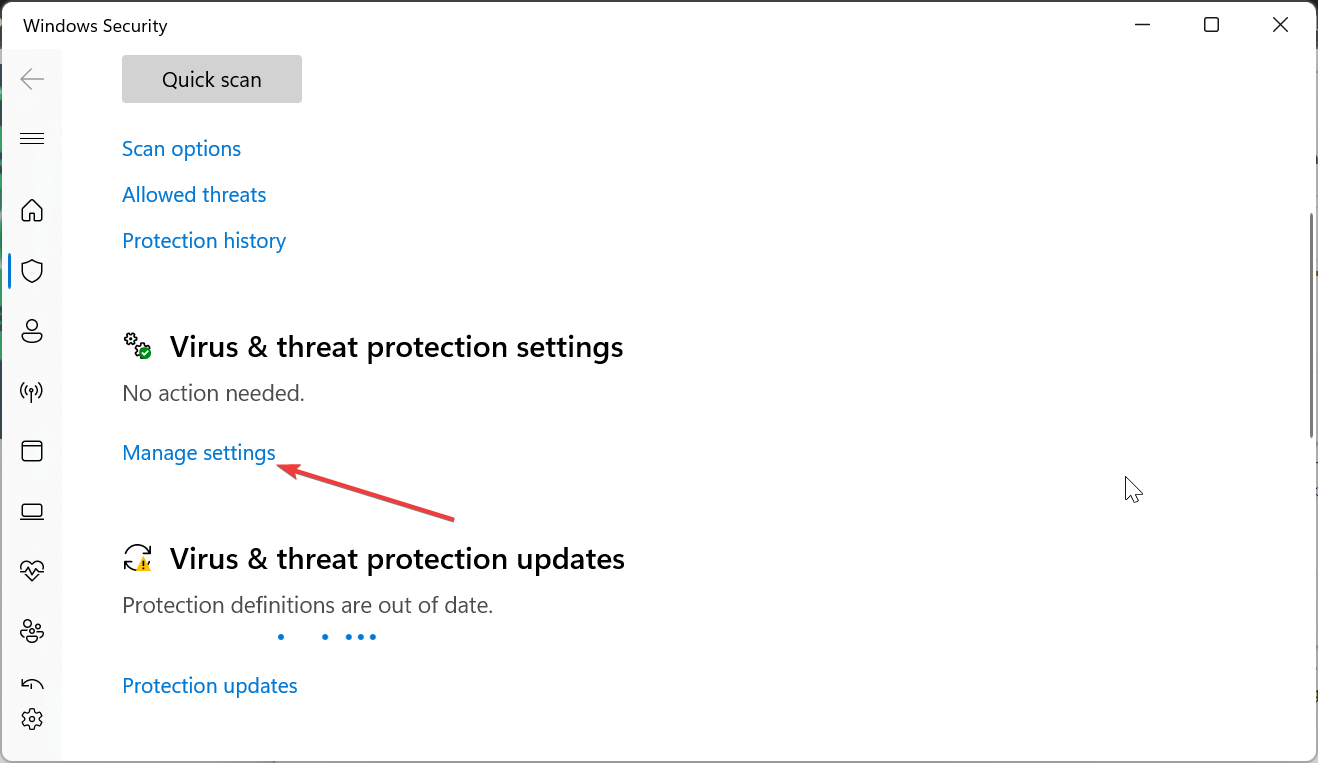
- Click the Manage settings link.

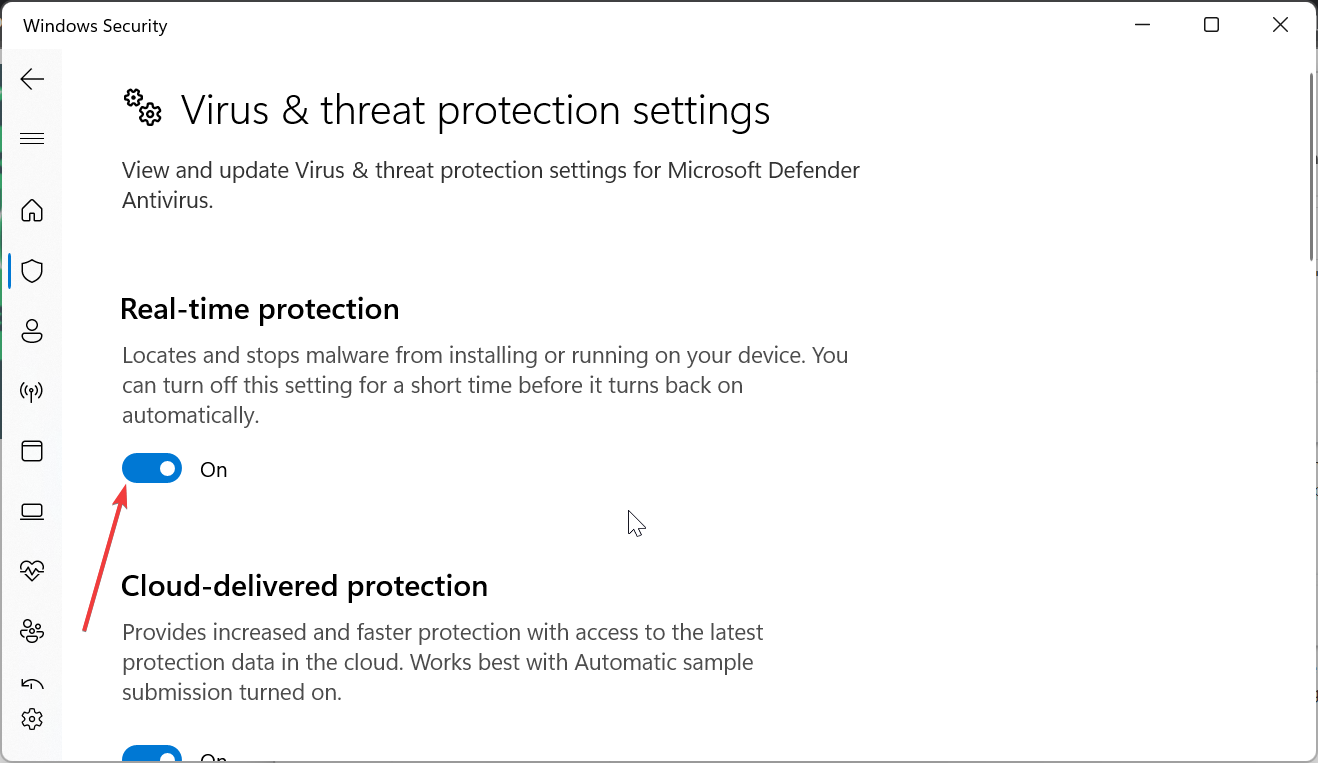
- Now, toggle the switch for Real-time protection backward to disable it.
- Finally, if you use a third-party antivirus, right-click its icon on the Taskbar, and select Disable or any corresponding option.
Sometimes, NVIDIA GeForce Experience might not be starting on startup on Windows 10 or 11 because your security software is blocking it. The solution to this is to disable it temporarily.
- Fix: Set Time Zone Automatically Defaults to Wrong Time Zone
- 0X8007013 Install Error: How to Quickly Fix it
3. Use Task Manager
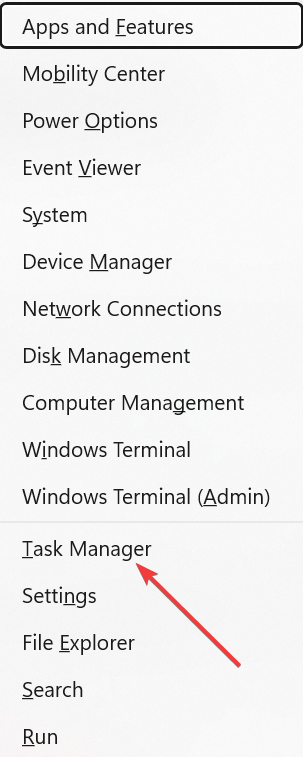
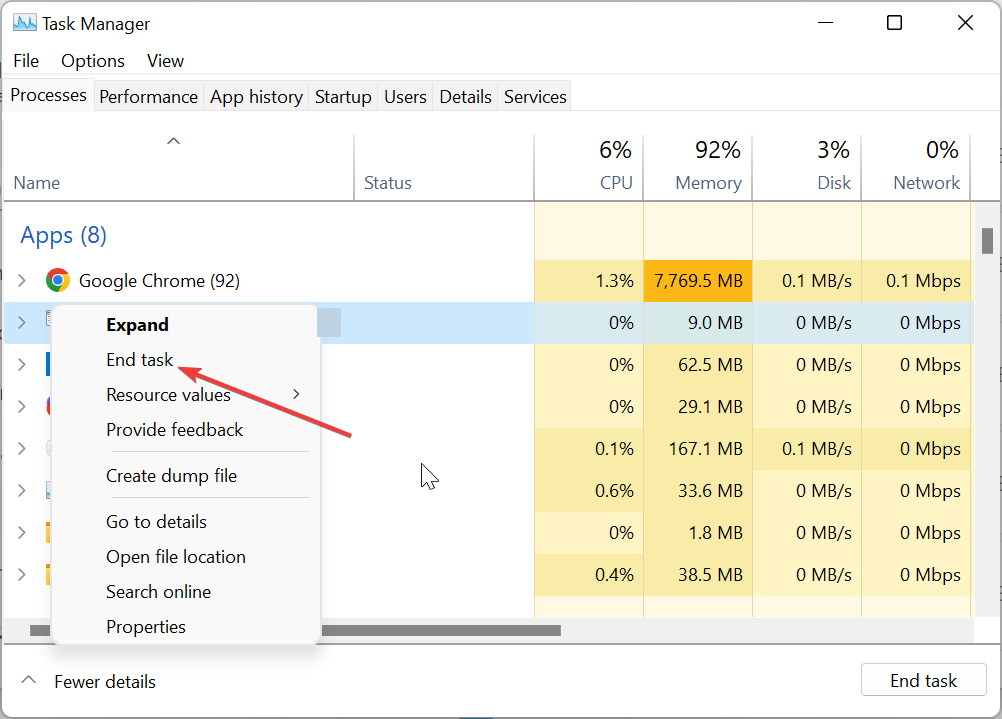
- Press the Windows key + X and select the Task Manager option.

- Right-click the NVIDIA GeForce Experience option and select the End task option.

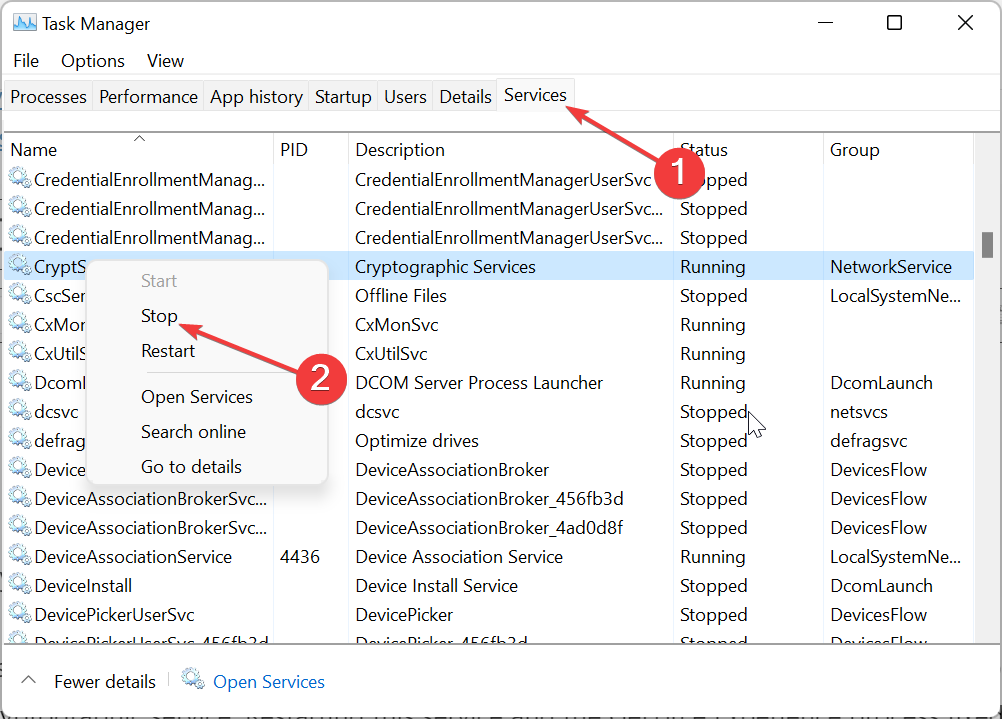
- Now, click the Services tab at the top.
- Next, right-click the Cryptographic Service (or CryptSvc) option and select Stop.
- Finally, relaunch GeForce Experience.
Some users have found the NVIDIA GeForce Experience not starting on Windows issues to be problems with the Cryptographic service. Restarting this service and the GeForce Experience process fixed this issue for them.
4. Update your driver
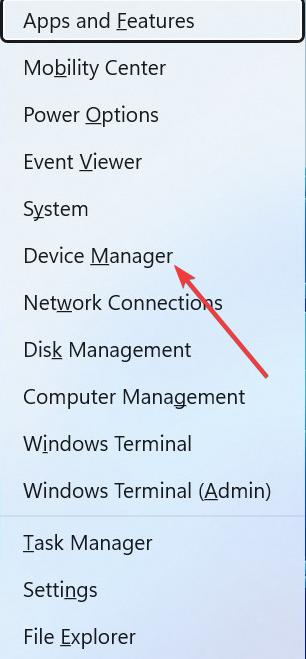
- Press the Windows key + X and select Device Manager.

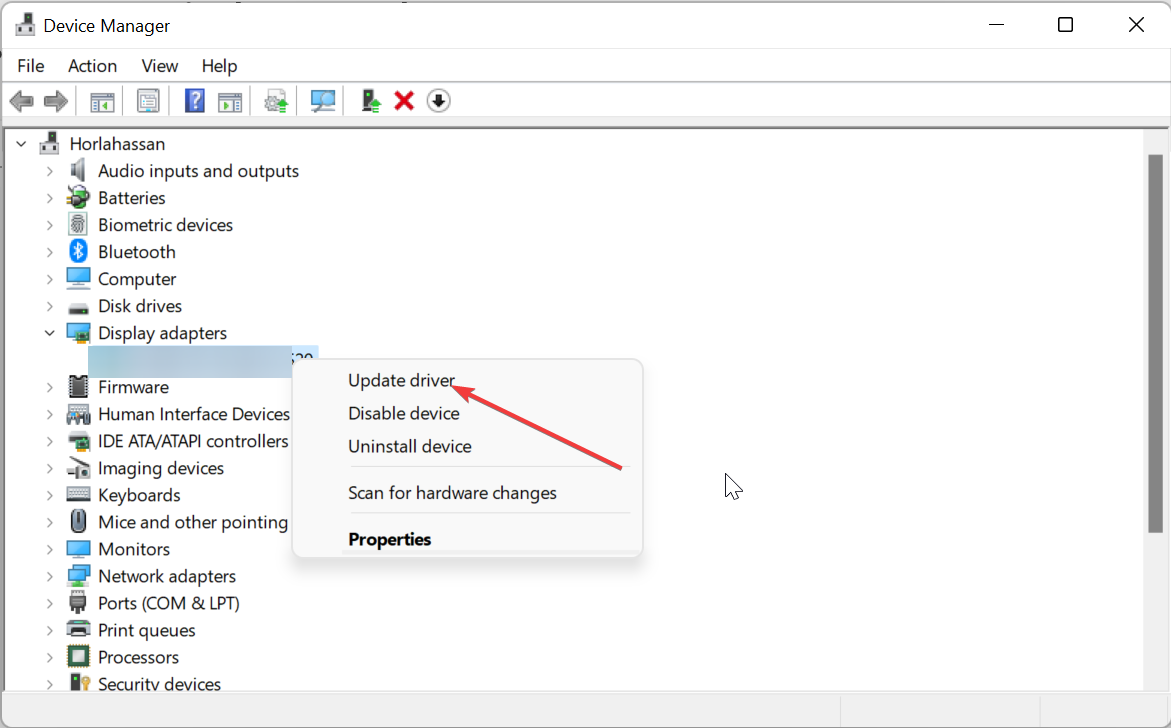
- Double-click the Display adapters option to expand it, and right-click the GeForce adapter there.
- Now, select the Update driver option.

- Choose the Search automatically for drivers option and install the available updates.
- If updating the driver does not work, choose Uninstall device in Step 2 instead.
- Finally, click the Uninstall button and restart your PC.
An outdated driver can cause the NVIDIA GeForce Experience app not to start with Windows. Hence, you need to update your driver to the latest version. If updating does not work, you should try to reinstall the driver completely.
Alternatively, you can use a dedicated driver solution to update your driver. Also, if the driver is broken, this automatic tool will replace it with the original version from its extensive database.
⇒ Get Outbyte Driver Updater
5. Uninstall GeForce Experience
- Press the Windows key + R, type appwiz.cpl, and click OK.
- Right-click the NVIDIA GeForce Experience option and select the Uninstall option.

- Now, follow the onscreen instructions to complete the process.
- Finally, go to the official website to download and install the software.
In some cases, you might have no choice but to uninstall NVIDIA GeForce Experience if it’s not starting on Windows 11 or 10. Reinstalling it from official sources should help clear the potential glitches that might be causing the issue.
If NVIDIA GeForce Experience is not starting on Windows PC, it reduces the ease of accessing the software. However, you can fix the issue by following the solutions in this guide.
Is NVIDIA GeForce Experience not working at all on your PC? Check our detailed guide for surefire solutions to get it working again.
Feel free to let us know the solution that helped you fix this issue in the comments below.
![]()
Пользователи Windows 11 пока еще часто сталкиваются с различными проблемами. Одна из них заключается в ошибке при попытке обновить графические драйверы NVIDIA.
В этой статье я покажу, как справиться с этой проблемой.
Способ 1: Скачивание NVIDIA GeForce Experience
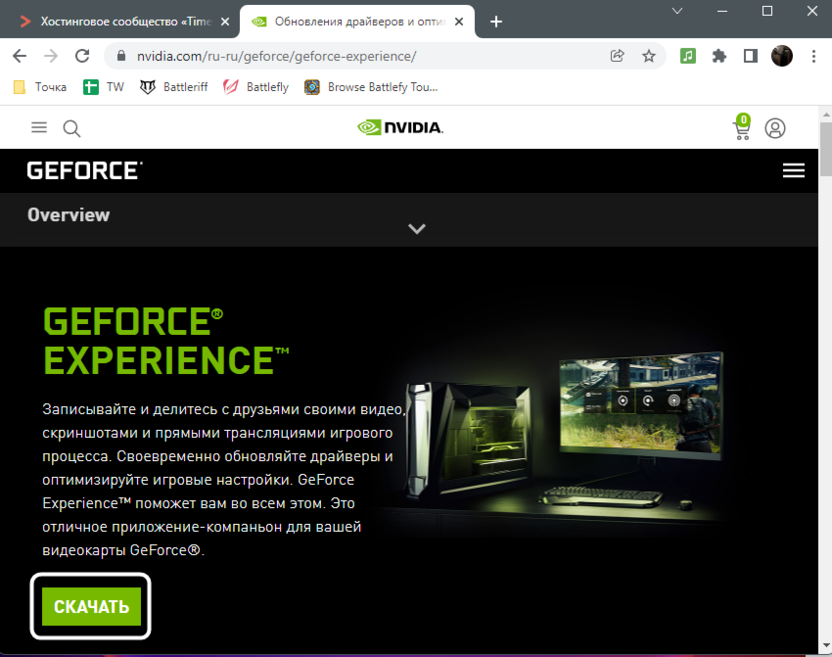
NVIDIA GeForce Experience – фирменная программа, предназначенная для расширения графических возможностей видеокарты и разблокировки дополнительных функций. Среди них есть и инструмент для автоматического обновления драйверов. Если вы еще не установили этот софт, рекомендую сделать это и запустить обновление через него. Часто это позволяет справиться с ошибками, и инсталляция происходит корректно.
Скачать NVIDIA GeForce Experience с официального сайта
Комьюнити теперь в Телеграм
Подпишитесь и будьте в курсе последних IT-новостей
Подписаться
Способ 2: Отключение служб NVIDIA
Другие пользователи заметили, что временная приостановка служб NVIDIA позволяет решить проблемы, возникающие при попытке инсталлировать новую версию драйвера. Это не займет много времени и никак не отразится на работе ОС, а внесенные изменения всегда можно вернуть, запустив службы вручную или путем перезагрузки ПК.
-
Откройте меню «Пуск» и через поиск отыщите приложение «Службы».

-
В нем отыщите пункты, в названиях которых присутствует «NVIDIA».
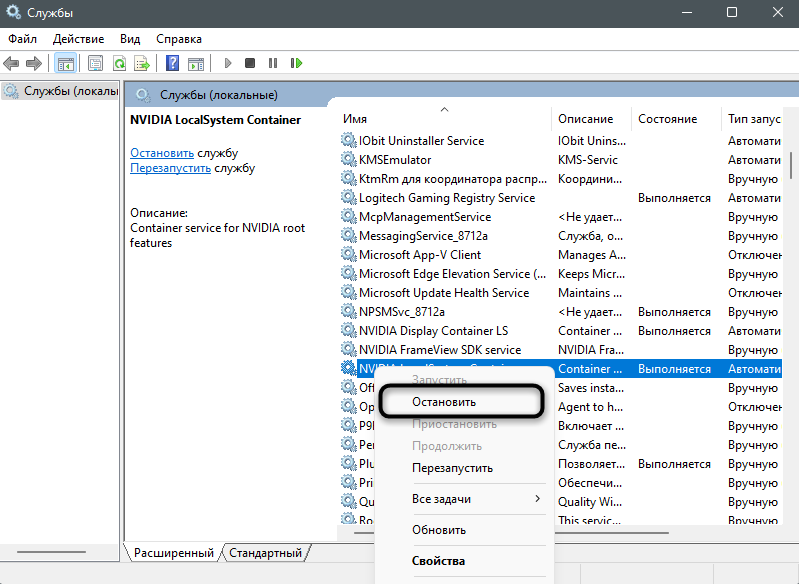
-
По очереди кликните по каждому из них правой кнопкой мыши и из появившегося контекстного меню выберите пункт «Остановить».

Сейчас не перезапускайте ПК, а сразу переходите к обновлению драйвера, запустив его через инсталлятор или GeForce Experience. Если ошибка снова появилась, переходите к следующим способам.
Способ 3: Отключение процессов NVIDIA
Во время работы Windows в активном состоянии находятся не только службы NVIDIA, но и некоторые задачи, просмотреть которые можно через Диспетчер Задач. Это же меню мы и будем использовать для их отключения, чтобы достичь результата.
-
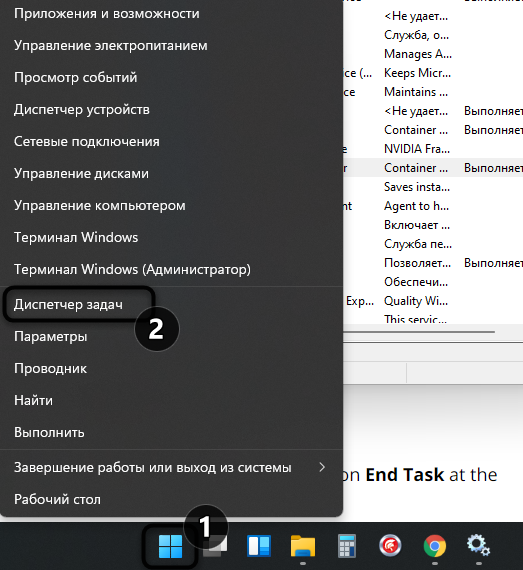
Щелкните правой кнопкой мыши по кнопке «Пуск» и из появившегося списка выберите пункт «Диспетчер задач».
-
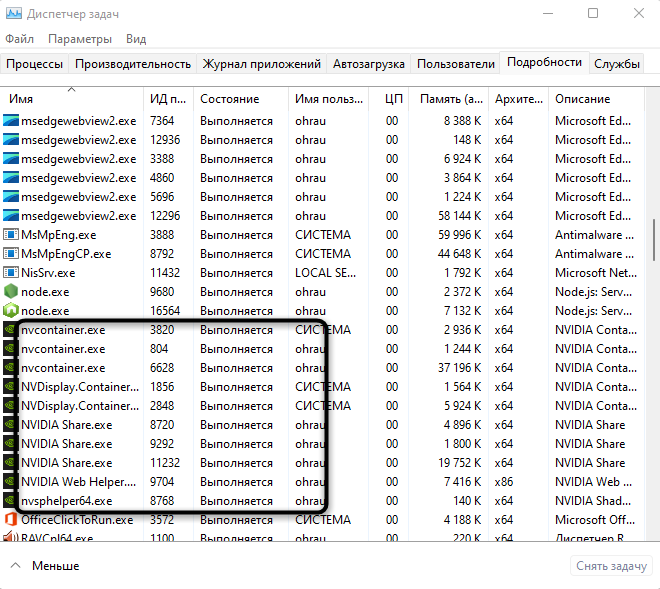
Перейдите на вкладку «Подробности» и отыщите процессы с названием «NVIDIA».
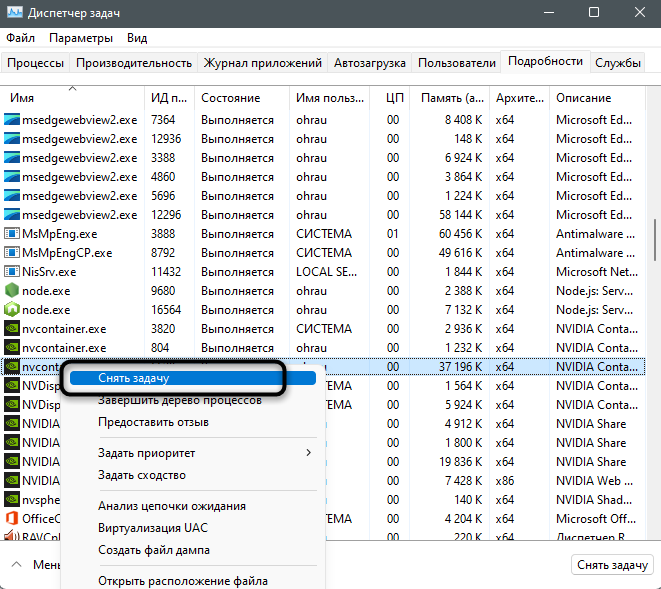
-
Кликните по очереди по каждому из них и нажмите «Снять задачу».
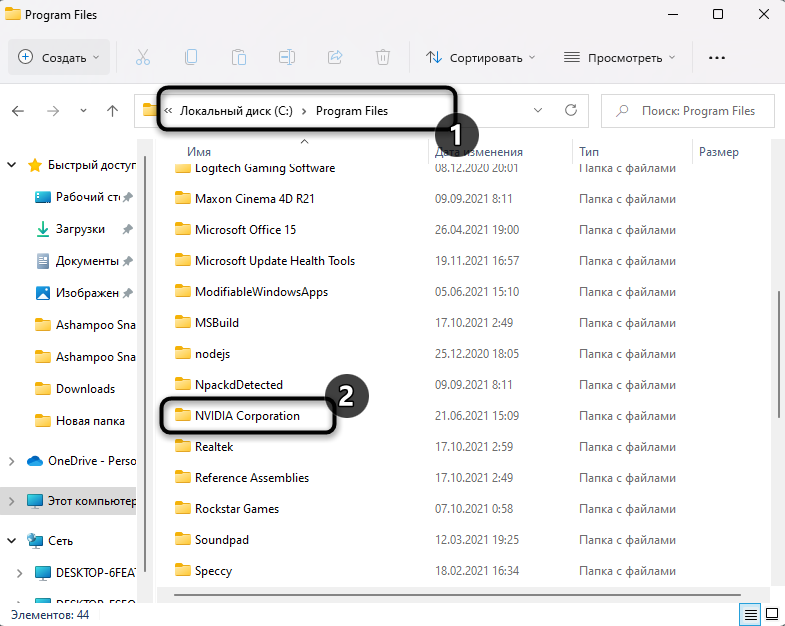
Способ 4: Удаление проблемных файлов
Иногда обновление драйверов становится невозможным из-за проблемных файлов, изменить или заменить которые у программы не получается. Если дело действительно в них, удаление объектов должно решить ситуацию. Ниже я оставляю пути, а вам необходимо перейти по ним и удалить либо отдельные файлы, либо все из них (в зависимости от самого пути).
C:\Windows\System32\DriverStore\FileRepository\nvdsp.inf document

C:\Windows\System32\DriverStore\FileRepository\nv_lh document

C:\Windows\System32\DriverStore\FileRepository\nvoclock document

C:Program Files\NVIDIA Corporation

C:Program Files (x86)\NVIDIA Corporation

Учитывайте, что в некоторых ситуациях удаление папок приводит к поломке текущего драйвера, поэтому создайте резервные копии папок или заранее подготовьте версию ПО, которую вы можете установить вместо текущей, восстановив корректную работу графического адаптера.
Способ 5: Очистка ключей реестра
Этот способ приводит практически к такому же результату, что и предыдущий, но позволяет сбросить настройки через ключи реестра, параметры которых могут мешать обновлению. Вам понадобится перейти по путям и удалить записи. Не беспокойтесь, их очистка не повлияет на работу операционной системы.
-
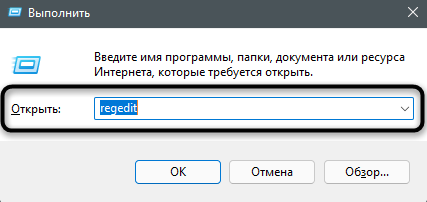
Откройте утилиту Выполнить, используя для этого сочетание клавиш Win + R, введите в поле regedit и нажмите Enter.
-
В Редакторе реестра вас интересуют два пути: HKEY_LOCAL_MACHINE\SOFTWARE\NVIDIA Corporation\Logging и HKEY_LOCAL_MACHINE\SOFTWARE\Wow6432Node\NVIDIA Corporation\Logging.
-
Удалите находящиеся там ключи и перезапустите компьютер.
Способ 6: Отключение Защитника Windows
По большей части данный метод актуален при использовании стороннего софта, но не стоит исключать тот факт, что Защитник Windows 11 по каким-то причинам может блокировать работу установщика от NVIDIA, особенно если где-то вы нашли бета-версию, и ПО еще считается непроверенным. В другой статье я рассказал о том, как временно отключить антивирус операционной системы. Используйте инструкцию, после чего произведите повторную попытку установить драйвер.
Подробнее: Как отключить Защитник Windows 11
Способ 7: Удаление текущей версии драйвера
Удаление текущей версии драйвера с последующей установкой нового – рисковый метод решения проблемы, поскольку ошибка может остаться, и вам придется искать другую версию ПО для ее корректной установки на компьютер. Если вы готовы к этому, выполните следующие действия:
-
Нажмите ПКМ по кнопке «Пуск» и вызовите «Диспетчер устройств».
-
Найдите в «Видеоадаптерах» вашу видеокарту, кликните по ней правой кнопкой мыши и выберите «Удалить устройство».
-
Обязательно отметьте галочкой «Попытка удалить драйвер для этого устройства», после чего подтвердите действие.
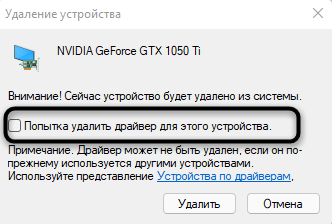
Скорее всего, теперь у вас будут недоступны некоторые разрешения экрана, и картинка станет несколько масштабной. Это решится после установки драйвера, но его еще предстоит инсталлировать, выбрав любой удобный метод (исполняемый файл, скачанный с официального сайта, GeForce Experience или стороннее ПО для установки драйверов).
Способ 8: Переименование папки NVIDIA Corporation
Практически все файлы, связанные с драйвером графического адаптера, хранятся в папке NVIDIA Corporation. При его обновлении объекты заменяются или дополняются. В некоторых случаях это становится невозможным из-за проблем с самим каталогом, поэтому его переименование поможет справиться с ошибкой. Если установка удастся, старую версию каталога можно удалить. В противном случае переименуйте его, вернув оригинальное название.
Вместо заключения
Хотя бы один из представленных методов должен помочь. Однако учитывайте, что обычно драйвер графического адаптера в Windows 11 устанавливается автоматически, а если этого не произошло, стоит попробовать штатное средство обновления, загрузив через него предлагаемую версию (если, конечно, она будет обнаружена).
Читайте также: Обновление драйверов в Windows 11: актуальные способы