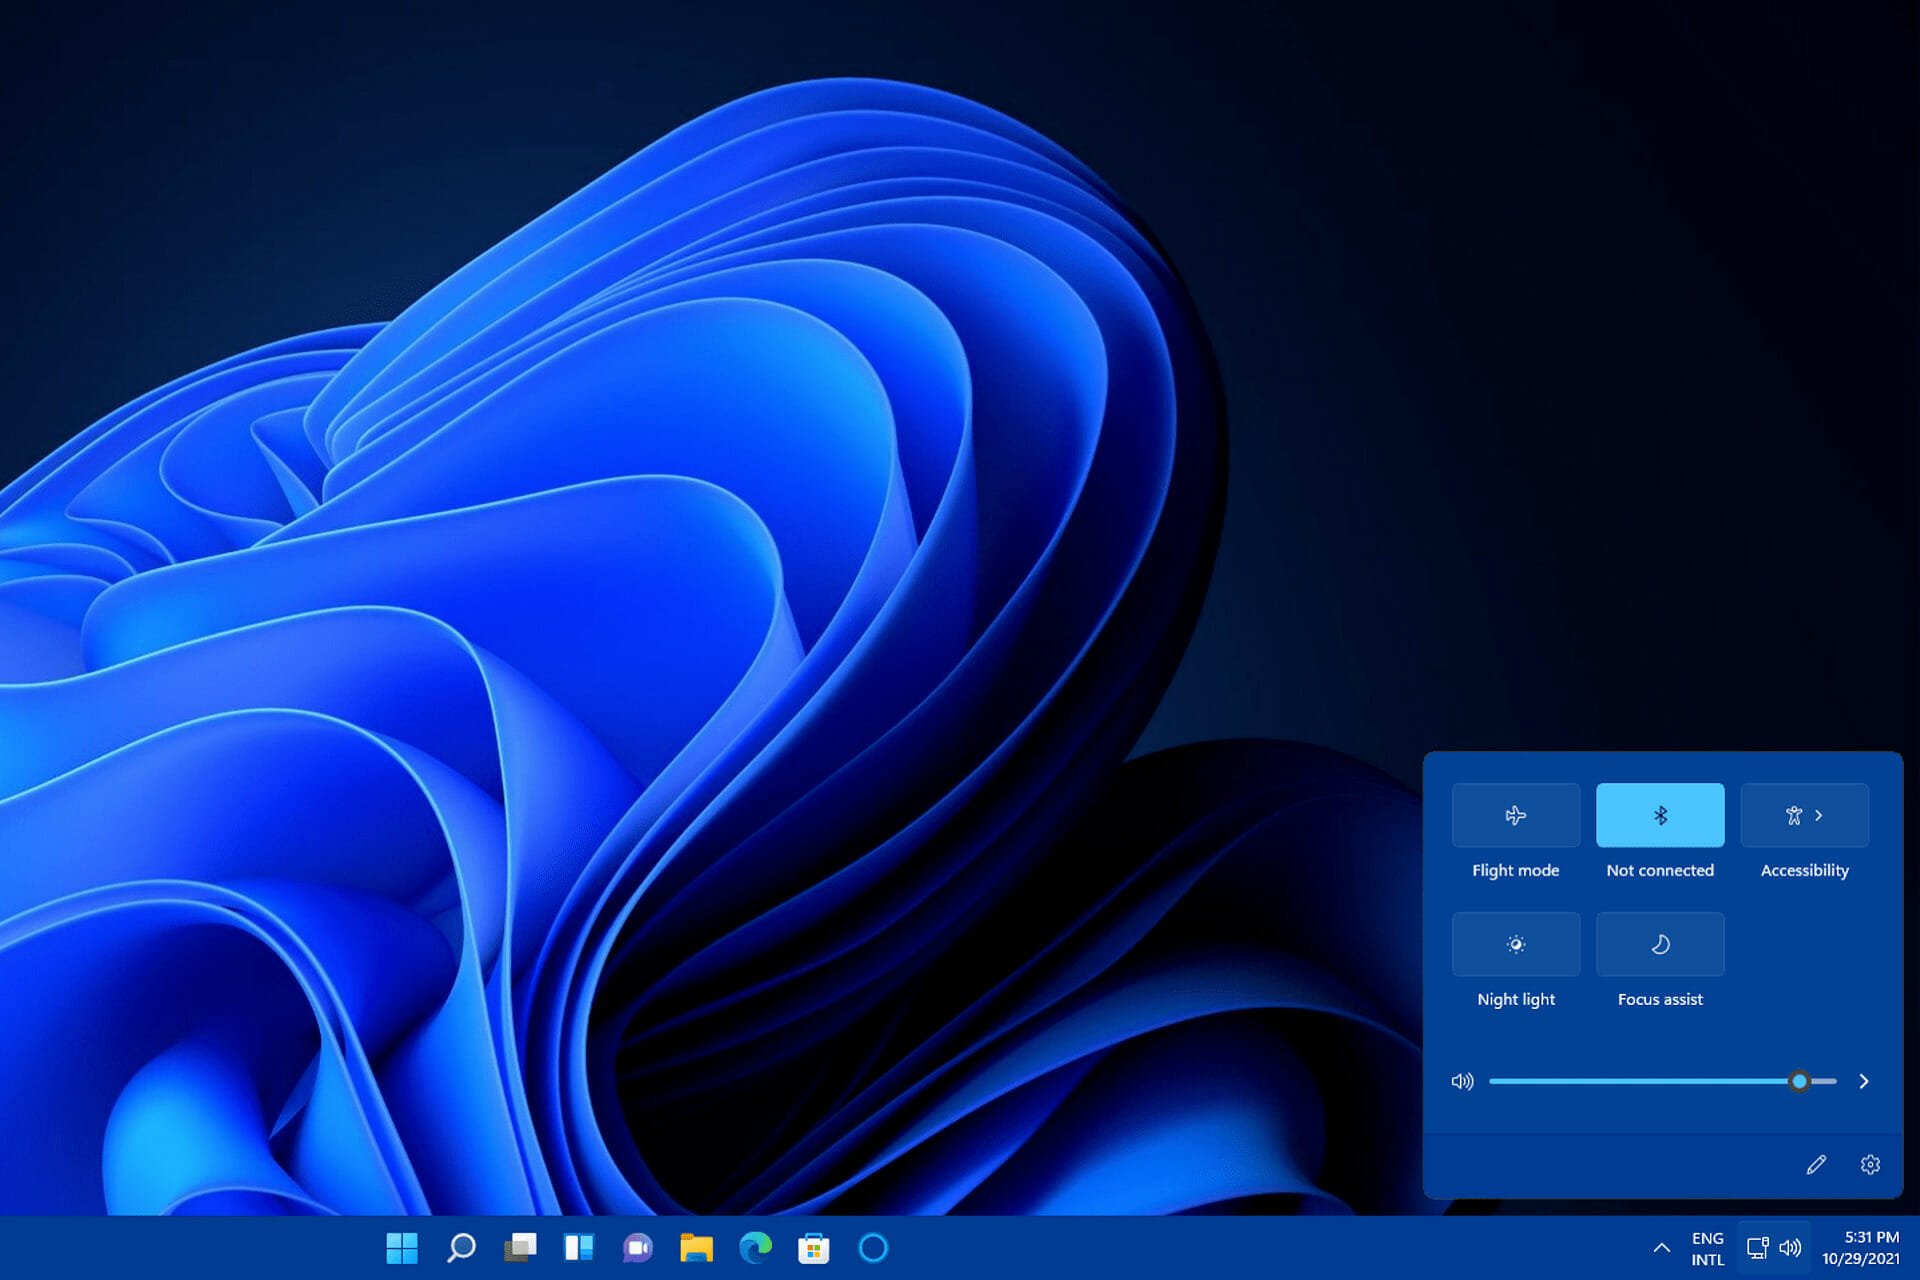
В центре уведомлений Windows (Action center) отображаются различные сообщения от пользовательских и системных приложений. Кроме того в Action Center доступны кнопки для быстрого включения/отключения различных функций Windows (Wi-Fi, мобильная точка доступа, Bluetooth и т.д.). В некоторых случая значок центра уведомления в трее Windows пропадает, и вы не можете открыть Action Center. В этой статье мы покажем, как восстановить Центр уведомлений в Windows, если он не открывается.
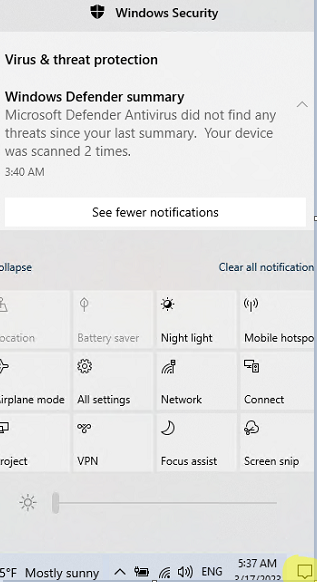
В первую очередь попробуйте открыть центр уведомлений с помощью сочетаний клавиш
Win +A
. Если панель Action Center открылась, это скорее всего означает, что вам достаточно включить отоюращения значка центра уведомлений в трее через панель Settings.
Нажмите
Win+I
и перейдите в раздел Personalization -> Taskbar (для быстрого перехода к этому разделу Settings выполните команду
ms-settings:taskbar
).
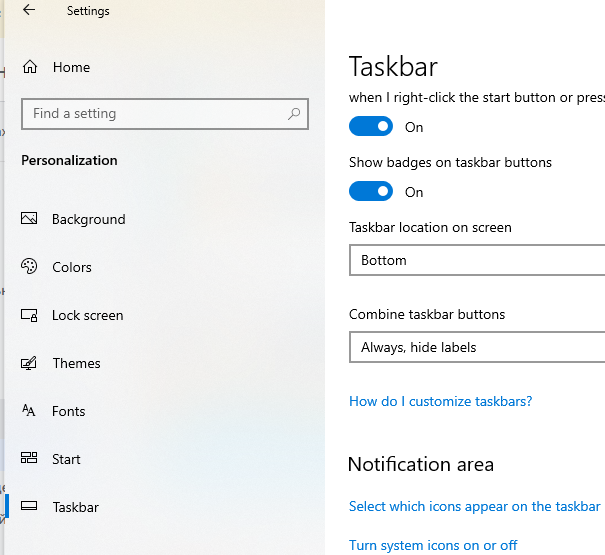
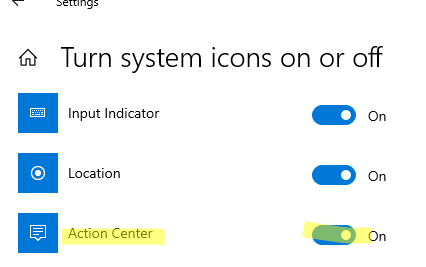
Промотайте список вниз и проверьте, что опция Action Center включена в разделе
Turn system icons on or off
.
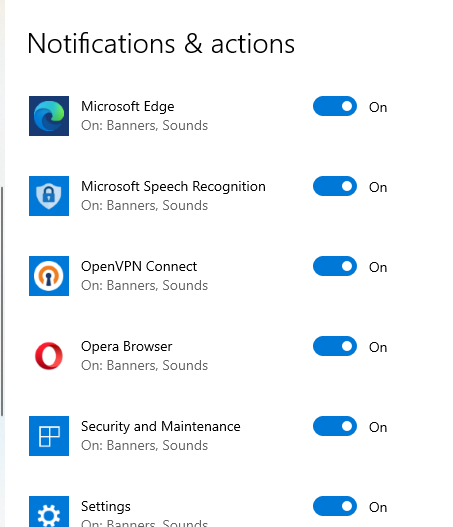
Затем перейдите в настройки центра уведомлений (Settings -> System -> Notification and Actions:
ms-settings:notifications
).
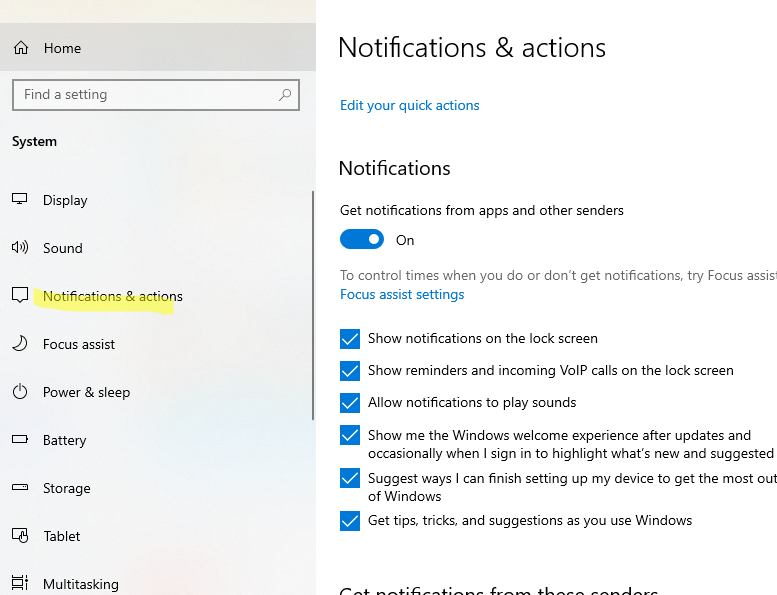
Здесь вы можете включить или отключить центр уведомления, а также настроить приложения, которым разрешено отправлять уведомления через Action Center.
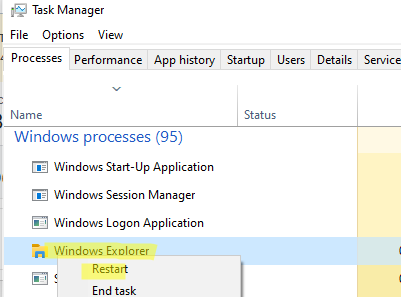
Если Action Center включен в настройках Windows, но не открывается, попробуйте перезапустить проводник Windows (File Explorer). Можно завершить процесс
exporer.exe
через Task Manager
Или вы можете перезапустить процесс из командной строки PowerShell:
taskkill /f /FI "USERNAME eq $env:UserName"/im explorer.exe
c:\windows\explorer.exe

Если это не помогло, проверьте возможно у вас включена локальная политика, которая отключает центр уведомлений в Windows.
- Откройте консоль локального редактора GPO (
gpedit.msc
); - Перейдите в раздел User Configuration -> Administrtive Templates -> Start Menu and Taskbar;
- Проверьте что параметр Remove Notifications and Action Center не настроен или отключен


Если ваш компьютер добавлен в домен Active Directory, на него могут действовать доменные политика, которые отключают центр уведомления. Получите результирующие настройки GPO на компьютере с помощью rsop.msc или gpresult и проверьте, что этот параметр не включен доменной GPO.
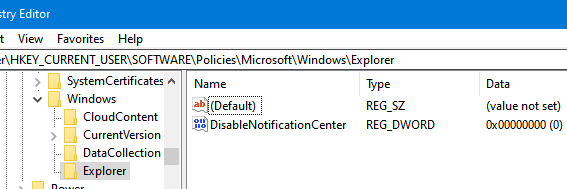
Также Центр уведомления может быть отключен через реестр. Проверьте значение параметра реестра DisableNotificationCenter в ветках:
- HKEY_CURRENT_USER\SOFTWARE\Policies\Microsoft\Windows\Explorer
- HKLM\Software\Policies\Microsoft\Windows\Explorer
Если значение параметра DisableNotificationCenter=1, значит цент уведомлений отключен. Вы можете включить его с помощью команды:
REG ADD HKEY_CURRENT_USER\SOFTWARE\Policies\Microsoft\Windows\Explorer /v DisableNotificationCenter /t REG_DWORD /d 0 /f
В некоторых случаях проблема с центром уведомления может быть вызвана ошибками в системные приложениях Windows Store или в панели Settings (см. статью, в которой описано как исправить приложение Параметры, если оно не запускается). Попробуйте перерегистрировать все приложения с помощью файлов манифестов из консоли PowerShell (запустите с правами администратора):
Get-AppXPackage -AllUsers | Foreach {Add-AppxPackage -DisableDevelopmentMode -Register "$($_.InstallLocation)\AppXManifest.xml"}
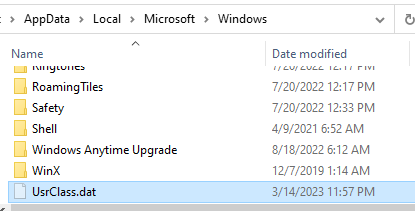
Также может помочь сброс настроек пользовательского окружения в файле UsrClass.dat. Достаточно переименовать файл и войти в Windows, чтобы пересоздать файл. Можно переименовать файл из проводника File Explore (
%localappdata%\Microsoft\Windows
) или переименовать его с помощью PowerShell:
Rename-Item "$env:localappdata\Microsoft\Windows\UsrClass.dat” oldUsrClass.dat –Force
Get Action Center running in no time with our solutions
by Matthew Adams
Matthew is a freelancer who has produced a variety of articles on various topics related to technology. His main focus is the Windows OS and all the things… read more
Updated on
- When the Windows 11 Action Center is not opening, that feature could be disabled on your PC, or there might be corrupted system files.
- Some users have confirmed that adjusting Group Policy settings can fix this issue.
- Restarting the file manager in Windows is another widely confirmed resolution for the Action Center not opening.
- Built-in system file scanning and restoration tools can also come in handy.
XINSTALL BY CLICKING THE DOWNLOAD
FILE
The Action Center is an integral part of Windows 11. It displays notifications to users and includes some handy settings as well. So, they often try to open the Action Center in Windows 11.
However, some of you must fix a few Action Center issues in Windows 11. For example, the Action Center not opening is one such problem.
When users can’t open the Action Center, they can’t access its settings or check notifications. Sure, they can probably still make do without it. However, a few potential resolutions can correct the problem in Windows 11.
Why is my Action Center not opening?
The same Action Center not opening issue is found in Windows 10. The Action Center might be disabled in Windows 11 when this happens.
It can also be disabled in Windows 11 Pro because of specific Group Policy settings. However, some users have confirmed needing to change GPE policies to solve the problem.
Or the issue could arise due to corrupted or missing system files. In this case, system file scanning might do the trick. System restoration is another option.
The File Explorer process is also known to cause Action Center issues when something is up with it. Restarting that process is a simple potential resolution that can often fix the problem.
How we test, review and rate?
We have worked for the past 6 months on building a new review system on how we produce content. Using it, we have subsequently redone most of our articles to provide actual hands-on expertise on the guides we made.
For more details you can read how we test, review, and rate at WindowsReport.
As for those times when the Action Center shortcut is missing, rest assured that there are a few solutions to apply. Even if this guide is for Windows 10, the users of the new OS can take advantage of it.
How do I enable or disable Action Center in Windows 11?
The Windows Action Center should be enabled by default on your OS. If you do not use it, there are several methods you can use to disable it.
If you want to turn off or modify the notifications, you can open Windows Settings. Then, head to System > Notifications. Toggle the button to disable notifications.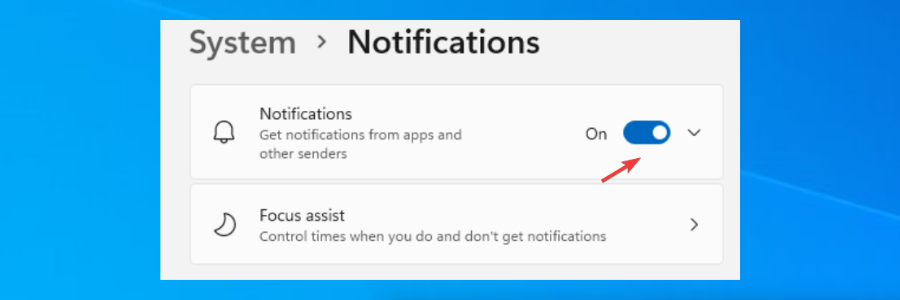
You can turn them off or select what apps you want to send notifications and how. To re-enable them, toggle the button back to on.
Follow the upcoming guidelines if you want to disable the Action Center altogether. You can disable it from the Group Policy Editor or the Registry.
How do I fix Windows 11’s Action Center if it’s not opening?
1. Scan system files
- To bring up the search tool in Windows 11, click its magnifying glass taskbar icon.

- Type the keyword cmd within the search tool’s text.
- Click the Run as administrator option for the Command Prompt search result.
- Input this Deployment Image Servicing and Management tool command and press Enter:
DISM.exe /Online /Cleanup-image /Restorehealth - When the first Scan is done, type this command in the Prompt’s window and press Enter:
sfc /scannow
- Wait for the system file scan to reach 100 percent complete. It will display a scan outcome when it’s done.


Once done, verify if the problem with Windows 11 notification panel not opening is resolved. If you are still unable to access the Action Center, see more solutions below.
If you want a more thorough scan of the integrity of your system files, we recommend using a specialized tool that will automatically find and repair them.
2. Restart File Explorer
- First, open the search box in Windows 11.
- Type the keyword Task Manager in the search tool’s text box.
- Click Task Manager to open it.
- Look for and select Windows Explorer listed under Windows Processes.

- Then click the Restart button for Windows Explorer.

3. Enable the Action Center with Group Policy Editor
- Right-click the Start taskbar icon and select the Run shortcut on the menu.

- Input this command in the Open text box within the Run window:
gpedit.msc - Press the OK button on Run’s window.
- Then select User Configuration followed by Administrative Templates on the left of the Group Policy Editor.

- Click the Start menu and Taskbar on the left side of Group Policy Editor.
- Then double-click the Remove Notifications and Action Center policy setting.

- Select the Disabled option.

- Click Apply to save the new settings.
- Then select OK to exit the Remove Notifications and Action Center window.
- Finally, restart Windows after closing Group Policy Editor.


NOTE
Group Policy Editor comes with the Pro and Enterprise editions but isn’t included with Windows 11 Home. However, you can enable Group Policy Editor in the platform’s Home edition as outlined in our guide on helping Gpedit.exe in Windows 11.
4. Reregister the Action Center
- Press the Windows key + S hotkey for the search tool.
- Then input PowerShell in the search box to find that command-line utility
- Double-click Windows PowerShell to open it.
- Type this command in PowerShell’s window:
Get-AppxPackage | % { Add-AppxPackage -DisableDevelopmentMode -Register "$($_.InstallLocation)\AppxManifest.xml" -verbose } - Press the Enter key to reregister the Action Center.

- Open the Start menu after reregistering the Action Center. Click on Power and then Restart options there to reboot Windows.

5. Enable Action Center by editing the Registry
- Bring up Windows 11’s search utility.
- To find the Registry Editor, type regedit in the search box.
- Click the Registry Editor search result.
- Then you’ll need to open this registry key:
Computer\HKEY_CURRENT_USER\Software\Policies\Microsoft\Windows - Look for and select an Explorer key within the Windows one. If you can’t find it, right-click the Windows key within the left pane and select the New and Key options on the open menu.

- Then you’ll need to enter Explorer for the new key’s title.
- Right-click the Explorer key you just added to open a context menu for it. Select the New and DWORD (32-bit) Value options.

- Enter DisableNotificationCenter to be the new DWORD’s title.
- Now double-click the DisableNotificationCenter DWORD to open a Value data text box.
 Value window")
- Make sure 0 is set as the Value data, and click OK to exit the window.
- When you’ve done that, restart your PC.


 Value window")
- Windows 10/11 Control Panel not responding [Fixed]
- Fix: XP-Pen is Detected as a Keyboard on Windows 11
6. Restore Windows 11 to a previous date
NOTE
Rolling Windows 11 back will remove software installed after your chosen restore point’s date. To see what software you’ll need to reinstall for a restore point, click Scan for affected programs within the System Restore window.
- Press Windows + X simultaneously, and select the shortcut for Run.
- To launch System Restore, type in the following text and click OK: rstrui
- Next, select the Choose a different restore point option if it’s available.

- Click Next to proceed to the list of restore points.
- If a Show more restore point checkbox is available, select that option.
- Then choose a restore point that will roll Windows 11 back to a time you could open the Action Center. If unsure, select the date that goes back to the furthest.

- Press the Next button to continue to the confirmation step.
- Select Finish to start system restoration for the chosen date.


How has the Action Center changed in Windows 11?
Microsoft has split the Windows 11 Action Center into two parts. Now it consists of two separate Quick Settings and Notification panels you can (usually) open from the system tray.
Windows 10’s Action Center had just one panel that included settings and notifications. However, the Action Center is still the same thing on both platforms, and you have the chance to customize the Action Center in Windows 11.
Why is my Action Center greyed out?
If the Action Center is greyed out, it could point towards a misconfigured Registry or Group Policy Editor. By misconfigured, it means that the feature is disabled.
Also, running an outdated version of the OS or the graphics driver is bound to cause problems. So, update the graphics driver and install any available updates for Windows.
Besides, check for corrupt system files if the Windows 11 Quick Settings are not working. Running the SFC or DISM scan should help fix things in this case.
It is no surprise that users complain that the Notification panel is not opening in Windows 11 or the Action Center itself is missing or not opening.
If none of the above potential resolutions fix these issues, consider resetting Windows 11 as a last resort. This will restore the platform to its original default factory settings. Check out our guide on how to reset Windows 11 for further details.
However, that’s only suggested as a very last resort resolution because you’ll need to reinstall all software that didn’t come pre-installed on your PC. Resetting the platform is much the same as reinstalling it. Could you not do it unless you must do so?
So, give all the potential resolutions above for fixing the Action Center first. Do you happen to know other solutions? Tell us about them in the comments area below.
![]()
Чтобы открыть quick Параметры, сделайте следующее:
-
Чтобы открыть панель быстрого Параметры, выберите значок аккумулятора, сети или громкости.
-
Нажмите клавишу Windows клавиши +A.
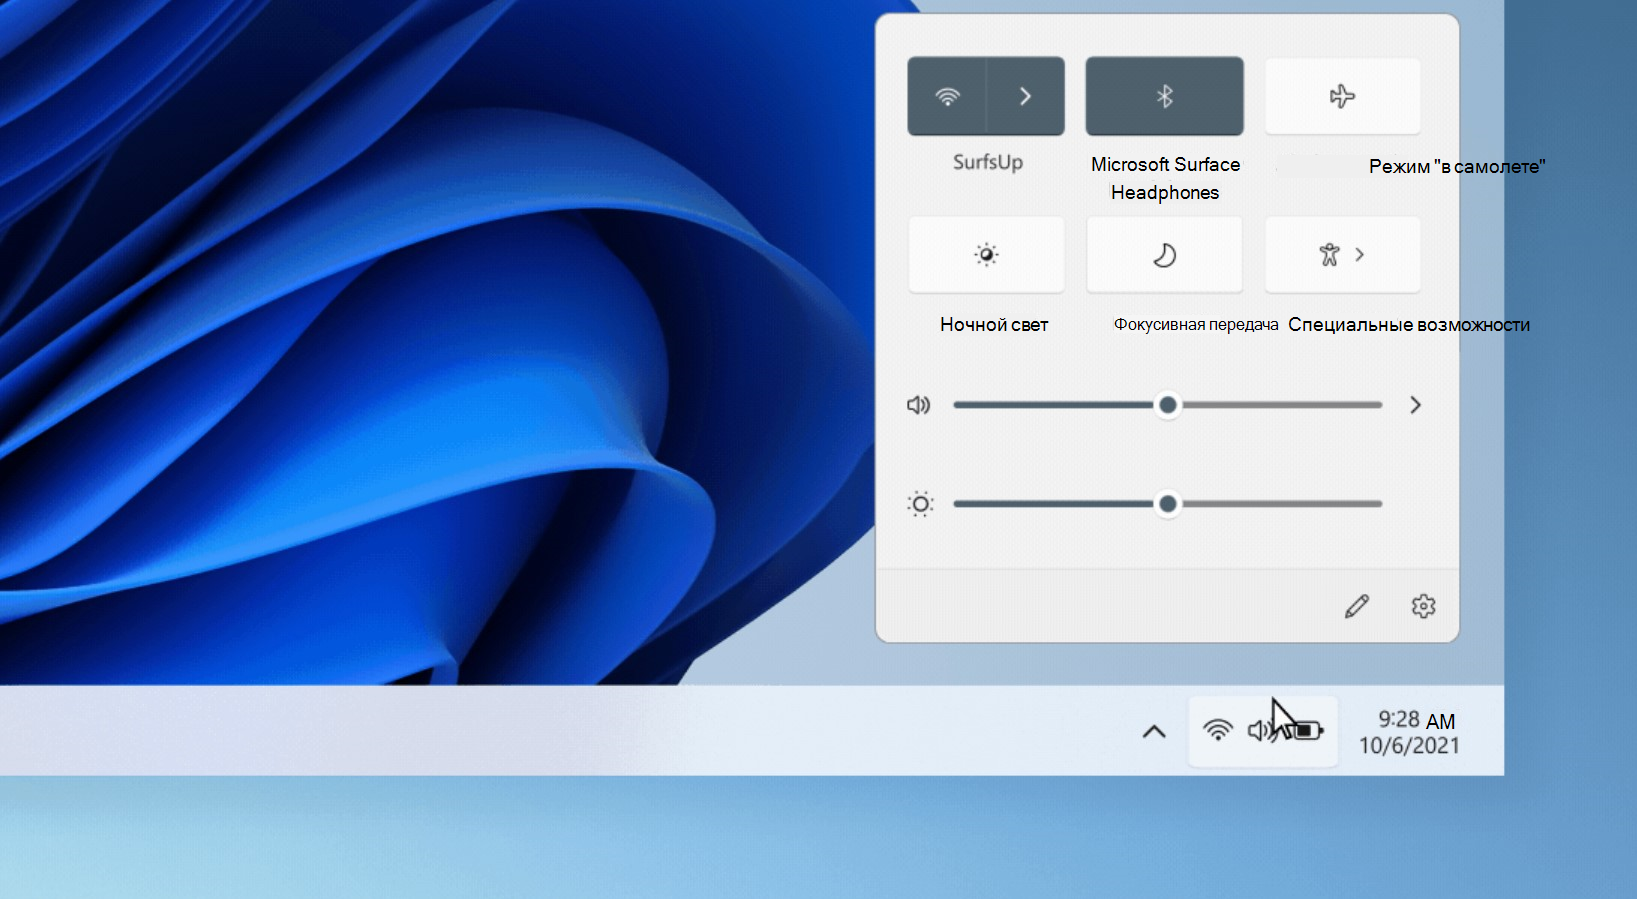
Чтобы открыть Центр уведомлений, сделайте следующее:
-
Выберите дату и время на панели задач.
-
Если используется устройство с сенсорным экраном, проведите пальцем от правого края экрана к центру.
-
Нажмите клавишу Windows клавишу с логотипом + N.
Чтобы открыть Центр действий, сделайте следующее:
-
В правой части панели задач выберите значок Центра действий.
-
Нажмите клавишу Windows клавиши+A.
-
Если используется устройство с сенсорным экраном, проведите пальцем от правого края экрана к центру.
Push Notifications have become an essential part of our lives. We can’t imagine our day without them, as they help us keep track of important messages, emails, etc. But sometimes, when our device’s push notifications stop working, it causes a lot of inconveniences. We miss out on time-sensitive alerts, messages, emails, etc. Sadly, a lot of Windows users are experiencing this issue with their Windows 11 PC.
According to them, their Windows 11 PC’s notifications have stopped working after updating the PC to the latest build. But fortunately, there are some ways that can make the notifications work again. You can try all the solutions mentioned in this troubleshooting article to fix the Notifications not working issue with your Windows 11 PC with ease.
Why Are Notifications Not Working or Showing on Windows 11?
Here are some of the most common reasons that are expected to cause this issue with your Windows 11 PC’s push notifications:
- Corrupted Windows Files
- Disabled Action Center
- Notifications Are Disabled
- Enabled Focus Assist
- Non-Functioning Windows Explorer
- Issues With Windows Push Notification System ervice
You can try all the workarounds mentioned in this section to fix the Notifications not working issue. So, let’s try the first workaround.
1. First, Restart Your Windows PC
Of course, the first and foremost solution is to restart the PC. It’s one of the easiest yet most effective solutions to fix minor bugs and glitches in the system and bring non-functioning components back to work.
In addition, it comes with higher chances of fixing the issue with ease. So, reboot your system and check if the push notifications are working properly now. Follow the steps below to restart your Windows 11 PC:
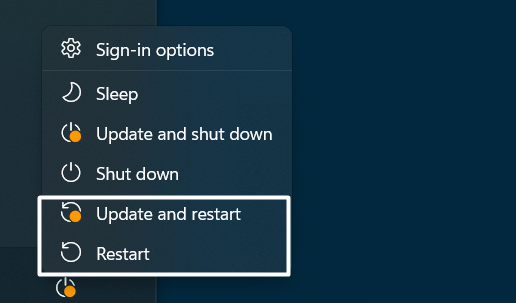
1. First, click on the Windows icon in the taskbar and then right-click on the Power icon.
![]()
2. Then, select the Restart or Update and restart option from the popup menu and wait for the system to restart.
Once the PC is rebooted, check if you’re now receiving notifications or not.
2. Make Sure Notifications Are Enabled
In order to receive push notifications, you need to allow the apps and system to send notifications. It’s likely that you’ve mistakenly disabled the notifications for the specific app or the entire system, which is why you’ve stopped receiving notifications.
Due to this, we once suggest you ensure that the push notifications are enabled on your system. We’ve explained to check the same in the below-mentioned steps:
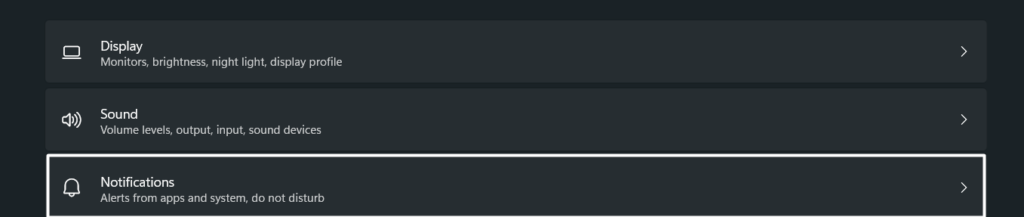
1. To start, open the Settings app on your Windows 11 PC and navigate to the Notifications category.
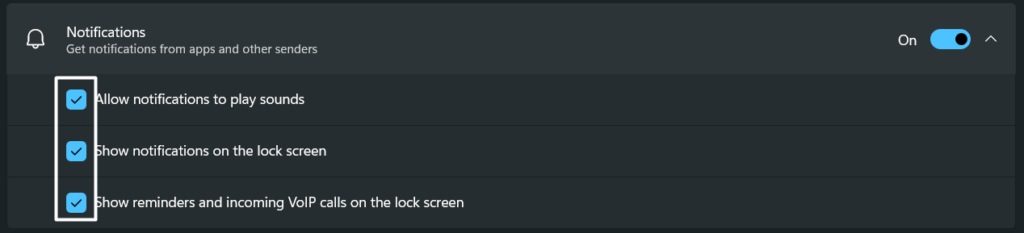
2. In the Notifications section, ensure the Notifications toggle and all other toggles under the same section are enabled or active.

- Allow notifications to play sounds
- Show notifications on the lock screen
- Show reminders and incoming VoIP calls on the lock screen
3. If you aren’t receiving the notifications from a particular app, then scroll down and move to the Notifications from apps and other senders.
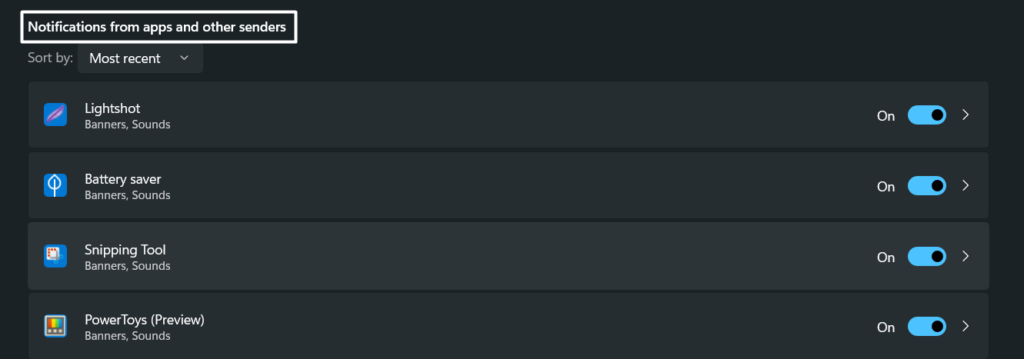
4. In the Notifications from other apps and senders section, search for the app that isn’t sending push notifications and click on it to open its notifications settings.
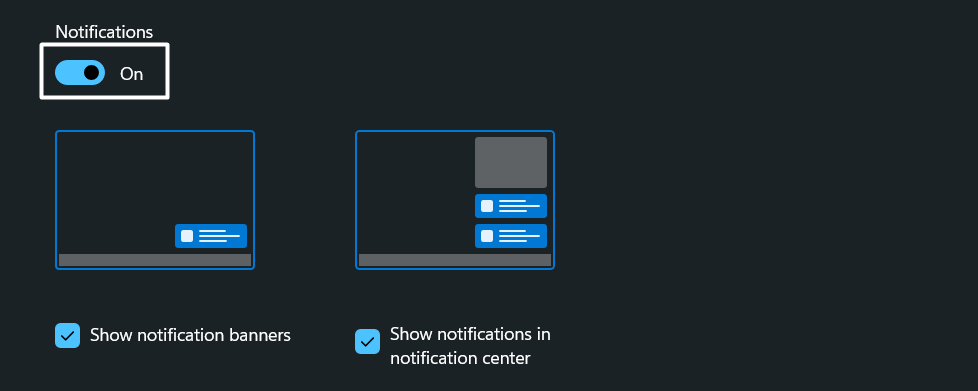
5. Then, make sure the Notifications toggle is enabled and the Show notification banner and Show notifications in notification center options are checked.
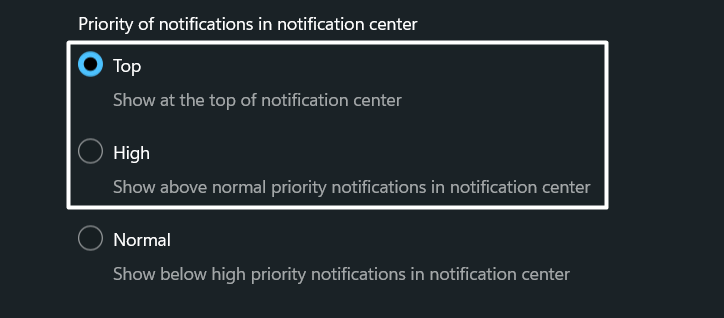
6. Lastly, move to the Priority of notifications in notification center section and set it to Top or High to see notifications above less priority notifications.
Once done, restart your Windows 11 PC and check whether the notifications are working fine. If it’s still the same, try other workarounds.
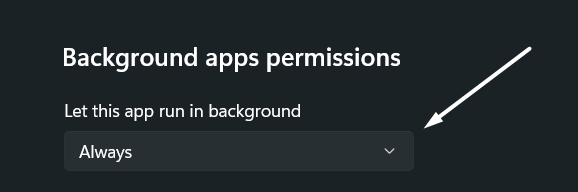
3. Allow the Apps To Run Background To Get Notifications
If you aren’t receiving the notifications from a specific program, then it could be possible that it’s not allowed to run in the background. In order to receive notifications from the program after minimizing it, you need to make sure it can run in the background without disturbing other tasks.
Otherwise, it’ll close, and you won’t receive notifications in real-time. Therefore, we recommend you ensure that the app not sending notifications has permission to operate in the system’s background. We suggest following the below-mentioned steps to know how to allow an app to run in the system’s background:
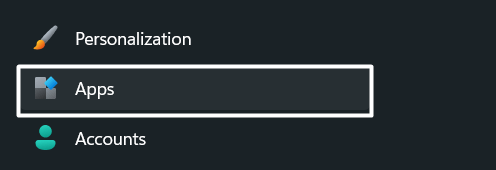
1. Open the Settings app on your Windows 11 PC and move to the Apps section from the left navigation menu.
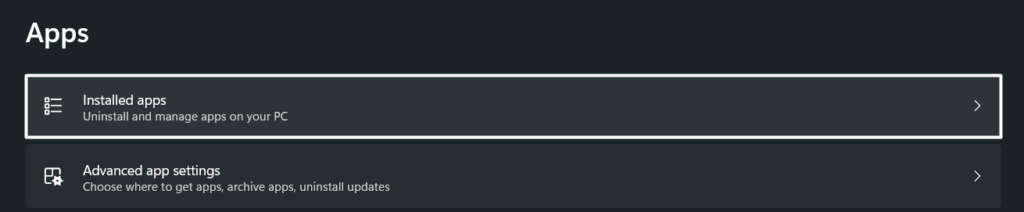
2. In the Apps section, click on Installed apps and search for the app that’s not sending the notifications after minimizing it.
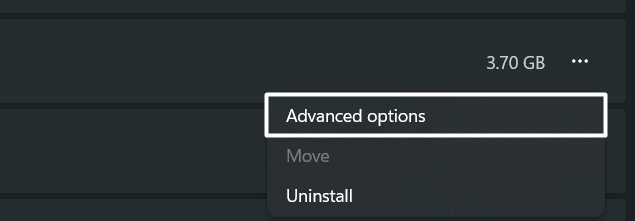
3. Then, click on three dots (…) next to the app and select the Advanced options from the dropdown menu.
4. Lastly, move to the Background app permissions section and make sure the Let this app run in the background option is set to Always.
Once you’ve allowed the app to run in the background, restart your system and check if the issue is fixed.
4. Disable the Focus Assist Feature
Focus assist is a Windows utility that helps you reduce distractions by muting notifications and other alerts. It could be possible that you’re using the system in the Focus assist mode, which is why you aren’t getting notifications from the senders.
Keeping this in mind, we suggest you make sure that the Focus assist mode is disabled on your Windows 11 PC. You can check the same by following the mentioned steps:
1. To do so, open the Settings app on your PC and navigate to Notifications of the System section.
2. Expand the Focus section in the Notifications section and click on the Stop focus session option.
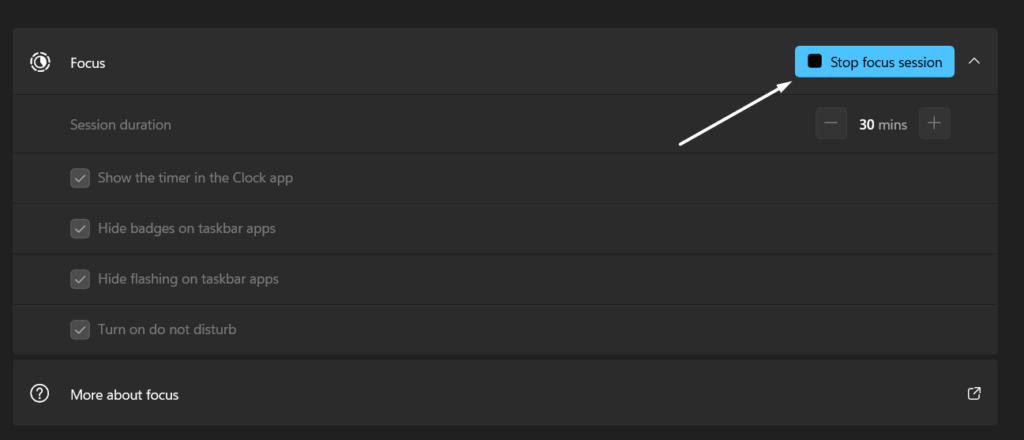
Once you’ve disabled the Focus assist mode, check if notifications are working now. If Focus assist was already off, then the issue isn’t because of it. Check other possible workarounds to fix the issue.
5. Turn Off the Do Not Disturb (DND) Mode
Windows comes with a Do not disturb mode that reduces distractions while working, studying, etc., by muting the system and app notifications. If the Focus assist mode is already disabled, then it’s likely that your system is running the Do not disturb mode and muting all the notifications. Due to this, we suggest you make sure that your system’s Do not disturb mode is disabled. Below are the steps to check the same with ease:
1. First, move to the Settings section on your Windows 11 PC and head to the Notifications category.
2. In the Notifications section, disable the Do not disturb toggle and then expand the Turn on do not disturb automatically section.

3. In the Turn on do not disturb automatically section, make sure the During these times checkbox is unchecked.

That’s it! You can check the issue’s status now.
6. Reinstate the Windows Explorer App
Some Windows features heavily rely on the Windows integrated file manager utility, File Explorer. If this utility faces difficulties in working, then it’ll also affect the functioning of other Windows features, like push notifications. It could be possible that your system’s Windows Explorer program isn’t functioning properly, which is the reason push notifications aren’t working correctly.
In that case, we recommend you reinstate the Windows Explorer program from Task Manager to fix all the minor issues with it and make it work again properly. You can take the help of the below-mentioned steps to restart the Windows File Explorer utility:
1. To start, press the Ctrl + Shift + Enter keys at the same time to open the Task Manager program on your Windows PC.

2. Now, look for the Windows Explorer task in the Task Manager and click on Restart task in the top menu and wait for it to restart.

After restarting Windows Explorer, reboot your Windows 11 PC and check if the push notifications are working fine now.
7. Repair Corrupted System Files & Windows Images With DISM & SFC Scan
In some cases, it’s found that corrupted or missing system files can also cause these problems with system’s push notifications. This could be the same in your case. Fortunately, there is a way to repair the corrupted system files in seconds. Therefore, we first suggest you run a DISM scan to scan and fix issues with Windows images.
If the DISM scan finds issues with the images, you can run the SFC scan to fix them. You can check the below steps to run these two system scans in some simple steps:
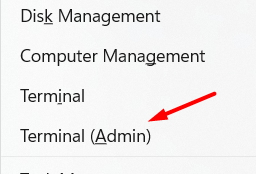
1. First, press the Windows + X keys shortcut to open the Windows menu and select Terminal (Admin) from it.
2. Now, run the below-mentioned command in the Terminal app and press Enter to run the DISM scan.
DISM.exe /Online /Cleanup-image /Restorehealth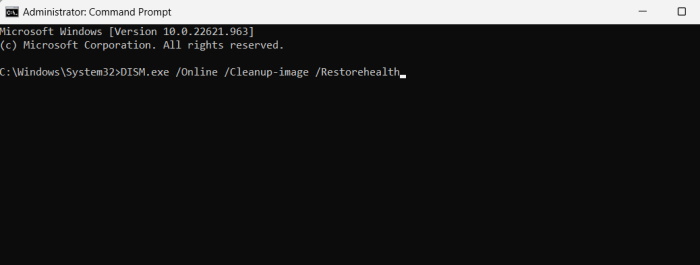
3. Once the DISM scan is completed, run the below command in the console and wait for the scan to complete.
SFC /scannow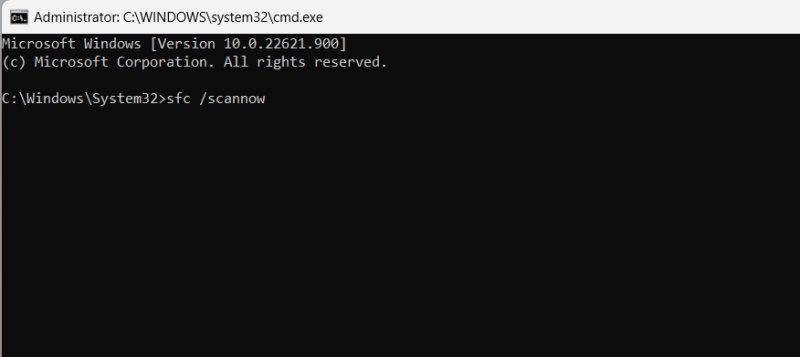
After running both system scans, restart your Windows 11 PC and check whether the issue is fixed.
8. Repair Windows Apps
During the research, we found that issues with the Windows apps can also cause this inconvenience. In that case, the best solution is to repair these Windows apps by executing a few commands in Windows Powershell. You can follow the below-mentioned steps to know how to repair Windows apps:
1. So first, open the Windows Powershell app on your Windows 11 PC with administrative privileges.
2. Subsequently, execute the below commands one-by-one in the console to repair the Windows apps.
Get-AppxPackage Microsoft.Windows.ShellExperienceHost | foreach {Add-AppxPackage -register "$($_.InstallLocation)\appxmanifest.xml" -DisableDevelopmentMode}Get-AppXPackage | Foreach {Add-AppxPackage -DisableDevelopmentMode -Register "$($_.InstallLocation)\AppXManifest.xml"}Once done, restart your system and check if the issue is fixed.
9. Re-Register Action Center
The Notifications Center is a part of the Windows Quick Action Center. If Windows Quick Action Center functions erroneously, then the Notifications Center will also behave weirdly.
So, it could be possible that your system’s Quick Action Center isn’t working properly, which is why the Notifications Center isn’t opening or working. To make it work again, you need to register the Windows Quick Action Center. So, below are the steps to do the same with ease:
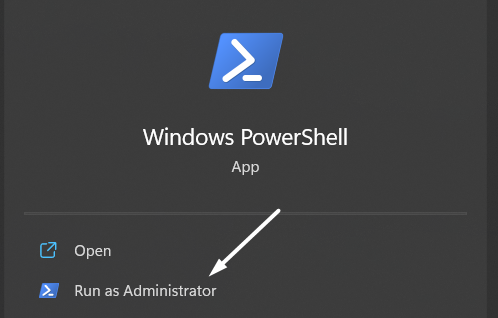
1. Open the Windows Search Box, type Windows PowerShell, and select Run as administrator under the app to run it with admin rights.
2. Next, paste the below command into the Windows PowerShell program and press the Enter key to execute it.
Get-AppxPackage | % { Add-AppxPackage -DisableDevelopmentMode -Register "$($_.InstallLocation)\AppxManifest.xml" -verbose }After re-registering the Windows Quick Action Center by executing the above-mentioned command, check if push notifications are working properly.
10. Tweak Registry Editor
If re-registering the Windows Quick Action Center doesn’t fix the issue, then we suggest making some system-level changes to make it work. You need to use the Registry Editor tool to do the same. We’ve explained to tweak push notifications settings in the below-mentioned steps with ease:
1. So first, open the Windows Search Box using the Windows key and type the Registry Editor in it.
2. Now, select Registry Editor from the Best match section and navigate to the below directory by pasting it into the address bar at the top.
HKEY_CURRENT_USER\Software\Microsoft\Windows\CurrentVersion\PushNotifications3. Next, right-click on the PushNotifications key, select New and then select the DWORD (32-bit) option from the dropdown menu.
4. Lastly, name the new key as ToastEnabled, set the new key’s Value data to 1, and save it by clicking on OK.
Once all the changes are saved, restart your Windows PC and confirm the issue’s status.
11. Stop & Restart Windows Push Notification System Service
Windows Push Notification System Service is an essential Windows service that helps the system and apps send push notifications. If this Windows service stops working or faces any difficulties in working, then you won’t receive notifications.
Keeping this in mind, we suggest you restart the Windows Push Notification System Service to make sure it’s working correctly and not causing this issue. You can check the steps below to do the same:
1. Open the Run dialog on your Windows 11 PC, type Services.msc in it, and press Enter to open the Services tab.

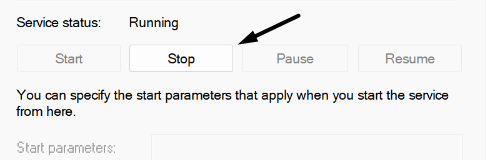
2. In the Services, search for the Windows Push Notification System Service and double-tap on it to move to the properties section.

3. Now, select Stop in the Service status section to halt it, and then click on the Restart option to reinstate it again.
After restarting the Windows Push Notification System Service, check if the issue is fixed.
12. Disable Fast Startup
Most Windows 11 PC’s come with Fast startup pre-enabled, which accelerates the startup process by not booting unnecessary programs and services. Some users said that keeping this feature enabled can prevent the Windows Push Notification System Service from starting at the system startup, which could cause this issue.
You can check whether it’s creating this issue by disabling the Fast startup feature on your Windows 11 PC. If push notifications work after disabling it, then keep it disabled. So, follow the step below to check the same:
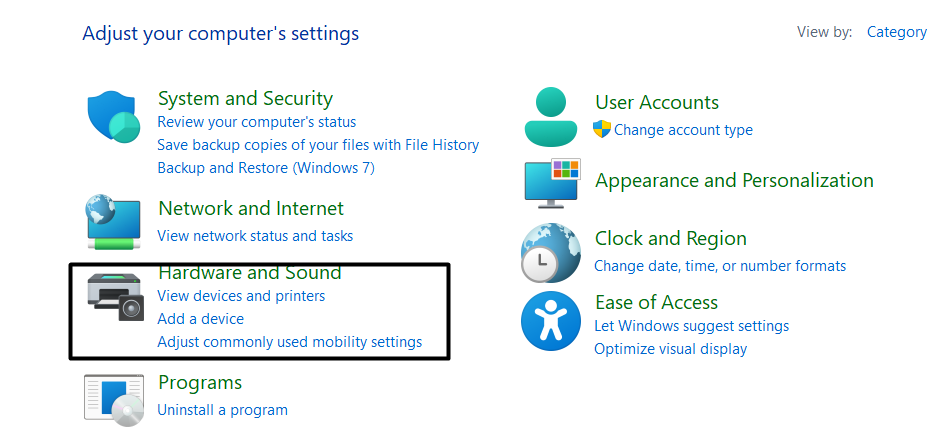
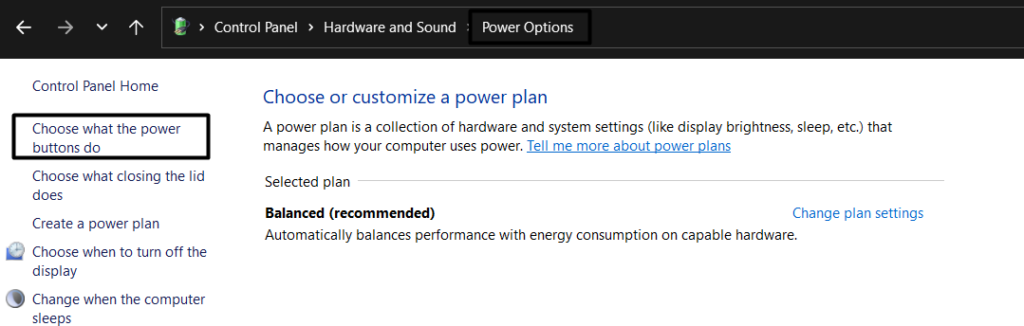
1. To do so, open the Control Panel app, move to the Hardware and Sound section, and then select Power Options from the same window.
2. In the Power Options section, select the Choose what the power button do option from the left side menu.
3. Then, click on Change settings that are currently unavailable and then deselect the Turn on fast startup (recommended) option under the Shutdown settings section.
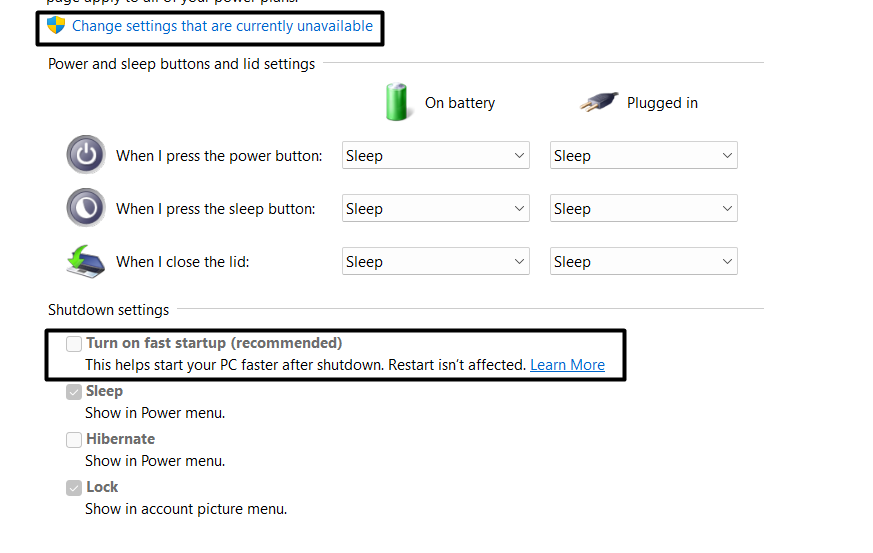
4. Once done, click on the Save changes option and then close the Control Panel window to check the issue’s status.

13. Update Your Windows PC
If the notifications not working issue still exists, then there is a higher chance of this happening because of bugs and glitches in the operating system. Microsoft releases new updates to fix these bugs and glitches and to improve the OS’s stability and smoothness.
You can also try updating your Windows 11 PC to the newest version and see if it fixes the issue. Please check the steps below to update your Windows 11 PC:
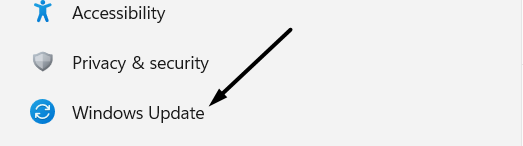
1. Launch the Settings app on your Windows 11 PC and move to the Windows Update section from the left navigation menu.
2. Subsequently, click on Check for updates to check for new Windows updates that are available for download and install.

3. In case it finds some new Windows updates, click on Download and install all to install all the pending updates on your Windows 11 PC.

We hope the new updates fixed the issue.
14. If Nothing Works, Reset the PC
If none of the above-mentioned workarounds fix the issue, then you can factory reset your Windows 11 PC. Doing so will remove all the problematic bugs and glitches from the system and fix the issue with ease. So, if you’re ready to factory reset your Windows 11 PC, then follow the steps mentioned below:
1. To start, open the Settings app using the Windows + I keyboard shortcut and navigate to the Recovery section.

2. Next, click on the Reset PC option in the Recovery options section to get the Reset PC prompt on your screen.
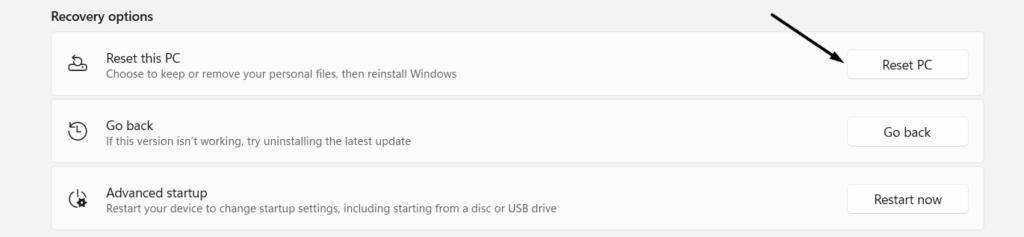
3. Lastly, select Remove Everything and follow the on-screen prompts to begin resetting your Windows 11 PC.

Once the PC is formatted, check if notifications are now working.
Frequently Asked Questions
How Do I Fix Windows Notification Not Working?
If you’re not receiving push notifications on your Windows PC, then we suggest reinstating the Windows Push Notification System Service. You can check Fix 11 to know how to restart it. If this doesn’t fix the issue, you can then try disabling Fast startup on your Windows PC. For that, we suggest checking Fix 12.
How Do I Turn On Notifications for Windows?
Follow the below-mentioned steps to turn on notifications on your Windows 11 PC:
- To do so, open Settings on your Windows PC and navigate to the Notifications tab from the System section.
- In the Notifications section, enable the Notifications toggle at the top to start receiving notifications in the Notifications Center.
That’s it!
Why Am I Not Getting Notifications on Windows 11?
You may haven’t enabled the notifications on your Windows 11 PC, which is why you aren’t receiving them in the Notifications Center. To check whether notifications are enabled on your PC, check Fix 2, as it demonstrates the same. Another reason behind this could be the ill-functioning Windows Explorer utility. You can check Fix 6 to restart Windows Explorer and make it work properly.
How Do I Reset Windows 11 Notifications?
Here are the steps to reset your Windows 11 PC’s notifications settings:
- First, use the Ctrl + Shift + Enter keyboard shortcut to open the Task Manager utility on your Windows 11 PC.
- Now, search for the Windows Explorer task, select it, and then click on Restart task in the top menu.
That’s it!
Why Am I Not Getting Notifications Even Though It’s On?
There could be several causes for not receiving notifications on a Windows 11 PC. But one of the most common reasons is corrupted or missing system files. In that case, you can try running the DISM and SFC scans by following the instructions mentioned in Fix 7. But before trying the previous solution, make sure to restart your PC.
Try Checking Notifications Now
We have to admit that notifications make our daily life so smooth and easy. But, when they don’t work, it creates chaos too. Sadly, it’s not working for a lot of Windows 11 users. And to help the affected users, we shared some working workarounds in this article.
Hopefully, the mentioned solutions helped you overcome the notifications not working issue. Also, make sure to let us know which of the mentioned solutions helps you fix the issue.
04.09.2023
Центр уведомлений Windows (Action Center, Notification Center) отвечает за отображение уведомлений самого разного характера: от вышедших обновлений для ОС до событий календаря и оповещений установленных программ. Когда приходит новое уведомление, оно ненадолго появляется в правом нижнем углу экрана, а затем сохраняется в Центре уведомлений, доступ к которому можно всегда получить через панель задач.
Иногда по разным причинам возникает проблема, при которой Action Center не открывается в Windows. Пользователи не получают сообщения о входящих электронных письмах, системных обновлениях или напоминаниях, что конечно значительно снижает эффективность работы в Windows.
- Перезапуск Проводника
- Перерегистрация Action Center
- Установка обновлений Windows
- Исправление поврежденных системных файлов
- Изменение реестра
В этой статье рассмотрим 5 рабочих способов исправить возникшую проблему с Центром уведомлений в Windows 10 и 11. Рекомендую применять их по очереди именно в том порядке, как они перечислены, до тех пор, пока ваша проблема не будет решена.
1. Перезапуск Проводника
Первое, что может помочь при проблемах с Notification Center – перезагрузка проводника Windows. Для этого выполните следующее:
- Нажмите одновременно на клавиатуре Ctrl+Shift+Esc
- В открывшемся окне Диспетчера задач найдите процесс проводника Windows (explorer.exe) среди запущенных процессов
- Щелкните на этом процесса правой кнопкой мыши
- В появившемся контекстном меню выберите пункт «Перезапустить»
- Проверьте работу Центра уведомлений

2. Перерегистрация Action Center
- Нажмите правой кнопкой мыши на иконке Пуск панели задач
- Выберите «Выполнить»
- В появившемся окне наберите powershell и нажмите ОК

Скопируйте и вставьте в окно Терминала (командную строку) следующую команду, после чего нажмите ENTER
Get-AppXPackage | Foreach {Add-AppxPackage -DisableDevelopmentMode -Register “$($_.InstallLocation)\AppXManifest.xml”}

Выполнение процесса перерегистрации может занять некоторое время, поэтому важно дождаться завершения процесса. Затем перезагрузите компьютер и проверьте сохранилась ли проблема с Центром уведомлений.
3. Установка обновлений Windows
Порой многие проблемы операционной системы удается решить установкой свежих обновлений. Предлагаю воспользоваться этой возможностью, тем более что сделать это очень легко.
- Нажмите сочетания клавиш WIN+I на клавиатуре
- В левой части окна Параметров выберите Центр обновления Windows
- Нажмите кнопку «Проверить наличие обновлений»

Установите обновления, если таковые будут доступны, после чего перезагрузите ПК.
4. Исправление поврежденных системных файлов
В ходе работы ОС системные файлы могут быть повреждены по различным причинам. Запустим проверку этих файлов и убедимся, что с ними всё в порядке. Если какой-то файл окажется поврежденным – он будет исправлен.
- Запустите Терминал, как было описано выше.
- Введите sfc /scannow и нажмите ENTER. Это запустит встроенную в Windows утилиту System Files Checker

В процессе выполнения задачи на экране будет отображаться информация о ходе сканирования. Дождитесь полного завершения проверки!
Если System Files Checker обнаружил ошибки, введите в терминал следующие команды, нажимая ENTER после каждой:
DISM /Online /Cleanup-Image /CheckHealth
DISM /Online /Cleanup-Image /ScanHealth
DISM /Online /Cleanup-Image /RestoreHealth
Перезагрузите ПК и проверьте корректность работы Центра уведомлений.
5. Изменение реестра
- Нажмите сочетание клавиш Win+R на клавиатуре
- В появившемся окошке введите regedit и нажмите ОК
Откроется редактор реестра. В нем:
- Найдите следующую ветку: Компьютер\HKEY_CURRENT_USER\Software\Policies\Microsoft\Windows\Explorer\
- Дважды кликните по ключу DisableNotificationCenter
- Назначьте ему значение 0

Если вы не можете найти раздел Explorer в вышестоящем разделе Windows, то нужно его создать.
- Кликните правой клавишей мыши на разделе Windows в окне редактора реестра
- Выберите «Создать» — «Раздел»
- Назовите новый раздел Explorer
- Зайдите в него

Теперь создадим новый параметр внутри раздела Explorer:
- В правой части панели редактора реестра нажмите правую клавишу мыши
- Выберите «Создать» — «Параметр DWORD (32-bit)»
- Назовите его DisableNotificationCenter

Закройте редактор реестра и перезапустите компьютер. Проверьте исправлена ли проблема с неработающим Центром уведомлений.
Похожие публикации:
- Кек – что это значит и когда употребляется в онлайн общении
- 1080p или 4K — есть ли ощутимая разница?
- Как расширить возможности Windows 10 при помощи Microsoft PowerToys
- Как настроить поиск в Яндекс и его главную страницу
- Как прямо с картинки скопировать текст?
Понравилось? Поделитесь с друзьями!

Сергей Сандаков, 43 года.
С 2011 г. пишу обзоры полезных онлайн сервисов и сайтов, программ для ПК.
Интересуюсь всем, что происходит в Интернет, и с удовольствием рассказываю об этом своим читателям.