Содержание
- 1 Загрузка и установка VirtualBox на Windows 10
- 2 Установка виртуальной машины на windows 10
- 3 Добавление общей папки
- 4 Итог
- 5 Видео по теме
На сегодняшний день существует много программных продуктов, позволяющие использовать виртуализацию для различных операционных систем. Наиболее интересным продуктом является программа VirtualBox, которую выпускает и поддерживает корпорация Oracle.
Эта программа распространяется по лицензии GNU GPL, что дает право использовать ее абсолютно бесплатно. Главной задачей VirtualBox является виртуализация операционных систем, то есть с помощью программы вы создаете виртуальную машину, на которой запускаете ОС. В данной статье мы подробно рассмотрим установку VirtualBox на новейшую операционную систему компании Microsoft — Windows 10.
Загрузка и установка VirtualBox на Windows 10
Для скачивания VirtualBox откройте любой установленный браузер в Windows 10 и перейдите по адресу www.virtualbox.org/wiki/Downloads. Перед вами откроется страница загрузки программы.

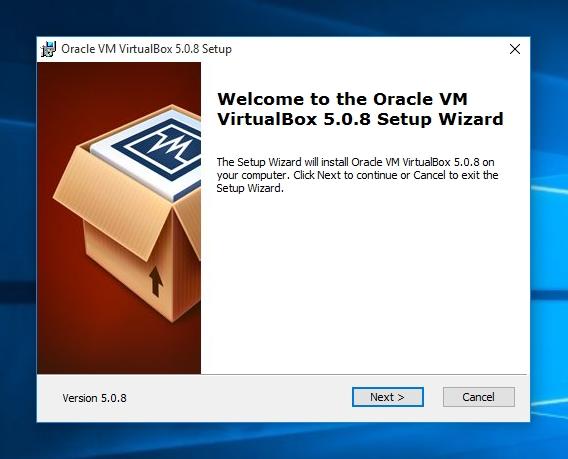
В данный момент VirtualBox 5.0.8 является самой новой версией программы и полностью совместима с Windows 10. Поэтому смело скачивайте эту версию, на которую ссылка находится в пункте «VirtualBox 5.0.8 for Windows hosts». После загрузки запустите инсталляционный файл, после чего откроется окно установки программы.
Нажимаем кнопку Next > и переходим к окну, где вам будет предоставлен выбор трех устанавливаемых компонентов:
- Virtualbox USB Support;
- Virtualbox Networking;
- Virtualbox Python 2 x Support.
Первый компонент отвечает за поддержку USB устройств, подключаемых к виртуальному компьютеру. Второй компонент отвечает за поддержку сети в такой машине, с его помощью создаются виртуальные сетевые адаптеры и устанавливаются драйвера для взаимодействия виртуальных адаптеров с физическими. Третий компонент устанавливается для поддержки скриптов, которые создаются на языке программирования Python.
Главной задачей скриптов является автоматизация задач в виртуалке. Также при нажатии кнопки Browse можно задать расположение установки исполняемых файлов.

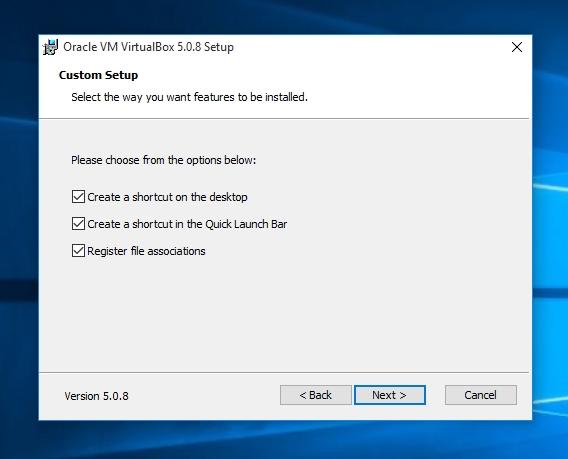
Следующее окно позволит создать ярлыки на рабочем столе и в меню пуск, а также позволит ассоциировать файлы виртуальных машин для работы в VirtualBox.
Далее идет окно с предупреждением «Warning Network Interface». Это окно означает, что следует установить дополнительные сетевые инструменты для виртуальных машин. Поэтому смело нажимайте кнопку Yes.

Теперь переходим к последнему окну инсталляции и нажимаем кнопку Install.

Начнется процесс инсталляции программы на компьютер, который займет пару минут.

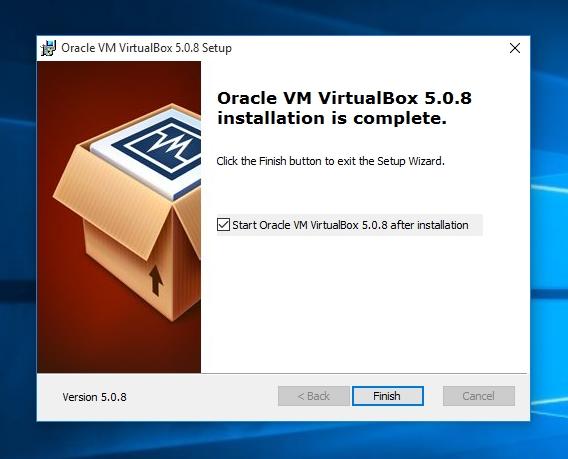
Как только инсталлятором будет завершена установка, появится окно с оповещением, что программа установлена. Также в окне будет стоять галочка с надписью «Start Oracle VM VirtualBox», которая позволит вам запустить VirtualBox после нажатия кнопки Finish.
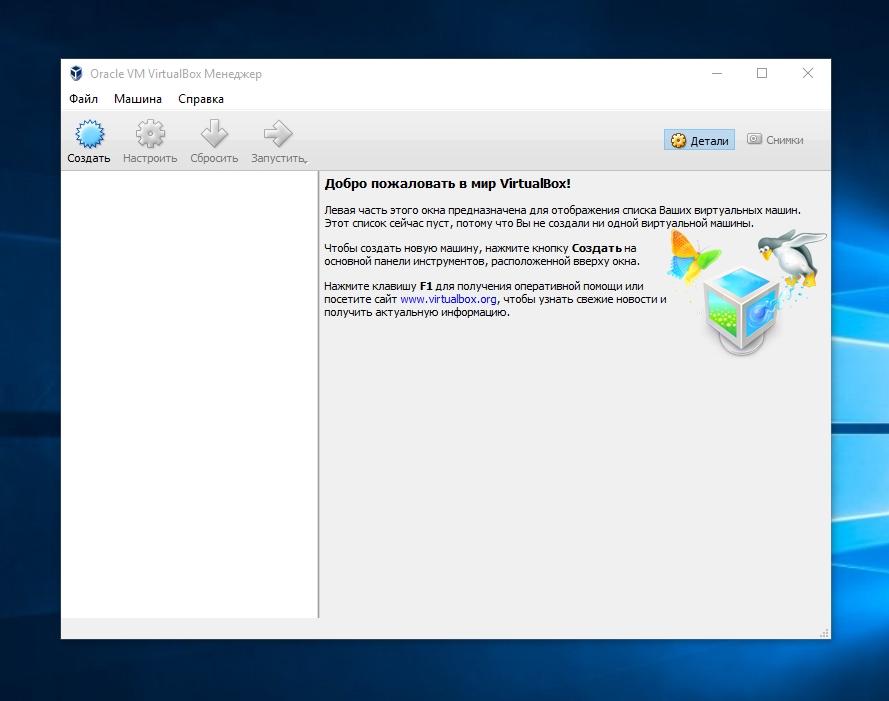
После всех проделанных действий запустится главное окно программы, как показано на изображении ниже.
Установка виртуальной машины на windows 10
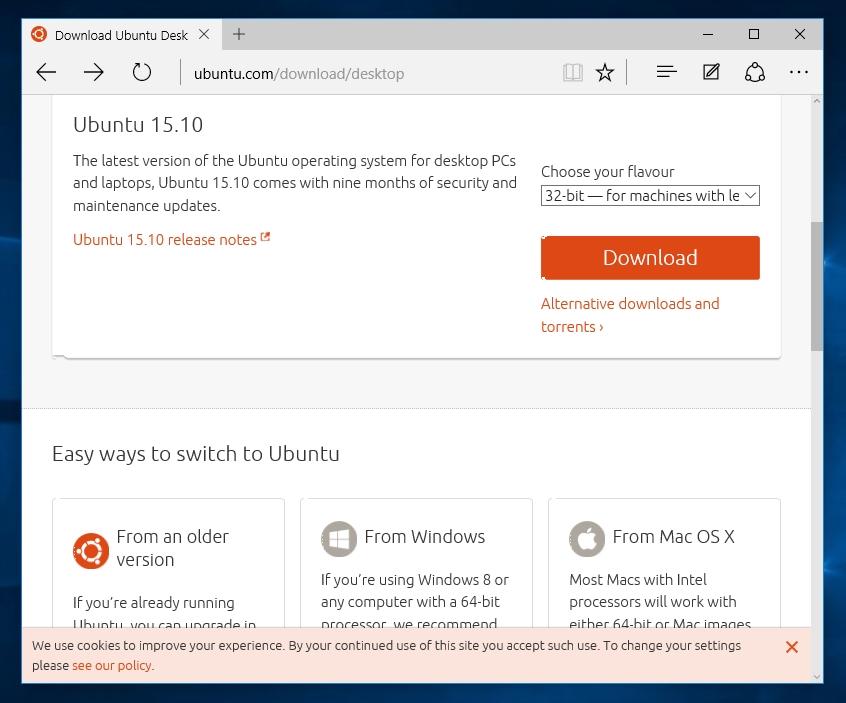
Вначале вы должны решить, для какой операционной системы создается виртуальная машина. Поэтому для начала подготовим образ ОС для инсталляции в нашу машину. Для примера мы возьмем образ бесплатной ОС Linux Ubuntu, который можно загрузить по адресу www.ubuntu.com/download/desktop. Выберем 32 битный образ Ubuntu и скачаем его на локальный диск ПК. Самым последним релизом Ubuntu является версия 15.10.
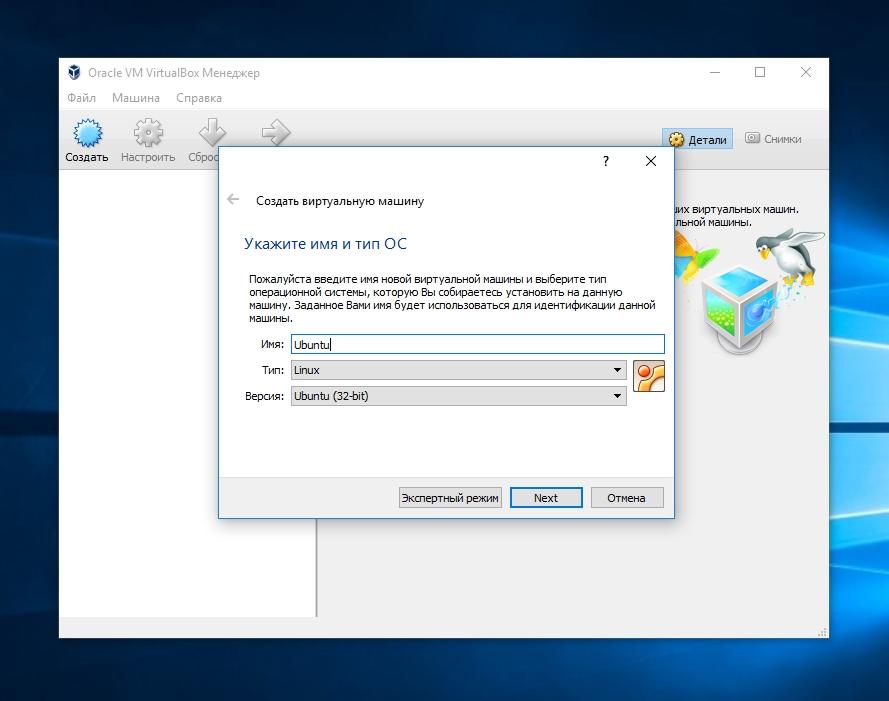
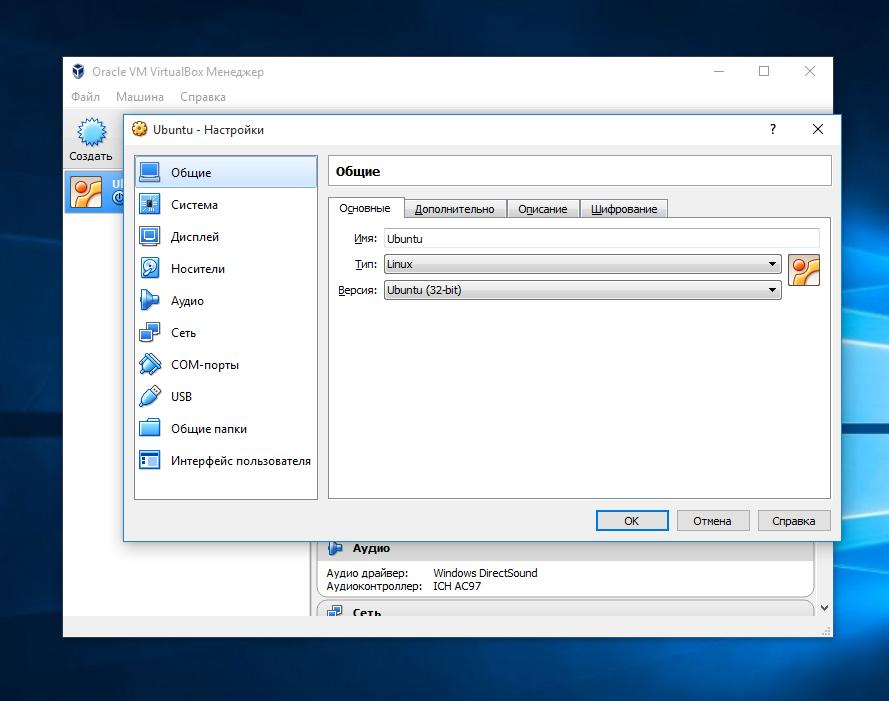
Теперь разберемся с таким наболевшим вопросом, как установить виртуальную машину на Windows 10. Для этого запускаем VirtualBox и нажимаем кнопку «Создать». В появившемся окне создаем имя виртуальной машины. Тип системы выбираем Linux, версию Ubuntu и переходим к следующему шагу.
Теперь укажем объем памяти, выделяемой для нашей виртуальной машины.

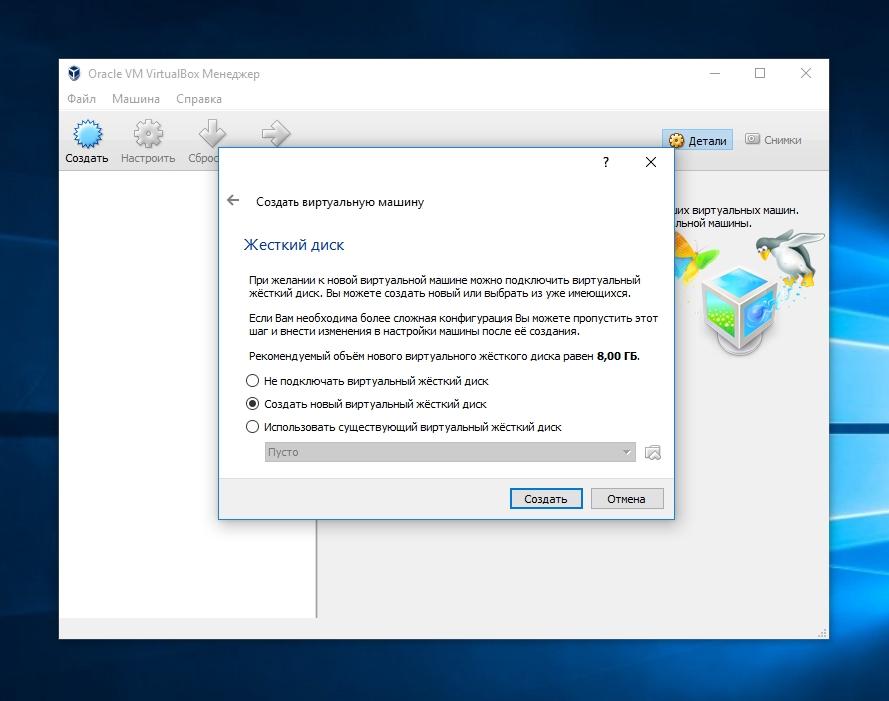
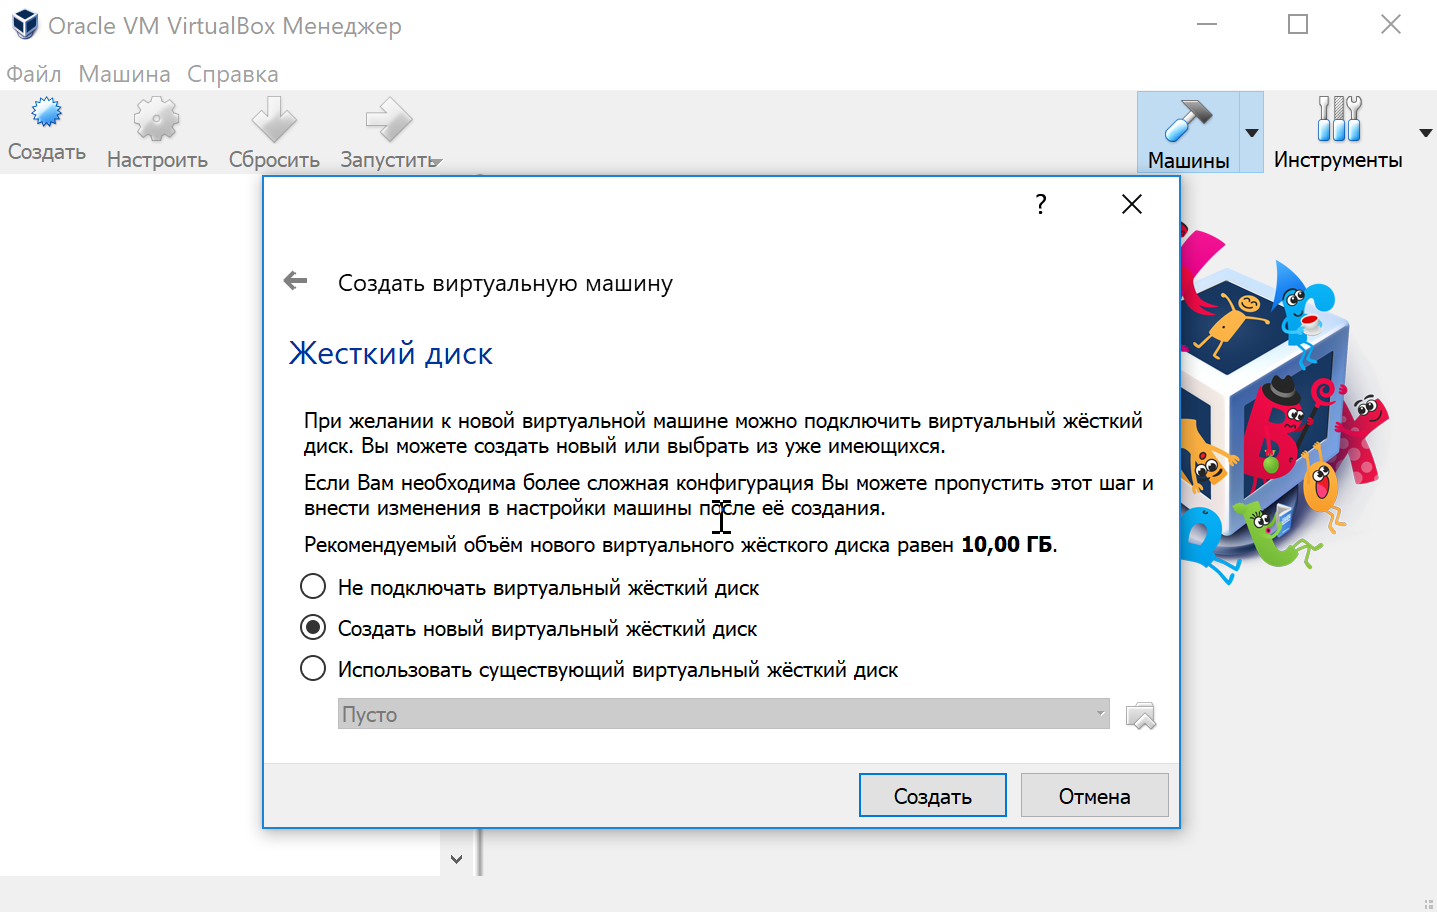
Следующим шагом будет создание виртуального диска, поэтому выбираем «создать новый виртуальный диск», нажимаем кнопку Создать и переходим к следующему окну.
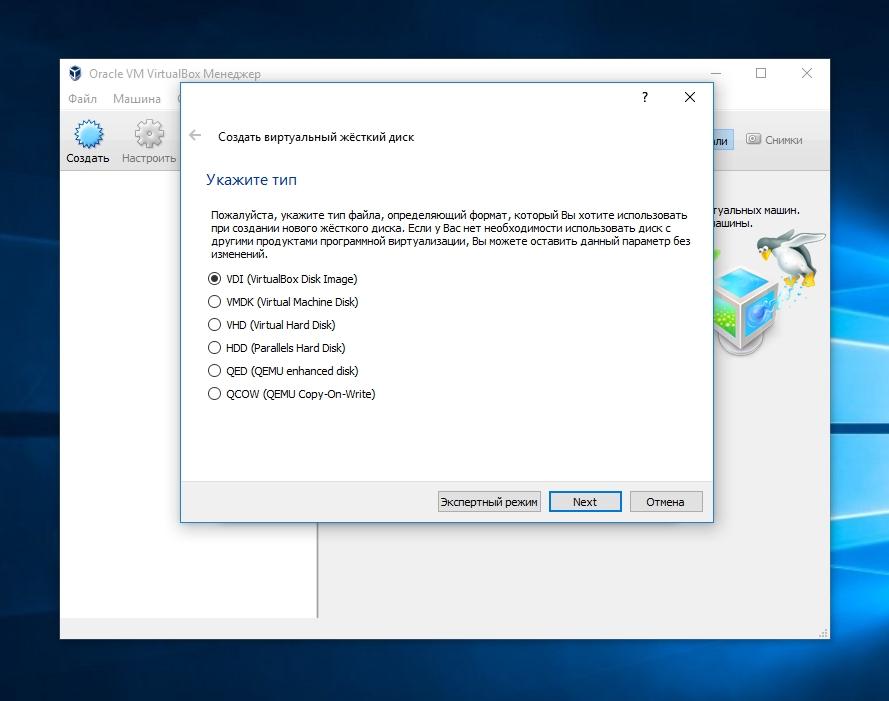
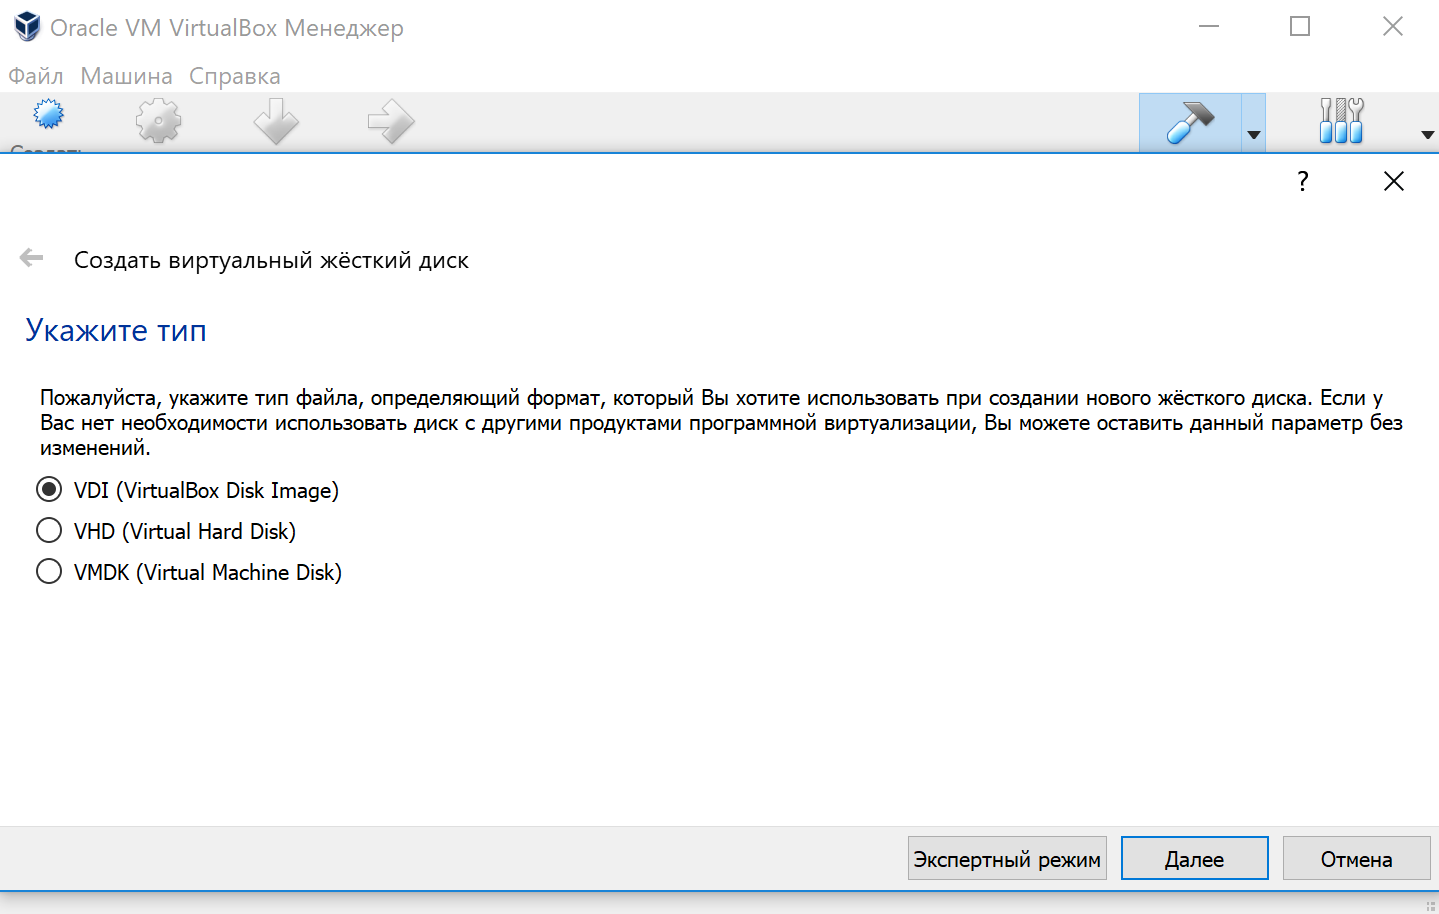
Укажем тип нашего жесткого диска, поставив галочку «VDI».
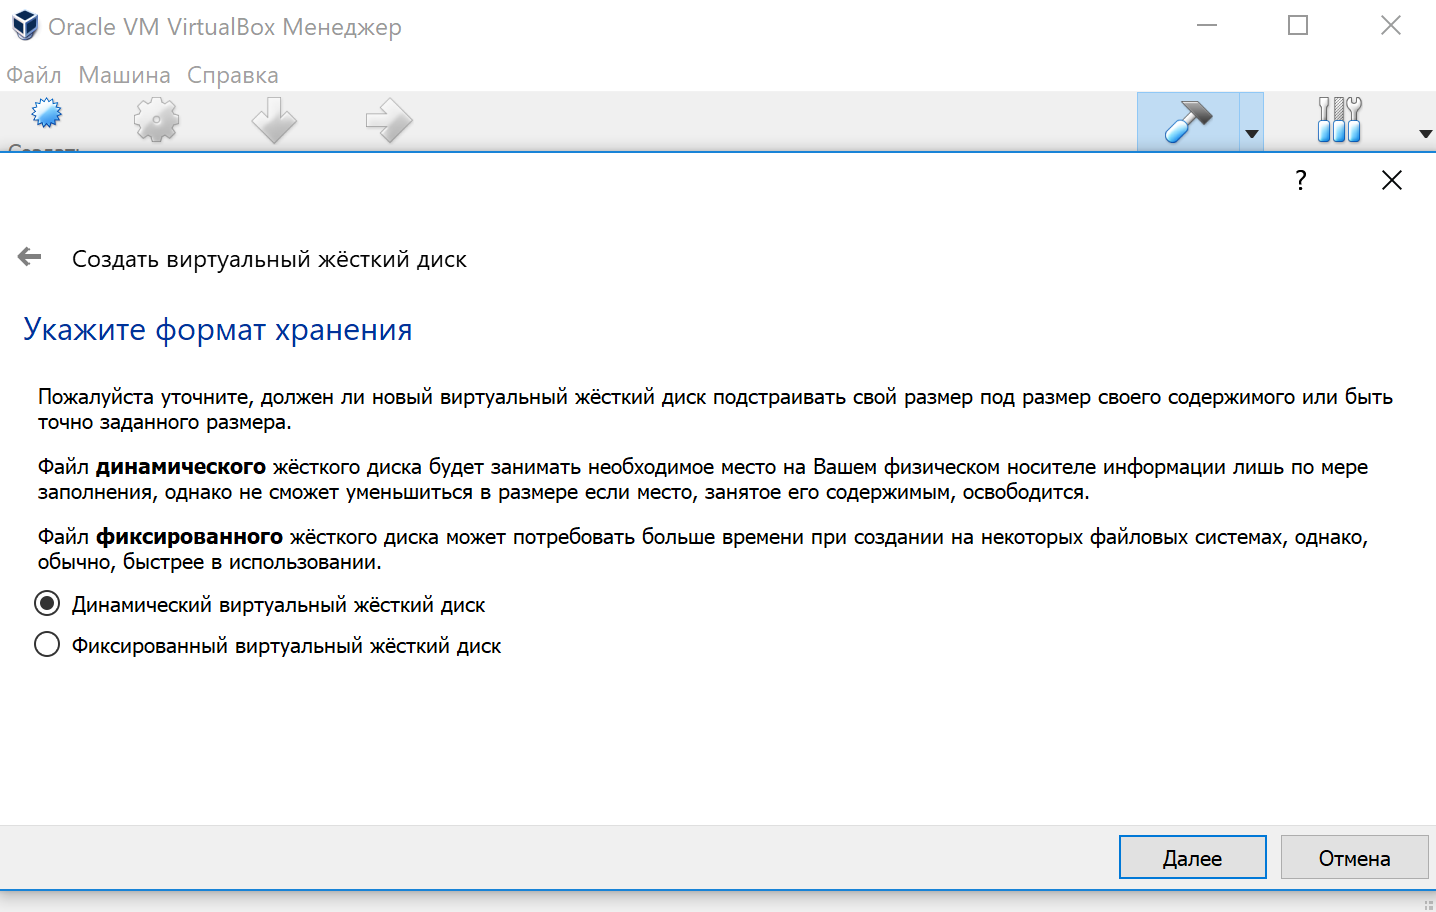
Создадим динамический жесткий диск, который будет заполняться по мере записи на него информации, затем нажмем клавишу Next

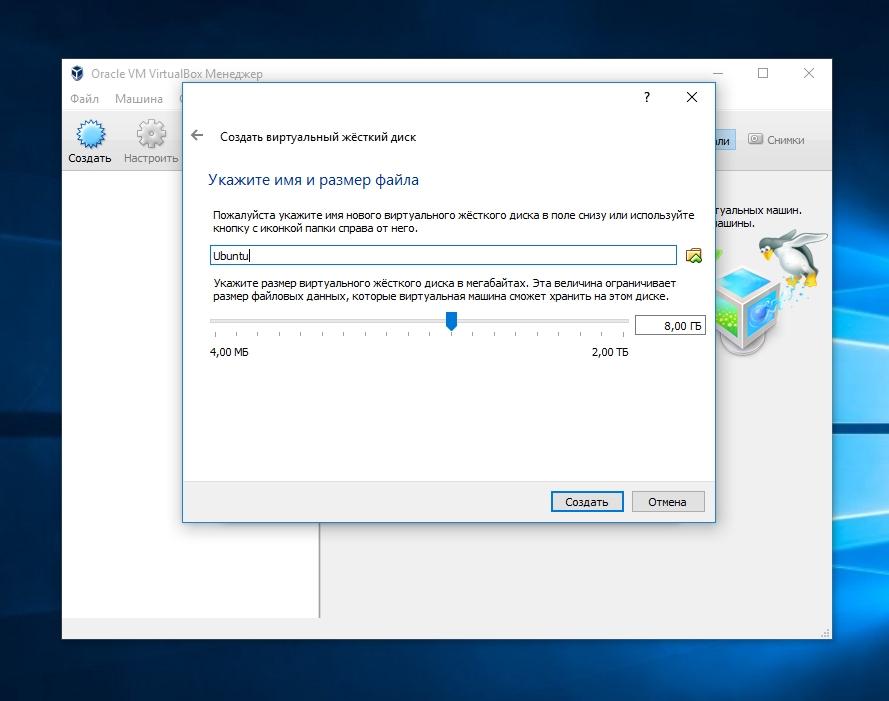
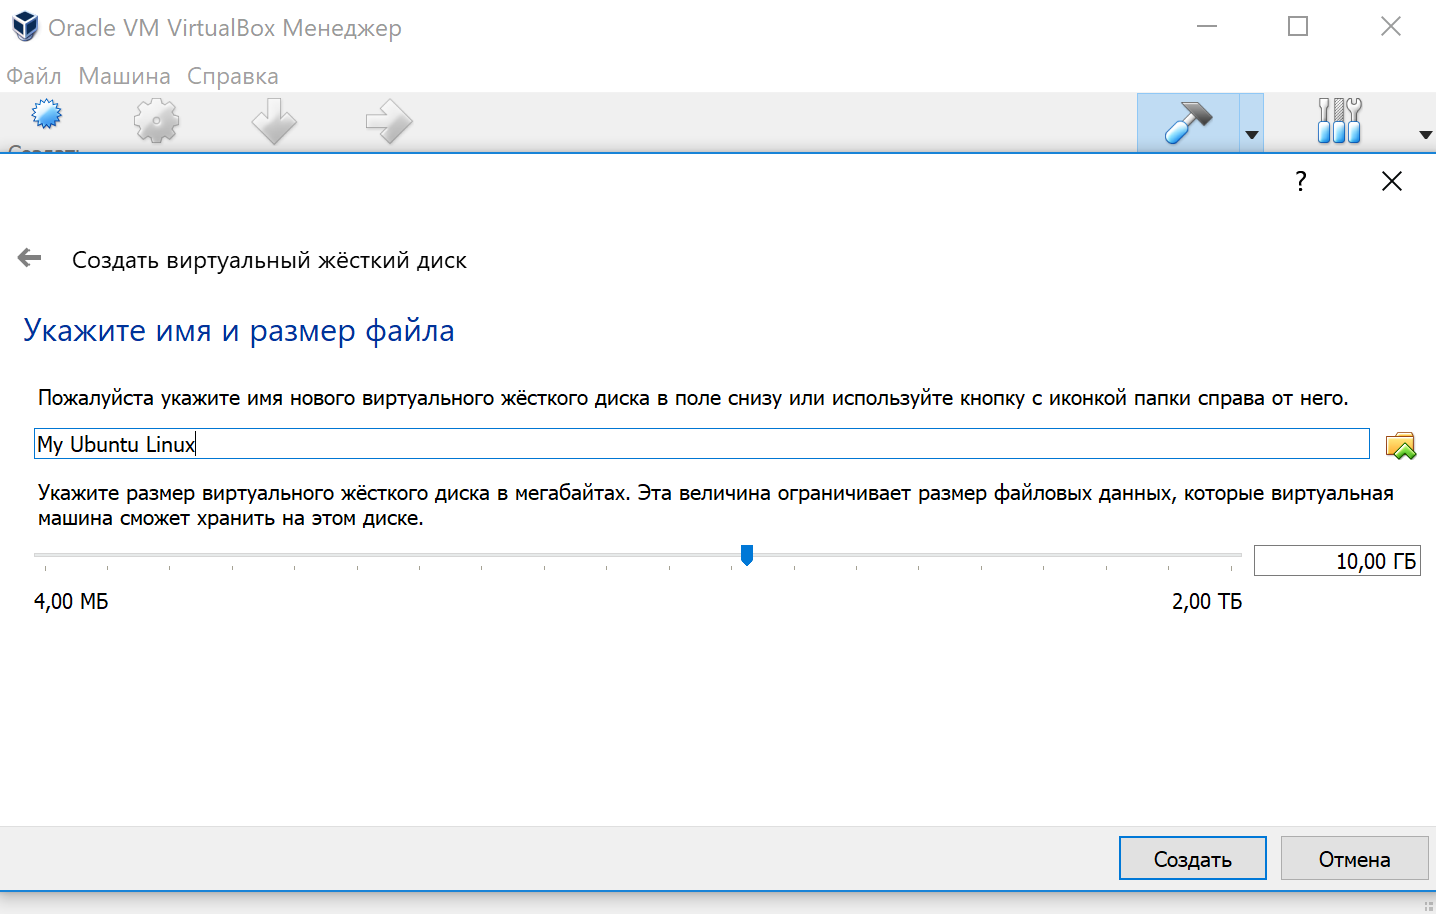
Выберем имя и необходимый размер диска, наиболее вам подходящий и надавим кнопку Создать.
Все, наша виртуальная машина создана, в настройках которой можно изменять объем памяти, подключать и редактировать виртуальные жесткие диски, редактировать конфигурацию и настройки сети, задавать объем памяти видеоадаптера, а также задавать опции нагрузки на ваш процессор. Это лишь малая часть описанных настроек. Установив VirtualBox, вы сможете более подробно разобраться во всех тонкостях настройки конфигурации машины.

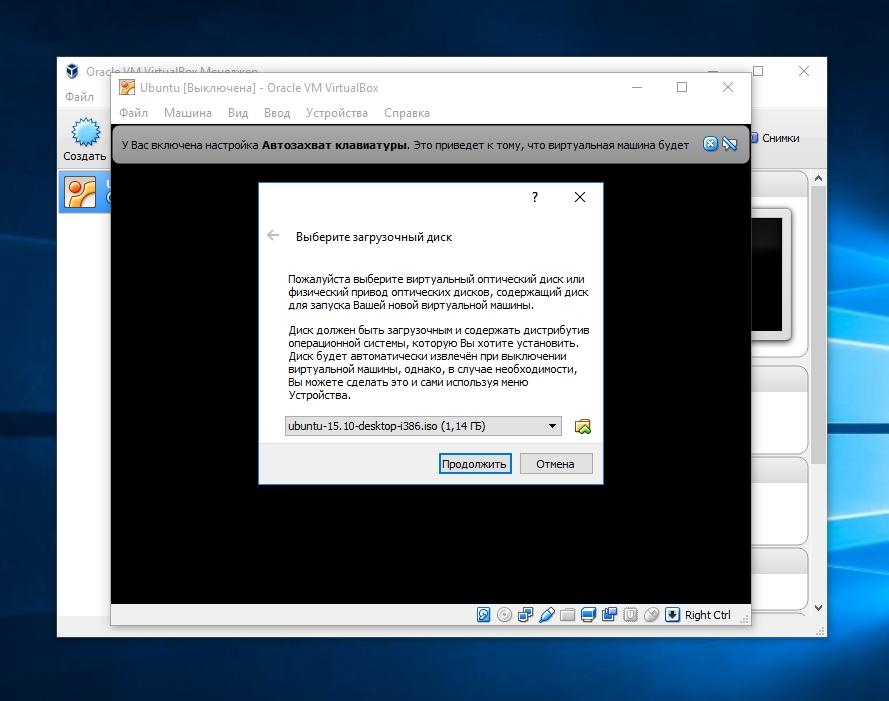
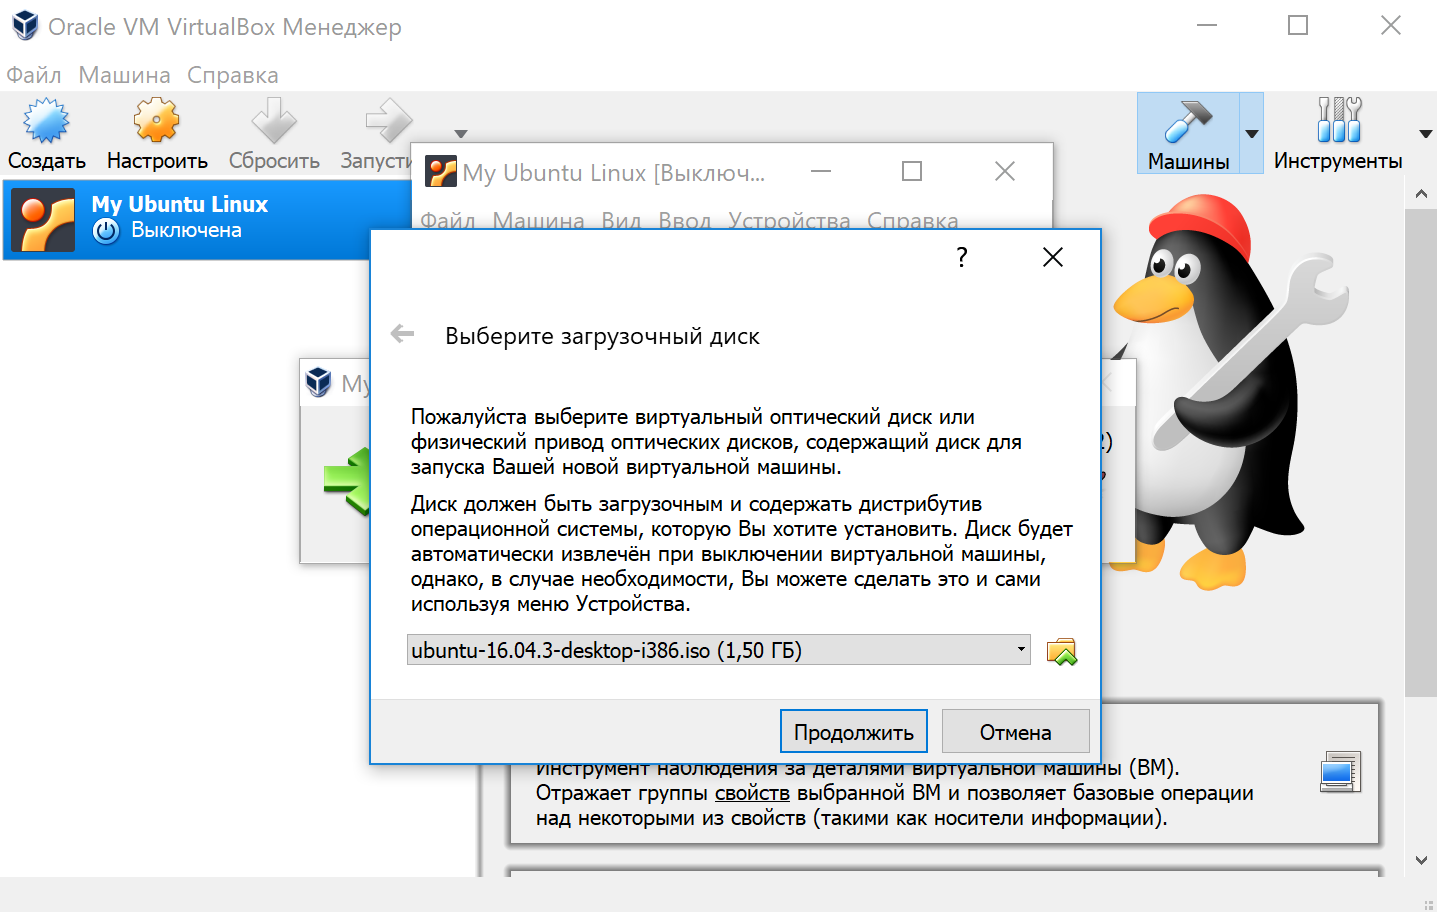
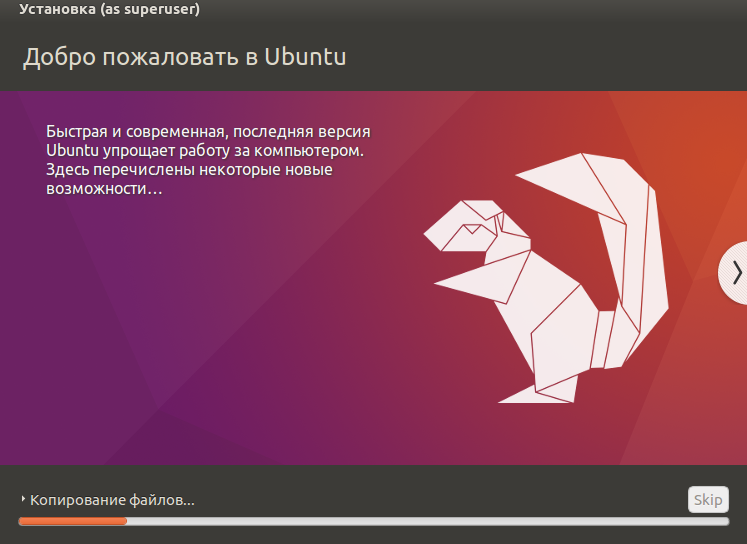
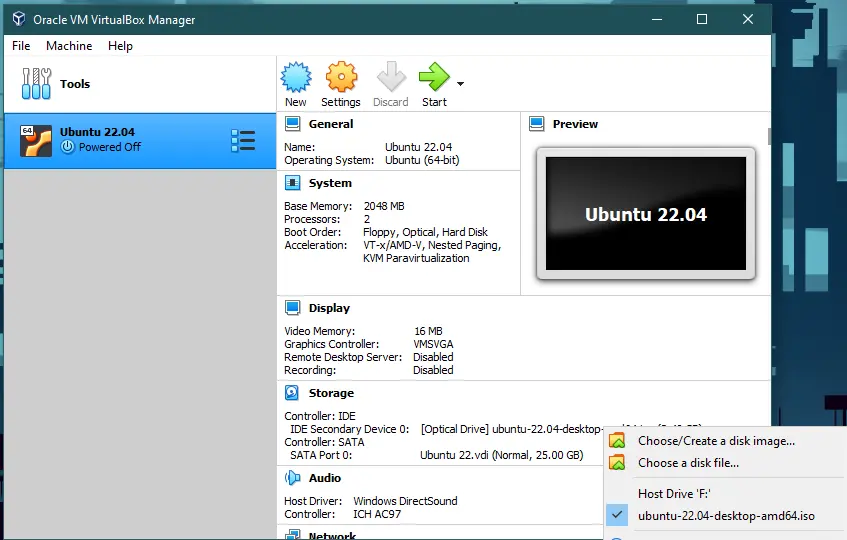
Создание нашего виртуального Linux компьютера закончено, теперь можно его запустить, кликнув по зеленой кнопке «Запустить». При запуске виртуальная машина предложит вам выбрать загрузочный диск. Выберите загрузочный диск ubuntu-15.10-desktop-i386.iso, который мы ранее скачали и нажмите Продолжить.
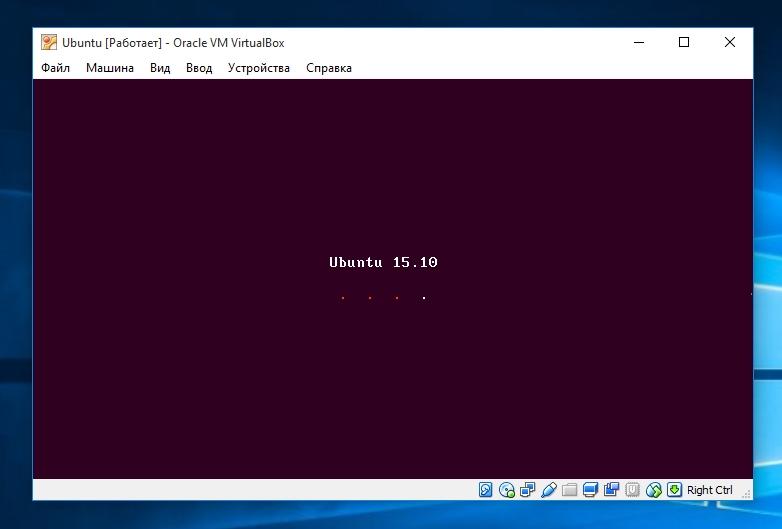
Как вы уже поняли, система начнет грузиться с выбранного нами образа.
Далее идет стандартная установка операционной системы, при которой вам предстоит выбрать жесткий диск, часовой пояс, раскладку клавиатуры, а также задать имя компьютера и пользователя. То есть дальнейшая установка пойдет так, как будто вы ставите Ubuntu на чистый компьютер.

После установки вы сможете использовать виртуальную машину как отдельный компьютер и использовать все возможности ОС Ubuntu, которые отсутствуют в Windows 10.
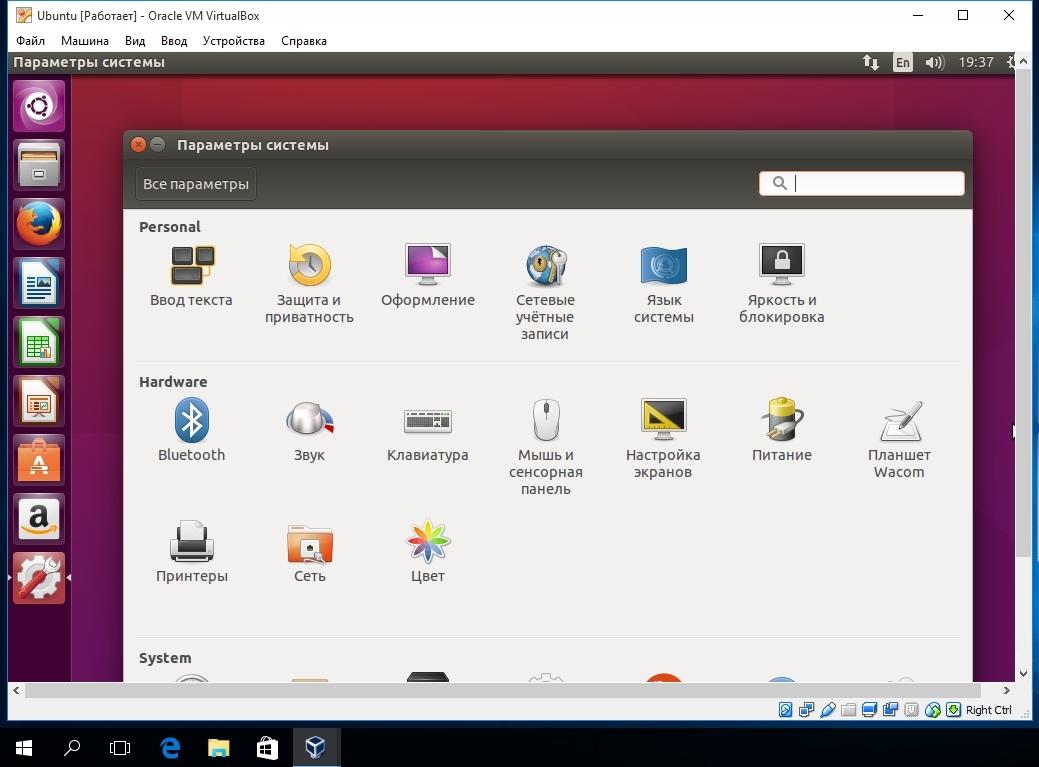
В VirtualBox можно настраивать конфигурацию на установленной виртуальной машине. Например, если вашему виртуальному компьютеру не хватает оперативной памяти, то ее можно быстро увеличить, перейдя в настройки виртуалки. Попасть в меню настройки можно при помощи нажатия кнопки «Настройки», предварительно выбрав редактируемую виртуалку.
В меню настройки вы увидите десять пунктов:
- Общие;
- Система;
- Дисплей;
- Носители;
- Аудио;
- Сеть;
- COM-порты;
- USB;
- Общие папки;
- Интерфейс пользователя.
Первый пункт позволяет изменять имя ВМ и тип операционной системы.
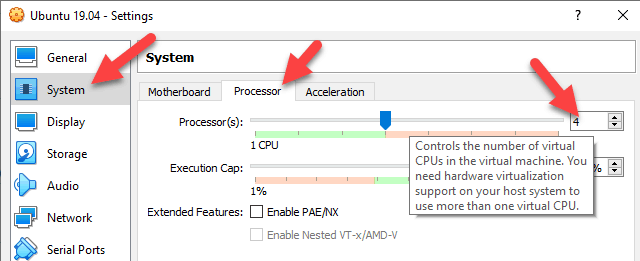
Второй позволяет изменять объем виртуальной памяти и порядок загрузки носителей информации. Также в этом пункте можно редактировать настройки процессора, выбирать количество ядер для вашей ВМ и включать поддержку технологии аппаратной виртуализации Intel-VT и AMD-V.
С помощью третьего пункта можно изменять объем памяти виртуального видеоадаптера и включать 3D-ускорение.
Пункт «Носители» дает возможность конфигурировать SATA/IDE носители информации и добавлять новые.
«Аудио» позволяет выбрать тип виртуальной звуковой карты.
Пункт «Сеть» может изменять конфигурацию сети, тип сетевого адаптера, а также позволяет подключать новые адаптеры.
Меню «COM-порты» позволяет использовать последовательный COM-порт и изменять его настройки.
С помощью меню «USB» можно включить контроллер USB и выбрать его тип, кроме этого можно добавлять, удалять и редактировать новые устройства USB.
Добавление общей папки
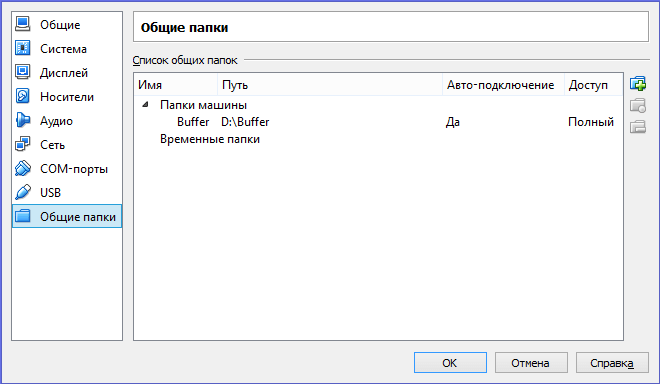
«Общие папки» дают возможность создавать общие директории между ВМ и физической системой. С помощью меню «Интерфейс пользователя» можно настроить интерфейс окна, в котором запущена ВМ.
Создать общую папку, на самом деле не так просто, как хотелось бы, однако, вот точная и работающая инструкция о том, как это сделать:
- Добавьте папку, которую вы хотите сделать общей в системе Windows 10 в разделе «Общие папки» настроек ВМ. Обратите внимание, что вы задаете имя — оно в дальнейшем пригодится.

- Убедитесь, что вы установили диск гостевой ОС в процессе установки ВМ. Если нет, то установите его.
- Далее, загрузите Ubuntu, создайте в ней папку, например, с именем buffer в вашей домашней папке. Через графический интерфейс, или через терминал с помощью команды
sudo mkdir ~/bufferДалее, в терминале введите командуsudo mount -t vboxsf Buffer ~/bufferгде, как вы наверное догадались, «Buffer» — имя папки, которое мы запомнили при выполнении пункта 1 инструкции, а «~/buffer» — путь к только что созданной папке Ubuntu.
Итог
Надеемся, что материал, изложенный в статье, поможет вам освоить методы виртуализации операционных систем, и у вас не будет возникать вопроса, как установить virtualbox на windows 10.
Также хочется дать несколько советов перед использованием виртуальных машин.
Перед созданием такой машины убедитесь, что у вас хватит аппаратных ресурсов компьютера для ее запуска. Поэтому для запуска виртуальных машин используйте мощный процессор, который поддерживает технологии аппаратной виртуализации Intel-VT и AMD-V. Также немаловажную роль играет объем оперативной памяти на вашем ПК. Например, если вы создадите виртуальную машину на базе ОС Windows 10, то вам потребуется минимум 2048 Мб оперативной памяти, которая будет выделена из основной системы.
Кроме этого, в VirtualBox можно использовать пакет плагинов Extension Pack, что существенно расширяет функциональные возможности программы и добавляет поддержку новых устройств.
Видео по теме
Если вы работаете на Windows версии ниже 10 или хотите получить изолированную операционную систему Linux, да ещё и с графическим окружением, то можно воспользоваться сторонним бесплатным программным продуктом под названием VirtualBox.
Общая информация о технологии виртуализации
Вам потребуется:
-
Инсталлятор Oracle VM VirtualBox для Windows Hosts
Ссылка на скачивание: Download Oracle VM VirtualBox -
Образ операционной системы Ubuntu Linux в формате ISO
Ссылка на скачивание: Download Ubuntu Desktop
Для начала необходимо установить и запустить приложение VirtualBox.

Нажимаем кнопку «Создать», выбираем из списка тип операционной системы «Linux», если нет своих предпочтений по дистрибутиву, то выбираем версию «Ubuntu» 32 или 64 битной архитектуры, а название можно ввести любое.

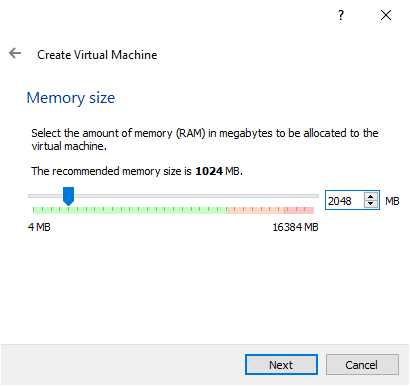
Указываем объём оперативной памяти выделенной под виртуальную систему. Рекомендованный объём составляет 1024 MB.

Указываем объём дискового пространства выделенного под виртуальную систему. Рекомендованный объём составляет 10 GB.
Тип виртуального жёсткого диска можно оставить как есть — VDI (VirtualBox Disk Image).
Формат хранения данных выберите исходя из личных предпочтений. Динамический виртуальный жёсткий диск растёт по мере заполнения, а фиксированный создаётся сразу того размера, который был указан на предыдущем шаге.
Имя и размер файла можно оставить без изменений и сразу нажать на кнопку «Создать».
По завершению у вас будет создана виртуальная машина, но она пока без операционной системы. Для того чтобы её установить, нужно скачать Ubuntu Linux (32-bit или 64-bit, в зависимости от того, что было выбрано на шаге, где мы указывали тип ОС).
Нажатие на кнопку «Запустить» должно привести к появлению диалогового окна с предложением указать путь до скаченного ISO образа. Сделайте этого и нажмите кнопку «Продолжить»
Виртуальная машина автоматически будет выполнять часть процессов, но в некоторых операциях всё же потребуется участие пользователя.
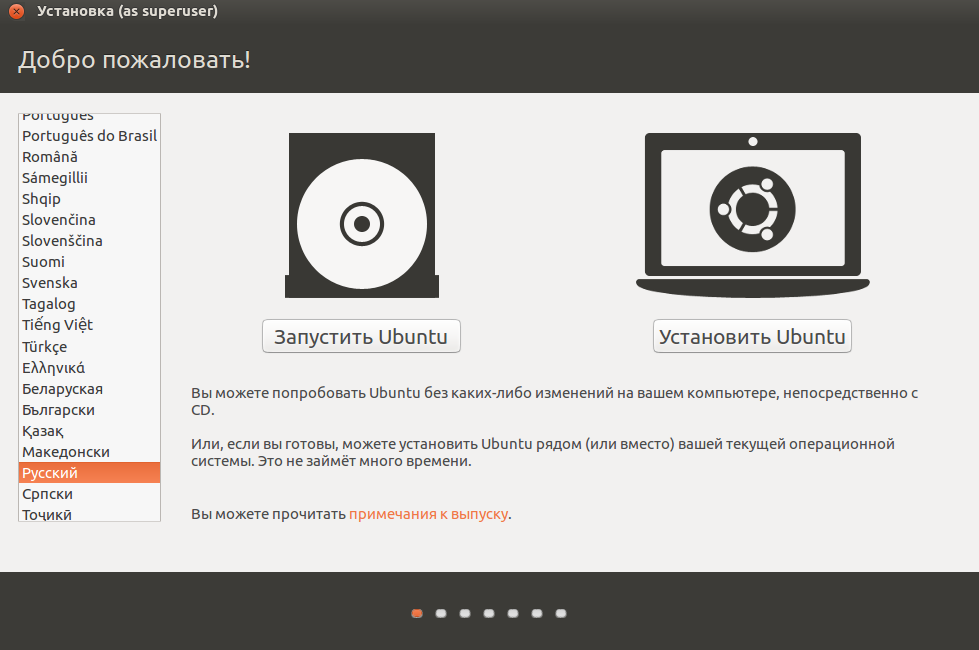
Выберите языковую поддержку в списке слева и нажмите «Установить Ubuntu».
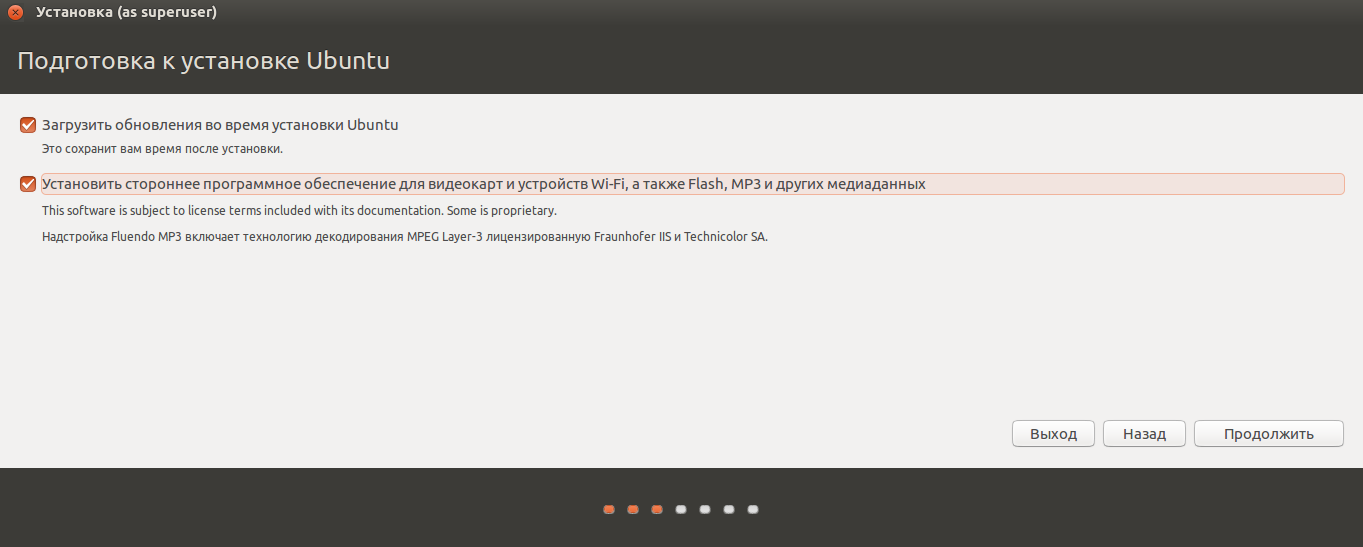
Можно загрузить обновления сразу на этапе установки.
Без особых опасений выбираем пункт «Стереть диск и установить Ubuntu» и двигаемся дальше.
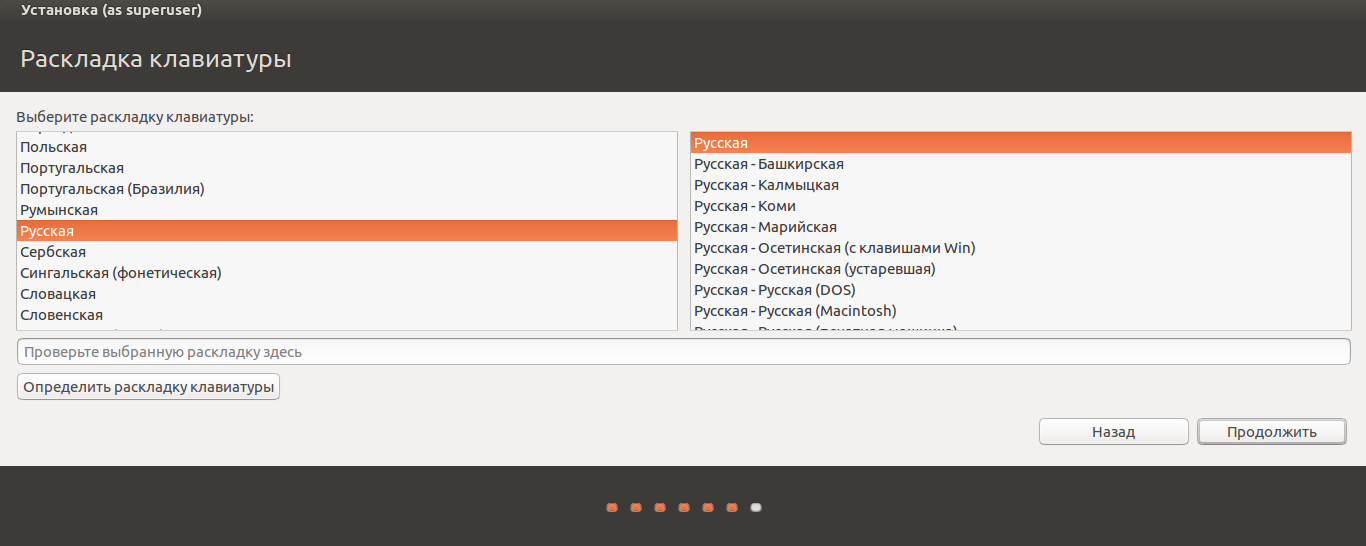
Если вы выбрали русский язык на первом этапе установки, то вам предложат русскую раскладку клавиатуры в качестве дополнительной.
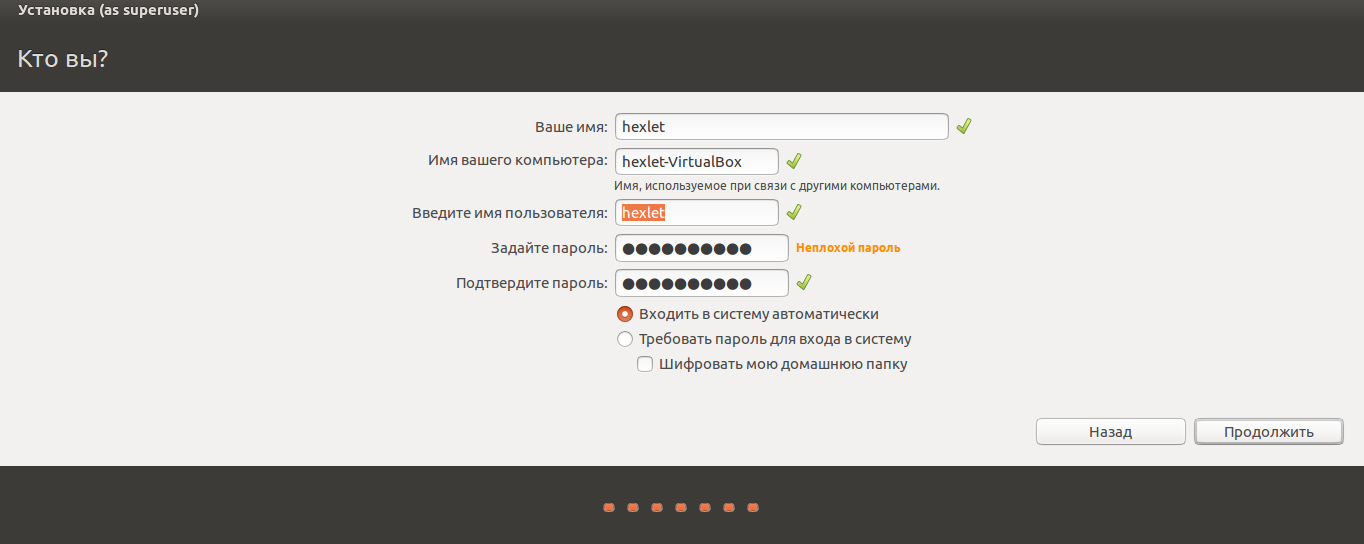
Заполните поля и выберите режим входа в систему.
Далее начнётся процедура разметки диска, переноса файлов, установка обновлений и другие процессы, которые не потребуют прямого участия пользователя.
По завершению виртуальный компьютер перезагрузится и вы попадёте в уже установленную среду Ubuntu Linux.
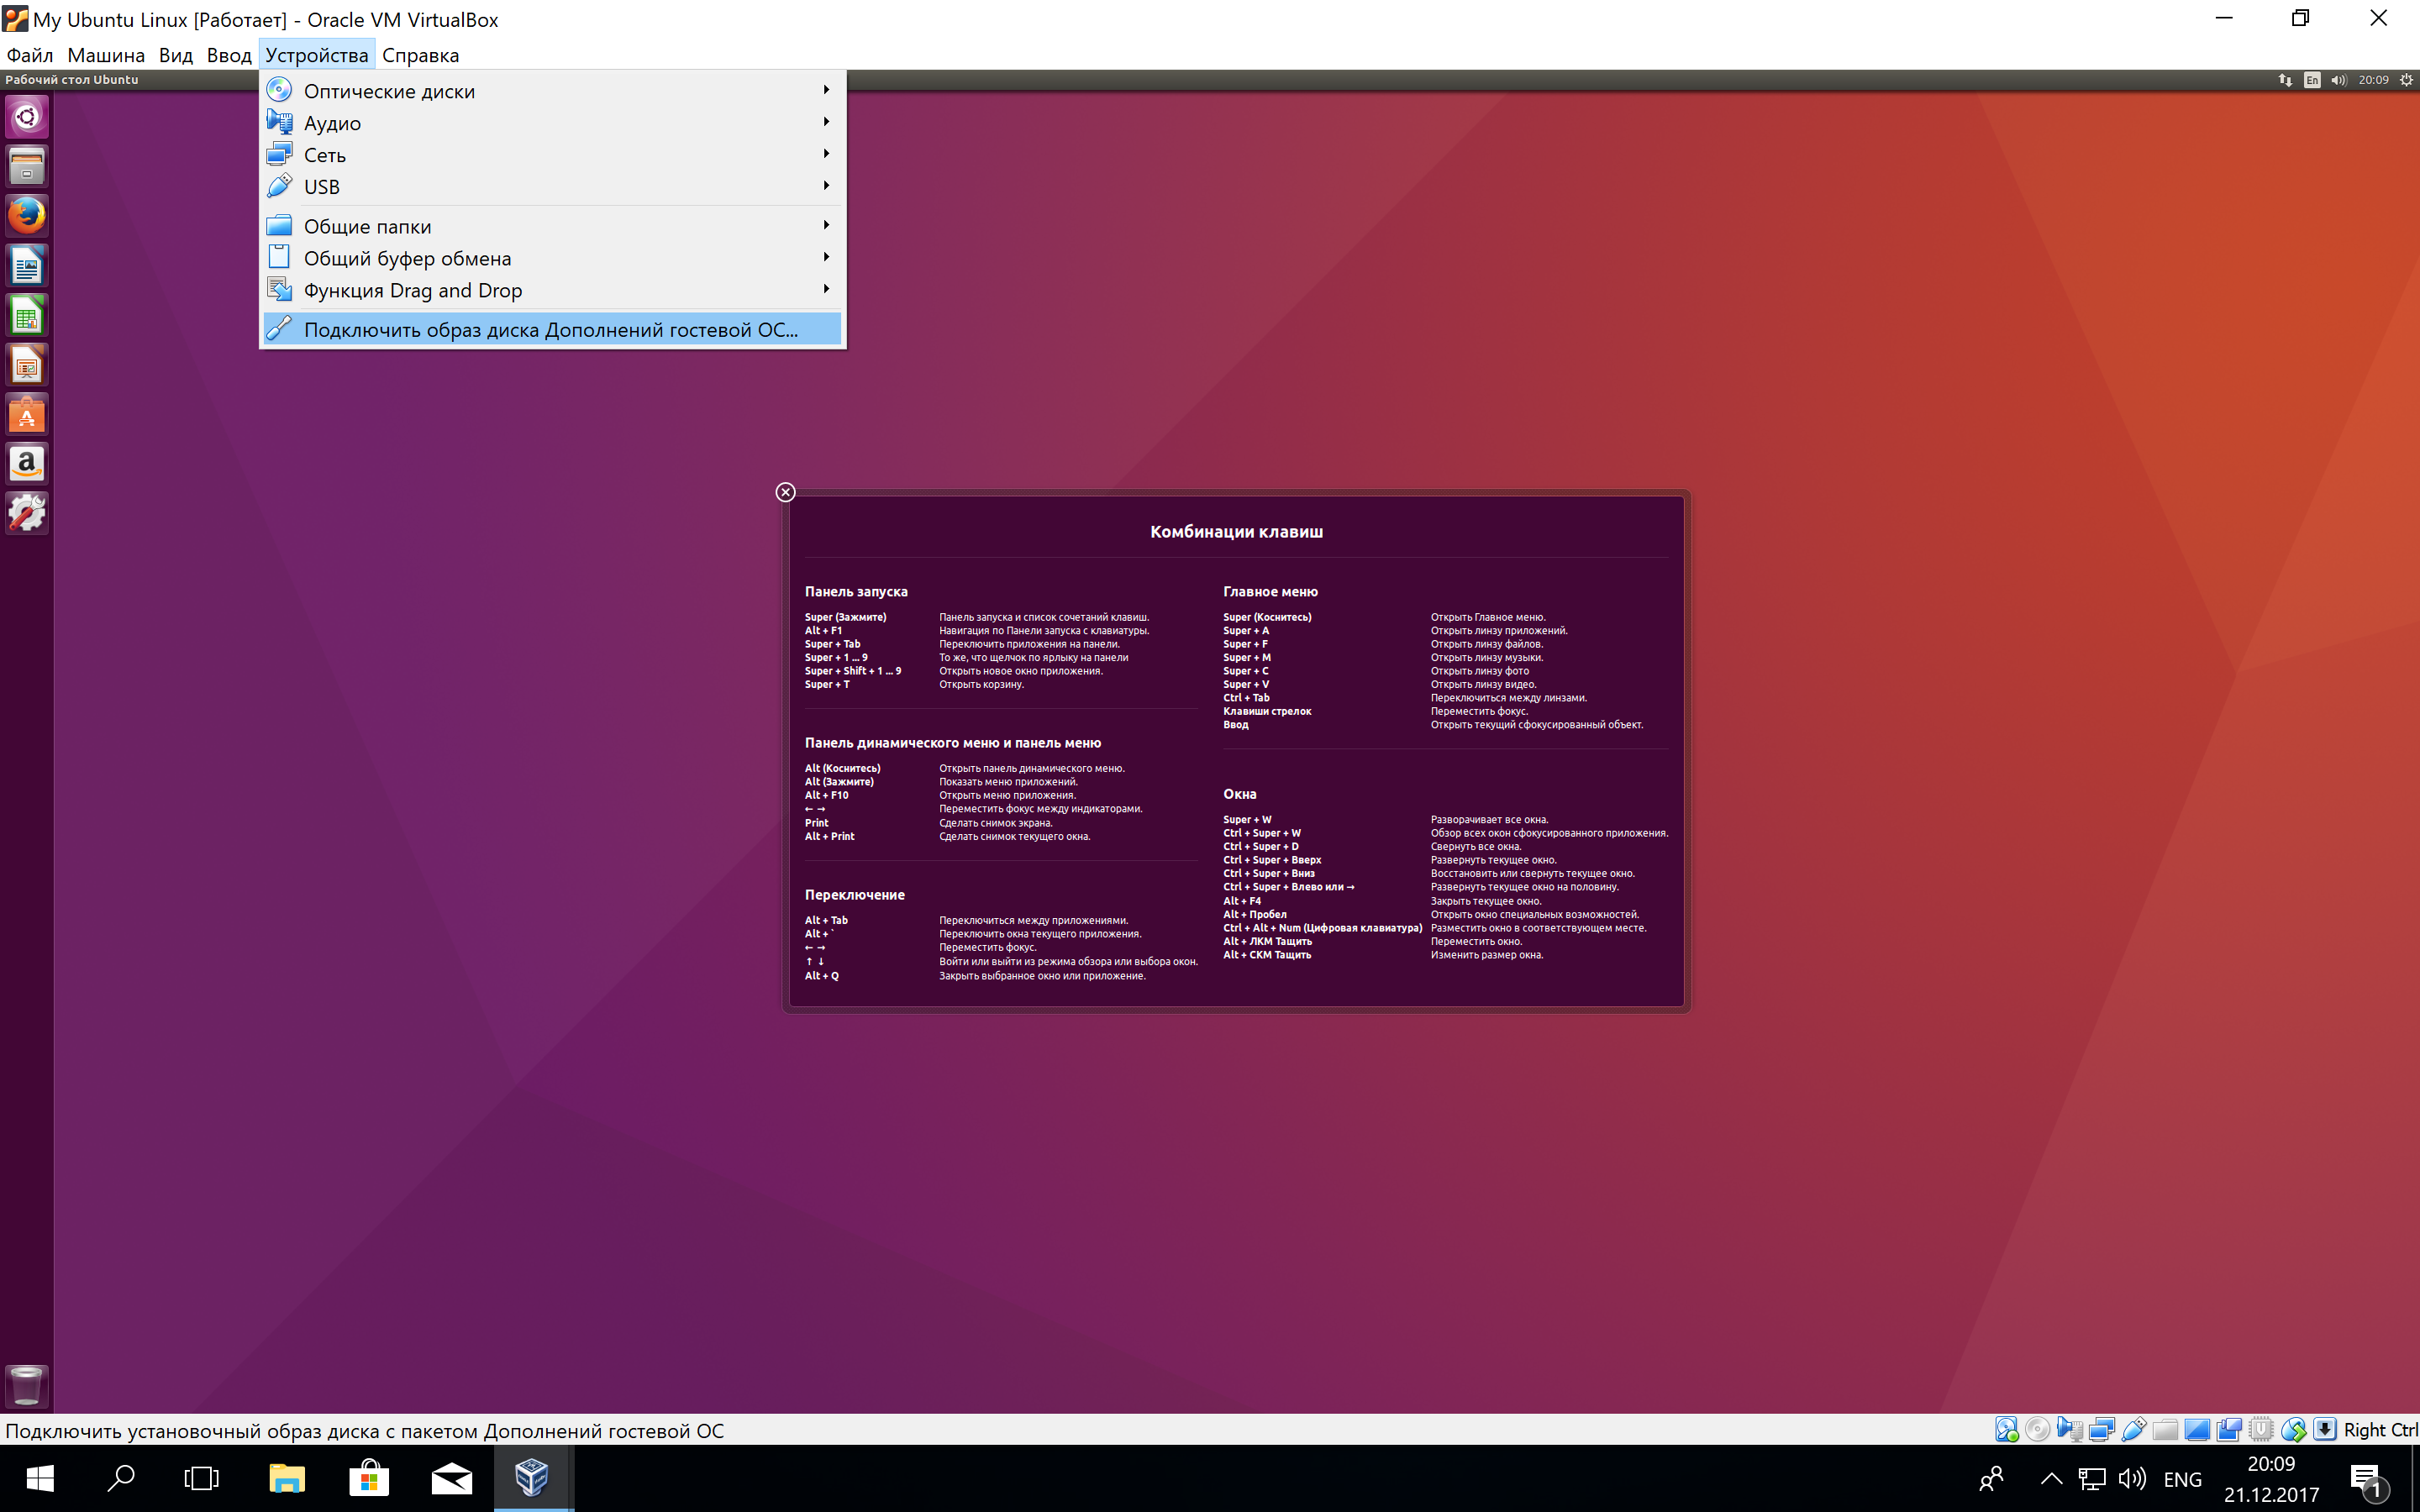
Но это ещё не всё. Весьма желательно установить так называемые «Дополнения гостевой ОС». Они содержат драйверы и прочие системные файлы, необходимые для наилучшей производительности и обеспечения дополнительных функциональных возможностей между виртуальной и гостевой операционными системами.
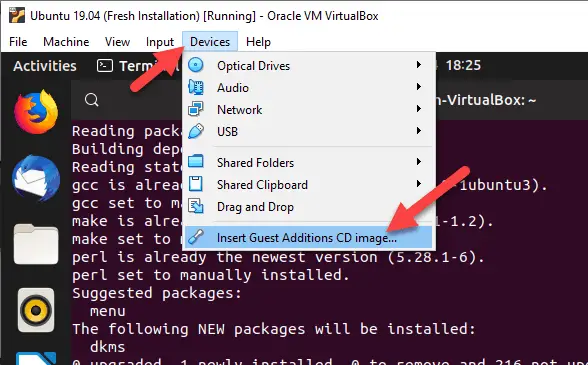
Выберите пункт меню «Устройства» программы VirtualBox, подпункт «Подключить образ диска Дополнений гостевой ОС…» и дождитесь предложение запустить приложение для автоматического запуска с виртуального привода.
Виртуальная ОС Ubuntu Linux установлена и готова к работе.
Ссылка на официальную документацию: Oracle VM VirtualBox User Manual
Here you will learn how to install Ubuntu 23.04 on VirtualBox with a step-by-step guide from enabling virtualization technology to installing the operating system.
Undoubtedly, Ubuntu will be the first Linux distribution for most people who have started Linux for the first time, and it will certainly be the most familiar distribution.
For this reason, we will cover the step-by-step process of downloading, installing, and setting up the latest Ubuntu operating system using VirtualBox running on your Windows 10 or 11 64-bit computer.
This is a very beginner’s guide
So it will be useful for a lot of new starters who want to try Ubuntu for the first time, and once you get familiar with Ubuntu, you can follow the same steps to install it on physical hardware.
Prerequisite
The basic requirements for following this guide are to have Oracle VirtualBox and Ubuntu 23.04 ISO images.
For any reason, if you do not have both of the following items, it is not an issue because we will show you how to get Oracle VirtualBox and the ISO image of Ubuntu 23.04.
More importantly, you should enable “Virtualization Technology” from the UEFI/BIOS settings to avoid interruptions during installation. If you are not sure about it, then you should check out the below article.
And those who already have VirtualBox, ISO Image, and Virtual Technology enabled in their UEFI/BIOS can directly jump into the installation part.
Enable Virtualization Technology
At the time of installation, if you have not enabled “Virtualization Technology”, you may face the problem of starting a virtual instance.
To avoid this, you need to enable “Virtualization Technology” in UEFI/BIOS.
Instead of booting your system into BIOS, first check whether the virtualization option is enabled or not by using the command prompt, which will show the Virtualization Enabled in Firmware status as “Yes” or “No”.
So, to find that information first, open your command prompt and enter the below command:
systeminfo.exe
At the bottom, you will find the text “Virtualization Enabled In Firmware”.
If it is “Yes”, then you don’t need to enable it, and you can directly jump to the installation part. Those who get the output “No” need to restart their system into BIOS/UEFI mode.
To get into BIOS, press the respective button if you are aware of it.
You can try the following keys: “ESC or F2 or F10 or F12 with FN or without FN key”; or else you can refer to the vendor’s manual to find the exact key.
On my HP laptop, the BIOS mode can be accessed by pressing the F10 key, and once you get into the BIOS mode, you will find the option to enable “Virtualization Technology” in the System Configuration menu.

Once you enable virtualization, save the changes and restart your system.
Download VirtualBox
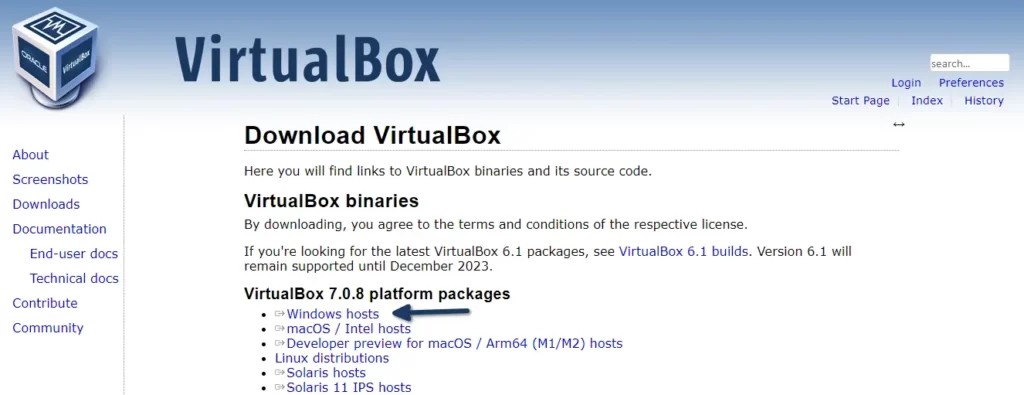
To get the latest version of VirtualBox, click on the below button, which will redirect you to the official download page, from where you can choose VirtualBox as per your operating system.
This guide is basically for Windows users, so I’ll select the first option.
If you are following this guide on any other operating system, then you should choose VirtualBox as per your running operating system.
After getting the installation file, I believe you will be able to install it on your system without any difficulty.
If you want to know how to install VirtualBox on Linux, then check out this article.
Download Ubuntu 23.04 ISO
Ubuntu 23.04, a.k.a Lunar Lobester is the latest version of Ubuntu, which you can download from the button below:
The file size is approximately 4.60GB, so it may take a while to complete the download.
Ubuntu 23.04 is very easy to install on VirtualBox. It will just ask you a couple of questions on the basis of your preferences, and it is very simple compared to Windows installation.
So let’s see the installation of Ubuntu 23.04 on your VirtualBox.
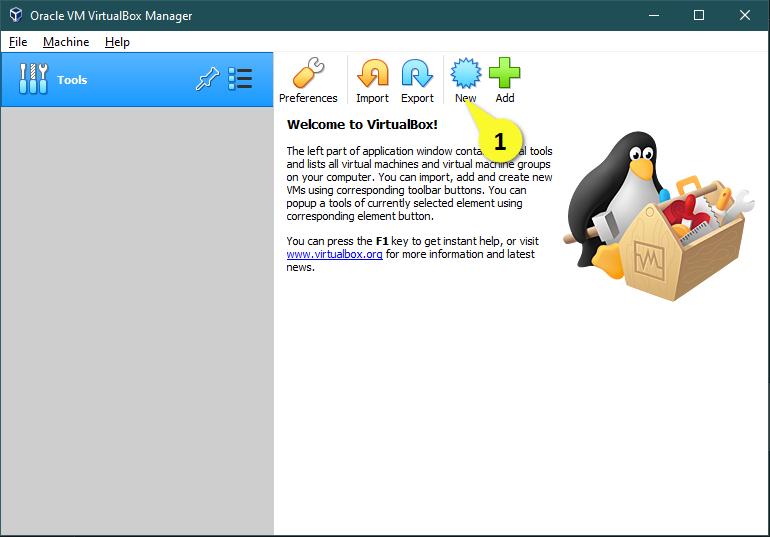
Step 1: Open Oracle VM VirtualBox
Once you complete the above prerequisites, then you are ready to install Ubuntu 22.04 on Windows VirtualBox, so first open your VirtualBox from the Start menu.
For the first time, your screen will look like mine, so to change your current interface, move your eye to the right side of the screen, and you will find multiple options like Preferences, Import, Export, New, and Add.
From this list of options, place your cursor on “New” to create a new Virtual Machine.
Step 2: Create Virtual Machine
There will be a couple of screens which will come in a series where you need to configure your virtual machine as per your requirements.
On the first screen you will be asked to enter your machine name, so simply ignore it and click on “Expert mode”, which is more convenient than “Guided mode”.
In the first block, enter your virtual machine name. I would suggest you put Ubuntu 22.04, which will automatically select the type of operating system to Linux, and also the version will be highlighted to 64bit.
I’m good with the default machine folder location. If you want to change it, then click on the drop-down button and choose the path where you want to store the file.
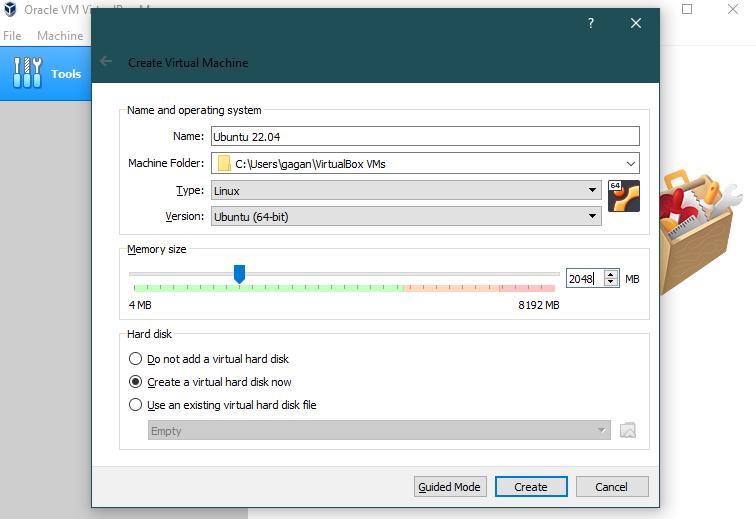
You can drag the slider back and forth to change the memory size, or else you can just put the memory size into the box.
And keep the rest of the options as they are and click on “Create.”
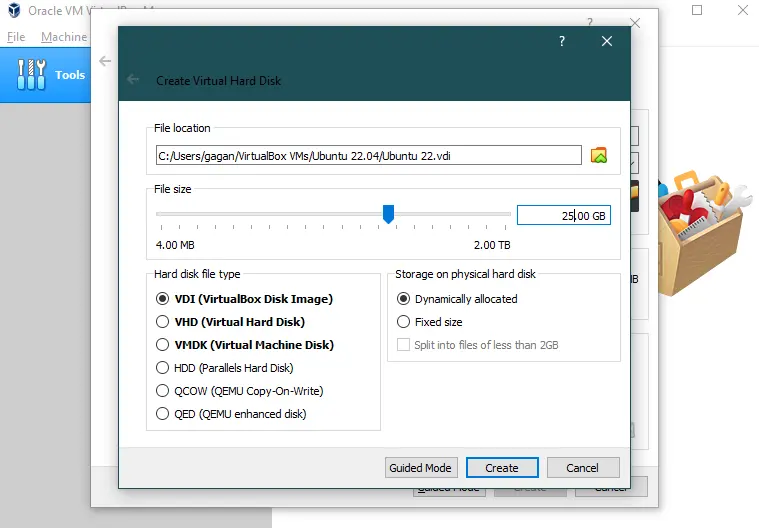
On the next screen, you will be asked to “Create Virtual Hard Disk”.
So simply put the size of the virtual hard disk size on the right side of the box, or else you can adjust the size using a slider, but make sure the file size should be more than 10 GB.
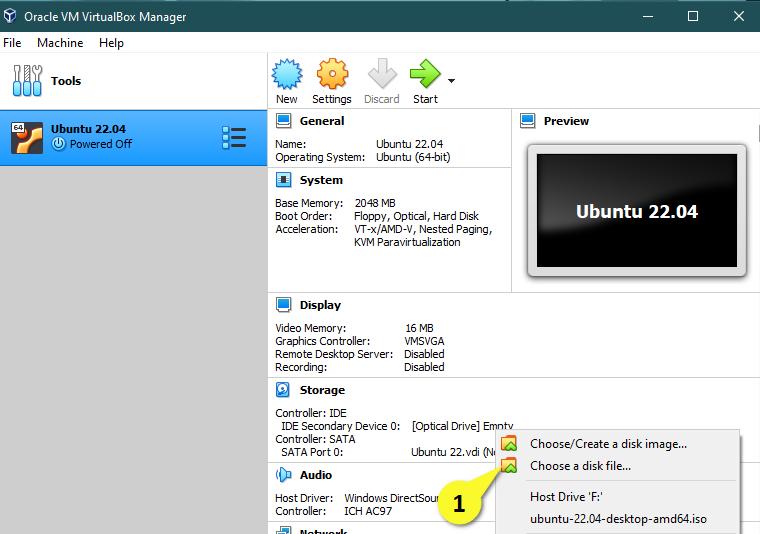
Step 3: Attach Ubuntu 22.04 ISO
You are almost done with the configuration. You just need to follow two more steps after that. You can start the virtual machine. Before that, let’s attach the ISO file to VirtualBox.
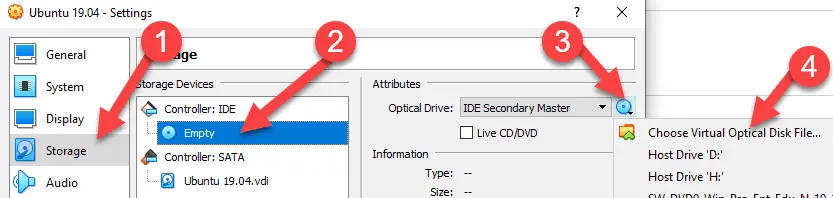
I think you are able to get a screen like mine on your end too, and as you can see, “[Optical drive] Empty”, so you need to click on “[Optical Drive] Empty” and select the ISO image.
After that, click on the “Settings” gear to finalize our virtual configuration. If anything is left to do, then you can easily do it from here.
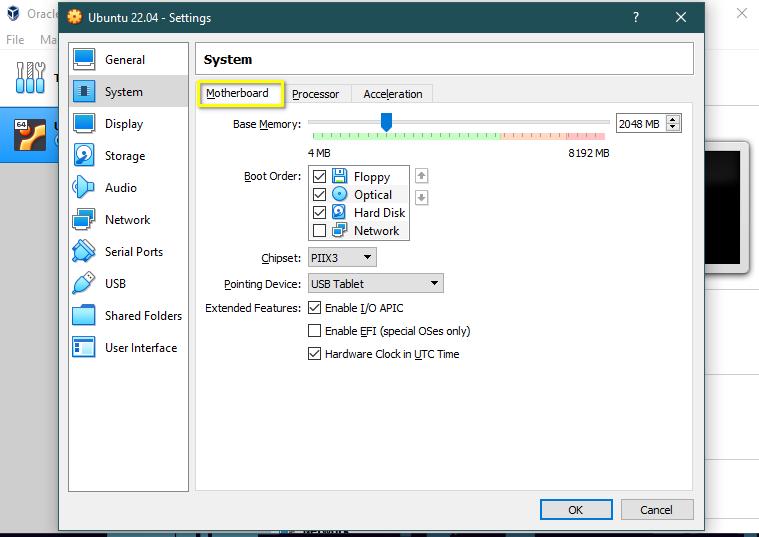
Under the Settings option, change your tab to “System”.
Here you will find the option to change the memory size. If you haven’t changed it yet, then do it now.
Next, go to “Processor” tab, which is next to “Motherboard”, and change the processor core according to your usage. In my case, I do have a 4 core, so I’ll select 2 cores.
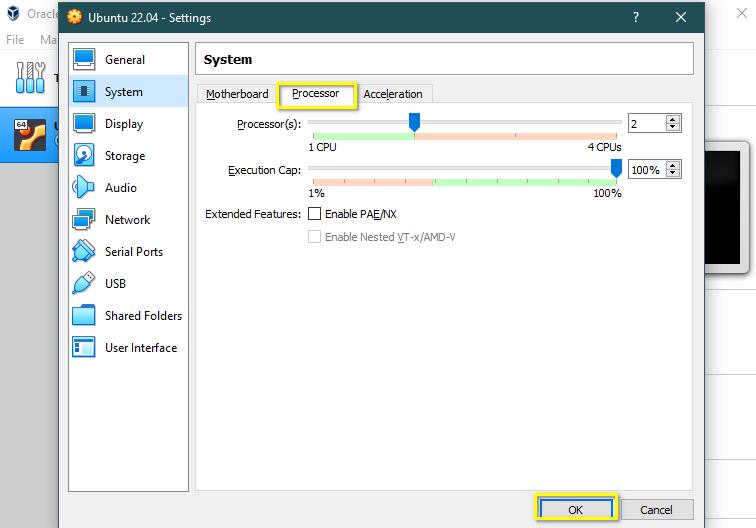
And keep the rest of the settings as it is. After that, click on “OK” to save the changes.
Step 4: Boot Virtual Machine
After following the above procedure, click on ![]() start button to power on the machine. Once you start the machine, you will be prompted with a mouse integration message. Simply click on “continue”.
start button to power on the machine. Once you start the machine, you will be prompted with a mouse integration message. Simply click on “continue”.
Basically, it instructs you to get out of the machine using the “Right Ctrl” key.
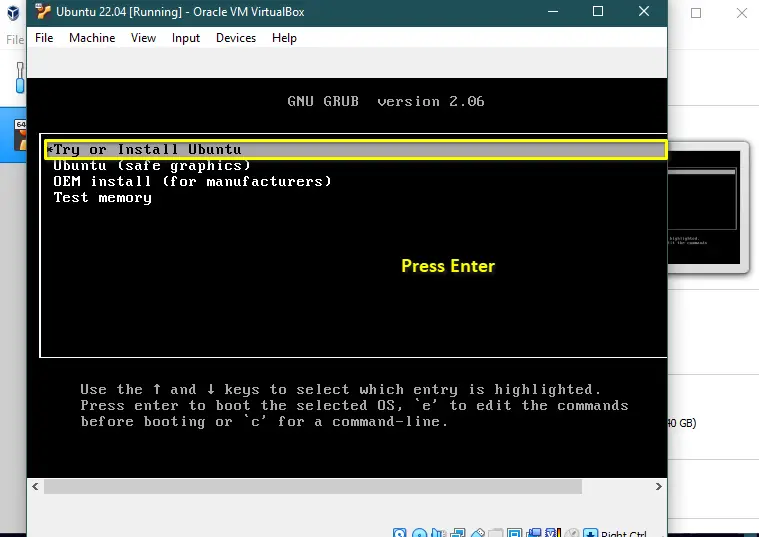
Next, you will find the boot option. Simply press enter on “Try or Install Ubuntu”.

Step 5: Select Language and Install Prompt
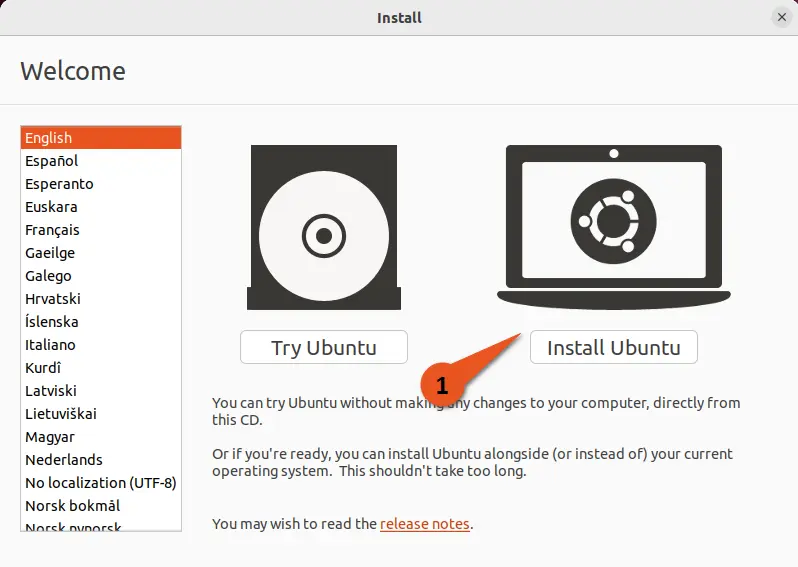
Once the boot is completed, you will be prompted to choose a language. Along with that, you need to select an option like how you want to install Ubuntu. If you want to first use Ubuntu and later decide whether you want to install it or not, then you can click on “Try Ubuntu”, or else you can directly jump to the installation part by choosing “Install Ubuntu”.
Even if you select “Try Ubuntu”, you will get the desktop icon on the Ubuntu screen to proceed with the installation.
If you want to follow this guide with me, you should click “Install Ubuntu”.
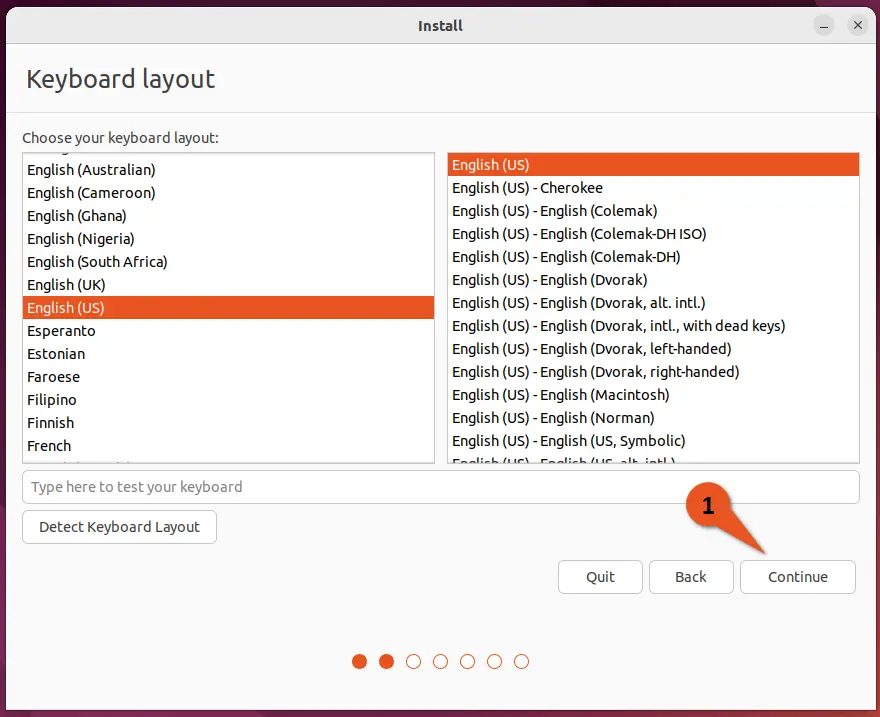
Step 5: Select Keyboard layout
On this screen, you can choose your keyboard layout as per your locale. If you are not able to find your keyboard layout on this list, then you can click on “Detect Keyboard Layout”.
I’m good with the default settings, so without thinking much, I will click on Continue.
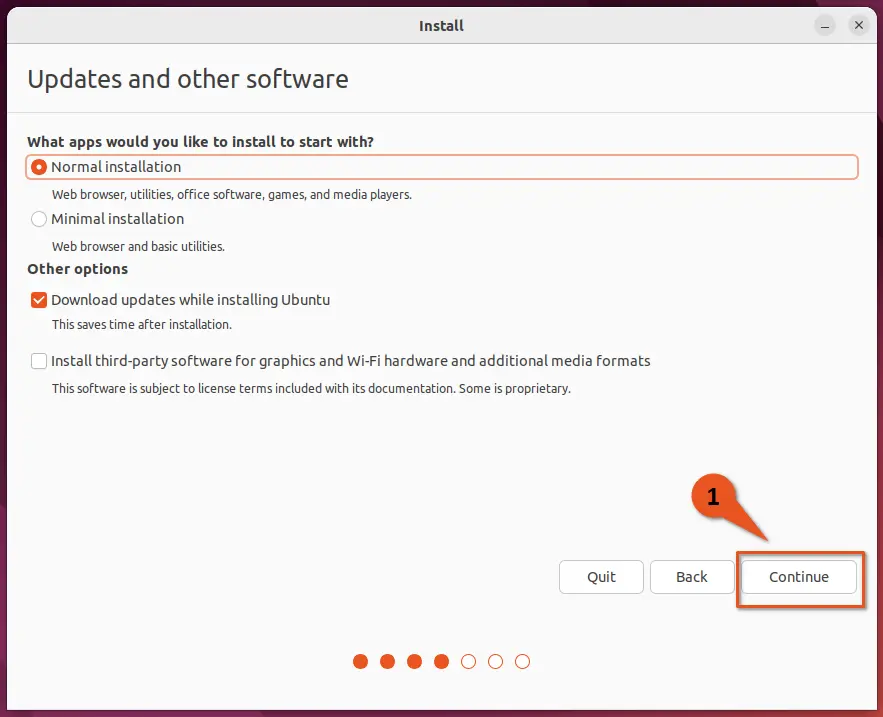
Step 6: Update and other software
I believe you are new to Ubuntu, so I would suggest you choose “Normal installation” over “Minimal installation” because minimal installation ships with a small number of utilities, and as a beginner, you may find it difficult to find a package if it is required in the future.
Do check on “Download updates while installing Ubuntu”, which will ensure you get the latest version of packages.
If you are following this guide to install Ubuntu on hardware, then I would suggest you check “Install third-party software for graphics and Wi-Fi hardware and additional media formats”, which ensures you have the third-party drivers installed for proprietary hardware like Realtek, Nvidia, etc.
Keep it unchecked if you are following this guide on virtual systems, and click on Continue to switch to the next screen.
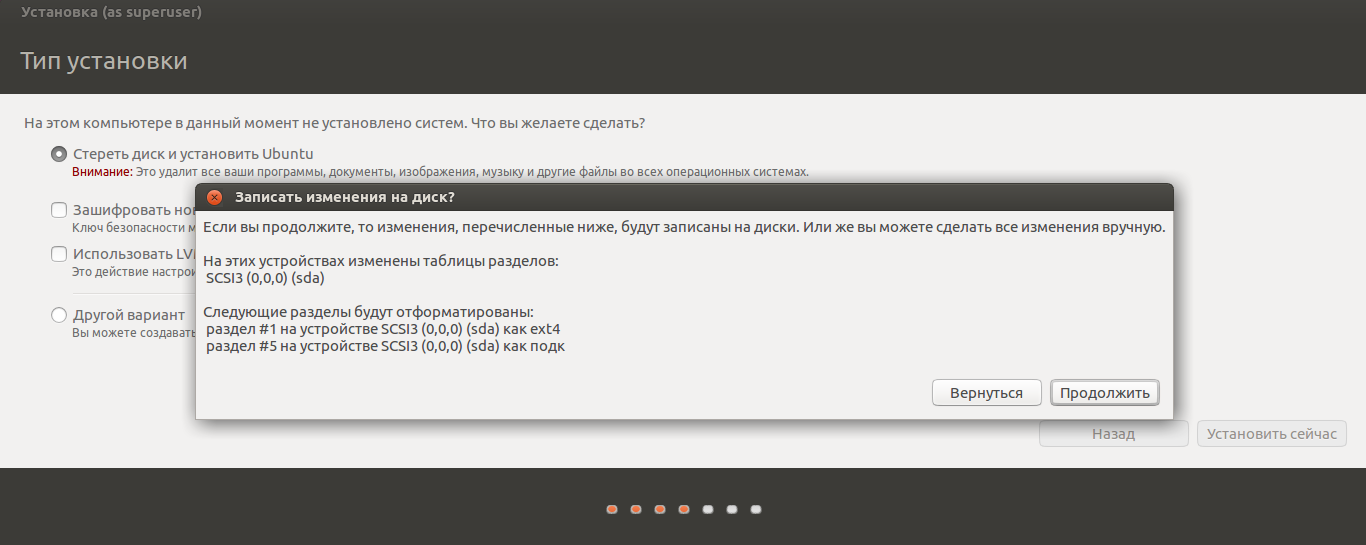
Step 7: Installation Type
You can choose how you want to install Ubuntu 22.04 on your virtual hard disk, which you have created initially. The first option you do have is to “Erase disk and install Ubuntu”, and the second is “Something else”.
As a starter, I would suggest you go with the first option, “Erase disk and install Ubuntu”.
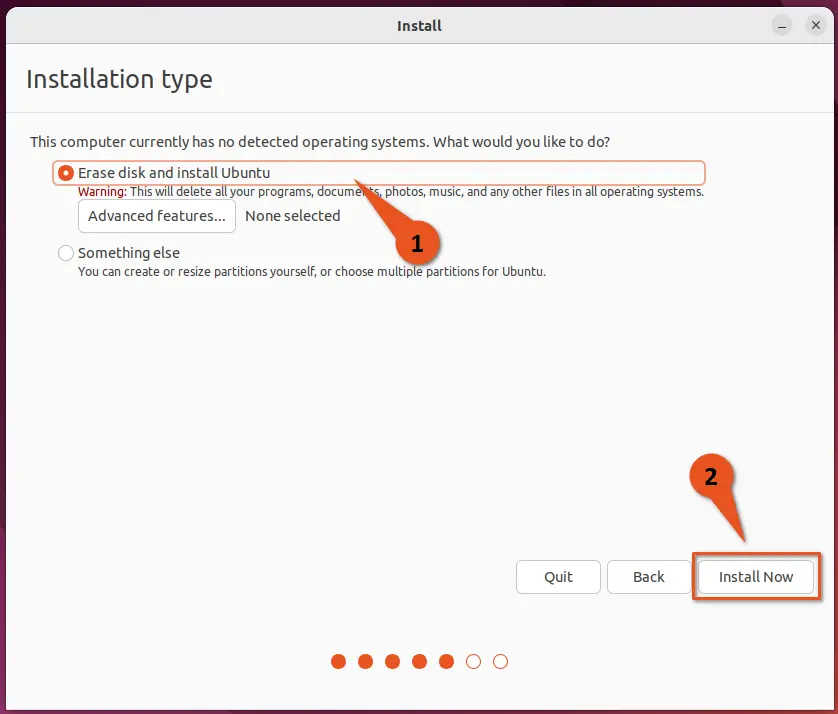
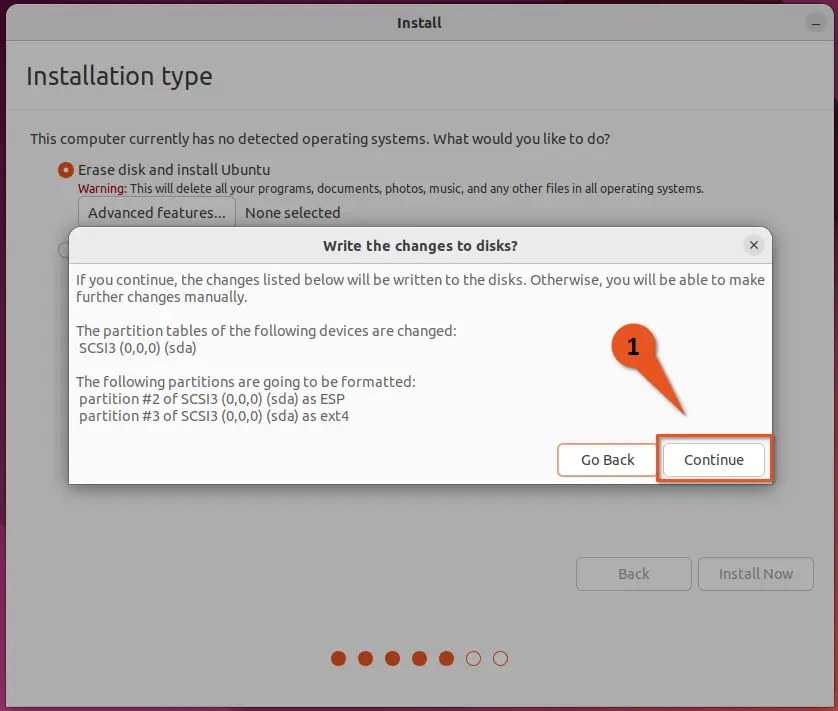
And click on “Install Now”, which will prompt you to verify the changes, so simply click on “Continue”.
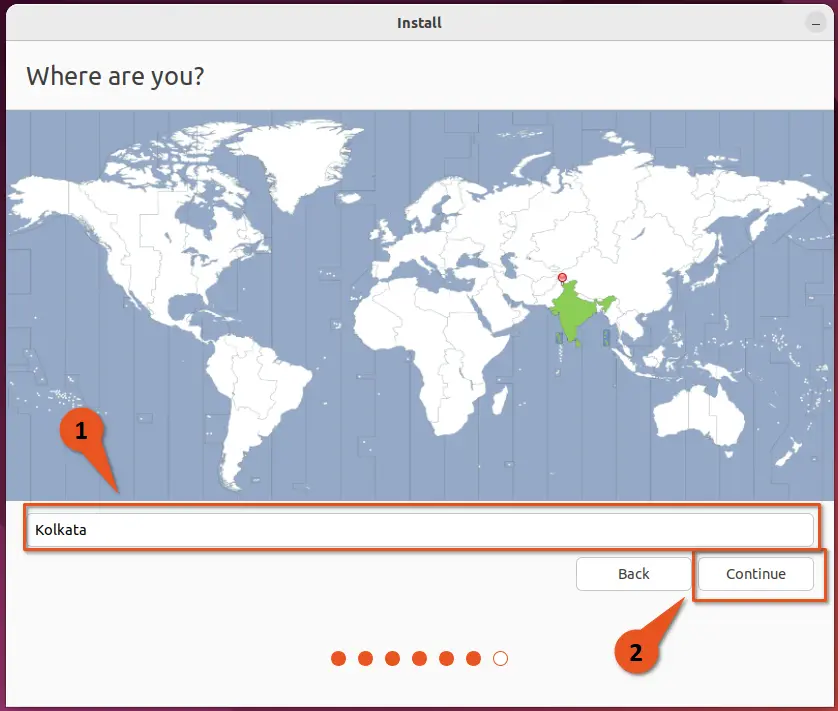
Step 8: Set your location
If your system is connected to the Internet, then the system will automatically fetch your region. If it is not the case, or you want to improve accuracy, then click on the drop-down menu and enter your location manually.
After that, click on “Continue”.
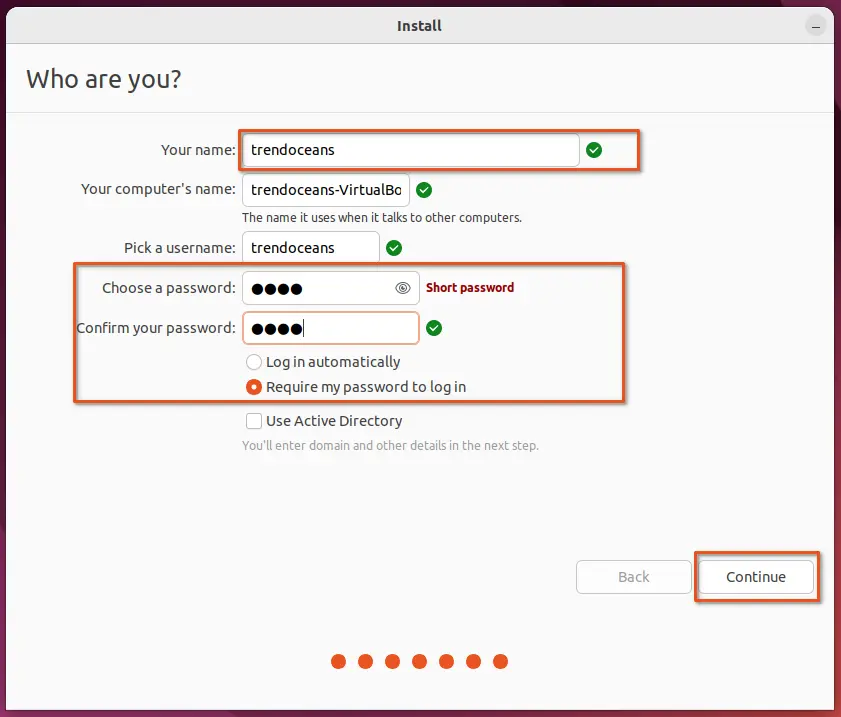
Step 9: Who are you
You are very close to experiencing Ubuntu 22.04 on your virtual machine, so let’s complete the installation by filling in a few details about the user.
First, start with your name, which will automatically feed details to the computer’s name and username. If you want to change those details, you can easily do so.
Make sure to check on “Require my password to log in” to secure your command, and don’t forget to set the password.
Once all is done, you can click on “Continue”, which will start the installation process.
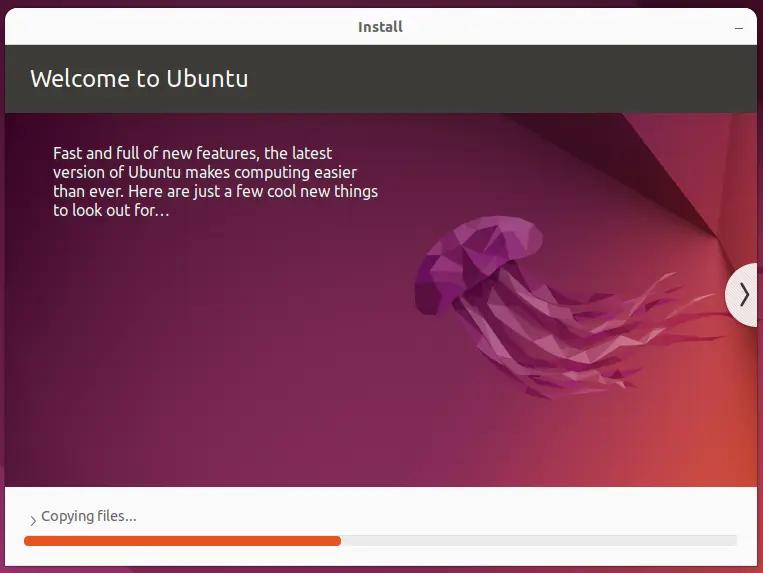
Step 10: Installation Progress
Installation takes some time to finish, and it varies from hardware to hardware, so wait for the process to complete and, once the process is complete, restart your system.
You will be asked to “Please remove the installation medium, then press Enter”, so simply press the ENTER key and wait for the system to get started.
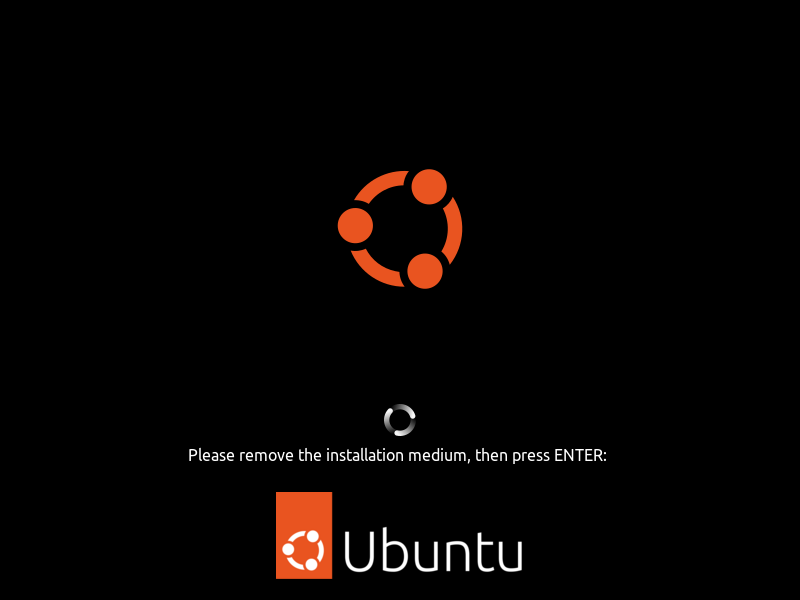
If you are getting the boot options menu again and again after the restart, then you need to remove the ISO image from the “Optical Drive” section.
The optical drive is the same option where you have attached the ISO image. Simply click on the optical drive, uncheck the options, and restart the machine.
Wrap up
That’s all to install Ubuntu 22.04 on VirtualBox.
You can also follow this guide on a physical machine. The only difference will be that you’ll need to create a bootable drive, which you can learn how to do by following this article: Creating a Bootable USB using Rufus for Linux Distributions

A man with a tech effusive who has explored some of the amazing technology stuff and is exploring more. While moving towards, I had a chance to work on Android development, Linux, AWS, and DevOps with several open-source tools.
Introduction
The first thing for this tutorial that you need to know is what an operating system is. An operating system acts as an interface between a user and computer hardware. It is system software that manages computer hardware, software, and handles various services for computer programs. We know that Microsoft Windows is a family of proprietary operating systems designed by Microsoft Corporation.
Like Windows or Mac OS, Linux is also an operating system. Linux is a family of open-source Unix-like operating systems. Some of the popular Linux distributions include Debian, Fedora, Linux Mint, and Ubuntu.
Ubuntu is a free and open-source Linux distribution based on Debian. As per Wikipedia, «Ubuntu is released every six months, with long-term support (LTS) releases every two years. As of 23 April 2020, the latest release and also the most recent long-term support release is 20.04, which is supported until 2025 under public support and until 2030 as a paid option».
There are some benefits of using Ubuntu — it’s free (I think this is the most attractive feature), open-source, fully customizable, more secure, and command-line based.
You should also know of VirtualBox and Virtual Machine. Oracle VM VirtualBox is a free and open-source virtualization platform developed by Oracle Corporation. The user can install the VirtualBox on Windows, macOS, Linux, Solaris, and OpenSolaris. It enables users to install other operating systems by creating virtual machines. As per Wikipedia, «It supports the creation and management of guest virtual machines running Windows, Linux, as well as limited virtualization of macOS guests on Apple hardware. For some guest operating systems, a «Guest Additions» package of device drivers and system applications is available, which typically improves performance, especially that of graphics».
A virtual machine is a software or a virtual environment that provides the same functionality as physical computers (eg, a computer system with its own CPU, memory, network interfaces, and storage capacity). A virtual machine is used to run software or OS like a physical computer.
This tutorial will show you various steps on how to install Ubuntu on Windows 10 using VirtualBox.
System Requirements
Before downloading and installing Ubuntu on windows 10 using VirtualBox, the following requirements are essential.
- Operating System Version — Microsoft Windows 10 (32-bit or 64-bit).
- Random Access Memory (RAM) — Minimum 4 GB RAM recommended.
- Free Disk Space — Minimum 25 GB free space recommended.
- Good Internet Connection to download the VirtualBox and Ubuntu ISO file.
Download and Install VirtualBox
To download the VirtualBox, follow the instructions below.
Step 1
To download the latest version of VirtualBox, visit the official VirtualBox website in your web browser.
Step 2
Now, download the VirtualBox from here.

Step 3
Navigate the folder where you have downloaded your VirtualBox and double-click on the downloaded «VirtualBox» file to run it.

Step 4
«Oracle VM VirtualBox 6.1.6 Setup» window will appear on the screen and click on the «Next» button to proceed.

Step 5
Choose the location where you want to install the VirtualBox and click on the «Next» button to proceed.

Step 6
Choose the options as per your choice and click on the «Next» button.

Step 7
Click on the Yes button and then the «Install» button.

Download Ubuntu
Follow the instructions below to download the Ubuntu ISO file.
Step 1
To download the latest version of Ubuntu, i.e. Ubuntu 20.04 LTS, visit the official Ubuntu website in your web browser.
Step 2
By clicking on the «Download» button, you can download the latest version of Ubuntu, i.e. Ubuntu 20.04 LTS (long term support).

Creating a Virtual Machine
Now, it is time to create a Virtual Machine. Follow the instructions below to proceed.
Step 1
Open VirtualBox and click on the «New» button.

Step 2
Choose a name for your virtual machine with its location. Based on the name you entered, VirtualBox will try to predict the «Type» and «Version». Otherwise, from the drop-down menu, select «Linux» as the type and «Ubuntu» as the version and click on the «Next» button.

Step 3
With the help of the slider, choose the amount of memory (RAM) to be allocated to the virtual machine. (The recommended memory size is 1024 MB (1 GB). Please note that this memory will only be used while using a virtual machine).

Step 4
Select «Create a virtual hard disk now» option and click on the «Create» button to proceed.

Step 5
Choose the «VDI (VirtualBox Disk Image)» option and click «Next».

Step 6
Again, click on the «Next» button.

Step 7
Select the amount of space for your virtual machine and click the «Create» button. (This will be used for your operating system which is going to be installed, so give as much space as possible).

Install Ubuntu Using VirtualBox
Now, your virtual machine has been successfully created and it is time to install Ubuntu on it. Since the latest version of Ubuntu is 20.04 LTS, but I am showing you the installation of Ubuntu 18.04 on VirtualBox and my aim is to show you the process of installing Ubuntu. I hope you understand the process and install the latest version of Ubuntu as you want. Follow the instructions below to proceed.
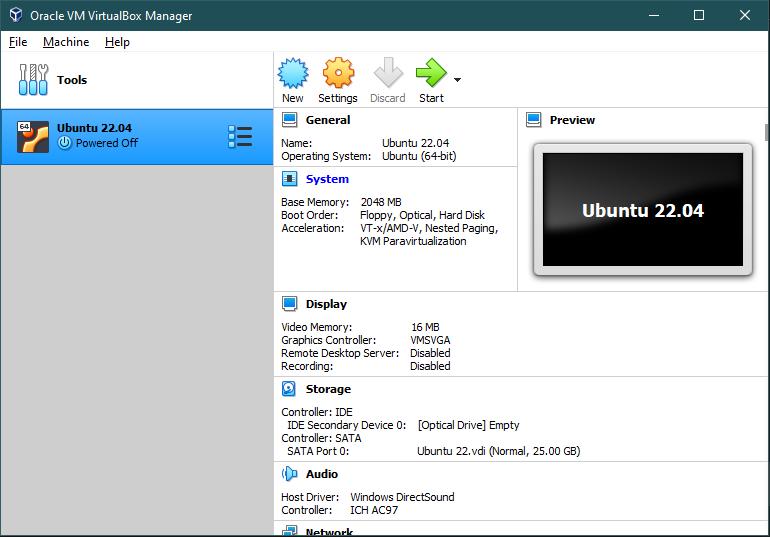
Step 1
The name of your virtual machine will now appear on the left side of the VirtualBox Manager. Click on the «Start» button in the toolbar to launch your VM.

Step 2
This time, you have to select your Ubuntu ISO file that you downloaded earlier. Now, click on the folder icon and then click on the «Add» button. Then, select your Ubuntu ISO file. Click on the «Start» button to proceed.

Note
If you get the following error,
The native API DLL was not found (C:\WINDOWS\system32\WinHvPlatform.dll) (VERR_NEM_NOT_AVAILABLE).
VT-x is not available (VERR_VMX_NO_VMX).
To resolve this above error, use the following command in Command Prompt (Admin), «dism.exe /Online /Disable-Feature:Microsoft-Hyper-V».
After removing this error, your Ubuntu installation will be ready to start on your VirtualBox.

Step 3
Now, click on the «Install Ubuntu» button to proceed.

Step 4
Select your desired «keyboard layout» and click on the «Continue» button to proceed.

Step 5
Use the default option as «Normal Installation» with the «Download updates while installing Ubuntu» and click on the «Continue» button.

Step 6
Select the default option as the «Erase disk and Install Ubuntu» and click on the «Install Now» option to proceed.

Step 7
A warning prompt will appear on the screen and click on the «Continue» button to ignore this warning.

Step 8
Choose your time zone on the map and click Continue.

Step 9
Now, set your user account here by filling the necessary details and click on the «Continue» button to proceed.

Now, the installation process will begin.

Step 10
Now, restart your system by clicking on the «Restart Now» option.

Congratulations! you have successfully installed and configured Ubuntu on Windows 10 using VirtualBox and the Welcome screen will appear.

Conclusion
By following the above steps, you can install Ubuntu on Windows 10 using VirtualBox.
I hope you enjoyed this article. Follow C# Corner to learn more new and amazing things about Windows 10.
Thanks for reading!
With the help of free virtualization software such as Oracle VirtualBox, we can have multiple Operating Systems on the same hardware. This guide shows how to install Ubuntu 19.04 on VirtualBox with the Windows 10 host computer. The same steps can be followed to install Ubuntu 19.04 on macOS computers such as MacBook Pro or Air as long as you have the latest VirtualBox.
Also, we mention how to install the working guest additions on Ubuntu 19.04 and set up shared folders between Linux guest and Windows 10 host computers. Ubuntu 19.04 Disco Dingo for desktop and server is one of the latest major releases. It is always better to install in the demo/test environment before implement in the production. VirtualBox is one of the free and best virtualization software you can use on Windows, Mac, and even Linux physical computers to create multiple various virtual machines. You can create the best test Ubuntu Disco Dingo environment with the VirtualBox.
![]()
New features of Ubuntu 19.04 can be found in the official site here. You need to have enough hardware resources such as processor cores, RAM and good hard disk to install another popular Linux OS top of your working Windows 10 computer.
Prepare the Environment
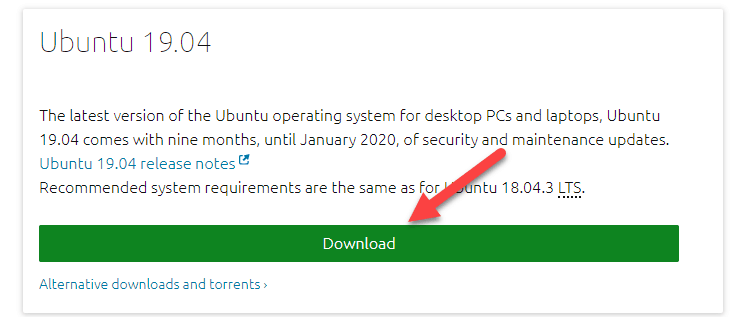
- Download the correct ISO. Visit the desktop version to download and select the latest version.
- Make sure you have the latest version of VirtualBox. As they support and enhance Linux versions in every release, it is better to have the latest version.
- Install the VirtualBox extension pack. This is nothing to do with the guest VMs. It has to be installed on the host computer. It improves the interaction between the host computer hardware and VirtualBox kernel.
Step 1) Download the correct ISO from the official site.
Step 2) Create a new virtual machine. Give a proper name for VM.
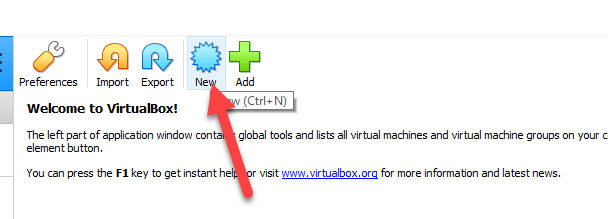
Once you enter ‘Ubuntu’ in the name field, it will automatically change the VM type to correct Linux version.
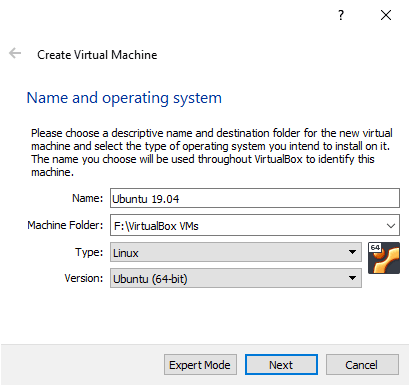
Step 3) Assign enough RAM. Ubuntu 19.04 requires a minimum 2GB of RAM. If your physical computer has more resources, then set more RAM, maybe 4GB. You can read more about the system requirements here.
Step 4) Create a new virtual disk. Select ‘Create a virtual hard disk now’ and VDI type in the next screen. VDI is the native virtual hard disk format of Oracle VirtualBox. Choose ‘Dynamically allocated’ option to save some space on the physical computer at the moment.
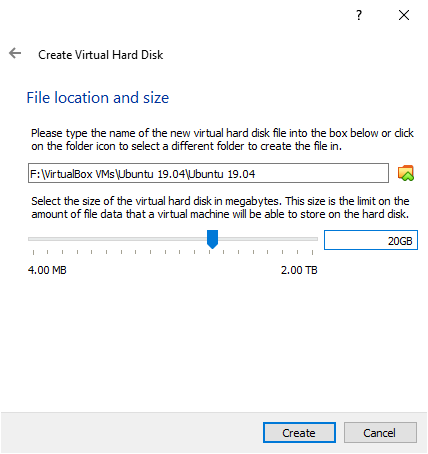
If you are installing Ubuntu 19.04 on VirtualBox for production usage where the sudden data growth is expected and good disk I/O needed, then select the ‘Fixed size’ option. Since we are installing for testing purpose, Dynamically allocated disk will do the job well. I set 20GB for disk space.
Step 5) Let’s do a few more tweaking before starting the VM. Click on the settings of VM and go to processor settings. Mostly it would have created with the 1 processor core. It is recommended to increase 2 or more if your physical computer processor has more cores. The more cores you assign the more powerful will be your Linux VM.
Step 6) Mount the ISO to the virtual machine. Go to ‘Storage’ option to attach the downloaded Ubuntu ISO file. Select ‘Choose Virtual Optical Disk File..’ and browse the ISO file.
Once the ISO file attached successfully, power on the virtual machine.
Step 7) In the first screen, choose ‘Install Ubuntu’ because that is what we are going to do now. Other option will enable you to try the Ubuntu without installing on the hard disk. It is almost like running an Operating System from Live-CD. In this example, we properly install the OS on the virtual hard disk.
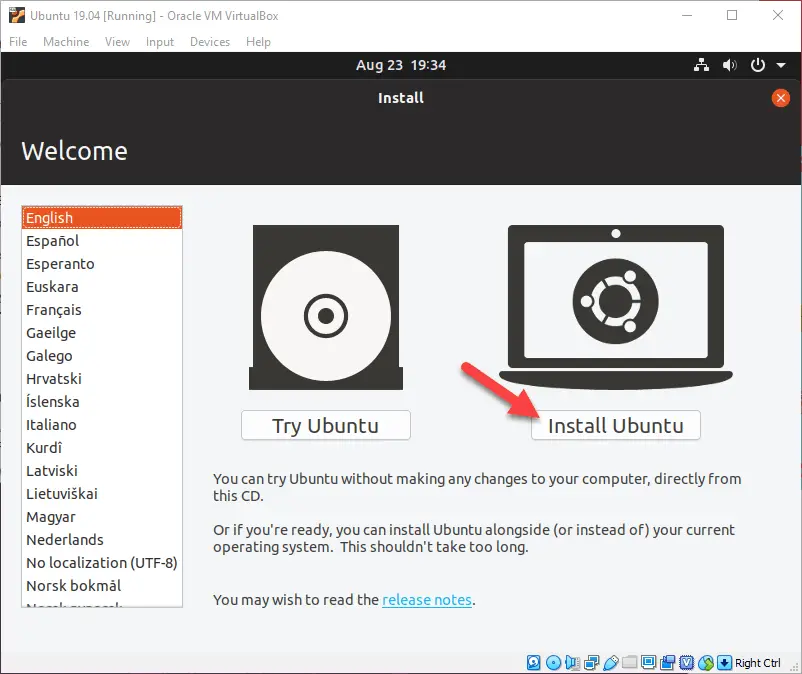
The other installation steps are straight forward like any other Linux distribution. We are not covering every step here. Make sure to have a right password for the user.
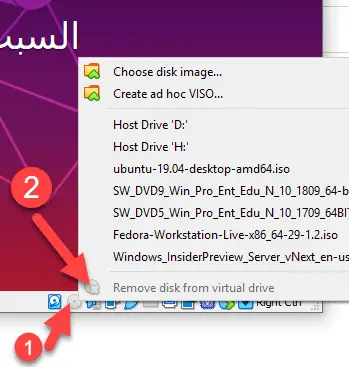
Step  Once the installation completed, remove the bootable ISO file from the CD drive, otherwise either it will try to boot from the ISO to install OS again, or it will wait for you to unmount the ISO without booting.
Right-click on the CD icon of VM console and eject the attached ISO once the installation completed.
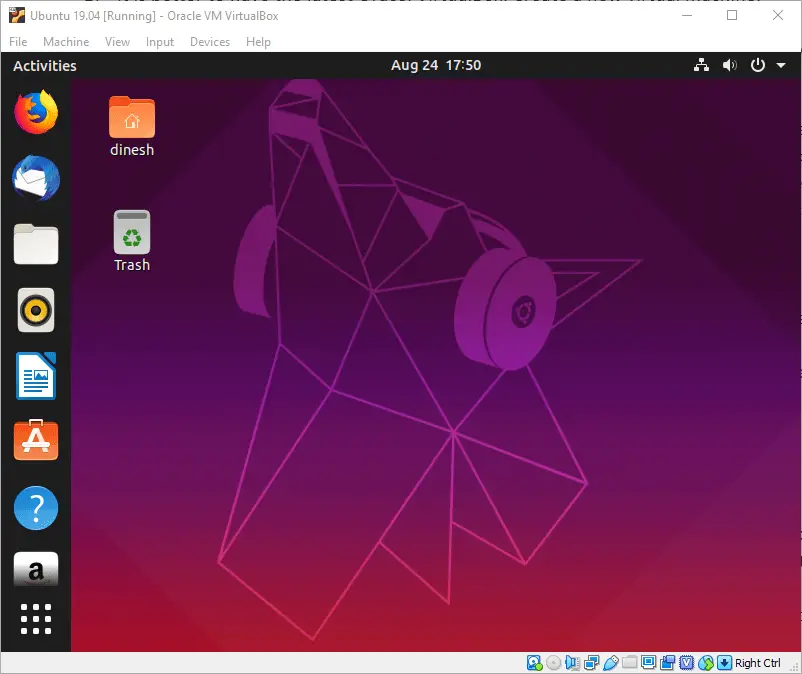
Here is the initial working Ubuntu 19.04 on VirtualBox with Windows 10 host computer.
First thing first, take a snapshot before do any further changes.

Now we will see how to install guest additions on Ubuntu
19.04, and other additional features such
as VirtualBox shared folders and bi-directional
data transfer on Windows 10 host computer.
Install VirtualBox Guest Additions for Ubuntu 19.04 on Windows 10
Guest additions need to be installed to get the full screen and smoother display. Not like Fedora (Latest Fedora comes with in-built guest additions), we need to install Guest additions on Ubuntu.
Just
to recap before proceeding further steps:
confirm the following points.
- You have installed the VirtualBox extension pack matching with the
version of current VirtualBox. - Taken the snapshot of VM
Step 9) To install the guest additions, execute the following command from Ubuntu 19.04 terminal. Internet connectivity is required to download additional packages. If the physical computer has Internet, then your VM also will have Internet access via NAT network type.
sudo apt install gcc make perl dkms
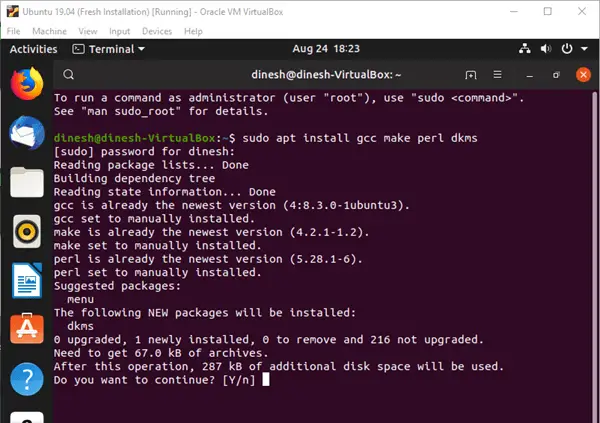
After above all modules installed, attach the guest additions.
It will pop-up to run the installation like below.
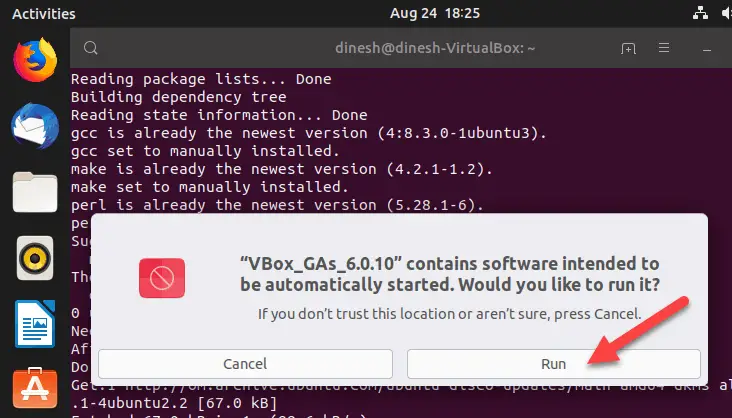
If not, you can execute the
following command.
sudo /media/$USER/VBox_GAs*/VBoxLinuxAdditions.runNeed to restart the VM after guest
additions installation.
You will notice the smooth mouse movement and interaction inside the VM. Also, the full-screen view will work now. Those are the main indicators of successful installation of VirtualBox guest additions in Linux Ubuntu 19.04.
Step 10) Enable bidirectional clipboard in the settings of VM as below.
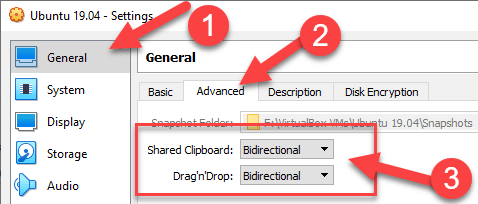
The bidirectional feature allows copying and pasting data between VM and host machine. Basically the clipboard can be shared with both computers. Also, with the drag’n’drop feature we can move the files and folders by mouse curser between host and virtual machines. It is a nice feature to transfer data or any type of content in between them.
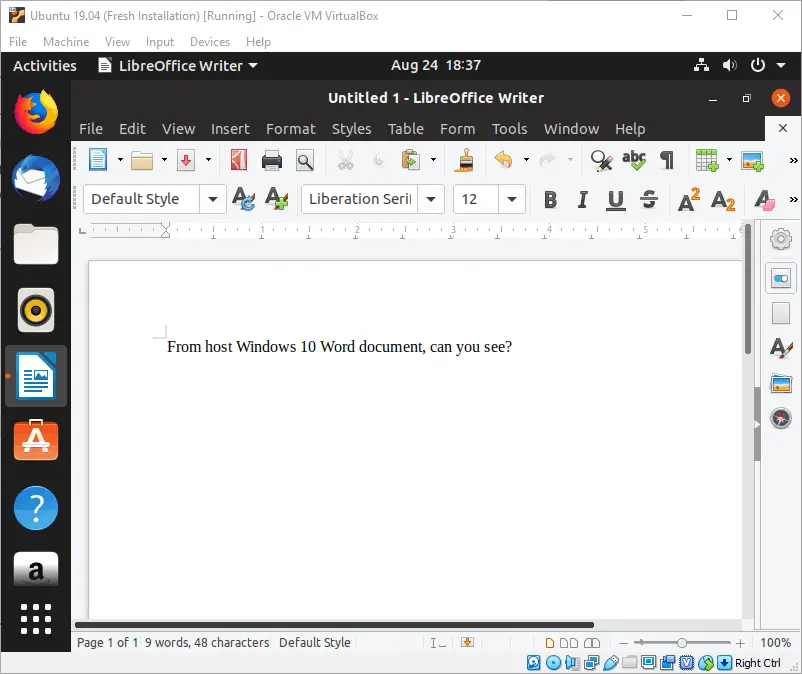
Here is my test, I could copy some texts from Windows 10 word file to Linux LibreOffice Writer.
VirtualBox shared folders between Ubuntu 19.04 and Windows 10
Step 11) Let’s set up the VirtualBox shared folders between Ubuntu 19.04 guest virtual machine and Windows 10 physical computer.
Decide the folder or partition you want to share from Windows 10 to Linux VM. Then, right-click on the shared folders icon (even while VM is working) and select add folder option.
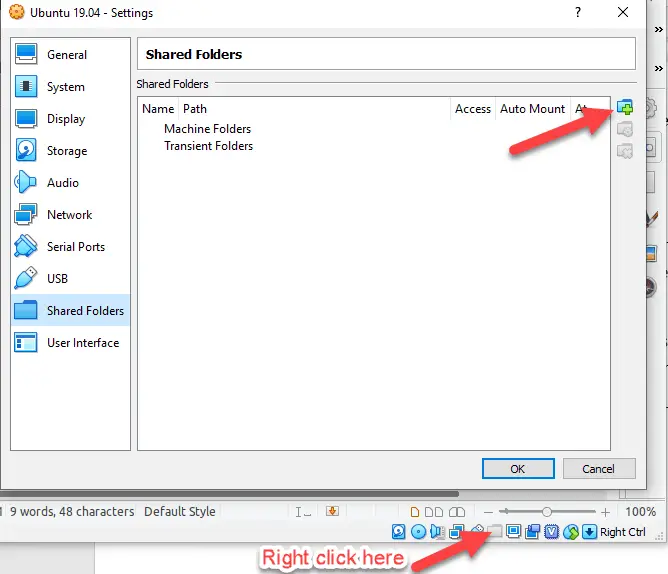
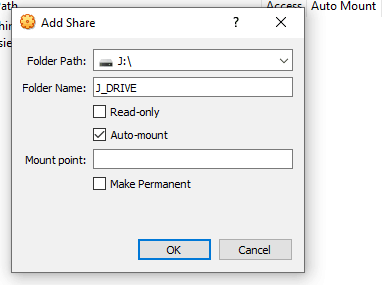
Browse the partition or a folder from the host computer. Set the ‘Auto Mount’ option. If you need to mount this share whenever you start the Ubuntu VM, then select the ‘Permanent’ option.
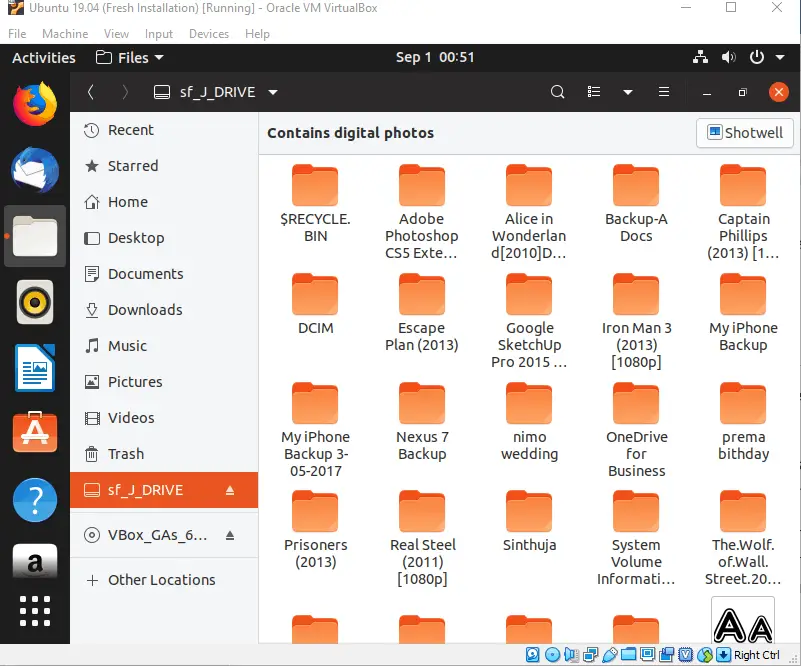
Not like earlier, nowadays without any additional commands, the shared folder will appear in
Linux automatically (because we selected auto mount option).
Open it to access the Windows OS files and folders.
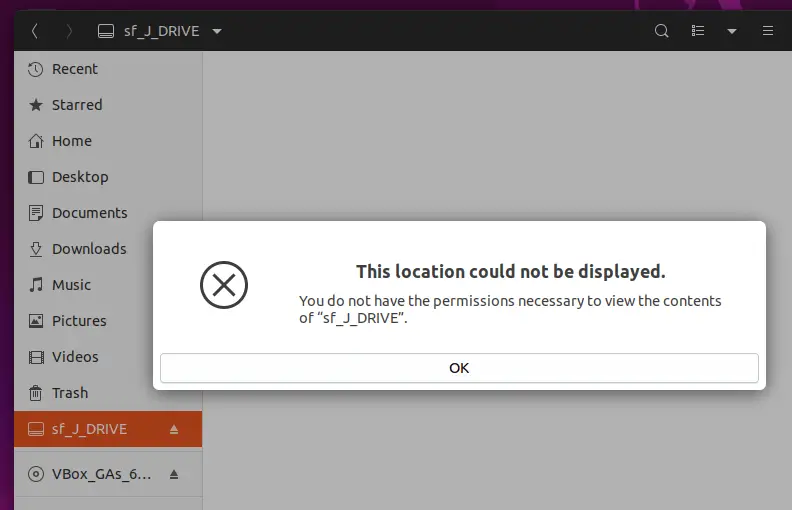
I got the following error the first time when I tried. I published another guide about fixing this error.
Once successfully the permission error fixed, you should be able to access the share.
We have covered most of the steps and possible errors/solutions
to install Ubuntu 19.04 on Windows 10 host with Oracle VirtualBox. Hope the
methods we mentioned here to setup bidirectional clipboard sharing access and
VirtualBox shared folders feature are useful.