Настройка собственного DNS сервера вам может потребоваться в случае, если ваш хостинг-провайдер и регистратор домена не предоставляют NS сервера для привязки домена, либо вам самостоятельно необходимо контролировать настройки и записи DNS.
Данная инструкция будет актуальна для ОС Windows Server версии 2012 — 2022.
- Добавление роли «DNS-сервера»
- Создание первичной зоны «DNS-сервера»
- Добавление «DNS-записей»
- Проверка работоспособности
Добавление роли «DNS-сервера»
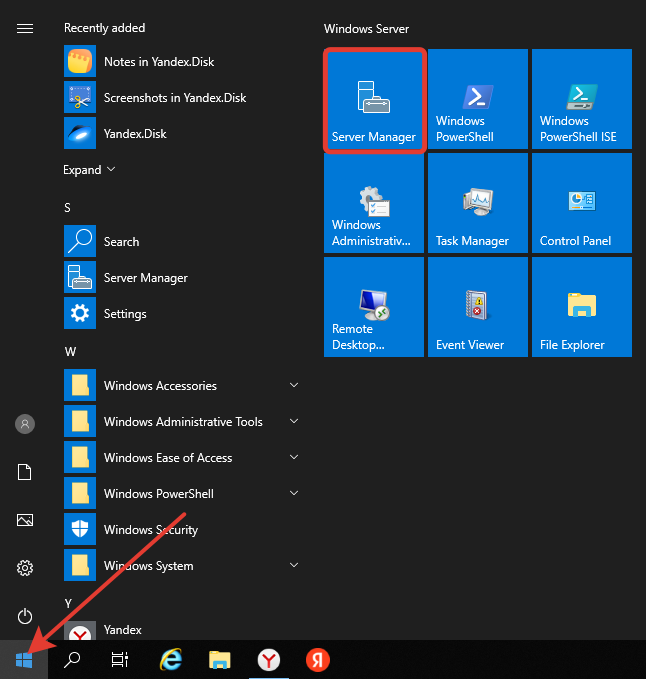
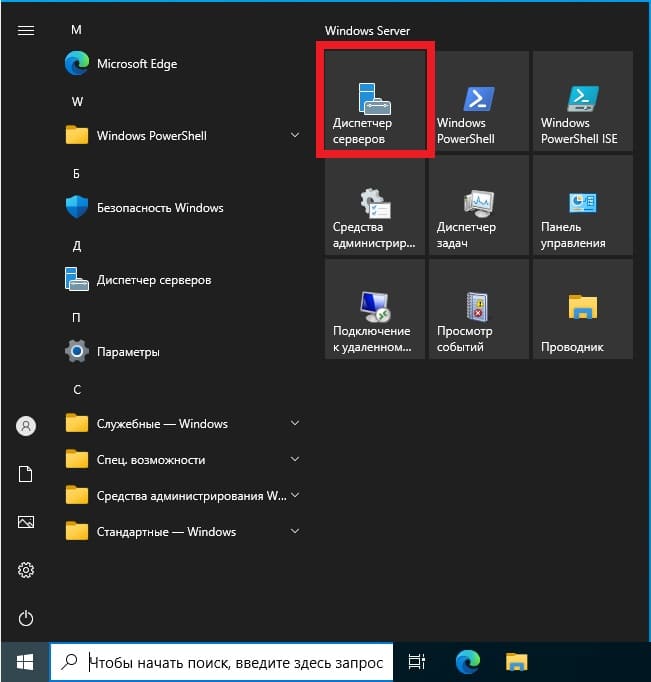
Откройте «Server Manager».
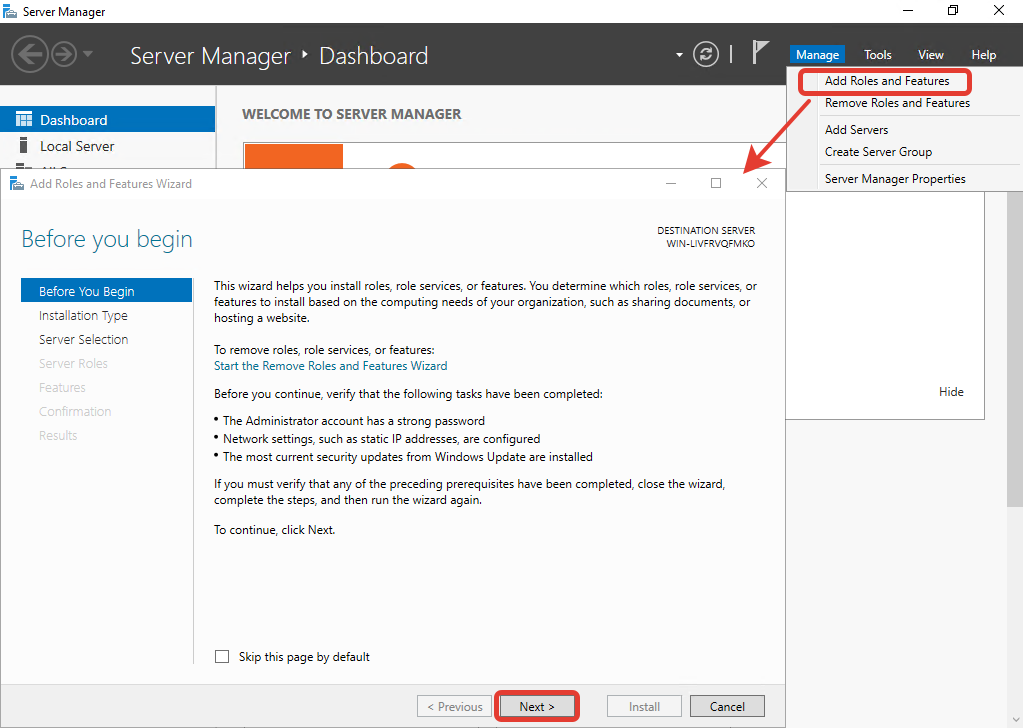
В правом верхнем меню выберите «Manage» > «Add Roles and Features». В появившемся окне нажмите «Next».
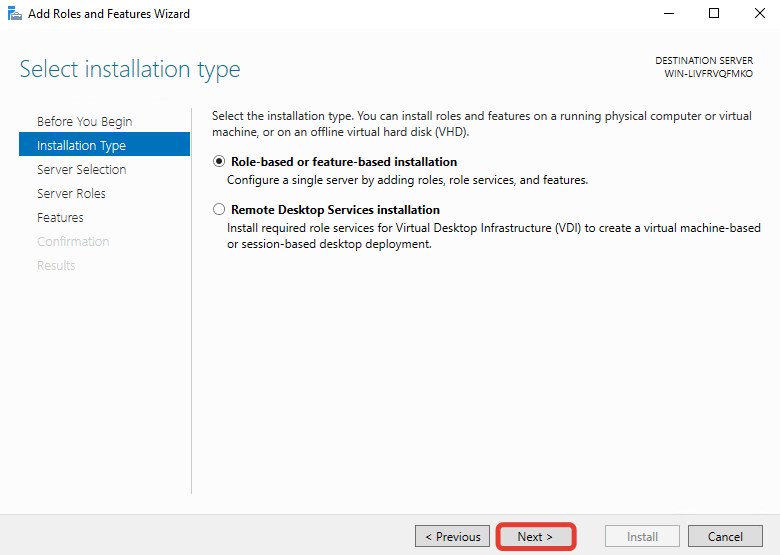
Далее убедитесь, что выбран пункт «Role-based or feature-based installation» и нажмите «Next».
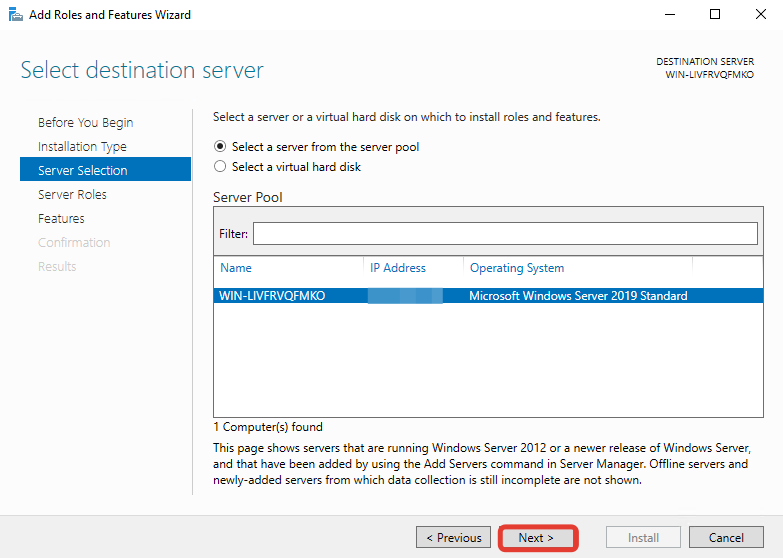
В окне выбора сервера установки ничего не меняйте и нажмите «Next».
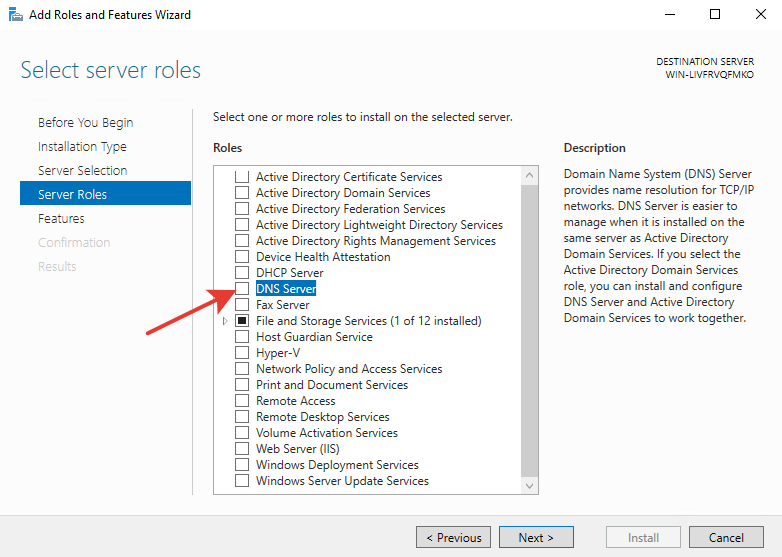
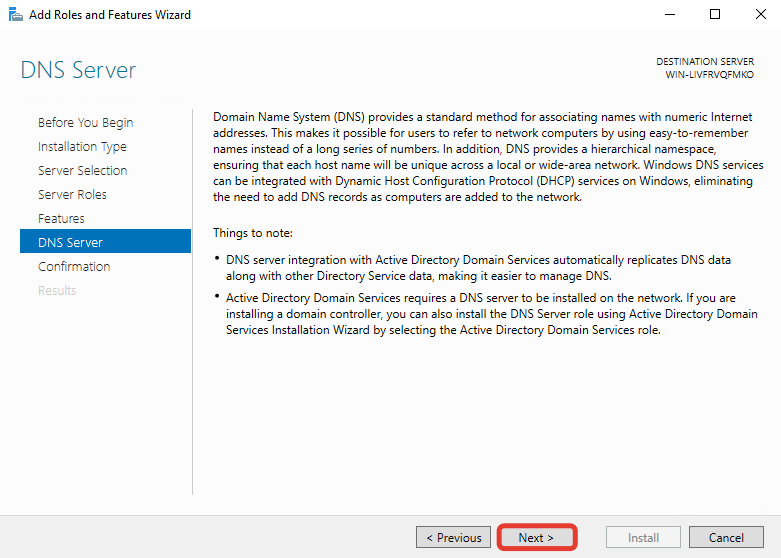
В окне выбора роли поставьте галочку на пункте «DNS Server».
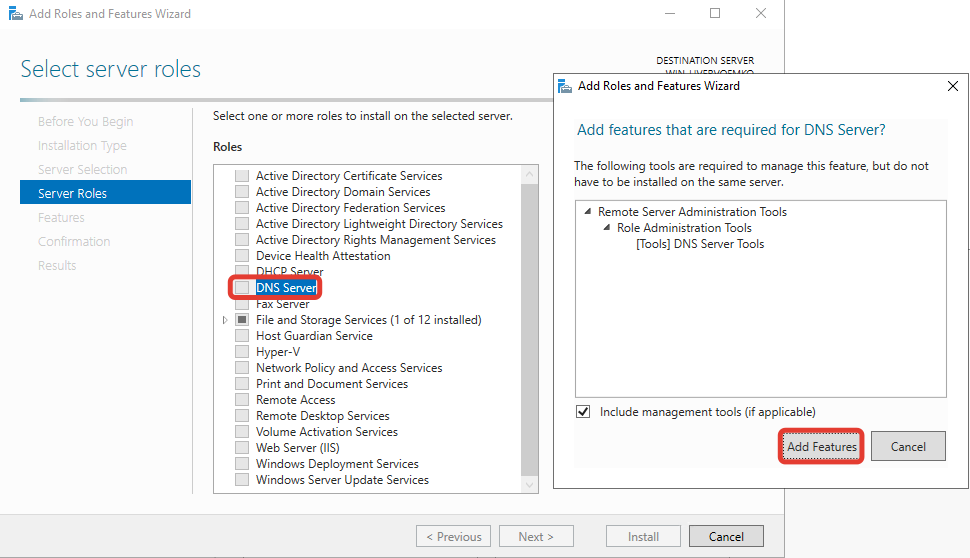
В появившемся окне согласитесь с добавлением утилит, нажав на кнопку «Add Features».
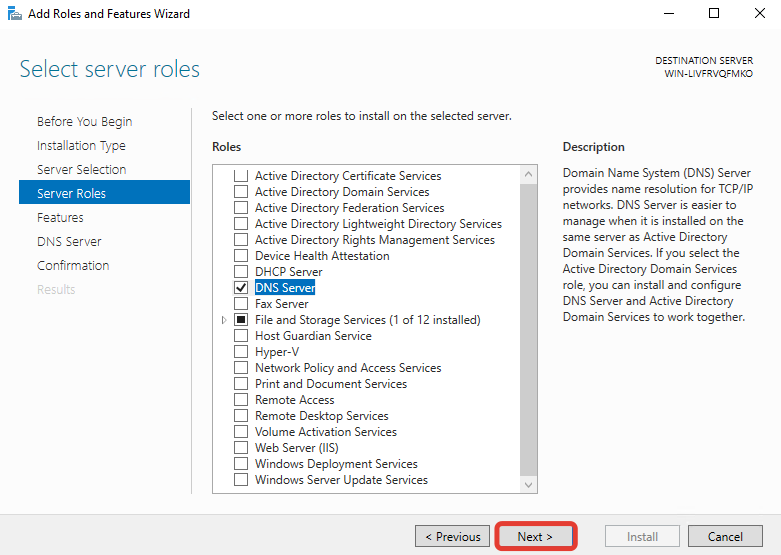
Нажмите кнопку «Next».
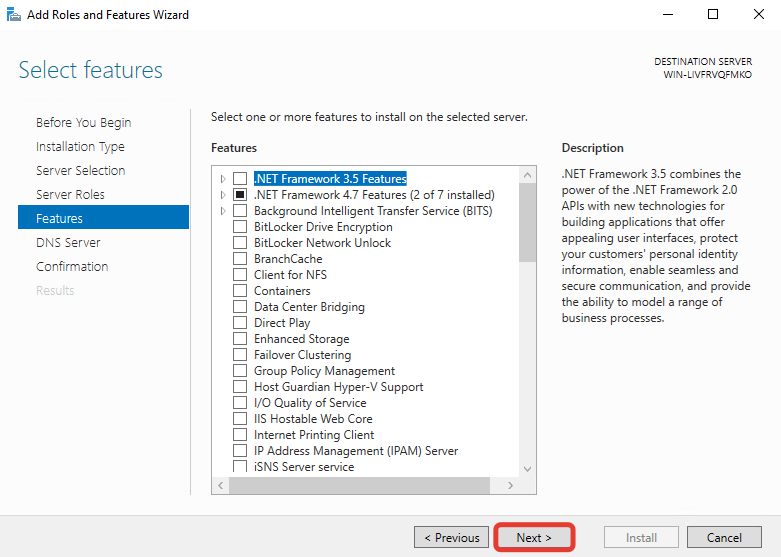
Далее ничего не меняйте, нажмите кнопку «Next».
Нажмите «Next».
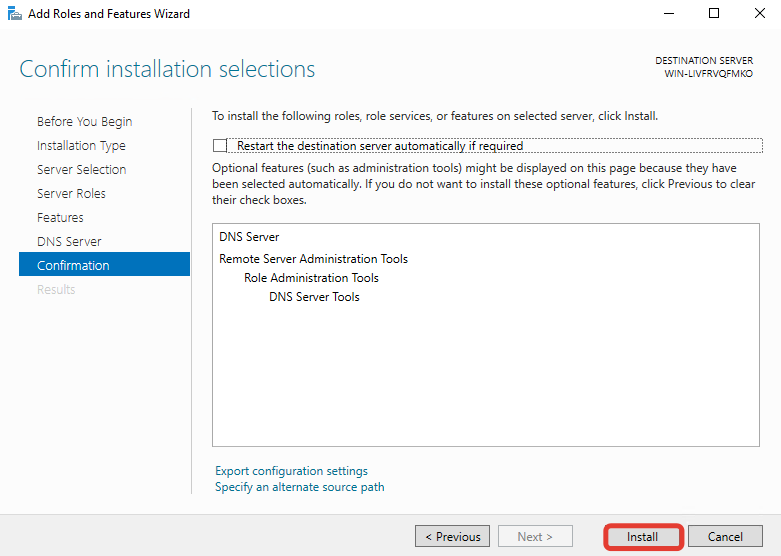
Далее для начала установки нажмите кнопку «Install».
Ждём завершения установки роли «DNS Server».

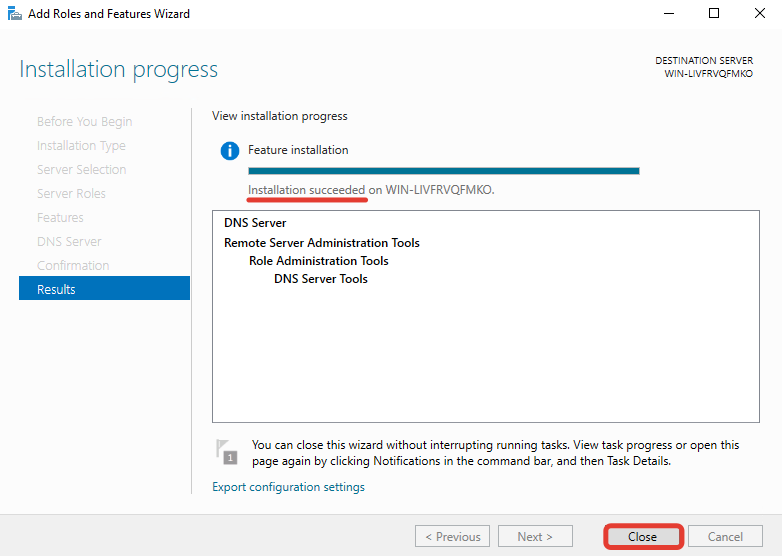
Как только увидите надпись о завершении установки «Installation succeeded», закройте окно, нажав «Close».
Создание первичной зоны «DNS-сервера»
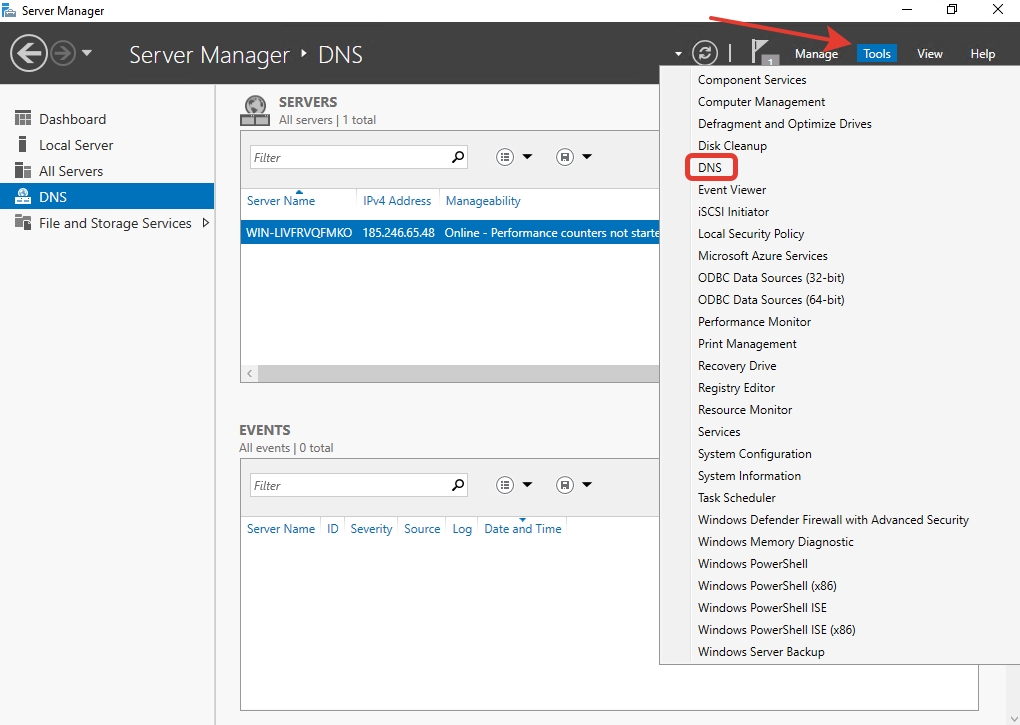
Возвращаемся в «Server Manager», в правом верхнем углу наведите курсор на «Tools» и выберите пункт «DNS».
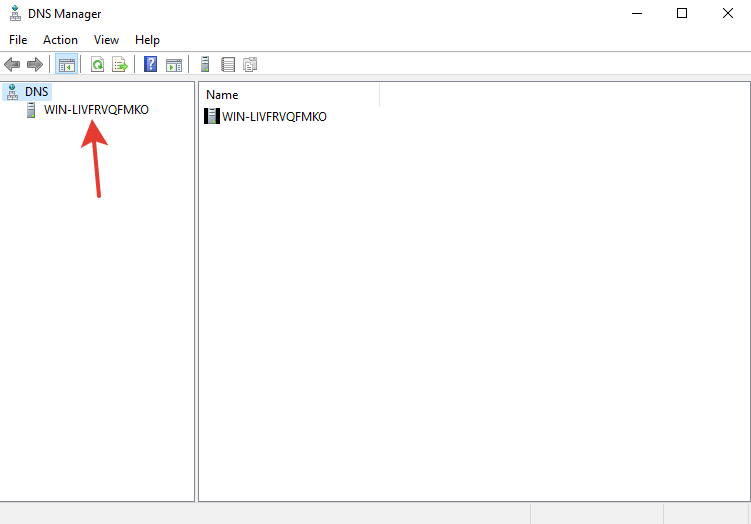
Двойным кликом выберите ваш сервер, в данном случае это «WIN-LIVFRVQFMKO».
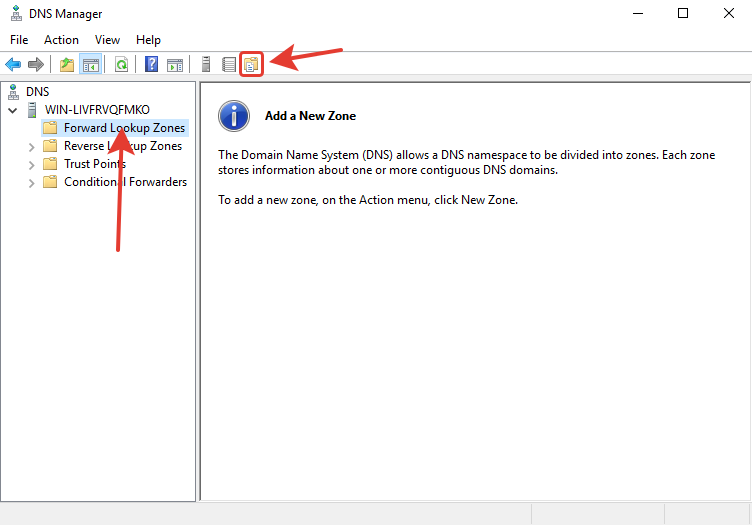
Выберите «Forward Lookup Zones» и нажмите кнопку «New Zone».
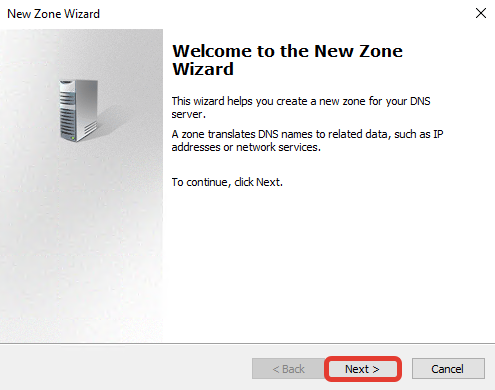
Нажмите «Next».
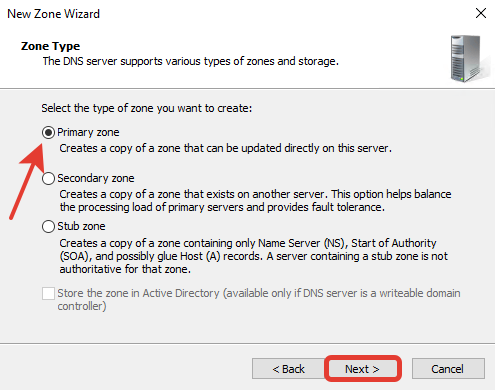
Выберите первичный тип зоны «Primary zone», нажмите «Next».
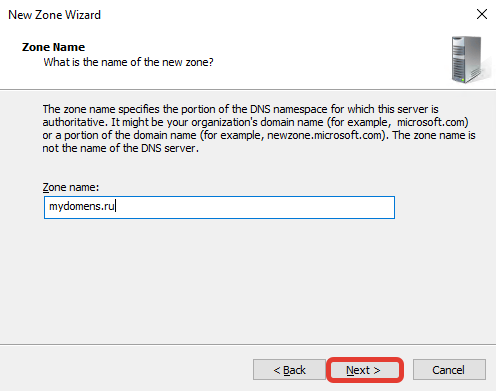
В поле «Zone name» введите имя домена, на основе которого будут создаваться DNS сервер, нажмите «Next».
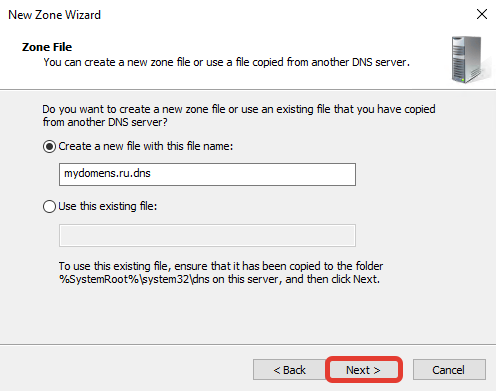
При необходимости поменяйте название создаваемого файла зоны, нажмите «Next».
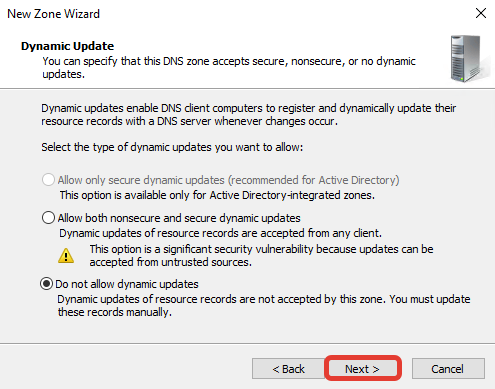
Выберите «Do not allow dynamic updates», чтобы запретить динамическое обновление зоны для повышения безопасности, нажмите «Next».
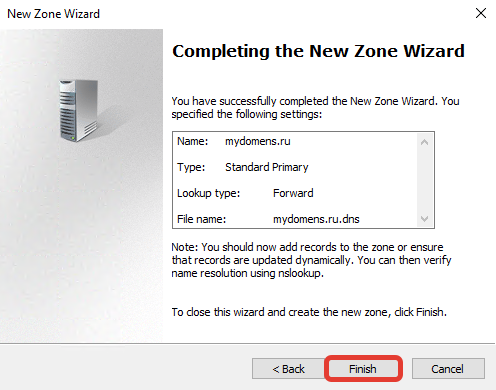
Нажмите «Finish».
Добавление «DNS записей»
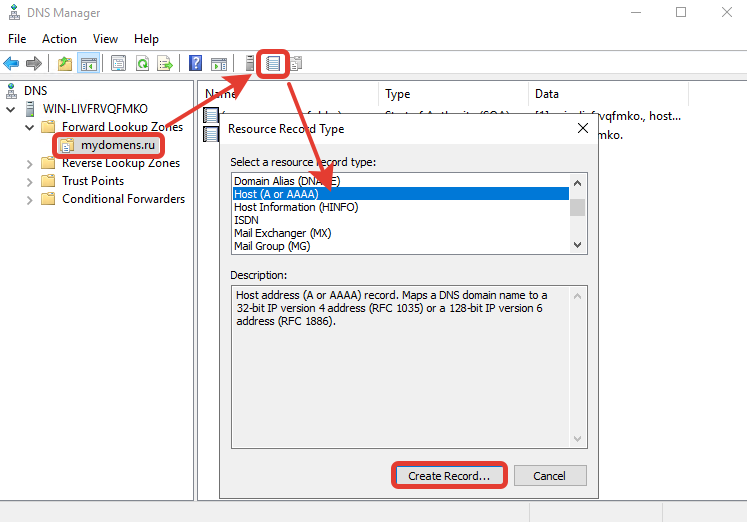
Выберите зону созданного домена и нажмите кнопку «New Record». Далее выберите из предложенного списка пункт «Host (A or AAAA)» для привязки домена к IP-адресу и нажмите кнопку «Create Record…».
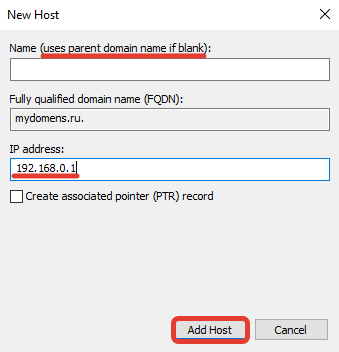
В появившемся окне добавьте «А» записи для основного домена зоны. Для этого поле «Name» оставьте пустым (в данном случае «А» запись будет добавлена для основного домена зоны mydomens.ru). В поле «IP address» введите IP, куда должен быть привязан домен. После нажмите кнопку «Add Host».
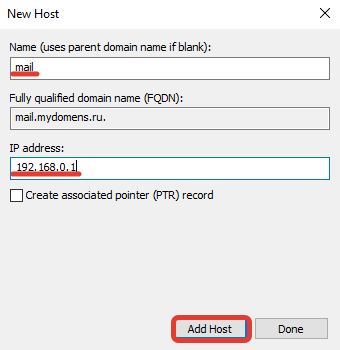
Остальные записи типа «А» добавляются по тому же принципу. Добавим для примера запись для домена mail.mydomens.ru. В поле «Name» введите имя поддомена mail, в поле «IP address» введите IP-адрес.
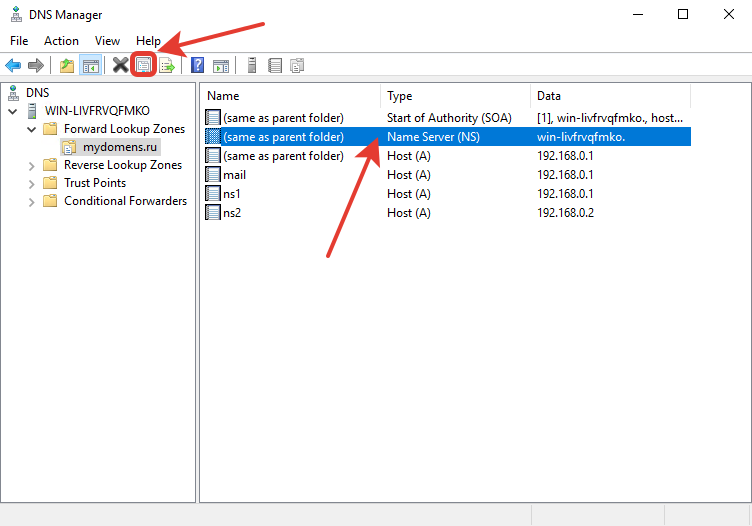
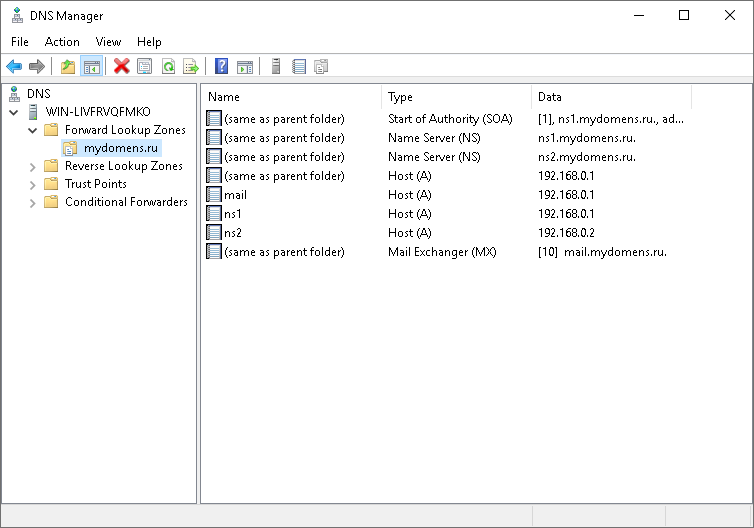
Все добавленные записи вы можете видеть в списке DNS записей зоны.
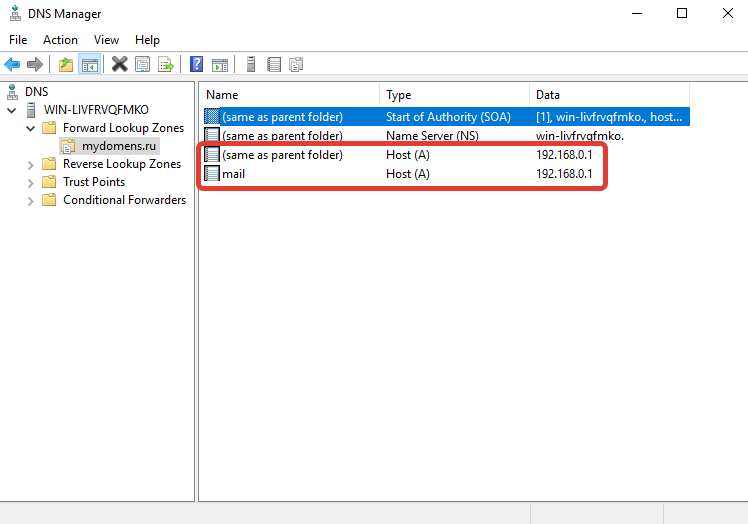
Добавьте все необходимые «А» записи для доменов. Обязательно добавьте «А» записи для NS адресов в том же соответствии, как они указаны у регистратора домена:
ns1.mydomens.ru\192.168.1.1
ns2.mydomens.ru\192.168.1.2
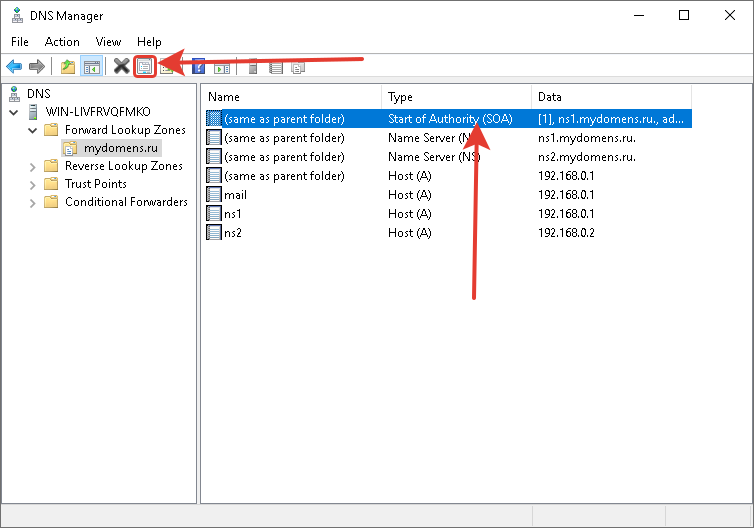
Далее отредактируйте запись типа «Name Server (NS)». Для этого выберите запись в списке, она создана по умолчанию, после нажмите кнопку «Properties».
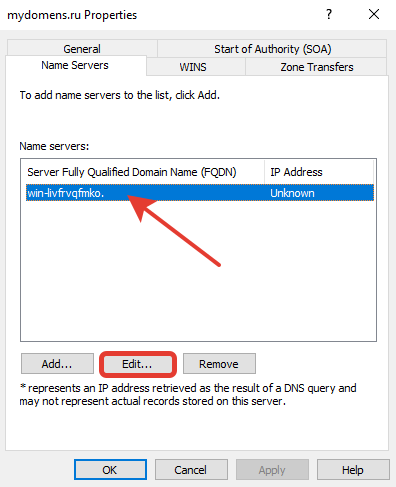
В появившемся окне выделите имеющуюся запись из списка и нажмите кнопку «Edit…».
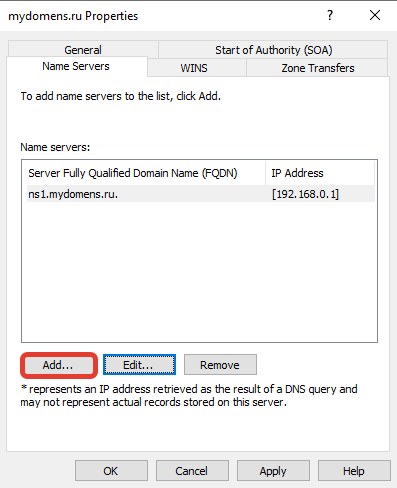
В первом поле введите имя NS адреса, ниже введите соответствующий ему IP, после нажмите «Enter» на клавиатуре, далее нажмите кнопку «OK».

Далее добавьте второй NS, для этого нажмите кнопку «Add…».
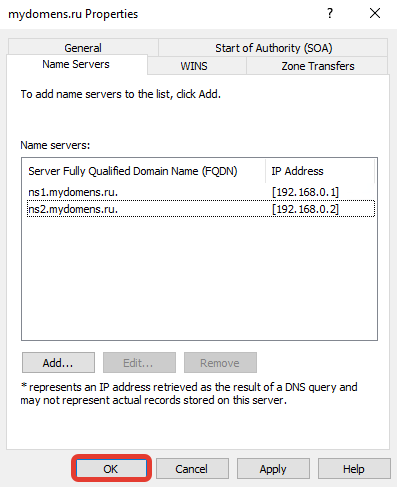
Введите соответствующие данные в поля и нажмите кнопку «ОК».

Проверьте, что все NS записи добавлены верно, и нажмите кнопку «ОК».
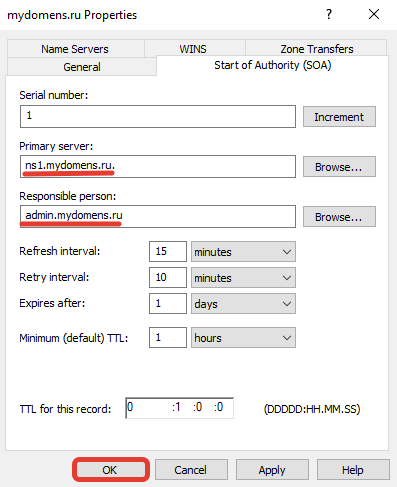
Отредактируйте «SOA» запись.
В поле «Primary server» введите первичный NS адрес вашей DNS зоны. В поле «Responsible person» введите email адрес ответственного лица зоны DNS, вместо знака @ поставьте точку. Далее нажмите кнопку «ОК».
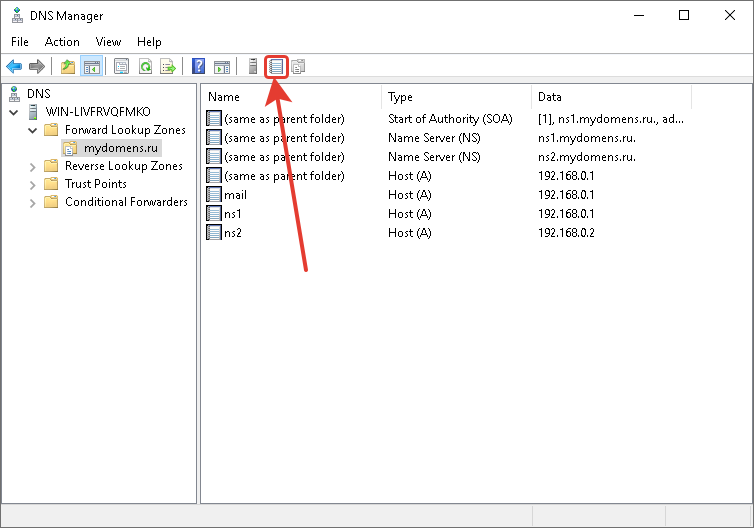
Добавьте «MX» запись для указания сервера, на который будет приходить почта на домен.
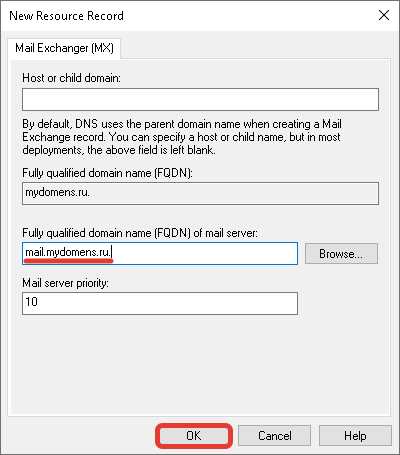
В окне выбора типа записи выберите «Mail Exchanger (MX)».

Если добавляете запись для основного домена зоны, поле «Host» оставьте пустым. В поле «mail server» введите доменное имя почтового сервера, куда будет пересылаться почта для домена.
После выполнения всех настроек у вас должен получится примерно следующий перечень записей.
Проверка работоспособности
Для проверки вы можете воспользоваться командной строкой CMD или PowerShell, сторонними ресурсами для проверки DNS записей, например https://2whois.ru/?t=dig.
После выполнения запроса записей зоны вы должны получить соответствующую запись запрошенную с DNS сервера. При запросе записи типа ANY, с сервера будут отданы все имеющиеся DNS записи домена. Для примера рассмотрим два варианта проверки, через PowerShell и на сайте 2whois.ru.
PowerShell
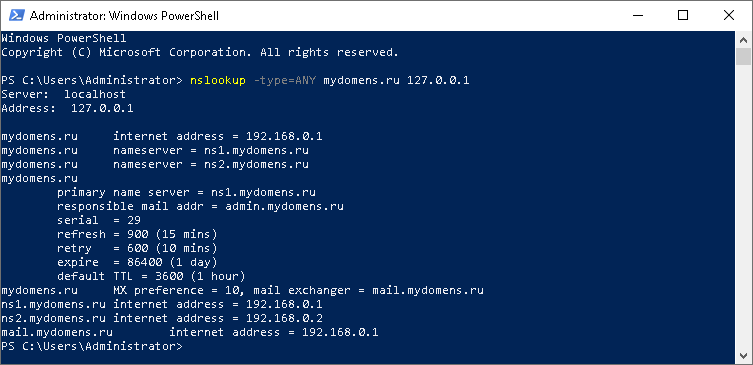
Для проверки используйте следующий синтаксис команды: nslookup -type=ANY имя_домена IP_сервера
После выполнения соответствующей команды вы увидите сервер, с которого получена информация, и соответствующий перечень записей, добавленных вами ранее.
В случае если запрашиваемые записи не удалось получить, проверьте введенную команду, если введено всё верно, но записи не отдаются, обратитесь в службу поддержки вашего сервера.
Онлайн сервис 2whois.ru
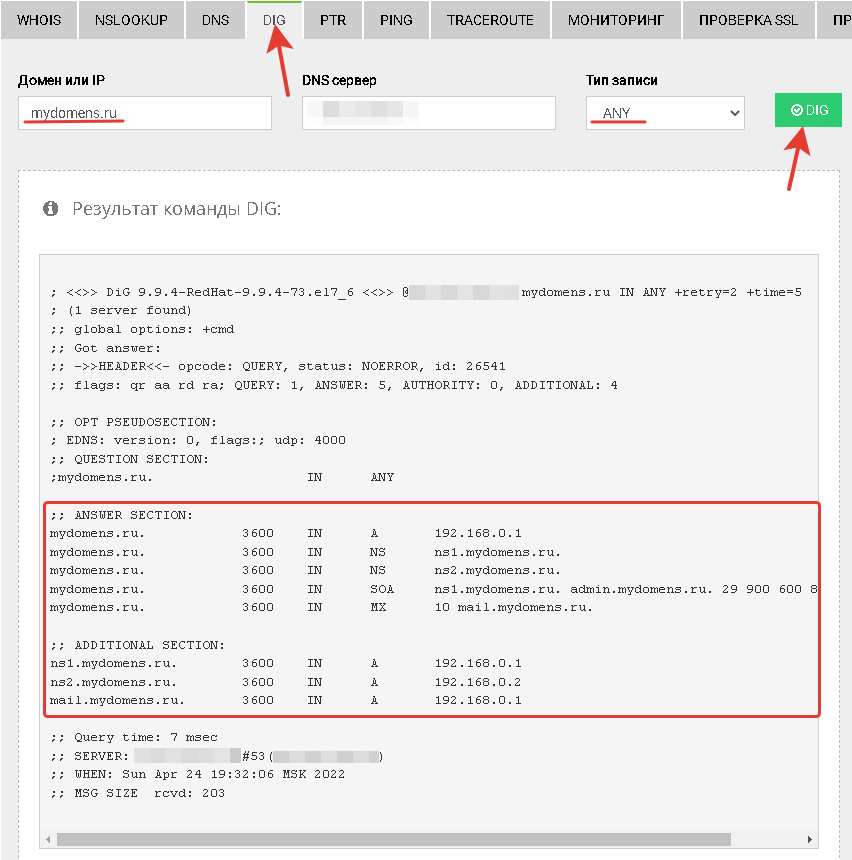
Для проверки работы DNS сервера на сайте https://2whois.ru/ выберите вкладку DIG, далее в поле «Домен или IP» введите имя домена, который вы добавляли ранее. В поле «DNS сервер» введите IP адрес сервера, на котором вы выполняли настройки. В поле «Тип записи» выберите «ANY» для получения всех записей доменной зоны. После нажмите кнопку «DIG».
После получения результата проверки в секции «ANSWER SECTION» вы увидите перечень записей, добавленных ранее на сервер, это будет означать, что DNS сервер функционирует и работает корректно.
Если добавленных ранее записей в данной секции не появится, обратитесь в службу поддержки вашего сервера.
Configuring a DNS server in Windows Server 2022 is a two-step process. First, you must create a DNS zone. Then, you must add a DNS server to that zone. In this article, we will walk you through the steps necessary to create a DNS zone and add a DNS server to it.
Creating a DNS Zone
To create a DNS zone, you must first open the DNS Manager console. To do this, open the Start menu, type dns, and then click the DNS Manager icon that appears.
In the DNS Manager console, you will see a list of zones. To create a new zone, click the Add Zone button.
In the Add Zone dialog box, you will need to provide a name for the zone and a description. Click the Next button.
In the Select a Zone Type dialog box, you will need to select the type of zone that you want to create. The options are Primary, Secondary, or Stub. Select the Primary zone type, and then click the Next button.
In the Select a DNS Server dialog box, you will need to specify the name of the DNS server that you want to use to serve the zone. Click the Next button.
In the Confirm Zone Creation dialog box, you will be asked to confirm that you want to create the zone. Click the Finish button to create the zone.
Adding a DNS Server to a Zone
Now that you have created a zone, you need to add a DNS server to it. To do this, open the DNS Manager console, and then click the Add Zone button.
In the Add Zone dialog box, you will need to provide a name for the zone and a description. Click the Next button.
In the Select a Zone Type dialog box, you will need to select the type of zone that you want to add the DNS server to. The options are Primary, Secondary, or Stub. Select the Primary zone type, and then click the Next button.
In the Select a DNS Server dialog box, you will need to specify the name of the DNS server that you want to use to serve the zone. Click the Next button.
In the Confirm Zone Creation dialog box, you will be asked to confirm that you want to add the DNS server to the zone. Click the Finish button to add the DNS server to the zone.
Table Of Contents Show
- What is DNS Server?
- What Is the Function of a DNS Server?
- DNS Resolution Process
- Windows DNS Server Installation and Configuration on Windows 2022
- Prerequisites
- Install DNS Server
- Create a Forward Lookup Zone
- Create a Reverse Lookup Zone
- DNS A and PTR records should be added.
- Verify DNS Name Resolution
- Conclusion to How to Setup Windows DNS Server and Configuration on Windows 2022
- In Windows, how do I set up a DNS server?
- How do you set up your DNS server?
- In Windows Server, how do I manage DNS?
- In Windows Server 2012, how do I set up a DNS server?
How to Install and Configure a Windows DNS Server in Windows 2022
by Hitesh Jethva
in DNS
In this post, we will introduce DNS server, its working process, and then move on to the DNS server setup and zone creation phase on Windows 2022.
The DNS server is the most important because you would be unable to find any website without it. It is a globally distributed service organized in a hierarchy, with each section denoting a subdivision.
Let’s get started with this blog post about Windows DNS Server Setup and Configuration on Windows 2022.
Also Read
Types of DNS Records: A, CNAME, AAAA, MX, TXT, NS, PTR, SRV, SOA
What is DNS Server?

DNS servers are quite similar to phonebooks and are crucial part of the Internet. What DNS servers do is they help convert website names into IP addresses so that machines can understand the query and load the requested pages for usersAs a result, users will find it easier and faster to access them online.
The domain name system (DNS) can be summed up as a naming database that stores data about domain names and the IP addresses that correspond to them. It also translates human readable domain names into the IP addresses that correspond to them, IPv4 or IPv6, which are difficult for people to remember and type out.
When a user types a domain name into a browser, it sends a request to the DNS server for its corresponding IP address (usually an IPv4 address). The DNS server then searches its database for the requested domain name, finds it, and returns its corresponding IP address to the browser, which uses this information to connect with the website.
A DNS server is a type of name server that responds to queries from other computers, such as web browsers and email clients. It is a hierarchical naming system for computers, services, or any resource connected to the Internet or a private network that associates various information with domain names assigned to each participating entity.
DNS servers are classified into four types: recursive servers, root name servers, TLD servers, and authoritative name servers.
Also Read
How Primary and Secondary DNS Function (Using DNS Servers)
What Is the Function of a DNS Server?
DNS basically converts domain names into IP addresses that computers can read, understand, and use. When a user types a query or domain into a browser, the DNS service translates the user type into Internet Protocol (IP) addresses that the machine can understand.
In exchange, the machine locates and delivers the requested webpage; this entire process of translating and discovering the requested data is known as DNS resolution.
DNS Resolution Process
The DNS resolution process includes the following steps:
- The user enters his or her query or a domain name into the browser.
- The recursive DNS query or message is forwarded to the network by the Browser in order to determine the corresponding IP address.
- The query is then forwarded to an ISP-managed recursive DNS server, which looks for the page and loads it for the user once it receives the address.
- If the recursive DNS server cannot find the correct answer to the user’s query, it will query other servers, beginning with the DNS root name servers, then moving on to top level domain (TLD) name servers, and finally authoritative name servers.
- These servers collaborate and redirect until they find a DNS record that contains the correct answer to the requested query.
- The recursive server also caches the information for future use, ensuring that the next time a similar request is made, it responds directly rather than querying a series of other servers.
- If the authoritative name servers also fail to find the information, the user receives an error message.
Because a domain name server (DNS) completes this process in a matter of seconds, the DNS protocol is the set of rules for querying and updating these servers that define how the Internet’s Domain Name System (DNS) works.
To put it simply, the process employs a recursive server that converts domain names into Internet Protocol (IP) addresses and asks on the user’s behalf.
Also Read
Configure Azure/AWS/Google GCP Cloud Windows DNS Server
It is now time to learn how to Setup and Configure Windows DNS Server on Windows 2022.
Windows DNS Server Installation and Configuration on Windows 2022
Prerequisites
- A server with the Windows Server 2022 operating system and RDP access.
- A user with administrative privileges.
- A minimum of 4 GB of RAM and a CPU with two cores is required.
Install DNS Server
Log in as an administrator user to Windows Server 2022 and follow the instructions below to install the DNS server.
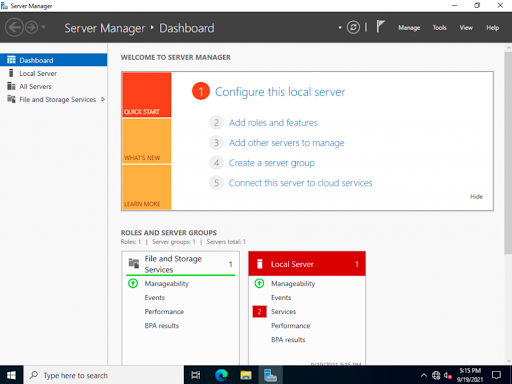
Step 1: Launch the Server Manager, as illustrated below:
Step 2 — Select Add roles and features, and you should see the following screen:
Step 3 — After clicking the Next button, you should see the following screen:
Step 4 — Click the Next button after selecting Role-based and feature-based installation, and you should see the Select Destination Server screen:
Step 5 — From the server pool, select the server and click the Next button to bring up the roles selection screen:
Step 6 — Select the DNS server and press the Next button; you should see the following screen:
Step 7 — Check all settings and click the Install button to begin the installation; you should see the following screen:
Step 8 — Allow some time for the installation to complete before closing the installation wizard by clicking the Close button.
Also Read
How to Install and Configure a Linux BIND DNS Server on Azure/AWS/GCP
Create a Forward Lookup Zone
To resolve the name to an IP address, you must first create a forward lookup zone. To do so, follow the steps below:
Step 1 — On the server manager, navigate to Tools => DNS to access the DNS manager, as shown below:
Step 2: Right-click on the server name to reveal the following options:
Step 3 — Select New Zone, and the zone configuration wizard should appear:
Step 4 — Press the Next button to bring up the zone type selection screen:
Step 5 — Click the Next button after selecting the Primary zone, and you should see the following screen:
Step 6 — Choose Forward lookup zone and press the Next button to see the following screen:
Step 7 — Enter your zone name and click the Next button to see the following screen:
Step 8 — Click the Next button after selecting «Create a file with the file name,» and you should see the Dynamic update screen:
Step 9 — Select «Do not allow dynamic update» and click the Next button. The following screen should appear:
Step 10 — Click the Finish button, and your forward lookup zone should appear in the following screen:
Also Read
How to Modify DNS Server Settings in Windows 10/11
Create a Reverse Lookup Zone
The next step is for you to create a reverse lookup zone to resolve the IP address to the name. To do so, follow the steps below:
Step 1 — In the DNS manager, right-click on the server name and select New Zone; the zone creation wizard should appear:
Step 2 — Press the Next button to bring up the zone type selection screen:
Step 3 — Choose the Primary zone and press the Next button to see the following screen:
Step 4 — Click the Next button after selecting «Reverse lookup zone,» and you should see the following screen:
Step 5 — Click the Next button after selecting IPv4 Reverse Lookup Zone, and you should see the following screen:
Step 6 — Enter your network id and press the Next button to see the following screen:
Step 7 — Click the Next button after selecting «Create a file with this file name,» and you should see the Dynamic update screen:
Step 8 — Select «Do not allow dynamic updates» and click the Next button. The following screen should appear:
Step 9 — Click the Finish button, and your reverse lookup zone should appear on the following screen:
Also Read
What is DNS Hierarchy Architecture (Explained) with Examples
DNS A and PTR records should be added.
The following steps should be followed to add A and PTR records to DNS for remote hosts in order to perform name resolution:
Step 1 — In the DNS manager, right-click on the forward lookup zone to bring up the following screen:
Step 2 — Select New Host (A or AAAA). The following screen should appear:
Step 3 — Enter your host’s parent domain name and IP address, and select «Create associated pointer record,» then click the Add Host button. Finally, click the forward lookup zone, and you should see your newly added A record on the screen below:
Also Read
Best DNS Security Practices for Securing Your DNS Server (Checklist)
Verify DNS Name Resolution
Now that the DNS server installation and configuration is complete, we must test whether or not the DNS name resolution works.
Open your command prompt and type the following command: nslookup
nslookup
You should get the following results:
					Default Server:  web.exampledns.com
Address:  208.117.85.195
Now, enter the FQDN of your newly added host:
> web.exampledns.com
The following output should show the name to IP address resolution:
					Server:  web.exampledns.com
Address:  208.117.85.195

Name:    web.exampledns.com
Address:  208.117.85.195
Then enter your newly added host’s IP address:
> 208.117.85.195
In the output, you should see the IP address to name resolution:
Server:  web.exampledns.com
Address:  208.117.85.195

Name:    web.exampledns.com
Address:  208.117.85.195
Thank you for reading this article on how to Setup and Configure Windows DNS Server on Windows 2022.
Also Read
Top 20 Open Source DNS Servers (Linux/Windows)
Conclusion to How to Setup Windows DNS Server and Configuration on Windows 2022
We explained how to install a DNS server, create a forward and reverse lookup zone, and add A/PTR records to DNS in this How to Setup Windows DNS Server and Configuration on Windows 2022 post, so I hope you can now easily deploy your own DNS server for local name resolution in your organization.
Furthermore, remembering a website’s IP address can be difficult, but DNS servers alleviate this problem by converting long IP addresses into human-readable domain names that are simple to remember and use.Finally, a DNS server and innovative features such as AI-based searches and chatbots allow you to make online transactions quickly.
In Windows, how do I set up a DNS server?
Windows..
Go to the Control Panel..
Change adapter settings by selecting Network and Internet > Network and Sharing Center.
Choose the connection for which you want to set up Google Public DNS..
Choose the Networking tab..
Select the DNS tab by clicking Advanced..
Click OK..
Select Use the DNS server addresses listed below.
How do you set up your DNS server?
How do I change the address of my DNS server?.
Launch the Google Home app…
Tap Wi-Fi Settings. Advanced Networking..
Tap DNS..
Choose your preferred public DNS server, or enter a primary and secondary server address if you want to use a custom DNS server.
Tap Save ..
In Windows Server, how do I manage DNS?
To edit a DNS zone..
Click IPAM in Server Manager..
Click DNS Zones under MONITOR AND MANAGE in the navigation pane..
Make one of the following choices in the lower navigation pane:…
Select IPv4 Reverse Lookup as an example.
Right-click the zone you want to edit in the display pane, and then select Edit DNS Zone.
In Windows Server 2012, how do I set up a DNS server?
Step 1: To install the DNS role, navigate to «Server Manager» and select Manage Add Roles and Features. Step 2: Click Next.Step 3 Select the Role-based or feature-based installation option, then click Next. Step 4 Install a Local DNS role, which will select a server from the server pool, then click Next.
How to Setup Windows DNS Server and Configuration on Windows 2022. In this post, we will introduce DNS server, it’s working process then move on to the DNS server setup and zone creation phase.
Primarily DNS server is highly important as, without it, you would not be able to find any website. It is a globally distributed service organized in a hierarchy with each section denoting a subdivision.
Let’s dive into this article blog about How to Setup Windows DNS Server and Configuration on Windows 2022.
What is DNS Server?

DNS servers are quite similar to phonebooks and are crucial part of the Internet. What DNS servers do is they help convert website names into IP addresses so that machines can understand the query and load the requested pages for users. Thus, making it easier and quicker for users to access them online.
In simple terms, the domain name system (DNS) is a naming database that stores information about domains and their corresponding IP addresses. It also translates human readable domain names into their corresponding IP addresses, IPv4 or IPv6, which are not easy for humans to remember and type out.
When someone types in a domain name like “www.google.com” in the browser, it sends a request to the DNS server for its corresponding IP address (usually an IPv4 address). The DNS server then checks its database for the requested domain name, finds it and returns its corresponding IP address back to the browser, which then uses this information to connect with the website.
A DNS server is a type of name server that responds to queries from other computers, such as web browsers and email clients. Organized is a hierarchical naming system for computers, services, or any resource connected to the Internet or a private network, it associates various information with domain names assigned to each of the participating entities.
How Does a DNS Server Work?

Basically DNS converts the domain name into IP addresses for computers to read, understand and use. The minute a user types his query or domain into a browser, the DNS service translates the user type into Internet Protocol (IP) addresses understandable by the machine.
In return, the machine finds and delivers the requested webpage. This whole process of translating and discovering the requested data is referred to as DNS resolution.
DNS Resolution Process
Here are the following steps included in the DNS resolution process:
- User types in his/her query or a domain name into the browser.
- The Browser forwards the recursive DNS query or message to the network to discover the corresponding IP address.
- The query is then passed to a recursive DNS server managed by ISP. Once the recursive DNS server receives the address, it looks for the page and loads it for the user.
- In case the recursive DNS server fails to find the right answer to the user’s query, it will query other servers. Firstly, it will check with the DNS root name servers, then top level domain (TLD) name servers, and finally authoritative name servers.
- These servers work together and redirect until they retrieve a DNS record containing the right answer for the requested query.
- The recursive server also caches the information for the future. What it does it makes sure the next time a similar request occurs, it will respond directly rather than querying with a series of other servers.
- In case the authoritative name servers also failed to find the information, an error message is returned to the user.
A domain name server (DNS) performs this entire process in a fraction of seconds. Consequently the DNS protocol is the set of rules for querying and updating these servers, which define how the Internet’s Domain Name System (DNS) works.
A simple way of looking at the process is it uses a recursive server that translates domain names into Internet Protocol (IP) addresses and asks on behalf of the user.
Now it is time to learn steps in how to Setup Windows DNS Server and Configuration on Windows 2022.
Setup Windows DNS Server and Configuration on Windows 2022
Prerequisites
- A server running Windows Server 2022 operating system along with RDP access.
- A user with administrative privileges.
- Minimum 4 GB of RAM with 2 Cores CPU.
Install DNS Server
Log in to the Windows Server as an administrator user and follow the steps given below to install the DNS server on Windows server 2022.
Step 1 – Open the Server Manager as shown below:

Step 2 – Click on Add roles and features. You should see the before you begin screen:

Step 3 – Click on the Next button. You should see the select installation type screen:

Step 4 – Select Role-based and feature-based installation and click on the Next button. You should see the select destination server screen:

Step 5 – Select the server from the server pool and click on the Next button. You should see the roles selection screen:

Step 6 – Select the DNS server and click on the Next button. You should see the confirm installation screen:

Step 7 – Verify all settings and click on the Install button to start the installation. You should see the installation progress screen:

Step 8 – Wait for some time to finish the installation. Once the installation is complete, click on the Close button to close the installation wizard.
Create a Forward Lookup Zone
Next, you will need to create a forward lookup zone to resolve the name to IP address. Follow the below steps to create a forward lookup zone:
Step 1 – On the server manager, click on the Tools => DNS to open the DNS manager as shown below:

Step 2 – Right click on the server name. You should see the following options:

Step 3 – Click on the New Zone. You should see the zone configuration wizard screen:

Step 4 – Click on the Next button. You should see the zone type selection screen:

Step 5 – Select the Primary zone and click on the Next button. You should see the following screen:

Step 6 – Select Forward lookup zone and click on the Next button. You should see the following screen:

Step 7 – Provide your zone name and click on the Next button. You should see the following screen:

Step 8 – Select “Create a file with the file name” and click on the Next button. You should see the Dynamic update screen:

Step 9 – Select “Do not allow dynamic update” and click on the Next button. You should see the following screen:

Step 10 – Click on the Finish button. You should see your forward lookup zone in the following screen:

Create a Reverse Lookup Zone
Following step is for you to create a reverse lookup zone to resolve the IP address to the name. Follow the below steps to create a reverse lookup zone:
Step 1 – On the DNS manager, right click on the server name and click on the New Zone. You should see the zone creation wizard:

Step 2 – Click on the Next button. You should see the zone type selection screen:

Step 3 – Select the Primary zone and click on the Next button. You should see the following screen:

Step 4 – Select “Reverse lookup zone” and click on the Next button. You should see the following screen:

Step 5 – Select IPv4 Reverse Lookup Zone and click on the Next button. You should see the following screen:

Step 6 – Define your network id and click on the Next button. You should see the following screen:

Step 7 – Select “Create a file with this file name” and click on the Next button. You should see the Dynamic update screen:

Step 8 – Select “Do not allow dynamic updates” and click on the Next button. You should see the following screen:

Step 9 – Click on the Finish button. You should see your reverse lookup zone on the following screen:

Add A and PTR Records to DNS
Further, you will need to add A and PTR records for remote hosts to perform name resolution. Follow the below steps to add A and PTR records to DNS:
Step 1 – On the DNS manager, right click on the forward lookup zone. You should see the following screen:

Step 2 – Click on the New Host (A or AAAA). You should see the following screen:

Step 3 – Provide the parent domain name and IP address of your host, and select “Create associated pointer record” then click on the Add Host button. Next, click on the forward lookup zone, you should see your added A record on the following screen:

Verify DNS Name Resolution
At this point, DNS server installation and configuration is finished. Now, we will need to test whether the DNS name resolution works or not.
Open your command line interface and run the nslookup command:
You should see the following output:
					Default Server:  web.exampledns.com
Address:  208.117.85.195
Now, type the FQDN of your added host:
You should see the name to IP address resolution in the following output:
					Server:  web.exampledns.com
Address:  208.117.85.195

Name:    web.exampledns.com
Address:  208.117.85.195
Then type the IP address of your added host:
And you should see the IP address to name resolution in the following output:
Server:  web.exampledns.com
Address:  208.117.85.195

Name:    web.exampledns.com
Address:  208.117.85.195
Thank you for reading this article about how to Setup Windows DNS Server and Configuration on Windows 2022.
How to Setup Windows DNS Server and Configuration on Windows 2022 Conclusion
In this How to Setup Windows DNS Server and Configuration on Windows 2022 post, we explained how to install a DNS server, create a forward and reverse lookup zone then add A/PTR records to DNS. I hope you can now easily deploy your own DNS server for local name resolution in your organization.
Additionally, it is quite challenging to remember a website’s IP address, but with DNS servers you do not have to worry much. They help translate long IP addresses into human readable domain names, which are quite easy to remember and use. Lastly, you can quickly make online transactions with a DNS server and innovative features, such as AI based searches and chatbots.
Read our content about DNS servers here.
В этой статье мы рассмотрим самые базовые настройки Windows Server 2022 — это Active Directory, DNS, DHCP, настройки терминальных лицензий, добавление пользователей… Эти настройки являются не обязательными, но как правило применяются как базовые для большинства задач.
— Скачать бесплатно дистрибутив Windows Server 2022 Standard и Datacenter можете в нашем каталоге.
— Пошаговая инструкция по установке Windows Server 2022 в нашей прошлой статье.
— Приобрести ключи активации для Windows Server 2022 Standard и Datacenter можете так же в нашем каталоге.
1) При установке Windows Server 2022 например на русском языке, добавляется по умолчанию только одна раскладка клавиатуры — «Русский язык», для настроек нам необходима еще английская раскладка клавиатуры. Добавим ее.
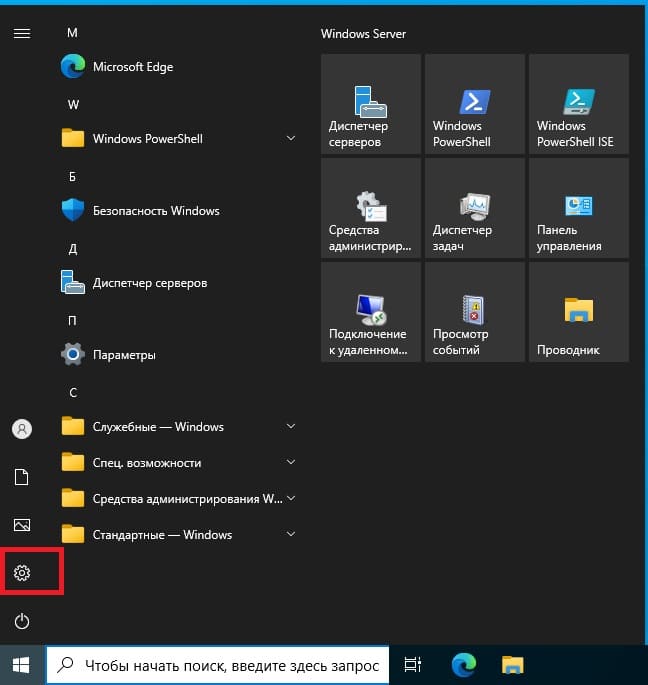
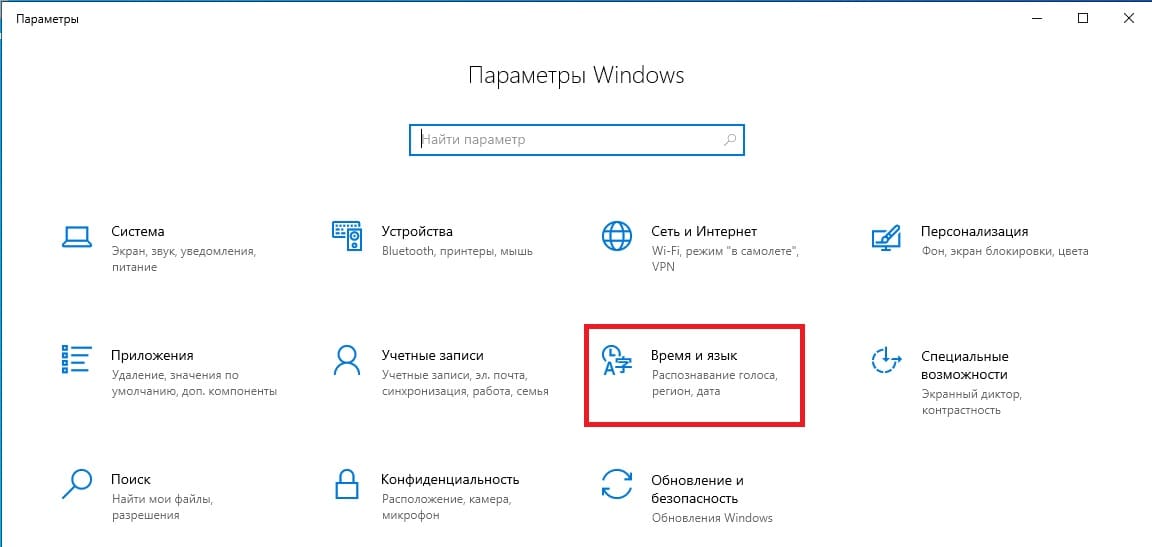
Заходим в меню «Пуск» => Параметры => Время и язык.
Во вкладке «Язык» нажимаем на «Добавление языка».

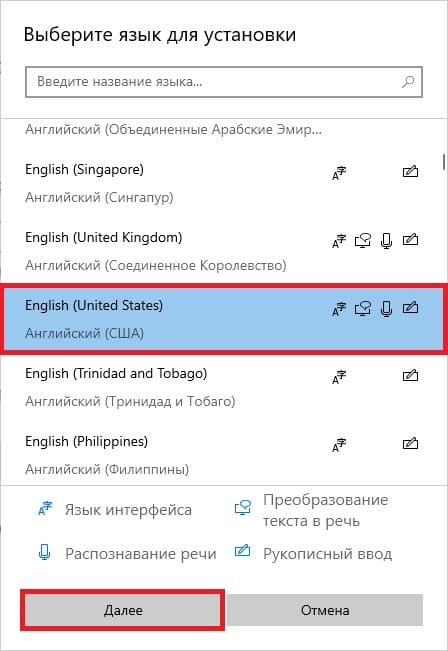
Выбираем «Английский» => Далее.
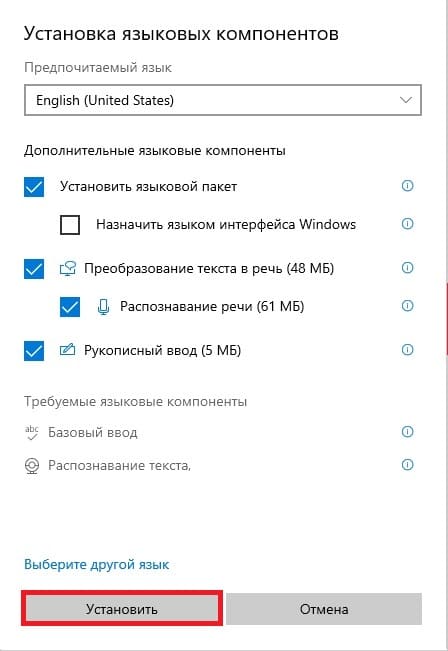
Можем оставить все галки, кроме назначения языком интерфейса и нажимаем «Установить».
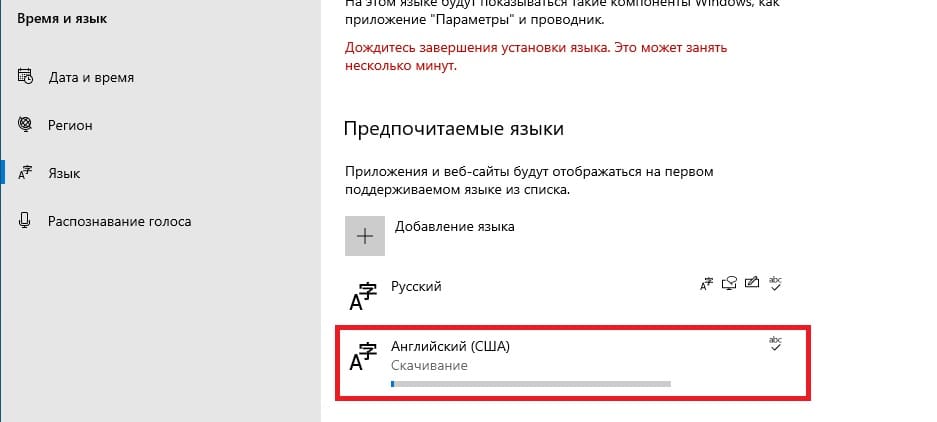
Теперь дожидаемся установки языкового пакета, после установки можете перезагрузить сервер и у Вас появится возможность переключения языка раскладки на английский язык.
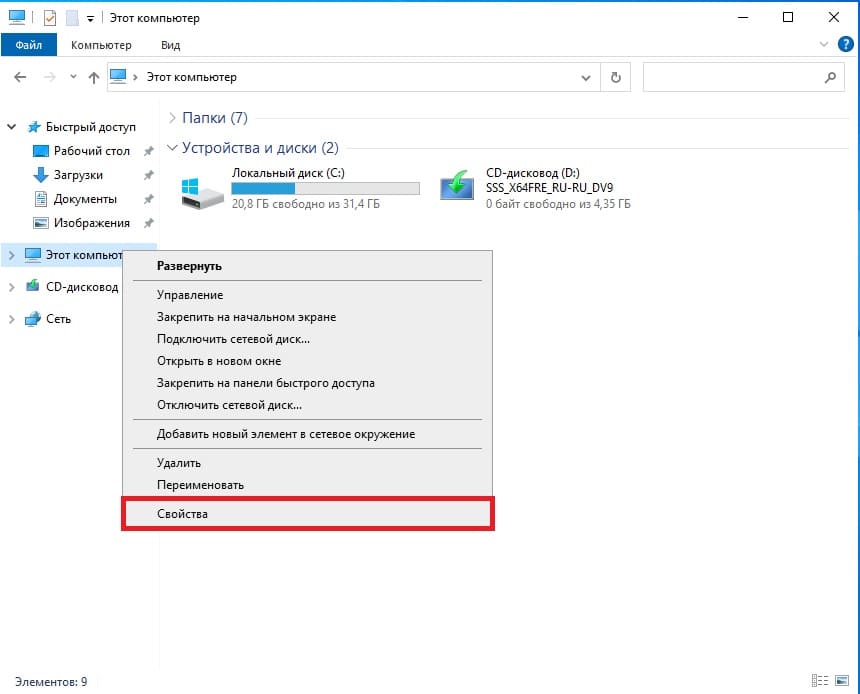
2) Следующим шагом, нам нужно задать имя серверу для более простого подключения к нему. Заходим в проводник => Слева «Этот компьютер» => Свойства.
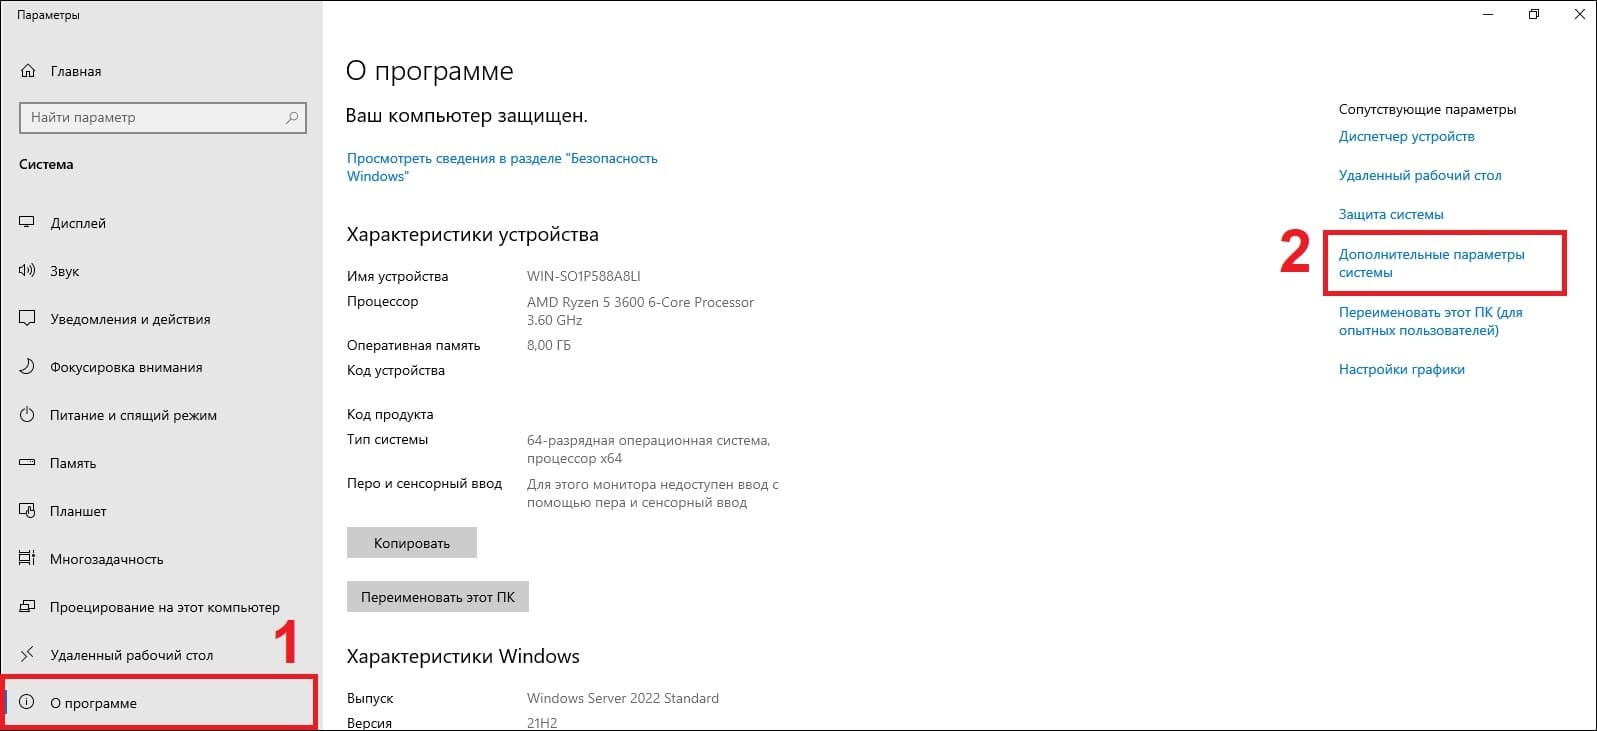
В меню «О программе» нажимаем «Дополнительные параметры системы».
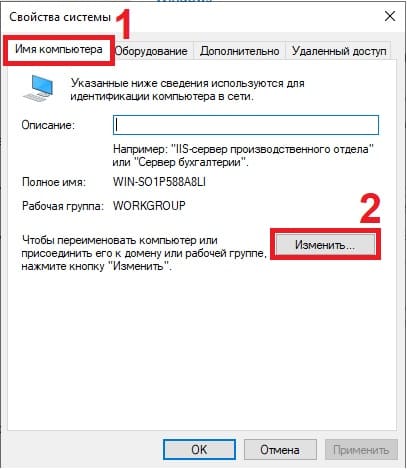
В новом окне выбираем вкладку «Имя компьютера» => Изменить.
Задаем имя компьютера, имя может быть любое. Рекомендуем не использовать кириллицу, а только латиницу и цифры.
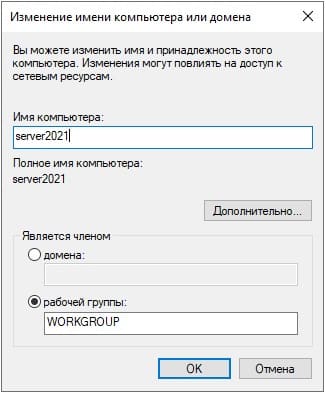
Для применения настроек — перезагружаем сервер.
3) Далее, зададим локальный статический IP адрес сервера. Это так же необходимо для бесперебойного подключения к нему. (мы рекомендуем помимо всего использовать так же статический публичный IP для корректного подключения к нему из внешней сети интернет). Так же, данная настройка обязательна для последующей настройки DHCP сервера.
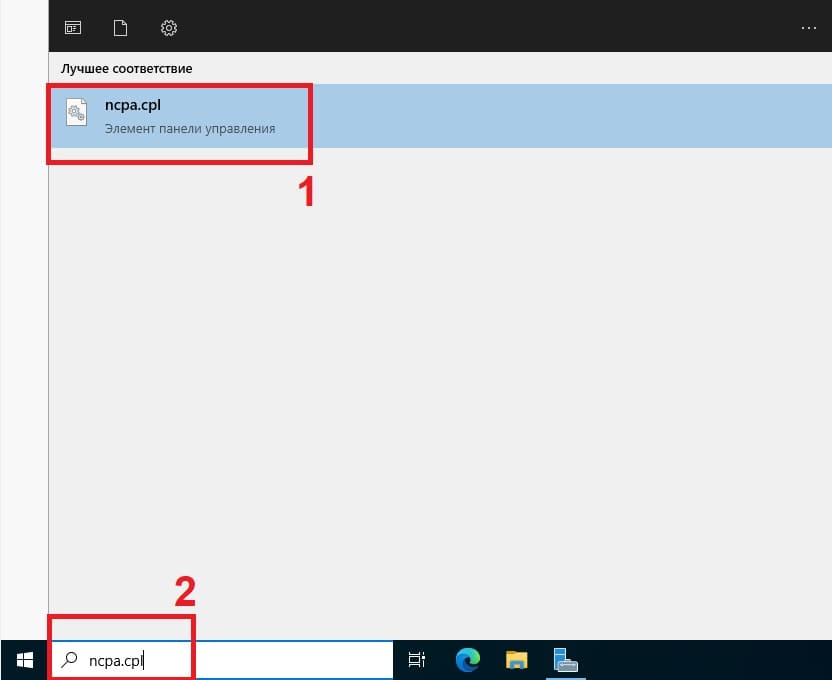
В поиск вводим ncpa.cpl
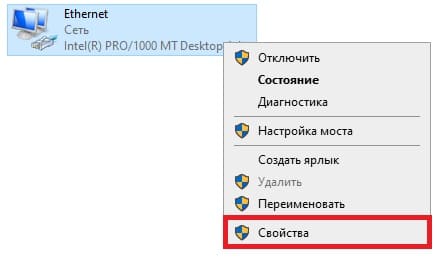
Правой кнопкой мыши на сетевую карточку => Свойства.
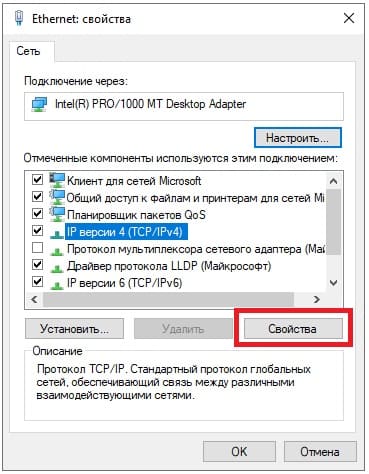
Мы будем настраивать Ipv4, выделяем его курсором и нажимаем «Свойства».
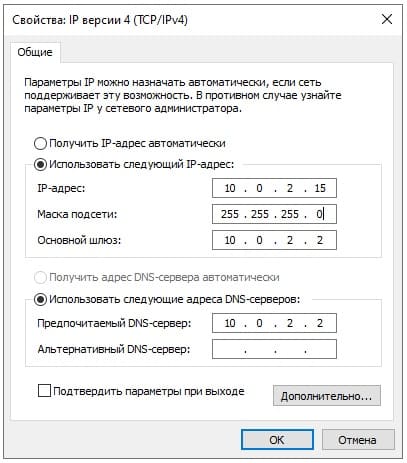
Задаем настройки IP Вашей сети. Внимание! На скриншоте ниже — это пример, у вас должны быть Ваши собственные настройки под Вашу сеть.
3) Теперь переходим к добавлению ролей и компонентов в Active Directory (Диспетчере серверов).
Нажимаем меню «Пуск» => Диспетчер серверов.
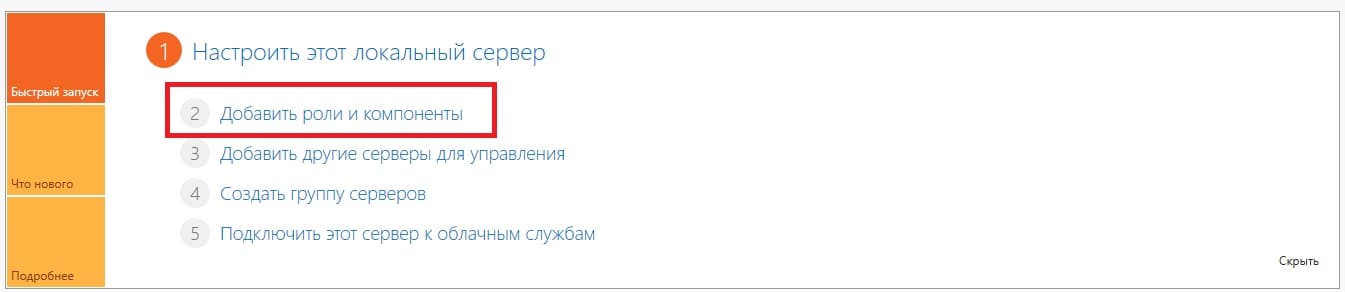
Добавить роли и компоненты.
В следующем окне просто нажимаем «Далее».
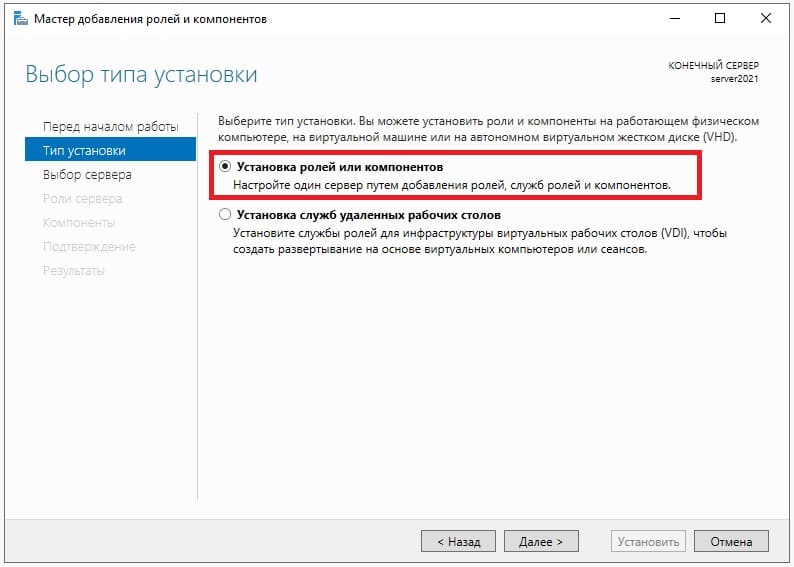
В меню «Тип установки» выбираем пункт => Установка ролей и компонентов.
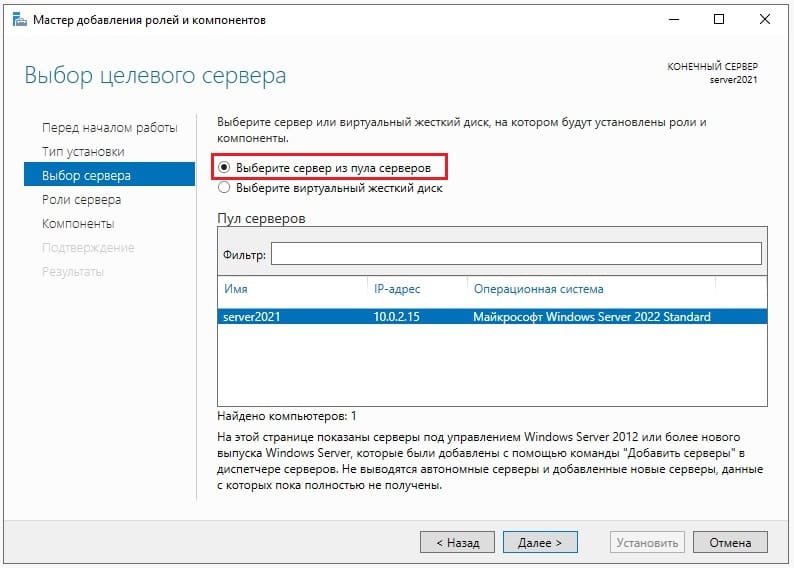
Далее «Выбираем сервер из пула». Он у нас должен быть один.
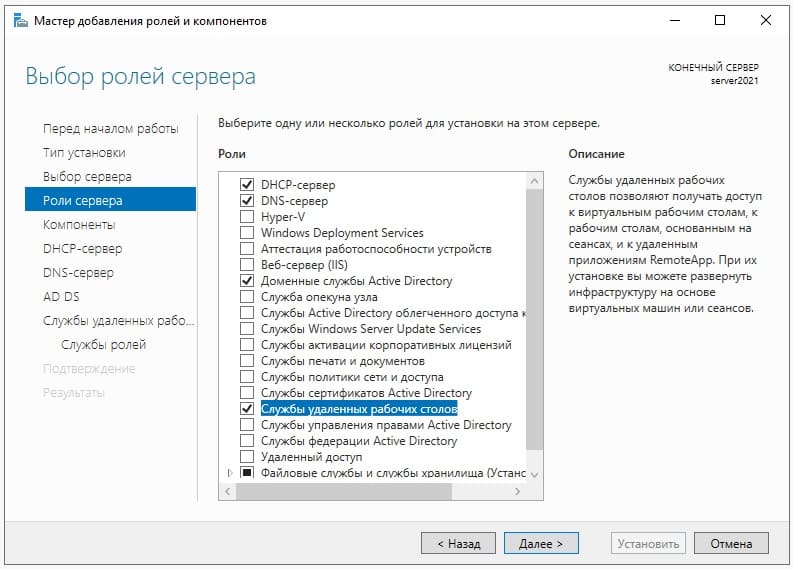
Далее, выбираем нужные Вам роли (функионал сервера), в случае чего, вы всегда сможете добавить что-либо еще, если что-то понадобится дополнительное.
Мы выберем на примере DHCP-сервер, DNS-сервер (Внимание! DNS (домен) не всегда нужен под рабочие задачи, убедитесь, что он нужен именно Вам, прежде чем его выбирать для установки. Мы его устанавливаем лишь для примера.), Доменные службы и Службы для удаленных рабочих столов (для подключения к серверу по RDP).
После выбора нужных служб идем далее.
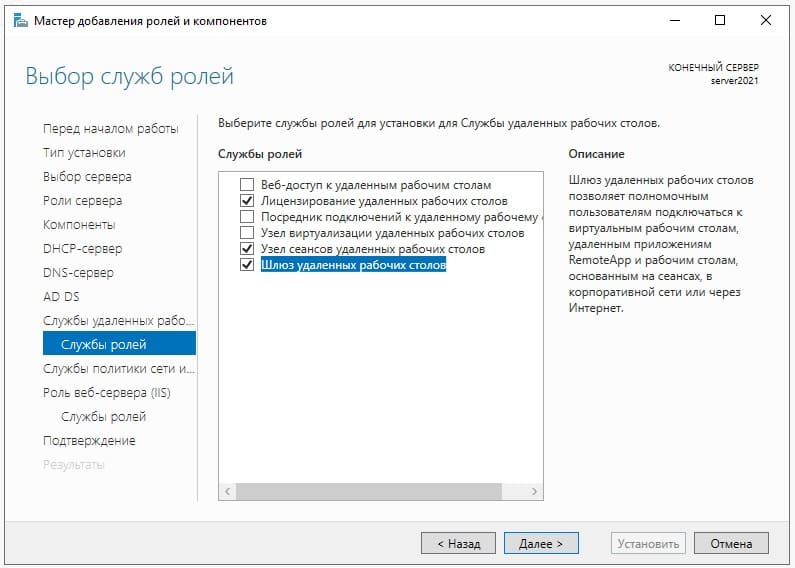
Далее, пролистываем до меню «Службы ролей» в подпункт «Службы удаленных рабочих столов» и выбираем здесь пункты «Лицензирование удаленных рабочих столов», «Узел сеансов удаленных рабочих столов» и «Шлюз удаленных рабочих столов».
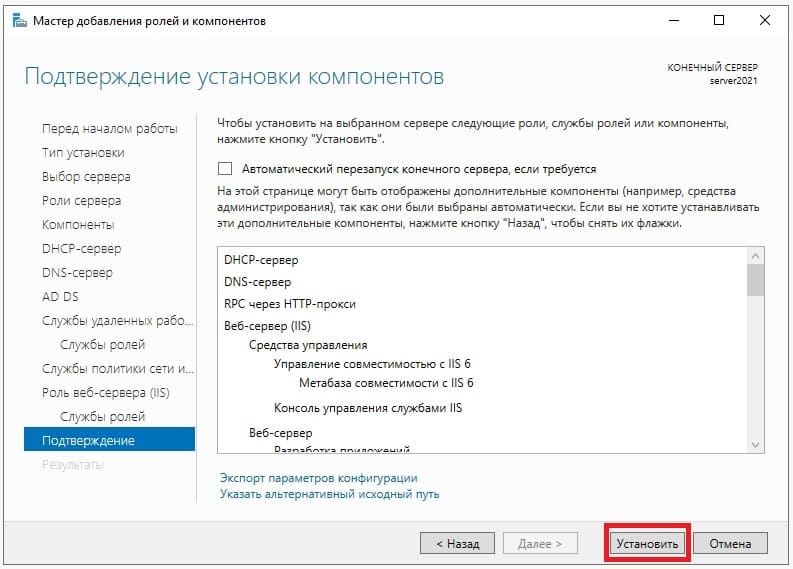
Пролистываем до конца в меню «Подтверждение», нажимаем «Установить» и дожидаемся установки служб.
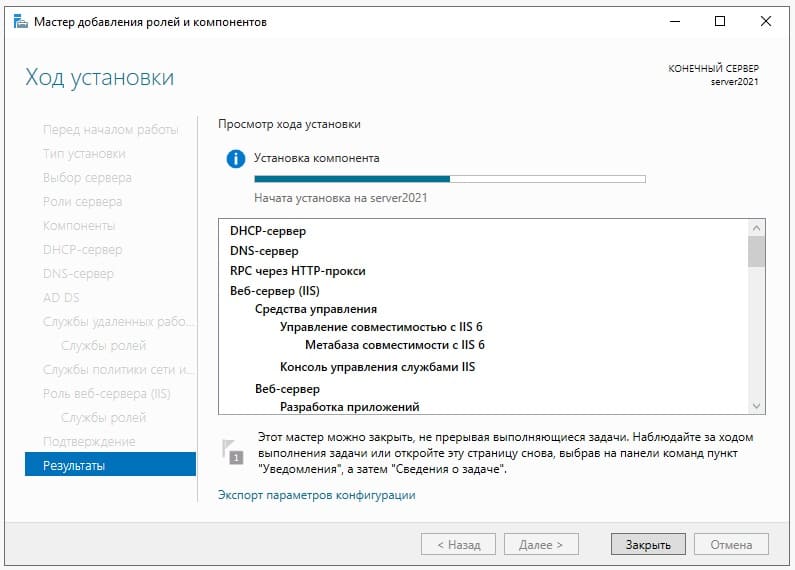
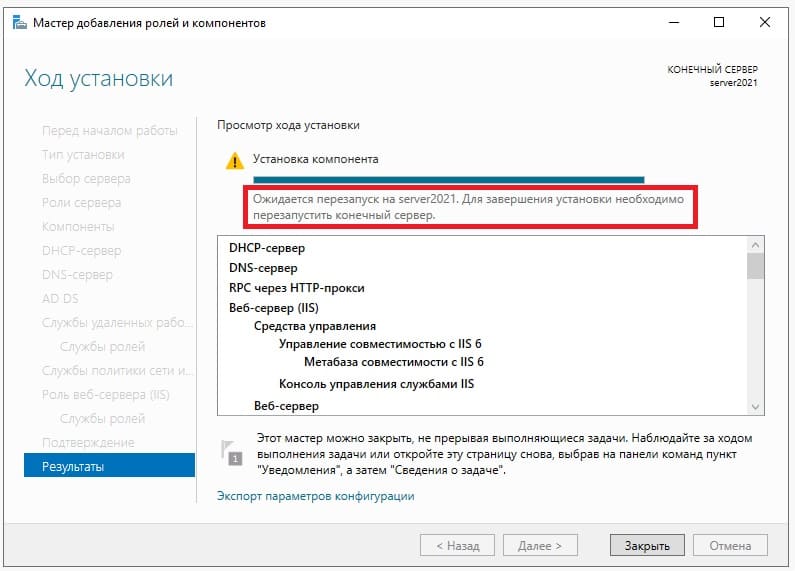
После перезагрузите сервер для применения настроек.
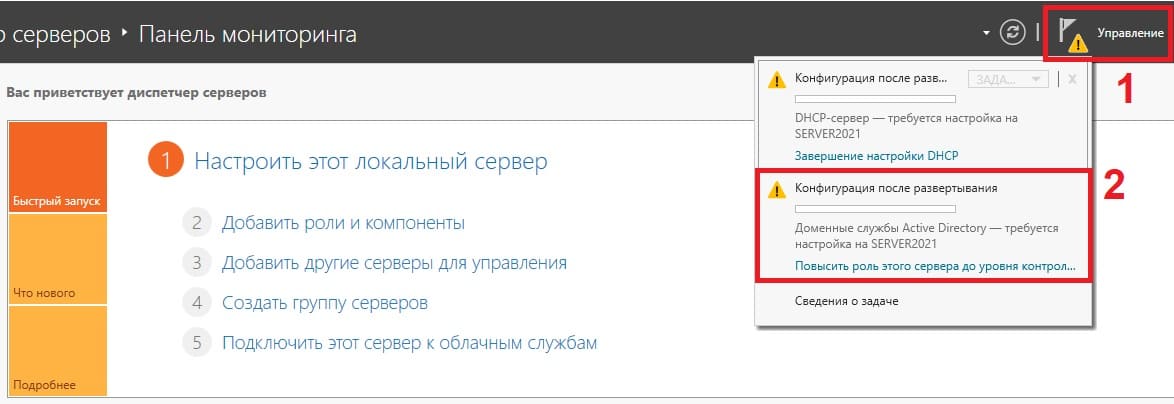
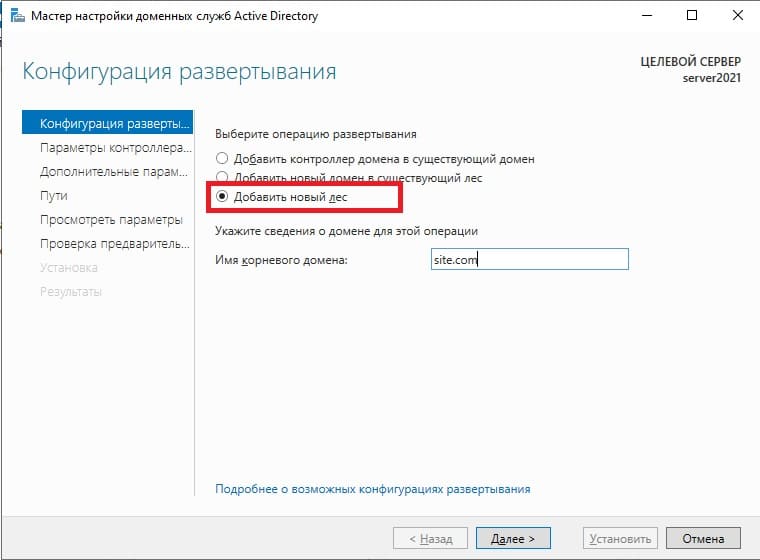
4) После перезагрузки заходим в меню Active Directory (Диспетчер серверов) и перейдем в настройки доменных служб (DNS), если вы не выбирали данную службу, то пропустите этот пункт настройки.
Выбираем пункт «Добавить новый лес» => и задаем имя для домена, он может быть любым, например названием вашей компании, или название вашего сайта. Настоятельно рекомендуем задавать только на латинице (или цифры).
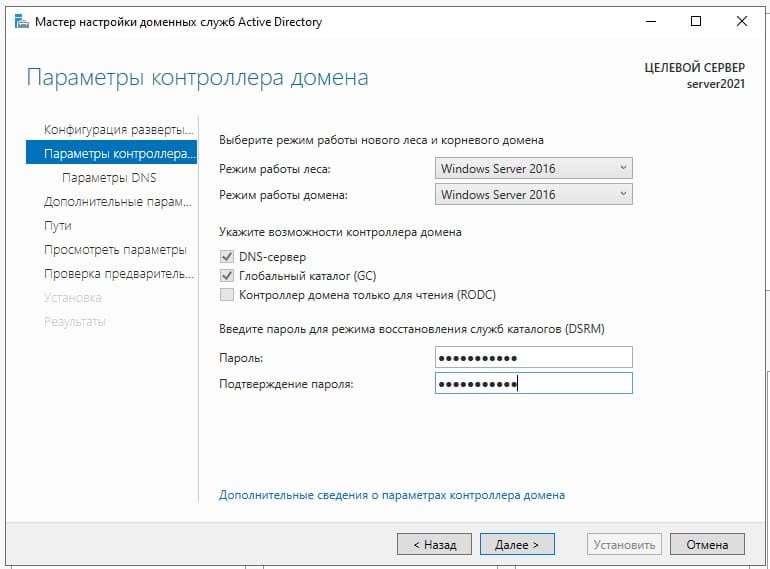
В параметрах контроллера домена задаем пароль для Вашего домена.
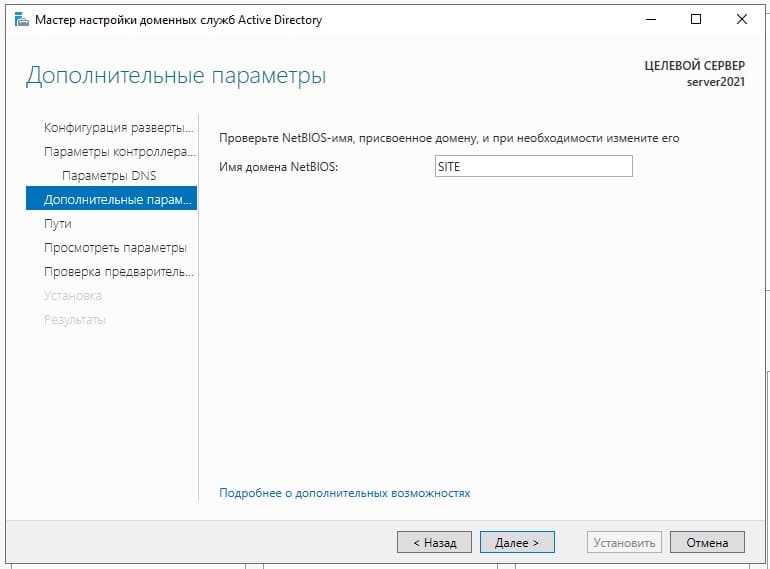
Параметр NetBIOS как правило задается автоматически от имени домена.
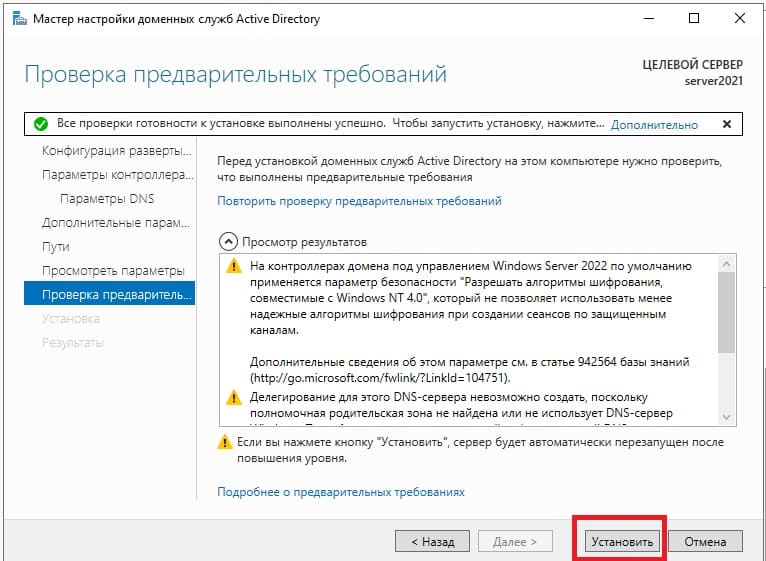
Доходим до проверки предварительных требований и нажимаем «Установить». Дождитесь установки.
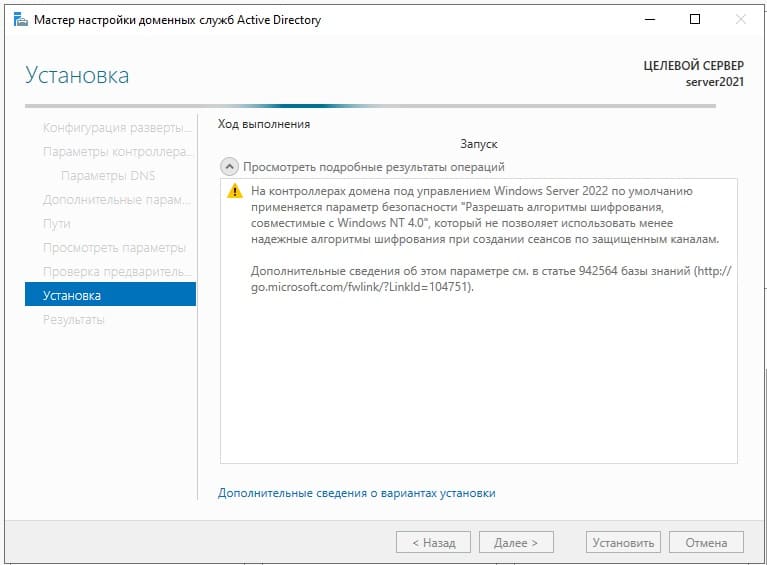
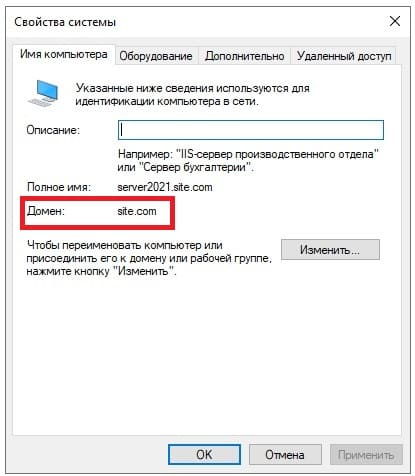
После установки домена можете проверить в свойствах системы, что Ваш сервер добавлен в домен.
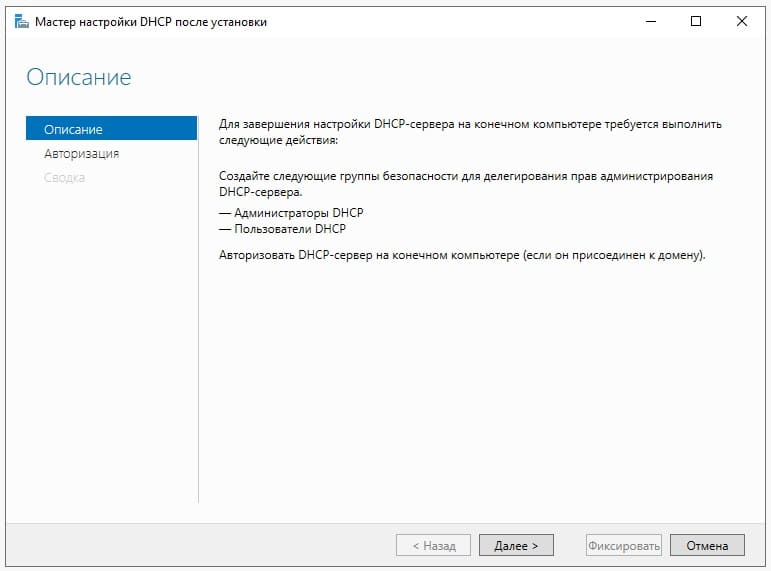
5) Перейдем к настройке DHCP, чтобы сервер мог раздавать IP адреса на клиентские ПК.

Нажимаем «Далее».
Оставляем по умолчанию.
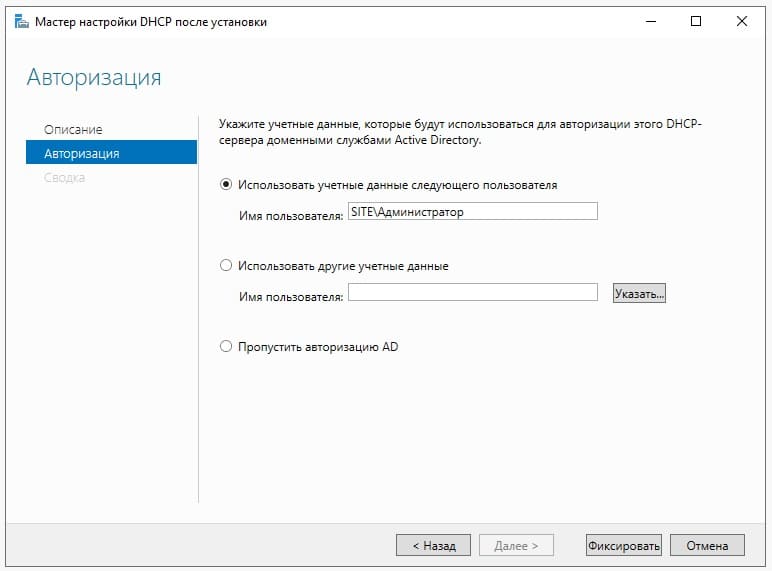
В этой настройке готово.

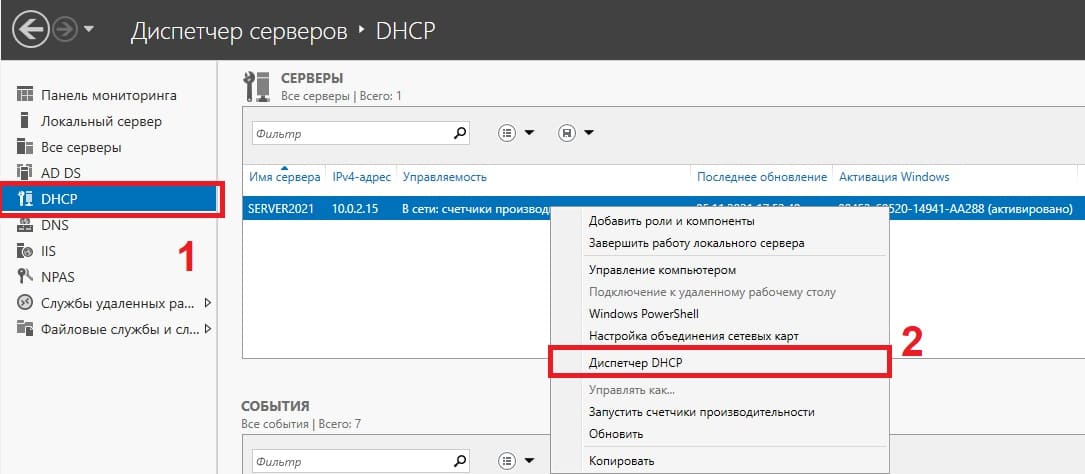
Теперь в диспетчере серверов, в меню слева выбираем пункт DHCP => Правой кнопкой мыши на Ваш сервер => Диспетчер DHCP
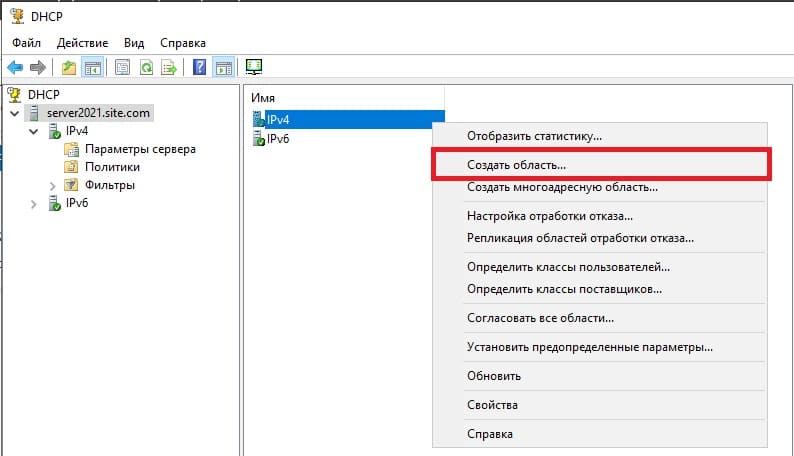
Раскрываем ветку DHCP => Ваш сервер => IPv4, правой кнопкой мыши на этот пункт => Создать область.
В новом окне «Далее».
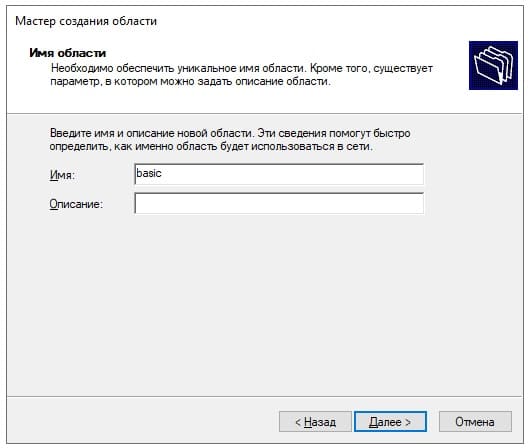
Задаем любое имя области.
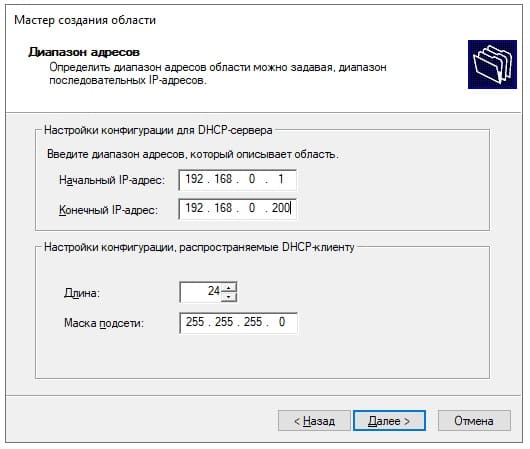
Далее задаем диапазон IP адресов, который будет раздавать сервер на локальные компьютеры, а так же маску подсети. (На скриншоте ниже — это пример, у вас может быть свой диапазон).
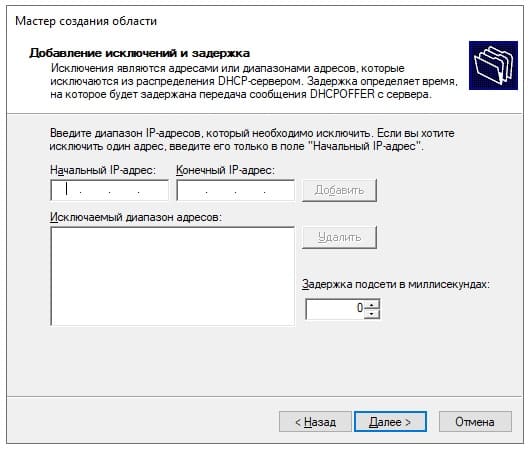
При желании, можете исключить какой-либо промежуток IP адресов, либо просто нажмите «Далее».
Задаем срок действия раздачи IP адреса на компьютеры. Мы зададим большой срок в 365 дней, у вас он может быть любой под Ваши задачи.

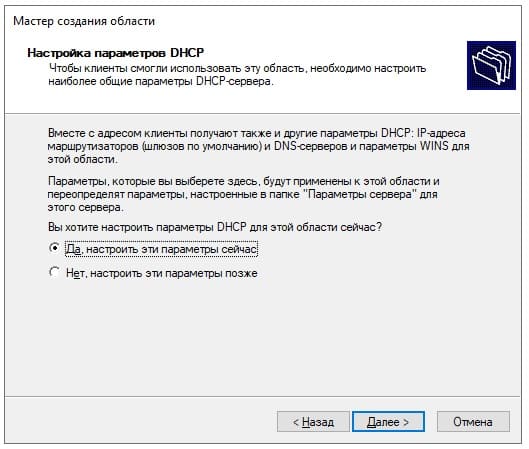
Выбираем пункт «Да, настроить эти параметры сейчас».
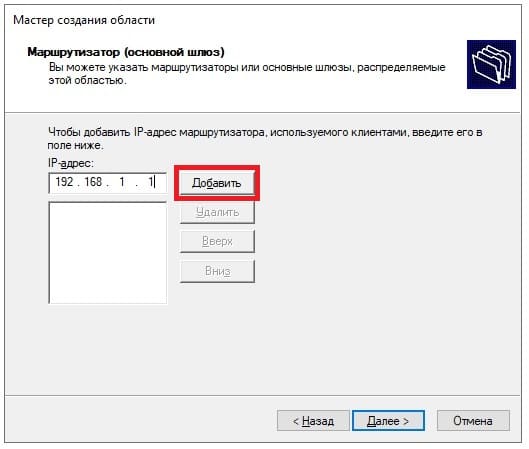
Можете добавить адрес маршутизатора (роутера) из вашей сети.
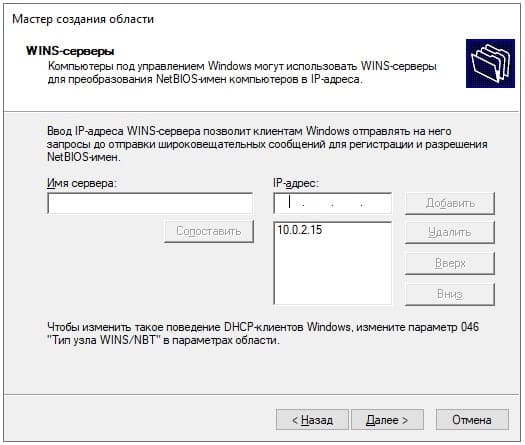
Можете добавить WINS-сервер, если у вас уже он был ранее настроен на сервере, то он добавится автоматически. Либо можете пропустить данный пункт настройки.
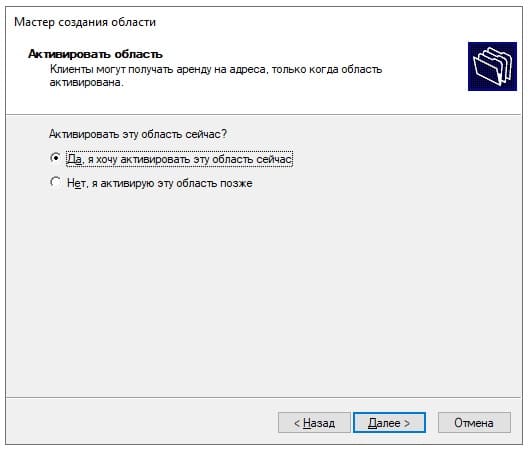
Активировать эту область сейчас.
Готово.
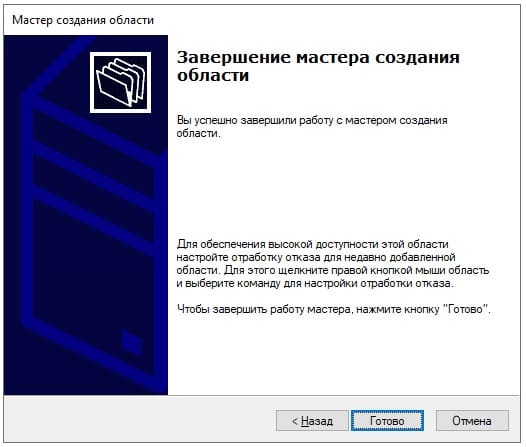
Теперь видим, что область успешно создана.

6) Теперь приступим к лицензированию удаленных рабочих столов (RDP / RDS), чтобы Вы могли подключаться к серверу с клиентских ПК по RDP.
— Первое, что для этого нужно — это ключ активации Windows Server 2022 RDS User или Device CAL. Приобрести его можете в нашем каталоге на следующей странице.
— Чем отличается User CAL от Device CAL можете ознакомиться в нашей прошлой статье.
— Для активации ключа RDS теперь можете воспользоваться следующей инструкцией по настройке и активации данного функционала в нашей прошлой статье. Инструкция является универсальной, начиная от 2012r2 версии до 2022 версии Windows Server.
7) Следующим шагом рассмотрим как добавить пользователя в Windows Server, в случае, если Вы не устанавливали на сервер домен (DNS). С созданными пользователями Вы можете под их данными подключаться к серверу по RDP.
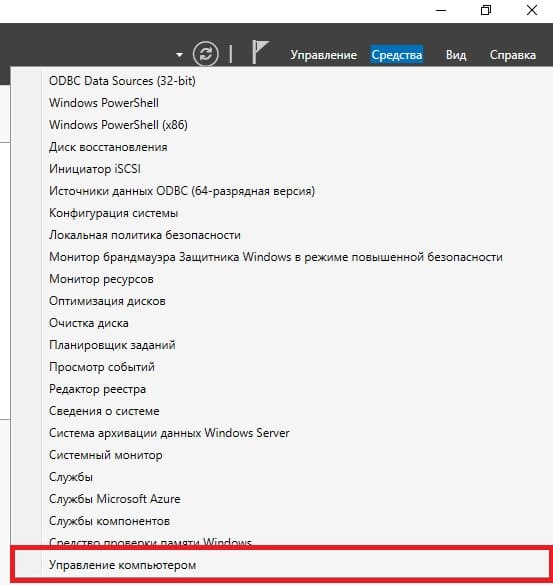
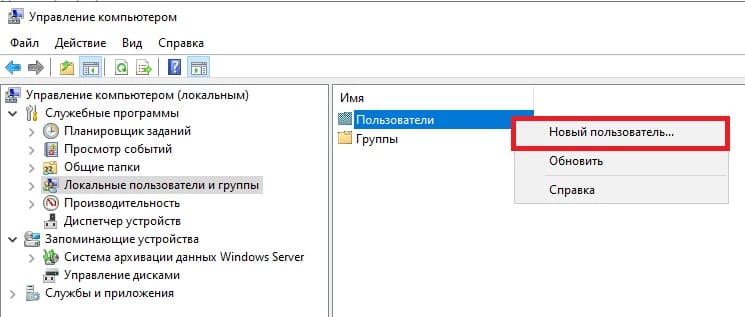
Заходим в Active Directory => Средства => Управление компьютером => Локальные пользователи и группы => Пользователи => Новый пользователь.
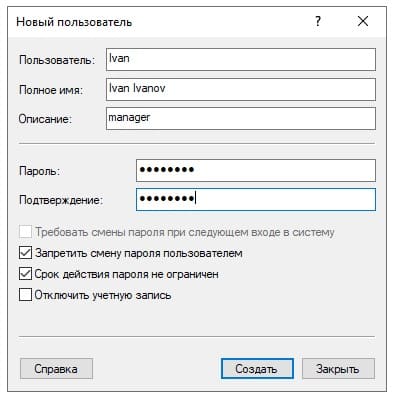
Задаем имя пользователя, можете так же указать его должность, или краткое описание. Обязательно задаем ему пароль для входа. При желании можете установить пункты запрета на смену пароля пользователю и отключение срока действия пароля.
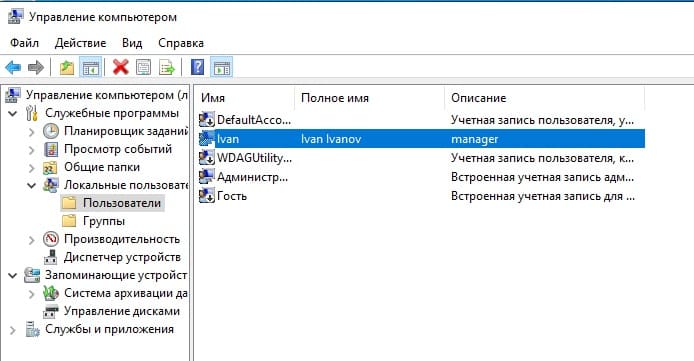
Пользователь создан. Нажав на него двойным кликом курсором мыши можете задать пользователю более детальные настройки, при необходимости.
Настройка собственного DNS сервера вам может потребоваться в случае, если ваш хостинг-провайдер и регистратор домена не предоставляют NS сервера для привязки домена, либо вам самостоятельно необходимо контролировать настройки и записи DNS.
Данная инструкция будет актуальна для ОС Windows Server версии 2012 — 2022.
- Добавление роли «DNS-сервера»
- Создание первичной зоны «DNS-сервера»
- Добавление «DNS-записей»
- Проверка работоспособности
Откройте «Server Manager».
В правом верхнем меню выберите «Manage» > «Add Roles and Features». В появившемся окне нажмите «Next».
Далее убедитесь, что выбран пункт «Role-based or feature-based installation» и нажмите «Next».
В окне выбора сервера установки ничего не меняйте и нажмите «Next».
В окне выбора роли поставьте галочку на пункте «DNS Server».
В появившемся окне согласитесь с добавлением утилит, нажав на кнопку «Add Features».
Нажмите кнопку «Next».
Далее ничего не меняйте, нажмите кнопку «Next».
Нажмите «Next».
Далее для начала установки нажмите кнопку «Install».
Ждём завершения установки роли «DNS Server».
Как только увидите надпись о завершении установки «Installation succeeded», закройте окно, нажав «Close».
Создание первичной зоны «DNS-сервера»
Возвращаемся в «Server Manager», в правом верхнем углу наведите курсор на «Tools» и выберите пункт «DNS».
Двойным кликом выберите ваш сервер, в данном случае это «WIN-LIVFRVQFMKO».
Выберите «Forward Lookup Zones» и нажмите кнопку «New Zone».
Нажмите «Next».
Выберите первичный тип зоны «Primary zone», нажмите «Next».
В поле «Zone name» введите имя домена, на основе которого будут создаваться DNS сервер, нажмите «Next».
При необходимости поменяйте название создаваемого файла зоны, нажмите «Next».
Выберите «Do not allow dynamic updates», чтобы запретить динамическое обновление зоны для повышения безопасности, нажмите «Next».
Нажмите «Finish».
Добавление «DNS записей»
Выберите зону созданного домена и нажмите кнопку «New Record». Далее выберите из предложенного списка пункт «Host (A or AAAA)» для привязки домена к IP-адресу и нажмите кнопку «Create Record…».
В появившемся окне добавьте «А» записи для основного домена зоны. Для этого поле «Name» оставьте пустым (в данном случае «А» запись будет добавлена для основного домена зоны mydomens.ru). В поле «IP address» введите IP, куда должен быть привязан домен. После нажмите кнопку «Add Host».
Остальные записи типа «А» добавляются по тому же принципу. Добавим для примера запись для домена mail.mydomens.ru. В поле «Name» введите имя поддомена mail, в поле «IP address» введите IP-адрес.
Все добавленные записи вы можете видеть в списке DNS записей зоны.
Добавьте все необходимые «А» записи для доменов. Обязательно добавьте «А» записи для NS адресов в том же соответствии, как они указаны у регистратора домена:
ns1.mydomens.ru192.168.1.1
ns2.mydomens.ru192.168.1.2
Далее отредактируйте запись типа «Name Server (NS)». Для этого выберите запись в списке, она создана по умолчанию, после нажмите кнопку «Properties».
В появившемся окне выделите имеющуюся запись из списка и нажмите кнопку «Edit…».
В первом поле введите имя NS адреса, ниже введите соответствующий ему IP, после нажмите «Enter» на клавиатуре, далее нажмите кнопку «OK».
Далее добавьте второй NS, для этого нажмите кнопку «Add…».
Введите соответствующие данные в поля и нажмите кнопку «ОК».
Проверьте, что все NS записи добавлены верно, и нажмите кнопку «ОК».
Отредактируйте «SOA» запись.
В поле «Primary server» введите первичный NS адрес вашей DNS зоны. В поле «Responsible person» введите email адрес ответственного лица зоны DNS, вместо знака @ поставьте точку. Далее нажмите кнопку «ОК».
Добавьте «MX» запись для указания сервера, на который будет приходить почта на домен.
В окне выбора типа записи выберите «Mail Exchanger (MX)».
Если добавляете запись для основного домена зоны, поле «Host» оставьте пустым. В поле «mail server» введите доменное имя почтового сервера, куда будет пересылаться почта для домена.
После выполнения всех настроек у вас должен получится примерно следующий перечень записей.
Проверка работоспособности
Для проверки вы можете воспользоваться командной строкой CMD или PowerShell, сторонними ресурсами для проверки DNS записей, например https://2whois.ru/?t=dig.
После выполнения запроса записей зоны вы должны получить соответствующую запись запрошенную с DNS сервера. При запросе записи типа ANY, с сервера будут отданы все имеющиеся DNS записи домена. Для примера рассмотрим два варианта проверки, через PowerShell и на сайте 2whois.ru.
PowerShell
Для проверки используйте следующий синтаксис команды: nslookup -type=ANY имя_домена IP_сервера
После выполнения соответствующей команды вы увидите сервер, с которого получена информация, и соответствующий перечень записей, добавленных вами ранее.
В случае если запрашиваемые записи не удалось получить, проверьте введенную команду, если введено всё верно, но записи не отдаются, обратитесь в службу поддержки вашего сервера.
Онлайн сервис 2whois.ru
Для проверки работы DNS сервера на сайте https://2whois.ru/ выберите вкладку DIG, далее в поле «Домен или IP» введите имя домена, который вы добавляли ранее. В поле «DNS сервер» введите IP адрес сервера, на котором вы выполняли настройки. В поле «Тип записи» выберите «ANY» для получения всех записей доменной зоны. После нажмите кнопку «DIG».
После получения результата проверки в секции «ANSWER SECTION» вы увидите перечень записей, добавленных ранее на сервер, это будет означать, что DNS сервер функционирует и работает корректно.
Если добавленных ранее записей в данной секции не появится, обратитесь в службу поддержки вашего сервера.
Всем привет! Есть вопрос к знатокам DNS серверов под управлением Windows. Даже несколько
Входные данные: локальный Windows Server 2022 с Active Directory и DNS сервером.
1. Какой ip-адрес должен быть вписан в поле DNS на сетевом интерфейсе сервера? Сейчас вписан адрес шлюза, который подключен к провайдеру интернета.
2. Какие ip-адреса DNS должен приписывать шлюз локальным пользователям? Шлюз является DHCP сервером. Сейчас он приписывает адрес локального DNS сервера, адрес шлюза и адрес DNS Google.
3. В приставке управления DNS сервером должно быть две зоны или одна? Сейчас присутствует одна с именем компа (netbios имя) и одна с суффиксом домена (fqdn имя).
4. Какие права доступа должны быть прописаны для папки NETLOGON и SYSVOL? При экспериментах были изменены и теперь есть проблемы с доступом и репликацией
dcdiag на сервере показывает следующие ошибки: проблема с доступом к папке SYSVOL, ошибка Connectivity.
Основные проблемы: а). медленная работа DNS (страницы у пользователей открываются очень медленно); для этого был прописан второй DNS-адрес шлюза. б). при первом подключении к домену новых пользователей компьютер не может найти контроллер домена по имени; приходится вручную прописывать DNS — адрес локального DNS сервера; в). при подключении пользователей к домену не всегда или не все правила GPO применяются к пользователю; приходится делать logout/login или gpupdate /force (не всегда помогает).
Заранее благодарю за все советы и наводки Всем мира и стабильно работающих серверов!
DNS (Domain Name System, Система Доменных имен) – система, позволяющая преобразовать доменное имя в IP-адрес сервера и наоборот.
DNS-сервер – это сетевая служба, которая обеспечивает и поддерживает работу DNS. Служба DNS-сервера не требовательна к ресурсам машины. Если не подразумевается настройка иных ролей и служб на целевой машине, то минимальной конфигурации будет вполне достаточно.
Как настроить DNS-сервер:
- Настройка сетевого адаптера для DNS-сервера
- Установка роли DNS-сервера
- Создание зоны прямого просмотра
- Создание зоны обратного просмотра
- Создание A-записи
- Описание функции Domain Name System (DNS), которые являются новыми или измененными в Windows Server 2016.
Настройка сетевого адаптера для DNS-сервера
Установка DNS-сервера предполагает наличие доменной зоны, поэтому необходимо создать частную сеть в личном кабинете и подключить к ней виртуальные машины.
После того, как машина будет присоединена к двум сетям, важно не перепутать, какое из подключений требует настройки. Первичный сетевой адаптер настроен автоматически с самого начала, через него открыт доступ к интернету, в то время как на дополнительно подключенных сетевых адаптерах доступа в интернет нет, пока не будет произведена ручная настройка:

Наведя курсор на значок сети в системном трее, можно вызвать всплывающую подсказку с краткими сведениями о сетях. Из примера выше видно, что присоединённая сеть это Network 3.
Далее предстоит проделать цепочку действий:
- Нажать правой клавишей мыши Пуск, в выпадающем меню выбрать пункт Сетевые подключения;
- Правой кнопкой мыши нажать на необходимый сетевой адаптер, в меню выбрать Свойства;
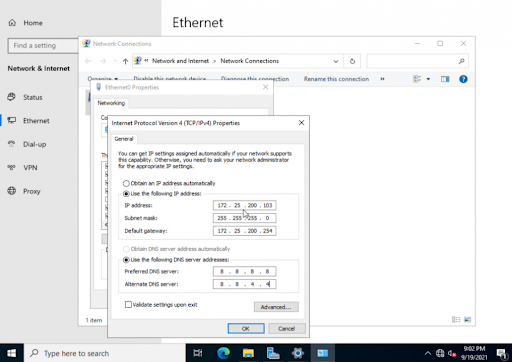
- В окне свойств выбрать IPv4 и нажать на кнопку Свойства;
- Заполнить соответствующие поля необходимыми данными:

Здесь в качестве предпочитаемого DNS-сервера машина назначена сама себе, альтернативным назначен dns.google [8.8.8.8].
Установка роли DNS-сервера
Для установки дополнительных ролей на сервер используется Мастер Добавления Ролей и Компонентов, который можно найти в Диспетчере Сервера.
На верхней навигационной панели Диспетчера сервера справа откройте меню Управление, выберите опцию Добавить Роли и Компоненты:

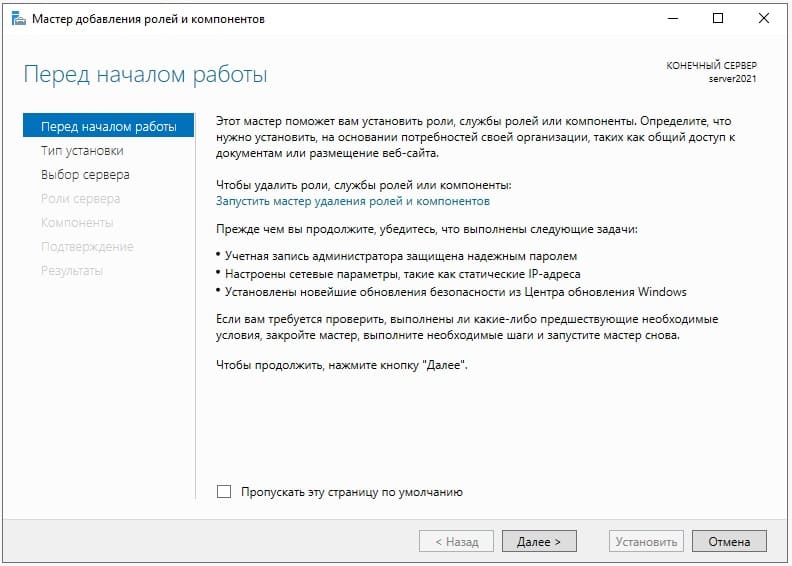
Откроется окно Мастера, в котором рекомендуют убедиться что:
1. Учётная запись администратора защищена надёжным паролем.
2. Настроены сетевые параметры, такие как статические IP-адреса.
3. Установлены новейшие обновления безопасности из центра обновления Windows.
Убедившись, что все условия выполнены, нажимайте Далее;
Выберите Установку ролей и компонентов и нажмите Далее:

Выберите необходимы сервер из пула серверов и нажмите Далее:

Отметьте чек-боксом роль DNS-сервер и перейдите Далее:

Проверьте список компонентов для установки, подтвердите нажатием кнопки Добавить компоненты:

Оставьте список компонентов без изменений, нажмите Далее:

Прочитайте информацию и нажмите Далее:

В последний раз проверьте конфигурацию установки и подтвердите решение нажатием кнопки Установить:

Финальное окно Мастера сообщит, что установка прошла успешно, Мастер установки можно закрыть:

Создание зон прямого и обратного просмотра
Доменная зона — совокупность доменных имён в пределах конкретного домена.
Зоны прямого просмотра предназначены для сопоставления доменного имени с IP-адресом.
Зоны обратного просмотра работают в противоположную сторону и сопоставляют IP-адрес с доменным именем.
Создание зон и управление ими осуществляется при помощи Диспетчера DNS.
Перейти к нему можно в правой части верхней навигационной панели, выбрав меню Средства и в выпадающем списке пункт DNS:

Создание зоны прямого просмотра
- Выделите каталог Зоны Прямого Просмотра, запустите Мастер Создания Новой Зоны с помощью кнопки Новая зона на панели инструментов сверху:

- Откроется окно Мастера с приветствием, нажмите Далее:

- Из предложенных вариантов выберите Основная зона и перейдите Далее:

- Укажите имя зоны и нажмите Далее:

- При необходимости поменяйте название будущего файла зоны и перейдите Далее:

- Выберите, разрешить динамические обновления или нет. Разрешать не рекомендуется в силу значимой уязвимости. Перейдите Далее:

- Проверьте правильность выбранной конфигурации и завершите настройку, нажав кнопку Готово:

Создание зоны обратного просмотра
- Выделите в Диспетчере DNS каталог Зоны Обратного Просмотра и нажатием кнопки Новая зона на панели инструментов сверху запустите Мастер Создания Новой Зоны:

- Выберите тип Основная Зона, перейдите Далее:

- Выберите назначение для адресов IPv4, нажмите Далее:

- Укажите идентификатор сети (первые три октета сетевого адреса) и следуйте Далее:

- При необходимости поменяйте название будущего файла зоны и перейдите Далее:

- Выберите, разрешить динамические обновления или нет. Разрешать не рекомендуется в силу значимой уязвимости. Перейдите Далее:

- Проверьте правильность выбранной конфигурации и завершите настройку, нажав кнопку Готово:

Создание A-записи
Данный раздел инструкции в большей степени предназначен для проверки ранее проделанных шагов.
Ресурсная запись — единица хранения и передачи информации в DNS, заключает в себе сведения о соответствии какого-либо имени с определёнными служебными данными.
Запись A — запись, позволяющая по доменному имени узнать IP-адрес.
Запись PTR — запись, обратная A записи.
- В Диспетчере DNS выберите каталог созданной ранее зоны внутри каталога Зон Прямого Просмотра. В правой части Диспетчера, где отображается содержимое каталогов, правой кнопки мыши вызовите выпадающее меню и запустите команду «Создать узел (A или AAAA)…»:

- Откроется окно создания Нового Узла, где понадобится вписать в соответствующие поля имя узла (без доменной части, в качестве доменной части используется название настраиваемой зоны) и IP-адрес. Здесь же имеется чек-бокс Создать соответствующую PTR-запись — чтобы проверить работу обеих зон (прямой и обратной), чек-бокс должен быть активирован:

Если поле имени остается пустым, указанный адрес будет связан с именем доменной зоны.
- Также можно добавить записи для других серверов:

- Добавив все необходимые узлы, нажмите Готово.
Проверка
- Проверьте изменения в каталогах обеих зон (на примере ниже в обеих зонах появилось по 2 новых записи):


- Откройте командную строку (cmd) или PowerShell и запустите команду nslookup:

Из вывода команды видно, что по умолчанию используется DNS-сервер example-2012.com с адресом 10.0.1.6.
Чтобы окончательно убедиться, что прямая и обратная зоны работают как положено, можно отправить два запроса:
- Запрос по домену;
- Запрос по IP-адресу:

В примере получены подходящие ответы по обоим запросам.
- Можно попробовать отправить запрос на какой-нибудь внешний ресурс:

В дополнение к имени домена и адресам появилась строчка «Non-authoritative answer», это значит, что наш DNS-сервер не обладает необходимой полнотой информации по запрашиваемой зоне, а информация выведенная ниже, хоть и получена от авторитетного сервера, но сама в таком случае не является авторитетной.
Для сравнения все те же запросы выполнены на сервере, где не были настроены прямая и обратная зоны:

Здесь машина сама себе назначена предпочитаемым DNS-сервером. Доменное имя DNS-сервера отображается как неопознанное, поскольку нигде нет ресурсных записей для IP-адреса (10.0.1.7). По этой же причине запрос 2 возвращает ошибку (Non-existent domain).
Описание функции Domain Name System (DNS), которые являются новыми или измененными в Windows Server 2016.
В Windows Server 2016 DNS-сервер предлагает обновления в следующих областях:
- Политики DNS-серверов
- Ограничение скорости отклика (RRL)
- Аутентификация именованных объектов на основе DNS (DANE)
- Поддержка неизвестных записей
- Корневые подсказки IPv6
- Доработка поддержки Windows PowerShell
Политики DNS-серверов
Теперь вы сможете использовать:
- DNS-политики для управления трафиком на основе геолокации
- Интеллектуальные ответы DNS в зависимости от времени суток, для управления одним DNS-сервером, настроенным для развертывания с разделением
- Применять фильтры к DNS-запросам и многое другое.
Конкретное описание данных возможностей:
Балансировка нагрузки приложений.
Когда вы развернули несколько экземпляров приложения в разных местах, вы можете использовать политику DNS для балансировки нагрузки трафика между разными экземплярами приложения, динамически распределяя нагрузку трафика для приложения.
Управление трафиком на основе геолокации.
Вы можете использовать DNS-политику, чтобы разрешить первичным и вторичным DNS-серверам отвечать на запросы DNS-клиентов на основе географического положения как клиента, так и ресурса, к которому клиент пытается подключиться, предоставляя клиенту IP-адрес ближайшего ресурса. .
Разделенный Brain-DNS.
При разделенном DNS записи DNS распределяются по разным областям зоны на одном и том же DNS-сервере, а DNS-клиенты получают ответ в зависимости от того, являются ли клиенты внутренними или внешними. Вы можете настроить разделенный DNS для зон, интегрированных с Active Directory, или для зон на автономных DNS-серверах.
Фильтрация.
Вы можете настроить политику DNS для создания фильтров запросов на основе предоставленных вами критериев. Фильтры запросов в DNS-политике позволяют настроить DNS-сервер для ответа настраиваемым образом на основе DNS-запроса и DNS-клиента, отправляющего DNS-запрос.
Forensics.
Вы можете использовать политику DNS для перенаправления вредоносных DNS-клиентов на несуществующий IP-адрес вместо того, чтобы направлять их на компьютер, к которому они пытаются подключиться.
Перенаправление по времени суток.
Политику DNS можно использовать для распределения трафика приложения между различными географически распределенными экземплярами приложения с помощью политик DNS, основанных на времени суток.
Вы также можете использовать политики DNS для зон DNS, интегрированных с Active Directory.
Ограничение скорости отклика (RRL)
Теперь вы cможете настроить параметры RRL, чтобы контролировать, как отвечать на запросы к DNS-клиенту, когда ваш сервер получает несколько запросов, направленных на одного и того же клиента. Сделав это, вы можете предотвратить отправку атаки типа «Отказ в обслуживании» (Dos) с использованием ваших DNS-серверов.
Например, бот-сеть может отправлять запросы на ваш DNS-сервер, используя в качестве отправителя IP-адрес третьего компьютера. Без RRL ваши DNS-серверы могут отвечать на все запросы, переполняя третий компьютер. При использовании RRL вы можете настроить следующие параметры:
Количество ответов в секунду. Это максимальное количество раз, когда один и тот же ответ дается клиенту в течение одной секунды.
Количество ошибок в секунду. Это максимальное количество раз, когда ответ об ошибке отправляется одному и тому же клиенту в течение одной секунды.
Окно между запросами. Это количество секунд, на которое приостанавливаются ответы клиенту, если сделано слишком много запросов.
Скорость утечки. Это то, как часто DNS-сервер отвечает на запрос во время приостановки ответов. Например, если сервер приостанавливает ответы клиенту на 10 секунд, а уровень утечки равен 5, сервер по-прежнему отвечает на один запрос на каждые 5 отправленных запросов. Это позволяет обычным клиентам получать ответы, даже если DNS-сервер применяет ограничение скорости ответов в их подсети или полном доменном имени.
TC rate. Эта функция используется, чтобы сообщить клиенту о попытке соединения с TCP, когда ответы клиенту приостановлены. Например, если скорость TC равна 3, и сервер приостанавливает ответы данному клиенту, сервер выдает запрос на TCP-соединение для каждых 3 полученных запросов. Убедитесь, что значение скорости TC ниже, чем скорость утечки, чтобы дать клиенту возможность подключиться через TCP перед утечкой ответов.
Максимум откликов. Это максимальное количество ответов, которые сервер выдает клиенту, пока ответы приостановлены.
Белые домены. Это список доменов, которые нужно исключить из настроек RRL.
Белые подсети. Это список подсетей, которые необходимо исключить из настроек RRL.
Интерфейсы серверов белого списка. Это список интерфейсов DNS-серверов, которые необходимо исключить из настроек RRL.
Аутентификация именованных объектов на основе DNS (DANE)
Теперь вы сможете использовать поддержку DANE (RFC 6394 и 6698), чтобы указать своим DNS-клиентам, от какого CA они должны ожидать выдачи сертификатов для доменных имен, размещенных на вашем DNS-сервере.
Это предотвращает форму атаки «main in the middle», когда кто-то может повредить кэш DNS и указать DNS-имя на свой собственный IP-адрес.
Поддержка неизвестных записей
«Неизвестная запись» — это RR, формат RDATA которой неизвестен DNS-серверу. Недавно добавленная поддержка неизвестных типов записей (RFC 3597) означает, что вы cvожете добавлять неподдерживаемые типы записей в зоны DNS-сервера Windows в двоичном формате по сети.
Распознаватель кэширования Windows уже имеет возможность обрабатывать неизвестные типы записей. DNS-сервер Windows не выполняет никакой конкретной обработки неизвестных записей, но отправляет их обратно в ответах, если для них получены запросы.
Корневые подсказки IPv6
Корневые подсказки IPV6, опубликованные IANA, были добавлены на DNS-сервер Windows. Запросы имен в Интернете теперь могут использовать корневые серверы IPv6 для разрешения имен.
Доработка поддержки Windows PowerShell
В Windows Server 2016 представлены следующие новые командлеты (cmdlets) и параметры Windows PowerShell:
Add-DnsServerRecursionScope — Этот командлет создает новую область рекурсии на DNS-сервере. Области рекурсии используются политиками DNS для указания списка серверов пересылки, которые будут использоваться в запросе DNS.
Remove-DnsServerRecursionScope — Этот командлет удаляет существующие области рекурсии.
Set-DnsServerRecursionScope — Этот командлет изменяет параметры существующей области рекурсии.
Get-DnsServerRecursionScope — Этот командлет извлекает информацию о существующих областях рекурсии.
Add-DnsServerClientSubnet — Этот командлет удаляет существующие подсети DNS-клиентов.
Set-DnsServerClientSubnet — Этот командлет изменяет параметры существующей подсети DNS-клиента.
Get-DnsServerClientSubnet — Этот командлет извлекает информацию о существующих подсетях DNS-клиентов.
Add-DnsServerQueryResolutionPolicy — Этот командлет создает новую политику разрешения запросов DNS. Политики разрешения запросов DNS используются для указания того, как и следует ли отвечать на запрос на основе различных критериев.
Remove-DnsServerQueryResolutionPolicy — Этот командлет удаляет существующие политики DNS.
Set-DnsServerQueryResolutionPolicy — Этот командлет изменяет параметры существующей политики DNS.
Get-DnsServerQueryResolutionPolicy — Этот командлет извлекает информацию о существующих политиках DNS.
Enable-DnsServerPolicy — Этот командлет включает существующие политики DNS.
Disable-DnsServerPolicy — Этот командлет отключает существующие политики DNS.
Add-DnsServerZoneTransferPolicy — Этот командлет создает новую политику передачи зоны DNS-сервера. Политики передачи зоны DNS определяют, следует ли отклонять или игнорировать передачу зоны на основе различных критериев.
Remove-DnsServerZoneTransferPolicy — Этот командлет удаляет существующие политики передачи зон DNS-сервера.
Set-DnsServerZoneTransferPolicy. — Этот командлет изменяет параметры существующей политики переноса зоны DNS-сервера.
Get-DnsServerResponseRateLimiting — Этот командлет извлекает параметры RRL.
Set-DnsServerResponseRateLimiting — Этот командлет изменяет настройки RRL.
Add-DnsServerResponseRateLimitingExceptionlist — Этот командлет создает список исключений RRL на DNS-сервере.
Get-DnsServerResponseRateLimitingExceptionlist — Этот командлет извлекает списки исключений RRL.
Remove-DnsServerResponseRateLimitingExceptionlist — Этот командлет удаляет существующий список исключений RRL.
Set-DnsServerResponseRateLimitingExceptionlist — Этот командлет изменяет списки исключений RRL.
Add-DnsServerResourceRecord — Этот командлет был обновлен для поддержки неизвестного типа записи.
Get-DnsServerResourceRecord — Этот командлет был обновлен для поддержки неизвестного типа записи.
Remove-DnsServerResourceRecord — Этот командлет был обновлен для поддержки неизвестного типа записи.
Set-DnsServerResourceRecord — Этот командлет был обновлен для поддержки неизвестного типа записи.
С дополнительными сведениями вы можете ознакомится в следующих разделах справочника по командам Windows PowerShell для Windows Server 2016 от Microsoft:
Powershell DNS Server
Powershell DNS Client
This article is a step-by-step Windows Server 2022 installation guide.
In it, you’ll learn:
- An overview of Windows Server 2022 installation
- Who should install Windows Server 2022
- Windows Server 2022 new features
- How to install Windows Server 2022
- How to install Server 2022 Updates
- And many more!
Let’s dive in!
Windows Server 2022 Installation Overview
Windows Server 2022 is based on Windows Server 2019 and was announced in 2021 with a ten-year support cycle. It’s designed for small-to-medium-sized businesses and offers increased stability and performance.
If you’re looking to upgrade your IT infrastructure to be more reliable and efficient, then the time has never been better!
Some of the new features in Windows Server 2022 include the following:
- AMD CPUs now support nested virtualization.
- As the default web browser, Microsoft Edge is bundled with the system.
- Improved security features to increase protection against all sorts of attacks, such as malware, privacy, and network attacks.
- Enhancements to UDP/TCP performance.
- Hybrid capabilities in Azure.
You can find more information on the product page.
Who should install Windows Server 2022?
The latest version of Microsoft Windows Server is the perfect fit for businesses and professionals who want to take their job more seriously, or educational institutions can benefit from Windows Server 2022.
It also works well with other professionals like engineers and educational organizations, giving them more uses than before! Windows Server 2022 offers peace of mind for safety-conscious employers in charge of running a business where you want people’s data secure.
Specifically, there has been an increased focus on the cloud, a foundation for data centers that provide our increasingly mobile world with technology-based communications. If you need support for cloud functionality, Windows Server 2022 is the perfect server OS to get invested in.
In conclusion, with the recent release of Windows Server 2022, businesses and organizations can now take their jobs seriously. This new version is tailored more specifically towards professionals in data centers who provide cloud services worldwide!
Why Install Windows Server 2022?
Answer: Windows Server 2022 has New, better, more efficient features
Windows Server 2022 New Features
Let’s look at the new features included in Windows Server 2022 release. Refer to the official Microsoft documentation for complete details on new features and enhancements.
- Advanced multi-layer security in Server 2022 security module provides the comprehensive protection that servers need in today’s modern tech world.
- Server 2022 is built on three key pillars: Advanced protection, simplified security, and preventative defense.
- TLS 1.3 and HTTPS are enabled by default on Windows Server 2022. Typically, this protects clients’ data connecting to the server and eliminates obsolete cryptographic algorithms. It also enhances security over older versions and aims to encrypt as much of the handshake as possible.
- DNS Client in Server 2022 now supports DNS-over-HTTPS (DoH) which encrypts DNS queries using the HTTPS protocol.
- New improvements to Windows Admin Center to manage Server 2022 include capabilities to both reports on the current state of the Secured-core features.
- HotPatching – A new way to install updates on new Windows Server Azure Edition virtual machines (VMs) that doesn’t require a reboot after installation
- Several platform improvements for Windows Containers, including application compatibility and the Windows Container experience with Kubernetes.
- Microsoft Edge is included with Windows Server 2022, replacing Internet Explorer.
How to install Windows Server 2022
Installing Windows Server 2022 can be a major change for your organization.
Note: To ensure you have the necessary tools and resources, carefully read through this guide. You’ll learn how installing a new Windows Server operating system can affect all areas of IT in an effective way that’ll meet current needs while preparing for future innovations.
Let’s discuss it in detail here below!
Part 1: Windows Server 2022 Hardware Requirements
Before we dive into the installation, let’s look at the minimum hardware/system requirements for installing Windows Server 2022 operating system.
- Processor: 1.4 GHz 64-bit processor Compatible with x64 instruction set. Supports NX and DEP, CMPXCHG16b, LAHF/SAHF, and prefetch.
- Memory/RAM: 512 MB (2GB for Server with Desktop Experience installation option). ECC (Error Correcting Code) type or similar technology, for physical host deployments
- Disk Space: Minimum 32 GB (Windows Server 2022 using the Server Core installation option).
- Network Requirements: An Ethernet adapter capable of at least 1 gigabit per second throughput. Compliant with the PCI Express architecture specification
- Additional requirements: UEFI 2.3.1c-based system and firmware that supports secure boot; Trusted Platform Module; Graphics device and monitor capable of Super VGA (1024 x 768) or higher-resolution.
Part 2: Windows Server 2022 Installation Options
Again, when you install Windows Server 2022, what options do you have?
Answer: You get two installation options to install Windows Server 2022.
Choose the install option that servers you need based on the information provided below.
- Server Core – In many cases, this is the recommended installation option. Server Core is a smaller installation that includes the core components of Windows Server and supports all server roles. However, it doesn’t include a local graphical user interface (GUI). It’s mostly used for remotely managed deployments usually through PowerShell, Windows Admin Center, or other server management tools.
- Server with Desktop Experience – If you want a complete installation, including a full GUI, this is your option. This option has a larger footprint than server core. It is the most preferred option by organizations.
Part 3: Step-By-Step Guide to Windows Server 2022 Installation
Let’s dive right in!
Step 1. Download the Windows Server 2022 ISO
The first and most crucial step in installing the new Windows Server 2022 is acquiring the installer file. This file is an ISO that contains the identical content of an optical disc. This file will allow you to create a boot media and then install your new server operating system.
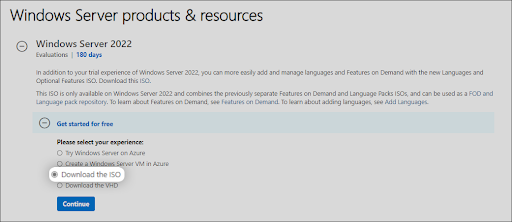
- To get the Windows Server 2022 ISO image, you first need to sign up at Microsoft’s official Windows Insider page. Navigate to this webpage in any browser of your choice.
- Click on Windows Server 2022, and then select Download the ISO from the available options. Click Continue.

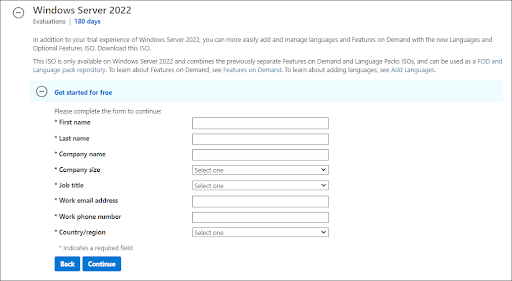
- You’ll be required to fill in your information to be eligible for downloading the Windows Server 2022 ISO image. Make sure to enter your information accurately, as verification may be required later. When done, click Continue.

- Choose the language you want to use when installing Windows Server 2022. You can currently choose from 8 different languages, including English, Spanish and Japanese. Once selected, click on the Download button.

- The download may take up to a couple of hours to complete. Ensure you don’t disconnect your computer from power or the internet while the process is happening, or else it may be lost!

Step 2. Make the bootable ISO image for Windows Server 2022
After successfully downloading the Windows Server 2022 ISO file, it’s time to prepare your boot environment. You can either install Windows Server 2022 on a physical host or virtual machine using an ISO image.
Follow one of the relevant guides by Microsoft to create your bootable media:
- Create a Bootable USB Flash Drive
- Create Windows Server bootable USB (Rufus)
If you have access to MSDN (via Visual Studio Subscriptions and Benefits), you have the option to download Windows Server 2022 ISO from there. All you have to do is generate a new key by clicking Get Key and using this for activation of your installation of Windows Server 2022.
Step 3. Install Windows Server 2022
With the boot media ready, you can now proceed to install Windows Server 2022. As it is an extensive operating system with many editions available for purchase or download, your company may want to choose which edition to install before beginning the process and installing the desired edition properly!
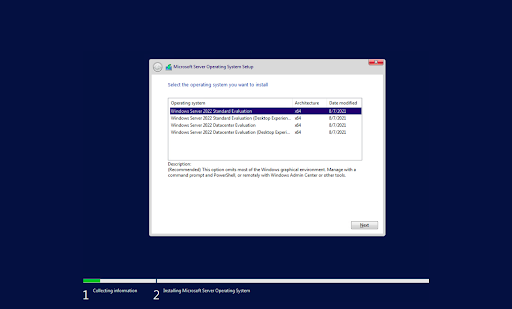
You can pick from the following editions when using the latest Windows Server 2022:
- Windows Server 2022 Standard
- Windows Server 2022 Essential
- Windows Server 2022 Datacenter
As you may know, each version has different strengths, features, and prices. When thinking about licensing, keep in mind that all editions of Windows Server 2022 require a legal license in order to use. Now, let’s get on with the installation process. Continue with the approach you prefer between Server Core and Desktop Experience.
Step 3.1 Installing Windows Server 2022 (Server Core)
If you want to install Windows Server 2022 using Server Core, follow the instructions in this section. Server Core is a minimal installation method that uses a Command Prompt to handle commands on the server. It’s suitable for smaller businesses that need to save space and resources.
- Power on your physical or virtual machine using the boot media you created. You’ll be asked to press any key when it asks for an input, which is used as a launching point for installing Microsoft’s newest server operating system.

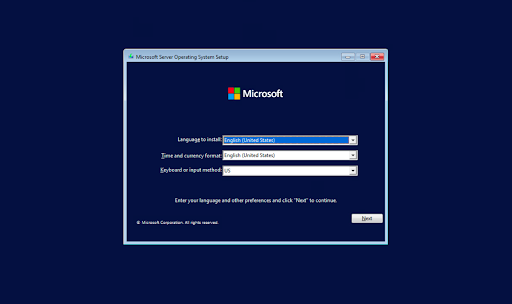
- Next, you’ll need to select a language of your choice, as well as keyboard layout preference and your time/currency settings. Click «Next» in the window that pops up, and let’s get started!

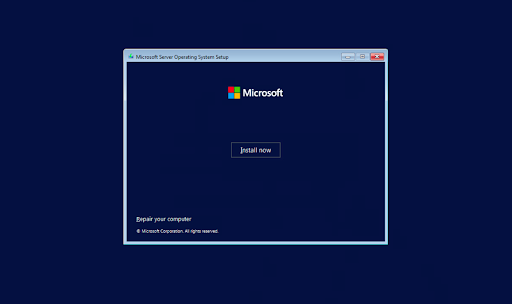
- Click on the Install now button to initiate the installation process for Windows Server 2022. This will begin the installation of the Server Core edition of Microsoft’s server platform.
- In the next window, choose the Windows Server 2022 server option you want to install with Server Core that gives you access and use for some of Microsoft’s powerful command-line tools. Click Next to proceed.

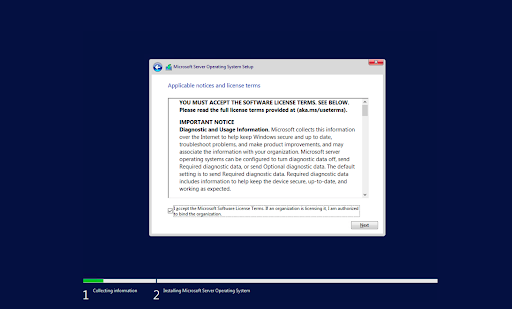
- Next, you need to read the License terms and agree to them for the installation process to continue by checking the “I accept all license agreements” box.
- When installing, select “Custom: Install Windows Server Operating System only” if you’re installing the OS on a fresh server. Otherwise, if upgrading from a previous version of Windows Server, choose the “Upgrade: Install Microsoft Server Operating System and keep files, settings, and applications” option.
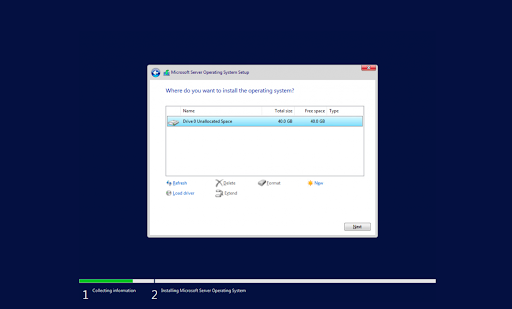
- Select a partition to install Windows Server onto. You can optionally create a new partition or use the entire drive size. When done selecting the designated OS partition, proceed by clicking “Next.”
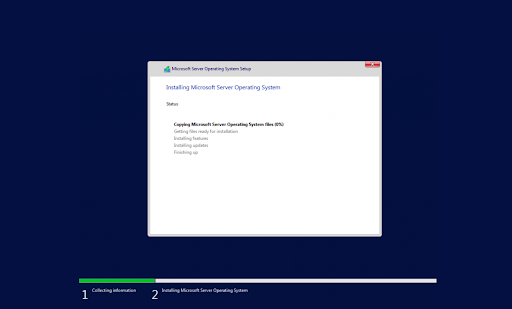
- The installer will begin installing the necessary system files. You’ll see when it’s completed, and the system reboots automatically.
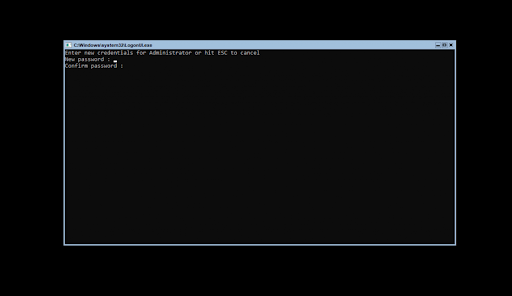
- After a successful installation, the system should immediately reboot and prompt you for an administrator password. Enter this information before re-entering it once again to verify it, and then continue.
- Next, you’ll be taken directly into Microsoft’s PowerShell interface, where you can begin managing your newly installed Windows Server 2022 operating system via the Server Core interface.


Step 3.2 Installing Windows Server 2022 (Desktop Experience)
If you want to install Windows Server 2022 using Desktop Experience, follow the instructions in this section. The Desktop Experience installation has a dedicated GUI (Graphical User Interface) similar to a regular Windows operating system, making server management easier.
- Follow the same instructions as the Server Core installation until your system restarts after installing the operating system. Also, make sure to select Desktop Experience when choosing your Windows Server 2022 version.
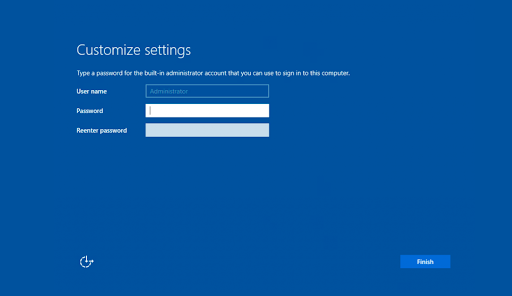
- After your system restarts, you’ll be greeted with a graphical interface. You’ll be prompted to create an administrator password before you can proceed. Click Finish when you’re done.

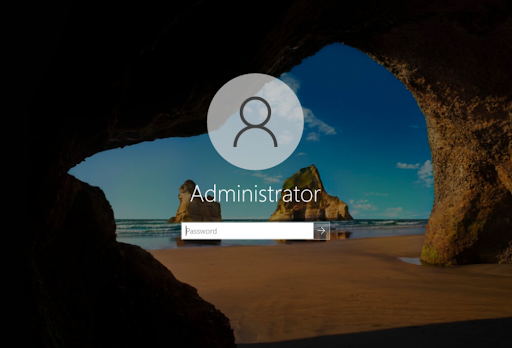
- The login screen will appear when you press Ctrl + Alt + Del. Enter the password set in the previous step to continue accessing your server.
- You should see the Server Manager launch by default. You can begin configuring your server here or explore more options in the Control Panel accessible in the same way as it is on regular Windows operating systems.

Step 4. Configure your network on Windows Server 2022
The previous sections covered how to install Windows Server 2022, but now it’s time for configuration. The first things that need configuring on your network are IPs and gateway addresses so that system admins can manage the server remotely and reach other parts of their environments, including internet-based services.
Step 4.1 Network configuration on Windows Server 2022 Server Core
The instructions below will help you configure the network if you installed Windows Server 2022 with a Server Core installation.
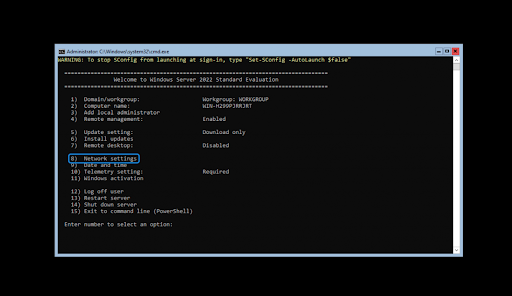
- To configure the network for Windows Server 2022, run the following command in the Command Prompt area:
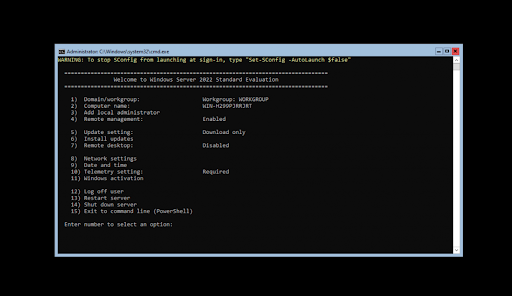
- You’ll see a menu open on the screen. Choose option 8 for Network Settings. You’ll be taken to your network configuration page, where all of these adjustments are made for both wired and wireless networks!
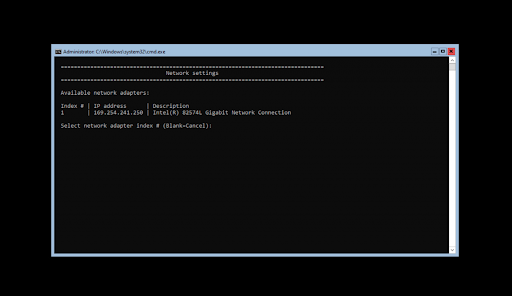
- To begin configuration, you need to select which IP to configure first. In this example case, we’ll choose 1 since our server has only one network connection. Normally, you might see multiple options here — select the one you want to work with first.
- Once you have selected your IP for configuration, you can begin customizing your settings. The computer’s network settings will be automatically updated. The process should take no more than five minutes to complete.
Step 4.2 Network configuration on Windows Server 2022 Desktop Experience
The instructions below will help you configure the network if you install Windows Server 2022 with a desktop experience.
- Open the Search interface in your taskbar by clicking on the magnifying glass icon. You can also bring it up with the Windows + S keyboard shortcut.
- Type in words Control Panel and click on the first matching search result. When it opens, navigate to Network and Internet > Network Connections.
- Right-click on the network you want to configure. We only have one network connection to the server computer in our example; however, you may see many possible options. Pick whichever you want to configure, and choose Properties from the context menu.
- You can begin configuring the network connection using the GUI, which resembles Windows 10’s.

How to install Server 2022 Updates
- Click Start > Settings
- Select Update and Security.
- Click Check for Updates.
- Now you should see the latest updates available for your Server 2022.
- Click Install Now to begin the installation of updates.
Final thoughts
Congratulations on completing the installation of Windows Server 2022. We hope that you found this guide helpful and that it will help you get up to speed with your new server software. If not, we’re here for you! Our Help Center and Blog offer a variety of articles on how to set up different services and features,so be sure to check there first if you need more information or assistance.
As always, feel free to contact us via available options. We’re here to answer any questions about our product and service offerings.
If you want to get early access to our newest blog posts, promotions, and discount codes, don’t forget to subscribe to our newsletter! You’ll get the best price on all products we offer at SoftwareKeep.
That’s all for today. Thanks for reading today’s article — see you next time!
Read next
» Microsoft Windows Server 2022 Buyer’s Guide
» Pricing and licensing for Windows Server 2022
» Windows Server 2022 vs 2019: Features and Security — All you need to know
Windows Server 2022 Installtion FAQ
How do I get Windows Server 2022?
There are two ways. First, Windows Server 2022 is available in the Microsoft Volume Licensing Center for customers with existing licensing agreements, or in the Azure Marketplace for use as an Azure virtual machine. Or you can get your Windows Server 2022 from SoftwareKeep. Alternatively, you can download evaluation versions from the Windows Evaluation Center, with ISO and VHD installer options.
Can you get Windows Server for free?
No. but Microsoft has a free trial for Windows servers. For example, you can upgrade to Windows Server 2019 or Windows Server 2022 for greater innovation, built-in security, and container support. Get started with a 180-day free trial.
How many editions of Windows Server 2022 are there
There are three editions/versions of Windows Server 2022: Essentials, Standard, and Data Center.
This article is a step-by-step Windows Server 2022 installation guide.
In it, you’ll learn:
- An overview of Windows Server 2022 installation
- Who should install Windows Server 2022
- Windows Server 2022 new features
- How to install Windows Server 2022
- How to install Server 2022 Updates
- And many more!
Let’s dive in!
Windows Server 2022 Installation Overview
Windows Server 2022 is based on Windows Server 2019 and was announced in 2021 with a ten-year support cycle. It’s designed for small-to-medium-sized businesses and offers increased stability and performance.
If you’re looking to upgrade your IT infrastructure to be more reliable and efficient, then the time has never been better!
Some of the new features in Windows Server 2022 include the following:
- AMD CPUs now support nested virtualization.
- As the default web browser, Microsoft Edge is bundled with the system.
- Improved security features to increase protection against all sorts of attacks, such as malware, privacy, and network attacks.
- Enhancements to UDP/TCP performance.
- Hybrid capabilities in Azure.
You can find more information on the product page.
Who should install Windows Server 2022?
The latest version of Microsoft Windows Server is the perfect fit for businesses and professionals who want to take their job more seriously, or educational institutions can benefit from Windows Server 2022.
It also works well with other professionals like engineers and educational organizations, giving them more uses than before! Windows Server 2022 offers peace of mind for safety-conscious employers in charge of running a business where you want people’s data secure.
Specifically, there has been an increased focus on the cloud, a foundation for data centers that provide our increasingly mobile world with technology-based communications. If you need support for cloud functionality, Windows Server 2022 is the perfect server OS to get invested in.
In conclusion, with the recent release of Windows Server 2022, businesses and organizations can now take their jobs seriously. This new version is tailored more specifically towards professionals in data centers who provide cloud services worldwide!
Why Install Windows Server 2022?
Answer: Windows Server 2022 has New, better, more efficient features
Windows Server 2022 New Features
Let’s look at the new features included in Windows Server 2022 release. Refer to the official Microsoft documentation for complete details on new features and enhancements.
- Advanced multi-layer security in Server 2022 security module provides the comprehensive protection that servers need in today’s modern tech world.
- Server 2022 is built on three key pillars: Advanced protection, simplified security, and preventative defense.
- TLS 1.3 and HTTPS are enabled by default on Windows Server 2022. Typically, this protects clients’ data connecting to the server and eliminates obsolete cryptographic algorithms. It also enhances security over older versions and aims to encrypt as much of the handshake as possible.
- DNS Client in Server 2022 now supports DNS-over-HTTPS (DoH) which encrypts DNS queries using the HTTPS protocol.
- New improvements to Windows Admin Center to manage Server 2022 include capabilities to both reports on the current state of the Secured-core features.
- HotPatching – A new way to install updates on new Windows Server Azure Edition virtual machines (VMs) that doesn’t require a reboot after installation
- Several platform improvements for Windows Containers, including application compatibility and the Windows Container experience with Kubernetes.
- Microsoft Edge is included with Windows Server 2022, replacing Internet Explorer.
How to install Windows Server 2022
Installing Windows Server 2022 can be a major change for your organization.
Note: To ensure you have the necessary tools and resources, carefully read through this guide. You’ll learn how installing a new Windows Server operating system can affect all areas of IT in an effective way that’ll meet current needs while preparing for future innovations.
Let’s discuss it in detail here below!
Part 1: Windows Server 2022 Hardware Requirements
Before we dive into the installation, let’s look at the minimum hardware/system requirements for installing Windows Server 2022 operating system.
- Processor: 1.4 GHz 64-bit processor Compatible with x64 instruction set. Supports NX and DEP, CMPXCHG16b, LAHF/SAHF, and prefetch.
- Memory/RAM: 512 MB (2GB for Server with Desktop Experience installation option). ECC (Error Correcting Code) type or similar technology, for physical host deployments
- Disk Space: Minimum 32 GB (Windows Server 2022 using the Server Core installation option).
- Network Requirements: An Ethernet adapter capable of at least 1 gigabit per second throughput. Compliant with the PCI Express architecture specification
- Additional requirements: UEFI 2.3.1c-based system and firmware that supports secure boot; Trusted Platform Module; Graphics device and monitor capable of Super VGA (1024 x 768) or higher-resolution.
Part 2: Windows Server 2022 Installation Options
Again, when you install Windows Server 2022, what options do you have?
Answer: You get two installation options to install Windows Server 2022.
Choose the install option that servers you need based on the information provided below.
- Server Core – In many cases, this is the recommended installation option. Server Core is a smaller installation that includes the core components of Windows Server and supports all server roles. However, it doesn’t include a local graphical user interface (GUI). It’s mostly used for remotely managed deployments usually through PowerShell, Windows Admin Center, or other server management tools.
- Server with Desktop Experience – If you want a complete installation, including a full GUI, this is your option. This option has a larger footprint than server core. It is the most preferred option by organizations.
Part 3: Step-By-Step Guide to Windows Server 2022 Installation
Let’s dive right in!
Step 1. Download the Windows Server 2022 ISO
The first and most crucial step in installing the new Windows Server 2022 is acquiring the installer file. This file is an ISO that contains the identical content of an optical disc. This file will allow you to create a boot media and then install your new server operating system.
- To get the Windows Server 2022 ISO image, you first need to sign up at Microsoft’s official Windows Insider page. Navigate to this webpage in any browser of your choice.
- Click on Windows Server 2022, and then select Download the ISO from the available options. Click Continue.
- You’ll be required to fill in your information to be eligible for downloading the Windows Server 2022 ISO image. Make sure to enter your information accurately, as verification may be required later. When done, click Continue.
- Choose the language you want to use when installing Windows Server 2022. You can currently choose from 8 different languages, including English, Spanish and Japanese. Once selected, click on the Download button.
- The download may take up to a couple of hours to complete. Ensure you don’t disconnect your computer from power or the internet while the process is happening, or else it may be lost!
Step 2. Make the bootable ISO image for Windows Server 2022
After successfully downloading the Windows Server 2022 ISO file, it’s time to prepare your boot environment. You can either install Windows Server 2022 on a physical host or virtual machine using an ISO image.
Follow one of the relevant guides by Microsoft to create your bootable media:
- Create a Bootable USB Flash Drive
- Create Windows Server bootable USB (Rufus)
If you have access to MSDN (via Visual Studio Subscriptions and Benefits), you have the option to download Windows Server 2022 ISO from there. All you have to do is generate a new key by clicking Get Key and using this for activation of your installation of Windows Server 2022.
Step 3. Install Windows Server 2022
With the boot media ready, you can now proceed to install Windows Server 2022. As it is an extensive operating system with many editions available for purchase or download, your company may want to choose which edition to install before beginning the process and installing the desired edition properly!
You can pick from the following editions when using the latest Windows Server 2022:
- Windows Server 2022 Standard
- Windows Server 2022 Essential
- Windows Server 2022 Datacenter
As you may know, each version has different strengths, features, and prices. When thinking about licensing, keep in mind that all editions of Windows Server 2022 require a legal license in order to use. Now, let’s get on with the installation process. Continue with the approach you prefer between Server Core and Desktop Experience.
Step 3.1 Installing Windows Server 2022 (Server Core)
If you want to install Windows Server 2022 using Server Core, follow the instructions in this section. Server Core is a minimal installation method that uses a Command Prompt to handle commands on the server. It’s suitable for smaller businesses that need to save space and resources.
- Power on your physical or virtual machine using the boot media you created. You’ll be asked to press any key when it asks for an input, which is used as a launching point for installing Microsoft’s newest server operating system.
- Next, you’ll need to select a language of your choice, as well as keyboard layout preference and your time/currency settings. Click «Next» in the window that pops up, and let’s get started!
- Click on the Install now button to initiate the installation process for Windows Server 2022. This will begin the installation of the Server Core edition of Microsoft’s server platform.
- In the next window, choose the Windows Server 2022 server option you want to install with Server Core that gives you access and use for some of Microsoft’s powerful command-line tools. Click Next to proceed.
- Next, you need to read the License terms and agree to them for the installation process to continue by checking the “I accept all license agreements” box.
- When installing, select “Custom: Install Windows Server Operating System only” if you’re installing the OS on a fresh server. Otherwise, if upgrading from a previous version of Windows Server, choose the “Upgrade: Install Microsoft Server Operating System and keep files, settings, and applications” option.
- Select a partition to install Windows Server onto. You can optionally create a new partition or use the entire drive size. When done selecting the designated OS partition, proceed by clicking “Next.”
- The installer will begin installing the necessary system files. You’ll see when it’s completed, and the system reboots automatically.
- After a successful installation, the system should immediately reboot and prompt you for an administrator password. Enter this information before re-entering it once again to verify it, and then continue.
- Next, you’ll be taken directly into Microsoft’s PowerShell interface, where you can begin managing your newly installed Windows Server 2022 operating system via the Server Core interface.
Step 3.2 Installing Windows Server 2022 (Desktop Experience)
If you want to install Windows Server 2022 using Desktop Experience, follow the instructions in this section. The Desktop Experience installation has a dedicated GUI (Graphical User Interface) similar to a regular Windows operating system, making server management easier.
- Follow the same instructions as the Server Core installation until your system restarts after installing the operating system. Also, make sure to select Desktop Experience when choosing your Windows Server 2022 version.
- After your system restarts, you’ll be greeted with a graphical interface. You’ll be prompted to create an administrator password before you can proceed. Click Finish when you’re done.
- The login screen will appear when you press Ctrl + Alt + Del. Enter the password set in the previous step to continue accessing your server.
- You should see the Server Manager launch by default. You can begin configuring your server here or explore more options in the Control Panel accessible in the same way as it is on regular Windows operating systems.
Step 4. Configure your network on Windows Server 2022
The previous sections covered how to install Windows Server 2022, but now it’s time for configuration. The first things that need configuring on your network are IPs and gateway addresses so that system admins can manage the server remotely and reach other parts of their environments, including internet-based services.
Step 4.1 Network configuration on Windows Server 2022 Server Core
The instructions below will help you configure the network if you installed Windows Server 2022 with a Server Core installation.
- To configure the network for Windows Server 2022, run the following command in the Command Prompt area:
- You’ll see a menu open on the screen. Choose option 8 for Network Settings. You’ll be taken to your network configuration page, where all of these adjustments are made for both wired and wireless networks!
- To begin configuration, you need to select which IP to configure first. In this example case, we’ll choose 1 since our server has only one network connection. Normally, you might see multiple options here — select the one you want to work with first.
- Once you have selected your IP for configuration, you can begin customizing your settings. The computer’s network settings will be automatically updated. The process should take no more than five minutes to complete.
Step 4.2 Network configuration on Windows Server 2022 Desktop Experience
The instructions below will help you configure the network if you install Windows Server 2022 with a desktop experience.
- Open the Search interface in your taskbar by clicking on the magnifying glass icon. You can also bring it up with the Windows + S keyboard shortcut.
- Type in words Control Panel and click on the first matching search result. When it opens, navigate to Network and Internet > Network Connections.
- Right-click on the network you want to configure. We only have one network connection to the server computer in our example; however, you may see many possible options. Pick whichever you want to configure, and choose Properties from the context menu.
- You can begin configuring the network connection using the GUI, which resembles Windows 10’s.
How to install Server 2022 Updates
- Click Start > Settings
- Select Update and Security.
- Click Check for Updates.
- Now you should see the latest updates available for your Server 2022.
- Click Install Now to begin the installation of updates.
Final thoughts
Congratulations on completing the installation of Windows Server 2022. We hope that you found this guide helpful and that it will help you get up to speed with your new server software. If not, we’re here for you! Our Help Center and Blog offer a variety of articles on how to set up different services and features,so be sure to check there first if you need more information or assistance.
As always, feel free to contact us via available options. We’re here to answer any questions about our product and service offerings.
If you want to get early access to our newest blog posts, promotions, and discount codes, don’t forget to subscribe to our newsletter! You’ll get the best price on all products we offer at SoftwareKeep.
That’s all for today. Thanks for reading today’s article — see you next time!
Read next
» Microsoft Windows Server 2022 Buyer’s Guide
» Pricing and licensing for Windows Server 2022
» Windows Server 2022 vs 2019: Features and Security — All you need to know
Windows Server 2022 Installtion FAQ
How do I get Windows Server 2022?
There are two ways. First, Windows Server 2022 is available in the Microsoft Volume Licensing Center for customers with existing licensing agreements, or in the Azure Marketplace for use as an Azure virtual machine. Or you can get your Windows Server 2022 from SoftwareKeep. Alternatively, you can download evaluation versions from the Windows Evaluation Center, with ISO and VHD installer options.
Can you get Windows Server for free?
No. but Microsoft has a free trial for Windows servers. For example, you can upgrade to Windows Server 2019 or Windows Server 2022 for greater innovation, built-in security, and container support. Get started with a 180-day free trial.
How many editions of Windows Server 2022 are there
There are three editions/versions of Windows Server 2022: Essentials, Standard, and Data Center.
Обновлено 11.06.2021
Добрый день! Уважаемые читатели и гости одного из крупней1ших IT блогов Рунета Pyatilistnik.org. В прошлый раз мы с вами починили кнопку Пуск в Windows Server 2019. На дворе почти 2021 год, рынки лихорадит, пандемия еще не ушла, но это не причина не развиваться, нужно всегда идти вперед. В сегодняшней статье мы с вами установим и настроим новую серверную операционную систему Windows Server 2022. Мы посмотрим, что нового в ней, что улучшили и добавили. Думаю вам будет интересно.
Что нового в Windows Server 2022 ?
Перед тем, как установить и настроить Windows Server 2022 давайте посмотрим, что же нового добавила компания Microsoft. Хочу выделить, что давно я не видел столько улучшений и нововведений по сети и сетевому стеку.
- Библиотека MsQuic — это реализация Microsoft QUIC, сетевого протокола транспортного уровня общего назначения, первоначально разработанного Джимом Роскиндом из Google. QUIC по-прежнему является черновиком Интернет-протокола, но он используется Google Chrome для подключений к собственным серверам Google. Microsoft Edge и Firefox поддерживают QUIC, но по умолчанию он отключен. QUIC использует мультиплексные соединения HTTP/3 и UDP для повышения производительности веб-приложений там, где в настоящее время используется TCP. Microsoft утверждает, что QUIC поддерживает веб-обработку HTTP/3 и передачу файлов SMB. Microsoft открывает исходный код библиотеки QUIC, MsQuic , на GitHub по лицензии MIT. QUIC стандартизируется Инженерной группой Интернета (IETF). MsQuic — это клиентское и серверное решение, оптимизированное для различных шаблонов использования и используемое несколькими продуктами и услугами Microsoft. MsQuic в настоящее время находится в предварительной версии и поддерживает Windows и Linux.
- Улучшение производительности протокола UDP — UDP становится очень популярным протоколом, несущим все больше и больше сетевого трафика. С протоколом QUIC, построенным на основе UDP, и растущей популярностью RTP и пользовательских (UDP) потоковых и игровых протоколов, пора вывести производительность UDP на уровень, равный TCP. В Windows Server 2022 реализует UDP Segmentation Offload (USO) . USO переносит большую часть работы, необходимой для отправки пакетов UDP с ЦП на сетевую карту. В дополнение к USO в Windows Server 2022 включается UDP Receive Side Coalescing (UDP RSC), которое объединяет пакеты и снижает использование ЦП для обработки UDP. В дополнение к этим двум новым улучшениям мы внесли сотни улучшений в путь передачи данных UDP, как для передачи, так и для приема.
- Улучшения производительности протокола TCP — Windows Server 2022 использует TCP HyStart++ для уменьшения потери пакетов при запуске соединения (особенно в высокоскоростных сетях) и SendTracker+RACK для уменьшения времени ожидания повторной передачи (RTO). Эти функции включены в транспортном стеке по умолчанию и обеспечивают более плавный сетевой поток данных с лучшей производительностью на высоких скоростях.
- Поддержка PktMon в TCPIP. Инструмент межкомпонентной сетевой диагностики для Windows теперь поддерживает TCP/IP, обеспечивая видимость сетевого стека. PktMon можно использовать для захвата пакетов, обнаружения отбрасывания пакетов, фильтрации пакетов и подсчета для сценариев виртуализации, таких как сеть контейнеров и SDN. Проблемы с сетевым подключением часто трудно диагностировать. В одной передаче данных задействовано несколько машин; как минимум две конечные точки и сложная сетевая инфраструктура посередине. В последнее время, с внедрением виртуализации сети, в конечные точки интегрировано больше возможностей инфраструктуры, таких как маршрутизация и коммутация. Дополнительная сложность конечных точек часто приводит к проблемам с подключением, которые трудно диагностировать. Эта новая инфраструктура требует более комплексного подхода к диагностике сети. Packet Monitor (PacketMon) — это встроенный кросс-компонентный инструмент сетевой диагностики для Windows. Его можно использовать для захвата пакетов, обнаружения отбрасывания пакетов, фильтрации и подсчета пакетов. Этот инструмент особенно полезен в сценариях виртуализации, таких как сеть контейнеров, SDN и т. Д. Он доступен в комплекте с помощью команды pktmon.exe и расширений Windows Admin Center.
- Улучшение производительности RSC в vSwitch — RSC в vSwitch была улучшена производительность. Функция объединения сегментов приема (RSC) в vSwitch, впервые выпущенная в Windows Server 2019, позволяет объединять и обрабатывать пакеты как один больший сегмент при входе в виртуальный коммутатор. Это значительно сокращает количество циклов процессора, потребляемых обработкой каждого байта (циклов/байт). Однако в своей первоначальной форме, как только трафик покинет виртуальный коммутатор, он будет повторно сегментирован для перемещения через VMBus. В Windows Server 2022 сегменты будут оставаться объединенными по всему пути данных до тех пор, пока они не будут обработаны предполагаемым приложением. Это улучшает два сценария:
- Трафик с внешнего хоста, полученный виртуальной сетевой картой
- Трафик от виртуальной сетевой карты к другой виртуальной сетевой карте на том же хосте
Эти улучшения RSC в vSwitch будут включены по умолчанию; с вашей стороны не требуется никаких действий.
- Поддержка балансировки нагрузки Direct Server Return (DSR) для контейнеров и Kubernetes — Direct Server Return (DSR) — это реализация асимметричного распределения сетевой нагрузки в системах с балансировкой нагрузки, что означает, что трафик запроса и ответа использует другой сетевой путь. Использование разных сетевых путей помогает избежать лишних переходов и снижает задержку, за счет чего не только ускоряется время ответа между клиентом и службой, но и снимается некоторая дополнительная нагрузка на балансировщик нагрузки. Использование DSR — это прозрачный способ повышения производительности сети для ваших приложений практически без изменений инфраструктуры. Дополнительная информация
- Введение в правила соответствия/защиты виртуальных машин с отказоустойчивой кластеризацией (Virtual Machine (Role) Affinity/AntiAffinity) — В прошлом мы полагались на свойство группы AntiAffinityClassNames, чтобы разделять роли, но не учитывали особенности сайта. Если был DC, который должен был быть на одном сайте, и DC, который должен был быть на другом сайте, это не было гарантировано. Также было важно не забыть ввести правильную строку AntiAffinityClassNames для каждой роли. Приведу примеры командлетов PowerShell:
- New-ClusterAffinityRule — Позволяет вам создать новое Affinity или AntiAffinityrule. Есть четыре разных типа правил (-RuleType)
- DifferentFaultDomain — Позволяет держать группы в разных доменах сбоя
- DifferentNode — сохранить группы на разных узлах (примечание может быть на другом или одном домене сбоя)
- SameFaultDomain — Позволяет держать группы в одном домене сбоя
- SameNode — Позволяет держать группы на одном узле
- Set-ClusterAffinityRule — Позволяет вам включить (по умолчанию) или отключить правило
- Add-ClusterGroupToAffinityRule — Добавить группу в существующее правило
- Get-ClusterAffinityRule — Показать все или определенные правила
- Add-ClusterSharedVolumeToAffinityRule — Для хранилища Affinity / AntiAffinity, где общие тома кластера могут быть добавлены к текущим правилам
- Remove-ClusterAffinityRule — Удаляет определенное правило
- Remove-ClusterGroupFromAffinityRule — Удаляет группу из определенного правила
- Remove-ClusterSharedVolumeFromAffinityRule — Удаляет определенный общий том кластера из определенного правила
- Move-ClusterGroup -IgnoreAffinityRule — Позволяет принудительно переместить группу на узел или в домен сбоя, что в противном случае было бы предотвращено. В PowerShell, диспетчере кластеров и центре администрирования Windows в качестве напоминания будет показано, что группа нарушает правила.
При перемещении роли объект сходства гарантирует, что ее можно перемещать. Объект также ищет и проверяет другие объекты, в том числе диски, поэтому при желании вы можете иметь сродство хранилища с виртуальными машинами (или ролями) и общими томами кластера (сродство хранилища). Вы можете добавлять роли к множеству, например, контроллерам домена. Вы можете установить правило AntiAffinity, чтобы контроллеры домена оставались в другом домене сбоя. Затем вы можете установить правило привязки для каждого контроллера домена к их конкретному диску CSV, чтобы они могли оставаться вместе. Если у вас есть виртуальные машины SQL Server, которые должны находиться на каждом сайте с определенным контроллером домена, вы можете установить правило соответствия одного и того же домена сбоя между каждым SQL и их соответствующим контроллером домена. Поскольку теперь это объект кластера, если вы попытаетесь переместить виртуальную машину SQL с одного сайта на другой, он проверяет все связанные с ней объекты кластера. Он видит, что на том же сайте есть соединение с DC. Затем он видит, что у DC есть правило, и проверяет его. Он видит, что контроллер домена не может находиться в том же домене сбоя, что и другой контроллер домена, поэтому перемещение запрещено.
Есть встроенные переопределения, чтобы при необходимости вы могли принудительно выполнить ход. Вы также можете легко отключить/включить правила, если хотите, по сравнению с AntiAffinityClassNames с ClusterEnforcedAffinity, где вам нужно было удалить свойство, чтобы оно переместилось и появилось. Мы также добавили функциональность в режим стока, где, если он должен переместиться в другой домен и есть правило AntiAffinity, препятствующее этому, мы обойдем это правило. Любые нарушения правил отображаются как в Cluster Admin, так и в Windows Admin Center.
- BitLocker Protector для отказоустойчивых кластеров (Flexible BitLocker Protector) — BitLocker уже довольно давно доступен для отказоустойчивой кластеризации. Требование заключалось в том, что все узлы кластера должны находиться в одном домене, поскольку ключ BitLocker привязан к объекту имени кластера (CNO). Однако для этих кластеров на границе, кластеров рабочих групп и многодоменных кластеров Active Directory может отсутствовать. Без Active Directory нет CNO. В этих кластерных сценариях не было защиты данных в состоянии покоя. Начиная с Windows Server 2022, Microsoft представили собственный ключ BitLocker, хранящийся локально (зашифрованный) для использования кластером. Этот дополнительный ключ будет создан только в том случае, если кластерные диски защищены BitLocker после создания кластера.
- Улучшенная защита — 2020 и последующие годы показали, что на первое место теперь нужно ставить компьютерную безопасность и Windwos Server 2022 безусловно несет в себе огромную проделанную работу в данном направлении. Улучшили защиту ядра, в составе которой защита микропрограмм, многоуровневая защита оборудования и самой операционной системы. Windows Server 2020 использует System Guard для безопасной загрузки и Trusted Platform Module 2.0. Это позволяет защищаться от уязвимостей микропрограмм. Нельзя забывать и про виртуализации, тут сервер использует VBS, например целостность кода, Credential Guard, защищенного гипервизором (HVCI).
В задачи Credential Guard использует безопасность на основе виртуализации для изоляции секретов, чтобы только привилегированное системное программное обеспечение могло получить к ним доступ. Несанкционированный доступ к этим секретам может привести к атакам с кражей учетных данных, таким как Pass-the-Hash или Pass-The-Ticket. Credential Guard в Защитнике Windows предотвращает эти атаки, защищая хэши паролей NTLM, билеты предоставления билетов Kerberos и учетные данные, которые хранятся приложениями в качестве учетных данных домена. В свою очередь HVCI использует аппаратную защиту и не дает вредоносному коду попасть в систему. Windows Server 2022 получил быстрый и безопасный протокол передачи зашифрованного гипертекста (HTTPS) и безопасности транспортного уровня (TLS) 1.3.
- Новые сетевые тесты Cluster Validation — Сетевые конфигурации продолжают усложняться. Был добавлен новый набор тестов проверки кластера, чтобы помочь проверить правильность настройки конфигураций. Эти тесты включают:
- Список сетевых показателей порядка (версия драйвера — driver versioning)
- Проверить конфигурацию сети кластера (конфигурация виртуального коммутатора — virtual switch configuration)
- Предупреждение о подтверждении конфигурации IP
- Успех сетевой коммуникации
- Встроенные конфигурации объединения коммутаторов (симметрия, vNIC, pNIC)
- Проверка успешной настройки брандмауэра Windows
- QOS (PFC и ETS) настроены
(Примечание относительно настроек QOS выше: это не означает, что эти настройки действительны, просто они реализованы. Эти настройки должны соответствовать вашей физической конфигурации сети, и поэтому MS не может подтвердить, что они установлены на соответствующие значения)
- Образы контейнеров Server Core стали на 20 процентов меньше — Размер загружаемого образа контейнера Windows Server 2022 Core был уменьшен на 20%, что должно быть значительной победой для любого рабочего процесса, который извлекает образы контейнеров Windows. Это было достигнуто за счет оптимизации набора предварительно скомпилированных образов .NET в машинном коде, включенных в образ контейнера Server Core. Если вы используете .NET Framework с контейнерами Windows, в том числе Windows PowerShell, используйте образ .NET Framework , который будет включать дополнительные предварительно скомпилированные образы .NET в машинном коде для поддержания производительности в этих сценариях, а также получить выгоду от уменьшенного размера.
- Новые возможности протокола SMB — Еще больше поднимая планку безопасности, SMB теперь поддерживает шифрование AES-256. Также повышается производительность при использовании шифрования SMB или подписи с помощью SMB Direct с сетевыми картами с поддержкой RDMA. SMB теперь также имеет возможность выполнять сжатие для повышения производительности сети. Сжатие SMB теперь доступно с помощью инструментов командной строки robocopy и xcopy и /compress. Если целевое устройство также поддерживает сжатие SMB, при передаче файлов должно наблюдаться значительное повышение производительности. Современные устройства с Windows Server 2019 и Windows 10 уже поддерживают сжатие. Windows Server 2022 содержит инструменты, позволяющие администраторам использовать их.
- Службы миграции хранилища получают поддержку многоуровневой службы синхронизации файлов Azure (AFS).
- Windows Server 2022 получил еще две новые возможности по работе с облаком, Azure Arc и служба миграции хранилища. Azure Arc это инструмент позволяющий1 упростить управление приложениями, кластерами Windows, Linux, SQL Server и Kubernetes в центрах обработки данных прямо из Azure. Azure Arc использует Azure Policy, Azure Monitor и Azure Defender. Теперь Windows Admin Center может включать включить подключение к Azure Arc.
- Windows Server 2022 теперь еще более просто позволяет производить миграцию данных с хранилищ NetApp FAS на сервера с Windows. Для этого используются службы миграции хранилища.
- Windows Server 2022 поддерживает 48 ТБ оперативной памяти, 2048 логических ядер CPU на 64 физических сокетах.
Как скачать Windows Server 2022
На текущий момент, есть два варианта, это вступить в программу Windows Server Insider Preview, или же загрузить у меня с mail облака. Предварительная версия Windows Server 2022 доступна в формате ISO на 18 языках и в формате VHDX только на английском языке. Следующие ключи позволяют неограниченное количество активаций:
- Standard: MFY9F-XBN2F-TYFMP-CCV49-RMYVH
- Datacenter : 2KNJJ-33Y9H-2GXGX-KMQWH-G6H67
- Windows Server 2022 Выпуски Server Core Datacenter и Standard доступны на 18 поддерживаемых серверных языках в формате ISO и в формате VHDX только на английском языке. Следующие ключи позволяют неограниченное количество активаций:
- Standard: V6N4W-86M3X-J77X3-JF6XW-D9PRV
- Datacenter : B69WH-PRNHK-BXVK3-P9XF7-XD84W
Ключи действительны только для предварительных сборок. После того, как активация ключей предварительного просмотра отключена, вы по-прежнему можете устанавливать и использовать предварительные сборки для разработки и тестирования без активации.
https://www.microsoft.com/en-us/evalcenter/evaluate-windows-server или https://www.microsoft.com/en-us/software-download/windowsinsiderpreviewserver?lc=1033
Установка Windows Server 2022
Давайте теперь посмотрим как устанавливается Windows Server 2022. Методов установке несколько:
- Установка по сети с помощью WDS сервера.
- Загрузочная флешка с Windows Server 2022. Это нормальный метод, так как это не массовая операция, флешку сделать можно.
- ПО сети через порт управления на физическом сервере, где будет монтироваться ISO образ. У каждого вендора он называется по разному, например ILO, IPMI, IMM, IDRAC.
- Через USB-коробку Zalman, которая выступает в роли виртуального DVD-ROM работающего по сети и умеющего монтировать ISO файлы.
- Через сторонний PXE сервер
Не важно, как вы подсунете дистрибутив с Windows Server 2022, сам процесс установки будет везде одинаковый, если вы конечно не используете файл ответов. Первое, как обычно вы увидите приглашение нажать «Enter«, чтобы инициировать работу мастера установки Server 2022.

Далее вас встречает классическое окно с выбором языка, который будет использоваться в качестве основного в интерфейсе мастера установки Windows Server 2022. Я оставлю все по умолчанию «Русский.»
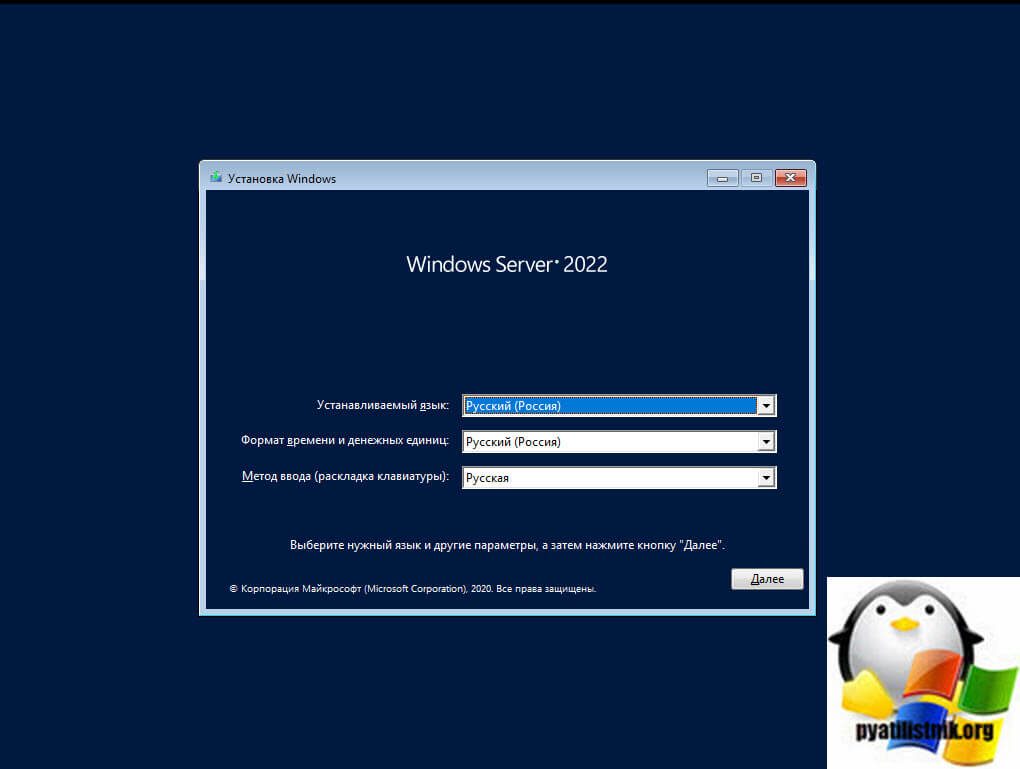
небольшой бонус, если вы начинающий системный администратор, то можете не знать, что если тут нажать одновременно Shift+F10, то вы сможете вызвать командную строку
Можете ее смело закрывать, это ни на что не влияет, у вас может быть вопрос для чего это может быть, вот пара примеров, устранение ошибки 0xc0000098 или сбросить пароль администратору домена.
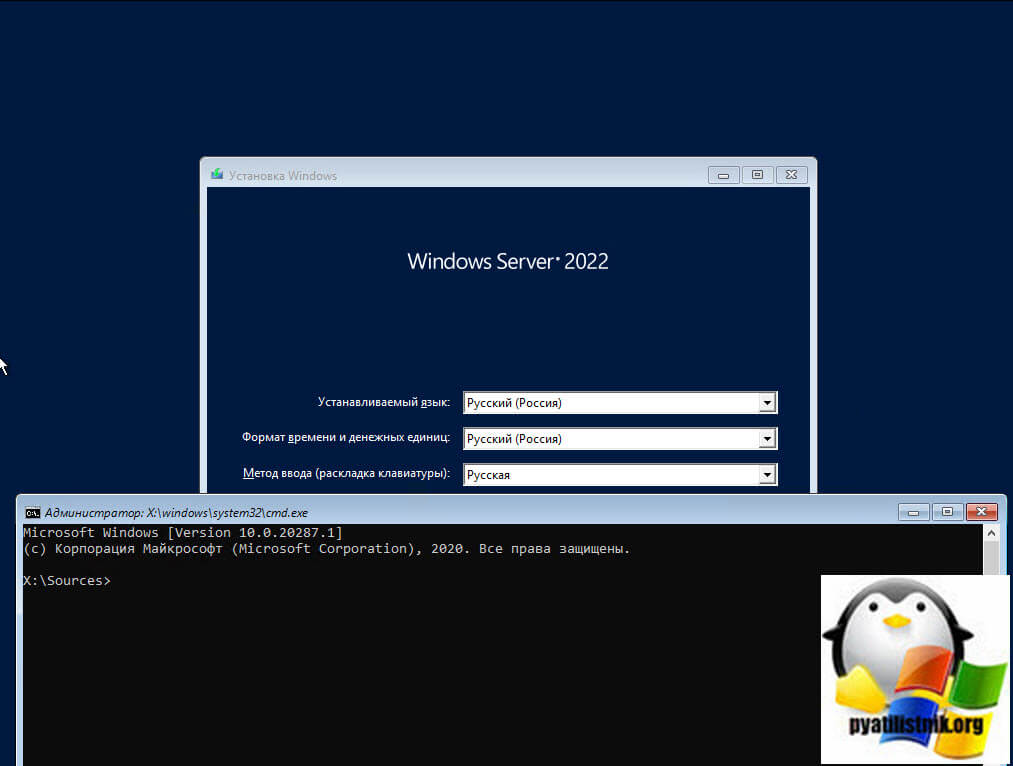
На следующем экране вам необходимо просто нажать кнопку «Установить«. Обратите внимание, что тут есть кнопка «Восстановление системы«, которое содержит инструменты, если у вас есть проблемы с загрузкой или повреждением файловой системы.
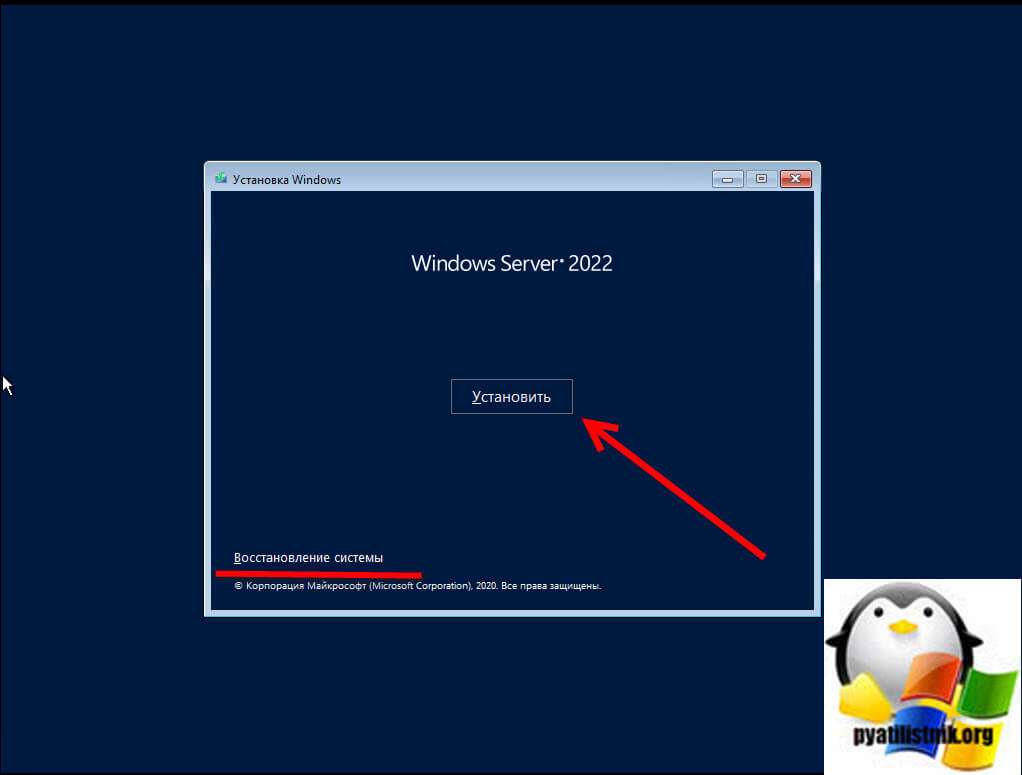
Если у вас есть лицензионный ключ, то вы можете указать его на данном шаге, если нет, то просто нажмите «У меня нет ключа продукта«.

Теперь вам нужно выбрать редакцию Windows Server 2022, на выбор будет четыре варианта:
- Windows Server 2022 SERVERSTANDARDCORE — Стандартная версия, без каких либо программных ограничений со всеми компонентами, в режиме ядра (без GUI), ограничение 4 виртуальные машины Hyper-V, которые лицензируются хостом
- Windows Server 2022 SERVERSTANDARD — То же самое, только с графическим режимом
- Windows Server 2022 SERVERDATACENTERCORE — Так же максимальная версия, но уже с неограниченным количеством лицензируемых виртуальных машин на хосте, так же без графического интерфейса
- Windows Server 2022 SERVERDATACENTER — Максимальная версия с графическим режимом.
Я буду устанавливать стандартную версию с графическим режимом.
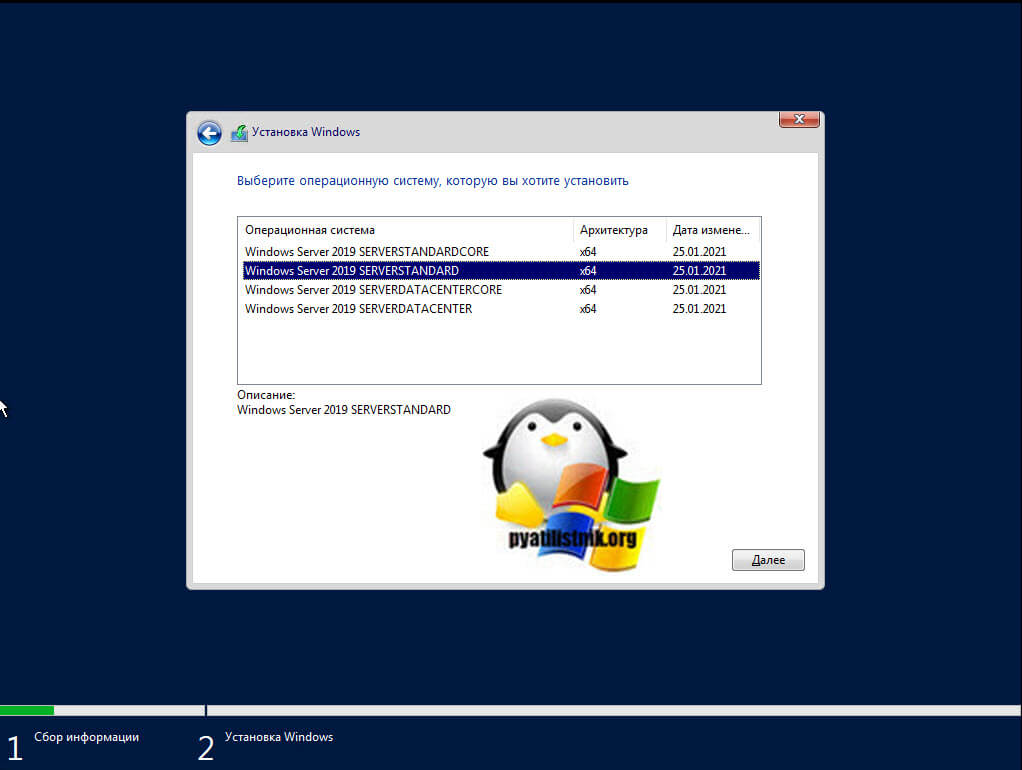
Далее вы «должны» прочитать лицензионное соглашение и если вас все устраивает, то поставить галку и нажать далее.
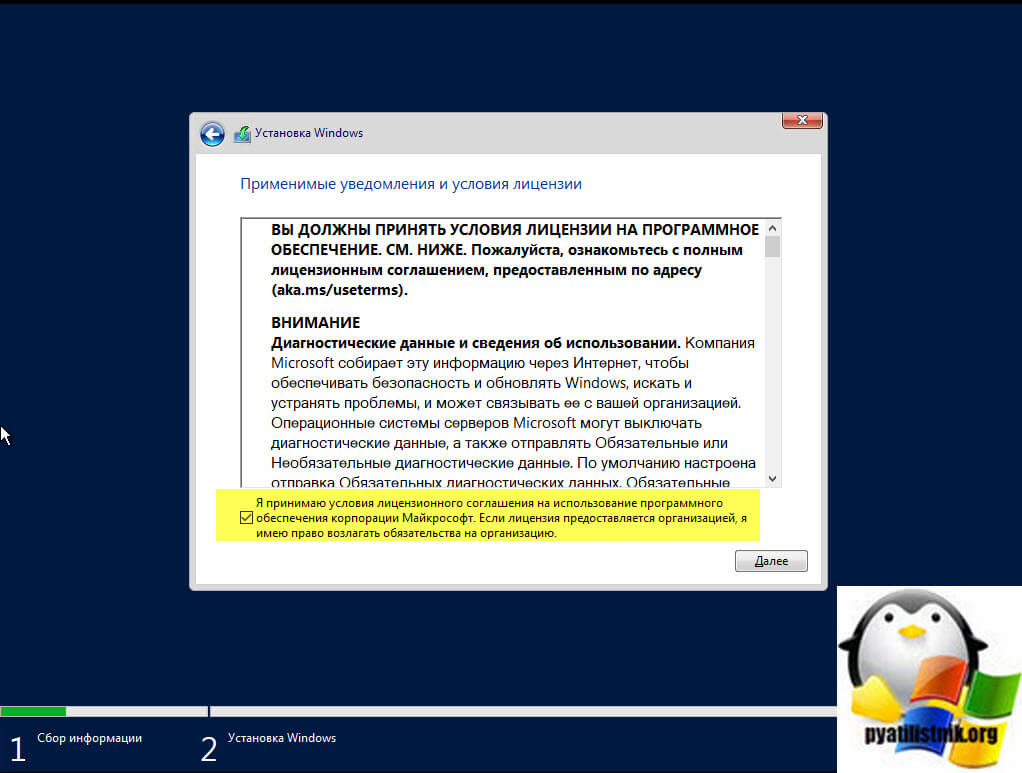
Теперь вам нужно определиться с типом установки, их существует два:
-
-
- Обновление: Установка с сохранением файлов, параметров и приложений — Данный тип я иногда применяю в своей работе, когда не хочу переустанавливать сервисы и хочу перейти на более свежую версию ОС, в случаях с виртуальными машинами это прокатывает, так как перед этим действием можно сделать снапшот и в случае чего просто откатиться обратно.
- Выборочная: только установка Windows — по сути это чистая инсталляция Windows Server 2022, где вам нужно размечать диск и после установки в ОС не будет ничего предустановленного. Вы должны выбирать именно этот метод.
-
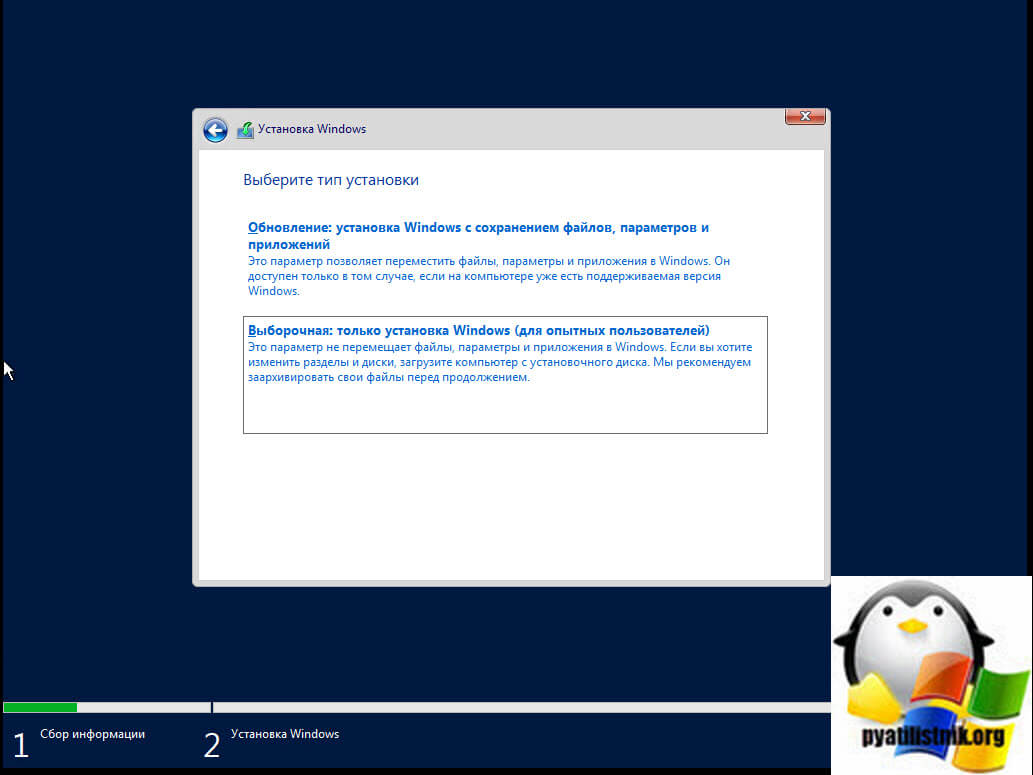
В моем примере есть только одна неразмеченная область, у вас может быть иначе, но в любом случае вы должны определиться куда будет производится установка системы. После чего просто нажмите далее.
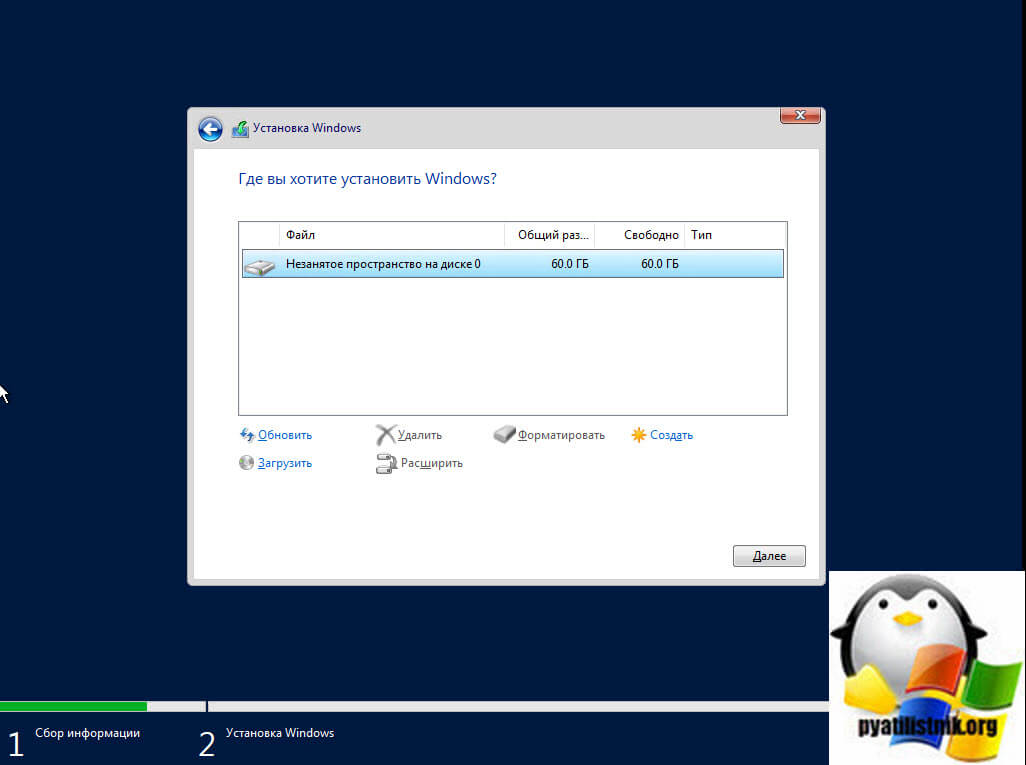
Начинается установка Windows Server 2022, тут все проходит в несколько этапов: распаковка дистрибутива и копирование его на диск, установка драйверов и обновлений
Через пару перезагрузок вы увидите форму в которой вам для учетной записи администратора нужно придумать пароль, напоминаю, что пароль должен соответствовать стандартам безопасности, (Заглавная буква, прописная, спецсимвол и цифра).
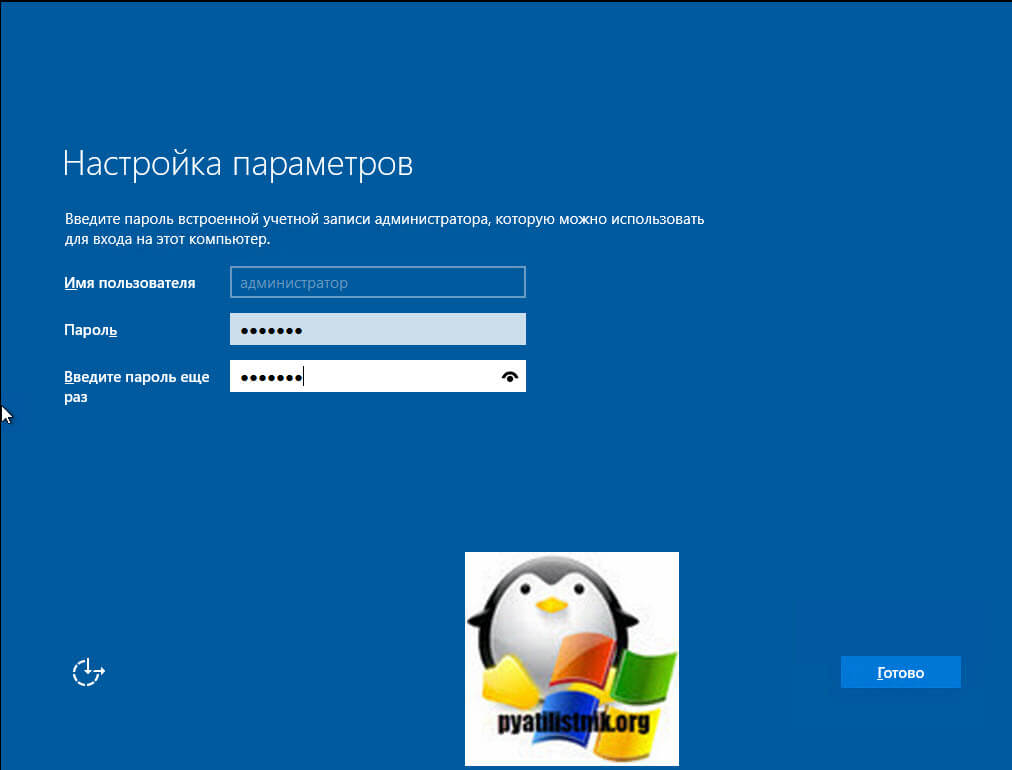
После этого вы увидите стандартную картинку с пещерой и побережьем от компании Microsoft.
Нажмите CTRL+ALT+DELETE, что открыть форму авторизации. Вбиваем пароль от учетной записи администратора и авторизовываемся в системе.
После авторизации вы в правом нижнем углу можете лицезреть надпись Windows Server 2022 Standard
В параметрах системы, в разделе «О программе» есть область характеристик Windows, тут вы так же обнаружите выпуск и версию сборки.
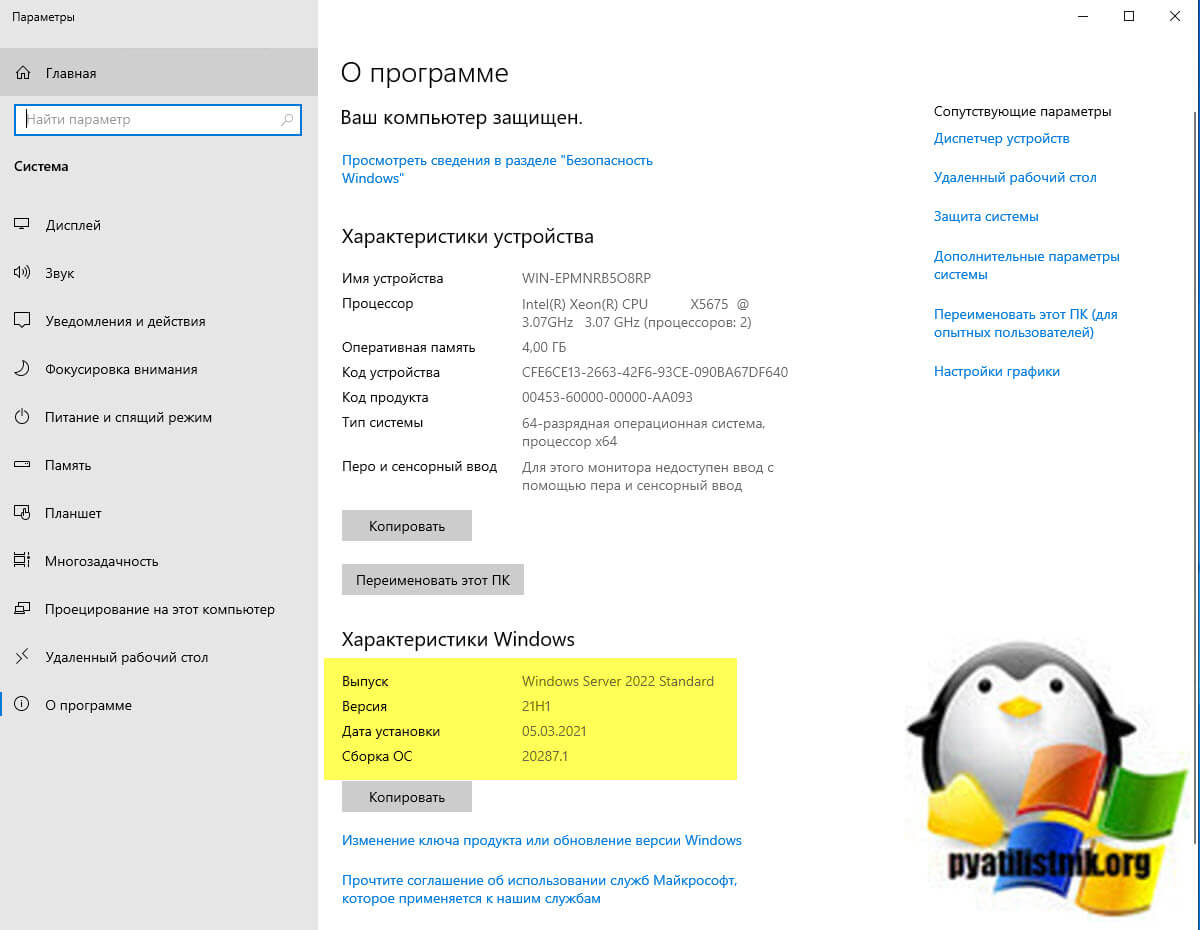
Далее можно переходить к базовой настройке Windows Server 2022 Standard, перед вводом ее в продакшен.
Domain Name System or DNS for short is a fundamental service that resolves names/services to IP addresses and sometimes vice versa. It is a key service that must be running in every network. The very first configuration regarding this topic is installing its capability on the server. Then, there are bundles of configurations and settings to understand and care about. So, as a beginner article regarding DNS, this article covers how to install DNS in Windows Server 2022 using both Server Manager and PowerShell tools.
You may also like to read: Install And Configure DHCP In Windows Server 2022 Using PowerShell.
Using Server Manager is a user-friendly and easy method to install roles, including DNS, in Windows Server Operating Systems. We just graphically navigate through the options and install it. The steps are listed below.
1. Open Server Manager console. It is present in the Start Menu by default. If it is not, search for it.
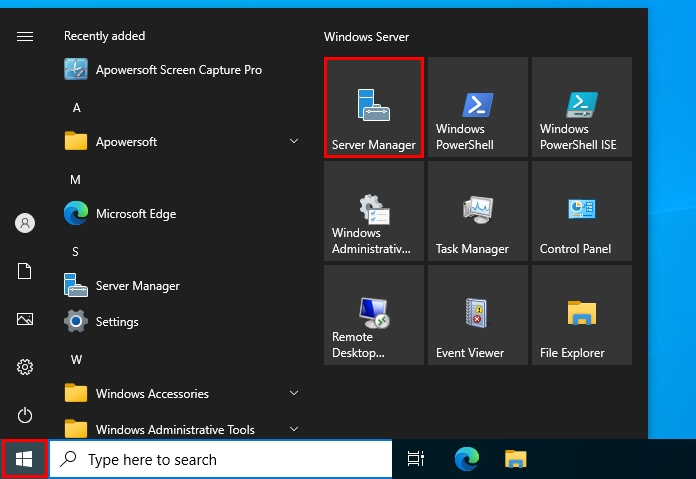
2. On the Server Manager console, click on Manage in the top-right corner. Then, select Add Roles and Features option.
3. On the Before You Being page, just click on Next to continue. Choose the Role-based or feature-based installation option on Installation Type. Then, click on the Next button.
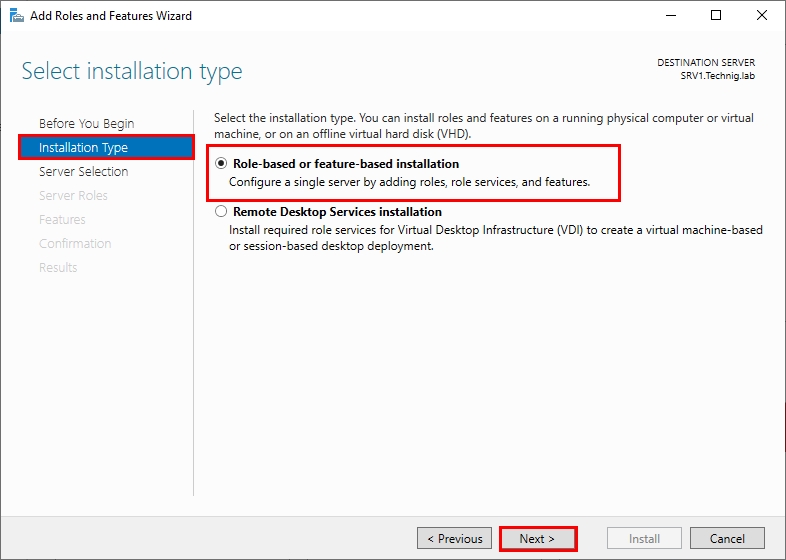
4. On the Server Selection section, choose the server on which you want to install DNS and click on the Next button, afterwards.
5. In this step, check out the DNS Server checkbox option on the Server Roles section. Click on Add Features on the next window that pops up. Finally, click on Next.
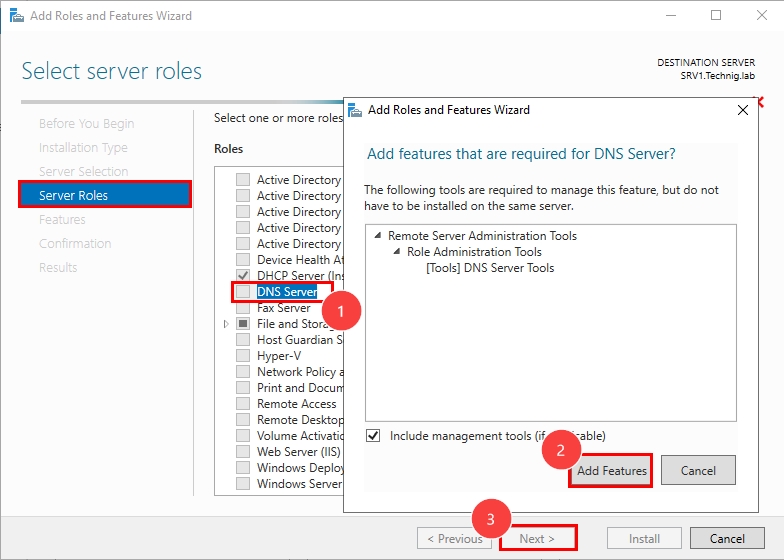
6. Click on Next on both Features and DNS Server wizards. On the Confirmation window, check out the option for the Restart if it needs to during the DNS role installation. And, finally, click on the Install button. See the picture below.
7. Wait for a few moments until the DNS role installation completes. Once completed, click on the Close button in the Result section.
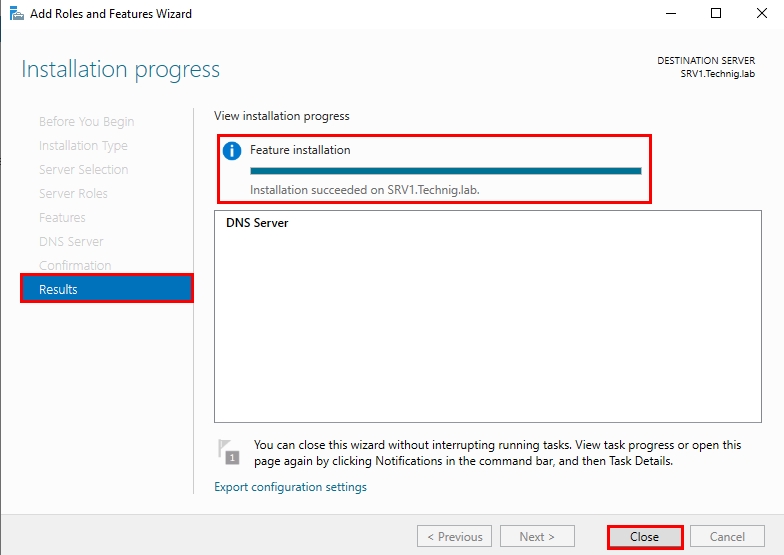
As simple as the above steps, we have installed the DNS Server in Windows Server 2022 using Server Manager. Now, if you open the Tools menu on the Server Manager console, you will observe the DNS is present there.
Install DNS using Windows PowerShell
Using Windows PowerShell is always a preferred and professional method of accomplishing such tasks. Besides other benefits, it takes us less time. Now, let’s dive into the brief steps to install DNS using the Windows PowerShell tool.
1. Open Windows PowerShell as administrator. To do so, go to the Start Menu, right-click on it and choose Run as Administrator. You can also open it using the Run dialogue box by using powershellas command.
2. Once you have opened the PowerShell tool, check the DNS if it is available to install. To check the DNS, use the Get-WindowsFeature DNS command. As you can see in the picture below, it is available to install.

3. To install DNS run Install-WindowsFeature DNS -IncludeManagementTools PowerShell command. Then, wait for a while until it finishes the installation process.
4. Now that we have installed DNS, once more, run Get-WindowsFeature DNS PowerShell command to verify the installation. You can see in the below picture that it is installed.

5. It is also the right point to mention how we can uninstall DNS using Windows PowerShell. To uninstall it, run Remove-WindowsFeature DNS PowerShell command. Wait for a moment until it completes the operation. You will receive a message to restart the server if it needs to. you can restart the server using Restart-Computer PowerShell command.
That is it. We learned how to install and uninstall the DNS in Windows Server 2022 using Windows PowerShell.
Summery
To summarize this article, we have walked through a step-by-step guide on how to install DNS service in Windows Server 2022 using Server Manager and Windows Powershell tools. We covered a detailed illustration to install DNS using Server Manager, first. Then, in a separate section, we discussed the PowerShell commands to install, verify and uninstall DNS in Server 2022.
In the end, I hope you find this article helpful. If you have any further questions, do not hesitate to share us in the comment section.