Network segmentation is a great way to compartmentalize the various networks you need to run in your environment. This provides many benefits from both a management and security perspective. When segmenting your networks, one of the things that you have to consider and take care of is IP addressing. Dynamic Host Configuration Protocol (DHCP) is an age-old standard that has been used in the enterprise for handing out IP addresses to clients on the network. DHCP requires its own broadcast domain, which in turn requires VLANs. Many organizations are using Windows Server for DHCP on their networks. In this post, we will take a look at Windows Server DHCP VLAN configuration. These steps work for Windows Server 2012, 2016, 2019, and Windows Server 2022.wind
Why are VLANs needed for DHCP?
When a client is provisioned on a network segment and is set up to have IP addressing configured automatically using DHCP, the client makes broadcast queries on the network segment to notify the DHCP server configured that it needs an IP address. The DHCP server responds with the appropriate IP address for the network segment and the additional configuration for network connectivity on the segment.
VLANs (Virtual Local Area Networks) allow taking a physical network switch and logically segmenting the physical network environment into multiple network segments. This makes much more efficient use of network hardware since additional segments do not require additional physical network switches. By introducing VLANs, you can provision multiple network segments on the same switch.
When you spin up a new network segment IP address range, you want to pair this with a new VLAN or logical network segment. VLANs control broadcast ranges. Within each VLAN, clients can initiate the broadcast for a network IP address from a DHCP server. There are many different ways to have a Windows Server participate in a VLAN network segment. Before we look at the specifics related to DHCP VLAN configuration, let’s take a look at the multiple options for connecting the Windows host into a VLAN-backed network.

Connecting Windows Server to Multiple VLANs
There are many different ways to connect Windows Server to multiple VLANs. This includes the following:
- Additional network interfaces Untagged for VLAN traffic
- A single network interface with Tagged VLAN frames
- Routed Layer 3 connectivity to VLAN-backed subnets
Additional network interfaces Untagged for VLAN traffic
With VLANs, you hear two different terms tossed out there related to the VLAN you are working with – untagged, and tagged. When you talk about untagged frames, this means the Windows host is not tagging the Ethernet frames originating from the host with VLAN information. Instead, it is relying on the upstream switch it is plumbed into to handle that configuration.
So, essentially, the Windows Server is unaware of the VLAN and doesn’t care. It simply relies on its physical uplink to do any VLAN tagging for it to communicate appropriately. However, this means that if you want to have a Windows Server to be a part of multiple VLANs, it means you need a physical uplink for each separate VLAN, since it is relying on the switch to tag the traffic appropriately for a specific VLAN.
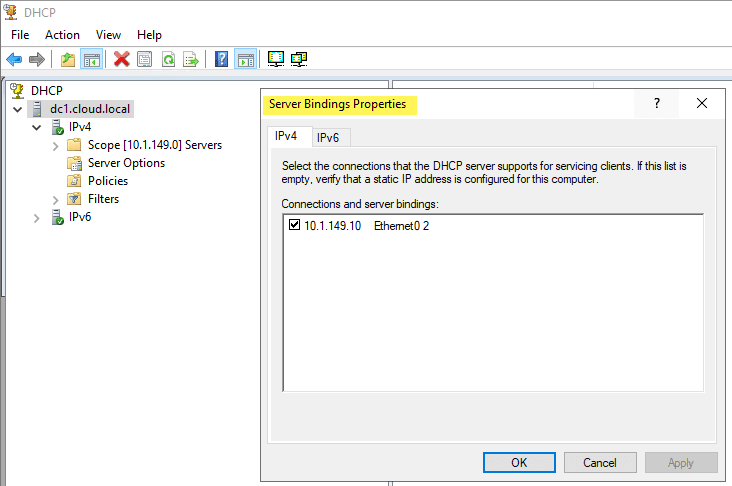
As shown below on a Windows Server 2019 server, you can specify the Bindings for the Windows DHCP Server so that it knows which interfaces to “listen” for DHCP on.
A single network interface with Tagged VLAN frames
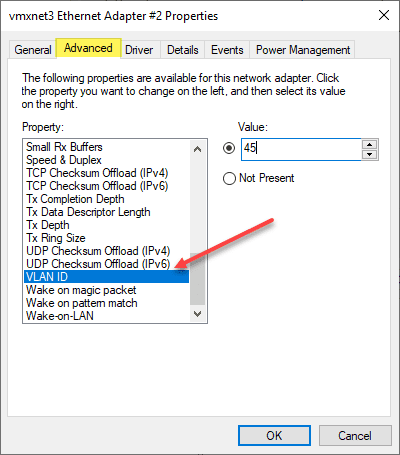
While there may be reasons that you use multiple physical uplinks with untagged frames for communicating with different VLANs, a more efficient approach is to use Tagged VLAN frames on a single network connection. When you use tagged frames, the Windows Server tags the frames appropriately for each VLAN it is associated with. The ability to Tag frames generally needs vendor-specific driver sets to be loaded, such as the Intel Pro Set drivers using Intel-based cards.
Routed Layer 3 connectivity to VLAN-backed subnets
The third option is simply relying on routing to take care of connectivity to the VLAN-backed subnets they need to communicate with. This technically does not connect the Windows Server into the VLAN as that would mean it would have the ability to be in the broadcast domain which is a Layer 2 VLAN construct. Instead, you are relying on Layer 3 connectivity to IP addresses. For many type of communication, including Windows Server 2012 DHCP VLAN configuration, this is all that is needed.
You can use all three of the methods above for Windows Server 2012, 2016, 2019, and Windows Server 2022 DHCP VLAN configuration. You can add multiple network adapters to each VLAN and have each scope listen on that specific network interface for DHCP requests. You can also use the tagging method listed above that allows adding multiple VLANs to a single network interface which allows keeping a single network adapter and connecting that physical network uplink to multiple VLANs.
You might assume the third option, since it is not connecting the uplink to the physical broadcast domain, would not be able to answer the broadcast DHCP request from the client on a specific VLAN. However, even though the DHCP server is not on the same broadcast domain/VLAN, there are really only two pieces of information the DHCP servers need to know to allocate an IP address on a particular subnet. This includes:
- Source subnet of the client
- MAC address of the client
You will note that the Windows Server DHCP server being a part of the VLAN is not a requirement for a successful DHCP request being made to the Windows Server. The third option is typically the option that I steer towards unless there are requirements for multiple physical uplinks for compliance or other security-based reasons. So, how does the Windows DHCP Server respond to a DHCP broadcast request if it is not on the same VLAN to take part in the broadcast traffic?
IP Helper Address, DHCP Relay, DHCP Proxy Address
This is made possible by the IP Helper Address which is sometimes referred to as DHCP Relay, or DHCP proxy address. Using an IP helper address, DHCP Relay, or DHCP proxy address allows the special DHCP broadcast messages to be forwarded from VLAN they originated from and forwarded to the DHCP server. This role is typically handled by a firewall or router device that is able to take the DHCP broadcast message and forward these to the DHCP server.
How does this work? When the DHCP client issues the DHCP broadcast request packet, is as of yet has no IP address configured. This being the case, it uses a broadcast with an all zero source address – 0.0.0.0. It also has no way to get to the DHCP Server with the lack of IP configuration. With this being the case, the client uses a general broadcast address of 255.255.255.255 as the destination with the DHCP request packet.
The device handling the DHCP proxy functionality receives the DHCP request packet from the client, replaces the destination address of 255.255.255.255 with the configured address of the server that was configured in the IP helper-address configuration. The client’s MAC address is included in the DHCP request so the receiving DHCP server knows the required MAC address of the client. This information is then forwarded to the DHCP server from the router, firewall, or another device in the role of the DHCP proxy.
The DHCP server issues an address now that it knows the subnet the client resides on along with the MAC address. It sends the DHCP response back to the DHCP Proxy device. The DHCP Proxy device then forwards the response to the correct MAC address of the requesting client and it is able to be configured with the IP address allowing network communication on the subnet.
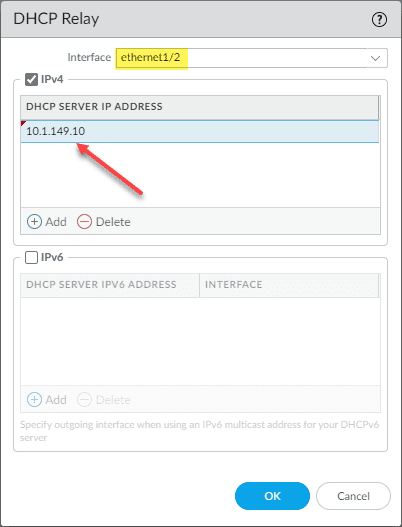
The configuration of DHCP Relay is generally simple but can vary depending on the vendor of router, firewall, or other device you might be using to perform this function. Below is the configuration of DHCP Relay on a Palo Alto firewall. You simply have to select the Interface and the DHCP Server IP Address you want to use for the target of DHCP requests.
Windows Server DHCP VLAN configuration for Virtual Machine DHCP servers
The principles still apply to Windows Server DHCP servers running inside a Windows Server virtual machine. The one method that is more difficult is the tagging of a single interface with multiple VLANs as this is not a feature that you can carry out with VMware Tools drivers that I am aware of. You can add multiple virtual NICs to a single VM and connect the virtual machine to different VLAN-backed port groups for each connection.
This will essentially place the Windows Server virtual machine on the same network segments as the clients that need addresses. Or, you can use the preferred method of using an IP Helper Address to forward the DHCP requests from all the other VLAN-backed subnets to the DHCP server and have the addresses issued by the server using only the single network connection.
Creating a Windows Server DHCP scope for a different VLAN
As detailed by the explanation above, the actual work of the Windows Server DHCP VLAN configuration takes place with the IP Helper Address/DHCP proxy device. Creating a Windows Server DHCP scope for a different VLAN is the same as creating a scope for the native VLAN network where the DHCP Server itself is located. Non-intuitively, you won’t see any part of the scope creation wizard that has you define the VLAN configuration. However, this is not needed in any of the configurations mentioned. With IP Helper Address, the packets are forwarded by the DHCP proxy to the DHCP server. If you are using different interfaces or tagged interfaces, the DHCP server will receive the DHCP broadcasts as normal.

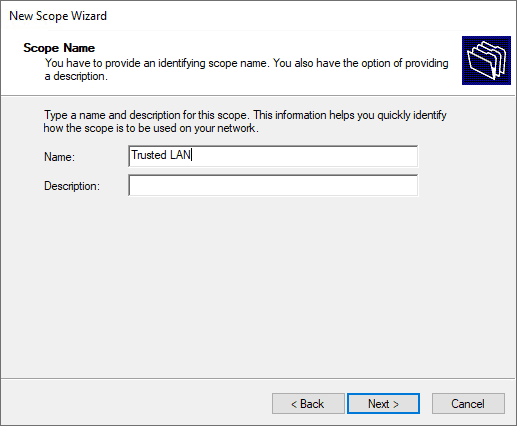
Set the name and description (optional) of the new DHCP scope.
Specify the new DHCP address range.
Set the exclusion range for the DHCP scope.
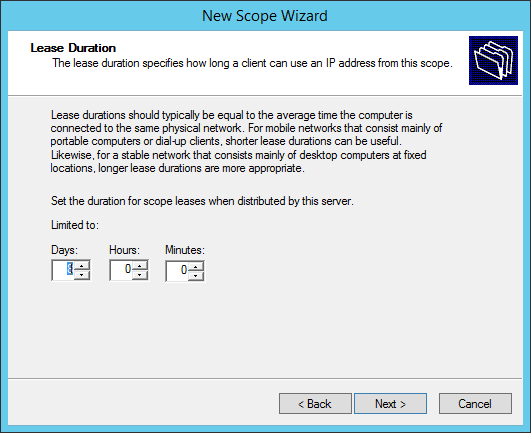
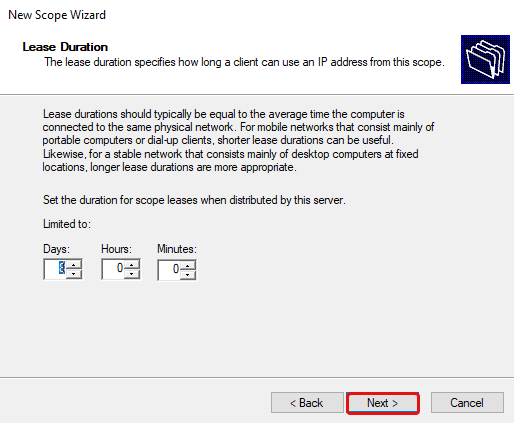
Specify the lease duration.
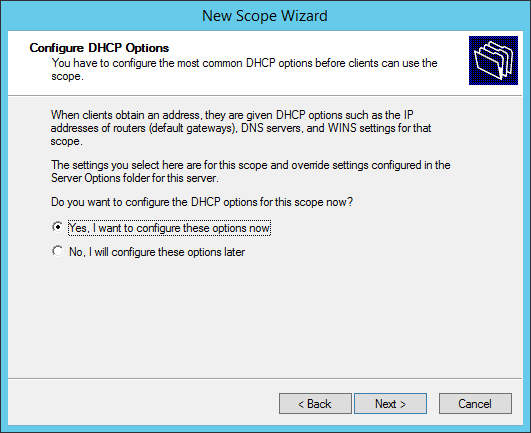
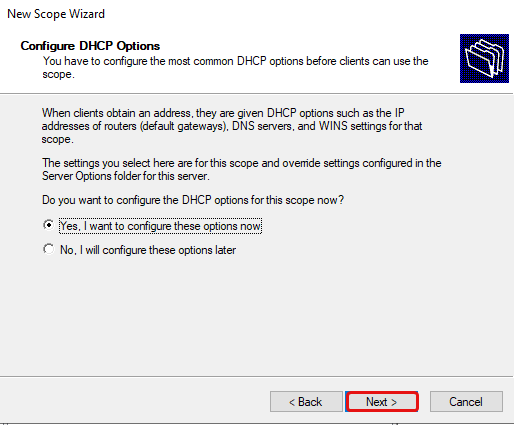
Configure the DHCP options for the new DHCP scope.
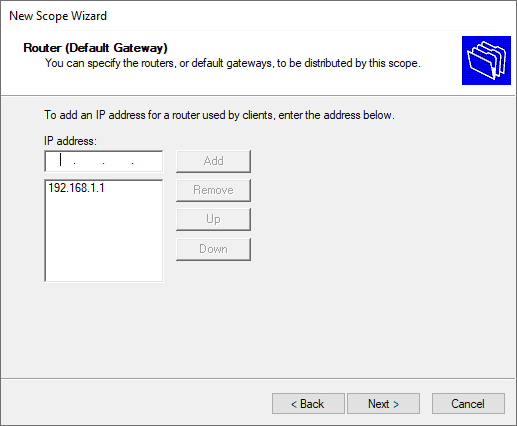
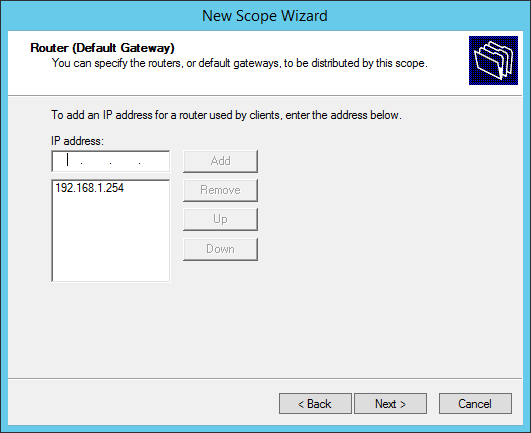
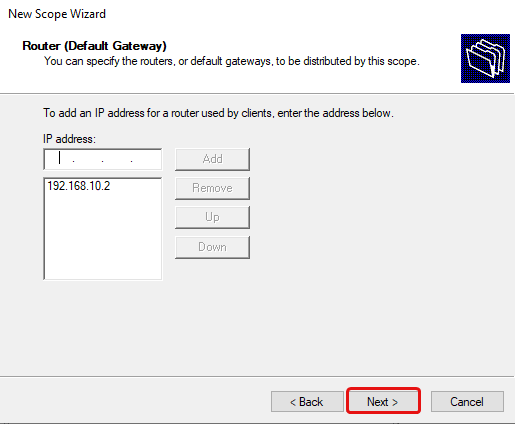
Define the default gateway of the new Windows Server DHCP VLAN configuration.
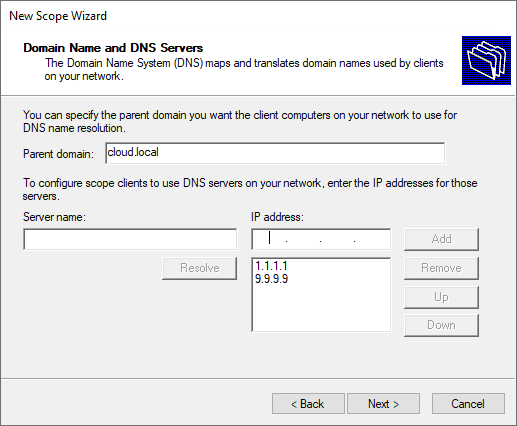
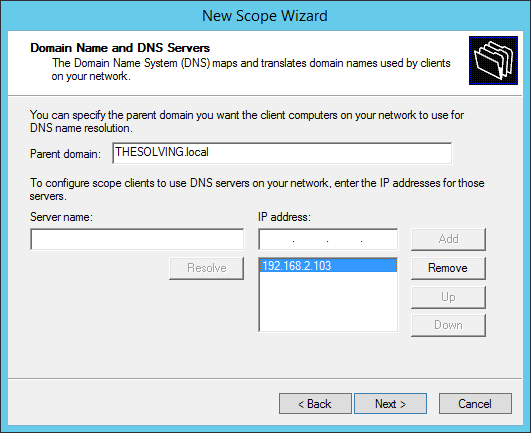
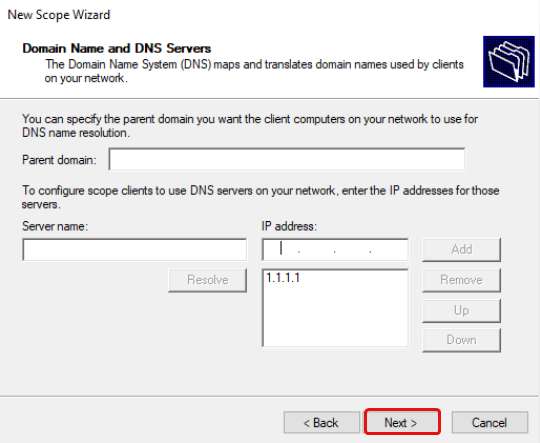
Configure domain name and DNS servers.
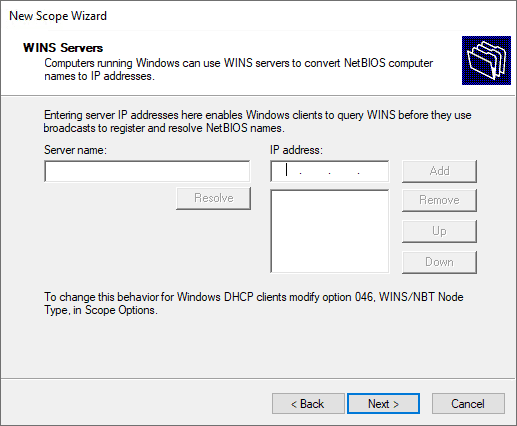
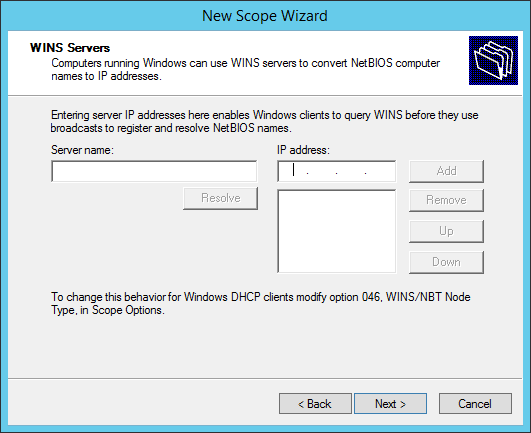
Setup any WINS server addresses.
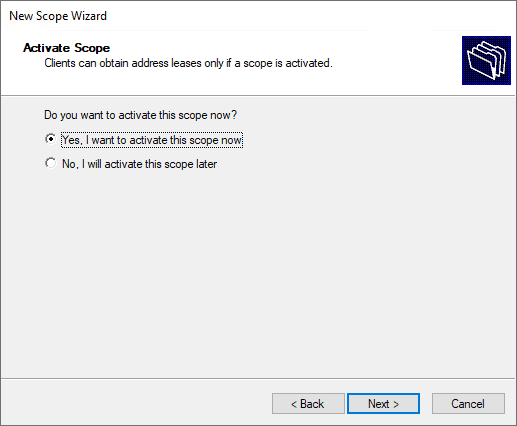
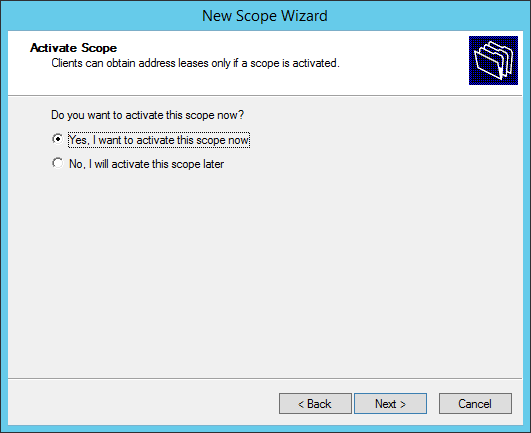
Activate the new DHCP scope.
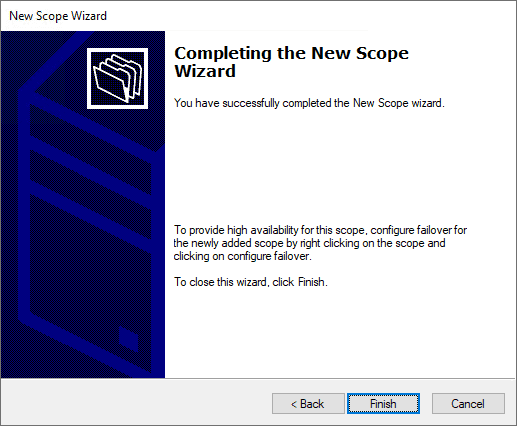
Complete the new DHCP scope wizard.
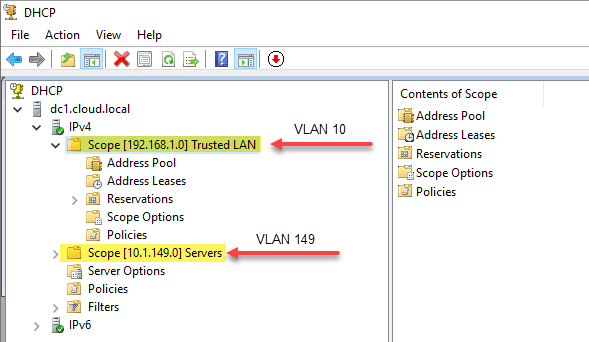
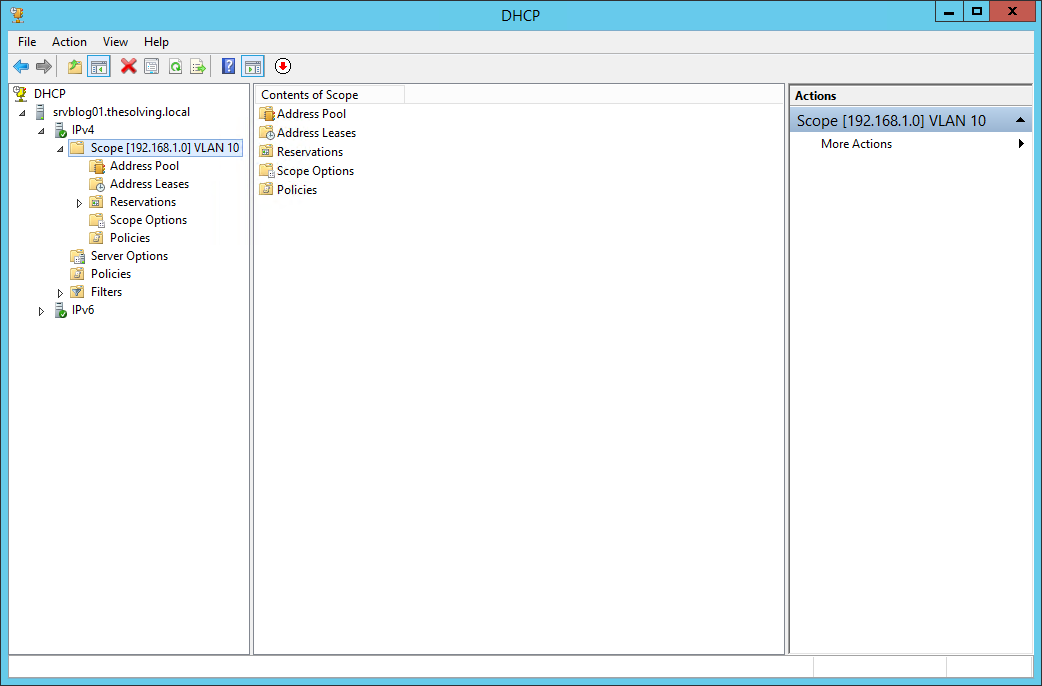
Below is an example of how my DHCP server looks after creating two different scopes for address leasing.
- 192.168.1.0/24 – associated with VLAN 10, which is not where the Windows Server DHCP server resides.
- 10.1.149.0/24 – associated with VLAN 149. This is the VLAN where the DHCP server resides.
Wrapping Up
Hopefully, this Windows Server DHCP VLAN Configuration: Detailed Guide will help any who may be trying to wrap their heads around the configuration of DHCP services for different VLANs and network segments in their network. By understanding the different means you have available to hand out IP addresses from a Windows DHCP Server you can effectively segment your network and easily handle IP addressing for all clients in the network, regardless of the VLAN they reside on.
In order to take advantage of the full capabilities of LAN segmentation (VLAN), you need to properly configure a DHCP server with different scopes (multiscope setup). Windows Server offers a simple solution to the problem and we are going to see how to perform the operation.
Before starting, it’s important to say you need a configured layer-3 switch with multiple VLANs (check this tutorial for further information). Following these steps you’ll be able to automatically assign VLAN-aware IP addresses to the devices connected at the physical ports of the switch. The switch will also need to forward DHCP requests to the Windows Server.
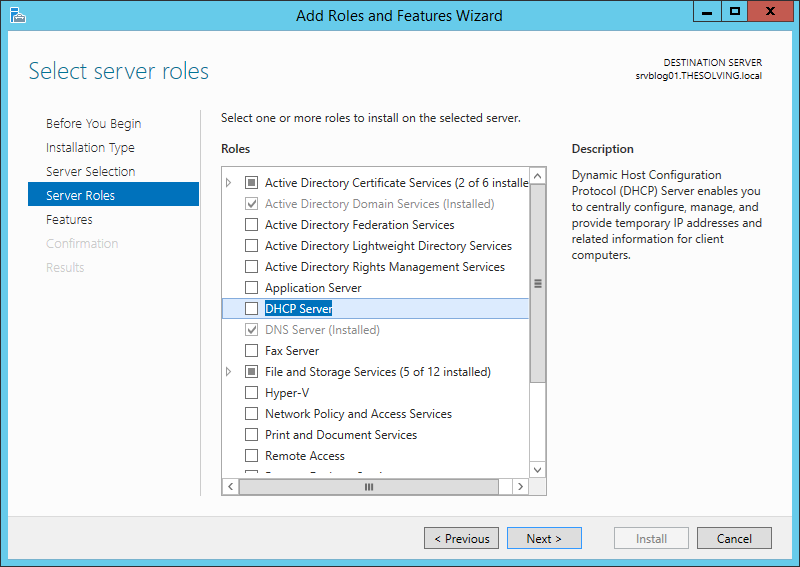
The first step is to install the DHCP server role:
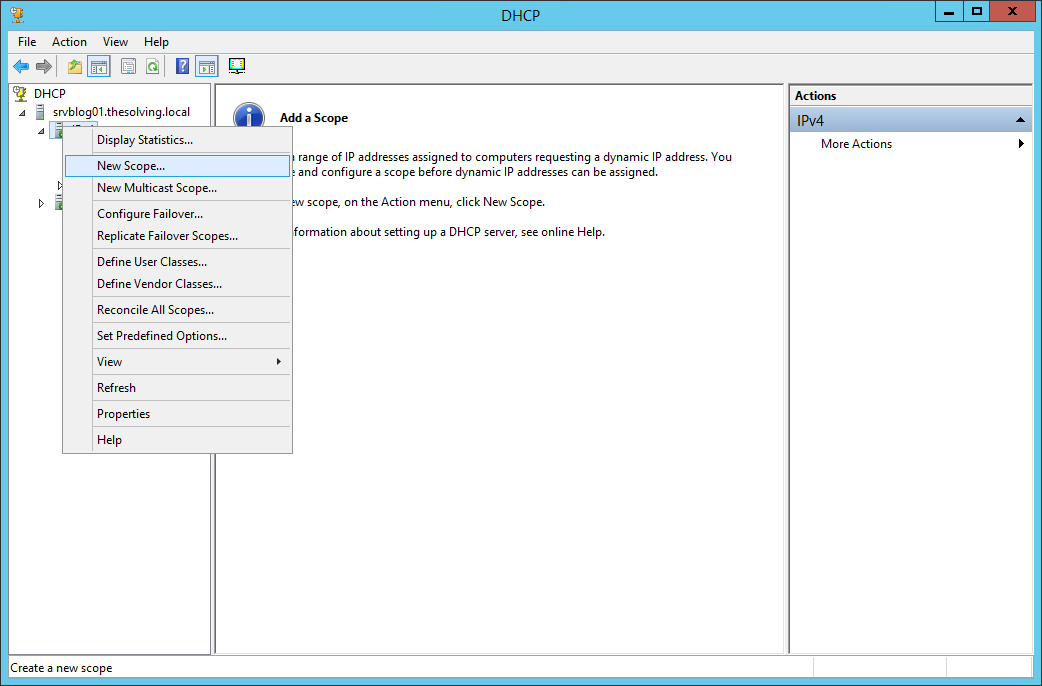
Then open the DHCP management panel:

Right-click on IPv4 and select New Scope, a Wizard will start:
Click Next:
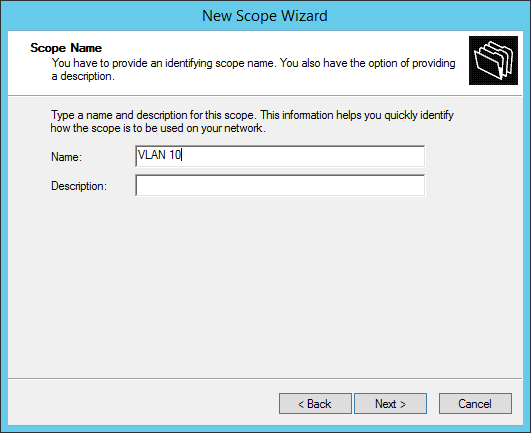
Give a name to the scope:
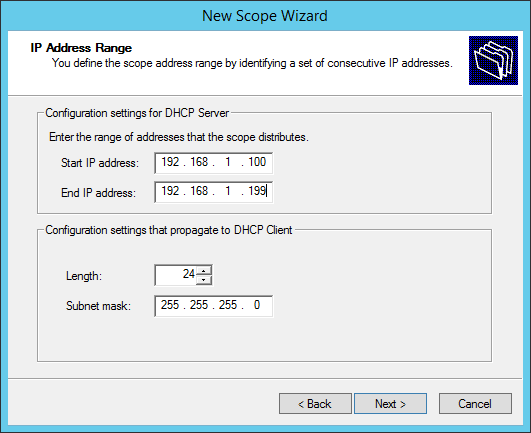
Specify the range of IP addresses that will be assigned by the scope. Note, we are configuring a scope for the VLAN 10 (IP range 192.168.1.xyz):
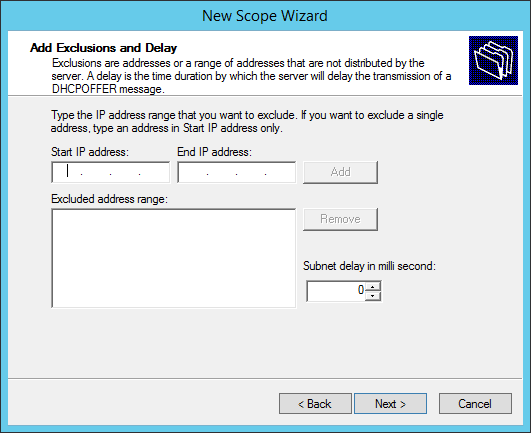
You can add exclusions to the range of IPs:
Default lease duration settings are fine:
Choose Yes:
Add the gateway IP address of the VLAN (important to identify the VLAN):
Specify the DNS servers:
You don’t need to specify a WINS server:
Choose Yes:
You’re ready to go!

The scope will appear in the panel.
Of course you need to repeat the operation for every VLAN you want to manage through DHCP.
Related articles:
How to segment a LAN into VLANs with affordable hardware
How to manage VLANs and virtual switches on ESXi/vSphere
Share:


Один из основных компонентов сети — DHCP (Dynamic Host Configuration Protocol), который отвечает за автоматическую настройку сетевых параметров устройствам в локальной сети. Однако, для эффективной работы DHCP необходимо правильно настроить Windows Server 2019, используя функцию VLAN (Virtual Local Area Network).
Позволяя разделять сеть на виртуальные VLAN, мы можем добиться большей безопасности и удобства управления в сети. Коммутаторы и маршрутизаторы VLAN дают возможность сегментировать локальные сети, таким образом, что трафик между VLAN будет столь же безопасным, как трафик внутри одного VLAN.
Настройка Windows Server 2019 для работы с DHCP и VLAN является задачей, которая требует определенного уровня компетентности и знания. В данной статье рассмотрим подробный процесс настройки Windows Server 2019 для работы с DHCP и VLAN, шаг за шагом, с пояснениями и дополнительными рекомендациями.
Содержание
- Как настроить Windows Server 2019 для работы с DHCP и VLAN
- Установка Windows Server 2019
- Создание и настройка DHCP-сервера
- Настройка VLAN на Windows Server 2019
Как настроить Windows Server 2019 для работы с DHCP и VLAN
Настройка Windows Server 2019 в режиме DHCP и VLAN позволяет создать гибкую и эффективную сетевую инфраструктуру. DHCP (Dynamic Host Configuration Protocol) обеспечивает автоматическую настройку IP-адресов и других параметров сети для клиентских устройств, тогда как VLAN (Virtual Local Area Network) позволяет разделить сеть на виртуальные сегменты.
Для начала настройки необходимо установить роль DHCP на сервере Windows Server 2019. Откройте «Установку ролей и компонентов» через «Менеджер сервера» и выберите «Установка на основе роли или функции». Выберите сервер, на котором хотите установить роль DHCP, и выберите роль «DHCP-сервер».
После установки роли DHCP, откройте «Мастер DHCP-сервера» для настройки основных параметров. Укажите имя и описание DHCP-сервера, затем укажите диапазоны IP-адресов, которые вы хотите, чтобы DHCP-сервер выдавал. Вы также можете настроить другие параметры DHCP, такие как шлюз по умолчанию, DNS-серверы и т.д.
Далее вам нужно настроить VLAN на коммутаторе. Войдите в интерфейс коммутатора и введите команду для создания виртуального интерфейса VLAN. Назначьте IP-адрес и маску подсети для каждого виртуального интерфейса VLAN.
После настройки VLAN вам нужно настроить транк (trunk) между коммутатором и сервером DHCP. Транк позволяет передавать трафик VLAN между коммутатором и сервером DHCP. Укажите на сервере Windows Server 2019 сетевое подключение с тегированными VLAN.
Затем настройте сетевые адаптеры на клиентских устройствах, чтобы они поддерживали VLAN. Настройте сетевую конфигурацию на клиенте, чтобы он получал IP-адрес и другие параметры сети от DHCP-сервера.
После выполнения всех этих шагов Windows Server 2019 будет настроен для работы с DHCP и VLAN. Клиенты смогут автоматически получать IP-адрес и другие настройки сети от DHCP-сервера, а VLAN позволит разделить сеть на виртуальные сегменты, обеспечивая безопасность и эффективность работы сети.
Установка Windows Server 2019
Для начала установки Windows Server 2019 вам понадобится загрузочный образ операционной системы. Скачайте образ с официального сайта Microsoft или используйте подготовленный носитель с операционной системой.
После получения загрузочного образа операционной системы, подключите носитель или откройте образ на компьютере. Затем следуйте инструкциям на экране для запуска процесса установки.
На первом экране выберите язык установки, формат даты и времени, а также раскладку клавиатуры, затем нажмите «Далее».
Прочтите и примите лицензионное соглашение, затем нажмите «Далее».
На следующем экране выберите тип установки, в данном случае выберите «Пользовательскую: установка Windows только с загрузочного носителя» и нажмите «Далее».
Выберите раздел, на котором вы хотите установить операционную систему. Если разделов нет, создайте новый раздел. Затем нажмите «Далее».
После анализа разделов система начнет установку. Подождите, пока установка завершится, и перезагрузите компьютер.
После перезагрузки вам потребуется ввести имя компьютера и пароль администратора. Следуйте инструкциям на экране и завершите установку.
Поздравляю, теперь у вас установлена операционная система Windows Server 2019!
Создание и настройка DHCP-сервера
Для работы с DHCP-сервером на Windows Server 2019 следует выполнить ряд шагов.
1. Откройте «Диспетчер сервера».
2. В левой панели выберите «Установка роли и компонента».
3. В появившемся окне кликните на «Далее».
4. Выберите «Сервер DHCP» и нажмите «Далее».
5. Прочтите информацию о роли DHCP-сервера и нажмите «Далее».
6. Назначьте сетевой адаптер, который будет использоваться DHCP-сервером, и нажмите «Далее».
7. Введите диапазон IP-адресов, которые будут выдаваться клиентам, и нажмите «Далее».
8. Выберите режим, в котором DHCP-сервер будет работать: «Автоматическое создание подсеток» или «Ручная настройка подсеток». После выбора нажмите «Далее».
9. Если вы выбрали ручную настройку подсеток, введите необходимые параметры и нажмите «Добавить». Затем нажмите «Далее».
10. Настройте параметры DNS-сервера и нажмите «Далее».
11. Выберите, какие дополнительные опции будут использоваться и нажмите «Далее».
12. Проверьте настроенные параметры и кликните на «Установить».
13. Дождитесь завершения процесса установки и нажмите «Завершить».
После выполнения этих шагов DHCP-сервер будет готов к использованию. Вы сможете настроить дополнительные параметры и опции в будущем, если это потребуется.
Настройка VLAN на Windows Server 2019
Для настройки VLAN на Windows Server 2019 необходимо выполнить следующие шаги:
- Убедитесь, что сервер работает под управлением операционной системы Windows Server 2019 и что у вас есть права администратора.
- Установите и настройте службу DHCP на сервере. DHCP (Dynamic Host Configuration Protocol) — это протокол, который автоматически назначает IP-адреса и другую сетевую конфигурацию клиентам в сети. DHCP позволяет присваивать IP-адреса VLAN-сегментам.
- Откройте «Управление компьютером» на сервере, для этого щелкните правой кнопкой мыши по кнопке «Пуск» и выберите «Управление».
- Выберите «Сервисы и приложения» > «Сетевые службы» > «Диспетчер виртуальных коммутаторов».
- Щелкните правой кнопкой мыши по «Диспетчер виртуальных коммутаторов» и выберите «Создать экземпляр сервиса виртуального коммутатора».
- Выберите тип виртуального коммутатора (в данном случае выберите «Виртуальный коммутатор с виртуальными ЛАН-картами (VLAN)»).
- Укажите имя коммутатора и выберите сетевые адаптеры, на которые будет применяться VLAN (для каждого VLAN выберите отдельный адаптер).
- Настройте параметры VLAN, включая идентификатор VLAN и привязку адаптера к VLAN.
- Создайте нужные VLAN-сегменты и привяжите их к нужным сетевым адаптерам.
- Протестируйте конфигурацию VLAN, убедитесь, что клиенты в сети получают IP-адреса от DHCP-сервера и имеют доступ к ресурсам в своей VLAN.
Теперь вы можете успешно настроить VLAN на Windows Server 2019 и эффективно управлять сетью, разделяя ее на отдельные виртуальные сегменты.
This guide assumes the following:
- You have an OPNsense firewall.
- You have already configured your VLANs on OPNsense.
- You have a Windows Server 2019 server.
Windows Server 2019
Set Static IP
You will need to set a static IP address for the DHCP server to work. Follow the steps below to do so.
Open a Command Prompt and run:
1control.exe /name Microsoft.NetworkAndSharingCenter
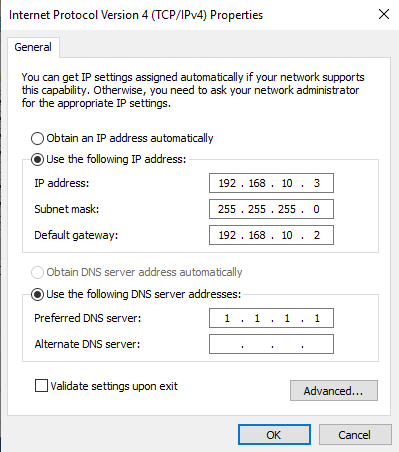
Network and Sharing Center should open. Now navigate to Change adapter settings, then right click on your network adapter and click Properties. Double click on «Internet Protocol Version 4 (TCP/IPv4)». Switch from Obtain an IP address automatically to Use the following IP address.
Change your IP address to one that is in the VLAN subnet that your server is connected to. For instance, my DHCP server is connected to my Services VLAN. The subnet is 192.168.10.0/24. My server IP address is set to 192.168.10.3 for simplicity.
Change your Subnet mask to the subnet mask of your VLAN subnet. E.g. 255.255.255.0 for me.
Change your Default gateway to your OPNsense router’s IP that is on the same VLAN. Mine is 192.168.10.2 in this instance.
Change your DNS server to any DNS server you wish, e.g. 1.1.1.1 for Cloudflare DNS. If your server is a DNS server, enter the same IP from above e.g. 192.168.10.3.
Add DHCP Role
Now we will add the DHCP role to the server. Open a command prompt and run
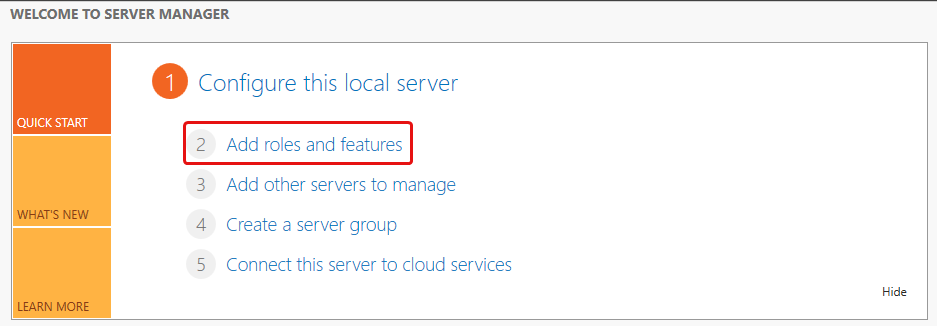
Add Roles and Features Wizard
Click «Add roles and features»
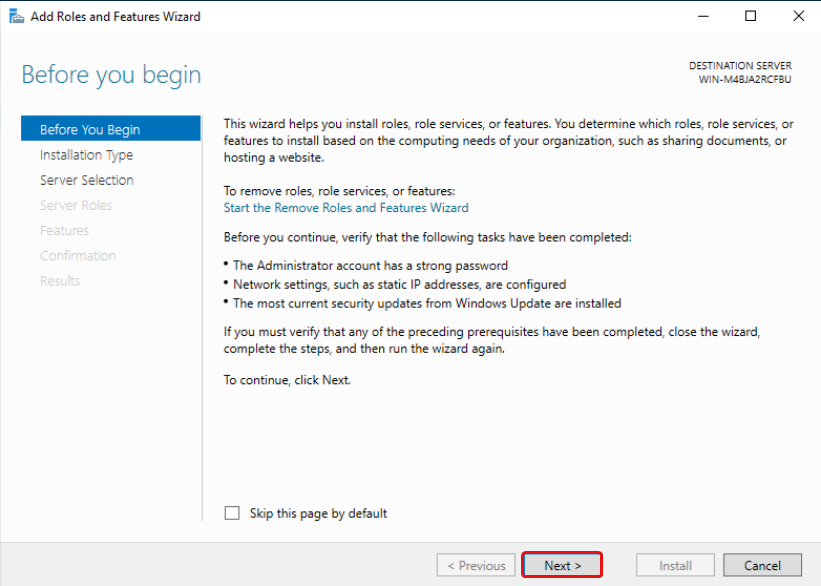
Click Next.
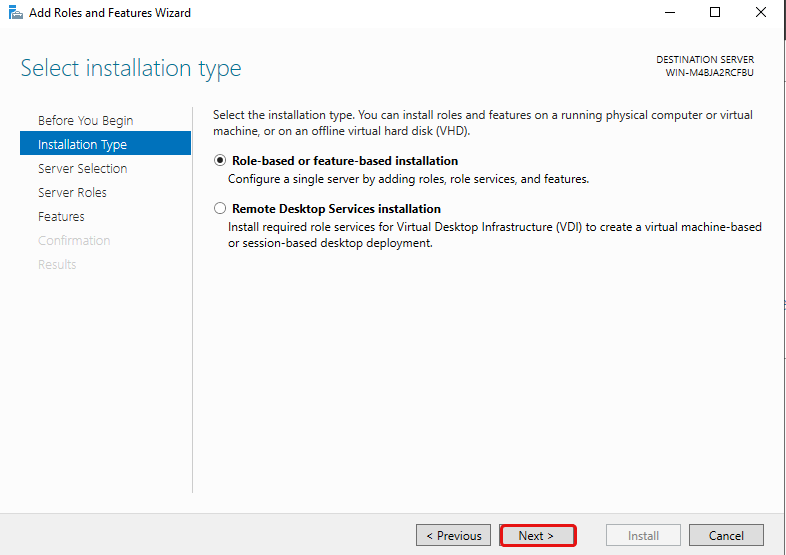
Select «Role-based or feature-base installation» and click Next.
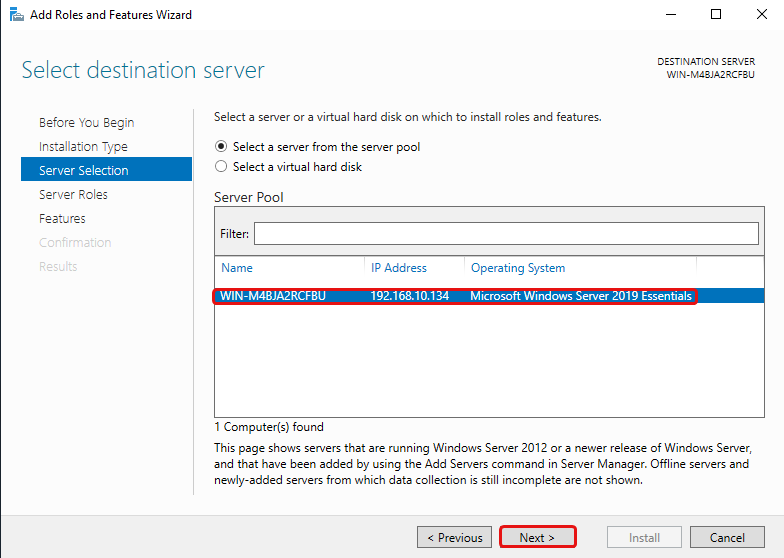
Select your server and click Next.
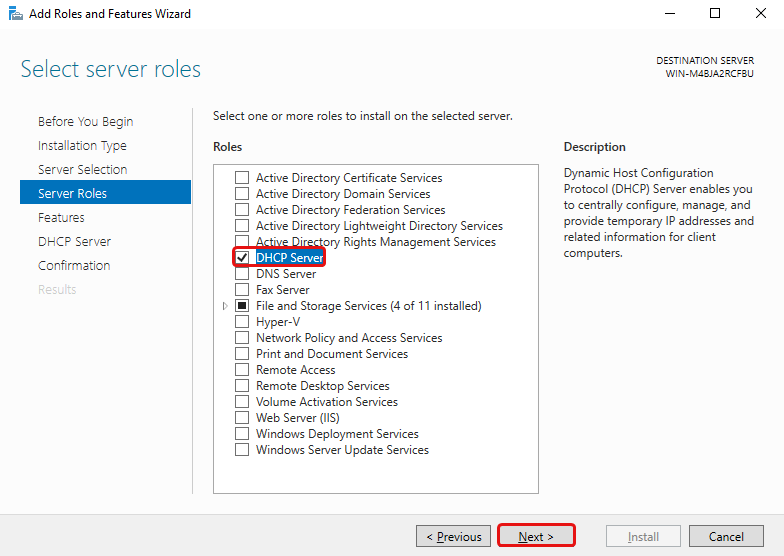
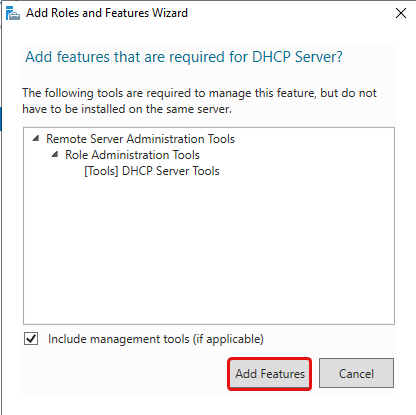
Tick the DHCP Server Role then click Add Features, then click Next until you can click Install. You may then click Close.
To check the status of the installation you can click the flag icon on Server Manager.
Post-deployment DHCP Configuration
After you’ve installed the DHCP Server role, you should see a yellow triangle next to the flag icon.
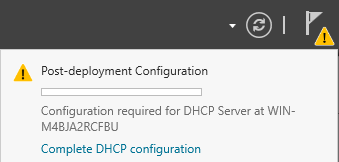
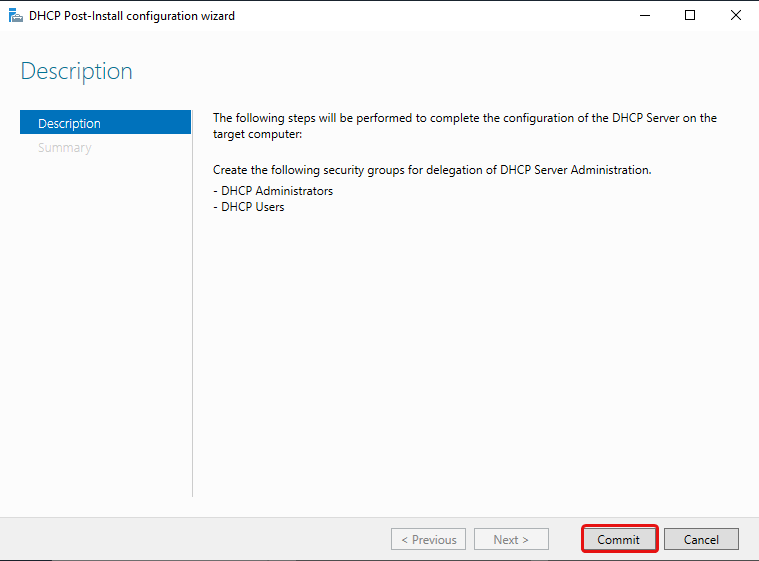
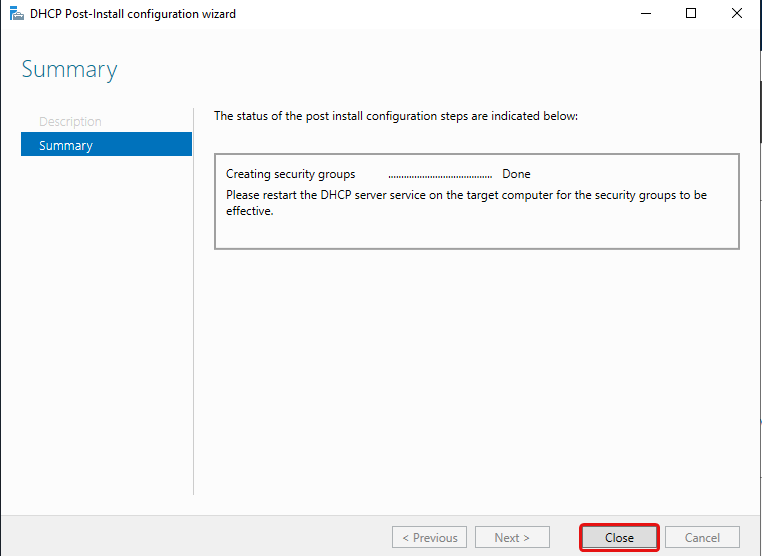
Click on the flag and then click Complete DHCP configuration. This will add the DHCP Administrators and DHCP Users security groups.
Click Commit.
Click Close.
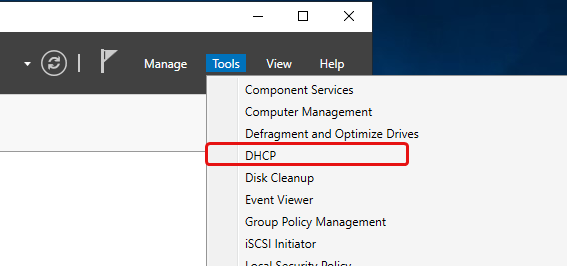
Configure DHCP Server
After everything has been installed, navigate to Tools > DHCP.
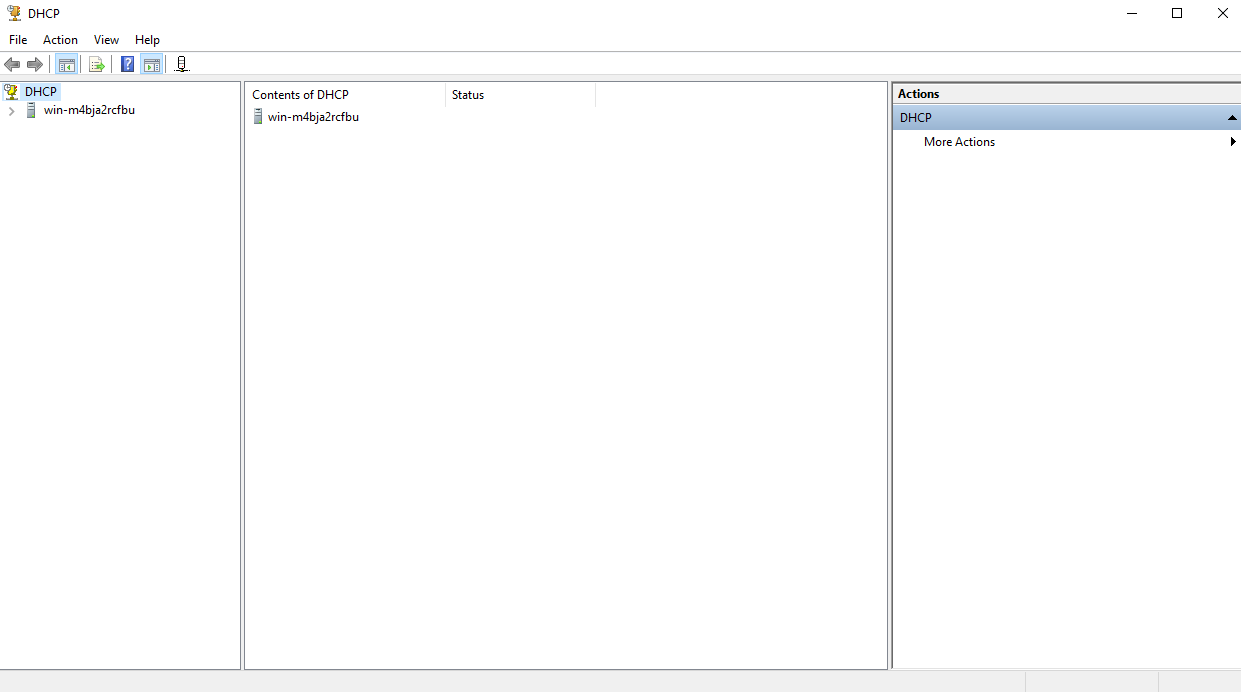
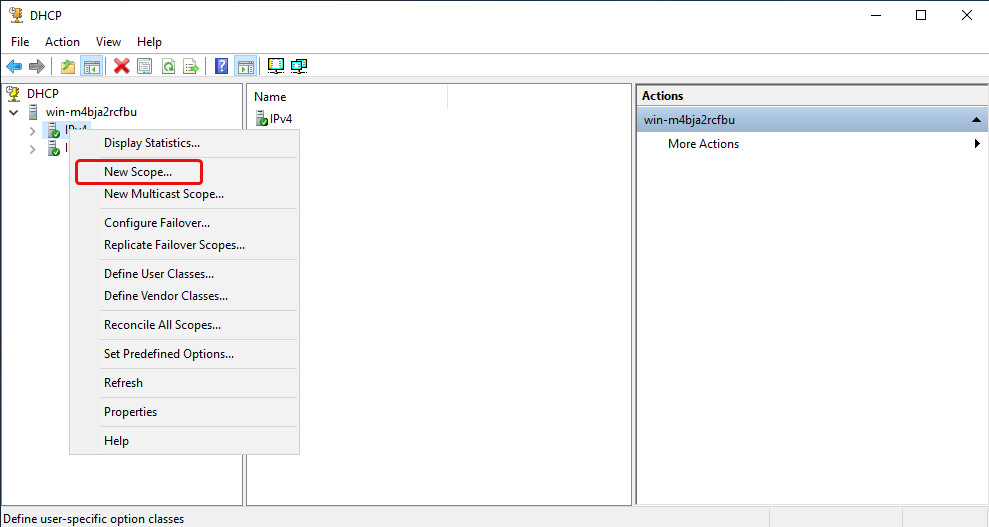
Add Scopes
Click on the dropdown arrow then right click IPv4 and click «New Scope»
Click Next.
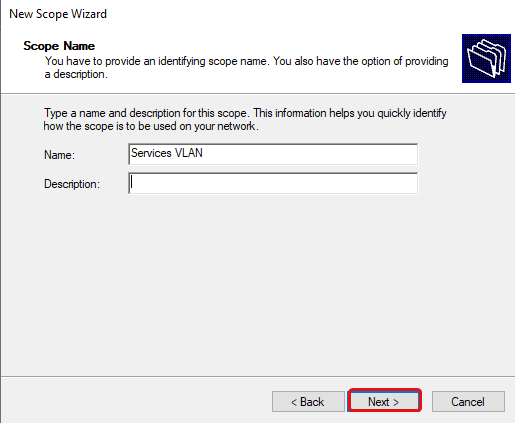
Add a name and description. The name is required, while the description is not.
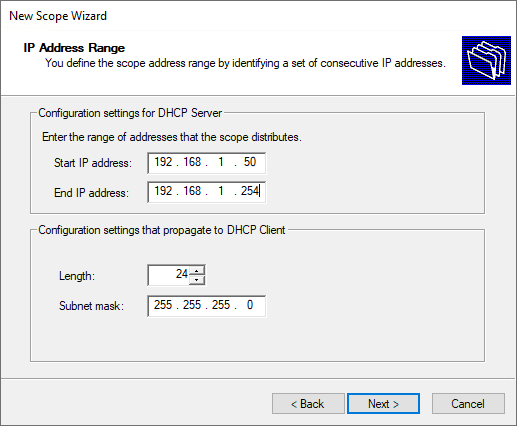
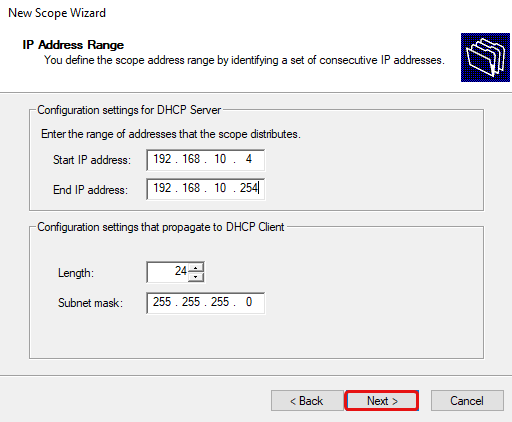
Define the IP address range that this scope will distribute. In my case, the IP address range would be 192.168.10.4-192.168.10.254.
The subnet mask defaults to 255.255.255.0 CIDR /24. Change this as necessary, for me I’ll leave this as is since it’s the same subnet mask as my Services VLAN. Then click Next.
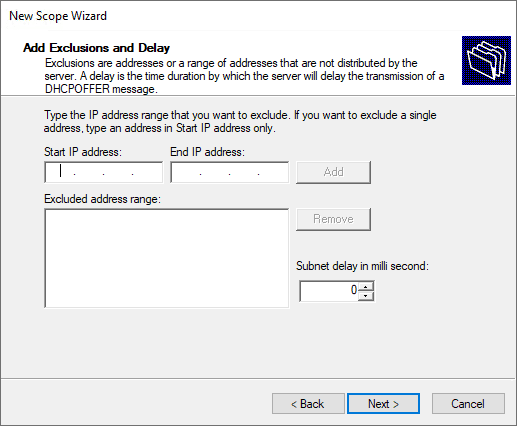
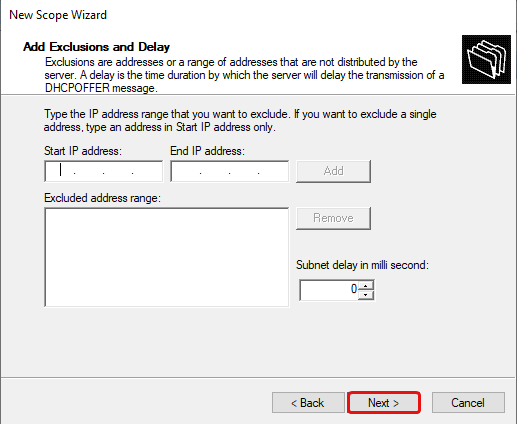
You may add an exclusion range for IP addresses that you do not want the DHCP server to distribute. This is optional, click Next.
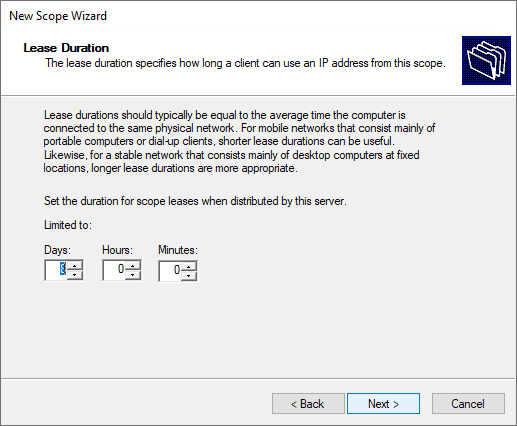
Set the lease duration here, this sets how long the IP address will be leased to each DHCP client. Either change it to another value, or leave it as is, then click Next.
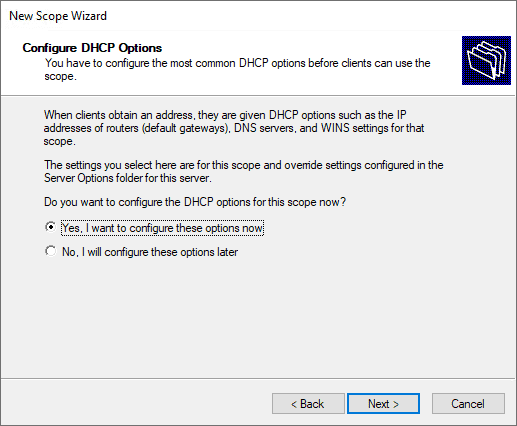
Select «Yes, I want to configure these options now» then click Next.
Type in the Default Gateway (Router) IP address for the VLAN and click Add, then click Next.
Type in a DNS server IP address e.g. 1.1.1.1 for Cloudflare DNS, click Add, then click Next.
Click Next.

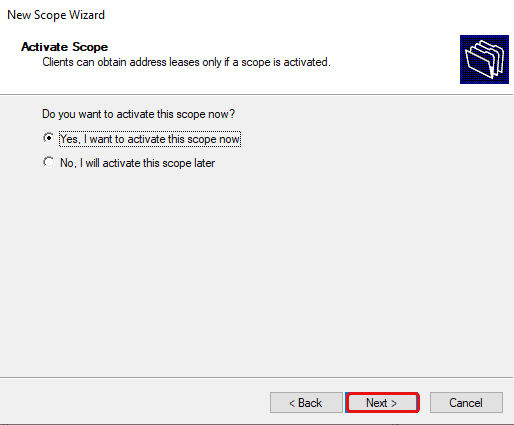
Select «Yes, I want to activate this scope now», then click Next, and then click Finish.
Additional DHCP Options
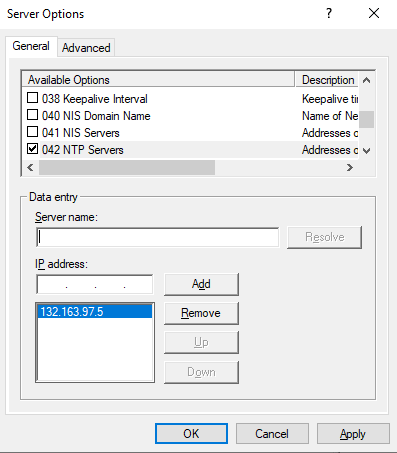
To configure additional DHCP options click the dropdown arrow next to IPv4, then the dropdown for your scope, and then right click on Scope Options, and click Configure Options.
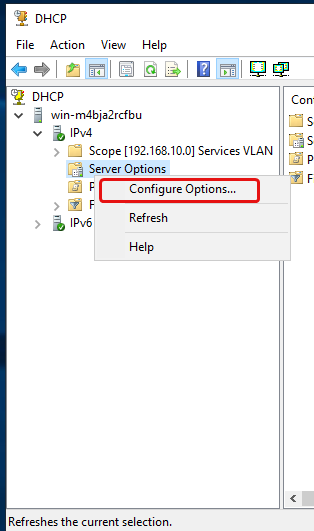
You can configure various DHCP options here, such as an NTP server for time synchronization.
Repeat For Each VLAN
After you’ve configured your first VLAN scope, repeat the steps above for each VLAN subnet you have on your network.
OPNsense
Now that we have our DHCP server configured, we need to configure a DHCP relay on our OPNsense router. It basically forwards our DHCP request from our DHCP client to our DHCP server.
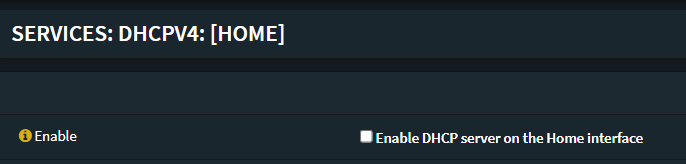
If you currently are using the DHCP server on OPNsense, you must disable it, navigate to the DHCP server for each VLAN interface, then untick «Enable DHCP server on x interface» then click Save at the bottom.
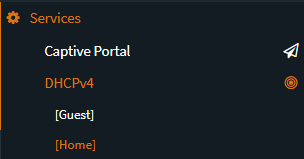
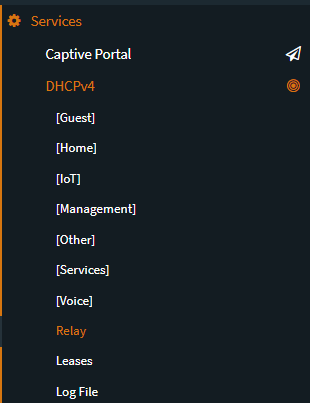
Now navigate to Services -> DHCPv4 -> Relay.
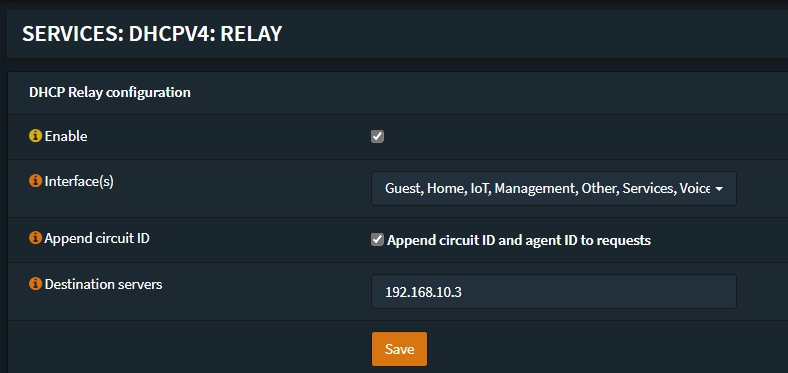
Tick Enable, select your VLAN interfaces, tick Append circuit ID, then enter your DHCP server IP address. Then click Save. This will then relay every DHCP request from clients on your VLANs to your DHCP server.
Conclusion
I hope this guide helped you! Now all of your DHCP clients will receive IP addresses from your DHCP server. Please contact me if you think I made any errors or if you have any suggestions to improve this guide.
На чтение 3 мин Опубликовано Обновлено
DHCP (Dynamic Host Configuration Protocol) — протокол динамической настройки сетевых параметров для компьютеров в IP-сети. Он позволяет автоматически присваивать IP-адреса, маски подсети, адреса шлюза и другие необходимые данные устройствам, подключенным к сети. В данной статье мы рассмотрим процесс настройки DHCP-сервера на операционной системе Windows Server 2012 R2 с учетом использования VLAN.
VLAN (Virtual Local Area Network) — виртуальная локальная сеть, позволяющая разделить физическую сеть на несколько логических сегментов. Использование VLAN позволяет улучшить безопасность и производительность сети, разделяя трафик между различными группами пользователей.
Для настройки DHCP на Windows Server 2012 R2 с учетом VLAN-сетей необходимо выполнить ряд шагов. Сначала необходимо установить и настроить роль DHCP-сервера на сервере с операционной системой Windows Server 2012 R2. Затем следует настроить сетевые адаптеры на DHCP-сервере, создав отдельные VLAN-интерфейсы для каждой виртуальной сети.
Важно помнить, что настройка DHCP на Windows Server 2012 R2 с VLAN требует определенных знаний и навыков в области сетевой инфраструктуры и системного администрирования. Перед выполнением настроек рекомендуется ознакомиться с документацией Microsoft и получить консультацию у специалистов.
Настройка DHCP на Windows Server 2012 R2 с VLAN
Для настройки DHCP на Windows Server 2012 R2 с использованием VLAN следуйте следующим шагам:
- Установите и настройте Windows Server 2012 R2 на физическом сервере.
- Настройте сетевые интерфейсы сервера в соответствии с вашими требованиями, включая VLAN-тегирование.
- Добавьте и настройте роль DHCP на сервере. Возможно, вам потребуется использовать роль Network Policy and Access Services (NPAS), если вы хотите, чтобы DHCP-сервер прослушивал и рассылал пакеты на нескольких VLAN.
- Настройте параметры DHCP-сервера, включая диапазоны IP-адресов, временные интервалы аренды IP-адресов, DNS-серверы и другие настройки в зависимости от ваших требований.
- Создайте и настройте VLAN на коммутаторе для каждого сегмента сети, который вы хотите использовать с DHCP-сервером.
- Настройте порты коммутатора для каждого VLAN, чтобы они были доступны на DHCP-сервере.
- Настройте DHCP Relay на коммутаторе для каждого VLAN, чтобы перенаправить DHCP-запросы на DHCP-сервер.
- Проверьте настройки DHCP-сервера и коммутатора, чтобы убедиться, что DHCP работает с VLAN.
После выполнения этих шагов вы должны успешно настроить DHCP на Windows Server 2012 R2 с использованием VLAN. Убедитесь, что все настройки правильно работают и что клиенты получают IP-адреса и другие настройки с DHCP-сервера.
Подготовка к настройке DHCP с VLAN
Для успешной настройки DHCP с VLAN на сервере Windows Server 2012 R2 необходимо выполнить ряд подготовительных шагов. Эти шаги включают в себя установку и настройку ОС, установку драйверов сетевых карт, настройку подключения к сети VLAN и установку и настройку службы DHCP.
Перед началом процесса настройки DHCP с VLAN убедитесь, что ваш сервер удовлетворяет следующим требованиям:
| Требование | Описание |
|---|---|
| Операционная система | Убедитесь, что на сервере установлена операционная система Windows Server 2012 R2 или новее. |
| Сетевая карта | Убедитесь, что на сервере установлена сетевая карта, совместимая с VLAN. Проверьте, что у вас есть драйверы для этой сетевой карты. |
| Настройка сети VLAN | Убедитесь, что у вас есть доступ к сети VLAN, на которой вы хотите настроить DHCP. |
| Установка и настройка службы DHCP | Убедитесь, что служба DHCP установлена и настроена на сервере Windows Server 2012 R2. |
После выполнения этих подготовительных шагов вы будете готовы приступить к конфигурации DHCP с VLAN на вашем сервере Windows Server 2012 R2.