In this article, we intend to teach you How To Install MySQL on Windows Server 2019.
MySQL is a relational database management system (RDBMS) developed by Oracle that is based on structured query language (SQL).
MySQL is integral to many of the most popular software stacks for building and maintaining everything from customer-facing web applications to powerful, data-driven B2B services.
Its open-source nature, stability, and rich feature set, paired with ongoing development and support from Oracle, have meant that internet-critical organizations such as Facebook, Flickr, Twitter, Wikipedia, and YouTube all employ MySQL backends.
- Steps To Install MySQL on Windows Server 2019
Steps To Install MySQL on Windows Server 2019
In this guide, you will learn to install MySQL on your Windows Server.
Follow the steps below to complete this guide.
Install and Download MySQL on Windows Server
First, you need to download MySQL for Windows from the MySQL Downloads Page.
A free “MySQL Community Server” edition is available in both a “web” installer and a “standalone” installer.
The “web” installer (which has a smaller initial installer download size but with additional components downloaded during installation), or the “full” installer (which has a larger installer download size, but doesn’t require downloading any additional components during installation) and click “Download”.
Here we will download the Full installer.
On the next screen, click No thanks just start my download.
When your download is completed, open your MySQL installer on your Windows server 2019. Then, you need to choose a setup type and click Next. Here we choose Server only.
Next, you need to click Execute.
The installer will then download (in the case of the “web” installer) and then install the selected components.
When your MySQL installation is completed click Next to configure your MySQL server.
Then, you need to choose your config type. Here we select Server computer in the case that we’re installing MySQL on a server. Also, you can specify the “Connectivity” options on this screen. In most cases, you can leave these as the default (TCP/IP, Port 3306) and click Next.
At this point, you need to choose an authentication method. Its recommended for maximum compatibility and to avoid any additional configuration, select “Use Legacy Authentication Method” and click Next.
Configure MySQL on Windows Server
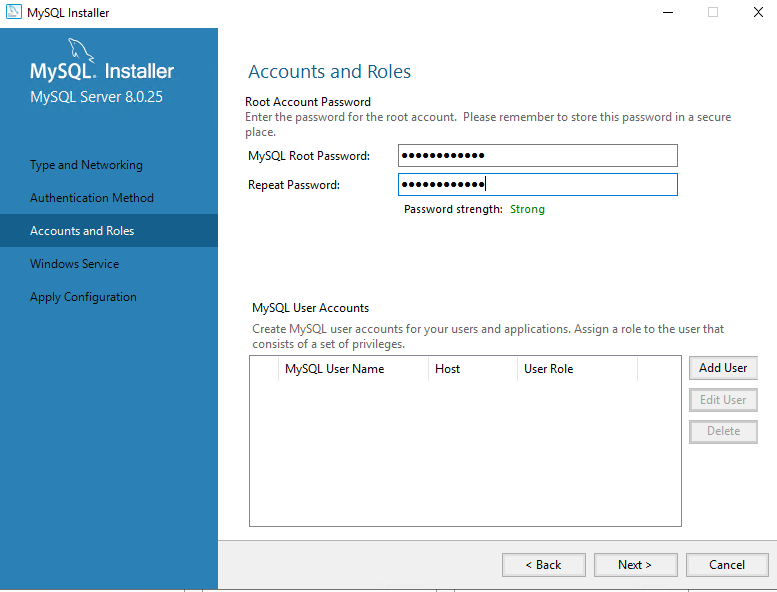
Next, you need to set up a MySQL root password on Windows Server 2019. Choose a strong one and click Next.
Also, you can set up additional MySQL user accounts from this screen.
Now you need to configure MySQL to run as a Windows service. Check the box next to the Configure MySQL a Windows service and Start MySQL at the system startup. And run Windows service as a Standard System Account and click Next.
In the Apply configuration screen, click Execute to start your MySQL configuration. Then, click finish.
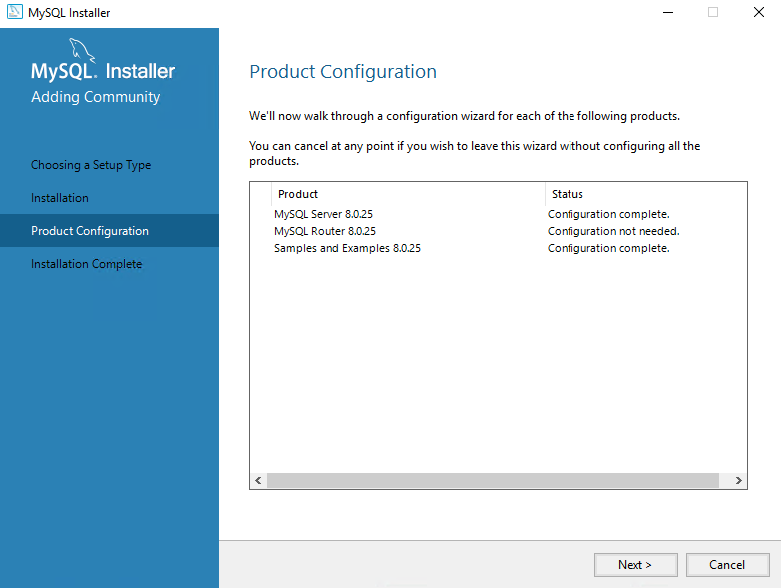
Next, you will see the Product configuration click Next and Finish your MySQL installation on Windows Server 2019.
Conclusion
At this point, you learn to Install MySQL on Windows Server 2019.
Hope you enjoy it.
Also, you may interested in these articles:
Install and Configure OpenSSL on Windows Server 2019.
How To Set up XAMPP on Windows Server 2019.

Introduction
In this article, you will learn how to install MySQL on Windows Server 2019.
MySQL is a database that can be downloaded for free and is used by many people. It is a relational database management system that is used by a lot of people. Even though Linux servers use it more often, it works just as well with Windows Servers.
Install MySQL
Step 1: Start by installing the Windows Server 2019 MySQL Installer. Select the version that fits on your machine, then click Download.

Step 2: Run the programme from the pop-up window at the bottom of your computer after you’ve downloaded the file.

MySQL Installer Setup
Step 1: When you ran the programme in the last step, a new window came up with the MySQL Installer setup. It asks you which MySQL items you want to put on the host.

One choice is to choose the setup type that is already set up and fits your needs. Here’s a quick look at each mode:
Developer Default: Installs MySQL Server, Shell, Router, Workbench, MySQL for Visual Studio, MySQL Connectors (for.NET, Python, ODBC, Java, and C++), MySQL Documentation, and MySQL Samples and Examples.
Server only: Only puts the MySQL server in place. This type of setup runs the GA (general availability) or development release server you chose when you downloaded MySQL Installer. It uses the download and data paths that are set by default.
Client only: Only downloads the latest MySQL applications and MySQL connectors. This setup type is similar to the Developer Default type, but it does not include the MySQL server or the client programmes that usually come with it, such as MySQL or mysqladmin.
Full: Installs all available MySQL tools.
Custom: With the custom setup type, you can search for and choose specific MySQL items from the MySQL Installer collection.
For this article, select Server only.
Step 2: Click on Execute.

Step 3: Click on terms and conditions, then click install.

Step 4: Once the setup is done, it will show the message below, which says that the installation was successful. Click the close.

Step 5: Click on Check Requirements, which is on the left side of the screen.

Step 6: Click on Execute.

Step 7: Click on next.

Step 8: Click on Next to configure the MySQL server.

Step 9: Choose the setting that works your needs, then click Next.

Step 10: Use Strong Password Encryption for Authentication and click Next in the Authentication Method area.

Step 11: The Accounts and Role window is the next screen. This is where you can set your MySQL Root Password. Fill out this part, then click Next.

Step 12: You can set up MySQL Server as a Windows service and give the service a name on the Windows Service screen. The given name for this lesson is MySQL8.0.
You can also start the service at System Startup and use the normal system account or a custom user to run it. Choose what you want and then click Next.

Step 13: Click «Execute» after selecting «Configuration Steps.»

Step 14: When the operation is finished, click the Finish button.

Using Command Prompt to access MySQL
If you use the Windows Start menu to open Command Prompt and then run the mysql command, you may see an error below.
# mysql

This mistake happens because MySQL Bin has not been added to the path. To find where the MySQL Bin is, use the File Manager to go to This PC. Then go to C drive > Program Files > MySQL > MySQL Server 8.0 > bin. Right-click on «bin» in the bar at the top and choose «Copy address.»
# cd C:\Program Files\MySQL\MySQL Server 8.0\bin
And then run the following to access your MySQL.
# mysql -u root -p

Conclusion
Hopefully, now that you have learned how to install MySQL on Windows Server 2019.
Also read: How to Block or Allow TCP/IP Port in Windows Firewall
Thank You 🙂
Введение
MySQL — реляционная система управления базами данных с открытым исходным. Простота использования и низкий порог входа сделал ее одной из популярных свободно распространяемых систем управления базами данных. MySQL используется как во многих небольших проектах (например, сайтах на WordPress), так и в высоконагруженных корпоративных системах.
В этой статье мы рассмотрим особенности установки MySQL на операционную систему Windows и расскажем о создании пользователей, оптимальной настройке производительности, устранении неполадок и о многом другом.
Подготовка Windows-сервера к установке MySQL
Перед началом подготовки сервера, закажем лицензию для Windows. Без этого создать сервер не получится. Для этого перейдем на экран «Лицензии» и нажмем кнопку «Купить лицензию».

В открывшемся выпадающем меню выберем соответствующий типа лицензии Windows Server 2019 Standard и нажмем кнопку «Оплатить».

После этого в списке лицензий появится лицензия Windows Server 2019 Standard.

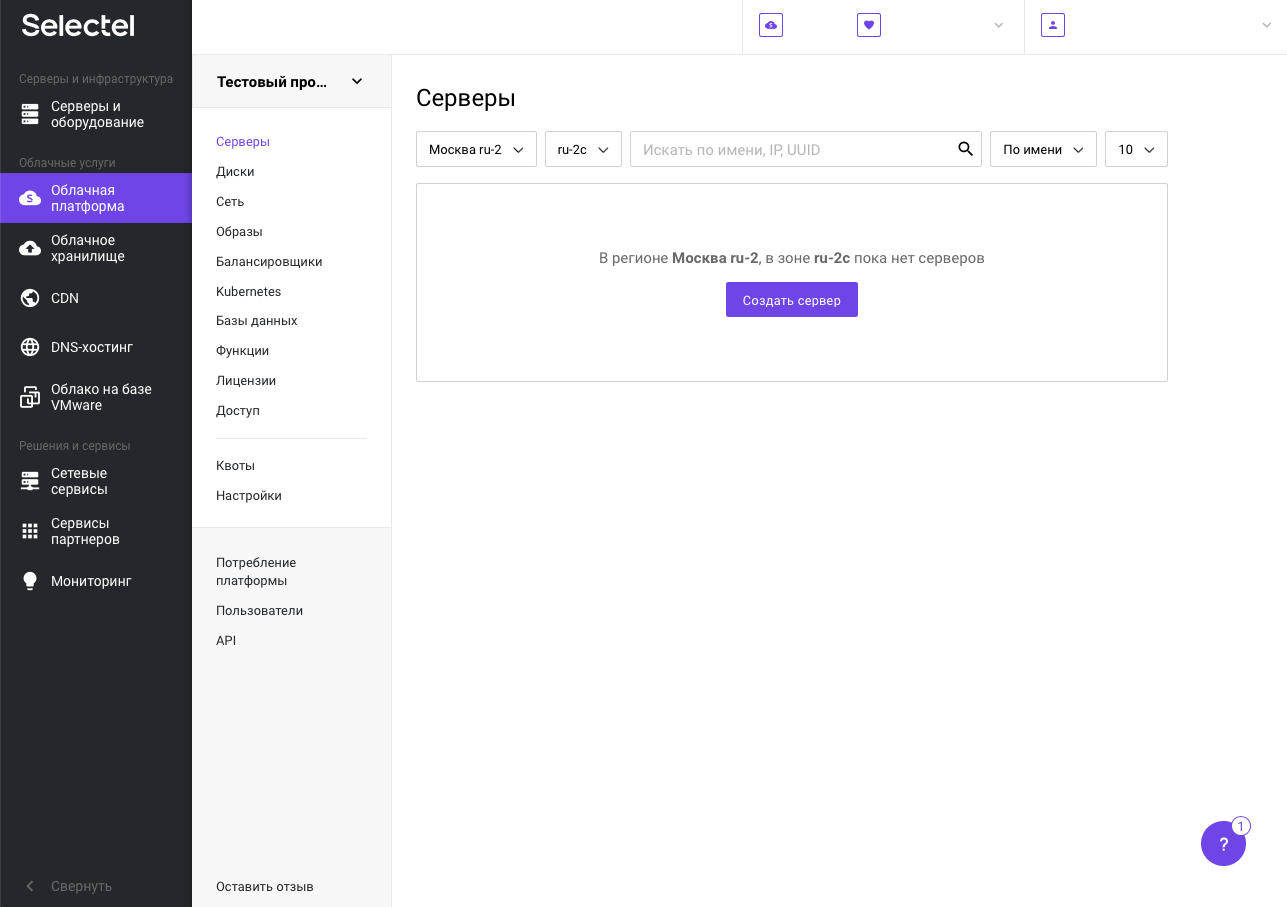
Теперь можно приступать к подготовке сервера на базе ОС Windows Server 2019. Для этого в панели управления Selectel перейдем на экран «Облачная платформа» и нажмем на кнопку «Создать сервер».
В качестве образа операционной системы необходимо выбрать образ операционной системы Windows. Для этого нажмем на кнопку «Выбрать другой источник».
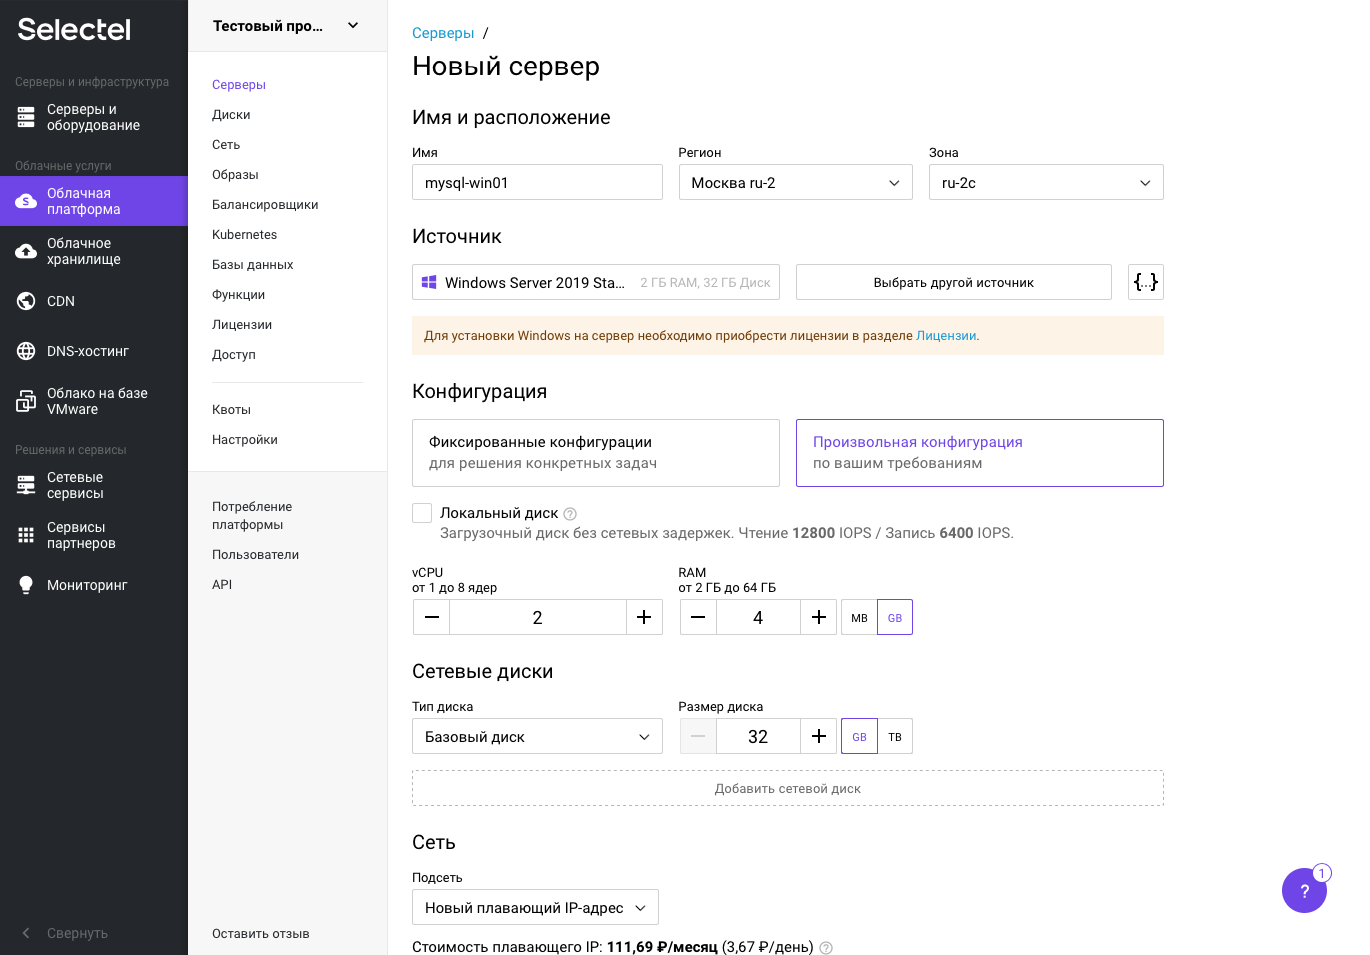
В появившемся всплывающем меню выберем готовый образ операционной системы Windows Server 2019 Standard Legacy BIOS и нажмем на кнопку «Выбрать».

В разделе «Серверы» и привязываем к серверу созданную лицензию. После выполненных действий нажимаем на кнопку «Создать».

Через несколько минут сервер перейдет в состояние Active и к нему можно будет подключиться по протоколу RDP.

После создания сервера, ему автоматически присваивается пароль учетной записи Administrator. Под этой учетной записью мы и подключаемся по RDP.

После выполненных подготовительных действий, можно приступать к установке MySQL на Windows-сервер.
Установка MySQL
Перед началом установки скачаем дистрибутив из специального раздела на официальном сайте MySQL. Нажимаем кнопку Go to Download Page.
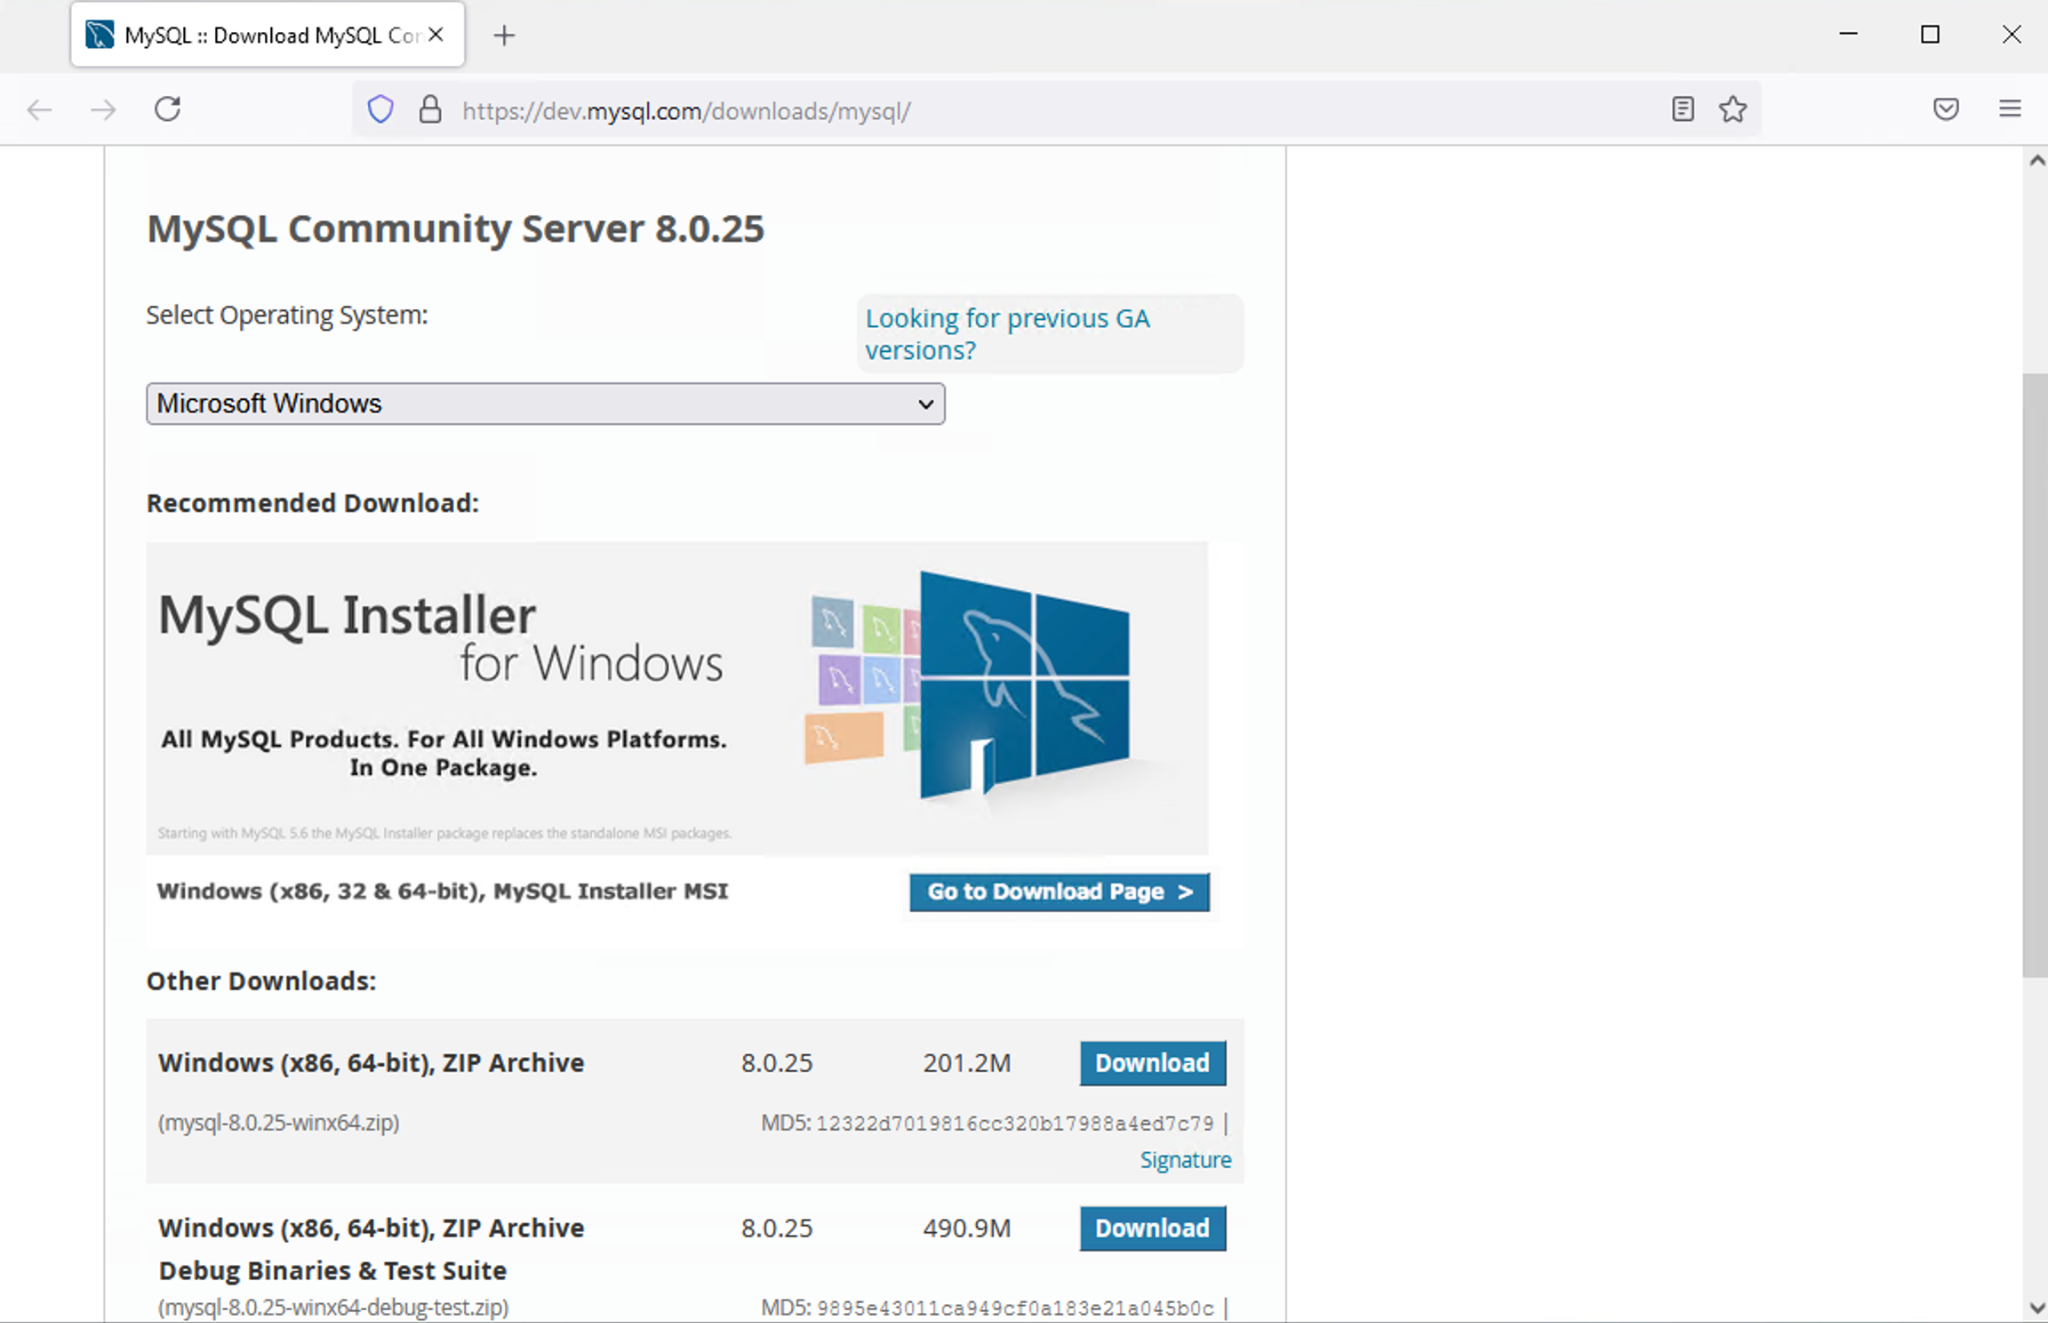
После перехода на страницу загрузки выбираем опцию Windows (x86, 32-bit), MSI Installer (mysql-installer-community) и нажимаем на кнопку Download. Это на самом деле 64-битная версия СУБД, которая отмечена вендором как 32-битная. В результате мы получим установочный пакет, который затем можно установить на сервер даже без подключения к интернету.
Также можно скачать версию mysql-installer-web-community, которая представляет собой автоматический установщик и работает при наличии подключения сервера к интернету. На серверах все же не часто можно встретить свободный доступ к интернету. После загрузки дистрибутива приступим к его установке.

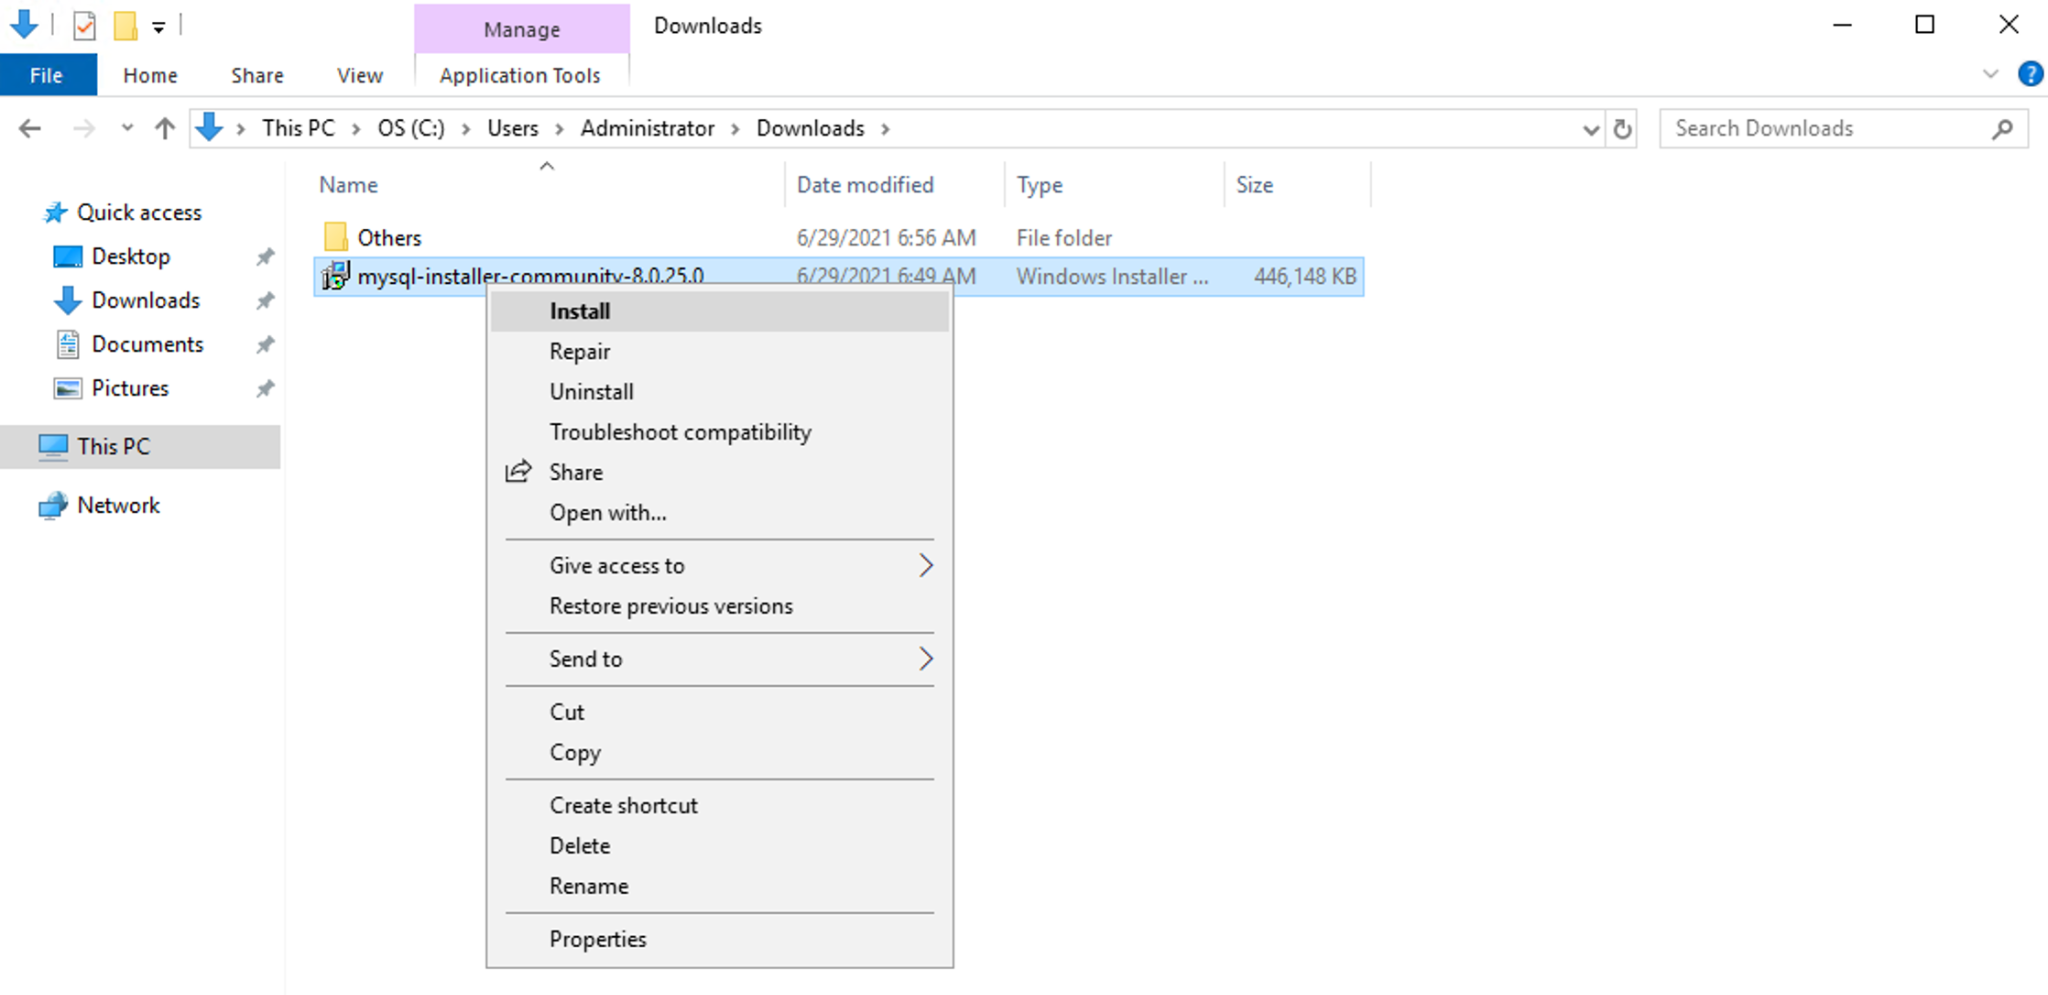
Дистрибутив должен появиться в папке с загрузками. Теперь можем его выполнить из контекстного меню и начать установку.
В появившемся представлении выбираем в меню Full для установки всех компонентов СУБД. Для работы с базой данных будет достаточно установить Server Only. В примере мы выбрали Full, т.к. считаем, что для знакомства с базой данных дополнительно понадобится визуальная консоль для управления MySQL Workbench. Также будут полезны примеры данных, с которыми можно сразу начинать работу для эффективного изучения работы СУБД. Также есть возможность выбрать для установки отдельные элементы, выбрав в меню пункт Custom. Нажимаем кнопку Next.

На следующем экране появятся системные требования к установке, выполнив которые, установщик приведет систему в соответствие с ними. Нажмем на кнопку Execute.

После установки дополнительных пакетов нажимаем кнопку Next. Пакеты в статусе Manual являются опциональными и не будут препятствовать нормальной работе СУБД.

На следующем экране будут показаны устанавливаемые компоненты. Проверяем статус готовности к установке каждого компонента и нажимаем на кнопку Execute.
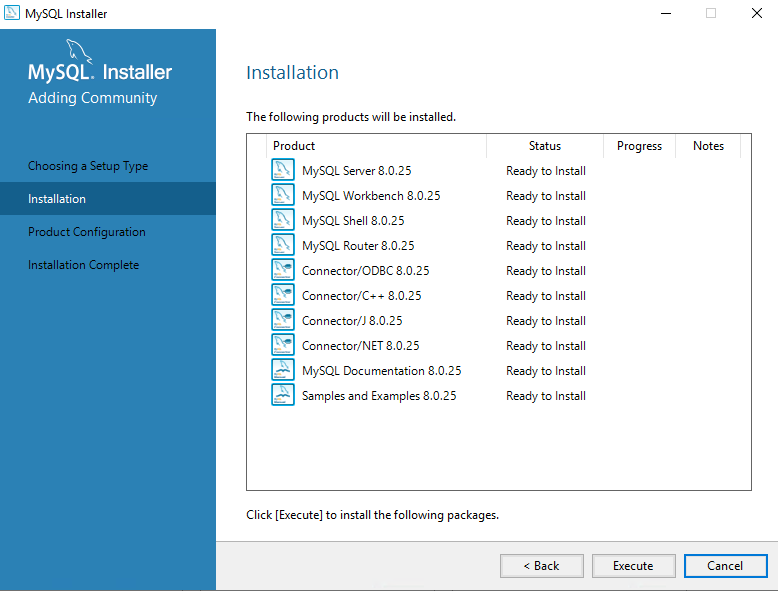
После установки компонентов убедимся в наличии статуса Complete по каждому из них. После этого нажмем на кнопку Next для перехода к следующему экрану.

На следующем представлении установщик предлагает выполнить конфигурацию компонентов MySQL Server, MySQL Router и Samples and Examples. Нажимаем кнопку Next.

В выпадающем меню Config Type выбираем Development Computer, т.к. установка выполняется в целях демонстрации. Для подключения к базе данных будем использовать протокол TCP/IP. Другие два варианта подключения, помимо TCP/IP, лучше использовать при локальном подключении, т.е. когда приложение установлено на том же сервере, что и база данных.
Например, метод подключения Shared Memory более производителен, он помогает избегать использование сетевого стека. Заметим, что в производственных средах метод подключения через TCP/IP более предпочтителен, т.к. приложение может иметь тенденцию к росту. Использование этого протокола в распределенной среде упрощает выявление и диагностику нештатного взаимодействия базы данных и приложения. Остальное оставляем по умолчанию и нажимаем кнопку Next.

На следующем экране выбираем тип аутентификации. Воспользуемся рекомендацией вендора, выберем пункт Use Strong Password Encryption for Authentication. Переключение на Use Legacy Authentication Method можем рассматривать только если драйвера приложения не поддерживают подключение к 8 версии MySQL. Нажимаем кнопку Next и переходим к следующему экрану.

На следующем экране установим пароль суперпользователя. Чтобы он был устойчивым к взлому, необходимо использовать символы в верхнем и нижнем регистрах, цифры и спецсимволы. Длина пароля должна быть не менее 8 символов. На этом же экране можно создать и другие пользовательские учетные записи. Созданием новых пользователей займемся после полной установки базы данных MySQL и ее компонентов. Далее нажимаем кнопку Next.
На следующем экране установщик предлагает запускать MySQL Server в виде Windows-сервиса и установить его имя. Это самый приемлемый вариант, т.к. в противном случае запуск MySQL придется выполнять из командной строки. Чекбокс Start the MySQL Server at System Startup оставляем по умолчанию, чтобы база данных запускалась вместе с запуском сервера. В разделе Run Windows Service as… оставим значение Standard System Account, т.к. нет никаких причин запускать сервис MySQL от специализированной учетной записи. В некоторых случаях это бывает необходимо. Нажимаем кнопку Next.

Следующий этап — выполнение конфигурации в автоматическом режиме. Нажимаем кнопку Execute.
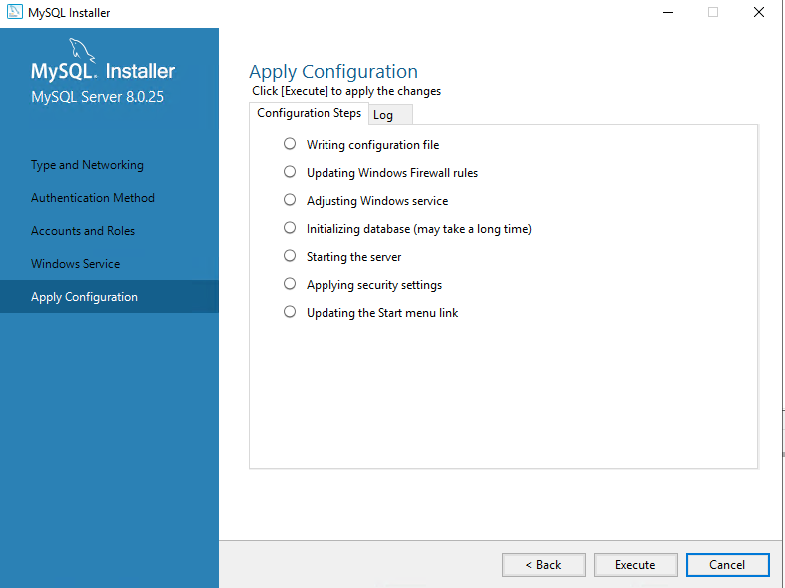
После выполнения конфигурации в автоматическом режиме все этапы должны быть помечены зеленой галочкой. Нажимаем кнопку Finish.

Следующий этап — конфигурирование MySQL Router и встроенных примеров. Нажимаем Next.

На экране с конфигурацией MySQL Router оставляем все по умолчанию и нажимаем кнопку Finish. Это функционал позволяет распределять нагрузку между экземплярами MySQL в рамках кластера. В нашем случае при установке единственного экземпляра базы данных этот функционал не имеет смысла.

На следующем экране установщик предложит выполнить конфигурирование примеров — их загрузку в БД. Нажимаем Next.

После этого появится экран с полем для ввода реквизитов доступа к БД и кнопкой для тестирования подключения — Check. Вводим логин и пароль, которые задавали ранее и нажмем кнопку. После подтверждения успешного подключения нажмем на кнопку Next.

На следующем экране будет предложено проверить уже установленных в БД примеров и установить их (запустить скрипты). Нажимаем кнопку Execute.

После успешной проверки и установки нажимаем кнопку Finish.

На следующем экране будет выдано сообщение об успешной установке примеров в БД. Нажимаем кнопку Next.
На этом установка завершена. Перед нажатием на кнопку Finish выберем чекбокс напротив Start MySQL Workbench after setup, что позволит автоматически запустить соответствующую консоль управления.

Консоль запущена и можно переходить к работе с СУБД MySQL Server и ее дополнительной настройке.

Проверка работоспособности MySQL
После подключения к БД MySQL в окне для ввода запроса введем select 1 from dual и в результате в ответе получим 1. В нижней части рабочей области в поле Output зеленой галочкой отмечен успешный статус выполнения запроса.

Также мы можем перейти на вкладку Schemas и обнаружим тестовые данные, которые были загружены в базу данных во время установки. Из контекстного меню выполним запрос в таблицу film_actor. В ответе получим значения столбцов actor_id, film_id и last_update.

Базовая настройка MySQL
После проверки корректности исполнения запросов, добавим новую пользовательскую учетную запись. Для этого на вкладке Administration перейдем в представление Users and Privileges. Нажмем на кнопку Add Account и заполним поля Login Name, Password и Confirm Password. Остальное оставим без изменений.

Еще один важный экран — Options File. Располагается также на вкладке Administration. Здесь можно в графическом интерфейсе изменять переменные, которые задаются в конфигурационном файле my.ini.

В MySQL Workbench можно также следить за производительностью базы данных. Отдельные метрики сгруппированы для удобства просмотра. Здесь присутствуют следующие группы: Memory Usage, Hot Spots for I/O, High Cost SQL Statements, Database Schema Statistics, Wait Event Times, InnoDB Statistics и User Resource Use.

Заключение
В статье мы рассмотрели установку и базовую настройку MySQL Server. Этого достаточно для запуска простого проекта, например, блога на WordPress. При необходимости MySQL может поддерживать высоконагруженные проекты за счет возможности работы в режиме кластера высокой доступности.
Hi friends, welcome back to the Kitsake blog. In this post, I will discuss how to install MySQL Server on Windows Server 2019.
MySQL Server is a popular and widely used database engine for production systems in businesses. Therefore, you should also know how to install it if you work as a system engineer.
In the case I presented in this post, the firewall on Windows Server 2019 is disabled. and in this article, I will provide step-by-step instructions until it can be accessed either locally or through a client computer. So, please read it until the end.
Preparation
Before you install MySQL Server, you need to install its dependencies, namely Microsoft Visual C++ and Python. For the download links, you can directly visit their official website through the following link:
- Microsoft Visual C++
- Python
And of course, you must download MySQL Community Server because that’s the topic I’m covering in this post. You can download it from the Official Website or click the following link: MySQL Community Server.
Recommended Download: Click Go to Download Page.
 |
| Go to Download Page |
Windows (x86, 32-bit), MSI Installer: Click Download.
 |
| MSI Installer: Click Download |
Login Now or Sign Up for a free account.: Click No thanks, just start my download.
 |
| Click No thanks, just start my download |
Don’t forget to match the OS bit version with the downloaded installer to ensure compatibility and smooth operation.
Installing
After you have downloaded the installer, you can proceed to the next step, which is installing it into Windows Server 2019 to install MySQL Server 8.0.33.
Step 1 : Installing Python 3.11.4 (64-bit)
Double Click on Installer python-3.11.4-amd64 - Install Now
") |
| Install Python 3.11.4 (64-bit) |
Please wait for the installation process to complete successfully.
Step 2 : Installing Microsoft Visual C++ Redistributable
Double Click on Installer VC_redist.x64 - Checklist I agree to the license terms and conditions - Install
 |
| Install Microsoft Visual C++ Redistributable |
Please wait for the installation process to complete successfully.
Step 3 : Installing MySQL Community Server
Double Click on Installer mysql-installer-community-8.0.33.0 - Choosing a Setup Type Developer Default - Next
 |
| Install MySQL Community Server Developer Default |
Installation : Click Execute - Next
 |
| Execute Installation |
 |
| Next Installation |
Configure MySQL Server 8.0.33
Product Configuration : Click Next
 |
| Product Configuration |
Type and Networking : Choose Config Type Server Computer - Next
 |
| Type and Networking |
Authentication Method : Choose Next
 |
| Authentication Method |
Account and Roles : Type Password for account root - and Add User for DB Admin - Next
 |
| Account and Roles |
Windows Service : Click Next
 |
| Windows Service |
Server File Permissions : Click Next
 |
| Server File Permissions |
Apply Configuration : Click Execute - Finish
 |
| Apply Configuration |
 |
| Click Finish |
Configure MySQL Router 8.0.33
Product Configuration : Click Next
 |
| Product Configuration |
MySQL Router Configuration : Click Finish
 |
| MySQL Router Configuration |
Configure Samples and Examples 8.0.33
Product Configuration : Click Next
 |
|
Product Configuration |
Connect To Server : Input Password - Click Check - Click Next
 |
| Connect To Server |
Apply Configuration : Click Execute - Click Finish
 |
| Apply Configuration |
Product Configuration : Click Next
 |
| Product Configuration |
Installation Complete : Click Finish
 |
| Installation Complete |
Trying
After you have installed it step by step as I described above, you should have succeeded. The next step is to process the data using the editor that you feel most comfortable with.
Here, I’m using two examples of editors that I often use, namely MySQL Workbench and Heidi. Here’s how to do it:
MySQL Workbrench
Open MySQL Workbrench - Click (+) - IP Address/localhost/127.0.0.1 - Input User - Click Store in Vault - Input Password - Ok
 |
| Login MySQL Server with MySQL Workbrench |
Setup New Connection : Click Test Connection - Ok - Ok
MySQL Connection : Click Kitsake-DB
HeidiSQL Editor
Open Heidi - Input IP Address MySQL Community Server - Input User - Input Password - Open
 |
| Open MySQL Community Server with Heidi |
Maybe that’s all I can share with you guys, hopefully this article will be useful.
Thank You
How to Install MySQL Server on Windows Server 2019. In this article we will introduce MySQL server and talk about it’s features and proceed to the installation phase on Windows server 2019.
What is MySQL

MySQL is a free, open source, and one of the most popular database management systems. It is easy to use, scalable and uses a relational database and SQL to manage its data. Generally, it is used in the modern web application as part of the popular LAMP and LEMP stack. MySQL server uses tables to store the data. A table is a collection of related data and it consists of columns and rows. It uses Structured Query Language to manipulate, control and query data.
Features of MySQL
- Free and open source.
- Supports large databases.
- Scalable and customizable.
- Concurrency Control.
- Storage Engines
- Supports many languages including, PHP, PERL, C, C++, JAVA, etc.
- Stored Procedure.
- Triggers.
- Foreign key constraints.
- Connectivity and Security.
- Client/Server Architecture.
- Secure and fast.
Follow this post next and we will explain how to install a MySQL server on Windows Server 2019.
Install MySQL Server on Windows 2019

At the time of writing this tutorial, the latest version of MySQL is version 8.0. Follow the below steps to install MySQL server on Windows 2019.
Step 1 – First, go to the MySQL download page and download the Full MySQL installer package as shown below:

Step 2 – Once the download is completed, double click on it to start the installation. You will be asked to select the setup type as shown below:

Step 3 – Select Full and click on the Next button to install all MySQL products. You should see the requirements check screen:

Step 4 – Click on the Execute button to install all required packages. Once all the packages are installed, you should see the following screen:

Step 5 – Click on the Next button. You will be prompt that “One or more product requirements have not been satisfied”:

Step 6 – Click on the Yes button. You should see the installation screen:

Step 7 – Click on the Execute button to start the installation. Once all the components have been installed, you should see the following screen:

Step 8 – Click on the Next button. You should see the product configuration screen:

Step 9 – Click on the Next button to configure the MySQL server. You should see the MySQL networking configuration screen:
Step 10 – Select your required configuration options and click on the Next button. You should see the authentication method screen:


Step 11 – Select your authentication method and click on the Next button. You should see the account and roles screen:

Step 12 – Define your root password and click on the Next button. You should see the MySQL service configuration screen:

Step 13 – Configure MySQL service and click on the Next button. You should see the MySQL logging option screen:

Step 14 – Select your logging options and click on the Next button. You should see the advanced options screen:

Step 15 – Define your server id and click on the Next button. You should see the Apply configuration screen:

Step 16 – Click on the Execute button to apply all the configurations. Once all the configurations are applied, you should see the following screen:

Step 17 – Click on the Finish button. You should see the MySQL product configuration screen:

Step 18 – Click on the Next button to configure the MySQL router. You should see the following screen:

Step 19 – Leave all options as it is and click on the Finish button. You should see the MySQL connect screen:

Step 20 – Provide your MySQL root username, password and click on the Check button. Once the connection is established, you should see the following screen:

Step 21 – Click on the Next button. You should see the following screen:

Step 22 – Click on the Execute button to apply all configuration, you should see the following screen:

Step 23 – Click on the Finish button to finish the product configuration. You should see the following screen:

Step 24 – Click on the Finish button to close the MySQL installation wizard.
After completing the MySQL server installation, proceed to the next step to verify the MySQL installation and interact with MySQL command line client.
MySQL CLI
At this point, a MySQL server has been installed on your server. Now, let’s open the command line interface and see how to interact with MySQL.
Click on the search in the taskbar, type MySQL, and open the MySQL command line client. You should see the MySQL client on the following screen:

Now, run the following command to verify the MySQL version:
You will get the MySQL version in the following output:
					+-----------+
| version() |
+-----------+
| 8.0.27    |
+-----------+
1 row in set (0.00 sec)
Next, create a database called testdb using the following command:
Please verify the created database using the command below:
You will get the following output:
					+--------------------+
| Database           |
+--------------------+
| information_schema |
| mysql              |
| performance_schema |
| sakila             |
| sys                |
| testdb             |
| world              |
+--------------------+
Then create a user called testuser using the following command:
CREATE USER 'testuser'@'localhost' IDENTIFIED BY 'password';
Next, grant all the privileges to the testdb using the following command:
GRANT ALL ON testdb.* TO 'testuser'@'localhost';
Flush the privileges to apply all the changes:
To list the MySQL users, run the following command:
SELECT USER from MySQL.user;
You will get the following output:
					+------------------+
| USER             |
+------------------+
| mysql.infoschema |
| mysql.session    |
| mysql.sys        |
| root             |
| testuser         |
+------------------+
Next, exit from the MySQL shell using the following command:
Access MySQL Workbench
MySQL Workbench is a graphical tool to manage the MySQL database from the graphical interface. It is installed automatically with MySQL full package installation.
To access it, search for MySQL Workbench in the search bar and click on it. You should see the MySQL Workbench interface on the following screen:

Click on the Database menu, you should see the following screen:

Provide your database host, root username, and click on the OK button. You will be asked to provide a MySQL root password as shown below:

Provide a MySQL root password and click on the OK button. Once the connection is established, you should see the MySQL Instance in the following screen:

You can now create and manage MySQL database and users from the graphical interface.
How to Install MySQL Server on Windows Server 2019 Conclusion
In the above guide, you learned how to install MySQL server on Windows server 2019. You also learned how to interact with MySQL using MySQL command line client and MySQL Workbench. For more information, visit the MySQL documentation page.