Вступление
Начиная работать с локальными серверами, делая «притирку» и ища удобный локальный сервер, который будет подходить по всем позициям, приходится периодически удалять, то или иное программное обеспечение. В одной из статей сайта, я рассказывал, как установить веб-сервер MySQL, для работы с базами банных. Здесь будем его удалять.
Итак, задача: полностью удалить MySQL с локальной машины и стереть её пребывание на компьютере.
Исходные данные: на компьютере стоит Windows 7, ранее установлен веб-сервер MySQL 5.7.11, сейчас удаляем MySQL 5.7.11. Покажу три варианта, как удалить MySQL.
Вариант 1, Полностью удалить MySQL вручную
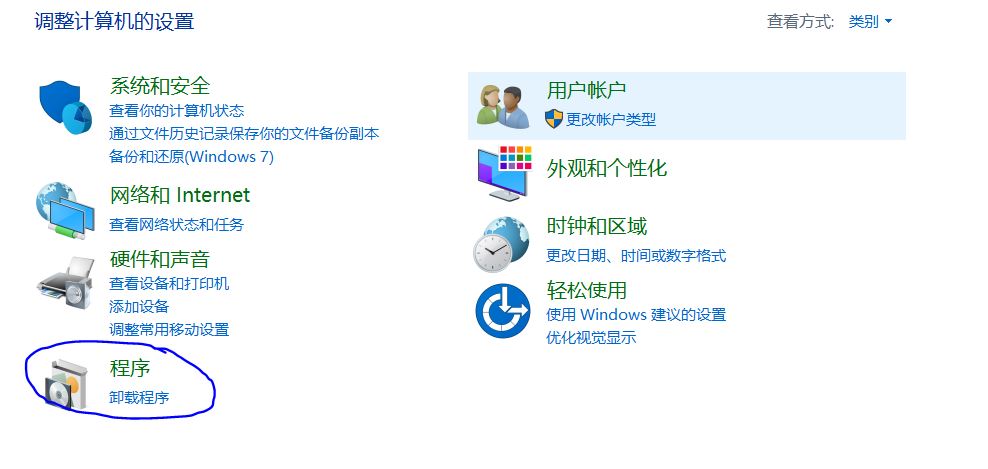
Шаг 1. Идем в Панель Управления→Программы и Компоненты→Удаление и Изменение программы;
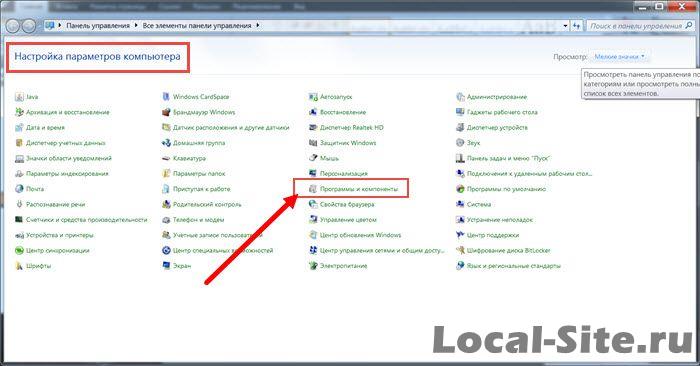
Удаляем все программы, которые вы использовали для установки MySQL. В моем варианте это MySQL Installer и MySQL Server 5.7. Для удаления выбираем программу и нажимаем кнопку «Удалить».
Шаг 2.
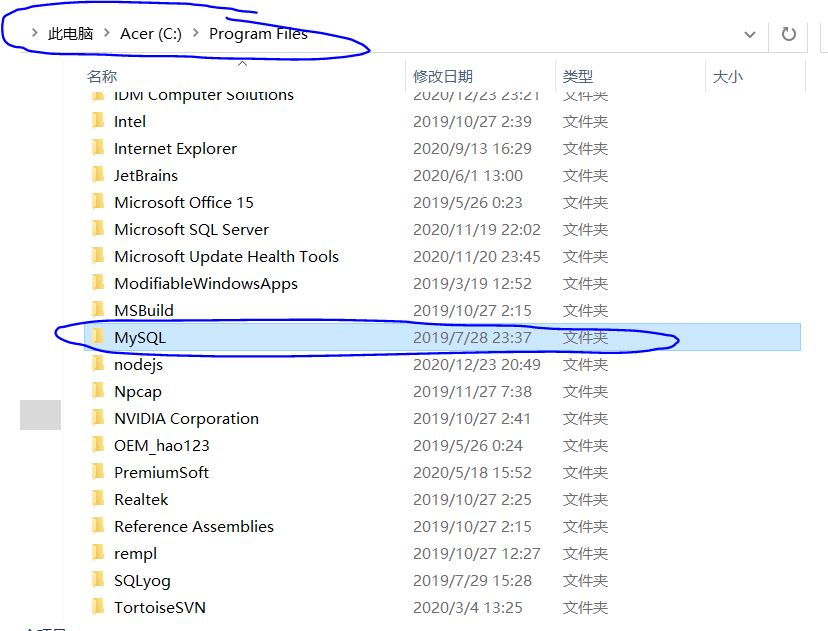
Идем, в каталог, куда устанавливали MySQL. Скорее всего, это: C: Program Files\MySQL и удаляем всё, что содержит MySQL.

Шаг 3.
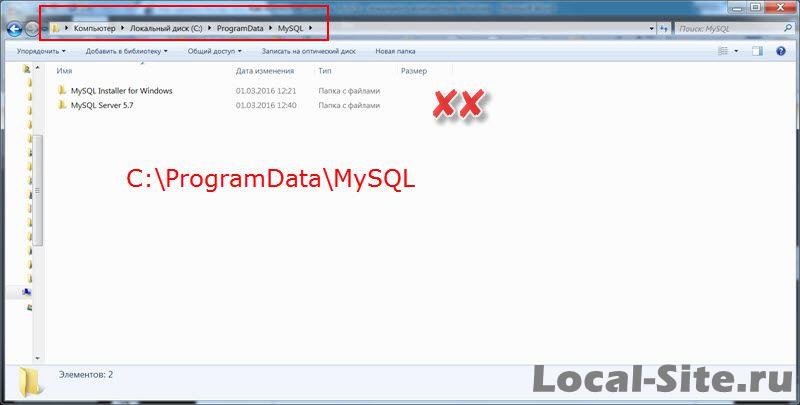
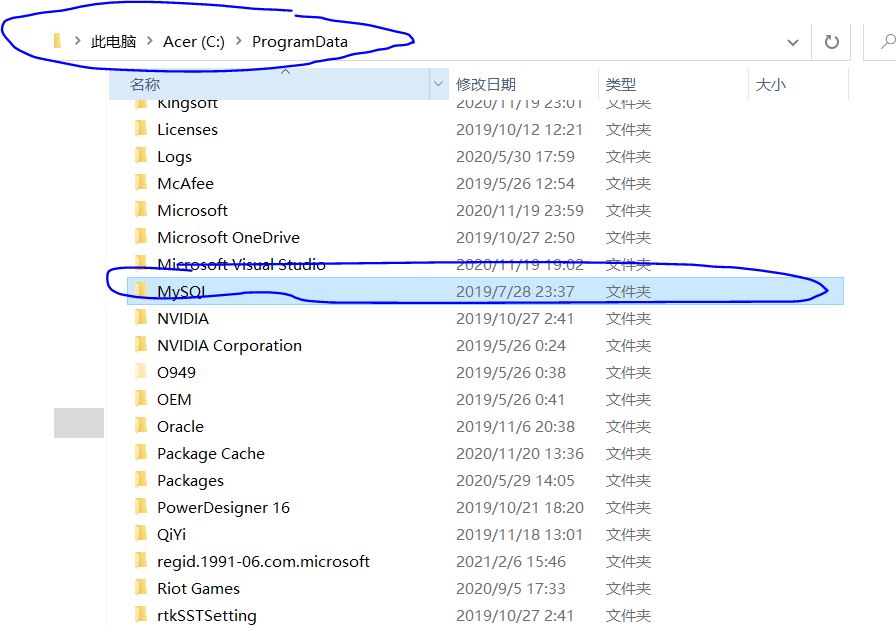
Идем, в каталог C:\ProgramData и удаляем папку MySQL (для Windows 7).
Папка ProgramData закрыта для просмотра и чтобы её открыть в Windows 7, вставляем в адресную строку: C:\ProgramData и жмем Enter. Папка откроется для работы. Далее удаляем папки с MySQL.
Примечание: В Windows XP это путь: C:\Documents and Settings\All Users\Application Data\MySQL.
Вариант 2, Автоматическое удаление MySQL
Для автоматического удаления, нам понадобится программа MySQL Installer (в первом варианте мы её удалили).
Чтобы удалить MySQL вместе с аккаунтом root, запускаем MySQL Installer;
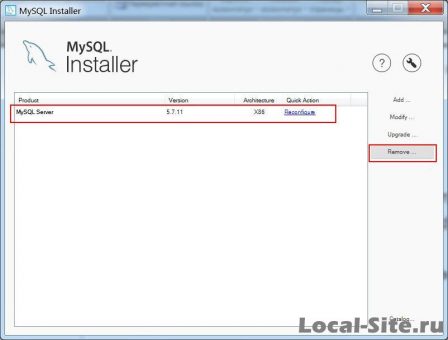
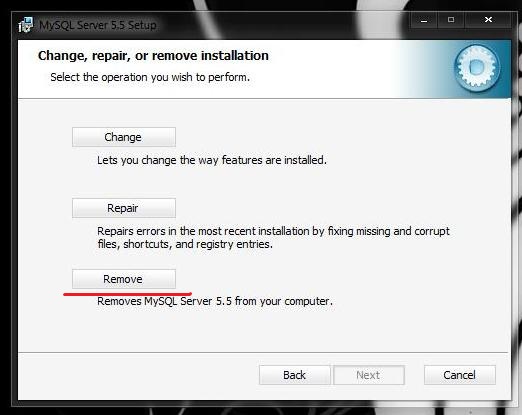
Жмем Remove (справа таблицы);
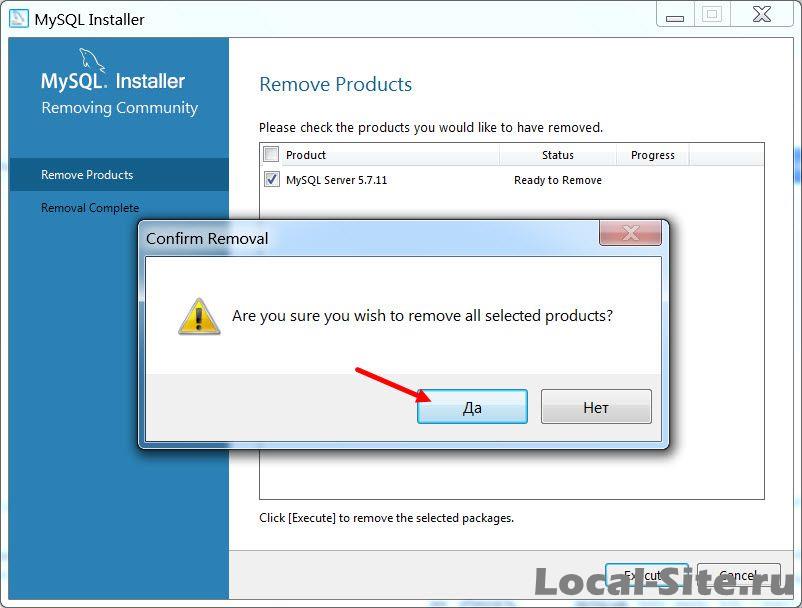
В таблице выделяем, то, что хотим удалить, в моем примере это веб-сервер MySQL 5.7.11 и удаляем по шагам инсталлятора (смотрим фото).
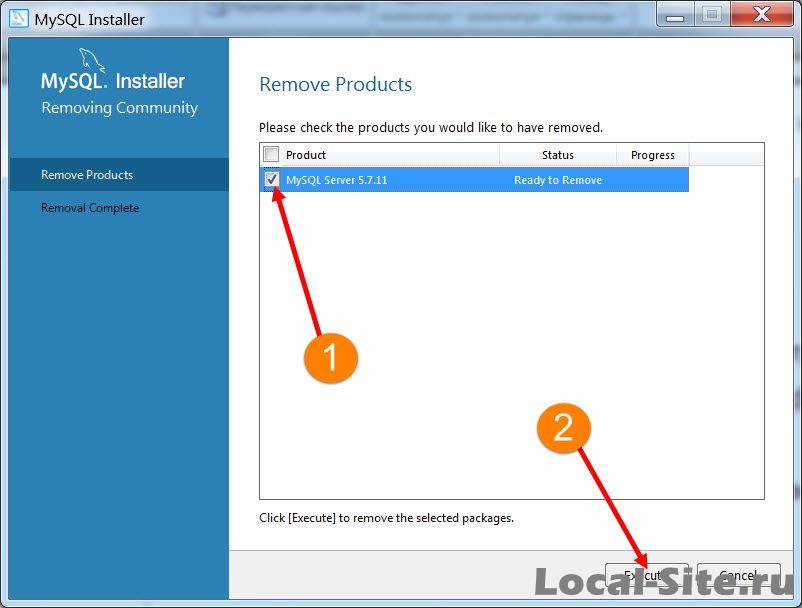
Если Вы ставили больше компонентов MySQL, картинка в окне будет такой:

Инсталятор попросит подтвердить удаление
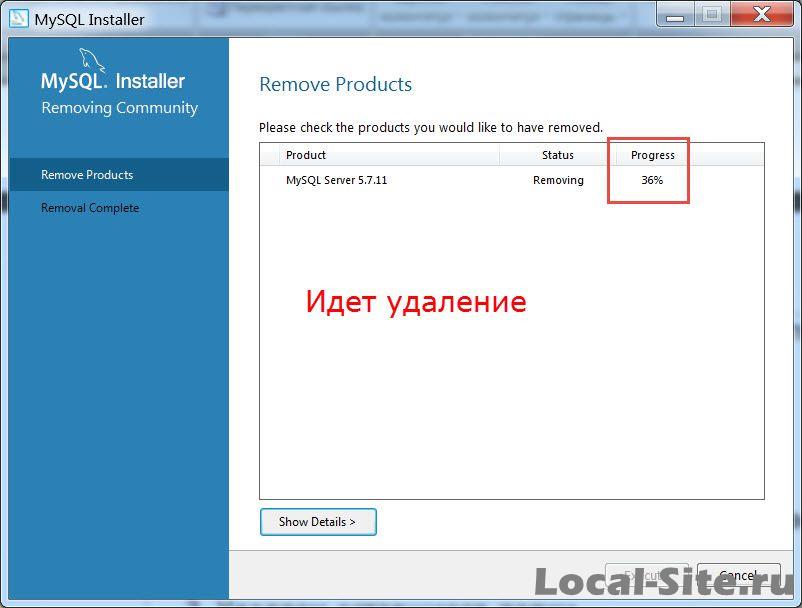
Начался процесс удаления MySQL
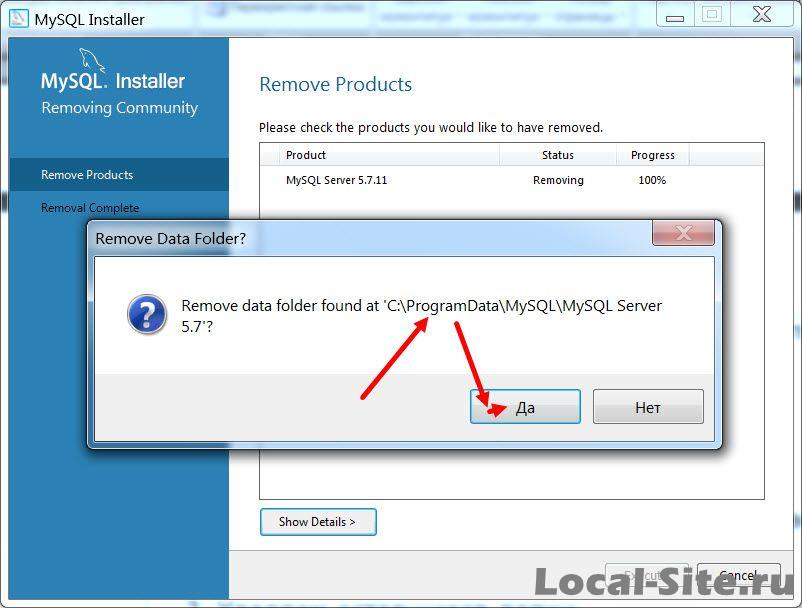
Инсталятор спросит, нужно ли удалять данные из папки ProgramData
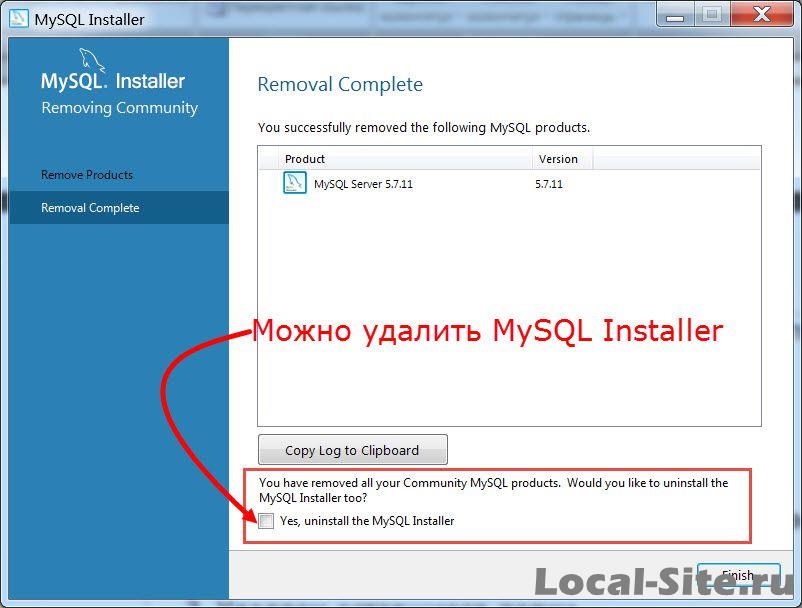
Процесс удаления MySQL завершен
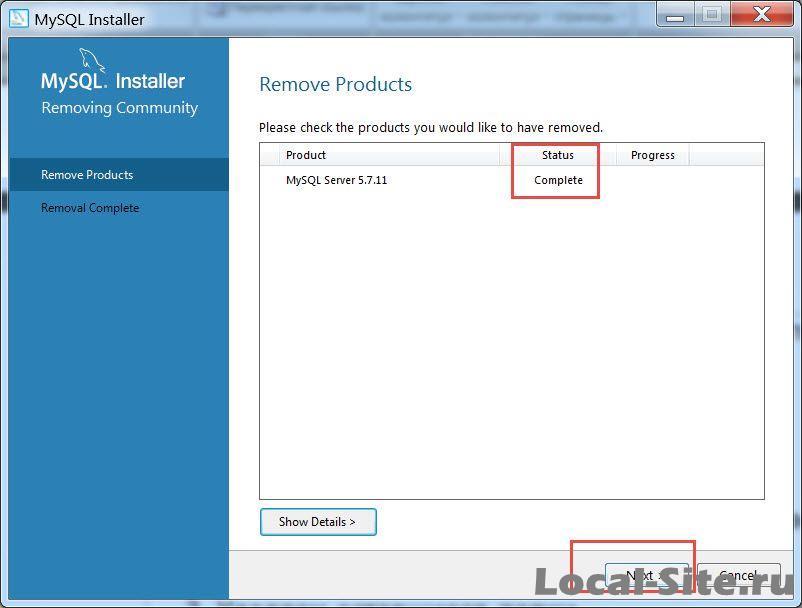
На последнем этапе можно удалить и сам инсталлятор MySQL Installer (чекбокс внизу таблицы на следующем фото).
Вариант 3, Удалить MySQL из командной строки
Для разнообразия удалим MySQL из командной строки операционной системы.
Шаг 1.
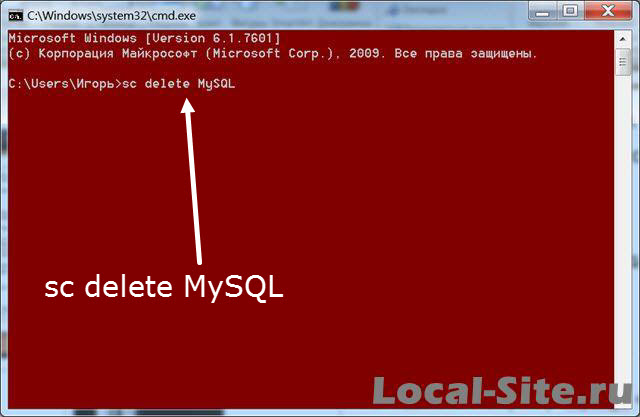
Из командной строки удаляем службу MySQL. Идем в Пуск→Командная строка в меню пуск. На правой кнопке командной строки запуск сервер от имени Администратора. В строке вводим команду: [sc delete MySQL] (без скобок).

Шаг 2.
Удаляем MySQL через панель или инсталятором (первый или второй вариант), на выбор.
Шаг 3.
Удаляем следы MySQL, то есть, папки содержащие MySQL.
По умолчанию MySQL ставится в папки:
Windows 7: [C:\Program Files\MySQL] и [C:\ProgramData\MySQL]
Windows XP: [C:\Program Files\MySQL] и [C:\Documents and Settings\All Users\Application Data\MySQL].
Чистка реестра Windows
Для успокоения души, поищем следы MySQL в реестре операционной системы (Windows 7).
Вариант чистки реестра Windows 7, опасный
Этим вариантом не следует пользоваться, если вы не представляете, как исправить ошибку.
Откройте реестр Windows 7. Для этого в Меню Пуск→Выполнить, вписываем команду: regedit.
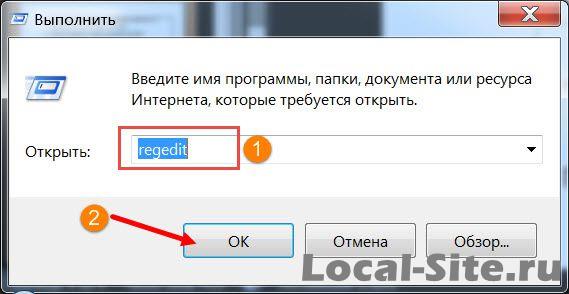
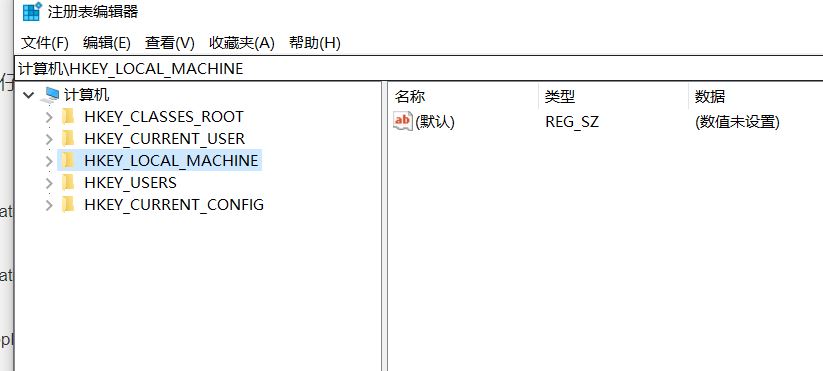
В окне “Редактор реестра” поиском ищем, только раздел, слово MySQL и удаляем его.
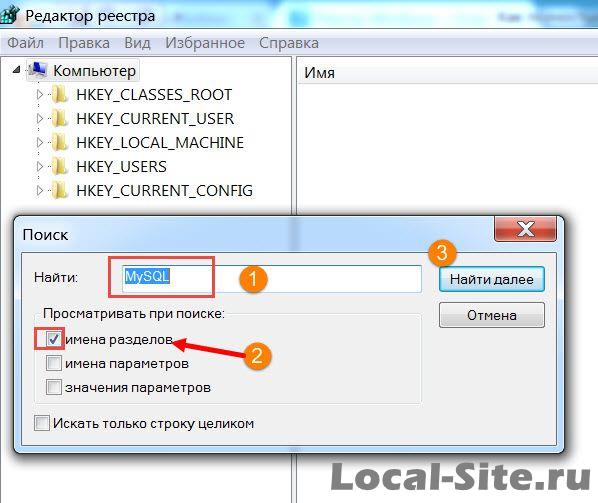
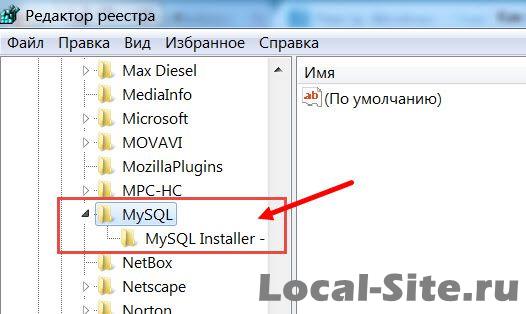
Примечание: На фото вы видите, что в реестре нашелся раздел MySQL. Это потому, что я не удалял MySQL Installer и оставил его для примера поиска по реестру.
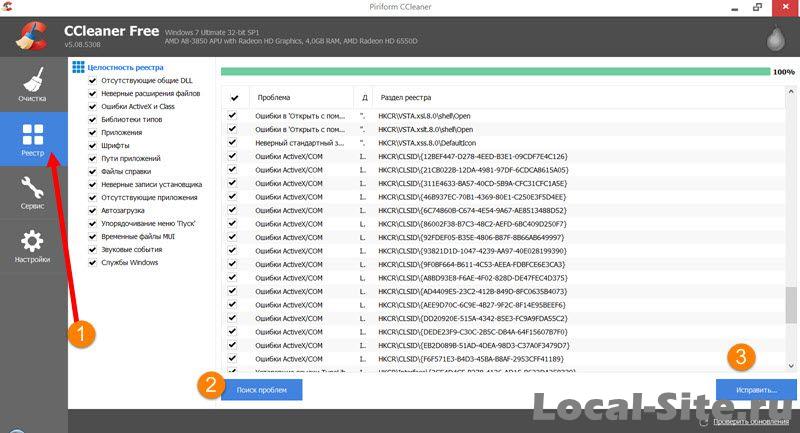
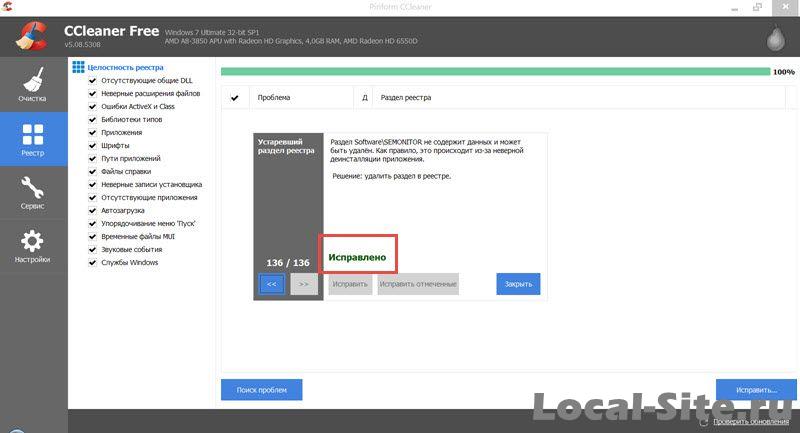
Вариант 2, безопасная чистка реестра программой CCleaner
Ставим программу «чистильщик Windows», например Defraggler или CCleaner и чистим реестр безопасно. На фото CCleaner.

Другие статьи раздела: Локальный сервер
Похожие посты:
- Home
- Coding
- MySQL
- Как полностью удалить MySQL включая root аккаунт в Windows
Когда забывают пароль, первым делом заново переустанавливают MySQL и обнаруживают что аккаунт пользователя root остался и для завершения установки необходимо ввести его пароль. В этой статье речь пойдет о том как полность удалить MySQL включая и аккаунт root.
1. Удаляем службу MySQL через командную строку.
Пуск —> Выполнить —> cmd —> Вводим: sc delete MySQL

2. Удаляем MySQL.
Либо запускаем инсталятор с MySQL и выбираем удалить либо через панель управления решайте сами.
3. Удаляем оставшиеся папки.
По умолчанию пути установки находятся
для Windows 7
C:\Program Files (x86)\MySQL
C:\ProgramData\MySQL
для Windows XP
C:\Program Files\MySQL
C:\Documents and Settings\All Users\Application Data\MySQL
На этом все. Всем пока.
For complete removal of MySQL installed from MSI package [MySQL 8 on Windows 10 PC.]
MySQL programs can be uninstalled one by one from Control Panel > Add or Remove Programs or using MySQL Installer application.
Using MySQL Installer:
Find MySQLInstaller.exe or MySQLInstallerLauncher.exe (both do the same job)
By default, installer reseides in the System folder where Windows is installed. In my PC it was in below location:
C:\Program Files (x86)\MySQL\MySQL Installer for Windows\
A start menu shortcut may also be available on default installation. Look for MySQL Installer - Community
Double-click on MySQLInstaller (or MySQLInstallerLauncher) and the MySQL installer window will appear.
Here you’ll see Add, Modify, Upgrade, Remove, etc. options. Select Remove.
Again, you can remove one by one or all at once by selecting Product and then execute.
This will take some time, installer may freeze in the middle, just kill the process and start again(takes a lot of patience). Don’t worry, installer will start where it stopped.
Note: When MySQL is removed using this method, only the installed components are removed. Any database information (including the tables and data), import or export files, log files, and binary logs produced during execution are kept in their configured location.
In default installation, MySQL files are stored in below locations:
C:\ProgramData\MySQL
C:\Program Files\MySQL
C:\Program Files (x86)\MySQL
C:\Users\user_name\AppData\Roaming\MySQL
The C:\ProgramData directory is hidden by default, thus installer will not remove this folder.
To delete MySQL completely, check above locations and remove MySQL folders manually if they exist.
Now MySQL should be removed completely along with all configurations and databases.
Uninstalling from Control Panel: I believe we all know how to uninstall programs from Control Panel.
Introduction
MySQL is an open-source relational database management system (RDBMS) available on Linux, Solaris, macOS, Windows, and FreeBSD. Sometimes, uninstalling the software and a fresh installation is the best solution for resolving bugs, or for fixing compatibility purposes.
In this tutorial, you will learn how to uninstall MySQL on Linux, Windows, and macOS.
Prerequisites
- MySQL installed on Linux, Windows, or macOS system.
- A user account with administrator privileges.
Depending on the operating system, the process of uninstalling MySQL is different. The sections below show how to uninstall MySQL on Linux, Windows, and macOS, and delete all the associated data.
Uninstall MySQL on Linux
Uninstall MySQL from Linux using the distribution’s default package manager, and the rm command to delete the leftover data. In this tutorial, we will work on Ubuntu, but the instructions for other distros are provided as well.
Follow the steps below:
1. Open a terminal window (Ctrl + Alt + T) and stop the MySQL service and all the related processes. Run the following commands:
sudo service mysql stop
sudo killall -KILL mysql mysqld_safe mysqld
3. Depending on the Linux distribution and package manager you are using, run one of the following commands to uninstall MySQL:
- CentOS, Rocky Linux, and RedHat:
sudo yum remove mysql-client mysql-server -y- Ubuntu and Debian:
sudo apt remove mysql-client mysql-server -y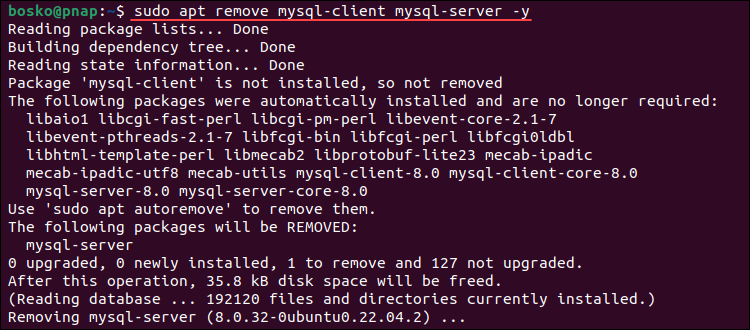
Run autoremove and autoclean to remove unnecessary packages and clean up the package cache:
sudo apt autoremove -y
sudo apt autoclean -y- Fedora:
sudo dnf remove mysql-client mysql-server -y4. After uninstalling MySQL, the next step is to remove residual data. If you still need the data, make a backup before removing it, or rename the directory.
Rename the /var/lib/mysql directory to keep the data if you ever need it again in the future:
sudo mv /var/lib/mysql /var/lib/mysql_directory_backupAlternatively, remove MySQL-related directories by running:
sudo rm -rf /etc/apparmor.d/abstractions/mysql /etc/apparmor.d/cache/usr.sbin.mysqld /etc/mysql /var/lib/mysql /var/log/mysql* /var/log/upstart/mysql.log* /var/run/mysqld5. Remove the mysql user and delete the mysql group, if it exists. Run:
sudo deluser --remove-home mysql
sudo delgroup mysql
After completing the steps above, you have successfully uninstalled MySQL from your Linux system.
Uninstall MySQL on Windows
Follow the steps below to uninstall MySQL from a Windows operating system:
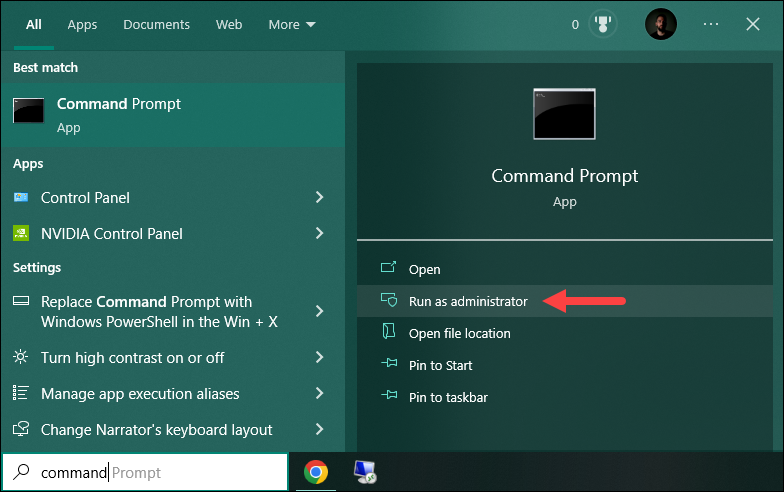
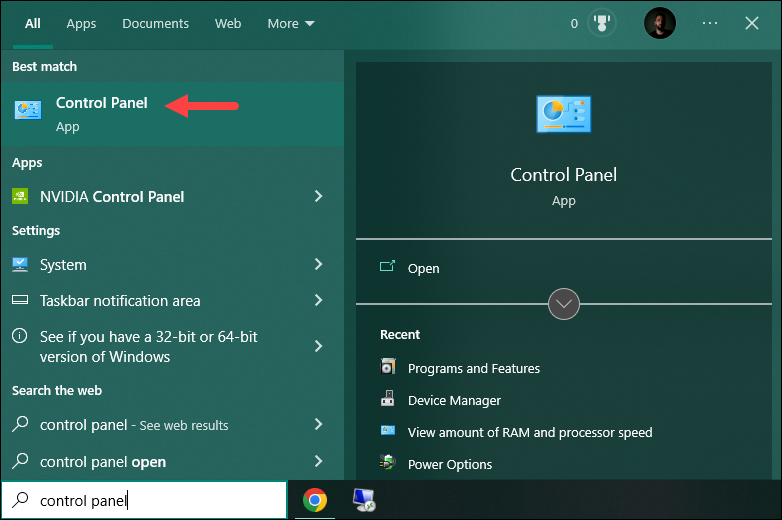
1. Press the Windows key and search for command prompt. Run the app as administrator.
2. Stop the running MySQL server before uninstalling it. The easiest way to stop it is by using the mysqladmin command which was installed automatically during the MySQL installation. In the command prompt, navigate to the bin folder of the MySQL installation directory. For example, the default path is:
cd C:\Program Files\MySQL\MySQL Server 8.0\bin
After navigating into that path, stop the running server by executing:
mysqladmin -u root -p shutdownThe command asks you for the password and shuts down the running server after confirming it.
3. Next, open the Control Panel. Press the Windows key and search for control panel. Press Enter to open the app.
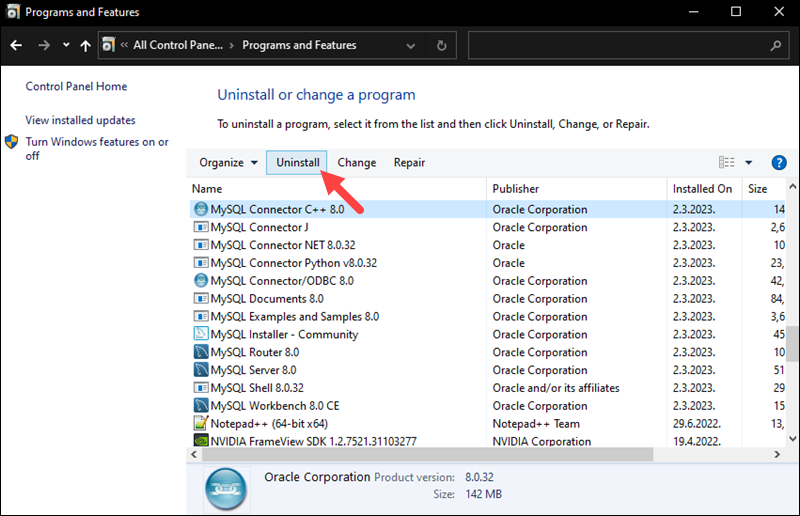
4. Open Programs and Features. In the list of installed programs, locate MySQL and all related programs. Click each one individually and select the Uninstall option.
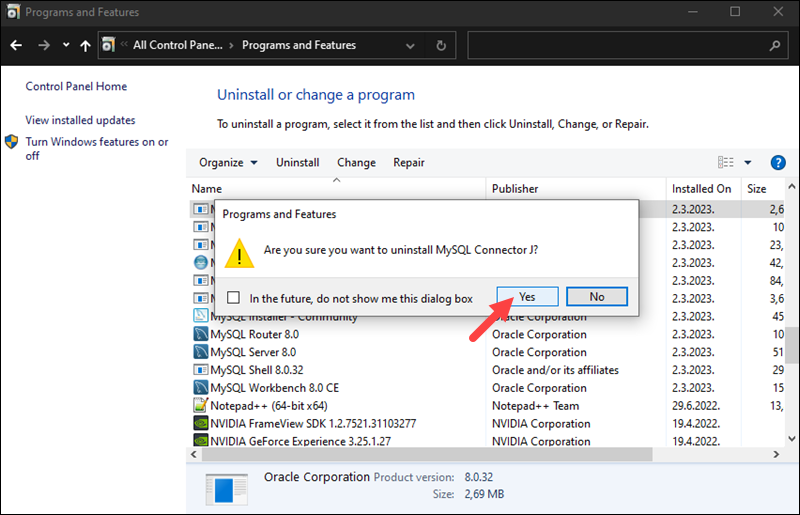
Click Yes for each prompt and wait for the wizard to finish.
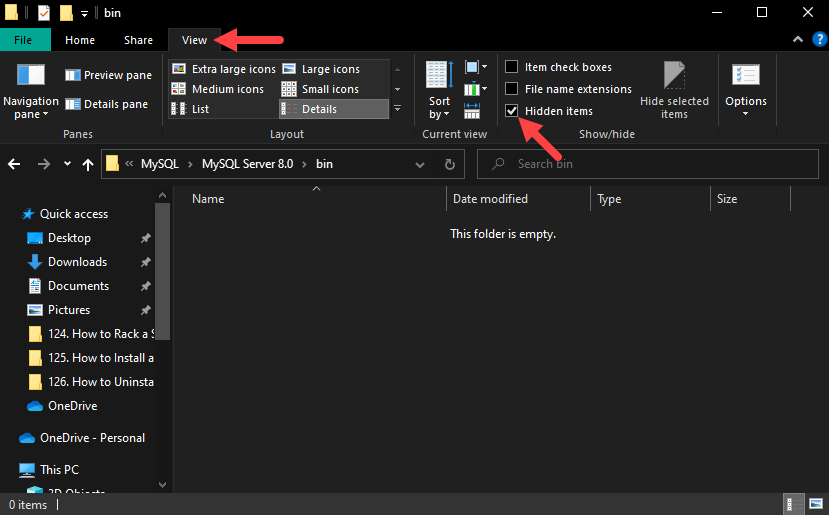
5. After uninstalling all MySQL components, delete the remaining data directories. Since one of the directories is hidden, make sure to enable the Hidden items option in folder settings.
To do so, open any folder using File Explorer, click the View tab, and check the Hidden items option:
Important: If there is critical data that you may still need, make sure to backup MySQL databases before deleting them.
The directories that you need to remove are:
- C:\Program Files\MySQL
- C:\Program Files (x86)\MySQL
- C:\ProgramData\MySQL
- C:\Users\[YourUsername]\AppData\Roaming\MySQL
6. After you uninstall all the components and delete the remaining directories, restart the computer for the changes to take effect.
Uninstall MySQL on macOS
Follow the steps below to uninstall MySQL on a macOS system:
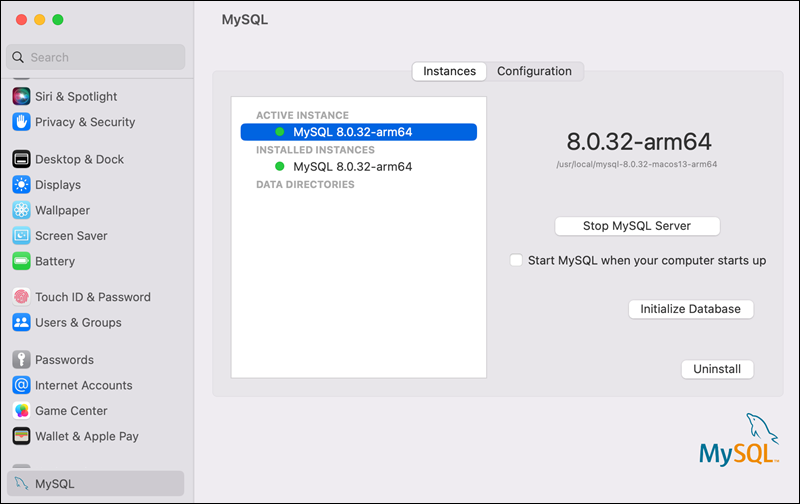
1. Go to System Settings and click MySQL. Click the Uninstall button to remove MySQL from the system.
2. Click the Launchpad icon in the Dock and type Terminal in the search field. Click Terminal to open a new terminal window.
3. Deleting MySQL removes all its databases. If you have critical data stored in MySQL, make sure to back up your files first.
Use mysqldump to back up your databases to a text file. Run the following command:
./mysqldump -u root -p --all-databases > mysqlbackup.sqlThe output is redirected to the mysqlbackup.sql file.
4. Check for running MySQL processes by running the following command:
ps -ax | grep mysql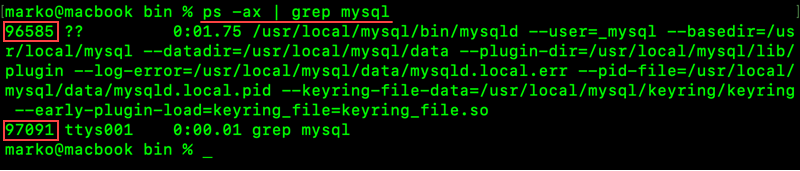
Terminate the running processes using the following syntax:
kill [process_id]For example, to kill the ttys001 process from the image above, run:
kill 970915. Remove the default MySQL directory and all the leftover directories and files. Run these commands:
sudo rm /usr/local/mysql
sudo rm -rf /usr/local/mysql
sudo rm -rf /usr/local/var/mysql
sudo rm -rf /Library/StartupItems/MySQLCOM
sudo rm -rf /Library/PreferencePanes/MySQL*
sudo rm -rf /Library/Receipts/mysql*
sudo rm -rf /private/var/db/receipts/*mysql*
Removing all the directories is important especially if you want to install an older MySQL version.
6. Use a text editor to open the /etc/hostconfig file and remove the following line:
MYSQLCOM=-YES-Note: Some versions of macOS don’t have the /etc/hostconfig file, so skip this step if the file doesn’t exist on your system.
After following the steps above, you have successfully uninstalled MySQL from your macOS system and cleaned up unnecessary files.
Conclusion
This tutorial showed how to uninstall MySQL from Linux, Windows, and macOS operating systems.
For more MySQL tutorials, see how to install and get started with MySQL Workbench on Ubuntu, or how to secure your MySQL installation.
Недавно я увидел относительно хороший проект от Github, и я пришел к обучению. Я использовал Flyway внутри, а затем мне было предложено, что версия базы данных MySQL была слишком низкой. Мой MySQL был установлен ранее ранее, поэтому версия старше, и я просто воспользуюсь этой возможностью, чтобы изменить новую версию.
Есть два варианта:
- Обновление на оригинале
- Удалите старую версию и загрузите обновленную версию
Я решил удалить и скачать снова.
Неизвестные шаги обычно делятся на три:
- Удалил оригинальное программное обеспечение MySQL
- Удалить данные, связанные с исходным MySQL (папка)
- Очистить реестр
1. Программное обеспечение удаления
Снимите панель управления, построенную компьютером.
(Обратите внимание, сначала остановите сервис MySQL, используйте Win+R, а затем введите Services.msc, найдите в нем службу MySQL, выключите)
2. Очистите папку, связанную с MySQL
Здесь нам нужно очистить две папки.
Первое: C: \ Program Files (x86) \ MySQL или C: \ Program Files \ MySQL
Второе: C: \ ProgramData \ MySQL. Программа DEDATA здесь может быть скрыта. Нам нужно настроить скрытый файл в диспетчере ресурсов.
Нам нужно полностью удалить эти два файла. Если мы займем ситуацию, мы можем перезагрузить компьютер или использовать различные инструменты для принуждения этих двух папок.
3. Очистите реестр
Часто мы выполняем два шага выше, и MySQL на нашем компьютере полностью удален. Таблица.
Мы включаем работу Windows и находим или нажимаем Windows+R в меню «Пуск».
Введите Regedit и введите редактор реестра.
Затем найдите следующий реестр по очереди и удалите его по очереди. Здесь должно быть некоторое терпение и найти его тщательно.
HKEY_LOCAL_MACHINE\SYSTEM\ControlSet001\Services\Eventlog\Application\MySQL
HKEY_LOCAL_MACHINE\SYSTEM\ControlSet002\Services\Eventlog\Application\MySQL
HKEY_LOCAL_MACHINE\SYSTEM\CurrentControlSet\Services\Eventlog\Application\MySQL

HKEY_LOCAL_MACHINE\SYSTEM\CurrentControl001\Services\MYSQL
HKEY_LOCAL_MACHINE\SYSTEM\CurrentControl002\Services\MYSQL
HKEY_LOCAL_MACHINE\SYSTEM\CurrentControlSet\Services\MYSQL
После вышеуказанных шагов наш MySQL полностью удален.