 Обновлено:
Опубликовано:
Что такое Linux и CIFS простыми словами.
Работа с общими папками Windows происходит с использованием протокола CIFS (SMB). Все примеры в данном руководстве выполняются на Linux Ubuntu и CentOS.
Подготовительная работа
Синтаксис mount
Ручное монтирование
Автоматическое монтирование
Примеры
Подготовка
Установка пакетов
Для монтирования общей папки необходимо установить набор утилит для работы с CIFS.
CentOS:
yum install cifs-utils
Ubuntu:
apt install cifs-utils
Сетевые порты
Если мы будем монтировать сетевую папку, сервер которой находится за брандмауэром, необходимо открыть следующие порты:
- 137/UDP
- 138/UDP
- 139/TCP
- 445/TCP
Синтаксис
mount.cifs <папка на сервере> <во что монтируем> <-o опции>
* вместо mount.cifs можно написать mount -t cifs.
Пример:
mount.cifs //192.168.1.1/public /mnt
* простой пример монтирования папки public на сервере 192.168.1.1 в локальный каталог /mnt.
Если нам не известны расшаренные папки на сервере, мы можем воспользоваться утилитой smbclient. Для начала установим ее.
а) на RPM (Rocky Linux / РЕД ОС / Red Hat / CentOS / Fedora):
yum install samba-client
б) на Deb (Debian / Ubuntu / Astra Linux / Mint):
apt install samba-client
Теперь вводим:
smbclient -L 192.168.1.1
или, при необходимости авторизоваться на файловом сервере:
smbclient -L 192.168.1.1 -U username
Ручное монтирование
Теперь монтирование можно выполнить следующей командой:
mount.cifs //192.168.1.10/share /mnt -o user=dmosk
* в данном примере будет примонтирован каталог share на сервере 192.168.1.10 в локальную папку /mnt под учетной записью dmosk.
То же самое, с использованием домена:
mount.cifs //192.168.1.10/share /mnt -o user=dmosk,domain=dmosk.local
Автоматическое монтирование CIFS через fstab
Для начала создаем файл, в котором будем хранить данные авторизации при подключении к общей папке:
vi /root/.smbclient
И добавляем в него данные следующего вида:
username=dmosk
password=dPassw0rd
domain=dmosk.local
* в этом примере создана пара логин/пароль — dmosk/dPassw0rd; domain указывать не обязательно, если аутентификация выполняется без него.
Задаем права на созданный файл, чтобы доступ был только у пользователя, скажем, root:
chmod 600 /root/.smbclient
chown root:root /root/.smbclient
Теперь открываем конфигурационный файл fstab:
vi /etc/fstab
и добавляем в него следующее:
//192.168.1.10/share /mnt cifs user,rw,credentials=/root/.smbclient 0 0
* в данном примере выполняется монтирование общей папки share на сервере с IP-адресом 192.168.1.10 в каталог /mnt. Параметры для подключения — user: позволяет выполнить монтирование любому пользователю, rw: с правом на чтение и запись, credentials: файл, который мы создали на предыдущем шаге.
Чтобы проверить правильность настроек, вводим следующую команду:
mount -a
Примеры использования опций
Версии SMB
Если на стороне Windows используется старая или слишком новая версия протокола SMB, при попытке монтирования мы можем получить ошибку mount error(112): Host is down. Чтобы это исправить, указываем версию:
mount.cifs //192.168.1.10/share /mnt/ -o vers=1.0
* монтирование по протоколу SMB1.0
Монтирование от гостевой учетной записи
Если сервер принимает запросы без логина и пароля, то клиент подключается, как гость:
mount.cifs //192.168.1.10/share /mnt -o guest
или в fstab:
//192.168.1.10/share /mnt cifs guest 0 0
Права на примонтированные каталоги
При монтировании папки мы можем указать определенные права:
mount.cifs //192.168.1.10/share /mnt -o file_mode=0777,dir_mode=0777
Для указания владельца, который будет назначен для примонтированного каталога, используем:
mount.cifs //192.168.1.10/share /mnt -o uid=33,gid=33
* чтобы посмотреть идентификаторы пользователя, вводим id -u <имя пользователя> и id -g <имя группы>.
Contents
- Introduction
- Prerequisites:
- Enable Name Resolution
- Install cifs-utils
-
Manual mounting from the command line
- Most basic mount command
- Unmounting
- Mount with read/write access
- Mount with authentication — next line
- Mount with authentication — same line
- Mount with authentication — file
-
FSTAB
- FSTAB with inline authentication
- FSTAB with file authentication
- If you need even more security
-
Troubleshooting
- Common mistakes
- Common error messages
Introduction
This document will cover how to connect to a Windows file share from the Linux command line on a single-user machine or a machine where all the users are ok with the other users having access to the mounted share. This method gives you considerably higher performance compared to the userland mounts that most GUI programs create. (just check out the benchmark at MountCifsFstabBenchmark) This method has been tested with Ubuntu 14.04 thru 20.04 and with Windows XP,7,10, and Server2019.
Prerequisites:
- A machine running Ubuntu 14.04 or newer
- A machine running Windows XP or newer
- The IP address or hostname of the Windows machine
- The name of the file share on the Windows machine
- A Windows username and password with permission to the file share
- root access to the Ubuntu machine. Pretty much every command on this page requires root.
Enable Name Resolution
This optional step requires Ubuntu 18.04 or newer and allows you to use the hostname of your windows machines instead of its IP address.
First, install winbind and libnss-winbind
apt install winbind libnss-winbind
then, edit nsswitch.conf and find the line that starts with «hosts» and add «wins» after «files»
nano /etc/nsswitch.conf
BEFORE: hosts: files mdns4_minimal [NOTFOUND=return] dns )
AFTER: hosts: files wins mdns4_minimal [NOTFOUND=return] dns ) restart the winbind service
systemctl restart winbind
Install cifs-utils
Ubuntu’s kernel has built-in support for mounting Windows file shares. It’s called the cifs kernel client, and it’s considerably faster than the mounts created by GUI programs such as nautilus and caja and thunar and some command line programs such as gio.
To be able to control the kernel’s cifs client, you’ll need to install cifs-utils:
apt install cifs-utils
Manual mounting from the command line
All of these commands require root permission, so let’s just start bash with root so we don’t have to type sudo on everything:
sudo bash
You’ll need to create a folder to host the mount point:
mkdir /mnt/share1
Most basic mount command
This command will only work if the windows machine as the “Turn OFF password protected sharing” option set.
Let’s start out with the most basic form of the mount command that actually works:
mount //win10/share1 /mnt/share1
When it asks for a password, don’t type one, just press enter. (replace “win10” with the hostname of your windows machine) (replace the first “share1” with the name of the file share on your windows machine) This command is actually all you need if the windows machine has the “Turn OFF password protected sharing” option set. You will have read/write permission to the share as long as you have root permissions in Linux. You will only have read-only access to the mount from GUI programs because GUI programs don’t normally run with root permission.
Unmounting
To UNmount it:
umount /mnt/share1
(notice it’s not unmount, it’s umount)
Mount with read/write access
In order to get read/write access to your mount from GUI programs or without root permissions, you’ll need to tell the kernel which Linux users are allowed to have read/write access to the mount. If you want ALL Linux users to have read/write access to the mount, you’ll want to use the noperm option, like this:
mount -o noperm //win10/share1 /mnt/share1
When it asks for a password, don’t type one, just press enter. -o means mount options are specified next noperm means “client does not do permission check”, which is going to get you read/write access to the mount replace “win10” with the hostname of your windows machine replace the first “share1” with the name of the file share on your windows machine
Mount with authentication — next line
Now let’s assume the windows machine has the “Turn ON password protected sharing” option set, so you will need to specify a windows username and password to access the share.
mount -o noperm,username=john,domain=domain1 //win10/share1 /mnt/share1
When it asks for a password, enter the windows password that goes with the windows account.
-o means mount options are specified next
noperm means “client does not do permission check”
replace “john” with the windows username. The windows machine will need to have an account matching this username, and this account needs to have permissions to the file share
replace “domain1” with the name of your active directory domain. If you don’t know what an active directory domain is, you don’t have one, so just leave this option blank or remove it.
replace “win10” with the hostname of your windows machine
replace the first “share1” with the name of the file share on your windows machine
Mount with authentication — same line
Let’s take it one step future and specify the password on the command line too so we don’t have to type it. This could be useful for scripts, but…
SECURITY WARNING: Keep in mind that anybody that has permissions to read the script file will be able to see your windows account password. The password would also be visible briefly in the output of the ps command or any command that shows a list of processes, and even non-root Linux users can see this list. Any program that logs commands would also log the password, including bash’s .history file which is enabled be default.
mount -o noperm,username=john,password=123,domain=domain1 //win10/share1 /mnt/share1
-o means mount options are specified next
noperm means “client does not do permission check”
replace “john” with the windows username. The windows machine will need to have an account matching this username, and this account needs to have permissions to the file share
replace “123” with the windows password
replace “domain1” with the name of your active directory domain. If you don’t know what an active directory domain is, you don’t have one, so just leave this option blank or remove it.
replace “win10” with the hostname of your windows machine
replace the first “share1” with the name of the file share on your windows machine
Mount with authentication — file
If you don’t like having those security risks, you can put the windows username and password in a separate file, and make that file readable only by root:
mount -o noperm,credentials=/root/creds.txt //win10/share1 /mnt/share1
-o means mount options are specified next
noperm means “client does not do permission check”
replace “/root/creds.txt” with the file that contains the windows username/password
replace “win10” with the hostname of your windows machine
replace the first “share1” with the name of the file share on your windows machine
Now we need to create our creds.txt file
nano /root/creds.txt
username=john
password=123
domain=domain1
replace “john” with the windows username. The windows machine will need to have an account matching this username, and this account needs to have permissions to the file share
replace “123” with the windows password
replace “domain1” with the name of your active directory domain. If you don’t know what an active directory domain is, you don’t have one, so just leave this option blank or remove it.
You can make it readable only by root:
chmod 600 /root/creds.txt
FSTAB
If you want to have persistent mounts, so that the mounts get mounted automatically at boot time, you can use the fstab file.
nano /etc/fstab
If the windows machine has the “Turn OFF password protected sharing” option set, and you want all Linux users to have read/write permissions to the share, add this line to the bottom of the fstab file:
//win10/share1 /mnt/share1 cifs noperm,_netdev 0 0
replace “win10” with the hostname of your windows machine
replace the first “share1” with the name of the file share on your windows machine
cifs tells the kernel to use mount.cifs as opposed to ext3 or ntfs or some other type of file system
noperm means “client does not do permission check”. This is required for read/write permissions from non-root linux users. You can safely remove this option if you only want root to have read/write and other users will have read-only
_netdev will cause the kernel to wait on the network to become ready before attempting the mount. Without this option, the mount will probably fail during boot because the network won’t be ready yet
the 2 zeros tell the kernel we don’t want to dump or check the filesystem
Now you can mount and unmount with very simple commands:
mount /mnt/share1
umount /mnt/share1
(you’ll need to be root though, unless you want to adjust your sudoers file to allow non-root users to have this ability)
FSTAB with inline authentication
Now let’s assume the windows machine has the “Turn ON password protected sharing” option set, so you will need to specify a windows username and password to access the share. SECURITY WARNING: Keep in mind that anybody that has permissions to read the fstab file will be able to see your windows account password, and the fstab file is readable by all Linux users by default!
//win10/share1 /mnt/share1 cifs noperm,_netdev,username=john,password=123,domain=domain1 0 0
replace “win10” with the hostname of your windows machine
replace the first “share1” with the name of the file share on your windows machine
cifs tells the kernel to use mount.cifs as opposed to ext3 or ntfs or some other type of file system
noperm means “client does not do permission check”. This is required for read/write permissions from non-root Linux users. You can safely remove this option if you only want root to have read/write and other users will have read-only
_netdev will cause the kernel to wait on the network to become ready before attempting the mount. Without this option, the mount will probably fail during boot because the network won’t be ready yet
replace “john” with the windows username. The windows machine will need to have an account matching this username, and this account needs to have permissions to the file share
replace “123” with the windows password
replace “domain1” with the name of your active directory domain. If you don’t know what an active directory domain is, you don’t have one, so just leave this option blank or remove it.
the 2 zeros tell the kernel we don’t want to dump or check the filesystem
FSTAB with file authentication
If you aren’t cool with all linux users being able to see your windows password, or you don’t want programs you run without root to be able to see your windows username and password, you can put the windows username and password in a separate file, and make that file readable only by root:
//win10/share1 /mnt/share1 cifs noperm,_netdev, credentials=/root/creds.txt 0 0
replace “win10” with the hostname of your windows machine)
replace the first “share1” with the name of the file share on your windows machine)
cifs tells the kernel to use mount.cifs as opposed to ext3 or ntfs or some other type of file system)
noperm means “client does not do permission check”. This is required for read/write permissions from non-root Linux users. You can safely remove this option if you only want root to have read/write and other users will have read-only)
_netdev will cause the kernel to wait on the network to become ready before attempting the mount. Without this option, the mount will probably fail during boot because the network won’t be ready yet)
replace “/root/creds.txt” with the file that contains the windows username/password) (the 2 zeros tell the kernel we don’t want to dump or check the filesystem)
Now we need to create our creds.txt file:
nano /root/creds.txt
username=john
password=123
domain=domain1
replace “john” with the windows username. The windows machine will need to have an account matching this username, and this account needs to have permissions to the file share replace “123” with the windows password replace “domain1” with the name of your active directory domain. If you don’t know what an active directory domain is, you don’t have one, so just leave this option blank or remove it. You can make it readable only by root:
chmod 600 /root/creds.txt
If you need even more security
This should cover the majority of home and business use cases. In more complex business environments, you might need to setup a mount that some users have read-only access to, and other users have full read/write, and other users have no access at all. The usermode fuse cifs client (which is what gui programs like natulus and caja use) is the easy answer to this, but there is a huge performance penalty. If you need fancy permissions AND speed, check out the MountCifsFstabSecurely page.
Troubleshooting
— If you are having a problem with the FSTAB method, try the manual mounting method and you will likely discover your problem.
— If you have access to another windows computer, see if it will mount the fileshare properly.
— Check the kernel log after you get a mount error to see if it logged a more useful error message:
dmesg
Ignore the white messages. Only the red messages are relevant. Search the internet for these error message(s)
Common mistakes
— Don’t use backslashes in the windows unc paths, always use forward slashes
- Incorrect: \\win10\share1 Correct: //win10/share1
— Don’t put spaces in the credentials options.
- Incorrect: username = john Correct: username=john
— If your windows password has special characters in it, like spaces or symbols, you might need special escape codes to make Linux read the password properly.
Common error messages
— mount: /mnt/share1: cannot mount //win10/share1 read-only.
- You need to install cif-utils
— mount error: could not resolve address for …: Unknown error
-
You need to Enable Name Resolution (see section above)
— mount error(2): No such file or directory
- The windows machine couldn’t be found. Can you ping it? OR the share name isn’t valid. Try this command to see if you can see the list of shares:
apt install smbclient
smbclient -L \\win10 -U john
— mount error(13): Permission denied
- Your windows username or password isn’t being accepted by the windows machine. Check the windows account to make sure “force user to change password on next login” isn’t on, and make sure “disable account” is off.
— mount error(112): Host is down
- You are probably using Ubuntu 16.04 or older with Windows 10 or newer. You can make your mount work by adding «vers=3.0» to the options.
— The mount command appears to hang when mounting a share on a Windows XP or older computer and smbclient throws «protocol negotiation failed: NT_STATUS_IO_TIMEOUT».
- You can make your mount work by adding «vers=1.0» to the options.
В этой статье мы рассмотрим, как в Linux смонтировать общую сетевую папку, расположенную на хосте Windows. В Windows для доступа к общим сетевым папкам используется протокол SMB (Server Message Block), который ранее назывался CIFS (Сommon Internet File System). В Linux для доступа к сетевым папкам Windows по протоколу SMB можно использовать клиент cifs-utils или Samba.
- Смонтировать сетевую папку в Linux с помощью cifs-util
- Автоматическое монтирование сетевой папки в Linux
- Linux: подключиться к сетевой папке с помощью клиента samba
Содержание:
Совет. Для доступа к сетевым папкам по SMB/CIFS используется порт TCP/445. Для разрешения имени используются порты UDP 137, 138 и TCP 139. Если эти порты закрыты, вы сможете подключиться к сетевой папке Windows только по IP адресу.
Смонтировать сетевую папку в Linux с помощью cifs-util
Вы можете смонтировать сетевую папку, находящуюся на Windows хосте, с помощью утилит из пакета cifs-util. Для установки пакета выполните команду:
- В Ubuntu/Debian:
$ sudo apt-get install cifs-utils - В CentOS/Oracle/RHEL:
$ sudo dnf install cifs-utils
Создайте точку монтирования:
$ sudo mkdir /mnt/share
Теперь вы можете смонтировать сетевую папку с компьютера Windows под пользователем User03с помощью команды:
$ sudo mount.cifs //192.168.31.33/backup /mnt/share -o user=User03
Укажите пароль пользователя Windows для подключения к сетевой папке.
![]()
При подключении сетевой SMB папки можно задать дополнительные параметры:
$ sudo mount -t cifs -o username=User03,password=PasswOrd1,uid=1000,iocharset=utf8 //192.168.31.33/backup /mnt/share
- //192.168.31.33/backup – сетевая папка Windows
- /mnt/share – точка монтирования
- -t cifs – указать файловую систему для монтирования
- -o опции монтирования (эту опцию можно использовать только с правами root, поэтому в команде используется sudo)
- username=User03,password=PasswOrd1 – имя и пароль пользователя Windows, у которого есть права доступа к сетевой папке. Можно указать имя пользователя guest, если разрешен анонимный доступ к сетевой папке
- iocharset=utf8 – включить поддержку кодировки UTF8 для отображения имен файлов
- uid=1000 – использовать этого пользователя Linux в качестве владельца файлов в папке

По умолчанию шары Windows монтируются в Linux с полными правами (0755). Если вы хотите изменить права по-умолчанию при монтировании, добавьте в команду опции:
dir_mode=0755,file_mode=0755
Если вы хотите использовать имя компьютера при подключении сетевого каталога Windows, добавьте в файл /etc/hosts строку:
IP_АДРЕС ИМЯ_КОМПЬЮТЕРА
Чтобы не указывать учетные данные пользователя Windows в команде монтирования сетевой папки, их можно сохранить в файле.
Например:
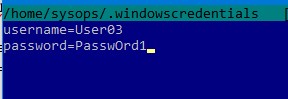
$ mcedit ~/.windowscredentials
Добавьте в файл:
username=User03
password=PasswOrd1
Для подключения к папке под анонимным пользователем:
username=guest
password=
Если нужно указать учетную запись пользователя из определенного домена Active Directory, добавьте в файл третью строку:
domain = vmblog.ru
Измените права на файл:
$ chmod 600 ~/.windowscredentials
Теперь при подключении сетевой папки вместо явного указания имени пользователя и пароля можно указать путь к файлу:
$ sudo mount -t cifs -o credentials=/home/sysops/.windowscredentials,uid=1000,iocharset=utf8 //192.168.31.33/backup /mnt/share
Отмонтировать сетевую SMB папку:
$ sudo umount /mnt/share
Автоматическое монтирование сетевой папки в Linux
Можно настроить автоматическое монтирование сетевой папки Windows через /etc/fstab.
$ sudo mcedit /etc/fstab
Добавьте в файл следующую строку подключения SMB каталога:
//192.168.31.33/backup /mnt/share cifs user,rw,credentials=/home/sysops/.windowscredentials,iocharset=utf8,nofail,_netdev 0 0
- rw – смонтировать SBM папку на чтение и запись
- nofail – продолжить загрузку ОС если не удается смонтировать файловую систему
- _netdev – указывает что подключается файловая система по сети. Linux не будет монтировать такие файловые системы пока на хосте не будет инициализирована сеть.
Вы можете указать версию протокола SMB, которую нужно использовать для подключения (версия SMB 1.0 считается небезопасной и отключена по-умолчанию в современных версиях Windows). Добавьте в конец строки с настройками подключения параметр vers=3.0.
//192.168.31.33/backup /mnt/share cifs user,rw,credentials=/home/sysops/.windowscredentials,iocharset=utf8,nofail,_netdev,vers=3.0 0 0
Если на стороне хоста Windows используется несовместимая (старая версия) SMB, при подключении появится ошибка:
mount error(112): Host is downилиmount error(95): Operation not supported
Чтобы сразу смонтировать сетевую папку, выполните:
$ mount -a
Linux: подключиться к сетевой папке с помощью клиента samba
Установите в Linux клиент samba:
- В Ubuntu/Debian:
$ sudo apt-get install smbclient - В CentOS/Oracle/RHEL:
# dnf install smbclient
Для вывода всех SMB ресурсов в локальной сети:
$ smbtree -N
Вывести список доступных SMB папок на удаленном хосте Windows:
smbclient -L //192.168.31.33 -N
Если в Windows запрещен анонимный доступ, появится ошибка:
session setup failed: NT_STATUS_ACCESS_DENIED
В этом случае нужно указать учетную запись пользователя Windows, которую нужно использовать для подключения:
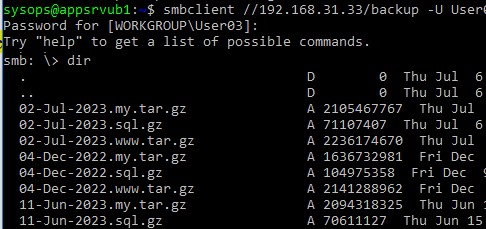
smbclient -L //192.168.31.33 -U User03
Если нужно использовать учетную запись пользователя домена, добавьте опцию –W:
smbclient -L //192.168.31.33 -U User03 –W Domain

Для интерактивного подключения к сетевой папке Windows используется команда:
smbclient //192.168.31.33/backup -U User03 -W Domain
или
smbclient //192.168.31.33/backup -U User03
Для анонимного доступа:
smbclient //192.168.31.33/backup -U Everyone
После успешного входа появится приглашение:
smb: \>
Вывести список файлов в сетевой папке:
dir
Скачать файл из сетевой папки Windows:
get remotefile.txt /home/sysops/localfile.txt
Сохранить локальный файл из Linux в SMB каталог:
put /home/sysops/localfile.txt remotefile.txt
Можно последовательно выполнить несколько команд smbclient:
$ smbclient //192.168.31.33/backup -U User03 -c "cd MyFolder; get arcive.zip /mnt/backup/archive.zip"
Полный список команд в smbclient можно вывести с помощью команды help. Команды smbclient схожи с командами ftp клиента.
При использовании команды smbclient может появиться ошибка:
Unable to initialize messaging contextsmbclient: Can't load /etc/samba/smb.conf - run testparm to debug it.
Чтобы исправить ошибку, создайте файл /etc/samba/smb.conf.
Если на хосте Windows отключен протокол SMB 1.0, то при подключении с помощью smbclient появится ошибка:
Reconnecting with SMB1 for workgroup listing.
protocol negotiation failed: NT_STATUS_CONNECTION_RESET
Unable to connect with SMB1 -- no workgroup available.
Иногда, при организации совместных сетей между Windwos и Linux системами, в последних может появиться необходимость монтирования расшаренных SMB-ресурсов прямо к файловой системе. Прежде всего такая необходимость появляется при использовании легковесных рабочих сред (XFCE, OpenBox, LXDE и др), файловые менеджеры которых не поддерживают прямой доступ к samba.
Например, в среде Gnome доступ к ресурсу Windows можно получить прямо из файлового менеджера Nautilus, введя в адресной строке путь вида smb://192.168.0.11/ (где вместо необходимого ip-адреса также может быть просто указано сетевое имя windows-системы). Но многие другие файловые менеджеры (к примеру, быстрый и удобный PCMan File Manager до определённой версии) не поддерживают такой возможности, поэтому универсальным решением становится монтирование SMB к конкретному пути вашей файловой системы, в результате вы получите доступ к расшаренному ресурсу удаленной системы точно так же, как вы его получаете к своим дискам. Для этой цели нам потребуется установленный пакет cifs-utils, в Ubuntu и Debian установить его можно командой:
sudo apt-get install cifs-utils
В Fedora, CentOS и других RedHat based дистрибутивах:
sudo yum install cifs-utils
Также, как заметили в комментариях, рекомендуется установить пакеты ntfs-3g и ntfs-config, если они у вас ещё не установлены.
Теперь для начала давайте разберем как монтировать расшаренные папки вручную. Потребуется создать путь куда будем монтировать SMB-папку, пусть это, к примеру, будет /media/sharefolder:
sudo mkdir /media/sharefolder
Вот такой командой можно примонтировать папку, требующую авторизации по логину и паролю:
sudo mount -t cifs //192.168.0.11/share /media/sharefolder -o username=windowsuser,password=windowspass,iocharset=utf8,file_mode=0777,dir_mode=0777
где вместо //192.168.0.11/share – ip-адрес и имя необходимой общей папки (если имя расшаренной папки содержит пробел, то необходимо заключить весь путь в кавычки, как это показано в следующем примере), /media/sharefolder – путь куда будет монтироваться ресурс, windowsuser – имя пользователя с необходимыми правами доступа к этому ресурсу Windows, windowspass – пароль этого пользователя.
Если необходимая папка не требует обязательной авторизации, то подключить ресурс можно такой командой:
sudo mount -t cifs "//192.168.0.11/общие документы" /media/sharefolder -o guest,rw,iocharset=utf8,file_mode=0777,dir_mode=0777
Если гостевой доступ к необходимой папке включен только в режиме чтения, то будет достаточно такой команды:
sudo mount -t cifs //192.168.0.11/общие /media/sharefolder -o guest,iocharset=utf8
При удачном выполнении этих команд не должно произойти никакого уведомления – можете смело проверять как примонтировалась папка перейдя по вашему пути (в нашем примере – /media/sharefolder).
Отмонтируется папка командой:
sudo umount /media/sharefolder
Для того чтобы осуществить автомонтирование таких папок нам придется отредактировать системный файл fstab. Также, если доступ к необходимому windows-ресурсу требует обязательной авторизации, то потребуется предварительно создать файл, в котором будут прописаны логин и пароль доступа (сделать это можно текстовым редактором nano):
sudo nano /root/.smbcredentials
В этот новый файл добавьте две строки:
username=windowsuser

password=windowspass
где, соответственно, windowsuser – имя пользователя с необходимыми правами доступа к ресурсу Windows, windowspass – пароль этого пользователя. Измените права созданного файла так, что редактировать и смотреть его смог только root, то есть сама система:
sudo chmod 700 /root/.smbcredentials
Сохраните изменения и переходите к редактированию файла /etc/fstab:
sudo nano /etc/fstab
И здесь в самом конце добавьте строку типа:
//192.168.0.11/share /media/sharefolder cifs credentials=/root/.smbcredentials,iocharset=utf8,file_mode=0777,dir_mode=0777 0 0
Если авторизации по имени и паролю не требуется, а требуется только гостевой доступ, то создавать файл .smbcredentials не потребуется, этот шаг можно было пропустить и сразу в /etc/fstab добавить строку:
//192.168.0.11/общие\040документы /media/sharefolder cifs guest,rw,iocharset=utf8,file_mode=0777,dir_mode=0777 0 0
Обратите внимание, что здесь если ваша папка содержит пробелы, то вариант аналогичный командной строке – заключении пути в кавычки – не поможет, для того, чтобы fstab понял пробелы – их необходимо заменить на четыре символа: \040
И, соответственно, если требуется только лишь гостевой доступ в режиме чтения к windows-папке, то будет достаточно такой строки:
//192.168.0.11/общие /media/sharefolder cifs guest,iocharset=utf8 0 0
Для того, чтобы проверить корректно ли монтируется shared-папка из fstab без перезагрузки нужно выполнить такую команду:
sudo mount -a
Также к этому стоит добавить, что если вы хотите получать доступ к windows-шаре не через ip-адрес, а через имя машины, то вам потребуется установить winbind, в Debian-based:
sudo apt-get install winbind
Или в RedHat-based системах:
sudo yum install samba-winbind
После этого отредактируйте файл /etc/nsswitch.conf:
sudo nano /etc/nsswitch.conf
Где в строке:
hosts: files mdns4_minimal [NOTFOUND=return] dns mdns4
перед dns добавьте wins, то есть после редактирования она должна выглядеть вот так:
hosts: files mdns4_minimal [NOTFOUND=return] wins dns mdns4
После перезагрузки для получения доступа к windows-ресурсу через CIFS можно будет указывать не только ip, но и сетевое имя windows-ресурса (netbios name). Но мы всеже рекомендуем использовать непосредственно ip-адрес (как было описано в статье) – к нему обращение идет напрямую, быстрее.
Также стоит отметить, что таким образом можно монтировать только конкретные общие папки (например: //192.168.0.11/share), но не весь windows-ресурс целиком (то есть просто: //192.168.0.11).
CIFS (Common Internet File System) – это популярный протокол обмена файлами в Интернете. Этот протокол и позволит пользователям ОС Linux получить доступ к общей папке Windows.
CIFS – это реализация SMB (Server Message Block) – протокола, используемого для совместного использования сетевых файлов. Но он устарел.
В этой статье мы по шагам пройдем все этапы установки и настройки CIFS, чтобы подключиться к сетевому ресурсу Windows на ОС Linux.
Установка CIFS
Сейчас мы установим пакет cifs-utils на Ubuntu Linux (точно так же можно сделать на всех Debain-подобных ОС).
$ sudo apt-get update
$ sudo apt-get install cifs-utils
Монтируем Windows Share (сетевой ресурс)
Сейчас мы разберем на примерах, как монтировать общую папку Windows вручную и автоматически.
Создадим на нашем Linux директорию, к которой мы будем монтировать сетевой ресурс. Назовем ее myshare и расположена она будет в каталоге /mnt
$ sudo mkdir /mnt/myshare
Сетевой ресурс (шара) Windows может быть примонтирован к ОС Ubuntu или Debian с помощью следующей команды:
$ sudo mount -t cifs -o username=user,password=Passw0rd //WINDOWS_HOST_IP/share /mnt/myshare
Где:
WIN_HOST_IP – это IP адрес хоста Windows, на котором расположена общая папка
share – имя сетевого ресурса
user – наш пользователь и Passw0rd – пароль с которыми мы подключемся к шаре.
Если пользователь доменный, то необходимо в опциях (-o) указать домен.
$ sudo mount -t cifs -o username=user,password=Passw0rd,domain=domain_name //WIN_HOST_IP/share /mnt/myshare
По-умолчанию сетевой ресурс монтируется с полными правами (rwx или 777). Если Вы хотите установить иные права, используйте опции dir_mode и file_mode.
$ sudo mount -t cifs -o username=user,password=Passw0rd,dir_mode=0755,file_mode=0755 //WIN_HOST_IP/share /mnt/myshare
Так же Вы можете установить владельцев uid (id пользователя) и gid (id группы).
$ sudo mount -t cifs -o username=user,password=Passw0rd,uid=1000,gid=1000,dir_mode=0755,file_mode=0755 //WIN_HOST_IP/share /mnt/myshare
Если после выполнения предыдущих команд Вы не получили никаких ошибок, то можете с помощью команды df -h убедиться, что сетевой ресурс успешно примонтирован к нашему ПК на Linux. В примере WIN_HOST_IP = 192.168.1.100 и имя общей папки share
$ df -h
Filesystem                 Size  Used Avail Use% Mounted on
udev                       3,9G     0  3,9G   0% /dev
tmpfs                      787M  2,2M  785M   1% /run
/dev/sda2                  450G   23G  405G   6% /
tmpfs                      3,9G  705M  3,2G  18% /dev/shm
tmpfs                      5,0M  4,0K  5,0M   1% /run/lock
tmpfs                      3,9G     0  3,9G   0% /sys/fs/cgroup
//192.168.1.100/share  1000G  108G  82G   11% /mnt/myshare
Безопасность учетных данных при монтировании через CIFS
В этом разделе опишем, как лучше всего передавать учетные данные (имя пользователя, пароль, домен) при монтировании сетевого ресурса к ОС на базе Линукс.
Создайте файл с учетными данными для cifs: /etc/cifs-credentials
Внутрь поместите следующее содержимое:
username=user
password=Passw0rd
domain=domain_name
Задайте права для этого файла:
$ sudo chmod +rw /etc/cifs-credentials
Теперь мы можем подключить общую папку такой командой:
$ sudo mount -t cifs -o credentials=/etc/cifs-credentials //WIN_HOST_IP/share /mnt/myshare
В примерах выше, после того, как Вы перезагрузите свой ПК, сетевой ресурс не примонтируется. Поэтому сделаем так, чтобы шара подключалась автоматически. В Linux это делается через файл /etc/fstab. Откройте этот файл любимым редактором.
$ sudo vim /etc/fstab
И добавьте такую строку:
//WIN_HOST_IP/share /mnt/myshare cifs credentials=/etc/cifs-credentials,file_mode=0755,dir_mode=0755 0 0
Следующей командой запустим монтирование всех точек, описанных в /etc/fstab
$ sudo mount -a
Теперь наш удаленный сетевой ресурс будет доступен даже после перезагрузки.
Как размонтировать общую папку CIFS
Размонтирование производится таким же способом, как и обычно мы жто делаем с дисками:
$ sudo umount /mnt/myshare
Часто бывает так, что сетевой ресурс занят каким-то процессом и тогда Вы получите ошибку при попытке размонтирования, тогда запустите команду с ключем -l (–lazy)
$ sudo umount -t cifs -l /mnt/myshare
Итог
Итак, в этой статье мы рассмотрели, как быстро примонтировать удаленную сетевую папку, которая находится на хосте с Windows, к нашему хосту на Linux с помощью CIFS. Если у Вас остались какие-либо вопросы, пожалуйста, пишите в комментариях.