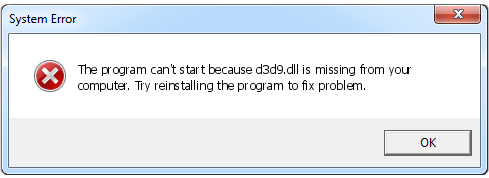
В этой статье мы поговорим о том, как исправить ошибку, связанную с отсутствием или повреждением на компьютере файла d3d9.dll. Данная проблема, как правило, возникает после загрузки и запуска компьютерных игр. Преимущественно с ней сталкиваются пользователи операционных систем Windows 7 и выше.
Ошибка с файлом d3d9.dll может возникнуть по нескольким причинам:
1. На компьютере поврежден или отсутствует файл d3d9.dll;
2. В папке с игрой уже присутствует файл d3d9.dll;
3. Файл d3d9.dll не зарегистрирован в системе.
Как устранить ошибку?
Способ 1. Перейдите в папку с игрой и убедитесь в том, что в ней не содержится файла d3d9.dll. Если он все же присутствует, то обязательно удалите его, и тогда система будет обращаться к тому файлу d3d9.dll, который располагается в системной папке.
Способ 2. Обновите DirectX. В состав пакета DirectX входит файл d3d9.dll, поэтому именно этот способ и поможет вам, если данный файл поврежден, устарел или вовсе отсутствует.
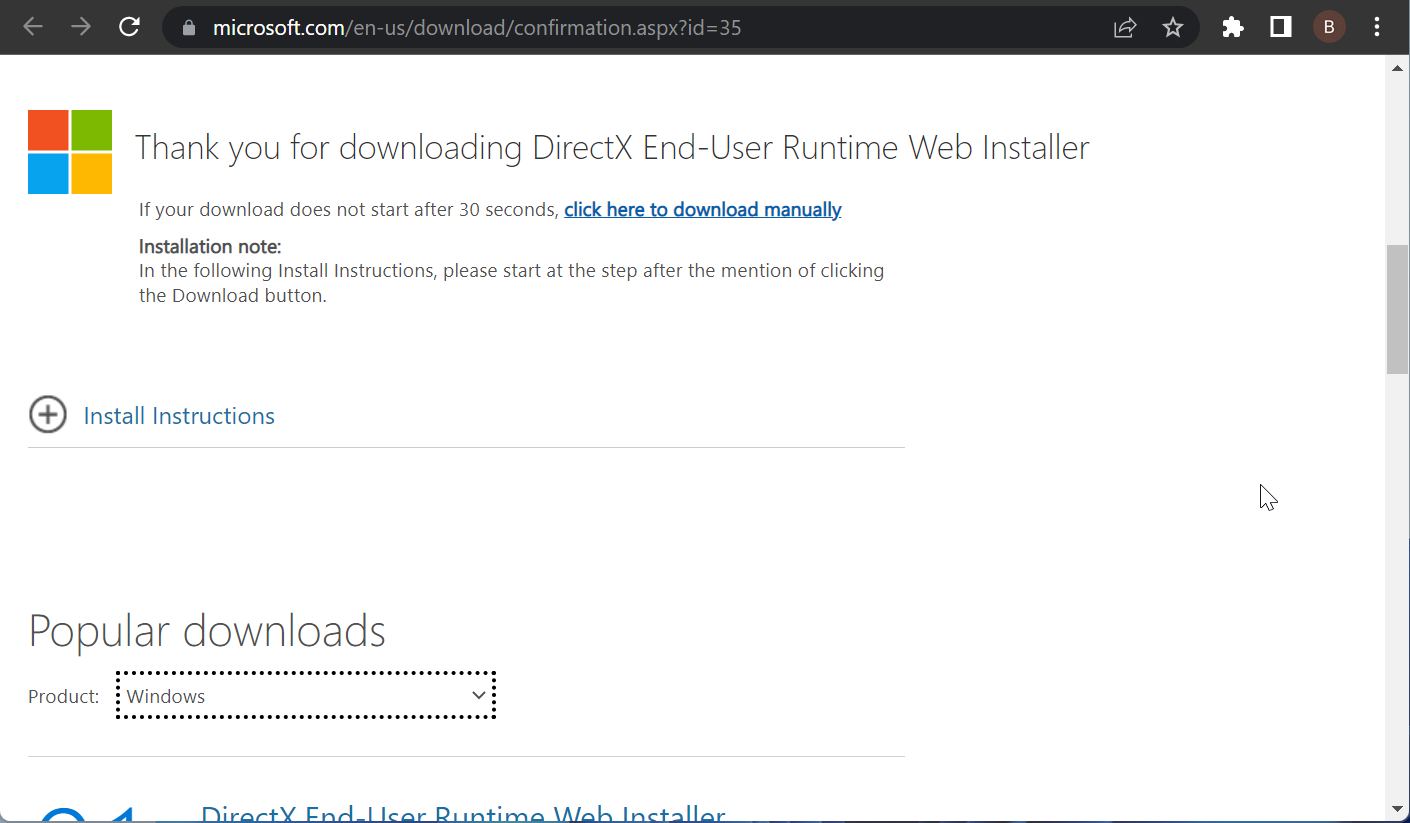
Для этого перейдите по ссылке в конце статьи на официальный сайт Microsoft и скачайте веб-установщик DirectX. После окончания загрузки запустите файл и проведите установку последней доступной для вашего компьютера версии DirectX.
Способ 3. Перейдите в системную папку C:\Windows\System32 и проверьте в ней наличие файла d3d9.dll. Если файл там присутствует, возможно, он не был зарегистрирован в системе.
Для этого запустите окно «Выполнить» сочетанием клавиш Win+R и в открывшемся миниатюрном окне введите следующую команду:
regsvr32 d3d9.dll
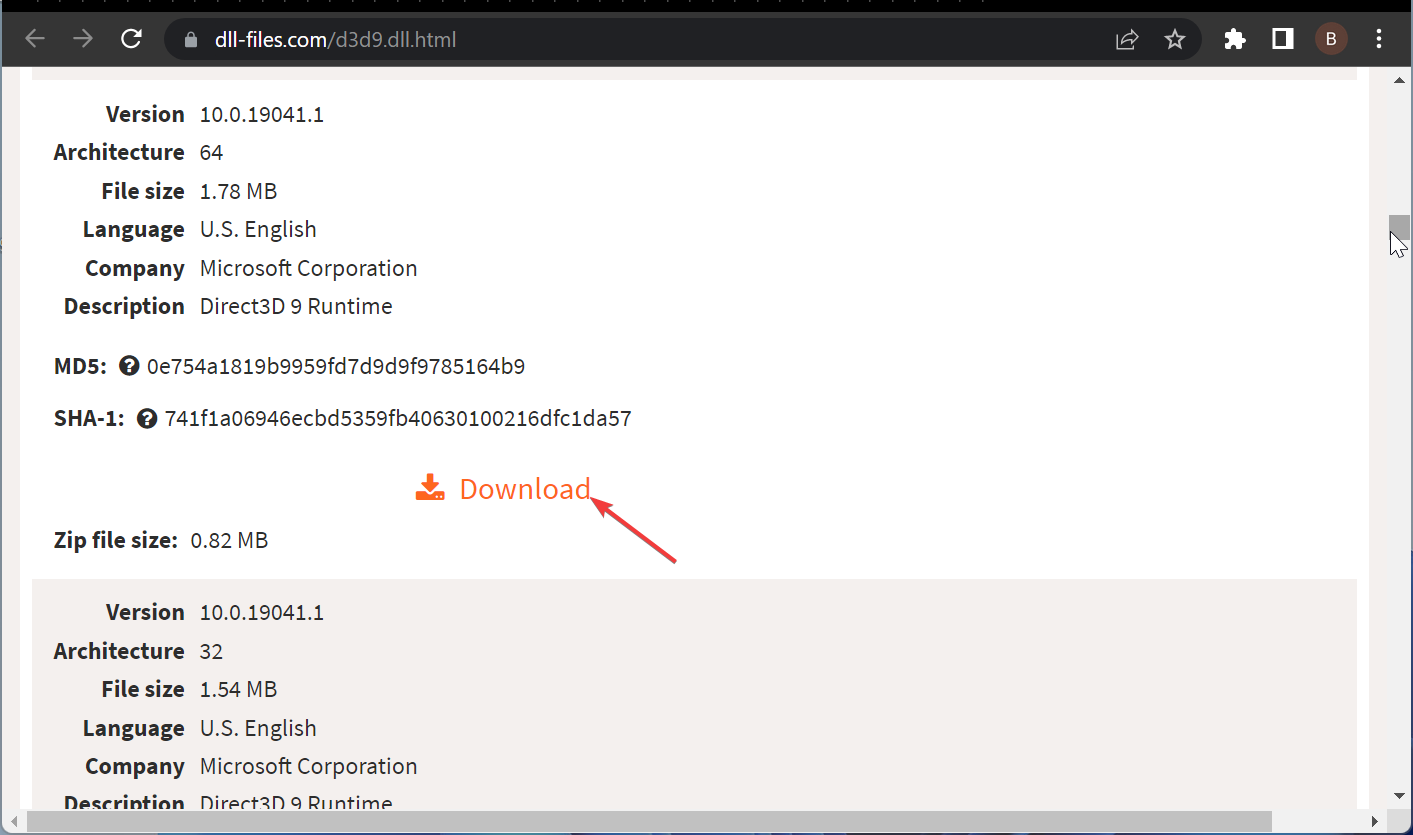
Способ 4. Если ни один из вышеприведенных способов не принес должного результата, а в папке C:\Windows\System32 отсутствует необходимый файл, то можно попробовать скачать его из стороннего источника, распространяющего подобные библиотеки.
Для этого откройте ваш поисковик и в строке поиска введите запрос следующего типа: «Скачать d3d9.dll». Уже в первых строках результатов появятся ссылки на ресурсы, откуда и можно скачать недостающий файл.
Обратите внимание! Скачивая файл d3d9.dll из сторонних источников, вы должны понимать, что вместо искомого файла вы вполне можете скачать вредоносный файл, который принесет серьезный ущерб компьютеру, вплоть до переустановки Windows. Далеко не все ресурсы распространяют безопасные DLL-файлы, поэтому будьте предельно внимательны!
Скачав необходимый файл, его необходимо перенести в системную папку C:\Windows\System32, а затем зарегистрировать в системе, как это было описано в предыдущем способе. Завершите установку файла d3d9.dll перезагрузкой компьютера и повторным запуском игры.
Скачать DirectX бесплатно
Загрузить программу с официального сайта
Note: Outbyte PC Repair tool has been proven to identify and fix the D3D9.DLL error. See more information about Outbyte and Uninstall Instructions. Please review Outbyte EULA and Privacy Policy.
Introduction
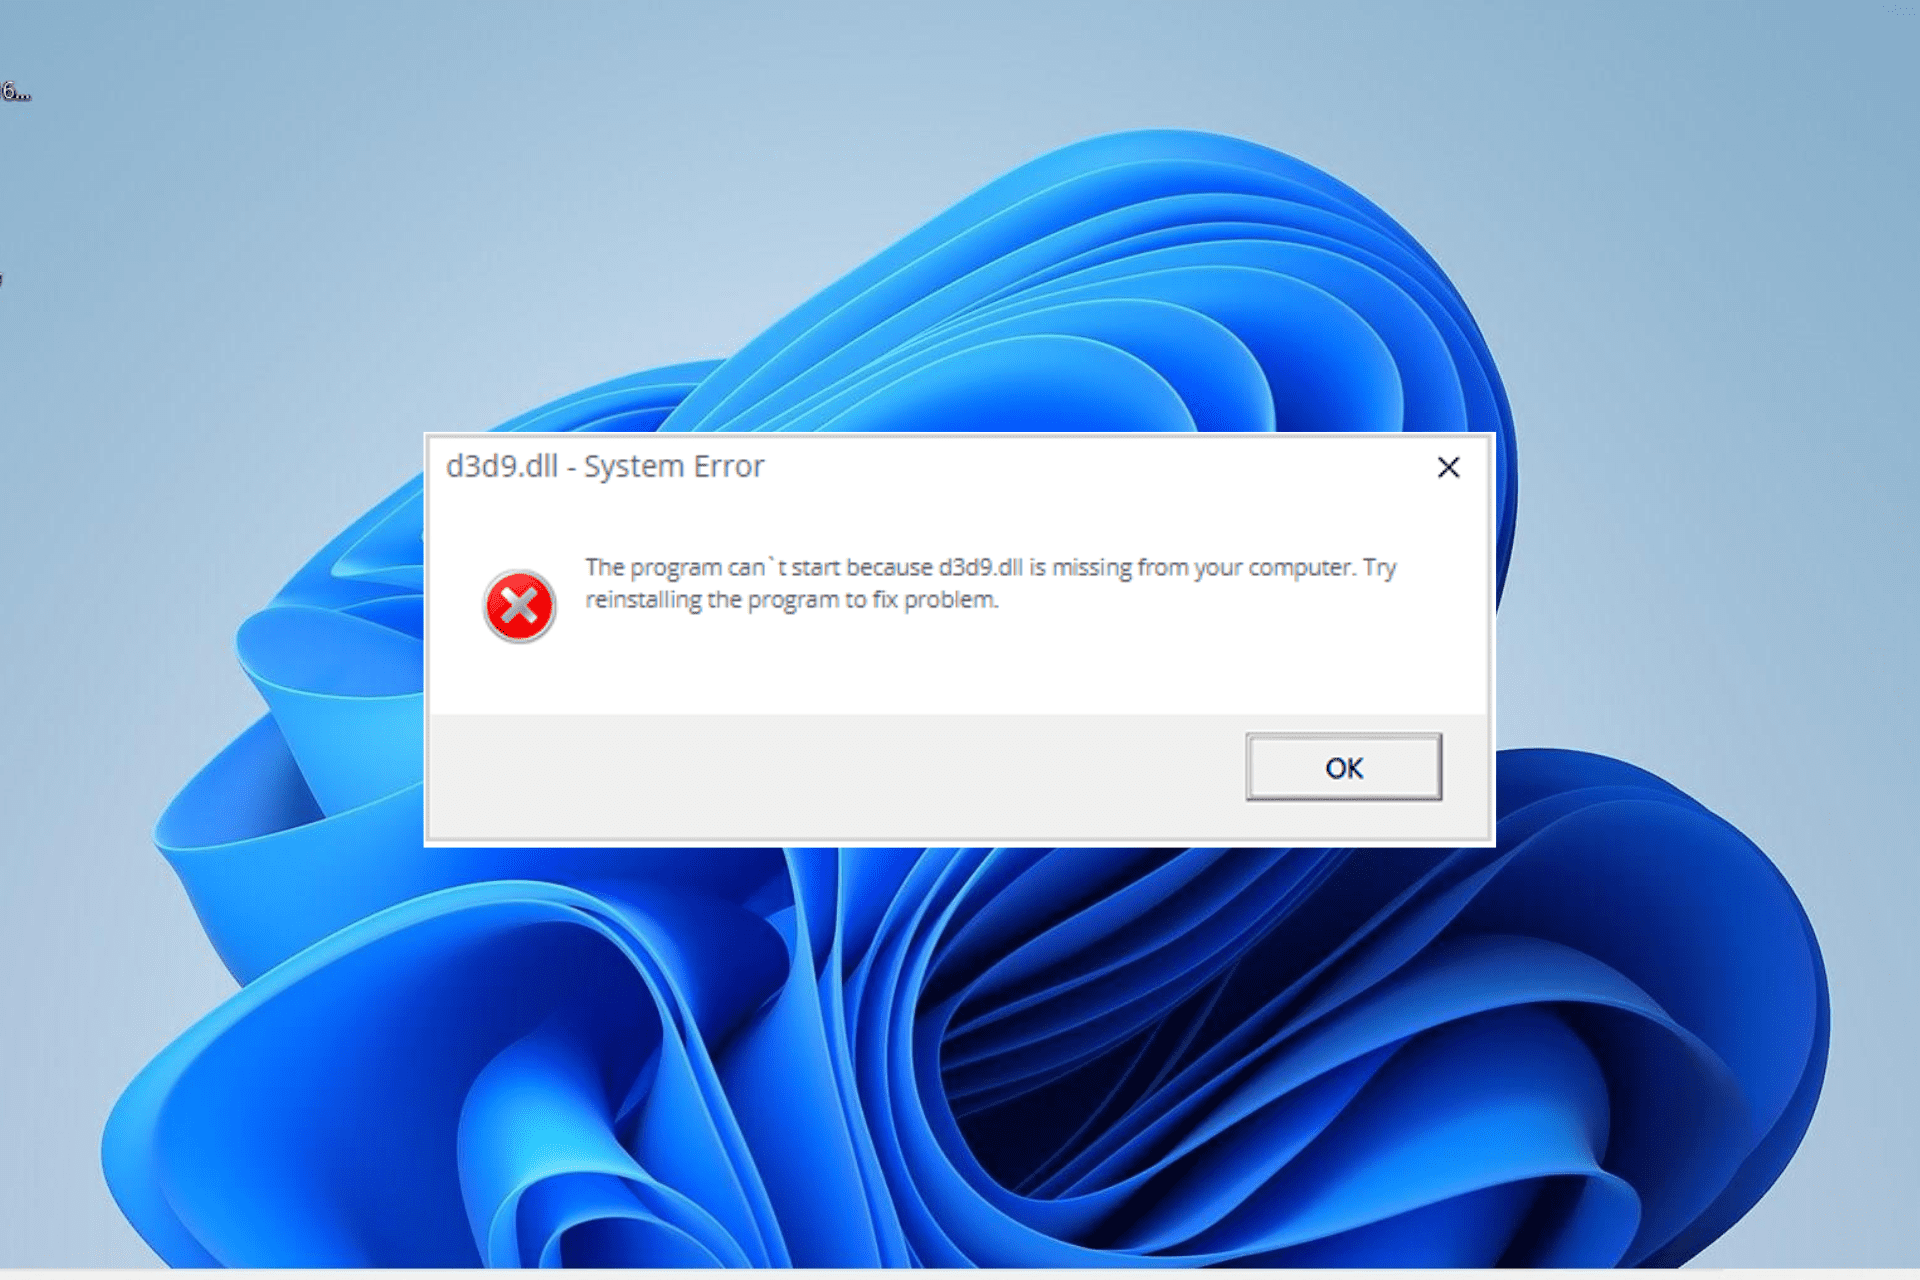
One of the most common errors a Windows user faces is the missing DLL error. This error will simply not let you run the application. When you try to open the application you will notice a pop-up window with the following error message.
‘The program can’t start because D3D9.DLL is missing from your computer’
Don’t worry! This is a common issue faced by Windows users all over the world and there are several ways to fix this.
In this detailed post, I’ll provide multiple solutions to fix the DLL file not found errors on Windows 11, 10, 8.1, 8, and 7 PCs.
What is a D3D9.DLL error?
The term ‘DLL’ refers to dynamically linked libraries, which may be found in Windows 11, 10, 8, 7, and other previous OS versions. A dynamic link library (DLL) is a collection of small programs that larger programs can load when needed to complete specific tasks. The small program, called a DLL file, contains instructions that help the larger program handle what may not be a core function of the original program. These instructions can be called upon multiple programs simultaneously. When you run a program on any Windows operating system, much of the functionality of the program may be provided by DLLs.
A dependency is created every time a DLL is used by a program. If another program uses a DLL and somehow breaks the dependency between the two programs then the first program will no longer execute. That is when you will see errors like,
‘The program can’t start because D3D9.DLL is missing from your computer. Try reinstalling the program to fix this problem.’
Causes of D3D9.DLL Missing Error
The typical reasons for the ‘D3D9.DLL missing error’ on Windows 10, 11, 8, 7, and other versions, are compiled below,
a) Deleted or corrupted D3D9.DLL — The DLL file used by a certain program has modified or deleted D3D9.DLL.
b) Missing or corrupted files of Microsoft Visual C++ Redistributable — The D3D9.DLL file is part of the Microsoft Visual C++ software runtime library. VC++ Runtime libraries are DLL files required to run programs compiled with Microsoft Visual Studio. If some files are missing or if Visual Studio is not installed correctly, then the ‘D3D9.DLL is missing’ error might appear.
c) System is infected with virus or malware – There is a possibility your system is corrupted or damaged with virus/malware. As a result, D3D9.DLL may have been damaged or corrupt.
d) Damaged/corrupted System files – If your Windows system files are corrupted after engaging with programs containing a virus or some malicious applications then D3D9.DLL might not work correctly.
Some other common D3D9.DLL errors include:
D3D9.DLL is missing
Cannot register D3D9.DLL
Problem starting D3D9.DLL
D3D9.DLL Access Violation
The procedure entry point D3D9.DLL error
D3D9.DLL error loading
D3D9.DLL crash
Cannot find D3D9.DLL
D3D9.DLL was not found
D3D9.DLL could not be located
The program can’t start because D3D9.DLL is missing from your computer. Try reinstalling the program to fix the problem.
There are several ways to fix this DLL error and we will be looking at them in detail below.
1. Download D3D9.DLL
The D3D9.DLL file can be manually downloaded and added/replaced with the missing or corrupt DLL file.
Step 1: Select and download the DLL files from the table below irrespective of the version of your OS i.e. Windows 11, 10, 8.1, 8 or 7.,
Download D3D9.DLL
| Version | Description | OS | Size | Language | MD5 | SHA1 | Download |
|---|---|---|---|---|---|---|---|
| 10.0.10240.16412 | Direct3D 9 Runtime | 32 | 1.78 MB | U.S. English |
e731e28… e73… |
0cd7e73… 0cd… |
|
| 10.0.10240.16412 | Direct3D 9 Runtime | 64 | 2.05 MB | U.S. English |
91e005e… 91e… |
b0fc2d1… b0f… |
|
| 10.0.10586.0 | Direct3D 9 Runtime | 32 | 1.78 MB | U.S. English |
9d8bc94… 9d8… |
58d95f0… 58d… |
|
| 10.0.10586.0 | Direct3D 9 Runtime | 64 | 2.05 MB | U.S. English |
6842bee… 684… |
853bf16… 853… |
|
| 10.0.10586.494 | Direct3D 9 Runtime | 32 | 1.78 MB | U.S. English |
4102898… 410… |
0eebf3b… 0ee… |
|
| 10.0.10586.494 | Direct3D 9 Runtime | 64 | 2.05 MB | U.S. English |
556e7c9… 556… |
d77a2bc… d77… |
|
| 10.0.14393.0 | Direct3D 9 Runtime | 32 | 1.36 MB | U.S. English |
d10ce25… d10… |
1f9d45d… 1f9… |
|
| 10.0.14393.0 | Direct3D 9 Runtime | 64 | 1.53 MB | U.S. English |
2d00225… 2d0… |
eb844fa… eb8… |
|
| 10.0.15063.0 | Direct3D 9 Runtime | 32 | 1.37 MB | U.S. English |
89c616a… 89c… |
667918f… 667… |
|
| 10.0.15063.0 | Direct3D 9 Runtime | 64 | 1.52 MB | U.S. English |
1bbe7d3… 1bb… |
3f04236… 3f0… |
|
| 10.0.16299.98 | Direct3D 9 Runtime | 64 | 1.57 MB | U.S. English |
de99750… de9… |
e4d916d… e4d… |
|
| 10.0.17763.1 | Direct3D 9 Runtime | 64 | 1.6 MB | U.S. English |
d5bac74… d5b… |
c7d07d6… c7d… |
|
| 10.0.18362.1 | Direct3D 9 Runtime | 64 | 1.75 MB | U.S. English |
548f9dc… 548… |
bd89276… bd8… |
|
| 10.0.18362.329 | Direct3D 9 Runtime | 64 | 1.76 MB | U.S. English |
8c4d0df… 8c4… |
67b24dd… 67b… |
|
| 10.0.18362.387 | Direct3D 9 Runtime | 32 | 1.54 MB | U.S. English |
50bd990… 50b… |
788d113… 788… |
|
| 10.0.18362.387 | Direct3D 9 Runtime | 64 | 1.76 MB | U.S. English |
00a77dc… 00a… |
500a784… 500… |
|
| 10.0.19041.1 | Direct3D 9 Runtime | 32 | 1.54 MB | U.S. English |
59df6e2… 59d… |
55b2a9f… 55b… |
|
| 10.0.19041.1 | Direct3D 9 Runtime | 64 | 1.78 MB | U.S. English |
0e754a1… 0e7… |
741f1a0… 741… |
|
| 10.0.19041.423 | Direct3D 9 Runtime | 32 | 1.54 MB | U.S. English |
e598bc6… e59… |
b7255ea… b72… |
|
| 10.0.19041.488 | Direct3D 9 Runtime | 64 | 1.78 MB | U.S. English |
7f7ca5c… 7f7… |
936a456… 936… |
|
| 4.9.0.901 | Microsoft Direct3D | 32 | 1.55 MB | Swedish |
cfef78d… cfe… |
a2e8184… a2e… |
|
| 5.3.2600.2180 | Microsoft Direct3D | 32 | 1.61 MB | U.S. English |
7b25a35… 7b2… |
917add5… 917… |
|
| 5.3.2600.2180 | Microsoft Direct3D | 32 | 1.61 MB | U.S. English |
013a032… 013… |
07bdb89… 07b… |
|
| 5.3.2600.5512 | Microsoft Direct3D | 32 | 1.61 MB | U.S. English |
3aab4a2… 3aa… |
cc1a12f… cc1… |
|
| 6.0.6001.18000 | Microsoft Direct3D | 32 | 1.71 MB | U.S. English |
fab8f08… fab… |
507b378… 507… |
|
| 6.0.6001.18000 | Microsoft Direct3D | 64 | 1.84 MB | U.S. English |
515417b… 515… |
e0008b0… e00… |
|
| 6.1.7600.16385 | Direct3D 9 Runtime | 32 | 1.74 MB | U.S. English |
7459301… 745… |
c69e4b7… c69… |
|
| 6.1.7601.17514 | Direct3D 9 Runtime | 32 | 1.74 MB | U.S. English |
6ef5f3f… 6ef… |
74e5861… 74e… |
|
| 6.2.9200.16384 | Direct3D 9 Runtime | 32 | 1.68 MB | U.S. English |
118ba30… 118… |
47d2843… 47d… |
|
| 6.2.9200.16384 | Direct3D 9 Runtime | 64 | 1.97 MB | U.S. English |
94c1741… 94c… |
294df89… 294… |
|
| 6.3.9600.16404 | Direct3D 9 Runtime | 32 | 1.72 MB | U.S. English |
d85f310… d85… |
5207691… 520… |
|
| 6.3.9600.17095 | Direct3D 9 Runtime | 32 | 1.71 MB | U.S. English |
949e0e4… 949… |
132e9cb… 132… |
|
| 6.3.9600.17095 | Direct3D 9 Runtime | 64 | 2.03 MB | U.S. English |
c1e44a9… c1e… |
770f3ae… 770… |
|
| 6.3.9600.17415 | Direct3D 9 Runtime | 32 | 1.82 MB | U.S. English |
0936955… 093… |
4663fab… 466… |
|
| 6.3.9600.17415 | Direct3D 9 Runtime | 64 | 2.13 MB | U.S. English |
972b9c1… 972… |
a9e9cd4… a9e… |
Step 2: Once downloaded, extract each file into separate folders using either Windows Compressed folders (comes with windows) or with an app like WinRAR.
Step 3: Next, copy the 64-bit ‘D3D9.DLL’ file and paste it into the C:\Windows\System32 folder. And copy the 32-bit ‘D3D9.DLL’ file and paste it into the C:\Windows\SysWOW64 folder. If there is an existing ‘D3D9.DLL’ file in either of these folders then replace it with the new file. However, if you have a 32-bit Windows system then place only the 32-bit file into the C:\Windows\System32 folder.
Re-launch the affected program to see if the issue is fixed. If not, please try the next method.
2. Fix missing D3D9.DLL error automatically
The missing DLL error can be fixed using a repair tool, like Outbyte PC Repair, which helps to solve any system issues, cleans up junk files, and fixes any DLL errors in the process.
Step 1: Download the installation file from here.
Step 2: Install PC Repair and scan your PC
Step 3: Click ‘Repair’ to fix all items that may cause the missing DLL errors.
Step 4: Launch the application to see if the error is fixed.
Recommended Download: Fix D3D9.DLL error or missing D3D9.DLL error with Outbyte.
Compatible with Windows 11, 10, 8, 7, Vista, XP and 2000
3. Re-register the DLL file
Another efficient method to fix the DLL error is to re-register the DLL file.
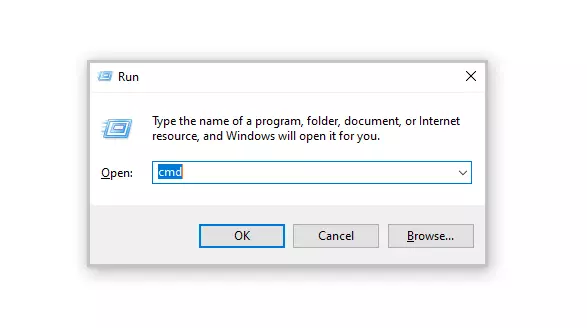
Step 1: Launch the Run utility by pressing Windows + R keys on your keyboard. Type in ‘cmd’ in the text input field. Then press Ctrl+Shift+Enter keys to open the Command Prompt in administrator mode.
Step 2: In the prompt window, select ‘Yes’ to allow Command Prompt to make modifications to your device.
Step 3: Now it’s time to unregister the DLL file from your computer. Type in or copy and paste the following command, then press Enter,
regsvr32 /u D3D9.DLL
Note: Replace vcruntime140.dll with D3D9.DLL
Step 4: Next, you need to re-register the file. To do this run the following command,
regsvr32 D3D9.DLL
Note: Replace vcruntime140.dll with D3D9.DLL
Step 5: Exit the Command Prompt and run the application again.
4. Reinstall the Latest Visual C++ Redistributable 2015 — 2022 for Visual Studio
The most commonly used solution is to re-install Microsoft Visual C++ Redistributable to fix DLL errors. Follow the steps mentioned below,
Step 1: To access the official page from where Microsoft Visual C++ Redistributable can be downloaded, please click on the link provided here
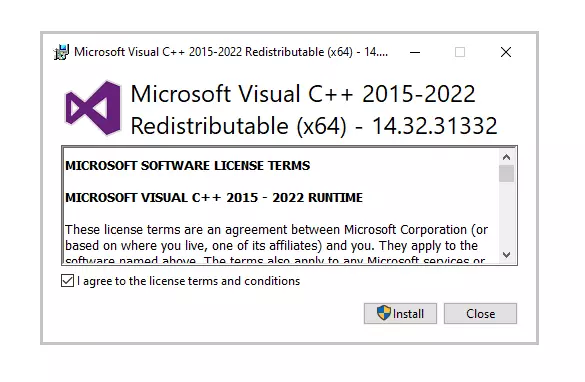
Select ‘Install’. The installation will begin and will take a couple of seconds to complete.
Step 2: Alternatively, you can also download it from below based on the version of Windows,
Download x86 version from here
Download x64 version from here
Step 3: Once you’ve selected the file, proceed to download. The download may take a while, depending on your internet connection speed.
Step 4: Once the download is complete install the downloaded file. When the installation begins tick the ‘I agree to the license terms and conditions’ box and then click on ‘Install’.
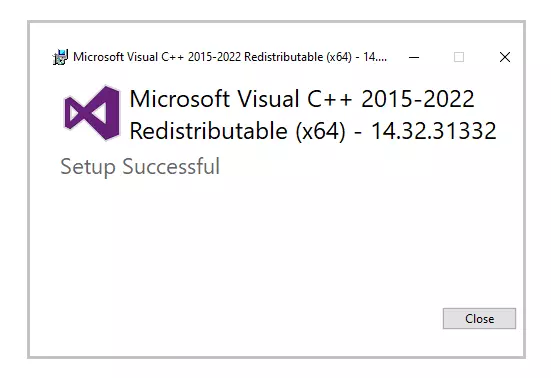
Step 5: It may take a few minutes for the installation to finish. Once the installation is completed restart the computer and launch the program again to see if the DLL error is fixed.
5. Run System File Checker (SFC) Scan
Step 1: To open the Run utility, press Windows + R on your computer. Enter ‘cmd’ in the input area and then press Ctrl+Shift+Enter.
Step 2: Select ‘Yes’ in the pop-up window to open the command prompt in administrator mode.
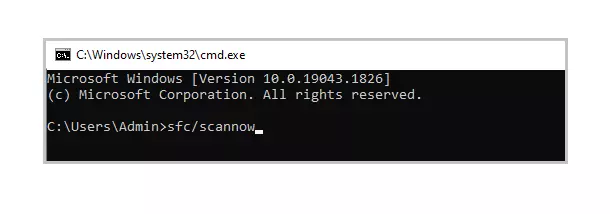
Step 3: Next, enter the below command and press Enter to execute it,
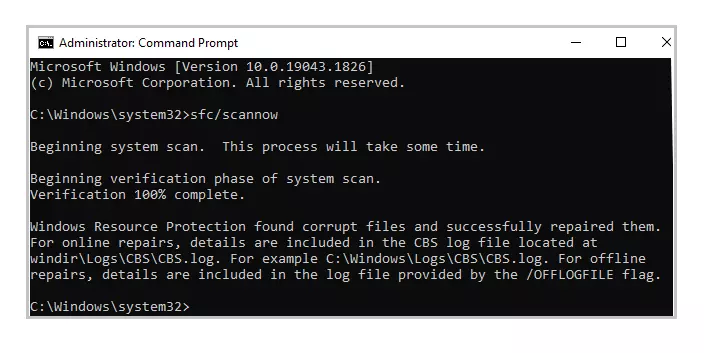
sfc/scannow
Step 4: This command will try to search and fix corrupt system files (including DLL files). Once the process is complete, you can check the log file created in the path shown in the command prompt. If in the log file you find details of the fixed DLL File then you can run the application again.
6. Reinstall the Program that cannot be launched
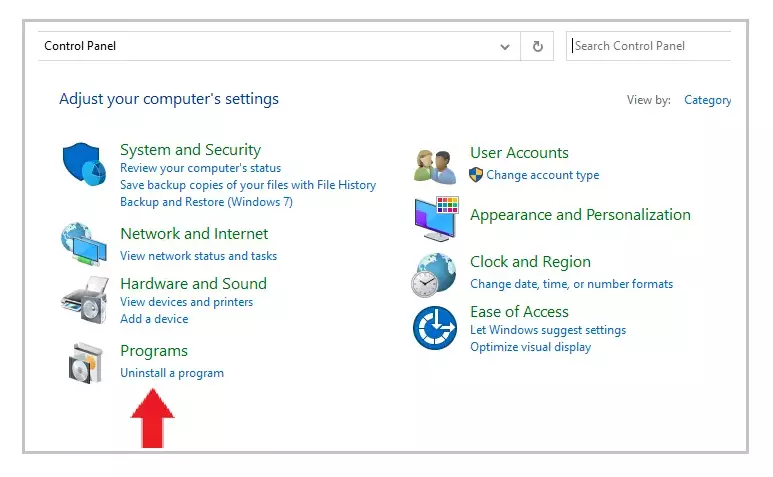
Step 1: Open Control Panel and click on ‘Uninstall a program’ under ‘Programs’.
Step 2: Search and find the program you’re experiencing problems with and click on it.
Step 3: Then click on the ‘Uninstall’ button, and proceed to continue with the uninstallation procedure of the application.
Step 4: Reinstall the program from its source. Either download the setup file or if you already have it then run the installation again to check if you can run the application this time.
7. Update drivers
In some cases, DLL errors can occur due to drivers. If the DLL error message appeared during or after you installed a program, then first update your drivers to the latest version.
Alternatively, there is also a possibility you might face the DLL error after updating drivers. In such a scenario, you need to roll back the driver to the previous version.
There are two ways to update drivers,
Method 1: Automatically Update Drivers
Step 1: Use a tool like Outbyte Driver Updater that automatically searches for missing and out dated drivers in your system and updates it. You can download the tool from here
Step 2: Download time depends on your internet speed connection. Once the download is completed start with the installation of the tool.
Step 3: Launch the application.
Step 4: Inside the application run update. Then, the Driver Updater tool will scan your computer for out dated and missing drivers.
Step 5: Finally, select the drivers and click update.
Method 2: Manually Update Drivers
Step 1: Go to the Taskbar search box – enter the text Device Manager and select Device Manager.
Step 2: Select the hardware device that needs to be updated. Expand the selection – select the device, right-click and select ‘Update Driver’.
Step 3: Choose the ‘Search automatically for drivers’ option.
Step 4: If the latest drivers are found then they will be installed automatically.
Step 5: Sometimes, Windows might not be able to find the latest driver. In such cases, the user can visit the manufacturer’s website, search for the driver, and instructions on how to proceed with the installation.
8. System Restore
In this method, your PC needs to be restored to its earlier version when it was working without any error. There is a chance the new updates to your PC caused the error, so the user must remove the new updates and roll back to a previous version.
To apply System Restore, first, check if you have a previous backup of your system. To check this,
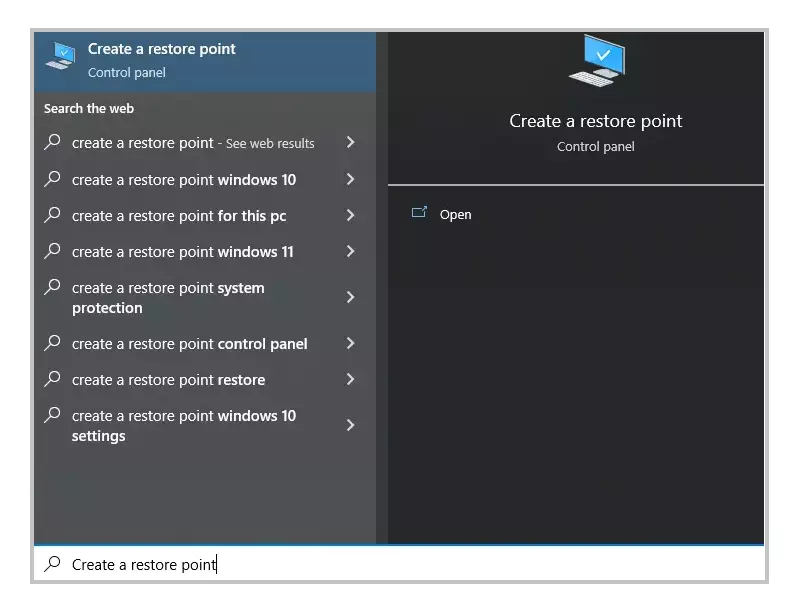
Step 1: Begin by clicking on the start button.
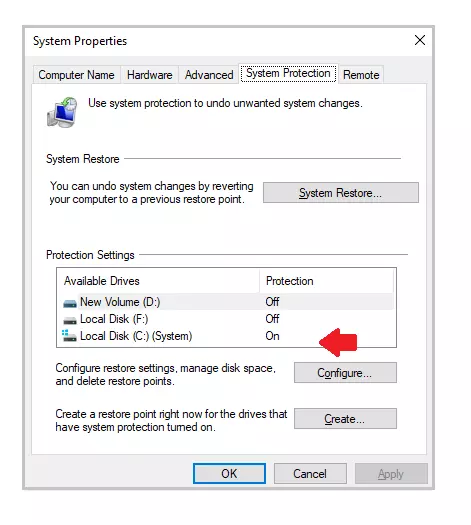
Step 2: To access the System Properties window, search for ‘Create a restore point’ and click the first result.
Step 3: Under the ‘System Protection’ tab select the ‘System’ drive. ‘Protection’ should be turned on for this drive.
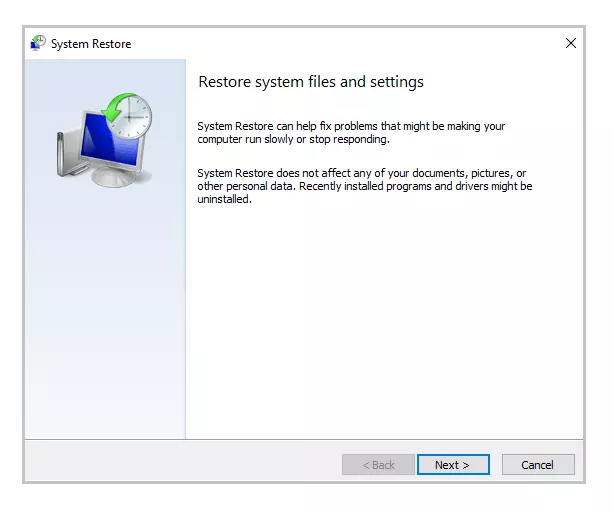
Step 4: Select ‘System Restore’ and click ‘Next’ on the initial screen
Step 5: A list of restore points will be displayed. Select the restore point when your application was running correctly without any error. Then select ‘Next’.
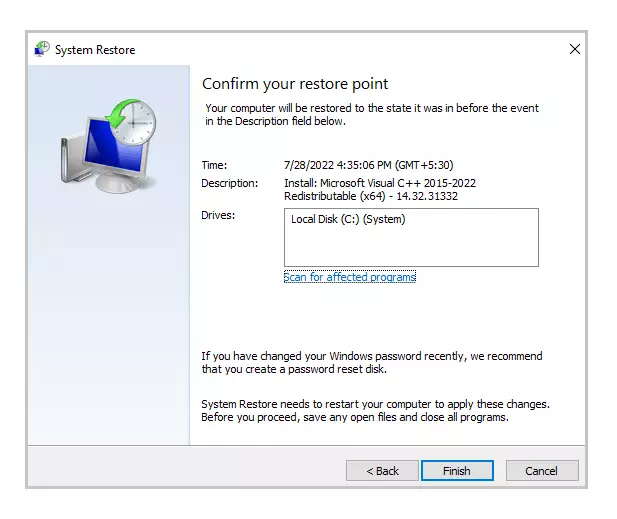
Step 6: Review your selection and click ‘Finish’. If a warning window pop-up appears then select Yes’.
Step 7: The System Restore will begin and your PC will restart once the process is complete. When you log in again, you will see a notification that the System Restore is complete. Now, you can run the application again to see if the error is fixed.
Note: If System Restore was not set up earlier or you’ve never backed up your PC before then this method might not apply to you.
9. Update Windows
D3D9.DLL missing issues have been reported by several windows users to disappear by upgrading to the latest edition of Windows.
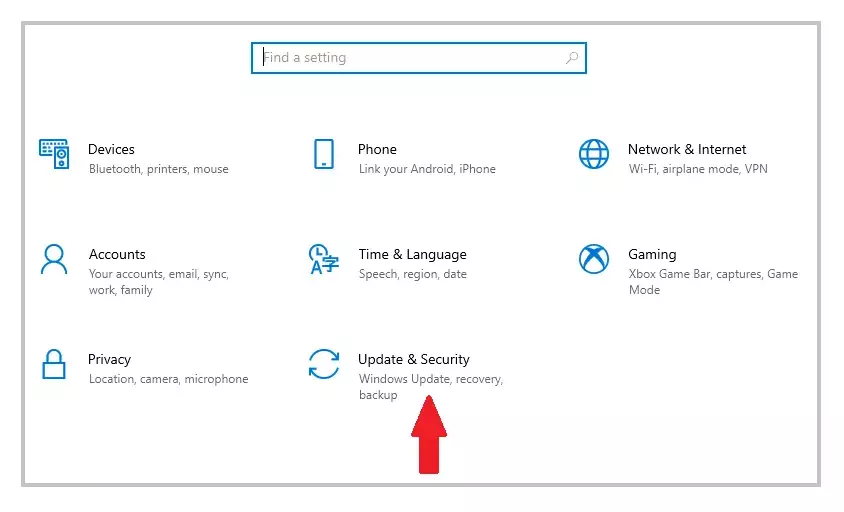
Step 1: Go to settings by selecting Start > Settings or using Windows + I shortcut
Step 2: Open the ‘Update and security’ option.
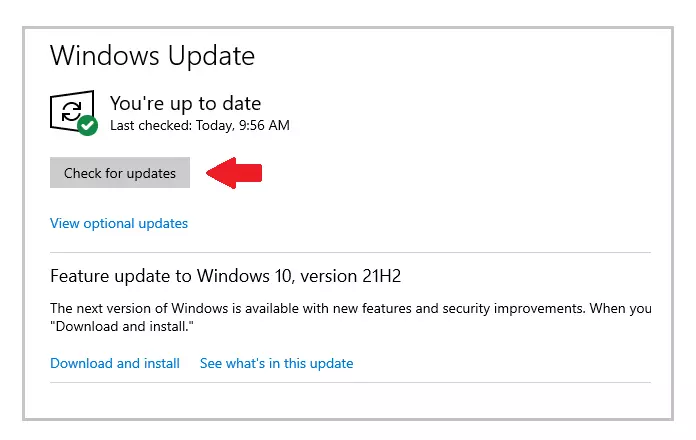
Step 3: See if there are any new updates by clicking on ‘Check for updates.’
Step 4: If a newer version is discovered, then the windows update will download and install to the latest version.
Step 5: After installing the newest version, run the program again to check if you face the D3D9.DLL was not found error.
Following these steps should have definitely helped you to fix the missing D3D9.DLL error.
by
·
Published
· Updated
D3D9.dll Error
d3d9.dll is a file that relates to the DirectX DLL and is designed to help support the DirectX9 utility. The file provides utilities and supports the functionality of DirectX when you use Windows Multimedia components and when accessing similar files and applications like games. Since d3d9.dll is classified as a non-system process, it comes from software that was originally installed into the system. In some cases, files or processes related to it may suffer fragmentation and can even be damaged, which results in you experiencing errors. When the computer experiences such a problem, one of the following messages is displayed:
- “The file d3d9.dll is missing”
- “D3d9.DLL Not Found”
- “File d3d9.dll not found”
- “D3d9.dll not found. Reinstalling might help fix this.”
What causes the d3d9.dll Error?
There are several issues that contribute to the error in the d2d9.dll file. One of these includes problems or errors within the Microsoft DirectX program. It’s important to note that the file is used for a series of programs that use the DirectX software. Thus, when these programs are used the d3d9.dll file is also used. In some cases extreme use of the file can corrupt or damage it. Further, these programs are not entirely immune from infections and other damage, thus they can malfunction and this will affect the file too. There are several ways to address this issue. It’s strictly recommended you adhere to the following procedures.
How to Fix the D3D9.dll Error on Your PC
Step 1 – Update DirectX
- Click Here To Download DirectX
One way to solve the error is to update Microsoft DirectX. The application was designed to help Windows-based computers in properly running multimedia elements. These elements include: video, full-colour graphics, rich audio and even 3D. DirectX requires many performance and security updates to continually function as it’s supposed to. Further, updates are necessary to make sure that the platform has all the new features.
By updating DirectX, you will also overwrite existing files, thereby providing the computer with new files and settings to access. To update DirectX, go to Microsoft website and find the available upgrade or download for it. There are two ways to get the update, either you click Open or Run to process the upgrade from its current location, or you can instead copy and then download the upgrade onto the computer. By clicking save and opening it, the installation will automatically proceed. Make sure to follow instructions accordingly.
Step 2 – Manually Replace the D3D9.dll File on your PC
If updating the platform does not work then manually replacing the file might be the best solution. To do this, follow these steps:
1) Download d3d9.zip from our server
2) Unzip the d3d9.dll file onto your computer’s hard drive
3) Browse to c:\Windows\System32
4) Locate the current d3d9.dll on your system
5) Rename the current d3d9.dll to d3d9BACKUP.dll
6) Copy & paste the new d3d9.dll into C:\Windows\System32
7) Click Start > Run (Or search”run” on Vista & Win7)
8 ) Type “cmd” in the box that appears
9) Type “regsvr32 d3d9.dll” on the black screen
10) Press enter
Step 3 – Clean Out the Registry of Windows
- Download This Registry Cleaner
To make sure that problems won’t persist, the computer registry should be cleaned. Registry problems are very often directly linked to d3d9.dll errors. To do this easily, download a registry cleaner application and then install it. Instructions are provided on how to use it.
Tested and trusted solutions to get back this vital DLL file
by Ola-Hassan Bolaji
A Computer Engineering graduate, he has spent most of his life reading and writing about computers. He finds joy in simplifying complex topics into simple solutions for PC… read more
Updated on
- If you are dealing with the D3D9.dll is missing error, it might be due to an outdated DirectX version.
- You can solve this problem easily by repairing some corrupt system files.
- Another excellent solution is to uninstall and reinstall the faulty application.
XINSTALL BY CLICKING THE DOWNLOAD
FILE
D3d9.dll is an integral DLL file used by Windows PC to run graphics-intensive programs. However, an important file can sometimes misbehave, as some users complain of a d3d9.dll missing error.
While this error can be caused by a series of factors like corrupt files and a faulty app, it is not the most difficult to fix, as we will show in this guide.
What is d3d9 DLL?
D3d9.dll is one of the many files that make up Microsoft DirectX. DirectX is an important software used by many games and advanced graphics software on Windows PC.
Hence, if d3d9.dll or any other DirectX DLL file is missing on your PC, it will affect most of these Windows-based programs.
How do I fix the d3d9.dll missing error?
1. Use a dedicated DLL fixer
While the d3d9.dll missing error can be frustrating, it is not the end of the world because the file can be restored. Restoring it doesn’t necessarily have to involve downloading or copying the file.
How we test, review and rate?
We have worked for the past 6 months on building a new review system on how we produce content. Using it, we have subsequently redone most of our articles to provide actual hands-on expertise on the guides we made.
For more details you can read how we test, review, and rate at WindowsReport.
Instead, you should consider using a top-notch DLL fixer that can restore the d3d9.dll file automatically. And with this being a system DLL file, you know this tool will 100% restore it.
2. Install the latest version of DirectX
- Visit the official website to download the latest version of DirectX.
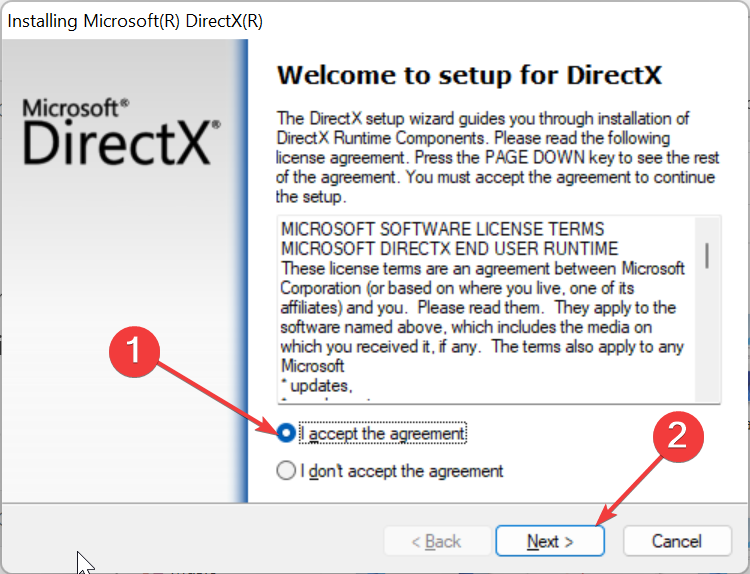
- Double-click the downloaded file to run it and accept the license terms.
- Finally, follow the onscreen instructions to complete the process.
Since the d3d9.dll file is part of DirectX, installing the latest version of the software should help restore it if it is really missing on your PC.
3. Reinstall the faulty program
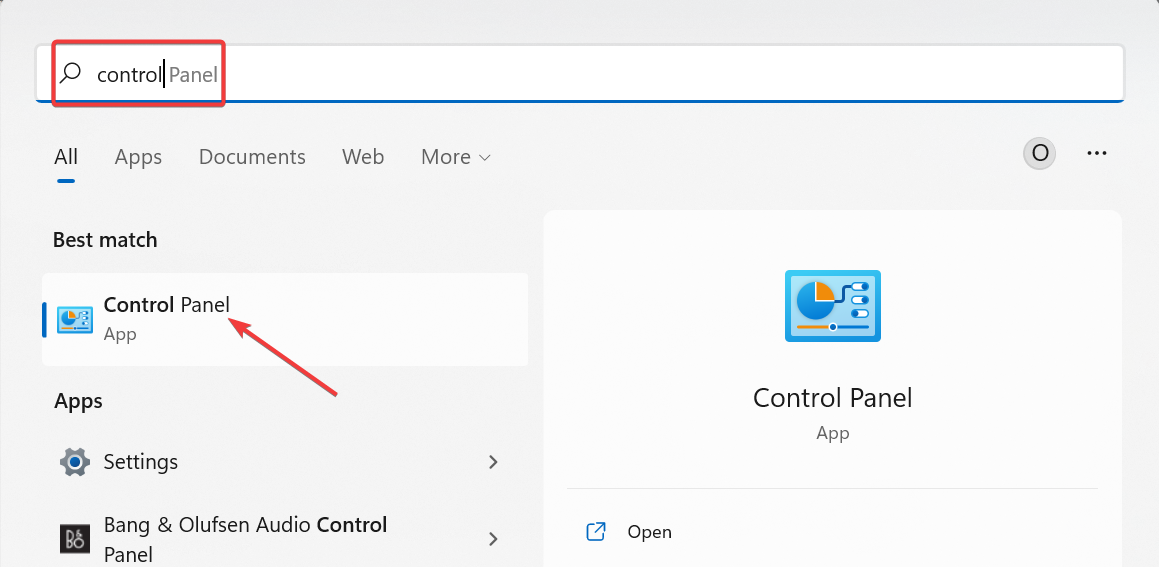
- Press the Windows key + S, type control, and select Control Panel.
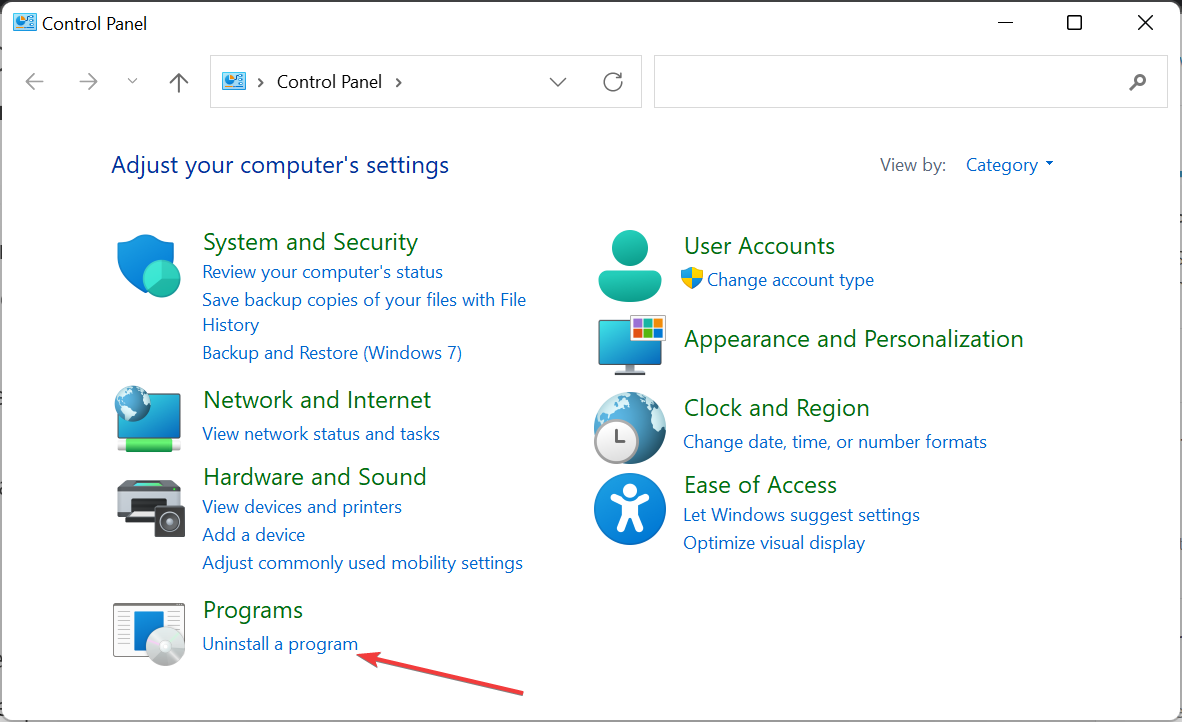
- Now, click Uninstall a program under Programs.
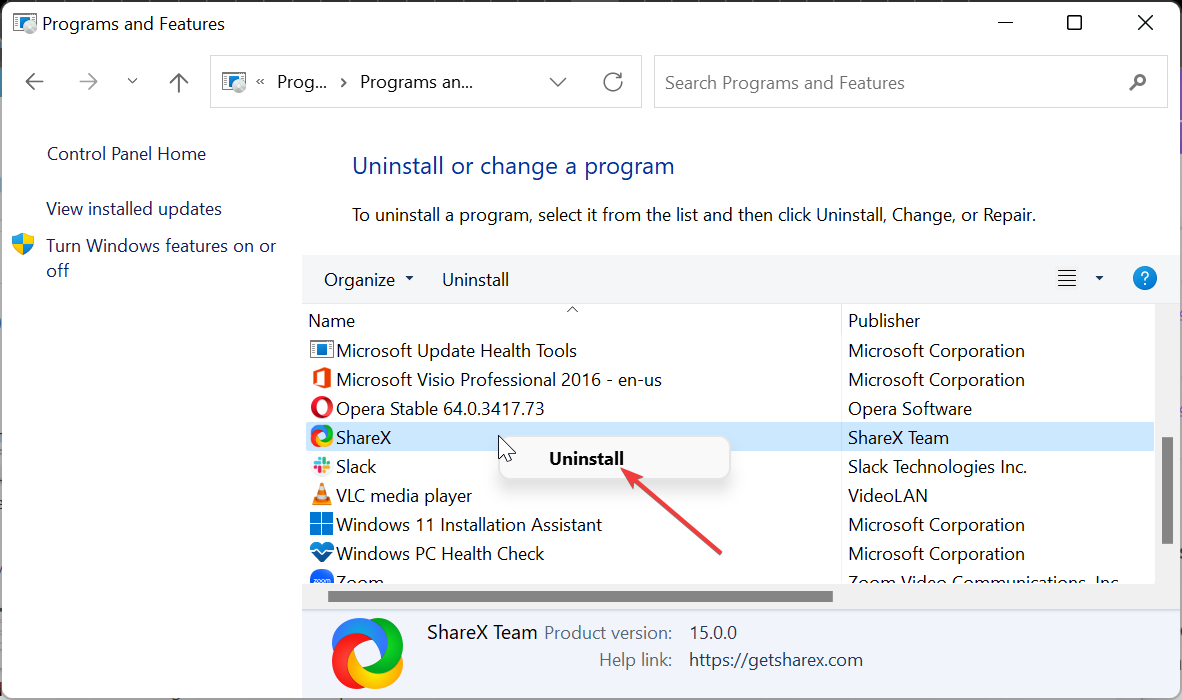
- Next, right-click the faulty app and choose Uninstall.
- Finally, go to the official website to reinstall the program or use the original installation disk.
Sometimes, the app giving the d3d9.dll error might be faulty, leading to the error message. In this case, you need to uninstall the app and reinstall it from official sources.
- Fix: Set Time Zone Automatically Defaults to Wrong Time Zone
- 0X8007013 Install Error: How to Quickly Fix it
4. Run an SFC scan
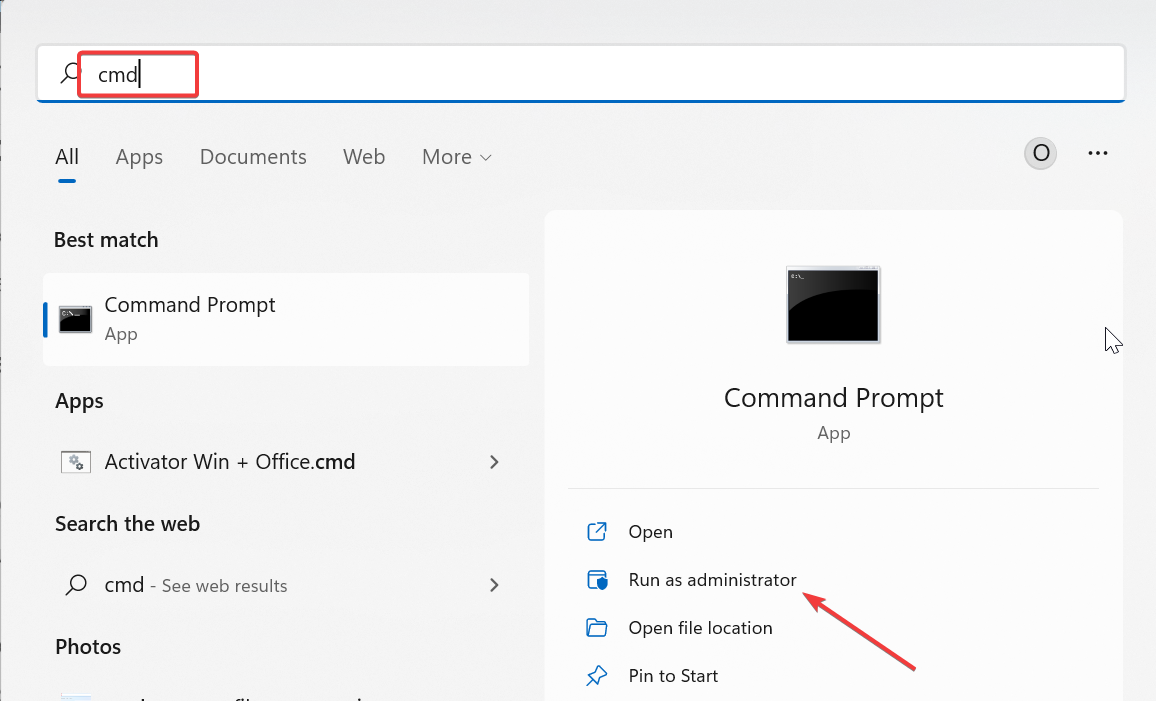
- Press the Windows key, type cmd, and select Run as administrator under Command Prompt.
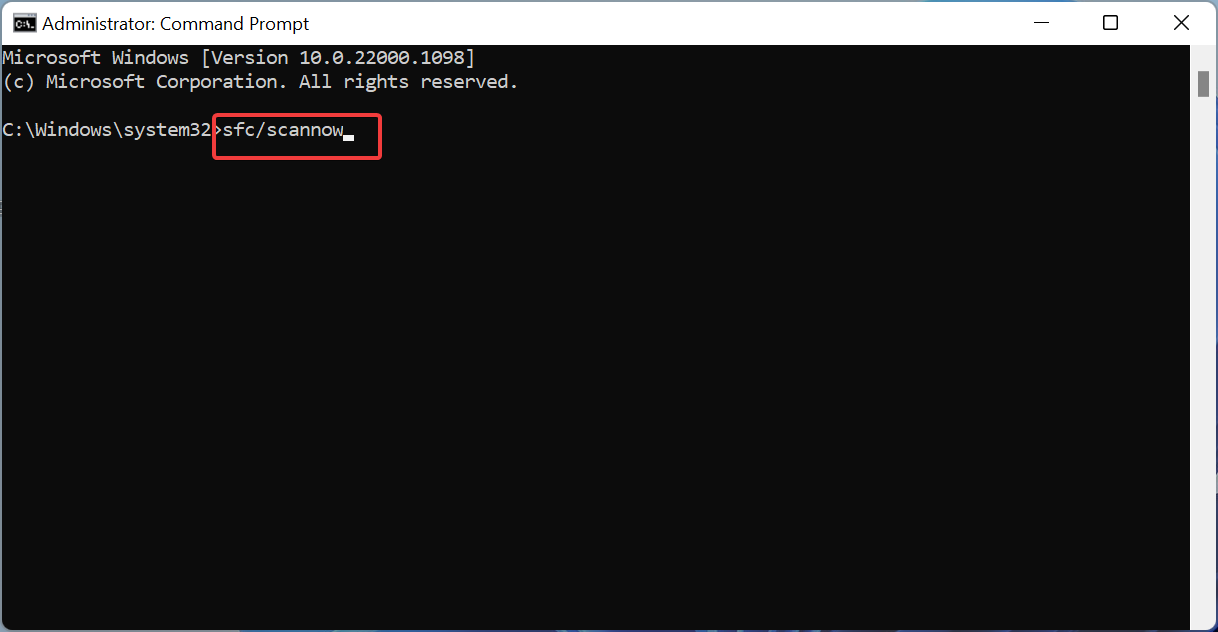
- Type the command below and hit Enter:
sfc /scannow - Finally, wait for the command to finish running and restart your PC.
Sometimes, the d3d9.dll can be due to broken or missing system files. Restoring these files should help you get past the error message.
5. Perform a system restore
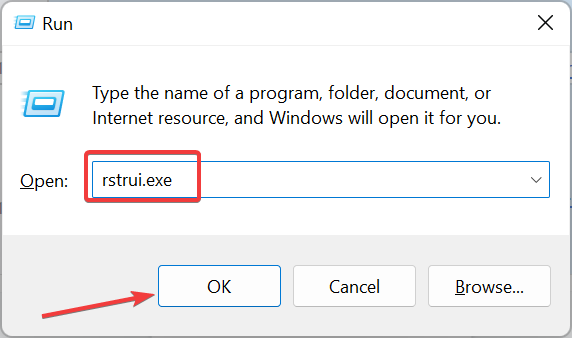
- Press the Windows key + R, type rstrui.exe, and click OK.
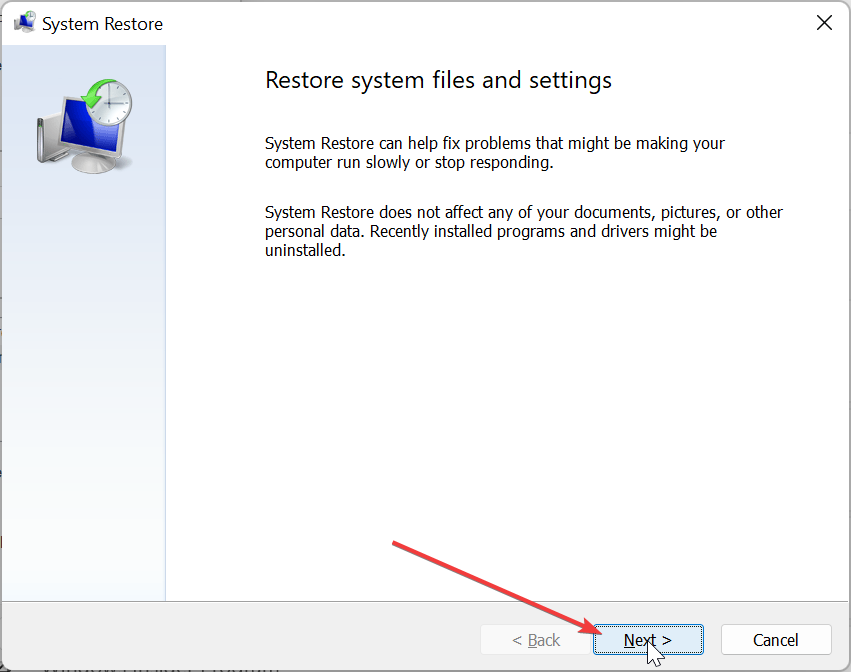
- Click the Next button on the next page.
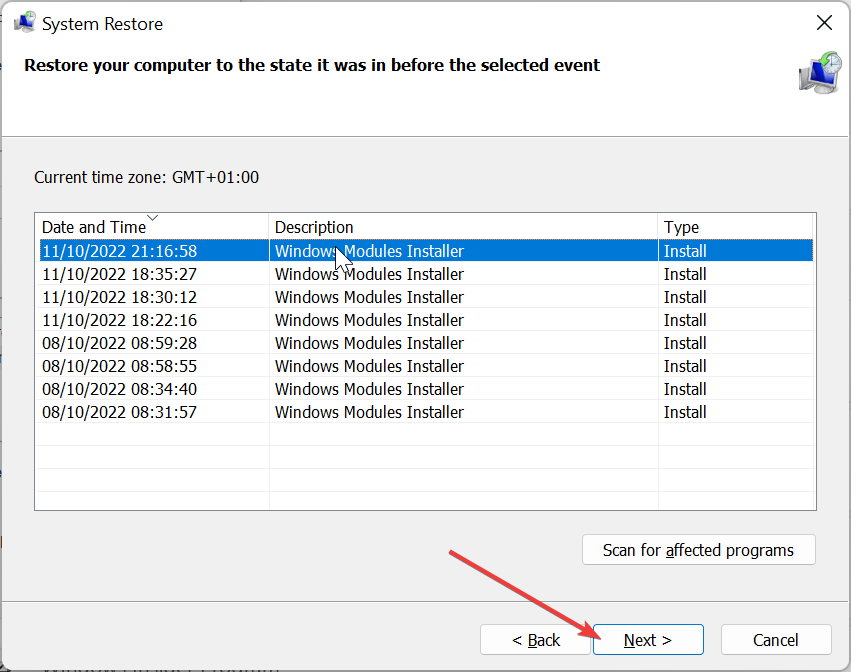
- Now, choose a restore point and click Next.
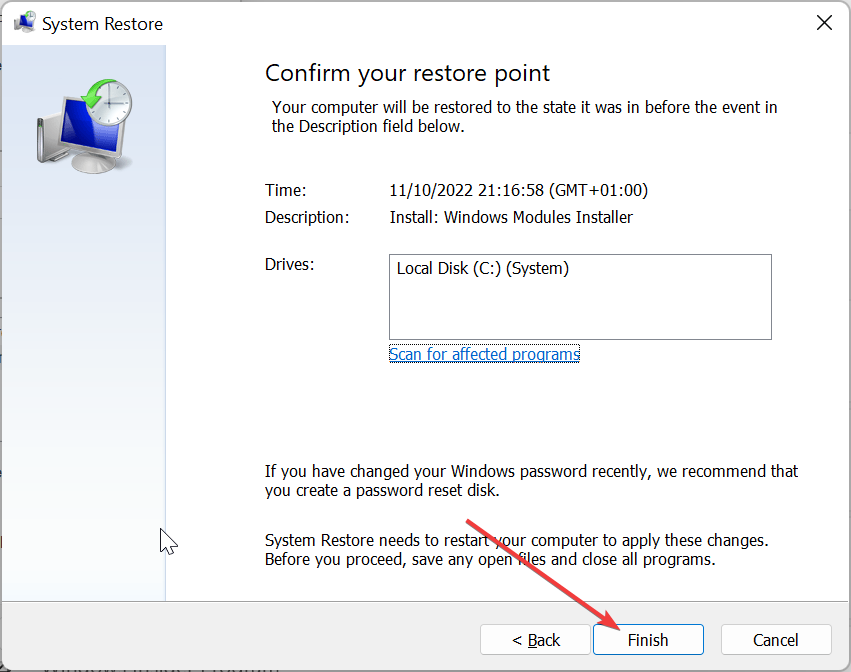
- Finally, click the Finish button.
At times, you might face this d3d9.dll issue because of recent changes to your PC. Performing a system restore to a point when everything was working well should do the trick.
6. Download from a third-party website
- Visit a trusted third-party website like DLL files.com.
- Click Download.
- Now, unzip the downloaded file and move the DLL file to the path below on a 32-bit PC:
C:\Windows\System32 - If you use a 64-bit PC, move it to the path below instead:
C:\Windows\SysWOW64 - Finally, restart your PC.
If none of the solutions above helped you restore the d3d9.dll file, you might need to download it from a third-party website. This is the last resort, but you can still get some safe websites out there.
Also, ensure you scan any file you download to ensure its safety.
The d3d9.dll missing error can be frustrating, as it affects a lot of apps and software. Fortunately, it is an issue that can be easily fixed, provided you follow the steps in this guide.
In the same vein, if DLL files are missing on Windows 10, check our detailed guide to restore them.
Feel free to let us know the solution that helped you fix this issue in the comments below.
Direct X — пакет для Windows, отвечающий за обработку графики в играх и других мультимедийных приложениях. Он не входит в стандартный набор программ, его обычно устанавливают вместе с играми. Многие геймеры сталкивались с ошибкой, которая гласит, что отсутствует файл D3d9.dll. Он может быть изменён, удалён или заблокирован антивирусом. Обычно это происходит из-за установки какой-либо новой игры, которая меняет D3d9.dll на свою версию этой библиотеки. Также с такой ошибкой можно столкнуться, если у вас стоит старая версия DirectX.
Исправить сложившуюся ситуацию можно двумя способами:
- Переустановить, или обновить DirectX
- Скачать файл D3d9.dll
Ошибка D3d9.dll чаще всего встречается при запуске таких игр, как CS GO, GTA San Andreas и World of Tanks. Если она выскакивает только на одной определённой игре, а остальные работают нормально, то можно попробовать переустановить проблемную игру. Если это не решит проблему, то следует скачать DirectX. Найти его можно на официальном сайте Microsoft, где вам предложат последнюю версию пакета. Установка DirectX полностью обновит все библиотеки, связанные с ним. В большинстве случаев это решает проблему с ошибкой D3d9.dll, но не всегда.
Если после переустановки DirectX игра так и не запустилась, то можно самостоятельно скачать D3d9.dll для GTA San Andreas и многих других игр. Этот манёвр наверняка решит вопрос. Библиотеку D3d9.dll скачать для Windows 7/8/10 можно на нашем сайте. После этого обычно встаёт вопрос, куда кидать этот файл. Для 64-х разрядной версии Windows это папка C:\Windows\SysWOW64, а для 32-х битной — C:\Windows\System32. После помещения библиотеки в правильную папку, нужно произвести её регистрацию. Затем обязательно перезагрузите компьютер и попробуйте снова запустить проблемное приложение. Скорее всего, всё должно заработать.
Рекомендуем сначала скачать и установить/обновить драйвер DirectX. Ошибка должна исчезнуть сразу же после установки.
Как установить DLL файл вы можете прочитать на страницы, в которой максимально подробно описан данный процесс.
Исправляем ошибку: отсутствует файл d3d9.dll
Скачать файл d3d9.dll
Разработчик
Microsoft Windows
ОС
Windows XP, Vista,7,8,10
Разрядность
32/64bit
Кол-во скачиваний
66816- Рейтинг
Поделиться файлом
Смотрите другие DLL-файлы


