-
Главная -
Драйверы
-
Принтеры
-
Принтеры Microsoft
- Microsoft XPS Document Writer

-
Microsoft XPS Document Writer
Версия:
10.0.19041.1
(21 июн 2006)
Файл *.inf:
prnms008.inf
Windows Vista
,
7
,
8
,
8.1
,
10/11
В каталоге нет драйверов для Microsoft XPS Document Writer под Windows.
Скачайте DriverHub для автоматического подбора драйвера.
Драйверы для Microsoft XPS Document Writer собраны с официальных сайтов компаний-производителей и других проверенных источников.
Официальные пакеты драйверов помогут исправить ошибки и неполадки в работе Microsoft XPS Document Writer (принтеры).
Скачать последние версии драйверов на Microsoft XPS Document Writer для компьютеров и ноутбуков на Windows.
Версия: 1.3.10.2240 для Windows 7, 8, 10 и 11
Бесплатное ПО
В комплекте идет опциональное ПО
- Yandex Browser
- Opera Browser
- Avast Free Antivirus
- World of Tanks
- World of Warships
Microsoft XPS Document Writer Windows drivers were collected from official vendor’s websites and trusted sources. This software will let you to fix Microsoft XPS Document Writer or Microsoft XPS Document Writer errors and make your stuff work. Here you can download all latest versions of Microsoft XPS Document Writer drivers for Windows devices with Windows 11, 10, 8.1, 8, and 7 (32-bit/64-bit). You can download all drivers for free. We check all files and test them with antivirus software, so it’s 100% safe to download. Get the latest WHQL certified drivers that works well.
Microsoft XPS Document Writer Drivers: A Comprehensive Guide
The Microsoft XPS Document Writer drivers are software programs that enable communication between the operating system on your computer and devices. These drivers play a crucial role in ensuring optimal performance and stability of your PC.
Installing the Microsoft XPS Document Writer Drivers
To install the Microsoft XPS Document Writer drivers, follow these steps:
- Visit the official website of the developer and navigate to the Drivers section.
- Use the search bar or select your device model from the list.
- Choose your operating system and click on «Search.»
- Click on the «Download» button next to the latest version of the drivers compatible with your system.
- Once downloaded, double-click on the installer file and follow the on-screen instructions to complete the installation process.
Updating the Microsoft XPS Document Writer Drivers
To update the Microsoft XPS Document Writer drivers, you can follow these steps:
- Open the Device Manager on your computer.
- Expand the category and locate your Microsoft XPS Document Writer driver.
- Right-click on the driver and select «Update Driver.»
- Choose the option to search for updated driver software automatically.
- If an update is available, follow the prompts to download and install it.
Reinstalling the Microsoft XPS Document Writer Drivers
If you need to reinstall the Microsoft XPS Document Writer drivers for any reason, here’s what you can do:
- Open the Device Manager on your computer.
- Expand the necessary category and locate your Microsoft XPS Document Writer driver.
- Right-click on the driver and select «Uninstall device.»
- Follow the prompts to complete the uninstallation process.
- Visit the official developer website and download the latest version of the driver for your needs.
- Run the installer and follow the instructions to complete the installation process.
Rolling Back or Downgrading the Microsoft XPS Document Writer Drivers
If you encounter any issues with the latest version of the Microsoft XPS Document Writer drivers, you can roll back or downgrade to a previous version by following these steps:
- Open the Device Manager on your computer.
- Expand the necessary category and locate your Microsoft XPS Document Writer driver.
- Right-click on the driver and select «Properties.»
- Go to the «Driver» tab and click on «Roll Back Driver.»
- Follow the prompts to complete the process.
Uninstalling the Microsoft XPS Document Writer Drivers
If you need to uninstall the Microsoft XPS Document Writer drivers completely, here’s what you can do:
- Open the Device Manager on your computer.
- Expand the necessary category and locate your Microsoft XPS Document Writer driver.
- Right-click on the driver and select «Uninstall device.»
- Follow the prompts to complete the uninstallation process.
- Restart your computer.
It is essential always to have the latest version of the Microsoft XPS Document Writer drivers installed for optimal performance and stability.
When attempting to download HP Smart, the first step is to ensure that your device meets the operating system requirements for the application. After confirming that you meet these requirements, then you should access the official download webpage on either your mobile device or computer. There, you will be able to download and install HP Smart. Once installed, open up the application and follow any further instructions.
If you are experiencing problems with your Pantum M6550NW printer, be sure to check the manufacturer’s website for troubleshooting and support options. Additionally, you should make sure that the printer is up-to-date with the latest firmware version. Troubleshooting steps such as restarting both devices (printer & PC/Laptop) or checking cables can help in many scenarios too.
If you are having issues with the Pantum M6550nw driver, please go to https://www.pantum.com/download and select your printer model from the drop-down menu to download and install the correct driver for your system.
Troubleshooting Microsoft Issues can be a time-consuming and complicated process. The goal of this guide is to provide a step-by-step approach to troubleshoot any issues with Microsoft products. We’ll start by providing general advice for diagnosing the problem and then review troubleshooting techniques specific to different types of Microsoft services, such as Windows, Office, or Azure services. With this comprehensive roadmap in hand, you should find yourself better equipped to identify and resolve even complex issues quickly.
Realtek can cause a range of issues that can be difficult to troubleshoot without the right expertise. This comprehensive guide covers everything you need to know for troubleshooting Realtek problems so that you can get back on track quickly and easily.
software that may be blocking TeamViewer. Many firewalls and antivirus programs will block the connection unless you explicitly allow it.
Driver packs are collections of drivers that can be used to update outdated or missing device drivers. If you are having trouble with driver pack, the best thing you can do is use a trusted and reliable driver updater tool to automatically download and install the correct version of the required drivers for your PC. This will ensure all your devices are running on their latest available software.
If you are looking to download the driver for your Canon Pixma MG2500 printer, you can do so from the official Canon website. Simply go to their online support page and search for the model number of your printer. Once selected, click on ‘Drivers & Downloads’ tab and choose your operating system to get access to a list of all available downloads related to that particular model.
If you’re having issues with your Epson L4150 Printer software, try updating the software by downloading and installing the latest version from Epson’s website. You can also refer to their troubleshooting guide for more help on resolving any issues.
KMS Pico is a powerful tool that can be used to activate Windows 10. It works by emulating the Microsoft KMS server on your computer, allowing you to bypass activation processes and activate your copy of Windows for free. To fix this user query, simply download the latest version of KMS Pico from a trusted source and follow the installation instructions when prompted.
Основная задача драйвера Microsoft XPS Document Writer заключается в том, чтобы пользователи могли предварительно настраивать документ перед печатью. При помощи компонента, вы сможете предоставлять или запрещать доступ другим пользователям для внесения корректировок.
Как работать с драйвером?
Скачайте и установите драйвер с нашего сайта. Теперь вам следует выбрать файл, который вы планируете напечатать с расширением «.Xps. В главном меню следует указать пункт «запись XPS». Чтобы напечатать копию, выберите в главном окне параметр – печать. Во время сохранения документа следует указать расширение — .Xps. После того, как создан документ в соответствующем формате, пользователи могут создавать копии, отправлять на печать, запрещать, или предоставлять доступ к просмотру и изменениям другим пользователям. Выделим основные особенности работы с драйвером.
- документ можно открывать в браузере для предварительного просмотра;
- возможность отправить документ через интернет для печати;
- в главном меню следует выбрать «запись в формате XPS»;
- для повышения безопасности можно создать цифровую копию документа;
- простая и быстрая установка на любую ОС.
Скачать последнюю версию драйвера вы может прямо сейчас с нашего сайта без вирусов и рекламы.
Windows 10, Windows 7, Windows 8, Windows Server, Windows Vista
- 27.09.2021
- 5 985
- 4
- 15
- 14
- 1
- Содержание статьи
- Установка принтера Microsoft XPS Document Writer
- Комментарии к статье ( 4 шт )
- Добавить комментарий
Microsoft XPS Document Writer — наименование виртуального принтера, который по умолчанию присутствует в операционных системах Windows, и предназначен для печати в документы формата OXPS и XPS. В данной инструкции мы рассмотрим ситуацию, когда данный принтер отсутствует в системе (например, был случайно удален), и его нужно восстановить.
Установка принтера Microsoft XPS Document Writer
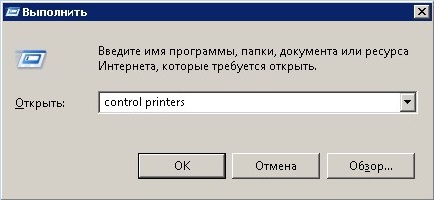
- Открываем «Устройства и принтеры» через Панель управления, или же, поочередно зажав клавиши Win + R, и набрав там команду
control printers, после чего нажать «ОК».

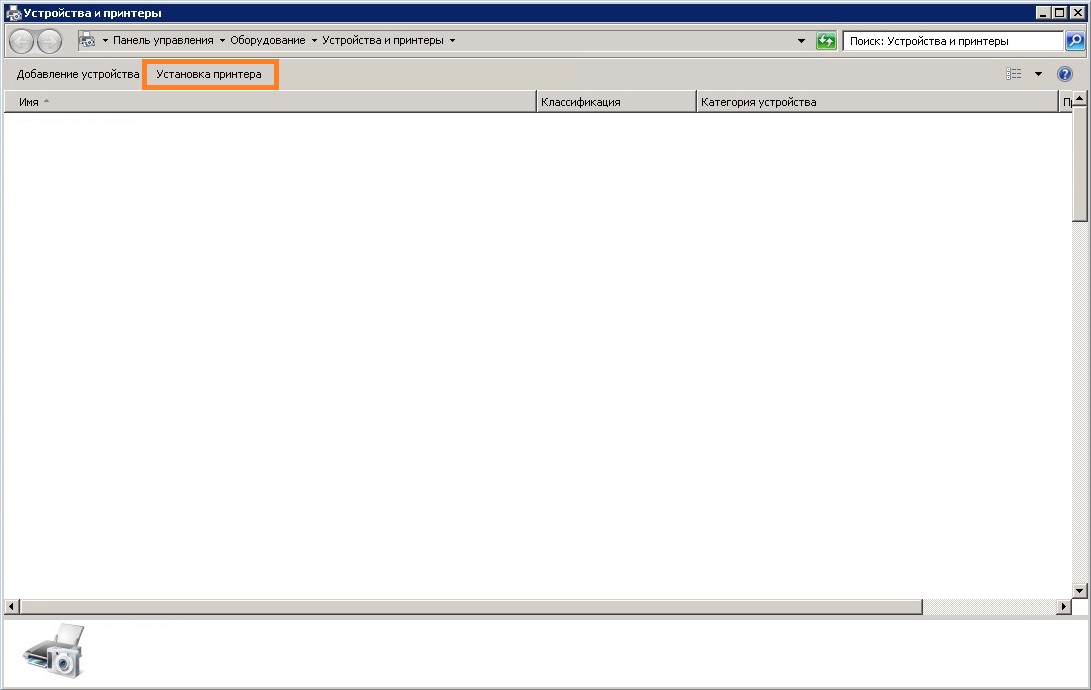
- В окне «Устройства и принтеры» нажимаем на кнопку «Установка принтера».

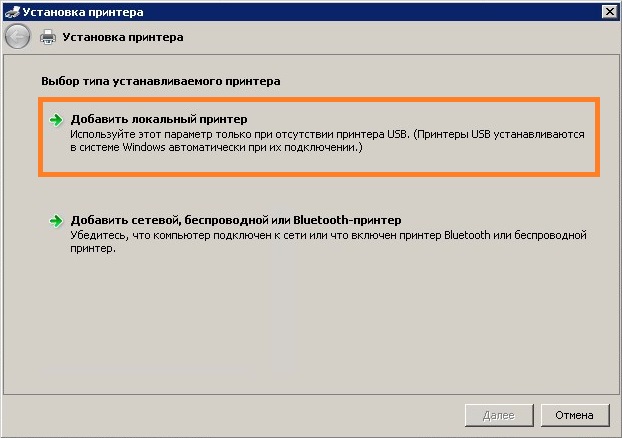
- В появившемся диалоговом окне с установкой принтера, выбираем пункт «Добавить локальный принтер».

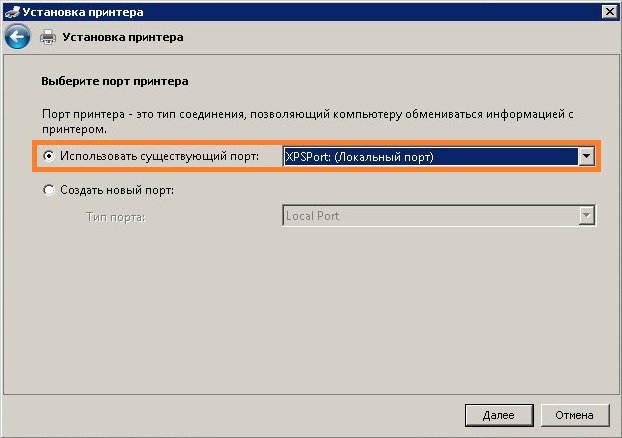
- В выпадающем списке у пункта «Использовать существующий порт», находим XPSPort, и нажимаем «Далее».
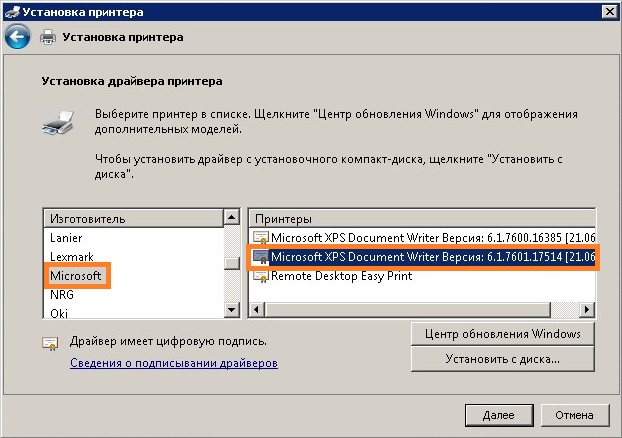
- Откроется окно с установкой драйвера для принтера. В списке «Изготовитель» выбираем «Microsoft», а в списке «Принтеры» — «Microsoft XPS Document Writer». Если в втором списке присутствует несколько версий «Microsoft XPS Document Writer», выбираем самую последнюю. Затем, нажимаем «Далее».
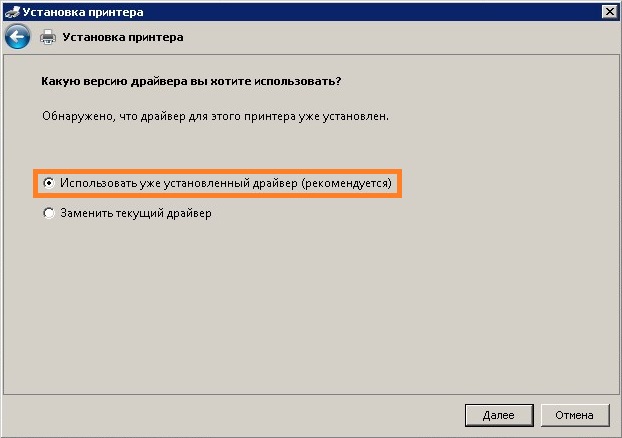
- Отмечаем пункт «Использовать уже установленный драйвер (рекомендуется)», и нажимаем «Далее».
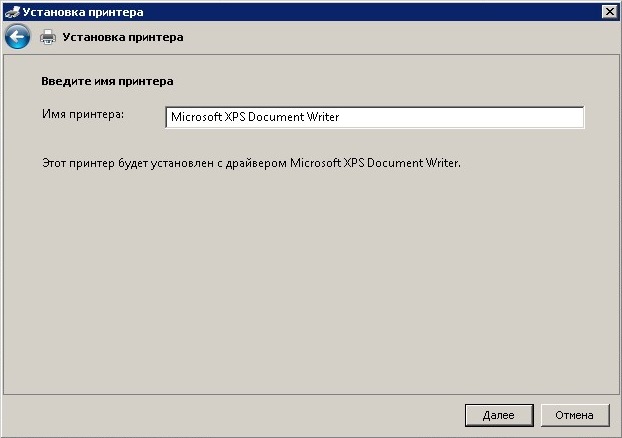
- В следующем окне можно будет установить желаемое имя создаваемого принтера, или оставить его по умолчанию. Для продолжения, нужно нажать «Далее».
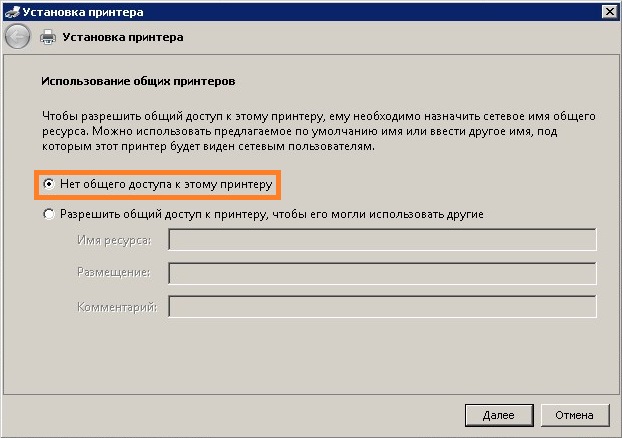
- После нажатия на кнопку «Далее» произойдет установка принтера в систему, после чего будет предложено предоставить общий доступ к принтеру. Выбираем «Нет общего доступа к этому принтеру», и нажимаем «Далее».
- На последнем шаге, все что потребуется — нажать кнопку «Готово». На этом установка виртуального принтера Microsoft XPS Document Writer будет завершена.