
Не выключается и не перезагружается по команде или очень долго выключается компьютер или ноутбук под управлением Windows, при этом вы видите примерно это:
“Task Host Window. Сервер задач останавливает фоновые задачи.
(\Microsoft\Windows\International\Synchronize Language Settings )“

Решение проблемы, во всех версиях ОС от Microsoft этот способ будет одинаковым:
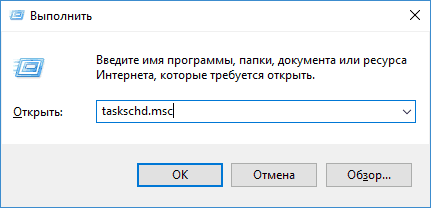
- Нажмите клавиши Win+R на клавиатуре (где Win — клавиша с эмблемой ОС), откроется диалоговое окно «Выполнить».
- Введите в него taskschd.msc и нажмите Enter — запустится планировщик заданий.
- В планировщике заданий по пути: Библиотека планировщика задач Microsoft->Windows->International->Synchronize Language Settings

- Нажмите правой клавшей мыши на задании Synchronize Language Settings – Завершить.

-
Нажмите правой клавшей мыши на задании Synchronize Language Settings – Отключить.

- Перезагрузите Windows – после перезагрузки больше ошибка не должна вас беспокоить.

Для быстрого выключения можете воспользоваться готовым
*.bat-файлом Synchronize Language Settings OFF (его желательно запускать от имени Администратора)
Просмотров страницы: 1 891
We just made a change so that those 2 services are left unchanged (CDPSvc, CDPUserSvc), in all folders. Their uses are unclear in many virtual desktop cases, and CDPUserSvc will spin up a «per-user» instance of Svchost.exe. That could lead to a number of services that may not be potentially needed, but better to have that than a problem at logoff.
If you have existing machines, and you don’t want to reimage them, if you have some kind of central management like AD GPO, or maybe Intune, you can change the service start values with GPO. That one isn’t difficult, especially if your VDI devices are in a common OU.
reg add HKLM\SYSTEM\CurrentControlSet\Services\CDPSvc /t REG_DWORD /v Start /d 2
reg add HKLM\SYSTEM\CurrentControlSet\Services\CDPUserSvc /t REG_DWORD /v Start /d 2
Note that in my test lab, I was able to stop the hanging task at logoff by changing ONLY ‘CDPUserSvc’ back to default start value (2). But I believe those are related services, so best to put them both back to default.
How to disable synchronization of Language preferences in Windows 10:
- Click on Windows Start button and select Settings.
- Go to Accounts -> Sync your settings -> Individual sync settings.
- Disable Language preferences pin.
- What does sync your settings mean?
- Where are my sync settings?
- How do I turn on sync settings in Windows 10?
- How do I change Windows language to English?
- Should Auto Sync be on or off?
- Is syncing safe?
- How do you sync Windows settings?
- Why is my email not syncing?
- How do I turn on auto sync?
- Why can’t I sync my settings in Windows 10?
- Should I sync my devices?
- How do I enable sync on Chrome?
What does sync your settings mean?
When Sync settings is turned on, Windows syncs the settings you choose across all your Windows 10 devices that you’ve signed in to with your Microsoft account. Note. You can also sync your settings for a work or school account if it’s allowed by your organization.
Where are my sync settings?
Which apps sync
- Open your phone’s Settings app.
- Tap Accounts. If you don’t see «Accounts,» tap Users & accounts.
- If you have more than one account on your device, tap the one you want.
- Tap Account sync.
- See a list of your Google apps and when they last synced.
How do I turn on sync settings in Windows 10?
To enable the device sync:
- Click the Start button.
- Click the Settings icon.
- Click Accounts.
- Click Sign in with a Microsoft account and enter your account information. Move to step 5 if you don’t see that option.
- Click Sync your settings.
- Turn on the switch next to Sync Settings.
How do I change Windows language to English?
Select Start > Settings > Time & Language > Language. Choose a language from the Windows display language menu.
Should Auto Sync be on or off?
Turning off auto syncing for Google’s services will save some battery life. In the background, Google’s services talk and sync up to the cloud.
Is syncing safe?
If you’re familiar with the cloud you’ll be right at home with Sync, and if you’re just getting started you’ll be protecting your data in no time. Sync makes encryption easy, which means that your data is safe, secure and 100% private, simply by using Sync.
How do you sync Windows settings?
Syncing settings: To sync your Windows settings, on your primary Windows 10 computer search for Settings, and from the Settings window select Accounts, Sync your settings to display the dialog box pictured at right, and then set all of the items you wish to sync to the On position.
Why is my email not syncing?
Clear the Cache and Data for Your Email App
Like all apps on your device, your email app saves data and cache files on your phone. While these files don’t normally cause any issues, it’s worth clearing them to see if that fixes the email sync issue on your Android device. … Tap on Clear Cache to remove cached data.
How do I turn on auto sync?
Go to “Settings” > “Users and accounts“. Swipe down and toggle on “Automatically sync data“. The following applies whether you are using Oreo or another Android version. If there are certain things of an app you can to unSync, you can.
Why can’t I sync my settings in Windows 10?
The main cause of sync problems for most people are wrong Feedback and diagnostics settings. Once you change Feedback and Diagnostics settings, you should be able to sync your settings normally again. Changing Feedback and Diagnostics settings should solve the sync problem.
Should I sync my devices?
Why Is Syncing Your Android Device Important? If you consider your data as important syncing should be important for you. … Syncing also provides you a platform to backup your data to a place where only you have to access them. Hence, you will be getting a backup and security as well.
How do I enable sync on Chrome?
Sign in and turn on sync
- On your computer, open Chrome.
- At the top right, click Profile .
- Sign in to your Google Account.
- If you want to sync your info across all your devices, click Turn on sync. Turn on.
You can set your system language during a clean installation or you can decide to change it afterward. If you need to change the language settings after installation, you can do it from the Settings menu. There are a few things you’ll need to consider before you do this, however.
If you want to change the system language in Windows 11, here’s what you’ll need to do.
How to Stop Language Settings Syncing on Windows 11
If you have multiple systems, you might want to stop your language settings from syncing before you change them. Otherwise, your language settings may change across all of your Windows devices. If you have a local account, your settings won’t sync as you’re not signing in with a Microsoft account.
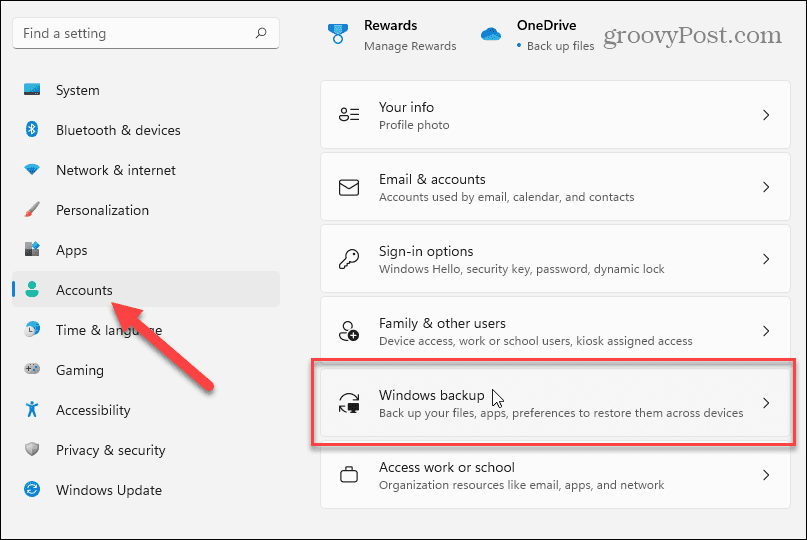
If you want the language settings to sync among your other devices, you can skip to the next section. To begin, press Start > Settings > Accounts, then press Windows Backup on the right.
Click to expand the Remember My Preferences section on the next screen, then uncheck the “Language Preferences” option.
When you’re done, close the Settings menu. Your Windows PC should now be prevented from syncing your customized language settings to other Windows devices using the same Microsoft account.
If you’re ready to begin changing your language settings on Windows 11, you can do so from the Settings menu.
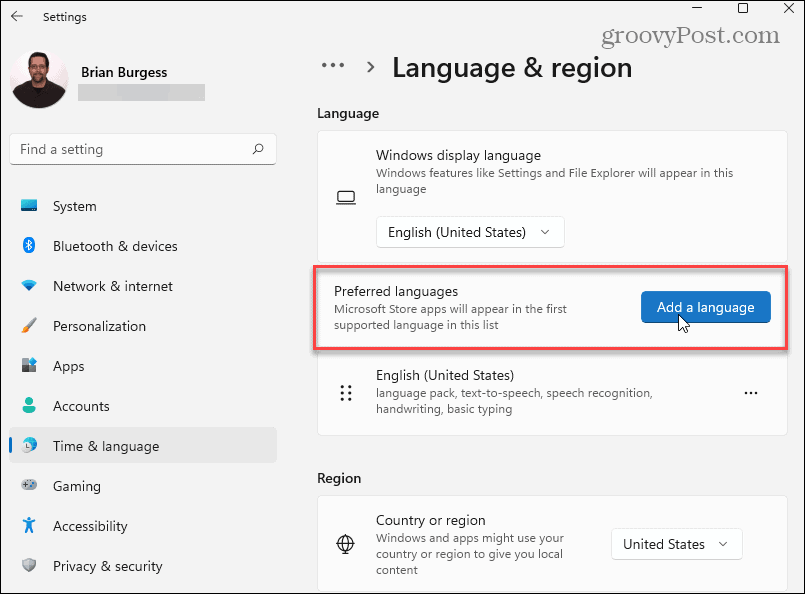
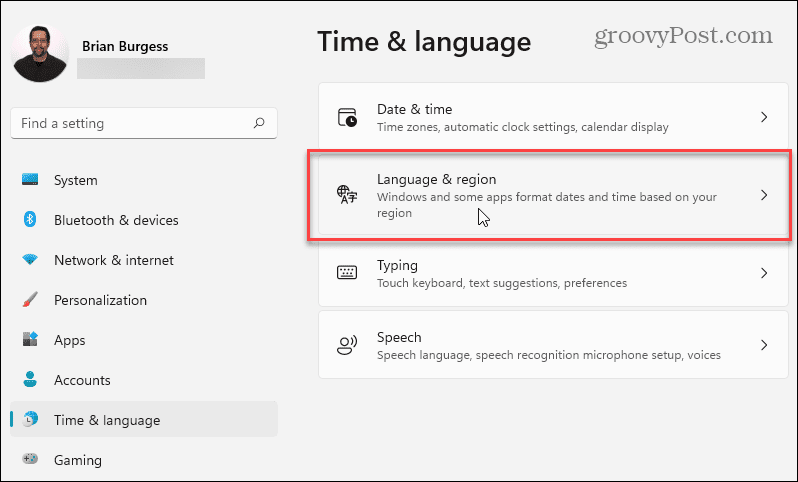
To access this, press Start and click Settings. In Settings, select Time & Language from the list on the left. From there, click Language & Region from the options on the right.
Next, click on the Add a Language button next to “Preferred Languages.”
Now, scroll through and find the language you want. To find a specific language quickly, search for it using the search field at the top.
Note: Not every language will support all Windows 11 input and display features. For example, Spanish (Mexico) supports Display language, Text-to-speech, Speech recognition, and Handwriting.
Other languages may support one or two input options only. Check the symbols next to each one to know which features they support.
When you’re ready to switch languages, click on the language you need, then click the Next button.
You’ll need to check or uncheck any available optional language features before you install your new language pack.
Under “Language Preferences,” check the “Set as my Windows display language” option. Click the Install button to begin the process.
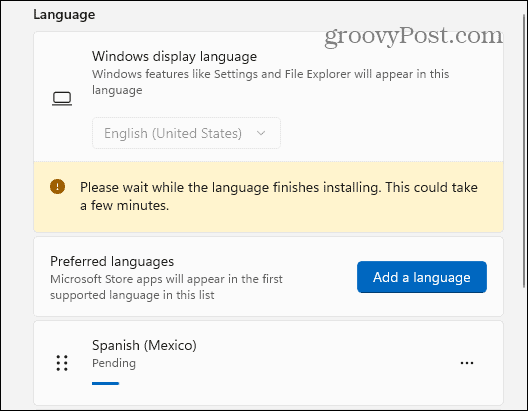
A progress bar will display while the language pack is installed—this can take several minutes to complete.
To complete the process, you’ll be asked to sign out. After signing back in, you’ll be able to start using the new language settings on Windows 11. The new language should be seen throughout most of the experience.
However, note that some labels will still be in English or a mix of both languages.
Change Regional Settings on Windows 11
If you’re in a different location, you can also configure regional settings (such as date formats) after changing the system language.
To do this, open Start > Settings > Time & Language, then click on Language & Region from the right side.
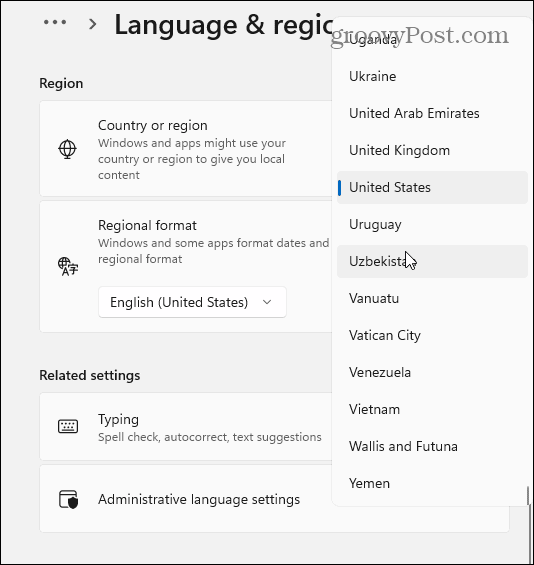
Next, under the “Region” section, click the dropdown menu and choose your country.
Use the “Regional Format” dropdown to set the region’s date and time formats.
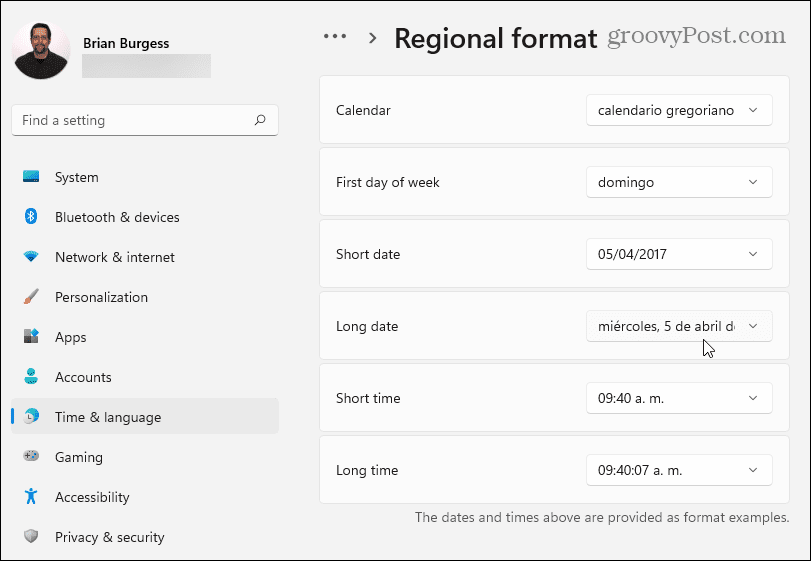
You can also click the Change Formats button to manually change your default calendar format, as well as customize the short date, the first day of the week, and time format settings.
Administrative Language Settings on Windows 11
If you change languages in Windows 11, you should see your new language appear across all apps that support it. If an app or system prompt doesn’t show your language (and you’re certain it supports it), you may need to change the administrative language settings.
This stops certain text prompts from being displayed if those prompts lack support for Unicode text encoding, which usually causes this issue.
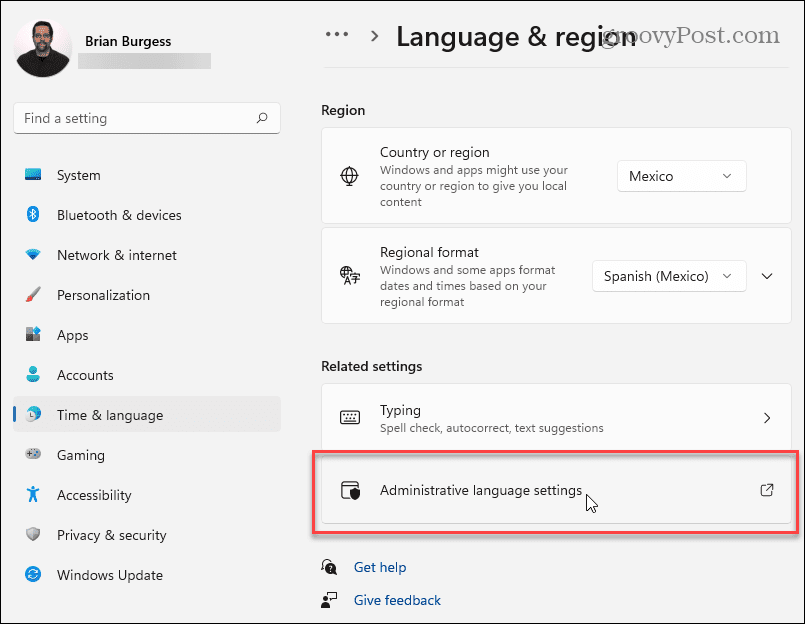
To change these settings, open the Settings app via Start. Press Language & Region on the left, then click Administrative Language Settings under the Related Settings section.
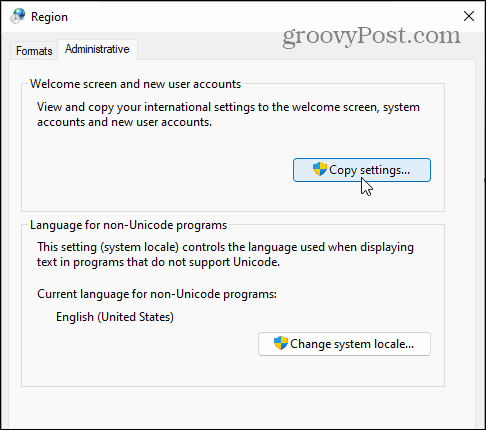
The Region window will open up to the Administrative tab. Under the “Language for non-Unicode Programs” section, click the Change System Locale button.
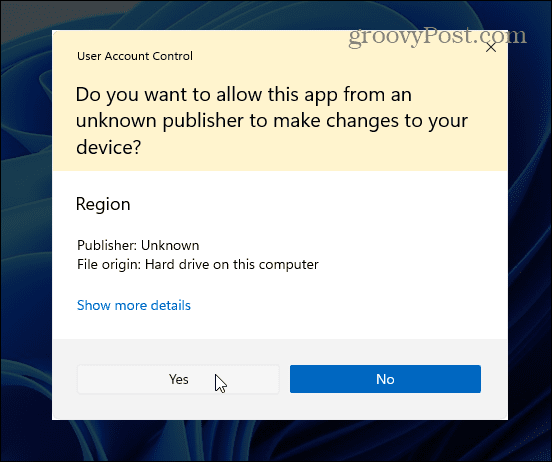
If the User Account Control message appears, click Yes to confirm.
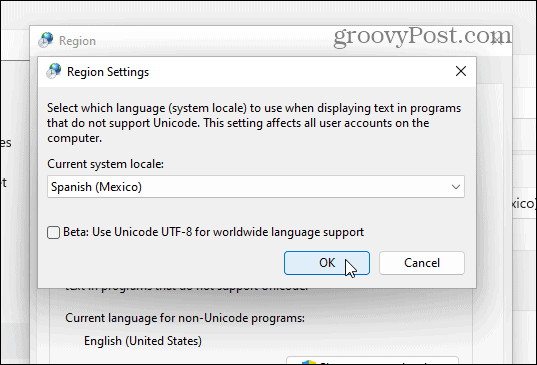
Next, select a system locale based on the new language that you set up and click OK.
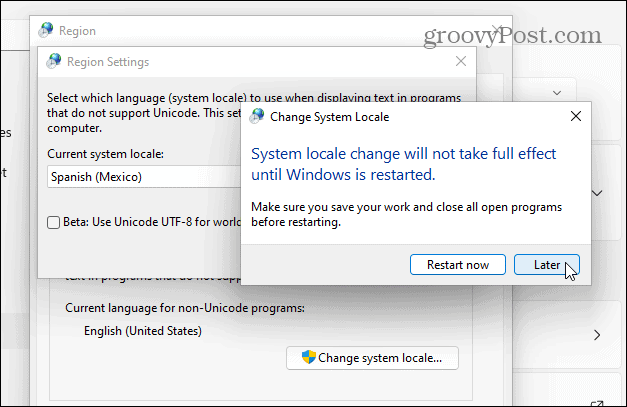
Windows will prompt you to restart your PC for the changes to go into effect. Press the Later button—you don’t want to restart just yet.
Next, click the Copy Settings button. This is visible in the Administrative tab in the Region window.
Click Yes to the UAC message if it appears again. In the Welcome Screen and New User Accounts Settings window, make sure to enable both the Welcome Screen and System Accounts and New User Accounts checkboxes.
Click OK to confirm, then close the Region window and restart your PC for the changes to go into effect.
How to Quickly Switch Between Languages on Windows 11
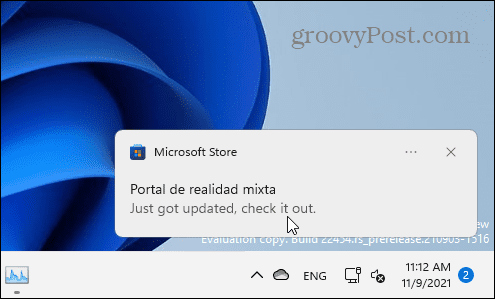
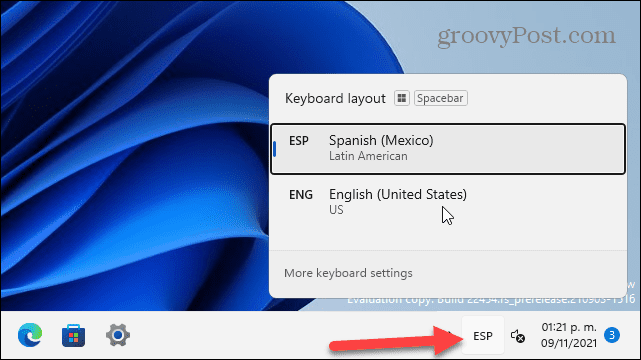
Once you’ve configured your language settings in Windows 11, you can switch between them on the fly. A new language icon will appear in the notification section on the taskbar.
To change languages quickly, click this icon and select the language you want to use. In the example below, you can switch between Spanish and English.
It’s also worth noting that you can change between languages from the sign-in screen by pressing the same icon in the bottom right.
Using Different Languages on Windows 11
The steps above should help you to quickly change languages in Windows 11, and there are plenty to choose from. Whether you need to change it for one member of your household or sync it among all of your PCs, the process is pretty straightforward.
You can customize Windows 11 in other ways. If you’re sick of the new Widgets feature in Windows 11, you can always remove it. If you’re having trouble getting used to the new Start position, you can always move it back to the left.
Comment
Name *
Email *
Δ
Save my name and email and send me emails as new comments are made to this post.


![]()
Добрый день! Через RDP на наш сервер проник вирус-шифровальщик, появился новый том А на диске, там 2 файла: bootsect.bak и scream.txt. В scream.txt содержание такое:
~~~ Scream V1.1~~~
>>> What happened?
We encrypted and stolen all of your files.
We use AES and ECC algorithms.
Nobody can recover your files without our decryption service.
>>> How to recover?
We are not a politically motivated group and we want nothing more than money.
If you pay, we will provide you with decryption software and destroy the stolen data.
>>> What guarantees?
You can send us an unimportant file less than 1 MG, We decrypt it as guarantee.
If we do not send you the decryption software or delete stolen data, no one will pay us in future so we will keep our promise.
>>> How to contact us?
Our email address: Scream_@tutanota.com
In case of no answer within 24 hours, contact to this email: De_Scream@tutanota.com
Write your personal ID in the subject of the email.
>>>>>>>>>>>>>>>>>>>>>>>>>>>>>>>>>>>>>>>>>>>>>>
>>>>> SCREAM 1.1 <<<<<
>>>>>>>>>>>>>>>>>>>>>>>>>>>>>>>>>>>>>>>>>>>>>>
>>> Warnings!
— Do not go to recovery companies, they are just middlemen who will make money off you and cheat you.
They secretly negotiate with us, buy decryption software and will sell it to you many times more expensive or they will simply scam you.
— Do not hesitate for a long time. The faster you pay, the lower the price.
— Do not delete or modify encrypted files, it will lead to problems with decryption of files.
Подскажите, пожалуйста, что делать?
Данных как-будто нет.
Заранее спасибо!