After 12 years on SqlServerBuilds.blogspot.com, it has been moved here to www.SqlServerVersions.com. The old address will be redirected automatically.
After SQL Server 2012, the primary ODBC driver for SQL Server has been developed and released as the Microsoft ODBC Driver for SQL Server. The Microsoft ODBC Driver for SQL Server is the driver that is updated with the most recent server features going forward.
How do I know what version/build I have? Look in the C:\Windows\System32 or C:\Windows\SysWOW64 folder for the file:
    msodbcsql18.dll, or
    msodbcsql17.dll, or
    msodbcsql13.dll, or
    msodbcsql11.dll
In the file properties, the Details tab and the Product version field.
Microsoft ODBC Driver for SQL Server build numbers:
| Build | File version | Description | Release date |
|---|---|---|---|
| 18.3.1.1 | 2018.183.1.1 | Microsoft ODBC Driver 18.3.1 for SQL Server Windows Latest Download x64 Installer
Download x86 Installer |
*new |
| 18.2.2.1 | 2018.182.2.1 | Microsoft ODBC Driver 18.2.2 for SQL Server Windows Download x64 Installer
Download x86 Installer |
*new |
| 18.2.1.1 | 2018.182.1.1 | Microsoft ODBC Driver 18.2.1 for SQL Server Windows Download x64 Installer
Download x86 Installer |
|
| 18.1.2.1 | 2018.181.2.1 | Microsoft ODBC Driver 18.1.2 for SQL Server Windows Download x64 Installer
Download x86 Installer |
|
| 18.1.1.1 | 2018.181.1.1 | Microsoft ODBC Driver 18.1.1 for SQL Server Windows Download x64 Installer
Download x86 Installer |
|
| 18.0.1.1 | 2018.180.1.1 | Microsoft ODBC Driver 18.0.1 for SQL Server Windows Download x64 Installer
Download x86 Installer |
|
| 17.10.4.1 | 2017.1710.4.1 | Microsoft ODBC Driver 17.10.4 for SQL Server Windows Download x64 Installer
Download x86 Installer |
*new |
| 17.10.3.1 | 2017.1710.3.1 | Microsoft ODBC Driver 17.10.3 for SQL Server Windows Download x64 Installer
Download x86 Installer |
|
| 17.10.2.1 | 2017.1710.2.1 | Microsoft ODBC Driver 17.10.2 for SQL Server Windows Download x64 Installer
Download x86 Installer |
|
| 17.10.1.1 | 2017.1710.1.1 | Microsoft ODBC Driver 17.10.1 for SQL Server Windows Download x64 Installer
Download x86 Installer |
|
| 17.9.1.1 | 2017.179.1.1 | Microsoft ODBC Driver 17.9.1 for SQL Server Windows Download x64 Installer
Download x86 Installer |
|
| 17.8.1.1 | 2017.178.1.1 | Microsoft ODBC Driver 17.8.1 for SQL Server Windows Download x64 Installer
Download x86 Installer |
|
| 17.7.2.1 | 2017.177.2.1 | Microsoft ODBC Driver 17.7.2 for SQL Server Windows Download x64 Installer
Download x86 Installer |
|
| 17.7.1.1 | 2017.177.1.1 | Microsoft ODBC Driver 17.7.1 for SQL Server Windows Download x64 Installer
Download x86 Installer |
|
| 17.6.1.1 | 2017.176.1.1 | Microsoft ODBC Driver 17.6.1 for SQL Server Windows Download x64 Installer
Download x86 Installer |
|
| 17.5.2.1 | 2017.175.2.1 | Microsoft ODBC Driver 17.5.2 for SQL Server Windows Download x64 Installer
Download x86 Installer |
|
| 17.5.1.1 | 2017.175.1.1 | Microsoft ODBC Driver 17.5.1 for SQL Server Windows Download x64 Installer
Download x86 Installer |
|
| 17.4.2.1 | 2017.174.2.1 | Microsoft ODBC Driver 17.4.2 for SQL Server Windows Download x64 Installer
Download x86 Installer |
|
| 17.4.1.1 | 2017.174.1.1 | Microsoft ODBC Driver 17.4.1 for SQL Server Windows Download x64 Installer
Download x86 Installer |
|
| 17.3.1.1 | 2017.173.1.1 | Microsoft ODBC Driver 17.3.1 for SQL Server Windows Download x64 Installer
Download x86 Installer |
|
| 17.3.0.1 | 2017.173.0.1 | Microsoft ODBC Driver 17.3.0 for SQL Server (Preview) Windows Preview Download x64 Installer
Download x86 Installer |
|
| 17.2.0.1 | 2017.172.0.1 | Microsoft ODBC Driver 17.2.0 for SQL Server Windows Download x64 Installer
Download x86 Installer |
|
| 17.1.0.1 | 2017.171.0.1 | Microsoft ODBC Driver 17.1.0 for SQL Server Windows Download x64 Installer
Download x86 Installer |
|
| 17.0.1.1 | 2017.170.1.1 | Microsoft ODBC Driver 17.0.1 for SQL Server Windows Download x64 Installer
Download x86 Installer |
|
| 13.0.4414.46 | 2015.131.4414.46 | Microsoft ODBC Driver 13.1 for SQL Server Windows Download x64 Installer
Download x86 Installer |
|
| 13.0.811.168 | 2015.130.811.168 | Microsoft ODBC Driver 13 for SQL Server Windows Download x64 Installer
Download x86 Installer |
|
| 12.0.5543.11 | 2014.120.5543.11 | Microsoft ODBC Driver 11 for SQL Server Windows Download x64 Installer
Download x86 Installer |
You can comment here. If you know of a Microsoft ODBC Driver for SQL Server version that we don’t have listed here, please use the comments.
I work on this site continuously and keep the information up to date. If it helps you, you can support me:
![]() Buy me a coffee
Buy me a coffee ![]() Support me in another way
Support me in another way
© 2007–2023 SqlServerVersions.com · Contact · Disclaimer · Privacy policy
Search code, repositories, users, issues, pull requests…
Provide feedback
Saved searches
Use saved searches to filter your results more quickly
Sign up
Microsoft Open Database Connectivity (ODBC) is an application programming interface (API) designed to access data from a different of database management systems (DBMS). ODBC is designed for relational data stores.
In this article, we will explain how to install the appropriate ODBC drivers for SQL Server, how to configure ODBC to connect to a SQL Server instance and how to create and configure a Linked Server using the ODBC driver and the MSDASQL provider to query tables on a SQL Server instance.
The diagram below explains the flow of connecting to a SQL Server database using the MSDASQL provider and a SQL Server ODBC driver.
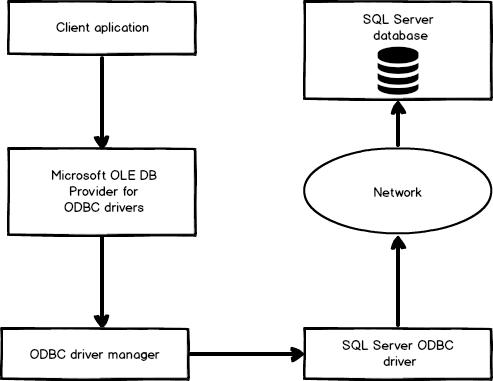
MSDASQL allows OLE DB consumer applications to use ODBC drivers to connect to a data source. The provider transforms incoming OLE DB calls into ODBC calls, and transfers them on to the specified ODBC driver. After that, it retrieves results from the ODBC driver and formats those into OLE DB specific structures which the consumer has access to them.
Installing and configuring the Microsoft ODBC drivers for SQL Server
From this link, the Microsoft ODBC drivers for SQL Server can be downloaded and installed. Depending on which Windows operating system version (32-bit or 64-bit) is used, there are two versions of the Microsoft ODBC drivers for SQL Server that can be installed:
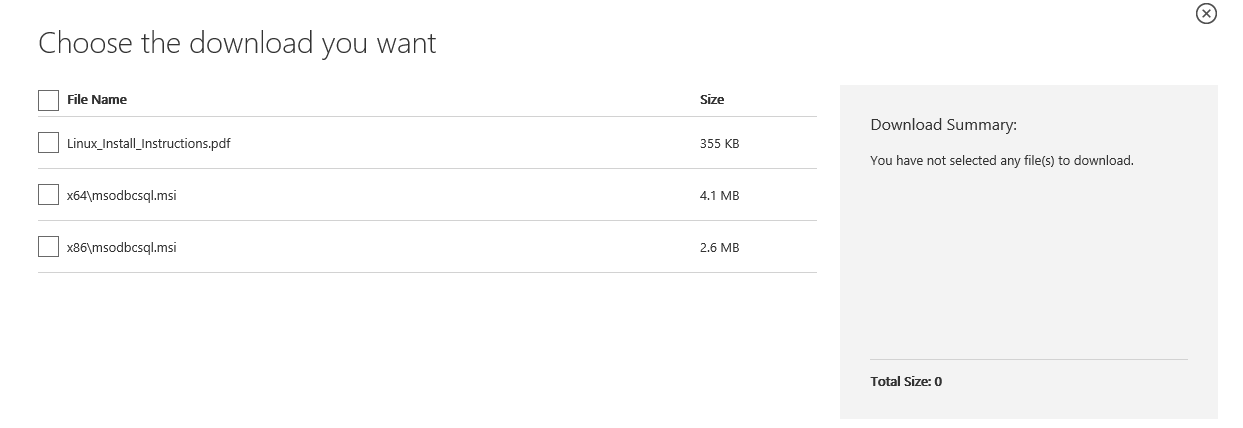
- x64\msodbcsql.msi is for the Windows 64-bit version
- x86\msodbcsql.msi is for the Windows 32-bit version
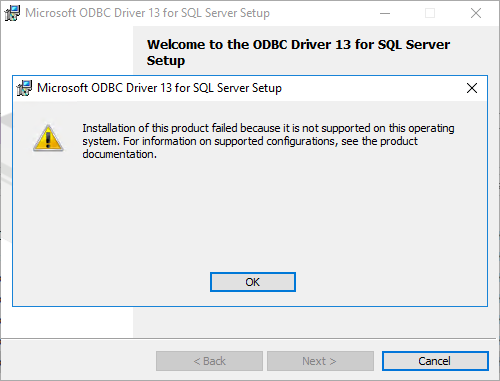
In case that the wrong version of the Microsoft ODBC drivers for SQL Server is trying to be installed (e.g. x86\msodbcsql.msi on the Windows 64-bit version), the following warning message will appear:
Let’s install the appropriate Microsoft ODBC drivers for SQL Server. The process of installation of the Microsoft ODBC drivers for SQL Server is very simple and straightforward. Double click on the (e.g. msodbcsql.msi ) file and the welcome screen will appear:

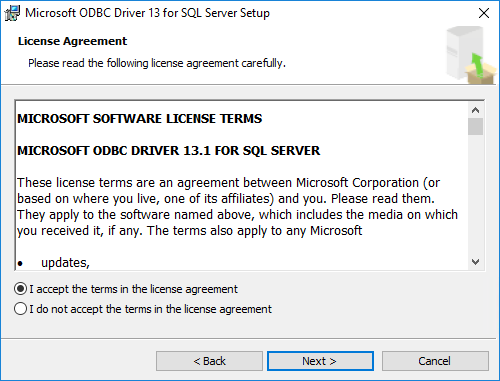
Click the Next button to proceed with installation. Under the License Agreement window read the license terms and if you agree, check the “I accept the terms in the license agreement” radio button and click the Next button:
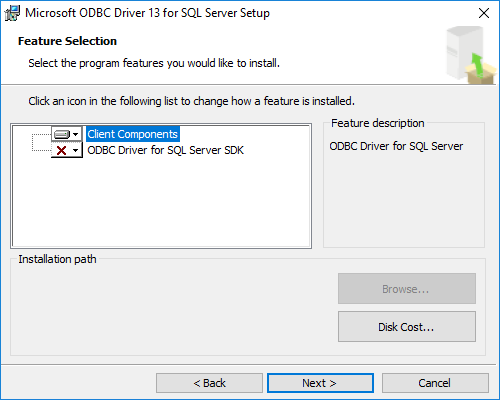
On the Feature Selection window, select the Client Components item and click the Next button:
Click the Install button on the Ready to Install the Program window to begin the installation of the Microsoft ODBC drivers for SQL Server:

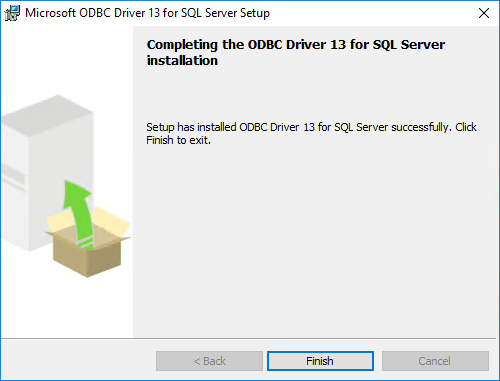
In a few seconds, the installation of the Microsoft ODBC drivers for SQL Server finishes. Click the Finish button to close the Microsoft ODBC drivers for SQL Server Setup window:
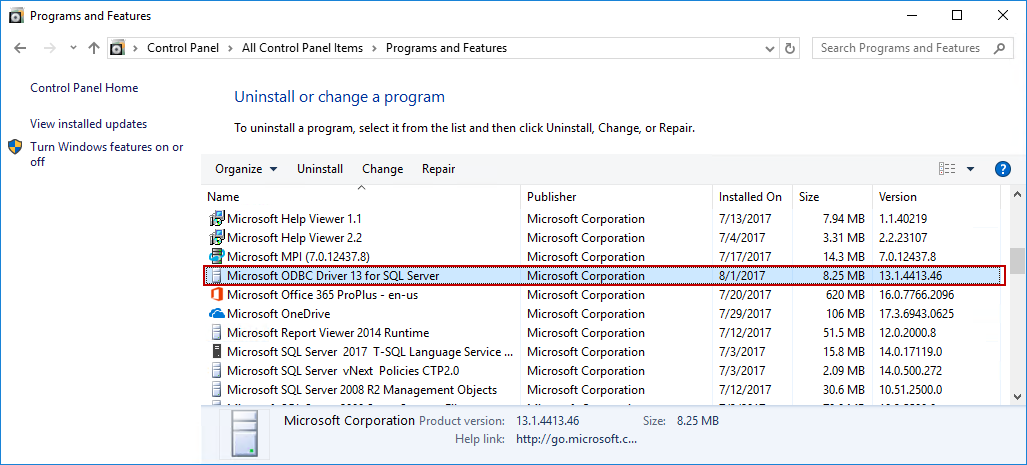
To confirm that the Microsoft ODBC drivers for SQL Server is installed, go to Control Panel and under the Program and Features find the Microsoft ODBC drivers for SQL Server:
Or open the ODBC Data Source Administrator dialog box:
Under the Drivers tab, check iif the ODBC Driver for SQL Server driver exists:
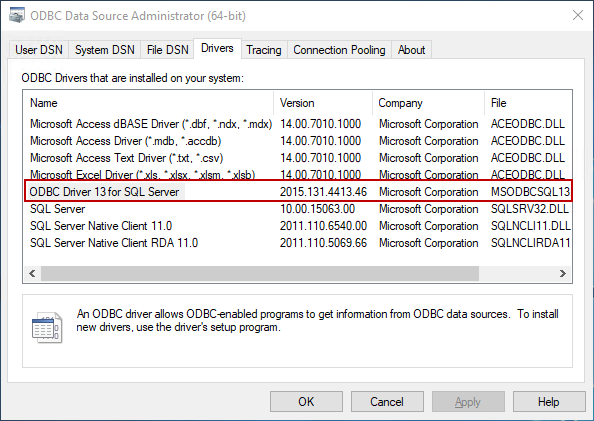
The ODBC Data Source Administrator dialog box is used to create and manage ODBC data sources. The ODBC Data Source Administrator dialog box is a Windows component.
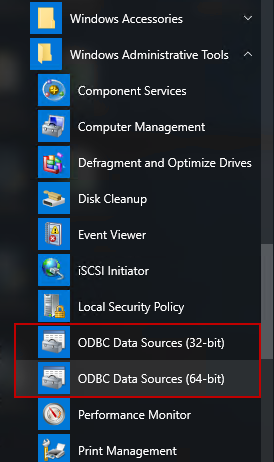
To open the ODBC Data Source Administrator dialog box, go to the Start menu under Windows Administrative Tools, choose ODBC Data Sources:
In the Control Panel under Administrative Tools, choose appropriate ODBC Data Sources:

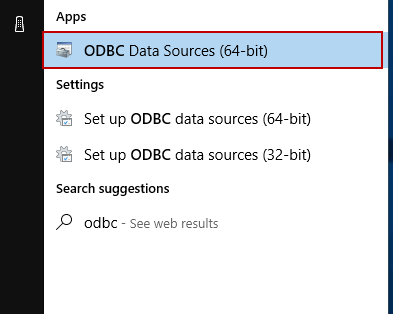
Or simpler, in the Windows search box, type the ODBC Data Sources word:
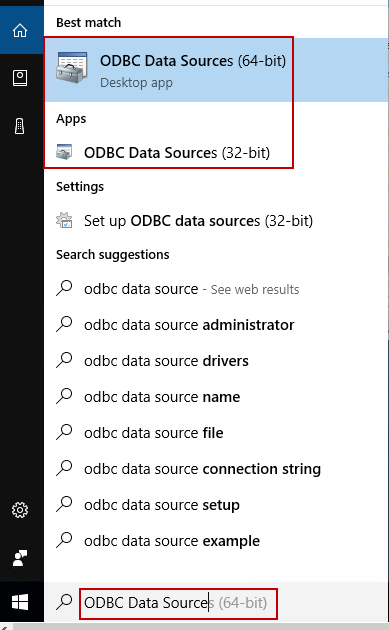
And from the search list, choose appropriate:
As you may notice, there are two versions of the ODBC Data Sources Administrator dialog boxes: one is the ODBC Data Sources Administrator (32-bit) and another is the ODBC Data Sources Administrator (64-bit) version. Since Windows 8 is the operating system, there are two the ODBC Data Sources Administrator dialog boxes, one is for 32-bit ODBC Data Sources and the other is for 64-bit ODBC Data Sources.
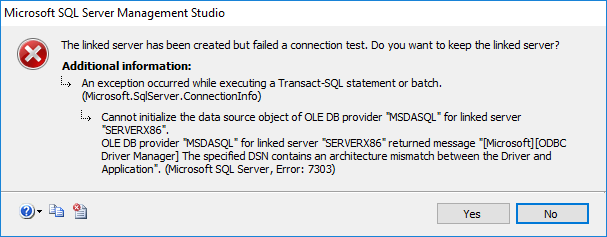
Note: If the ODBC Data Sources Administrator (64-bit) dialog for creating connection with 32-bit data source (e.g.32-bit SQL Server) is used, the following error may appear when a linked server is created:
The linked server has been created but failed a connection test. Do you want to keep the linked server?
ADDITIONAL INFORMATION:
An exception occurred while executing a Transact-SQL statement or batch. (Microsoft.SqlServer.ConnectionInfo)
Cannot initialize the data source object of OLE DB provider “MSDASQL” for linked server “SERVERX86”.
OLE DB provider “MSDASQL” for linked server “SERVERX86” returned message “[Microsoft][ODBC Driver Manager] The specified DSN contains an architecture mismatch between the Driver and Application”. (Microsoft SQL Server, Error: 7303)
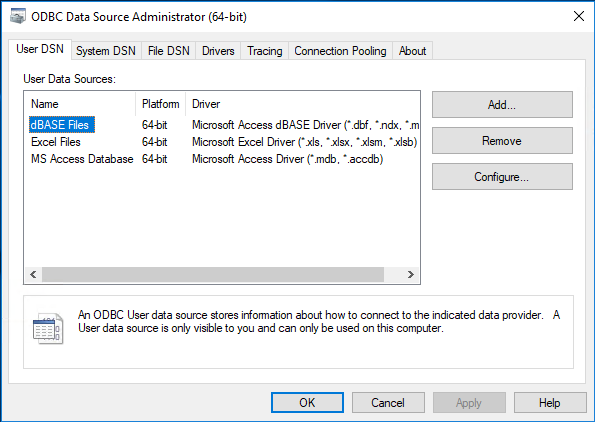
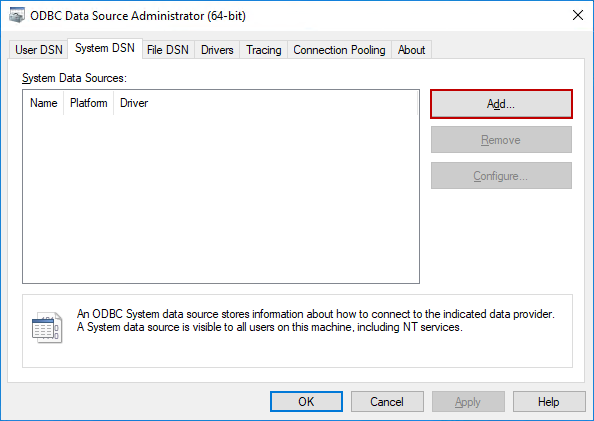
To create a new SQL Server ODBC data source, press the Add button under the User DSN or System DSN tab. Both of these tabs are used to create a connection to ODBC data source, the difference is that the User DSN tab will show data source only for a currently logged user on this computer. While creating data sources under the System DSN, it will be available to any user that is logged on to this computer.
For the purpose of this article, the SQL Server ODBC data source will be created under the System DSN tab. To start creating connection, press the Add button:
This will open the Create New Data Source dialog, from the list, choose a driver for which you want to set up a data source. In our case, that will be ODBC Driver 13 for SQL Server:
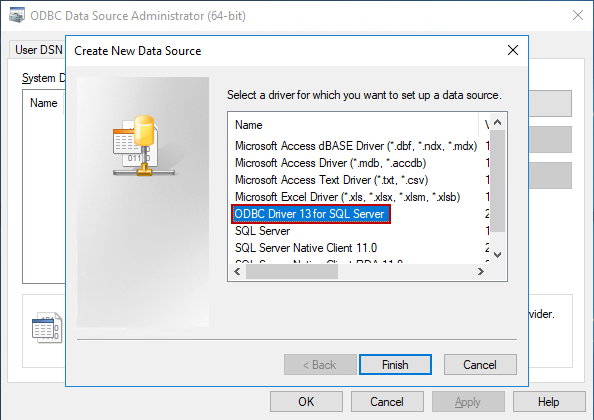
After selecting a desired driver, click the Finish button, this will open the Create a New Data Source to SQL Server dialog:
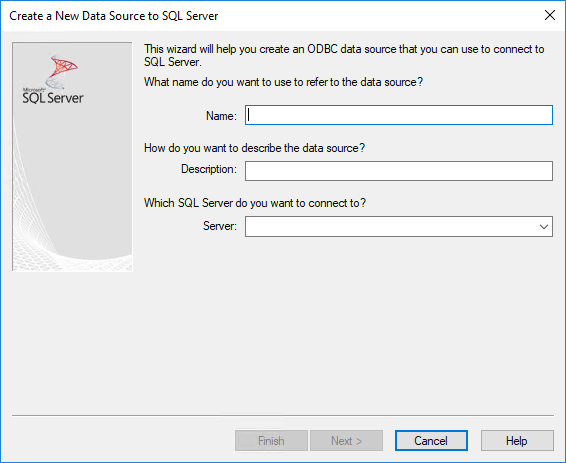
Under the Name box, enter the connection name, the name can be whatever you like (e.g. TestServer). The Description box is optional and it’s for a description of the data source. In the Server field, enter a name of a SQL Server for which you want to connect to (e.g. WIN10\SQLEXPRESS):
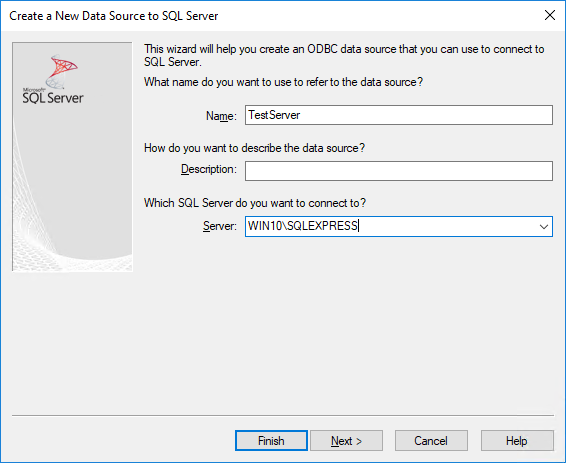
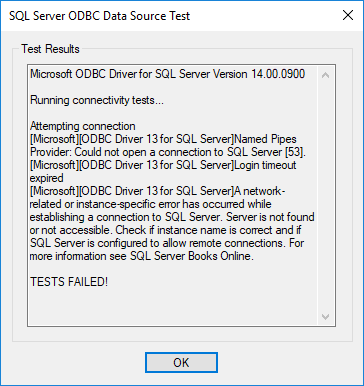
If a SQL Server instance is the default instance, type the name of the computer that hosts the instance of SQL Server (e.g. WIN10). If SQL Server is a named instance, type the name of the computer and the name of the instance separated by a slash (e.g. WIN10\SQLEXPRESS). Otherwise, the following message will appear when testing the SQL Server ODBC data source connection and the name of the SQL Server instance is wrong:
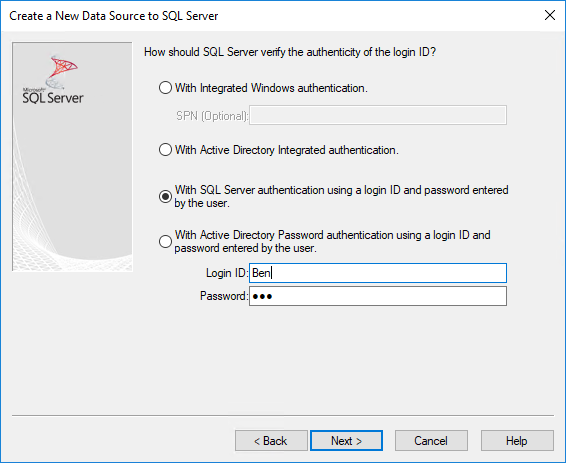
After setting the appropriate Server and connection name, press the Next button. In this dialog, how to connect to SQL Server by using Windows authentication can be specified, including Active Directory authentication or using SQL Server authentication.
For the purpose of this article, SQL Server authentication will be used. Check the With SQL Server authentication using a login ID and password entered by the user radio button and, in the Login ID and Password field, enter appropriate credentials and press the Next button:
On this dialog, set the database that you want to connect to, by checking the Change the default database to check the box and from the combo box, choose a deserted database.
During the change of the default database the following message may appear:
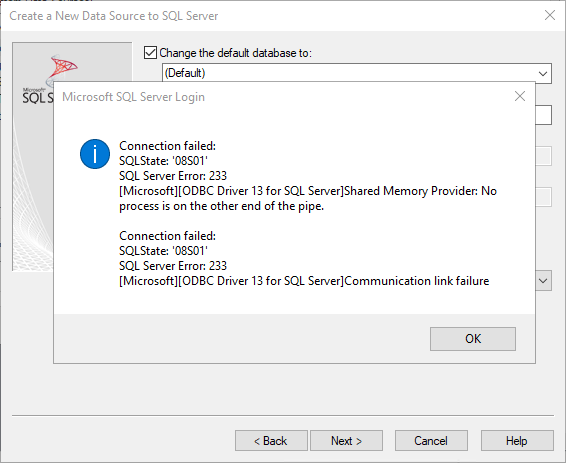
This means that communication link between the driver and the data source to which the driver was attempting to connect failed.
To resolve this, close the ODBC Data Sources Administrator dialog box and try again to create connection to ODBC data source.
If that isn’t successful, check if Named Pipes under the Protocols for SQL Server for which you want to create a connection to (e. g. SQLEXPRESS) are enabled:
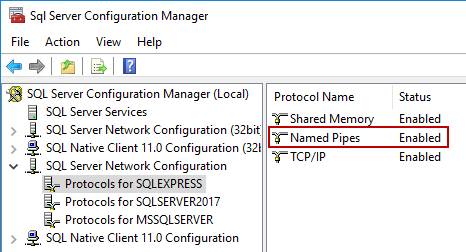
Don’t forget to restart SQL Server under the SQL Server Services after enabling Named Pipes in order to changes have effect.
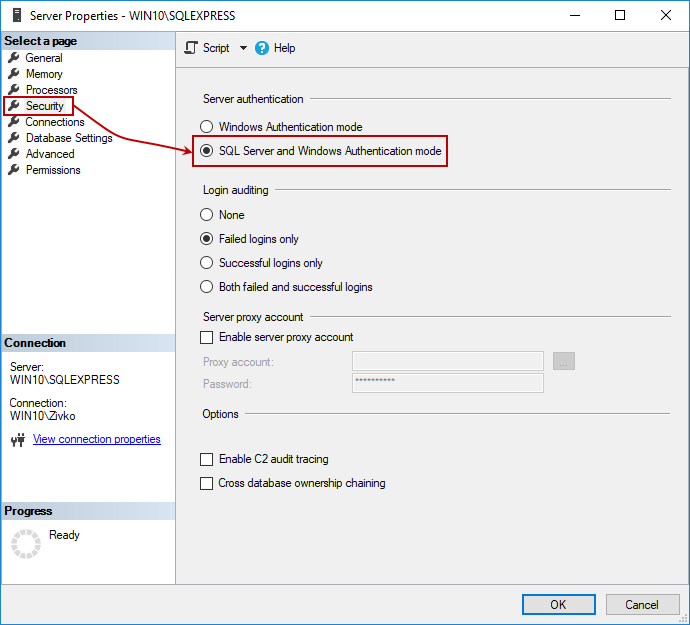
Make sure that the SQL Server and Windows Authentication mode radio button under the Security tab of the Server Properties dialog is checked:
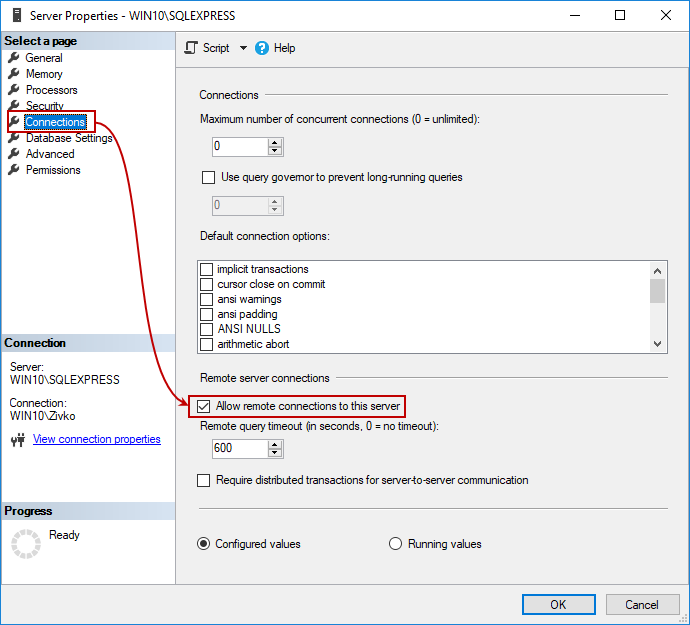
Also, check if the Allow remote connections to this server check box under the Connections tab is checked:
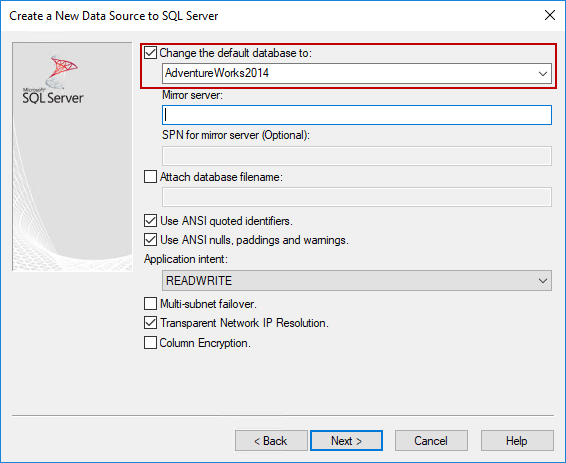
After these settings are done, under the Change the default database to combo box, available databases will appear, choose a database (e.g. AdventureWorks2014) and click the Next button:
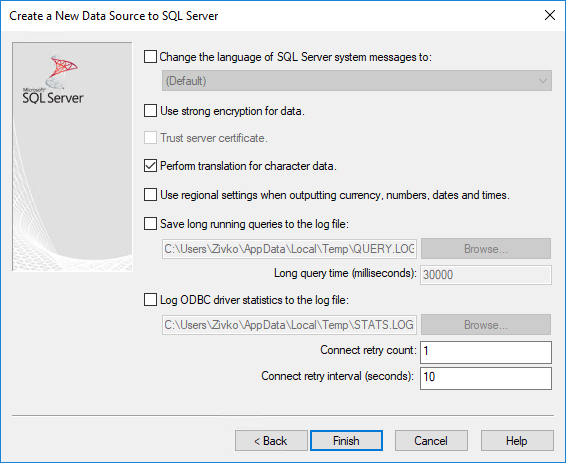
This will open one more dialog with more options to set. These options will be left as it is and click the Finish button:
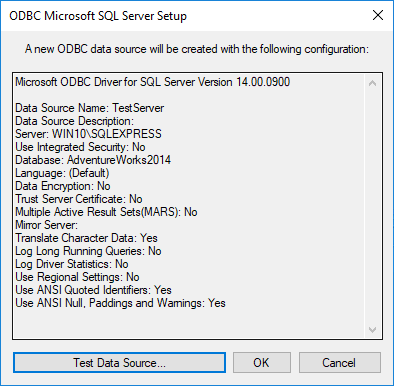
After, clicking the Finish button, the ODBC Microsoft SQL Server Setup window will appear with configuration information that we set for the ODBC data source. At the bottom of the ODBC Microsoft SQL Server Setup window, there is the Test Data Source button, by clicking on this button, it can be checked if the connection with the data source is established successfully or not:
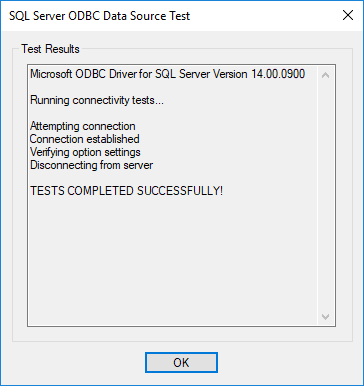
In case that connection with data source is established successfully, on the SQL Server ODBC Source Test window, the “TESTS COMPLETED SUCCESSFULLY” message will appear:
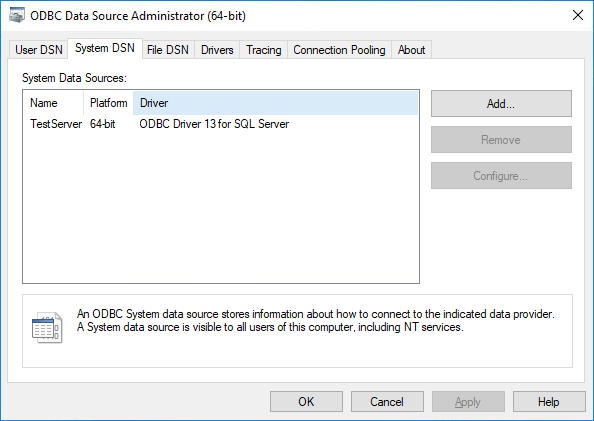
To confirm that the ODBC data source connection is created, in the ODBC Data Source Administrator dialog box under the System DSN tab, the name of the ODBC data source that was created will appear:
Deleting an ODBC data source
To delete ODBC data source in the ODBC Data Source Administrator dialog box, select the desired item from User DSN or System DSN tab and click the Remove button:
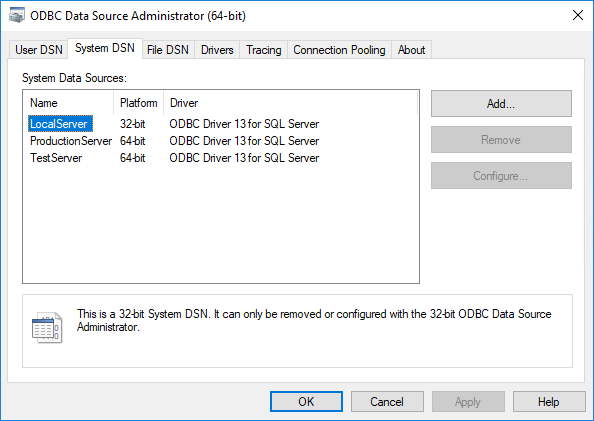
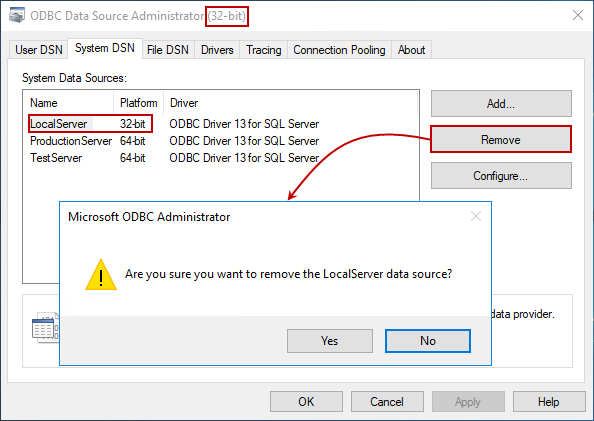
As you may notice, under the System DSN tab, the LocalServer name is selected, but the Remove button is disabled. This happens because we are trying to delete a 32-bit System DSN from 64-bit ODBC Data Source Administrator dialog box. To delete 32-bit DSN, open the 32-bit ODBC Data Source Administrator dialog box and click the Remove button:
Now, when the ODBC data source is created, let’s create and configure a Linked Server using the ODBC.
Creating and configure a Linked Server using the ODBC driver via SQL Server Management Studio
In SQL Server Management Studio (SSMS) go to the Object Explorer, right click on the Linked Servers folder and, from the context menu, choose the New Linked Server command:
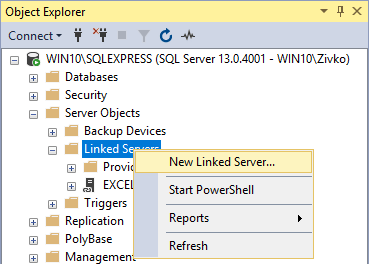
This will open the New Linked Server dialog:
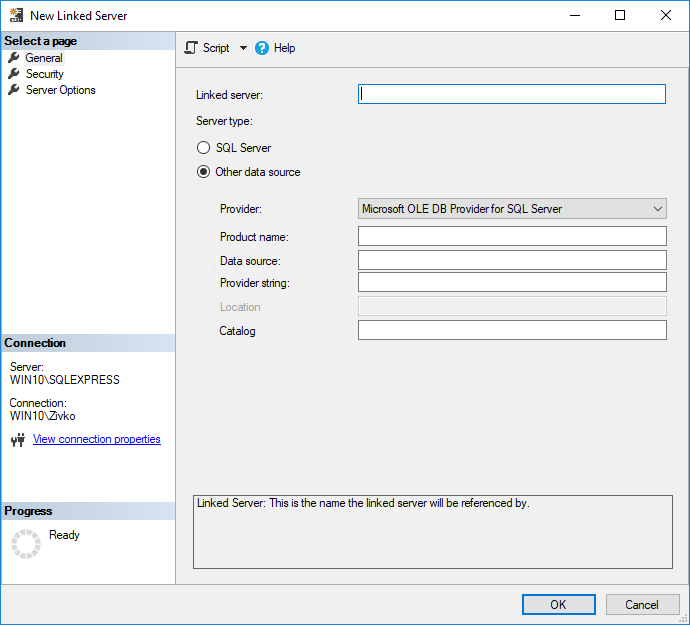
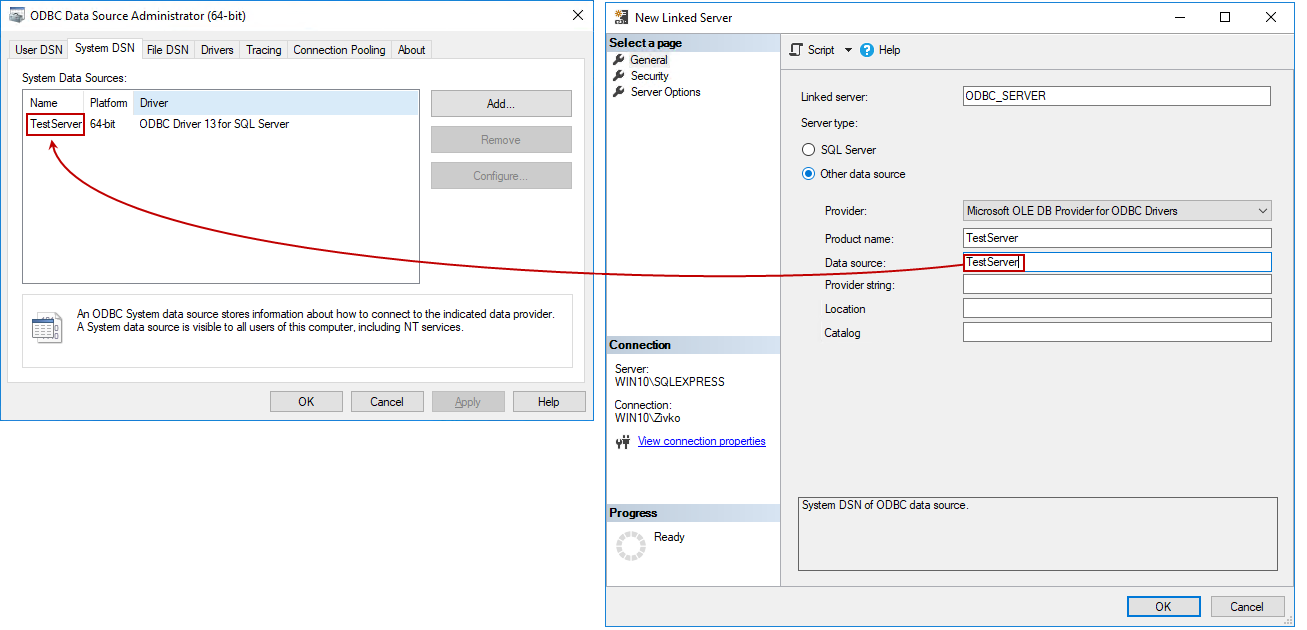
Under the General tab of the New Linked Server dialog in the Linked server text box, enter a name of a new linked server (e.g. ODBC_SERVER). in the Provider combo box, choose the Microsoft OLE DB Provider for ODBC Drivers item. The Product name is an identifier and any appropriate value for this field (e.g. TestSarever) can be used. The data source must match a system data source defined in the ODBC Data Source Administrator dialog box System DSN tab:
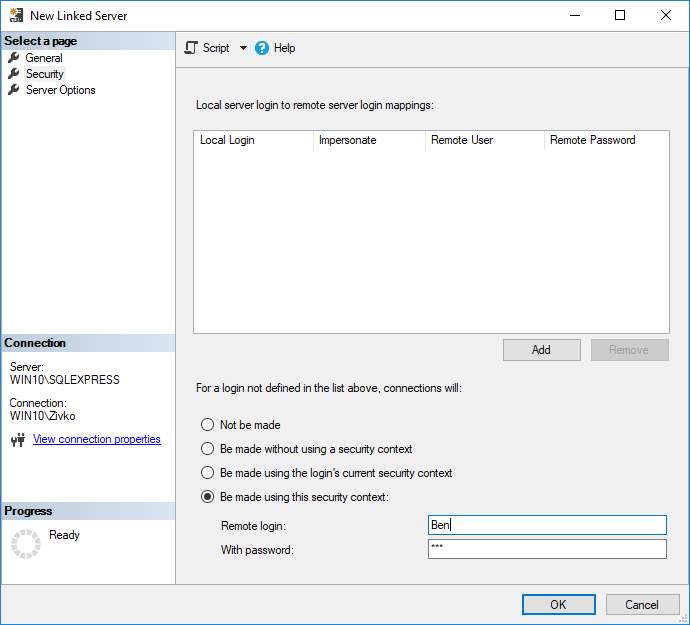
Under the Security tab, choose the Be made using this security context radio button, then enter the username and password for a user account existing on the TestServer instance that was chosen as our data source:
For more about the Security and Options tab, see the How to create and configure a linked server in SQL Server Management Studio page.
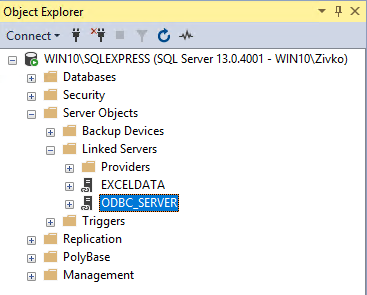
After, the security configuration is done, press the OK button on the New Linked Server dialog to create a new linked server. A newly created linked server will appear under the Linked Servers folder:
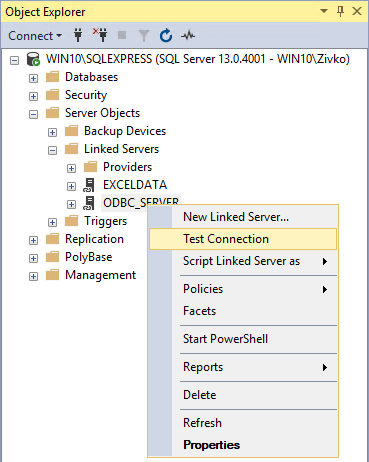
To test if the connection with the ODBC data source is established successfully, right click on the ODBC_SERVER linked server and, from the context menu, choose the Test Connection command:
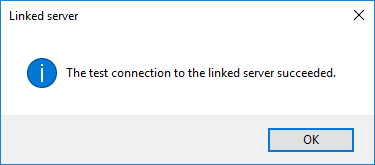
If a connection with the ODBC data source is established successfully, the following info message box will appear:
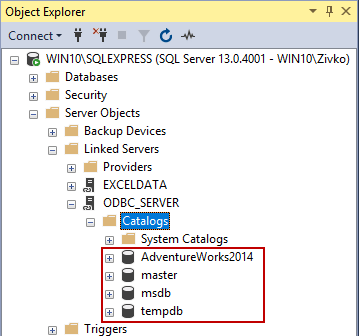
In case that the connection with a linked server is created successfully, but under the Catalogs folder of the linked server, only the default database is shown:

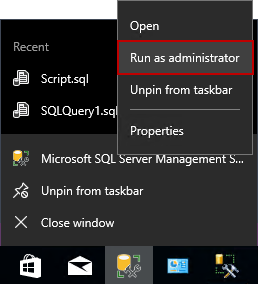
To resolve this, close SQL Server Management Studio and run it again, but this time as an administrator:
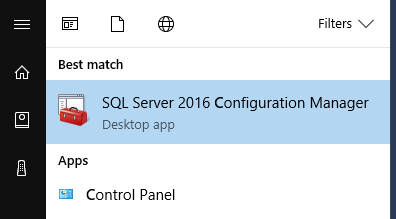
Another way is to go to the SQL Server Configuration Manager:
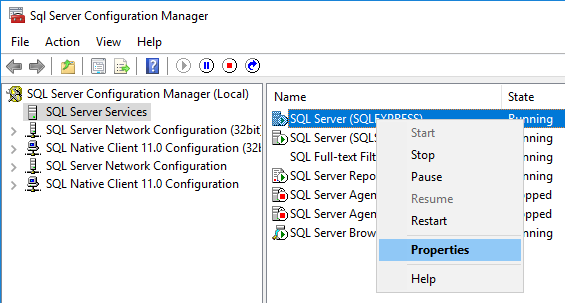
From the SQL Server Configuration Manager dialog, select SQL Server for which a linked server has been created:

From the context menu, choose the Properties option:
Under the Log on tab of the SQL Server Properties dialog, choose the Built-in account radio button and from the combo box, select the Local System item:
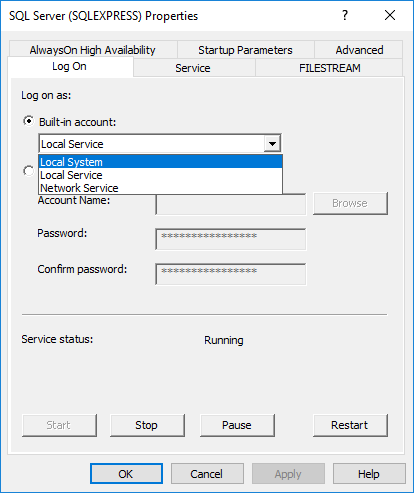
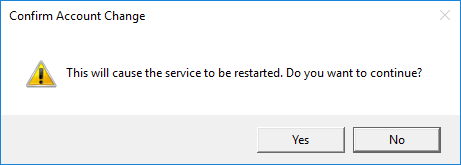
From the SQL Server Properties dialog, click the Apply button and press the Yes button on the Confirm Account Change warning message box:
Now, open SQL Server Manage Studio as administrator and under the Catalogs folder, the databases should appear:
If the problem still persists, contact MSDN troubleshooting and support
Creating and configuring a ODBC Linked Server using T-SQL
To create a linked server using T-SQL, execute the following code:
|
EXEC master.dbo.sp_addlinkedserver @server = N‘ODBC_SERVER’, @srvproduct=N‘TestServer’, @provider=N‘MSDASQL’, @datasrc=N‘TestServer’ GO /* For security reasons, the linked server remote logins password is changed with ######## */ EXEC master.dbo.sp_addlinkedsrvlogin @rmtsrvname=N‘ODBC_SERVER’,@useself=N‘False’,@locallogin=NULL,@rmtuser=N‘Ben’,@rmtpassword=‘########’ GO |
Note:
@rmtpassword is the password of the remote user used to connect to a remote server, for security reasons password is changed with ‘########’.
More about how to create and configure a SQL Server linked server using T-SQL can be found on the How to create, configure and drop a SQL Server linked server using Transact-SQL page.
Other articles in this series:
- How to create and configure a linked server in SQL Server Management Studio
- How to create, configure and drop a SQL Server linked server using Transact-SQL
- How to query Excel data using SQL Server linked servers
- How to create a linked server to an Azure SQL database
- Author
- Recent Posts

Marko aka “Zivko” is a senior software analyst from Nis, Serbia focusing on SQL Server and MySQL as well as client technologies like SSMS, Visual Studio, and VSCode. He has extensive experience with quality assurance, issue escalation/resolution, and product evangelism.
He is a prolific author of authoritative content related to SQL Server including a number of “platinum” articles (top 1% in terms of popularity and engagement). His writing covers a range of topics on MySQL and SQL Server including remote/linked servers, import/export, LocalDB, SSMS, and more.
In his part-time, Zivko likes basketball, foosball (table-soccer), and rock music.
See more about Marko at LinkedIn
View all posts by Marko Zivkovic
Microsoft ODBC Driver for SQL Server is a single dynamic-link library (DLL) containing run-time support for applications using native-code APIs to connect to SQL Server. This article will serve as an informative guide and give you a clear understanding of how to perform a silent installation of the Microsoft ODBC Driver 17 for SQL Server from the command line using the MSI installer.
Microsoft ODBC Driver 17 for SQL Server Silent Install (MSI) on 32-bit Systems
- Navigate to: https://docs.microsoft.com/en-us/sql/connect/odbc/windows/release-notes-odbc-sql-server-windows?view=sql-server-ver15#179
- Select Download x86 installer link
- Download the msodbcsql.msi to a folder created at (C:\Downloads\x86)
- Navigate to: https://aka.ms/vs/17/release/vc_redist.x86.exe
- Download the vc_redist.x86.exe to a folder created at (C:\Downloads\x86)
- Open an Elevated Command Prompt by Right-Clicking on Command Prompt and select Run as Administrator
- Navigate to the C:\Downloads\x86 folder
- Enter the following commands:
vc_redist.x86.exe /install /quiet /norestart |
MsiExec.exe /i msodbcsql.msi IACCEPTMSODBCSQLLICENSETERMS=YES /qn |
After a few moments you will find Microsoft ODBC Driver 17 for SQL Server entries in the Installation Directory and Programs and Features in the Control Panel.
| Software Title: | Microsoft ODBC Driver 17 for SQL Server |
| Vendor: | Microsoft Corporation |
| Version: | 17.9 |
| Architecture: | 32-bit |
| Installer Type: | MSI |
| Silent Install Switch (Step 1) | vc_redist.x86.exe /install /quiet /norestart |
| Silent Install Switch (Step 2) | MsiExec.exe /i msodbcsql.msi IACCEPTMSODBCSQLLICENSETERMS=YES /qn |
| Silent Uninstall Switch: | |
| Repair Command: | |
| Download Link: | https://docs.microsoft.com/en-us/sql/connect/odbc/windows/release-notes-odbc-sql-server-windows?view=sql-server-ver15 |
| PowerShell Script: | https://silentinstallhq.com/microsoft-odbc-driver-17-for-sql-server-install-and-uninstall-powershell/ |
Microsoft ODBC Driver 17 for SQL Server Silent Install (MSI) on 64-bit Systems
- Navigate to: https://docs.microsoft.com/en-us/sql/connect/odbc/windows/release-notes-odbc-sql-server-windows?view=sql-server-ver15#179
- Select Download x64 installer link
- Download the msodbcsql.msi to a folder created at (C:\Downloads\x64)
- Navigate to: https://aka.ms/vs/17/release/vc_redist.x64.exe
- Download the vc_redist.x64.exe to a folder created at (C:\Downloads\x64)
- Open an Elevated Command Prompt by Right-Clicking on Command Prompt and select Run as Administrator
- Navigate to the C:\Downloads\x64 folder
- Enter the following commands:
vc_redist.x64.exe /install /quiet /norestart |
MsiExec.exe /i msodbcsql.msi IACCEPTMSODBCSQLLICENSETERMS=YES /qn |
After a few moments you will find Microsoft ODBC Driver 17 for SQL Server entries in the Installation Directory and Programs and Features in the Control Panel.
| Software Title: | Microsoft ODBC Driver 17 for SQL Server |
| Vendor: | Microsoft Corporation |
| Version: | 17.9 |
| Architecture: | 64-bit |
| Installer Type: | MSI |
| Silent Install Switch (Step 1) | vc_redist.x64.exe /install /quiet /norestart |
| Silent Install Switch (Step 2) | MsiExec.exe /i msodbcsql.msi IACCEPTMSODBCSQLLICENSETERMS=YES /qn |
| Silent Uninstall Switch: | |
| Repair Command: | |
| Download Link: | https://docs.microsoft.com/en-us/sql/connect/odbc/windows/release-notes-odbc-sql-server-windows?view=sql-server-ver15 |
| PowerShell Script: | https://silentinstallhq.com/microsoft-odbc-driver-17-for-sql-server-install-and-uninstall-powershell/ |
The information above provides a quick overview of the software title, vendor, silent install, and silent uninstall switches. The download links provided take you directly to the vendors website. Continue reading if you are interested in additional details and configurations.
Additional Configurations
Create an Installation Log File
The Microsoft ODBC Driver 17 for SQL Server installer offers the option to generate a log file during installation to assist with troubleshooting should any problems arise. You can use the following commands to create a verbose log file with details about the installation.
Microsoft ODBC Driver 17 for SQL Server Silent Install with Logging on 32-bit System
vc_redist.x86.exe /install /quiet /norestart /log "%WINDIR%\Temp\VC2017x86-Install.log" |
MsiExec.exe /i msodbcsql.msi IACCEPTMSODBCSQLLICENSETERMS=YES /qn /L*v "%WINDIR%\Temp\MSODBCSQL17x86-Install.log" |
Microsoft ODBC Driver 17 for SQL Server Silent Install with Logging on 64-bit System
vc_redist.x64.exe /install /quiet /norestart /log "%WINDIR%\Temp\VC2017x64-Install.log" |
MsiExec.exe /i msodbcsql.msi IACCEPTMSODBCSQLLICENSETERMS=YES /qn /L*v "%WINDIR%\Temp\MSODBCSQL17x64-Install.log" |
Include the ODBC Driver for SQL Server SDK Feature
32-bit System
vc_redist.x86.exe /install /quiet /norestart |
MsiExec.exe /i msodbcsql.msi ADDLOCAL=ALL IACCEPTMSODBCSQLLICENSETERMS=YES /qn |
64-bit System
vc_redist.x64.exe /install /quiet /norestart |
MsiExec.exe /i msodbcsql.msi ADDLOCAL=ALL IACCEPTMSODBCSQLLICENSETERMS=YES /qn |
How to Uninstall Microsoft ODBC Driver 17 for SQL Server Silently
Check out the Microsoft ODBC Driver 17 for SQL Server Install and Uninstall (PowerShell) post for a scripted solution.
- Open an Elevated Command Prompt by Right-Clicking on Command Prompt and select Run as Administrator
- Enter one of the following commands:
| Version | Microsoft ODBC Driver 17 for SQL Server Silent Uninstall String |
17.10 (32-bit) |
MsiExec.exe /x {C36787AB-95C4-4E00-9645-E9DB459F04DE} /qn |
17.10 (64-bit) |
MsiExec.exe /x {4FA42D7E-0446-4406-BB89-643765F9A38F} /qn |
17.9 (32-bit) |
MsiExec.exe /x {B779698E-BCFA-4735-B23F-45AA5F47B5A4} /qn |
17.9 (64-bit) |
MsiExec.exe /x {BC76A645-75D3-4A9E-9DDC-1DFBC959FB67} /qn |
17.8 (32-bit) |
MsiExec.exe /x {2496C3F0-D156-48F1-9514-E488EE19C0F7} /qn |
17.8 (64-bit) |
MsiExec.exe /x {7453C0F5-03D5-4412-BB8F-360574BE29AF} /qn |
17.7.2 (32-bit) |
MsiExec.exe /x {6B841706-4DE6-48B7-B420-8242D9E7A503} /qn |
17.7.2 (64-bit) |
MsiExec.exe /x {853997DA-6FCB-4FB9-918E-E0FF881FAF65} /qn |
17.7 (32-bit) |
MsiExec.exe /x {DE420266-132A-4521-8247-B93C84B04AC3} /qn |
17.7 (64-bit) |
MsiExec.exe /x {014E8F90-CED3-41BD-ACF3-D6EA3EAD4560} /qn |
17.6 (32-bit) |
MsiExec.exe /x {3755F5CE-EFD4-4671-9C67-B0359D595379} /qn |
17.6 (64-bit) |
MsiExec.exe /x {DBCD7798-30AE-474B-A733-717996DCCA41} /qn |
17.5.2 (32-bit) |
MsiExec.exe /x {61CFB794-D1FA-4C61-8B11-FDB153D1C47E} /qn |
17.5.2 (64-bit) |
MsiExec.exe /x {12DC69AF-787B-4D76-B69D-2716DACA79FB} /qn |
17.5 (32-bit) |
MsiExec.exe /x {9227BFE7-F9AB-4AF4-802F-F312DD1A4E02} /qn |
17.5 (64-bit) |
MsiExec.exe /x {E36FFC78-D25E-4962-872B-9CE0E50E62CD} /qn |
17.4.2 (32-bit) |
MsiExec.exe /x {A267F78D-3999-4EBD-9F63-9CADAF07E64A} /qn |
17.4.2 (64-bit) |
MsiExec.exe /x {50BD7EC6-A085-48F8-8664-18A8BB3E768C} /qn |
17.4 (32-bit) |
MsiExec.exe /x {B27925A2-E6A2-4A62-8BE3-92F6974D1996} /qn |
17.4 (64-bit) |
MsiExec.exe /x {72AFAF21-33FB-45A5-9468-A9EC07427F82} /qn |
17.3 (32-bit) |
MsiExec.exe /x {7265E8BC-4EA4-403F-9B87-6FD9BD964D0A} /qn |
17.3 (64-bit) |
MsiExec.exe /x {175BC9FC-C256-4EFC-9D87-4A9AF3B47A12} /qn |
17.2 (32-bit) |
MsiExec.exe /x {D3A13CE1-E8A4-4812-90CD-2DDCA13F4CF7} /qn |
17.2 (64-bit) |
MsiExec.exe /x {8D98AC2C-FC5C-440D-A2D3-6C9655F957D8} /qn |
17.1 (32-bit) |
MsiExec.exe /x {C9A0CE4D-741E-4505-8D01-BBF61A27D031} /qn |
17.1 (64-bit) |
MsiExec.exe /x {5F9345E2-76B2-4639-AD3B-DB2ABC716930} /qn |
17.0 (32-bit) |
MsiExec.exe /x {6D03E27A-F010-4D45-B884-028E91452285} /qn |
17.0 (64-bit) |
MsiExec.exe /x {01D74C69-4BB4-4616-9968-A7E6A6EE81B4} /qn |
Always make sure to test everything in a development environment prior to implementing anything into production. The information in this article is provided “As Is” without warranty of any kind.
Jason Bergner
I am an accomplished Software Engineer at Patch My PC, leveraging more than 17 years of hands-on experience in Configuration Manager administration and application packaging. I am driven by a genuine passion for solving complex problems and consistently strive to discover innovative and effective solutions. Sharing my extensive knowledge of application deployments is a true joy for me, and I am honored to contribute to the community here at Silent Install HQ.
Recent Posts
Air Explorer Install and Uninstall (PowerShell)
This article will serve as an informative guide and give you a clear understanding of how to perform silent or interactive installs and uninstalls of Air Explorer using the Powershell App Deployment…
- Introduction
- Connect to Microsoft SQL Server
- Setup ODBC
- Troubleshooting
- More Information
Introduction
This article explains how to connect to Microsoft SQL Server with ODBC from Windows 10.
It covers the following topics:
- How to connect to Microsoft SQL Server (with code samples).
- How to setup ODBC:
- Configure ODBC using the ODBC Data Source Administrator:
We recommend using system DSNs (available to all users).
- Configure ODBC using the ODBC Data Source Administrator:
Connect to Microsoft SQL Server [top]
We strongly recommend using connection objects to connect to databases, and this is what we demonstrate in the code samples.
Follow these steps to connect:
- Create a new channel to try out the code:
- Create a channel like this:
- Name: DB SQL Server Connection (or similar)
- Source: From Translator
- Destination: To Channel
- Alternatively use an existing channel:
Your channel will need a From/To Translator or a Filter component.
- Create a channel like this:
- Connect to a database using ODBC:
- Paste this code into the Translator:
If your script uses connection object methods
conn:query{}orconn:execute{}to connect to a remote Microsoft SQL Server database, the location of the remote host is specified as part of the name parameter in thedb.connect{ }command. If you useconn:merge{}to connect the remote host is specified as part of the name parameter in theconn:merge{}command itself.function main() local conn = db.connect{ api=db.SQL_SERVER, name='your_odbc_server_name', user='', -- use empty string for integrated security password='', -- use empty string for integrated security use_unicode = true, live = true } conn:execute{sql='SELECT * FROM <your table>', live=true} end - The name is the name of an ODBC source that you create using the ODBC Administrator.
- Paste this code into the Translator:
- Adapt the code to your requirements.
Setup ODBC [top]
Note: Iguana may not always support the very latest version of the Microsoft SQL Server ODBC drivers, so you can simply download an earlier version if necessary. This is particularly true if you are not able to use the the latest version of Iguana.
If you need to know which versions of Microsoft SQL Server are supported by the version of Iguana you are using please contact us at support@interfaceware.com.
To set up a new ODBC data source for Microsoft SQL Server:
- Install the latest Microsoft SQL Server ODBC drivers:
- Download the latest drivers from the Microsoft ODBC download site.
- Run the installer and accept the defaults.
- Open the 64 bit ODBC Administrator:
Windows 10 (64 bit version) supports 32 and 64 bit ODBC sources — always use the 64 bit ODBC Administrator.
- Open the System DSN tab and click Add:

- Choose the latest SQL Server ODBC driver and click Finish:

- Enter the ODBC credentials:
- Use any Name and Description you prefer.
- Enter the Network Name of the SQL Server in the Server field:
Note: If you are unsure of the name ask your DBA (database administrator). - Click Finish to create the ODBC data source:

- This will open the the ODBC Microsoft SQL Server Setup dialog box that lists the chosen settings:
The ODBC source will use all the standard defaults which will work in most cases. There are two settings that you may need to change: Use Integrated Security and Database. Speak to your DBA (database administrator) about changing these if necessary.
- Use Integrated Security: Sometimes you might want to use a SQL Server user and password
- Database: You can specify the database that you want to use by default.

- Test the data source connection:


If you need to modify the ODBC source follow these steps:
- These are the two most common things to change:
- Default Database: Change to Test
- User Login: Change to user billsmith with password something-secret
- Modify the ODBC source to change Database and User:
- Change the default database:
- Select the Change the default database option:
- Choose your default database from the drop list and click Next:
- Finally test the connection to see that the changes worked.

Troubleshooting [top]
- Problems with connection settings:
Speak to your DBA (database administrator) for general connection issues like: User name and password, Database Server network name etc.
- Iguana may not always support the very latest version of the ODBC drivers:
Please contact us at support@interfaceware.com if you need to know the latest supported version of the ODBC drivers.
- Incorrect port number:
SQL Server defaults to port 1433, but a different port can be used. Speak to your database administrator (DBA) or network administrator.
- Using integrated security:
Using integrated security is the usual way to connect to a Microsoft SQL Server database. If this does not work speak to your DBA (database administrator) about the user credentials you should use to connect to the database.
If you need more help please contact us at support@interfaceware.com.
More Information [top]
- Using Database Connection Objects
- Forum thread on Windows ODBC
- Using Integrated Authentication, Microsoft SQL Server documentation (kerberos etc)
- Connect to Microsoft SQL Server from Linux or Mac with ODBC