Internet Explorer was retired on June 15, 2022
IE 11 is no longer accessible. You can reload Internet Explorer sites with IE mode in Microsoft Edge.
The Microsoft Deployment Toolkit (MDT) is for Windows operating system deployment.
Important! Selecting a language below will dynamically change the complete page content to that language.
-
File Name:
MicrosoftDeploymentToolkit_x64.msi
MicrosoftDeploymentToolkit_x86.msi
- The Microsoft Deployment Toolkit (MDT) is a free tool for automating Windows and Windows Server operating system deployment, leveraging the Windows Assessment and Deployment Kit (ADK) for Windows 10.
- Version 8456 was released on January 25th 2019 and is the latest current version.
-
Supported Operating Systems
Windows Server 2019, Windows Server 2016, Windows 10, Windows Server 2012 R2, Windows Server 2008 R2, Windows Server 2012, Windows 7, Windows 8, Windows 8.1
Other Requirements
- The Windows ADK for Windows 10, version 1809 or later, is required for all deployment scenarios.
- Configuration Manager, version 1810 or later, is required for zero-touch installation (ZTI) and user-driven installation (UDI) scenarios.
-
- From the link above, download the installer for the proper system architecture.
- Run the .msi on the target MDT server.
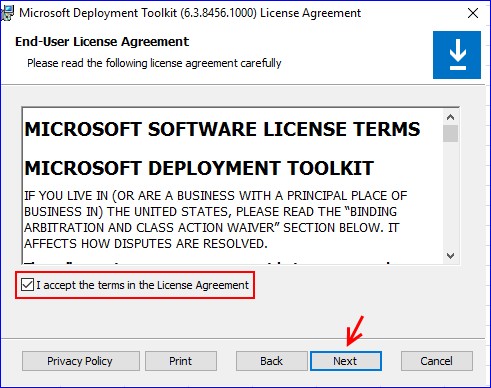
- Accept the Microsoft Software License Terms.
- Follow the steps in the installation process to complete the installation.
- Start the Deployment Workbench desktop app from the Start menu in the Microsoft Deployment Toolkit group.
Время на прочтение
8 мин
Количество просмотров 87K
Как было написано в одной умной книге — если в вашем IT-отделе нет автоматизированной установки операционной системы, то её создание может быть самой важной задачей, которую вы когда-либо выполняли.
Для работы MDT необходимо:
- WDS
- Windows ADK
- PowerShell
- .net Framework
- DHCP
План
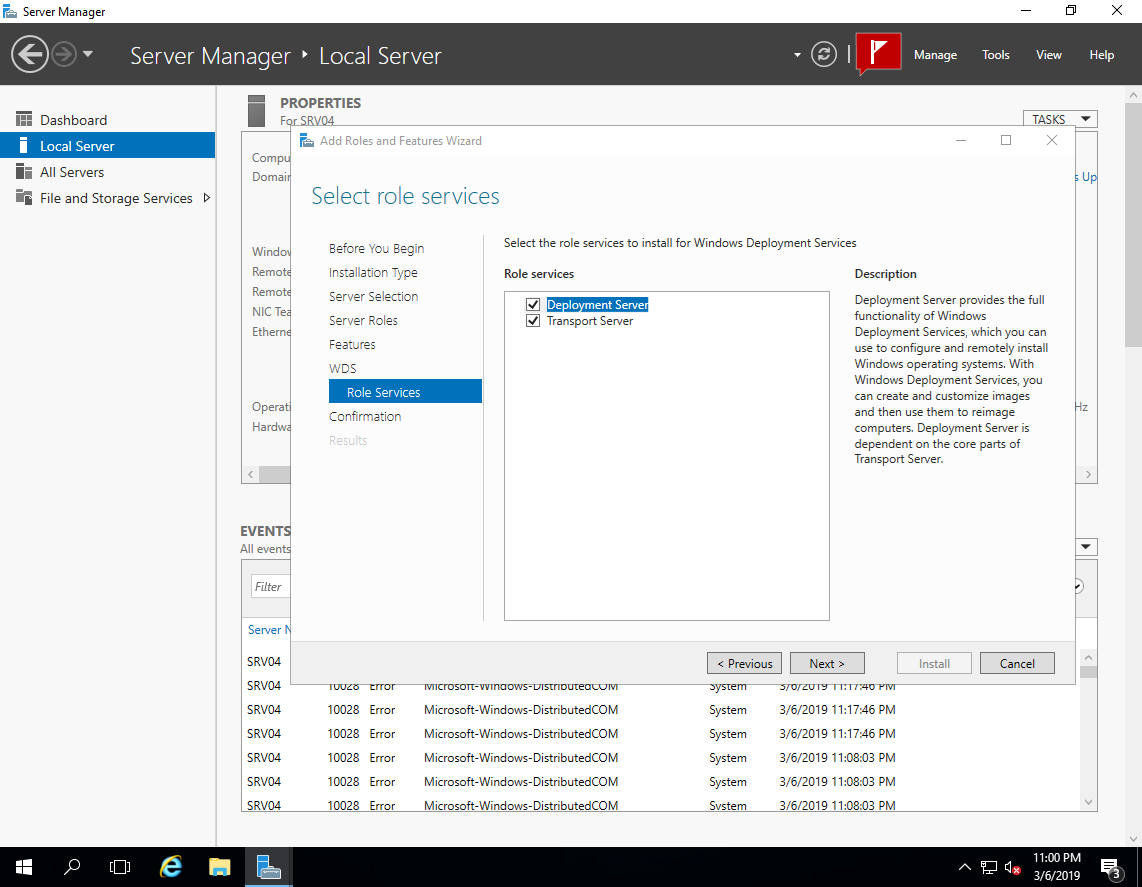
- Добавление роли Windows Deployment Services (WDS) на сервер;
- Загрузка и установка на сервер необходимых компонентов;
- Запуск и настройка WDS;
- Запуск и настройка MDT;
- Импорт приложений;
- Импорт установочных образов;
- Импорт драйверов;
- Импорт пакетов;
- Создание задач;
- Тестирование.
Добавление роли Windows Deployment Services (WDS) на сервер
На сервере включаем роль WDS.


Загрузка и установка на сервер необходимых компонентов
С официального сайта скачиваем и устанавливаем Windows Assessment and Deployment Kit (ADK):
1) Download the Windows ADK for Windows 10, version 1809 (возможно, новее)
2) Download the Windows PE add-on for the ADK
Отмечаем для установки:
- Deployment Tools
- Imaging And Configuration Designer
- Configuration Designer
- User State Migration Tools

Также скачиваем и устанавливаем Microsoft Deployment Toolkit (MDT)
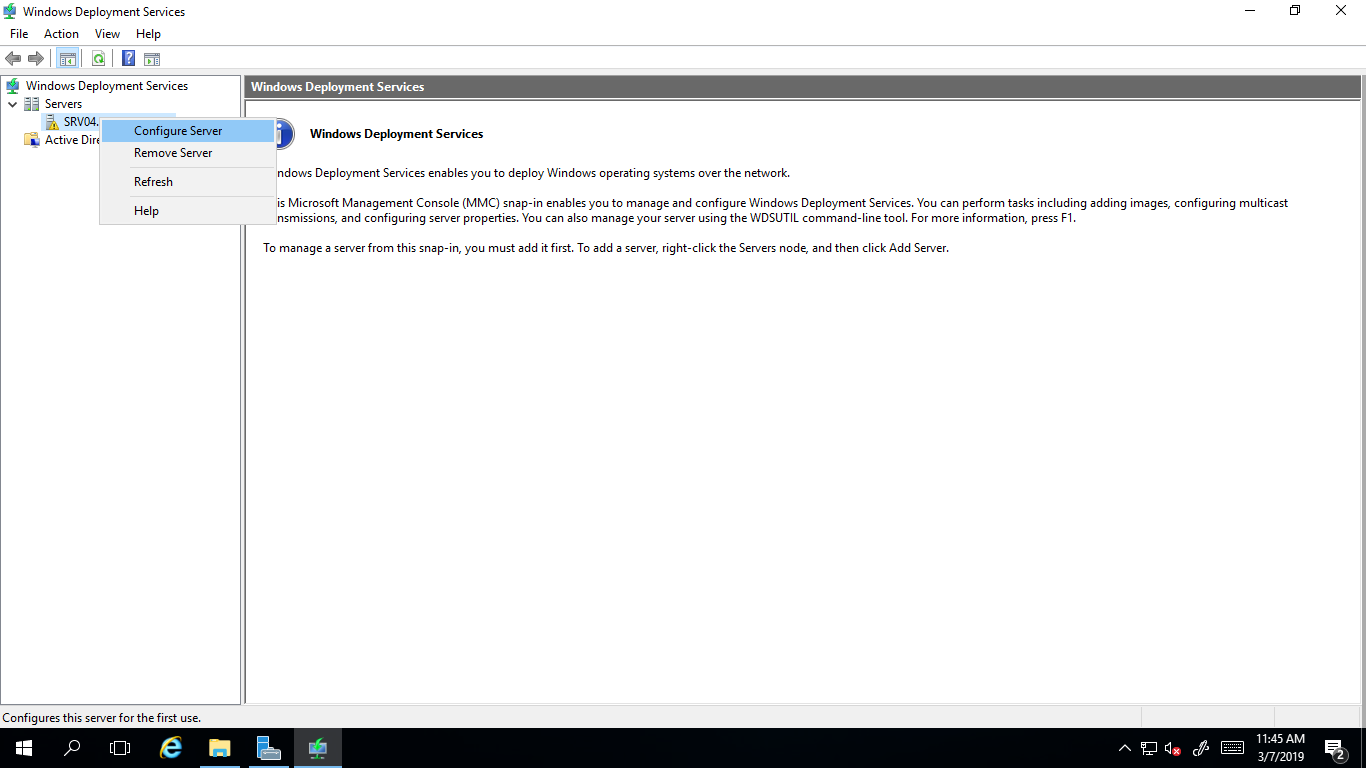
Запуск и настройка WDS
Открываем консоль WDS

Запускаем конфигурирование.
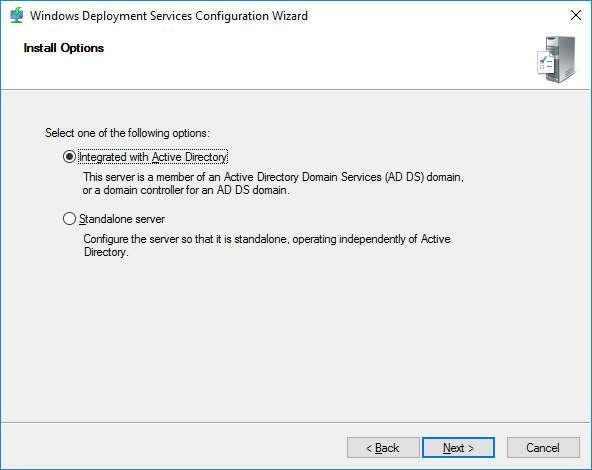
В мастере настройки выбираем интеграцию с доменом.
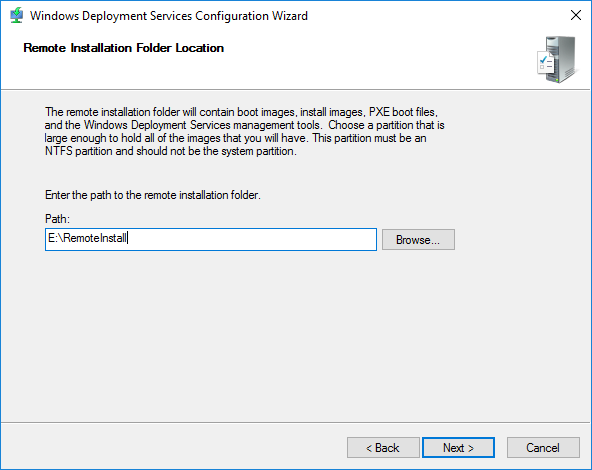
Задаем служебную папку WDS.
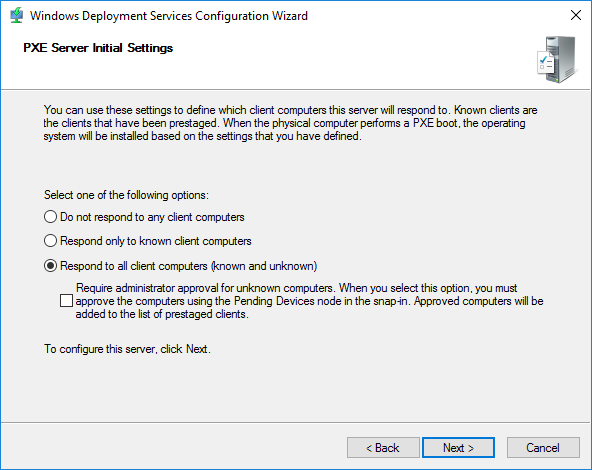
На следующем шаге можно выбрать каким компьютерам будет отвечать сервер WDS:
- Никому не отвечать — можно отключить работу сервера на время настройки или тестирования, например, чтобы пользователи не получали возможные конфликты при установке.
- Отвечать только известным компьютерам — список составляется в консоли и если записи адреса компьютера нет, то он не получит возможность работать с сервером.
- Отвечать всем клиентам — ответ получат все компьютеры. Если установить галку ниже, то при обращении неизвестных устройств (не записанных ранее) в консоли появится запись, что некий компьютер с определенным адресом запрашивает подключение. Можно отклонить или принять и процесс продолжится. Позже эти настройки можно изменить в консоли WDS.
Завершаем процесс первоначальной настройки. Имеем следующую структуру папок:
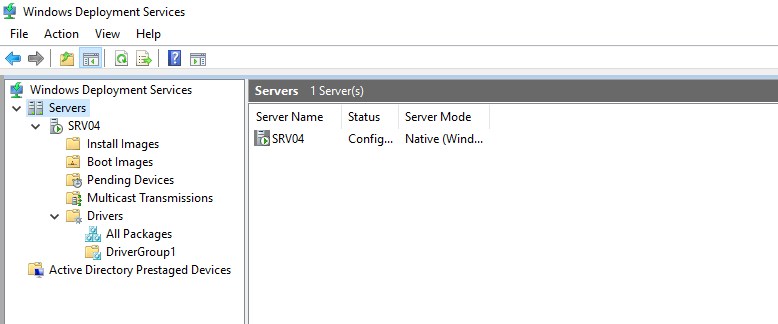
WDS нам понадобится только для подключения и передачи образов, поэтому без подробного объяснения:
Install Images — установочные образы (не используем);
Boot Images — загрузочные образы (добавим созданные в MDT);
Pending Devices — появляются устройства запрашивающие соединение если включена опция «требуется подтверждение администратора».
Запуск и настройка MDT
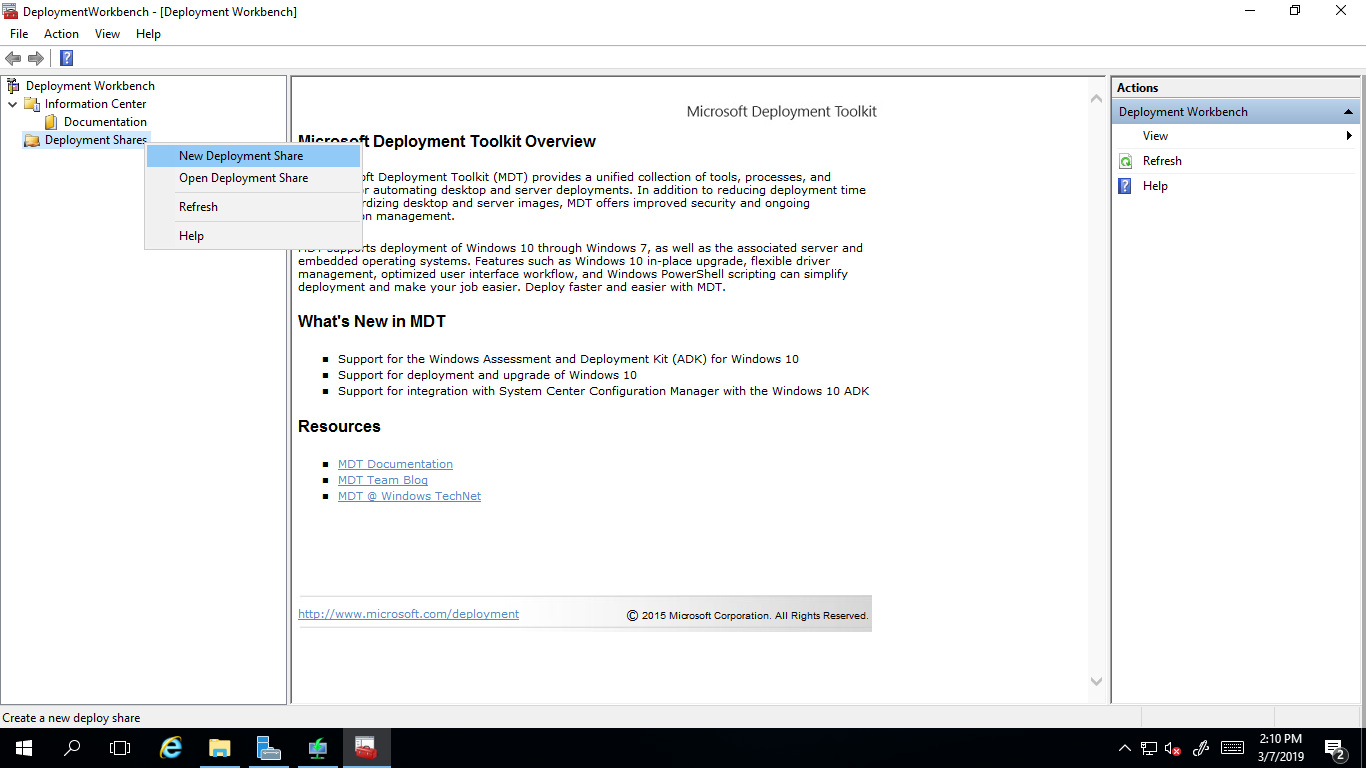
Для настройки MDT запускаем его консоль. Microsoft Deployment Toolkit -> Deployment Workbench.

Добавляем новую DeploymentShare. В ней будут храниться все файлы для установки.
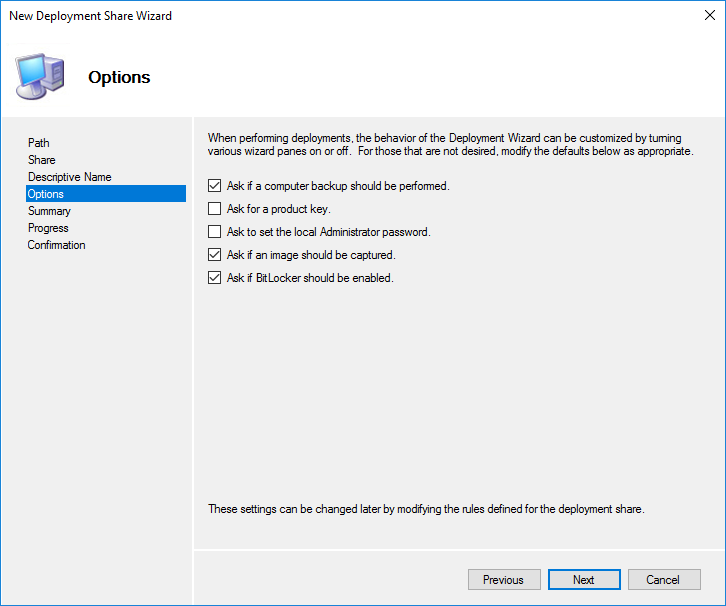
Следующие опции относятся к процессу установки и могут быть изменены позже.
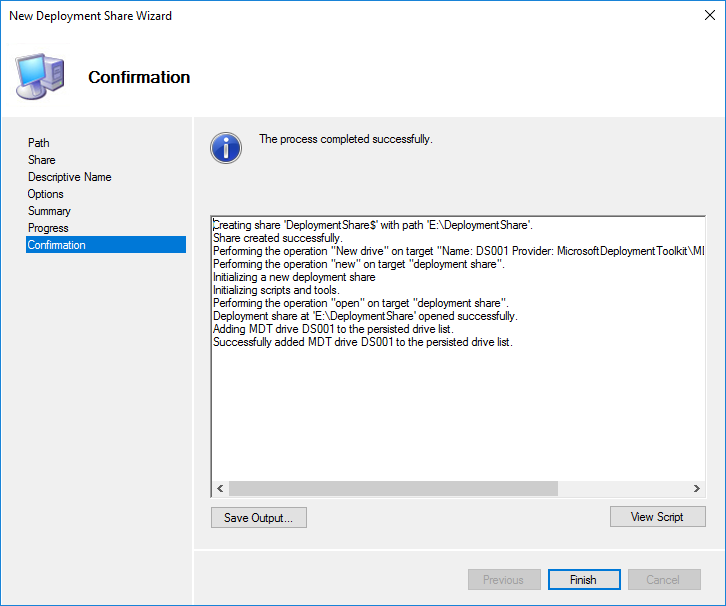
На завершающем этапе будет запущен процесс создания который должен пройти успешно.
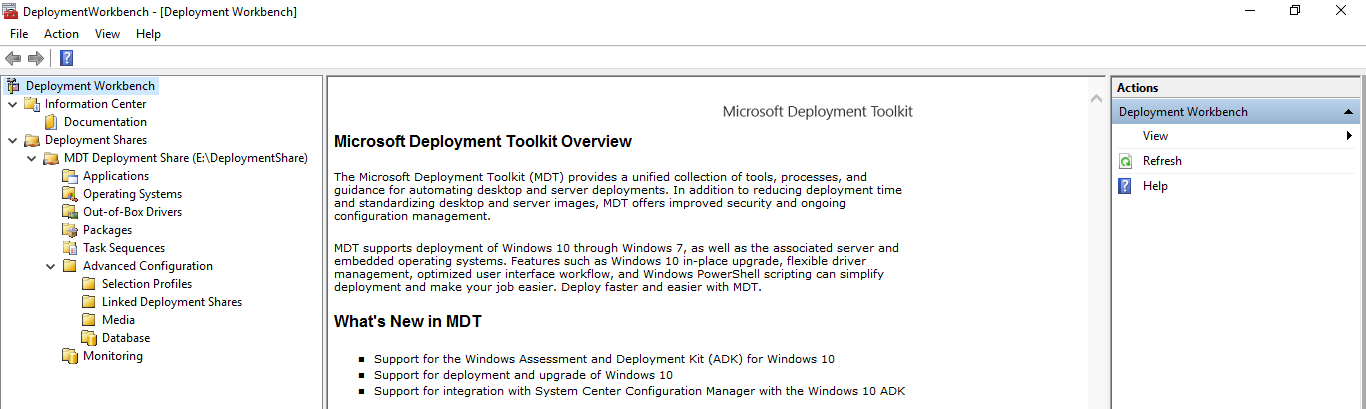
Общая папка E:\DeploymentShare$ может переноситься на другие сервера простым копированием. Отключение и подключение осуществляется в консоли MDT.
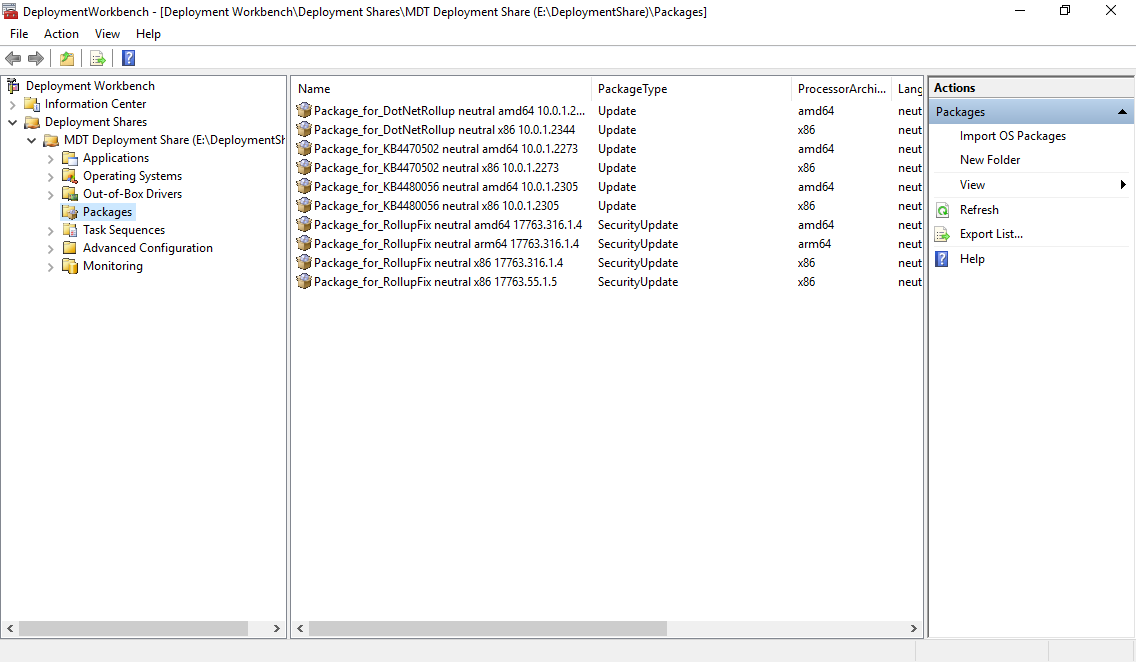
Applications — приложения которые устанавливаются на операционную систему;
Operating Systems — операционные системы доступные для загрузочного образа;
Out-of-Box Drivers — драйвера (.inf);
Packages — пакеты обновлений безопасности, сервисные, языковые и т.д. (.cab и .msu);
Task Sequences — последовательность задач установки;
Selection Profiles — логические группы объединения контента;
Linked Deployment Shares — другие подключенные DeploymentShare с других серверов;
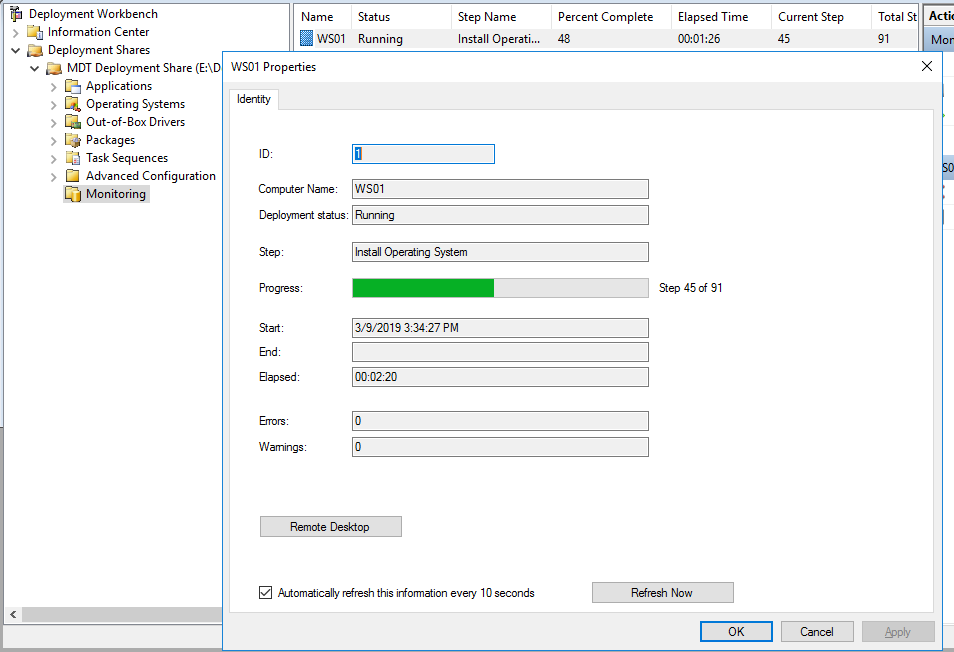
Monitoring — при включенной опции отображается ход выполнения установки на клиентах.
Открываем свойства нашей шары MDT Deployment Share. На вкладке General можно выбрать для каких платформ создавать .wim файлы с которых позже можно будет загружаться.
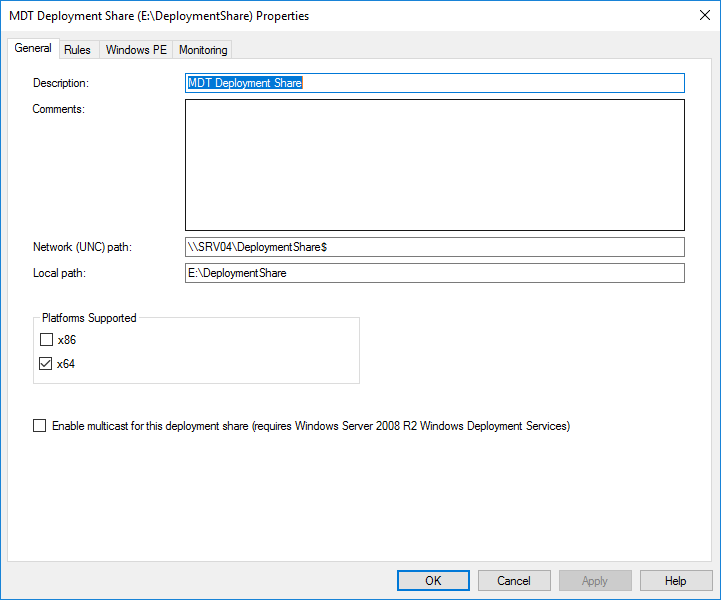
На вкладке Rules настраиваются конфигурационные файлы автоматизации MDT. В самом окне отображается текст файла .\Control\CustomSettings.ini, а под кнопкой Edit Bootstrap.ini файл .\Control\Bootstrap.ini.
CustomSettings.ini — находится на сервере и скрывает шаги меню установки, а также определяет некоторые параметры установки.
Bootstrap.ini — находится в загрузочном образе и определяет параметры для подключения к DeploymentShare.
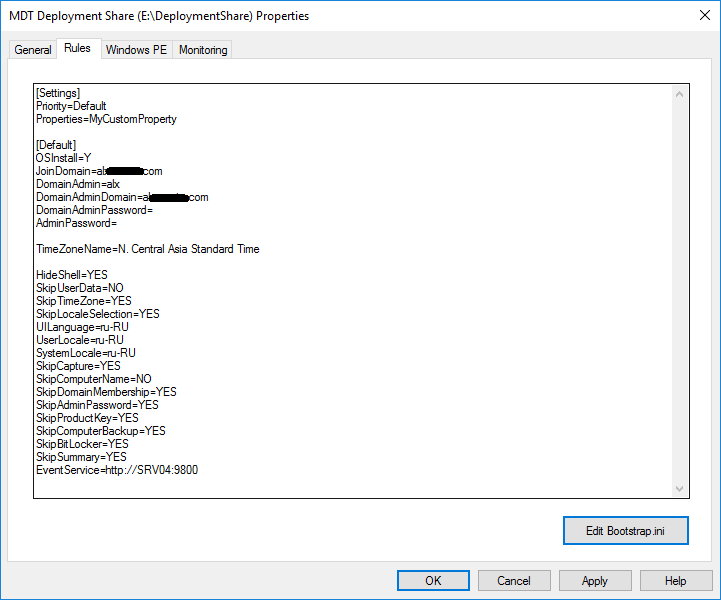
.\Control\CustomSettings.ini
OSInstall=Y //установить операционную систему
JoinDomain=alx*.com //ввести в этот домен
DomainAdmin=alx - имя пользователя используемого для присоединения
DomainAdminDomain=alx*.com //домен пользователя
DomainAdminPassword= //пароль пользователя
AdminPassword= //пароль локального администратора на новой машине
HideShell=YES //скрыть Shell
SkipUserData=NO //пропустить шаг о решении сохранности пользовательских данных (если установка производится поверх существующей системы)
TimeZoneName=N. Central Asia Standard Time //временная зона
SkipTimeZone=YES //пропустить выбор временной зоны
UILanguage=ru-RU //выбор языка интерфейса
UserLocale=ru-RU //выбор местоположения
SkipLocaleSelection=YES //пропустить выбор месторасположения
SystemLocale=ru-RU //выбор языка для non-Unicode программ
SkipCapture=YES //пропустить захват установленной операционной системы
SkipComputerName=NO //пропустить ввод имени компьютера
SkipDomainMembership=YES //пропустить членство в домене
SkipAdminPassword=YES //пропустить пароль администратора
SkipProductKey=YES //пропустить ввод лицензионного ключа
SkipComputerBackup=YES //пропустить выполнение резервного копирования
SkipBitLocker=YES //пропустить настройку шифрования BitLocker
SkipSummary=YES //пропустить страницу с выводом результирующих настроек
EventService=http://SRV04:9800 //установить сервер назначения для логов
Список временных зон
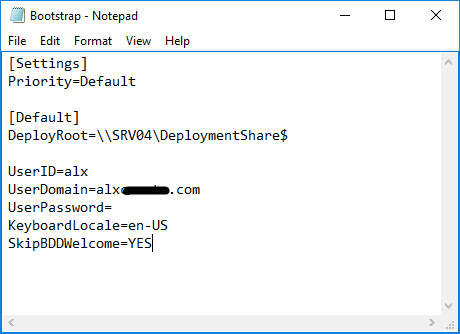
.\Control\Bootstrap.ini
[Settings]
Priority=Default
[Default]
DeployRoot=\\SRV04\DeploymentShare$
UserID=alx //имя пользователя для доступа к папкам Deployment Share
UserDomain=alx*.com //домен пользователя
UserPassword= //пароль пользователя
KeyboardLocale=en-US //выбор языка
SkipBDDWelcome=YES //пропустить начальную страницу установщика
На вкладке Windows PE настраивается создание загрузочных образов. Можно отключить на первой вкладке создание .wim файла, но выбрать на третьей .iso файл, если он нам нужен. Сейчас оставил только платформу x64. Второй пункт Generate a Lite Touch bootable ISO image понадобится, если нам необходим загрузочный ISO файл который мы могли бы записать на флешку или диск и загрузиться с него. Scratch space size — размер памяти в мегабайтах выделяемой для скриптов и команд установщика.
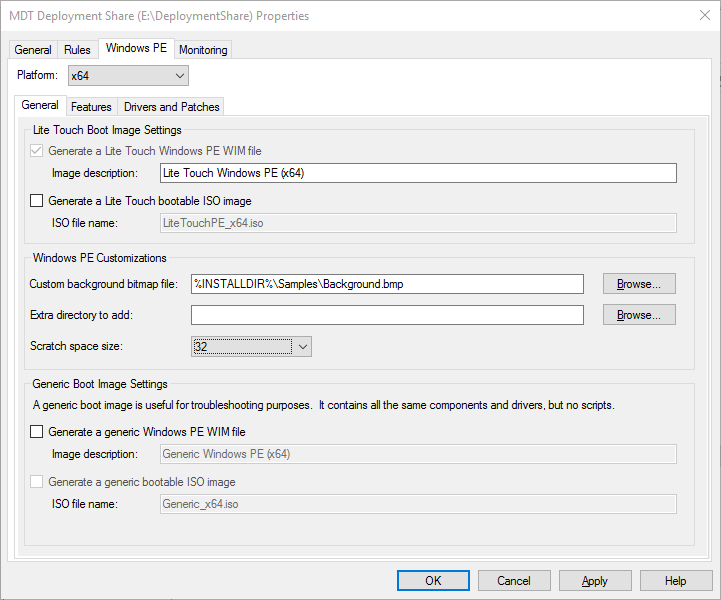
На вкладке Features можем добавить какие-либо компоненты в загрузочный образ. На вкладке Drivers and Patches лучше выбрать созданный специально для загрузочного образа Selection profile с сетевыми драйверами.
На следующей вкладке Monitoring включаем опцию чтобы он начал принимать логи от клиентов во время установки и отображать статус в папке Monitoring.
В соответствии со своей политикой безопасности добавляем разрешения на чтение каталога DeploymentShare$ и на этом простая настройка MDT закончена.

Импорт приложений
В контекстном меню папки Applications выбираем пункт New Application.
Добавим Google Chrome.
Скачиваем Standalone Enterprise на 64 бита и сохраняем в отдельную временную папку, например, E:\Soft. Указываем, где программа находится и выбираем опцию чтобы всё содержимое было перемещено в новую папку.
Далее составляем команду для тихой установки этого приложения и заполняем соответствующее поле.
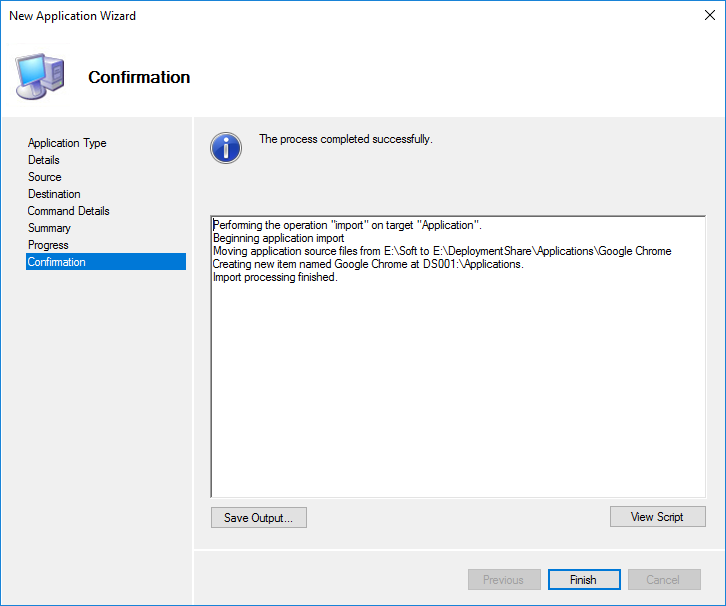
По аналогии добавляем весь нужный нам софт.
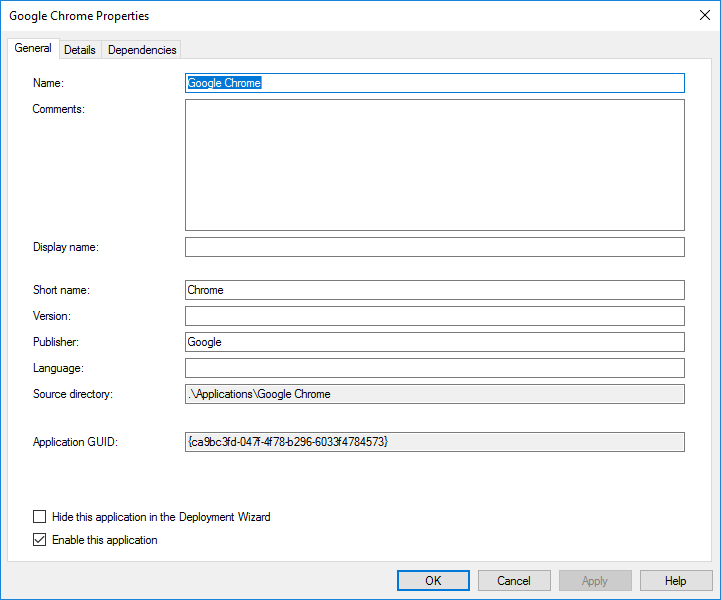
При переходе в свойства импортированного приложения на вкладке General можно редактировать ранее заполненные параметры, скрыть из списка выбора приложений при установке (если хотим устанавливать принудительно через задачу, например) и отключить это приложение в MDT вовсе если нужно исключить его использование в установке, но не желаем удалять (например, тестирование или обновление).
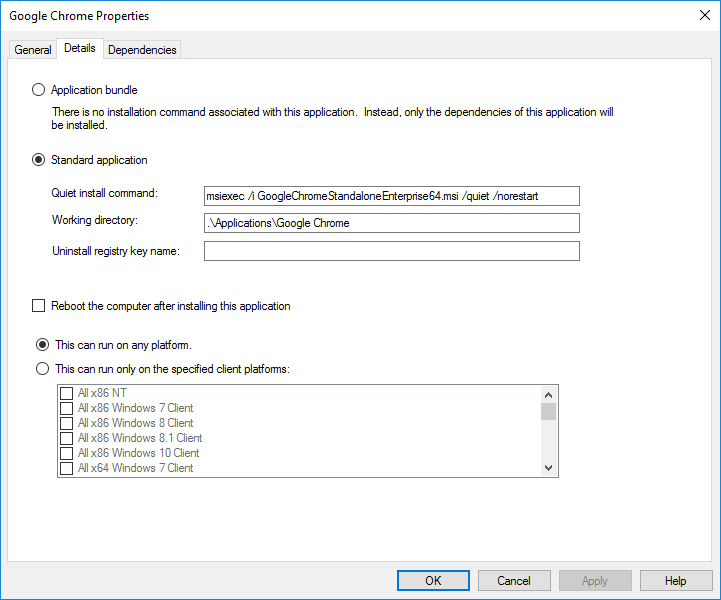
На вкладке Details можно изменить внесенные настройки, обязать перезагружаться после установки и разрешить запуск только на выбранных платформах.
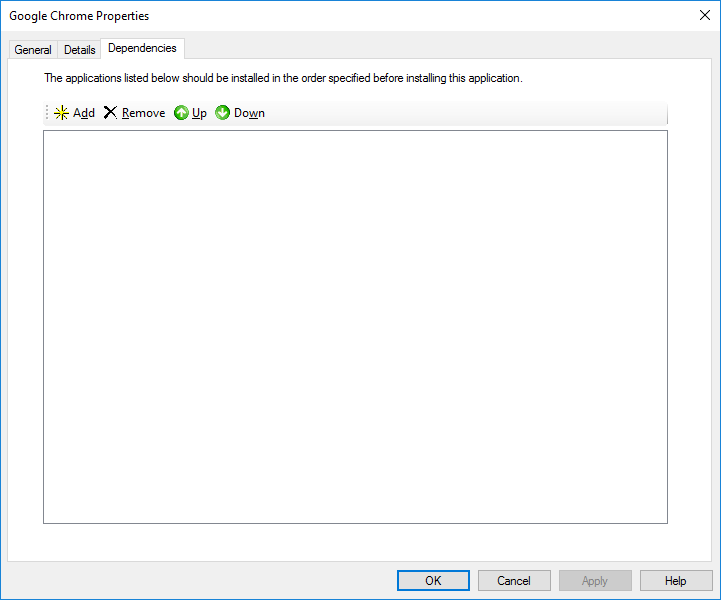
На последней вкладке Dependencies указываются зависимости. Если для приложения нужны какие-то дополнительные установки, то тут указывается их порядок. Только после установки зависимостей установится основное приложение. Софт, указанный в списке, должен быть импортирован заранее.
Импорт установочных образов
В папку Operating Systems добавляем операционную систему. У меня имеется .wim файл с Windows 10 Pro x64.
Почему .wim?
Лицензий на LTSC нет, только Pro. Поэтому приходится с выходом новой версии скачивать актуальную Windows 10 и с помощью MSMG ToolKit вычищать предустановленное… программы. На выходе получается .iso с вложенным .wim.

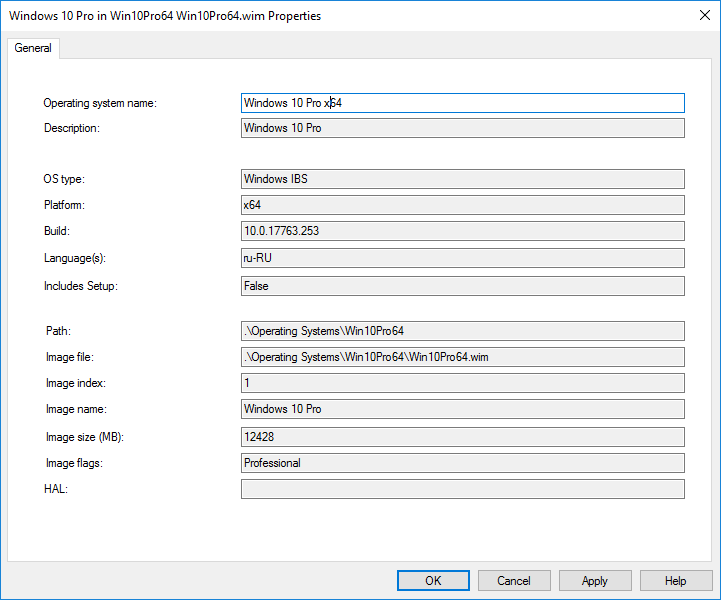
Переименовываем в более удобный вид.
Импорт драйверов
Для примера импортируем драйвера для сетевых карт Intel. Стоит сразу заметить, что любые архивы должны быть распакованы т.к. MDT автоматически по указанной директории ищет именно .inf файлы.


Целесообразно создавать подпапки для разделения производителей и моделей компьютерного оборудования. Отдельно стоит выделить драйвера для сетевых карт и дисков для загрузочного образа с помощью Selection Profiles.
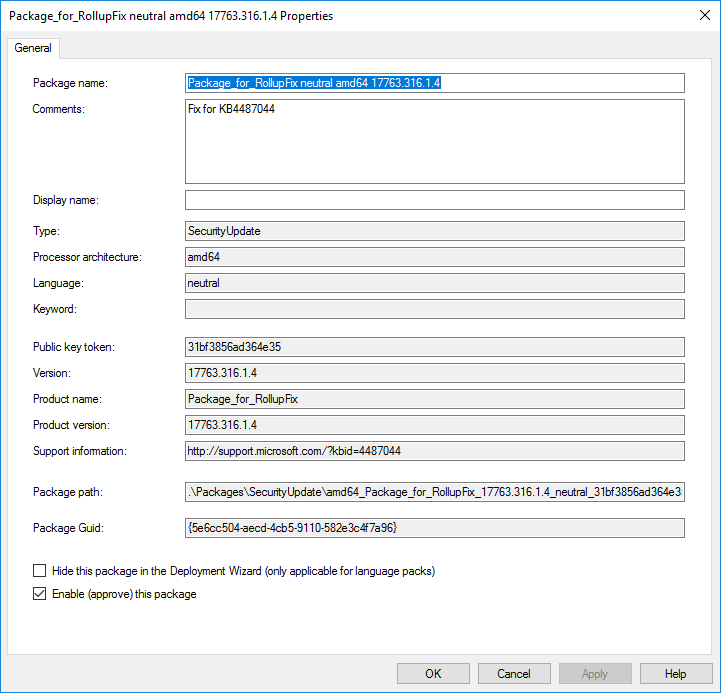
Импорт пакетов
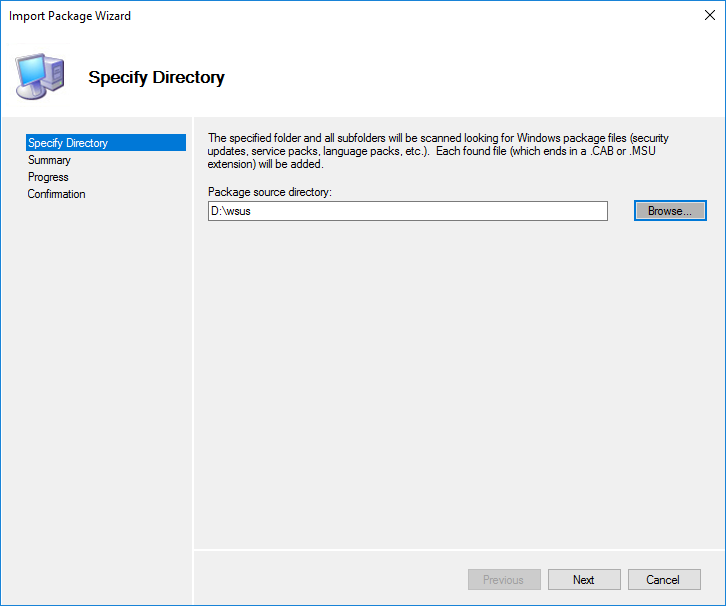
Если имеется WSUS, то можно указать на папку с его расположением и все пакеты будут найдены автоматически (из найденных сортировать через Selection Profiles). Если нет, то необходимо вручную скачать пакеты и указать место их расположения.
Создание задач
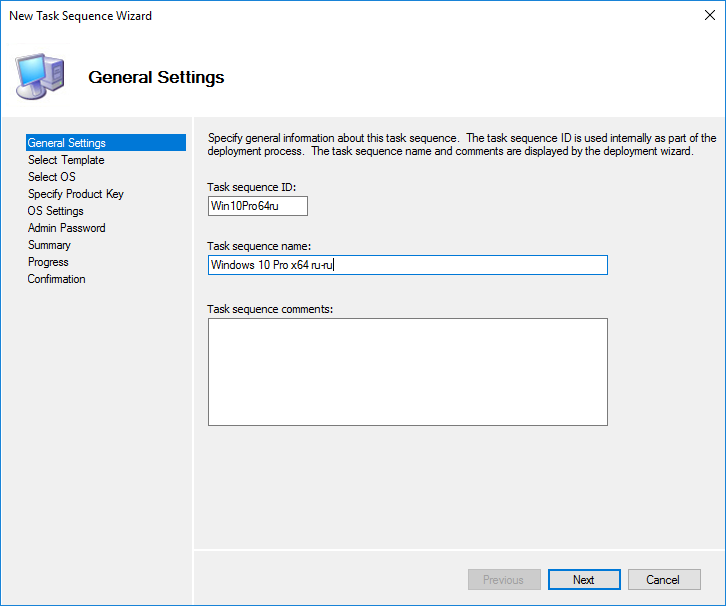
Task Sequences — это последовательность задач для установки. Можно добавлять, удалять или изменять шаги установки. На первой странице при добавлении задается ID и название.
Выбирается шаблон.
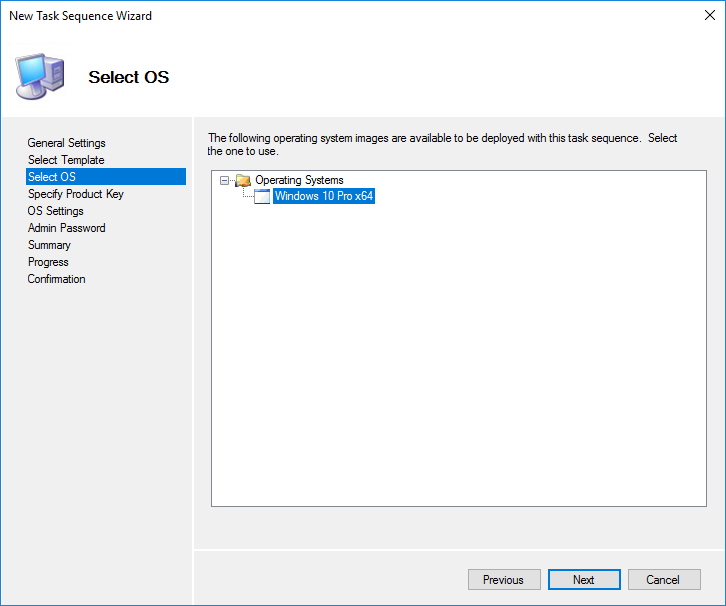
Выбор операционной системы из добавленных ранее.
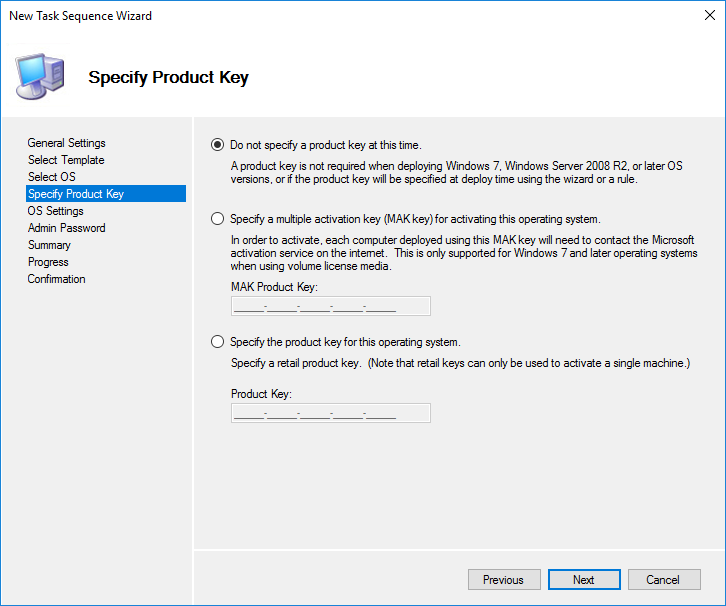
Ввод лицензионных ключей. Ключ будет указан после или во время установки, поэтому не задан.
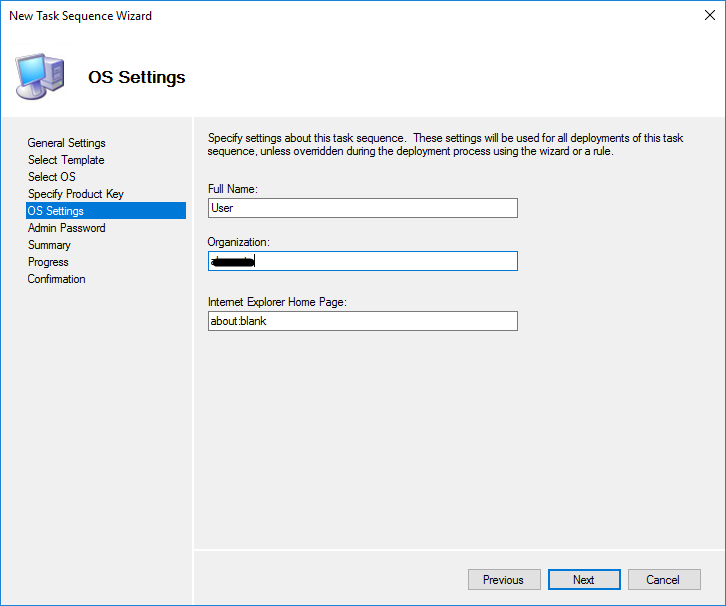
Вводим имя пользователя и название организации.
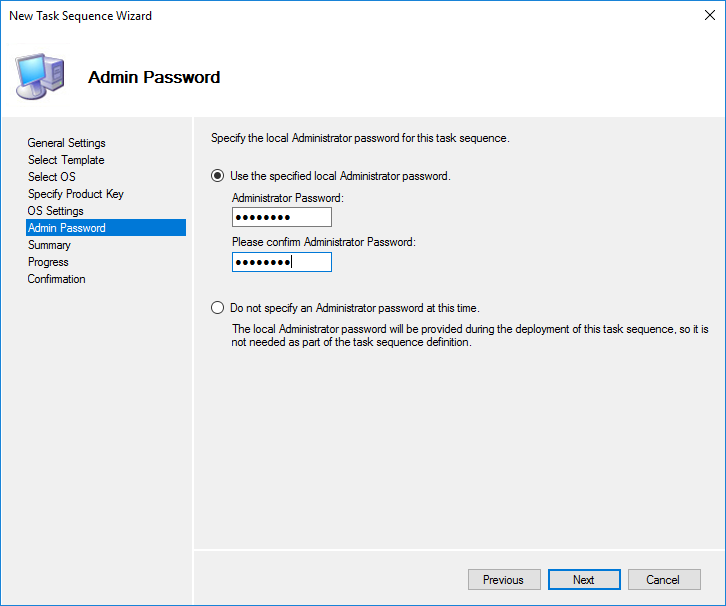
Пароль будущего локального администратора.
После создания можно аналогично просматривать её свойства и вносить изменения.

На вкладке Task Sequence описан весь процесс выполнения установки. Последовательность необходимо изменять под свои нужды.

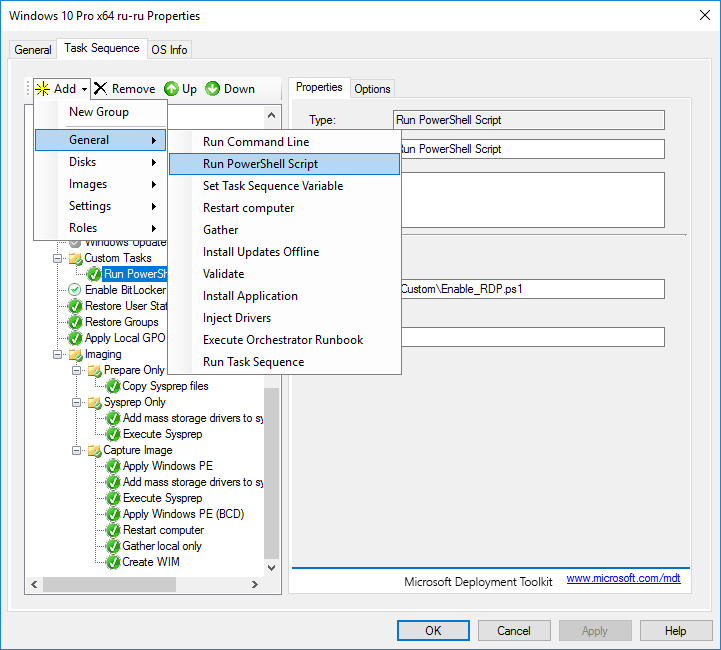
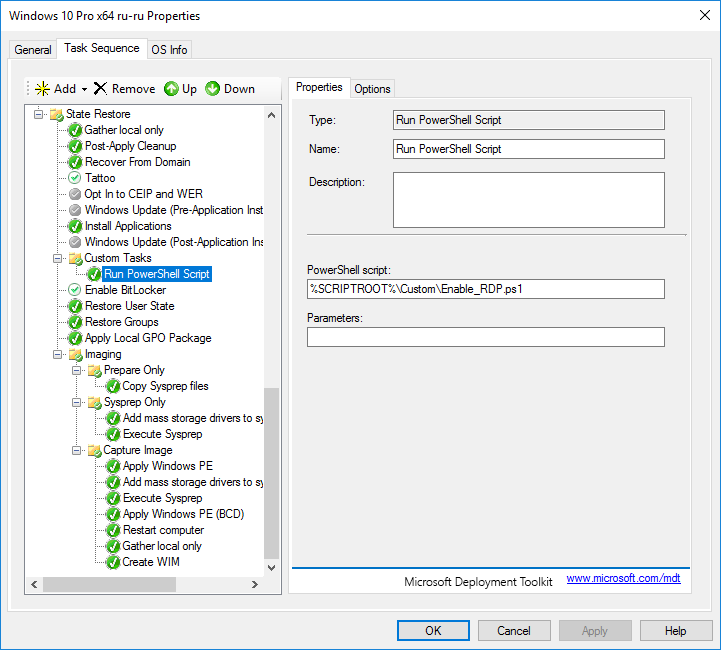
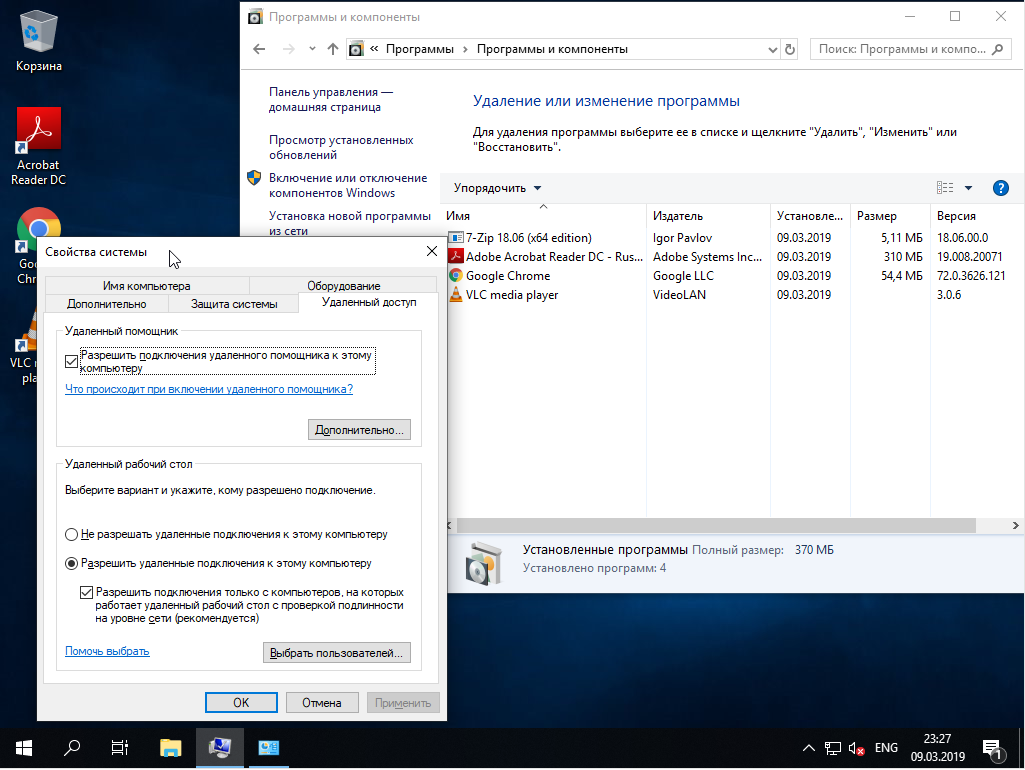
Для примера я добавлю скрипт включающий возможность подключиться по RDP т.к. по умолчанию после установки она отключена.
В папке .\Scripts\Custom создан скрипт на PowerShell Enable_RDP.ps1:
(Get-WmiObject Win32_TerminalServiceSetting -Namespace root\cimv2\TerminalServices).SetAllowTsConnections(1,1)
(Get-WmiObject -Class "Win32_TSGeneralSetting" -Namespace root\cimv2\TerminalServices -Filter "TerminalName='RDP-tcp'").SetUserAuthenticationRequired(1)
Enable-NetFirewallRule -DisplayGroup "Remote Desktop"
Далее выбираем желаемое место в этом порядке и добавляем новый пункт.
На вкладке Options мы можем отключить выполнение этого шага и включить продолжение выполнения установки если на этом шаге возникнет ошибка. Там же добавляются дополнительные необходимые условия для выполнения этого шага.
Рекомендую более детально изучить возможности разных типов задач. После завершения редактирования последовательности можно приступить к созданию загрузочных образов.

Для создания образов выбираем второй пункт.

Обновление DeploymentShare необходимо выполнять после:
- обновления загрузочных драйверов (сетевых карт и дисковых накопителей);
- добавления компонентов в загрузочный образ;
- изменения параметров загрузочного образа;
- обновления версии Windows ADK;
- изменения Bootrstrap.ini;
- изменения файлов «экстра»-директорий.
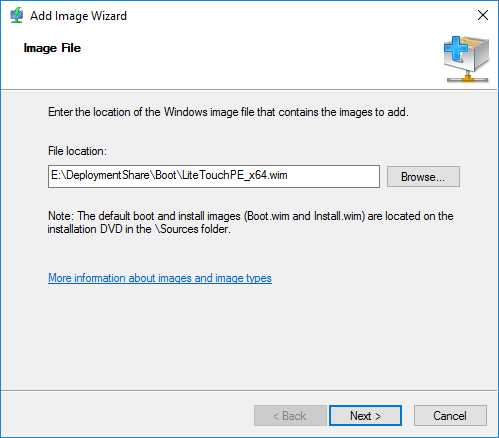
Переходим в консоль WDS и в папку Boot Images добавляем созданный загрузочный образ. WDS скопирует этот образ в свой рабочий каталог.
Тестирование
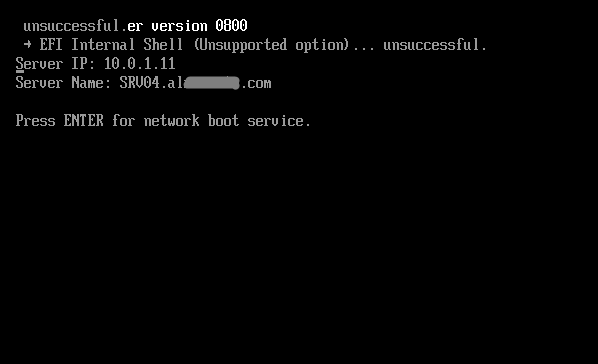
Настраиваем на тестовом компьютере загрузку по сети. Сервер WDS определяется автоматически. По умолчанию, компьютер ожидает нажатия F12 для продолжения загрузки. Эта настройка меняется в свойствах сервера WDS на вкладке Boot.

Большинство настроек было определено в конфигурационных файлах, остается заполнить недостающие. Выбираем доступный Task Sequences.

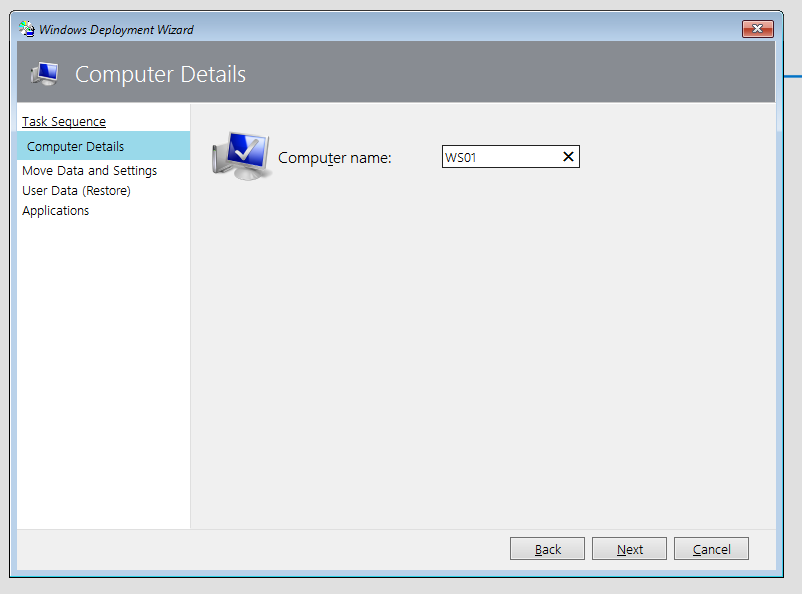
Задаем имя компьютера.
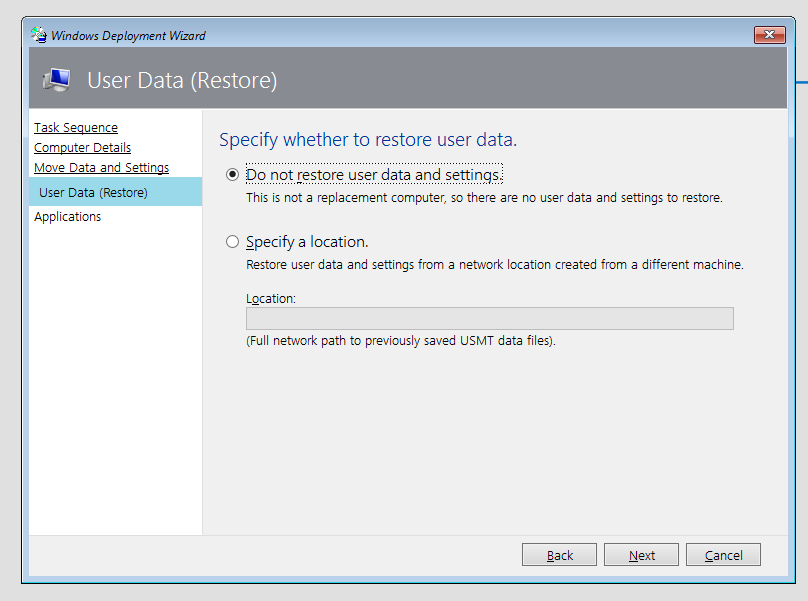
Данная настройка позволяет сохранить профили пользователей. У нас чистая установка, поэтому оставим как есть.

Можно и восстановить откуда-либо.
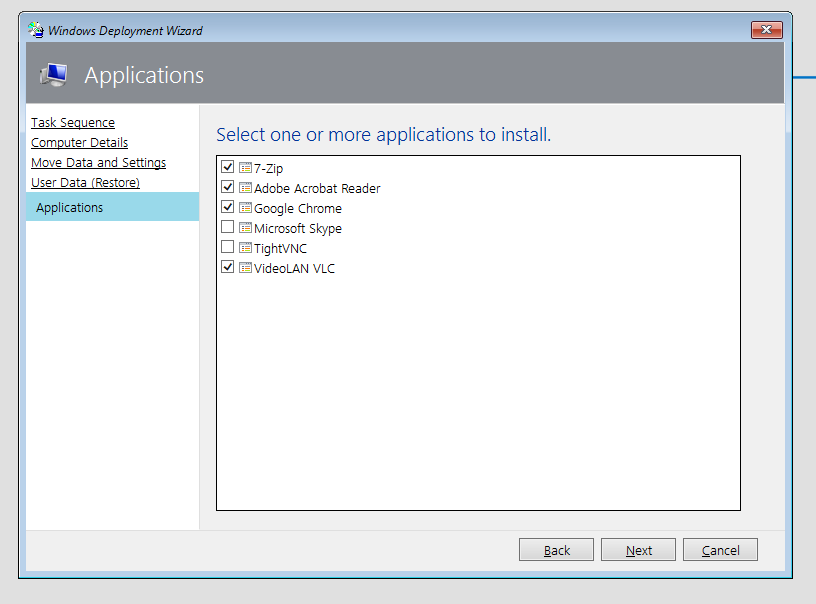
Выбираем необходимый софт.
Дальнейшая установка производится в автоматическом режиме.

При включенном мониторинге за ходом процесса установки можно наблюдать через консоль.
В конечном итоге, затратив пару минут своего времени (не считая установку) на загрузку по сети и ввод оставшихся настроек, мы получаем готовую к работе отвечающую нашим требованиям операционную систему. Сложность конечного результата определяется заранее, поэтому смысла особого не имеет.
Явные плюсы автоматизации:
- Экономия своего времени. Во время установки можем заниматься интересными делами.
- Единообразие устанавливаемых систем.
- Меньше время ожидания, чем это делалось бы вручную.
- Возможность менять отдельные элементы при изменениях, а не пересобирать образ целиком.
Полная официальная документация MDT
Здравствуйте, уважаемые читатели сайта remontcompa.ru! Меня зовут Роман Нахват и я представляю вашему вниманию статью о создании установочного дистрибутива операционной системы Windows 10 (версии 1809) с интегрированными в него приложениями и драйверами. Создавать данный установочный дистрибутив мы с вами будем используя Microsoft Deployment Toolkit (MDT) версии 8456. Для создания такого дистрибутива нам понадобится оригинальный, скачанный с официального сайта Microsoft iso образ Windows 10, комплект средств для развёртывания и оценки Windows 10 (ADK for Windows 10) версии 1809, установочный файл Microsoft Deployment Toolkit, установочные файлы приложений и драйвера, которые необходимо включить в состав дистрибутива Windows 10. Итак, поехали.
Создание установочного дистрибутива Windows 10 1809 с приложениями и драйверами используя Microsoft Deployment Toolkit (MDT) версии 8456
Переходим по адресу:
https://docs.microsoft.com/en-us/windows-hardware/get-started/adk-install
И выполняем скачивание пакета ADK for Windows 10 версии 1809.
 версии 8456")
Также переходим по адресу:
https://www.microsoft.com/en-us/download/details.aspx?id=54259
И скачиваем установочный файл Microsoft Deployment Toolkit.
 версии 8456")
Выполняем установку ADK for Windows 10 версии 1809.
 версии 8456")
В окошке принятия правил конфиденциальности жмём «Далее». Затем принимаем лицензионное соглашение. На этапе выбора компонентов всё оставляем по умолчанию, жмём «Установить».
 версии 8456")
И устанавливаем.
 версии 8456")
Теперь выполняем установку Microsoft Deployment Toolkit. Принимаем лицензионное соглашение.
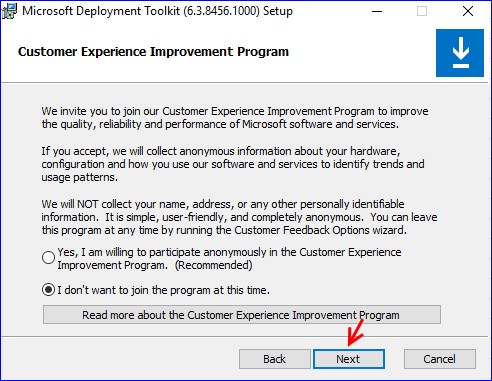
Жмём просто Next на этапе настройки компонентов. И на следующем за ним этапе тоже жмём Next.
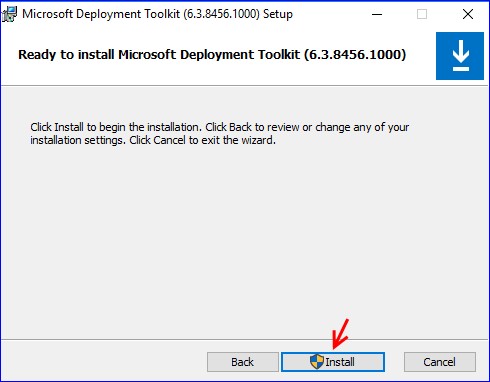
Install.
Установка Microsoft Deployment Toolkit завершена. Жмём в конце «Finish».
Запускаем Deployment Workbench в меню «Пуск». Microsoft Deployment Toolkit (MDT) предоставляет пользователю набор инструментов для автоматизации развертывания операционных систем на настольных компьютерах и серверах. MDT поддерживает развертывание операционных систем от Windows 7 до Windows 10, гибкое управление драйверами и приложениями.
 версии 8456")
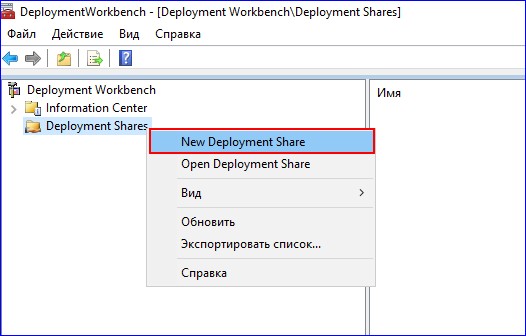
Создадим новую Deployment Share (New Deployment Share).
Указываем месторасположение создаваемой Deployment Share (в нашем случае это раздел E:).
 версии 8456")
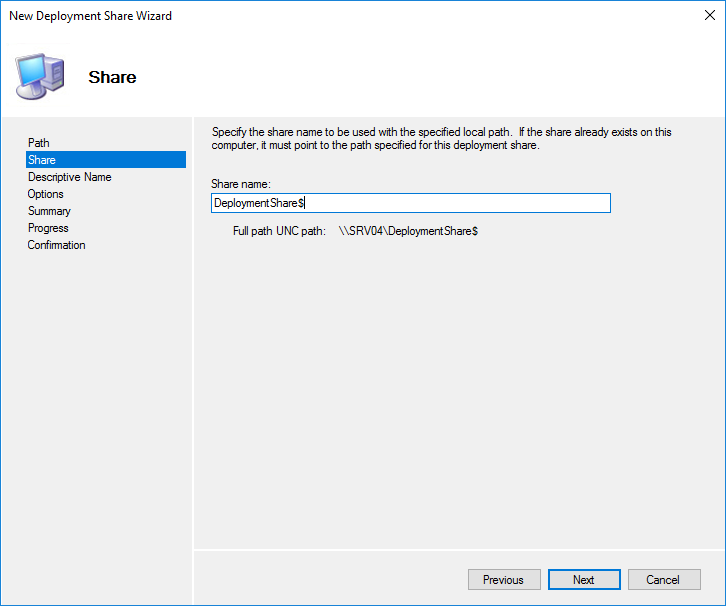
На странице Share оставляем всё по умолчанию.
 версии 8456")
Next.
Next.
 версии 8456")
Next.
 версии 8456")
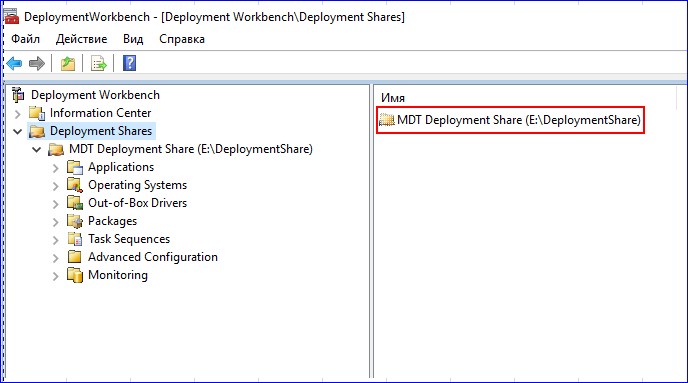
Deployment Share успешно создана.
 версии 8456")
Созданная Deployment Share.
Под буквой G: у нас смонтирован в виртуальный привод установочный дистрибутив Windows 10. Cмонтированный дистрибутив Windows 10 базируется на файле install.esd.
 версии 8456")
Создадим на разделе C: папку win10x64 и скопируем в него файл install.esd.
 версии 8456")
Запустим командную строку от имени администратора, перейдем в папку win10x64 и выполним команду:
dism /Get-WimInfo /WimFile:install.esd
 версии 8456")
Как видим, файл install.esd содержит в себе несколько редакций операционной системы Windows 10. Нас интересует редакция под индексом 4, то есть Windows 10 Pro.
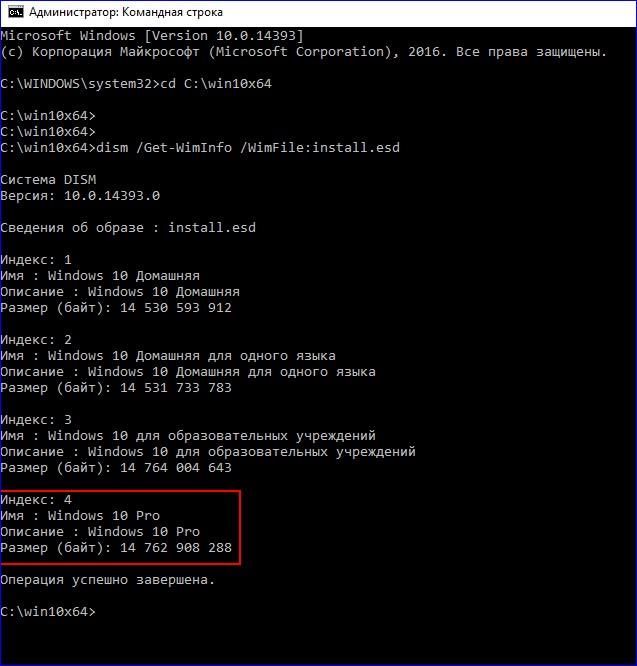
Выполним экспорт образа Windows 10 Pro из файла install.esd в отдельный файл c расширением .wim. Для этого вводим команду:
dism /export-image /SourceImageFile:install.esd /SourceIndex:4 /DestinationImageFile:install.wim /Compress:max /CheckIntegrity
После параметра SourceIndex указываем число 4 (т.е порядковый номер индекса Windows 10 pro), задаём максимальное сжатие экспортируемого образа (параметр Compress:max), параметр CheckIntegrity применяем для выявления повреждения wim-файла.
 версии 8456")
Процесс экспорта Windows 10 pro в отдельный файл с расширением .wim.
 версии 8456")
Экспорт образа Windows 10 pro успешно завершён
 версии 8456")
Перейдём в папку win10x64 и рядом с файлом install.esd видим файл install.wim
 версии 8456")
Перейдём в окно Deployment Workbench, развернём созданную Deployment Share и далее в Operating Systems создадим папки windows 10 pro и x64 (пункт New Folder).
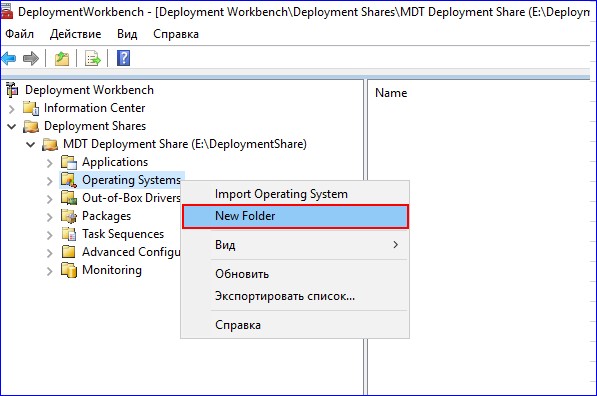
Указываем имя папки.
 версии 8456")
Жмём Next.
 версии 8456")
Finish.
 версии 8456")
Таким же образом создаем папку x64. В итоге получаем следующее
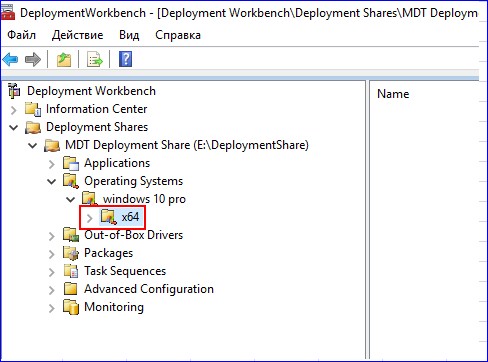
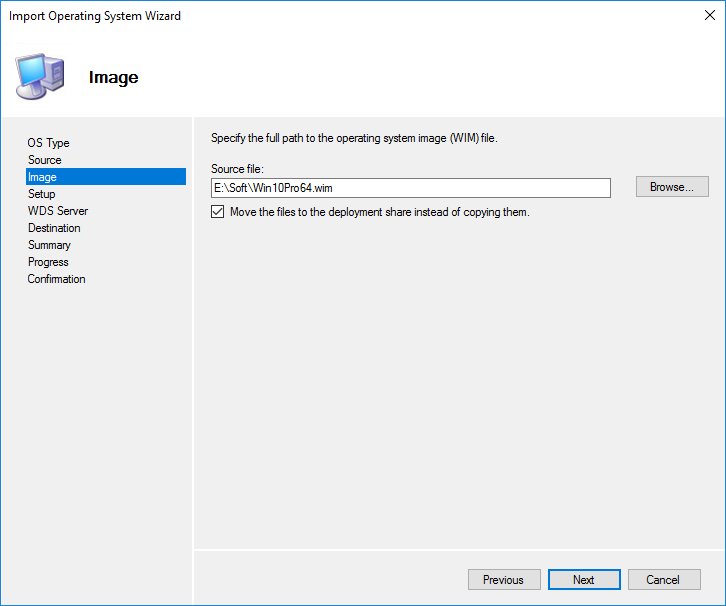
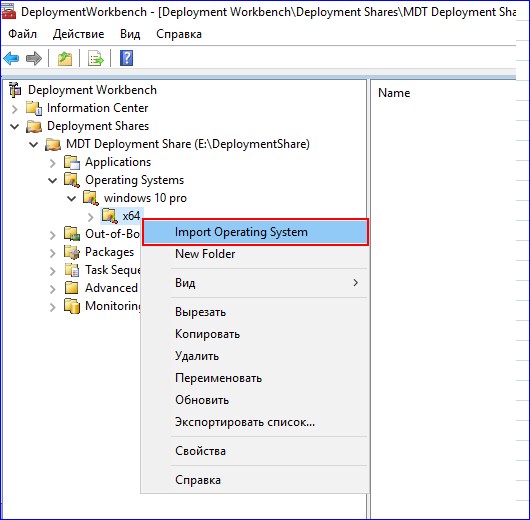
Выделяем папку x64 и в контекстном меню выбираем Import Operating System.
Выбираем Custom image file.
 версии 8456")
Указываем путь к файлу install.wim, который мы выше экспортировали из файла install.esd.
 версии 8456")
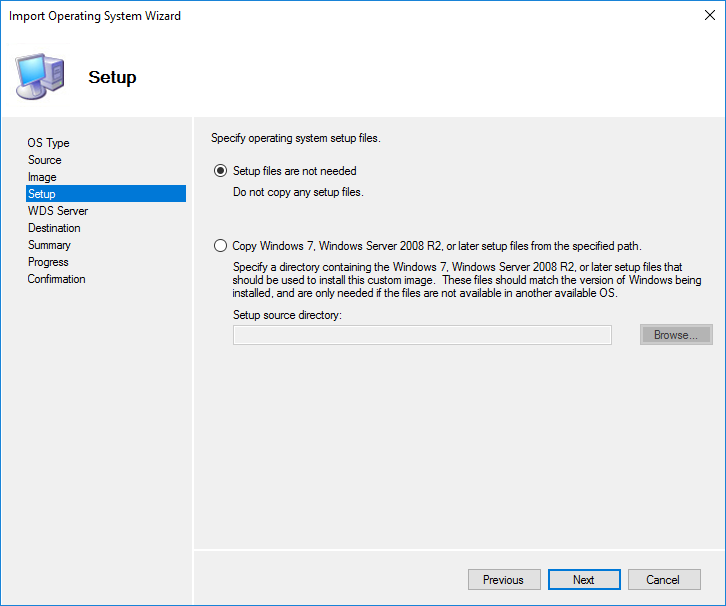
Оставляем всё по умолчанию. Жмём Next.
 версии 8456")
Next.
 версии 8456")
Next.
 версии 8456")
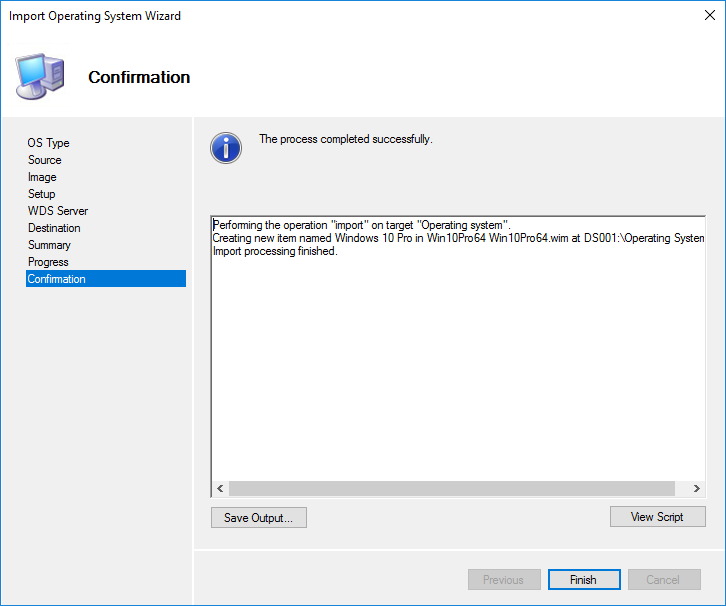
Процесс добавления образа Windows 10 pro в Deployment Share.
 версии 8456")
Жмём Finish.
 версии 8456")
Видим, что мы успешно добавили образ Windows 10 pro в Deployment Share.
 версии 8456")
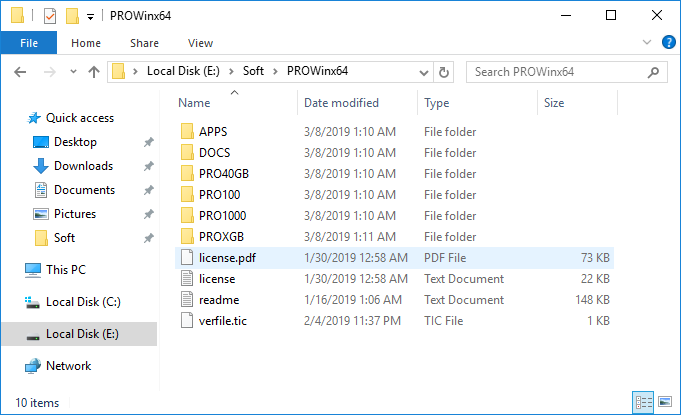
Добавим в созданную Deployment Share приложения и драйвера. На флеш накопителе в соответствующих папках у нас находятся драйвера и установочные файлы приложений.
 версии 8456")
Выбираем Out-of-Box Drivers, и создаём структуру папок, как показано ниже.
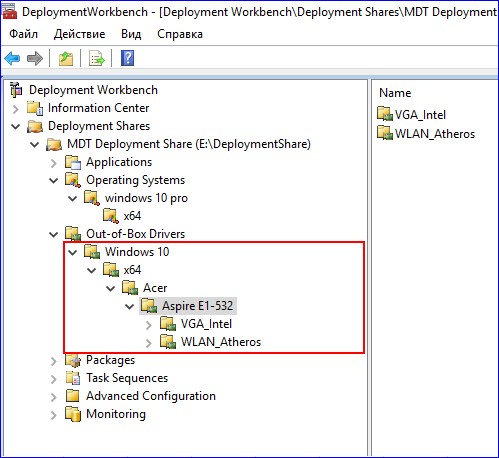
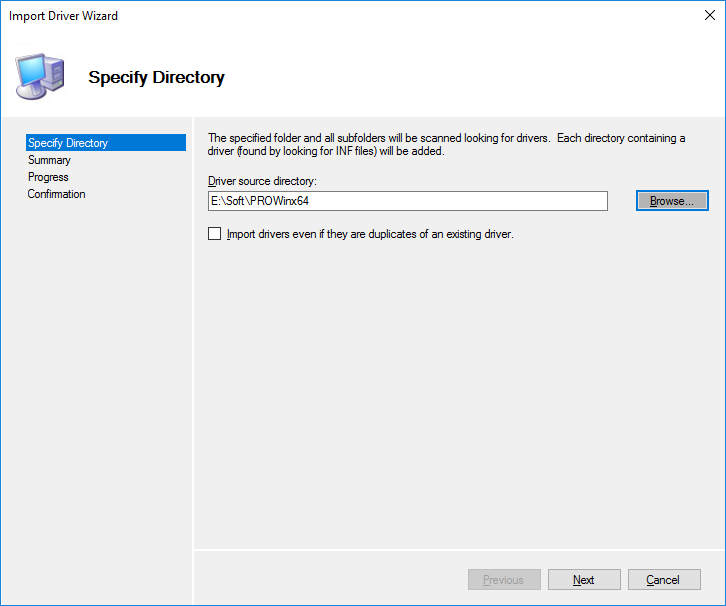
Выделяем папку VGA_Intel и выбираем Import Drivers.
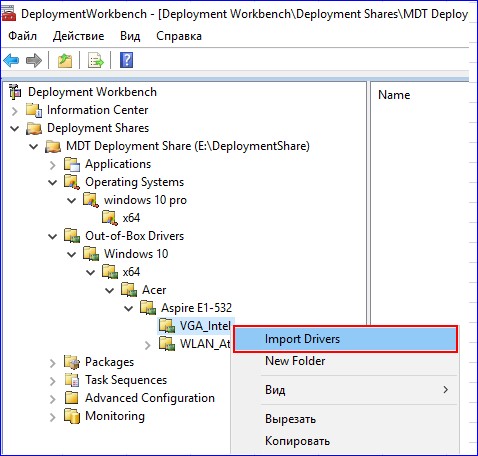
Указываем путь к драйверам, которые будем добавлять в папку VGA_Intel.
 версии 8456")
Next.
 версии 8456")
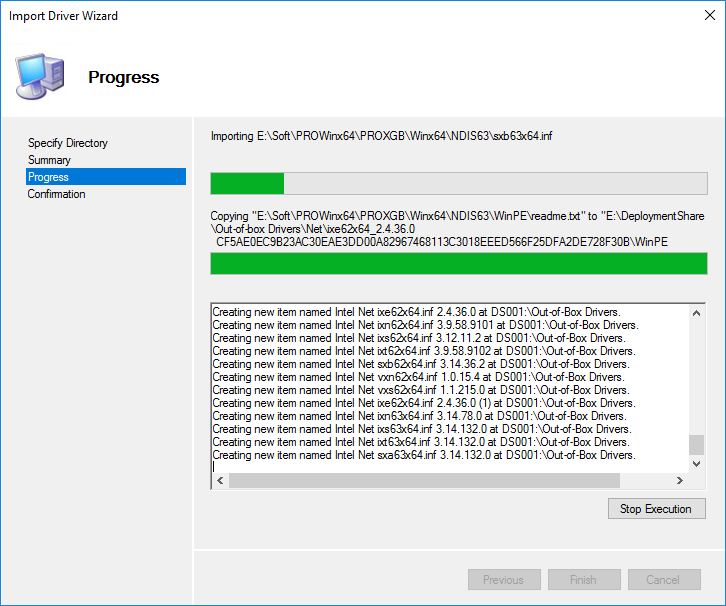
Процесс добавления драйверов в папку VGA_Intel.
 версии 8456")
Finish.
 версии 8456")
Драйвера, добавленные в папку VGA_Intel.
 версии 8456")
Таким же образом добавим драйвера и в папку WLAN_Atheros. Получим следующее.
 версии 8456")
В Deployment Share переходим в Applications и создаём три папки: AIMP, Notepad++ и Visual Studio Code.
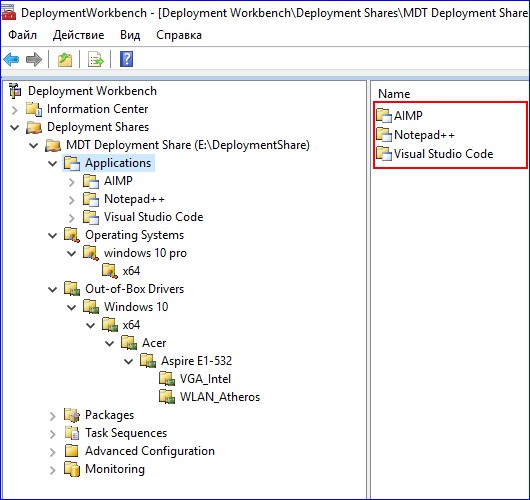
В каждую из созданных папок добавим соответствующие приложения. Выделяем папку AIMP и выбираем New Application.
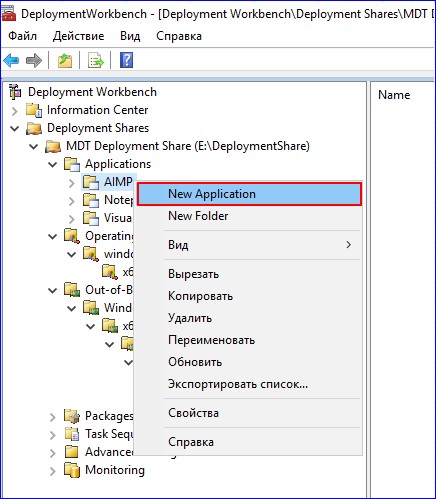
Выбираем Application with source files.
 версии 8456")
Указываем название приложения и его версию.
 версии 8456")
Прописываем путь к установочному файлу приложения.
 версии 8456")
В строке Command line указываем название установочного файла приложения с расширением и далее прописываем ключ для тихой установки данного приложения. Например, для медиапроигрывателя AIMP ключ тихой установки будет /SILENT /AUTO.
 версии 8456")
Next.
 версии 8456")
Приложение AIMP успешно добавлено.
 версии 8456")
Таким же образом в соответствующие папки добавляем приложения Notepad++ и Visual Studio Сode, используя следующие ключи тихой установки:
- для Notepad++ /S, а
- для Visual Studio Сode /VERYSILENT /SUPPRESSMSGBOXES /NORESTART /SP-
Получаем следующее.
 версии 8456")
 версии 8456")
Переходим в Task Sequences, и как это делали выше, создаём папку Install Windows 10 x64. Создадим новую последовательность задач, выделив данную папку и выбрав New Task Sequence.
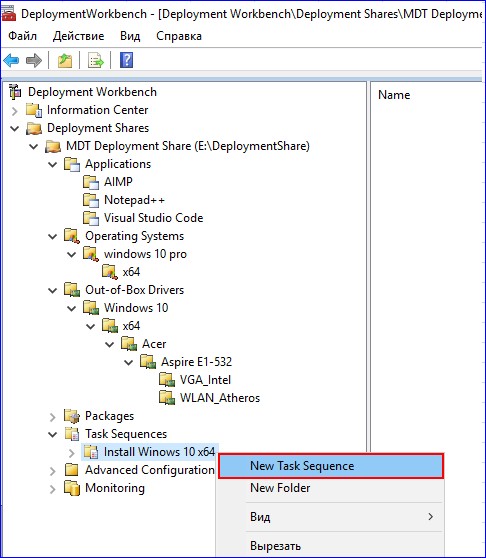
Указываем идентификатор последовательности задач (w10), и название (Install Windows 10).
 версии 8456")
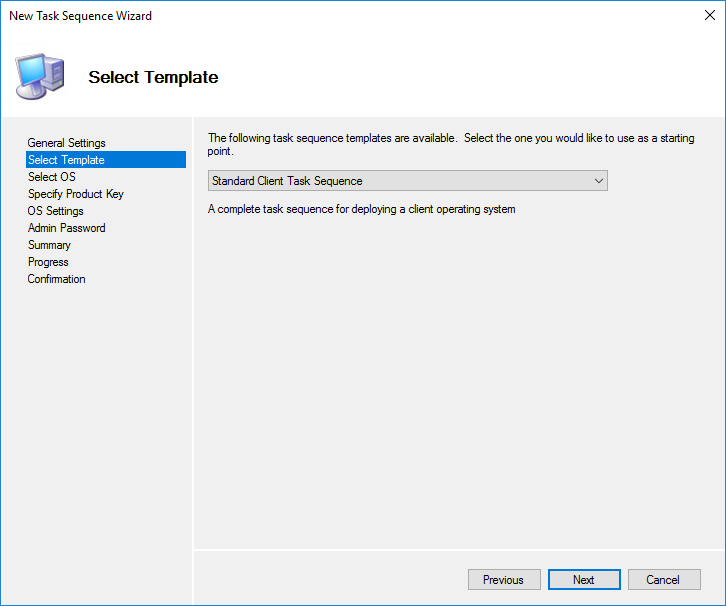
На вкладке Select Template из выпадающего списка выбираем Standard Client Task Sequence.
 версии 8456")
Указываем операционную систему для установки.
 версии 8456")
Вводим ключ для установки Windows 10 pro.
 версии 8456")
Указываем имя владельца системы, название организации и домашнюю страницу для встроенного в операционную систему браузера.
 версии 8456")
Указываем пароль для встроенной учётной записи администратора.
 версии 8456")
Жмём Next.
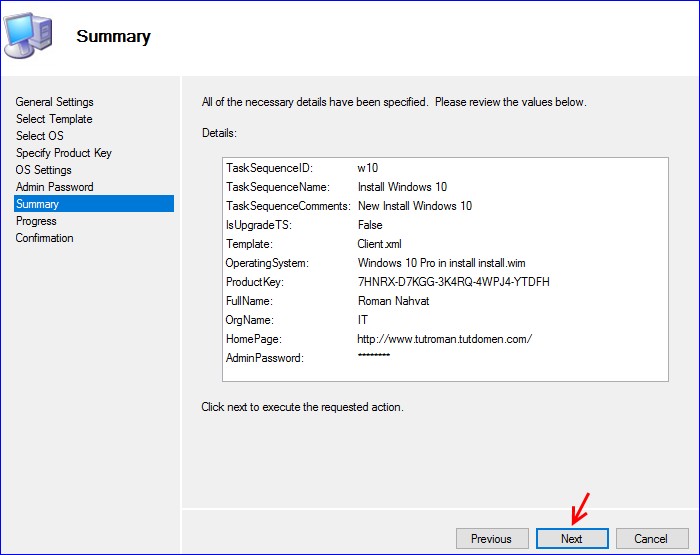
Последовательность задач Install Windows 10 x64 успешно создана.
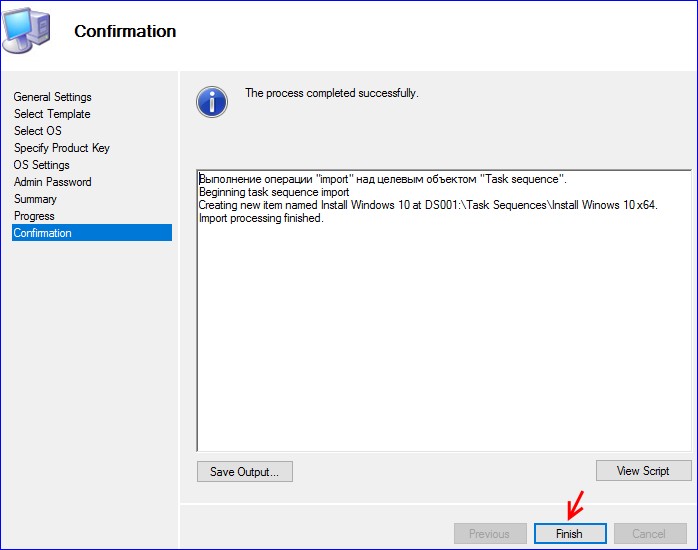
Созданная последовательность задач Install Windows 10 x64.1
 версии 8456")
Переходим к Selection Profiles и выбираем New Selection Profile.
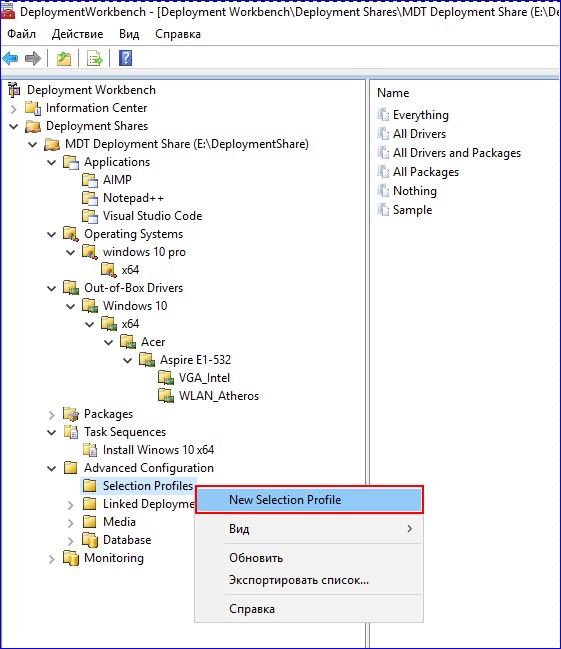
Указываем имя для создаваемого Selection profile, в нашем случае это Drivers Acer Aspire E1-532.
 версии 8456")
Выбираем компоненты для создаваемого Selection profile (ставим галочки напротив папок с драйверами, а именно VGA_Intel и WLAN_Atheros).
 версии 8456")
Жмём Next.
 версии 8456")
Finish.
 версии 8456")
Selection profile c именем Drivers Acer Aspire E1-532 успешно создан.
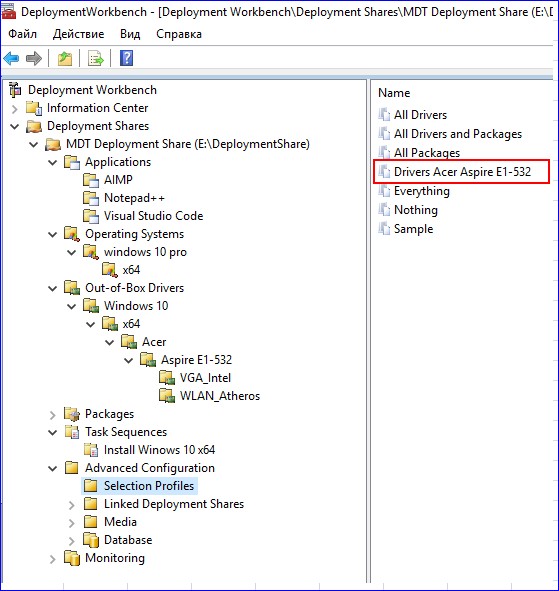
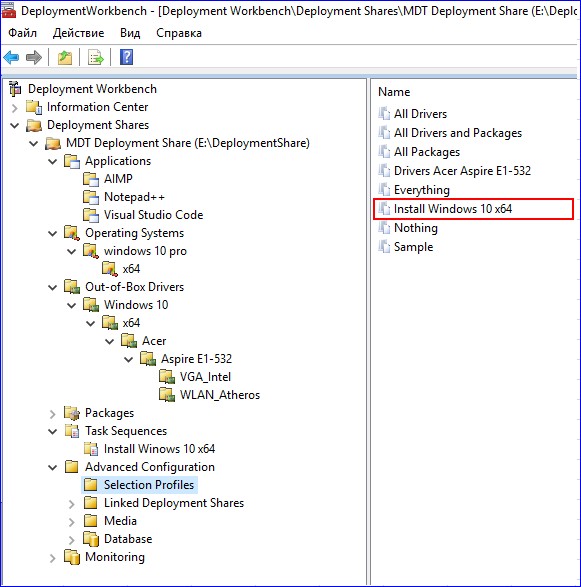
Создадим ещё один Selection profile с именем Install Windows 10 x64.
 версии 8456")
Для Selection profile с именем Install Windows 10 x64 поставим галочки для компонентов, как это показано ниже.
 версии 8456")
Next.
Selection profile с именем Install Windows 10 x64 успешно создан.
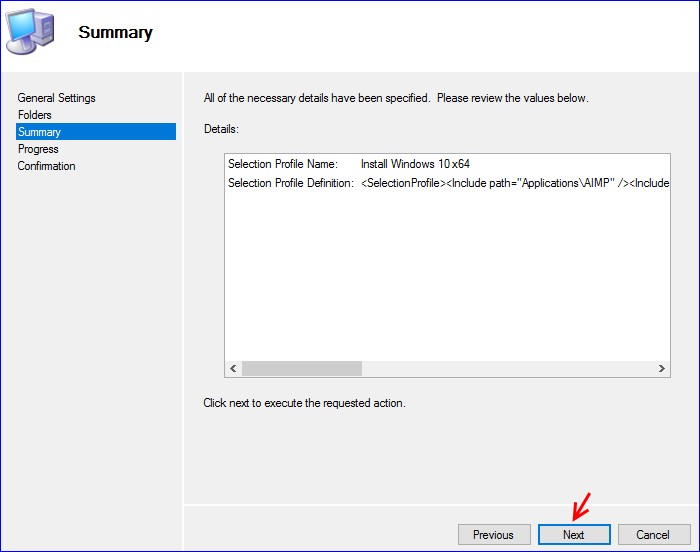
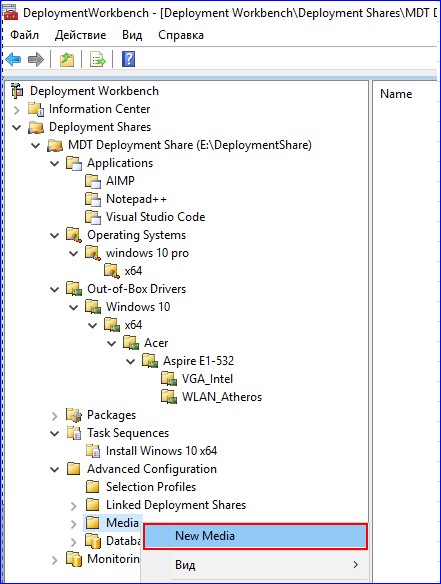
Приступим к созданию установочного дистрибутива с Windows 10 pro. Щёлкаем по Media и выбираем New Media.
Указываем путь, где будет сохраняться создаваемый установочный дистрибутив. В выпадающем списке Selection profile выбираем Install Windows 10 x64.
 версии 8456")
Next.
 версии 8456")
Ожидаем завершения процесса копирования файлов, необходимых для создания установочного дистрибутива (в нашем случае с Windows 10).
 версии 8456")
Finish.
 версии 8456")
Получаем следующее.
 версии 8456")
Щёлкаем по созданному MEDIA001 и выбираем Свойства.
 версии 8456")
Переходим на вкладку Windows PE.
 версии 8456")
Далее переходим на вкладку Drivers and Patches.
 версии 8456")
Включим в состав создаваемого установочного дистрибутива Windows 10 драйвера, которые мы добавляли в Deployment Share. Для этого в выпадающем списке Selection profile выбираем Drivers Acer Aspire E1-532.
 версии 8456")
Жмём Применить и ОК
 версии 8456")
Выделяем созданный Media (MEDIA001) и выбираем Update Media Content
 версии 8456")
Ожидаем завершения процесса создания установочного дистрибутива Windows 10. Процесс создания установочного дистрибутива Windows 10 с интегрированными драйверами и приложениями успешно завершён
 версии 8456")
Переходим на раздел E: в папку media и видим созданный установочный дистрибутив Windows 10 под именем LiteTouchMedia и расширением .iso
 версии 8456")
В следующей статье по Microsoft Deployment Toolkit (MDT) мы выполним установку Windows 10 на компьютер используя созданный дистрибутив, а так же рассмотрим процесс настройки данного дистрибутива для полной автоматизации установки Windows 10
If you’ve read my other posts you’ll know that usually I make a post focusing on building a reference image and then another post on deploying that image.
This post is very similar but I’m going to streamline things by just covering the installation of MDT, and deploying Windows 10 1909. I have also recently published a video walkthrough covering this.
What you’ll need:
- A server to host the MDT share.
- A client PC, or the MDT server above to install the tools.
- A VM to test the install task sequence.
This walkthrough will cover installing the tools on a client PC and then the MDT deployment share will be hosted on a server. Here are the links to the software we’ll be using:
- Windows 10 1903 Assessment and Deployment Kit (ADK)
- Windows System Image Manager (WSIM) 1903 update
- Windows PE add-on for the ADK
- Microsoft Deployment Toolkit (8456)
- Windows 10 1909 x64 ISO Volume Licensing Service Center
Installing Microsoft Deployment Toolkit and Dependencies
- First we’ll install the Windows 10 1903 ADK. During setup additional files will need to be downloaded, so it may take some time depending on your internet connection.
- On the Select the features you want to install screen select:
- Deployment Tools
- Imaging And Configuration Designer (ICD)
- Configuration Designer
- User State Migration Tool (USMT)
- Install WinPE by running the adkwinpesetup.exe. There is no specific configuration during the install wizard.
- Install MDT by running the MicrosoftDeploymentToolkit_x64.msi. There is no specific configuration during the install wizard.
Install the Windows System Image Manager Update
- Unzip the archive containing the WSIM 1903 fix.
- Copy the two files: ImageCat.exe and ImgMgr.exe to the location the ADK is installed to. The default location is: C:\Program Files (x86)\Windows Kits\10\Assessment and Deployment Kit\Deployment Tools\WSIM.
- After installation you will still not be able to access WSIM through MDT. You will need to load WSIM from the Start Menu then open the XML file for the Operating System you wish to change. The XML answer file will be located in \\server\deploymentshare$\Control\Task-Sequence-ID\Unattend.xml.
- Go to the server that will host the deployment share.
- Create a folder called DeploymentShare.
- Share the folder by right-clicking on the folder and go to Properties > Sharing > Advanced Sharing.
- Tick the Share this folder check box.
- Enter DeploymentShare$ as the Share name. We do this so the share is hidden.
- Go to Permissions, remove Everyone.
- Add Domain Users and leave the permissions as Allow Read. Add Domain Admins and check Allow Full Control permissions.
- Go back on the client PC where the MDT tools installed.
- Open the Deployment Workbench from the Start Menu.
- Right click on Deployment Shares.
- Select New Deployment Share.
- Under Deployment share path enter the UNC path: \\server\DeploymentShare$
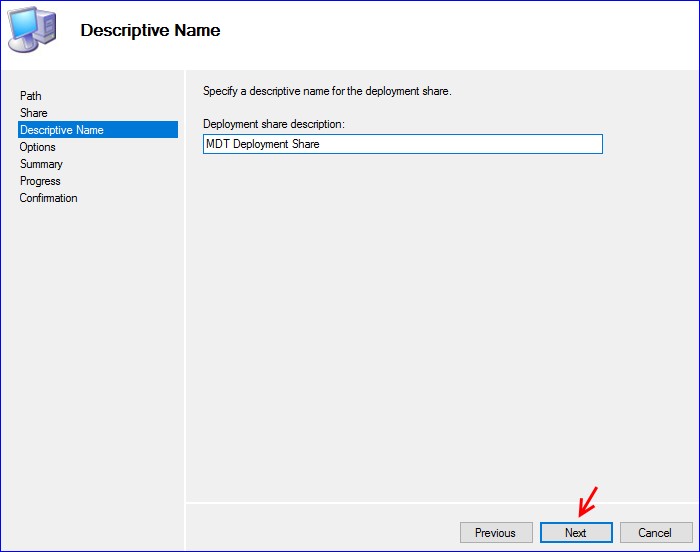
- Enter a description in the Deployment share description text field.
- On the Options screen, accept the defaults as we’ll change them later.
- Complete the wizard to create the share.
Adding an Operating System
- Mount the Windows 10 1909 ISO in File Explorer.
- Go to Deployment Workbench > Operating Systems.
- Right click and select New Folder.
- Enter the name Windows 10 1909 x64 and click through the wizard to create the folder.
- Right click again and select Import Operating System.
- In the wizard, select Full set of source files and then enter the root of the mounted ISO as the Source directory.
- For the destination directory name enter Windows 10 1909 x64 and complete the wizard.
Adding Packages
- Go to Deployment Workbench > Packages.
- Create a folder named Windows 10 1909 x64.
- Go to the website catalog.update.microsoft.com
- Search for Windows 10 version 1909.
- Download the latest Cumulative Update for Windows 10 1909 x64.
- Download the latest Servicing Stack Update for Windows 10 x64.
- Create a folder and put both update files in the folder.
- Go to Deployment Workbench > Packages.
- Right-click on the folder Windows 10 1909 x64.
- Select Import Packages.
- In the Package source directory enter the path to the new folder we created containing the updates.
- Click Next and complete the wizard.
Now we’ll create a selection profile so that the task sequence only installs updates for Windows 10 1909 x64.
Creating A Selection Profile
- Expand the Advanced Configuration node.
- Right click on Selection Profiles and select New Selection Profile.
- Name it Windows 10 1909 x64.
- On the Folders page, tick the Windows 10 1909 x64 folder under Packages and complete the wizard.
Importing Applications
Here I’m going to cover how to add Microsoft Office 2016, but the method is the same for all applications.
- Go to Deployment Workbench > Deployment Share > Applications.
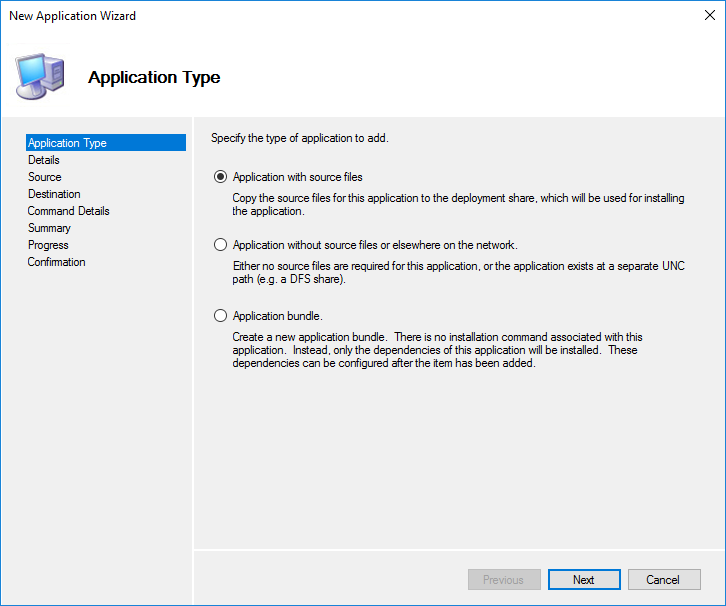
- Right click on Applications and select New Application.
- In the New Application Wizard, choose Application with source files.
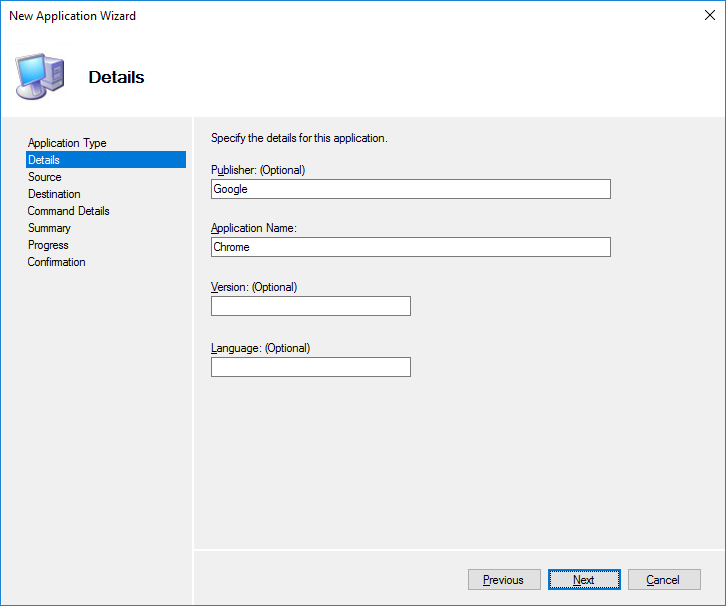
- Give the application the name: Microsoft Office 2016.
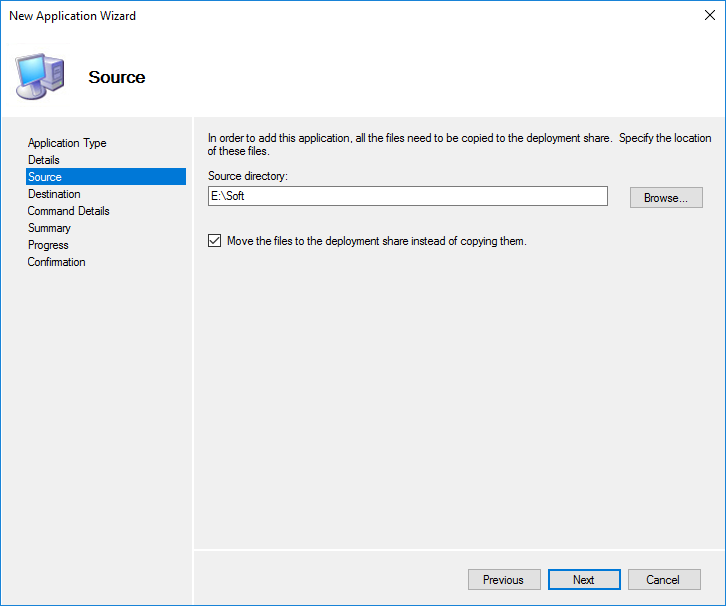
- Enter the Source directory of the installation files.
- Enter the Destination directory: Microsoft Office 2016.
- For the Command line enter anything, we’ll revisit this later.
- On the summary page, click Next and after the files are copied click Finish to complete the wizard.
Configuring Microsoft Office 2016 in MDT
- Right click on Microsoft Office 2016, go to the Office Products Tab.
- Choose the desired Office Product to Install from the drop down menu.
- Check the desired Office language.
- Enter a product key, unless you will be activating Office via KMS in which case leave the Product Key option unchecked.
- Check the Customer name option and enter the desired information.
- Check the Display level option and select None in the drop down menu.
- Check the Accept EULA option.
- Check the Always suppress reboot option.
- Click Apply.
- Go to the Details tab and the Quiet install command should now read:
|
|
Microsoft Office is now set up to be installed silently by a task sequence. This process can also be done for Microsoft Visio and Project 2016. If you wish to customise the installation to a greater degree, the Office Customization Tool can be launched from the Office Products tab. This only works with the Office 2016 family of products. Office 365 and 2019 do not support this method and should be installed like a regular application. To customise Office 365 and 2019, check out my post: Deploying Office 2019 or Office 365.
Adding Third-party Applications
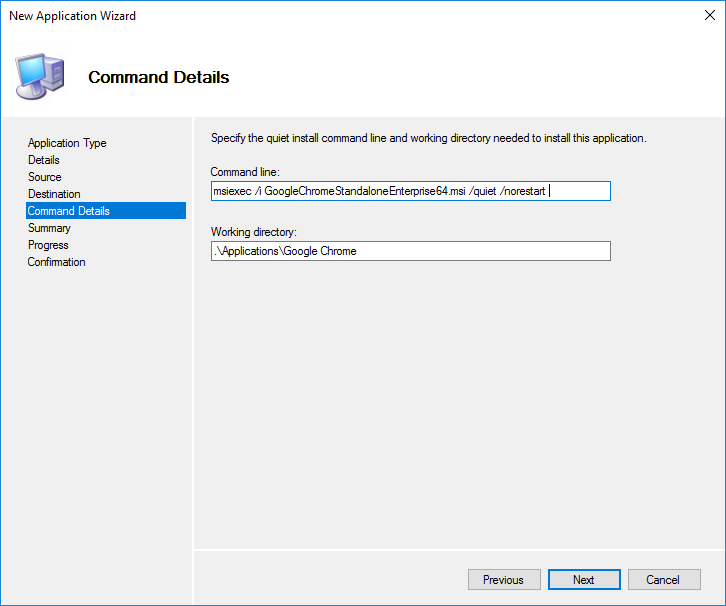
To add other popular third party software, you’ll need to repeat the steps above with the relevant Command line to execute a silent install. You’ll also need to fill in the Working directory: .\Applications\App-name
Google Chrome — Enterprise Installer
msiexec /i googlechromestandaloneenterprise64.msi /qn
Adobe Reader — Enterprise Installer
AdobeReaderDC.exe /sAll
VLC Player
VLC.exe /S
7-Zip
msiexec.exe /i 7zip.msi /qn
We now need to create a new task sequence to deploy Windows 10 along with the applications.
Creating a Task Sequence
- In Deployment Workbench, go to Task Sequences.
- Right click and select New Task Sequence.
- For the ID enter: W10-1909-A.
- Name it Deploy Windows 10 1909 x64 Edition.
- Select Standard Client Task Sequence.
- Select the Operating System Windows 10 1909 x64 Edition.
- Select Do not specify a product key at this time if you are using KMS.
- Enter an Organization name.
- Enter the local Administrator password.
- Complete the wizard.
Now we’ll configure the task sequence.
Configuring the Task Sequence
- Right click on the Task Sequence just created and select Properties.
- Go to the Task Sequence tab on the Properties window of the Task Sequence.
- Expand the Initialization folder in the left hand pane.
- Go to the Gather local only item.
- In the Properties window select Gather local data and process rules.
- Enter the following in the Rules file: customsettings.ini
- Expand the Preinstall folder, and select the Apply Patches item.
- Change the Selection Profile to Windows 10 1909 x64.
- Go to the State Restore folder and select Windows Update (Pre-Application Installation).
- On the right side of the Properties window, go to the Options tab.
- Uncheck the Disable this step tick box and do the same with Windows Update (Post-Application Installation).
- Go to the Install Applications item.
- In the right side of the Properties box, select the Install a single application option and click the Browse… button.
- Select Microsoft Office 2016 and change the name Install Applications to Microsoft Office 2016.
- To install other Applications, copy and paste the Install Applications item and repeat the previous steps.
- Click Apply and close the task sequence.
Next we need to configure the Bootstrap.ini and the CustomSettings.ini files to control certain aspects of the deployment environment. The settings below enable auto login and skip the welcome screen, so these should only be used for lab or closed development environments.
Configuring Bootstrap.ini
- In Deployment Workbench, right click the Deployment Share and select Properties.
- Select the Rules tab and click the Edit Bootstrap.ini button.
- Add the settings below to the Bootstrap.ini.
- Close and Save the Bootstrap.ini
|
|
Configuring CustomSettings.ini
The settings below need some explanation. The [Virtual Machine] section is regarding driver installs which we’ll cover later in this post.
The JoinDomain= section is important. Here I’ve put the account sysadmin to use as the account to join the device being imaged to the domain contoso.com. The account entered here must have the relevant permissions to join a device to the domain.
The other settings are location preferences relevant to the UK and resolution settings which prevent the finished device from defaulting to a resolution of 1024 x 768, and instead using the recommended resolution Windows receives from the display. On the Rules tab of the Deployment Share properties window, add the settings below.
|
|
We now need to create the boot media in order to boot the VM into WinPE for deployment.
Creating The Boot Media
- In Deployment Workbench, right click on the Deployment Share.
- Select Update Deployment Share.
- Select Completely regenerate the boot images.
- Complete the wizard. It will take some time to create the boot images.
Testing The Task Sequence
To test everything we need to copy the ISO file that we just generated. It is located in the Boot folder in the Deployment Share. Go to the server that is hosting the deployment share and navigate to the boot folder. Inside there should be a file named LiteTouchPE_x64.iso. Copy this file to a location where a virtual machine will be able to access it. Create a new VM with the following configuration:
- For Hyper-V Only: Generation 1, not 2. I’ve had issues reported with Gen2 VMs.
- 2x vCPUs
- 4GB of RAM
- Network Adapter with access the local network.
- Virtual Hard Drive of at least 40GB, preferably on an SSD.
- Boot from CD using the LiteTouchPE_x64.iso from MDT.
- Start the VM and it will boot from the LiteTouchPE_x64.iso into WinPE.
- You will be presented with a login screen. Here you should login with Active Directory credentials that have access to the deployment share.
- Once logged in you will be presented with a screen with the name of the task sequence you created earlier. Select your Task Sequence and click Next.
- You’ll be prompted to enter a Computer Name.
- Click Next and the task sequence will begin.
The task sequence will install Windows 10 1909. Windows Update will run and install updates from the WSUS server and the VM will be added to the Active Directory domain. When this process completes the VM will shut down. Boot up the VM and check to see if it has successfully joined the domain and has all the applications installed.
Driver Management
In this section we’re going to configure how drivers are managed during deployment. There are a few ways to do this, here I’ll show the method I’ve been using which has worked very well for a variety of manufactures and models of devices.
The first thing you’ll need is the model numbers for all the devices you want to deploy to. You can find this out by booting the device in to its current version of Windows or the deployment environment using the LiteTouch_x64.iso boot disc or PXE booting. I haven’t covered PXE booting in this post but here’s a previous post I wrote on how to setup PXE booting for MDT: PXE Booting for Microsoft Deployment Toolkit.
When the device is booted into WinPE, press F8 to get a command prompt, and type out the following command:
|
|
The output of the command is the model number you’ll need.
The next thing you’ll need is the drivers. I’ve found Windows 10 is good at installing missing drivers from Windows Update, but it can take some time and it would be better for the device to be running with all the drivers it needs once deployment has completed.
Windows 10 tends to have some drivers built right in and I’ve found they are usually very stable, so I only add drivers to MDT that Windows 10 cannot find. Deploy the image to each type of device you have and use Device Manager to see what’s missing.
If you’re missing drivers, go to Settings > Windows Update and use Check online for updates from Microsoft Update which should find and install the relevant drivers. Then using the Update History and see what you need to find and import into MDT.
Note: I recommend to avoid using WSUS to download and install drivers as it inflates the WSUS database, slowing WSUS down and making it difficult to manage.
To import drivers into MDT you’ll need the INF files. Most large manufacturers do a decent job of providing drivers that can be used with MDT. Should you have difficulty with them you can use the Microsoft Update Catalog to search for and download the specific drivers that Windows Update installs and use them with MDT. I use this method myself and although it can be time consuming, the results are worth it.
Once you have the drivers you require, we need to add them to MDT.
- Open the Deployment Workbench.
- Navigate to Deployment Share > Out-of-Box Drivers.
- Right click and select New Folder, call the folder Windows 10 x64.
- Right click on the Windows 10 x64 folder and select New Folder.
- Name the folder a human readable name for the model of device you’ll be adding drivers for.
- Right click on the folder you just created and create folders for each driver type you’ll be adding, eg. Graphics, Chipset, Bluetooth.
- Right click on a driver type folder and select Import Drivers.
- Enter the source directory of the drivers for that driver type.
- Check the Import drivers even if they are duplicates of an existing driver check box.
- Click Next and complete the wizard. The wizard will copy all the files needed to the driver type folder.
- Repeat steps 7-10 for each driver type required.
We now need to edit the CustomSettings.ini to configure the driver location for each model.
- Go to the Deployment Workbench and right click on the Deployment Share, select Properties.
- Go to the Rules tab in the Properties window.
- Enter the text below under the [Settings] section but after the Properties.
- Once you’ve added in all the models required, click Apply to save the changes.
|
|
You’ll need to enter the above text for each model. Below is an example of my CustomSettings.ini for reference.
|
|
The deployment share is now configured to install drivers for the models specified.
Boot the physical device into WinPE and run the task sequence. After it completes, check Device Manager and all devices should be successfully installed.
Adding Drivers to the WinPE Boot Media
It may be necessary to add drivers to the WinPE boot media for devices such as storage or network adaptors.
To determine if drivers are required:
- Boot the device in question into the deployment environment and press F8 to bring up a command prompt.
- Type ipconfig and if you have an IP address, you should not have to add network adaptor drivers
- Type diskpart, and when diskpart has loaded, type list disk. If the local hard drive is listed, you should not need to add storage drivers.
If you do need to add drivers to the boot image:
- In the Deployment Workbench, go to Deployment Share > Out-of-Box Drivers.
- Right click and select New Folder, call the folder WinPE x64.
- Right click on the WinPE x64 folder and select New Folder.
- Name the folder a suitable name for the model of device you’ll be adding drivers for.
- Right click on the folder you just created and create folders for each driver type you’ll be adding, eg. Storage, Network.
- To import the drivers, right click on a driver type folder and select Import Drivers.
- Enter the source directory of the drivers and tick the Import drivers even if they are duplicates of an existing driver check box.
- Click Next and complete the wizard. The wizard will copy all the files needed to the driver type folder.
- Repeat steps 6-8 for each driver type required.
- Now we must create a Selection Profile for WinPE x64.
- Go to Advanced Configuration > Selection Profiles.
- Right click on Selection Profiles and select New Selection Profile.
- Enter WinPE x64 as the Selection profile name.
- In the folders list navigate to DS001:\ > Out-of-Box Drivers > WinPE x64 and check the box next to the folder.
- Click Next > Next > Finish to complete the wizard.
- Right click on the Deployment Share and select Properties.
- Go to the Windows PE tab and change the Platform drop down menu to x64.
- Go to the Drivers and Patches tab, and change the Selection profile drop down menu to WinPE x64.
- Make sure that Include only drivers of the following types is selected and both Include all network drivers in the selection profile and Include all mass storage drivers in the selection profile are checked.
- Click Apply to save the changes, click OK to close the Properties window.
- Right click the Deployment Share and select Update Deployment Share.
- Select Completely regenerate the boot images, and then Next. The boot images will be regenerated with the drivers included.
- Click Finish to complete the wizard.
The WinPE boot media should now have the network and/or storage drivers required.
I take great care to test my ideas and make sure my articles are accurate before posting, however mistakes do slip through sometimes. If you have any questions or comments please leave them below.
I hope this article is useful to you. Please consider supporting my work on patreon or by donating with paypal.
-Mike
From Wikipedia, the free encyclopedia
| Developer(s) | Microsoft |
|---|---|
| Initial release | August 2003 |
| Stable release |
Build 8456 (6.3.8456.1000) |
| Operating system |
|
| Platform | x86 and x64[1] |
| Size | 20 MB[1] |
| Available in | English[1] |
| Type | System software |
| License | Freeware[1] |
| Website | www |
Microsoft Deployment Toolkit (MDT; originally released as Business Desktop Deployment in August 2003[2][3]) is a free software package from Microsoft for automating the deployment of Windows 10, Server 2019 and older Windows Server and desktop operating systems.[4]
Overview[edit]
MDT can help build an automated installation source for deploying Windows operating systems from Windows 7, Windows 10 and Windows Server 2008 onwards, from either a single machine or a central server distribution tool, such as Windows Deployment Services (WDS) or System Center Configuration Manager (SCCM).[5] Device drivers, Windows updates and software can be included with the build.[6][5]
All the software intended for installation (Operating System, drivers, updates and applications) are added to a pool of available software and packaged into deployment packages.[7] The Operating System and drivers to be included with this package are selected, and the administrator password, owner information, and product key are specified.[5][7][8] Microsoft Deployment Toolkit generates a custom Windows PE (Preinstallation Environment) image that allows client machines to install the assembled deployment packages over the network from the MDT server.[7][8] This Windows PE disk image can be burned to and booted from a CD, or booted with Windows Deployment Services. When selecting the package to deploy, software that has been included in the pool may also be selected for installation.[5]
Operation[edit]
The Microsoft Deployment Toolkit (MDT) supports three types of deployments:[5] Zero Touch Installation (ZTI), Lite Touch Installation (LTI), and User Driven Installation (UDI). ZTI is a fully automated deployment scheme in which installation requires no user interaction whatsoever.[8] UDI deployments require full manual intervention to respond to every installation prompt, such as machine name, password or language setting.[9] ZTI and UDI deployments both require a Microsoft System Center infrastructure.[5] ZTI deployments require a persistent network connection to the distribution point.[8] LTI deployments require limited user interaction. An LTI deployment needs very little infrastructure, so it can be installed from a network share, or media using either a USB flash drive or an optical disc.[7]
See also[edit]
- Remote Installation Services
- Microsoft System Center Configuration Manager (formerly known as SCCM or SMS)
- User State Migration Tool
- Windows Assessment and Deployment Kit (ADK) (previously known as Windows Automated Installation Kit)
- Windows Deployment Services
- Windows Preinstallation Environment (Windows PE)
References[edit]
- ^ a b c d e «Microsoft Deployment Toolkit Download Page». Microsoft.
- ^ Niehaus, Michael (22 Jan 2008). «A concise history of BDD». Retrieved 27 Mar 2021.
- ^ «Deploying fully patched Windows 10 computers: A guide for IT pros». TechGenix. 2020-12-30. Retrieved 2021-03-27.
- ^ Vigo, Jesus (July 5, 2016). «How to set up Microsoft Deployment Toolkit: Step by step». TechRepublic. Retrieved 2021-03-27.
- ^ a b c d e f «Microsoft (August 2012). Using the Microsoft Deployment Toolkit«. Archived from the original on 2019-09-14. Retrieved 2013-02-17.
- ^ Sharwood, Simon. «Microsoft automates Office 365 installs». www.theregister.com. Retrieved 2021-03-27.
- ^ a b c d «Microsoft (August 2012). Quick Start Guide for Lite Touch Installation«. Archived from the original on 2019-09-14. Retrieved 2013-02-17.
- ^ a b c d «Microsoft (August 2012). Quick Start Guide for Configuration Manager 2012«. Archived from the original on 2019-09-14. Retrieved 2013-02-17.
- ^ «Microsoft (August 2012). Quick Start Guide for User Driven Installation«. Archived from the original on 2019-09-14. Retrieved 2013-02-17.
External links[edit]
- Official website
