Здравствуйте, читатели ХабраХабр.
Недавно я начал самостоятельно изучать программирование, и с тех пор во время учебного процесса (ну или процесса примитивной разработки) регулярно сталкиваюсь со следующими проблемами:
—
лень учиться
— затраты времени и «сил» на организацию окон, с которыми работаешь в данный момент
— присутствие лишних окон, с которыми или в данный момент, или вообще не работаешь (например, консоль запущенного сервера)
— физический недостаток пространства для размещения всех окон, при котором будет удобно работать
Если в Google ввести запрос «менеджер окон Mac», выдается множество результатов утилит — менеджеров окон, обзоры и отзывы. А вот для Windows — полная тишина.
На любимом сервисе Toster мне подсказали несколько утилит, существенно облегчающих организацию рабочего пространства, которыми я теперь пользуюсь сам и хочу поделиться с другими.
Чтобы не тратить время тех, кто о них знает, сразу перечислю: AquaSnap, DIVVY и BetterDesktopTool.
Сам же постараюсь кратко описать их наиболее полезные функции.
AquaSnap
Коронной функцией этой программы считаю
синхронное изменение
размера окон. Странно, что фирме Microsoft в своем популярнейшем ПО с названием «Окна» (Windows) не пришла в голову идея реализовать это.

Также существенным удобством является возможность переместить окно в одну из четвертей (или двух половин) рабочего стола, потянув за его заголовок, или назначить на это горячие клавиши

Лучший способ
влюбиться
оценить все возможности программы можно, посмотрев полное демонстрационное видео.
Небольшое отступление или «камень в огород LG»
В данный момент фирма LG активно рекламирует и пытается внедрить в новых моделях мониторов ту самую функцию синхронного изменения окон, но программное обеспечение работает исключительно криво, а резкие и краткие ответы операторов Call-центра создают впечатление, что маркетологи сработали хорошо, а вот разработчики «немного не успели» реализовать обещанное. Все вышесказанное проверенно и подтверждено покупкой (и последующим возвратом в магазин) монитора LG с заявленной функцией.
DIVVY
Из-за того, что AquaSnap выполняет весь необходимый функционал, я несколько раз устанавливал, а после удалял DIVVY.
Причиной тому является дополнительная неплохая (но мне не очень нужная) функция, позволяющая размещать окно в определенном месте, просто выделив это место на сетке, представляющей схему рабочего стола.

На этот раз на горячие клавиши можно назначить расположение окон не только в одну из четвертей экрана, а в любую, заранее заданную область.
Полное демонстрационное видео
BetterDesktopTool
Во время просмотра презентации новой ОС от Apple я заметил отличный функционал под названием Mission Control, позволяющий отобразить на экране все открытые окна, что визуально облегчает выбор нужного при их большом количестве. Именно это выполняет указанная программа.

Приятным бонусом является возможность создавать виртуальные столы и взаимодействовать с ними с помощью горячих клавиш. Например, я на виртуальный стол всегда «отправляю» ненужные окна (например, консоль запущенного сервера).
Полное демонстрационное видео
Второй монитор
Я очень надеюсь, что однажды стану достойным программистом, но уже сейчас, на стадии обучения, испытываю потребность в увеличении рабочего пространства, для чего планирую приобрести еще один монитор.
Это не программа, но все же, по утверждению многих, отличное решение в подобных ситуациях.
Уверен, что совместное использование описанных утилит и увеличенного рабочего пространства улучшит эффективность работы.
P.S. Пока писал статью, нашел список альтернатив перечисленным программам.
Исходя из этого, буду благодарен за приведение примеров используемых Вами решений и их преимуществ\недостатков для выявления наиболее удачных программ.
P.P.S. Всем высокой продуктивности.
Только зарегистрированные пользователи могут участвовать в опросе. Войдите, пожалуйста.
Используете ли Вы менеджеры окон?
12.53%
Использую (это удобно)
45
55.15%
Не использую (не возникает необходимость)
198
32.31%
Не использовал, но теперь, возможно, попробую
116
Проголосовали 359 пользователей.
Воздержались 82 пользователя.
Менеджеры окон позволяют эффективно разделить экранное пространство между запущенными приложениями и работать с ними максимально продуктивно. Лайфхакер собрал для вас десять полезных утилит, которые помогут в этом.

В macOS и Windows есть встроенные инструменты, упрощающие работу с окнами, но всё же со специализированными решениями они конкурировать не могут. Если у вас нет второго монитора, то при одновременной работе с несколькими приложениями приходится изрядно исхитряться. Приложения из нашей подборки не смогут увеличить диагональ вашего дисплея, но однозначно сделают жизнь проще.
MacOS
1. BetterSnapTool
Самое популярное приложение для управления окнами с огромным количеством настроек. Содержит уйму шаблонов расположения окон, которые можно использовать с помощью горячих клавиш и выпадающих меню. Размеры и положение областей настраиваются вручную, причём можно даже отдельно для каждого приложения.
Для ненавистников горячих клавиш есть активные края, разворачивающие окно до определённых размеров при перетягивании к соответствующим границам экрана. Есть даже возможность заменить действия стандартных кнопок «Закрыть», «Свернуть», «Развернуть» на более удобные для вас.
appbox fallback https://apps.apple.com/ru/app/id417375580
2. Spectacle
Очень простой и бесплатный менеджер окон, который по функциональности мало чем уступает своим платным аналогам. Spectacle умеет менять размер и положение активных окон с помощью горячих клавиш.
Шорткаты можно настроить по своему усмотрению. Всё остальное изменить нельзя. Впрочем, это и не нужно — предустановленных шаблонов хватит на все случаи жизни.
Скачать (бесплатно) →
3. Magnet
Magnet похож на предыдущую утилиту, но помимо изменения размера окон также умеет работать с активными краями — при перетаскивании к границам экрана окна масштабируются как в Windows. Из других преимуществ Magnet можно выделить поддержку многодисплейных конфигураций. Приложение одновременно может работать с шестью мониторами.
4. Moom
Главная идея Moom — удобное изменение размеров окон через небольшое меню, которое всплывает при наведении на кнопку «Развернуть». Там содержатся избранные шаблоны (их можно заменить по желанию) и сетка, позволяющая настроить размер окна вручную. Для тех, кому больше нравится работа с клавиатуры, предусмотрены горячие клавиши, дублирующие пункты меню.
5. SizeUp
Как и другие менеджеры окон из этой подборки, SizeUp умеет быстро изменять размер и расположение окон с помощью горячих клавиш или соответствующих пунктов выпадающего меню. При этом доступен выбор пропорции разделения экранного пространства отдельно для каждого из режимов.
Из продвинутых возможностей приложение может похвастаться поддержкой AppleScript, позволяющей создавать свои собственные действия.
Купить (13 долларов) →
Windows
6. AquaSnap
Наверное, лучший менеджер окон для Windows с целым рядом фирменных фишек, из-за которых влюбляешься в приложение с первого взгляда. Самая крутая — это синхронное изменение размера группы окон и их перетаскивание. Также любое окно растягивается по клику и липнет к границам других окон и краёв экрана, позволяя настроить рабочее пространство буквально за секунды.
В дополнение к клавиатурным сокращениям в AquaSnap можно настроить шорткаты для мыши и даже заменить действия стандартных кнопок управления окном.
Скачать (бесплатно) →
7. MaxTo
Достаточно простое приложение для управления окнами, но отлично справляющееся со своими функциями. MaxTo может изменять расположение и размер открытых окон в соответствии с готовыми профилями, а также позволяет добавлять свои собственные.
Взаимодействие происходит с помощью горячих клавиш или перетаскиванием на определённые области. Всё это одинаково хорошо работает как на одном мониторе, так и на нескольких.
Купить (19 долларов) →
8. Mosaico
У Mosaico примерно те же возможности, что и у других менеджеров, включая горячие клавиши для изменения окон и активные границы экрана. Ключевые отличия — это функция автоматического распределения пространства между открытыми окнами на основе умного алгоритма, а также возможность сохранять и быстро восстанавливать избранные группы окон в один клик.
Скачать (бесплатно) →
9. Divvy
В отличие от других приложений, Divvy умеет изменять размеры окон не только по заранее настроенным шаблонам, а также вручную с помощью выделения нужного места на специальной сетке. Активные области экрана и горячие клавиши также присутствуют.
Купить (14 долларов) →
10. BetterDesktopTool
В macOS есть замечательная функция Misson Control, отображающая эскизы окон запущенных приложений на всех рабочих столах. Именно её и повторяет BetterDesktopTool.
Реализовано всё довольно качественно и заметно облегчает переключение между открытыми окнами. С помощью горячих клавиш можно взаимодействовать с окнами на различных рабочих столах и перемещать приложения между ними.
Скачать (бесплатно) →
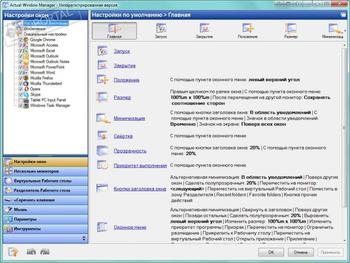
Actual Window Manager — многофункциональный оконный менеджер для Microsoft Windows. Состоит из более чем 50 инструментов для организации рабочего стола. Повышает удобство использования и производительность работы с любыми приложениями. С его помощью вы сможете организовать рабочую среду для удобного, быстрого и эффективного выполнения ваших задач без необходимости отвлекаться на рутинные манипуляции с окнами.
После установки и запуска программа работает в фоновом режиме, обеспечивая:
- автоматическое выполнение широкого спектра действий над окнами, таких как: свернуть при запуске/деактивации, развернуть при запуске, закрыть при запуске, изменить положение/размер при запуске, зафиксировать положение/размер, изменить приоритет выполнения при запуске/деактивации и многих других;
- быстрый доступ к скрытым возможностям системы («Свернуть окно в область уведомлений», «Окно всегда поверх всех», «Полупрозрачное окно» и др.) через дополнительные кнопки заголовка окна или дополнительные пункты в системном меню окна;
- поддержку механизма виртуальных Рабочих Столов;
- дополнительные средства при работе с несколькими мониторами: эмуляция Панели Задач, кнопки «Пуск» и Переключателя Задач на каждом мониторе, быстрое перемещение окон между мониторами, быстрое разворачивание окна на все мониторы.
- и многое другое.
ТОП-сегодня раздела «Десктоп менеджеры»
![]() Carroll 1.30
Carroll 1.30
Carroll — простенький инструмент для управления разрешением экрана монитора…
![]() DisplayFusion 10.1.1
DisplayFusion 10.1.1
DisplayFusion — приложение, которое призвано существенно упростить жизнь владельцев…
![]() Clover 3.5.4
Clover 3.5.4
Бесплатная легковесная программа, добавляющая в стандартный Проводник Windows поддержку…
![]() Fences 4.1.1.5
Fences 4.1.1.5
Fences — программа с помощью которой пользователь может организовать и привести в порядок…
Отзывы о программе Actual Window Manager
Dima про Actual Window Manager 8.14.3 [21-03-2021]
Мощная штука.
Класс.
Пробовать пробовать
Эксперементировать.
60 дней пробный период.
2 | 2 | Ответить
Дмитрий про Actual Window Manager 8.14.2 [20-04-2020]
Не понял как работает эта прога, возможно я тупой.
2 | 2 | Ответить

В статье мы расскажем о практичности работы в операционной системе Windows 10 по сравнению с предыдущими версиями.
Работа с окнами
Windows 10 предлагает гибкий инструмент работы с окнами для тех, кто работает в нескольких окнах одновременно. При этом функция доступна независимо от того, какой у вас монитор и сколько их вы используете. Неважно также, какие характеристики у вашего ПК или ноутбука. Работа с окнами доступна бесплатно и включается парой нажатий на клавиатуру. Единственным ограничением является количество окон на один экран — это 4 окна при условии, что вы доверили ОС определить их расположение. В ручном же режиме подобных окон можно открыть в несколько раз больше (но нужно ли?).
Для примера, окна трех приложений можно расположить таким образом:

Чтобы воспользоваться данным функционалом, сперва необходимо запустить все необходимые приложения в любом порядке. Рекомендуем открывать не более четырех окон.
После этого вам необходимо сделать окно активным, просто нажав на него. Теперь с помощью комбинации клавиши Win и клавиш-стрелок выбрать направление, в котором окно должно «прилипнуть».

Для примера: комбинация «Win + ←» расположила окно слева на всю высоту экрана.

Если хотите, чтобы окно заняло четверть рабочего стола, то комбинация «Win + ↓» или «Win + ↑» разместит окно снизу или сверху соответственно.

Следующий пример был получен сначала нажатием «Win + →», а затем «Win + ↓», что «прилепило» окно снизу и справа соответственно.

Такими же комбинациями можно настроить оптимальное расположение и размер остальных окон, переключаясь между ними. Все окна можно расположить в том порядке, который вам необходим.

Если у вас есть еще один монитор, вы можете таким же образом расположить окна в нем, расширив работу до 8 окон одновременно. Вероятно, такой способ кому-то покажется нагруженным и непрактичным, но тем, кто не хочет постоянно переключаться между окнами, он будет в самый раз.
Работа с рабочими столами
Работа с виртуальными рабочими столами повысит продуктивность и расширит понятие многозадачности при работе в Windows 10. Этот инструмент позволит увеличить кол-во окон, в которых можно работать одновременно, и отделить одну группу окон от другой. Например, если в одной группе окон вы работаете с текстом, а в другой — с фото. Как уже говорилось ранее, завышенных требований к характеристикам вашего ПК нет, платить за это тоже не надо.
Как только вам необходимо дополнительное пространство — новый рабочий стол для работы с необходимыми приложениями или даже играми, — нажмите комбинацию «Win + Tab».

Вы увидите менеджер работы с окнами и рабочими столами.

В верхнем левом углу, в блоке рабочих столов, вы можете создать необходимое количество рабочих столов.

Создав рабочий стол, вы получаете виртуальное пространство, аналогичное вашему основному рабочему столу, но только без запущенных в нем окон. Также вы можете переключаться на окна предыдущего рабочего стола, чтобы не загромождать рабочее пространство.
Если вам необходимо переключиться на предыдущий или следующий рабочий стол, воспользуйтесь комбинациями «Ctrl+Win+←» или «Ctrl+Win+→» соответственно. Переключение происходит почти мгновенно, нет необходимости ждать загрузки.

Виртуальные рабочие столы имеют общий буфер обмена, которым вы можете воспользоваться для того, чтобы скопировать и перенести информацию на любой из ваших рабочих столов.
Используя полученный опыт использования «многооконности» и «мультизадачности», вы можете приумножить скорость и удобство работы в приложениях. Это применимо к работе, общению, играм, разработке и так далее.
komorebi
Tiling Window Management for Windows.


- About
- Charitable Donations
- GitHub Sponsors
- Demonstrations
- Description
- Design
- Getting Started
- Quickstart
- GitHub Releases
- Building from Source
- Running
- Configuring
- Common First-Time Tips
- Development
- Logs and Debugging
- Restoring Windows
- Panics and Deadlocks
- Window Manager State and Integrations
- Window Manager Event Subscriptions
- Subscription Event Notification Schema
- Communication over TCP
- Socket Message Schema
- Appreciations
About
komorebi is a tiling window manager that works as an extension to
Microsoft’s Desktop Window Manager in Windows 10 and
above.
komorebi allows you to control application windows, virtual workspaces and display monitors with a CLI which can be
used with third-party software such as AutoHotKey to set user-defined
keyboard shortcuts.
komorebi aims to make as few modifications as possible to the operating system and desktop environment by default.
Users are free to make such modifications in their own configuration files for komorebi, but these will remain
opt-in and off-by-default for the foreseeable future.
Translations of this document can be found in the project wiki:
- komorebi 中文用户指南 (by @crosstyan)
There is a Discord server available for komorebi-related discussion, help,
troubleshooting etc. If you have any specific feature requests or bugs to report, please create an issue in this
repository.
There is a YouTube channel where I livestream development
on komorebi. If you would like to be notified of upcoming livestreams please subscribe and turn on
notifications. Videos of previous livestreams are also made available in
a dedicated playlist.
Articles, blog posts, demos, and videos about komorebi can be added to this list by PR:
- Moving to Windows from Linux Pt 1
- Windows 下的现代化平铺窗口管理器 komorebi
- komorebi を導入してみる
Charitable Donations
komorebi is a free and open-source project, and one that encourages you to make charitable donations if
you find the software to be useful and have the financial means.
I encourage you to make a charitable donation
to Fresh Start Refugee before
you consider sponsoring me on GitHub.
GitHub Sponsors
GitHub Sponsors is enabled for this project. Users who sponsor my work
on komorebi at any of the predefined monthly tiers will be given access to a private fork of this repository where I
push features-in-progress that are not yet quite ready to be pushed on the main repository.
There will never be any feature of komorebi that is gated behind sponsorship; every new feature will always be
available for free in the public repository once it meets the requisite level of code quality and completion.
Features-in-progress that are available in early access will be tagged in the issues with
an «early access» label.
Demonstrations
@haxibami showing komorebi running on Windows
11 with a terminal emulator, a web browser and a code editor. The original
video can be viewed
here.
0vadqFOyIJHglPRY.mp4
@aik2mlj showing komorebi running on Windows 11
with multiple workspaces, terminal emulators, a web browser, and the
yasb status bar with the komorebi workspace
widget enabled. The original video can be viewed
here.
0e0dd7fc-7115-11ec-a064-42a1fbc2e1e9-v4_t10000011-wbjnuX5De6.mp4
Description
komorebi only responds to WinEvents and the
messages it receives on a dedicated socket.
komorebic is a CLI that writes messages on komorebi‘s socket.
komorebi doesn’t handle any keyboard or mouse inputs; a third party program (e.g.
whkd) is needed in order to translate keyboard and mouse events to komorebic commands.
This architecture, popularised by bspwm on Linux and
yabai on macOS, is outlined as follows:
          PROCESS                SOCKET
whkd/ahk  -------->  komorebic  <------>  komorebi
Design
komorebi holds a list of physical monitors.
A monitor is just a rectangle of the available work area which contains one or more virtual workspaces.
A workspace holds a list of containers.
A container is just a rectangle where one or more application windows can be displayed.
This means that:
- Every monitor has its own collection of virtual workspaces
- Workspaces only know about containers and their dimensions, not about individual application windows
- Every application window must belong to a container, even if that container only contains one application window
- Many application windows can be stacked and cycled through in the same container within a workspace
Getting Started
Quickstart
It highly recommended that you enable support for long paths in Windows by running the following command in an
Administrator Terminal before starting with this quickstart guide:
Set-ItemProperty 'HKLM:\SYSTEM\CurrentControlSet\Control\FileSystem' -Name 'LongPathsEnabled' -Value 1
Make sure that you have either the Scoop Package Manager or WinGet installed, then run the following
commands at a PowerShell prompt. If you are using WinGet, make sure that you open a new terminal window or reload your
profile after running the installation steps. Since this is not required when using scoop, I personally recommend that
you use scoop for this process.
As of v0.1.17, the quickstart recommends the use of a static configuration file. If you would like to see older versions
of this quickstart which recommend the use of dynamic configuration scripts, please refer to
the README file of v0.1.16.
# if using scoop
scoop bucket add extras
scoop install whkd
scoop install komorebi

# if using winget
winget install LGUG2Z.whkd
winget install LGUG2Z.komorebi

# save the example configuration to ~/komorebi.json
iwr https://raw.githubusercontent.com/LGUG2Z/komorebi/master/komorebi.example.json -OutFile $Env:USERPROFILE\komorebi.json

# save the latest generated app-specific config tweaks and fixes
komorebic fetch-app-specific-configuration

# ensure the ~/.config folder exists
mkdir $Env:USERPROFILE\.config -ea 0

# save the sample whkdrc file with key bindings to ~/.config/whkdrc
iwr https://raw.githubusercontent.com/LGUG2Z/komorebi/master/whkdrc.sample -OutFile $Env:USERPROFILE\.config\whkdrc

# start komorebi and whkd
komorebic start -c $Env:USERPROFILE\komorebi.json --whkd
Thanks to @sitiom for getting komorebi added to both the popular Scoop Extras bucket and
to WinGet.
You can watch a walkthrough video of this quickstart below on YouTube.
Using Autohotkey
If you would like to use Autohotkey, please make sure you have AutoHotKey v2 installed.
Generally, users who opt for AHK will have specific needs that can only be addressed by the advanced functionality of AHK,
and so they are assumed to be able to craft their own configuration files.
If you would like to try out AHK, a simple sample configuration powered by komorebic.lib.ahk is provided as a starting
point. This sample configuration does not take into account the use of a static configuration file; if you choose to use
a static configuration file alongside AHK, you can remove all the configuration options from your komorebi.ahk and use
it solely to handle hotkey bindings.
# save the latest generated komorebic library to ~/komorebic.lib.ahk
iwr https://raw.githubusercontent.com/LGUG2Z/komorebi/master/komorebic.lib.ahk -OutFile $Env:USERPROFILE\komorebic.lib.ahk

# save the latest generated app-specific config tweaks and fixes to ~/komorebi.generated.ahk
iwr https://raw.githubusercontent.com/LGUG2Z/komorebi/master/komorebi.generated.ahk -OutFile $Env:USERPROFILE\komorebi.generated.ahk

# save the sample komorebi configuration file to ~/komorebi.ahk
iwr https://raw.githubusercontent.com/LGUG2Z/komorebi/master/komorebi.sample.ahk -OutFile $Env:USERPROFILE\komorebi.ahk
GitHub Releases
Prebuilt binaries are available on the releases page in a zip archive.
Once downloaded, you will need to move the komorebi.exe and komorebic.exe binaries to a directory in your Path (
you can see these directories by running $Env:Path.split(";") at a PowerShell prompt).
Building from Source
If you prefer to compile komorebi from source, you will need
a working Rust development environment on Windows 10/11. The x86_64-pc-windows-msvc toolchain is
required, so make sure you have also installed
the Build Tools for Visual Studio 2019.
You can then clone this repo and compile the source code to install the binaries for komorebi and komorebic:
cargo install --path komorebi --locked
cargo install --path komorebic --locked
Running
komorebi can be run in two ways, using either a static configuration file or a dynamic configuration script.
The quickstart covers running with a static configuration file.
If you would like to use a dynamic configuration script, ensure that you have a komorebi.ps1 or komorebi.ahk file
present, run komorebic start --await-configuration at a Powershell prompt, and you will see the following output:
Start-Process komorebi.exe -ArgumentList '--await-configuration' -WindowStyle hidden
Waiting for komorebi.exe to start...Started!
This means that komorebi is now running in the background, tiling all your windows, and listening for commands sent to
it by komorebic. You can similarly stop the process by running komorebic stop.
For further information on running with a dynamic configuration script, please refer to
the quickstart section in the README file of v0.1.16
Configuring
If you followed the quickstart, komorebi.json will be the single place where you declaratively configure the behaviour
of the window manager. There is a complete JSON Schema for this configuration file available to provide
users with auto-completions in their editors.
If you are running with a dynamic configuration script as recommended in v0.1.16 and earlier, komorebi will find the
sample komorebi.ps1 file in your $Env:USERPROFILE directory and automatically load it. This file also starts whkd using the sample whkrc file
in your $Env:USERPROFILE\.config directory.
Alternatively, if you have AutoHotKey installed and a komorebi.ahk file in $Env:UserProfile directory, komorebi
will automatically try to load it when starting.
Migrating to a Static Configuration File
If you have been using komorebi with a dynamic configuration script and wish to migrate to using a static
configuration file, once you have komorebi running in the desired configuration state, you can
run komorebic generate-static-config.
This will print a static configuration that mostly represents your current configuration to the terminal.
There are four configuration options that you may need to set yourself, if you make use of them:
- Custom layouts paths for workspaces
- Custom layout rules for workspaces
- The applications.yaml path
- Any individual application rules you have that are not in applications.yaml
Configuration with komorebic
As previously mentioned, this project does not handle anything related to keybindings and shortcuts directly. I
personally use whkd to manage my window management shortcuts, and have provided a
sample whkdrc configuration that you can use as a starting point for your own.
You can run komorebic.exe to get a full list of the commands that you can use to customise komorebi and create
keybindings with. You can run komorebic.exe <COMMAND> --help to get a full explanation of the arguments required for
each command.
You can run any configuration command in the komorebi.ps1 file, and you can bind any action command to your desired
key combinations in the whkdrc file.
AutoHotKey Helper Library for komorebic
❗️NOTE: This section is only relevant for people who wish to use AutoHotKey instead of whkd.
❗️NOTE: This helper library is only compatible with AutoHotKey v1.1, not with AutoHotKey v2.
Additionally, you may run komorebic.exe ahk-library to generate a helper library for AutoHotKey which wraps
every komorebic command in a native AHK function.
The output of this command is in AHKv1 syntax. It must be manually converted to AHKv2 syntax
using this tool or something similar.
If you include the generated library at the top of your ~/komorebi.ahk configuration file, you will be able to call
any of the functions that it contains.
Using Different AHK Executables
❗️NOTE: This section is only relevant for people who wish to use AutoHotKey instead of whkd.
The preferred way to install AutoHotKey for use with komorebi is to install it via scoop:
scoop bucket add versions
scoop install autohotkey
If you install AutoHotKey using a different method, the name of the executable file may differ from the name given by
scoop, and thus what is expected by default in komorebi.
You may override the executable that komorebi looks for to launch and reload komorebi.ahk configuration files by
setting the $Env:KOMOREBI_AHK_EXE environment variable.
Please keep in mind that even when setting a custom executable name using these environment variables, the executables
are still required to be in your Path.
Common First-Time Tips
Setting a Custom KOMOREBI_CONFIG_HOME Directory
If you do not want to keep komorebi-related files in your $Env:USERPROFILE directory, you can specify a custom directory
by setting the $Env:KOMOREBI_CONFIG_HOME environment variable.
For example, to use the ~/.config/komorebi directory:
# Run this command to make sure that the directory has been created
mkdir -p ~/.config/komorebi

# Run this command to open up your PowerShell profile configuration in Notepad
notepad $PROFILE

# Add this line (with your login user!) to the bottom of your PowerShell profile configuration
$Env:KOMOREBI_CONFIG_HOME = 'C:\Users\LGUG2Z\.config\komorebi'

# Save the changes and then reload the PowerShell profile
. $PROFILE
If you already have configuration files that you wish to keep, move them to the ~/.config/komorebi directory.
The next time you run komorebic start, any files created by or loaded by komorebi will be placed or expected to
exist in this folder.
Generating Common Application-Specific Configurations
❗️NOTE: This section is only relevant for people who use dynamic configuration scripts.
A curated selection of application-specific configurations can be generated to
help ease the setup for first-time users.
komorebi-application-specific-configuration
contains YAML definitions of settings that are known to make tricky
applications behave as expected. These YAML definitions can be used to generate
a ps1 or an ahk file which you can import at the start of your own komorebi.ps1 or komorebi.ahk files,
leaving you to focus primarily on your desired keybindings and workspace
configurations.
If you have settings for an application that you think should be part of this
curated selection, please open a PR on the configuration repository.
In the event that your PR is not accepted, or if you find there are any
settings that you wish to override, this can easily be done using an override
file.
# Clone and enter the repository
git clone https://github.com/LGUG2Z/komorebi-application-specific-configuration.git
cd komorebi-application-specific-configuration

# Use komorebic to generate a ps1 file
komorebic.exe pwsh-app-specific-configuration applications.yaml

# Application-specific generated configuration written to C:\Users\LGUG2Z\.config\komorebi\komorebi.generated.ps1

# Or use komorebic to generate an ahk file
komorebic.exe ahk-app-specific-configuration applications.yaml

# Application-specific generated configuration written to C:\Users\LGUG2Z\.config\komorebi\komorebi.generated.ahk
#
# You can include the generated configuration at the top of your komorebi.ahk config with this line:
#
# #Include %A_ScriptDir%\komorebi.generated.ahk

# Optionally, provide an override file that follows the same schema as the second argument
komorebic.exe pwsh-app-specific-configuration applications.yaml overrides.yaml
Adding an Active Window Border
If you would like to add a visual border around the currently focused window, two commands are available:
komorebic.exe active-window-border [enable|disable]
komorebic.exe active-window-border-colour [R G B] --window-kind single

# optionally, if you want a different colour for stacks of windows
komorebic.exe active-window-border-colour [R G B] --window-kind stack

# optionally, if you want a different colour for windows in monocle mode
komorebic.exe active-window-border-colour [R G B] --window-kind monocle
It is important to note that the active window border will only apply to windows managed by komorebi.
Removing Gaps
If you would like to remove all gaps from a given workspace, both between windows themselves, and between the monitor edges and the windows, you can set the following two configuration options to 0 for the desired monitors and workspaces:
komorebic.exe container-padding <MONITOR_INDEX> <WORKSPACE_INDEX> 0
komorebic.exe workspace-padding <MONITOR_INDEX> <WORKSPACE_INDEX> 0
Multiple Layout Changes on Startup
❗️NOTE: This section is only relevant for people who use dynamic configuration scripts.
Depending on what is in your configuration, when komorebi is started, you may experience the layout rapidly being adjusted
with many retile events.
If you would like to avoid this, you can start komorebi with a flag which tells komorebi to wait until all configuration
has been loaded before listening to and responding to window manager events: komorebic start --await-configuration.
If you start komorebi with the --await-configuration flag, you must send the komorebic complete-configuration
command at the end of the configuration section of your komorebi.ps1 (or komorebi.ahk config, before you start
defining the key bindings). The layout will not be updated and komorebi will not respond to komorebic commands until
this command has been received.
Floating Windows
❗️NOTE: A significant number of floating window rules for the most common applications are
already generated for you
Sometimes you will want a specific application to never be tiled, and instead float all the time. You can add rules to
enforce this behaviour:
komorebic.exe float-rule title "Control Panel"
# komorebic.exe float-rule exe [EXE NAME]
# komorebic.exe float-rule class [CLASS NAME]
Windows Not Getting Managed
❗️NOTE: A significant number of force-manage window rules for the most common applications are
already generated for you
In some rare cases, a window may not automatically be registered to be managed by komorebi. When this happens, you can
manually add a rule to force komorebi to manage it:
komorebic.exe manage-rule exe TIM.exe
# komorebic.exe manage-rule class [CLASS NAME]
# komorebic.exe manage-rule title [TITLE]
Tray Applications
❗️NOTE: A significant number of tray application rules for the most common applications are
already generated for you
If you are experiencing behaviour where
closing a window leaves a blank tile, but minimizing the same window does not
, you have probably enabled a ‘close/minimize to tray’ option for that application. You can tell komorebi to handle
this application appropriately by identifying it via the executable name or the window class:
komorebic.exe identify-tray-application exe Discord.exe
# komorebic.exe identify-tray-application class [CLASS NAME]
# komorebic.exe identify-tray-application title [TITLE]
Microsoft Office Applications
❗️NOTE: Microsoft Office-specific application rules are
already generated for you
Microsoft Office applications such as Word and Excel require certain configuration options to be set in order to be
managed correctly. Below is an example of configuring Microsoft Word to be managed correctly by komorebi.
# This only needs to be added once
komorebic.exe float-rule class _WwB

# Repeat these for other office applications such as EXCEL.EXE etc
# Note that the capitalised EXE is important here- double check the
# exact case for the name and the file extension in Task Manager or
# the AHK Window Spy

komorebic.exe identify-layered-application exe WINWORD.EXE
komorebic.exe identify-border-overflow-application exe WINWORD.EXE
Focus Follows Mouse
komorebi supports two focus-follows-mouse implementations; the native Windows Xmouse implementation, which treats the
desktop, the task bar, and the system tray as windows and switches focus to them eagerly, and a custom komorebi
implementation, which only considers windows managed by komorebi as valid targets to switch focus to when moving the
mouse.
To enable the komorebi implementation you must start the process with the --ffm flag to explicitly enable the feature.
This is because the mouse tracking required for this feature significantly increases the CPU usage of the process (on my
machine, it jumps from <1% to 4), and this CPU increase persists regardless of whether focus-follows-mouse is enabled
or disabled at any given time via komorebic‘s configuration commands.
When calling any of the komorebic commands related to focus-follows-mouse functionality, the windows
implementation will be chosen as the default implementation. You can optionally specify the komorebi implementation by
passing it as an argument to the --implementation flag:
komorebic.exe toggle-focus-follows-mouse --implementation komorebi
Mouse Follows Focus
By default, the mouse will move to the center of the window when the focus is changed in a given direction. This
behaviour is know is ‘mouse follows focus’. To disable this behaviour across all workspaces, add the following command
to your configuration file:
komorebic.exe mouse-follows-focus disable
Saving and Loading Resized Layouts
If you create a BSP layout through various resize adjustments that you want to be able to restore easily in the future,
it is possible to «quicksave» that layout to the system’s temporary folder and load it later in the same session, or
alternatively, you may save it to a specific file to be loaded again at any point in the future.
komorebic.exe quick-save # saves the focused workspace to $Env:TEMP\komorebi.quicksave.json
komorebic.exe quick-load # loads $Env:TEMP\komorebi.quicksave.json on the focused workspace

komorebic.exe save ~/layouts/primary.json # saves the focused workspace to $Env:USERPROFILE\layouts\primary.json
komorebic.exe load ~/layouts/secondary.json # loads $Env:USERPROFILE\layouts\secondary.json on the focused workspace
These layouts can be applied to arbitrary collections of windows on any workspace, as they only track the layout
dimensions and are not coupled to the applications that were running at the time of saving.
When layouts that expect more or less windows than the number currently on the focused workspace are loaded, komorebi
will automatically reconcile the difference.
Creating and Loading Custom Layouts
Particularly for users of ultrawide monitors, traditional tiling layouts may not seem like the most efficient use of
screen space. If you feel this is the case with any of the default layouts, you are also welcome to create your own
custom layouts and save them as JSON or YAML.
If you’re not comfortable writing the layouts directly in JSON or YAML, you can use
the komorebi Custom Layout Generator to interactively
define a custom layout, and then copy the generated JSON content.
Custom layouts can be loaded on the current workspace or configured for a specific workspace with the following
commands:
komorebic.exe load-custom-layout ~/custom.yaml
komorebic.exe workspace-custom-layout 0 0 ~/custom.yaml
The fundamental building block of a custom komorebi layout is the Column.
Columns come in three variants:
- Primary: This is where your primary focus will be on the screen most of the time. There must be exactly one Primary
Column in any custom layout. Optionally, you can specify the percentage of the screen width that you want the Primary
Column to occupy. - Secondary: This is an optional column that can either be full height of split horizontally into a fixed number of
maximum rows. There can be any number of Secondary Columns in a custom layout. - Tertiary: This is the final column where any remaining windows will be split horizontally into rows as they get added.
If there is only one window on the screen when a custom layout is selected, that window will take up the full work area
of the screen.
If the number of windows is equal to or less than the total number of columns defined in a custom layout, the windows
will be arranged in an equal-width columns.
When the number of windows is greater than the number of columns defined in the custom layout, the windows will begin to
be arranged according to the constraints set on the Primary and Secondary columns of the layout.
Here is an example custom layout that can be used as a starting point for your own:
YAML
- column: Secondary
  configuration: !Horizontal 2 # max number of rows
- column: Primary
  configuration: !WidthPercentage 50 # percentage of screen
- column: Tertiary
  configuration: Horizontal
Dynamically Changing Layouts Based on Number of Visible Window Containers
With komorebi it is possible to define rules to automatically change the layout on a specified workspace when a
threshold of window containers is met.
# On the first workspace of the first monitor (0 0)
# When there are one or more window containers visible on the screen (1)
# Use the bsp layout (bsp)
komorebic workspace-layout-rule 0 0 1 bsp

# On the first workspace of the first monitor (0 0)
# When there are five or more window containers visible on the screen (five)
# Use the custom layout stored in the home directory (~/custom.yaml)
komorebic workspace-custom-layout-rule 0 0 5 ~/custom.yaml
However, if you add workspace layout rules, you will not be able to manually change the layout of a workspace until all
layout rules for that workspace have been cleared.
# If you decide that workspace layout rules are not for you, you can remove them from that same workspace like this
komorebic clear-workspace-layout-rules 0 0
Development
If you would like to contribute code to this repository, there are a few requests that I have to ensure a foundation of
code quality, consistency and commit hygiene:
- Flatten all
usestatements - Run
cargo +nightly clippyand ensure that all lints and suggestions have been addressed before committing - Run
cargo +nightly fmt --allto ensure consistent formatting before committing - Use
git czwith
the Commitizen CLI to prepare
commit messages - Provide at least one short sentence or paragraph in your commit message body to describe your thought process for the
changes being committed
If you use IntelliJ, you should enable the following settings to ensure that code generated by macros is recognised by
the IDE for completions and navigation:
- Set
Expand declarative macros
toUse new engineunder «Settings > Langauges & Frameworks > Rust» - Enable the following experimental features:
org.rust.cargo.evaluate.build.scriptsorg.rust.macros.proc
Logs and Debugging
Logs from komorebi will be appended to %LOCALAPPDATA%/komorebi/komorebi.log; this file is never rotated or overwritten, so it will keep
growing until it is deleted by the user.
Whenever running the komorebic stop command or sending a Ctrl-C signal to komorebi directly, the komorebi process
ensures that all hidden windows are restored before termination.
If however, you ever end up with windows that are hidden and cannot be restored, a list of window handles known
to komorebi are stored and continuously updated in %LOCALAPPDATA%/komorebi//komorebi.hwnd.json.
Restoring Windows
Running komorebic restore-windows will read the list of window handles and forcibly restore them, regardless of
whether the main komorebi process is running.
Panics and Deadlocks
If komorebi ever stops responding, it is most likely either due to either a panic or a deadlock. In the case of a
panic, this will be reported in the log. In the case of a deadlock, there will not be any errors in the log, but the
process and the log will appear frozen.
If you believe you have encountered a deadlock, you can compile komorebi with --features deadlock_detection and try
reproducing the deadlock again. This will check for deadlocks every 5 seconds in the background, and if a deadlock is
found, information about it will appear in the log which can be shared when opening an issue.
Window Manager State and Integrations
The current state of the window manager can be queried using the komorebic state command, which returns a JSON
representation of the State struct, which includes the current state of WindowManager.
This may also be polled to build further integrations and widgets on top of (if you ever wanted to build something
like Stackline for Windows, you could do it by polling this command).
Window Manager Event Subscriptions
It is also possible to subscribe to notifications of every WindowManagerEvent and SocketMessage handled
by komorebi using Named Pipes.
First, your application must create a named pipe. Once the named pipe has been created, run the following command:
komorebic.exe subscribe <your pipe name>
Note that you do not have to include the full path of the named pipe, just the name.
If the named pipe exists, komorebi will start pushing JSON data of successfully handled events and messages:
{"event":{"type":"AddSubscriber","content":"yasb"},"state":{}}
{"event":{"type":"FocusWindow","content":"Left"},"state":{}}
{"event":{"type":"FocusChange","content":["SystemForeground",{"hwnd":131444,"title":"komorebi – README.md","exe":"idea64.exe","class":"SunAwtFrame","rect":{"left":13,"top":60,"right":1520,"bottom":1655}}]},"state":{}}
{"event":{"type":"MonitorPoll","content":["ObjectCreate",{"hwnd":5572450,"title":"OLEChannelWnd","exe":"explorer.exe","class":"OleMainThreadWndClass","rect":{"left":0,"top":0,"right":0,"bottom":0}}]},"state":{}}
{"event":{"type":"FocusWindow","content":"Right"},"state":{}}
{"event":{"type":"FocusChange","content":["SystemForeground",{"hwnd":132968,"title":"Windows PowerShell","exe":"WindowsTerminal.exe","class":"CASCADIA_HOSTING_WINDOW_CLASS","rect":{"left":1539,"top":60,"right":1520,"bottom":821}}]},"state":{}}
{"event":{"type":"FocusWindow","content":"Down"},"state":{}}
{"event":{"type":"FocusChange","content":["SystemForeground",{"hwnd":329264,"title":"den — Mozilla Firefox","exe":"firefox.exe","class":"MozillaWindowClass","rect":{"left":1539,"top":894,"right":1520,"bottom":821}}]},"state":{}}
{"event":{"type":"FocusWindow","content":"Up"},"state":{}}
{"event":{"type":"FocusChange","content":["SystemForeground",{"hwnd":132968,"title":"Windows PowerShell","exe":"WindowsTerminal.exe","class":"CASCADIA_HOSTING_WINDOW_CLASS","rect":{"left":1539,"top":60,"right":1520,"bottom":821}}]},"state":{}}
You may then filter on the type key to listen to the events that you are interested in. For a full list of possible
notification types, refer to the enum variants of WindowManagerEvent in komorebi and SocketMessage
in komorebi-core.
An example of how to create a named pipe and a subscription to komorebi‘s handled events in Python
by @denBot can be
found here.
An example of how to create a named pipe and a subscription to komorebi‘s handled events in Rust can also be found
in the komokana repository.
Subscription Event Notification Schema
A JSON Schema of the event notifications emitted to subscribers can be generated with
the komorebic notification-schema command. The output of this command can be redirected to the clipboard or a file,
which can be used with services such as Quicktype to generate type definitions in different
programming languages.
Communication over TCP
A TCP listener can optionally be exposed on a port of your choosing with the --tcp-port=N flag. If this flag is not
provided to komorebi or komorebic start, no TCP listener will be created.
Once created, your client may send
any SocketMessage to komorebi in the
same way that komorebic would.
This can be used if you would like to create your own alternative to komorebic which incorporates scripting and
various middleware layers, and similarly it can be used if you would like to integrate komorebi with
a custom input handler.
If a client sends an unrecognized message, it will be disconnected and have to reconnect before trying to communicate
again.
Socket Message Schema
A JSON Schema of socket messages used to send instructions to komorebi can be generated
with the komorebic socket-schema command. The output of this command can be redirected to the clipboard or a file,
which can be used with services such as Quicktype to generate type definitions in different
programming languages.
Appreciations
-
First and foremost, thank you to my wife, both for naming this project and for her patience throughout its never-ending development
-
Thank you to @sitiom for being an exemplary open source community leader
-
Thank you to the developers of nog who came before me and whose work taught me more than I can ever hope to repay
-
Thank you to the developers of GlazeWM for pushing the boundaries of tiling window management on Windows with me and having an excellent spirit of collaboration
-
Thank you to @Ciantic for helping me bring the hidden Virtual Desktops cloaking function to
komorebi