It’s fairly easy to create bootable USB installation media for Windows 10 when using Microsoft’s Media creation tool. Unfortunately this tool is not available for macOS. This post explains you how to do this without using a Windows-based PC or VM and without using BootCamp assistant. This can come in handy when trying to install Windows on your mac or when there is simply only an Apple Mac available and you need to boot the Windows installer for various reasons.
YouTube Video
If you are interested, I also created a YouTube video from this blogpost. If you prefer classic text, you can just follow the rest of this article:
Introduction
Unfortunately, since some time, it became a bit more complicated to create this USB drive from macOS. The main reason for this is because macOS supports only FAT32 as filesystem that is compatible with Windows (and ExFat but that causes issues to boot from). FAT32 has a file size limit of 4GB while the installation ISO now contains one file that is larger.
To overcome this, we will need to use a tool, Wimlib, which is able to split this file in two parts. More about this later.
In case you’re looking for the instructions to create a bootable USB drive to install Windows 11 instead, have a look at the following article: https://jensd.be/1740/windows/create-a-bootable-windows-11-installation-usb-on-macos
Download the Windows 10 ISO
Let’s start by downloading the ISO from Microsoft. This can be done from: https://www.microsoft.com/en-us/software-download/Windows10ISO. When you open this link on macOS, it should show you the ability to download the ISO rather than the Media Creation tool, which is shown when opening the same on a Windows-based PC.
Choose for Windows 10, then select the preferred language, go for the “64-bit Download” and wait for the download to complete to get the .iso file on your Mac:
Prepare the USB drive
While the ISO is downloading, we can prepare our USB drive. You will need one that is at least 8GB. Insert the drive in your Mac and start Disk Utility.
In Disk Utility, choose to show all devices:
Then, on the left side, select your USB drive from the list and click Erase on the top right menu. In the dialog, enter a name for the drive (WINUSB here), choose to format as “MS-DOS (FAT)” and “Master Boot Record” as scheme. Finally click “Erase” to complete the process.
Copy all smaller files to the USB drive
After the previous step, our USB drive is prepared. Once the ISO file is download as well, double click the ISO file to mount it. Then open it in Finder. As you can see, the sources folder contains one large file: install.wim which is over 4GB and will not fit on the FAT32-formatted USB drive:
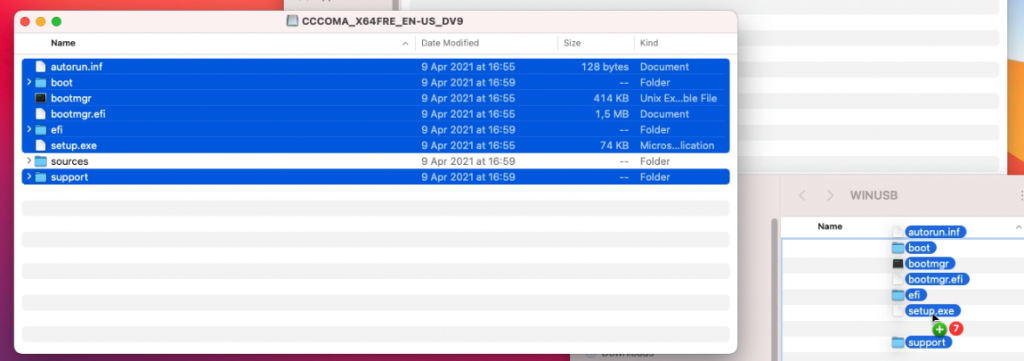
We will take care of that later so for now, copy all remaining files to the USB drive using Finder.
I typically start by copying all separate files and folders, except for the sources folder:
Then I create the sources folder and copy all files from sources with the exception of install.wim:
Prepare to split install.wim
So far things were pretty straightforward and if it wouldn’t be for that large file it would be a piece of cake. Unfortunately we have to work around that by splitting the file in two parts, smaller than the limit of our file system on the USB drive.
To accomplish this, we can use Wimlib (https://wimlib.net/). This is a tool that is developed to work with, and modify, .wim files. The easiest way to get this installed on your Mac is by using Brew (https://brew.sh/).
So, as just mentioned, we start by installing Brew. As is instructed on the Brew website, copy and paste the mentioned line in a terminal and execute it.
user@users-iMac ~ % /bin/bash -c "$(curl -fsSL https://raw.githubusercontent.com/Homebrew/install/HEAD/install.sh)" ==> Checking forsudoaccess (which may request your password). Password: ==> This script will install: /usr/local/bin/brew /usr/local/share/doc/homebrew ... ==> Next steps: Runbrew helpto get started Further documentation: https://docs.brew.sh user@users-iMac ~ %
Once Brew is installed, we can use it to install Wimlib:
user@users-iMac ~ % brew install wimlib
 ==> Downloading https://ghcr.io/v2/homebrew/core/openssl/1.1/manifests/1.1.1k
...
==> Installing wimlib
==> Pouring wimlib--1.13.4.big_sur.bottle.tar.gz
🍺  /usr/local/Cellar/wimlib/1.13.4: 65 files, 2.7MB
user@users-iMac ~ %
Split install.wim and get it on the USB drive
Now that we have Wimlib installed, we can use it to split the large install.wim file and copy it to our USB drive. In the same or a new Terminal session, execute the following:
user@users-iMac ~ % wimlib-imagex split /Volumes/CCCOMA_X64FRE_EN-GB_DV9/sources/install.wim /Volumes/WINUSB/sources/install.swm 4000
Splitting WIM: 4654 MiB of 4654 MiB (100%) written, part 2 of 2
Finished splitting "/Volumes/CCCOMA_X64FRE_EN-GB_DV9/sources/install.wim"
In the command above, we told to execute the wimlib-imagex tool (part of Wimlib) and passed some arguments:
- “split” to indicate that we want to split this larger file
- “/Volumes/CCCOMA_X64FRE_EN-GB_DV9/sources/install.wim” which is the source file to split. Keep in mind that the name under /Volumes depends on the ISO name so you need to adjust this accordingly. Just do ls /Volumes from the terminal to see what is there.
- “/Volumes/WINUSB/sources/install.swm” the destination of where the split files should end. As with the ISO name, here WINUSB is the volume label I gave to my USB drive when erasing it with Disk Utility. Adjust this as well when you chose something different earlier.
- 4000 the max. size of the destination file, so the file will be split in a part of 4000MB and the rest.
After this command completes, you can see that now two files were created on the USB drive:
The Windows 10 installer knows how to deal with these and will just work fine.
That should be all you need to create a bootable USB drive for Windows 10 installation.
(Optionally) download Windows 10 drivers for your Mac
If you plan to use the USB drive, which you created with the above steps, on a regular PC then you can skip this step. If you, on the other hand, plan to use this for installation on a Mac, it is a good idea to go through these additional steps.
The goal of this is to fetch the necessary drivers for use on Mac. As I did from Windows in a previous article, I will use Brigadier for this. Brigadier, which is basically a script, works just from macOS directly as well.
From the author’s Github page: https://github.com/timsutton/brigadier, click the green Code button then choose to “Download ZIP”
Once the file is downloaded, open a fresh Terminal session and navigate to the “brigadier-master” in your Downloads folder, then simply execute it using ./brigadier:
user@user-iMac ~ % cd Downloads/brigadier-master
user@user-iMac brigadier-master % ./brigadier
Using Mac model: iMac13,1
...
Expanding flat package...
Extracting Payload...
Extracted to /Users/user/Downloads/brigadier-master/BootCamp-041-84821/WindowsSupport.dmg
user@user-iMac brigadier-master %
As you can see in the output, executing brigadier automatically detected the model identifier of the mac which we executed this on. If you want to download the required drivers for another model, you can simply pass it using the –model parameter. The files got downloaded as a subfolder of brigadier-master as WindowsSupport.dmg
All that is left to do is to navigate to the folder using Finder, then to open WindowsSupport.dmg to mount it and to copy those files to the USB drive:
After going through the installation, executing BootCamp/setup.exe will install most of the required drivers or at least enough to continue the rest of the driver installation using Windows update.
Boot from the USB drive
As the final step, now that the USB drive is prepared, with or without additional drivers for your Mac, you can boot from it.
On a regular PC, this is usually done by pressing a key at BIOS time to bring up a boot menu (F11 is often used for this) or, for some older BIOS, by changing the boot order from the BIOS setup.
On a Mac, you can choose to boot from USB by holding down the Alt key on boot and to select the USB drive from the boot loader:
Can I create a Windows 10 installation USB on a Mac? How to make a Windows 10 bootable USB on Mac? To figure out answers to these two questions, you can go on to read this post. It is not easy as the creation on a Windows PC and MiniTool shows you a detailed guide with multiple ways to create Windows 10 bootable on Mac.
If you switch from a Windows PC to a Mac, you may find Windows and macOS are two entirely different operating systems. If you are familiar with Windows, you may want to still use this OS on the Mac. In this case, you may ask: can I install Windows 10 on my Mac for free? Of course, you can do it using a bootable Windows 10 USB flash drive. Although the Mac runs macOS, you can run Windows on it in this way.
Then, how to make a Windows 10 bootable USB on Mac? It is easy to create a bootable USB drive of Windows 10 on a PC but how about the creation on macOS? Things can become simple if you follow the methods in the following part to make bootable Windows 10 USB on Mac.
Tips:
If you are interested in Windows 11, you can also create a Windows 11 bootable USB drive to install this operating system. To know more information, read our related post — How to Create Windows 11 Installation Media on PC, Mac, or Linux.
How to Create Windows 10 Bootable USB on Mac
Download Windows 10 ISO
The following methods require an ISO image, so download a Windows 10 ISO file by following the given steps before you start creating a bootable USB drive.
Tips:
Windows 10 Media Creation Tool can only run on Windows and you should download the ISO on a Windows PC. Or, you can visit some third-party websites in a web browser to get an ISO image.
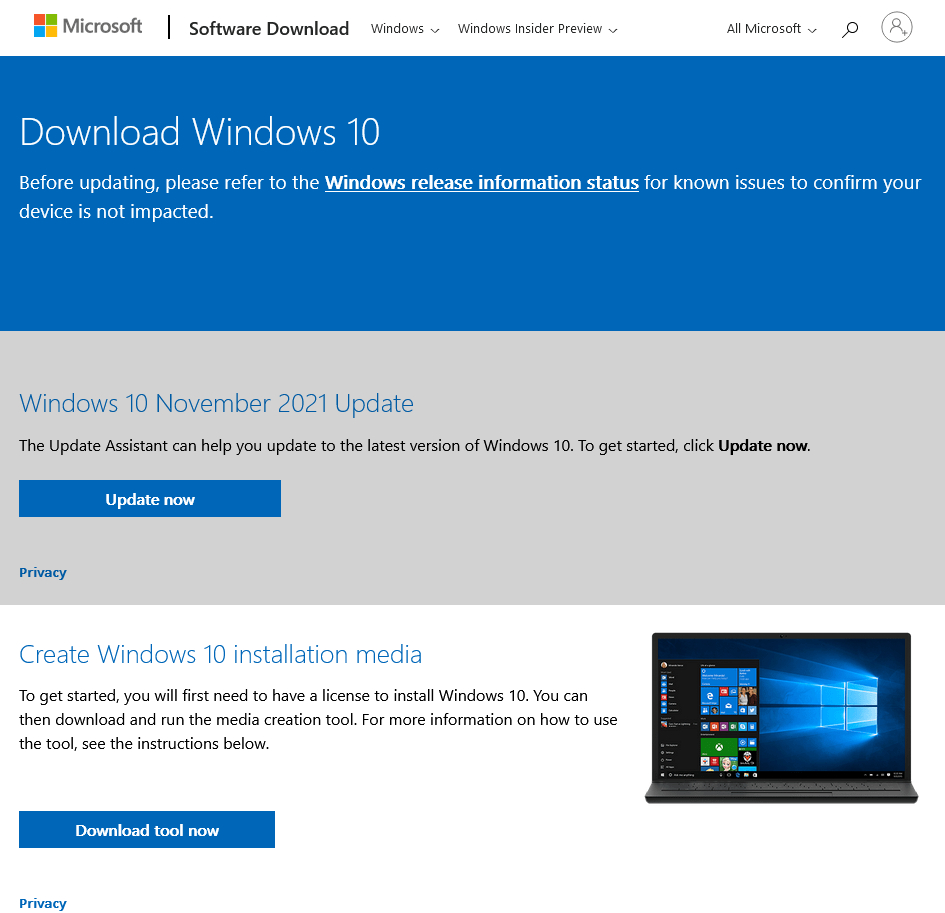
- Visit the official Microsoft website of windows 10 – https://www.microsoft.com/en-hk/software-download/windows10.
- Click Download tool now to get Windows 10 Media Creation Tool.
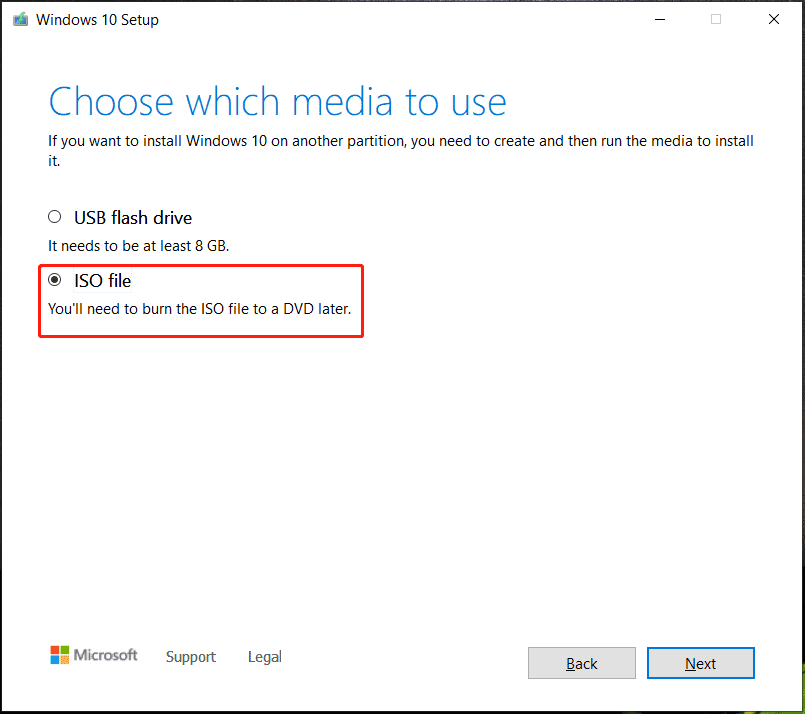
- Run this tool, accept terms, choose Create installation media (USB flash drive, DVD, or ISO file) for another PC, choose language, architecture, and edition, check the box of ISO file, and start downloading the ISO image of Windows 10.
Create Windows 10 Bootable USB on Mac with Boot Camp Assistant
As a multi-boot utility included in macOS like formerly Mac OS X/OS X, Boot Camp Assistant can be used to install Windows 10 on Intel-based Macintosh computers. Besides, this tool can help make a Windows 10 bootable USB on Mac. Note that Boot Camp Assistant isn’t supported on Apple Silicon Macs.
If you are running an Intel-based Mac with an old version, follow the steps below to start creating a bootable USB drive of Windows 10 with Boot Camp Assistant.
Step 1: Prepare a USB flash drive with at least 16GB of space and connect it to your Mac.
Step 2: Navigate to Finder > Applications > Utilities and open Boot Camp Assistant.
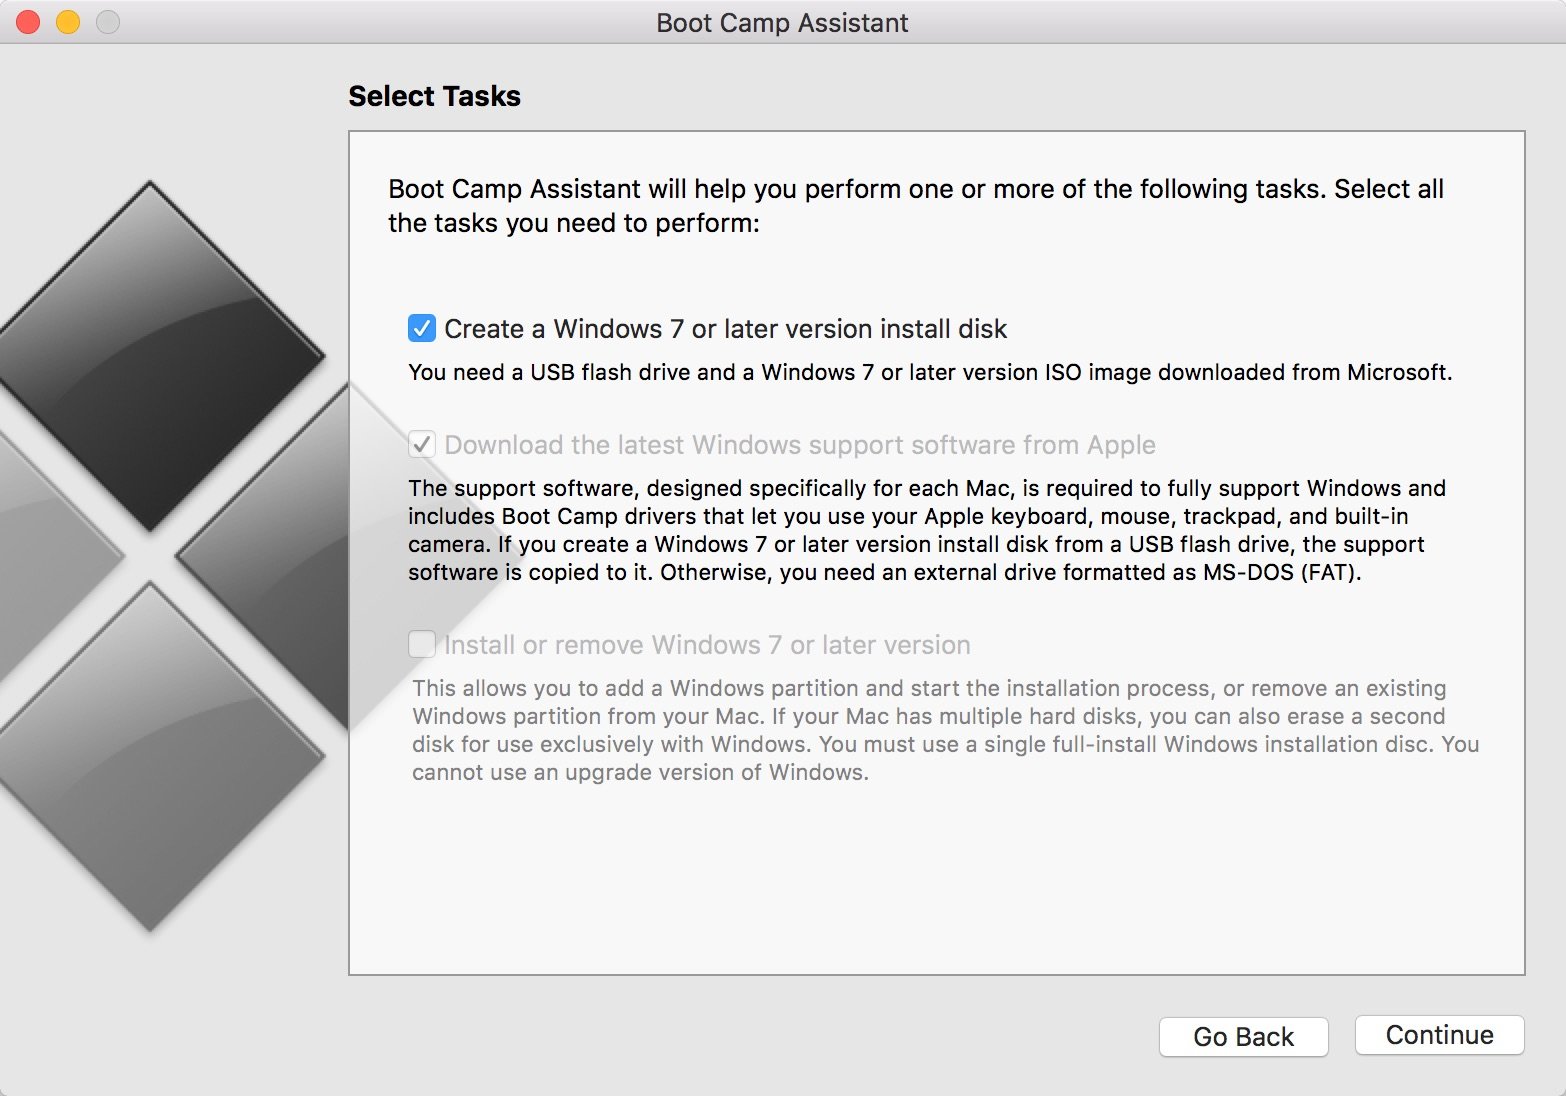
Step 3: Check the option of Create a Windows 10 or later install disk and click Continue. Here, you only want to make bootable Windows 10 USB on Mac, so don’t choose the option of Install Windows 10 or later version.
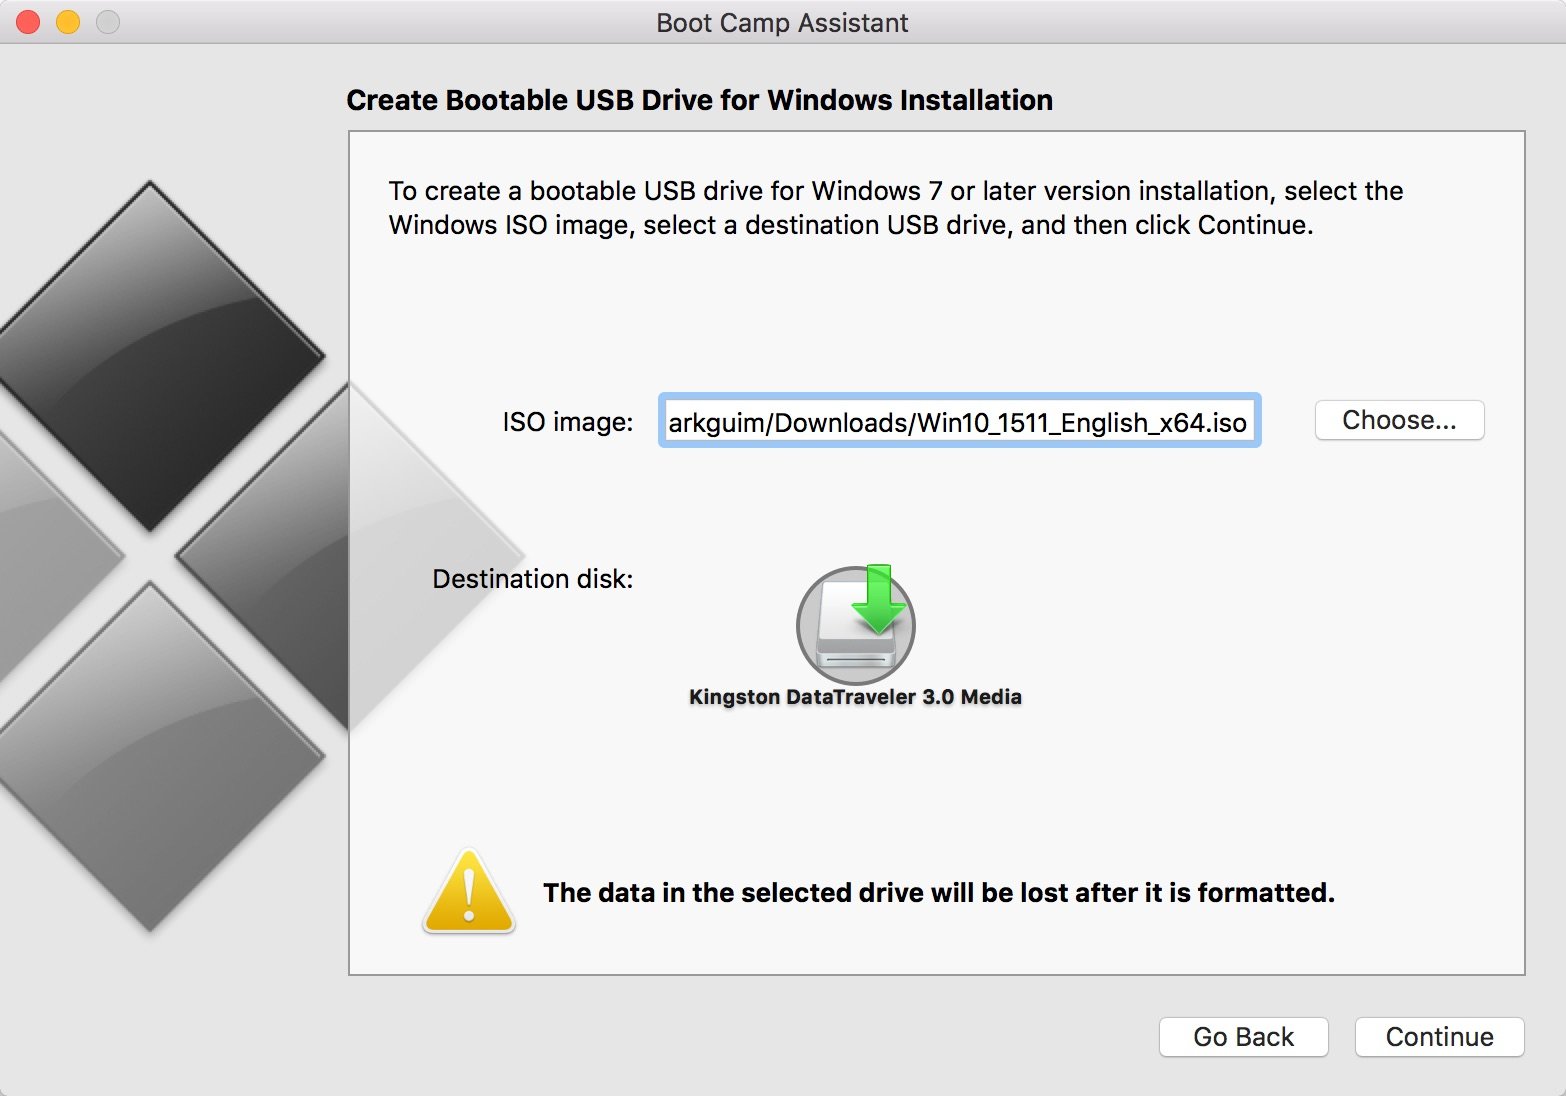
Step 4: Click Choose to go to find the Windows 10 ISO file you have downloaded in the popup and click Continue to go on.
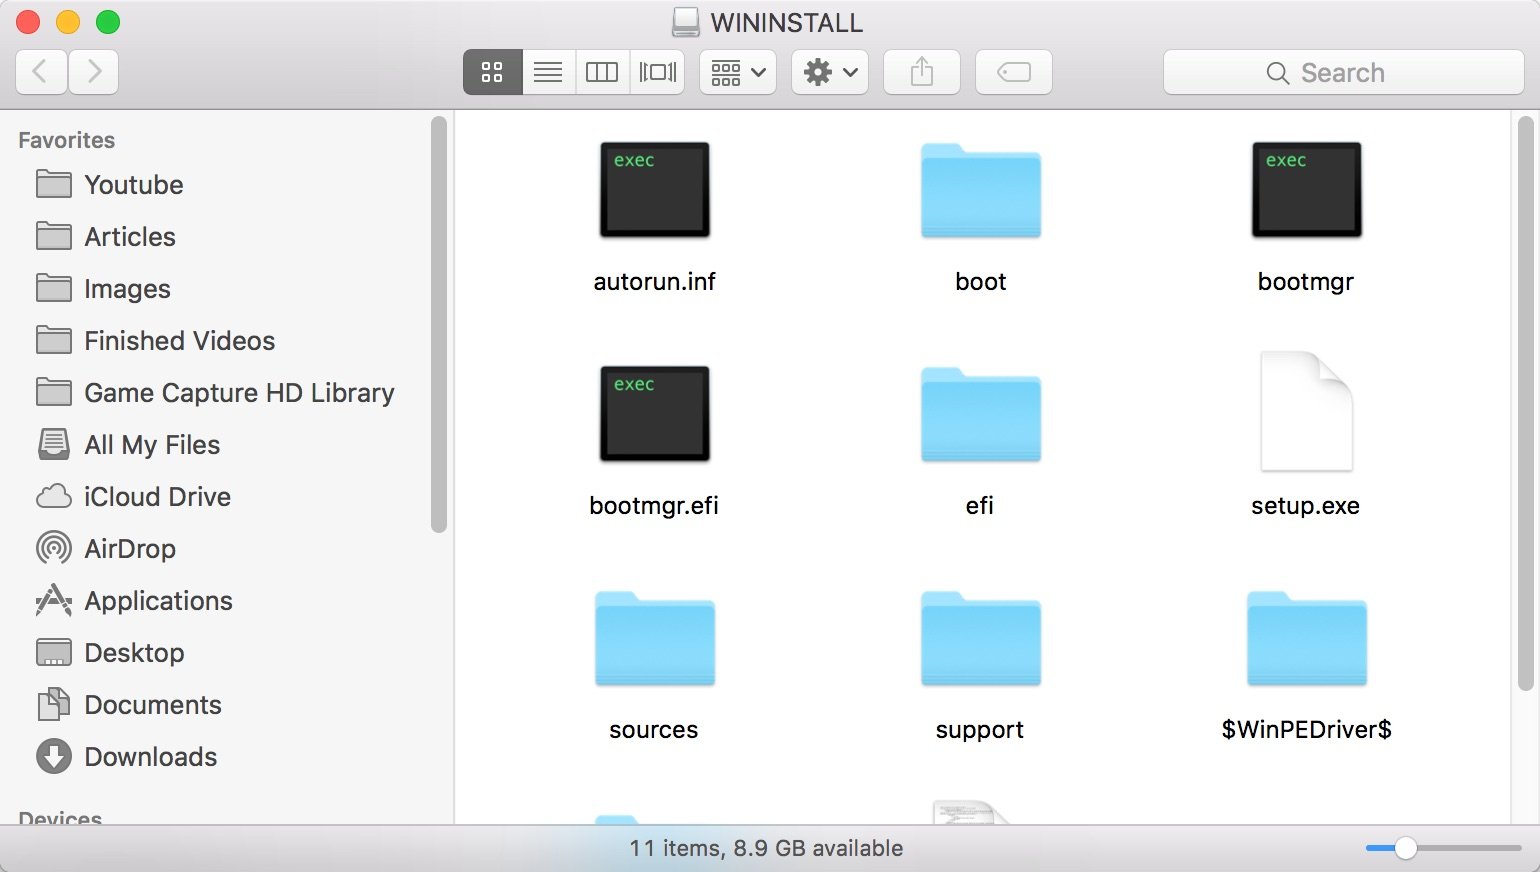
Step 5: Then, Boot Camp Assistant will begin creating Windows 10 bootable USB. After that, check if your USB flash drive is renamed WININSTALL. Then, eject this USB drive from your Mac.
This method is very simple and helpful for you to create bootable USB Windows 10 on Mac. However, if you are running a Mac with an Apple Silicon M1 chip rather than an Intel-based Mac, skip this method and go to find what you should do from the following solutions.
Create Windows 10 Bootable USB on Mac via Disk Utility
How to create Windows 10 bootable USB on Mac without Boot Camp? Disk Utility is a choice for you.
It is a system utility that is designed to perform some tasks regarding disk and disk volumes on the macOS operating system. In addition, you can use Disk Utility to get a bootable Windows 10 USB drive and let’s see the instructions below:
Step 1: Connect your USB flash drive to your Mac.
Step 2: Navigate to Finder > Go > Utilities and open Disk Utility by double-clicking the icon of this tool. Alternatively, you can press Command + Spacebar, type in Disk Utility, and open it.
Step 3: Right-click on your USB drive on the left and format it to MS-DOS (FAT).
Step 4: Drag & drop the Windows 10 ISO file you have downloaded to the USB drive. Then, the writing process of the ISO file on USB starts. After finishing the process, you can get a bootable USB and use it to install Windows 10 on Mac or fix the issues with the current macOS.
Make Windows 10 Bootable USB on Mac Using UNetbootin
As a cross-platform utility that enables you to create live USB systems, UNetbootin is powerful. You can run it on Windows, Linux, and Mac OS X properly. If you need to create Windows 10 USB on Mac, it is also helpful. To use this tool, you need to download a Windows 10 ISO file from Microsoft and save it to your USB flash drive. Then, plug the drive into your Mac and start the following steps to get Windows 10 bootable USB.
Step 1: Go to Disk Utility by accessing Finder > Go > Utilities. Then, choose the USB drive from the left side and note down the disk identifier like disk5s1 that is located in the Device section on the right side.
Step 2: Download UNetbootin – search for UNetbootin in Google Chrome, click the website https://unetbootin.github.io/, and click the download button on macOS.
Step 3: Open the downloaded file to run UNetbootin. Then, check the option of Diskimage, choose ISO, and click three dots to specify the Windows 10 ISO you have downloaded.
Step 4: Choose USB Drive from the Type drop-down menu and select the USB drive’s name in Drive.
Step 5: Click OK after choosing all the parameters. After a few minutes, the USB drive will be formatted to a bootable device.
Create Bootable USB Windows 10 on Mac Using PassFab 4Winkey
In terms of the above three methods, you need to download a Windows 10 ISO first via Media Creation Tool, which takes some time. If you don’t want to download an ISO image file, you can try this way – using PassFab 4Winkey.
It is a powerful, free, and premium tool that enables you to reset, delete & unlock your Windows login password, and create a new Windows account with a USB flash drive, CD, or DVD. In addition, it allows you to make bootable Windows 10 USB on Mac.
Let’s know how to create Windows 10 bootable USB on Mac without Boot Camp using this tool by following the instructions given below.
Step 1: On your Mac, visit https://www.passfab.com/products/windows-password-recovery.html via the web browser and download PassFab 4Winkey. Use the downloaded file to install this tool on your Mac.
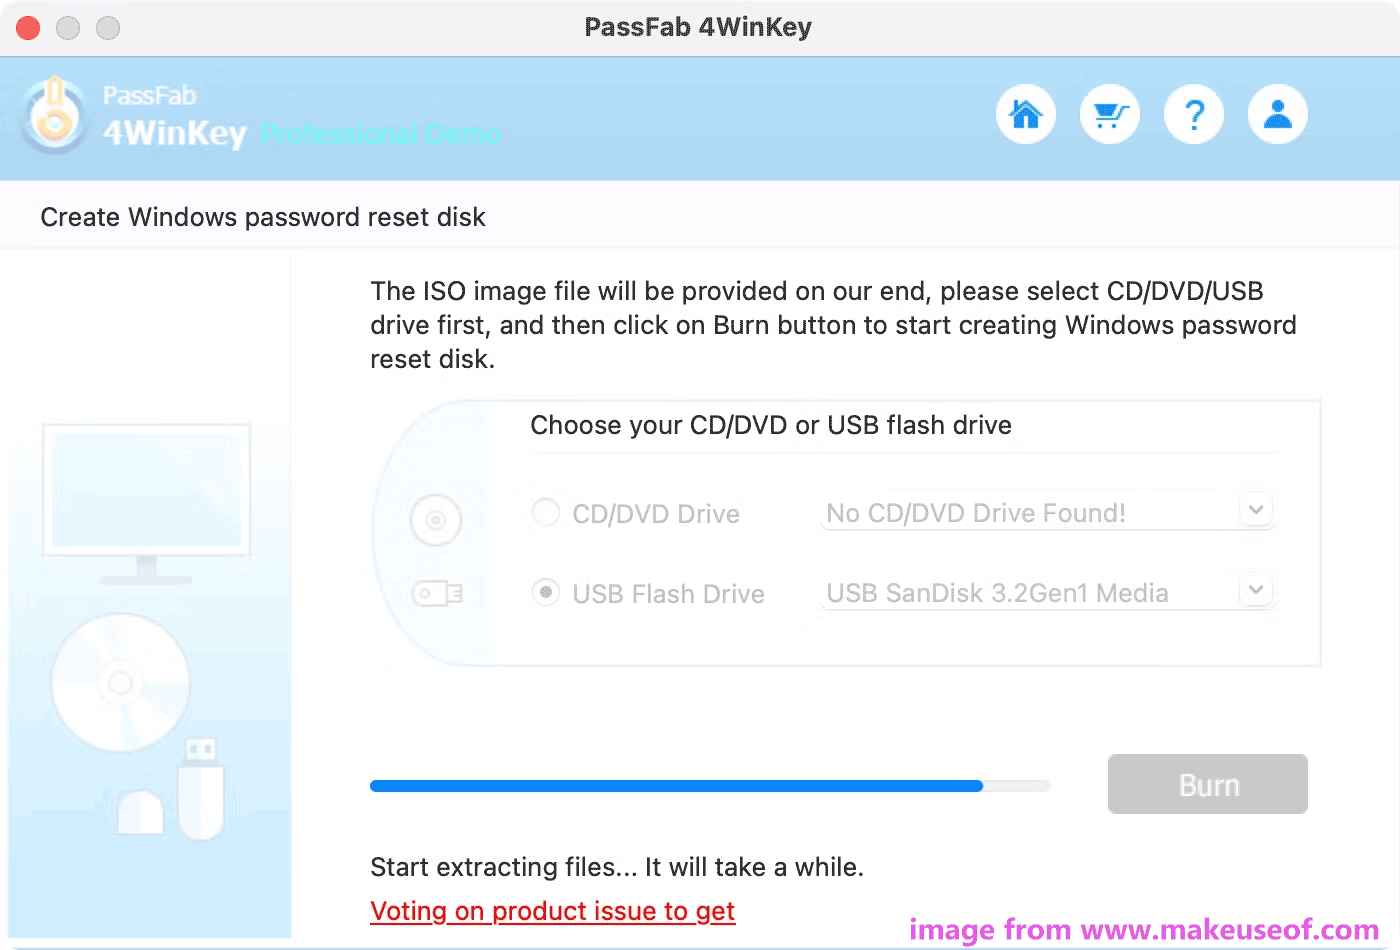
Step 2: After the installation, launch this utility, connect your USB drive to the machine and PassFab 4Winkey can automatically detect it.
Step 3: Choose USB Flash Drive and click the Burn button.
Step 4: The ISO file will be offered by this software. Just wait for the process to complete. Once it is done, you can see some instructions on what you should do next. click OK.
Create Bootable USB Windows 10 on Mac via Terminal
In addition, there is another way to help you create a bootable Windows 10 USB drive and it is using the Terminal tool that is built into macOS. This is the most complicated method out of all the methods. See how to make a Windows 10 bootable USB on Mac using Terminal by following the given steps below.
Step 1: Connect your USB flash drive to your Mac and then open the command tool by going to Finder > Applications > Utilities > Terminal. Alternatively, you can press Command + Spacebar, type into Terminal, and launch it.
Step 2: Type diskutil list into the Terminal window and press Enter. Then, you can see the list of connected drives on the Mac. Find the USB drive and note down its name like disk2.
Step 3: Copy and paste the following command, then press Enter to format the USB drive to MS-DOS (FAT).
diskutil eraseDisk MS-DOS “WIN10” GPT disk2
Step 4: Download an ISO file of Windows 10 by following the instructions in part Download Windows 10 ISO.
Step 5: Type the command – hdiutil mount ~/Downloads/Windows10.iso to the Terminal window and press Enter to mount the ISO file. ~/Downloads/Windows10.iso means the file called Windows10.iso is located in the Downloads folder. Just replace it with your own.
Step 6: Copy the ISO file to your USB drive via the command – cp -rp /Volumes/MOUNTED-ISO/* /Volumes/WINDOWS10/. Replace MOUNTED-ISO with the name of the mounted ISO. After some time, you will get a bootable USB drive of Windows 10.
Step 7: Run the command hdiutil unmount/Volumes/MOUNTED-ISO and close Terminal.
Now 5 ways to create Windows 10 bootable USB on Mac are introduced to you. Just choose one way based on your situation to get a bootable USB drive so that you can install Windows 10 on Mac. You can share them with people who also need them.
Click to Tweet
How to Install Windows 10 from USB on Mac
After you make Windows 10 bootable USB on Mac, you can take action to install Windows 10 on Mac using USB. Well then, how can you do this thing?
Step 1: Shut down your Mac and insert the bootable USB drive into it.
Step 2: Power on the machine and immediately press & hold the Option key. Then, you are allowed to choose the startup disk instead of booting to the default disk.
Step 3: Select the USB drive and press Return. Then, you can see a blue window and just follow the on-screen instructions to install Windows 10 on Mac using USB.
How to Back up Windows 10
After installing Windows 10 on your Mac via the bootable USB drive, you can start running this system. To make sure you have a smooth operating system, there are some things you should do – update Windows 10, install the latest device drivers, install some necessary software, and adjust privacy settings.
To keep Windows 10 smooth, we also recommend you to back up your Windows PC – create a system image so that you can restore the machine to a working state in case the system crashes or fails to boot. To do this task, you can use a third-party backup software called MiniTool ShadowMaker.
It is designed to back up your Windows operating system by default. Also, you can use this tool to back up your files and folders to keep data safe. Besides, disk backup, partition backup, disk clone, and file sync are also supported. Just click the download button to get MiniTool ShadowMaker and install it on the machine.
MiniTool ShadowMaker TrialClick to Download100%Clean & Safe
Step 1: Launch MiniTool ShadowMaker and click Keep Trial to continue.
Step 2: Go to the Backup page, you can see system partitions for Windows 10 to run are selected. Besides, a target folder is also selected but we recommend you to choose an external hard drive or USB drive as the storage path for the system image file.
Step 3: Click Back Up Now to execute the backup task right now.
Verdict
A guide on how to make a Windows 10 bootable USB on Mac is introduced here. If you want to make Windows 10 bootable USB on Mac and install Windows 10 on Mac using USB, just follow the given methods and steps. If you find out any efficient workarounds, don’t hesitate to tell us. Thanks a lot.
We previously showed you how to create a Windows 10 USB installation media when performing a clean install of Windows 10, but there might be an instance where the only machine you have available is a Mac. We’ll show you to create a bootable USB flash drive with the Windows 10 installer from a Mac. It’s easier than you think, thanks to the built-in Boot Camp Assistant from Apple.
Download Windows 10 Disc Image
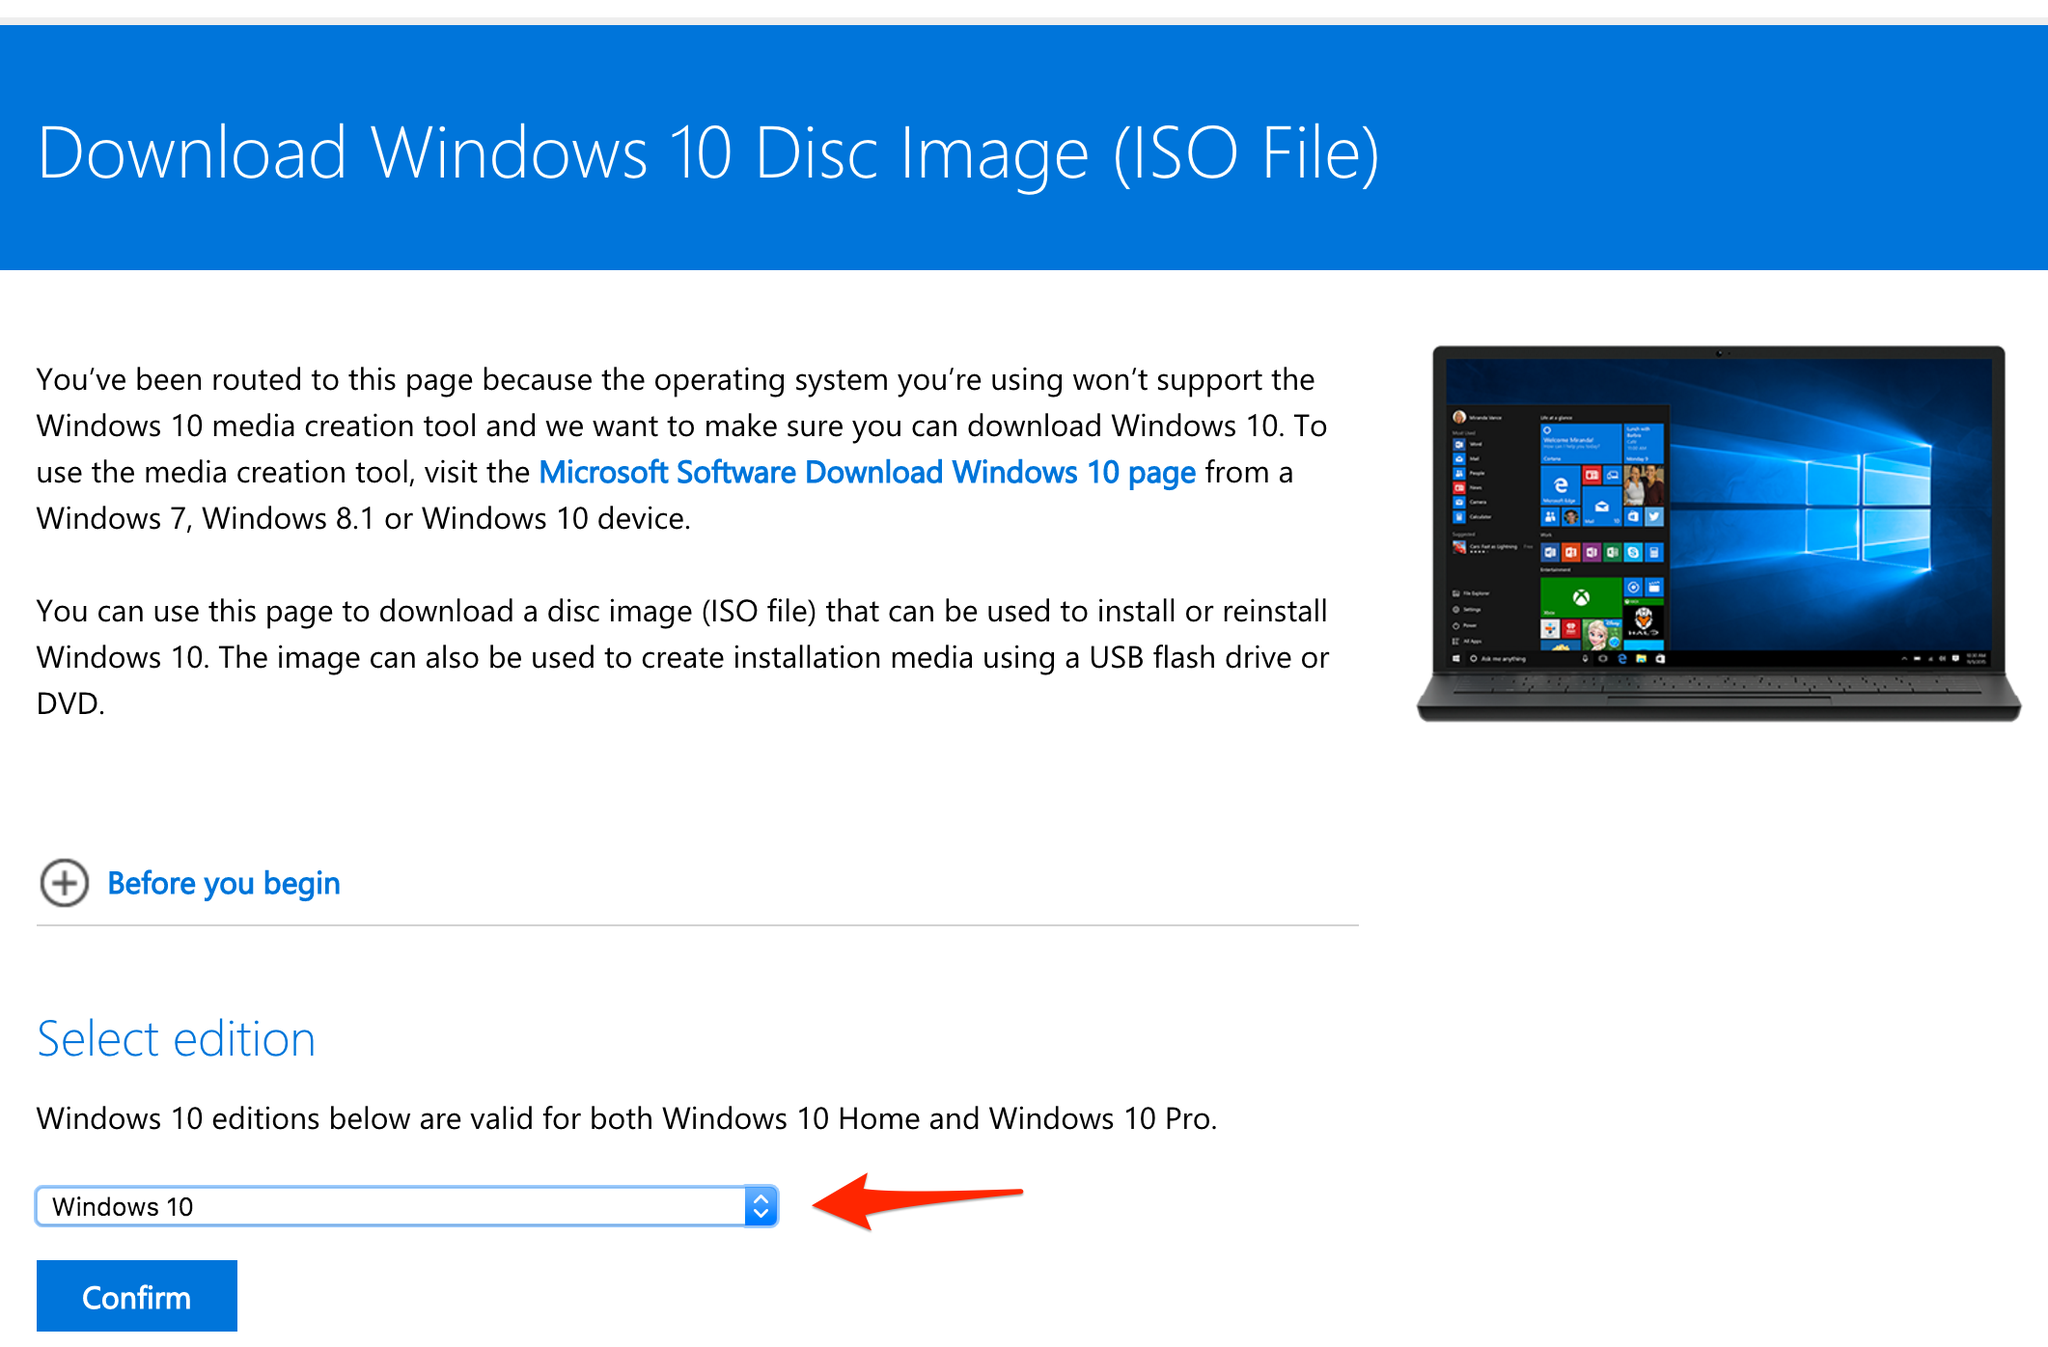
First, you need to download the Windows 10 ISO file. Go to the download page and select the proper edition of Windows 10 in the dropdown menu. If you don’t know what K, KN, or Single Language edition stands for, just select Windows 10 in the list.
Download Windows 10 ISO
Create USB installer with Boot Camp Assistant
After downloading the ISO file, you’ll need to use Boot Camp Assistant to move it to a bootable USB drive.
- Insert a USB flash drive to your Mac. Make sure it’s at least 8GB, which is usually marked on the USB stick. You can also check by right-clicking the USB drive on your desktop and clicking Get Info. Check if the number next to Capacity is at least 8GB. All the files in the drive will be deleted, so make sure there are no important documents inside.
- Open Boot Camp Assistant. The easiest way to launch it is through Spotlight Search, which you can bring up by pressing Command and Spacebar. Press Enter to launch the app.
- Check the box for «Create a Windows 7 or later version install disk» and deselect «Install Windows 7 or later version.»
- Click Continue to proceed.
- Boot Camp Assistant will automatically locate the ISO file from your downloads folder, but make sure it is the right file. Click the «Choose…» button and locate the ISO file. Make sure the destination disk is the USB thumb drive you’ve inserted.
- Click Continue. It can take about 20 minutes to format and set up the USB installer on the Mac.
- When Boot Camp Assistant is done, the USB drive will be renamed to WININSTALL. Click Quit to close the app and then Eject the USB drive.
That’s it! You now have a bootable USB drive with the Windows 10 installer. You can use it to configure new Windows 10 PCs from scratch. We told you it was easy!
Have you tried creating a Windows 10 installer USB drive from a Mac before? Did you encounter any issues? Let us know your experience in the comments.

SanDisk 32GB Ultra Flair USB 3.0 Flash Drive
Our go-to for USB storage.
This compact USB flash drive provides affordable USB 3.0 storage flexing steady transfer speeds up to 150MB/s. Ideal for portable data storage, including any Windows installation.
All the latest news, reviews, and guides for Windows and Xbox diehards.
Mark Guim is Video Editor at Windows Central. He switched to Windows because the MacBook Pro isn’t Pro enough. You can follow him on Twitter at @markguim.
Most new PCs don’t come with DVD drives anymore. So it can be a pain to install Windows on a new computer.
Nội dung chính Show
- Step 1: Download the Windows 10 ISO file
- Step 2: Insert your USB storage drive into your Mac
- Step 3: Use the diskutil command to identify which disk your USB drive is mounted on
- Step 4:
Format your USB Drive to work with Windows - Step 5: Use hdiutil to mount the Windows 10 folder and prepare it for transfer.
- Step 6: Copy the Windows 10 ISO over to your USB Drive
- Step 7: Put your USB into your new PC and start loading Windows
- How do I create a Windows 10 media creation tool on my Mac?
- Does Microsoft media creation tool work on Mac?
- Can you use a Mac to download Windows onto a USB?
- Can I download Windows software on my Mac?
Luckily, Microsoft makes a tool that you can use to install Windows from a USB storage drive (or
«thumbdrive» as they are often called).
But what if you don’t have a second PC for setting up that USB storage drive in the first place?
In this tutorial we’ll show you how you can set this up from a Mac.
Step 1: Download the Windows 10 ISO file
You can download the ISO file straight from Microsoft. That’s right — everything we’re going to do here is 100% legal and sanctioned by Microsoft.
You can download Windows 10
directly from Microsoft for free using this link. If you visit the link using a Windows device, you’ll be redirected to the Windows Media Creation Tool like this:
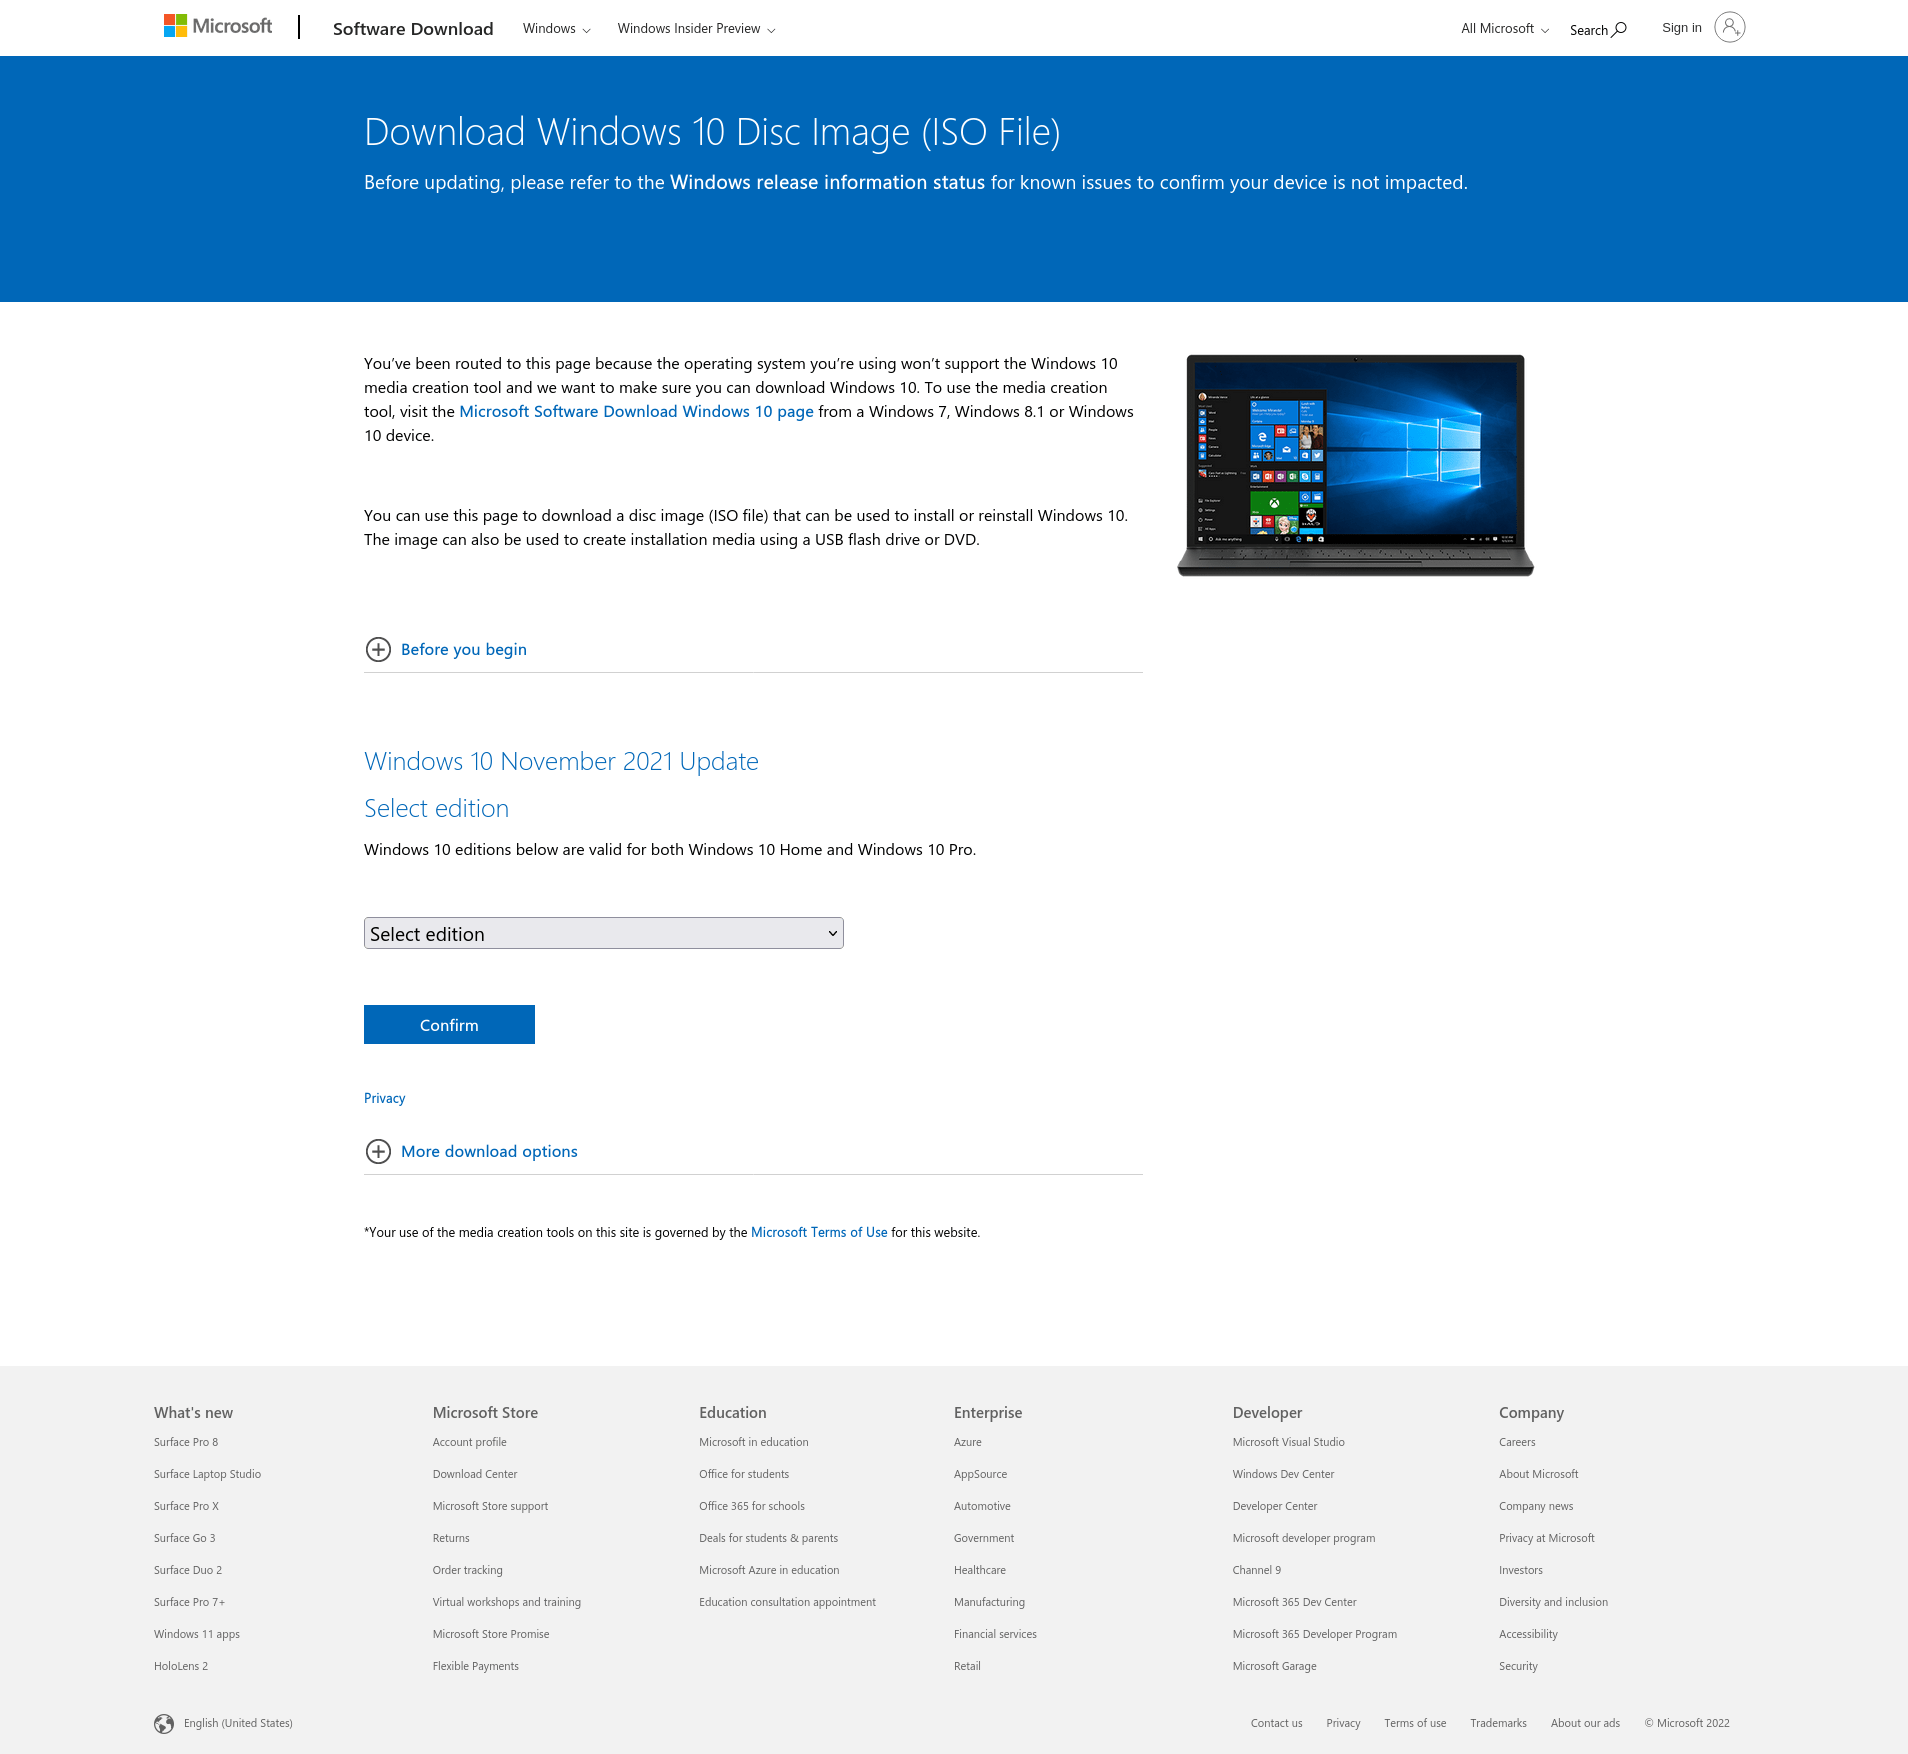
If you visit the same link from a non-Windows device, such as a Mac or a Linux device or any smartphone, you’ll land on the official ISO download
page:
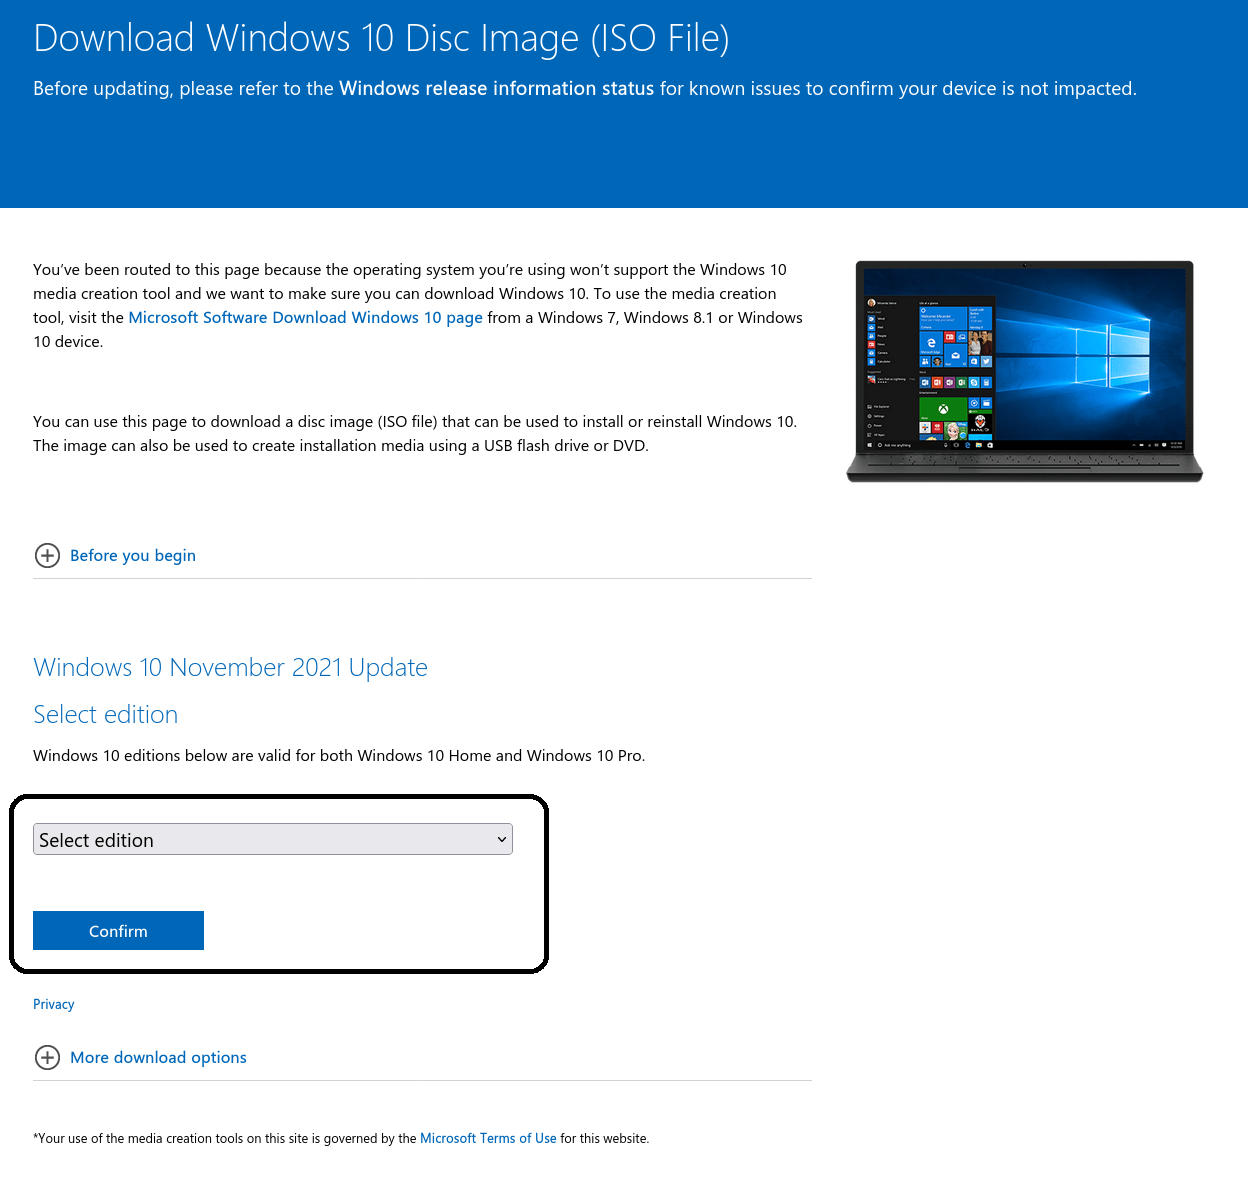
Select your desired edition from that drop-down and hit Confirm.
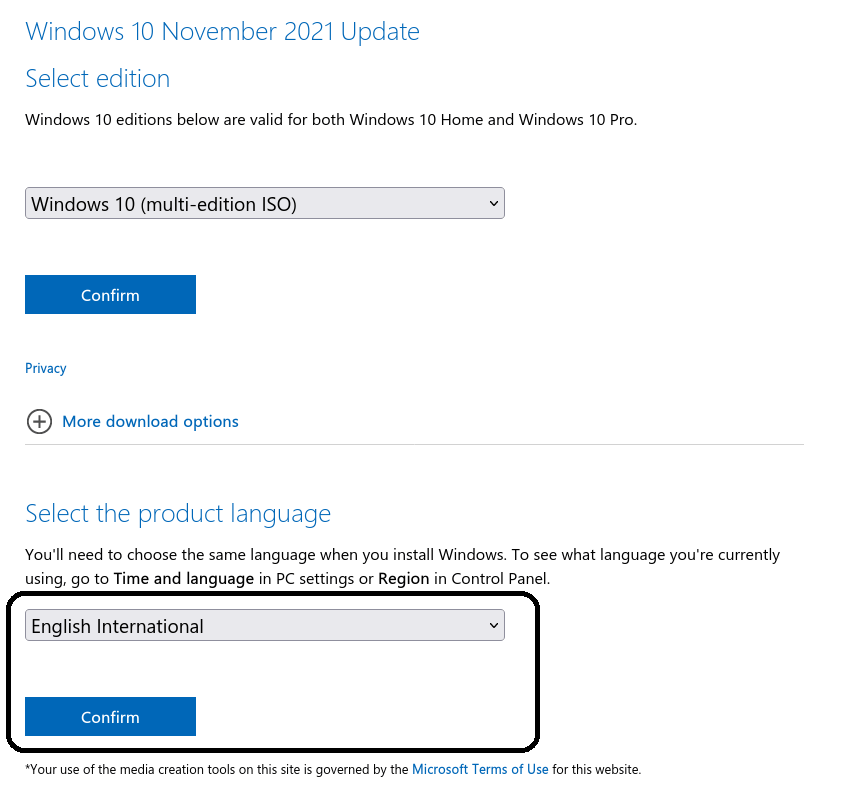
At this time, Windows 10 (multi-edition ISO) was the only one available. Once you’ve confirmed your edition, you’ll get another drop-down that lets you pick a language. Pick the one you want and hit the Confirm button.
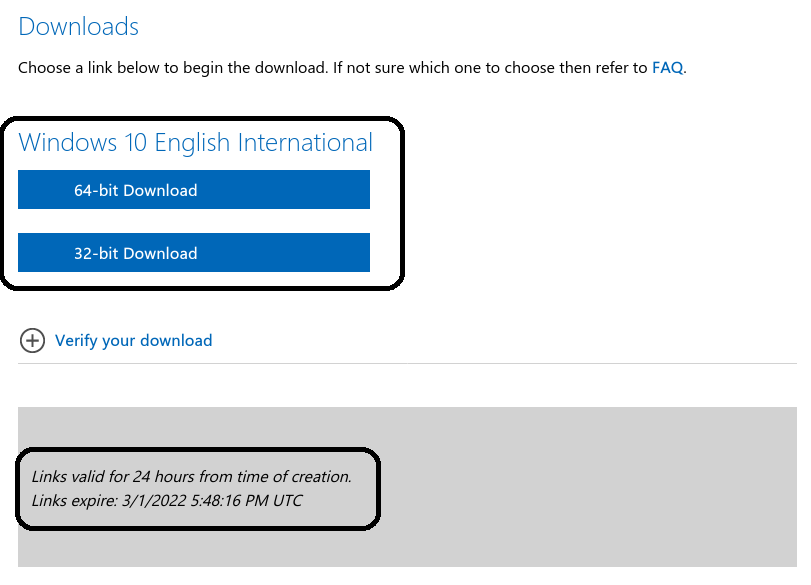
Once you’ve confirmed
your language, you’ll get two download links, one for the 64-bit edition, and the other one for the 32-bit edition. Both links are valid for 24 hours and the page will also show when they expire.
If you don’t know how to decide between 64-bit and 32-bit, here’s what you should do. If you have a processor that supports 64-bit architecture and you have more than 4GB of RAM, go with the 64-bit one. 32-bit operating systems have a 4GB RAM limit.
To
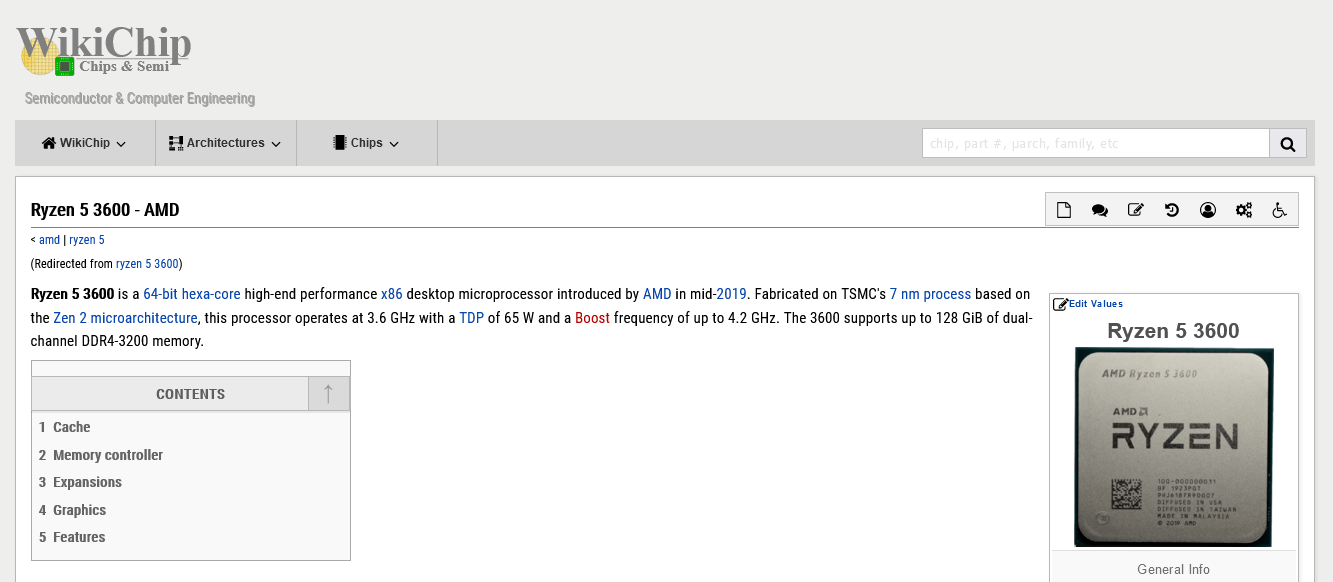
figure out whether your processor supports 64-bit architecture or not, head over to a website like WikiChip, and search for your processor model.
As you can see in the screenshot above, my Ryzen 5 3600 supports 64-bit architecture. I also have 16GB of RAM which is a lot more than 4GB, so I’ll go for the 64-bit edition.
Step 2: Insert your USB storage drive into your Mac
The ISO file is only about 5
gigabytes, but I recommend you use a USB drive with at least 16 gigabytes of space just in case Windows needs more space during the installation process.
I bought a 32 gigabyte USB drive at Walmart for only $3, so this shouldn’t be very expensive.
Stick your USB drive into your Mac. Then open your terminal. You can do this using MacOS Spotlight by pressing both the ⌘ and Space bar at the same time, then typing «terminal» and hitting enter.
Don’t be intimidated by the command
line interface. I’m going to tell you exactly which commands to enter.
Step 3: Use the diskutil command to identify which disk your USB drive is mounted on
Open Mac Spotlight using the ⌘ + space keyboard shortcut. Then type the word «terminal» and select Terminal from the dropdown list.
Paste the following command into your terminal and hit enter:
diskutil list
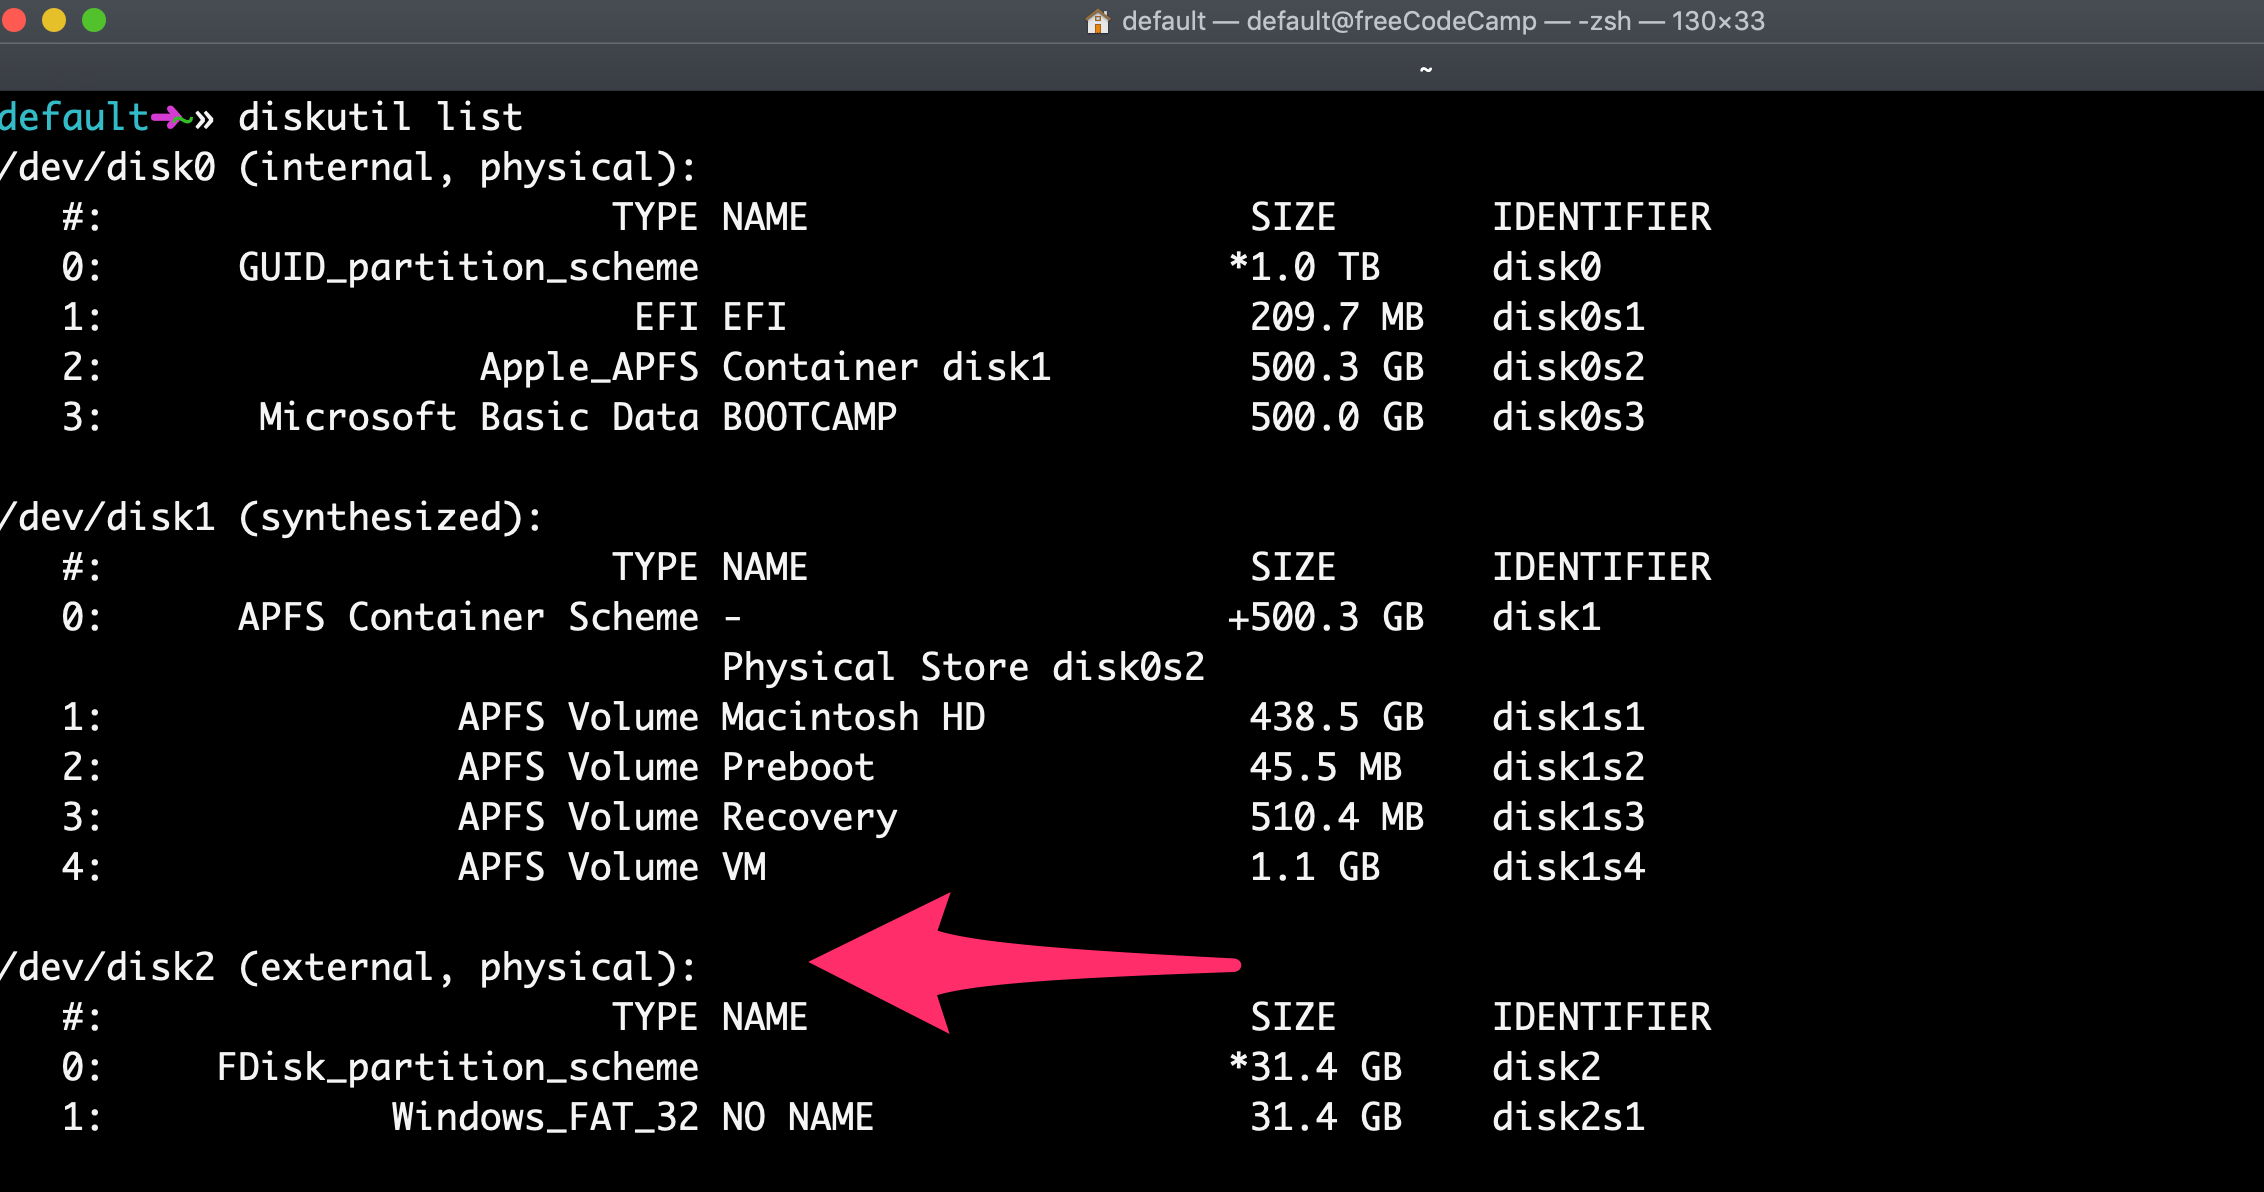
You will see output
like this (note — your Mac’s terminal may be black text on a white background if you haven’t customized it).
Copy the text I point to here. It will probably be something like
/dev/disk2.
Step 4:
Format your USB Drive to work with Windows
Next format your USB drive to Windows FAT32 format. This is a format that Windows 10 will recognize.
Note that you should replace the disk2 with the name of the your drive from step 3 if it wasn’t disk2. (It may be disk3 or disk4).
Run this command using the correct disk number for your USB:
diskutil eraseDisk MS-DOS "WIN10" GPT /dev/disk2
Then you’ll see terminal output like this.
This will probably only take about 20 seconds on a newer computer, but may take longer on an older computer.
Note that for some hardware, you may instead need to run this command, which uses the MBR format for partitioning instead of GPT. Come back and try this command
if step 7 fails, then redo steps 5, 6, and 7:
diskutil eraseDisk MS-DOS "WIN10" MBR /dev/disk2Step 5: Use hdiutil to mount the Windows 10 folder and prepare it for transfer.
Now we’re going to prep our downloaded ISO file so we can copy it over to our USB drive.
You will need to check where your downloaded Windows 10 ISO file is and use that. But your file is probably located in your ~/Downloads folder with a name of Win10_1903_V1_English_x64.iso.
hdiutil mount ~/Downloads/Win10_1903_V1_English_x64.iso
Step 6: Copy the Windows 10 ISO over to your USB Drive
Update April 2020: One of the files in the Windows 10 ISO – install.wim – is now too large to copy over to a FAT-32 formatted USB drive. So I’ll show you how to copy it over separately.
Thank you to @alexlubbock for coming up with this workaround.
First run this command to copy
over everything but that file:
rsync -vha --exclude=sources/install.wim /Volumes/CCCOMA_X64FRE_EN-US_DV9/* /Volumes/WIN10
Then run this command to install Homebrew (if you don’t have it installed on your Mac yet):
/usr/bin/ruby -e "$(curl -fsSL https://raw.githubusercontent.com/Homebrew/install/master/install)"
Then use Homebrew to install a tool called wimlib with this terminal command:
brew install wimlib
Then go ahead and create the directory that you’re going to write the files into:
mkdir /Volumes/WIN10/sources
Then run this command. Note that this process may take several hours, you may see 0% progress until it finishes. Don’t abort it. It
will use wimlib to split the install.wim file into 2 files less than 4 GB each (I use 3.8 GB in the following command), then copy them over to your USB:
wimlib-imagex split /Volumes/CCCOMA_X64FRE_EN-US_DV9/sources/install.wim /Volumes/WIN10/sources/install.swm 3800
Once that’s done, you can eject your USB from your Mac inside Finder. Note that Windows will automatically rejoin these files later when you’re installing.
Step 7: Put your USB into your new PC and start loading Windows
Congratulations — your
computer now should boot directly from your USB drive. If it doesn’t, you may need to check your new PC’s BIOS and change the boot order to boot from your USB drive.
Windows will pop up a screen and start the installation process.
Enjoy your new PC, and your newly-installed copy of Windows.
Learn to code for free. freeCodeCamp’s open source curriculum has helped more than 40,000 people get jobs as developers.
Get started
How do I create a Windows 10 media creation tool on my Mac?
Go to Finder > Applications > Utilities and launch Boot Camp Assistant. Select Continue, and check the option to Create a Windows 10 or later install disk. Select the Windows 10 ISO image from Mac’s internal storage and select Continue. Boot Camp Assistant will create the bootable Windows 10 USB.
Does Microsoft media creation tool work on Mac?
As you may have already found out, Microsoft’s Media Creation Tool does not work on macOS. In that case, the best way to create a Windows 10 bootable USB for Mac is to manually format a flash drive and copy the relevant files into it using the Mac’s Terminal.
Can you use a Mac to download Windows onto a USB?
Open Boot Camp Assistant, which is in the Utilities folder of your Applications folder. Follow the onscreen instructions. If you’re asked to insert a USB drive, plug your USB flash drive into your Mac. Boot Camp Assistant will use it to create a bootable USB drive for Windows installation.
Can I download Windows software on my Mac?
With Boot Camp, you can install and use Windows on your Intel-based Mac. Boot Camp Assistant helps you set up a Windows partition on your Mac computer’s hard disk and then start the installation of your Windows software.
Создайте загрузочную флешку Windows без помощи компьютерного мастера или знакомого, который разбирается в технике. Напишу о разных способах, подходящих новичкам.
При составлении данного пошагового руководства исхожу из того, что образ системы вы уже:
- Загрузили с сайта разработчика ОС
- Сохранили на жестком диске или SSD
Если это еще не сделано, начните чтение с подробной инструкции по загрузке ISO. Рассмотренная в материале по ссылке программа Media Creation Tool от Microsoft может применяться для скачивания с последующей записью образа на накопитель. И это первый метод создания загрузочной флешки.
Для скачивания образа может применяться:
- Настольный компьютер или ноутбук под управлением Windows
- ПК с Линуксом
- Mac
- Android-телефон
- Планшет
Создать загрузочную флешку, предназначенную для дальнейшей установки Windows вы можете на ПК с ОС:
- macOS
- Linux
- Windows
Обратите внимание, что некоторые методы работают только в ОС от Microsoft.
Теперь рассмотрю наиболее простые и универсальные способы. Для входа на веб-сайты использую Microsoft Edge. Вы можете воспользоваться другим браузером. Возможны отличия в интерфейсе.
Загрузочная флешка Windows на Mac, Windows- или Linux-компьютере
Содержание
- Загрузочная флешка Windows на Mac, Windows- или Linux-компьютере
- Rufus
- WinSetupFromUSB
- UltraISO
Программный инструмент balenaEtcher привлекателен для новичков, поскольку в нем отсутствуют шаги, требующие компьютерных знаний и навыков.
Перейдите на официальный сайт balenaEtcher, программы для записи ISO-образов на карты памяти SD и накопители, подключаемые к разъему USB (флешки). Обратите внимание: в окне браузера показан интерфейс утилиты.

Прокрутите страницу. Нажмите кнопку «Download for Windows» для загрузки версии, совместимой с операционными системами от Microsoft.

Если загрузочный накопитель будет создаваться на ПК под управлением другой ОС:
- Щелкните по стрелке вниз, расположенной на салатовом фоне справа

- Выберите версию для платформы: macOS или Linux
- Скачайте на HDD или SSD версию для своей ОС

В Edge вам предлагается:
- «Выполнить»: запустить исполняемый файл сразу после скачивания
- «Сохранить»: разместить файл по указанному вами пути на накопителе ПК
- Отменить загрузку
Первый вариант удобнее для начинающих пользователей, поскольку в нем меньше шагов. При втором варианте скачанную программу нужно запустить из того каталога, в который она сохранена.

После проверки безопасности загружаемого EXE-файла…

…стартует мастер установки утилиты. Программа будет работать только после принятия пользователем условий лицензионного соглашения. Внимательно ознакомьтесь с текстом перед тем, как нажать кнопку «Принимаю».

Установка инструмента займет некоторое время.

Если используете Linux, Windows или Mac и предпочитаете устанавливать программное обеспечение с применением команд, обратите внимание на строку под перечнем версий утилиты для разных платформ.
Щелкните по ссылке: «Debian (.deb) packages» если ваша ОС основана на Debian. К таким системам в том числе относятся Ubuntu и Linux Mint. «Red Hat (.rpm) packages» — ссылка для пользователей Линуксов, поддерживающих установку софта из RPM-пакетов. Пример: Fedora. Обе ссылки ведут на одну страницу с описанием процесса установки для разных ОС.

По ссылкам содержатся инструкции по установке и удалению утилиты:
- для DEB

- для RPM

- для Solus (GNU/Linux x64)

- через Brew Cask в macOS

- через Chocolatey в Windows

В правой верхней части окна программы — значок настроек («шестеренка»). Щелкните по нему.

Оставьте настройки предлагаемые по умолчанию, если не требуются особые опции, о которых вы точно знаете. Единственный параметр, на который стоит обратить внимание — первая строка перечня. Предлагает пользователю отправлять отчеты об ошибках и использовании инструмента. Исходно опция включена, но может быть отключена вами. Для этого нужно снять «птичку» слева от текста.
Вторая снизу опция — автоматическое обновление программы.

Процесс создания флешки для последующей установки операционной системы состоит из трех шагов.
Первый («Select image»). Укажите путь к образу (ISO-файлу) ОС:
- Windows 10
- Windows 7
- Linux Mint
- Ubuntu
- Другого дистрибутива Линукс
Второй («Select target»). Выберите чистую подключенную к USB-порту ноутбука или настольного ПК флешку. Она и станет загрузочной после завершения третьего шага работы программного инструмента.
Третий («Flash!»). Запись образа системы на флеш-накопитель. Дождитесь завершения работы программы.

Извлеките созданный загрузочный накопитель из разъема. В дальнейшем используйте его в качестве источника для установки системы.
Rufus
Перейдите на официальный сайт утилиты Rufus.
В правом верхнем углу страницы — список.

Выберите из него язык. Подтвердите выбор щелчком мыши.

Прокрутите страницу вниз до надписи «Скачать». Под надписью выберите версию:
- Rufus (надо устанавливать)
- Переносная версия (достаточно запустить скачанный исполняемый файл)
Чуть выше отображается дата свежайшего обновления программного инструмента. Рекомендую остановиться на версии, не требующей установки, то есть дополнительного шага на пути к конечному результату — работоспособному загрузочному USB-накопителю. Щелкните по ссылке выбранной версии программы.

В браузере Microsoft Edge, в нижней части окна приложения, появится перечень доступных действий с файлом. Упростите себе задачу — нажмите «Выполнить». Утилита начнет работу сразу после загрузки без дополнительных действий. Предусмотрена возможность сначала «Сохранить» ее на жесткий диск, а затем — запустить ее.

Система спросит у вас: «Разрешить этому приложению вносить изменения на вашем устройстве?» Примите решение. Продолжение работы программы возможно только после нажатия пользователем кнопки «Да».

Определитесь, необходима ли вам автоматическая проверка обновлений программного инструмента («Да»). В большинстве случаев работа с более свежей версией ПО предпочтительна, поскольку в ней исправлены известные ошибки.

Программа удобна тем, что у нее всего одно окно. Все настройки и параметры указываются в нем.
Определите «Устройство». Выберите из списка флешку. Перед этим ее нужно подключить к USB-порту компьютера.
«Методом загрузки» является ISO-образ Windows, путь к которому необходимо указать.
«Схема раздела»:
- GPT
- MBR
Выбор «Целевой системы» зависит от того, используется ли на ПК современный интерфейс UEFI или классический BIOS.
Из списка «Файловая система» рекомендую выбрать «FAT32», а «Размер кластера» оставить предлагаемый по умолчанию — 16 килобайт.

Поочередно щелкните по надписям: «Показать расширенные свойства диска» и «Показать расширенные параметры форматирования». Отобразятся предназначенные для опытных пользователей дополнительные опции утилиты. Кроме случаев, когда вы абсолютно уверены в необходимости дополнительных настроек, не меняйте ничего в этих разделах.

После завершения установки параметров:
- Нажмите кнопку «Старт»
- Дождитесь завершения создания загрузочного накопителя
- Извлеките флешку из USB-порта
- Используйте ее для установки ОС

Метод удобен для начинающих пользователей, поскольку сложные настройки в программе отсутствуют.
WinSetupFromUSB
Программа для операционных систем Windows предназначена для создания загрузочных (в том числе и мультизагрузочных) флешек операционных систем:
- Windows (начиная с версий 2000/XP)
- Linux
- BSD
Созданный с ее помощью загрузочный накопитель может использоваться на компьютерах с (U)EFI и классическим BIOS.
Перейдите на домашнюю страницу утилиты.
Щелкните по пункту «Downloads» меню веб-сайта.

Для загрузки предлагается наиболее свежая на момент посещения веб-сайта версия. Щелкните по ссылке с названием EXE-файла.

Нажмите кнопку «Download» для того, чтобы загрузить программу.

В самораспаковывающемся архиве содержатся версии для 32- и 64-битных компьютеров.

Запустите версию, соответствующую архитектуре центрального процессора вашего ПК. В единственном окне программы:
- Выберите из списка «USB disk selection and format tools» флешку, которая станет установочной
- Добавьте один или несколько образов для последующей записи на загрузочный носитель (в блоке «Add to USB disk»)
- Нажмите кнопку «GO»

Мощный инструмент для опытных пользователей, которым нужна возможность загрузки и установки нескольких ОС с одного накопителя. Несложен и для начинающих.
UltraISO
Запускается на компьютерах под управлением Windows:
- 98/98SE
- NT 4.0(SP6a)
- XP
- 2003
- Vista
- 2008
- 7
- 8
- 8.1
- 10
Предусмотрена возможность создания загрузочных CD операционных систем Windows NT, 2000, XP. Инструмент поможет пользователям, которым нужно создать загрузочный накопитель старой ОС на древнем компьютере.
Применяется также для редактирования компакт-дисков с аудитоконтентом. Обрабатывает образы Audio CD в формате .NRG(Nero). Предусмотрена возможность определения метки диска и названия песни.
Перейдите на официальный сайт программы UltraISO.
Откроется домашняя страница утилиты. Обратите внимание, что это платный программный продукт. Посетителям сайта предлагается скачать триал-версию UltraISO Premium.

Для этого нажмите на кнопку «Free Trial». Edge предложит «Выполнить» или «Сохранить» исполняемый файл. Первый вариант удобнее, поскольку ПО запустится сразу после загрузки.

Чтобы начать работу с приложением, ему необходимо предоставить разрешение на внесение изменений на устройстве (кнопка «Да»).

Установка начнется только после того, как пользователь примет условия лицензионного соглашения. Перед тем, как выбирать этот вариант (первый в выделенном блоке) и нажимать кнопку «Далее», внимательно прочитайте текст. Если предпочитаете воспользоваться одним из ранее рассмотренных методов — прервите установку (второй вариант).

Будет предложена папка, в которую устанавливается программный инструмент для создания загрузочного накопителя. Вы можете указать другую. Для этого используйте кнопку «Обзор». Нажмите «Далее» для установки утилиты в выбранный каталог.

Мастер установки спросит, в какой папке главного меню создать ярлык программы и предложит выбрать другой каталог. Жмите «Далее», чтобы перейти к следующему шагу установки.

Вам предлагается:
- Создать значок программы на Рабочем столе
- Открывать ISO-файлы в ней по умолчанию
- Установить эмулятор дисков для ISO
Опции по умолчанию активны. Отключите вторую, если не пока не уверены, станете ли использовать утилиту в качестве основного инструмента для создания загрузочных флешек.

Нажмите кнопку «Установить».

Если оставить «птичку» перед опцией запуска, программный инструмент откроется после нажатия кнопки «Завершить».

В стартовом окне указана цена программы. Предлагается ввести регистрационный ключ или купить ПО. Доступна также опция «Пробный период».

Откроется окно инструмента.

В меню «Файл» выберите пункт «Открыть». Укажите путь к ранее скачанному образу операционной системы.

Щелкните по подпункту «Записать образ жесткого диска» из меню «Самозагрузка».

Выберите из списка флешку и нажмите «Записать». Не меняйте никаких настроек, кроме случаев, когда точно уверены, какие параметры нужно переопределить.

Подробную инструкцию по установке Windows 10 читайте дополнительно.
Какой метод создания загрузочной флешки предпочитаете вы?


