Несколько дней назад пользователи из России столкнулись с невозможностью скачать образы ОС Windows 10 и Windows 11 с официального сайта Microsoft. Попытка скачать средство загрузки образов Media Creation Tool выдает ошибку «404 — File or Directory not found». То, что блокировка касается именно российских пользователей подтверждается тем, что при использовании VPN расширения в браузере Media Creation Tool прекрасно скачивается.
Некоторые пользователи жалуются на то, что даже скаченный Media Creation Tool отказывается загружать образы Windows, если в системе не установлен внешний VPN сервис. Видимо, такие нюансы зависят от ip-адреса пользователя. Microsoft пока не делала никаких заявлений, но, видимо, мы их и не дождемся, ведь еще в марте 2022 года Microsoft приняла решение о приостановке своей деятельности на территории России.
Сказать, что запрет на скачивание образов Windows, это большая проблема — нельзя, ведь раньше мы прекрасно обходились без официального сайта Microsoft. А вот новости о том, что Microsoft заблокировала установку обновления для инсайдерской версии Windows 11 — это уже серьезно. При попытке найти обновление KB5014668 на системе с российским ip-адресом через Центр обновления Windows пользователей ждет неудача, а при использовании VPN соединения оно появляется в Центре обновления Windows и корректно устанавливается.
Судя по всему, это был пробный шаг перед полной блокировкой обновлений Windows для пользователей из России и это уже серьезная проблема, ведь в современном мире система без обновлений крайне уязвима. Такого огромного количества троянов, ворующих аккаунты от различных сервисов и платежные данные и файловых шифровальщиков-вымогателей не было никогда, а обновления постоянно закрывают дыры и уязвимости в системах, через которые они проникают на наши ПК и ноутбуки.
Не стоит забывать и то, что через Центр обновления Windows в Windows 10 и Windows 11 устанавливаются все необходимые драйвера на наши компьютеры и мы настолько привыкли к этой удобной функции, что потерять ее будет очень неприятно. Ситуация усугубляется еще и тем, что многочисленные зарубежные VPN-сервисы, с помощью которых мы решаем проблемы с доступом к сайтам, массово блокируются, а скорость у оставшихся оставляет желать лучшего. В этом блоге я расскажу, как решить проблемы со скачиванием образов и с обновлениями.
Скачиваем образы Windows
На своей системе я попробовал скачать средство Media Creation Tool для Windows 10 с официального сайта и получил ошибку «404 — File or Directory not found». Но через браузер с VPN расширением средство Media Creation Tool скачалось, а затем корректно скачало свежий образ Windows 10 нужной редакции.
Но, поскольку Media Creation Tool работает теперь не у всех пользователей, мы разберем пару способов скачивания образов Windows без него. Microsoft заблокировала прямые ссылки на скачивание образов Windows нужных редакций на своем сайте, принуждая пользователей использовать средство Media Creation Tool. При этом официальный сайт поддержки Microsoft использует возможность определения вашей операционной системы – если вы используете Windows 10 и 11, то прямых ссылок на сайте для скачивания Windows вы не увидите.
А вот если зайти на сайт Microsoft с системы Apple или Android, то ссылки на сайте отображаются, как и раньше. И чтобы скачать образ Windows с официального сайта мы заставим его думать, что зашли на сайт с системы Apple или Android, для чего нам нужно будет подменить идентификатор браузера. Но простая подмена идентификатора все равно не даст скачать образ Windows с российского ip-адреса, поэтому в браузер нужно установить и активировать VPN-расширение.
Способ подмены идентификатора будет отличаться в зависимости от того браузера, который вы используете. Как обычно, самый простой способ доступен пользователям Mozilla Firefox, которым нужно лишь установить расширение для изменения идентификации браузера, например, User-Agent Switch или Random User-Agent. Выбрать в нем браузер Safari и систему Apple, перейти на страницу загрузки, выбрать нужную редакцию Windows и скачать ее.
Для браузеров Google Chrome, Яндекс.Браузер и Opera Chromium действия будут чуть сложнее. Вам нужно перейти страницу загрузки, нажать сочетание клавиш Сtrl+Shift+I и открывшихся инструментах разработчика выбрать меню «три точки» (справа вверху), а затем в выпадающем меню перейти в «More tools» — «Network conditions».

В разделе «User agent» уберите галочку «Select automatically». В выпадающем списке выберите первый из списка, например Android (4.0.2) Browser – Galaxy Nexus и обновите страницу.
Теперь на сайте Microsoft появляются ссылки на прямое скачивание нужных образов Windows, если в браузере работает VPN-расширение.

В браузере Microsoft Edge на Chromium алгоритм действий будет похож, только в инструментах разработчиков нужно выбрать меню «три точки», затем в выпадающем меню перейти в «Дополнительные средства» — «Состояние сети».
Второй способ
Второй способ скачать нужные образы Windows 11 и Windows 10 — это воспользоваться помощью сервиса TechBench by WZT. Для чего перейти на сайт сервиса и в нужном меню выбрать требуемую редакцию Windows. Например, для загрузки Windows 11 окно будет выглядеть так.

Сервис не хранит образы Windows, а лишь генерирует ссылки на их скачивание с сайтов Microsoft, в чем можно убедиться, проверив ссылку, по которой идет скачивание. Для примера выше она будет иметь вот такой адрес:
https://software.download.prss.microsoft.com/dbazure/Win11_Russian_x64v1.iso?t=1d243a53-2131-49e5-9060-585cf573579c&e=1655766177&h=2c81daa275b6670424c0ea1c7e74d9d558241f5face2fabf97e9957ff9e23456
Скачиваем у устанавливаем обновления Windows вручную
Даже если Microsoft перейдет к полной блокировке обновлений Windows для российских пользователей, выход, конечно, есть. Проще всего будет пользователям старых систем на Windows 7, для которых есть удобнейший оффлайн установщик обновлений UpdatePack7R2 от simplix, которым продвинутые пользователи пользуются много лет.
Пользователям Windows 10 и Windows 11 придется повозиться, но ради защищенной системы это стоит сделать. Для этого следует перейти на сайт Microsoft, в раздел журнала обновлений. Для Windows 10 это будет выглядеть вот так.
Далее нужно выбрать последнее обновление от 14 июня — KB5014699, и скопировать его название. Затем перейти в Каталог Центра обновления Майкрософт, ввести название нашего обновления в поиск.
Выбрать нужно обновление в списке и скачать его.
На моей системе обновление корректно скачалось без использования VPN.
Драйвера устройств
Что же касается драйверов для ваших устройств, то не помешает заранее скачать их с сайтов производителей и держать их на жестком диске, как в старые времена, когда интернет был дорого и медленен. Места они занимают совсем немного, а вы будете уверены, что при новой установке Windows не получите сюрприз от Microsoft в виде неработающей системы установки драйверов.
Похоже, что теперь для корректной работы Windows нам понадобится не только VPN-расширение в браузере, но и возможность настройки VPN-соединения в роутере для всего трафика вашего ПК и ноутбука. Для этого понадобится современный и качественный роутер, например, от TP-LINK. В Ситилинке роутеры от TP-LINK стали лидерами по популярности среди пользователей, и на первом месте модель TP-LINK Archer AX73.
На втором — TP-LINK Archer C80.
А на третьем, гораздо более доступная по цене модель TP-LINK Archer C54.
Пишите в комментарии, столкнулись ли вы с невозможностью загрузки образов или обновлений Windows?
Более 450 блогов автора Zystax обо всем, что связано с компьютерами и играми.
рекомендации
4070 MSI по старой цене дешевле Palit
13900K в Регарде дешевле чем при курсе 60
Ищем PHP-программиста для апгрейда конфы
Время на прочтение
1 мин
Количество просмотров 106K
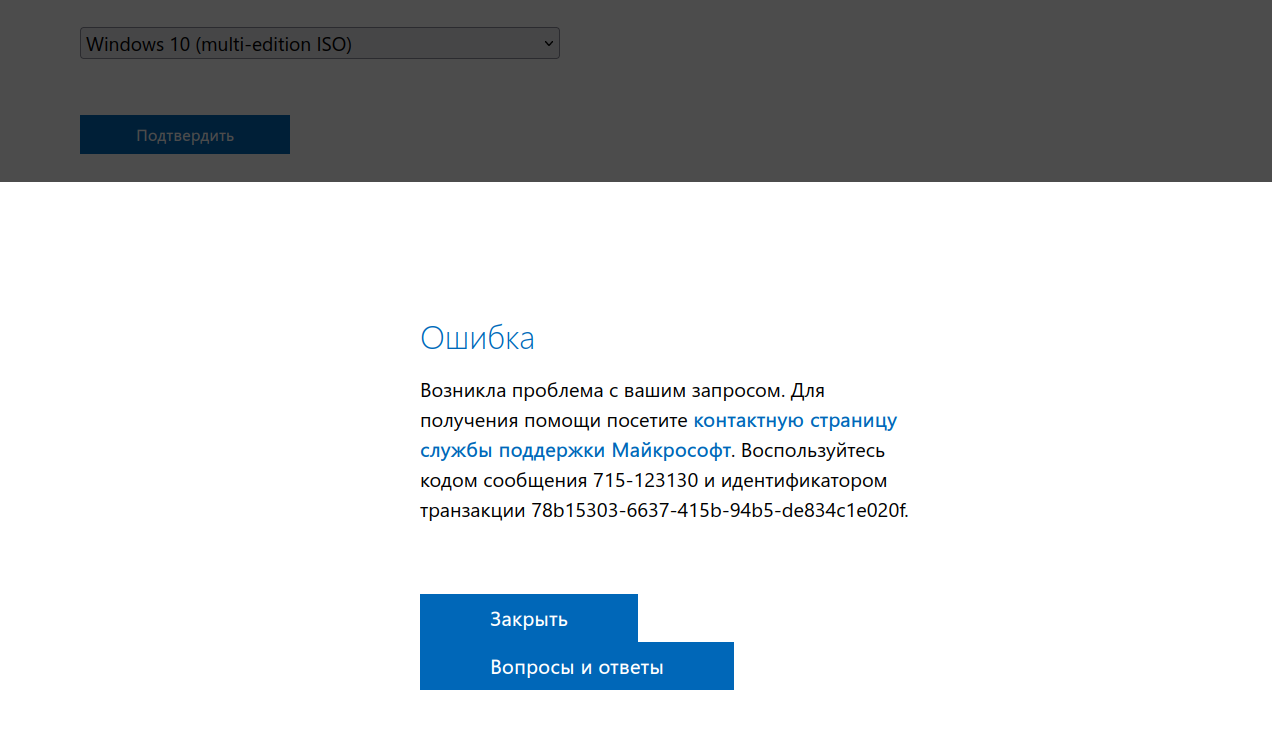
С 16 июня 2022 года пользователи из РФ столкнулись с проблемой: они не могут скачать ISO-образы Windows 10 и Windows 11 с сайта Microsoft. В процессе попытки скачивания выходит ошибка «Возникла проблема с вашим запросом». Примечательно, что при заходе через VPN скачивание образов новых ОС происходит нормально. Скачивание утилиты Media Creation Tool для Windows 11 не заблокировано, но для Windows 10 сайт выдаёт ошибку 404 — файл не найден (404 — File or Directory not found).
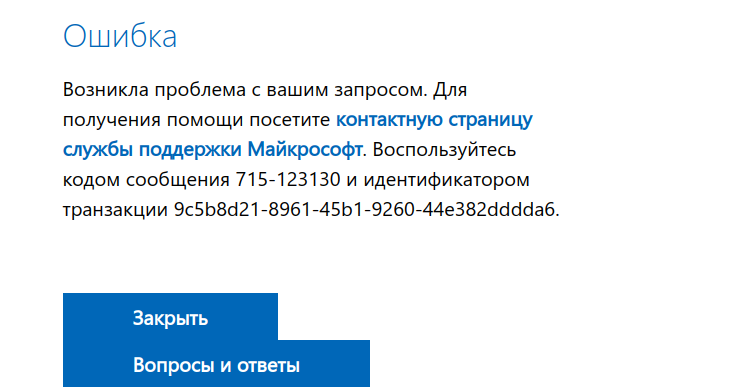
С чем связана эта проблема — непонятно. Microsoft ранее обещала, что продолжит выполнять все существующие договорные обязательства с российскими клиентами, пока действует приостановка новых продаж. Компания не объявляла, что будет блокировать доступ к своему сайту и продуктам.
8 июня Microsoft сообщила, что компания сокращает операционную деятельность в России.
В начале марта Microsoft приостанавила продажу товаров, ПО, сервисов и предоставление любых новых услуг в России. Тем не менее компания продолжила поддерживать существующих клиентов и сохранила в стране офисы.
В марте Dell и Lenovo закрыли возможность пользователям из РФ скачать драйвера без VPN.
В апреле Intel приостановила свою деятельность в России. Также для всех пользователей из РФ перестал работать сайт Intel. Нельзя скачать драйвера или документацию. Везде стоит заглушка о прекращении работы. Теперь для скачивания информации нужно использовать VPN. Портал ark.intel.com работает, но с него многие ссылки ведут на заглушку.
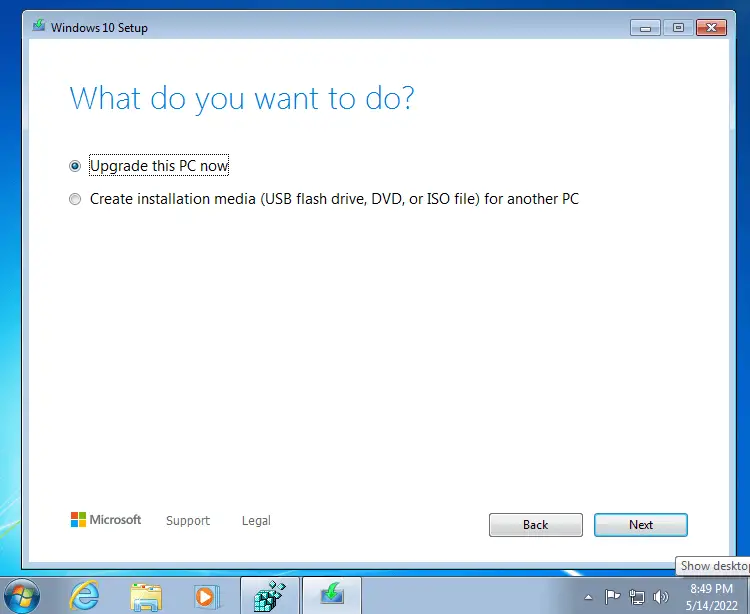
Ошибка 0x80072f8f 0x20000 появляется при двух распространенных ситуациях. Первая из них – при обновлении с Windows 7 до более свежей версии или просто при установке Windows 10. Вторая частая ситуация заключается в появлении ошибки при запуске Media Creation Tool. Причины появления, как и особенности проявления в каждой них, будут разными. Но есть и хорошая новость, она заключается в том, что есть довольно четкое представление об ошибке и эффективное решение к каждой вариации проблемы.
Почему появляется ошибка 0x80072f8f 0x20000?
Нам придется разделять две ситуации появления ошибки. Хотя они и имеют идентичный код, но во всем остальном сильно отличаются. Основная причина сбой с кодом 0x80072f8f 0x20000 при установке Windows 10 – отсутствие поддержки протоколов безопасности TLS. В Windows 7 Service Pack 1 по умолчанию включена поддержка только TLS 1.0. Сейчас же сервера Microsoft более не поддерживают столь устаревший стандарт. Требуется версия TLS 1.1 и TLS 1.2, которые по умолчанию отключены в старой операционной системе Windows 7. Их включение должно исправить проблему.
Если ошибка появляется при обновлении Windows, в основном через официальную утилиту Media Creation Tool, то проблема в некорректных файлах обновления. Видимо, система пыталась загрузить файлы для апдейта, но они оказались поврежденными. Нужно принудительно удалить их.
Как исправить ошибку 0x80072f8f 0x20000 при установке Windows 10?
Как мы и писали, нам нужно заставить Windows 7 работать с TLS 1.1 и TLS 1.2. Это вполне реально сделать, если подкорректировать реестр операционной системы. Можно запустить Windows в безопасном режиме и сделать необходимые изменения. Это можно сделать вручную, но есть и более быстрый способ – запустить файл. Нам нужен один из файлов Microsoft, вот ссылка. Скачиваем его, запускаем и через пару секунд исправления должны быть внесены. Можно перезагружать ПК и снова пытаться установить Windows 10.
Что нужно сделать вручную:
- Нажимаем комбинацию Win + R, вводим regedit и нажимаем Enter.
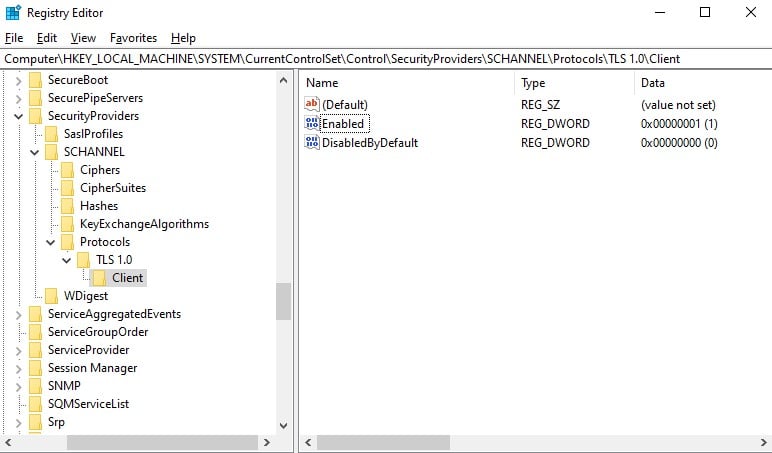
- Идем по пути HKEY_LOCAL_MACHINE\SYSTEM\CurrentControlSet\Control\SecurityProviders\SCHANNEL\Protocols\TLS 1.1\Client.
- Изменяем значение параметра DisabledByDefault на 0 (если его нет, то просто создаем его).
- Переходим в ветку HKEY_LOCAL_MACHINE\SYSTEM\CurrentControlSet\Control\SecurityProviders\SCHANNEL\Protocols\TLS 1.2\Client.
- Тоже создаем или изменяем существующий параметр DisabledByDefault в значение 0.
Важно! Есть еще один интересный способ – запустить установку через ISO. Для этого нужно войти на сайт Microsoft с клиентом Windows и скачать его. Обязательно следует использовать для этого телефон. Затем передаем файл на ПК и запускаем его. У многих такое решение сработало.
Как исправить ошибку при обновлении через Media Creation Tool?
Для решения проблемы нужно зачистить файлы в одной из важных директорий, а также запустить обновление другим способом.
Пошаговая инструкция:
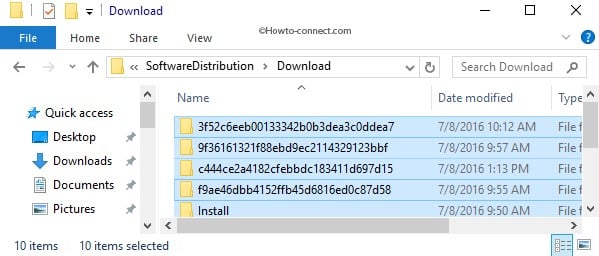
- Переходим по пути C:\Windows\SoftwareDistribution\Download.
- Удаляем все файлы, которые хранятся в этой папке.
- Кликаем правой кнопкой мыши по Пуску и выбираем «Командная строка (администратор).
- Вводим команду wuauclt.exe /updatenow.
Теперь вы знаете, что делать, если появляется ошибка 0x80072f8f 0x20000 при разных обстоятельствах. Включение поддержки TLS 1.1 и новее поможет успешно завершить установку операционной системы, а очистка файлов и обновление через консоль избавит от неполадки при апдейте Windows.
Будем рады увидеть ваши комментарии в отношении данной ошибки. Давайте вместе сделаем статью максимально полной.
Windows Media Creation Tool is a very useful tool that can help you upgrade your Windows system to the latest version or install the latest Windows 10/11 on your device. However, if Windows Media Creation Tool is not working, do you know how to fix it? You can find some easy solutions here.
Windows Media Creation Tool is an official tool from Microsoft. You can use it to upgrade your system to the latest version or install the latest Windows 10/11 on your device. MiniTool Software has talked about Windows 10 Media Creation Tool in this article: A Complete Guide to Windows 10 Media Creation Tool: How to Use.
However, the usage of Windows 10 Media Creation Tool and Windows 11 Media Creation Tool is slightly different.
For example,
You can use Windows 10 Media Creation Tool to:
- Upgrade your PC to the latest version.
- Create a Windows 10 installation USB drive.
- Download a Windows 10 ISO file.
You can use Windows 11 Media Creation Tool to:
- Create a Windows 11 installation USB drive.
- Download a Windows 11 ISO file.
You see the only difference is that you can’t use Windows 11 Media Creation Tool to directly upgrade your PC now. But it is not a big problem. You can use Windows 11 Installation Assistant to update your system. The effect is the same.
Windows 10/11 Media Creation Tool is not preinstalled on your PC. You need to download it from the Microsoft software download site.
- Download Windows 10 Media Creation Tool
- Download Windows 11 Media Creation Tool
After downloading Windows 10/11 Media Creation Tool, you can directly open and run it to do what you want to do. However, some users report that their Windows Media Creation Tool is not working.
There are multiple scenarios for this problem. For example:
- Windows 11 Media Creation Tool not working
- Windows 10 Media Creation Tool not working
- Windows Media Creation Tool won’t run
- Windows Media Creation Tool won’t open
- Windows Media Creation Tool couldn’t run on a PC
- And more….
We propose some solutions to these problems. You can try them to help you out.
If Windows Media Creation Tool is not working or you can’t open it on your PC, you can delete the tool and download it again. This is the quickest way to solve this issue: you need to make sure your downloaded Media Creation Tool is complete.
Your internet connection should be enabled and work smoothly during the download process. This is also to ensure the integrity of the download. On the other hand, it also requires a good network connection when using Windows Media Creation Tool.
If the above method doesn’t work for you, you can run the tool as administrator to have a try. You can right-click the Media Creation Tool and select Run as administrator. If the User Account Control interface pops up, you need to click the Yes button to continue.
Fix 3: Create an AllowOSUpgrade Registry Key
Windows Registry is an administrative tool that saves information about your installed programs and services on your Windows PC. It contains an OSUpgrade registry key and it is related to your Windows update. You can create an AllowOSUpgrade Registry key to allow Windows Media Creation Tool to run and upgrade your system.
Tips:
You should back up the registry key in advance to protect your system.
Step 1: Click the search icon from the taskbar, then search for Registry Editor. Select Registry Editor to open this tool. If you receive the User Account Control interface, click the Yes button to continue.
Step 2: Go to the following path. You can directly copy and paste this path to the address bar and press Enter to open the path.
Computer\HKEY_LOCAL_MACHINE\SOFTWARE\Microsoft\Windows\CurrentVersion\WindowsUpdate\OSUpgrade
Step 3: Right-click the OSUpgrade key and go to New > DWORD (32-bit) Value to create a new key. Then, rename the new key to AllowOSUpgrade.
Step 4: Double-click the newly created value to open it. Then, change the value data to 1.
Step 5: Click OK to save the change.
Step 6: Restart your computer.
After these steps, you can run Windows Media Creation Tool again and check if it runs normally.
Fix 4: Enable the Relevant Services
If Windows Media Creation Tool is not working on your PC, you also need to check if the Windows update relevant services are enabled.
You may disable one or more of the following services by mistake but you don’t it:
- Background Intelligent Transfer Service (BITS)
- Server
- TCP/IP NetBIOS Helper
- Workstation
- IKE and AuthIP IPsec Keying Modules
- Windows Update
Any service being shut down will affect Windows 10/11 Media Creation Tool. You can open Services to check.
Step 1: Press Windows + R to open Run.
Step 2: Type services.msc in the Run dialog and press Enter to open the Services app.
Step 3: Check if the above services are enabled. If one service is disabled, you can double-click that service and select Automatic for Status type. Then, click Apply and OK to save the change.
Step 4: Close Services.
After these steps, you can run Media Creation Tool again and see if it can run successfully.
Fix 5: Check the Available Space on Your System Disk
You should have at least 8 GB of free space on the C drive to run Media Creation Tool on your PC. You can go to File Explorer to check if the free space is enough. If not, you can delete unimportant files on the C drive to free up more space. You can also run Disk Cleanup to get more available space.
Here are 10 ways to free up disk space on Windows 10/11.
Fix 6: Use another Way to Upgrade Your PC
Using Media Creation Tool is not the only way to upgrade your PC. If you can’t use this tool to perform a Windows 10/11 update, you can use another way to do the job.
For example, you can check for updates in Windows Update, then download and install the available update on your device.
You can also download a Windows 10/11 disk image (ISO), create a Windows 10/11 installation USB drive using Rufus, and then install Windows 10/11 from USB.
Fix 7: Use another Way to Create a Windows 10/11 Installation USB Drive
If you can’t use Windows Media Creation Tool to create an installation USB drive, you can try another tool like Rufus to create a Windows installation USB drive. This method is free: Rufus is free for download, and Windows 10/11 ISO file is free for download. You just need to prepare a USB drive that has at least 8 GB of space.
Fix 8: Use another Way to Download a Windows 10/11 ISO File
If you can’t use Windows Media Creation Tool to download an ISO file due to Media Creation Tool not working or opening, you still have other choices to download a Windows 10/11 ISO file.
Microsoft allows you to directly download a Windows 10 ISO file (all editions) on a non-Windows device from the Windows 10 software download page. You can set a non-Windows agent in Chrome and then download a Windows 10 ISO file.
Windows 11 ISO download is different. You can download the Windows 11 disk image directly from Microsoft’s official site.
So, it is not a big deal if Windows Media Creation Tool is not working on your PC. You see, there are many ways to replace this tool.
Click to Tweet
Recover Your Lost and Deleted Files on Windows 10/11
Usually, Windows 10/11 updates via Media Creation Tool will not delete files on your device. But to protect your files and system, you’d better use MiniTool ShadowMaker to back up your computer to an external hard drive. If a Windows update destroys your system or deletes your files, you can restore them using your backup.
MiniTool ShadowMaker TrialClick to Download100%Clean & Safe
However, if there is no available backup to restore your files, what can you do to save your losses? You can try professional data recovery software like MiniTool Power Data Recovery.
It is a free file recovery tool that is specially designed to recover files from different types of data storage devices. This MiniTool data recovery software can work in different situations. For example:
- When you permanently delete a file from your computer, you can recover it using this software as long as that file is not overwritten by new data.
- When you can’t open a data storage drive, you can use this tool to rescue your files and then fix the inaccessible drive.
- If you want to recover data from an SD card, you can also try this tool.
- When your Windows system corrupts, you can boot your device from the bootable edition of this software and then recover data. After that, you can feel free to reinstall Windows or use other methods to fix the system.
- If you can’t find some of your important files after upgrading Windows 10/11 to the latest version, you can run this software to scan the drive that previously saved the files and recover them.
You can first run the MiniTool Power Data Recovery trail edition to see if it can find your needed files and then decide whether to use this tool to recover data.
MiniTool Power Data Recovery TrialClick to Download100%Clean & Safe
You can follow these steps to recover data using this MiniTool software.
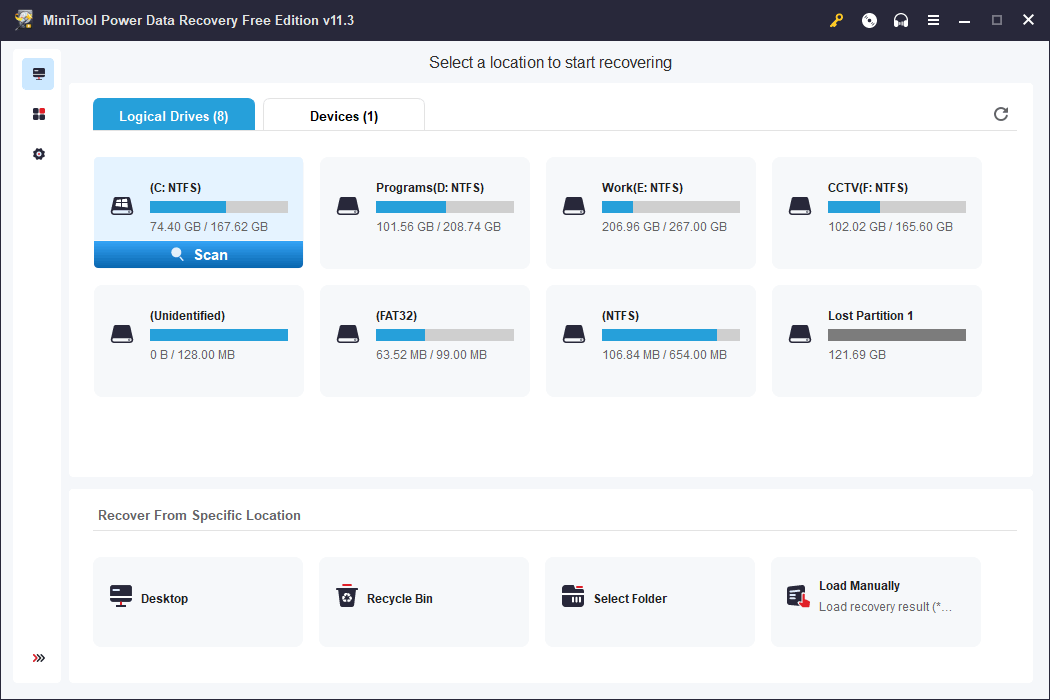
Step 1: Launch MiniTool Power Data Recovery.
Step 2: You need to find the drive where the lost files were previously saved, hover over that drive, and then click the Scan button to start scanning.
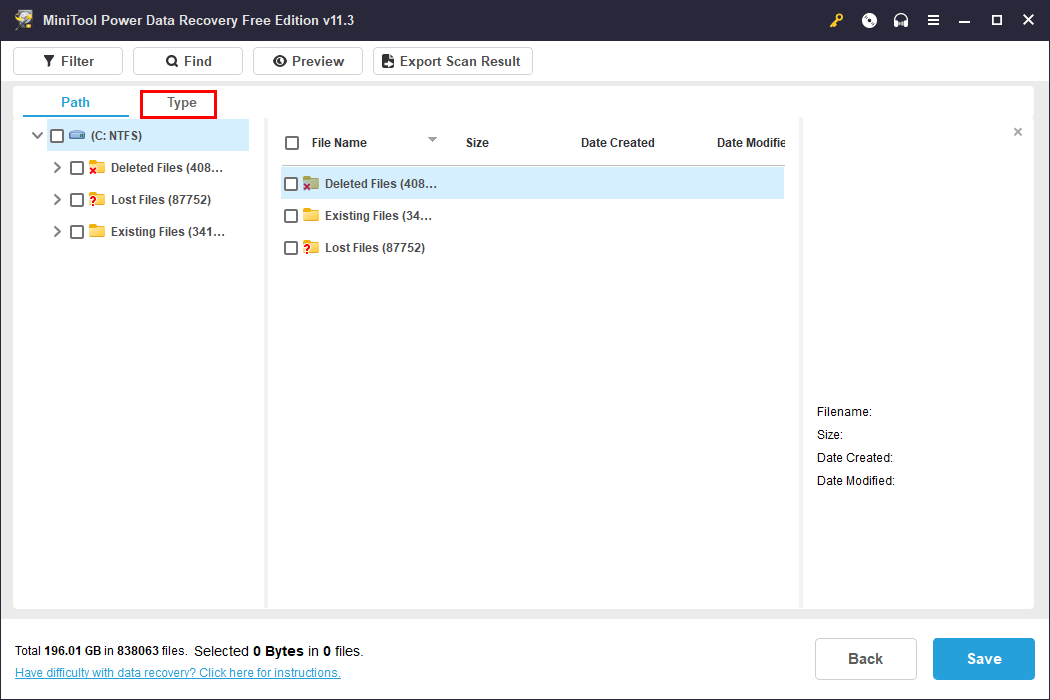
Step 3: After scanning, this software will show you the files it finds. These files are listed by path by default. You can open each path to look for your needed items. If you want to find certain types of files, you can switch to Type to make this software display files by type, then you can find files by type.
To recover data using this software, you need to use a full edition of this software. You can get a license key from the MiniTool official site, then click the key icon from the above ribbon menu, enter the license key, and press Enter to register the software.
After registering the software, you can select all your needed files once, then click the Save button, and select a suitable path to save them. To avoid data from being overwritten, the destination folder should not be the original location of the lost files.
Wrap Things up
By reading this, you should know the things you can do to fix the issue if Windows Media Creation Tool is not working on your PC. You can take steps to resolve the problem. You can also use another way to do the same thing that Media Creation Tool should do for you.
Additionally, if you are looking for a data recovery program to retrieve your files, you can try MiniTool Power Data Recovery.
Should you have other related issues that need to be fixed, you can let us know in the comments. You can also contact us via [email protected].
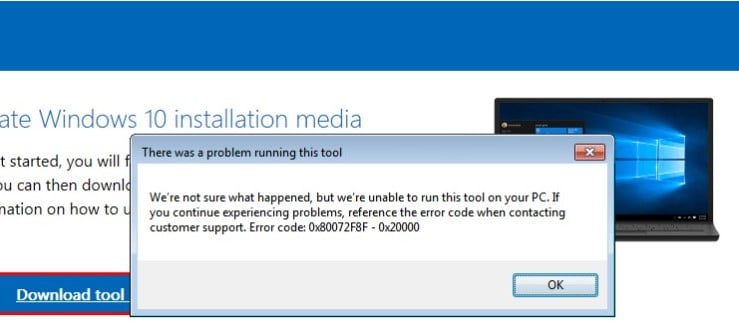
When you attempt to upgrade to Windows 10 from a Windows 7/8 computer using Microsoft’s Media Creation Tool, the error 0x80072F8F - 0x20000 may appear. The full error message verbatim is below:
There was a problem running this tool

We're not sure what happened, but we're unable to run this tool on your PC. If you continue experiencing problems, reference the error code when contacting customer support. Error code: 0x80072F8F - 0x20000
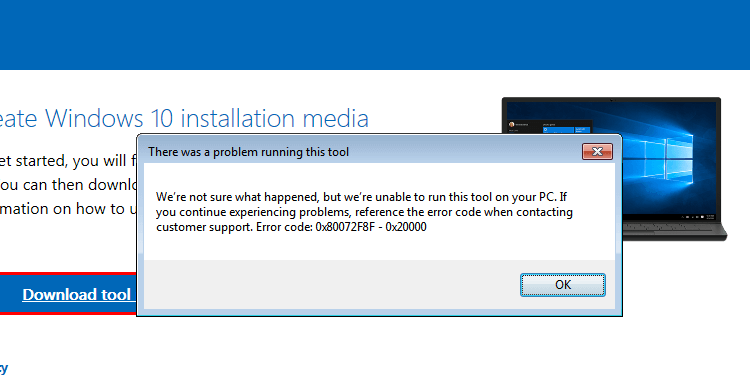
Let’s see how to fix this error on Windows 7 and Windows 8.
Important: Information in this article (and the registry fix) is for Windows 7 SP1 and Windows 8 systems only. They don’t apply to Windows 8.1 and higher!
Cause
The error 0x80072F8F - 0x20000 happens because the Media Creation Tool uses the TLS 1.2 Protocol, but the protocol is disabled by default on Windows 7 and Windows 8 computers. By default, only SSL3 and TLS1 are enabled in Windows 7 and Windows 8. On Windows 8.1 and Windows 10, SSL3, TLS1.0, TLS1.1, and TLS1.2 are enabled by default.
To resolve the Media Creation Tool Error 0x80072F8F – 0x20000 error on Windows 7 and Windows 8 computers, enable the TLS 1.1 and TLS 1.2 protocols. Follow these steps to do so:
Method 1: Enable TLS 1.1 and TLS 1.2 via the registry (Windows 7 & 
- Make sure your system is fully updated.
- Open Notepad.
- Copy the following lines into Notepad.
Windows Registry Editor Version 5.00

[HKEY_LOCAL_MACHINE\SOFTWARE\Microsoft\Windows\CurrentVersion\Internet Settings\WinHttp]
"DefaultSecureProtocols"=dword:00000a00

[HKEY_LOCAL_MACHINE\SOFTWARE\Wow6432Node\Microsoft\Windows\CurrentVersion\Internet Settings\WinHttp]
"DefaultSecureProtocols"=dword:00000a00

[HKEY_LOCAL_MACHINE\SYSTEM\CurrentControlSet\Control\SecurityProviders\SCHANNEL\Protocols\TLS 1.1\Client]
"DisabledByDefault"=dword:00000000
"Enabled"=dword:00000001

[HKEY_LOCAL_MACHINE\SYSTEM\CurrentControlSet\Control\SecurityProviders\SCHANNEL\Protocols\TLS 1.2\Client]
"DisabledByDefault"=dword:00000000
"Enabled"=dword:00000001
- Save the file with a .reg extension — e.g.,
enable_tls.reg - Double-click the
enable_tls.regfile to apply the settings into the registry. Click Yes when asked for confirmation. - Download the KB3140245 package (TLS 1.1/1.2 enablement update) from Microsoft and install it.
- Restart Windows.
- Download registry files: If you wish to download premade registry file(s), download enable-tls.zip. Unzip and run the enclosed file enable_tls.reg. To reverse/undo the setting to Windows 7/8 defaults, run the
undo.regregistry file.
(Credits to Markus for the fix.)
Method 2: Easy Fix (for Windows 7)
The above registry fix was created incorporating the suggestions in the Microsoft article titled Update to enable TLS 1.1 and TLS 1.2 as default secure protocols in WinHTTP
The article talks about the Microsoft Update with will enable TLS 1.1 and TLS 1.2 support via KB3140245 package. Here are the instructions:
- Download the KB3140245 package. Don’t run it yet.
- Download the “Easy Fix” executable via the above link (direct download) and run it. The fix will create the
DefaultSecureProtocolsregistry value which is a prerequisite for the Microsoft update. - Now run the KB3140245 .msi package you downloaded in Step 1.
This automatically enables TLS 1.1 and TLS 1.2 on the computer.
Re-run the Media Creation Tool now. It should work now!
Editor’s note
Note that the Easy Fix sets the “DefaultSecureProtocols” registry value only; it doesn’t write to the SCHANNEL registry location. But the manual registry fix in “Method 1” above does both! So, if you’ve explicitly disabled the TLS 1.1 and TLS 1.2 protocols via the SCHANNEL registry modification (e.g., by using the nisudf.reg registry fix to resolve a game/server connectivity issue), then the “Easy Fix” tool won’t help. You need to use “Method 1” in that case.
One small request: If you liked this post, please share this?
One «tiny» share from you would seriously help a lot with the growth of this blog.
Some great suggestions:
- Pin it!
- Share it to your favorite blog + Facebook, Reddit
- Tweet it!
So thank you so much for your support. It won’t take more than 10 seconds of your time. The share buttons are right below. 
Ramesh Srinivasan is passionate about Microsoft technologies and he has been a consecutive ten-time recipient of the Microsoft Most Valuable Professional award in the Windows Shell/Desktop Experience category, from 2003 to 2012. He loves to troubleshoot and write about Windows.
Ramesh founded Winhelponline.com in 2005.


