| Workable Solutions | Step-by-step Troubleshooting |
|---|---|
| Fix 1. Rescue Data from Mac That Cannot Boot with Software | With EaseUS Data Recovery Wizard for Mac, you can rescue data from a…Full steps |
| Fix 2. Create a GPT Partition on a USB Drive |
Creating a GPT partition will enable you to manage your drive easily…Full steps |
| Fix 3. Create a Mac Bootable USB with UltraDMG on Windows | Insert an empty USB Drive into your Windows PC. Open UltraDMG from the Desktop on…Full steps |
| Fix 4. Boot Mac with the macOS Bootable USB | Most of the work is already done by creating Mac bootable USB from Windows…Full steps |
You should know how to create a bootable Mac USB and not wait until there is a problem with your Mac. As with every other machine, there might come a time in their life cycle when your Mac device goes beyond repair.
Making a Mac bootable installer is an easy DIY, as with how to create macOS Ventura bootable USB, or how to download macOS Ventura, etc. With a Mac DMG installer, you can easily download and install the software.
Due to file corruption, severe hardware breakdown, or continuous recurring faults, you may finally have to let it go. While you hope it will not happen, you would need all your data safe and sound if it ever comes to it.
However, using an Apple device doesn’t stop you from creating a Mac bootable USB from Windows 10.
The reasons you need to do this are valid for both you and the safety of your data, such as:
- Use your Mac Bootable installer to troubleshoot your malfunctioned Mac.
- Have a backup data file in cases of emergency or unexpected Mac failures.
- Install the earliest version of macOS on your Mac easily when you want.
- Installing the latest versions of macOS on various Mac devices without downloading them individually etc.
Let’s move on to how you can rescue data that cannot boot with software.
Rescue Data from Mac That Cannot Boot with Software
Data safety has to be the most important thing to look out for regarding various devices. With EaseUS Data Recovery Wizard for Mac, you can recover files from Mac won’t boot, recover accidentally deleted files, and rescue data from a dead hard drive or damaged hardware.
Irrespective of what device you use or how you lost your data, you should be able to recover it entirely, and EaseUS Data Recovery Wizard for Mac users helps you do just that. Scenarios such as a virus attack, hard drive damage, operation error, or a macOS being wrongly installed can all be solved by the EaseUS Data Recovery Wizard for Mac software.
The EaseUS data recovery program also allows you to preview recovered files for the files you deleted intentionally. The best part would be the ease of use and navigation, which this next step would help you with, so keep reading.
Following these few easy steps helps you use this software easily while gaining the best results. These steps include:
Step 1. Install and run EaseUS Data Recovery Wizard for Mac on another Mac computer, and select «Unbootable Mac > Start».
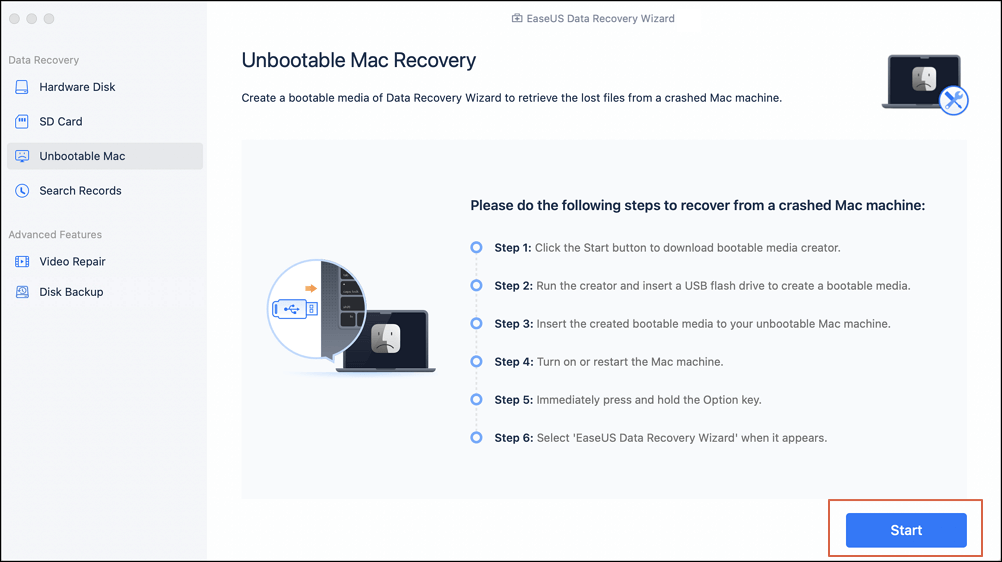
Step 2. Then, choose a prepared USB drive to create the bootable disc. Select «Next» to start creating the bootable disk.

- Warning
- The creator will prompt to erase the drive to reallocate the space; then it can write the bootable files to this drive. Please back up all USB files before processing «Eraser».
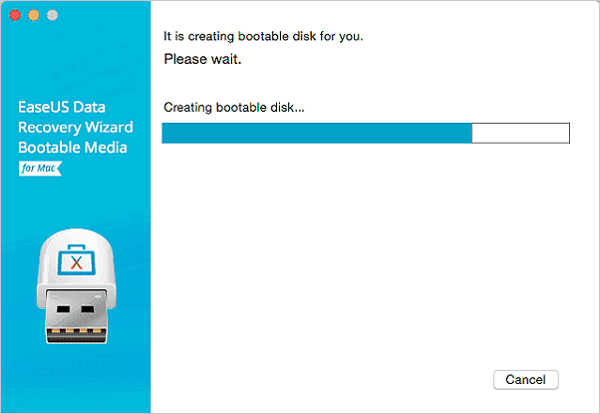
Step 3. The program starts to create a 2GB space and save the boot files. The rest space on the USB can be still used for storage.
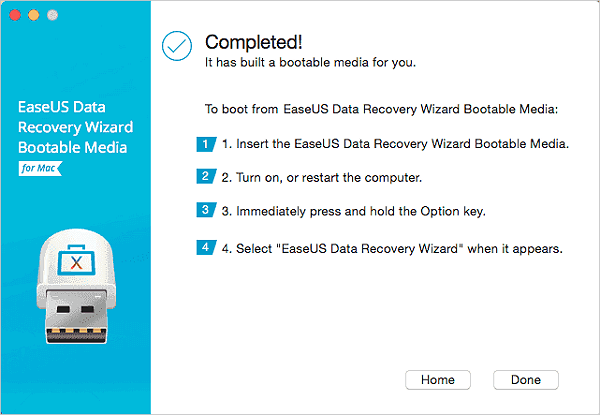
Step 4. Once it completes, please follow the guide to boot the corrupted Mac from the bootable disc and start the recovery. We suggest you restore the data to an external hard drive.
Step 5. After booting the Mac, launch EaseUS Data Recovery Wizard for Mac. Select the disk location (an internal HDD/SSD or a removable storage device) where you lost data and files. Then, this recovery tool will scan for lost files automatically.
Note: Before data recovery, you’d better create a backup of your Mac to avoid further data loss. After backing up, the software can recover data from the Mac backup, and your computer can wirte new data again.

Having proven how important and useful this is, in this section, you will learn in detail how to do so. The video below offers a thorough and simplified guide to help you create a Mac bootable USB from Windows.
This simplified video guide will give you all the necessary information and a practical walkthrough of what you will do. Watch it now, and check the following highlights:
- 02:26 Run Command Prompt on your computer
- 03:40 Download TransMac from the Internet
- 04:10 Download macOS DMG files
1. How to Create a GPT Partition on a USB Drive
If you want to create Mac bootable USB from Windows, you must create partitions on your USB drive. Creating a GPT partition will enable you to manage your drive easily, amongst other benefits, and it’s effortless. Follow the steps below to create a GPT Partition on a USB Drive:
Step 1. Go to Start on your PC and search for Command Prompt. Right-click on the top result and select ‘Run as an administrator.’
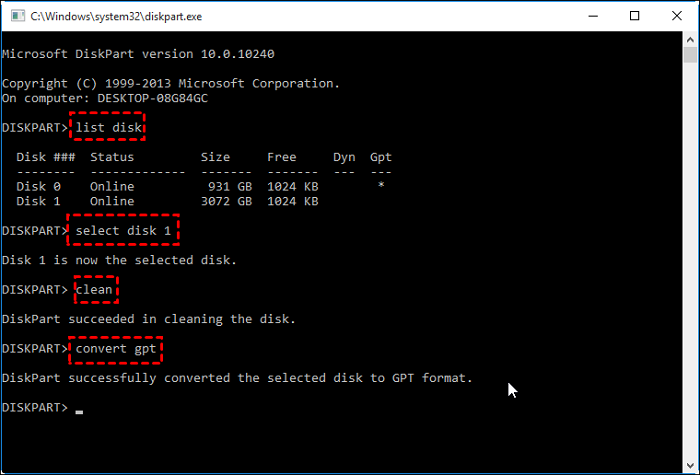
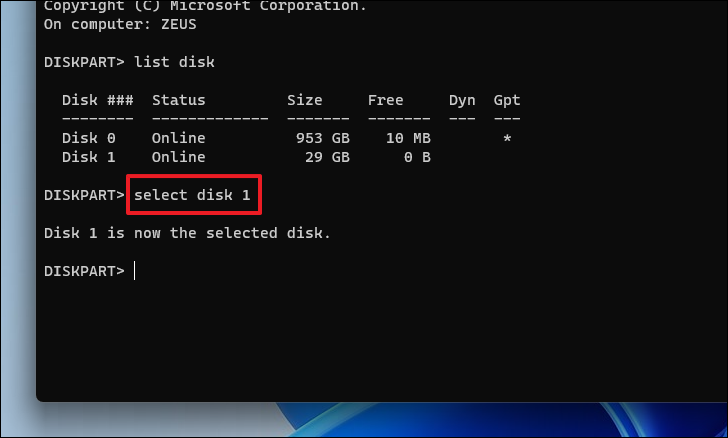
Step 2. Open the «diskpart» and click «list disk» to view your USB drive.
Step 3. Select your USB disk and press Enter.
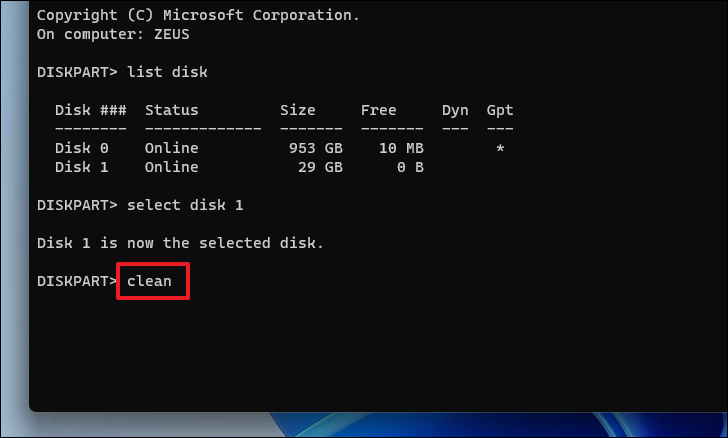
Step 4. Select the «Clean» option to clear your disk.
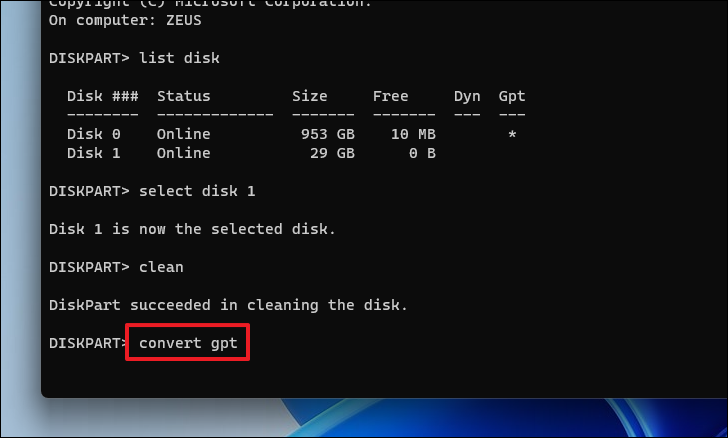
Step 5. Select and click the «Convert GPT» command.
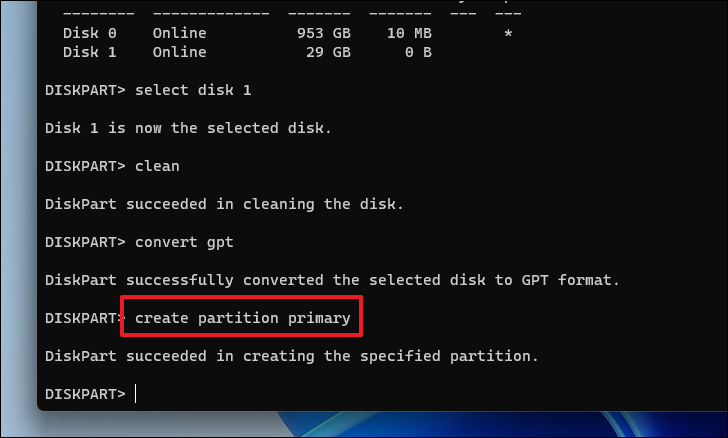
Step 6. Click the «Create Partition Primary», and the process is complete.
2. How to Create a Mac Bootable USB with UltraDMG on Windows
A Mac bootable USB can always be prepared to run directly on your Mac device. However, if your Mac isn’t bootable now, you can always create a Mac bootable USB with UltraDMG on Windows. You can do this on Windows 7, 10, and 11.
To carry out this action, you will need the basics, such as a macOS DMG file, a USB Drive with over 16 GB storage, a trial copy of SysGeeker UltraDMG, and a Windows PC to run it on. The steps below will help you create a Mac Bootable USB with UltraDMG on Windows, taking the latest macOS Sonoma as example.
Step 1. Insert an empty USB Drive into your Windows PC.
Step 2. Download the UltraDMG software on your PC from the link and install the software.
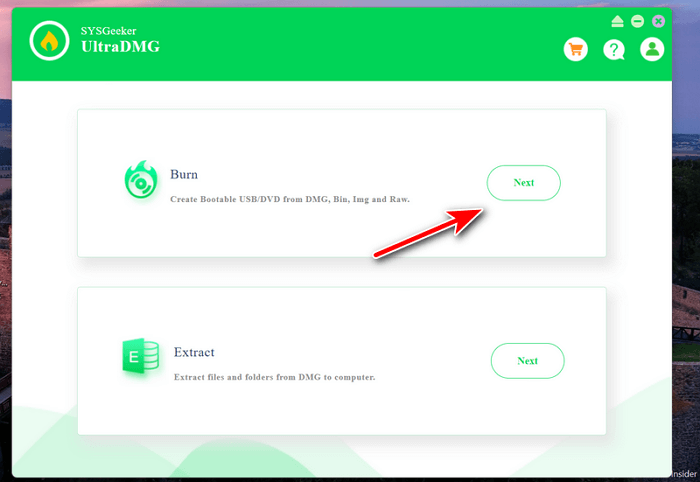
Step 3. Open UltraDMG from the Desktop on your PC, and click on the «Next» button at the right side of the «Burn» menu. You will be redirected to a new window at this time.
Step 4. You are now at the place where you can create a macOS bootable USB. Please click the «Browse» button to import the macOS dmg file into the software.
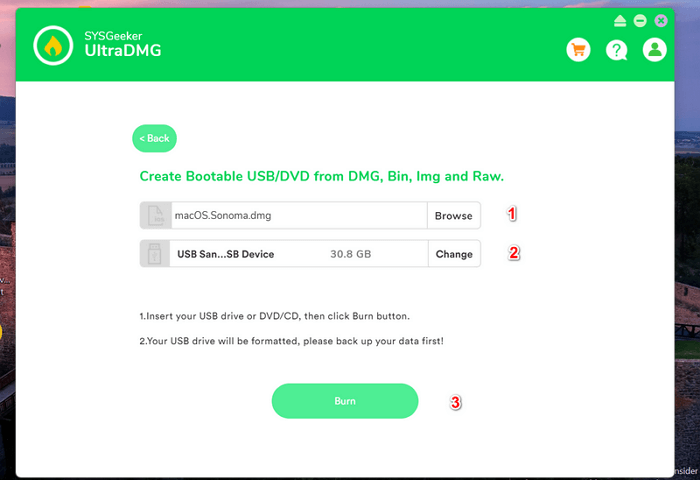
Step 5. You will see the USB name at the same time. If the USB name is not correct, please click the «Change» button to pick up the right one from the list.
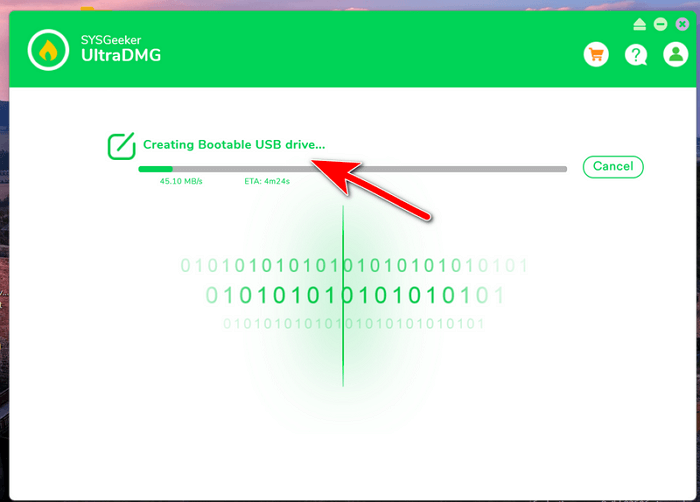
Step 6. Click on the «Burn» button at the bottom to start burning macOS dmg file to the USB drive. Once it is done, you will get a bootable USB drive for macOS installation.
3. How to Boot Mac with the macOS Bootable USB
Most of the work is already done by creating Mac bootable USB from Windows. Follow these steps to continue.
Step 1. Insert the bootable USB into any open USB slot.
Step 2. Press the Power button to turn on your Mac.
Step 3. Once the startup chime begins, press and hold the Option key down. This gives you access to OS X’s Startup Manager. Release the Option key immediately after the Startup Manager screen appears. At this point, the utility will open any available drive with bootable content.
Step 4. Select the USB drive you want to boot from and either double-click or press the return key. Your Mac begins to boot immediately.
Summary
In this article, you have learned how to create Mac bootable USB from Windows and how to recover lost data. Losing data is a nightmare no one wants to go through, which makes the EaseUS Data Recovery Wizard for Mac the best fit for you. It helps you recover from as little as a Word document to numerous photos, pictures, and videos with few straightforward steps.
Create Mac Bootable USB from Windows FAQs
In this article, you have learned how to create Mac bootable USB from Windows and how to recover lost data. Here are a few questions that are found to be recurring and answered in detail
1. How do I make a bootable DMG file in Windows 11?
Here are the steps required to burn a DMG file on a Windows PC:
- 1. Begin by running PowerISO, and insert a blank or rewritable disc in the drive.
- 2. Select the «Tools» bar, then click «burn.»
- 3. The «DMG Burner» dialogue pops up while the DMG file starts burning on the disk.
- 4. Take the disc with the burnt DMG file to where you want it.
2. Can you boot macOS from a USB drive?
Yes, you can boot Mac from a USB flash drive. Here is how you do it:
- 1. Insert the USB drive and power on the system.
- 2. Once the system chimes, press and hold down the Alt key.
- 3. When the startup manager appears, select the USB drive with the startup disk.
- 4. Your device begins to boot off the USB drive.
3. What format does a bootable USB need to be for Mac?
A bootable USB for Mac should be in APFS format. The APFS is the original default file format used on macOS. The APFS isn’t compatible with the older versions. You might need a macOS X Extended if you are using an older macOS version.
4. Can I create Windows bootable USB on Mac?
Yes, you can create a Windows bootable USB on your Mac. Here is how you to
Download the Windows 10 ISO file to your Mac and insert your USB drive.
- 1. Use the «diskutil» command to identify which drive your USB is mounted on.
- 2. Format the USB to work with Windows.
- 3. Use «hdiutil» to mount the Windows 10 folder and proceed to prepare it for transfer.
- 4. Copy the Windows 10 ISO over to your USB drive.
- 5. Put your USB into your new PC and start loading Windows.
UPDATED 8/29/2023: It doesn’t matter whether you use macOS, Windows 11, or Windows 10. It’s a matter of time until the device refuses to start, which could happen for many reasons, including (but not limited to) file corruption, hardware failure, or buggy update. If the unexpected happens with an Apple computer, you can resolve the problem using a macOS bootable USB with the installation media.
This is one of the main reasons you should consider creating a macOS bootable USB when your computer is working correctly. However, if none of your devices (MacBook, MacBook Air, MacBook Pro, iMac, Mac Pro, or Mac Mini) are not working when you need them the most, it’s possible to use a Windows computer to rescue your Apple device. You can use a Windows 11, 10, 8.1, or 7 computer to quickly create a USB bootable installation media to reinstall macOS Ventura, Monterey, Big Sur, Catalina, or Mojave on your Mac.
This guide will teach you the steps to create a macOS bootable USB installation on Windows 10 (or 11), which you can use to reinstall or upgrade the Apple OS.
- Requirements
- Create macOS bootable USB installation media
- Create a GPT partition on a USB flash drive
Requirements
To perform this task, you’ll need:
- Broken Mac computer running macOS.
- A trial copy of the TransMac software.
- One high-quality USB flash drive with 16GB of storage.
- Copy of macOS (DMG file).
Create macOS bootable USB installation media
To create a bootable USB drive with macOS, use these steps:
-
Download and install TransMac on Windows 10.
Quick note: This is a paid piece of software, but it gives you a 15-day trial, which is more than enough time. (If this works and you want to support the developer, purchase the full version.)
-
Connect the USB flash drive.
Important: If you have any data on the flash drive, remember to back it up since this process will erase everything on it.
-
Right-click the TransMac app and select the Run as administrator option.
-
Click the Run button. (If you use the trial version, wait 15 seconds.)

-
Right-click the USB flash drive and select the “Format Disk for Mac” option from the left pane.

Quick note: You want to perform this task before creating the bootable media because there is a good chance that the drive was formatted using a Windows device. If this is the case, the chances are it’s using an MBR partition, and the USB drive needs a GPT partition to work on a Mac.
-
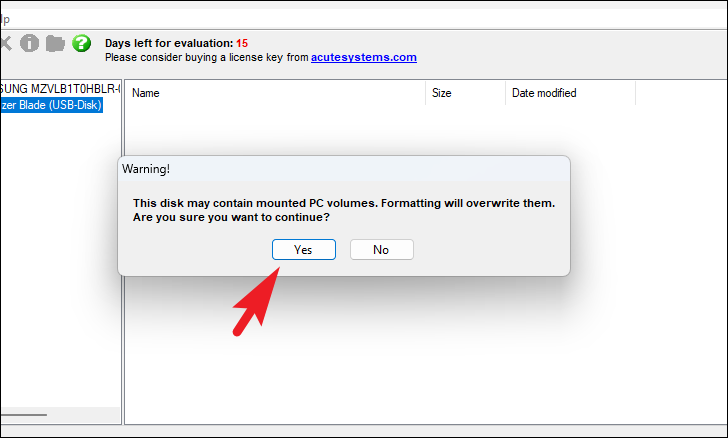
Click the Yes button to format the drive on the warning message.

-
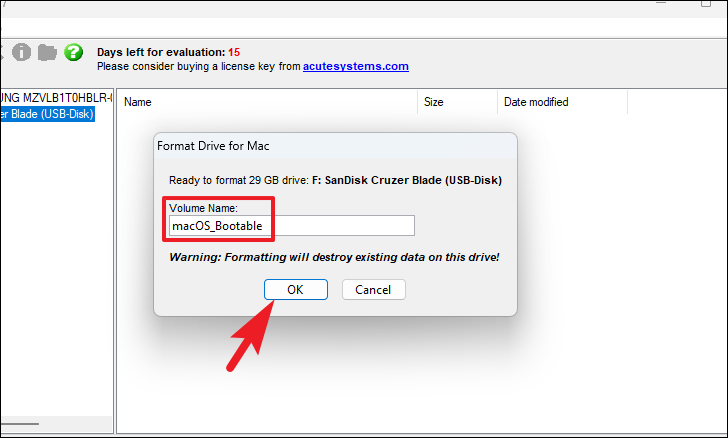
Confirm a name for the drive. For example, “macOS bootable USB.”
-
Click the OK button.

-
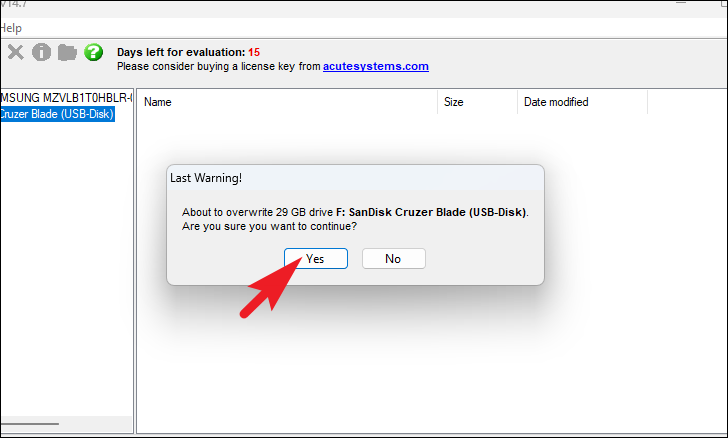
Click the Yes button.

-
Click the OK button.
-
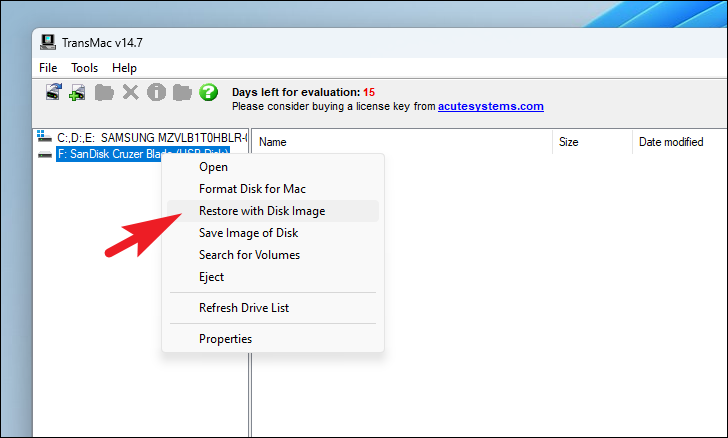
Right-click the USB flash drive and select the “Restore with Disk Image” option from the left pane.
-
Click the Yes button to confirm the erase of the USB flash drive data.

-
Click the browse button on the right.
-
Select the “.dmg” file with the macOS installation files.

-
Click the Open button.
-
Click the OK button.
-
Click the Yes button.


Once you complete the steps, insert the USB flash drive on your Mac to install, reinstall, or upgrade the operating system to the latest macOS version (Ventura, Monterey, Big Sur, Catalina, or Mojave).
Create a GPT partition on a USB flash drive
If the USB flash drive is not working with TransMac, it could still be a partition problem. In this case, you may need to redo the entire process. However, this time, you should follow these steps to use the Diskpart command-line utility on Windows 10 (or 11) to create the appropriate GPT partition, and then follow the above instructions.
To create a GPT partition on a removable drive, use these steps:
-
Open Start.
-
Search for Command Prompt, right-click the top result, and select the Run as an administrator option.
-
Type the following command and press Enter:
diskpart
-
Type the following command to view all drives connected to your computer and press Enter:
list disk
-
Type the following command with the number assigned for the USB flash drive and press Enter:
select disk 4
In the command, change “4” to the number corresponding to the USB flash drive.
-
Type the following command to clean the drive and press Enter:
clean
-
Type the following command to convert the drive to the GPT style and press Enter:
convert gpt
-
Type the following command to create a primary partition and press Enter: create partition primary
create partition primary
Once you have formatted the USB flash drive with a GPT partition, you can use the instructions mentioned above to use TransMac to create a bootable media, but this time, skip steps 5 through 10 and continue on step 11.
After the process, which could take up to an hour, connect the USB flash drive, turn on your Mac by holding down the “Option” key, and select the USB drive to install macOS.
A USB installer can significantly save time when installing macOS on multiple Macs without an internet connection. Additionally, it serves as a useful tool for system recovery after a startup failure. Creating a macOS USB disk from the full installer downloaded from the App Store is straightforward, as Apple provides clear instructions for this purpose. However, people only utilise this feature when encountering issues with their Mac, particularly when their system fails to boot up. This article will explore various methods to create a bootable macOS USB for High Sierra 10.13, Catalina, Monetary 12.4, Ventura 13.4 and other macOS versions on Windows PCs and Macs.
How to make macOS USB installer on a Windows PC
Using a Time Machine is the most secure and convenient approach for restoring a faulty Mac in offline mode. However, if you don’t have a backup, you must perform a clean installation using a bootable USB/DVD drive or the Internet. In my case, I faced a problem with the boot partition of my iMac and, unfortunately, did not have a Time Machine backup. Despite the option for internet recovery being available, I faced repeated failures in downloading the necessary OS files from the servers.
Since my iMac was the only Mac I had access to, I had no other options until I stumbled upon a method that involved utilising a Windows PC to create a bootable USB installer for macOS. I used the following the steps to create a macOS High Sierra USB drive and successfully restored my iMac. I am using macOS Catalina, but the process described below is compatible with all macOS versions, including Ventura. It’s important to note that I have tested this method on an Intel Mac, so I cannot guarantee its effectiveness on M series hardware.
Step 1: Download bootable macOS [DMG] for Windows
As previously stated, a Mac is needed when it comes to creating a bootable macOS USB disk. The options are pretty limited if you consider doing this task from a Windows computer. This is due to the compatibility issues between these two operating systems. Certain file formats that are commonly used on Mac cannot be opened in Windows, and vice versa. Fortunately, some Windows applications support a bootable macOS disk format called DMG. Therefore, if we have access to the right and bootable DMG file, it is be feasible to make a macOS USB installer even within a Windows environment, provided we use a Windows tool capable of handling the DMG format.
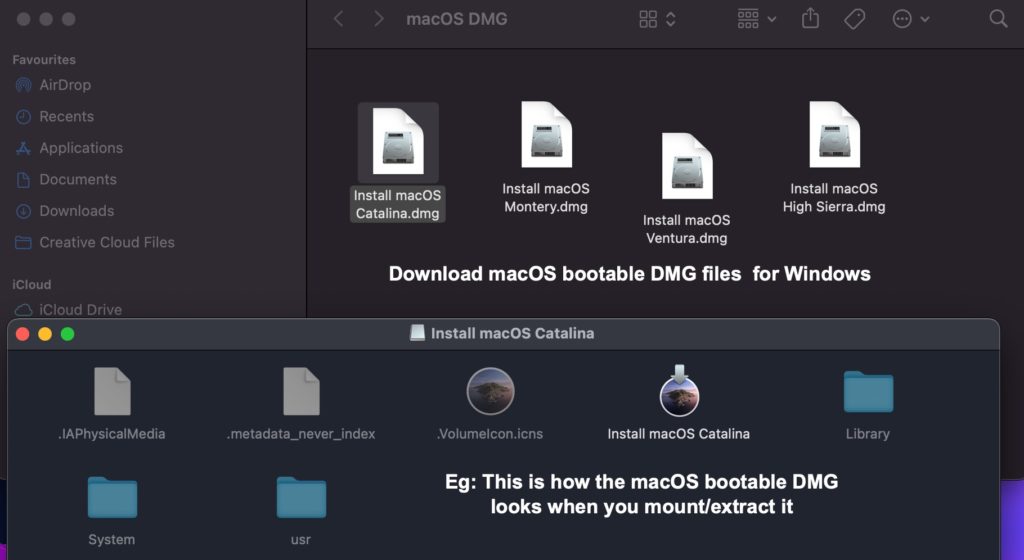
Many websites that provide instructions on creating a bootable macOS USB installer on Windows never mention how to get the cited DMG file. I can assist if you’re wondering how to download the correct DMG file, the bootable version for any macOS version. Contact me at [email protected], and for a nominal fee of $4, I will solve your concerns via email or Skype within 6-12 hours, depending on your time zone. This fee covers the data/hosting charges and compensates for my time and effort in handling your case. Please consider it as a service charge. Alternatively, you can visit our dedicated webpage on macOS offline installers or learn how to convert a macOS installer .app into a bootable DMG yourself. You can proceed with the following steps once you download/transfer the DMG file to your Windows PC.
Once you perform a USB restore using the DMG mentioned above file on a Windows system, all of the boot files, including the macOS installer, will be seamlessly transferred, just as if the process was executed on a Mac.
Check the following sections to learn about burning the DMG file onto a USB pen drive on Windows 11.
Step 2: Partition USB disk on Windows to make it bootable on Mac
Here we are creating a UBS installer for Mac on Windows. So make sure that we keep the partition of the USB disk to have an appropriate scheme. Converting the USB disk to have a GUID partition table (GTP) is recommended for this method work effectively.
Connect a USB disk of more than 8GB free space to the Windows PC. Search and open the command-line tool, and run the above given commands in the correct order. It cleans and converts the USB disk to GUID partition table if it is using MBR or something else.
Step 3: Make bootable macOS USB installer (ref: Catalina) on Windows 11
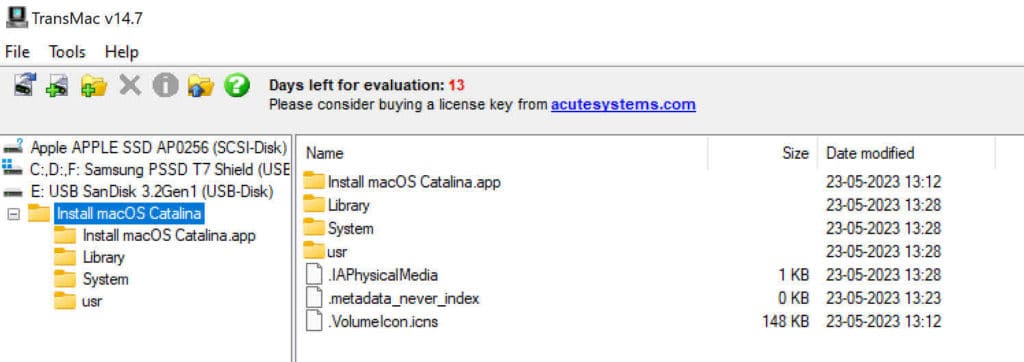
In cases where Internet recovery becomes unresponsive and fails to download the necessary macOS files, Windows can serve as a helpful alternative for creating a bootable macOS USB installer. Among the various software options for managing macOS installer files (dmg) on a Windows system, Balena Etcher is the best choice. However, in this case, we use TransMac. Although Transmac is not free, the developers provide a 15-day trial period, which is typically acceptable for one-time use. Let’s proceed to the step-by-step instructions for creating a macOS Catalina USB disk on a Windows platform using TransMac.
- Transfer the bootable dmg file to Windows 11 desktop.
- Install the Transmac 14.7 trial for Windows; download here.
- Right-click on Transmac icon, and select to run it with Admin privileges.
- As shown in the screenshot, right-click on your USB disk and pick the option Restore with Disk Image.
- Point the Windows Explorer to the location where you have the bootable macOS DMG file.
- Wait until the software completes restoring the USB disk with Install macOS Catalina app.
- The disk is ready when you see the message “Restore Complete”.
- Now, safely remove the USB and connect it to the Mac you would like to recover.

It’s important to note that the method described is not limited to creating a macOS Catalina USB disk alone. It can be used as a reference for creating installer disks for other macOS versions, such as High Sierra, Mojave, Monetary, and Ventura. All you need is to obtain the corresponding DMG files for the desired macOS version and follow the steps explained in the procedure.
How to boot to macOS from USB Installer made on Windows
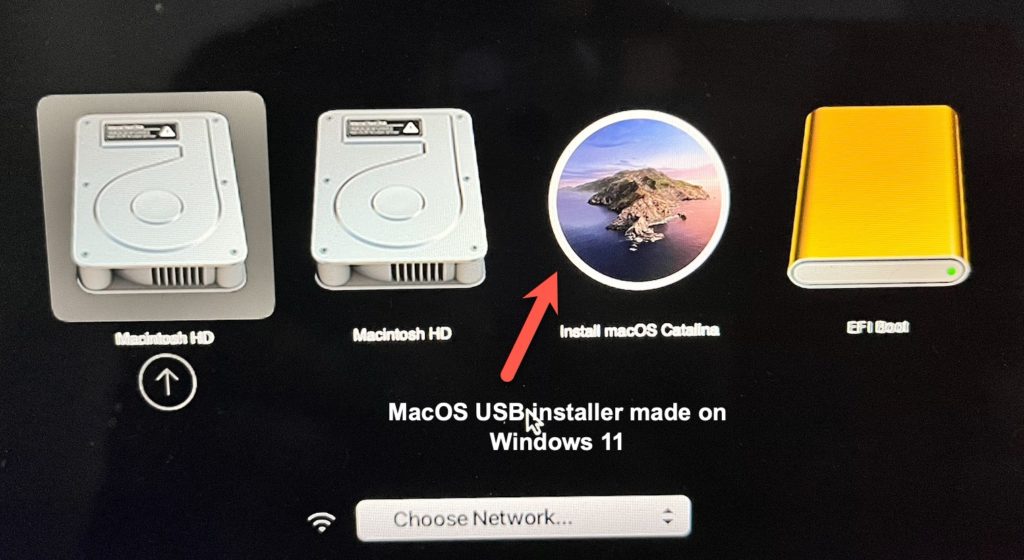
After connecting the macOS USB installer, we created on the Windows system to your Mac, wait for the startup chime. As soon as you hear it, press and hold the Option Key, which lists the various boot various options. Take a look at the image below to see our newly made macOS Catalina USB installer listed among the available boot options.
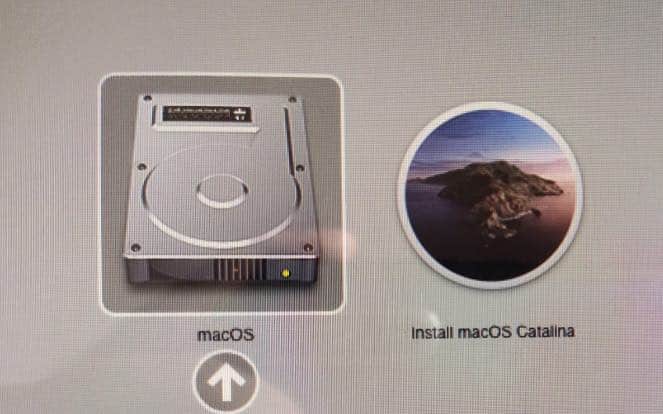
If, by chance, your Mac restarts after selecting the “Install macOS (Catalina or similar)” icon during the process, don’t worry. Repeat the process and choose the USB installer again. Additionally, if you own a new Mac equipped with the security chip, you’ll need to access the Startup Security Utility to make a few adjustments. To do this, press Command+R during boot to enter the settings. Once there, enable medium security and authorize booting from external USB media. This will ensure that you can successfully boot from the macOS installer you created on Windows.
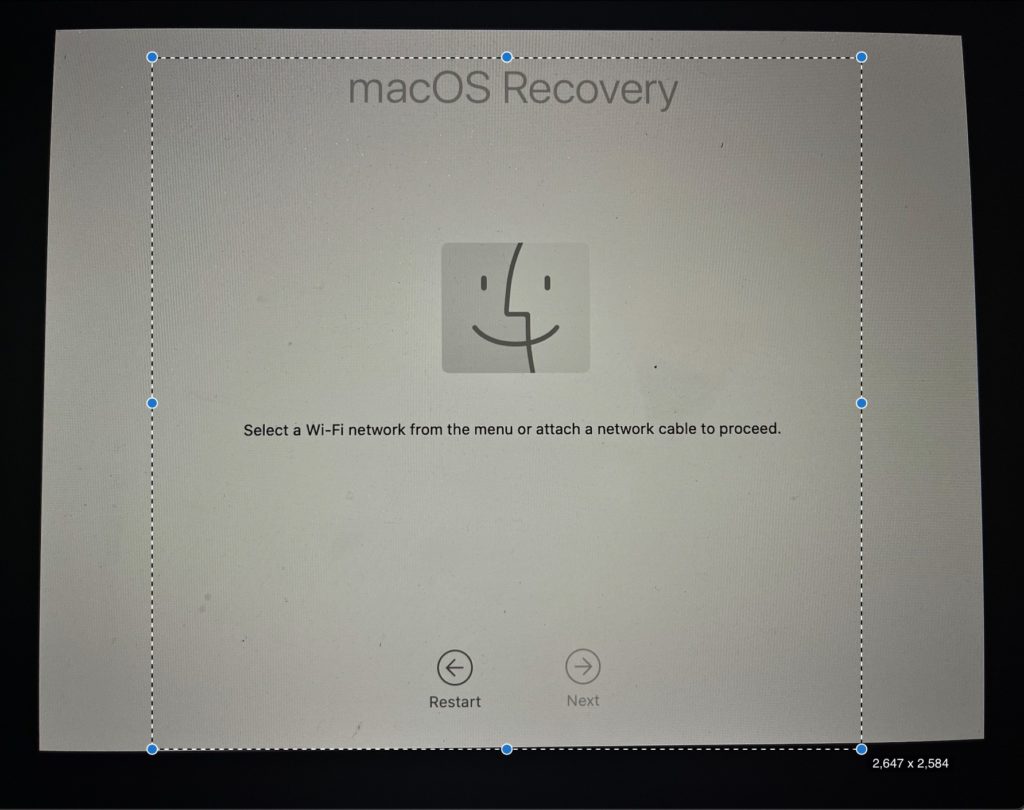
Also, there may be instances where you see the macOS Recovery window. In such cases, connect to a Wi-Fi network, from the Menu, and provide your Apple ID and password to unlock macOS and pass the activation lock window.
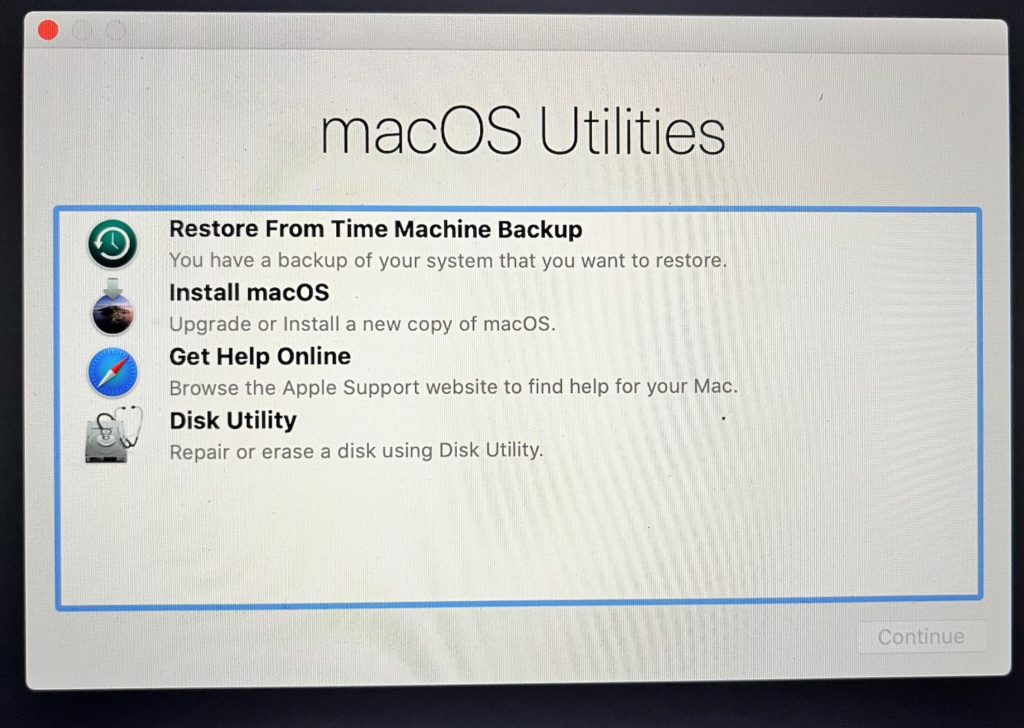
Following this, you’ll find yourself in the macOS Utilities window, where you can select the desired macOS version (click on “Install macOS”) and proceed with the installation process.
PS: You can use the same method explained above to burn macOS DMG to a DVD disc.
-
Home
-
News
- How to Create macOS Bootable USB on Windows 10/11? See the Guide!
By Vera | Follow |
Last Updated
It is a good way to create macOS bootable USB on Windows 10/11 when your Mac fails to boot. Don’t know how to make a bootable USB drive for Mac on Windows? Thankfully, MiniTool gives you detailed guidance in this post. Let’s get started.
Some of you choose a Mac to use since it is reliable and secure. However, you may run into bootable issues and the Mac fails to run to the desktop. No matter you are running Windows 11/10 or macOS, it’s a matter of time before the device cannot start up.
If your Mac refuses to boot up due to file corruption, update issue, and other software issues, you can make a bootable medium to repair the Mac. So, how to create macOS bootable USB drive? You can choose to do this thing on a Windows PC by following the guide below.
How to Create Mac Bootable USB from Windows
Note that the operations below apply to many macOS versions, including macOS Ventura, Monterey, Big Sur, Catalina, and Mojave.
Part 1: What to Do Before Creating Bootable USB for Mac on Windows
Before you do, some things should be prepared.
#1. Prepare a USB Drive
Prepare a USB flash drive that has at least 16GB of storage space. Besides, make sure there is no important data saved to this drive. If yes, back up the crucial files to another safe place. You can do this thing via copy & paste or use a piece of free backup software like MiniTool ShadowMaker.
MiniTool ShadowMaker TrialClick to Download100%Clean & Safe
#2. Download Mac DMG File
A DMG file is a type of disk image in macOS that is used to store compressed software installers, just like an ISO file in Windows. To create macOS bootable USB, a .dmg file is required. So, how to download a copy of Mac (.dmg)? Follow the help document from Apple – How to download macOS, then you can get a .dmg file of macOS.
#3. Download TransMac or UUByte
When searching for “make bootable USB Mac Windows 10” or “create a macOS bootable USB on Windows” online via Google Chrome, you may see the related searches – UUByte create macOS bootable USB and TransMac bootable USB.
UUByte and TransMac are third-party tools that can be used to make a macOS bootable USB drive. Just download one of them and install it on your PC. Here, we take TransMac as an example. Note that it is a paid software but you can free try it for 15 days. Just get it via https://www.acutesystems.com/scrtm.htm.
Part 2: Create a GPT Partition on USB
Sometimes the USB drive is not bootable due to the partition issue. So, you first need to convert the USB drive to GPT and then run TransMac for a bootable USB drive.
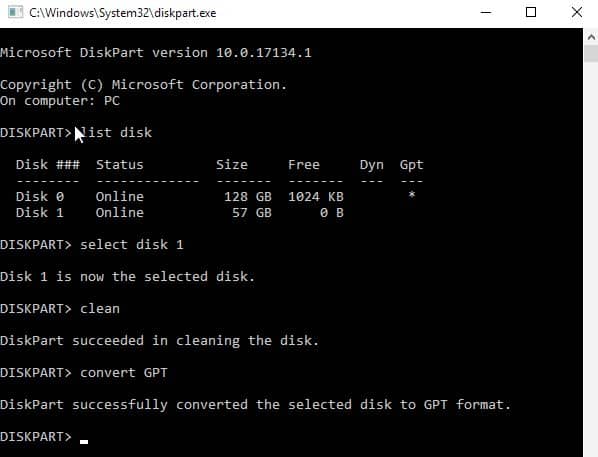
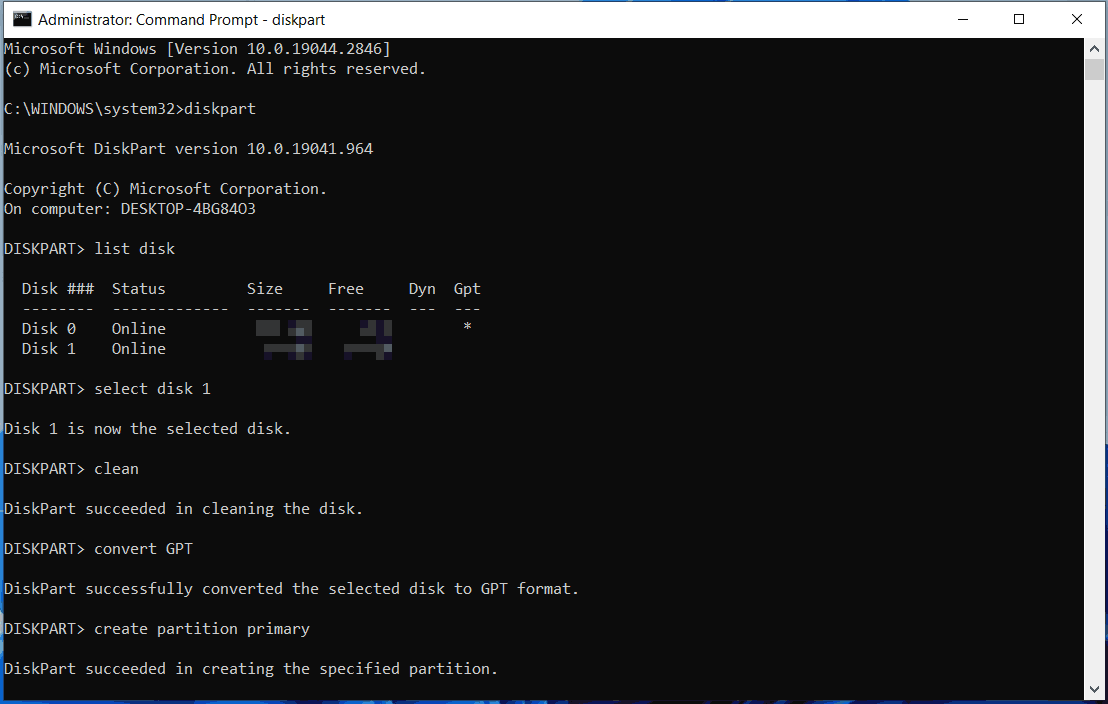
To create a GPT partition on USB, run Command Prompt as an administrator. Then, type diskpart and press Enter. Next, execute the following commands:
list disk
select disk n: n means the drive letter of your USB drive.
clean
convert GPT
create partition primary
Tips:
In addition to Diskpart, you can run MiniTool Partition Wizard to convert disk to GPT.
After everything is ready, let’s see how to create macOS bootable USB now.
Part 3: Make Bootable USB Mac Windows 10/11
How to make a bootable Mac USB on Windows via TransMac? Accomplish it in these steps:
Step 1: Connect your USB flash drive to your Windows PC and launch TransMac as an administrator.
Step 2: Click Run to start a free trial.
Step 3: Right-click on the USB drive and choose Format Disk for Mac. Then, click Yes to confirm. You are asked to name the USB drive and we type macOS.
Step 4: Right-click on the drive and choose Restore with Disk Image.

Step 5: Click Yes, choose the .dmg file you have downloaded, and click OK > Yes. Then, this tool is creating a bootable USB drive.
Now you get the bootable USB drive for Mac on Windows. Eject the drive from the PC and connect it to your Mac. Then, run the macOS from this drive to perform a repair.
Verdict
It is a simple way to create macOS bootable USB on Windows 11/10. If you need it to fix your Mac, this guide is helpful to you and just follow the given instructions for a Mac bootable USB from Windows.
About The Author

Position: Columnist
Vera is an editor of the MiniTool Team since 2016 who has more than 7 years’ writing experiences in the field of technical articles. Her articles mainly focus on disk & partition management, PC data recovery, video conversion, as well as PC backup & restore, helping users to solve some errors and issues when using their computers. In her spare times, she likes shopping, playing games and reading some articles.
🔊
In Short.
To create a macOS Bootable USB on Windows 11, you need a 16GB USB drive and a macOS DMG file. First, prepare the USB disk using either diskpart Command Prompt utility. Then, use TransMac to load the macOS DMG file onto the USB drive. Once done, insert the macOS bootable USB into your Mac’s port, press and hold the ‘Option’ key while turning it on to get to Startup Disk Manager screen and select the bootable USB from there.
Computers, including macOS systems, can occasionally experience issues that prevent them from starting up properly. In such cases, having a bootable USB for macOS can be invaluable. Even if your macOS computer is unresponsive, it’s possible to create a bootable USB using a Windows 11 computer. To make the process as beginner-friendly as possible, we’ve outlined the necessary components and steps below.
To create a bootable USB for your Mac using Windows 11, you will need:
- 16 GB USB drive
- macOS
.dmgfile
If you don’t already have a .DMG file, you can download older versions directly from the Apple website, which can be updated after installation. Alternatively, you can obtain newer versions from third-party websites. However, please be cautious, as third-party sources may contain malware, viruses, or even be illegal. We strongly recommend using the official channels whenever possible.
For your convenience, we’ll guide you through the official method for downloading a macOS .DMG file and writing on the USB to drive to create a bootable macOS USB in a clear and informative manner.
Downloading the macOS DMG file
To get the macOS DMG file, head to support.apple.com using your preferred browser. Then, scroll down on the page and right-click on one of the available options for macOS and click on the ‘Save as’ option. Then, choose your preferred download location.
Preparing the USB Drive for macOS
After downloading the macOS DMG file, you will need to first prep the USB disk and then download a third-party tool that can create a bootable USB for macOS on your Windows 11 computer.
Insert the USB disk if you haven’t already. Once the system has detected it, head to the Start Menu and type Terminal to perform a search. Then, right-click on the ‘Terminal’ tile and select the ‘Run as administrator’ option.
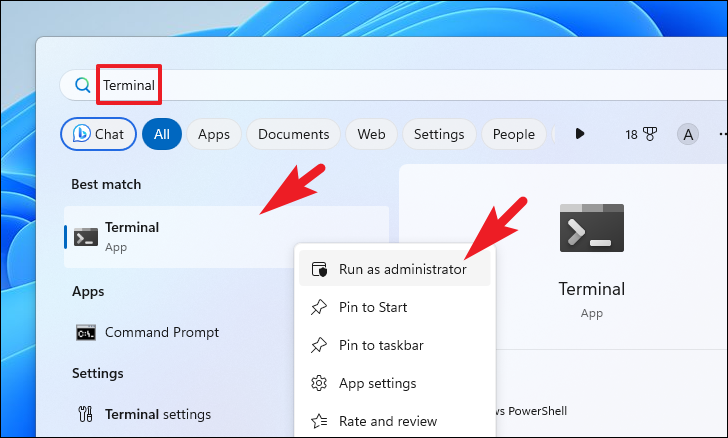
After that, click on the chevron icon (downward arrow) and click on the ‘Command Prompt’ option.
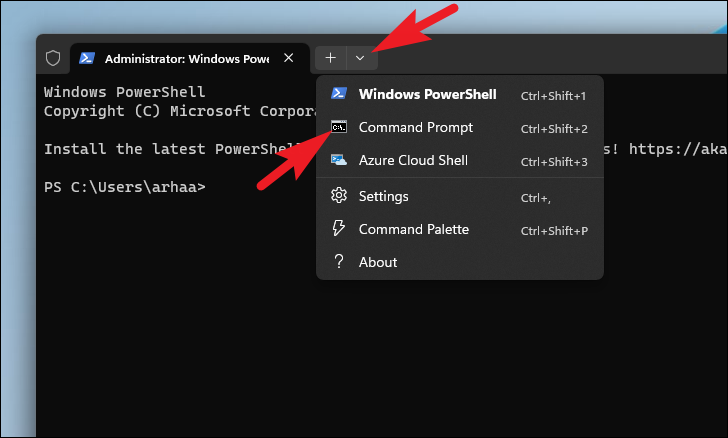
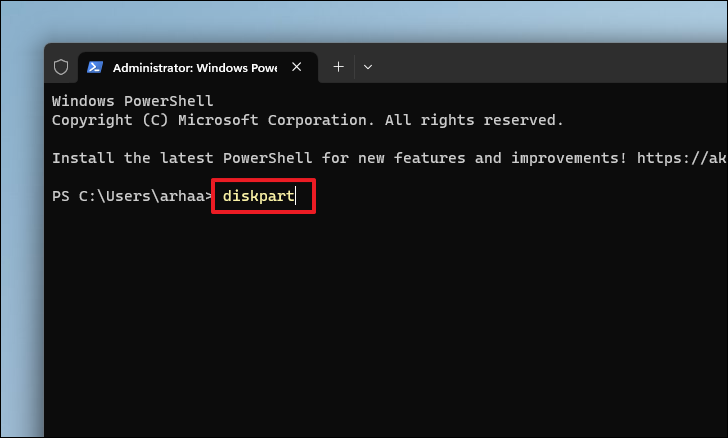
On the Command Prompt screen, type the diskpart command and hit Enter on your keyboard.
Then, type or copy+paste the list disk command to continue. This will display all the storage partitions.
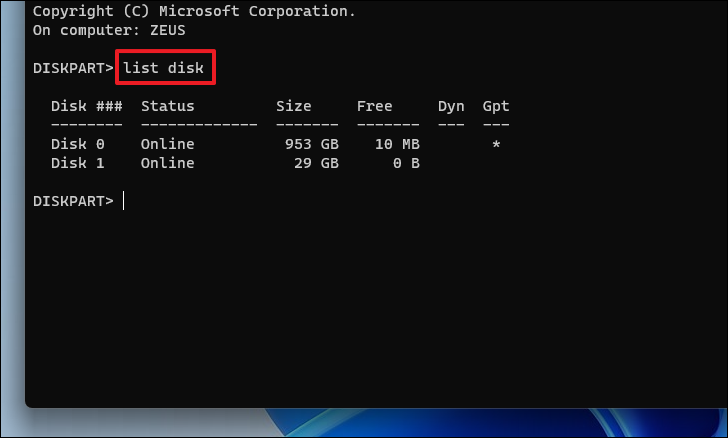
Next, use the command select disk <number>. Here, replace the placeholder with the number corresponding to the connected USB drive that you wish to create as a bootable USB. For example, we’ll use Disk 1.
Note: You must identify your USB disk from the list by referencing the disk size. If your USB disk was 32GB, it might show up as 29GB in the list.
Once the disk has been selected, type clean and hit Enter to execute the command and format the disk clean.
Next, type convert GPT and hit Enter to convert the disk into GPT format.
Finally, type create partition primary and press Enter to execute the command.
Now that you have converted the USB drive from MBR (Master Boot Record) to GPT (GUID Partition Table) system, you can proceed with writing the DMG file to the USB drive.
the TransMac software and load the .DMG file on the USB drive.
Creating a Bootable macOS USB
To write the macOS DMG file to a USB drive, we’ll use the free trial version of the TransMac application for Windows.
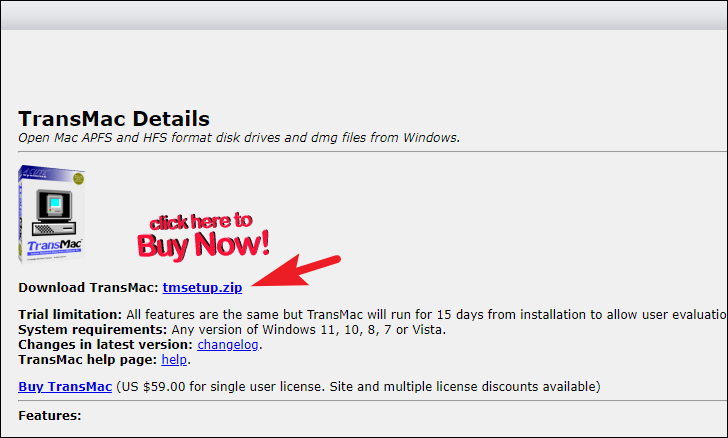
To download TransMac, head to acutesystems.com/scrtm.htm and click on the ‘tmsetup.zip’ link to download the application on your PC.
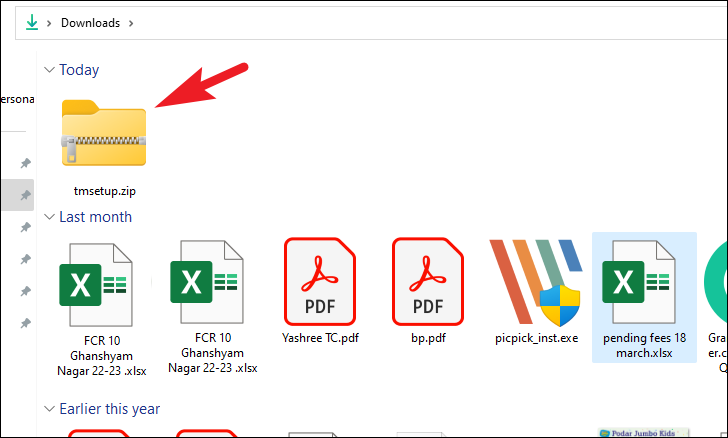
Next, head to to your computer’s default ‘Downloads’ directory and double-click on the tmsetup.zip file to open it.
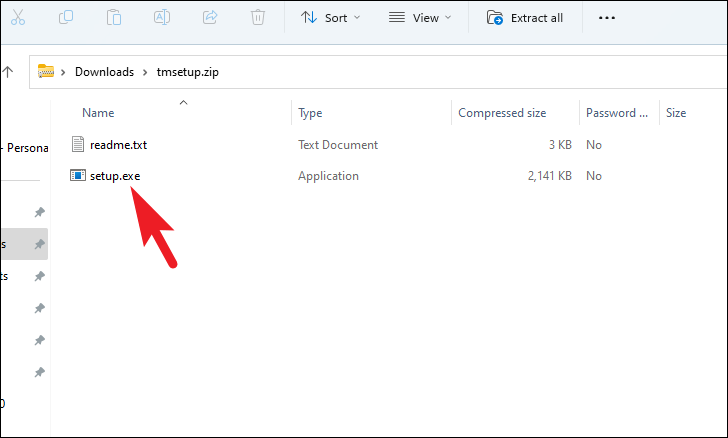
Then, double-click on the setup.exe file to run the installer.
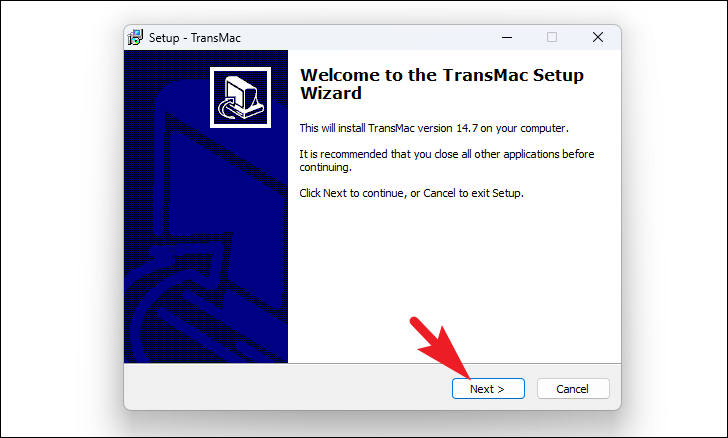
On the installer window, click on the ‘Next’ button to proceed.
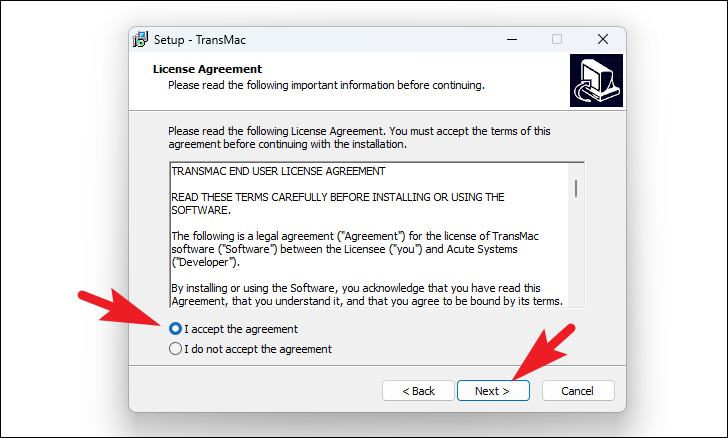
Then, click on the ‘I accept the agreement’ option and then hit ‘Next’.
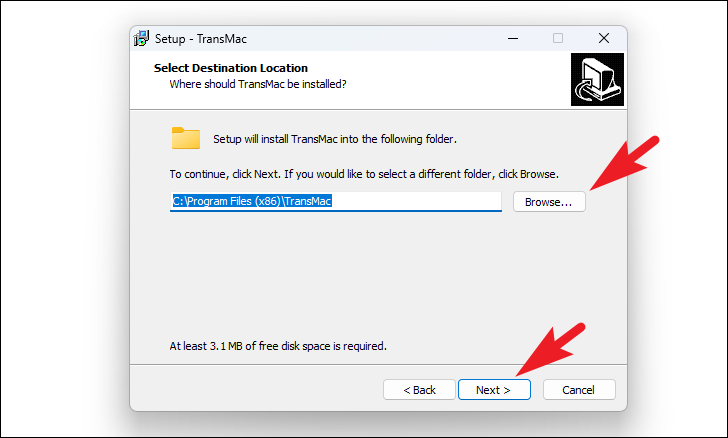
Click ‘Next’ on the Select Destination Location option screen. If you need to change the default installation directory, click on the ‘Browse’ button, select a location, and hit the ‘Next’ button.
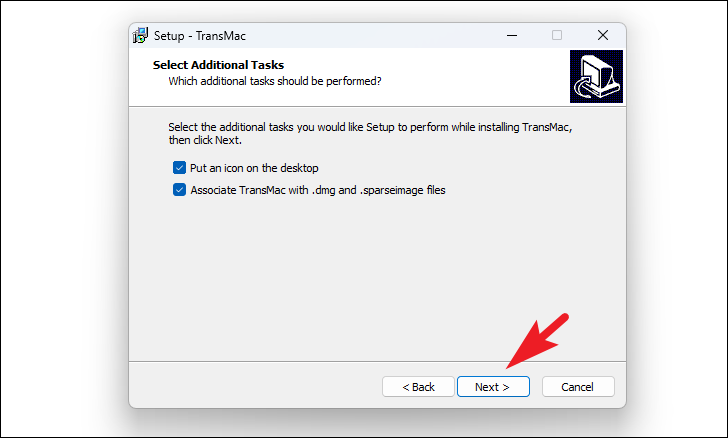
On the Select Additional Tasks screen, click on the ‘Next’ button to proceed.
Finally, click on the ‘Install’ button to commence installation for TransMac.
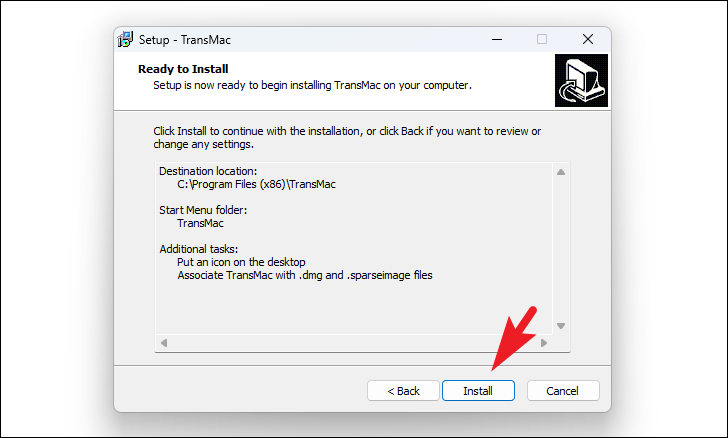
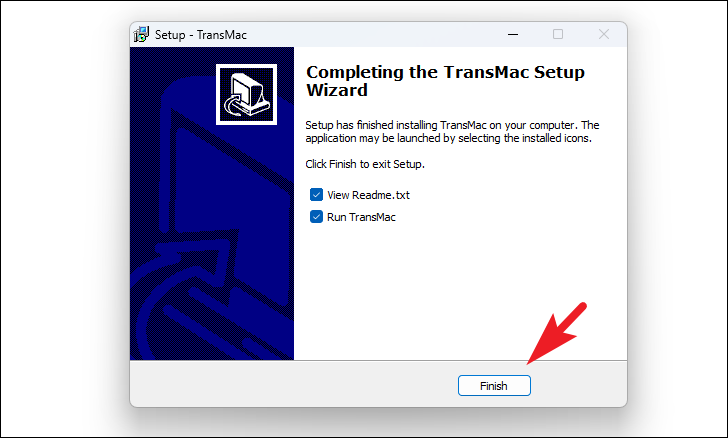
Once the installation is completed, click on the ‘Finish’ button to exit the installer.
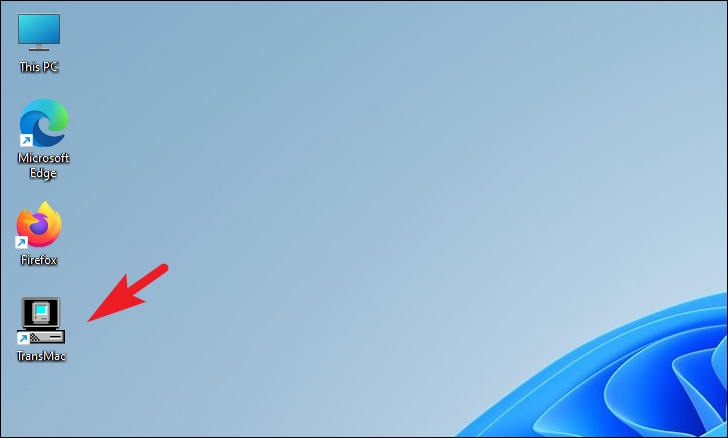
Now launch TransMac from by double-clicking on the ‘TransMac’ app icon on your Desktop.
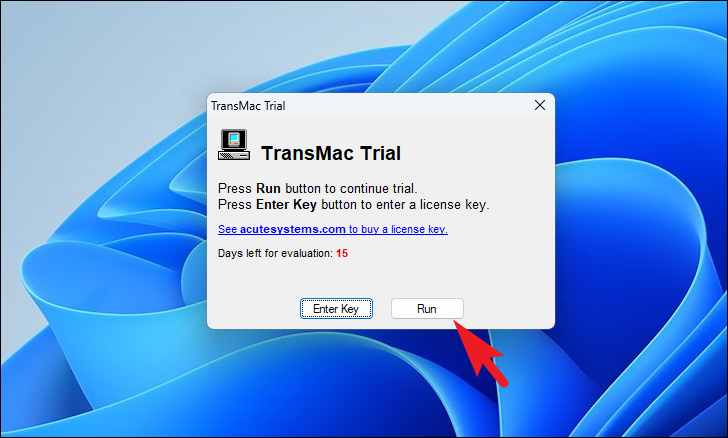
On the TransMac Trial screen, click on the ‘Run’ button to continue with the 15-days trial run.
Now, even though you have already prepared the USB with GPT partitioning, it is better to once again repeat the step using TransMac’s built-in utility to format and create a macOS compatible USB drive.
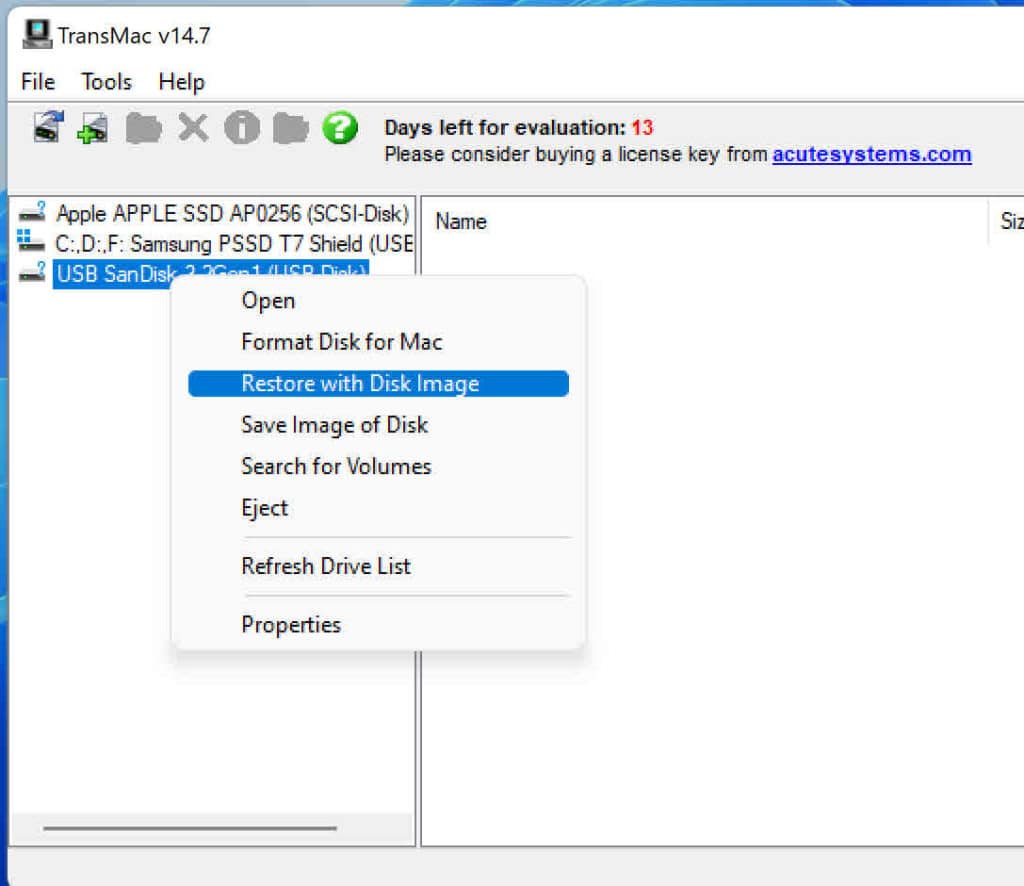
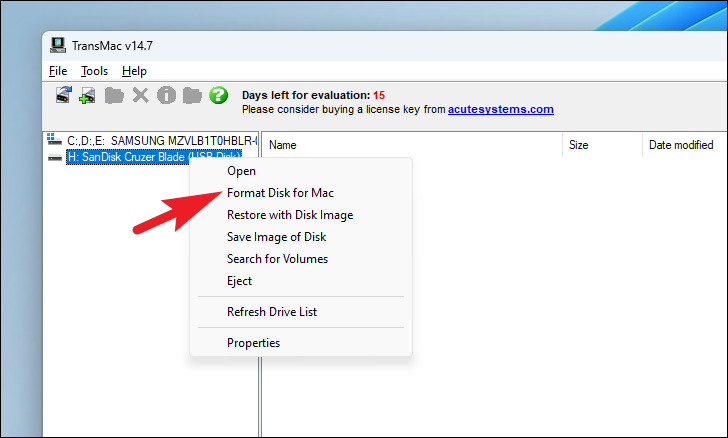
Right-click on the USB drive in the left pane and click on the ‘Format Disk for Mac’ option.
After that, click on the ‘Yes’ button to confirm.
When prompted to name the disk, provide an apt name for the drive and click on the ‘OK’ button. We’re naming it «macOS_Bootable».
On the Last Warning screen, click on the ‘Yes’ button to continue.
Once the disk is formatted, again-right click on the USB drive from the left pane and click on the ‘Restore with Disk Image’ option.
You will receive another warning screen dialogue, click on ‘Yes’ to continue.
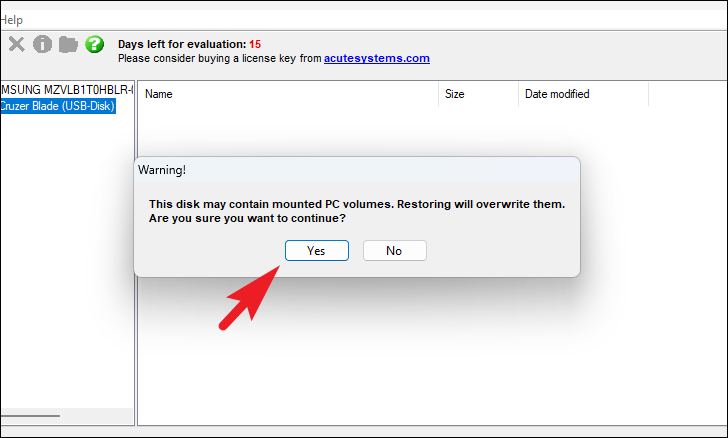
Finally, on the ‘Restore Disk Image to Drive’ dialogue box, click on the ‘ellipsis’ button below the ‘Disk Image to restore’ prompt and select the macOS DMG file that you previously downloaded to your computer. Then, click on the ‘Yes’ button to initiate the process.

Sit back and wait for TransMac to finish restoring the macOS DMG file to your USB drive.
Booting your Mac with the Newly Created macOS Bootable USB
Once TransMac has successfully restored/written the disk image to USB drive. Safely plug-out the USB drive from your Windows 11 PC.
Shutdown your Mac (if it isn’t already), insert the bootable macOS USB drive into your Mac’s USB port and turn it On. Make sure you press and hold the ‘Option’ key while you switch on your Mac.
Your Mac will take you to Startup Disk Manager screen. You should be able to see the macOS bootable disk there and you can then select it to install the macOS from the bootable USB.
Conclusion
Creating a bootable USB for macOS using a Windows 11 computer is a valuable tool for troubleshooting and fixing startup issues on Mac computers. By following the detailed steps provided above, you can safely download the macOS DMG file and use TransMac to create a macOS bootable USB drive.
With a macOS bootable USB in hand, you can easily restore your Mac to a functional state, even if it’s unresponsive. Always remember to use official channels for obtaining a macOS DMG file to ensure the safety and legality of your actions.