macOS is a lifetime operating system for Apple Mac computers. Now there are lots of techniques to install macOS on your PC-Hackintosh, or Windows PC, and Dual Boot Boot macOS with Windows 10 is a single drive. Or you can install some of the supported computers. But not all the hardware can support the macOS operating system. Again without any worries, there are many ways to experience macOS Catalina versions. Like macOS Sierra, High Sierra, macOS Mojave, or the latest version macOS Catalina. Even you can install or experience Linux, Ubuntu, Zorin OS, using the professional and complete platform by the name of VMware.
Did you know about the effects of the VMware virtual machine’s side effect? That VMware Workstation doesn’t have any kind of side effects on your computer. Using the VMware Workstation Virtualization machines, you can install or use Windows, macOS, Linux, or Mobile OS at the same time on the platform of Virtual machine. Although beside this as I experienced Windows or Linux doesn’t affect much on the computer. Besides, that macOS operating system effect much on a computer cause the computer to run slow.
Installing macOS Catalina on VMware isn’t enough for our experience. Still, you may think that some cool features or unused Apps remain to be tested in VMware. There are many ways to install macOS Mojave 10.14 on VMware on Windows PC, Using the VMDK file of macOS Mojave. Or installing macOS Mojave on VirtualBox. But don’t worry we make it easy. As in the developer, era creates various ways of installation of macOS. Also, if you know there aren’t any differences between the installation of macOS operating systems on VMware or VirtualBox. Installing an operating system in the virtual world we don’t complete accessibility to every function. Because that is not the actual OS. Exactly we install as a guest operating system on Virtual machines. The exact OS we install on our PC.
However, VMware is one of the perfect and advanced Virtual machines for running different kinds of OS at the same time on it. VMware can be found in two sorts of versions, the version we use freely is VMware Workstation, VMware Player. But to use the VMware Pro version you have to pay money and buy it.
If you installed macOS Mojave previously on VMware or VirtualBox with VMDK file. But in this article, I will use macOS Mojave ISO for the installation process. Also, macOS Mojave can be found in two separate methods, whether you create the ISO file by yourself. Or you have to download the ISO file from our website. Again it depends on you which you want to decide. After that, install macOS Mojave on VMware on Windows PC with a new method of experimentation.
- Install macOS Mojave on VirtualBox on Windows PC
Download macOS Mojave ISO File for VMware
While we are using macOS Mojave VMDK “Virtual Machine Disk File” to install on VMware and VirtualBox. It is the same to use a macOS Mojave ISO file to install on VMware or VirtualBox. Do you know what is ISO? It is a combination of files and stored in a disk. Above I declared for you whether you have to download firstly for Mac App Store and create by yourself. Or whether you have to download from the below link. When the installation of the macOS Mojave process is different using the VMDK and between ISO. Also, there is a huge separation between the VMDK file and ISO below.
Download macOS Mojave ISO File final Version
When the ISO file is downloaded you will see that file is compressed. Use the WinRaR to unzip the ISO file, Right-click on the ISO file click on Extract Here.

Extract ISO file
- Install macOS Catalina on VirtualBox on Windows PC [New Method]
Install VMware Workstation
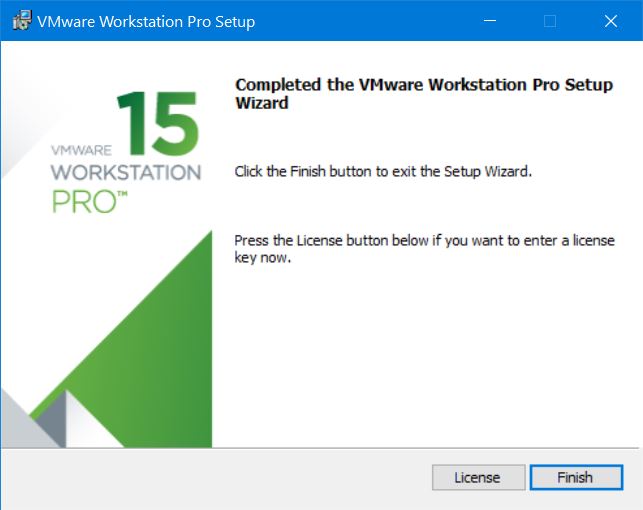
In this step, for installing macOS Mojave on VMware you have to install VMware. The installation process is easy you can perform it in a few clicks. Firstly, download it from its own official site. When the file downloaded to launch the setup and it will some times. Then at the last step click Finish option to end the installation.
Install VMware Unlocker Patch tool: However, by default, the VMware Workstation doesn’t provide the option to create the Mac OS X option in the list. Don’t worry there is a tool to unlock the macOS option in VMware Workstation using the Unlocker tool. Use the below and download Unlocker.
- Download macOS Unlocker Patch Tool
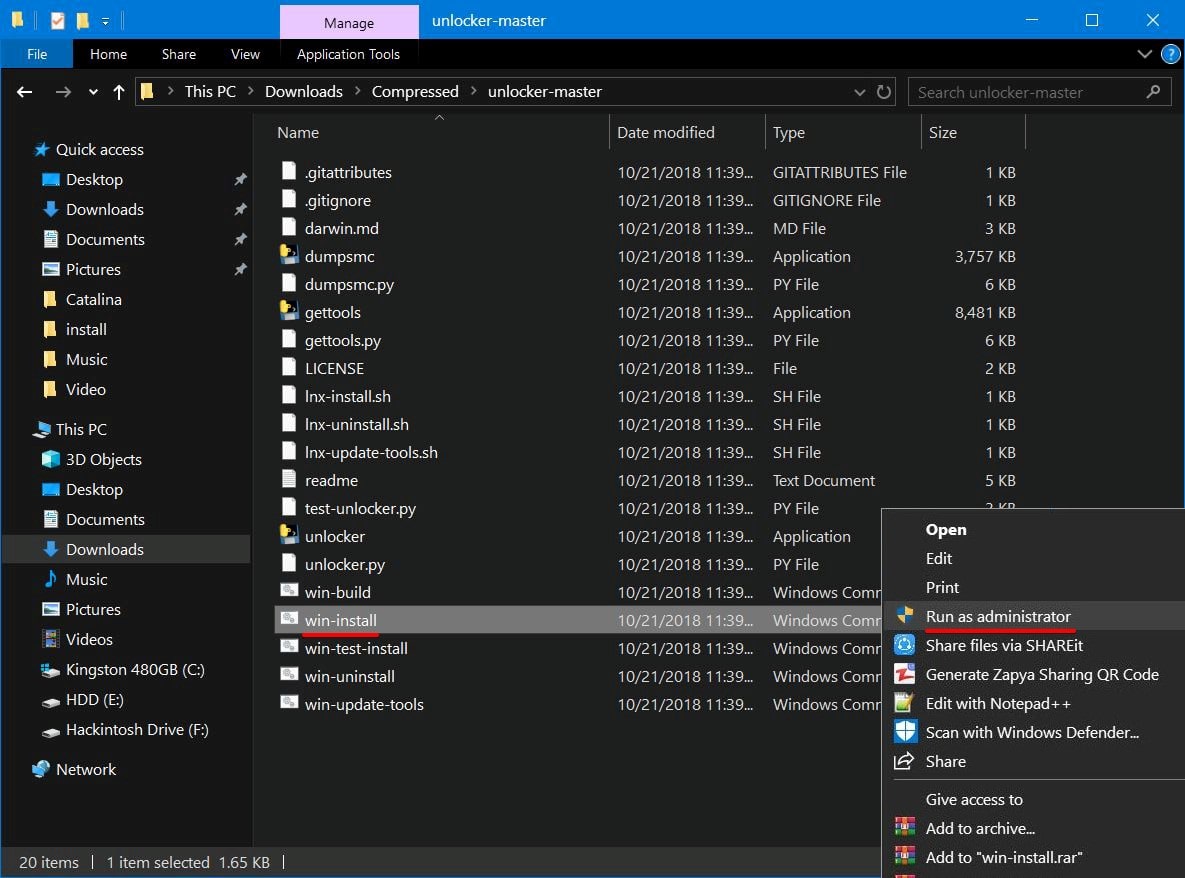
After you downloaded the Unlocker extract the file. Then Power Off the Virtual machine VMware if running. Open the folder go ahead find the file Win-install right-click and select Run As Administrator to unlock.

Run As Administrator
When you run as administrator wait for this black screen to download the features and install on VMware.

Installing Unlocker
Create a New virtual machine
Now VMware Workstation is ready to create a new virtual machine for macOS Mojave.
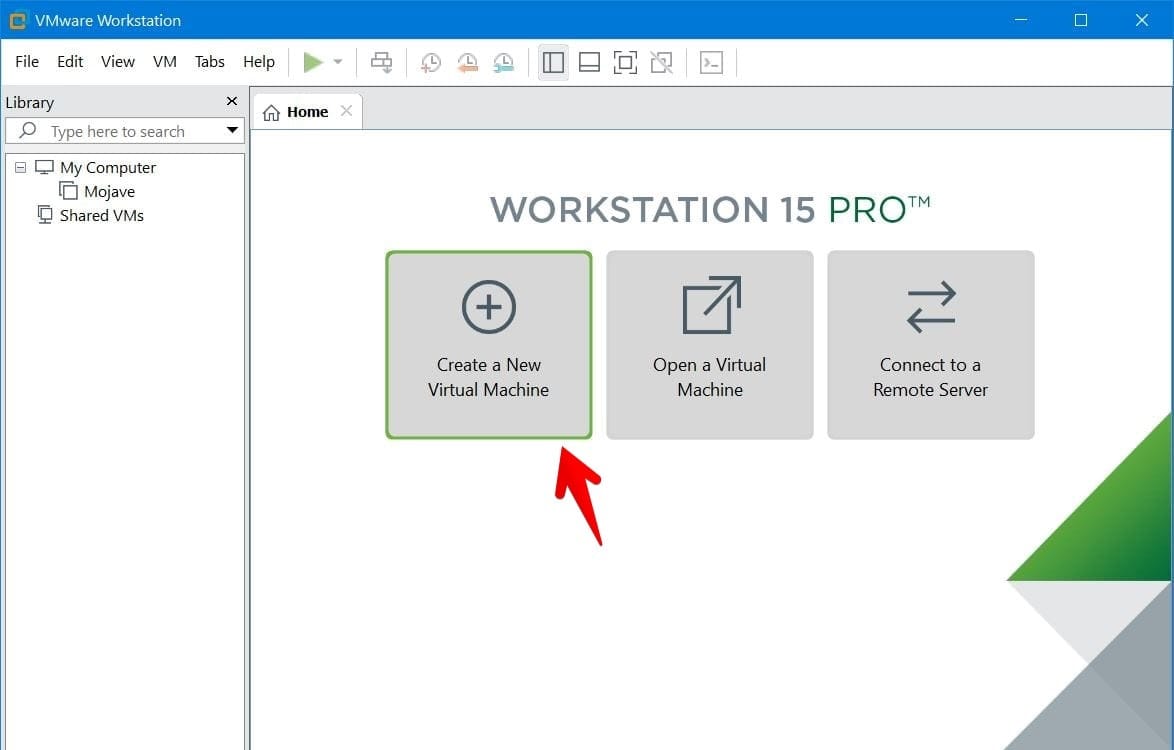
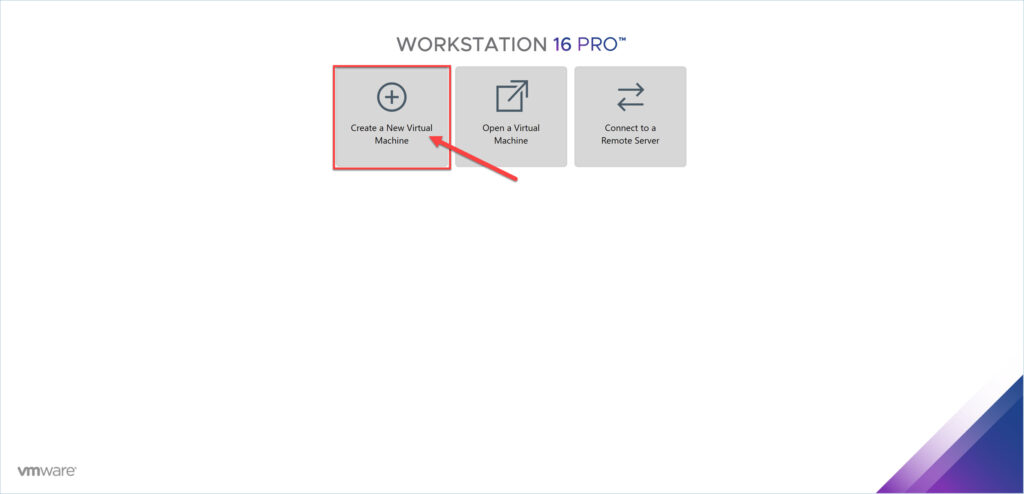
To create a new virtual machine open up the VMware Workstation, or VMware Player. Then click on Create a new virtual machine.

Create a new virtual machine
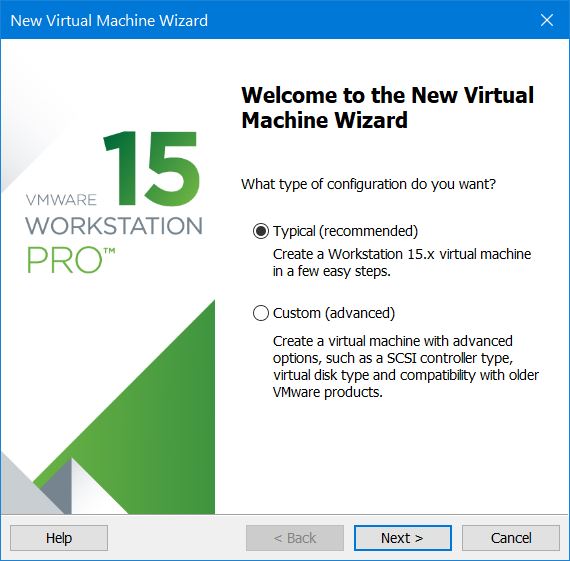
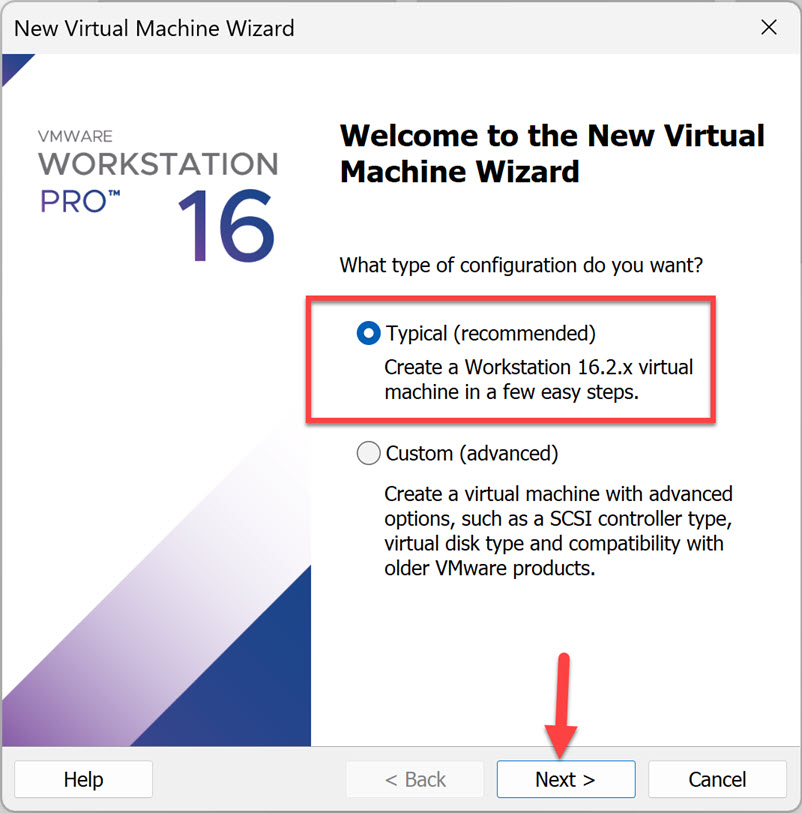
Select Typical (Recommended) then click next

Typical Recommended
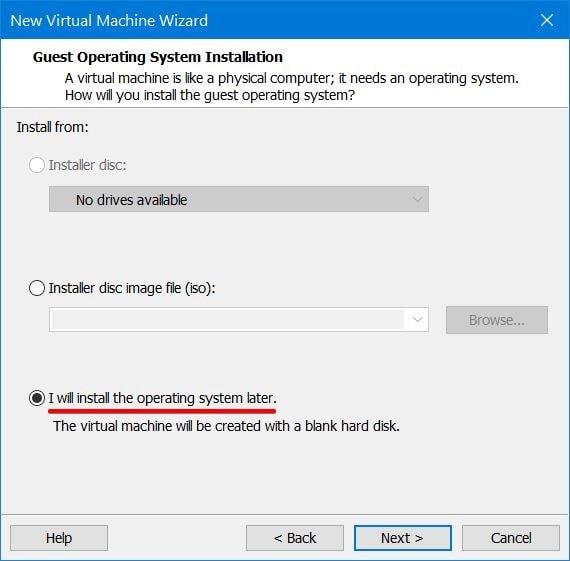
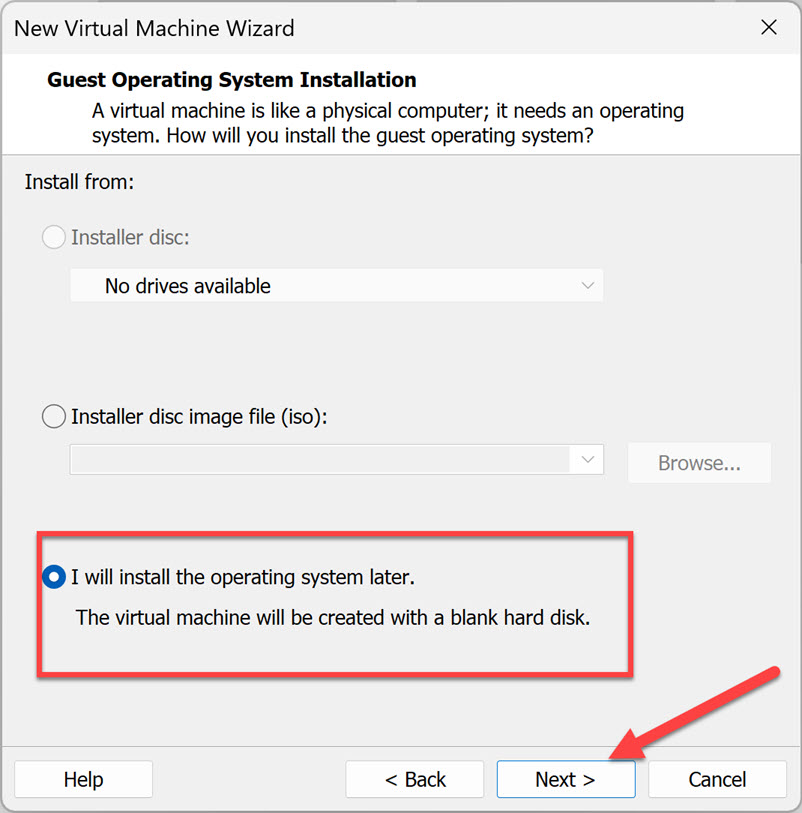
Select the option “I will install the operating system later” then click next

I will install the operating system later
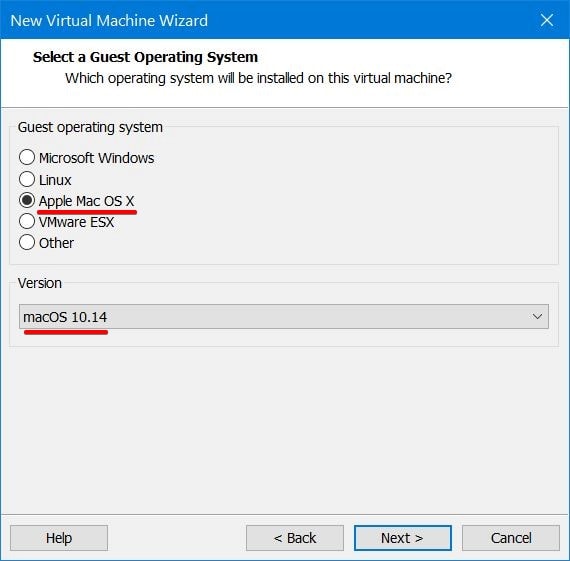
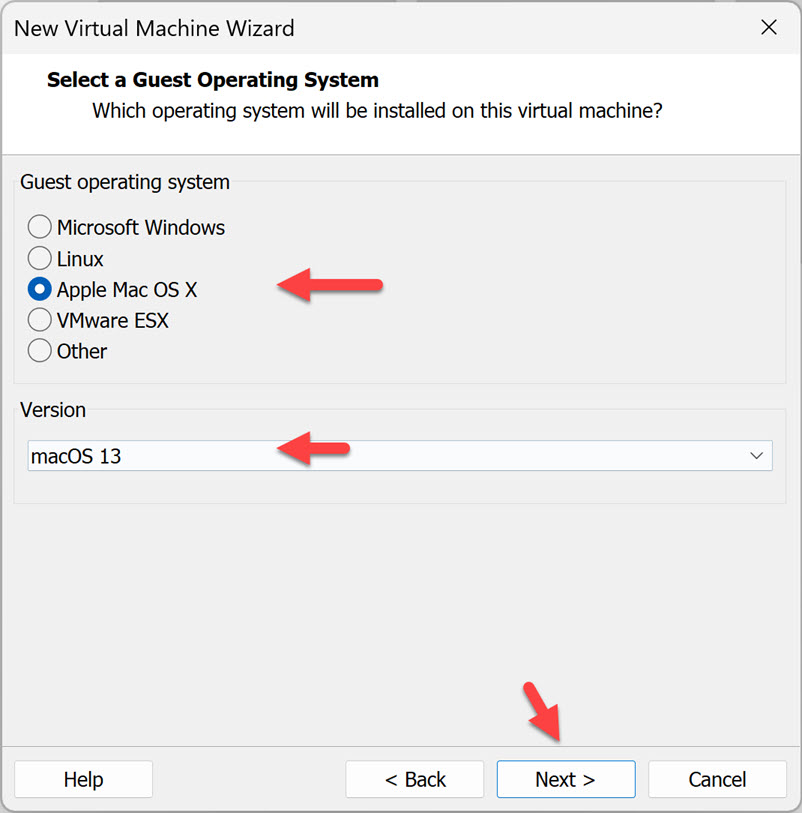
When you installed the macOS Unlocker, of course, the options Apple Mac OS X will appear in the list. Again if the option doesn’t appear. Change the VMware version or the version of the macOS Unlocker. However, select the guest operating system “Apple Mac OS X” and the version “10.14” then click next.

Select Apple Mac OS X
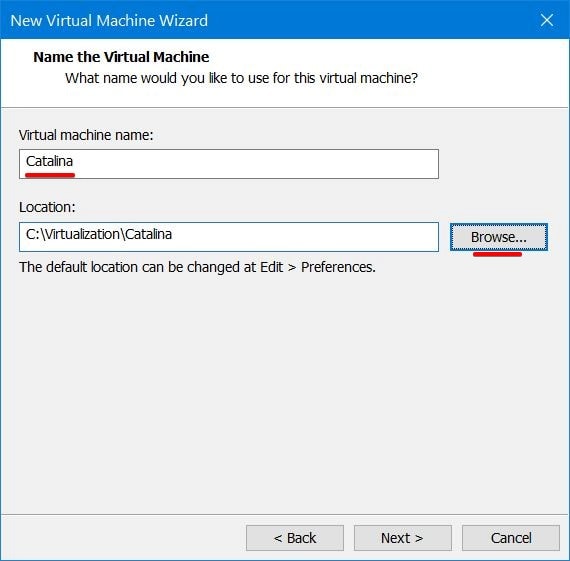
Choose a name for the virtual machine, the name is optional type a name and click next

Select a name for virtual machine
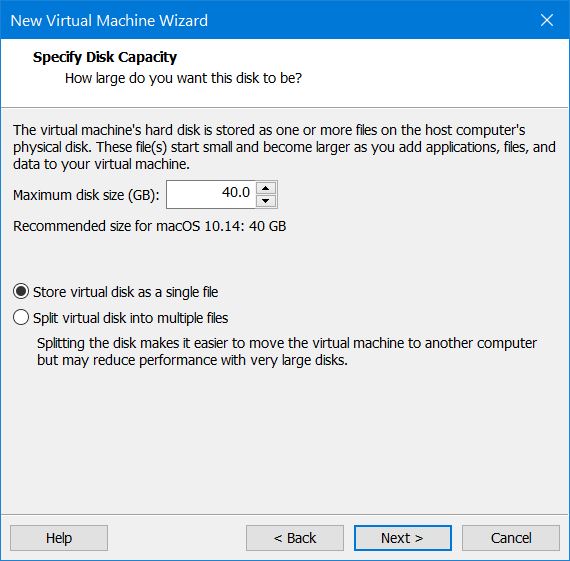
Specify the Disk Capacity then choose the option “Store virtual disk as single file” then click next

Specify the Disk Capacity
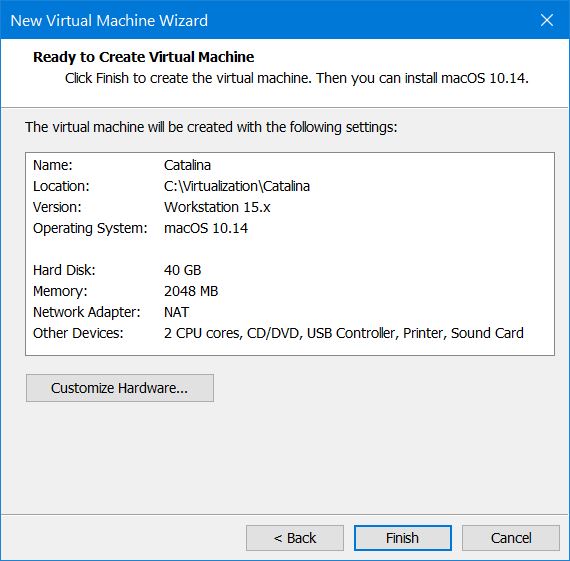
That’s it the virtual machine is created click Finish to end

Click Finish
Edit the Virtual Machine Settings
To perform a clean installation of macOS Mojave with ISO file and for better performance. There you have to edit some equipment needed in VMware settings for macOS Mojave.
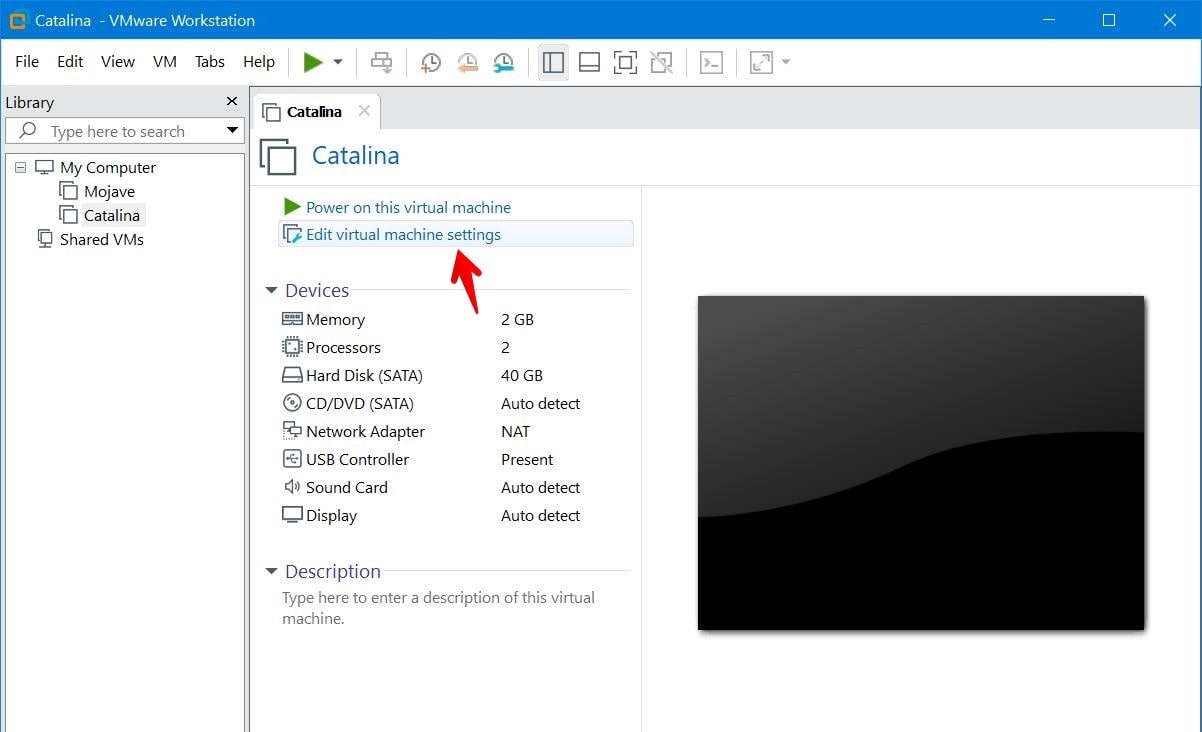
To edit the setting select the created virtual machine and click on Edit Virtual Machine. Or another way right-click on the virtual machine and click Edit virtual machine.

Edit Virtual machine settings
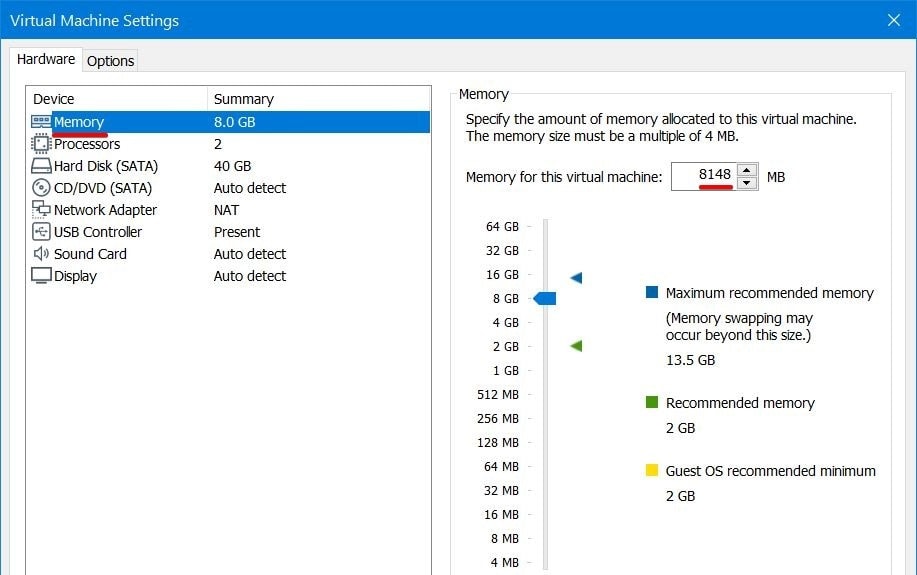
When the settings open on the hardware tab select “Memory” then increase the memory.

Increase memory
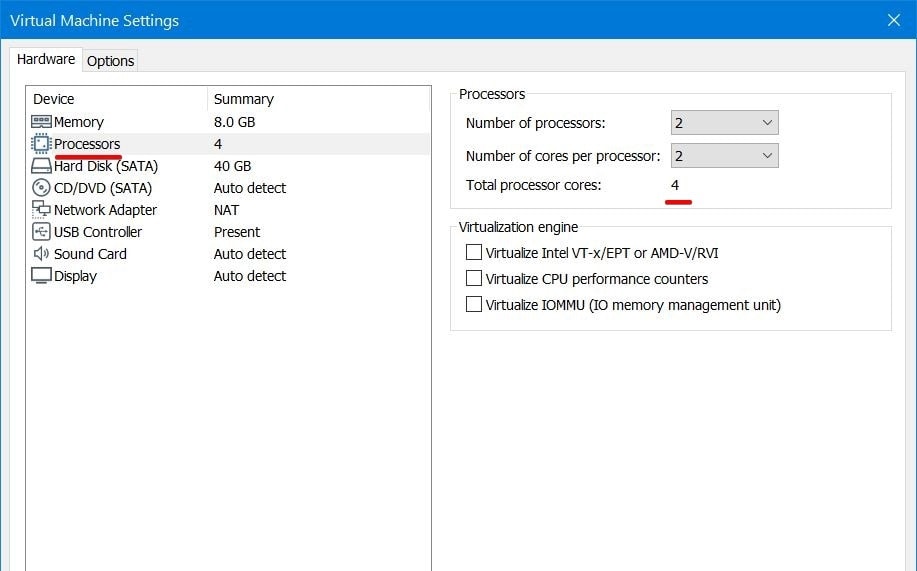
Click on the Processors tab, then increase the number of the core processor

Increase processor
Select CD/DVD (SATA) Tab, then choose “Use ISO image file”, and click on “Browse…” then choose the macOS Mojave ISO file and click Open.

Open ISO File
Select the USB Controller, on the connections menu change the USB compatibility into USB 3.0

USB Controller
Edit macOS Mojave VMX file
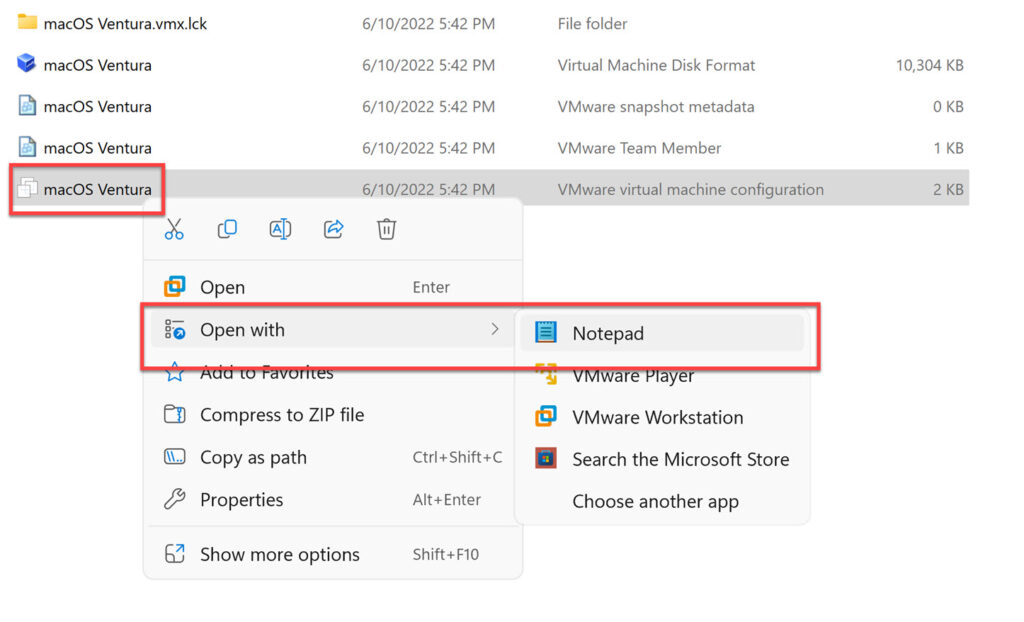
Wow! you have done successfully all the settings of macOS Mojave on the VMware Workstation for better performance. It is time to insert a small number of codes into the VMX file of macOS Mojave. Therefore, close the VMware Workstation, Open the Documents>Virtual Machines>macOS Mojave 10.14>Right-click on the VMX file>Open With>Notepad.

Open VMX file with Notepad
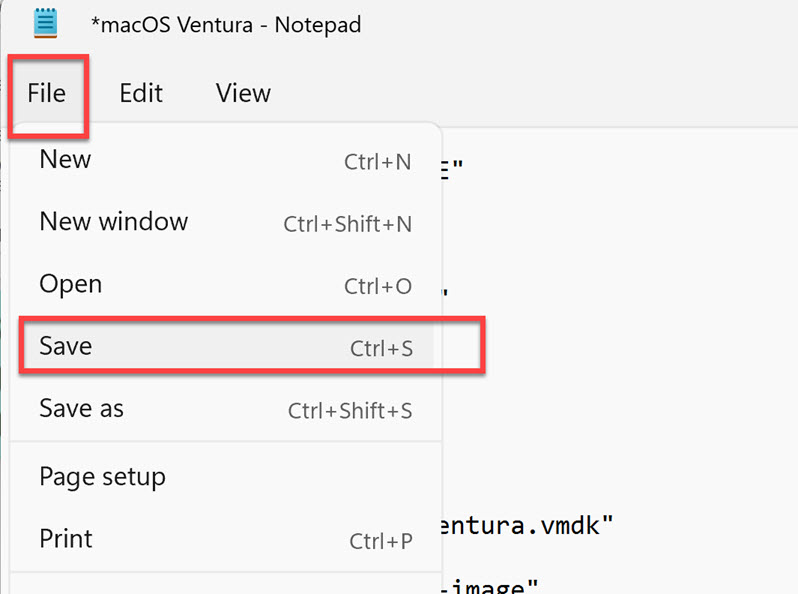
Scroll down at the last, type (Smc.version = “0”) and sometimes it is not working. In place type (Smc.version = 0). Then click “File” from the top menu and click “Save” to save changes. Or simply press the shortcut key Ctrl+S.

Insert VMX code
Fast Install macOS Mojave 10.14 on VMware on Windows PC
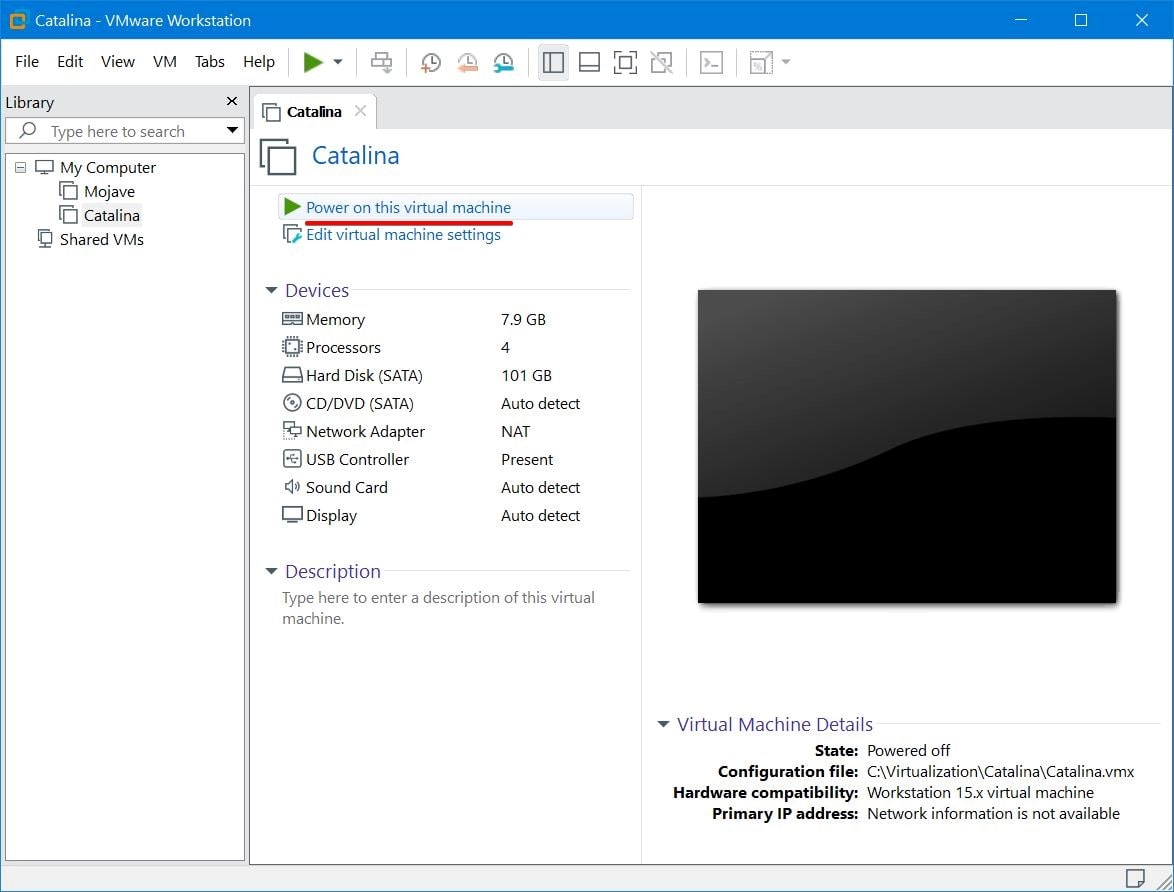
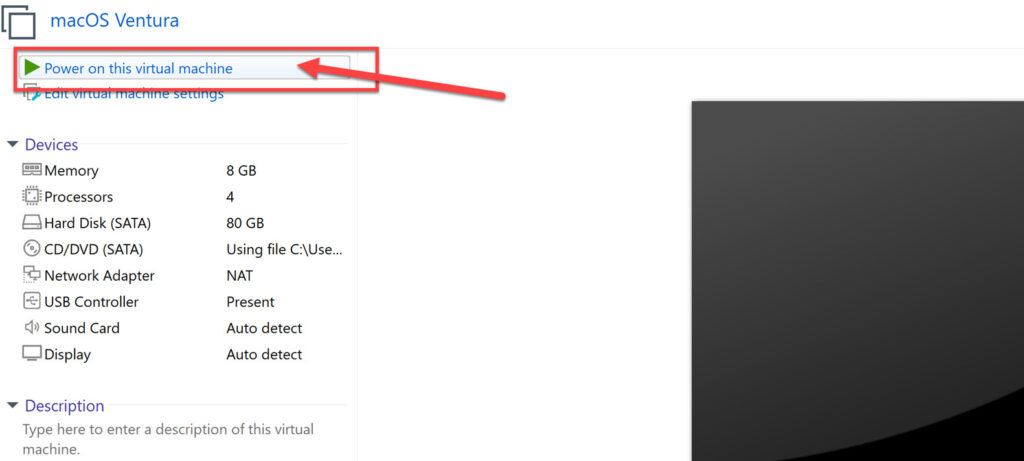
You have done everything correctly, it’s time to start the installation. To install macOS Mojave on VMware on Windows PC, simply click on Power on this virtual machine.

Power on this virtual machine
After a moment the Apple logo will appear, wait until it to bypass.

Apple Logo
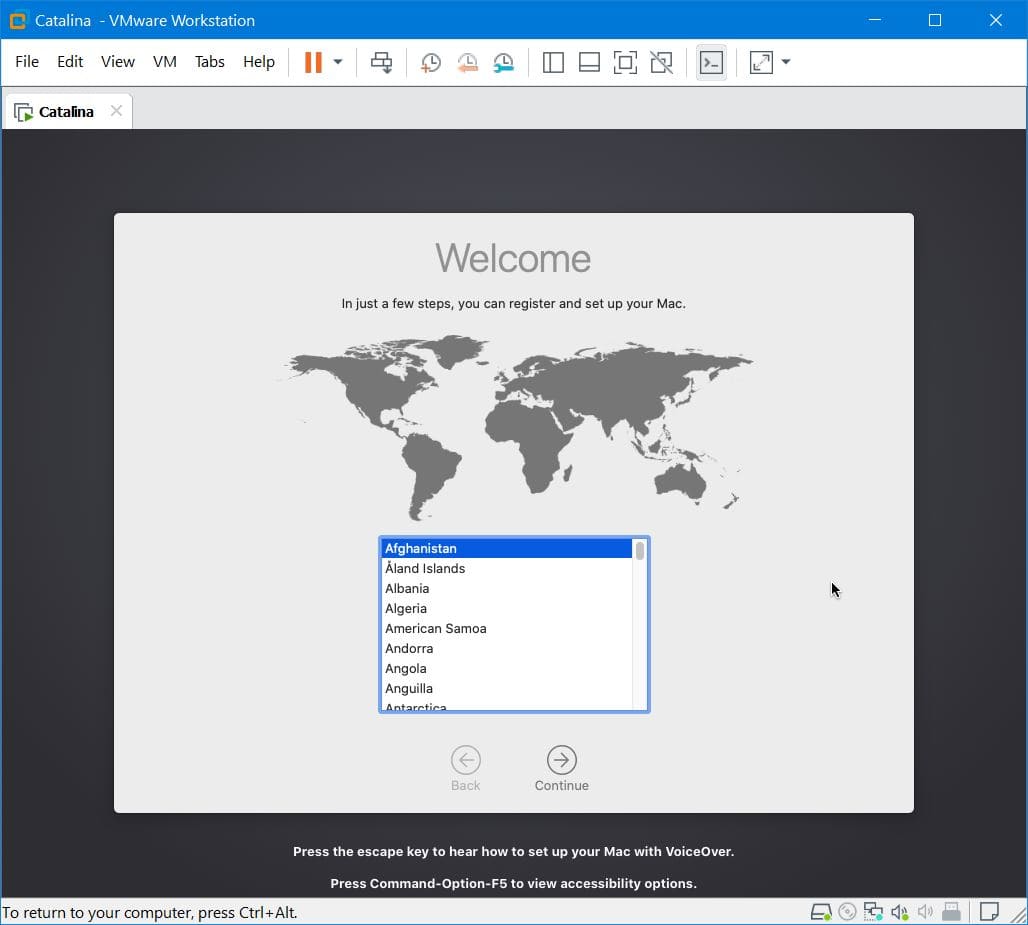
Here you have to select the existence country, after selecting click continue.

Select your country
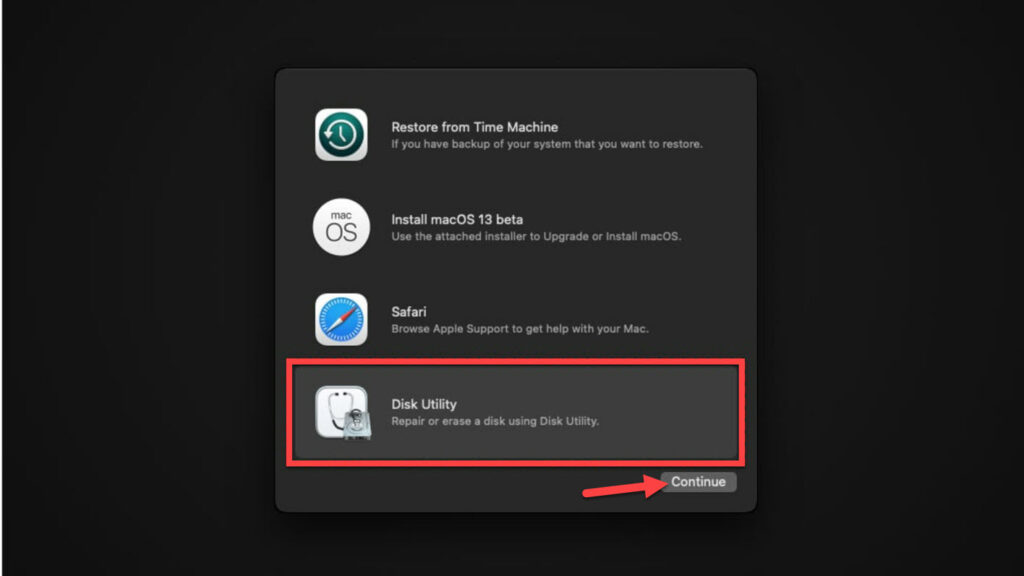
On the macOS Utility window, click on Disk Utility then click continue.

Select Disk Utility
Select the drive which you want to format, in my case, I want to erase the “VMware Virtual SATA”. Then click on Erase option, give a name to the disk “macOS Catalina”. Select the format “Mac OS X Extended (Journaled)”, select the scheme “GUID Partition Map”, then click Erase button. Go according to the below screenshot.

Erase the disk
When the disk erased, simply click finish. And also close the Utility window.

Click Done
Hit on “Install macOS” and click continue.

Install macOS
Again to set up the installation of macOS Mojave, click continue.

Click continue
Agree to the terms and conditions of macOS Mojave by clicking agree for two times.

Agree to terms and conditions
Select the disk which you erased in the Disk Utility option, then click continue.

Select the disk
Wait for the installation to complete

Installing
Once, the installation completed the virtual machine will restart, coming back wait for this step of installation also.

Installing macOS Mojave
Now select your country and click continue

Select your country
Click Sign up later and click Skip

Skip
Agree to terms and conditions

Agree to terms and conditions
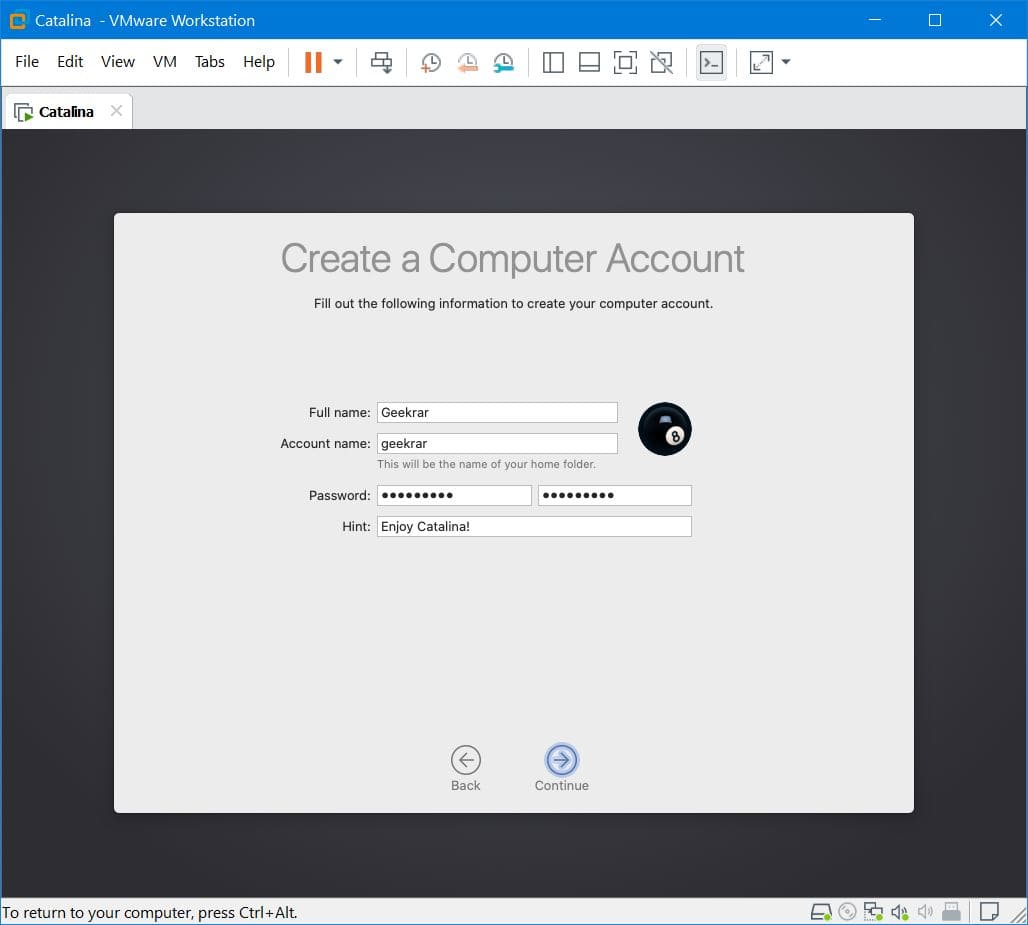
Create a computer account and click continue

Agree to terms and conditions
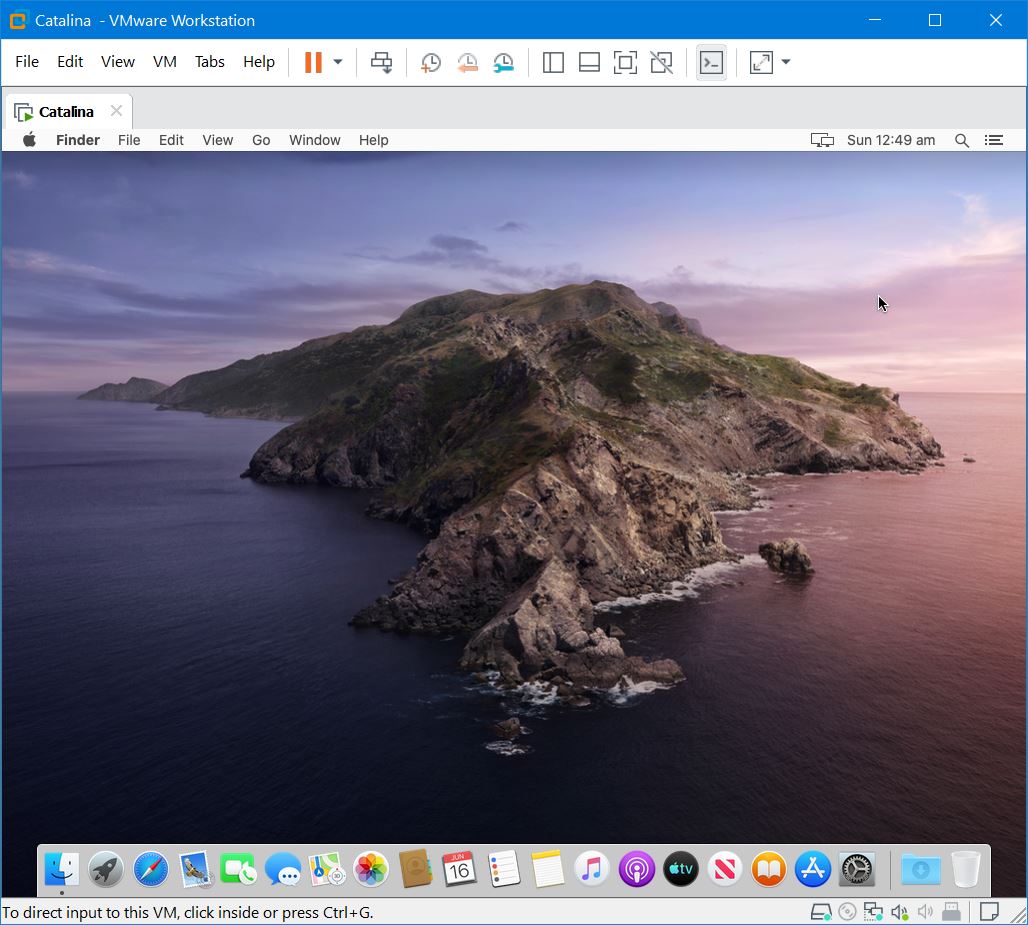
Once the installation completed the actual look will be like the below screenshot.

Installation is done
Install VMware Tools on macOS Mojave
The last step is about the installation of VMware Tools on macOS Mojave after the installation succeeds on VMware. VMware Tools is a beneficial tool for macOS on VMware. It has an essential effect to fix the full-screen mode, Speed up the high performance, drag and drop from a virtual machine to the actual OS.
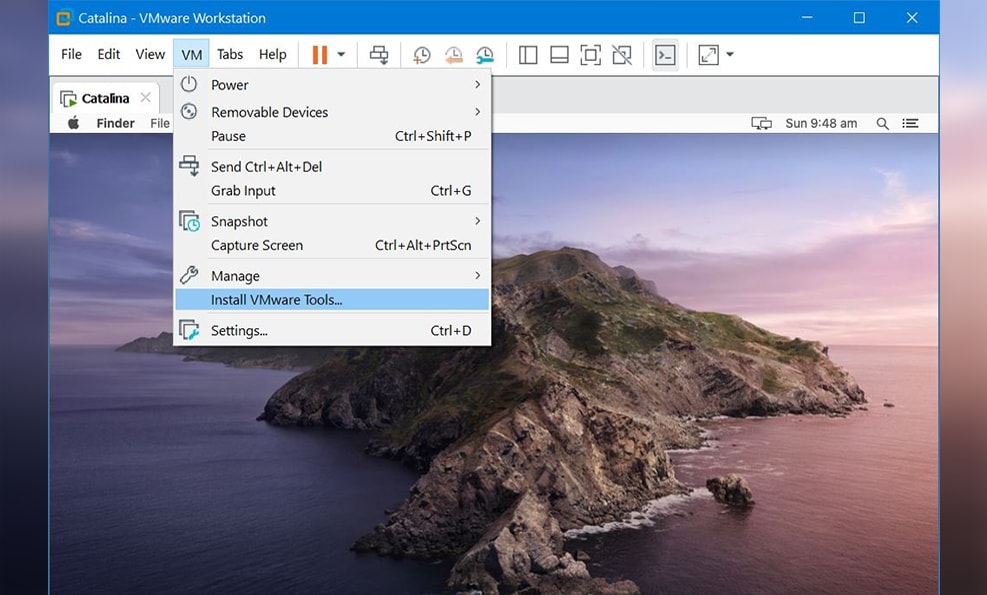
Once you completely signed in the macOS Mojave window. Navigate VM tab> click on Install VMware Tools…

Install VMware tools
Once you clicked on Install VMware tools, after that the VMware tools installation software will appear on the desktop. Double click on that to launch the installation wizard. Complete the full installation to fix the features.

Open VMware tools
After VMware tools installed you will see the full-screen size of macOS Mojave on VMware. Again if you are getting confused check the below article.
- Fix macOS Mojave Screen Resolution on VMware on Windows

macOS Mojave full-screen
Final Point
That’s it about how to Fast Install macOS Mojave 10.14 on VMware on Windows PC with a new method. I hope all the things were fine and well for you. Again if there should be any confusion feel free to share below in the comment section.
In this post, we’ll install macOS Catalina on VMware on Windows PC. For this procedure, we’ll also need VMware Unlocker Patch Tool for macOS or macOS VMware Unlocker Patch Tool, so we’ve provided this and also installed it in this tutorial. In a significant event of Apple’s yearly developer conference which started yesterday, the keynote was chock-full of announcements, demos, and some super mind-blowing tech. From killing iTunes to iPadOS, here’s some of the best stuff that came out at WWDC 2019 so far. In this post, we’ll install macOS Catalina on VMware on Windows PC. We’ll do with macOS Catalina Unlocker for VMware or VMware Unlocker for macOS Workstation and Player. Here’s how to do it.
- Related: Video – How to Install macOS Catalina on VMware
That’s just a small number of things that were announced and shown yesterday, but expanding those, there are some more. While there’s a lot of new stuff to talk about but first the important stuff: Of all the things announced yesterday, by far the coolest update to Mac is the next version of macOS, which was introduced on the stage is macOS Catilina.
With the most powerful Mac, it also needs a powerful macOS operating system. The worlds most advanced desktop operating system has now got the next major release of macOS. It’s no other but macOS Catalina.
After Sierra, High Sierra, Mojave, the next one is macOS Catalina. Now Catalina includes a huge deal of fresh green stuff. First off, starting off with iTunes, Apple’s Senior VP Craig Federighi nailed it with making fun of showing off some apps in iTunes.
Now there’s a new photo browsing experience, an updated start page in Safari, the brand-new gallery view in Notes and a completely redesigned reminders app. There’s also a screen time to the Mac. But when it comes to third-party apps, Mac users love to work with so they love more of them.
- Related: Install macOS Catalina on VirtualBox on Windows PC
Table of Contents
macOS Unlocker for VMware (VMware Unlocker Tool)
Download VMware Unlocker Tool or Unlocker for VMware which will patch VMware. This macOS Catalina Unlocker for VMware make install macOS Catalina on VMware work. If you’re wondering what Unlocker actually is. It’s VMware Unlocker for macOS which Unlocks VMware for macOS Catalina or macOS to install with the option it creates. This VMware Unlocker or VMware Unlocker for macOS will definitely make the installation successful. We’ve tested and work with VMware Unlocker in VMware Workstation and Player so that’s great.
What’s a Virtual Machine?
While it’s entirely possible for Mac users to run Windows apps on macOS, believe it or not, Windows users could actually do the opposite — running entire macOS and apps in Windows with a pretty rock-solid software, meet VMware Workstation Player. There are VMware Workstation and VMware Player version of the VMware. While the price is the most important part, but if you use the VMware Player mode, you’ll use it for free.
What VMware actually does is, it utilizes the power of virtual machines to let you try different operating systems within the Windows. For some quick background, virtual machines are a sandboxed separate environment with its own virtual hardware that allow you play with different operating systems within your working OS. There’s no doubt in you could entirely run the operating system specifically Catalina.
In order to install, you’ll certainly need the macOS Catalina image. But that doesn’t mean downloading macOS Catalina from the Apple beta program or from App Store when it’s released. Even if you do that and try installing macOS Catalina on VMware, you’ll end up without proceeding. In this case, we’ve created and configured the macOS Catalina VMware image specifically for VMware which ends up with the file extension .vmdk. All you’ve to do is download the image and extract it.
- Related: Install macOS Catalina on VMware on Windows PC [New Method]
Why You’d Want to Create a Virtual Machine
There’s a whole lot of benefits of running an operating system in a virtual machine. The first is you aren’t willing to install the operating system aside or in place of your actual operating system. The second is, you might be willing to remain your data untouched since the VM works in an entirely separated environment. The next is, you’re willing to give a try to the operating system instead of purchasing it. While the Macs are undeniably super expensive, you might want to try or work with the macOS for free which this is the perfect option.
When you could use the virtual machine, you would probably want to install macOS Catalina on your Windows computer for some reason. For all these reasons and more, you can completely try it for completely free with this walkthrough. If this sounds appealing to you, here’s how to install macOS Catalina on VMware on Windows PC. After all, there’s no compatibility question in terms of installing macOS Catalina on VMware.
What You’ll Need
If you’ve been considering giving your computer a new update, Catalina is one of the most popular operating system update available today. In order to install, we’ve created and provided you some tools that you’re going to need. Go ahead and collect them all now. Here’s the list:
- VMware Workstation / VMware Player (Link 1 | Link 2)— If I was to choose between the virtual machine apps, I would definitely choose VMware. Although VMware doesn’t support install macOS Catalina or other versions of macOS with the quick tool, that’s not a hurdle. Not only you would install macOS Catalina but you’ll certainly experience whole features which makes Catalina awesome. With Catalina running on the virtual machine, you’ll get all the tools you’ll need in a real computer such as the internet, sound, screen resolution, and a lot more. When you’ve installed macOS Catalina, you can also install the VMware Tools which enhances the performance and provides some great features such as full-screen resolution.
- Unlocker For VMware or VMware Unlocker Tool — The macOS Catalina on VMware requires a useful file which is VMware Unlocker Patch Tool. This particular file patches the VMware to install macOS Catalina on VMware. VMware Unlocker Patch Tool (Unlocker for VMware) is a macOS Catalina Unlocker Patch tool created for installing macOS on VMware.
Join us on Patreon and support us in making better content.
https://bit.ly/39ZB1FR
For the complete video: Install macOS Catalina on VMware on Windows PC [Video]
After you’re done, you may extract the files with Winrar or 7-Zip to make them ready to use. Here’s also the latest macOS Catalina VMware and VirtualBox available to download.
With your preparations done, you’re ready to get flashing.
Here’s a new method to install macOS Catalina on VMware on Windows PC.
- Install macOS Catalina on VMware on Windows PC [New Method]
Step One: Install VMware Workstation Player on Windows
Before you get super excited and start dipping into things, make sure you have everything you need to get started. From the BIOS, watch out if the Intel VT-x hardware acceleration options are enabled. If it’s not enabled, you may not be able to succeed with the installation process. Once you’re ready, go for it.
So, first things first, from the installation files, go for setup.exe.
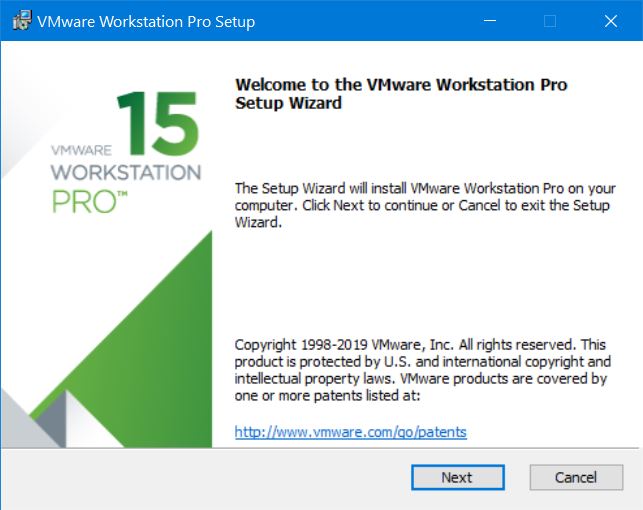
Installing VMware is no different from other ordinary programs, so proceed with the installation.
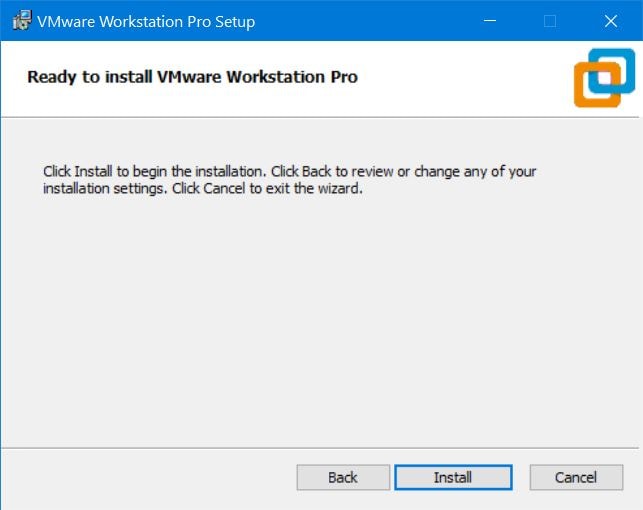
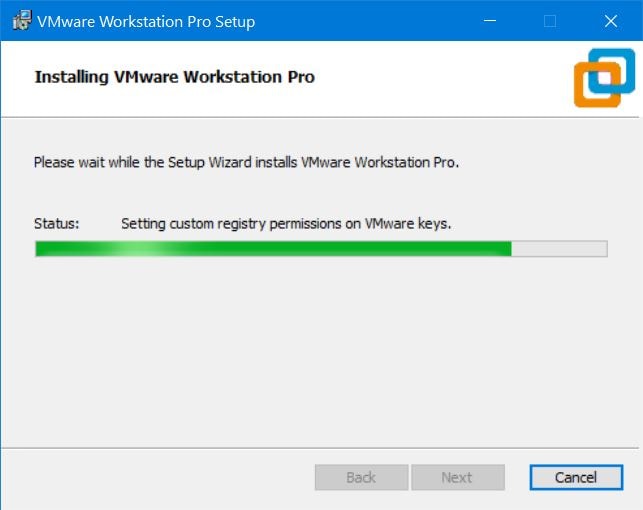
The installation will be done quick
When you’re done, click Finish but don’t open it (seriously). You’ve been warned!
Step Two: Install The macOS VMware Unlocker Patch Tool (Unlocker for VMware)
The VMware Unlocker Tool for macOS or macOS Unlocker for VMware is a VMware Unlocker for macOS Catalina or macOS Unlocker for VMware and other macOS to install macOS Catalina on VMware. Since VMware doesn’t support installing macOS on virtual machine, the installation process isn’t possible without the patch. It particularly to remove the restrictions and patch VMware in order to work macOS in VMware Workstation or Player.
In order to install this patch, all you’ve to do is close VMware completely and from the VMware Unlocker Patch Tool for macOS, right click on win-install and Run as administrator. It will pop up command prompt running some commands, but that’s fine.
Step Three: Create a New Virtual Machine
With the supportive files, you’re now ready to set up a virtual machine.
First, open VMware Workstation Player and click Create New Virtual Machine.
Once the wizard pops up, let the settings by default and click Next.
In order to create the virtual machine without a disk, select I’ll install the operating system later.
Now choose Apple Mac OS X from Guest operating system and select 10.14 for the version, then click Next.
Specify the virtual machine as you would like to and click Next.
Doesn’t matter which one you choose, we will replace it later with macOS Catalina VMDK file.
On the confirmation screen, if everything looks good, go ahead and click Finish to start the virtual machine.
Step Four: Configure macOS Catalina Virtual Machine
With the virtual machine created, now we need to do some little configuration which will make it usable.
From VMware, click on Edit virtual machine settings on Catalina VM.
We recommend at least 4GB of RAM, ideally 8GB or more. If your computer has 8GB, you may allocate 4GB of it.
As a matter of fact, the virtual machine requires huge processors, set up 50% – 75% of your system’s CPU and click Next. The processors should be above 2 or more.
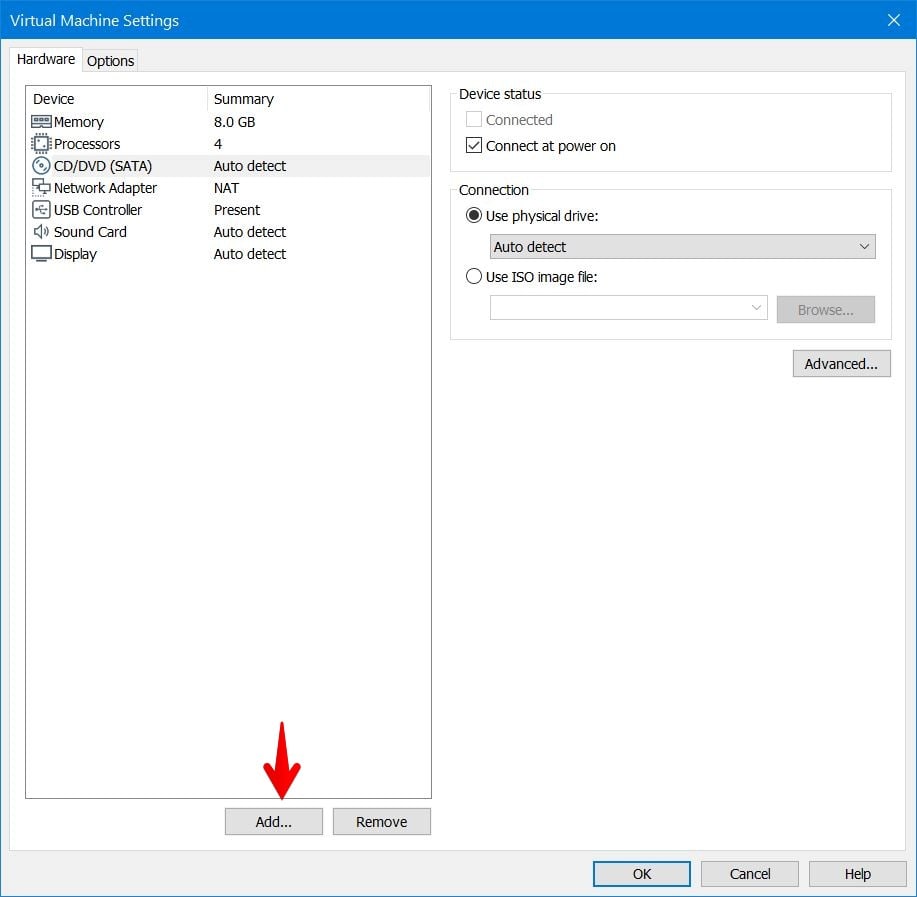
In order to replace the disk with Catalina VMDK, select the Hard Disk and click Remove from the end.
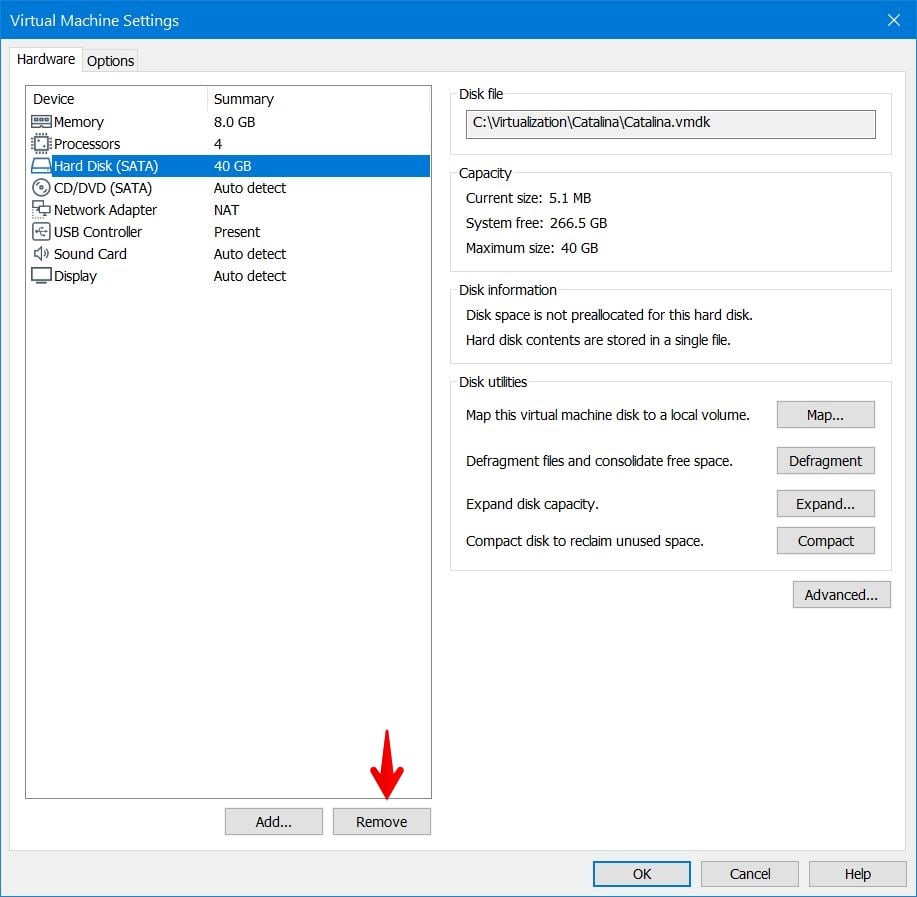
Next click on Add.
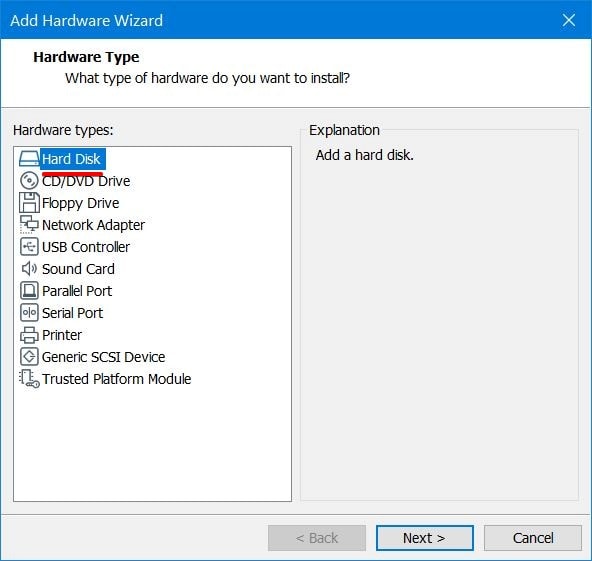
From the hardware, select Hard Disk and click Next.
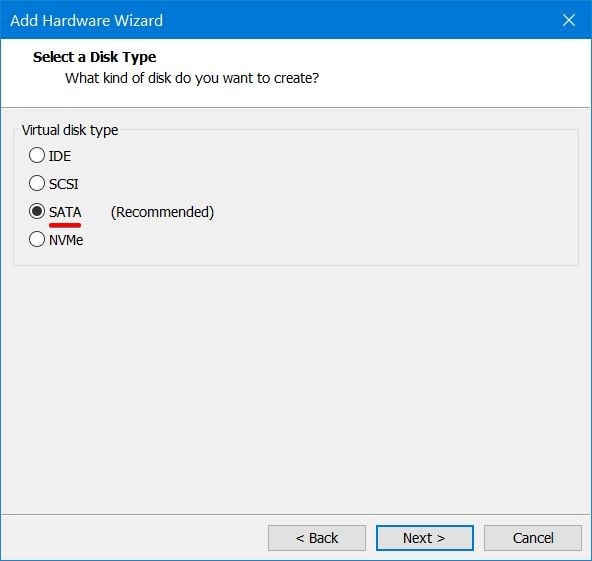
Simply click Next.
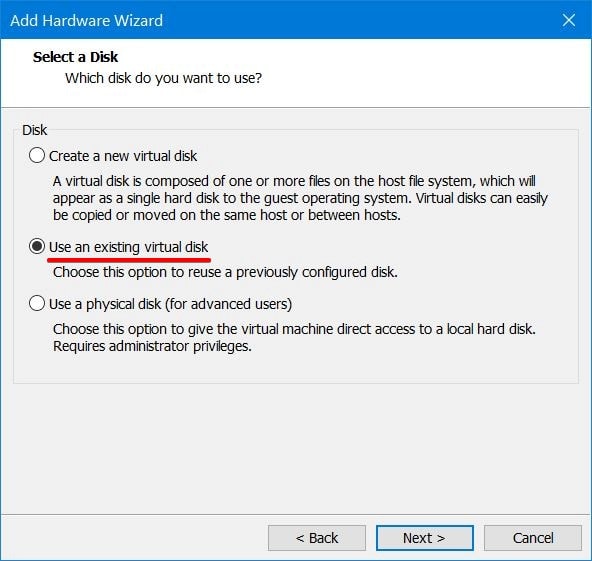
On the next window that appears, select Use an existing virtual hard disk and follow Next.
Now without closing the virtual machine settings, browse the macOS Catalina (VMDK) image and click Finish.
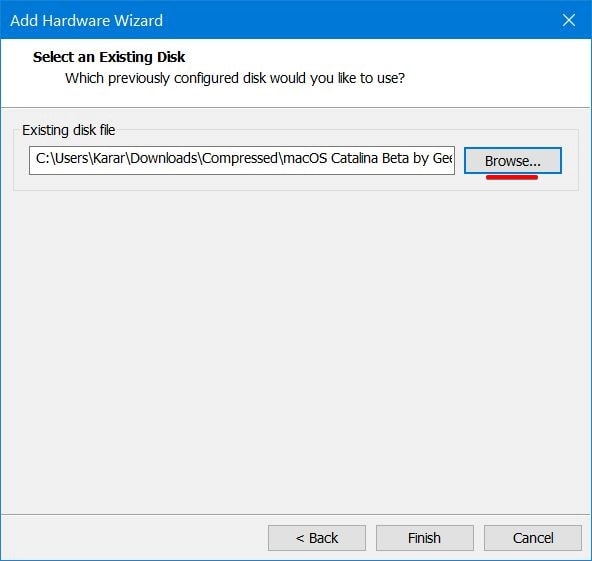
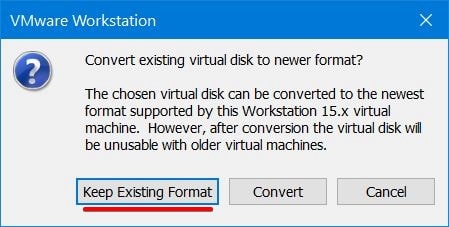
When you’re asked for the disk format, select Keep Existing Format. This will create the new existing macOS Catalina VMDK disk with the existing format for the virtual machine.
When the settings is done, simply click Ok on the virtual machine settings window.
Step Five: Insert Config Key For VMX file
The VMware virtual machine configuration (VMX) file is the core of the virtual machine. At this point, there are some changes which you need to make to install macOS Catalina.
After the virtual machine is created, close VMware. Make sure you do it otherwise this may end up without installation.
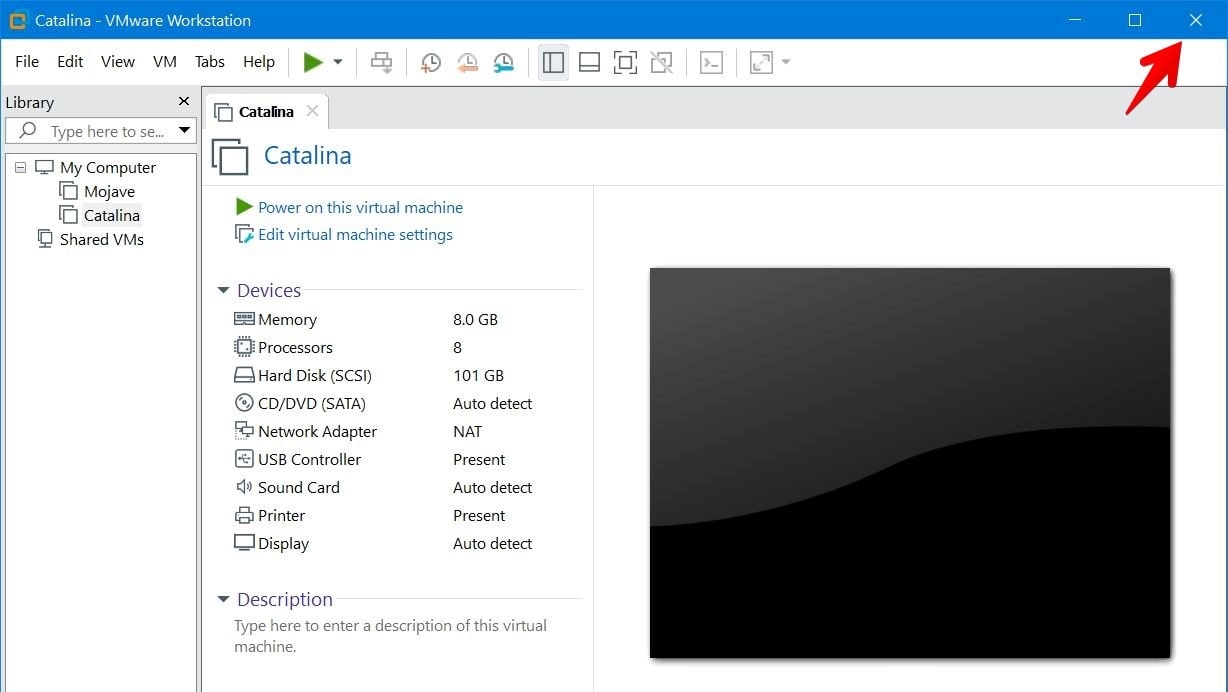
Now navigate to the macOS Catalina files. From the files, open (macOS Catalina).vmx with Notepad.
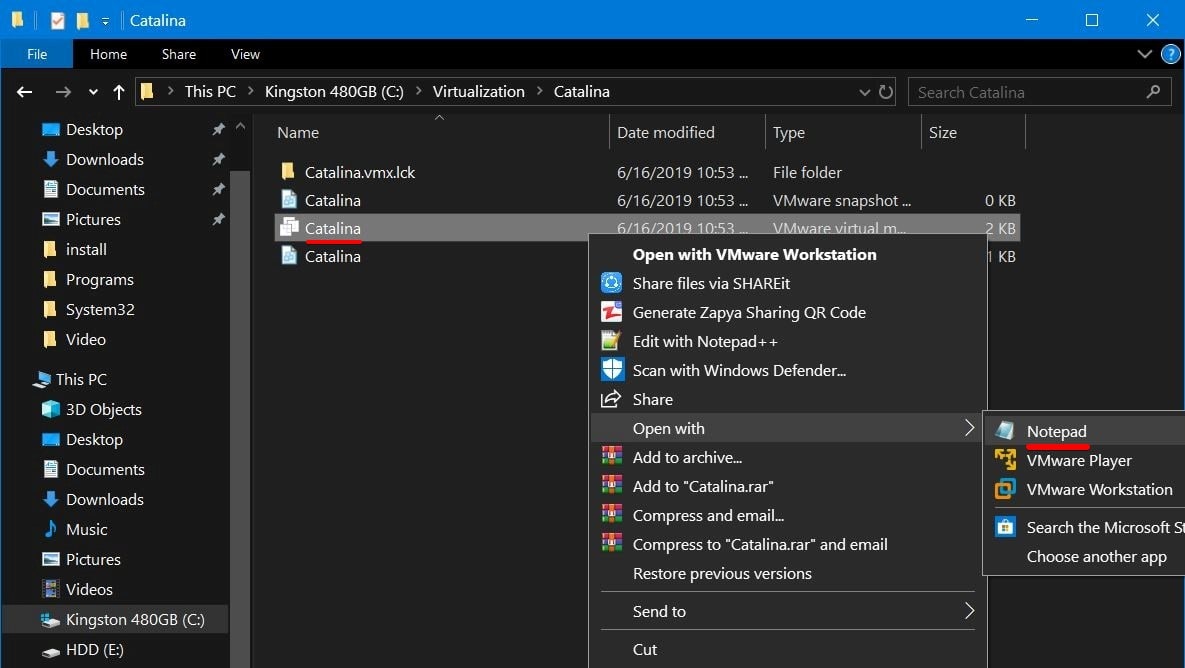
Now copy the key and paste it at the end of the lines.
smc.version = “0”
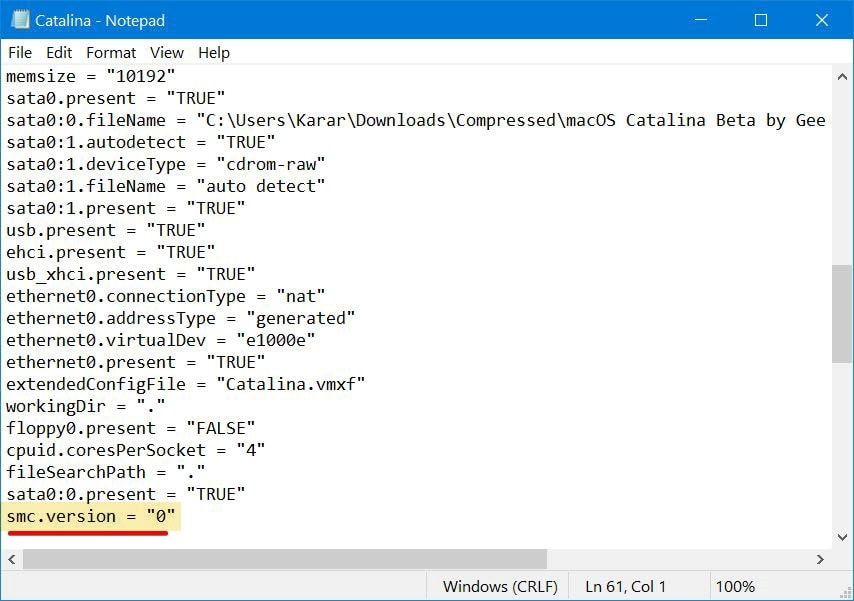
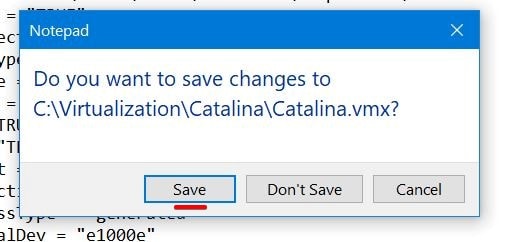
When you’re done, save it.
Step Six: Install macOS Catalina on VMware Workstation
With the virtual machine configured, you’re ready to install macOS Catalina entirely on your computer, so let’s get started.
From the VMware, select the Catalina and click Power on the virtual machine.
Wait a few moments since this is the first time virtual machine booting. How long it takes to boot largely depends on how much resources you’ve assigned to, but it’s generally pretty quick. When the screen appeared, select your region and click Continue.
Some users have trouble installing macOS Catalina in VMware if you encounter a crashes with the error “The CPU has been disabled by the guest operating system. Power off or reset the virtual machine”, try how to diagnose and fix the problem.
- How to Fix The CPU has been disabled by the guest operating system
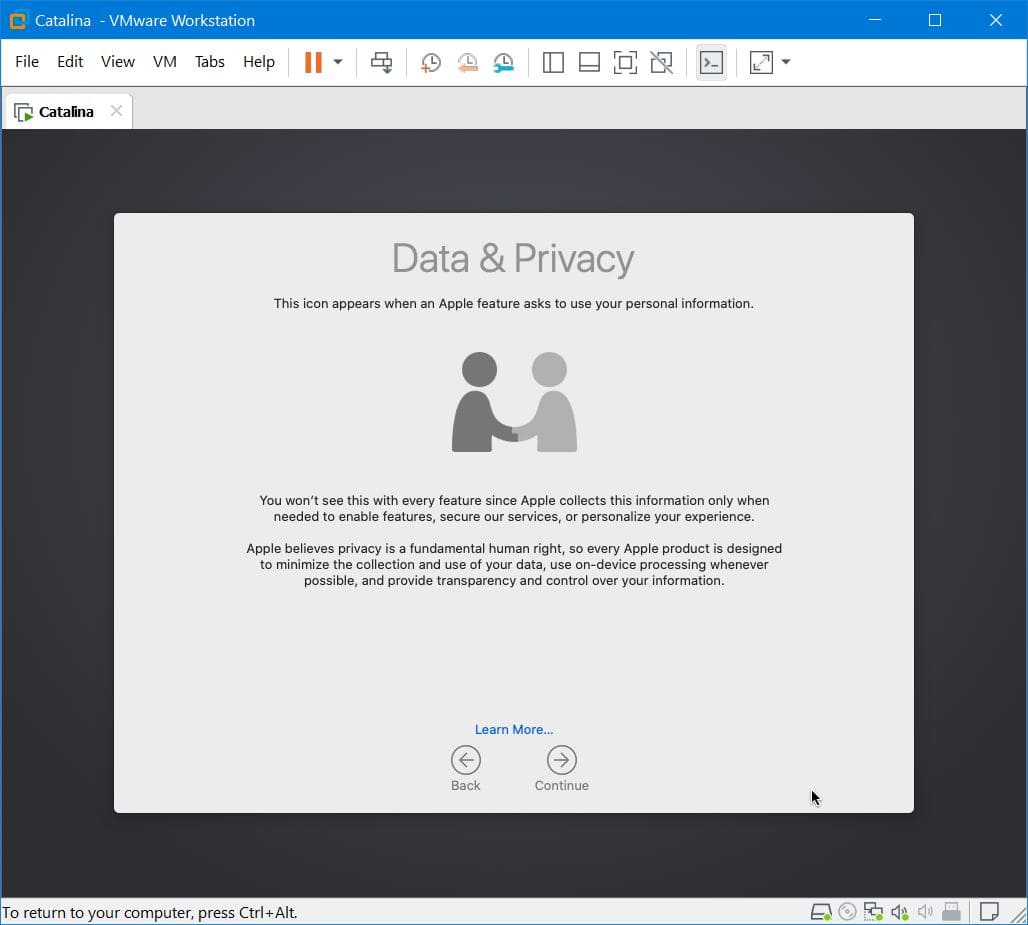
Your data and privacy on macOS point to the following Data & Privacy.
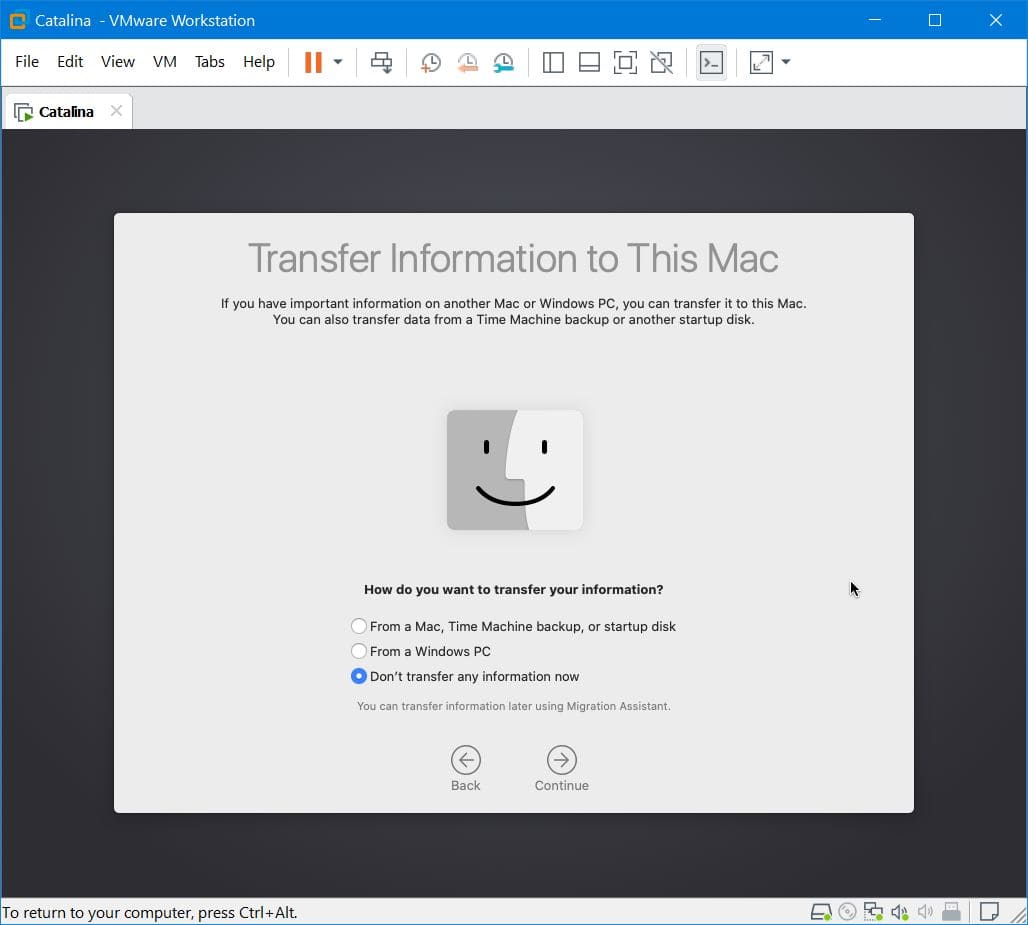
While we’re not going to use this as our actual operating system, we’ll use with Don’t transfer any information now.
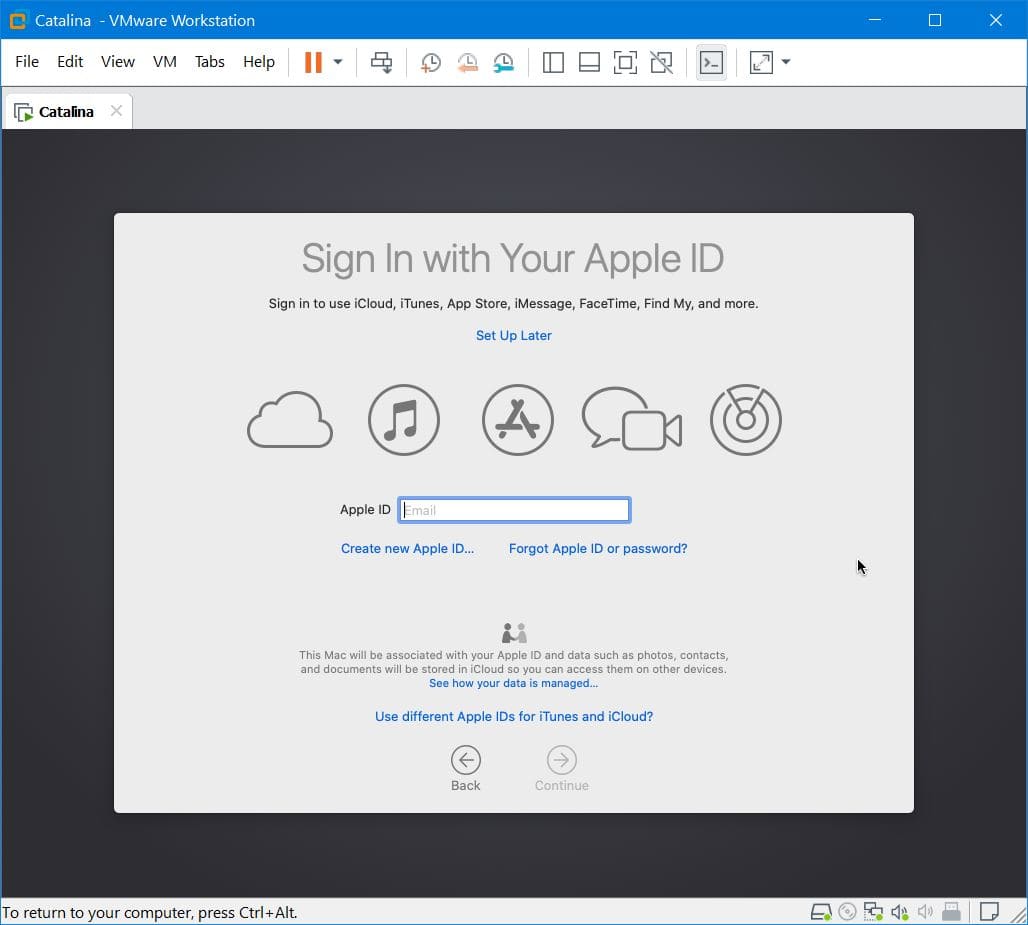
For whatever apps you would download, you’ll require an Apple ID, if you don’t have one, you can make one.
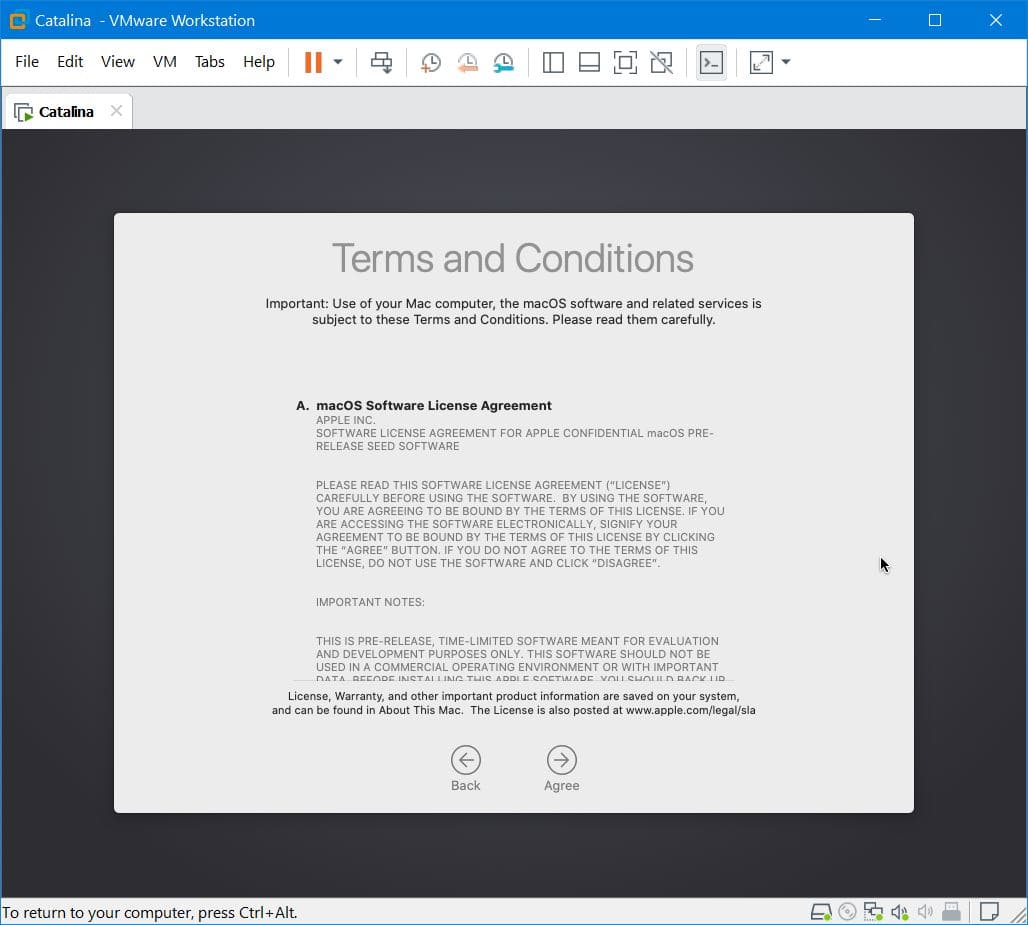
Since you’re using macOS, you’ll need to comply with terms and conditions, Agree with it.
Just like every operating system you install, you’ll need to create an account, do it and click Continue.
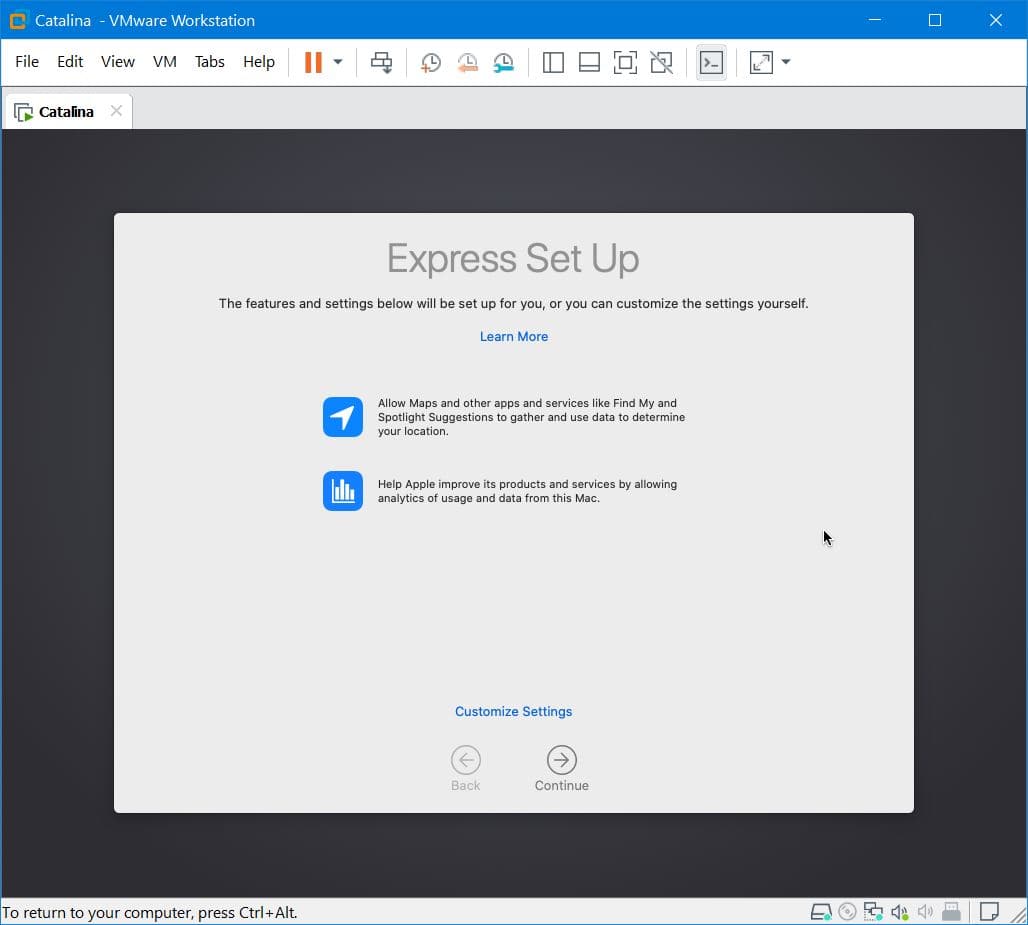
The Express set up enables some useful features such as Maps, Location Services. If you would like to use, Continue.
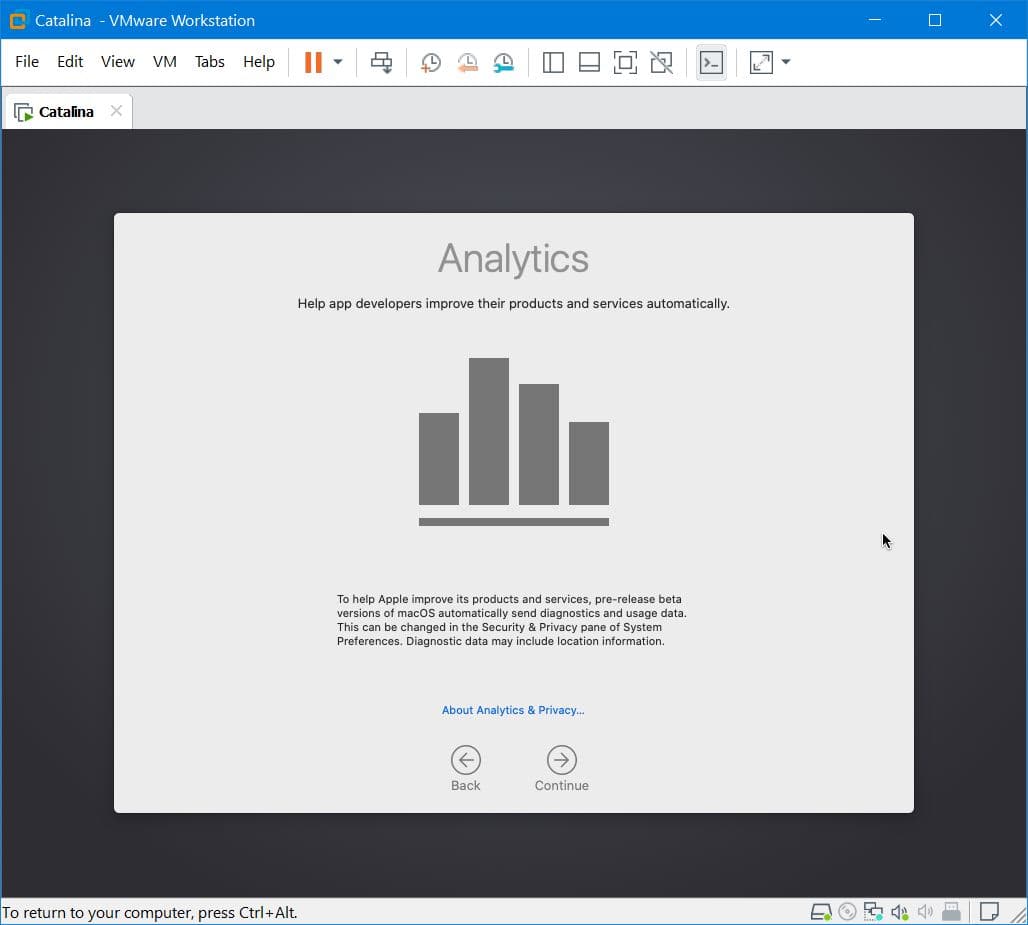
The analytics might send some information (not personal) but information on how you use the product to Apple, Continue with it. This can later be changed from System Preferences.
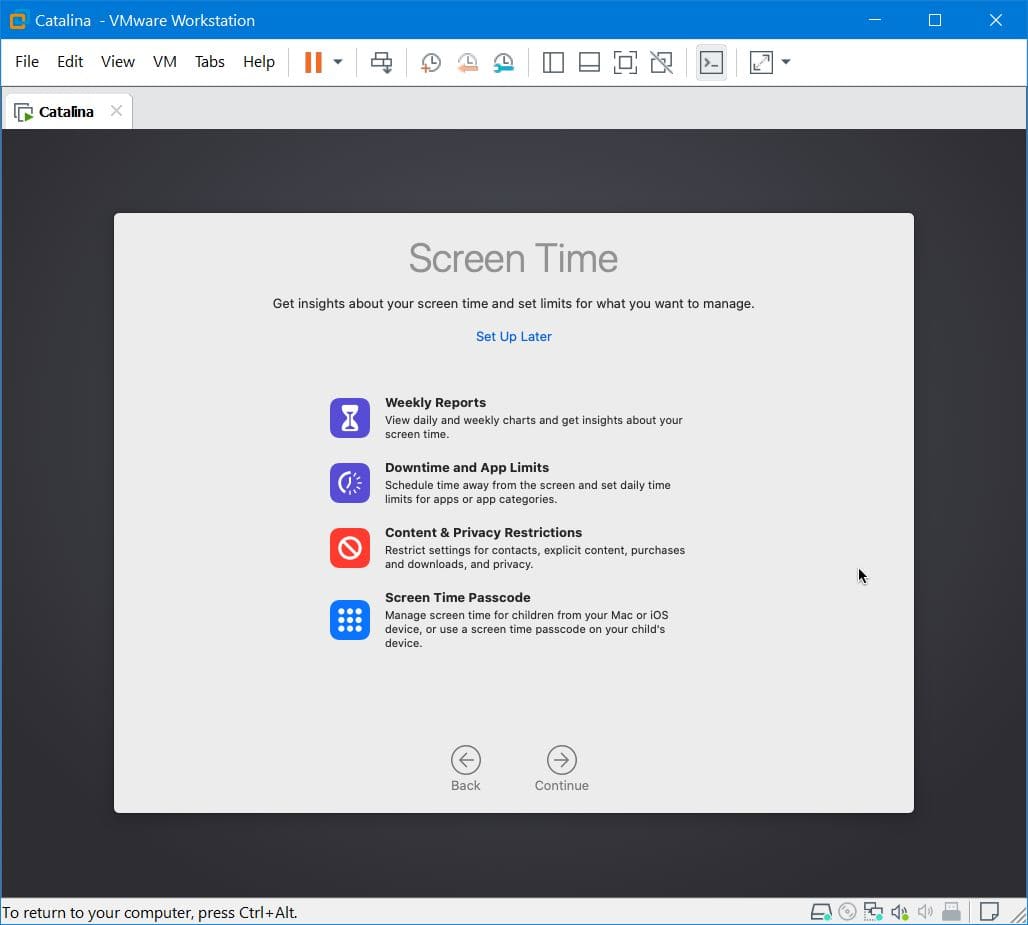
Great! The new Screen Time feature is here! Click Continue.
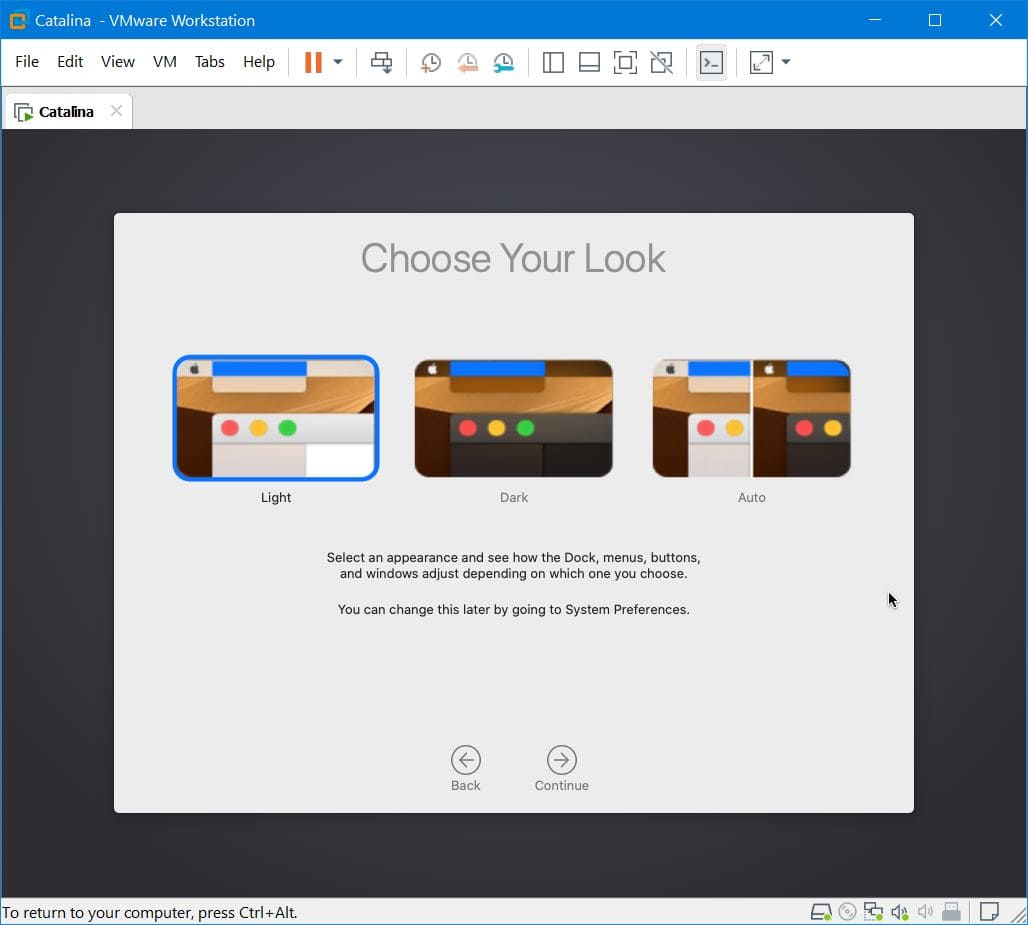
The new styles are there, choose one of them and Continue.
In a moment, everything will set up for you.
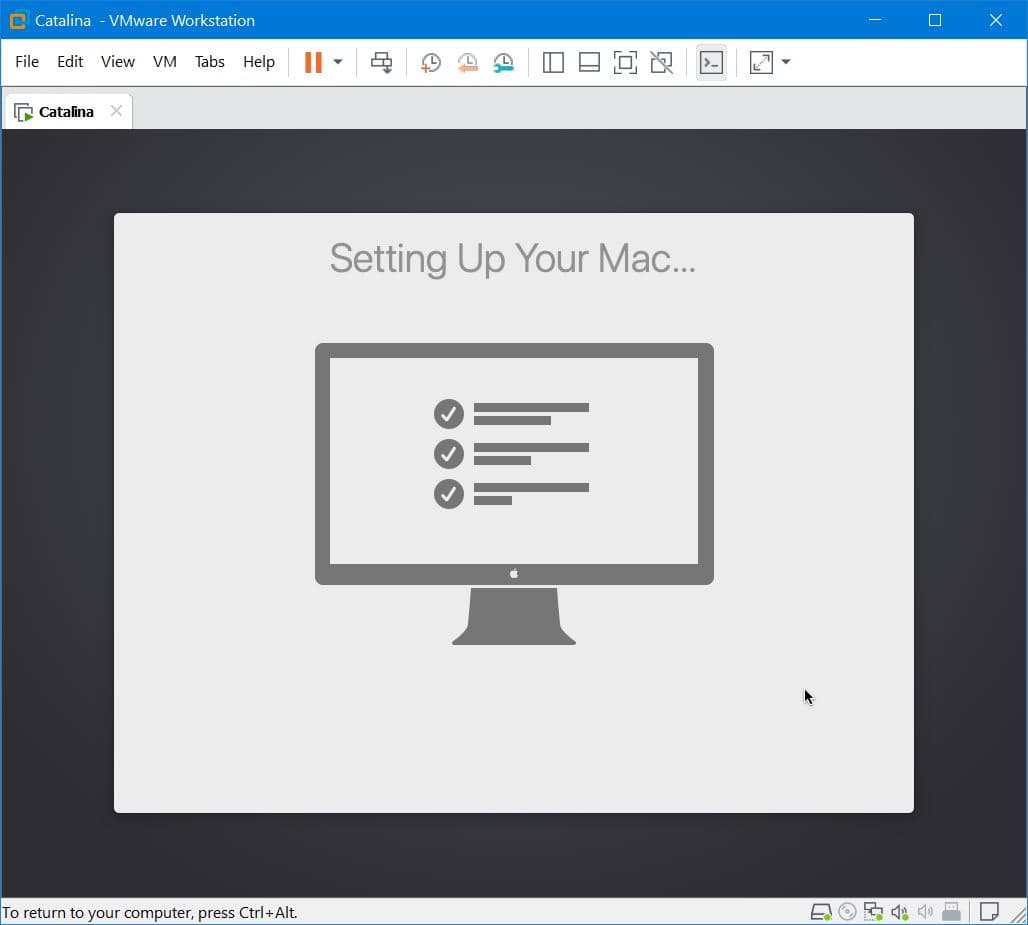
With that done, you’ve eventually installed macOS Catalina on your Windows computer.
How to share folders on VirtualBox & Vmware? (Windows-MAC) Step by Step Guide
Optional Step: Install VMware Tools on macOS Catalina
With all that out of the way, there’s one last thing you’ll need to do before you can completely start working into it. That is installing VMware Tools. This is likely the easiest part of the entire process.
Don’t worry, it won’t be very tricky. Here’s step by step how to do it.
- Install VMware Tools on macOS Catalina
One More Step: Take A Snapshot
Once you’ve done that, you’re completely free to do whatever you had planned for. As a rule of good practice, it’s always best to take a backup which is incredibly easy on a virtual machine, here how to do it.
- How to Take & Use Snapshots on VMware

In case, if you would like to speed up the macOS Catalina’s performance, you’re good to go.
- How to Speed up macOS on Virtual Machine
In between, if you encounter errors when installing, you may want to fix it with the instructions.
- How to Fix macOS Catalina Problems & Errors on VMware
So there you go! That’s the newest version of macOS installed on your computer. When there’s a newer update, you can always update your Catalina to the latest version.
With that, we’ve the video tutorial that explains and shows how to install macOS Catalina on VirtualBox on Windows PC.
OK, that’s enough for the installation. If you find it interesting or would like to add something here, I’d be interested to hear your thoughts.
Install macOS Catalina on VMware on Windows PC – Video
https://youtu.be/BrlBoXELAO0
macOS Big Sur is the latest operating system released by Apple for their Mac computers, first introduced in June 2020. It is the successor to macOS Catalina and features several new updates and improvements, including a redesigned user interface, enhanced privacy features, and improved compatibility with iOS devices. One of the most notable changes in Big Sur is the redesigned user interface. The icons, menus, and windows have been updated with a fresh and modern look, with translucent backgrounds and rounded corners. The Dock has also been updated with a new design and features, such as the ability to see recently used apps.
Another critical feature of macOS Big Sur is its improved privacy protection. It now requires apps to ask for permission before accessing sensitive information, such as your location, camera, or microphone. Additionally, Safari has been updated with new privacy features, including a Privacy Report that shows which trackers have been blocked.
Regarding compatibility, Big Sur is designed to work seamlessly with Apple’s other devices. It supports new features like Continuity, which allows you to use your iPad or iPhone as a second display or input device for your Mac. It also includes support for Universal apps, which run natively on both Macs with Apple silicon and Intel-based Macs.
Other new features in macOS Big Sur include enhancements to Messages and Maps, improvements to the Photos app, and new widgets to the Notification Center. Additionally, the Control Center has been redesigned and now includes quick access to commonly used settings and controls. Overall, macOS Big Sur is a significant update to Apple’s operating system, offering users a more modern and streamlined experience while also improving privacy and compatibility with other Apple devices.
Also, macOS Big Sur is compatible with the following MacBook Machines:
- iMac (Mid 2014 or later)
- iMac Pro
- MacBook (Early 2015 or later)
- MacBook Air (Mid 2013 or later)
- MacBook Pro (Late 2013 or later)
- Mac Mini (Late 2014 or later)
- Mac Pro (Late 2013 or later)
- Developer Transition Kit (only up to Big Sur 11.3 beta
By using the patch tools you can install macOS Big Sur on the earlier Mac that doesn’t supports it. Such as iMac 2012, and MacBook Pro 2012. Using the patch tools you can install macOS Big Sur on the old version of MacBook Pro 2008, and iMac Minin 2009.
To install macOS Big Sur on VMware on Windows PC, first, you need to download and install some required files. Such as downloading and installing the VMware Workstation Pro 17/Player on your Windows PC. Download the macOS Big Sur ISO image or VMDK file.
- Download the macOS Big Sur ISO image file
- Download the macOS Big Sur VMDK file
- Download & Install VMware Workstation on your Windows PC
- Edit the macOS VMX file
- Start installing macOS, Big Sur
- Complete the basic settings of macOS Big Sur on VMware
- Install the VMware tools (Full-screen mode, Drag & Drop)
What is VMware?
VMware is an open-source platforms virtualization software application for Windows, Linux, and macOS. VMware is one of the advanced virtualization software that allows you to test several and multiple operating systems at the same time on a single physical machine. For example, you can install Windows, macOS, Windows, Linux, & Android OS on VMware on your Windows PC. So, VMware Workstation comes with two different versions, such as VMware Workstation/Player. If you want to test the VMware Workstation Pro on your Windows PC, then you have to purchase it. And if you want to use the VMware Player, it’s completely free of cost. So, there are differences between Workstations and Players. As the VMware Workstation comes with full features, and VMware Player features are limited.
And currently, the latest version of VMware Workstation is VMware Pro 17, the VMware Workstation Pro 17 features are excluded more than VMware Workstation Pro 16. And here is the free version in the below down guide.
- How to Install VMware Workstation Pro 17 on Windows 11 PC?
Create A New Virtual Machine on VMware on Windows PC For macOS Big Sur
To create a new virtual machine for macOS Big Sur on VMware on Windows PC, simply open up the VMware Workstation on the first window and click on create a new virtual machine.

When this window opened select the typical recommended then click next, Select the option “I will install the operating system later” and click next.

Select the guest operating system, Mac OS X, and version macOS 11 then click next. Type the name of the virtual machine, then specify the location, and click next.

Select the maximum disk size for macOS Big Sur, then select “Store virtual disk a single file” and click next. Now you are ready to create the virtual machine so click finish to finalize.

Edit the macOS Big Sur Virtual Machine Settings
Once you have created the macOS Big Sur Virtual Machine on VMware on Windows PC. So, there are a few settings to edit for better performance, simply select the virtual machine and click on Edit virtual machine settings.

When the settings window opened, on the first step, from the left-handed window side select the hardware tab. Then select the Memory tab, and increase the memory size.

Select the processor tab, and increase the number of processors.

Select the CD/DVD SATA tab, then select the Use ISO image file option, and click on browse.

Now select the macOS Big Sur ISO Image file and click open.

Choose the USB Controller tab, then select USB 3.1 and click on OK to save the changes.

Edit the VMX file of macOS Big Sur
You might see lots of changes to the vmx file of other macOS, and macOS Big Sur. Don’t worry there are some extra commands which configure the macOS Big Sur vmx file on VMware on Windows PC. So, to edit the macOS Big Sur vmx file simply close the VMware Workstation.

Now go to the virtual machines folder, find the macOS Big Sur Virtual Machine, right-click on vmx file>and open with notepad.

Once the vmx file is opened, scroll down copy and paste the below down commands, and press and hold ctrl+s to save changes.
smbios.reflectHost = "TRUE"
hw.model = "MacBookPro14,3"
board-id = "Mac-551B86E5744E2388"
smc.version = "0"
Perform a Clean Install of macOS Big Sur on VMware on Windows PC
Once the virtual machine is successfully created for macOS Big Sur on VMware on Windows. And the vmx files are configured, so now it’s time to install macOS Big Sur on VMware on Windows PC. Simply, navigate to VMware Workstation and open then click on “Power on this virtual machine” to start installing macOS, Big Sur.

When the installation is launched on the first window select your language and click on the arrow option.

On the recovery window, selects the disk utility and click continue.

From the left-handed window side, select the VMware Virtual Sata option, then click on erase option. And format the disk with the following parameters.
- Name optional
- Format Mac OS X Extended (journaled)
- Scheme GUID Partition Map

Once the disk is formatted simply click on the done option.

Now simply close the disk utility window.

Now again on the recovery window, select the “Instal macOS” option and click continue.

To set up the installation of macOS Big Sur on VMware simply click continue.

Agree with the terms and conditions of macOS Big Sur.

Select the disk where you want to install macOS Big Sur on it, as this disk is formatted in the previous step on the Disk Utility window.

And now the macOS Big Sur starts installing on VMware on Windows PC. So, the installation may take time, and during the installation, it will start several times.

Complete the Basic Settings of macOS Big Sur
While the installation of macOS Big Sur successfully completed on VMware on Windows PC. There are only a few steps that you have to complete the basic settings in order to use the macOS Big Sur on VMware on Windows PC.
- Select your country and click continue
- Choose a keyboard layout and click continue. If you want to customize the keyboard layout, to add any other language you can add that by clicking on customize settings.
- You can turn on the accessibility options feature on macOS Big Sur. There are multiple options for accessibility such as Vision, Motor, Hearing, and Cognitive. So if you don’t want to use this feature click on the Not now option.
- Read the Data & Privacy then click continue.
- On the migration assistant page simply click on the not now option.
- You can enter the Apple ID on this window, So, there is no need to enter the Apple ID simply continue by clicking on the Set up later option.
- Click agree to agree with the terms and conditions of macOS Big Sur.
- If you want to use the express setup, so if you don’t want simply click continue.
- On the Analytics window simply click continue.
- On the Screen-time window click to set up later.
- Select the look for macOS Big Sur on VMware on Windows PC.
- And finally, the macOS Big Su is successfully installed on VMware on Windows PC.
There is a related guide to installing macOS Ventura, and macOS Monterey, on VirtualBox & VMware on Windows PC. In the below down guide links.
- How to Install macOS Big Sur Final on VirtualBox on Windows PC?
- How to Install macOS Ventura 13 on VMware on Windows PC?
- How to Install macOS Ventura 13 on VirtualBox on Windows PC?
- How to Install macOS Monterey Final on VirtualBox on Windows PC?
- How to Install macOS Monterey Final on VMware on Windows PC?
Fix macOS Big Sur screen resolution on VMware on Windows PC
- Fix macOS Big Sur Screen Resolution on VMware on Windows PC
Conclusion
Finally, macOS Big Sur is successfully installed on VMware on Windows PC. And the only thing just remains in this part is to use macOS Big Sur full-screen mode. And the next thing is to have the access to drag & drop feature between Windows and macOS on VMware. You can fix this issue by installing VMware Tools on macOS Big Sur.
In this article, we will examine how to set up and configure macOS Ventura 13 on a new virtual machine using VMware Workstation 17 Pro on the Windows 11 operating system.

How to Run macOS Ventura 13 in a Virtual Machine on Windows 10 or Windows 11 using VMware 17 Pro
Apple released macOS Ventura, the next most current operating system for Macintosh computers, after macOS Catalina, on October 24, 2022, after announcing it at WWDC on June 6, 2022.
Apple’s addition of a name to each macOS version is a popular approach for the sake of being memorable. As with the old versions, the name Ventura was determined from a region in California for the 13 version.
Apple has improved the rounded corners icons and windows in the user interface for Ventura, giving it a more transparent and smoother look. It also supports GIF or video content in order to increase user interaction in the messages application.
With the release of Ventura, Apple now fully supports ARM processors, with silicon chips developed for its own operating system instead of the x86/64 instruction set. With the M1/M2 processors it has produced recently, it has achieved longer charging times and system performance compared to Intel and AMD‘s processors.
Users with iMac, MacBook, or MacBook Pro computers can download the Ventura 13 update from the Apple Store and easily update their system. If you do not know how to update using the Apple Store, you can take a look at this article.
If you do not have a Mac computer, you can install macOS 13 on a host computer with Windows 10 or Windows 11 with the VMware Workstation Pro virtualization program and experience Apple’s new system.
Normally you cannot install an Apple operating system on VMware Workstation because the program has no support for Apple OS systems. However, you can enable this support and unlock macOS using VMware Unlocker.
You can also unlock Apple Mac OS X using Unlocker software on both Windows and vSphere ESXi.
How to Create a New Virtual Machine for macOS Ventura
After installing VMware on your Windows 11 host computer, in order to install a guest macOS operating system, you need to use the Unlocker tool, as we mentioned, and set the VM’s settings correctly.
Step 1
After opening VMware Workstation 17 Pro, open the wizard by clicking on the Create a Virtual Machine option that you see on the main screen. After opening the New Virtual Machine Wizard, select Custom (Advanced) to better configure the settings of the virtual machine and click Next.

Step 2
In the Choose the Virtual Machine Hardware Compatibility window, select the latest version of VMware Pro installed on your computer. If you are trying to install an older system version and get an error, you can downgrade the Workstation version from the compatibility section.

Step 3
In the Guest Operating System Installation window, you can select the type of media you will use for system installation. To install with your host’s physical DVD drive, you can choose your installation media from the Installer Disc section or add the ISO image you downloaded to your computer from the Installer Disc Image section to the virtual machine.
When you add the ISO file to the virtual machine at this stage, the type and settings of the macOS virtual machine will be automatically determined by the image you add. This process may not be suitable for installation, so select I will install the operating system later and continue to configure the settings manually.

Step 4
In the Select a Guest Operating System window, you can select the operating systems of Microsoft Windows, Linux, ESX or other platforms, but you will see that there is no Apple Mac OS X here.
When you try to install macOS on the virtual machine, you will see that there is no support for Apple Mac OS X systems. So you need to enable macOS support with Unlocker.
In this window, click the Cancel button to close the virtual machine creation wizard and then close your VMware Workstation program completely.

Step 5
Download VMware Unlocker to your computer, and then extract the zip file to the folder and run the win-install.cmd file in the folder as an administrator.

Step 6
After running the Unlocker tool, some files of the VMware program will be automatically organized and backed up. In addition, VMware Tools (Darwin.iso) will start to download, allowing you to use the Apple operating system more efficiently on your host.
NOTE: If the VMware Tools file cannot be downloaded, you can download the relevant file to your computer by visiting this article.

Step 7
After unlocking macOS, you can see that Apple Mac OS X support is enabled this time in the guest operating system selection window.
After selecting the Apple Mac OS X platform, select macOS 13 from the Version section and click Next.

Step 8
Type the name of the system you will install on the virtual machine and if you want to change the installation location, you can specify the location on an external disk via the Browse button.
If the type of your host disk is SSD or NVMe, you can continue without changing the installation location for the performance of the guest machine.

Step 9
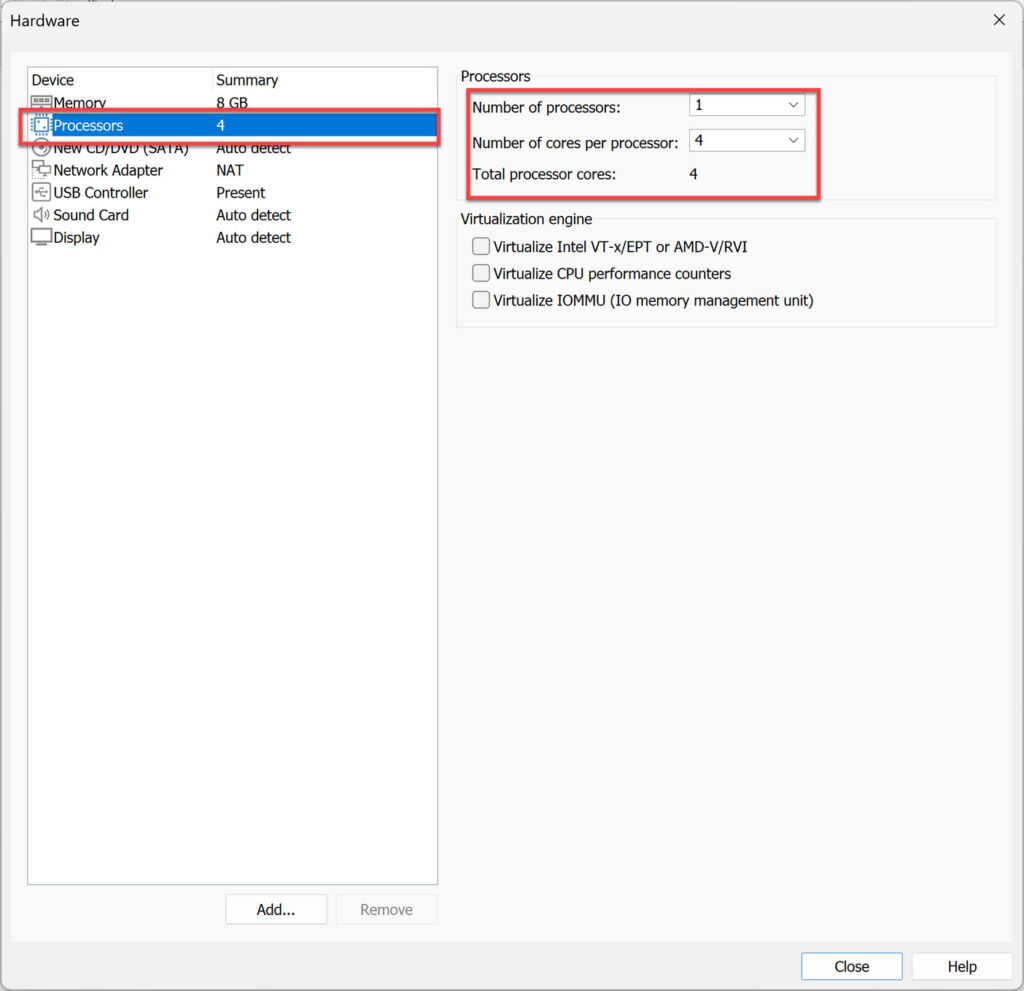
In the Processor Configuration window, you can increase the number of virtual processor cores in accordance with the hardware performance of your host computer. Increasing the number of processors can cause the virtual system to not work stable, so you need to find the most suitable value for the macOS guest operating system.

Step 10
Likewise, configure a suitable memory value for the macOS VM depending on the RAM capacity of your host computer. If your system has 16GB of RAM, you can allocate 8GB of memory size to the VM.

Step 11
In Network Type settings, use NAT to connect the virtual computer to your local network. If you don’t need Internet connection in the VM, you can choose Host-Only or choose not to use any network adapters.

Step 12
Proceed with LSI Logic, which is recommended and selected by default in the I/O Controller types window.

Step 13
In the Disk Types window, you can select the virtual PC’s disk as IDE, SCSI, SATA or NVMe, but you need to find out if the system you are going to install has support.
Since macOS Ventura is an up-to-date operating system and supports new technologies, you can significantly increase the performance of the virtual machine by choosing the NVMe disk type.

Step 14
In the Select a Disk window, you can create a new virtual HDD for the virtual computer, add an existing disk file, or mount your physical disk directly to the VM.
For a clean macOS installation, select Create a new virtual disk and click Next.

Step 15
In the Specify Disk Capacity window, change the size of the virtual disk for Ventura to 100 GB and choose to backup the virtual disk to be created as a single file on your host.
If you are using an old mechanical disk type on your computer, you can allocate 100 GB of disk space for the VM from your host disk with the Allocate all disk space now option. If you continue without selecting this option, if the virtual machine needs disk space, the required space will be automatically allocated from your host disk.

Step 16
If you want to back up the virtual disk file to a location other than the virtual machine configuration files, you can select the relevant location in this window. When you install more than one virtual machine on your computer, do not change the location of the disk file, as virtual disk files in different locations may cause confusion.

Step 17
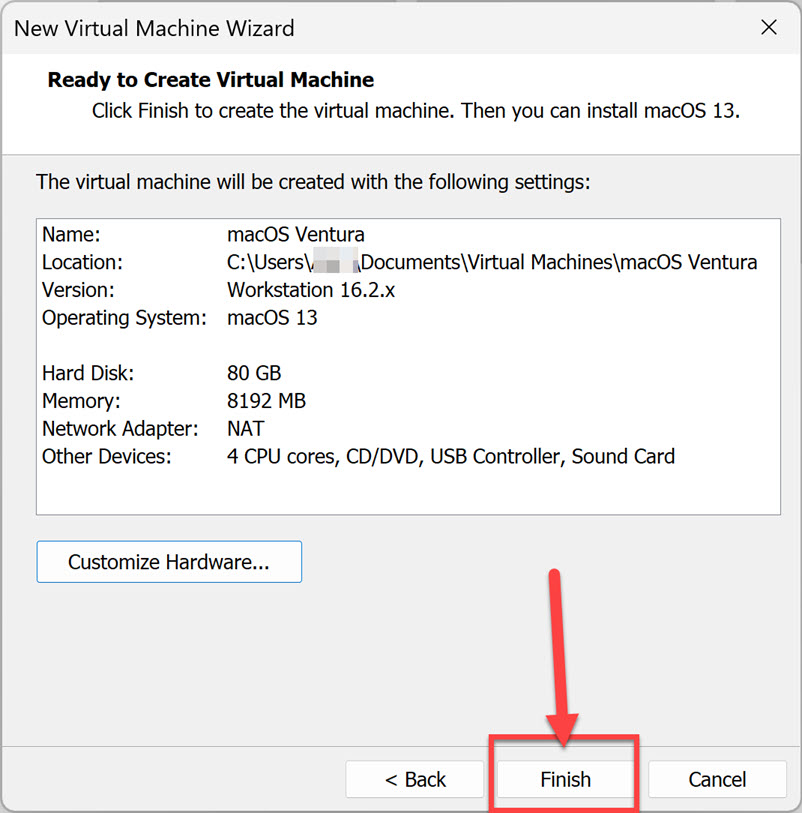
When the virtual computer is ready to be created, you will be greeted with a summary window like the one below. After checking all the settings you have made for the VM in the summary window, click the Customize Hardware button.

Step 18
View the processor settings of your macOS virtual system and enable the “Virtualize Intel VT-x or AMD-V/RVI” option from the Virtualization Engine section.

Step 19
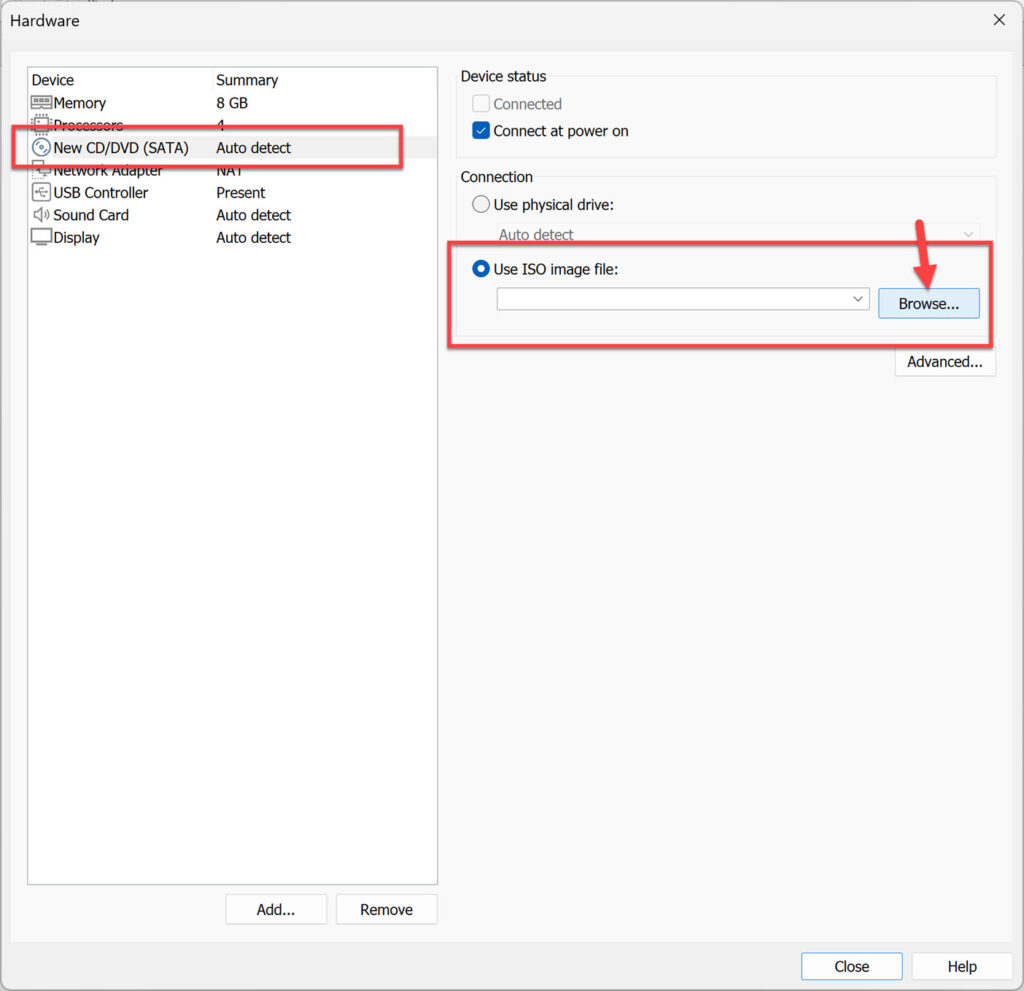
To add the macOS Ventura ISO file to the guest system you created, in the hardware settings window, select the Use ISO Image File option on the CD/DVD (SATA) device and click Browse.
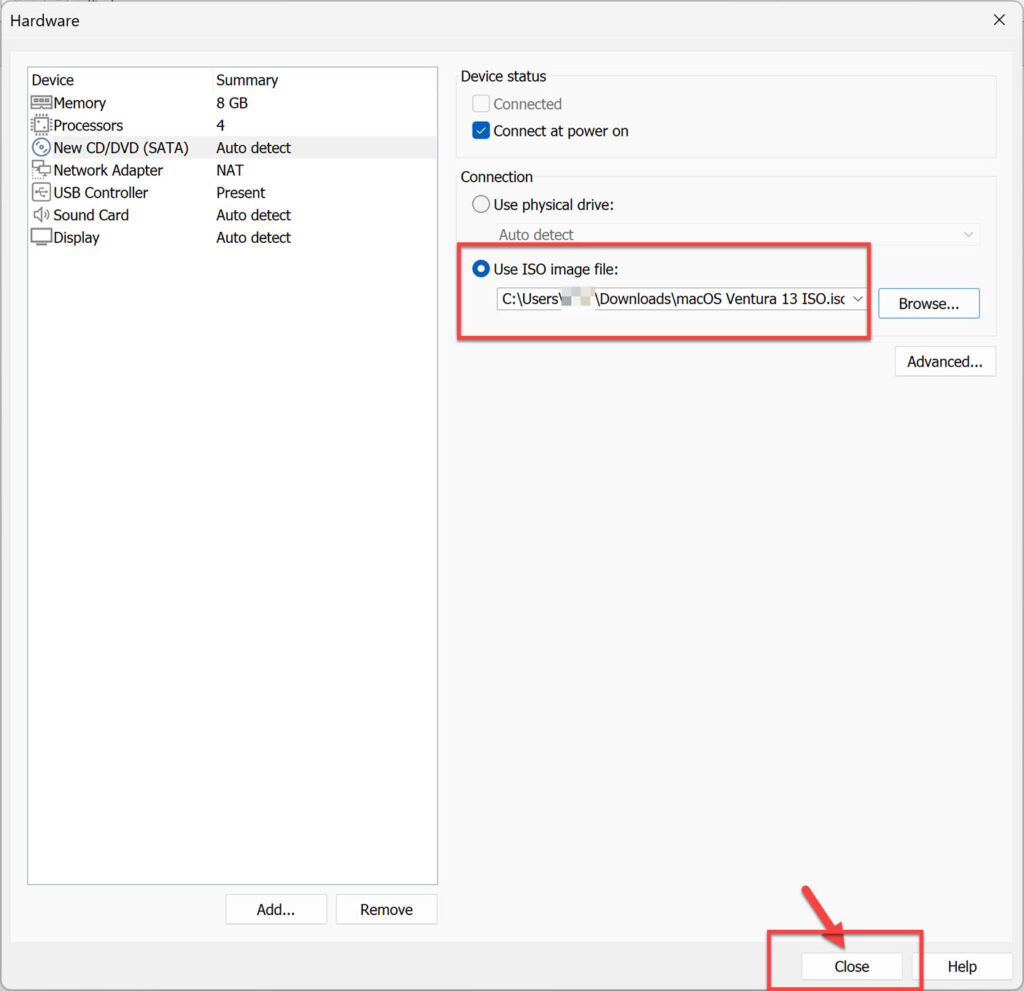
Select the macOS 13 ISO file you downloaded to your computer and click Open.

Step 20
After adding the macOS image file to the guest machine, disable the “Accelerate 3D Graphics” feature in the Display settings and close the window.

Step 21
Close the summary window of the Guest virtual PC and continue.

Step 22
Before running the Ventura virtual machine and starting the installation, you need to add codes to its VMX file. Right-click on the VM you created from the Library section of Workstation Pro, and then click Open VM Directory.
Open the macOS.vmx file with Notepad and save the file after adding the following codes.
smbios.reflectHost = "TRUE"
hw.model = "MacBookPro14,3"
board-id = "Mac-551B86E5744E2388"
smc.version = "0"
If you have an AMD processor host, add the bottom codes to the VMX file and save it.
smc.version = "0"
cpuid.0.eax = "0000:0000:0000:0000:0000:0000:0000:1011"
cpuid.0.ebx = "0111:0101:0110:1110:0110:0101:0100:0111"
cpuid.0.ecx = "0110:1100:0110:0101:0111:0100:0110:1110"
cpuid.0.edx = "0100:1001:0110:0101:0110:1110:0110:1001"
cpuid.1.eax = "0000:0000:0000:0001:0000:0110:0111:0001"
cpuid.1.ebx = "0000:0010:0000:0001:0000:1000:0000:0000"
cpuid.1.ecx = "1000:0010:1001:1000:0010:0010:0000:0011"
cpuid.1.edx = "0000:0111:1000:1011:1111:1011:1111:1111"
smbios.reflectHost = "TRUE"
hw.model = "MacBookPro14,3"
board-id = "Mac-551B86E5744E2388"
Step 23
After adding the necessary codes to the Ventura.vmx file and saving the file, run the virtual computer.

How to Install macOS Ventura
After creating a new virtual machine for macOS with VMware up to this stage, you can now start the system setup.
Step 1
After running the macOS virtual computer, wait for the system to boot when you see the Apple logo.

Step 2
Choose which system display language you will use the macOS operating system with and continue.

Step 3
When the Recovery screen appears, open Disk Utility as you need to format the virtual disk before installation.

Step 4
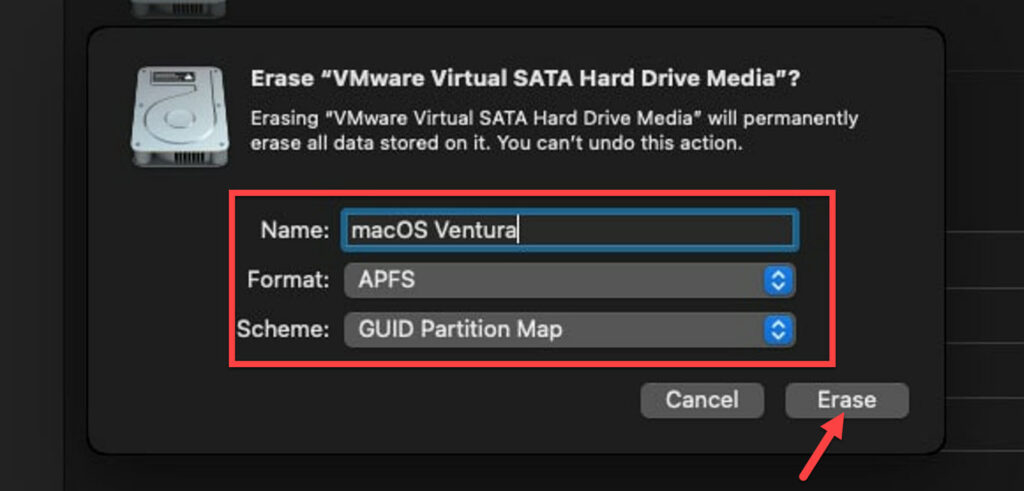
Select VMware Virtual NVMe Disk Media on Disk Utility and click the Erase button. To format the selected disk, type any disk name in the Name field in the window that opens, and then select the APFS format and click the Erase button again and wait for the process to complete.
- Name: macOS
- Format: APFS
- Scheme: GUID Partition Map

Step 5
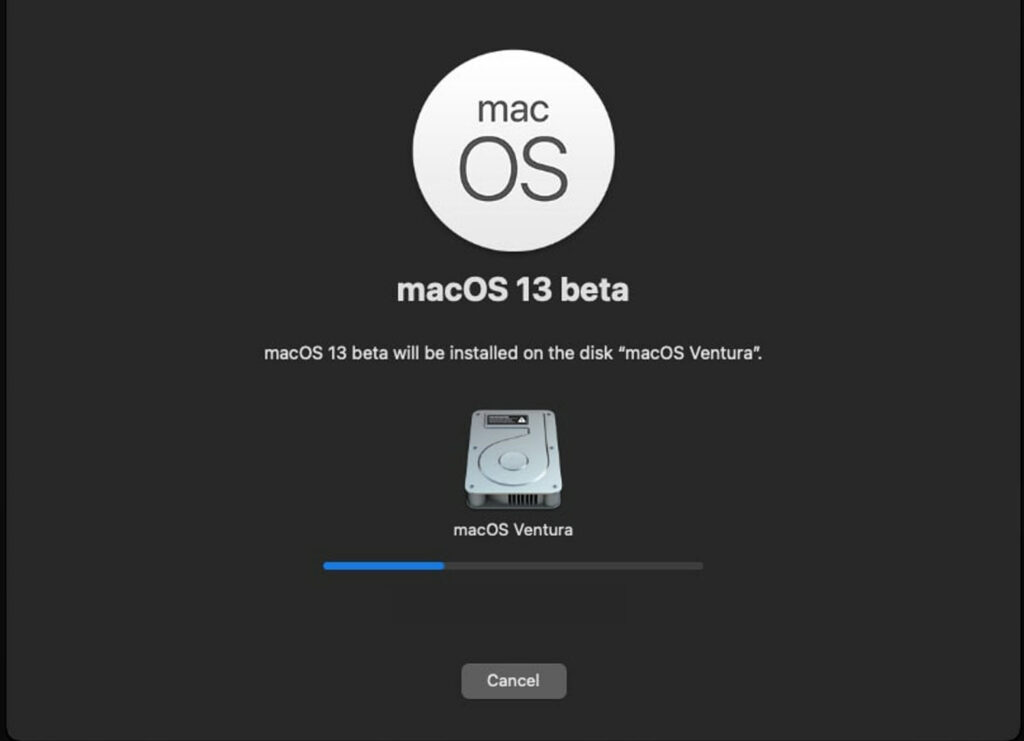
After formatting the virtual disk, select Install macOS Ventura and click Continue to start installing the system.

Step 6
Click Continue again to start the macOS installation.

Step 7
Accept the license agreement to continue installing the macOS software.

Step 8
Select the virtual disk you formatted and click Continue.

Step 9
Wait while the setup wizard copies the system files to the macOS disk. The progress bar says approximately how long it will take, but this may take less time depending on the performance of your host computer.

Step 10
After the system files are copied, your guest virtual system will restart and continue to operate on the Apple logo.

Step 11
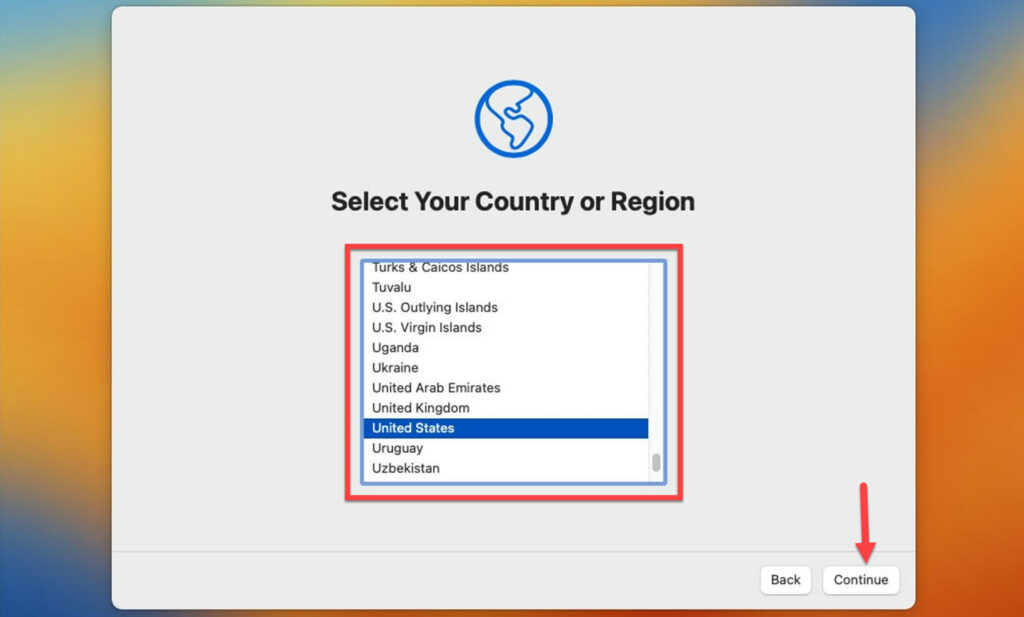
After the necessary files are copied, select the country you live in and click Continue when the Select Your Country or Region screen appears.

Step 12
On the Written and Spoken Languages screen, you can change the system language, keyboard layout and system robot voice you want to use in your system.

Step 13
You can customize your system according to your personal needs in the Accessibility settings. For example, you can use the VoiceOver screen reader to speak text in files, web pages, or appearing on the screen.

Step 14
On the Data & Privacy screen, Apple clearly states that it uses minimum personal information of users and respects human rights. The collection of your personal data is only aimed at improving Apple services and enhancing the user experience.

Step 15
You can transfer your files and documents from another Mac or Windows computer to the guest machine. You can transfer data later to get a system experience from scratch.

Step 16
If you want to use iCloud, App Store and other Apple services on the Sign In with Your Apple ID screen, you can log in. If you do not have an account, you can also create a new Apple account on this screen.

Step 17
After reading the macOS software license agreement on the Terms and Conditions screen, accept it.

Step 18
Create a new computer account for your virtual system and select your profile picture.

Step 19
You can allow and disallow data usage to enhance personalized user experience for Apple maps and other services. This decision is entirely personal, but you can share your data and location information with Apple to help further improve macOS.

Step 20
On the Time Zone screen, select the zone where you live or closest to you and continue.

Step 21
Likewise, by sharing the crash and usage data you encounter in the applications you use with the application developers, you can help them develop their own applications more for users.

Step 22
Screen Time allows parents to have more control of the system over their children of all ages. It also allows to review the time spent on apps and web pages. To configure these settings in detail later, click Set Up Later and continue.

Step 23
You can select the theme you want to use on your Ventura system on the Choose Your Look screen. Apple has offered users three different theme skins: Light, Dark, and Auto.
If you choose to use the Auto view, your system’s view will automatically turn light or dark depending on the time zone of the country you live in.

Step 24
After adjusting the system settings, clicking the Apple logo, you can find out your macOS version via About This Mac.

How to Install VMware Tools
After installing macOS Ventura with VMware, you need to install VM Tools in order to use your guest virtual system in full screen resolution and more performance.
For macOS guest machines, you do not need to download the VM Tools ISO file from anywhere. Because when you use the Unlocker tool, the VM Tools (Darwin.iso) file will be downloaded to your computer.
Step 1
In macOS virtual PC, go to VM / Removable Devices / CD/DVD (SATA) in the tool menu and click Settings.

Step 2
After changing the status of the CD/DVD device to Connected, add the Darwin.iso file in the Unlocker/Tools folder to the VM.

Step 3
After the ISO image is mounted on the VM, double-click Install VMware Tools and start the installation.

Step 4
In the VMware Tools Installer window, click Continue to continue the installation.

Step 5
VMware Tools will use 7.6 MB of disk space on your virtual disk. Do not change the installation location and click the Install button directly for standard installation.

Step 6
When the installation starts, type your user account password to authorize the wizard and click the Install Software button.

Step 7
This time, when you encounter the System Extension Blocked warning, click Open Security Preferences.

Step 8
Click the Allow button next to the “System software from developer VMware, Inc. was blocked from loading” warning.

Step 9
Click Not Now in the window informing you that you need to restart your system for the new system components to take effect.

Step 10
After the VM Tools installation on macOS is successfully completed, restart your system.

Step 11
Check that your guest system is available in full screen resolution on VMware and also that the graphics memory is 128 MB instead of 3 MB.

Step 12
In order to use your guest machine in full screen resolution depending on the screen of your host, click View / Full Screen from the Workstation tool menu.

Step 13
When you try to transfer a file by dragging and dropping a file from the Windows 10 host machine to the macOS guest machine, you will get the vmware-tools-daemon error. Click Open System Preferences to resolve this error.

Step 14
To make changes to the security and privacy settings, unlock the system again and enable the vmware-tools-daemon component in the Accessibility section.

Step 15
When you try to transfer a file from your host to the VM again after allowing the VMware-tools-daemon component, you can see that the operation will be successful as in the image below.

How to Check Internet Connection
After making all the settings on your Guest macOS computer, it is useful to test the Internet connection. Otherwise, you will not be able to install new updates on your system or install the applications you want to use.
Step 1
To run Terminal, press Windows Key + Space together, type terminal in the search bar that opens and run it.
To ping on macOS, execute the command ping -c 2 www.google.com in the terminal. If you see the TTL=128 value in the ping output, it means you can access the Internet.

Step 2
When the ping is successful, open the Safari web browser on your Mac virtual computer and test your connection by visiting the Google homepage.

How to Use USB Flash Memory
You can use your USB flash drives in a virtual machine you have set up in VMware Workstation 17 Pro software. As soon as the host inserts a USB disk into your computer, the new device detected by the program window opens, you can easily plug your device into the VM or the host.
Step 1
Insert a USB flash disk into your Windows 10 host computer and when the New USB Device Detected window opens, select the Connect to a virtual machine option, select your virtual machine and click OK.

Step 2
You cannot use an NTFS formatted flash drive on macOS. So you need to format your USB stick as ExFAT. After opening Disk Utility, right-click on your flash disk from the External section and click Erase.
In the disk formatting window, type any name in the Name field and select ExFAT from the Format field and click the Erase button again.

Step 3
After formatting your flash disk as ExFAT, you can now transfer your data to it.

Step 4
Disconnect your flash disk attached to the macOS VM and connect it to the host this time. The purpose of this is to test that the data transferred to the flash drive on macOS can be viewed through Windows.

Step 5
When you view the contents of your flash memory through My Computer on your Windows 10 host, you can see the folder named Backup created in the VM.

How to Improve the Performance of a macOS Guest Machine
Unfortunately, even if you run the macOS operating system virtually, you will not be able to use some of your applications or games because it does not support 3D graphics. This is because there is no 3D graphics support for macOS by the virtualization software used.
By installing VMware Tools on the guest machine, you can increase the graphics memory from 3 MB to 128 MB, but this will not work for you even if you have a new generation computer.
At the very least, it may be ideal for software developers or people who want to experience Apple systems. For example, you will experience performance issues when using the latest version of macOS with a VM, even on Intel’s 12th or 13th generation processors.
For this reason, changing the visual effects of your system, adjusting the menu transition effects or lowering the screen resolution may affect the system performance a little.
You can quickly change system settings using the codes listed below, but don’t forget to back up your system with the snapshot beforehand!
- Quick Access to the Dock
sudo defaults write com.apple.dock autohide-time-modifier -float 0.15- Turning Off Visual Effects
sudo defaults write com.apple.finder DisableAllAnimations -bool truesudo defaults write com.apple.finder InitialSpringBoardDelay -float 0- Disabling Spotlight Search
sudo mdutil -a -i off- Shorten Delay in Visual Effects
sudo defaults write -g com.apple.mouse.scaling -float 5.0sudo defaults write -g com.apple.trackpad.scaling -float 5.0sudo defaults write -g InitialKeyRepeat -int 15sudo defaults write -g KeyRepeat -int 2- Window Sensitivity Settings
sudo defaults write com.apple.driver.AppleBluetoothMultitouch.trackpad TrackpadThreeFingerDrag -bool truesudo defaults write com.apple.driver.AppleBluetoothMultitouch.trackpad TrackpadThreeFingerHorizSwipeGesture -int 0sudo defaults write com.apple.driver.AppleBluetoothMultitouch.trackpad TrackpadThreeFingerVertSwipeGesture -int 0- Increasing Drag Speed
sudo defaults write -g com.apple.trackpad.scaling 2.5sudo defaults write NSGlobalDomain NSWindowResizeTime -float 0.001- Lowering the Resolution
sudo /Library/Application\ Support/VMware\ Tools/vmware-resolutionSet 1920 1080- Turning Off Visual Effects to Reduce CPU Load
sudo defaults write com.apple.universalaccess reduceMotion -bool true- Turning Off Visual Effects in Safari
sudo defaults write com.apple.Safari WebKitInitialTimedLayoutDelay 0.25- Disabling Bluetooth
sudo defaults write /Library/Preferences/com.apple.Bluetooth.plist ControllerPowerState 0- Turning Off Menu Transition Effects
sudo defaults write NSGlobalDomain NSAutomaticWindowAnimationsEnabled -bool falseInstalling Old Versions
Related Articles
♦ How to Run macOS with VirtualBox
♦ How to Run macOS with ESXi
♦ How to Run VMware Fusion
♦ How to Use PlayOnMac
♦ How to Use Wine in Mac
Have you yet heard about the new Mac operating systems, macOS Ventura or macOS 13? Do you want to install it on your Windows 10 or 11 PC? If that’s what you’re looking for, you’ve come to the perfect place. This article will show you how to install macOS Ventura on VMware on a Windows 10/11 PC or laptop.
At its annual Worldwide Developers Conference, Apple unveiled macOS Ventura, the latest version of its desktop operating system. This fall, macOS Ventura, also known as MacOS 13, will be released with a slew of new features for desktop and laptop computers. The following are some of the features:
- Rich Results in Spotlight, a new feature in macOS Ventura, enables you to do actions directly from search results.
- Apple has also released an update to Safari. Using Tab Groups, friends and relatives can see what other people are looking at in real time.
- Apple has also implemented more secure passwords in the form of “Passkeys.”
- One such feature is Stage Manager, which allows you to focus entirely on your app.
- Messages sent recently can be edited or unsend; unread messages can be marked; mistakenly deleted messages can be restored with the latest upgrade to macOS Ventura.
- The Mac Mail app has also seen significant improvements. In macOS Ventura, you can undo a sent email a few seconds later, schedule emails, and set follow-up reminders in one spot.
There are many more features like these available. However, you need to know that macOS Ventura is now only available as a developer beta; testing it on a virtual machine is advised first. Below, we will show you to the steps install it on your Windows PC using VMware:
Table of Contents
We will show you how to install and use macOS Ventura with your Windows PC using VMware Workstation Pro/Player in seven simple steps. The steps are as follows:
- Download and install the required software.
- Enable virtualization on your Windows PC.
- Download and install Workstation Pro/Player on your PC.
- Unlock VMware to Install macOS Ventura on Windows.
- Create a New Virtual Machine for macOS Ventura.
- Edit the macOS Ventura VMX file.
- Install macOS Ventura on VMware on a Windows PC and finally do some basic settings.
Note: macOS Ventura should only be installed on a computer with a solid-state drive (SSD); otherwise, it will run slowly. Also, increasing your computer’s RAM can improve its performance.
Step 1. Download and install the prerequisites
It would help if you did a few things before installing and using macOS Ventura on your Windows PC or laptop. Later on in this tutorial, you’ll be using them. If you’ve already completed the following, you can skip this step. To get started, you’ll need to get the following files:
- Download the macOS Unlocker for VMware.
- Download macOS Ventura ISO.
Step 2. Enable Virtualization on Your Windows PC
Hardware virtualization features present in modern CPUs allow VMware-created virtual machines to run faster than they would otherwise. You must, however, first enable this feature on certain PCs before taking advantage of it. To install macOS Ventura on VMware, you must have virtualization enabled on your PC. Otherwise, you will get the error message “Can’t open a session on the virtual machine.” See the link below to learn more about it and how to enable it on your Windows PC.
=> Enable virtualization on your Windows PC
Step 3. Download and Install VMware Workstation Pro or Player
Before installing macOS Ventura on your Windows 10 or 11 system, you must first install VMware Workstation Pro or Workstation Player on your PC or laptop. VMware Workstation Pro or Workstation Player is a popular hypervisor or virtualization software. It lets professional system administrators or power users run many virtual PCs simultaneously on a single physical computer. We have step-by-step instructions for you if you don’t know how to install them. Please click on the link below.
=> Download and Install VMware Workstation Pro/Player on your PC
Note: You can skip this step if you already have VMware Workstation Pro or VMware Player installed on your computer. However, make sure it is compatible with your system.
Step 4. Unlock VMware to Install macOS Ventura on your Windows PC
As macOS does not show in the guest operating system list by default, we should install the unlocker we downloaded previously. This enables macOS in the list of guest operating systems.
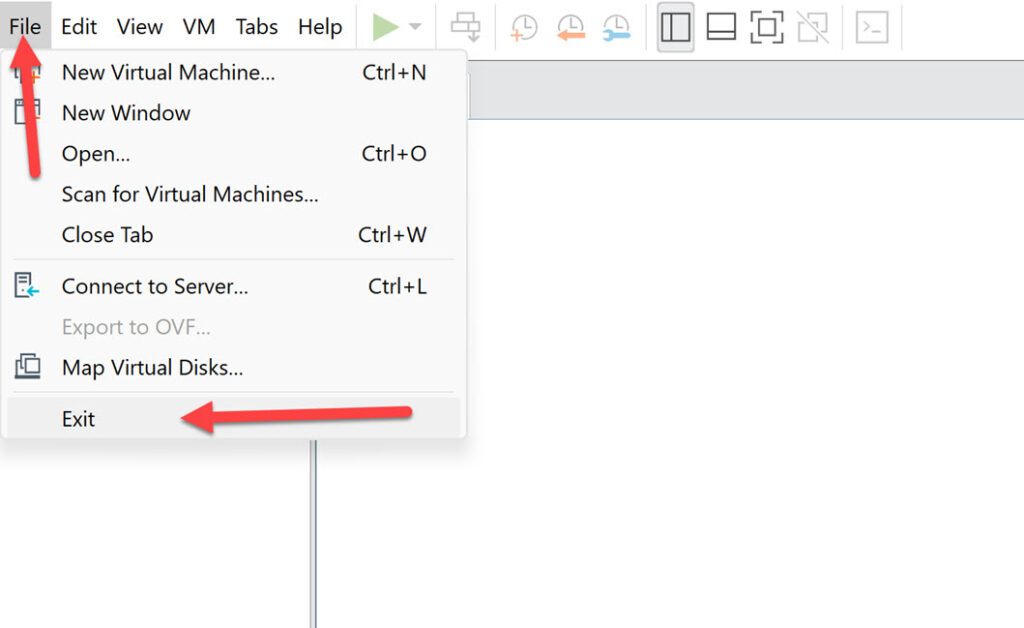
- First, ensure that VMware Workstation Pro/Player is entirely closed; otherwise, the VMware unlocker will not work. To do so, go to the “File” menu and click “Exit.”
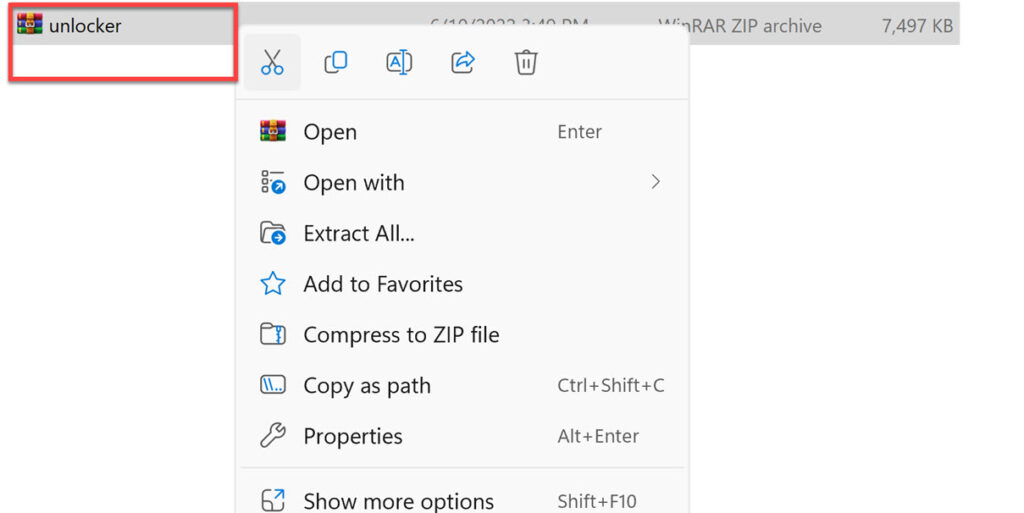
- Next, open and extract the unlocker file.
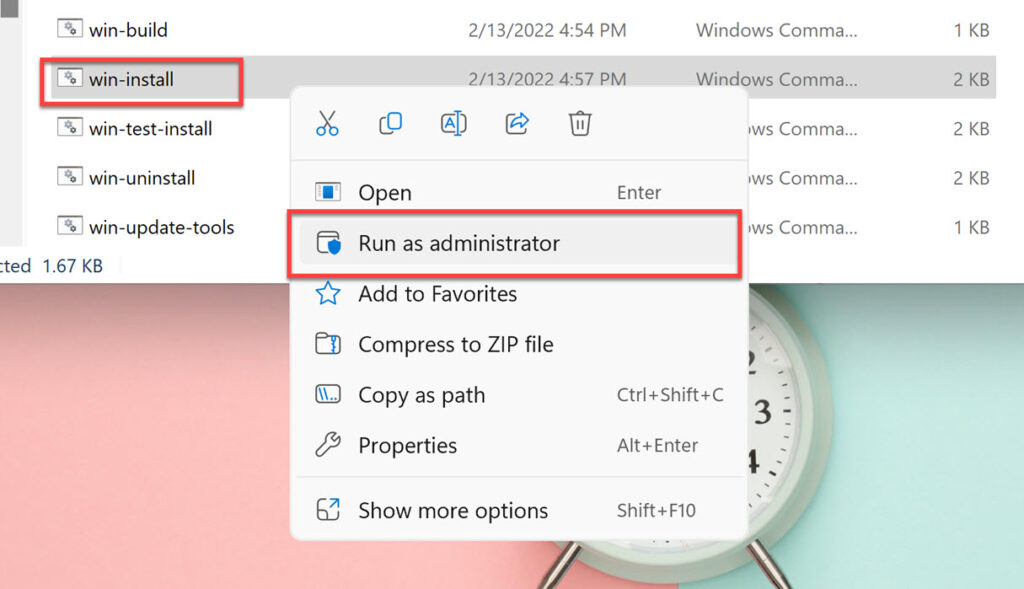
- Right-click “win-install.cmd” and select “Run as Administrator.“
Step 5. Create a New Virtual Machine for macOS Ventura on VMware
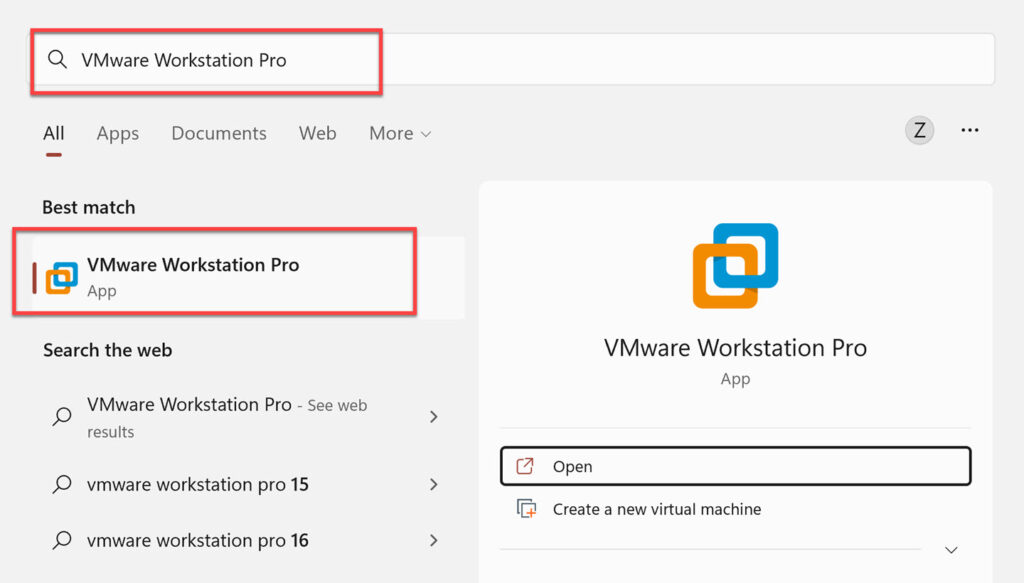
- First, open “VMware Workstation” by searching for it in the Start Menu.
- Next, tap “Create a New Virtual Machine,” or you can use “Ctrl + N” to get to it.
- Then, click on “Typical (recommended)” and tap on “Next” to continue.
- Here, check “I will install the operating system later” and tap on “Next.”
- Now, select “Apple Mac OS X” from the operating system list, tap on macOS 13 from the version drop-down list, and tap “Next.”
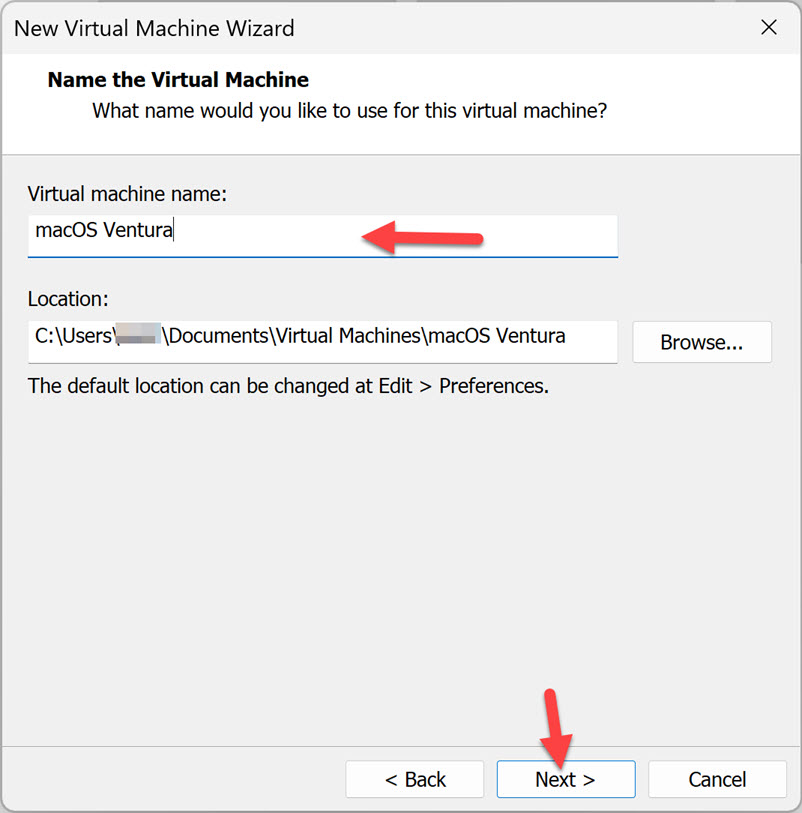
- Now, give your virtual machine a name, such as “macOS Ventura.” Tap “Browse” to pick a place to store virtual machine files, tap “Next,” or leave it as the default.
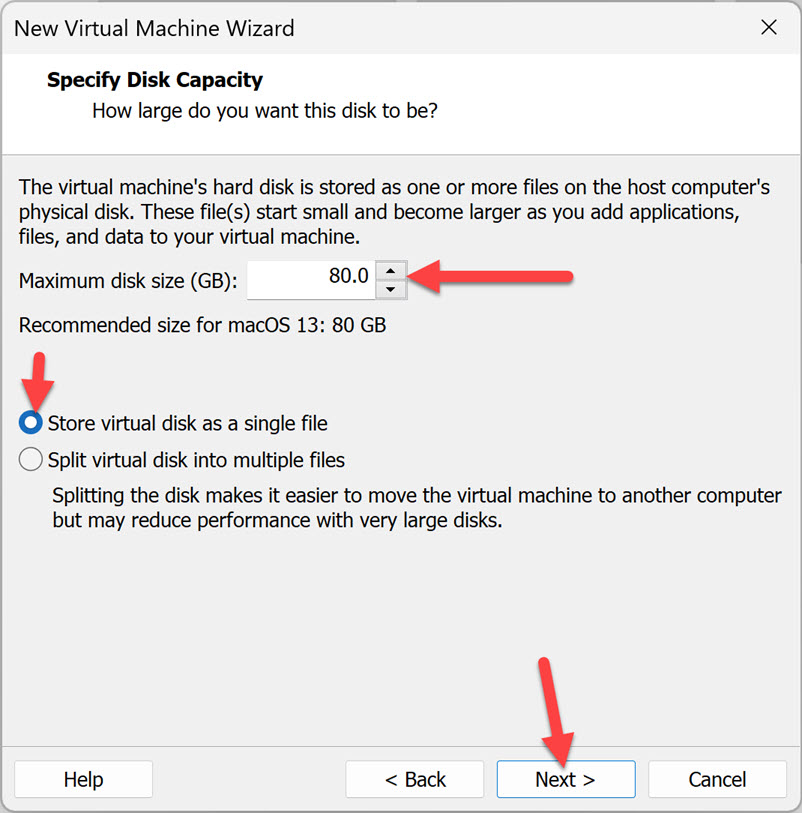
- Next, choose a disk capacity of 80 GB or more, check “Store the virtual disk as a single file,” and tap “Next” to continue.
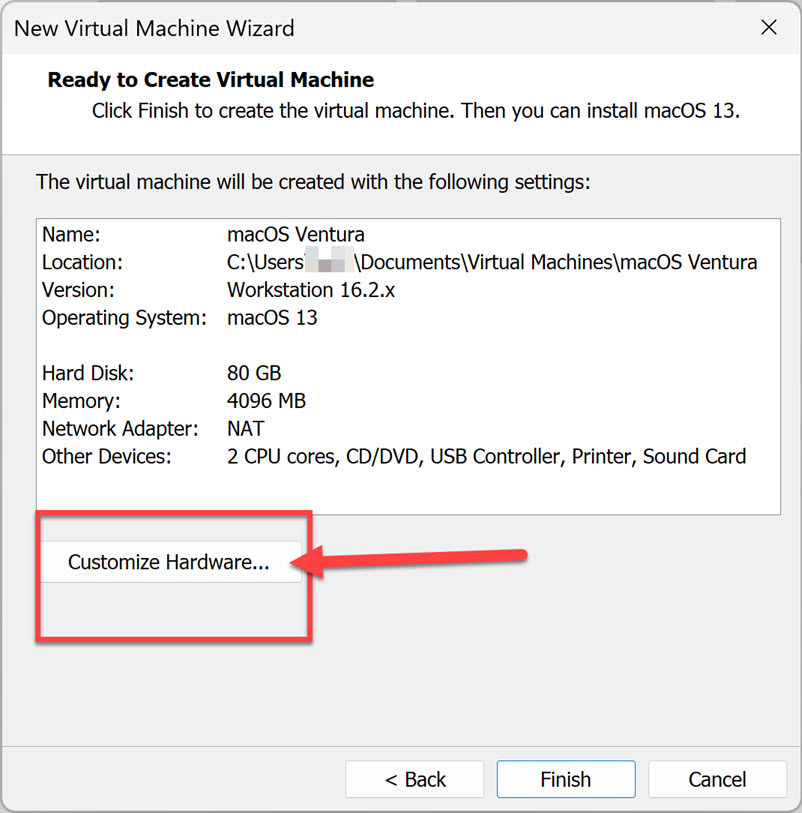
- Then, tap “Customize Hardware” on the Ready to Create Virtual Machine page.
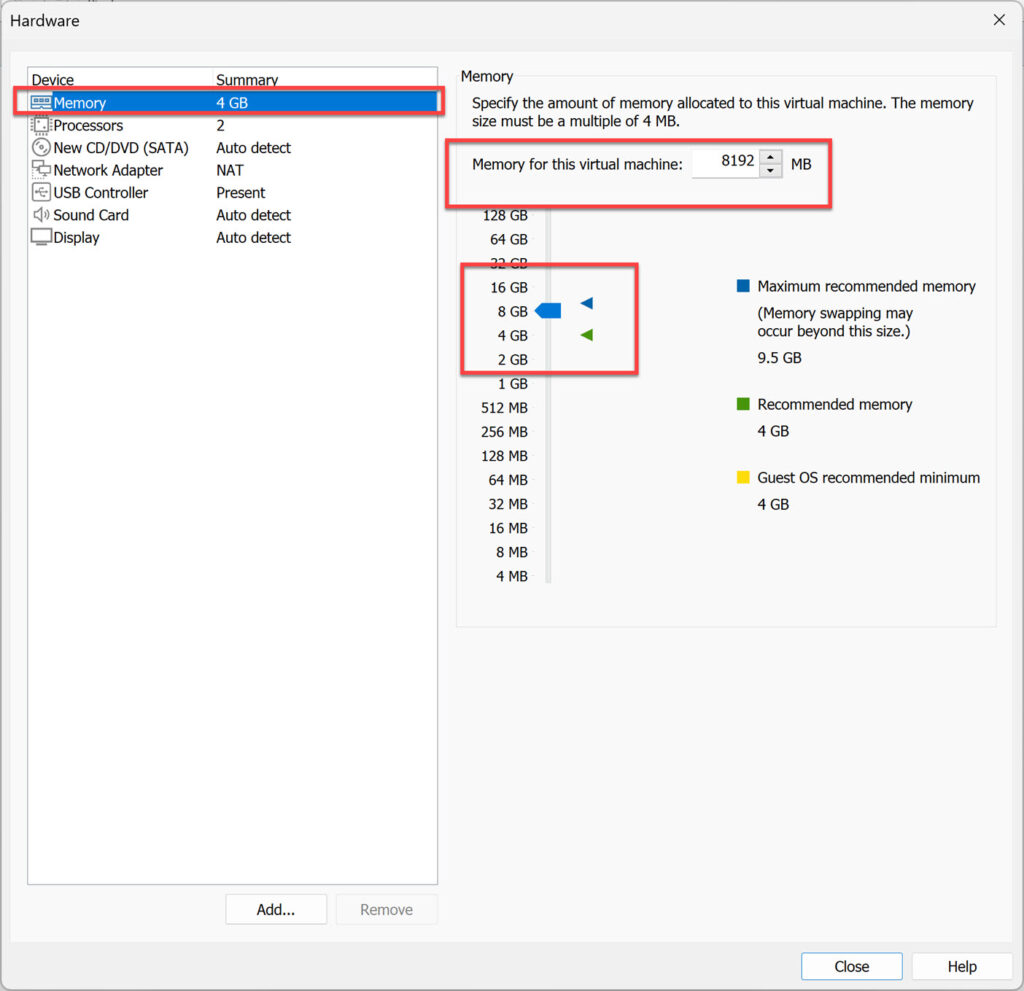
- Here, increase the memory from 4 GB to 8 GB or higher for better performance.
- Next, go to the Processors menu. Then, increase the CPU processor core from 2 cores to 4 or higher cores for better performance for macOS Ventura.
Note: If you want to run macOS Ventura on a Windows PC using VMware, the minimum memory and processor requirements are 4 GB and two processor cores.
- Now, on the left menu, select “New CD/DVD (SATA),” then “Use ISO image file” and “Browse.”
- Find the macOS Ventura (macOS 13) iso file, then click “Open.”

- After adding the macOS Ventura ISO, click “Close” to save all changes.
- Finally, tap “Finish” on the New Virtual Machine Wizard Window.
Step 6. Modify the macOS Ventura VMX file
Go to the virtual machine folder you selected earlier in this instruction to edit the VMX file. If you haven’t specified a new location, the default is Document > Virtual Machine.
- Now, right-click on “macOS13.vmx” and choose “Notepad” or another text editor.
- Add the following code at the bottom of the text.
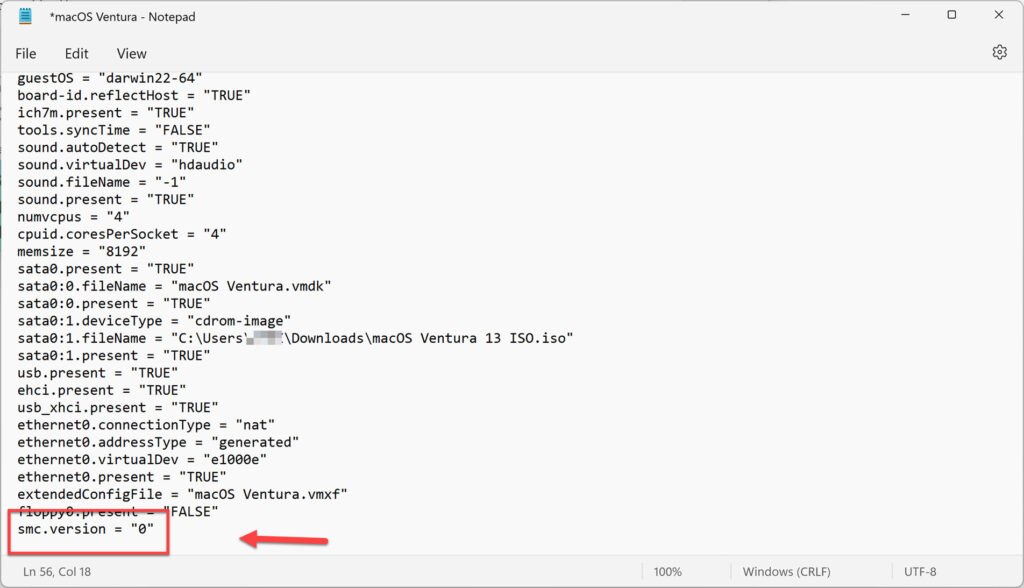
smc.version = "0"
- Finally, go to “File,” and select “Save.” You can close the Notepad now.
Step 7. Install macOS Ventura on VMware on Windows PC
After completing the previous six stages, this is the last step in installing and running macOS Ventura with Windows through VMware. It is now time to install macOS Ventura from scratch on VMware Workstation Pro or Player. So let’s get this installation underway. Follow the steps below to do this:
- Start VMware, then choose “Power on this Virtual Machine” in the macOS Ventura VM panel and wait for it to start.
- Next, on the language screen, choose your preferred language.
- Now, tap on the “Disk Utility” and select “Continue.”
- Next, select “VMware Virtual SATA Hard Drive Media” and click “Erase.”
- Now, type “macOS13HD” for the name, then choose “APFS” from the Format drop-down menu and click “Erase.”
- Tap on “Done” to close the dialogue box.
- Tap “Quit Disk Utility” from the Disk Utility Tab.
- Tap on “Install macOS 13 Beta” and tap on “Continue” twice.

- You must accept the software licensing agreement’s terms and conditions.
- Tap on the available disk, then click “Install.”
- The installation of macOS Monterey will be finished after two or three restarts. Depending on your system, it might take 15 to 30 minutes.
After successfully installing macOS Ventura on VMware on a Windows 10 or 11 PC or laptop, you must configure some basic account settings according to your preferences.
- To begin, choose your chosen language.
- You may now pick your country of residence. Select it so the country’s language can be used with the keyboard.
- With accessibility, you may customize the Mac to your liking. If you need it, enable it; otherwise, skip it.
- Choose “My computer does not connect to the internet” and disregard the internet warning.
- After reading Data & Privacy, click “Continue.”
- We don’t need the migration tool since we are performing a clean installation. You can tap on “Not now.”
- Now, click “Agree with the terms and conditions.“
- Next, create a computer account with a strong password for your privacy concerns and click “continue.”
- Click “Continue” in the Make This Your New Mac window.
- You can go for the “Screen time” option to keep track of your weekly reports, app downtime, or uptime. If you don’t want this feature, hit “Setup later” and go to the next step.
- If you wish to use Siri on your Mac, press “Continue.” Otherwise, uncheck the box next to “Siri.”
- Finally, choose a theme for your macOS Ventura or macOS 13, click “Continue,” and you are all set!
Pro tip: if you want your macOS Ventura to work smoothly and quickly on VMware on your PC, we recommend installing VMware Tools.
Final Words
That is how you can easily and step-by-step install macOS Ventura on VMware on a Windows 10 or 11 PC or laptop. If you have any queries or face any problems, please leave them in the comments area.
Read also:
- How to Install macOS Ventura on VirtualBox on Windows 10/11
- How to Download macOS Ventura VMDK For Virtual Machines
- How to Download macOS Ventura DMG File for Clean Installation