MacOSMojaveOnHyper-V
Установка MacOS Mojave или Catalina на Hyper-V
To english speking
My English-speaking friends, if you need a translation, write me an email koroten@ya.ru or create issues
Цель
Установка MacOS Mojave или Catalina гипервизор Hyper-V и запуск в полностью автоматическом режиме с доступностью хоста из внутренней сети.
Так как основная цель сборка приложений, то мы не учитываем работу с графической подсистемой. Работает сносно, но для постоянной работы лучше купить железо.
Сокращения
- HP — машина на которой установлен Hyper-V
- Ubuntu18 — Виртуальная машина на которой будет разворачиваться KVM
- MacHost — Виртуальная машина MacOS Mojave или Catalina
Ограничения
Данная инструкция подразумевает что ваш процессор поддерживает инструкции VT-x и EPT поэтому будет работать только на процессорах Intel .
Установка
Подготовка
Создайте виртуальную машину со следующими параметрами
- Количество процессоров 4
- Поколение 2
- Количество памяти 8192 Мб
- Размер жесткого диска 80 — 127 Гб
Все остальные параметры выберите по своему усмотрению
На гипервизоре выполните команду в powershell
Set-VMProcessor -VMName <VMName> -ExposeVirtualizationExtensions $true
VMName — в моем случае Ubuntu18
Set-VMProcessor -VMName Ubuntu18 -ExposeVirtualizationExtensions $true
Установка переменных, добавьте следующую строку в файл /etc/modprobe.d/kvm.conf
# /etc/modprobe.d/kvm.conf
echo 1 > /sys/module/kvm/parameters/ignore_msrs
Установка переменных, добавьте следующую строку в файл /etc/sysctl.conf
# /etc/sysctl.conf
net.ipv4.ip_forward=1
Установка пакетов
apt install -y qemu qemu-kvm libvirt0 virt-manager bridge-utils libvirt-daemon-system libvirt-clients uml-utilities libguestfs-tools
Клонирование репозитория
cd ~
git clone https://github.com/kholia/OSX-KVM.git
cd OSX-KVM
Получение образа
Выбираете подходящий, я использовал Mojave
Конвертируете образ
dmg2img BaseSystem.dmg BaseSystem.img
Создаете диск для виртуальной машины
qemu-img create -f qcow2 mac_hdd_ng.img 128G
Создаете сеть для установки, позже мы настроим сеть более вдумчиво
sudo ip tuntap add dev tap0 mode tap
sudo ip link set tap0 up promisc on
sudo ip link set dev virbr0 up
sudo ip link set dev tap0 master virbr0
Запускаете сеть для установки
virsh net-start default

virsh net-autostart default
Итак, все готово для установки.
Отредактируйте скрипт boot-macOS-NG.sh задав значения для памяти сменив -m 3072 -m 8192 в противном случае вы будете ждать очень долго!
Запускайте консоль
После этого процесс установки пройдет в штатном режиме.
Шаги после инсталляции
Установка Clover на загрузочный диск
См. https://artem.services/?p=722
Автостарт виртуальной машины
В папке OSX-KVM
Выполните команду, для замены путей к файлам
sed -i "s/CHANGEME/$USER/g" macOS-libvirt-NG.xml
Выполните импорт определения виртуальной машины.
virsh --connect qemu:///system define macOS-libvirt-NG.xml
После этого запустите менеджер виртуальных машин и настройте все параметры, обьем памяти 8192 Мб, количество ядер 4, сетевая карта.
Добавьте статус автозапуска для виртуальной машины
Настройка сети
Используйте шаблон default.xml для настройки вашей сети
virsh net-create default.xml
или отредактируйте существующую сеть.
virsh net-edit default.xml
Основная идея включить режим nat и добавить фиксированный адрес для машины MacOS в dhcp секцию сети,
mac адрес адаптера нужно взять из вашего файла виртуальной машины.
задайте аттрибут автостарта для данной сети.
virsh net-autostart default
Еще раз проверьте настройку виртуальной сети, уберите диск с clover, должен остаться 1 диск.
Зайдя в саму MacOS разрешите удаленный доступ к машине через ssh и подключение к экрану машины (vnc порт 5900)
Файлы для контроля
default.xml
<network>
  <name>default</name>
  <forward mode='nat'>
    <nat>
      <port start='1024' end='65535'/>
    </nat>
  </forward>
  <bridge name='virbr0' stp='on' delay='0'/>
  <ip address='192.168.122.1' netmask='255.255.255.0'>
    <dhcp>
      <range start='192.168.122.2' end='192.168.122.254'/>
      <host mac='52:54:00:8e:e2:66' name='mac-os' ip='192.168.122.63'/>
    </dhcp>
  </ip>
  <ip family='ipv6' address='2001:db8:ca2::1' prefix='64'>
  </ip>
</network>
Проверки
Роутинг на хостовой машине
У меня завелось сразу, но возможно нужно будет добавить маршрут к вашему коммутатору Hyper-V
Ссылки
- https://github.com/kholia/OSX-KVM
- https://artem.services/?p=722
- https://docs.microsoft.com/en-us/virtualization/hyper-v-on-windows/user-guide/nested-virtualization
Владимир Коротенко, вы что правда не понимаете разницы между Hyper-V и KVM? Ещё раз и по буквам: запустить гостеаую macOS под управлением виртуальной машины Hyper-V практически, технически и фактически невозможно. Эта операционная система не поддерживается в Hyper-V никак. От слова совсем. Запуск, описанный вами на гитхабе — это запуск гостевой macOS под управлением виртуальной машины KVM. При этом неважно, что она вложена в другую виртуальную машину. Технически для гостевой macOS она выполняется также как в виртуальной машине на реальном физическом сервере под управлением KVM Linux. KVM и Hyper-V это разные технологии, как и разный набор букв в их названии. Под управлением Hyper-V в вашем случае запускается не macOS, а Linux Ubuntu. И устанавливаете «на Hyper-V» вы в своем «рецепте» в действительности не macOS, а Linux. Так что не вводите людей в заблуждение, утверждая то, что не соответствует реальности, описаной вами же. А «гроб с esxi» поддерживает запуск macOS без «диалапа через IP-телефонию»…
Mac OS is known for its stability, performance, and user-friendly interface. But what if you’re a Windows user who wants to experience Mac OS? You can install Mac OS on Hyper V. This virtualization software allows you to run multiple operating systems on a single machine. In this article, we’ll show you how to install Mac OS on Hyper V step-by-step.
What is Hyper V?
Hyper V is a virtualization software developed by Microsoft. It allows you to run multiple operating systems on a single machine. Hyper V creates a virtual environment that simulates the hardware of a physical computer, allowing you to install and run different operating systems on your computer without additional hardware.
System Requirements
Before we start the installation process, make sure that your computer meets the following system requirements:
- A 64-bit processor with Second Level Address Translation (SLAT)
- At least 4 GB of RAM
- A hard disk with at least 50 GB of free space
- A computer that supports Hyper V (check with Microsoft’s Hardware Compatibility List)
Downloading the Mac OS
You’ll need to download the Mac OS installer to install Mac OS on Hyper V. You can download the Mac OS installer from the Apple App Store or through a third-party website.
Downloading from Apple App Store
- Open the Apple App Store on your Mac.
- Search for the Mac OS version you want to download.
- Click on the “Download” button to start the download process.
- Once the download is complete, the installer will launch automatically.
Downloading from Third-Party Websites
- Go to a trusted third-party website that provides Mac OS installers.
- Download the Mac OS installer from the website.
- Once the download is complete, the installer will be saved in your Downloads folder.
Creating a New Virtual Machine in Hyper V
Now that you have downloaded the Mac OS installer, creating a new virtual machine in Hyper V is time.
- Open Hyper V Manager.
- Click on “New” in the Actions pane.
- In the New Virtual Machine Wizard, click “Next.”
- Name your virtual machine and choose a location to save it.
- Select “Generation 1” for the virtual machine generation.
- Allocate memory to the virtual machine. We recommend allocating at least 4 GB of RAM.
- Create a virtual hard disk. Please choose the hard disk size and the location to save it.
- Select the installation option “Install an operating system from a bootable CD/DVD-ROM.”
- Click “Finish” to create the virtual machine.
Installing Mac OS on the Virtual Machine
Now that you have created a virtual machine, installing Mac OS is time.
- Start the virtual machine.
- In the Connect Virtual Hard Disk window, click “Image file” and select the Mac OS installer you downloaded.
- Click “Start” to begin the installation process.
- Follow the instructions on the screen to install Mac OS on the virtual machine.
- Once the installation is complete, you can use Mac OS on your virtual machine.
Why Run Mac OS on Hyper V
Running Mac OS on Hyper V can be beneficial for several reasons.
Compatibility Testing: As a developer, you may need to test your applications on various operating systems, including Mac OS. Running Mac OS on Hyper V allows this testing environment without purchasing a Mac computer.
Cost-Effectiveness: Mac computers can be expensive, and not everyone can afford one. Running Mac OS on Hyper V allows users to enjoy the Mac OS environment without investing in a physical Mac computer.
Familiarity: If you are already comfortable with the Mac OS environment and wish to continue using it, running Mac OS on Hyper V provides the perfect environment.
Flexibility: Running Mac OS on Hyper V allows you to run both Mac OS and Windows simultaneously on one computer, giving you more freedom and options.
Educational Purposes: If you’re learning Mac OS, running it on Hyper V can be a great option as it lets you experiment with the operating system without damaging your computer.
Overall, running Mac OS on Hyper V can benefit personal and professional applications, offering an economical and versatile way to experience the Mac OS environment.
Customizing Virtual Machine Settings
In certain circumstances, you may need to adjust the settings of a virtual machine for Mac OS to run optimally. Here are some suggestions:
Increase the RAM allocated to a virtual machine to enhance performance.
Increase the number of processors allocated to a virtual machine for enhanced performance.
Enable “Nested Virtualization” in Hyper V settings to help Mac OS run more smoothly.
Ensure your virtual machine has access to the internet so you can download updates and install the software.
Optimizing the virtual machine settings for Mac OS on Hyper V can enhance its performance and ensure it runs optimally.
FAQs
Can I install any version of Mac OS on Hyper V?
A: No, not all versions of Mac OS are compatible with Hyper V. Make sure to check the system requirements for the Mac OS version
What if the Mac OS installer doesn’t start?
If the Mac OS installer doesn’t start, you may need to adjust the virtual machine’s settings. Try the following:
- Shut down the virtual machine.
- Right-click on the virtual machine in Hyper V Manager and select “Settings.”
- Click on “Security” to ensure that “Secure Boot” is disabled.
- Click on “Processor” and make sure that “Virtualization Extensions” are enabled.
- Click “Apply” and then click “OK.”
- Start the virtual machine and try rerunning the Mac OS installer.
Can I use a Mac OS virtual machine for commercial purposes?
It is illegal to use a Mac OS virtual machine for commercial purposes without permission from Apple. Check the terms and conditions of the Mac OS license agreement before using a Mac OS virtual machine for commercial purposes.
Is sharing files between the Mac OS virtual machine and the host computer possible?
Yes, sharing files between the Mac OS virtual machine and the host computer is possible. You can use the “Shared Folders” feature in Hyper V to share files between the virtual machine and the host computer.
Conclusion
Running Mac OS on Hyper V is a great way to experience the Mac OS environment without purchasing a Mac computer. In this guide, we have shown you how to install Mac OS on Hyper V step-by-step. Remember to check the system requirements for the Mac OS version you want to install and adjust the virtual machine settings if necessary. Enjoy your new Mac OS virtual machine!
Getting macOS to run on a Windows machine has always been a tiresome job. Unlike Windows, macOS relies heavily on hardware compatibility to function properly on any machine. But what if we tell you there’s an easy way to install and experience the same alongside your Windows operating system? In this explainer, we have demonstrated easy steps to install macOS on Windows 11 or 10. Additionally, you can try macOS’s Quick Look feature on your Windows machine.
How to Install macOS on a Windows Computer
For this demonstration, we will install macOS Catalina on Windows 11 using a third-party virtualization software called VMware Player. The advantage of using this software is that you don’t have to format or relocate your system data to install it. All you have to do is create a virtual disk using VMware on your system and install macOS on it to experience the same.
Installation Pre-Requisites
Let’s have a look at the prerequisites to install it.
- Enable Virtualization
- Disable Hyper V
- Download macOS Image
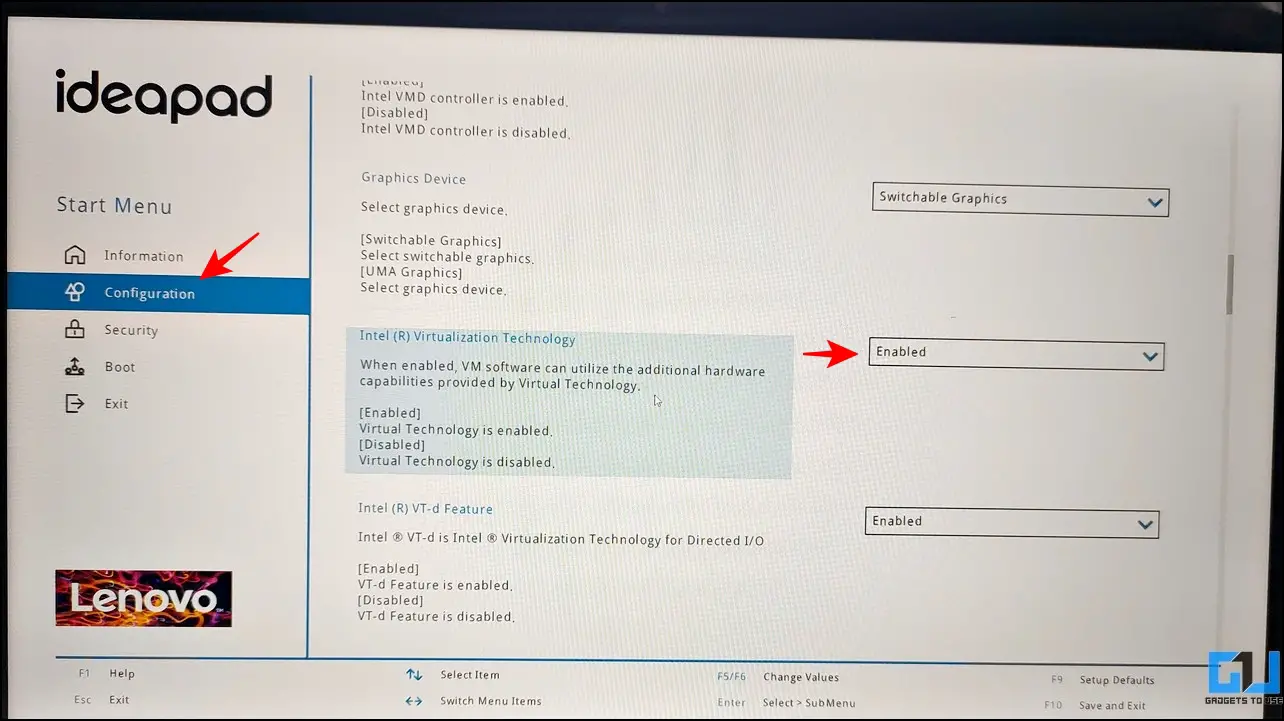
Step 1- Enable Virtualization Technology on Windows
Virtualization Technology helps users emulate and run different operating systems on a single machine. To install macOS as a virtual machine on your Windows PC, you must ensure that the Virtualization Technology is enabled in your device’s BIOS. Here’s how you can check the same:
1. Restart your Windows PC and press the dedicated Function key at boot to enter your system’s BIOS. If you’re unsure about the key, you can search for the same by searching your system’s model number on Google.
2. Switch to the configuration tab and locate Virtualization Technology to enable it. Once done, save the changes and reboot your system.
Step 2- Disable Windows Hyper-V to install Virtual Machines
By default, Microsoft Windows comes with its native virtualization product called the ‘Hyper-V’ that lets you create and run virtual machines. Since we are using third-party virtualization software (VMware) to run our ‘Virtual macOS’, which offers far more customization features, you need to disable Hyper-V on your machine to avoid conflicts between the two. Here’s what you need to follow.
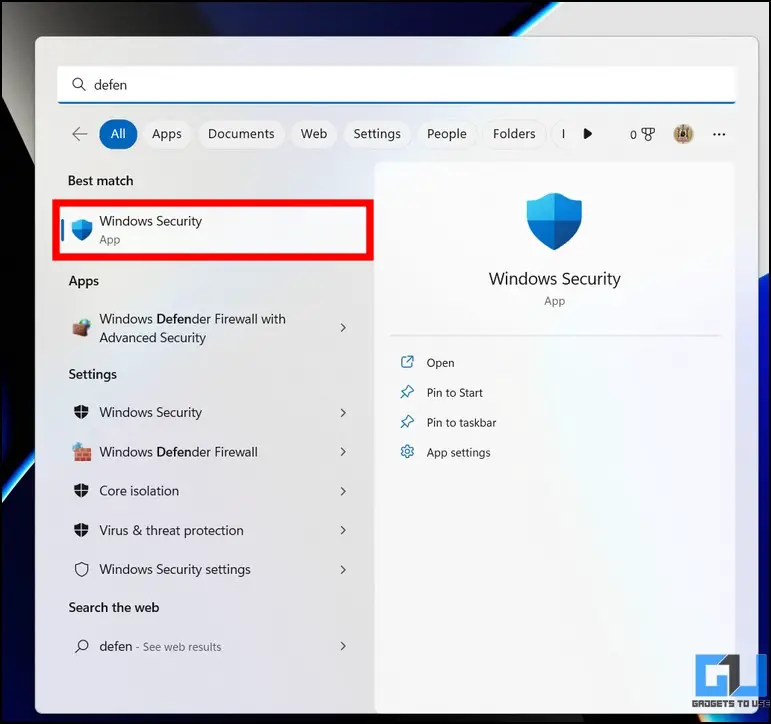
1. Press the Windows key and access Windows Security settings.

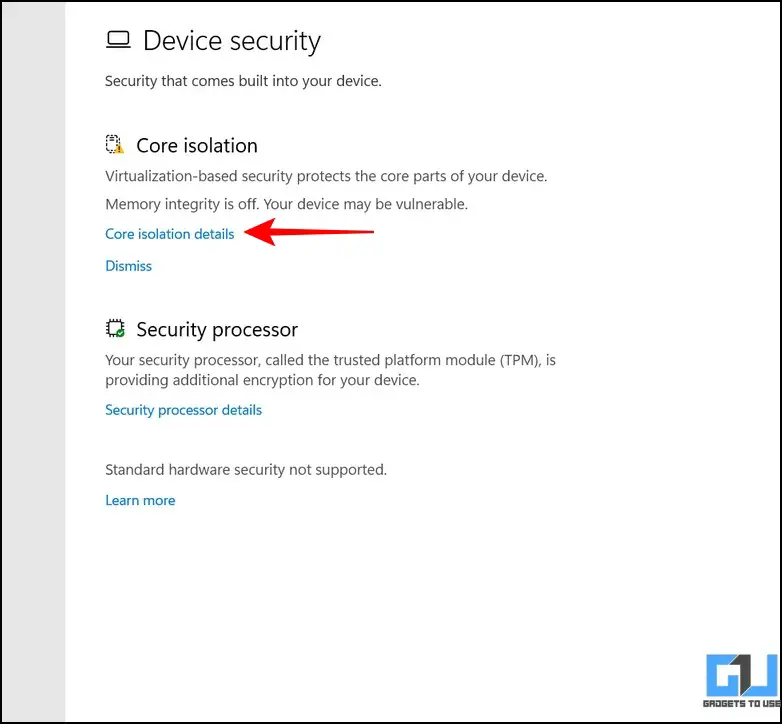
2. Next, click on the Device Security option to configure it.
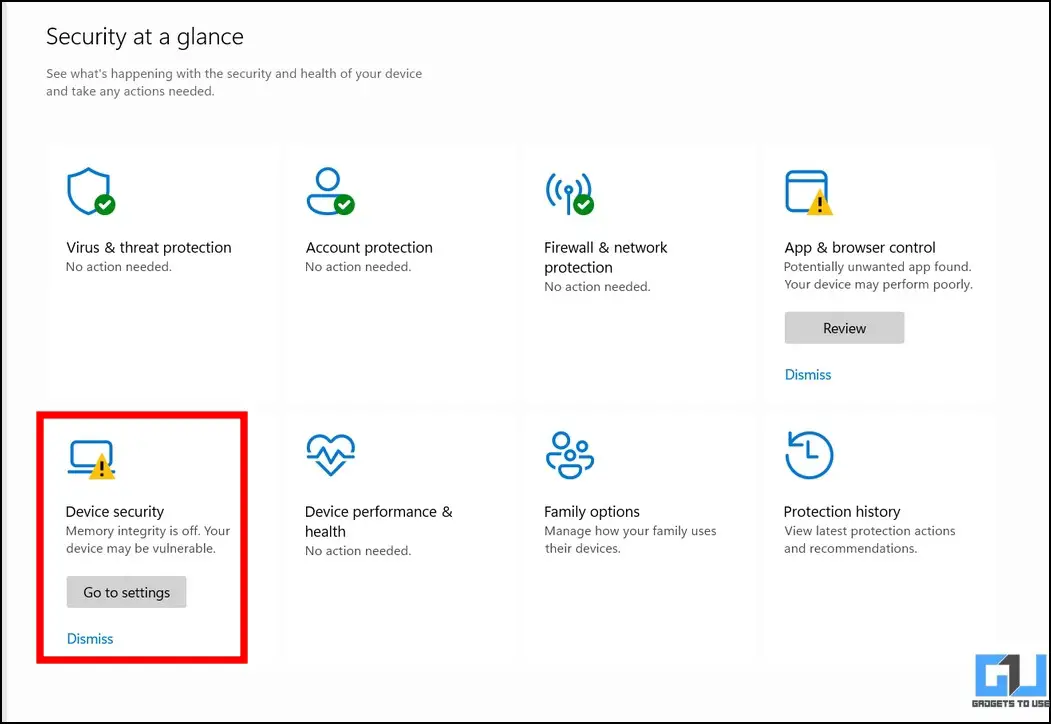
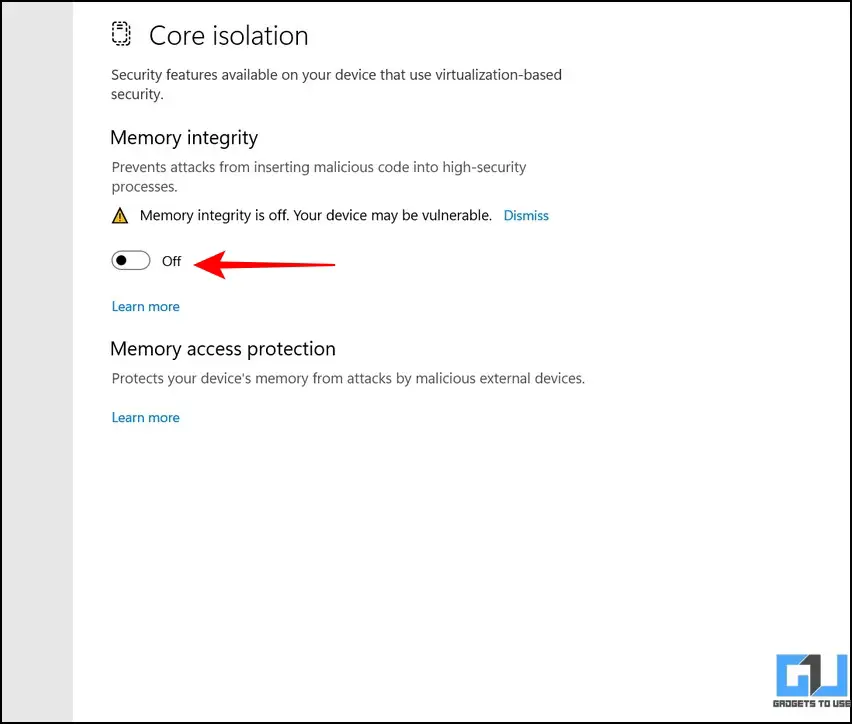
3. Further, tap on the Core Isolation feature to access its settings.

4. Finally, turn off the toggle for Memory Isolation to disable it. This will prevent Windows Security from interrupting while making changes to the system product (Hyper-V in this case).
5. Now, launch Command Prompt with Administrator privileges.

6. Execute the following command on the terminal to turn off the Windows Hypervisor (Hyper-V):
Set hypervisorlaunchtype off
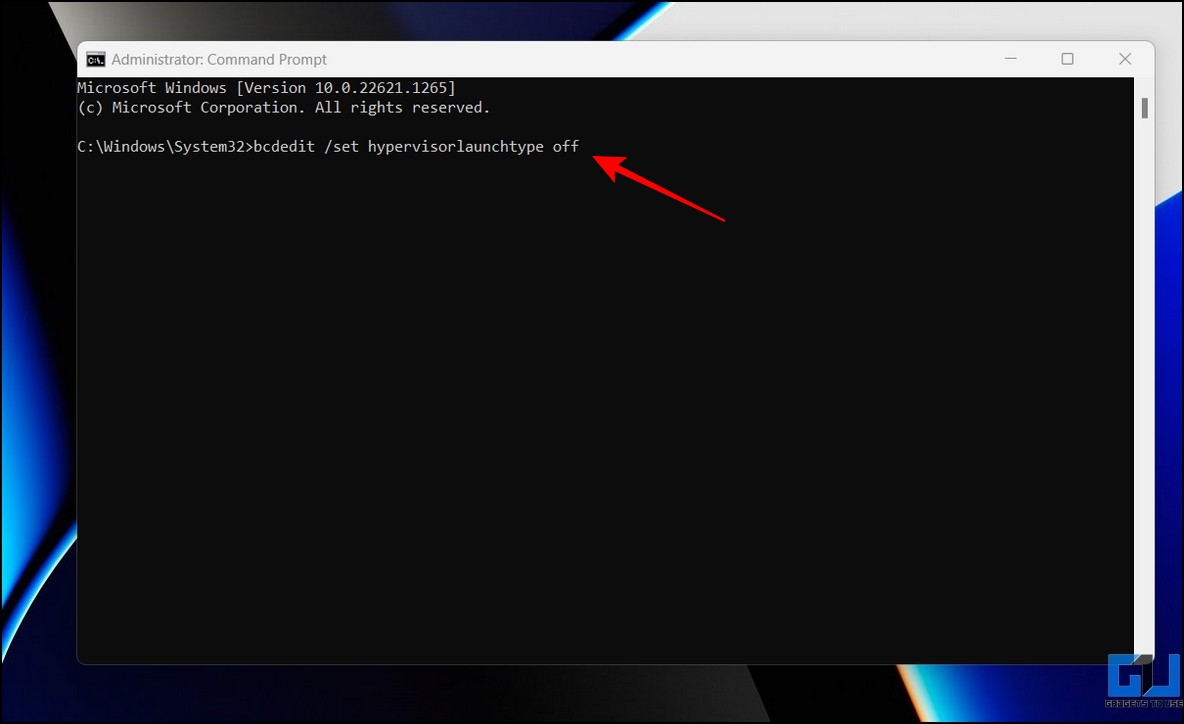
7. Reboot your system to apply changes.
Step 3- Download the macOS Catalina VMware Image
The final pre-requisite to install macOS Catalina is its VMware image. Follow these steps to download the same.
1. Download the macOS Catalina VMware image from the Google Drive Link.
2. Extract the downloaded compressed file to your system via native or third-party decompression tools such as WinRAR.
Tip: The password for extracting the compressed file is Geekrar.com
3. Once extracted, you will see the .vmdk file that will be used for installation.
Steps to Install macOS on Windows 11/10
Now that you’ve fulfilled the prerequisites, let’s look at the steps to install macOS on Windows 11/10.
1. Download and install the VMware Workstation Player from its official website.
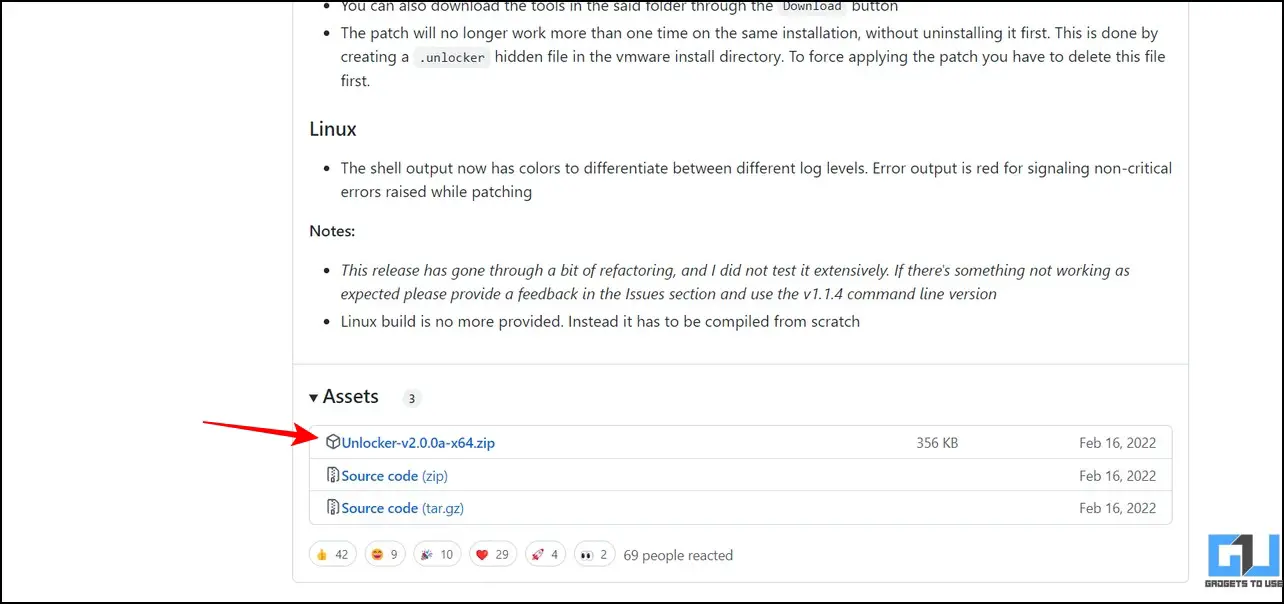
2. Next, download the VMware Unlocker tool and extract the downloaded file to a new folder.

3. Locate the win-install.cmd in the list of extracted files and right-click on it to run it as administrator.
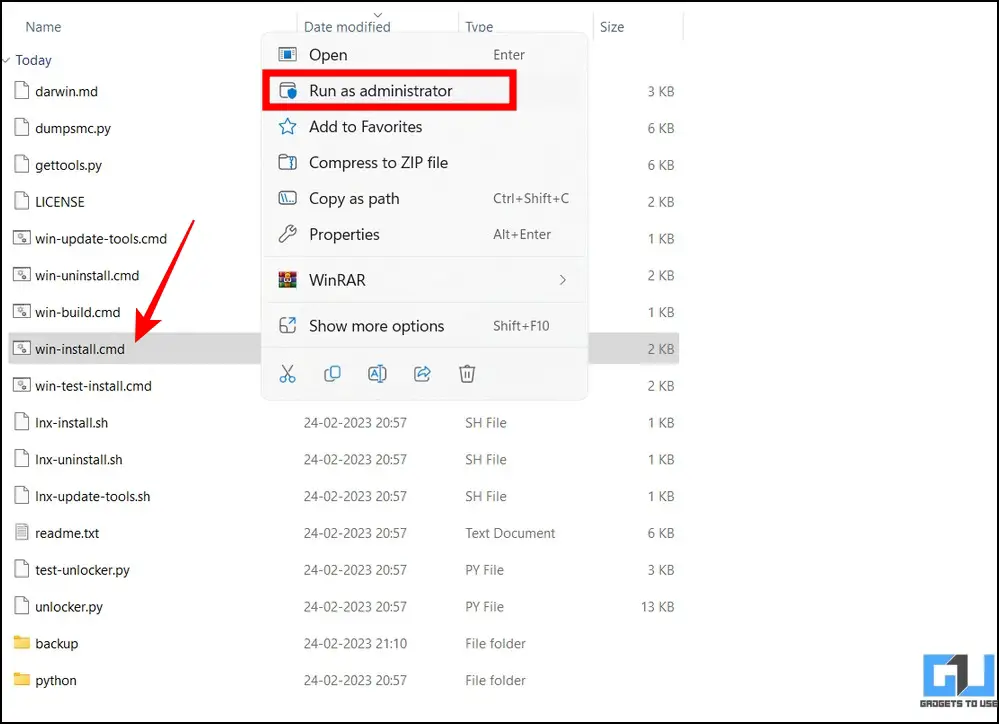
4. The commands in the win-install.cmd file will patch the installed VMware Workstation Player to add an entry for Apple macOS during installation.
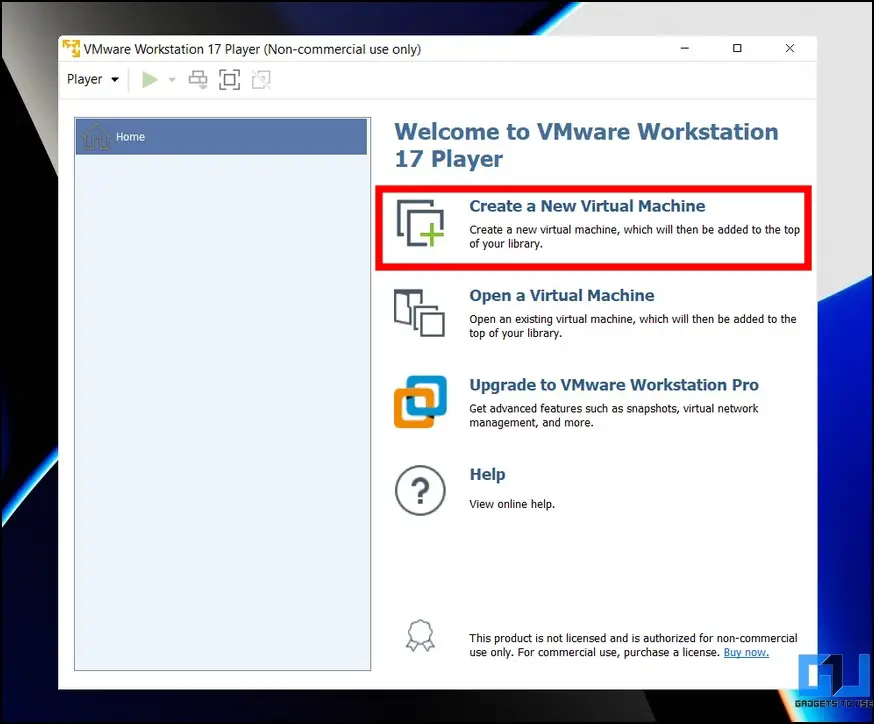
5. Open the VMware Workstation Player and create a New Virtual Machine.
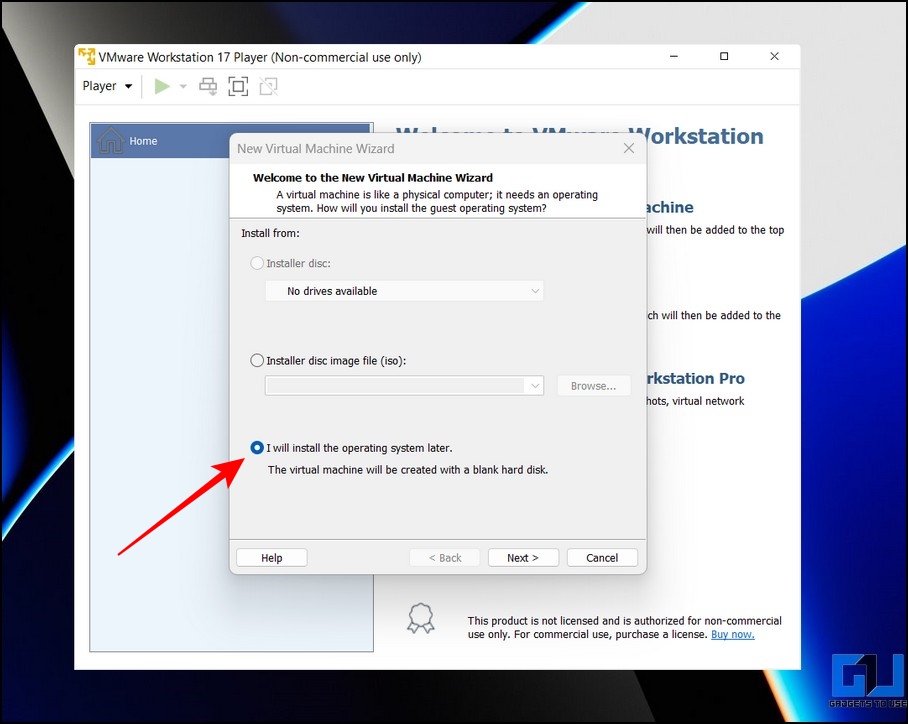
6. Next, pick ‘I will install the operating system later‘ and click the Next button.
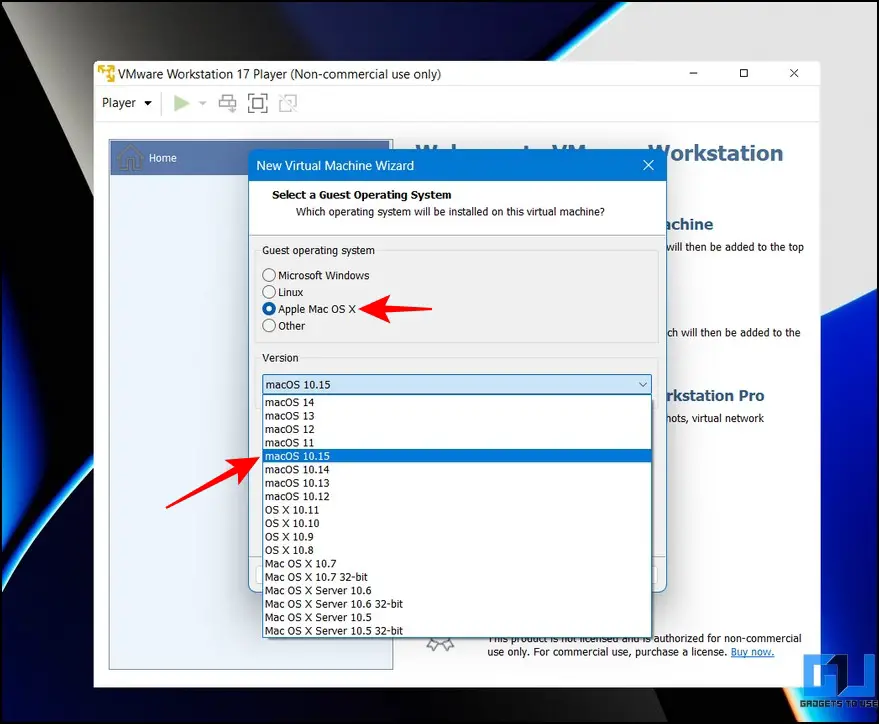
7. Select Apple Mac OS X from the list and pick macOS 10.15 to install macOS Catalina.

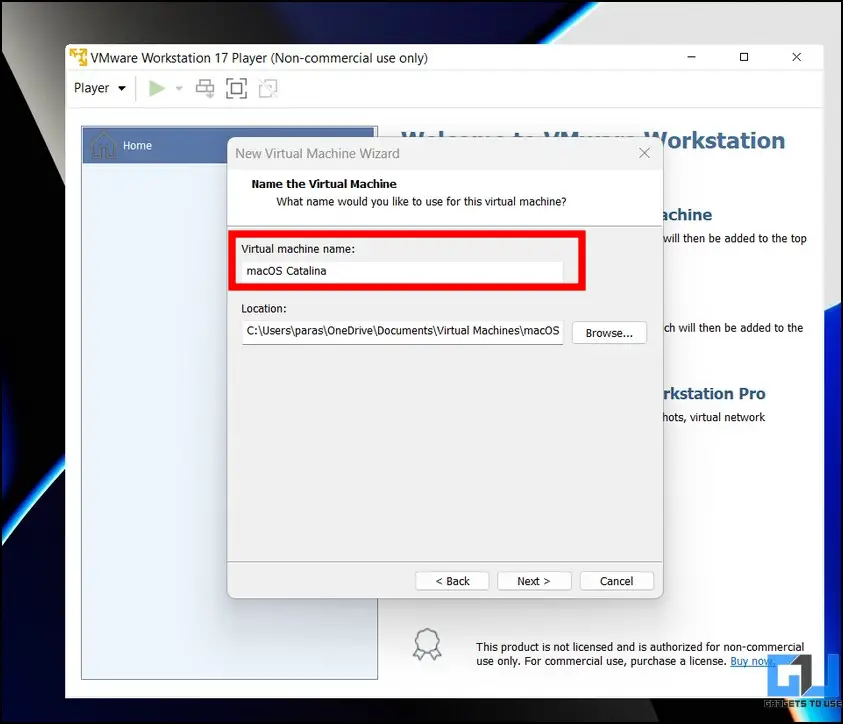
8. Provide a new name to your virtual machine and click the Next button to proceed.
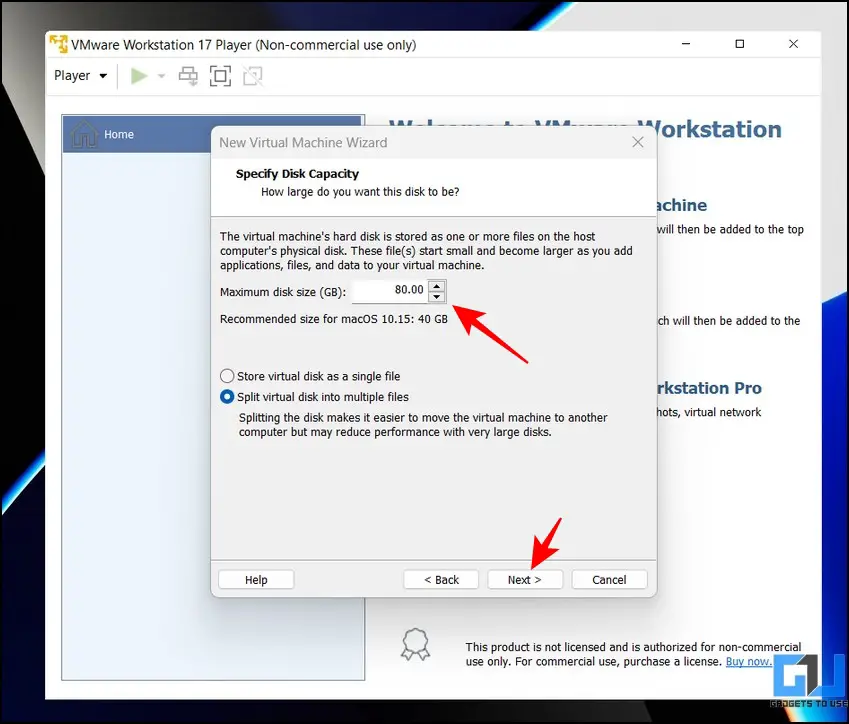
9. Allocate at least 80GB of disk space and click the Next button to finish setting up the configuration.

10. Click the Finish button to complete the creation of a new virtual machine.

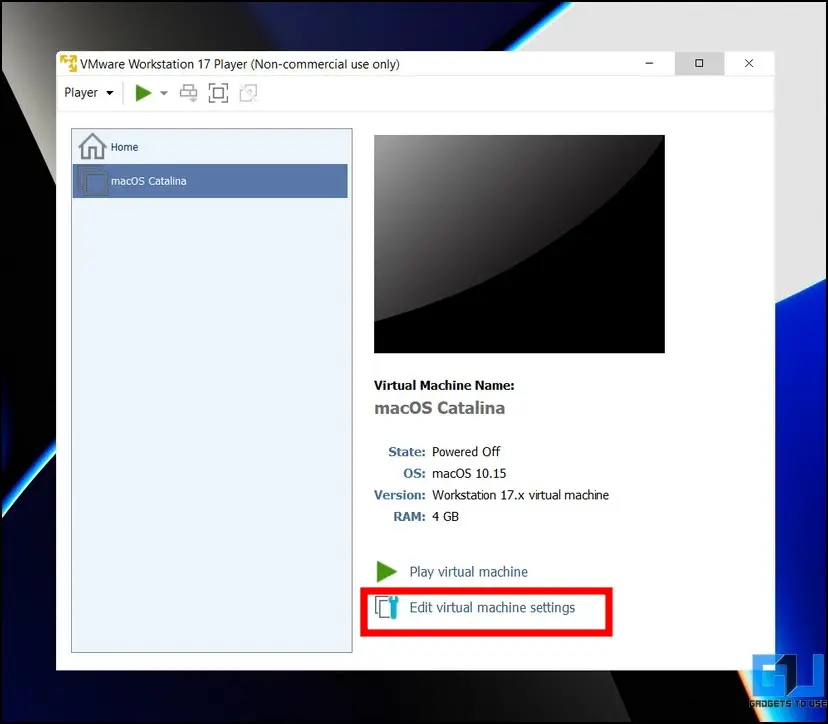
11. Now, click Edit Virtual Machine Settings to edit the configuration of the created VM.
12. Here, select the Hard Disk in the left sidebar and click the Remove button to delete it.

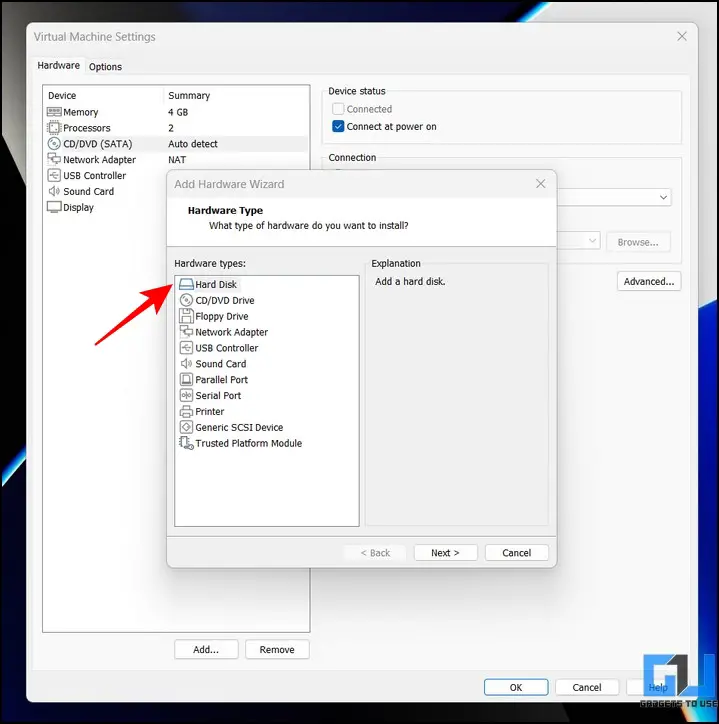
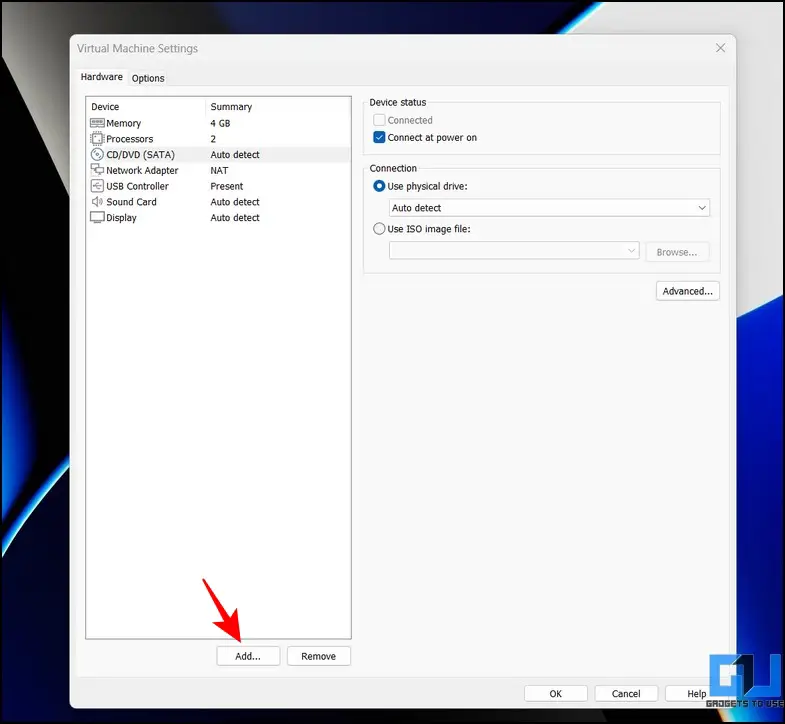
13. Once removed, click the Add button to add new virtual hardware to your machine.

14. Select Hard Disk under the Hardware types list.
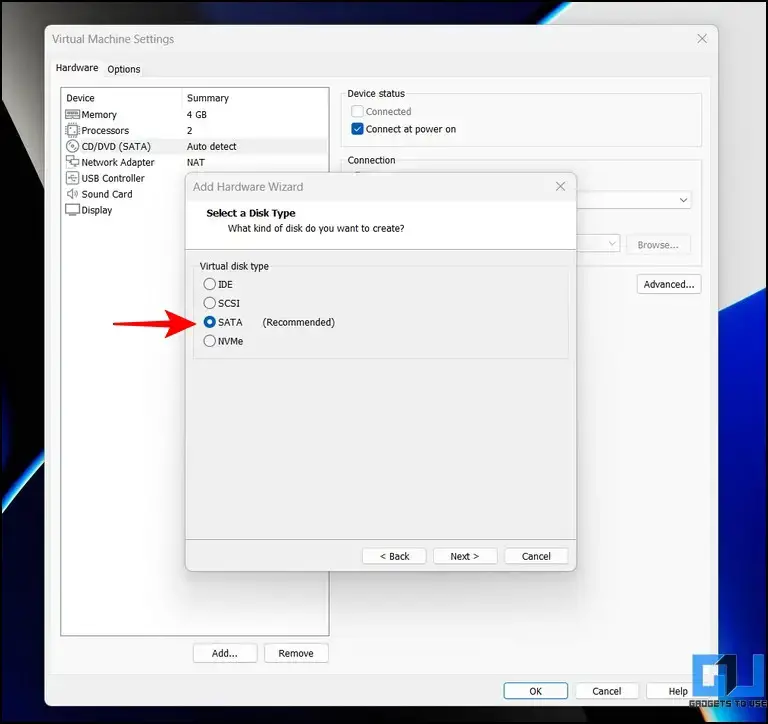
15. Pick the SATA disk drive under the virtual disk type.

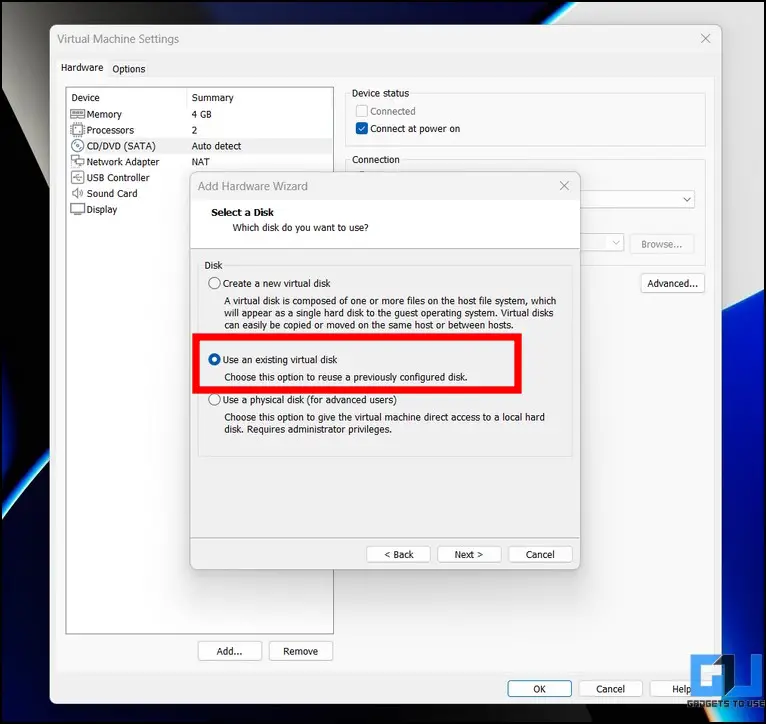
16. Next, select the ‘Use an Existing Virtual Disk‘ option.

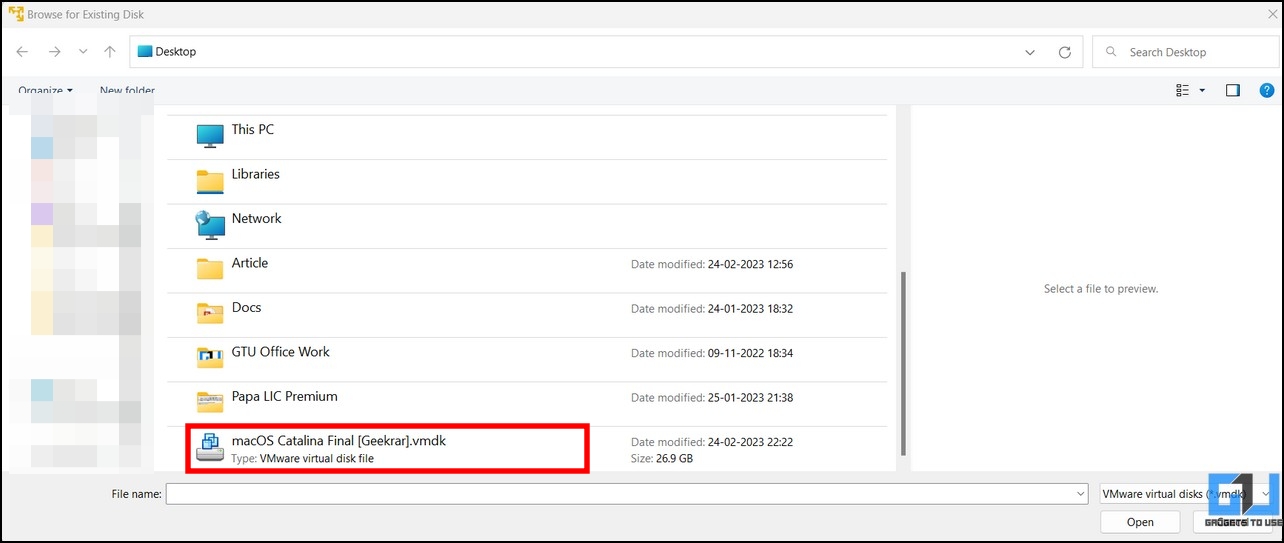
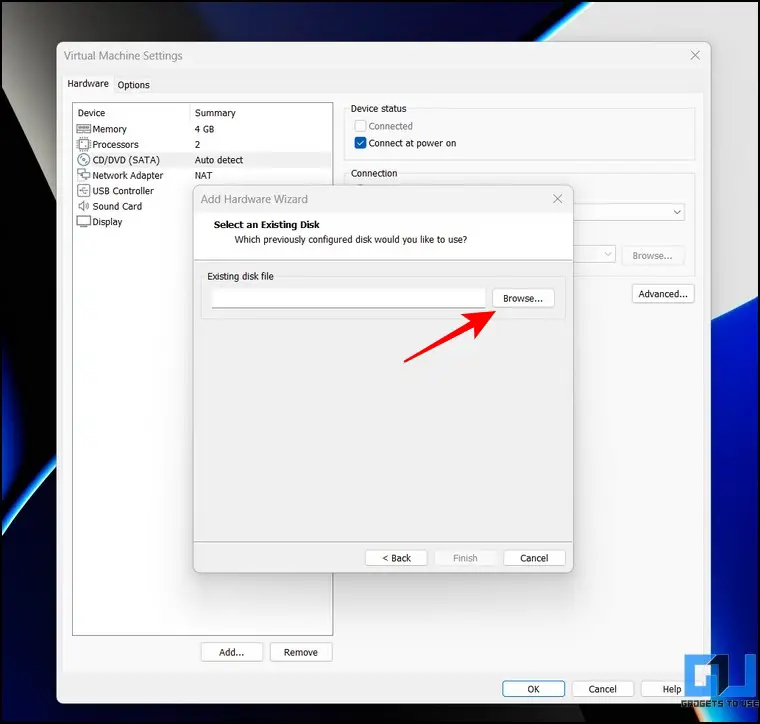
17. On the next page, click the Browse button to locate the .vmdk file extracted earlier from the downloaded file.

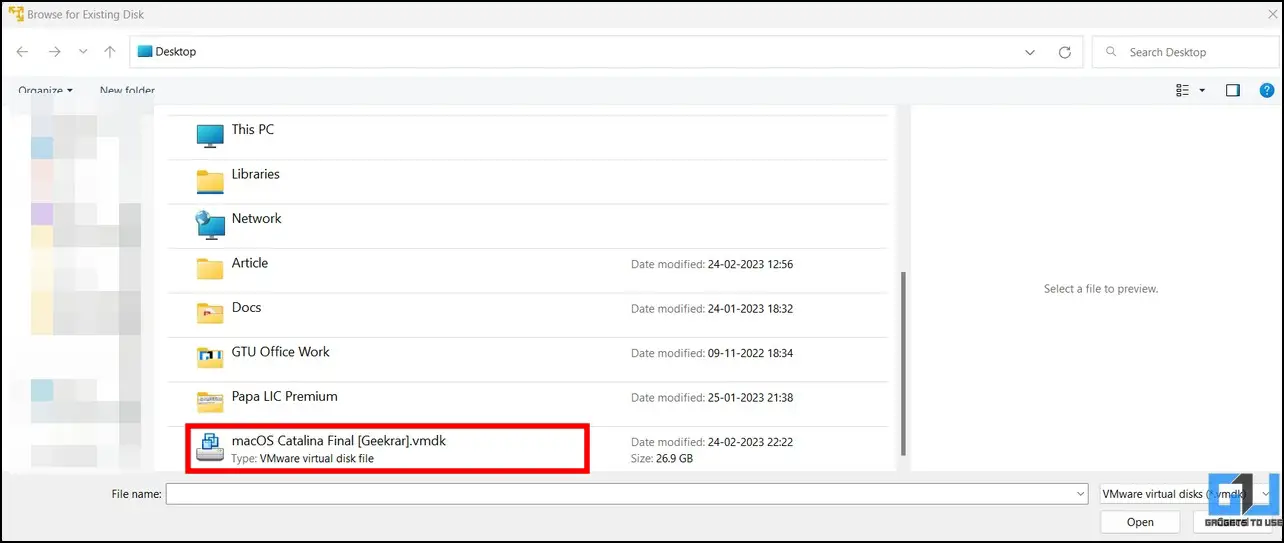
18. Select the macOS Catalina Final .vmdk file and click the open button to allocate it to your virtual machine.
19. Press the Finish button to save your changes.
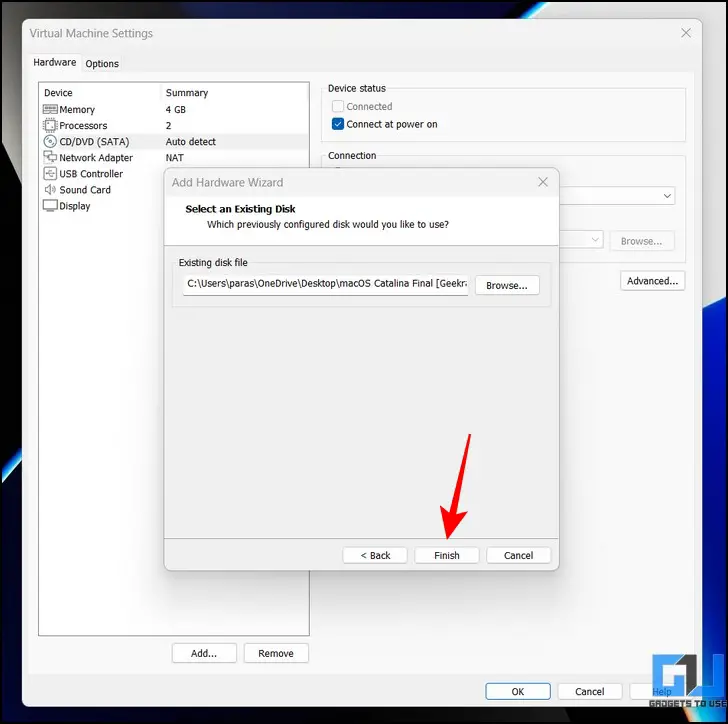
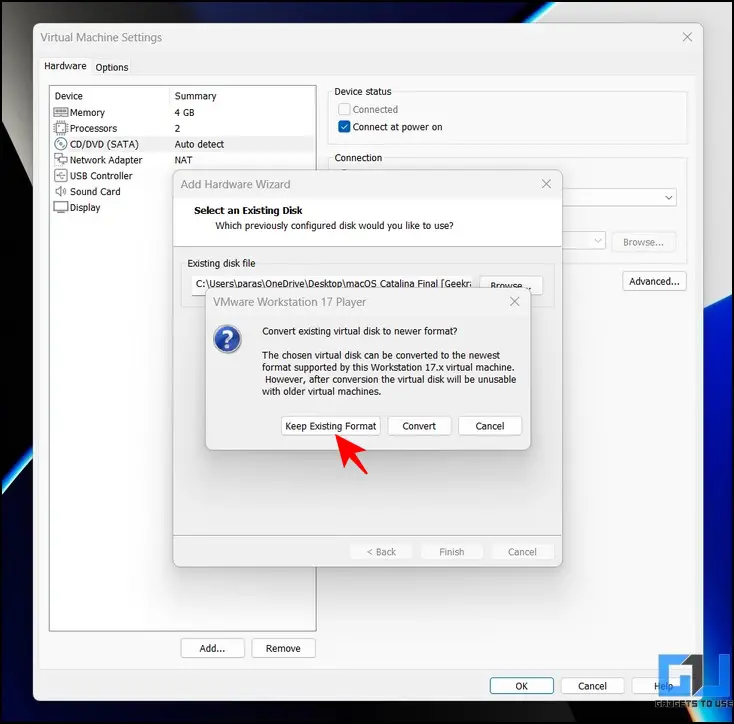
Pro-Tip: If you get a prompt asking to convert the existing virtual disk to a newer format, click the Keep Existing Format button to retain the original disk format.

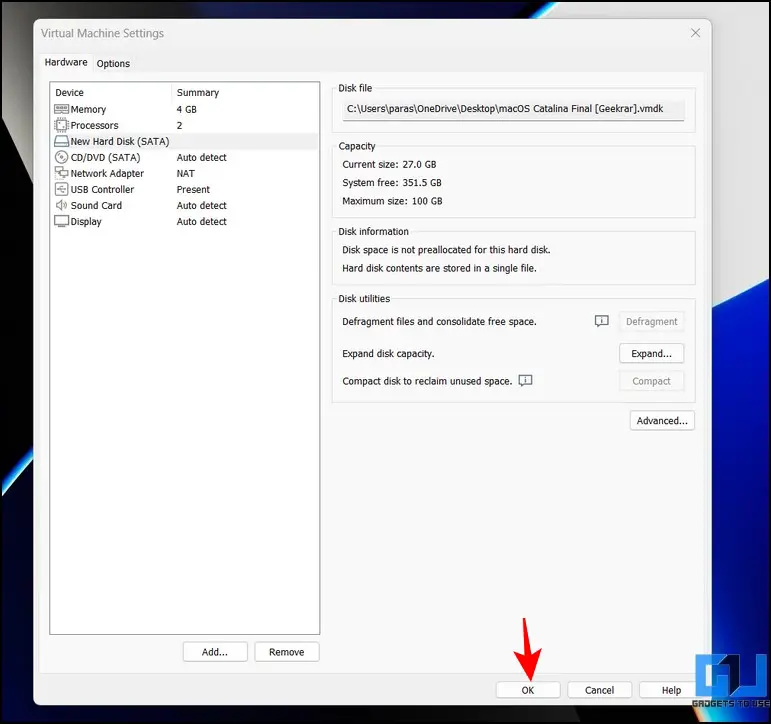
20. Click the OK button to save changes.
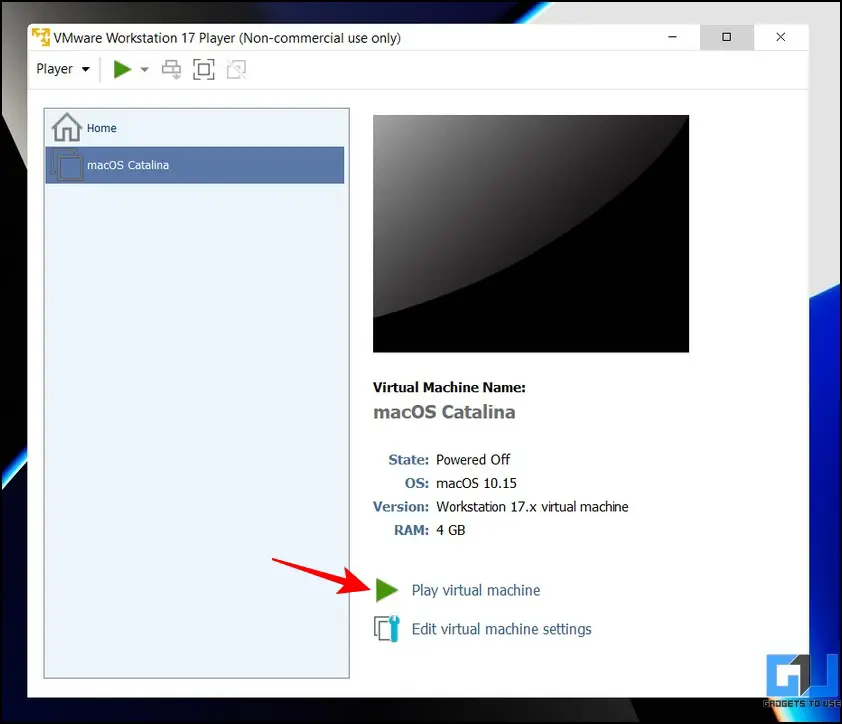
21. Finally, press the Play Virtual Machine option to boot into the macOS virtual machine.

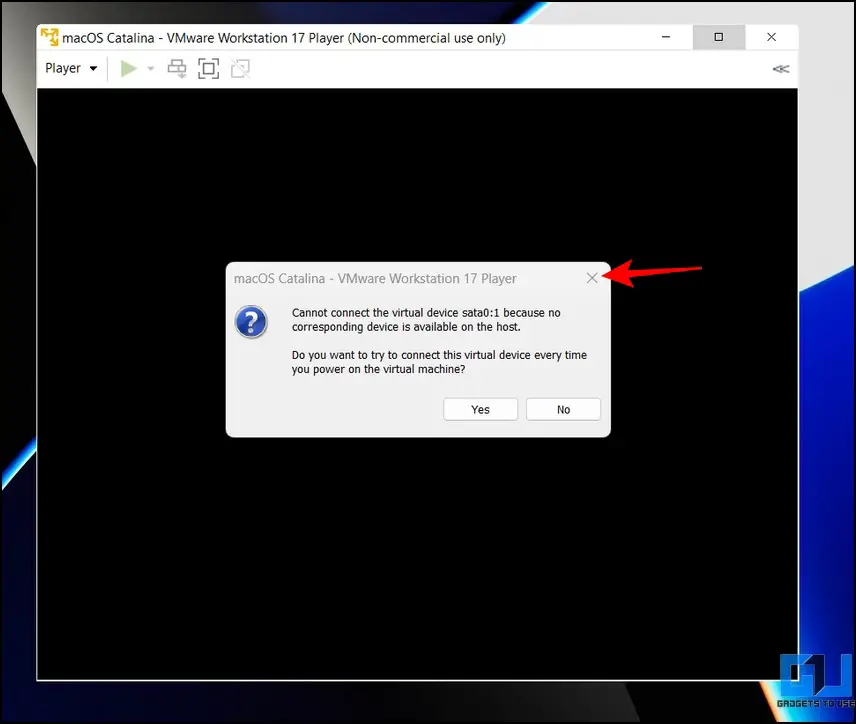
Pro-Tip 2: If you get the ‘cannot connect the virtual device sata0:1 warning, simply close the popup to ignore it.

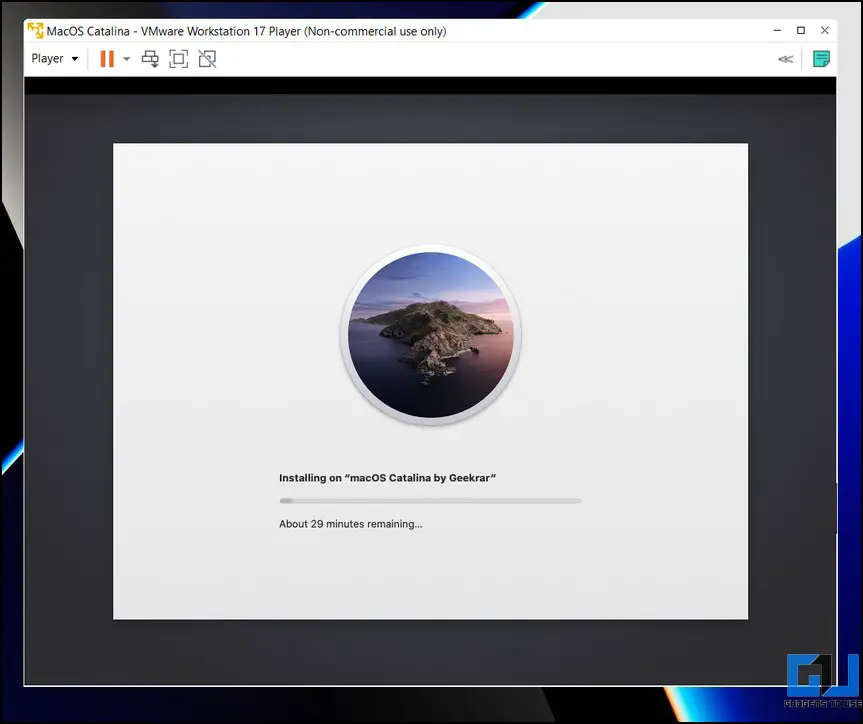
22. You will now boot into macOS Catalina, where you will see the Apple logo.

23. Wait a few minutes to let macOS install on the allocated virtual disk. The virtual machine will restart automatically once the installation completes.
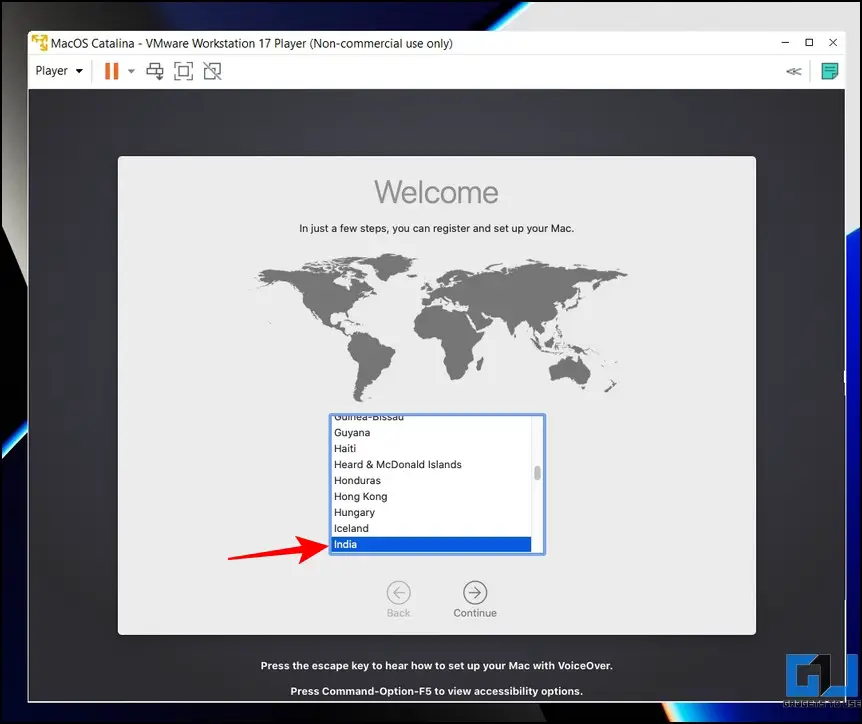
24. After reboot, pick your desired region to set up the macOS. You can also press the Escape key to set up your Mac with Voiceover.

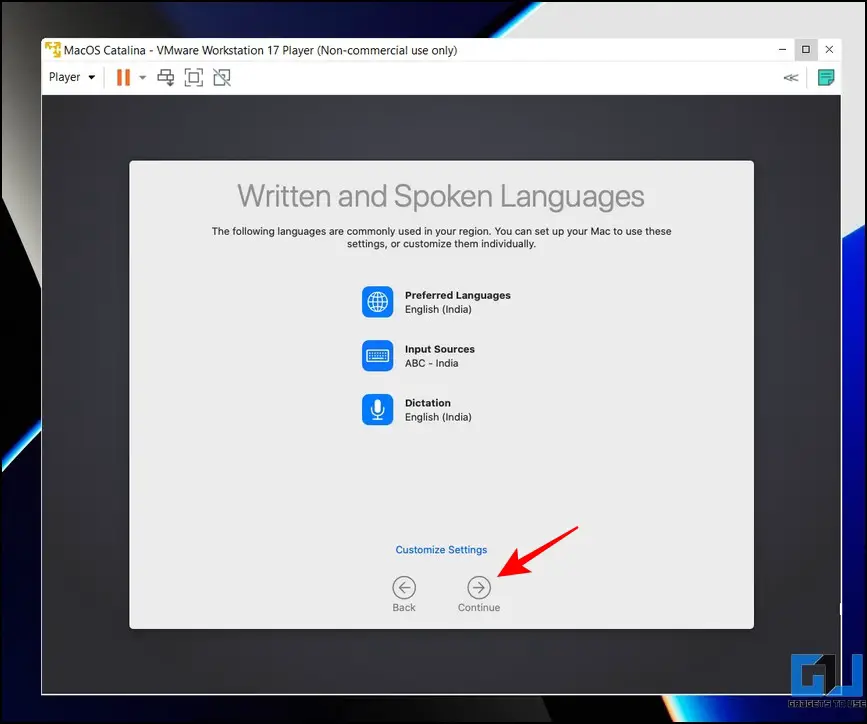
25. Next, pick your written and spoken language and press the Continue button.
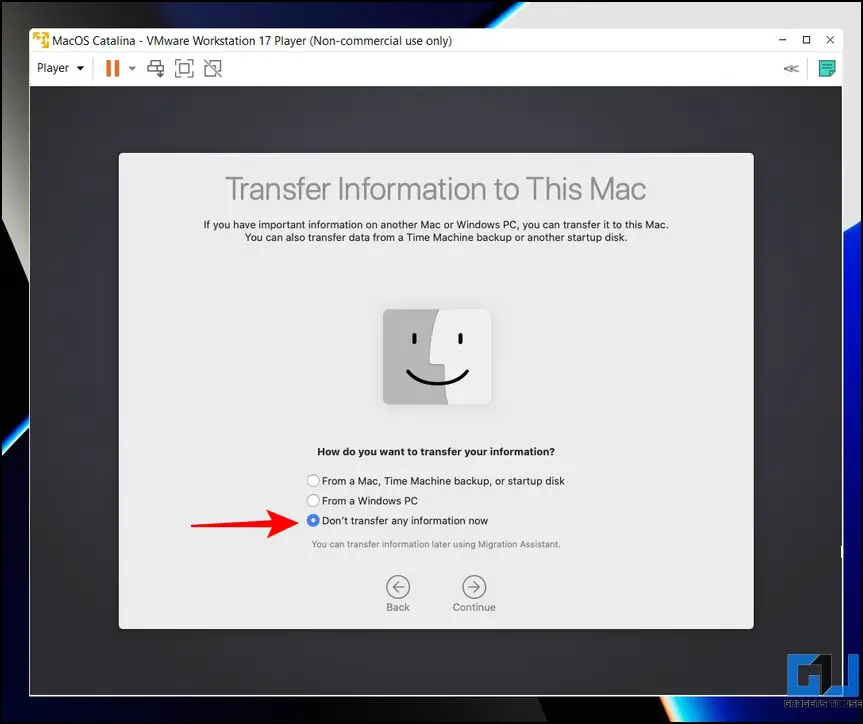
26. You will now see the page to transfer information from your old Macbook or Windows PC. Alternatively, if you desire to set macOS afresh, pick the ‘Don’t Transfer any Information now‘ option.
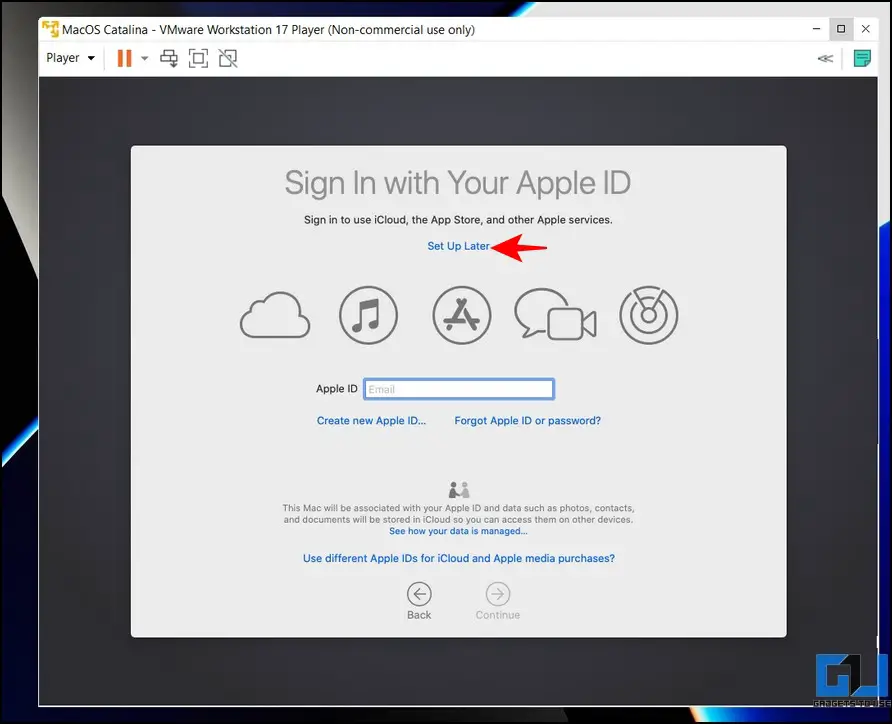
27. Next, skip the option to set up iCloud by clicking the Set Up Later button. (This is because users have often reported issues completing the setup after signing into iCloud during the initial setup. You can sign in to iCloud later after booting the macOS)

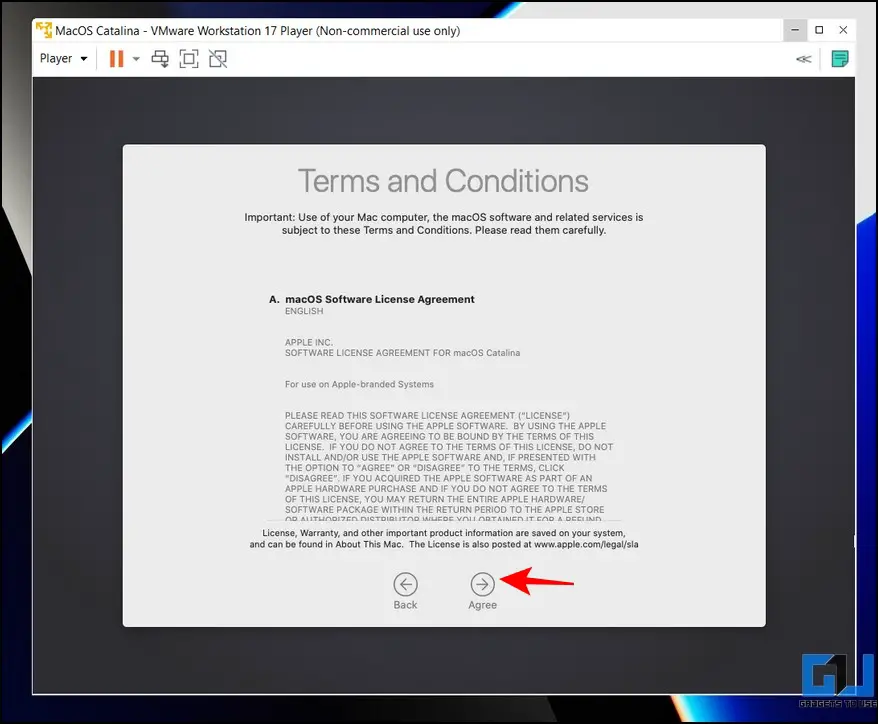
28. On the next page, press the Agree button to accept the Terms and Conditions.

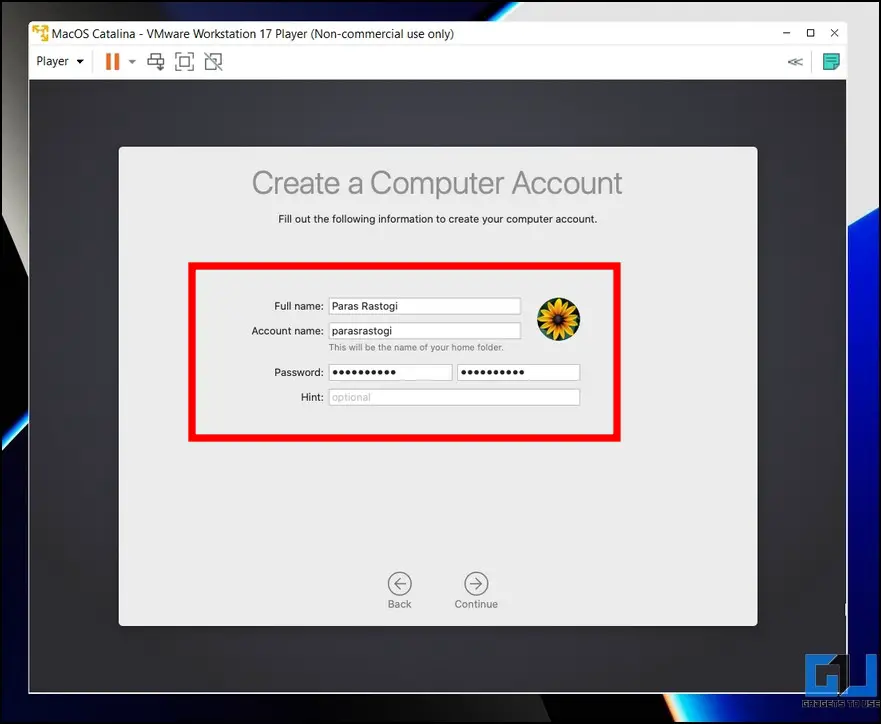
29. Enter your desired Account Name and Password for the virtual machine and hit the Continue button.

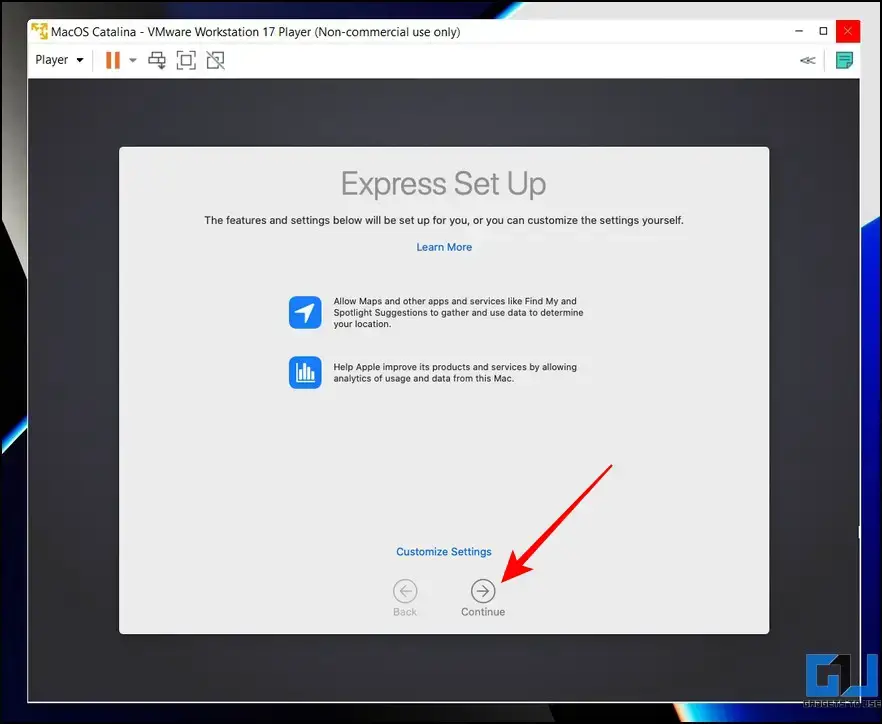
30. Pick Express Setup and press the Continue button. If you wish to customize some features during installation, you can click the Customize Settings button.

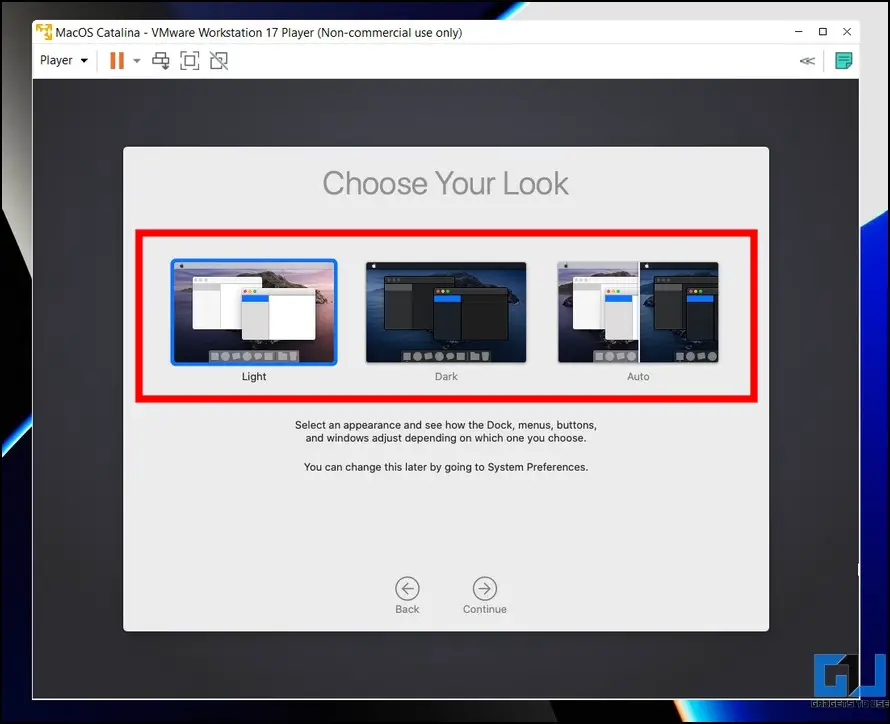
31. Select your theme appearance for the macOS and press Continue.

32. That’s it! Wait a few seconds to finalize setting up your Mac.

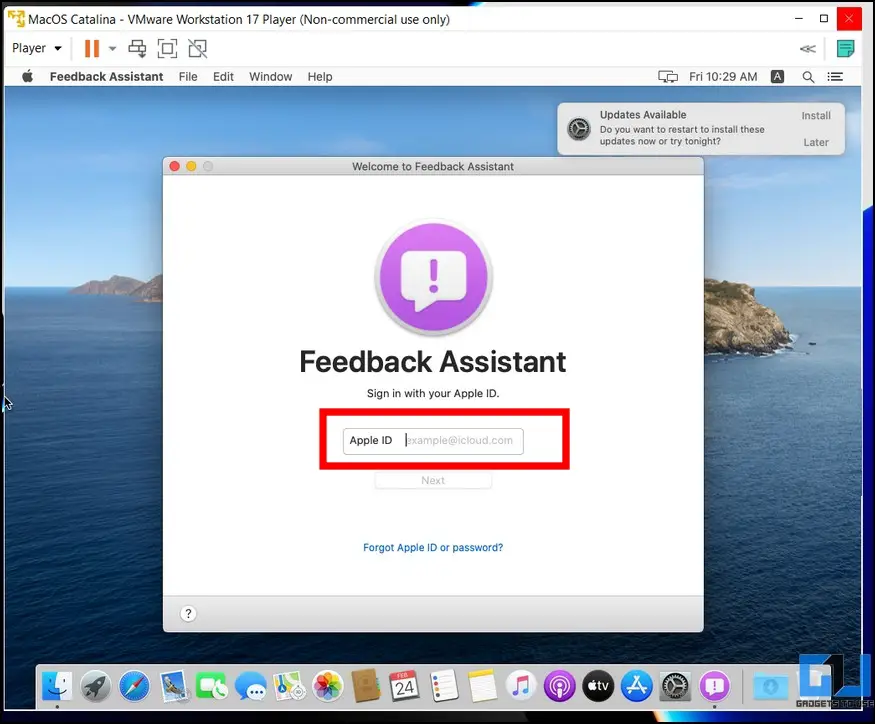
33. Once booted, accept the Feedback Assistant terms and conditions and sign in with your Apple ID to access all iCloud features on your virtual machine.

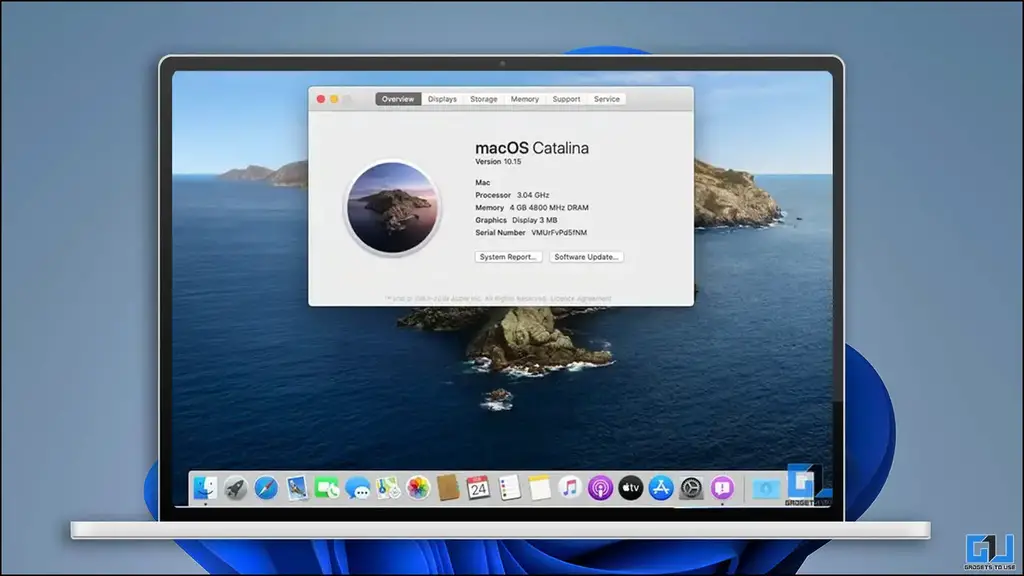
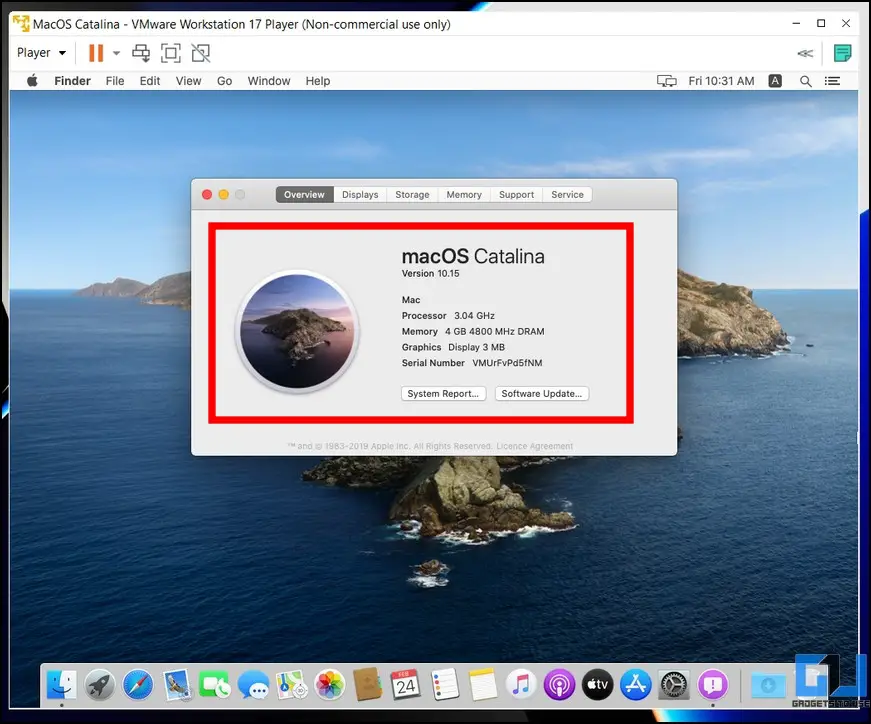
34. Congrats! You’ve successfully installed macOS Catalina on Windows 11/10 using VMware. You can head over to the ‘About this Mac‘ option to see details of your ‘Virtual Mac’.
35. We’ve tested most features of the virtual Mac, and they seem to work fine without any major bugs or crashes. You can also update the system to the latest version by installing the available updates.
Troubleshooting Issues When Installing macOS on Windows
If you’re facing issues while installing macOS Catalina on your Windows PC, we have compiled common error fixes in this section to help you troubleshoot them easily.
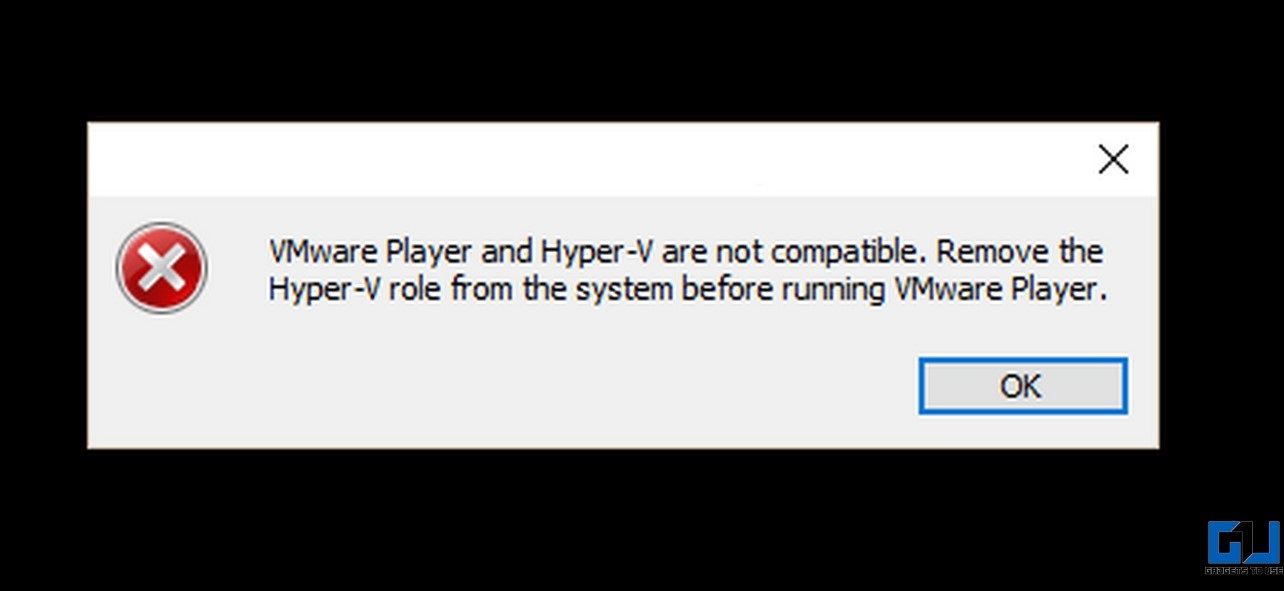
Error 1: VMware Player and Hyper-V are Not Compatible
You need to disable Hyper-V on your system to run the virtual machine on the VMware Workstation Player. Follow the steps in the pre-requisite section above to troubleshoot the same.
Error 2: No Apple MacOS X Option in Virtual Machine Installation Wizard
Download and run the ‘unlocker CMD installation‘ file to patch VMware for adding an entry for Apple Mac OS X while installing the virtual machine. For more details, refer to the pre-requisites section.
Warning 1: Convert Existing Virtual Disk to New Format
Retain the original image format by clicking the ‘Keep Existing Format‘ button. Converting the image to a new format might corrupt it.
Error 3: Vmware Workstation Unrecoverable Error
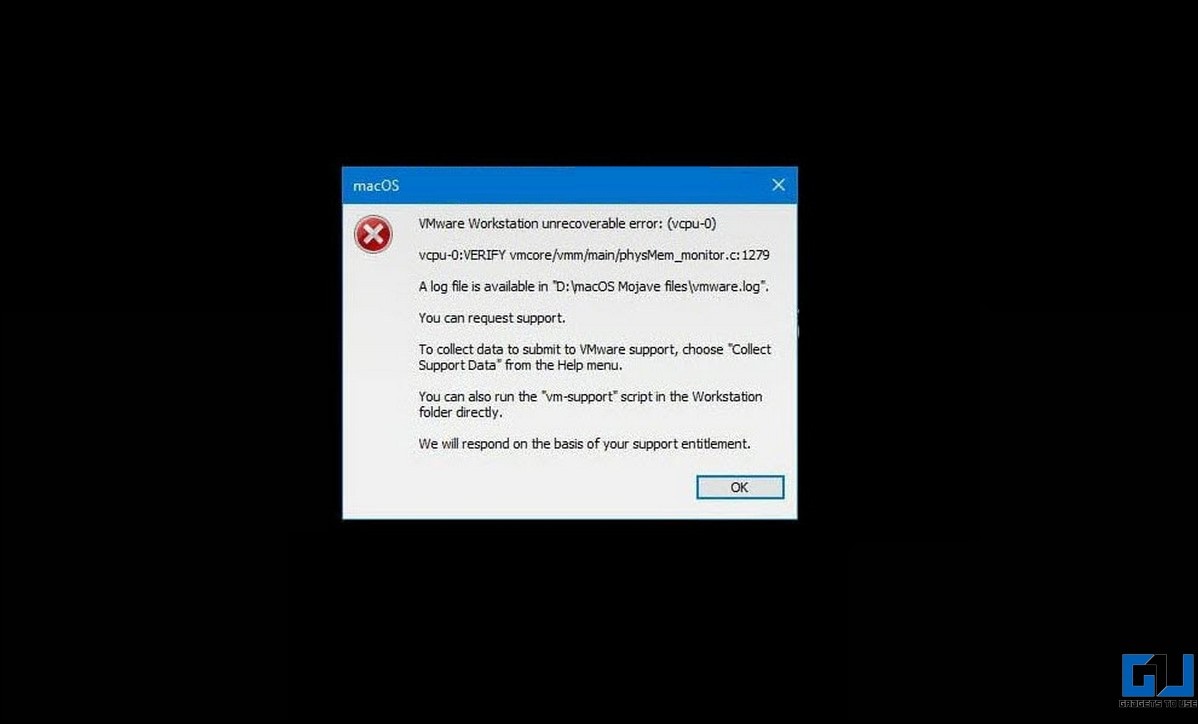
Follow these easy steps to fix the VMware Workstation Unrecoverable error:
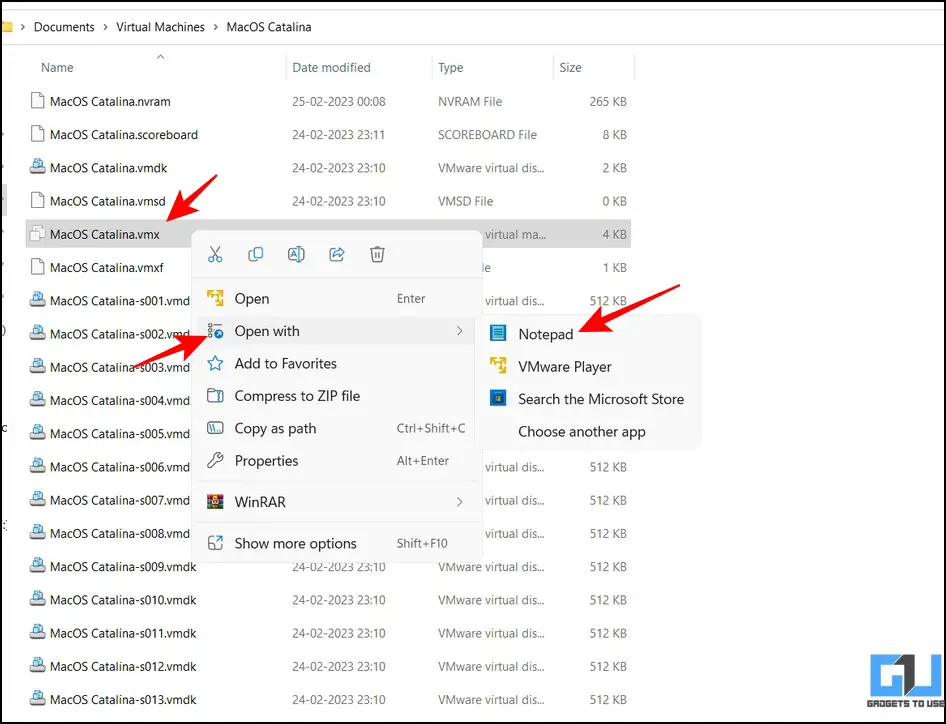
1. Head over to your system’s Document> Virtual Machines> MacOS Catalina folder and locate the .vmx file to edit it with Notepad.

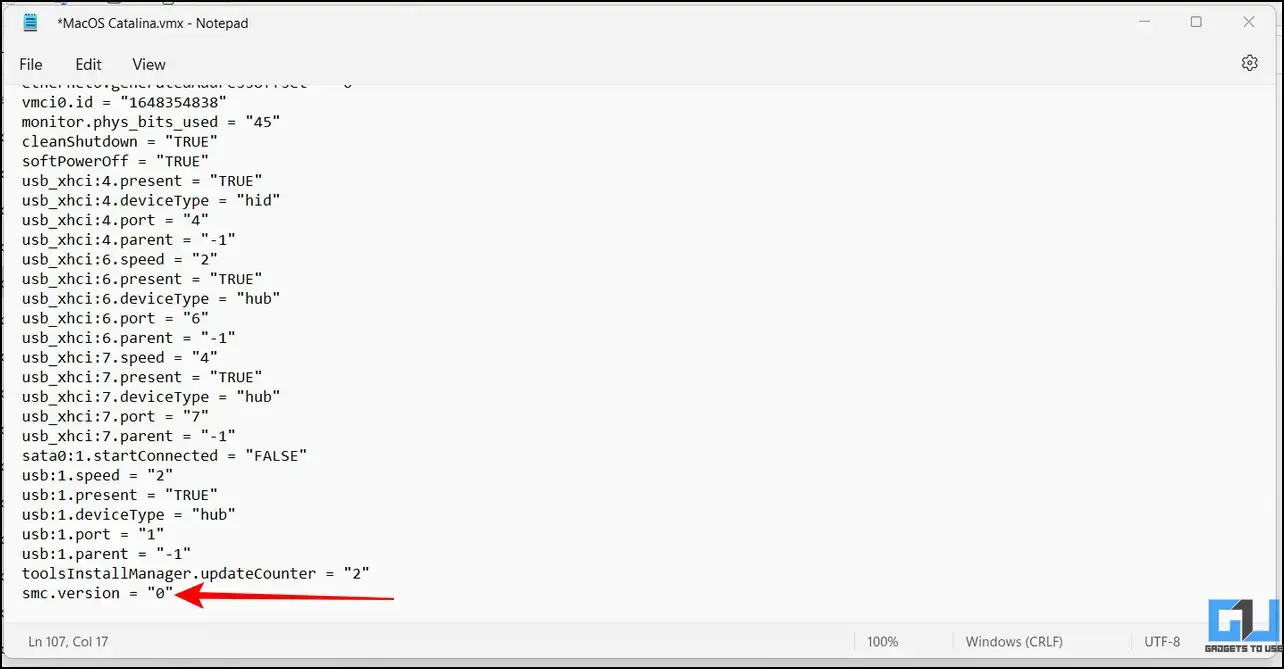
2. Next, add the following line at the end and save the changes:
smc.version = “0”

3. Play the Virtual Machine to verify if the issue is fixed.
Warning 2: Can’t connect the Virtual device Sata0:1
The easiest method to eliminate this warning and run the macOS without errors is to ignore it. Simply close the warning popup by clicking the X button.

FAQs
Q: How to install macOS on Windows PC without Mac?
A: You need to create a virtual machine on your Windows PC to install macOS on Windows. Follow the easy steps in this guide to install macOS on your Windows PC.
Q: Can you install macOS on Windows 11?
A: Yes, you need third-party virtualization software such as VMware to create a virtual macOS on Windows 11. For more details, refer to the steps above.
Q: How to install macOS on VMware Workstation Player?
A: Check out VMware installation steps in this explainer to install macOS without errors.
Wrapping Up: Experience macOS without paying a Fortune!
We hope this explainer has assisted you in installing macOS on your Windows 11/10 system. If you find it useful, spread the word with your friends, and check the below links for more helpful articles on macOS. Stay tuned to GadgetsToUse for more such reads.
Also, Read:
- MacOS Ventura Stage Manager Tricks: Hide Recent Apps, Show Desktop Files, and More.
- How to Unblock AirDroid to run on macOS.
- Guide to Install ADB on Your Mac and Connect Android
- How to Install macOS Dynamic Wallpapers on Windows 11/10.
You can also follow us for instant tech news at Google News or for tips and tricks, smartphones & gadgets reviews, join GadgetsToUse Telegram Group, or for the latest review videos subscribe GadgetsToUse Youtube Channel.
Запуск macOS на компьютере с Windows всегда был утомительной работой. В отличие от Windows, macOS в значительной степени зависит от аппаратной совместимости для бесперебойной работы на любом компьютере. Но что, если мы скажем вам, что есть простой способ установить и использовать то же самое с вашей операционной системой Windows? В этом объяснении мы продемонстрировали простые шаги по установке macOS в Windows 11/10. Кроме того, вы можете попробовать функцию быстрого просмотра macOS на своем компьютере с Windows.
Предварительные требования для установки
Для этой демонстрации мы установим macOS Catalina в Windows 11 с помощью стороннего программного обеспечения для виртуализации под названием VMware Player. Преимущество использования этого программного обеспечения заключается в том, что вам не нужно форматировать или перемещать системные данные для его установки. Все, что вам нужно сделать, это создать виртуальный диск с помощью VMware в вашей системе и установить на него macOS, чтобы пользоваться тем же. Давайте посмотрим на предварительные условия для его установки.
- Включить виртуализацию
- Отключить гипервизор
- Скачать образ macOS
Включить технологию виртуализации в Windows
Технология виртуализации помогает пользователям эмулировать и запускать различные операционные системы на одном компьютере. Чтобы установить macOS в качестве виртуальной машины на ПК с Windows, необходимо убедиться, что технология виртуализации включена в BIOS вашего устройства. Вот как вы можете проверить то же самое:
1. Перезагрузите ваш ПК с Windows и нажмите специальную клавишу Функциональная клавиша при запуске, чтобы войти в BIOS вашей системы. Если вы не уверены в ключе, вы можете найти его, введя в Google номер модели вашей системы.
2. Затем перейдите к конфигурация вкладка и найти Виртуальная технология чтобы активировать его. После этого сохраните изменения и перезагрузите систему.

Отключить Windows Hyper-V для установки виртуальных машин
По умолчанию Microsoft Windows поставляется с собственным продуктом виртуализации под названием «Hyper-V», который позволяет создавать и запускать виртуальные машины. Поскольку мы используем стороннее программное обеспечение для виртуализации (VMware) для запуска нашей «виртуальной macOS», которая предлагает гораздо больше функций настройки, вам следует отключить Hyper-V на вашем компьютере, чтобы избежать конфликтов между ними. Вот чему вам нужно следовать.
1. нажмите Клавиша Windows и доступ Безопасность Windows настройки.
2. Затем нажмите на Безопасность устройства возможность его настройки.

3. Затем нажмите кнопку Изоляция жилы функцию для доступа к его настройкам.
4. Enfin, éteindre рокер для Изоляция памяти чтобы выключить его. Это предотвратит нарушение безопасности Windows при смене системного продукта (в данном случае Hyper-V).

5. Теперь беги Командная строка с правами администратора.

6. Выполните следующую команду на терминале, чтобы отключить гипервизор Windows (Hyper-V):
Отключить тип запуска гипервизора

7. Перезагрузите систему, чтобы применить изменения.
Загрузить образ VMware macOS Catalina
Последним требованием для установки macOS Catalina является ее образ VMware. Выполните следующие действия, чтобы загрузить то же самое.
1. скачать macOS Catalina Образ VMware по ссылке на Google Диск.
2. Затем извлеките загруженный сжатый файл в свою систему с помощью собственных или сторонних инструментов распаковки, таких как WinRAR.
Conseil: Пароль для извлечения сжатого файла geekrar.com
3. После извлечения вы увидите .vmdk-файл который будет использоваться для установки.
Теперь, когда вы выполнили предварительные условия, давайте рассмотрим шаги по установке macOS в Windows 11/10.
1. Загрузите и установите VMware Workstation Player с официального сайта.
2. Затем загрузите инструмент VMware Unlocker и извлеките загруженный файл в новую папку.
3. Найдите победа-install.cmd в списке извлеченных файлов и щелкните правой кнопкой мыши, чтобы запустить его как Administrateur.

4. Команды в файле win-install.cmd исправят установленный VMware Workstation Player, добавив запись для Apple macOS во время установки.
5. Откройте VMware Workstation Player и создайте Новая виртуальная машина.

6. Тогда выбирай ‘Я установлю операционную систему позже‘ и нажмите кнопку следующая кнопка.

7. Выбирать Apple Mac OS X из списка и выберите Macos 10.15 для установки macOS Catalina.
8. Обеспечить новое имя на виртуальную машину и нажмите кнопку следующая кнопку, чтобы продолжить.

9. Выделить не менее 80 Go место на диске и нажмите кнопку следующая кнопку для завершения настройки конфигурации.
десять. Щелкните по нему Заканчивать кнопку, чтобы завершить создание новой виртуальной машины.

11 Теперь нажмите Изменить настройки виртуальной машины изменить конфигурацию созданной ВМ.

12 Здесь выберите Диске Дур на левой боковой панели и нажмите кнопку отзывать кнопку, чтобы удалить его.

13 После удаления нажмите кнопку Добавить кнопку для добавления нового виртуального оборудования на вашу машину.
14 Выбирать Диске Дур в списке Типы материалов.

15 Choisissez le SATA-дисковод под типом виртуального диска.
16 Затем выберите «Использовать существующий виртуальный диск‘.
17 На следующей странице нажмите кнопку Просматривать кнопку, чтобы найти .vmdk-файл извлеченный ранее из скачанного файла.
18 Выберите macOS Каталина Финал .vmdk файл и нажмите кнопку открытый кнопку, чтобы выделить его для вашей виртуальной машины.
19 нажмите Заканчивать кнопку, чтобы сохранить изменения.

Pro tip: если вы получите приглашение преобразовать существующий виртуальный диск в более новый формат, нажмите кнопку Сохранить существующий формат чтобы сохранить исходный формат диска.

20 Щелкните по нему ХОРОШО кнопка сохранения изменений.

21 Наконец, нажмите кнопку Играть на виртуальной машине возможность загрузки в виртуальную машину macOS.
Профессиональный совет 2: Если вы получите ‘невозможно подключить виртуальное устройство sata0:1 предупреждение, просто закройте всплывающее окно, чтобы игнорировать его.
22 Теперь вы загрузитесь в macOS Catalina, где увидите логотип Apple.
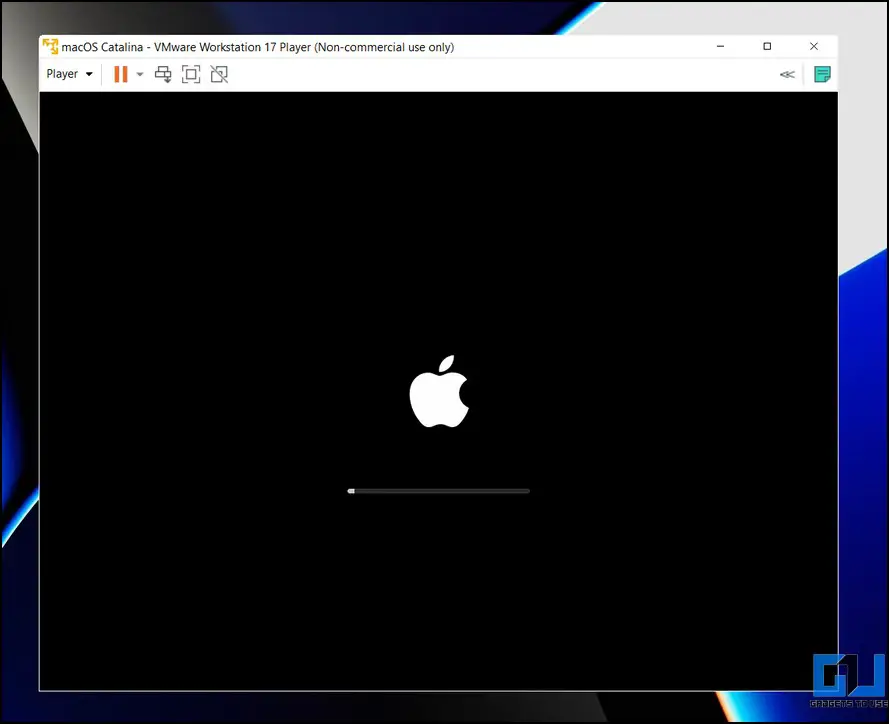
23 Подождите несколько минут, пока macOS не установится на выделенный виртуальный диск. Виртуальная машина автоматически перезапустится после завершения установки.

24 После перезапуска выберите желаемый регион для настройки macOS. Вы также можете нажать кнопку Клавиша выхода для настройки вашего Mac с функцией Voiceover.
25 Затем выберите письменный и разговорный язык и нажмите кнопку Продолжатель кнопка.

26 Теперь вы увидите страницу для передачи информации со своего старого Macbook или ПК с Windows. В качестве альтернативы, если вы хотите сбросить macOS, выберите «Не передавать никакую информацию сейчас‘.

27 Затем пропустите параметр настройки iCloud, нажав кнопку Настроить позже кнопка. (Действительно, пользователи часто сообщали о проблемах с завершением настройки после входа в iCloud во время первоначальной настройки. Вы можете войти в iCloud позже после запуска macOS)
28 На следующей странице нажмите кнопку принимать кнопку, чтобы принять Условия использования.
29 Введите ваше желание Имя учетной записи et Пароль для виртуальной машины и нажмите кнопку Продолжатель кнопка.
30 Начать Экспресс-настройка и нажмите Продолжатель кнопка. Если вы хотите настроить некоторые функции во время установки, вы можете нажать кнопку «Настроить параметры».
31 Sélectionnez votre внешний вид темы для macOS и нажмите «Продолжить».
32 Вот и все! Подождите несколько секунд, чтобы завершить настройку Mac.

33 После запуска примите положения и условия Ассистента обратной связи и войдите под своим Apple ID для доступа ко всем функциям iCloud на вашей виртуальной машине.
34 Радость! Вы успешно установили macOS Catalina в Windows 11/10 с помощью VMware. Вы можете отправиться в ‘Об этом Mac‘, чтобы увидеть подробную информацию о вашем ‘Virtual Mac’.

35 Мы протестировали большинство функций Virtual Mac, и, похоже, они работают нормально, без серьезных ошибок или сбоев. Вы также можете обновить систему до последней версии, установив доступные обновления.
Устранение распространенных проблем при установке
Если у вас возникли проблемы с установкой macOS Catalina на ПК с Windows, в этом разделе мы собрали некоторые распространенные исправления ошибок, которые помогут вам легко их исправить.
Ошибка 1: VMware Player и Hyper-V несовместимы
Вы должны отключить Hyper-V в своей системе, чтобы запустить виртуальную машину в VMware Workstation Player. Выполните действия, описанные в разделе предварительных условий выше, чтобы решить проблему.
Ошибка 2: Нет параметра Apple MacOS X в мастере настройки виртуальной машины
Скачайте и запустите ‘Возможность разблокировки CMD‘, чтобы исправить VMware, чтобы добавить запись для Apple Mac OS X при установке виртуальной машины. Дополнительные сведения см. в разделе предварительных требований.
Предупреждение 1. Преобразуйте существующий виртуальный диск в новый формат
Сохраните исходное соотношение сторон, нажав кнопку ‘Сохранить существующий формат‘ кнопка. Преобразование изображения в новый формат может привести к его повреждению.

Ошибка 3: Фатальная ошибка рабочей станции Vmware
Выполните следующие простые шаги, чтобы исправить неисправимую ошибку VMware Workstation:
1. Перейти к вашей системе Документ > Виртуальные машины > MacOS Catalina папку и найдите .vmx файл, чтобы отредактировать его с помощью Блокнота.
2. Затем добавьте следующую строку в конце и сохраните изменения:
smc.версия = «0»
3. Запустите виртуальную машину, чтобы проверить, решена ли проблема.
Предупреждение 2: невозможно подключить виртуальное устройство Sata0:1
Самый простой способ устранить это предупреждение и запустить macOS без ошибок — игнорировать его. Просто закройте окно предупреждения, нажав кнопку X кнопка.

FAQ
В: Как установить macOS на ПК с Windows без Mac?
ONE: Вам необходимо создать виртуальную машину на ПК с Windows, чтобы установить macOS в Windows. Следуйте простым шагам, описанным в этом руководстве, чтобы установить macOS на ПК с Windows.
В: Можно ли установить macOS на Windows 11?
ONE: Да, вам потребуется стороннее программное обеспечение для виртуализации, такое как VMware, для создания виртуальной macOS в Windows 11. Подробности см. в шагах выше.
В: Как установить macOS на VMware Workstation Player?
ONE: См. шаги установки VMware в этом объяснении, чтобы установить macOS без ошибок.
Вывод: откройте для себя macOS, не заплатив целое состояние!
Мы надеемся, что это объяснение помогло вам установить macOS в вашей системе Windows 11/10. Если вы сочтете это полезным, расскажите об этом своим друзьям и ознакомьтесь с приведенными ниже ссылками на другие полезные статьи о macOS. Оставайтесь с нами для большего количества таких чтений.
Узнайте больше о сравнениях, обзорах и пробных версиях продуктов, а также о советах и рекомендациях по neuf.tv

Флориан
Здравствуйте, меня зовут Флориан, я увлекаюсь новыми технологиями, люблю тестировать новые продукты. Я всегда стараюсь больше, чтобы иметь возможность найти лучшие и поделиться ими с вами. Чтобы узнать больше обо мне, посетите эта страница
Отказ от ответственности: некоторые статьи содержат партнерские ссылки на продукты Amazon. Если вы нажмете на эти ссылки и совершите покупку, мы можем получить комиссию без каких-либо дополнительных затрат для вас. Эти комиссионные помогают нам поддерживать нашу команду и продолжать предоставлять обзоры продуктов и пробные версии.