Под GNU/Linux-дистрибутивы создано огромное количество полезных и удобных инструментов и приложений для обычных пользователей и разработчиков. Далеко не всё из этого доступно на Windows, но, к счастью, для ОС от Microsoft есть решения, исправляющие эту проблему.
WSL — официальная подсистема Linux внутри Windows
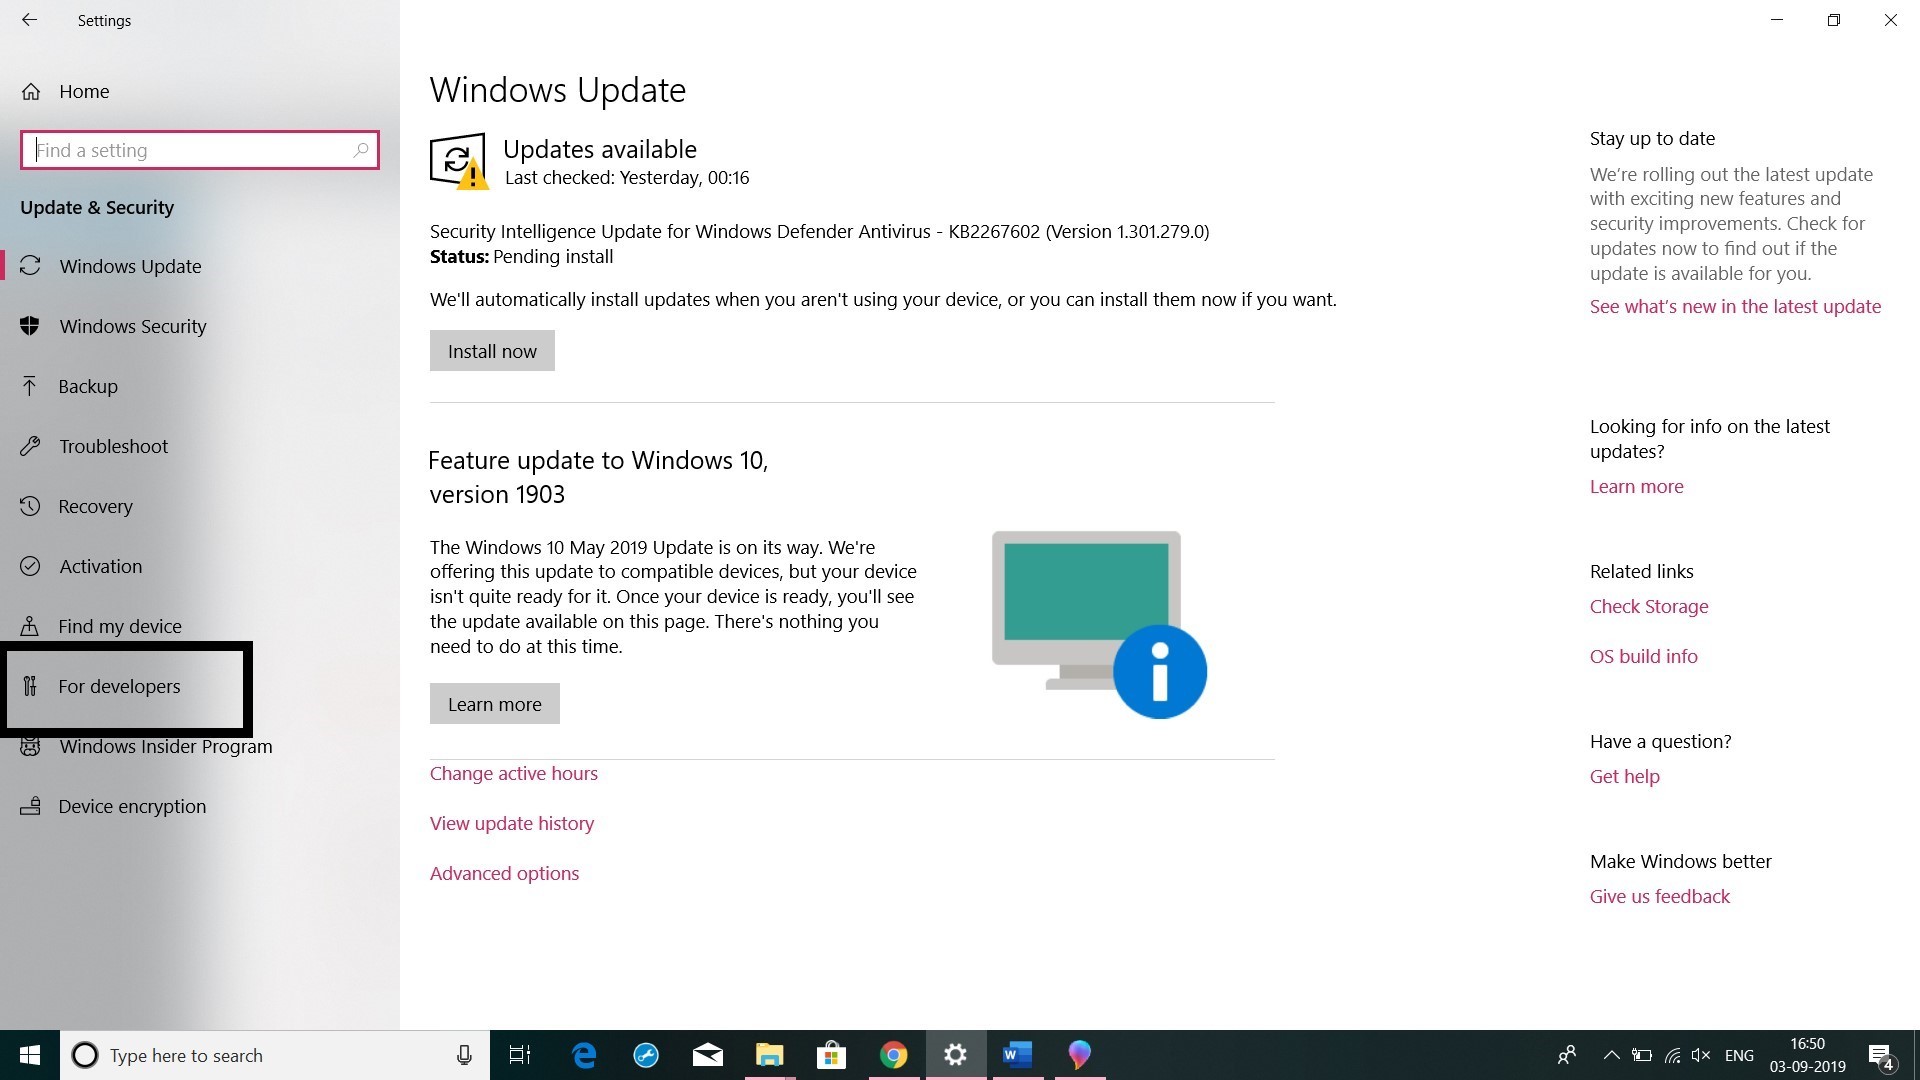
В Windows 10 существует крайне полезная вещь под названием Windows Subsystem for Linux (WSL). Она позволяет использовать GNU/Linux-среду прямо в Windows и запускать не только команды, но и, например, Bash-скрипты. Для использования WSL необходимо следовать инструкции ниже.
Шаг 1. Проверьте, подходит ли текущая версия Windows требованиям. Для этого нажмите сочетание клавиш Win+R, затем введите winver. Найдите строку «Сборка ОС» — она должна быть свежее версии 14316.
Шаг 2. Запустите стандартную утилиту PowerShell от имени администратора и введите в ней команду для включения WSL:
dism.exe /online /enable-feature /featurename:Microsoft-Windows-Subsystem-Linux /all /norestart
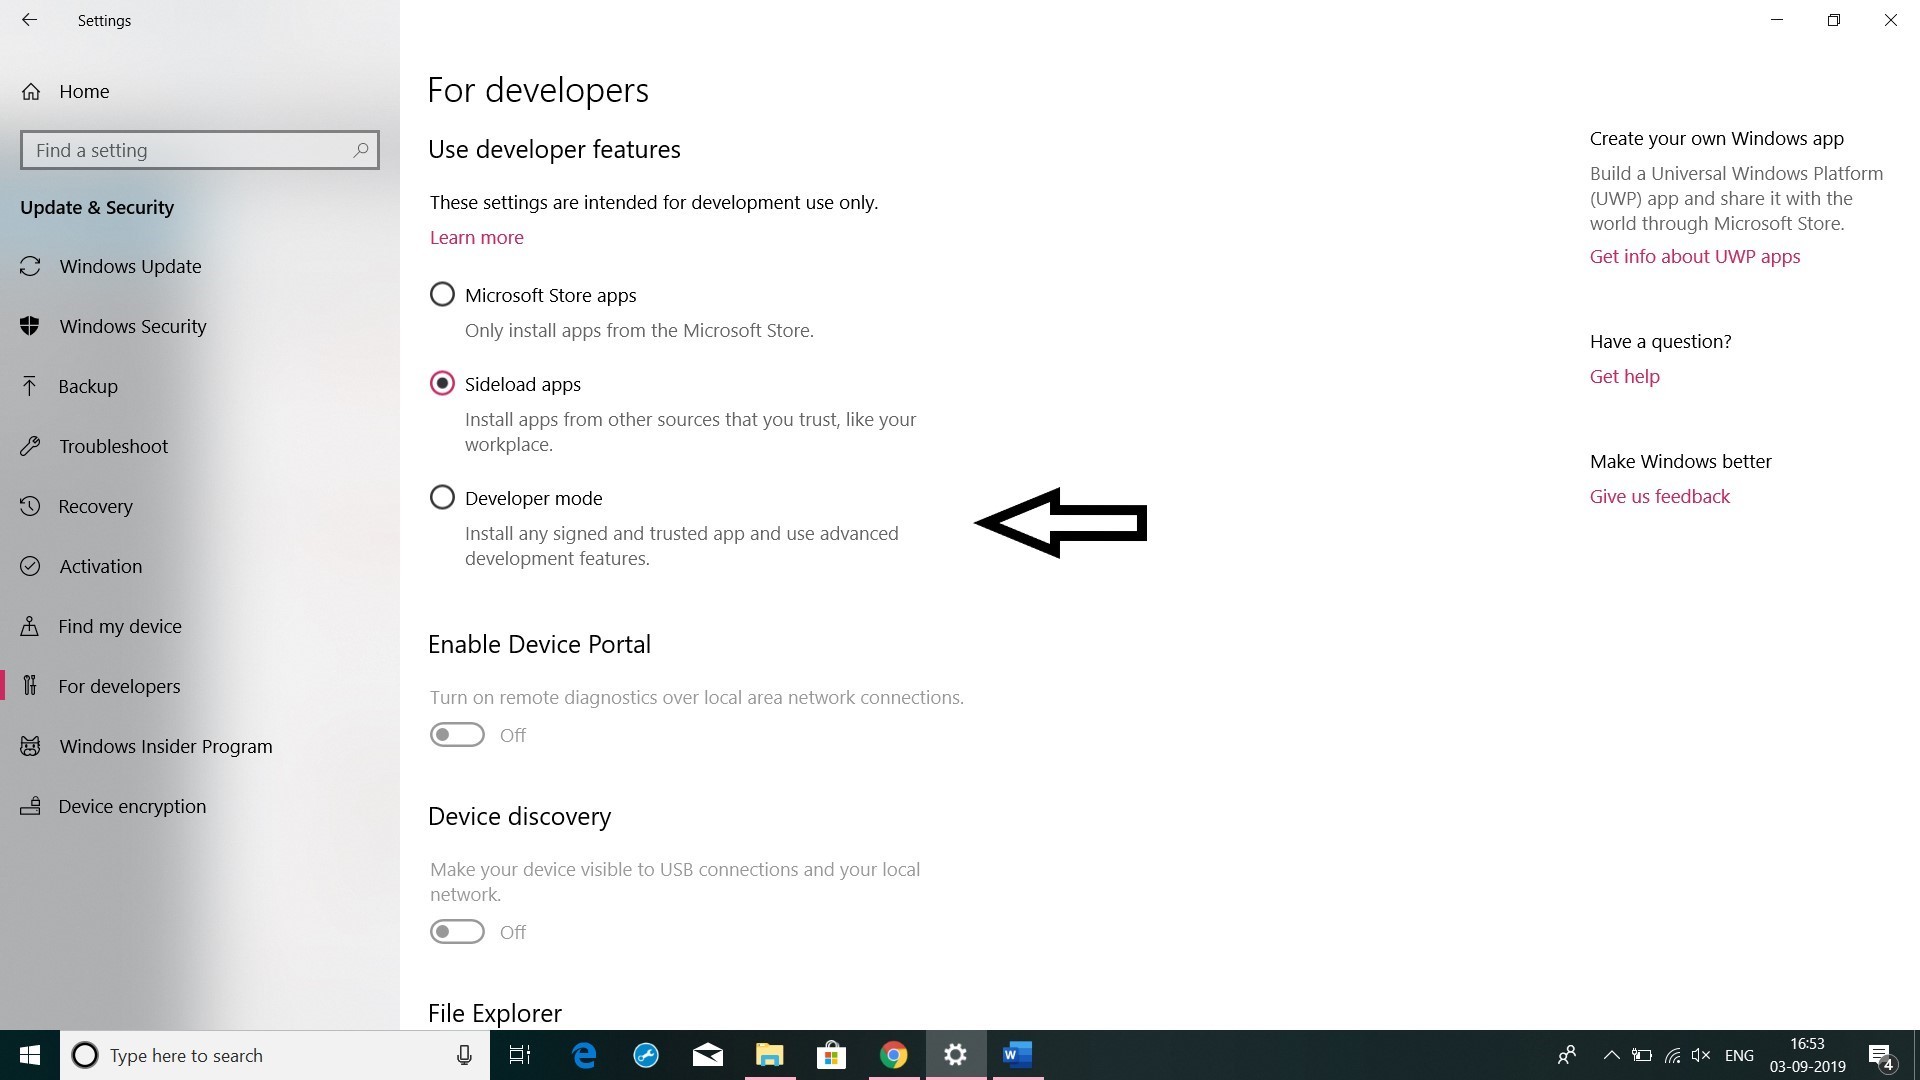
Шаг 3. Если версия Windows, определённая в первом пункте, свежее 18362, вы можете установить WSL 2, который в разы быстрее первой версии и обладает доработанным ядром. Введите команду ниже, если нужно установить WSL 2:
dism.exe /online /enable-feature /featurename:VirtualMachinePlatform /all /norestart
После этого скачайте и установите пакет обновления с официального сайта.
Шаг 4. Перезагрузите компьютер. Если была произведена установка WSL 2, введите в PowerShell от имени администратора следующую команду:
wsl —set-default-version 2
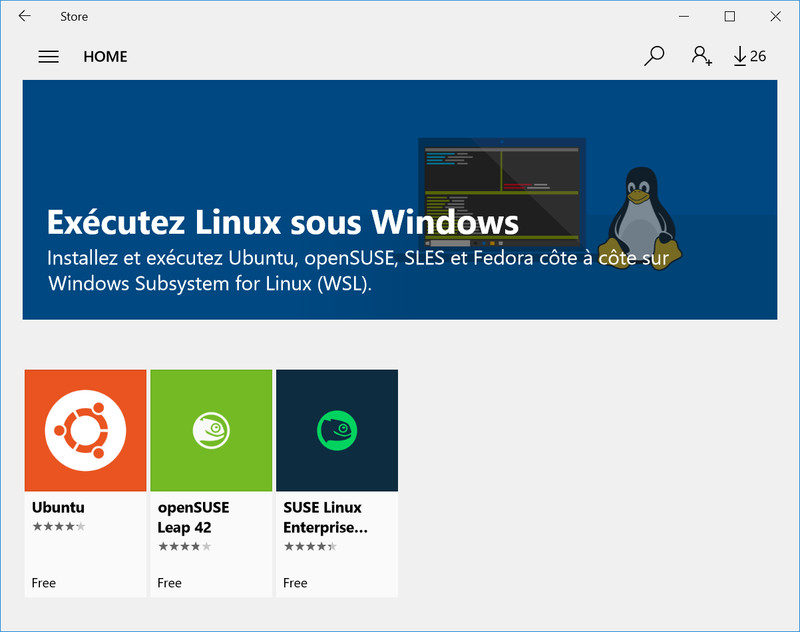
Шаг 5. После перезагрузки откройте фирменный магазин приложений Microsoft Store и найдите подходящий GNU/Linux-дистрибутив. Самым популярным является Ubuntu — вы можете установить любую версию из представленных в Microsoft Store.
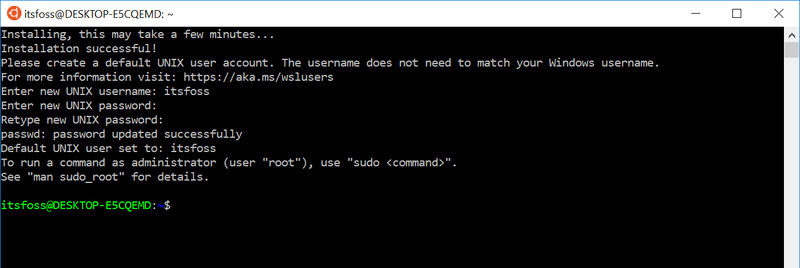
Шаг 6. Как только установка завершится, найдите дистрибутив в меню «Пуск» и запустите его.
Шаг 7. Пройдите этап первоначальной настройки, введя имя нового пользователя и придумав пароль.
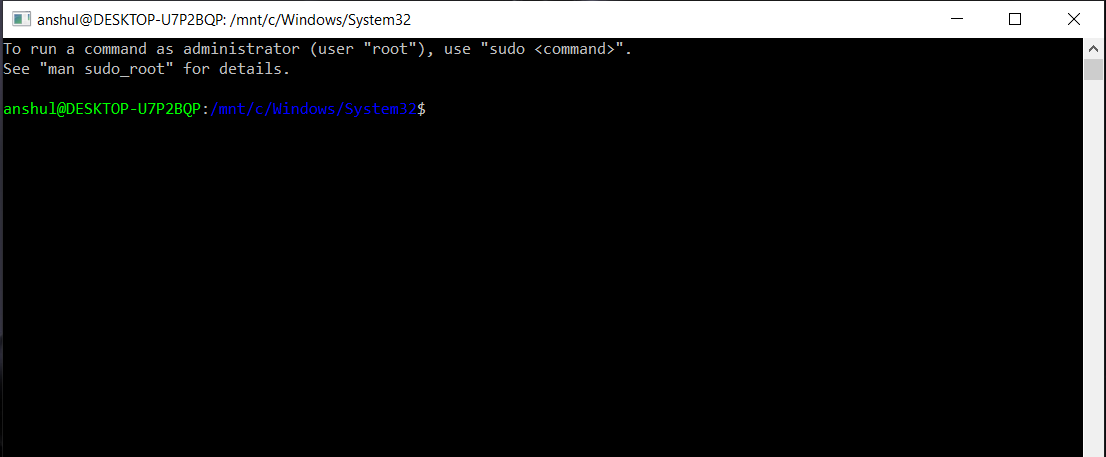
Шаг 8. Теперь различные GNU/Linux-команды можно выполнять, запустив дистрибутив, либо введя в командной строке wsl <команда>. Например, для просмотра всех файлов в текущей директории достаточно в командной строке выполнить wsl ls -a.
Обращу внимание на то, что путь к дискам в WSL отличается от такового в Windows. Вместо привычного C:/ используйте /mnt/c/. Также не забывайте про экранирование пробелов с помощью символа \ — это также пригодится при вводе путей к файлам.
Помимо выполнения базовых команд, с помощью WSL можно даже запускать приложения с графическим интерфейсом. Правда, рассчитывать на большое количество поддерживаемых подобных программ не стоит.
Шаг 1. Загрузите X-сервер и установите его.
Шаг 2. Запустите его с помощью ярлыка на рабочем столе. В открывшемся окне выберите вариант Multiple windows, затем Start no client. Завершите настройку кнопкой Finish.
Шаг 3. Откройте дистрибутив через меню Пуск и выполните команду export DISPLAY=:0
Шаг 4. Запустив приложение с графическим интерфейсом в WSL, вы увидите новое окно прямо в Windows.
CoreUtils — лёгкий инструмент для запуска базовых команд
Плюс данной утилиты — возможность запуска не только на Windows 10, но и на более старых версиях ОС. Кроме того, она легка и не занимает много места. Не обошлось без недостатков — программа скудна на функционал и не обновлялась очень давно. Она не только не умеет запускать скрипты и приложения с GUI, но и поддерживает лишь самые базовые GNU/Linux-команды. Установка CoreUtils весьма проста.
Шаг 1. Скачайте утилиту с официального сайта.
Шаг 2. Следуйте инструкциям установщика.
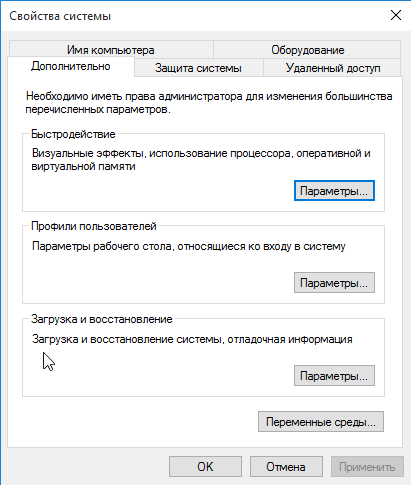
Шаг 3. Откройте «Панель управления», в разделе «Система и безопасность» выберите пункт «Система». На панели слева откройте «Дополнительные параметры системы». Нажмите кнопку «Переменные среды» и в открывшемся окне найдите область с заголовком «Системные переменные». В случае, когда там есть переменная Path, выберите её, нажмите «Изменить» и далее создайте новую строку. Содержимым этой строки должен быть путь к папке, который был указан при установке. Если вы ничего не меняли, то введите следующее:
C:\Program Files (x86)\GnuWin32\bin
Переменной Path нет? Тогда для начала создайте её кнопкой «Создать», затем в поле имени введите Path, а в поле значения — строку выше.
Шаг 4. Запустите командную строку и выполняйте команды прямо там.
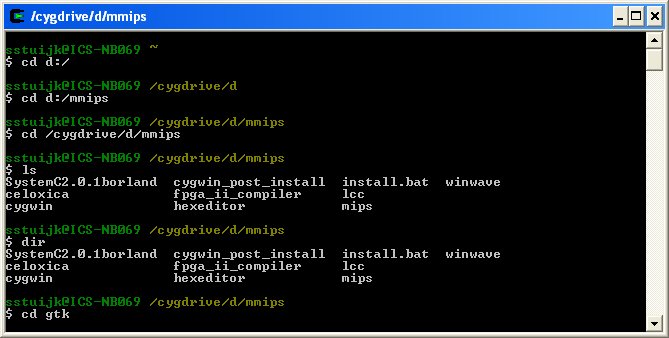
Cygwin — запуск команд и Bash-скриптов
Ещё одна утилита, схожая с CoreUtils, но обладающая более широким функционалом — в том числе и возможностью запуска скриптов. Из минусов — немалый вес и более сложная установка. Разумеется, не идёт ни в какое сравнение с максимально удобным WSL, но для базовых команд вполне подойдёт.
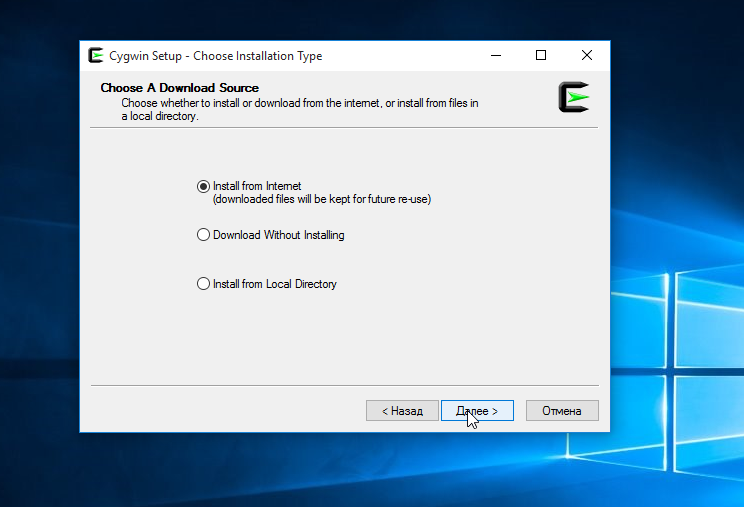
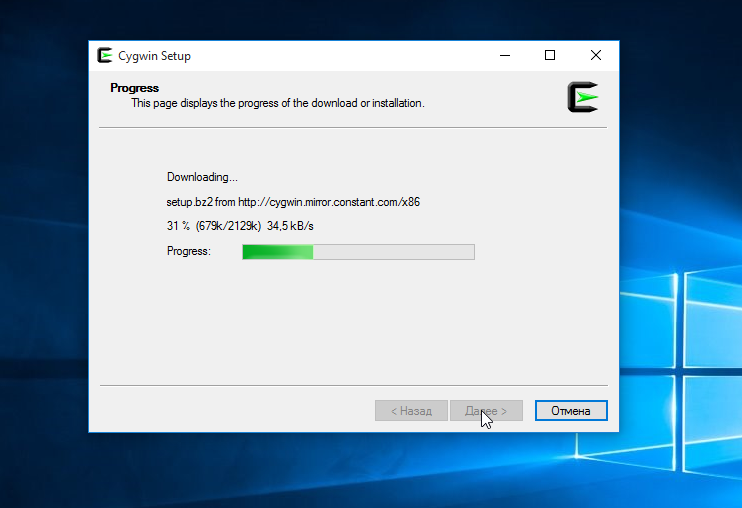
Шаг 1. Загрузите Cygwin и запустите установку.
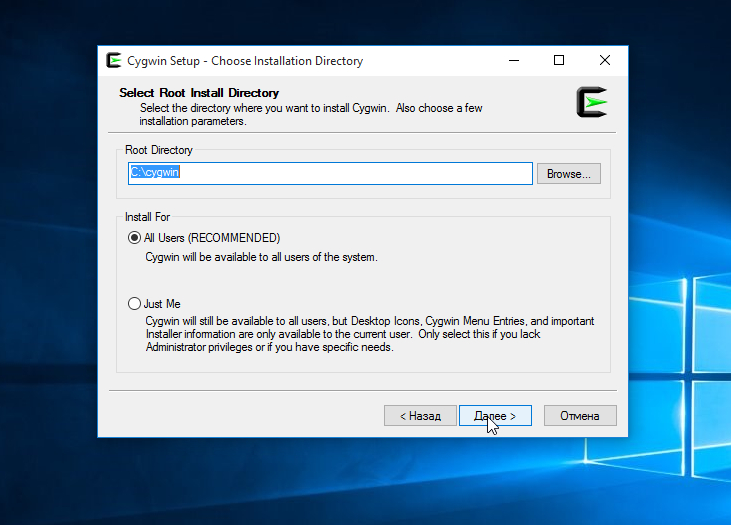
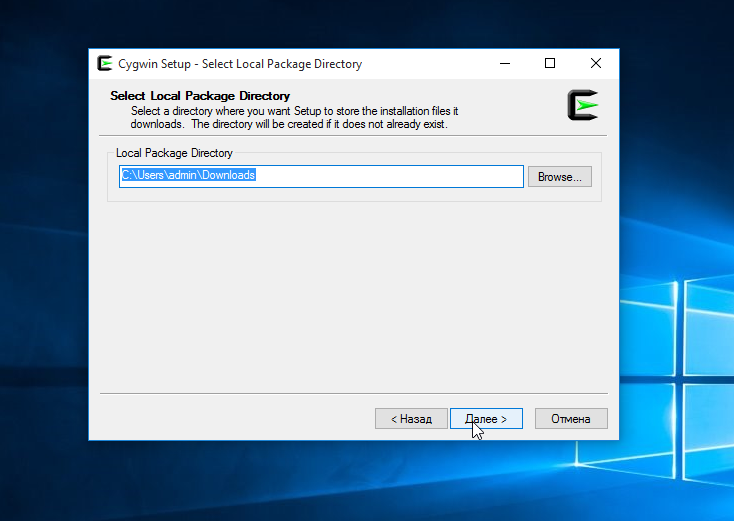
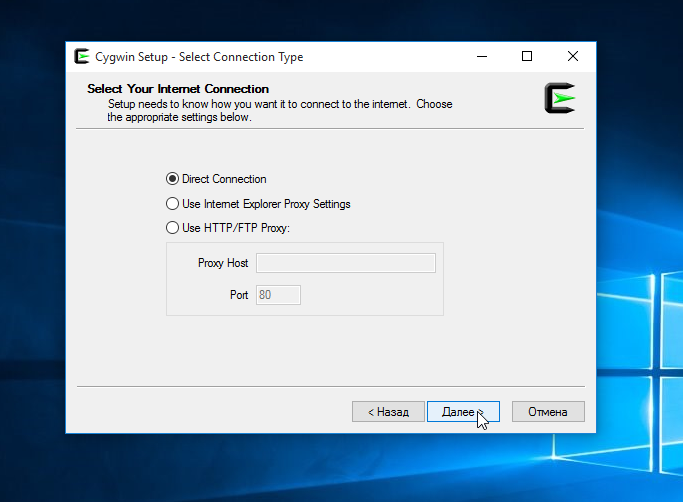
Шаг 2. Выберите Install from Internet, укажите директории для установки и загрузки пакетов, а также любой подходящий сайт из списка для скачивания файлов.
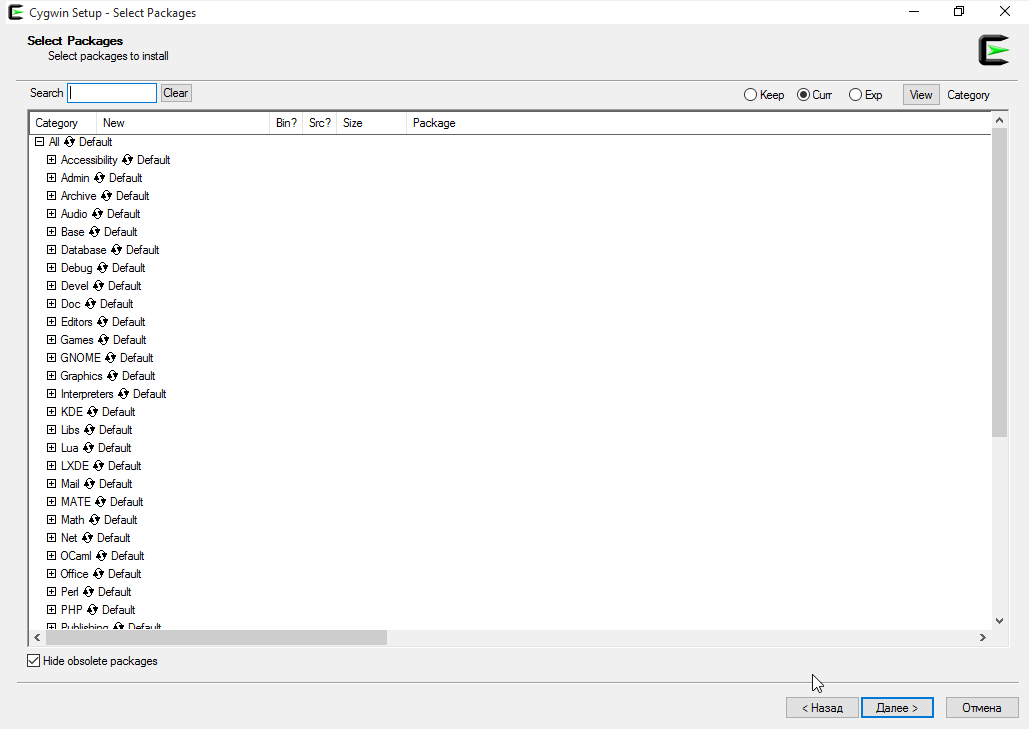
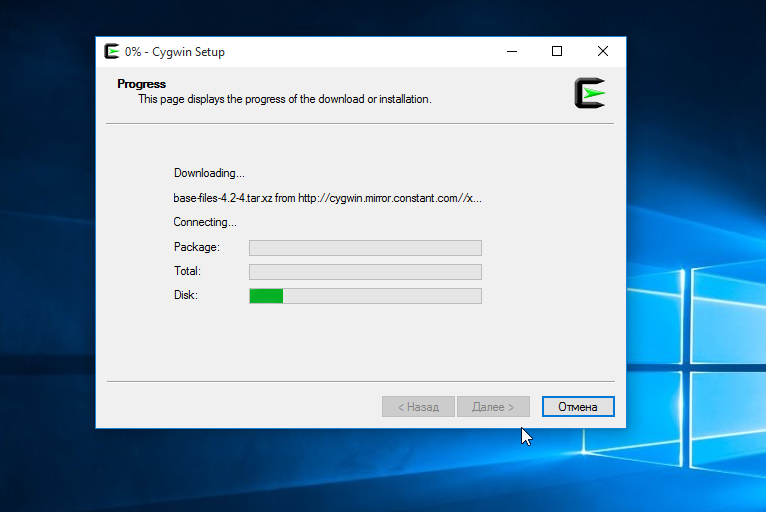
Шаг 3. В процессе установки можете выбрать необходимые пакеты, либо сразу нажать «Далее», оставив базовый набор.
Шаг 4. Откройте «Панель управления», в разделе «Система и безопасность» выберите пункт «Система». На панели слева откройте «Дополнительные параметры системы». Нажмите кнопку «Переменные среды» и в открывшемся окне найдите область с заголовком «Системные переменные». В случае, когда там есть переменная Path, выберите её, нажмите «Изменить» и далее создайте новую строку. Содержимым этой строки должен быть путь к папке, который был указан при установке. Если вы ничего не меняли, то введите следующее:
C:\cygwin64\bin
Переменной Path нет? Тогда для начала создайте её кнопкой «Создать», затем в поле имени введите Path, а в поле значения — строку выше.
Шаг 5. Команды можно выполнять как через командную строку, так и через специальный терминал.
Шаг 6. Для удаления Cygwin достаточно удалить папку, в которую программа была установлена, а также (по желанию) значение из переменной Path по методу, обратному тому, что был описан в 4 шаге (не удаляйте саму переменную).
If you are learning Shell scripting probably as a part of your course curriculum, you need to use Linux commands to practice the commands and scripting.
Your school lab might have Linux installed but you don’t have a Linux laptop but a regular Windows computer like everyone else. Your homework needs to run Linux commands and you wonder how to run Bash commands and scripts on Windows.
You can install Linux alongside Windows in dual boot mode. This method allows you to choose either Linux or Windows when you start your computer. But taking all the trouble to mess with partitions for the sole purpose of running Linux commands may not be for everyone.
You can also use Linux terminals online but your work won’t be saved here.
The good news is that there are several ways you can run Linux commands inside Windows, like any regular application. Isn’t it cool?
Using Linux commands inside Windows
As an ardent Linux user and promoter, I would like to see more and more people using ‘real’ Linux but I understand that at times, that’s not the priority. If you are just looking to practice Linux to pass your exams, you can use one method to run Bash commands on Windows.
1. Use Linux Bash Shell on Windows 10 with WSL
Did you know that you can run a Linux distribution inside Windows 10? The Windows Subsystem for Linux (WSL) allows you to run Linux inside Windows. The upcoming version of WSL will be using the real Linux kernel inside Windows.
This WSL, also called Bash on Windows, gives you a Linux distribution in command-line mode running as a regular Windows application. Don’t be scared with the command line mode because your purpose is to run Linux commands. That’s all you need.
You can find some popular Linux distributions like Ubuntu, Kali Linux, openSUSE etc in Windows Store. You just have to download and install it like any other Windows application. Once installed, you can run all the Linux commands you want.
Please refer to this tutorial about installing Linux bash shell on Windows.
How to Install Linux Bash Shell on Windows [Step-by-Step Guide]
Step-by-step screenshot guide to show you how to install bash on Windows 11 and 10.
 It’s FOSSAbhishek Prakash

2. Use Git Bash to run Bash commands on Windows
You probably know what Git is. It’s a version control system developed by Linux creator Linus Torvalds.
Git for Windows is a set of tools that allows you to use Git in both command line and graphical interfaces. One of the tools included in Git for Windows is Git Bash.
Git Bash application provides and emulation layer for Git command line. Apart from Git commands, Git Bash also supports many Bash utilities such as ssh, scp, cat, find etc.
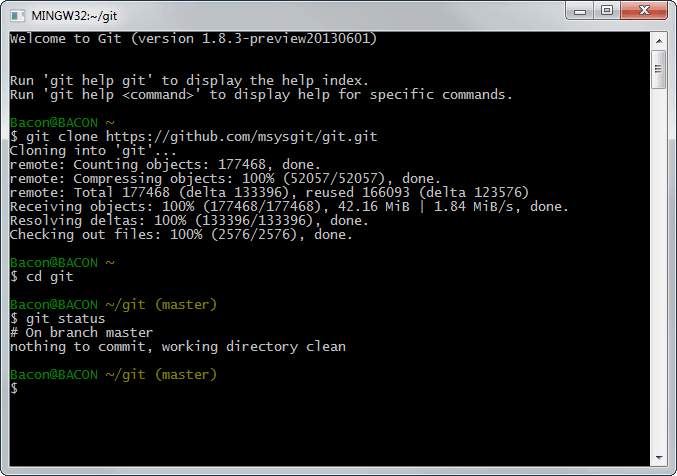
In other words, you can run many common Linux/Bash commands using the Git Bash application.
You can install Git Bash in Windows by downloading and installing the Git for Windows tool for free from its website.
3. Using Linux commands in Windows with Cygwin
If you want to run Linux commands in Windows, Cygwin is a recommended tool. Cygwin was created in 1995 to provide a POSIX-compatible environment that runs natively on Windows. Cygwin is a free and open source software maintained by Red Hat employees and many other volunteers.
For two decades, Windows users use Cygwin for running and practicing Linux/Bash commands. Even I used Cygwin to learn Linux commands more than a decade ago.
You can download Cygwin from its official website below. I also advise you to refer to this Cygwin cheat sheet to get started with it.
4. Use Linux in a virtual machine
Another way is to use virtualization software and install Linux in it. This way, you install a Linux distribution (with a graphical interface) inside Windows and run it like a regular Windows application.
This method requires that your system has a good amount of RAM, at least 4 GB but better if you have over 8 GB of RAM. The good thing here is that you get the real feel of using a desktop Linux. If you like the interface, you may later decide to switch to Linux completely.
There are two popular tools for creating virtual machines on Windows, Oracle VirtualBox and VMware Workstation Player. You can use either of the two. Personally, I prefer VirtualBox.
You can follow this tutorial to learn how to install Linux in VirtualBox.
Install Linux Inside Windows Using VirtualBox [Step by Step Guide]
Brief: Using Linux in a virtual machine gives you the option to try Linux within Windows. This step-by-step guide shows you how to install Linux inside Windows using VirtualBox. There are several ways to install Linux. You can clean everything from your system and install Linux. You can dual bo…
It’s FOSSAbhishek Prakash
Conclusion
The best way to run Linux commands is to use Linux. When installing Linux is not an option, these tools allow you to run Linux commands on Windows. Give them a try and see which method is best suited for you.
About the author

Abhishek Prakash
Created It’s FOSS 11 years ago to share my Linux adventure. Have a Master’s degree in Engineering and years of IT industry experience. Huge fan of Agatha Christie and classic detective mysteries 🕵️♂️
It is a dilemma when you want to switch from one operating system to another. This is a common case when you switch from Windows to Linux. Either you store your data and then uninstall Windows to install Linux and then transfer your data or you can have a dual boot system where you encounter an option as to which OS to choose in the beginning. Don’t you think that both methods require a lot of work? No worries! What if you practice Linux commands on Windows itself? Yes, it will save a lot of work! Here are some ways to run Linux commands on Windows.
Windows Subsystem for Linux(WSL)
Step 1: Go to Update and Security in Settings.
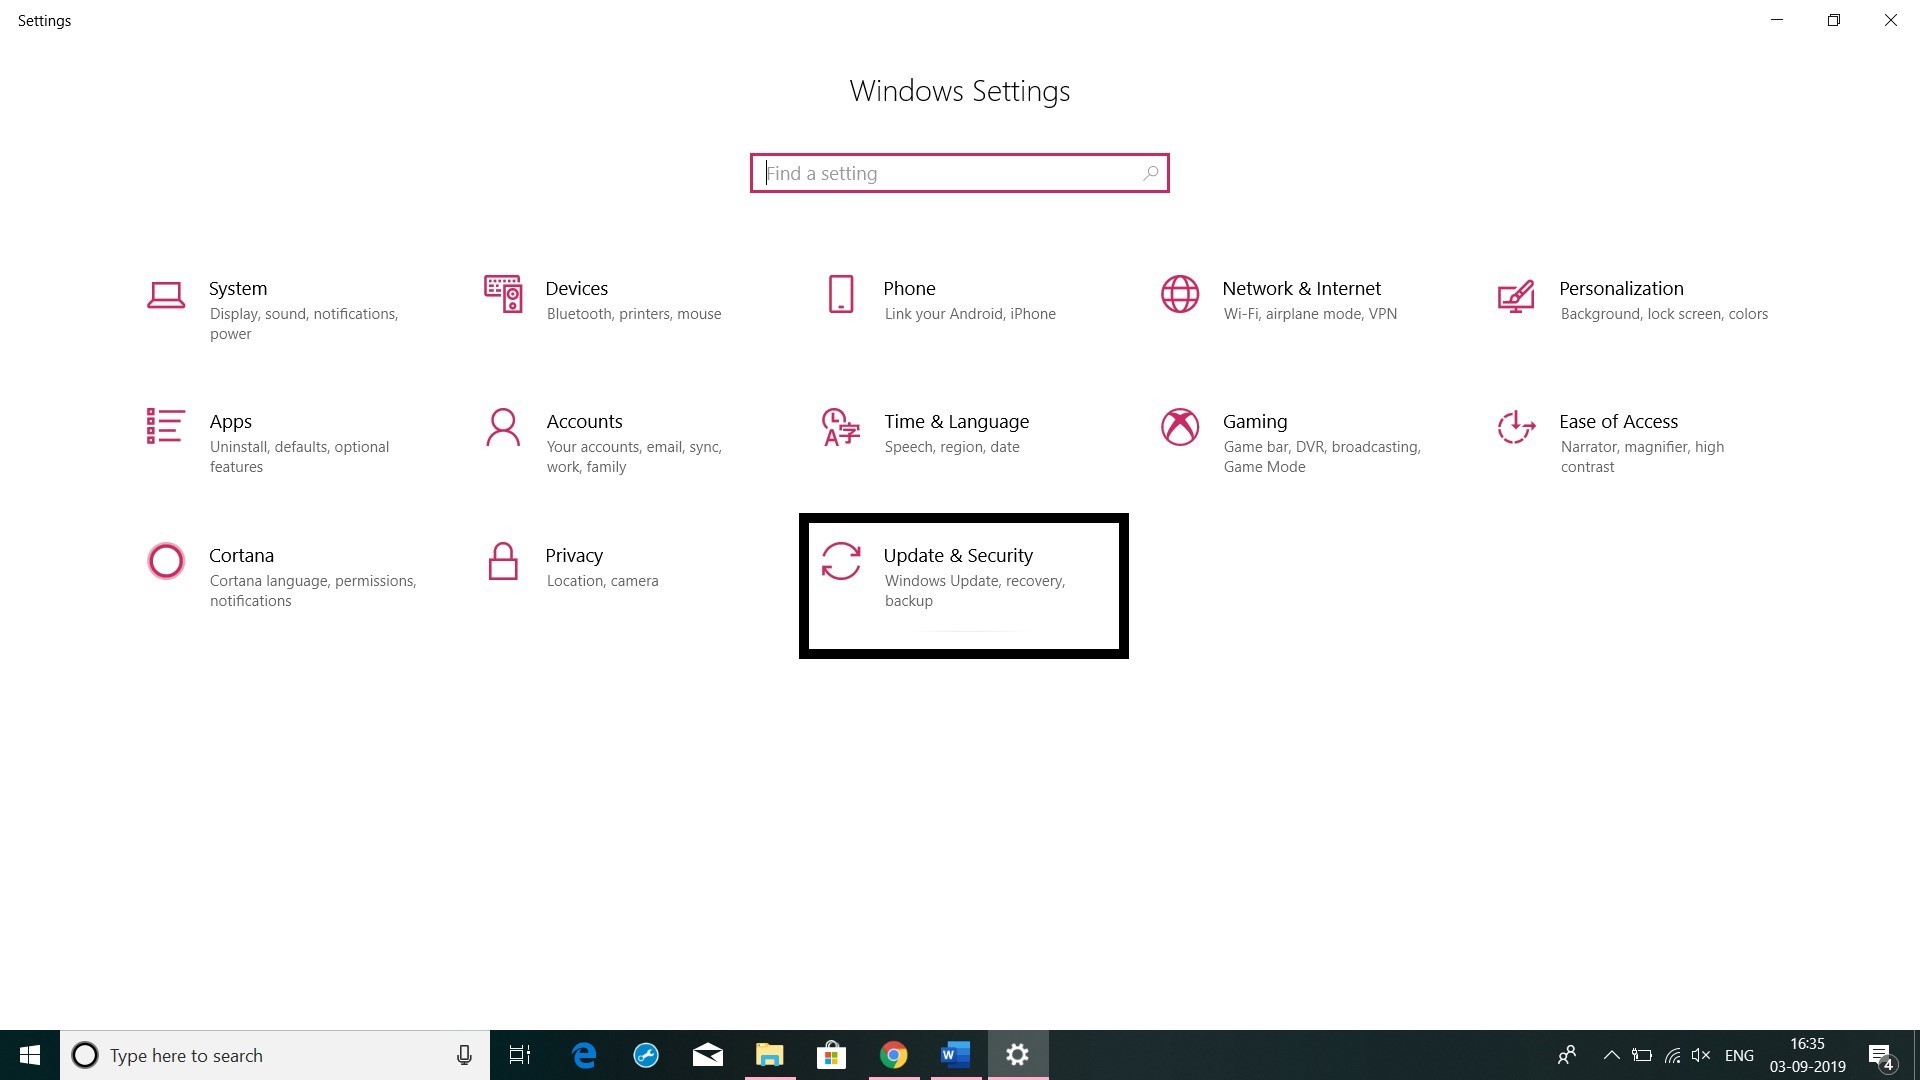
Step 2: Go to the Developer’s Mode and Select the Developer’s Mode option.
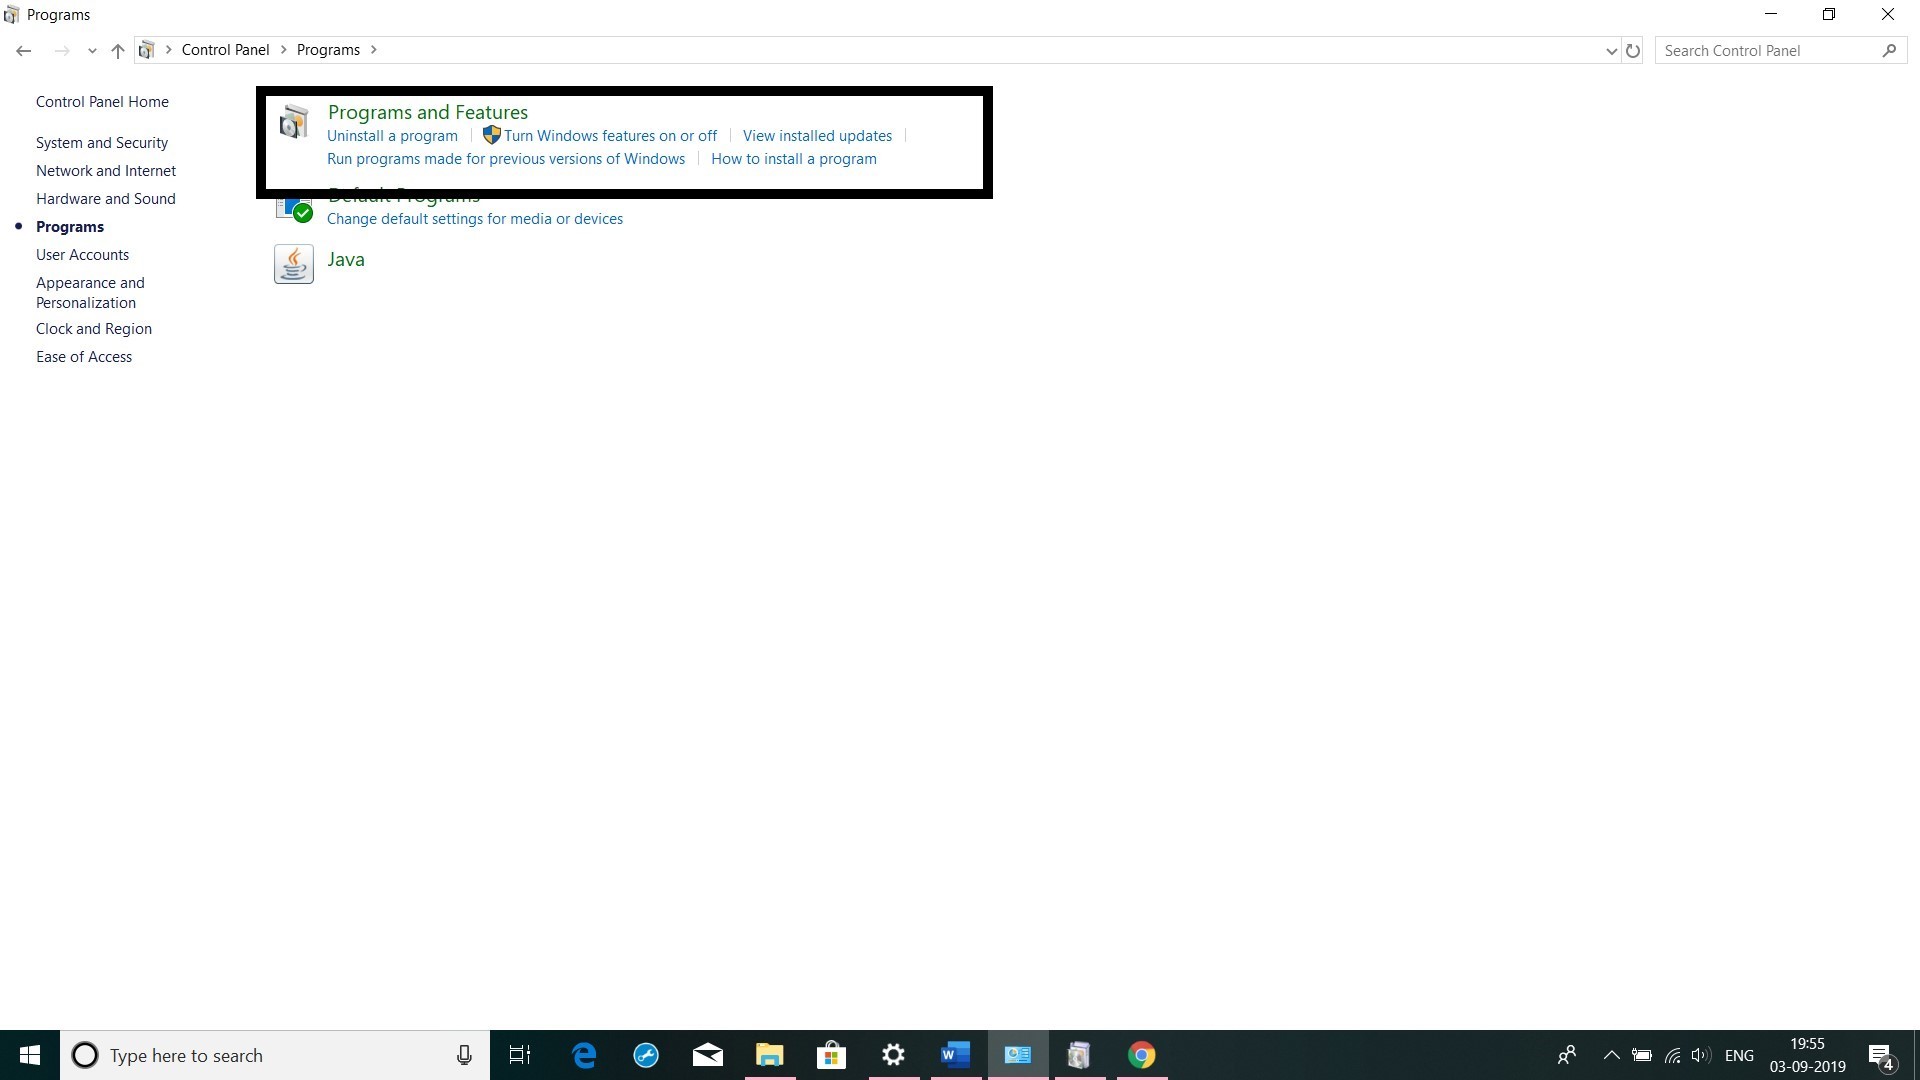
Step 3: Open the Control Panel.
Step 4: Click Programs and Features.
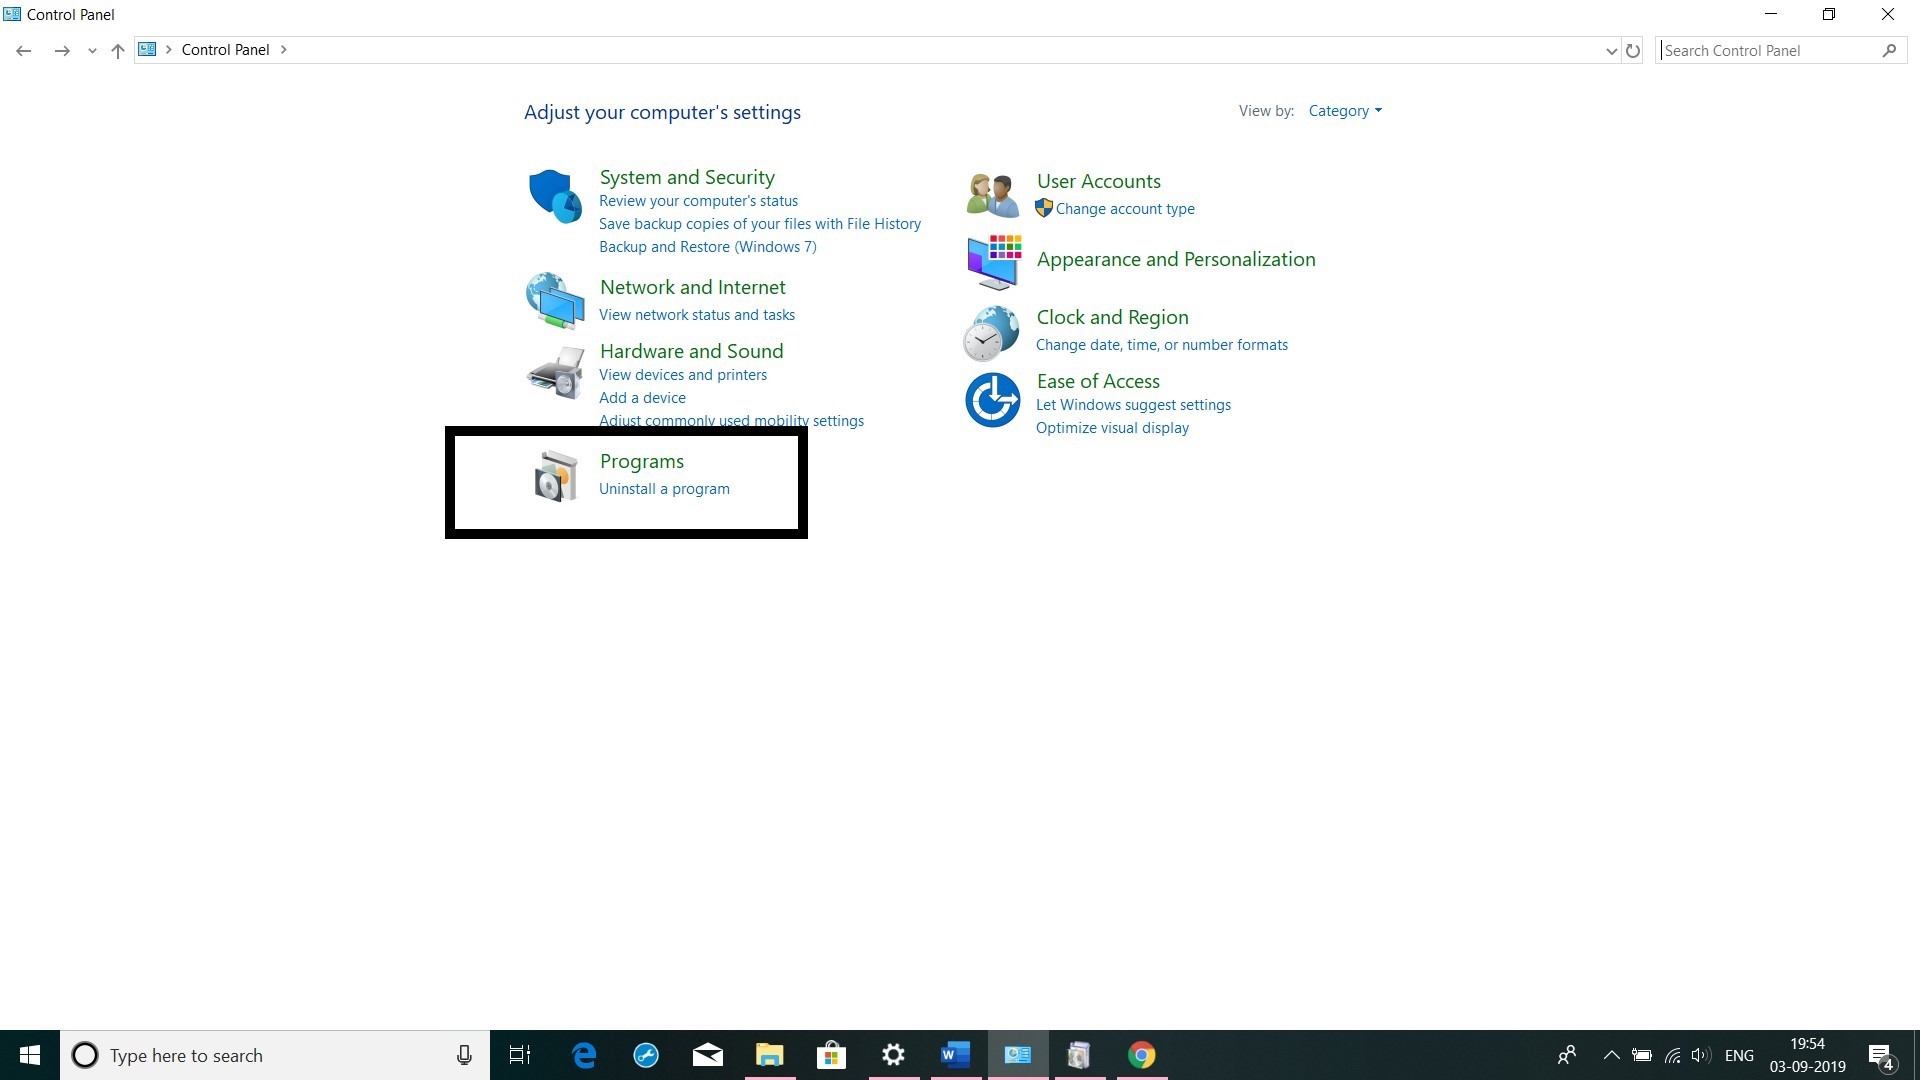
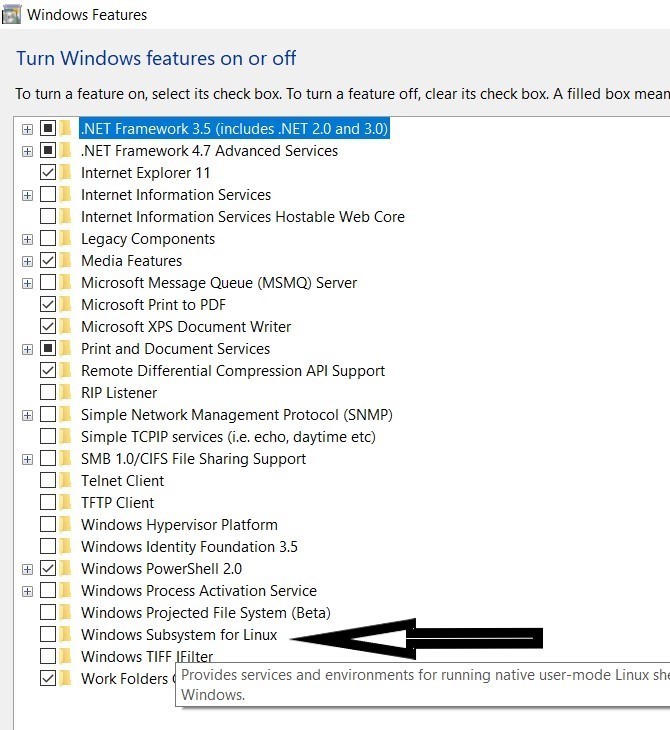
Step 5: Click Turn Windows Features On or Off.

Step 6: Enable the Windows Subsystem for Linux Option in the List. Click OK. Click Restart Now to Reboot your Computer.
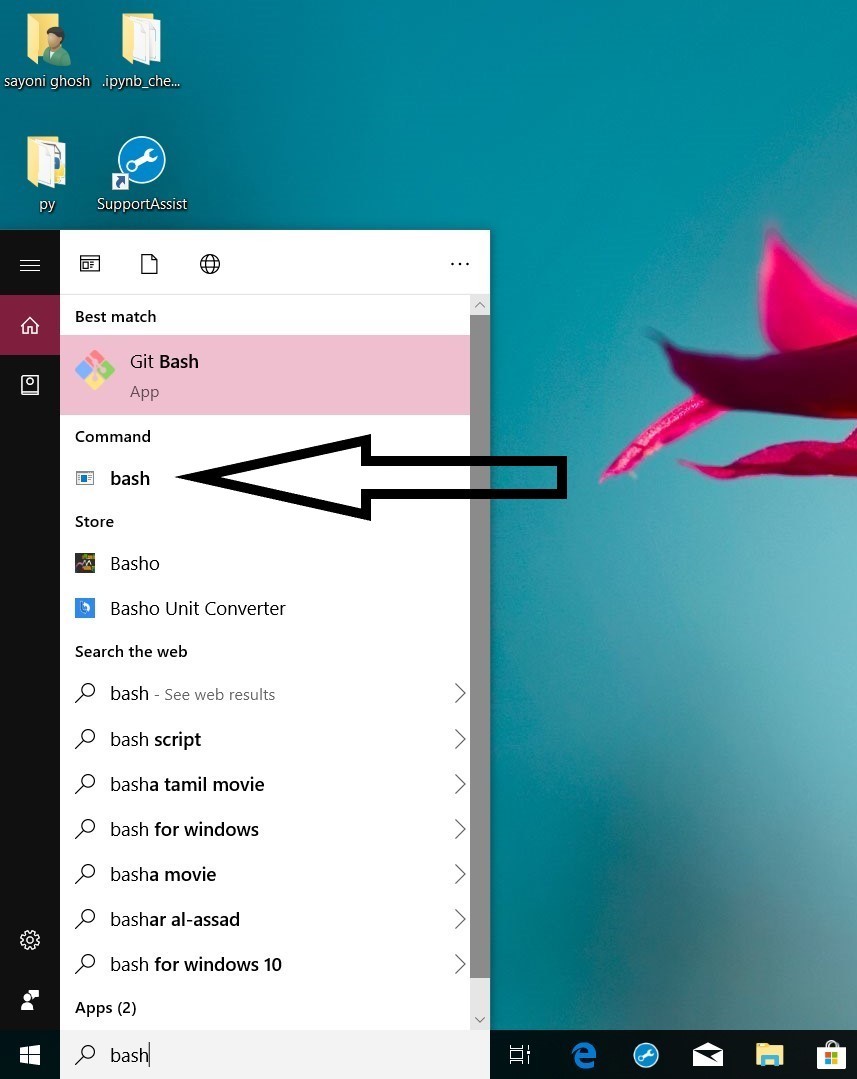
Step 7: Click the Start button (or press the Windows key), type bash, and press Enter.
Note: There are two problems that you might face after this step:
1. If you are seeing a message like:
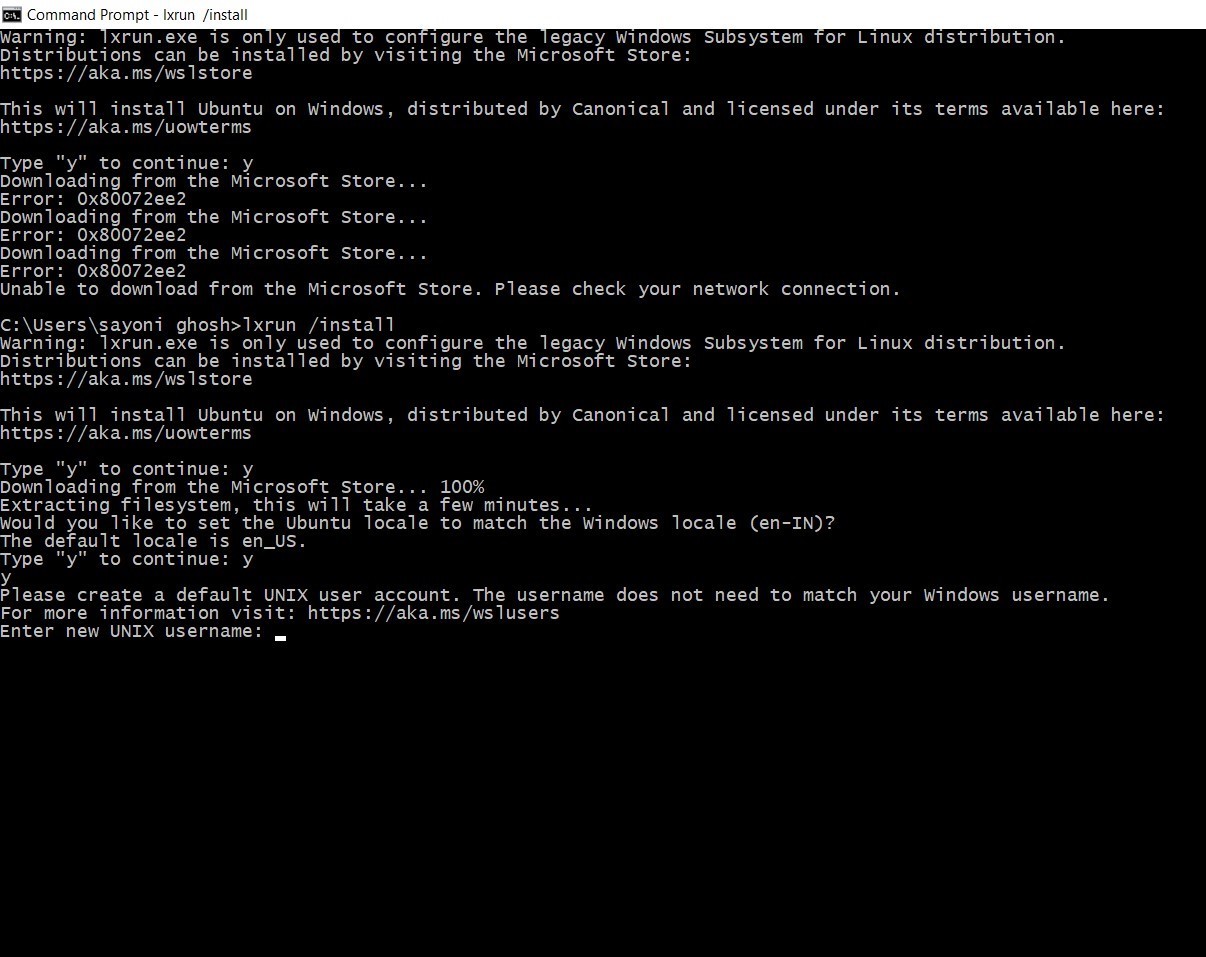
“Windows Subsystem for Linux has no installed distributions. Distributions can be installed by visiting the Microsoft Store: https://aka.ms/wslstore
Press any key to continue…”
Then open command prompt and type “lxrun /install“. This will install Ubuntu on Windows.
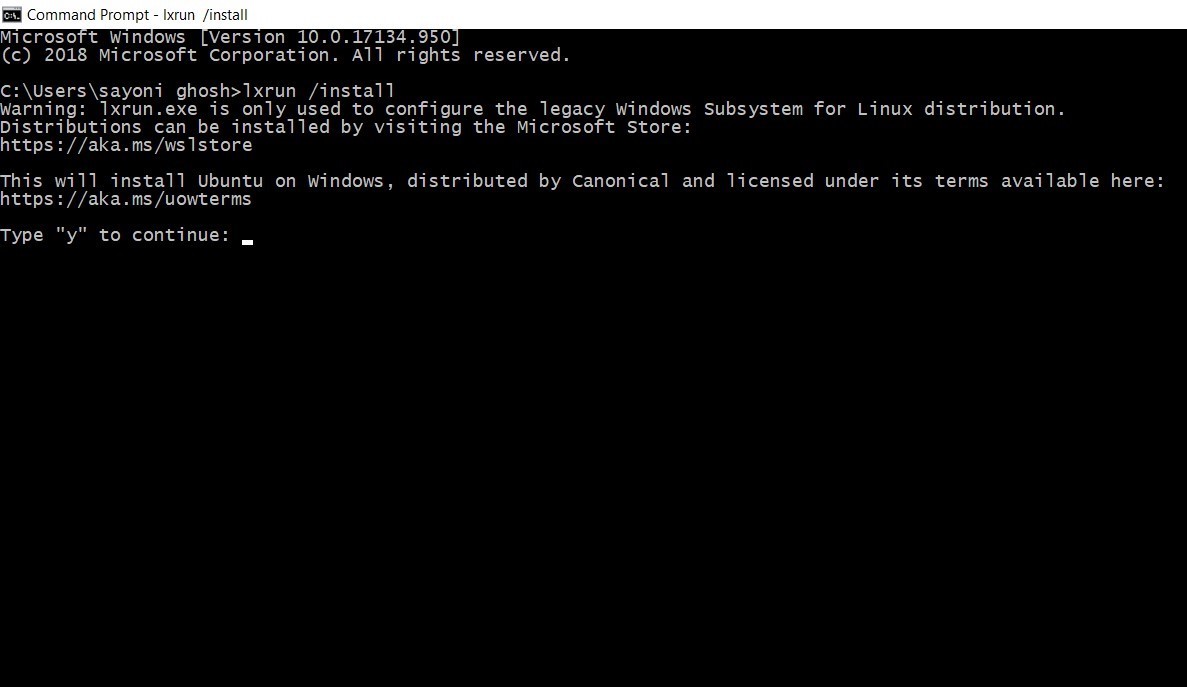
Accept the terms after which Ubuntu bash will be downloaded from Windows store
2. If the bash is not opening or above solution not working then you can open Microsoft Store. Download and Install Ubuntu. Or click here to download and install the Ubuntu for Developer Tools Utilities.
Step 8: Create user Account and Password to use bash. Again click the Start button (or press the Windows key), type bash, and press Enter.
Last Updated :
29 Jun, 2022
Like Article
Save Article
Если вы иногда все же используете операционную систему от Microsoft, вам, наверное, очень нужны некоторые утилиты Linux в windows. Было бы очень удобно использовать стандартные утилиты командной строки для фильтрации вывода, сортировки, фильтрации и потокового редактирования, в Windows, где такие функции не поддерживаются.
Для реализации этого есть несколько решений. В этой статье мы рассмотрим только два из них. Первое, о котором вы, возможно, уже слышали, а может, уже и используете — Cygwin. Второе, нечто более интересное и новое — Cash. Начнем с Cygwin. В последней версии Windows 10 появилось и третье решение — возможность запускать linux команды в windows нативно, с помощью специальной подсистемы. Об этом читайте в отдельной статье.
Cygwin
Cygwin — это набор инструментов, обеспечивающий Unix подобную среду в Windows. Здесь нельзя запускать уже существующие утилиты для Linux. Для того чтобы выполнить linux команду из Windows Cygwin, ее нужно сначала перекомпилировать.
Тем не менее пересобрано уже достаточно много программного обеспечения. Cygwin даст вам Linux подобную среду со многими утилитами, к которым вы уже привыкли в Linux. Его можно использовать как для стандартных утилит таких как команда cp windows, так и для подключения к удаленному серверу по ssh.
Установка Cygwin
Как и другие программы Windows, Cygwin устанавливается с помощью установщика в формате .exe. Скачать его можно на официальном сайте.
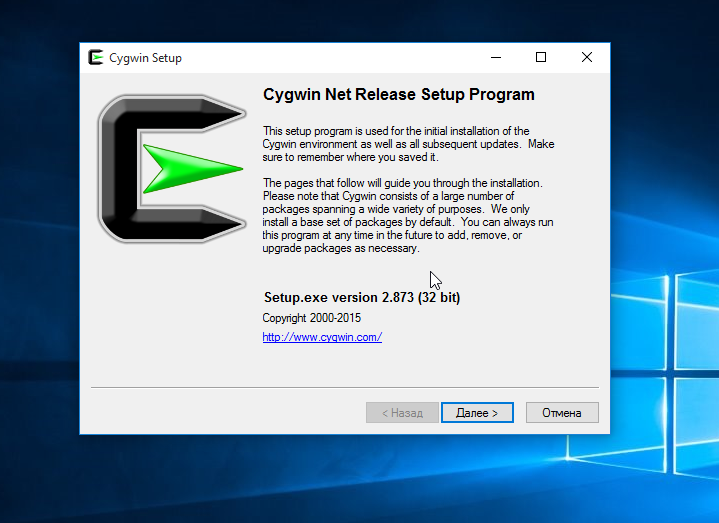
Для установки вам придется пройти несколько шагов мастера, по умолчанию программа будет установлена в C:\Cygwin:
С установочным пакетом не поставляется полный набор окружения. Оно будет загружено в процессе установки. В этом окне нужно выбрать сервер для загрузки компонентов:

Затем необходимо выбрать пакеты, которые нужно загрузить и установить. Доступно довольно-таки много программ и они рассортированы по категориям. Если вы не знаете нужен ли вам тот или иной пакет, оставьте значение по умолчанию. Вы сможете установить их потом:
Осталось только нажать Next для начала загрузки и завершения установки.

Добавление Cygwin в Path
После завершения установки, чтобы выполнить команды linux в windows с максимальным удобством, желательно добавить папку с исполняемыми файлами Cygwin в переменную среды Path.
Вы можете запустить терминал Cygwin, кликнув по ярлыку на рабочем столе. Откроется терминал с папкой C:\Cygwin\bin
Здесь можно выполнять все нужные linux команды в windows, но вы не сможете их выполнить в другой директории или другом терминале.
Чтобы решить эту проблему, необходимо добавить папку Cygwin в переменную Path. Откройте окно свойства системы с помощью сочетания клавиш Win+Pause/Break, затем выберите пункт Дополнительные параметры системы на левой панели:
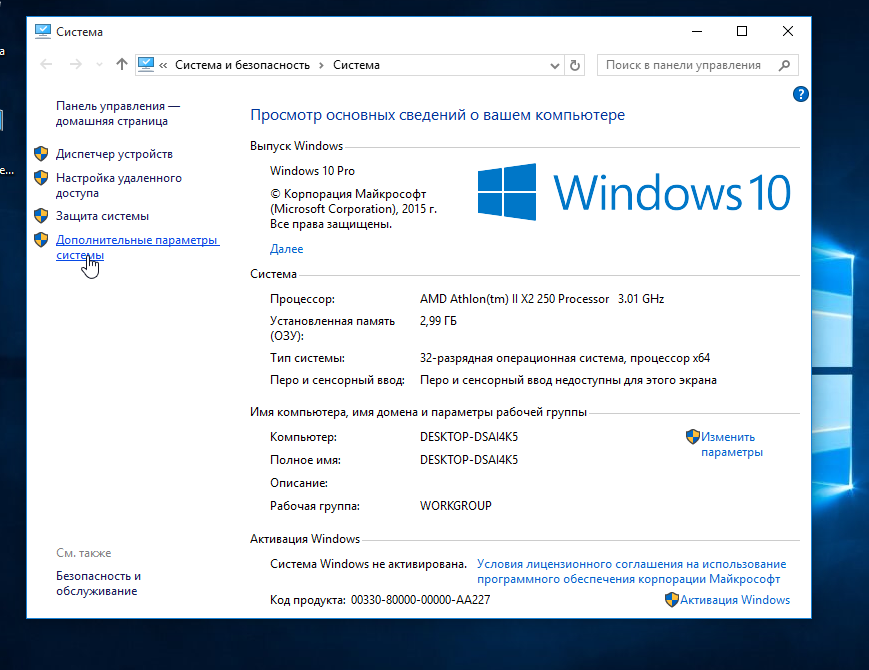
На вкладке дополнительно выберите Переменные среды:
Найдите в списке переменную Path и нажмите Изменить:

Добавьте в конец строки вот такую запись:
;C:\Cygwin\bin

Обратите внимание, что все пути должны быть разделены точкой с запятой. Осталось нажать Ок и тестировать выполнение Linux команд в Windows.
Cash
Это кое-что совсем новое. Утилита с открытым исходным кодом Cash, это кроссплатформенная реализация командной оболочки Linux на JavaScript. Цель этого проекта обеспечить более гибкую, простую альтернативу Cygwin, для тех кто хочет чувствовать себя в WIndows, как и в Linux.
Установив Cash, вы сможете выполнить linux команду из windows в любом эмуляторе терминала, в том числе в стандартной командной строке Windows.
На данный момент поддерживаются только некоторые утилиты linux для windows. Вот список поддерживаемых:
- alias
- cat
- clear
- cd
- cp
- echo
- export
- false
- grep
- head
- kill
- less
- ls
- mkdir
- mv
- pwd
- rm
- sort
- source
- tail
- touch
- true
- unalias
Так как утилита еще находится на стадии разработки, то список команд Linux в Windows будет постоянно увеличиваться. Вы также можете проголосовать за добавление команд которые вам нужны.
Вот как все работает:
Что самое интересное, вы можете комбинировать Windows и Linux команды. Например, вы можете выполнить:
ipconfig | grep IPv4 | sort
И команда правильно отработает. Сначала выполнится ipconfig, а затем результат будет отфильтрован с помощью Grep.
Установка Cash в Windows
Я буду устанавливать Cash в Windows 10. Это делается очень просто и работает также в более старых версиях Windows. Поскольку Cash основан на JavaScript для его работы необходимо установить Node.js. Скачать Node.js можно на официальном сайте.
После того как Node.js Будет установлена, можно переходить к установке Cash. Его можно установить в нескольких режимах:
- Ручное использование Cash — нужно выполнить cash чтобы начать запускать linux команды
- Глобальное использование — linux команды доступны во всех терминалах windows
- Установить только некоторые команды — вы можете выбрать компоненты для установки если не хотите ставить все
Для установки Cash глобально откройте командную строку Windows с помощью Win+R:
npm install cash-global -g
Установка может занять несколько минут, в зависимости от скорости вашего интернет-соединения. После завершения установки вы можете сразу тестировать Linux команды в Windows.
Выводы
Как я уже говорил, проект Cash еще на стадии разработки и есть вероятность что вы столкнетесь с ошибками. Не забудьте сообщить о найденных ошибках разработчикам, чтобы помочь улучшить проект. Если для вас критична стабильность лучше использовать старый добрый Cygwin.
Нам, пользователям Linux нечасто понадобиться использование unix команд в windows и такие инструменты . Мы можем использовать Linux команды напрямую в нашей системе. Но если вы по каким-либо причинам не можете установить Linux, и все же хотите использовать linux команды, это может быть отличным решением.
Обнаружили ошибку в тексте? Сообщите мне об этом. Выделите текст с ошибкой и нажмите Ctrl+Enter.
September 26th, 2019
A common question Windows developers have is “why doesn’t Windows have <INSERT FAVORITE LINUX COMMAND HERE> yet?”. Whether longing for a powerful pager like less or wanting to use familiar commands like grep or sed, Windows developers desire easy access to these commands as part of their core workflow.
The Windows Subsystem for Linux (WSL) was a huge step forward here, enabling developers to call through to Linux commands from Windows by proxying them through wsl.exe (e.g. wsl ls). While a significant improvement, the experience is lacking in several ways:
- Prefixing commands with
wslis tedious and unnatural - Windows paths passed as arguments don’t often resolve due to backslashes being interpreted as escape characters rather than directory separators
- Windows paths passed as arguments don’t often resolve due to not being translated to the appropriate mount point within WSL
- Default parameters defined in WSL login profiles with aliases and environment variables aren’t honored
- Linux path completion is not supported
- Command completion is not supported
- Argument completion is not supported
The result of these shortcomings is that Linux commands feel like second-class citizens to Windows and are harder to use than they should be. For a command to feel like a native Windows command, we’ll need to address these issues.
PowerShell Function Wrappers
We can remove the need to prefix commands with wsl, handle the translation of Windows paths to WSL paths, and support command completion with PowerShell function wrappers. The basic requirements of the wrappers are:
- There should be one function wrapper per Linux command with the same name as the command
- The wrapper should recognize Windows paths passed as arguments and translate them to WSL paths
- The wrapper should invoke
wslwith the corresponding Linux command, piping in any pipeline input and passing on any command line arguments passed to the function
Since this template can be applied to any command, we can abstract the definition of these wrappers and generate them dynamically from a list of commands to import.
# The commands to import.
$commands = "awk", "emacs", "grep", "head", "less", "ls", "man", "sed", "seq", "ssh", "tail", "vim"

# Register a function for each command.
$commands | ForEach-Object { Invoke-Expression @"
Remove-Alias $_ -Force -ErrorAction Ignore
function global:$_() {
    for (`$i = 0; `$i -lt `$args.Count; `$i++) {
        # If a path is absolute with a qualifier (e.g. C:), run it through wslpath to map it to the appropriate mount point.
        if (Split-Path `$args[`$i] -IsAbsolute -ErrorAction Ignore) {
            `$args[`$i] = Format-WslArgument (wsl.exe wslpath (`$args[`$i] -replace "\\", "/"))
        # If a path is relative, the current working directory will be translated to an appropriate mount point, so just format it.
        } elseif (Test-Path `$args[`$i] -ErrorAction Ignore) {
            `$args[`$i] = Format-WslArgument (`$args[`$i] -replace "\\", "/")
        }
    }

    if (`$input.MoveNext()) {
        `$input.Reset()
        `$input | wsl.exe $_ (`$args -split ' ')
    } else {
        wsl.exe $_ (`$args -split ' ')
    }
}
"@
}
The $command list defines the commands to import. Then we dynamically generate the function wrapper for each using the Invoke-Expression command (first removing any aliases that would conflict with the function).
The function loops through the command line arguments, identifies Windows paths using the Split-Path and Test-Path commands, then converts those paths to WSL paths. We run the paths through a helper function we’ll define later called Format-WslArgument that escapes special characters like spaces and parentheses that would otherwise be misinterpreted.
Finally, we pass on pipeline input and any command line arguments through to wsl.
With these function wrappers in place, we can now call our favorite Linux commands in a more natural way without having to prefix them with wsl or worry about how Windows paths are translated to WSL paths:
man bashless -i $profile.CurrentUserAllHostsls -Al C:\Windows\ | lessgrep -Ein error *.logtail -f *.log
A starter set of commands is shown here, but you can generate a wrapper for any Linux command simply by adding it to the list. If you add this code to your PowerShell profile, these commands will be available to you in every PowerShell session just like native commands!
Default Parameters
It is common in Linux to define aliases and/or environment variables within login profiles to set default parameters for commands you use frequently (e.g. alias ls=ls -AFh or export LESS=-i). One of the drawbacks of proxying through a non-interactive shell via wsl.exe is that login profiles are not loaded, so these default parameters are not available (i.e. ls within WSL and wsl ls would behave differently with the alias defined above).
PowerShell provides $PSDefaultParameterValues, a standard mechanism to define default parameter values, but only for cmdlets and advanced functions. Turning our function wrappers into advanced functions is possible but introduces complications (e.g. PowerShell matches partial parameter names (like matching -a for -ArgumentList) which will conflict with Linux commands that accept the partial names as arguments), and the syntax for defining default values would be less than ideal for this scenario (requiring the name of a parameter in the key for defining the default arguments as opposed to just the command name).
With a small change to our function wrappers, we can introduce a model similar to $PSDefaultParameterValues and enable default parameters for Linux commands!
function global:$_() {
    …

    `$defaultArgs = ((`$WslDefaultParameterValues.$_ -split ' '), "")[`$WslDefaultParameterValues.Disabled -eq `$true]
    if (`$input.MoveNext()) {
        `$input.Reset()
        `$input | wsl.exe $_ `$defaultArgs (`$args -split ' ')
    } else {
        wsl.exe $_ `$defaultArgs (`$args -split ' ')
    }
}
By passing $WslDefaultParameterValues down into the command line we send through wsl.exe, you can now add statements like below to your PowerShell profile to configure default parameters!
$WslDefaultParameterValues["grep"] = "-E"
$WslDefaultParameterValues["less"] = "-i"
$WslDefaultParameterValues["ls"] = "-AFh --group-directories-first"
Since this is modeled after $PSDefaultParameterValues, you can temporarily disable them easily by setting the "Disabled" key to $true. A separate hash table has the additional benefit of being able to disable $WslDefaultParameterValues separately from $PSDefaultParameterValues.
Argument Completion
PowerShell allows you to register argument completers with the Register-ArgumentCompleter command. Bash has powerful programmable completion facilities. WSL lets you call into bash from PowerShell. If we can register argument completers for our PowerShell function wrappers and call through to bash to generate the completions, we can get rich argument completion with the same fidelity as within bash itself!
# Register an ArgumentCompleter that shims bash's programmable completion.
Register-ArgumentCompleter -CommandName $commands -ScriptBlock {
    param($wordToComplete, $commandAst, $cursorPosition)

    # Map the command to the appropriate bash completion function.
    $F = switch ($commandAst.CommandElements[0].Value) {
        {$_ -in "awk", "grep", "head", "less", "ls", "sed", "seq", "tail"} {
            "_longopt"
            break
        }

        "man" {
            "_man"
            break
        }

        "ssh" {
            "_ssh"
            break
        }

        Default {
            "_minimal"
            break
        }
    }

    # Populate bash programmable completion variables.
    $COMP_LINE = "`"$commandAst`""
    $COMP_WORDS = "('$($commandAst.CommandElements.Extent.Text -join "' '")')" -replace "''", "'"
    for ($i = 1; $i -lt $commandAst.CommandElements.Count; $i++) {
        $extent = $commandAst.CommandElements[$i].Extent
        if ($cursorPosition -lt $extent.EndColumnNumber) {
            # The cursor is in the middle of a word to complete.
            $previousWord = $commandAst.CommandElements[$i - 1].Extent.Text
            $COMP_CWORD = $i
            break
        } elseif ($cursorPosition -eq $extent.EndColumnNumber) {
            # The cursor is immediately after the current word.
            $previousWord = $extent.Text
            $COMP_CWORD = $i + 1
            break
        } elseif ($cursorPosition -lt $extent.StartColumnNumber) {
            # The cursor is within whitespace between the previous and current words.
            $previousWord = $commandAst.CommandElements[$i - 1].Extent.Text
            $COMP_CWORD = $i
            break
        } elseif ($i -eq $commandAst.CommandElements.Count - 1 -and $cursorPosition -gt $extent.EndColumnNumber) {
            # The cursor is within whitespace at the end of the line.
            $previousWord = $extent.Text
            $COMP_CWORD = $i + 1
            break
        }
    }

    # Repopulate bash programmable completion variables for scenarios like '/mnt/c/Program Files'/<TAB> where <TAB> should continue completing the quoted path.
    $currentExtent = $commandAst.CommandElements[$COMP_CWORD].Extent
    $previousExtent = $commandAst.CommandElements[$COMP_CWORD - 1].Extent
    if ($currentExtent.Text -like "/*" -and $currentExtent.StartColumnNumber -eq $previousExtent.EndColumnNumber) {
        $COMP_LINE = $COMP_LINE -replace "$($previousExtent.Text)$($currentExtent.Text)", $wordToComplete
        $COMP_WORDS = $COMP_WORDS -replace "$($previousExtent.Text) '$($currentExtent.Text)'", $wordToComplete
        $previousWord = $commandAst.CommandElements[$COMP_CWORD - 2].Extent.Text
        $COMP_CWORD -= 1
    }

    # Build the command to pass to WSL.
    $command = $commandAst.CommandElements[0].Value
    $bashCompletion = ". /usr/share/bash-completion/bash_completion 2> /dev/null"
    $commandCompletion = ". /usr/share/bash-completion/completions/$command 2> /dev/null"
    $COMPINPUT = "COMP_LINE=$COMP_LINE; COMP_WORDS=$COMP_WORDS; COMP_CWORD=$COMP_CWORD; COMP_POINT=$cursorPosition"
    $COMPGEN = "bind `"set completion-ignore-case on`" 2> /dev/null; $F `"$command`" `"$wordToComplete`" `"$previousWord`" 2> /dev/null"
    $COMPREPLY = "IFS=`$'\n'; echo `"`${COMPREPLY[*]}`""
    $commandLine = "$bashCompletion; $commandCompletion; $COMPINPUT; $COMPGEN; $COMPREPLY" -split ' '

    # Invoke bash completion and return CompletionResults.
    $previousCompletionText = ""
    (wsl.exe $commandLine) -split '\n' |
    Sort-Object -Unique -CaseSensitive |
    ForEach-Object {
        if ($wordToComplete -match "(.*=).*") {
            $completionText = Format-WslArgument ($Matches[1] + $_) $true
            $listItemText = $_
        } else {
            $completionText = Format-WslArgument $_ $true
            $listItemText = $completionText
        }

        if ($completionText -eq $previousCompletionText) {
            # Differentiate completions that differ only by case otherwise PowerShell will view them as duplicate.
            $listItemText += ' '
        }

        $previousCompletionText = $completionText
        [System.Management.Automation.CompletionResult]::new($completionText, $listItemText, 'ParameterName', $completionText)
    }
}

# Helper function to escape characters in arguments passed to WSL that would otherwise be misinterpreted.
function global:Format-WslArgument([string]$arg, [bool]$interactive) {
    if ($interactive -and $arg.Contains(" ")) {
        return "'$arg'"
    } else {
        return ($arg -replace " ", "\ ") -replace "([()|])", ('\$1', '`$1')[$interactive]
    }
}
The code is a bit dense without an understanding of some bash internals, but basically:
- We register the argument completer for all of our function wrappers by passing the
$commandslist to the-CommandNameparameter ofRegister-ArgumentCompleter - We map each command to the shell function bash uses to complete for it (
$Fwhich is named aftercomplete -F <FUNCTION>used to define completion specs in bash) - We convert PowerShell’s
$wordToComplete,$commandAst, and$cursorPositionarguments into the format expected by bash completion functions per the bash programmable completion spec - We build a command line that we can pass to
wsl.exethat ensures the completion environment is set up correctly, invokes the appropriate completion function, then outputs a string containing the completion results separated by new lines - We then invoke
wslwith the command line, split the output string on the new line separator, then generateCompletionResultsfor each, sorting them, and escaping characters like spaces and parentheses that would otherwise be misinterpreted
The end result of this is now our Linux command wrappers will use the exact same completion that bash uses! For example:
ssh -c <TAB> -J <TAB> -m <TAB> -O <TAB> -o <TAB> -Q <TAB> -w <TAB> -b <TAB>
Each completion will provide values specific to the argument before it, reading in configuration data like known hosts from within WSL!
<TAB> will cycle through options. <Ctrl + Space> will show all available options.
Additionally, since bash completion is now in charge, you can resolve Linux paths directly within PowerShell!
less /etc/<TAB>ls /usr/share/<TAB>vim ~/.bash<TAB>
In cases where bash completion doesn’t return any results, PowerShell falls back to its default completion which will resolve Windows paths, effectively enabling you to resolve both Linux paths and Windows paths at will.
Conclusion
With PowerShell and WSL, we can integrate Linux commands into Windows just as if they were native applications. No need to hunt around for Win32 builds of Linux utilities or be forced to interrupt your workflow to drop into a Linux shell. Just install WSL, set up your PowerShell profile, and list the commands you want to import! The rich argument completion shown here of both command options and Linux and Windows file paths is an experience even native Windows commands don’t provide today.
The complete source code described above as well as additional guidance for incorporating it into your workflow is available at https://github.com/mikebattista/PowerShell-WSL-Interop.
Which Linux commands do you find most useful? What other parts of your developer workflow do you find lacking on Windows?
Let us know in the comments below or over on GitHub!