Linux on Windows is a reality, thanks to the partnership between Canonical (parent company of Ubuntu) and Microsoft.
When Microsoft’s CEO announced that the Bash shell was coming to Windows, several people couldn’t believe it. #BashOnWindows trended on Twitter for days; such was the impact of this news.
But Bash on Windows (or Windows Subsystem for Linux) was not available to everyone immediately. People had to install the Windows 10 technical preview to install Linux on Windows 10.
That’s not the case anymore; it is pretty easy to install and use WSL now!
📋
This tutorial was tested with the latest Windows 11 version 22H2, and build 22621.819. You might need to update your Windows installation if you have an older build to follow everything in this tutorial.
What is Bash on Windows?
Bash on Windows provides a Windows subsystem, and Linux runs atop it. It is not a virtual machine or an application like Cygwin. It is a complete Linux system inside Windows 10/11. It allows you to run the same Bash shell you find on Linux. You can run Linux commands inside Windows without installing a virtual machine or dual-boot Linux and Windows.
You install Linux inside Windows like a regular application. This is a good option if your main aim is to learn Linux/UNIX commands.
Check for System Compatibility
You must be running specific versions of Windows for the different features described in this article. Requirements necessary for a particular feature to work are described under its titles. To check your Windows version, search for about in the start menu.
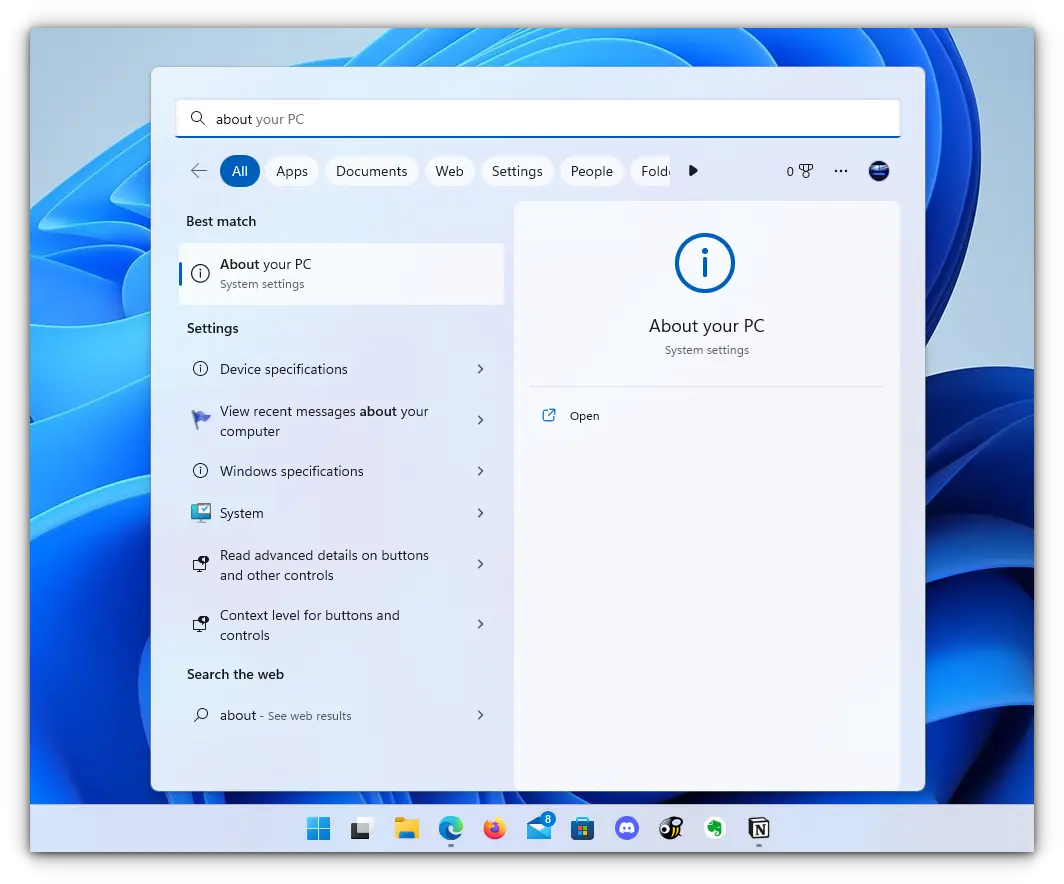
Here, you can see the build of your PC, as shown in the screenshot below. Make sure it is matching with the respective requirements described under various sub-headings here in this article.
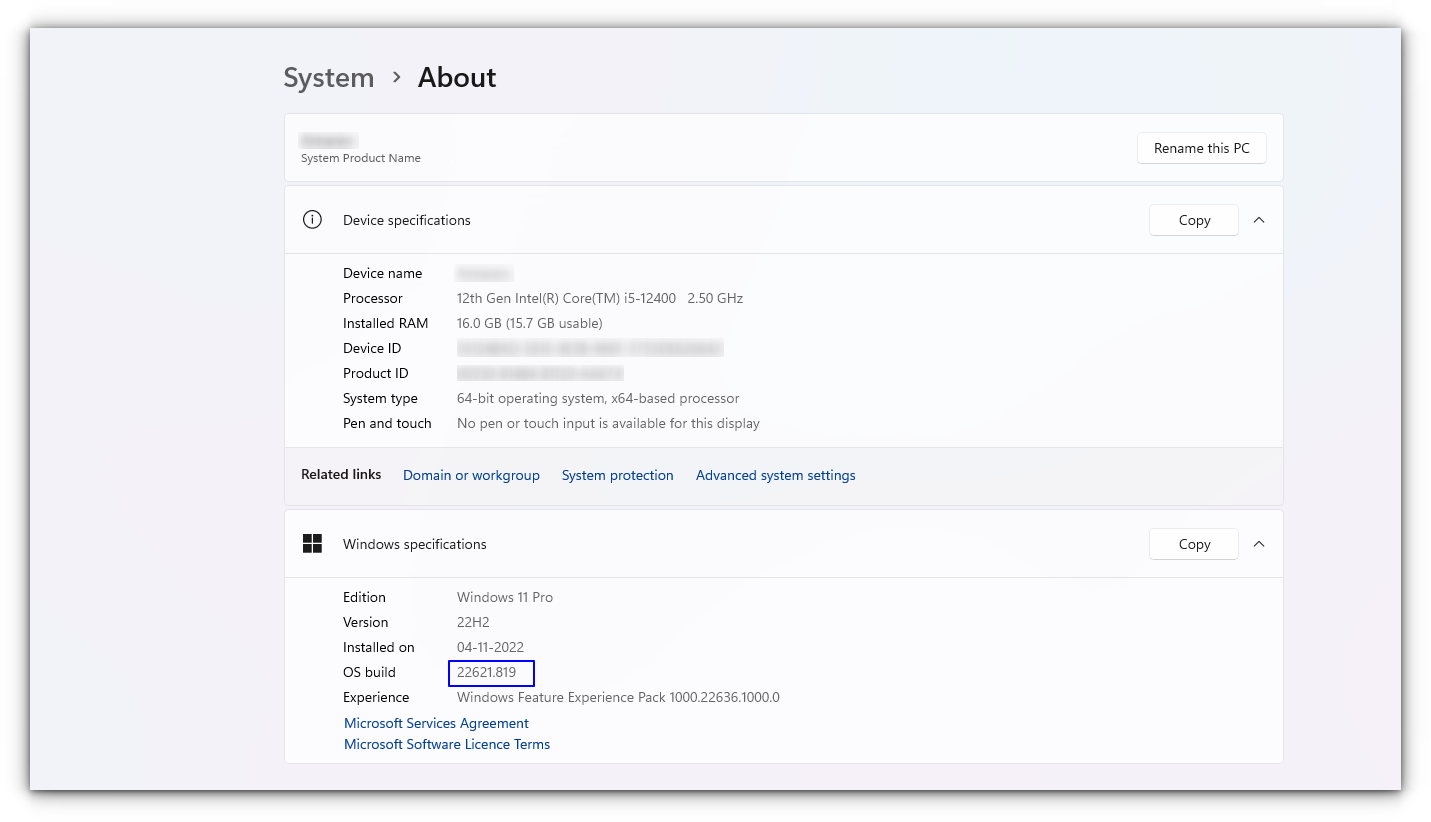
- You must be running Windows 10 version 1607 (the Anniversary update) or above.
- WSL only runs on 64-bit versions 32-bit versions are not supported.
Install Bash in Newer Windows 10 and 11
The good thing is that the latest set of upgrades, including the stable release of WSL v1.0 released from Windows, makes it easier to install Bash on Windows.
There are two ways you can go about it:
- You can get it in one click from Windows Store.
- Choose to use the command-line.
1. Install WSL Using the Microsoft Store
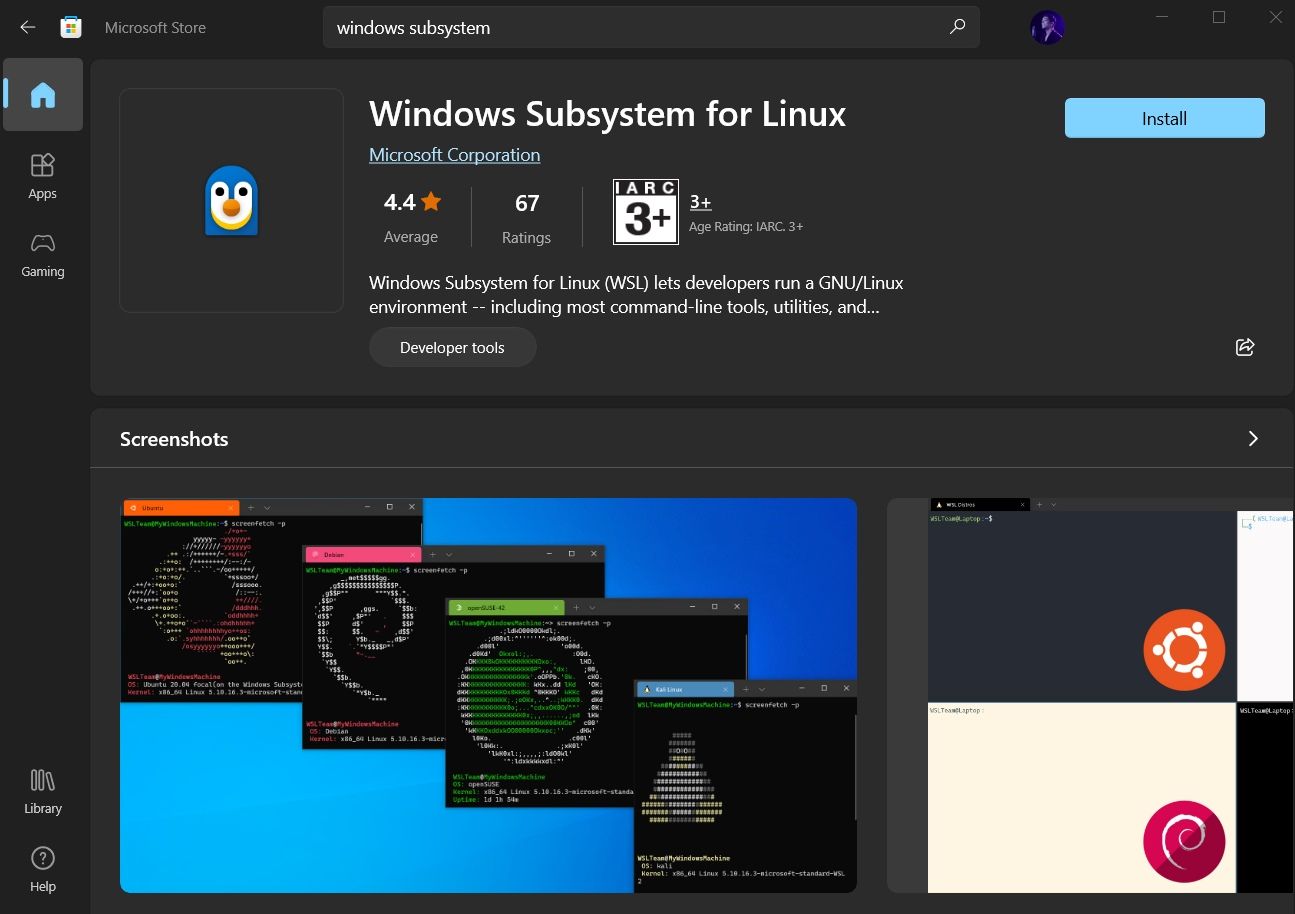
Launch the Microsoft Store and search for «Windows subsystem«.
Install it, and you’re done with the first step. Next, you have to install a Linux distribution.
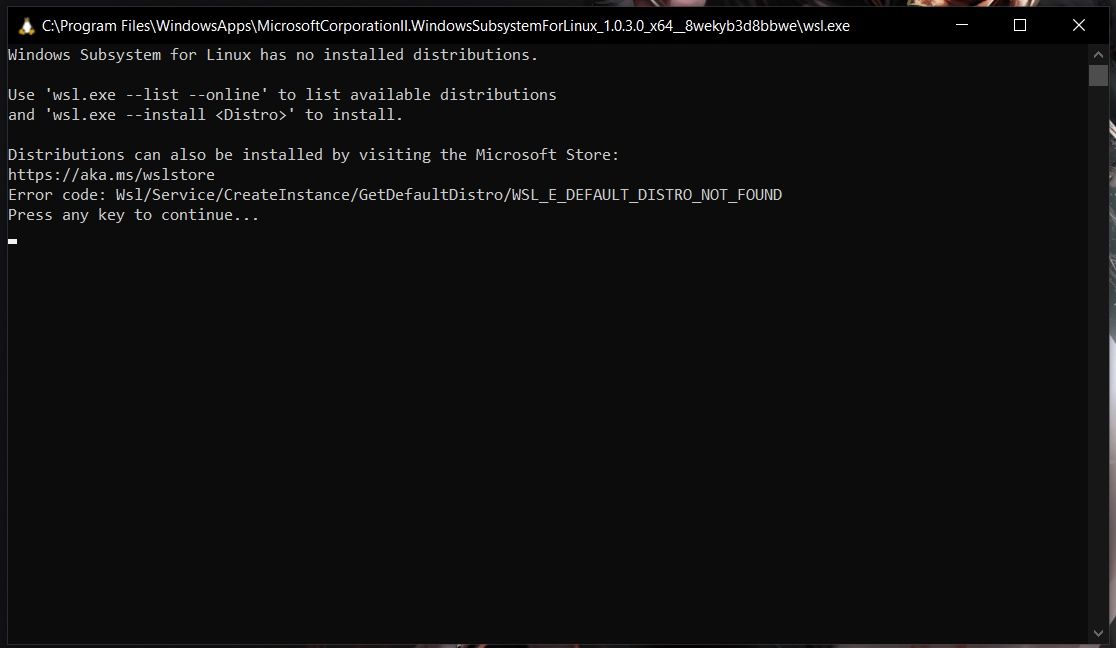
So, if you try to open WSL, you will get to see a window informing you that no distribution is installed.
Similar to WSL, search for the distribution on Microsoft Store, and then install it.
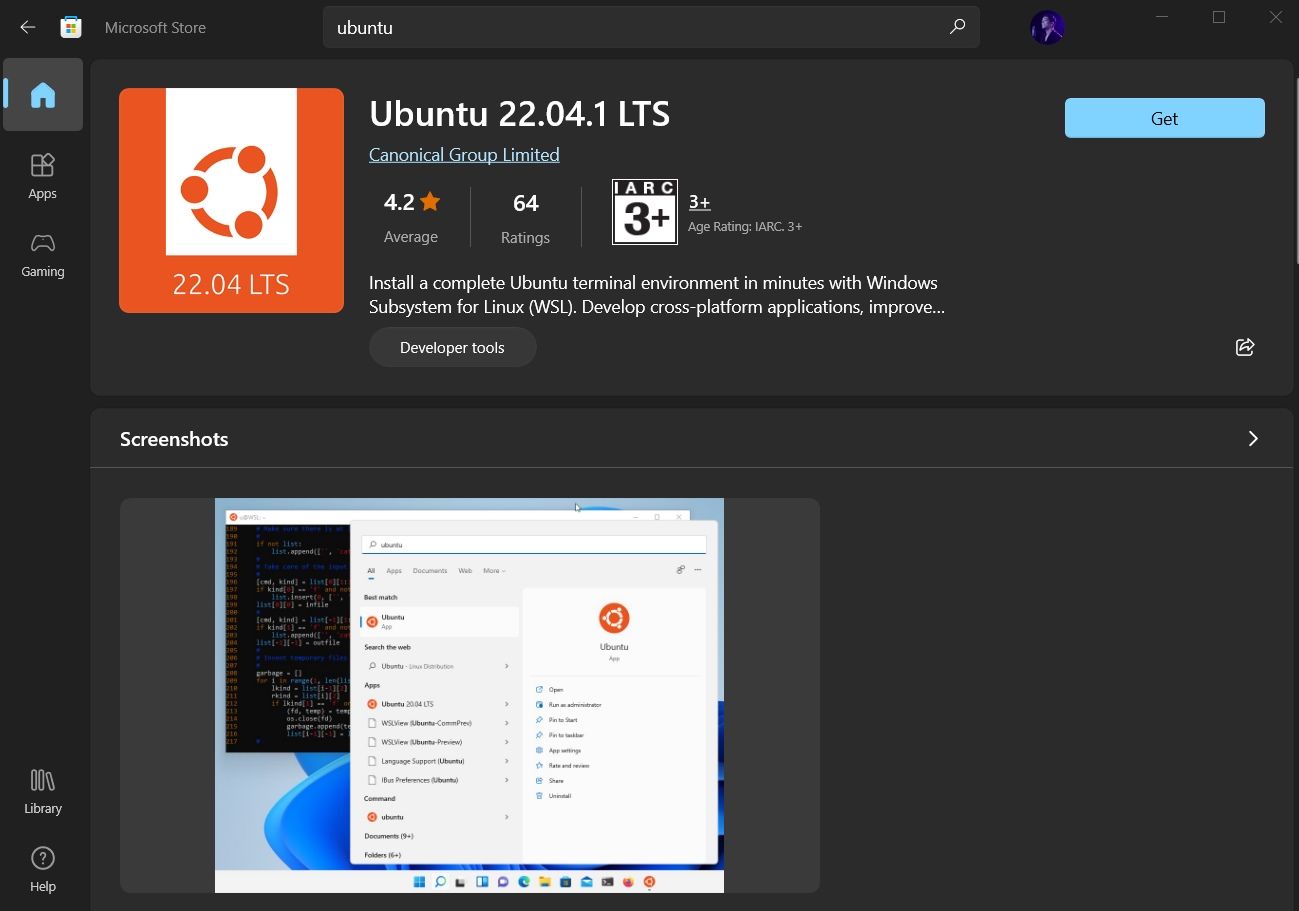
For instance, I installed Ubuntu from the store as shown in the image below:
And, then proceed to «Open» it and it will automatically start installing. The procedure is same for any distribution you choose.
We then have to configure it, which is discussed right after installing it through the command line.
2. Install WSL and the default distribution using the command-line
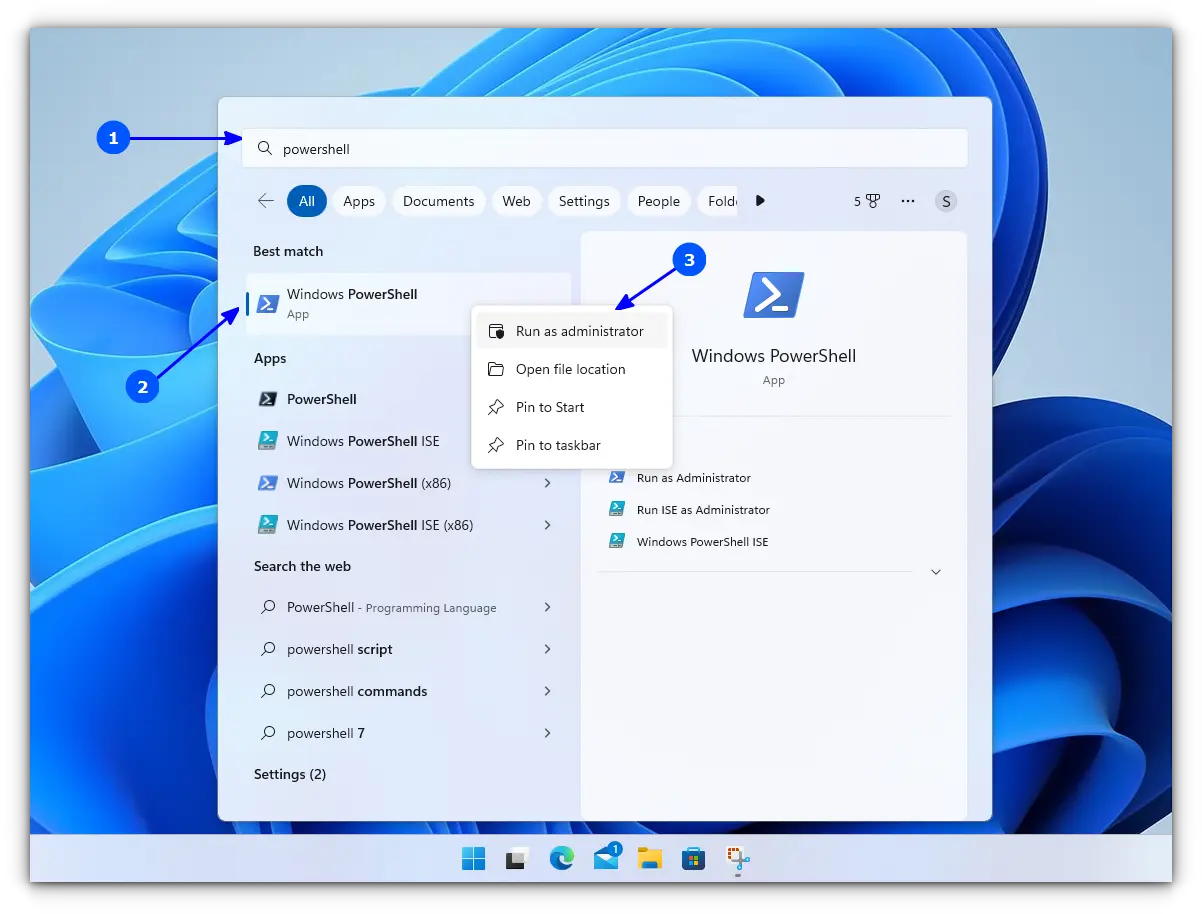
In WSL, the default distribution is Ubuntu (which can be changed). To install, open Powershell as an administrator.
For this, search for Powershell in the start menu, right-click on Powershell and select Run as Administrator.
Inside Powershell, enter the following command to install WSL, along with all necessary features and the default distribution, that is, Ubuntu.
wsl --installOnce finished downloading and installing, you need to reboot to apply the changes.
Whether you installed WSL and Ubuntu using the Microsoft Store or the command line, you need to configure it.
Here’s how it is done:
🛠️ Configure the newly installed Ubuntu
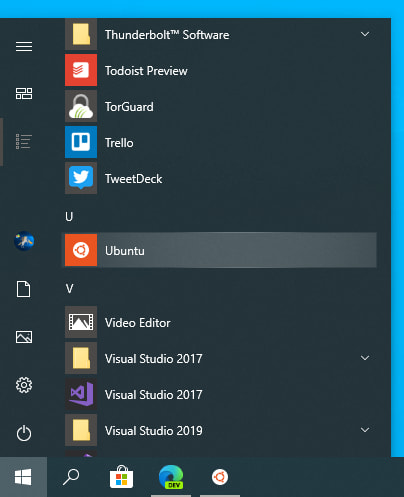
After rebooting, search for Ubuntu in Start Menu and open it.

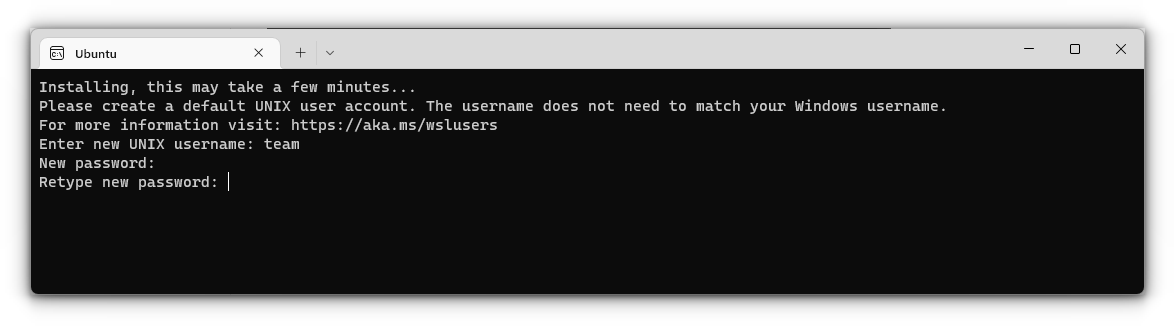
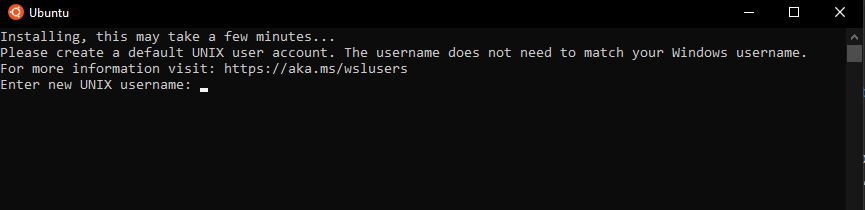
It will ask you to enter a UNIX Username and Password. Enter these details and press enter key.
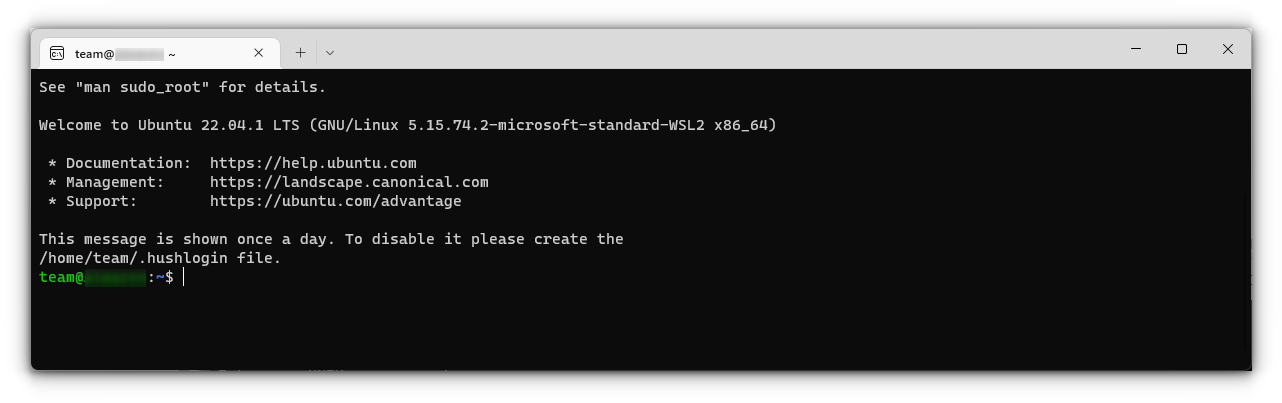
You will now be inside the terminal window of Ubuntu.
Once logged in, you need to update the installed Ubuntu. For this, enter the following commands one by one:
sudo apt update
sudo apt full-upgrade
After completing the update, you are good to go with Ubuntu in WSL.
Install Bash on Older Windows
If you have the minimum requirements mentioned in the beginning but are running an older Windows build, the previous method may not be supported. So there is a manual installation method.
Also, there are both WSL1 and WSL2 available. WSL2 offers some upgraded functionalities but has some minimum requirements to run:
- For x64 systems: Version 1903 or later, with Build 18362 or later.
- For ARM64 systems: Version 2004 or later, with Build 19041 or later.
So this brings us to two possibilities to install:
- Install Ubuntu with WSL1
- Install Ubuntu with WSL2
1. Install Ubuntu with WSL 1
This is a relatively simple procedure for those with a system incompatible with WSL2. First, you need to enable the Windows Subsystem for the Linux feature. This can be done through the command line. Open Powershell as an administrator and enter the following command:
dism.exe /online /enable-feature /featurename:Microsoft-Windows-Subsystem-Linux /all /norestartOr, to do this via GUI, follow the steps below:
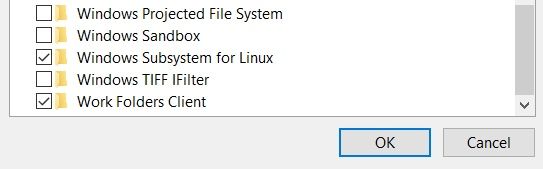
- Search for Windows Features in Start Menu.
- Turn on Windows Subsystem for the Linux feature.
- Reboot your system.
- Open the Windows store and search for the distribution of your choice to install.
Once installation is completed, open the Ubuntu app from the start menu. It will take a couple of seconds to install. You will be prompted to enter a username and password. Provide those credentials, and you are good to go with Ubuntu in WSL1.
2. Install Ubuntu with WSL 2
It is recommended to use WSL2 instead of WSL1 if you have support. To install Ubuntu with WSL2, you need to make sure that the Windows Subsystem for Linux feature is turned on. For this, as in the above case, execute the following command in an elevated Powershell:
dism.exe /online /enable-feature /featurename:Microsoft-Windows-Subsystem-Linux /all /norestartReboot the device once the command is completed.
After this, you need to enable the Virtual Machine Platform feature. Open the Powershell with admin privileges and enter the following command:
dism.exe /online /enable-feature /featurename:VirtualMachinePlatform /all /norestartOnce again, restart the device to complete the WSL install and update to WSL 2.
Now, download the Linux Kernel Update Package for x64 machines from the official website. If you are using ARM64 devices, use this link to download the latest kernel update package.
If you are not sure about the device architecture, enter the command below in Powershell to get the type:
systeminfo | find "System Type"When the file is downloaded, double-click on it and finish the installation of the Kernel update package.
Now, open PowerShell and run this command to set WSL 2 as the default version when installing a new Linux distribution:
wsl --set-default-version 2Once WSL2 is set as the default version, you can now install the Linux distribution of your choice.
Go to Windows Store and install Ubuntu, as described in the earlier steps. and the rest of the procedure is already described above.
Enjoy Linux inside Windows.
🔧 Troubleshooting Tip 1
«The WSL optional component is not enabled. Please enable it and try again.»
You may see an error like this when you try to run Linux inside Windows 10:
The WSL optional component is not enabled. Please enable it and try again.
See https://aka.ms/wslinstall for details.
Error: 0x8007007e
Press any key to continue...
And when you press any key, the application closes immediately.
The reason here is that the Windows Subsystem for Linux is not enabled in your case. You should enable it as explained in this guide. You can do that even after you have installed Linux.
🔧 Troubleshooting Tip 2
Installation failed with error 0x80070003
This is because Windows Subsystem for Linux only runs on the system drive i.e. the C drive. You should ensure that when you download Linux from the Windows Store, it is stored and installed in the C Drive.
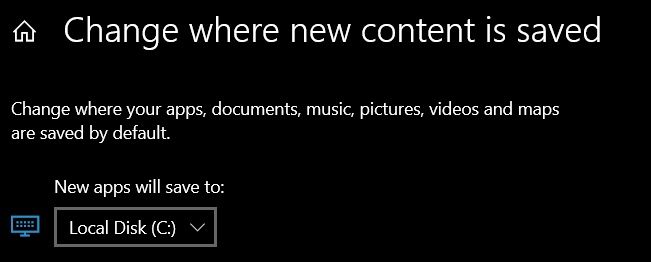
On Windows 10, go to Settings -> Storage -> More Storage Settings -> Where new content is saved: Change where new content is saved and select C Drive here.
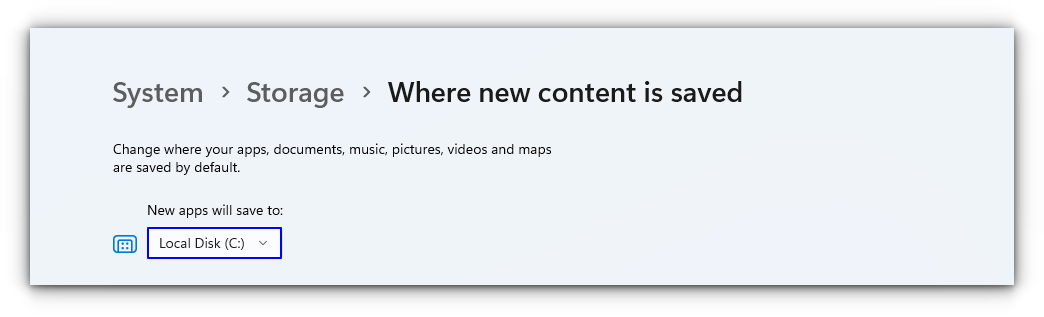
On Windows 11, go to Settings -> System -> Storage -> Advanced storage settings -> Where new content is saved and select C Drive here.
🔧 Troubleshooting Tip 3
«Failed to attach disk Error»
Sometimes, this error will appear when we reinstall the Ubuntu in WSL.
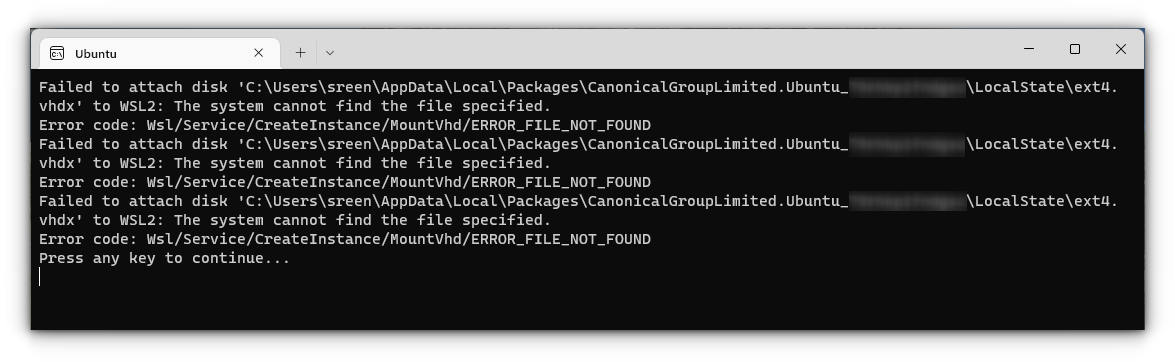
In this case, open Powershell and run the following command:
wsl -l -vThis will list the installed Linux systems. Find the name of the system, that is throwing the error, in my case Ubuntu. Now run the following command:
wsl --unregister UbuntuYou can restart the ubuntu app and it will run without any issues.
You can refer to more common troubleshooting methods from the official website.
Run GUI Apps On Windows Subsystem for Linux
The ability to run GUI apps on Windows Subsystem for Linux was introduced with the WSL 2 release in May 2020.
Windows Subsystem for Linux (WSL) with WSL2 now supports running Linux GUI applications (X11 and Wayland) on Windows in a fully integrated desktop experience. This allows you to install Linux applications and seamlessly integrate them into Windows desktop, including features like “pin to taskbar”.
📋
One crucial point is that you must be on Windows 10 Build 19044+ or Windows 11 to access this feature.
Step 1: Enable/Update WSL 2
This procedure has been explained in the above section and you can refer to it.
Step 2: Download and Install Graphics drivers
To run GUI apps, you need to install appropriate graphics drivers. You can use the following link to download the drivers according to your provider.
- Intel GPU Driver for WSL
- AMD GPU Driver for WSL
- NVIDIA GPU Driver for WSL
Once installed, you are all done.
Step 3: Install some GUI Apps
Now, go to your Ubuntu app and install any GUI app using the APT package manager. You should note that running apps from other sources like flatpak are problematic within WSL.
For this article, I installed the Gedit text editor using the following command:
sudo apt install gedit -yThis will install several MB of packages including required libraries. Once completed, you can run the following command to start the GUI Gedit app in Windows.:
gedit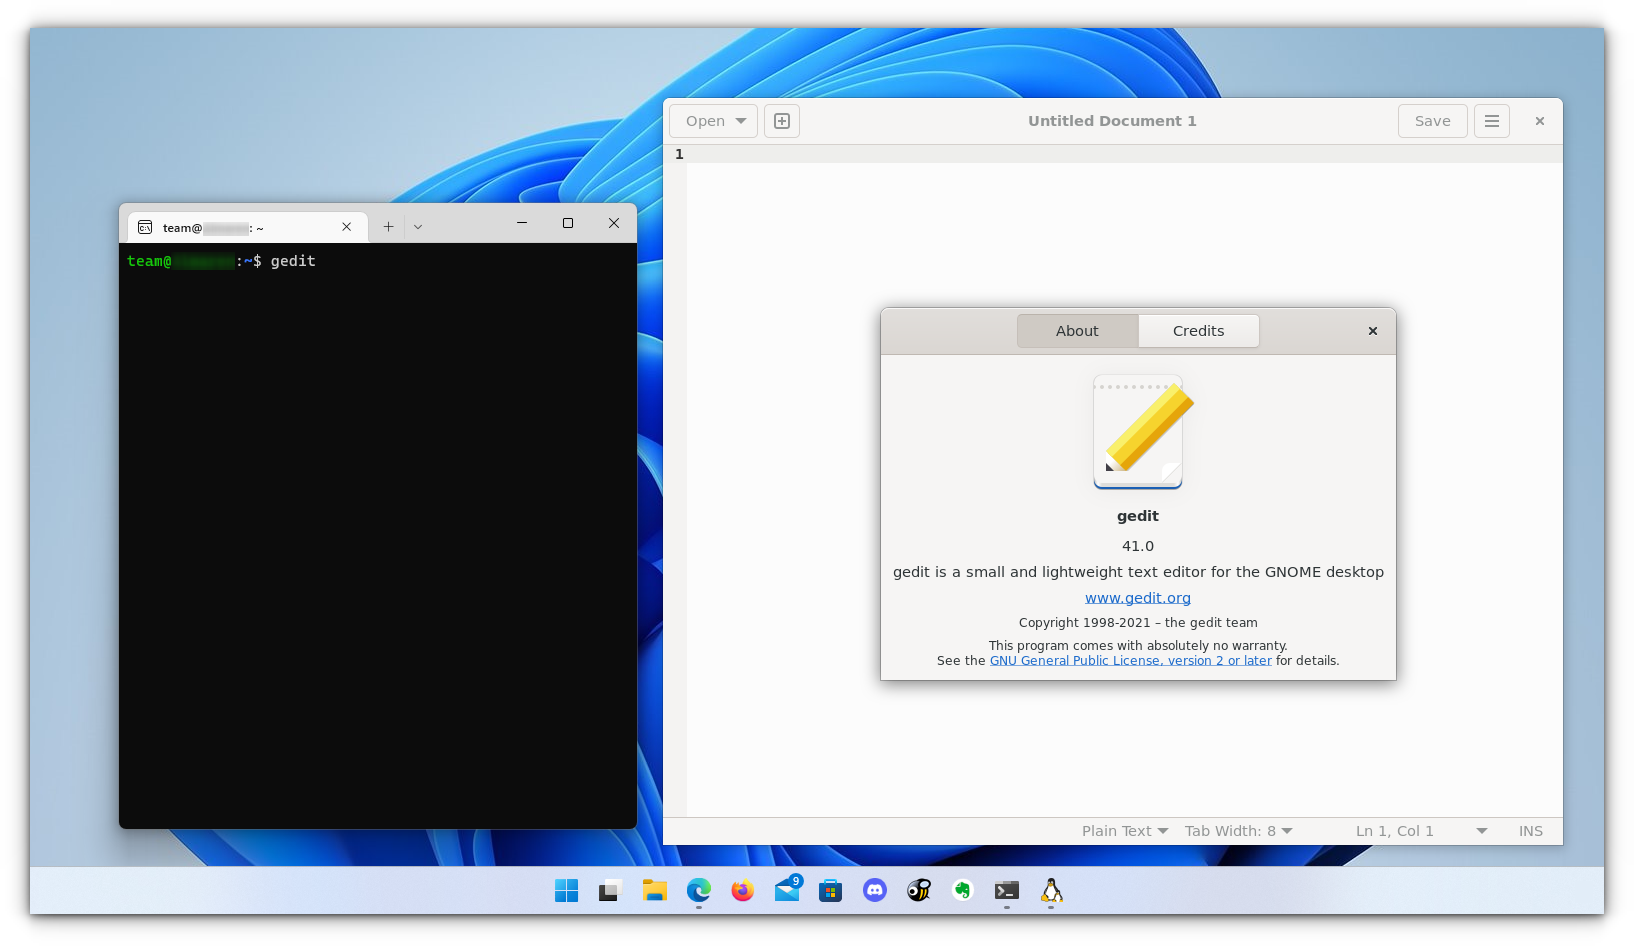
Similarly, you can install all the popular applications available to Linux, including Nautilus file manager, GIMP, etc. For more about running GUI applications in WSL, you can refer to the official documentation.
Install Linux Bash Shell on other older Windows 10
If you cannot get the Fall Creator’s update on Windows 10 for some reason, you can still install it if you have the Anniversary update of Windows 10. But here, you’ll have to enable developer mode. I still recommend upgrading to the Fall Creator’s update or the latest Windows 10 2004 version update though.
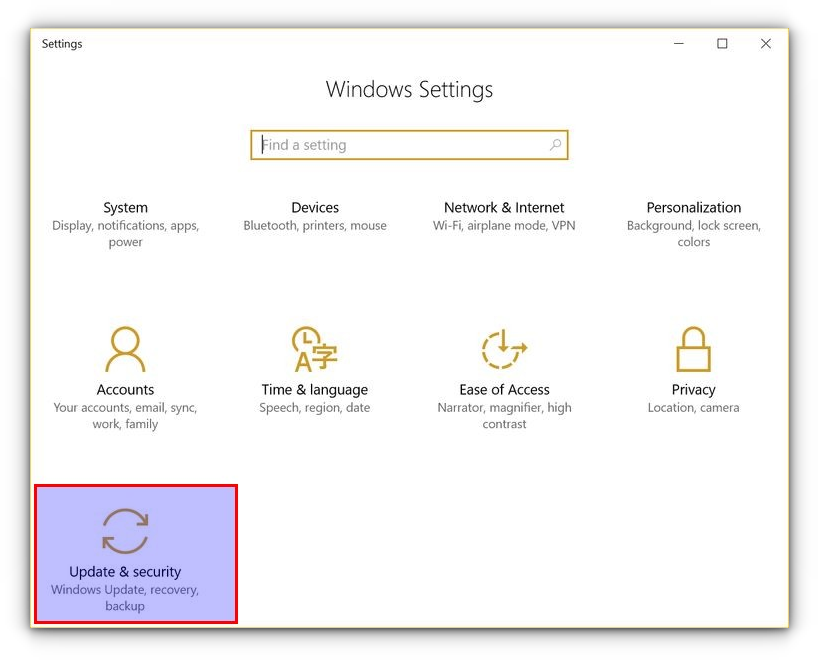
Press Windows Key + I to access Windows system settings. Here, go to Update & Security:
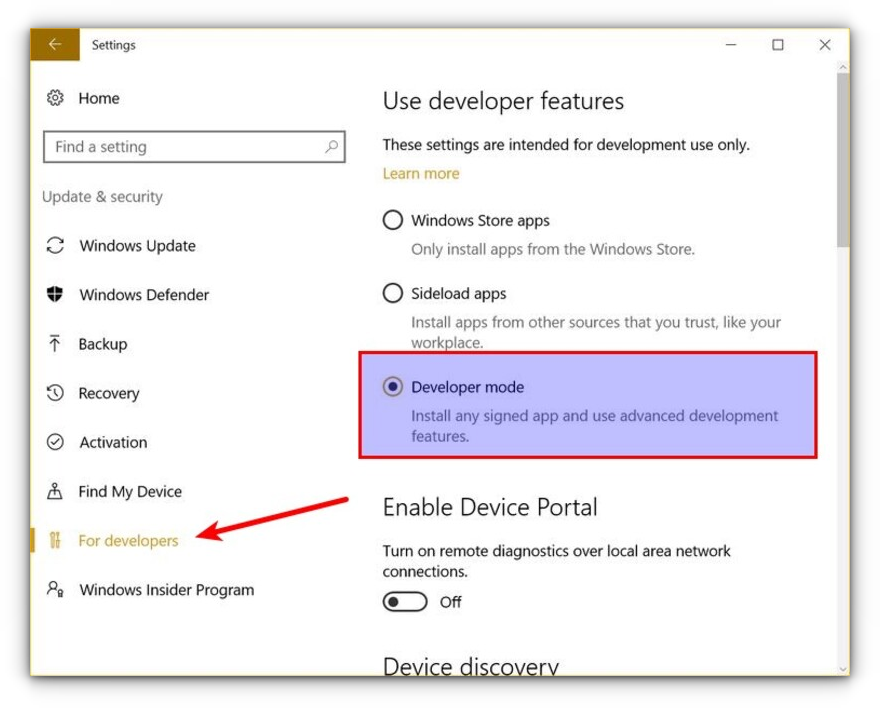
From the left side pane, choose “For developers.” You’ll see an option for “Developer mode.” Enable it.
Now search for Control Panel and in Control Panel, click on “Programs”:
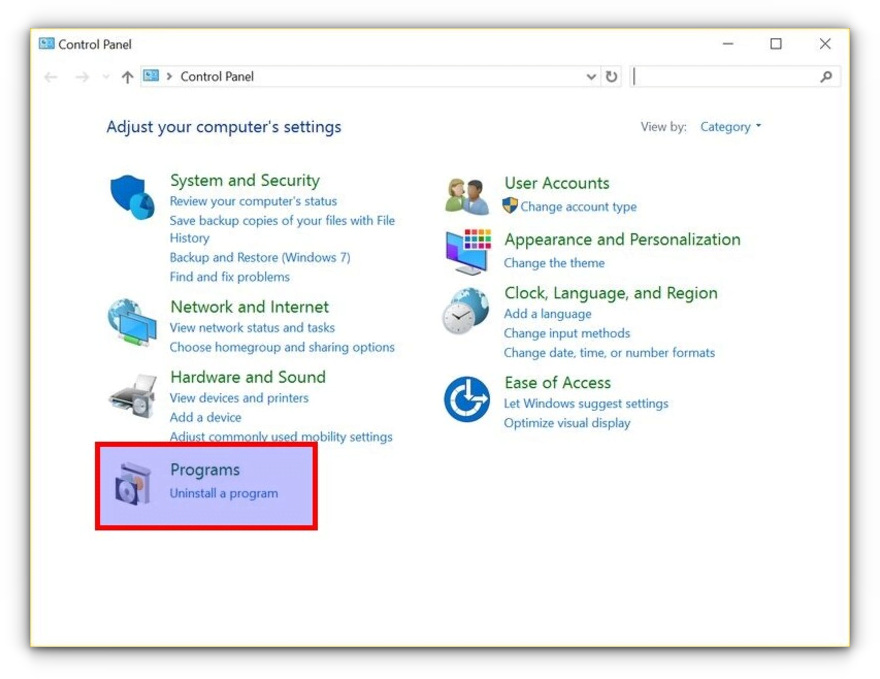
In Programs, click “Turn Windows features on or off”:
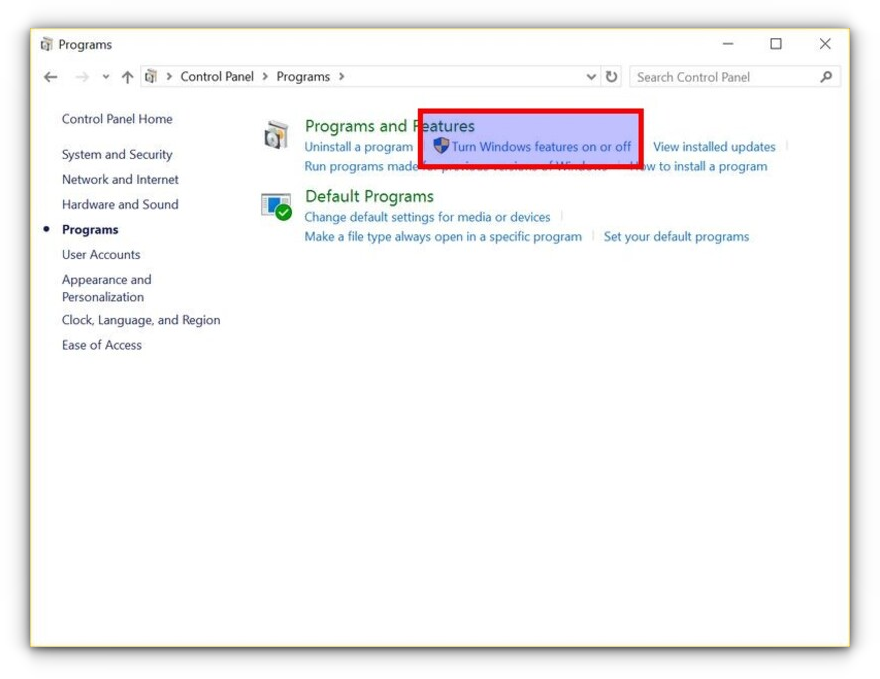
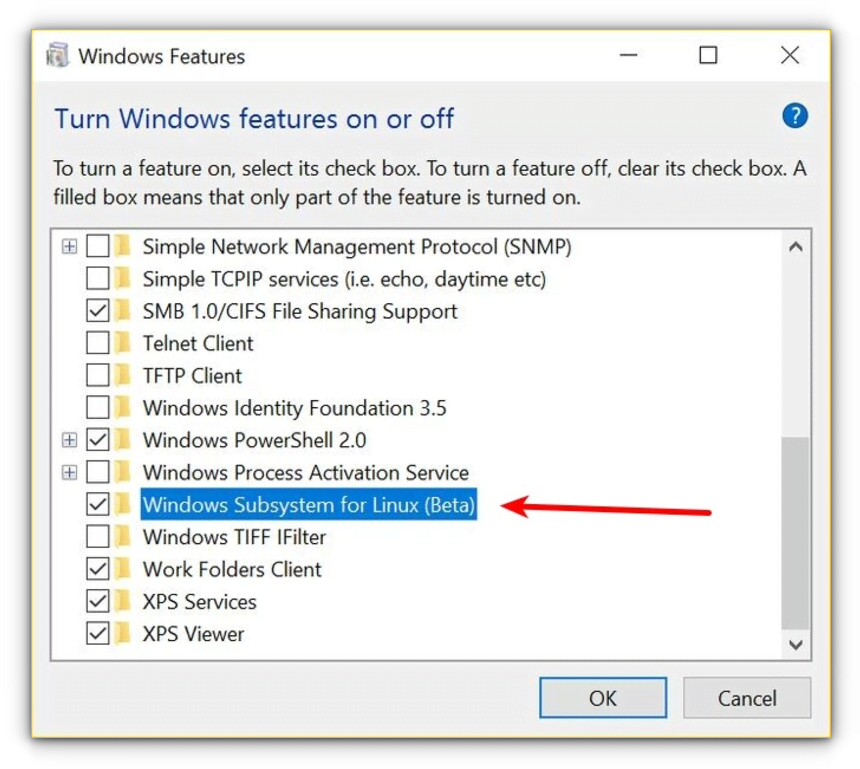
When you do this, you’ll see several Windows features. Look for “Windows Subsystem for Linux” and enable it.
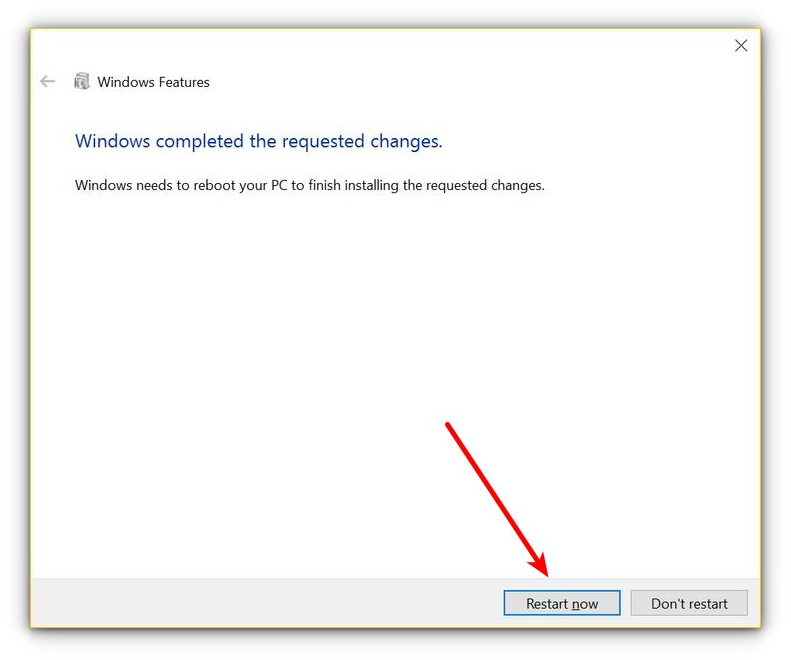
You’ll need to restart the system after doing this.
After restarting the computer, click the start button and search for “bash”.
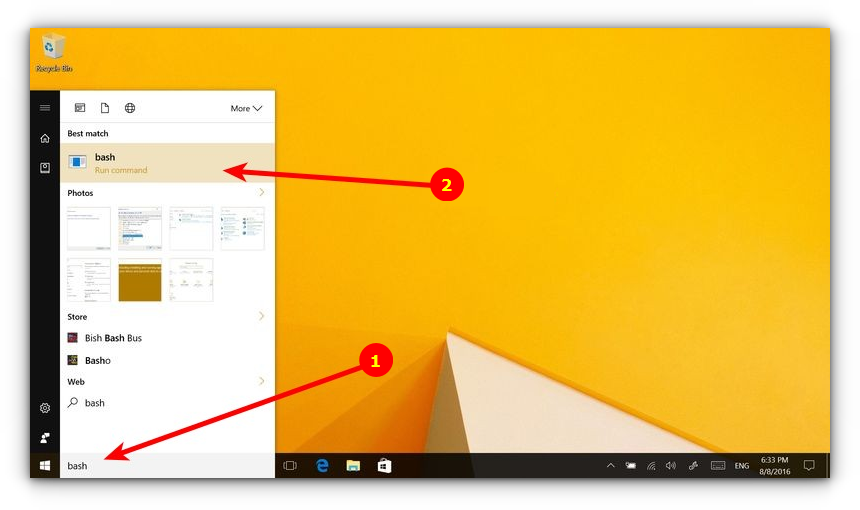
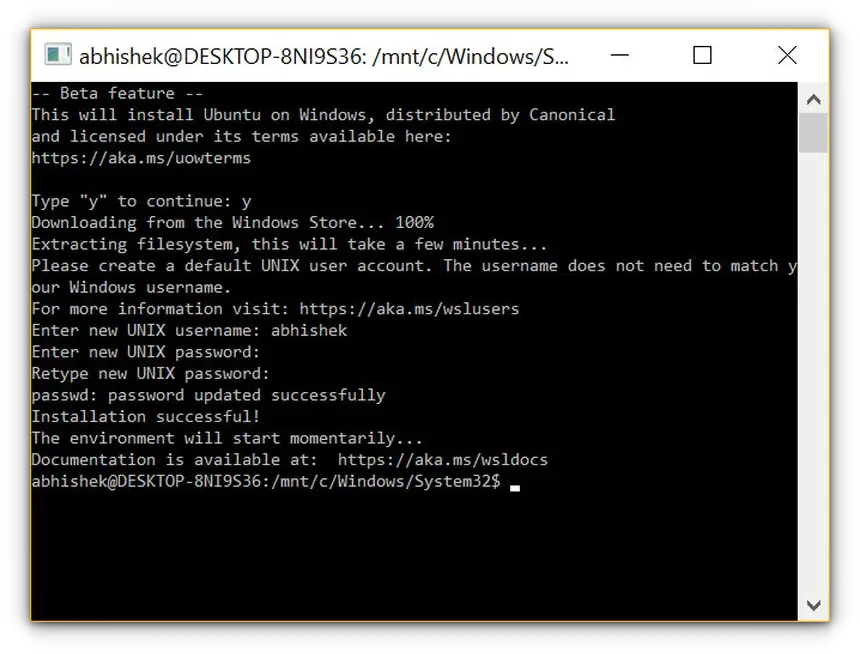
When you run it for the first time, you’ll be given the option to download and install Ubuntu. You’ll be asked to create a username and password during this process. It will install an entire Ubuntu Linux system, so have patience as it will take some time in downloading and installing Linux on Windows.
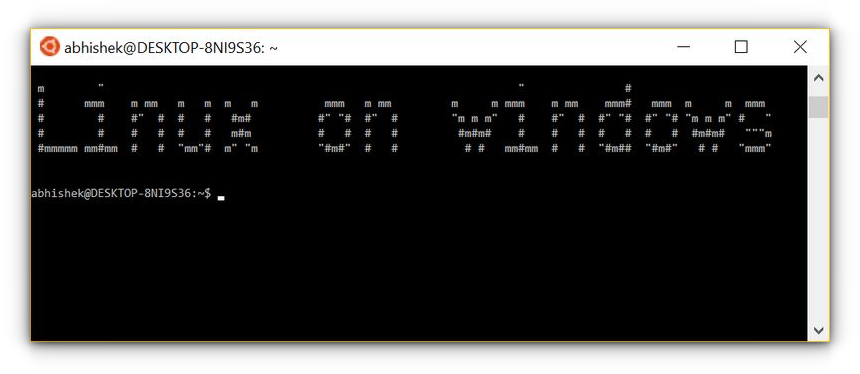
Once this is done, go back to the Start menu and search for Ubuntu or Bash.
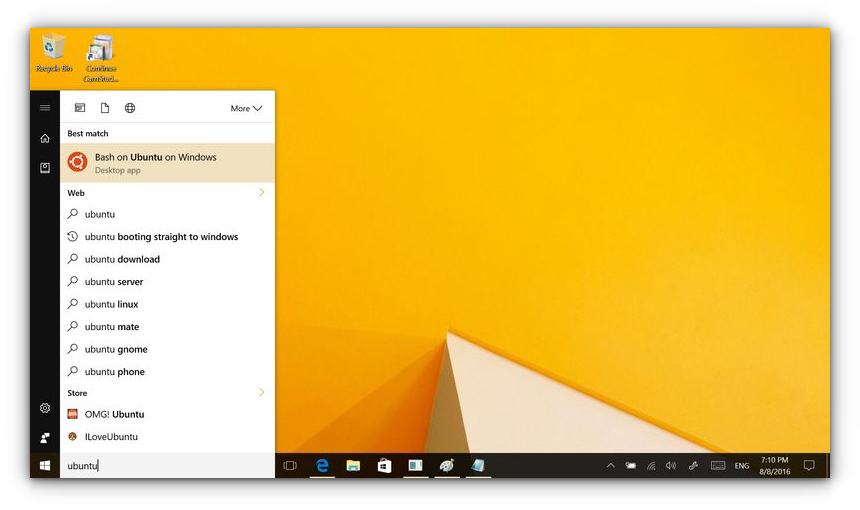
Now you have a command line version of Ubuntu Linux. You can use apt to install various command line tools in it.
💬 I hope you find this tutorial helpful for installing bash on Windows and experimenting with Linux GUI apps on Windows. No wonder WSL lets you play with Linux inside of Windows. If you have questions or suggestions, feel free to ask.
Недавно мы говорили о том, как выполнять различные Linux утилиты в Windows. Но для Windows 10 это, похоже, уже неактуально. Уже давно в Windows 10 появилась нативная поддержка оболочки Bash, в окружении дистрибутива Ubuntu благодаря подсистеме Linux для Windows 10.
Вы можете запускать различные дистрибутивы Linux в Windows без виртуализации, а с недавних пор, можно даже полноценно заставить работать графический интерфейс, правда для этого уже нужна вторая версия WSL. В этой статье мы рассмотрим как установить Linux в Windows 10.
Что такое WSL?
В начале цикла разработки Windows 10, Microsoft открыла страницу обсуждения и голосования за новые функции. Там зашел разговор о командной строке Windows. Разработчики спросили сообщество, что им не нравится в командной строке Windows и какие функции они хотели бы увидеть в новой версии.
Многие пользователи заявили что им нужны небольшие улучшения командной строки, другие же сказали что неплохо было бы иметь возможность использовать инструменты Linux / Unix и Bash в Windows 10. Много пользователей согласились с тем, что нужно сделать проще использование этих инструментов в Windows.
Прислушиваясь к голосу сообщества, в Microsoft первым делом улучшили CMD, PowerShell и другие инструменты командной строки. А во-вторых, они сделали, то что казалось невероятным несколько лет назад, они добавили реальный, нативный Bash вместе с поддержкой всех необходимых инструментов командной строки, работающих непосредственно на Windows, в среде, которая ведет себя как Linux. Это не какая-нибудь виртуальная машина, это реальный Linux в Windows.
Для реализации этого Microsoft построили новую инфраструктуру в Windows, это Windows Subsystem for Linux или WSL, на основе которой работает образ окружения Ubuntu, поставляемый партнером Canonical. Эта функция позволит разработчикам более эффективно использовать инструменты Linux. Инфраструктура основана на уже заброшенном проекте, Project Astoria, который должен был использоваться для запуска Android-приложений в Windows. Ее можно расценивать как противоположность Wine, только Wine запускает приложения Windows в Linux, подсистема Linux позволяет выполнять приложения Linux в Windows, точнее, только консольные приложения Bash в Windows 10.
С технической точки зрения, это вообще не Линукс. Каждая система GNU Linux должна быть основана на ядре Linux, здесь же просто есть возможность выполнять двоичные файлы, которые работают в Ubuntu.
С каждой новой версией в WSL всё меньше ограничений, вы уже можете использовать сервисы, а также с WSL 2 стали доступны графические приложения. Решение предназначено для разработчиков, которые хотят запускать linux-утилиты из командной строки Windows. Да, эти команды имеют доступ к файловой системе Windows, но вы не можете использовать их для автоматизации своих задач или в стандартной командной строке Windows. Теперь давайте разберемся как установить WSL в Windows 10.
1. Проверка версии системы
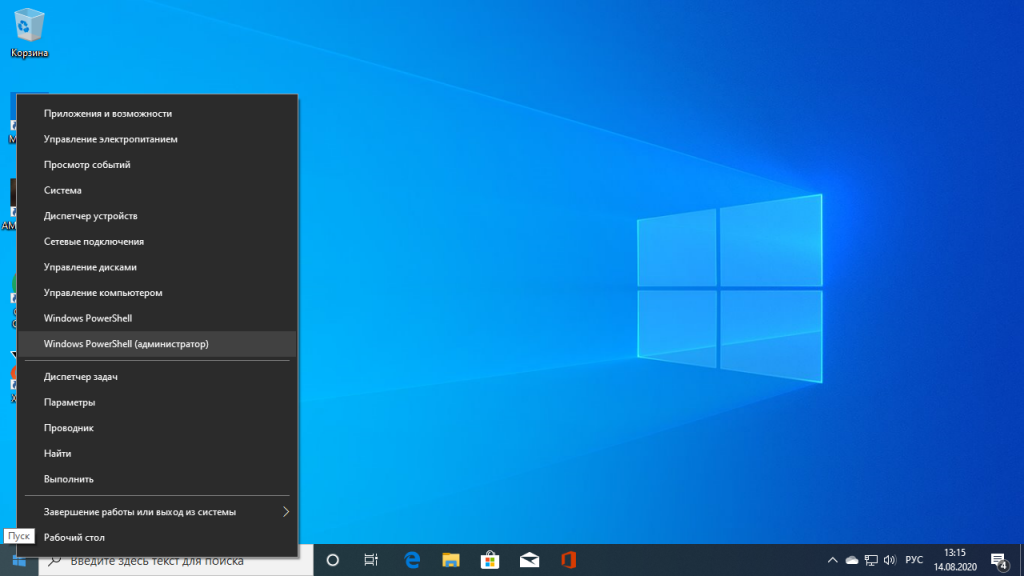
Вы можете установить WSL в Windows 10 начиная с версии Windows 10 Insider Preview 14316, а для WSL версии 2, которая принесла много улучшений нужно обновление Windows 10 19041 или новее. Сначала убедитесь, что у вас правильная версия Windows. Для этого октройте PowerShell кликнув правой кнопкой по иконке пуск:
Затем выполните команду:
[environment]::osversion
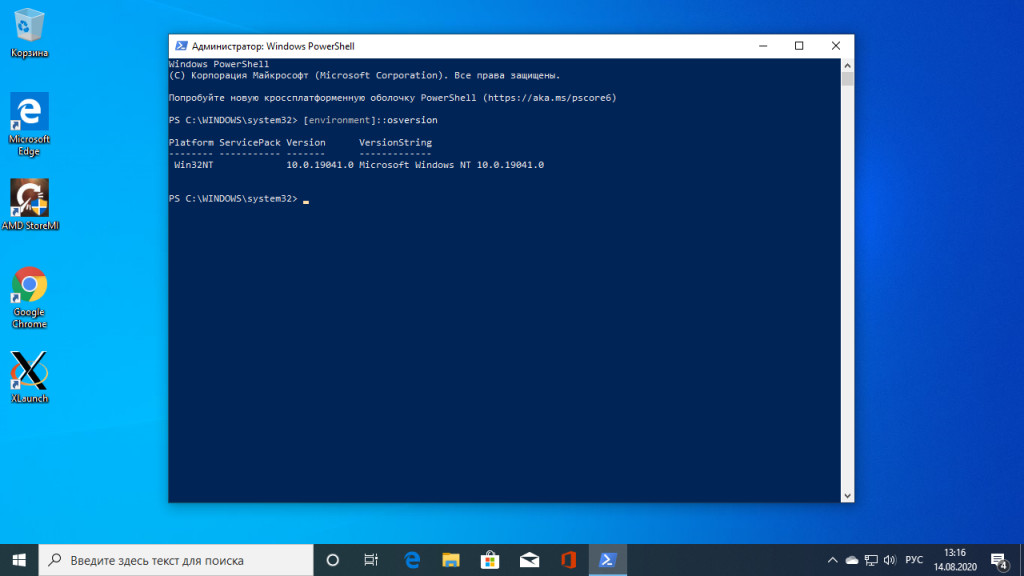
Если отображается версия как на снимке экрана или выше, значит всё хорошо. Иначе идите обновлять систему.
2. Активация WSL и виртуализации
Чтобы активировать компонент Windows Subsystem for Linux можно использовать уже открытую командную строку PowerShell. Для этого выполните:
dism.exe /online /enable-feature /featurename:Microsoft-Windows-Subsystem-Linux /all /norestart
Затем выполните ещё одну команду чтобы включить компонент виртуализации Hyper-V:
dism.exe /online /enable-feature /featurename:VirtualMachinePlatform /all /norestart
Когда эта работа будет выполнена перезапустите компьютер, чтобы все компоненты установились.
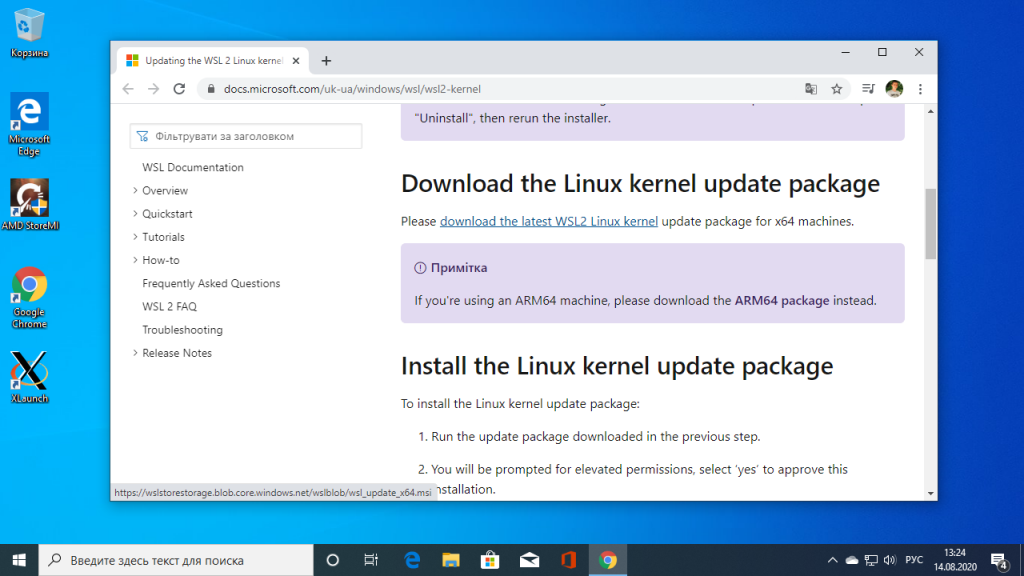
3. Активация WSL 2
Чтобы установить WSL 2 необходимо скачать пакет с новым ядром с официального сайта Microsoft. Кликните по ссылке download the latest WSL2 Linux kernel:
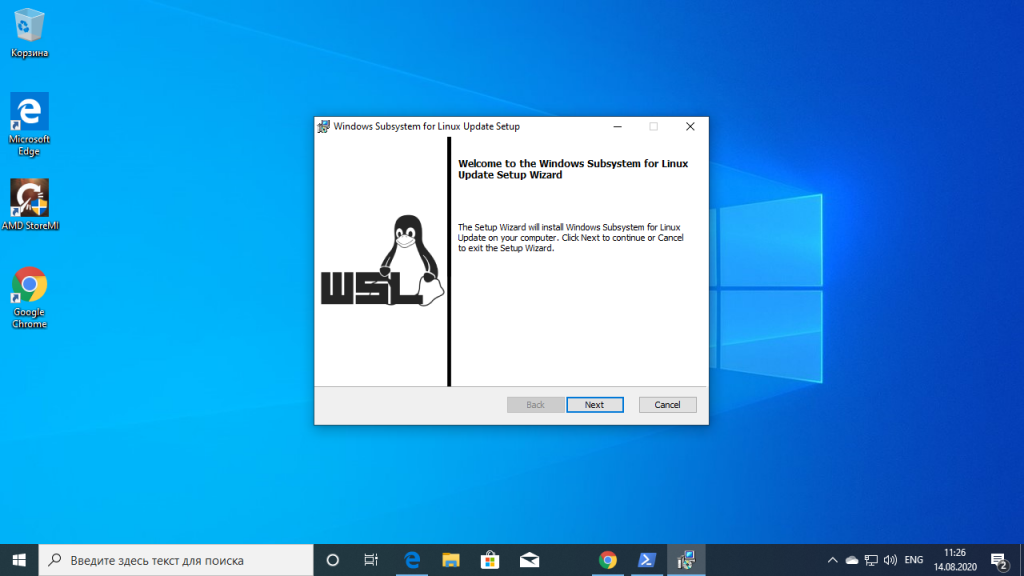
Затем установите загруженный файл:
Чтобы всегда по умолчанию использовалась версия WSL 2 необходимо выполнить такую команду:
wsl --set-default-version 2
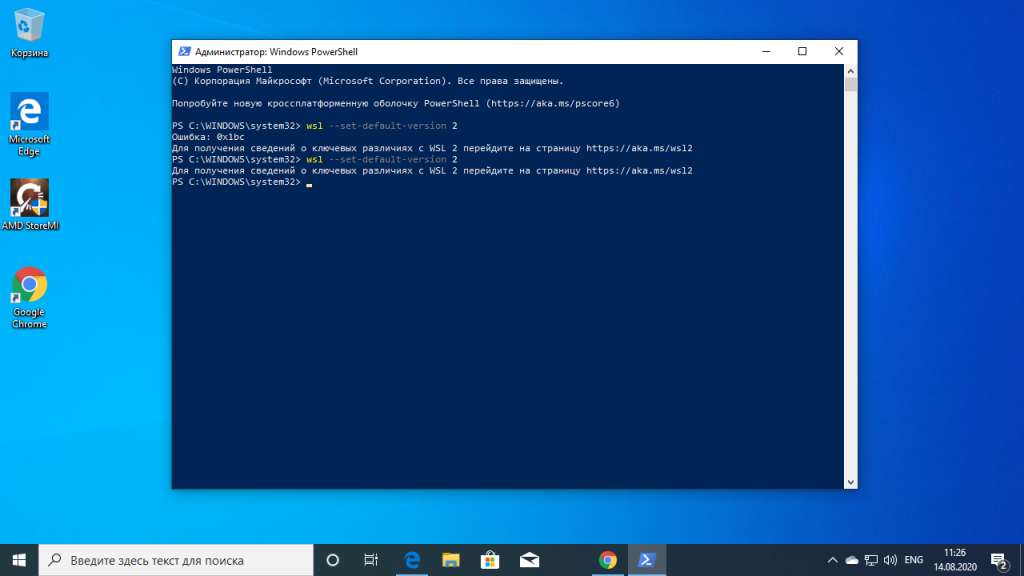
Если вы всё же получаете ошибку, с сообщением о том, что такой опции у этой команды нет, значит у вас старая версия Windows, обновляйте. Если команда не выдала ошибки — значит настройка WSL завершена успешно.
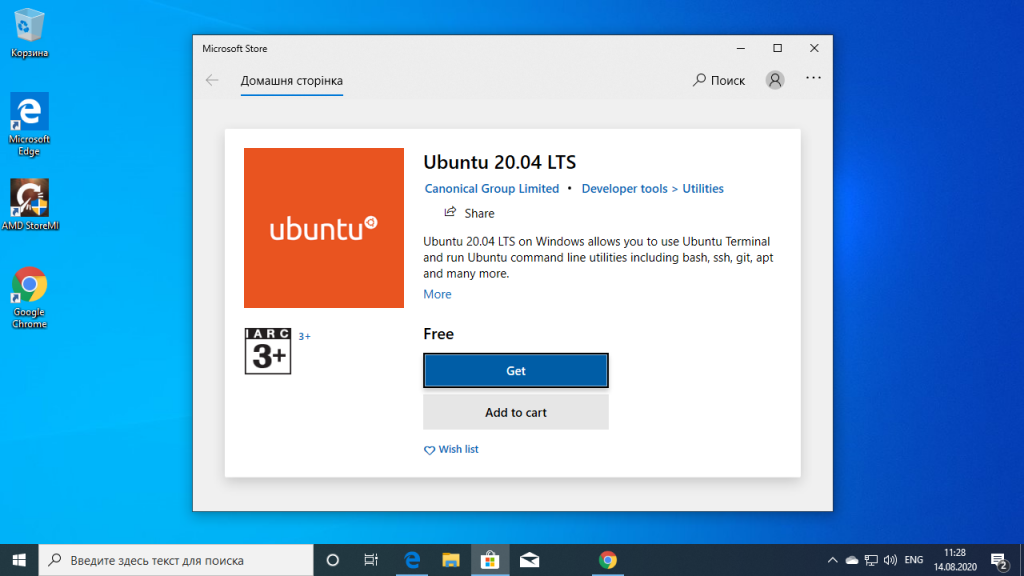
4. Установка Linux
Далее вам надо установить какой-либо дистрибутив Linux из магазина Microsoft. Достаточно просто открыть магазин и набарть в поиске имя дистрибутива, например Ubuntu, затем нажмите кнопку Get:
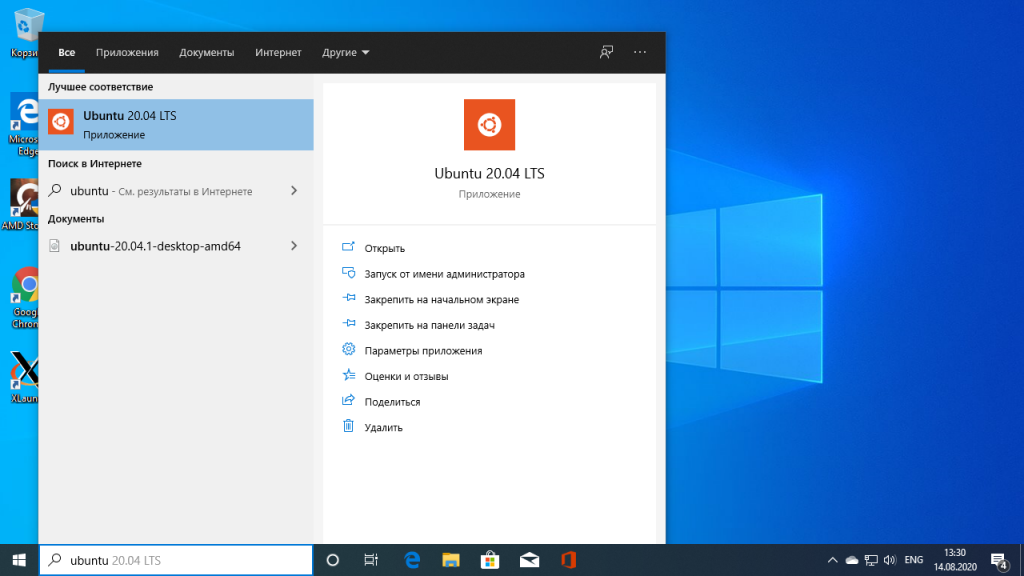
Дождитесь завершения установки и запустите загруженный дистрибутив из главного меню:
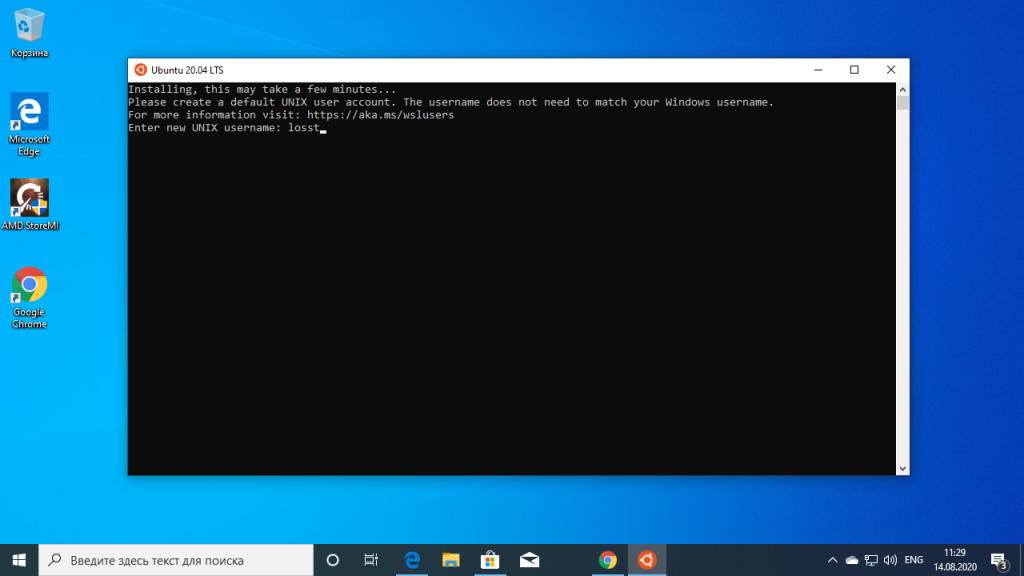
5. Настройка дистрибутива
При первом запуске будет выполняться настройка окружения. Вам необходимо указать имя пользователя:
Затем два раза пароль:
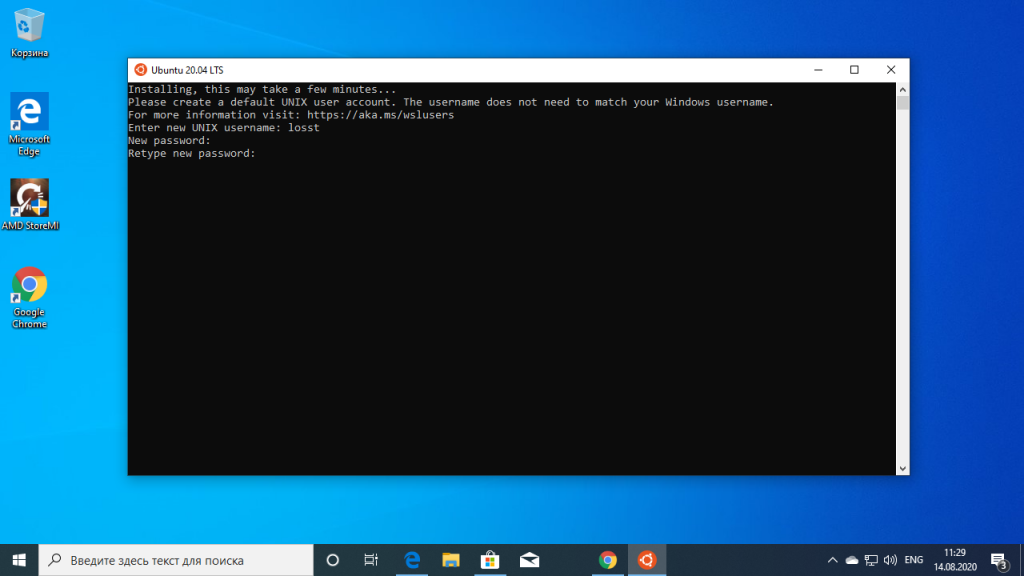
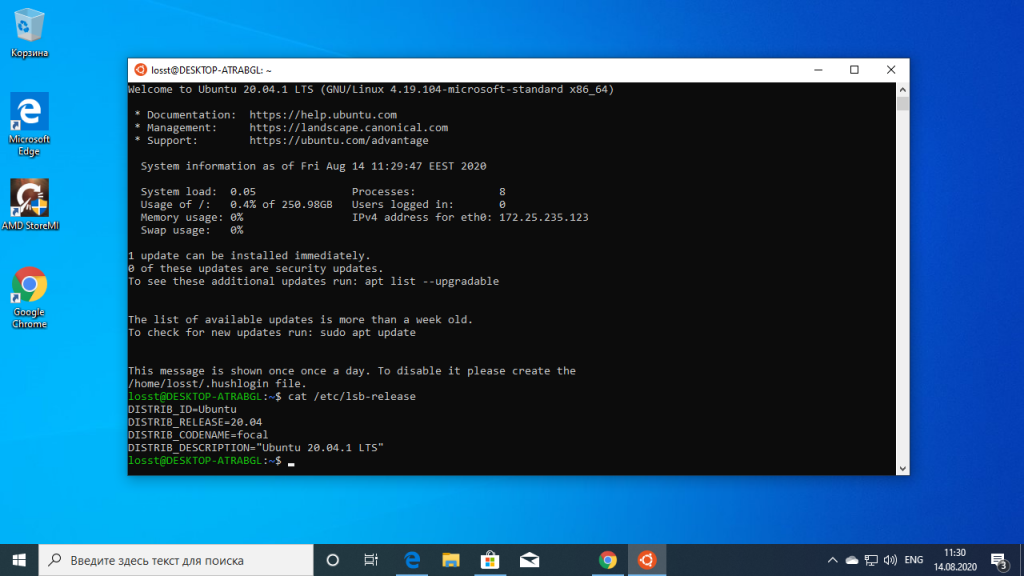
После этого вы сможете пользоваться оболочкой Bash в Windows 10:
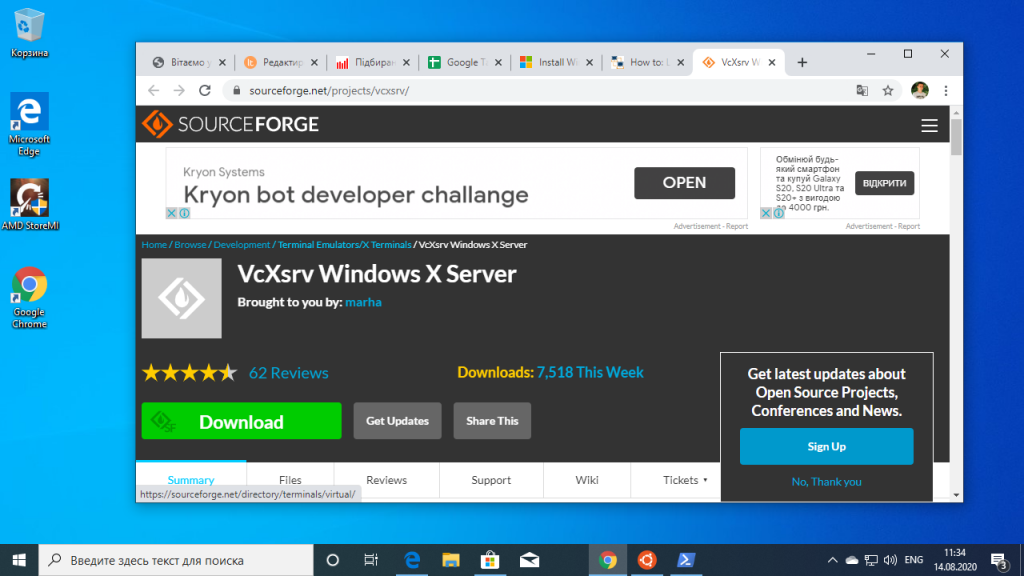
6. Установка X сервера
Если вы хотите запускать графические приложения из WSL Windows, то вам понадобится установить в систему X сервер. Скачать его можно здесь.
Затем просто установите.
7. Запуск X сервера
После завершения установки на рабочем столе появится ярлык. В первом окне выберите Multipe windows чтобы окна программ, выполняемых на X сервере интегрировались в систему:
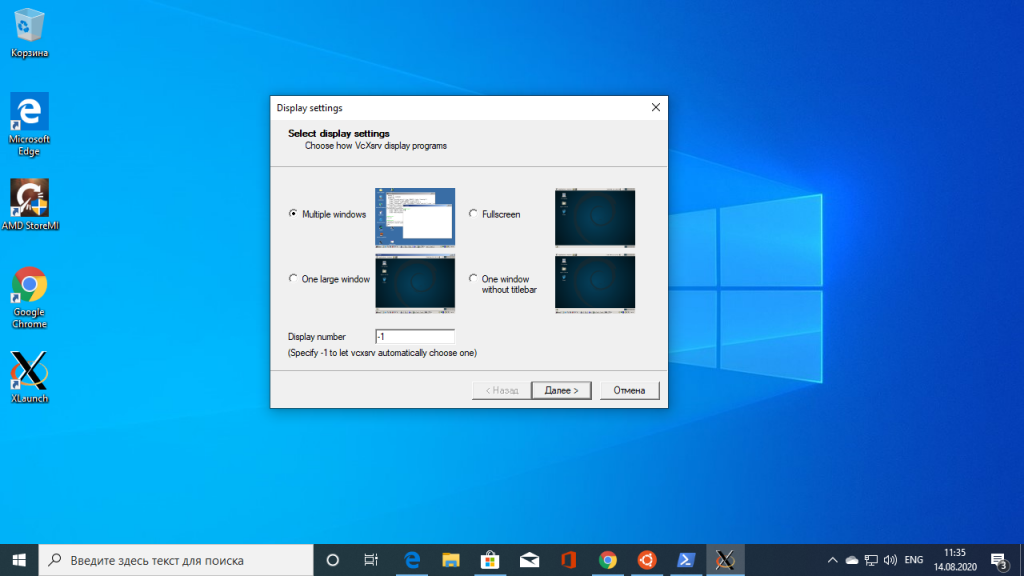
Затем выберите, что клиентов запускать не надо — Start no client:
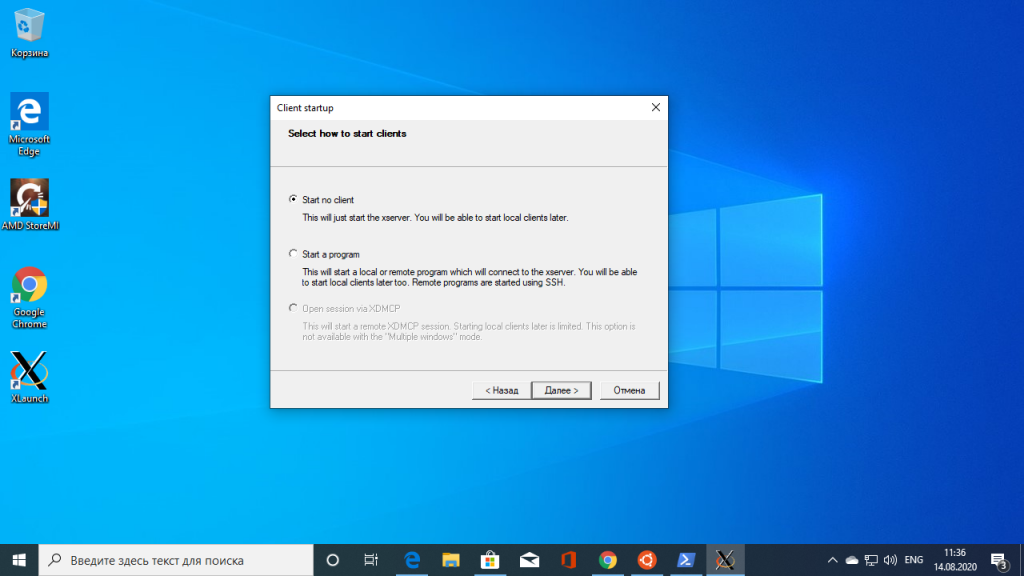
Поставьте все галочки, затем нажмите кнопку Next, а потом Finish для завершения установки.

Брандмауэр Windows тоже попросит разрешить доступ этому приложению в сеть. Надо разрешить.
8. Настройка подключения
Чтобы настроить подключение к X серверу из WSL нужно узнать какой адрес система Windows присвоила WSL окружению, для этого вернитесь к PowerShell и выполните:
ipconfig
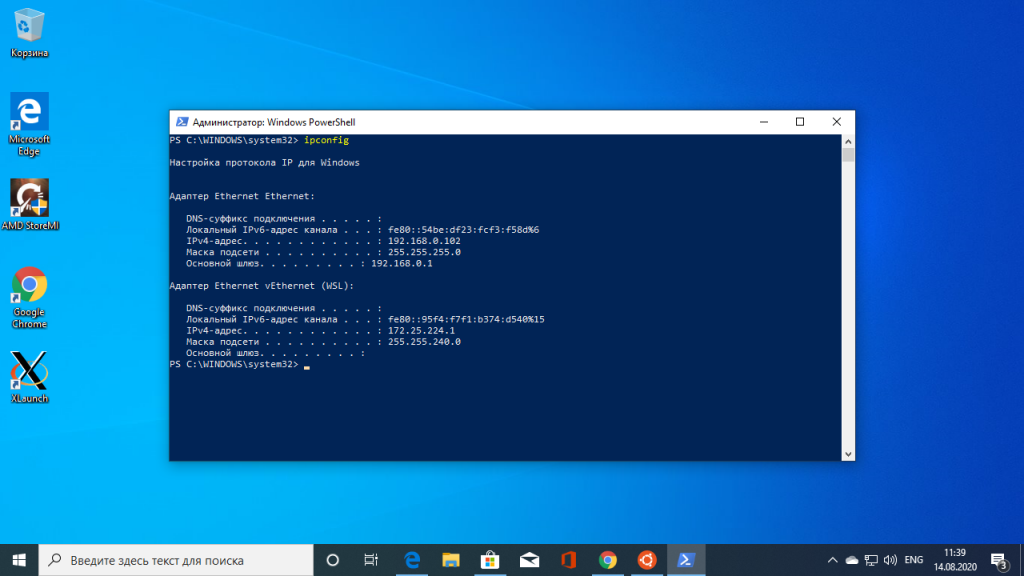
В данном случае это 172.25.224.1. Выполните в окружении дистрибутива такую команду:
export DISPLAY=172.25.224.1:0
Шаг 9. Установка и запуск приложений
Для установки приложений в дистрибутив необходимо сначала обновить списки репозиториев:
sudo apt update
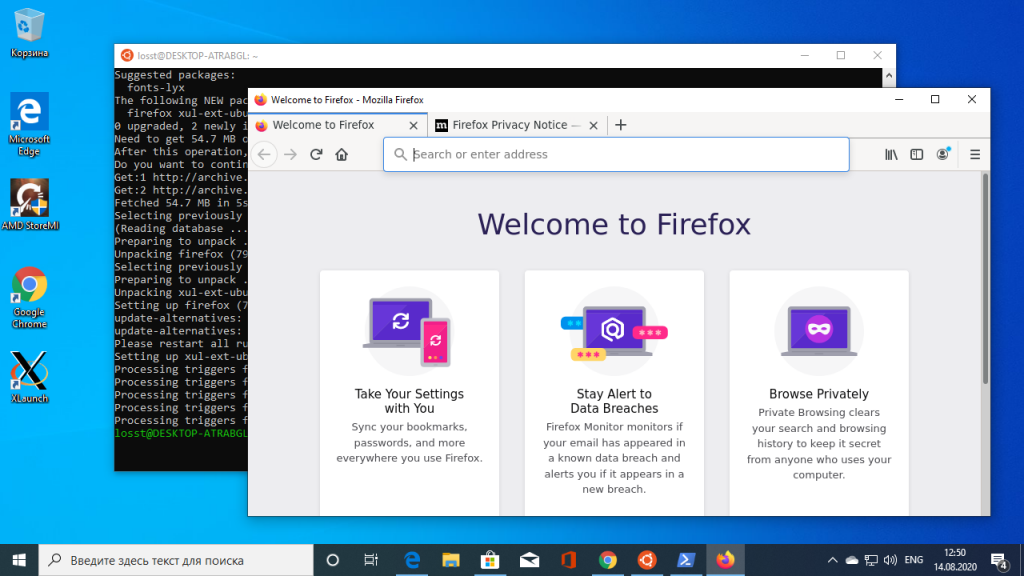
Затем установите графическое приложение, например, Firefox:
sudo apt install firefox
После этого его можно запустить:
firefox
На снимке вы видите графический интерфейс WSL для браузера Firefox, запущенного в Linux:
Использование WSL
Установка WSL Windows 10 завершена. Теперь у вас есть полноценная командная строка Ubuntu в Windows с оболочкой Bash. Поскольку используются одни и те же двоичные файлы, вы можете устанавливать программное обеспечение с помощью apt из репозиториев Ubuntu. Можно установить любое приложение, но не все будут работать.
Если вы раньше уже пользовались Bash в Linux или MacOS, то будете чувствовать себя здесь как дома. Здесь не нужно использовать команду sudo, поскольку у оболочки уже есть права администратора. Ваша файловая система Windows доступна в /mnt/c.
Для управления и перемещения по каталогам используйте те же команды что и в Linux. Если вы привыкли к стандартной оболочке Windows, то вот основные команды, которые вам могут понадобится:
- cd — изменить текущий каталог;
- ls — посмотреть содержимое каталога;
- mv — переместить или переименовать файл;
- cp — скопировать файл;
- rm — удалить файл;
- mkdir — создать папку;
- vi или nano — открыть файл для редактирования.
Важно также понимать, что в отличии от WIndows, оболочка Bash и ее окружение чувствительны к регистру. Другими словами, file.txt и File.txt, это совсем разные файлы.
Для установки и обновления программ необходимо использовать команду apt-get. Вот небольшой список ее параметров:
- apt update — скачать списки программного обеспечения из репозиториев;
- apt install пакет — установить пакет;
- apt search слово — поиск пакета по слову;
- apt upgrade — загрузка и установка последних обновлений дистрибутива.
Не забудьте, что устанавливаемые в этой оболочке программы, ограничиваются по области действия оболочкой. Вы не можете получить доступ к ним из обычной командной строки PowerShell, CMD или в любом другом месте Windows. Также WSL не может напрямую взаимодействовать с исполняемыми файлами Windows, хотя обе среды имеют доступ к одним и тем же файлам на компьютере.
Выводы
Использование Linux в Windows как нельзя лучше подойдёт для разработчиков, но может понадобиться и начинающим пользователям, которые хотят познакомиться с системой. А что вы обо всём этом думаете? Использовали ли когда-нибудь WSL? Напишите в комментариях!
Обнаружили ошибку в тексте? Сообщите мне об этом. Выделите текст с ошибкой и нажмите Ctrl+Enter.
1. Overview
Windows Subsystem for Linux (WSL) allows you to install a complete Ubuntu terminal environment in minutes on your Windows machine, allowing you to develop cross-platform applications without leaving Windows.
In this tutorial, we’ll show you how to get up and running with Ubuntu on WSL. These instructions will work on both Windows 10 or Windows 11.
Whilst WSL is a powerful tool for all users, some features, such as the ability to run graphical Linux applications, are only available on Windows 11. Please check out our Windows 11 tutorial for more information.
2. Install WSL
Installing WSL is now easier than ever. Search for Windows PowerShell in your Windows search bar, then select Run as administrator.

At the command prompt type:
wsl --install
And wait for the process to complete.
For WSL to be properly activated, you will now need to restart your computer.
3. Download Ubuntu
WSL supports a variety of Linux distributions, including the latest Ubuntu release, Ubuntu 20.04 LTS and Ubuntu 18.04 LTS. You can find them by opening the Microsoft store app and searching for Ubuntu.
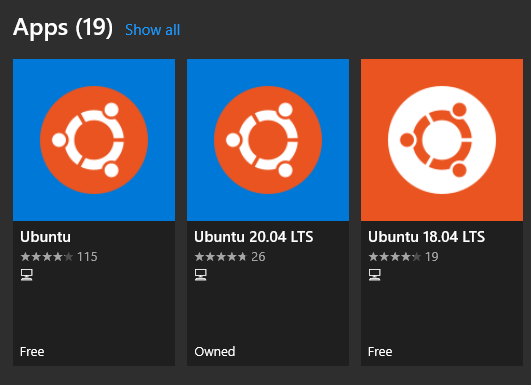
Choose the distribution you prefer and then click on Get as shown in the following screenshot:

Ubuntu will then install on your machine.
The one line install!
There is a single command that will install both WSL and Ubuntu at the same time.
When opening PowerShell for the first time, simply modify the initial instruction to:
wsl --install -d ubuntu
This will install both WSL and Ubuntu! Don’t forget to restart your machine before continuing.
Once installed, you can either launch the application directly from the store or search for Ubuntu in your Windows search bar.
4. Configure Ubuntu
Congratulations, you now have an Ubuntu terminal running on your Windows machine!
If Ubuntu returns an error during this initial installation, then the most common issue is that virtualisation is disabled in your device’s BIOS menu. You will need to turn this on during your device’s boot sequence. The location of this option varies by manufacturer, so you will need to refer to their documentation to find it.
Once Ubuntu has finished its initial setup you will need to create a username and password (this does not need to match your Windows user credentials).
Finally, it’s always good practice to install the latest updates with the following commands, entering your password when prompted.
sudo apt update
Then
sudo apt upgrade
Press Y when prompted.
5. Install your first package
Installing packages on Ubuntu is as easy as using a single command. Below, you will see how to install bpython, a simple python interpreter for trying out ideas, featuring some nice usability features like expected parameters and autocompletion.
To check that you have the latest package lists, type:
sudo apt update
Then install bpython:
sudo apt install bpython
To run the application type:
bpython
And you’re ready to go!

6. Customising your Terminal with Windows Terminal Preview
Since you’re likely to be using your Ubuntu terminal a fair bit, it’s always nice to do some customisation. We recommend installing Windows Terminal Preview to get the most user-friendly setup. You can find it in the Microsoft Store.

Windows Terminal allows you to open multiple Terminal instances as tabs, so you can have PowerShell running alongside Ubuntu. It also includes a number of customisation options. In the below screenshot, we’ve changed the tab name and colour, and configured the terminal appearance to use the Tango Dark theme and the Ubuntu font!
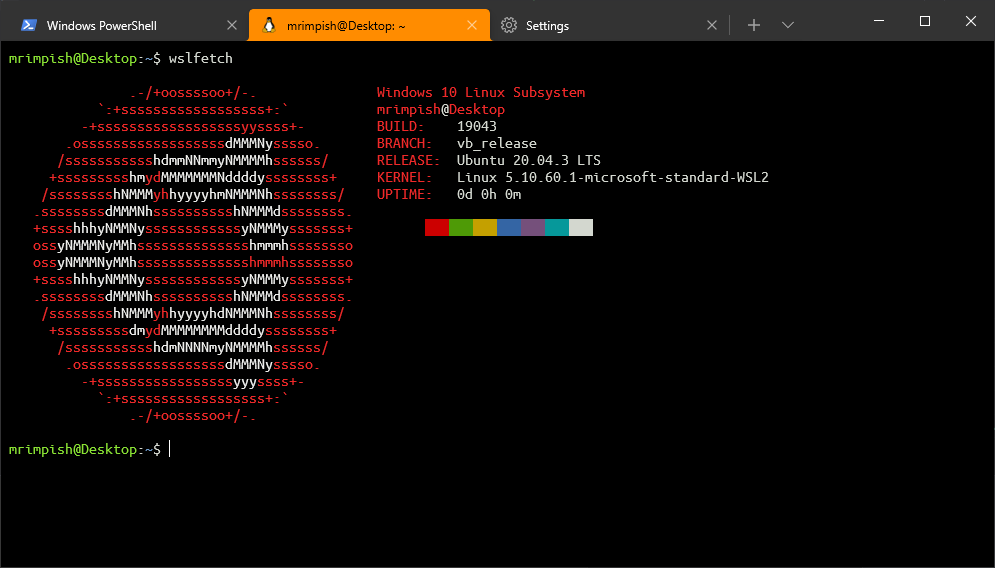
These customisations can be applied universally using the Appearance menu in Settings or to individual profiles which each have their own Appearance menu. Try it yourself to find something you feel comfortable with!

7. Enjoy Ubuntu on WSL!
That’s it! In this tutorial, you’ve seen how to install WSL and Ubuntu, set up your profile, and install your first package. You also got some tips on how to customise your experience.
We hope you enjoy working with Ubuntu inside WSL. Don’t forget to check out our blog for the latest news on all things Ubuntu.
Further Reading
- Install Ubuntu on WSL2 on Windows 11 with GUI Support
- Working with Visual Studio Code on Ubuntu on WSL2
- Enabling GPU acceleration on Ubuntu on WSL2 with the NVIDIA CUDA Platform
- Setting up WSL for Data Science
- WSL on Ubuntu Wiki
- Ask Ubuntu
Was this tutorial useful?
Thank you for your feedback.
Время на прочтение
9 мин
Количество просмотров 241K
К написанию данной статьи меня побудил вопрос на Тостере, связанный с WSL. Я, после нескольких лет использования систем на ядре Linux, около полугода назад перешел к использованию Windows 10 на домашнем ПК. Зависимость от терминала и Linux окружения в моей работе практически сразу привели меня к вопросу: или ставить виртуалку или попробовать WSL. Я выбрал второе, и остался вполне доволен.
Под катом я расскажу как установить и настроить WSL, на какие я наткнулся проблемы и ограничения, как запускать Linux приложения из Windows и наоборот, а так же как интегрировать элементы окружения Xfce в окружение рабочего стола Windows.

Никогда не думал, что однажды вернусь на Windows, но повод попробовать мне дали стечения обстоятельств: жена, далекая от IT, дергала почти каждый раз, когда у нее возникала необходимость воспользоваться компом; проснулась ностальгия по одной игре, но она никак не хотела адекватно работать под wine; а тут еще мне подарили коробочную Windows 10 Pro. WSL я поставил чуть ли не сразу после установки системы, поигрался несколько вечеров, понял, что продукт для моих задач годный, но хочется более привычный терминал и вообще некоторых удобств.
Установка WSL и дистрибутива
Сразу оговорюсь, в интернете можно найти описание установки с помощью выполнения команды lxrun /install в командной строке или консоли PowerShell. Данный способ больше не работает (после выхода WSL в стабильный релиз). Насколько мне известно, сейчас WSL можно установить только из Microsoft Store вместе с предпочитаемым дистрибутивом.
Так же отмечу, что когда установку производил я, на выбор были доступны дистрибутивы OpenSUSE, SUSE Linux Enterprise и Ubuntu 16.04 — последний я и установил. Сейчас также доступны Ubuntu 18.04, Debian 9 и Kali Linux, возможно появятся и другие дистрибутивы. Действия по установке могут отличаться. Так же, часть проблем описанных в статье может быть уже исправлена.
Находим в магазине желаемый дистрибутив и устанавливаем. Установка пройдет быстро, так как скачает только эмулятор ядра Linux и утилиту для запуска подсистемы, которая окажется в системной папке в трех экземплярах: wsl.exe, bash.exe и ubuntu.exe (вместо ubuntu будет имя Вашего дистрибутива). Все они равнозначны и делают одно и то же — запускают собственный эмулятор терминала, в нем linux’овый bash работающий под эмулятором ядра. При первом же запуске нас попросят придумать логин и пароль для пользователя по умолчанию, а после произойдет непосредственно установка дистрибутива. В качестве пользователя по умолчанию указываем root без пароля — это потребуется для дальнейших шагов. Безопасность не пострадает, кроме того при подготовке материалов к статье, в англоязычном туториале, я наткнулся на информацию, что новые версии WSL теперь делают пользователем по умолчанию root без пароля без лишних вопросов.
Дожидаемся установки. Далее первым делом стоит обновить зеркала apt на ближайшие. Для этого понадобится CLI текстовый редактор. В комплекте только vi, я же больше предпочитаю nano, поэтому ставлю его:
apt install nanosudo вводить не требуется, так как мы уже под root’ом. Отредактируем файл /etc/apt/sources.list:
nano /etc/apt/sources.listУ меня лучше всего работают зеркала Яндекса, поэтому мой файл выглядит так:
deb http://mirror.yandex.ru/ubuntu/ xenial main universe restricted
deb-src http://mirror.yandex.ru/ubuntu/ xenial main universe  restricted

deb http://mirror.yandex.ru/ubuntu/ xenial-security main universe restricted
deb-src http://mirror.yandex.ru/ubuntu/ xenial-security main universe restricted

deb http://mirror.yandex.ru/ubuntu/ xenial-updates main universe restricted
deb-src http://mirror.yandex.ru/ubuntu/ xenial-updates main universe restricted
Нажимаем Ctrl+O для сохранения и Ctrl+X для выхода. Теперь можно обновить систему до актуального состояния:
apt update && apt upgradeПосле обновления можно создать нашего основного пользователя. В данной статье я назову его user1, Вы же можете задать привычное имя:
addgroup --gid 1000 user1
adduser --home /home/user1 --shell /bin/bash --uid 1000 -G user1,sudo user1
Далее переходим в папку юзера, зайдем под ним, установим пароль и отредактируем файл ~/.bashrc:
cd /home/user1
su user1
passwd
nano .bashrc
Мой базовый .bashrc выглядит так
# If not running interactively, don't do anything
case $- in
    *i*) ;;
      *) return;;
esac

# don't put duplicate lines or lines starting with space in the history.
# See bash(1) for more options
HISTCONTROL=ignoreboth

# append to the history file, don't overwrite it
shopt -s histappend

# for setting history length see HISTSIZE and HISTFILESIZE in bash(1)
HISTSIZE=1000
HISTFILESIZE=2000

# check the window size after each command and, if necessary,
# update the values of LINES and COLUMNS.
shopt -s checkwinsize

# If set, the pattern "**" used in a pathname expansion context will
# match all files and zero or more directories and subdirectories.
#shopt -s globstar

# make less more friendly for non-text input files, see lesspipe(1)
[ -x /usr/bin/lesspipe ] && eval "$(SHELL=/bin/sh lesspipe)"

# set variable identifying the chroot you work in (used in the prompt below)
if [ -z "${debian_chroot:-}" ] && [ -r /etc/debian_chroot ]; then
    debian_chroot=$(cat /etc/debian_chroot)
fi

# set a fancy prompt (non-color, unless we know we "want" color)
case "$TERM" in
    xterm|xterm-color|*-256color) color_prompt=yes;;
esac

# uncomment for a colored prompt, if the terminal has the capability; turned
# off by default to not distract the user: the focus in a terminal window
# should be on the output of commands, not on the prompt
#force_color_prompt=yes

if [ -n "$force_color_prompt" ]; then
    if [ -x /usr/bin/tput ] && tput setaf 1 >&/dev/null; then
    # We have color support; assume it's compliant with Ecma-48
    # (ISO/IEC-6429). (Lack of such support is extremely rare, and such
    # a case would tend to support setf rather than setaf.)
    color_prompt=yes
    else
    color_prompt=
    fi
fi

if [ "$color_prompt" = yes ]; then
    if [[ ${EUID} == 0 ]] ; then
        PS1='${debian_chroot:+($debian_chroot)}\[\033[01;31m\]\h\[\033[01;34m\] \W \$\[\033[00m\] '
    else
        PS1='${debian_chroot:+($debian_chroot)}\[\033[01;32m\]\u@\h\[\033[00m\] \[\033[01;34m\]\w \$\[\033[00m\] '
    fi
else
    PS1='${debian_chroot:+($debian_chroot)}\u@\h \w \$ '
fi
unset color_prompt force_color_prompt

# If this is an xterm set the title to user@host:dir
case "$TERM" in
xterm*|rxvt*)
    PS1="\[\e]0;${debian_chroot:+($debian_chroot)}\u@\h \w\a\]$PS1"
    ;;
*)
    ;;
esac

# enable color support of ls and also add handy aliases
if [ -x /usr/bin/dircolors ]; then
    test -r ~/.dircolors && eval "$(dircolors -b ~/.dircolors)" || eval "$(dircolors -b)"
    alias ls='ls --color=auto'
    #alias dir='dir --color=auto'
    #alias vdir='vdir --color=auto'

    alias grep='grep --color=auto'
    alias fgrep='fgrep --color=auto'
    alias egrep='egrep --color=auto'
fi

# colored GCC warnings and errors
#export GCC_COLORS='error=01;31:warning=01;35:note=01;36:caret=01;32:locus=01:quote=01'

# some more ls aliases
alias ll='ls -alF'
alias la='ls -A'
alias l='ls -CF'

# Add an "alert" alias for long running commands.  Use like so:
#   sleep 10; alert
alias alert='notify-send --urgency=low -i "$([ $? = 0 ] && echo terminal || echo error)" "$(history|tail -n1|sed -e '\''s/^\s*[0-9]\+\s*//;s/[;&|]\s*alert$//'\'')"'

# Alias definitions.
# You may want to put all your additions into a separate file like
# ~/.bash_aliases, instead of adding them here directly.
# See /usr/share/doc/bash-doc/examples in the bash-doc package.

if [ -f ~/.bash_aliases ]; then
    . ~/.bash_aliases
fi

# enable programmable completion features (you don't need to enable
# this, if it's already enabled in /etc/bash.bashrc and /etc/profile
# sources /etc/bash.bashrc).
if ! shopt -oq posix; then
  if [ -f /usr/share/bash-completion/bash_completion ]; then
    . /usr/share/bash-completion/bash_completion
  elif [ -f /etc/bash_completion ]; then
    . /etc/bash_completion
  fi
fi
Все, подсистема готова к использованию… почти…
Установка X-сервера, Xfce и прочих GUI’шных приложений
Первая же проблема, на которую я натолкнулся — bash-completion в предлагаемом эмуляторе терминала работал, мягко говоря, некорректно. Кроме того, данный эмулятор не умеет вкладки, а каждый его экземпляр запускает все в новом пространстве процессов, с отдельным init’ом (который кстати не заменить). Мне захотелось нормальный эмулятор терминала, некоторых других GUI приложений, а так же панельку, чтоб это все быстро запускать.
Когда я гуглил этот вопрос, я наткнулся на множество проблем, вроде необходимости перевода dbus на tcp протокол. На данный момент всех этих проблем нет. В подсистеме нормально работают unix-domain-socket’ы и все спокойно общается через них.
Первым делом нам понадобится X-сервер, притом установленный в основную систему (в Windows). Лично я использую для этих целей VcXsrv — порт X11 на Windows. Официальный сайт указанный в about самой утилиты его сейчас не предоставляет, поэтому гуглим установщик и устанавливаем все по умолчанию.
Пока идет установка возвращаемся в терминал WSL, командой exit выходим обратно в root’а. Первым делом настроим русские локали:
locale-gen ru_RU
locale-gen ru_RU.UTF-8
update-locale
Далее установим некоторые компоненты Xfce. Можно конечно установить его целиком из мета-пакета, но большинство компонентов нам не понадобится, а модульная архитектура Xfce позволяет нам поставить только необходимое:
apt install -y xfce4-session xfce4-notifyd xfce4-appfinder xfce4-panel xfce4-quicklauncher-plugin xfce4-whiskermenu-plugin xfce4-xkb-plugin xfce4-settings xfce4-terminal xfce4-taskmanager mousepadЗапускать каждый раз окружение руками не очень удобно, поэтому я автоматизировал данный процесс. Для этого в основной системе создадим в удобном для нас месте папку, а в ней 3 файла для запуска:
- config.xlaunch — файл настроек для VcXsrv
<?xml version="1.0" encoding="UTF-8"?> <XLaunch WindowMode="MultiWindow" ClientMode="NoClient" LocalClient="False" Display="0" LocalProgram="xcalc" RemoteProgram="xterm" RemotePassword="" PrivateKey="" RemoteHost="" RemoteUser="" XDMCPHost="" XDMCPBroadcast="False" XDMCPIndirect="False" Clipboard="True" ClipboardPrimary="True" ExtraParams="" Wgl="True" DisableAC="False" XDMCPTerminate="False" /> -
x-run.vbs — WSL всегда запускается со своим эмулятором терминала, если его закрыть — завершатся все его дочерние процессы. Чтоб данное окно не мозолило глаза, неплохо его запускать скрытым. К счастью в Windows встроен интерпретатор VBScript, который позволяет это сделать в одну строчку:
WScript.CreateObject("Shell.Application").ShellExecute "wsl", "cd /home/user1; DISPLAY=:0 LANG=ru_RU.UTF-8 su user1 -c xfce4-session", "", "open", 0Поясню, что здесь происходит. Мы говорим VBscript выполнить приложение wsl с параметром
cd /home/user1; DISPLAY=:0 LANG=ru_RU.UTF-8 su user1 -c xfce4-session, папка запуска нам не важна, поэтому пустая строка, действие open — запуск, 0 — скрытый режим. Самому wsl мы отдаем команду на выполнение: переход в папку пользователя, затем с установкой переменных окружения DISPLAY (дисплей X-сервера) и LANG (используемая локаль) мы запускаем xfce4-session от имени нашего пользователя user1 (благодаря команде su) - start.bat — batch файл для запуска, по желанию его можно засунуть в автозагрузку
start config.xlaunch
wscript x-run.vbs
Далее можем запустить наш start.bat и настроить панель Xfce под себя. Замечу, что здесь я наткнулся на еще одну проблему — панель прекрасно отображается поверх всех окон, но вот выделить себе место, как панель на рабочем столе Windows она не может. Если кто знает решение данной проблемы, поделитесь в комментариях.
Ну и под конец данной части, скриншот моего рабочего стола:

Взаимодействие окружения Windows и окружения подсистемы Linux
Запускать Linux приложения напрямую из Windows можно через те же 3 команды — bash, wsl или ubuntu. Не забываем, что по умолчанию запуск идет от root, поэтому стоит понижать привилегии через su, так же нужно не забывать передавать переменную окружения DISPLAY=:0 если приложению требуется X-сервер. Так же нужно менять папку, из которой должно работать приложение, через cd внутри WSL. Пример, посчитаем md5 для file.txt на диске D средствами Linux’овой md5sum:
wsl md5sum < d:\file.txtДоступ к файловой системе Linux так же имеется, лежит она в %localappdata%\Packages\CanonicalGroupLimited.UbuntuonWindows_79rhkp1fndgsc\LocalState\rootfs. Читать таким образом файлы можно, а вот писать — не желательно, можно поломать файловую систему. Думаю проблема в том, что Windows не умеет работать с правами и владельцами файловой системы Linux.
Из Linux так же можно запускать Windows приложения. Просто запускаем exe-шник и он выполнится в основной системе.
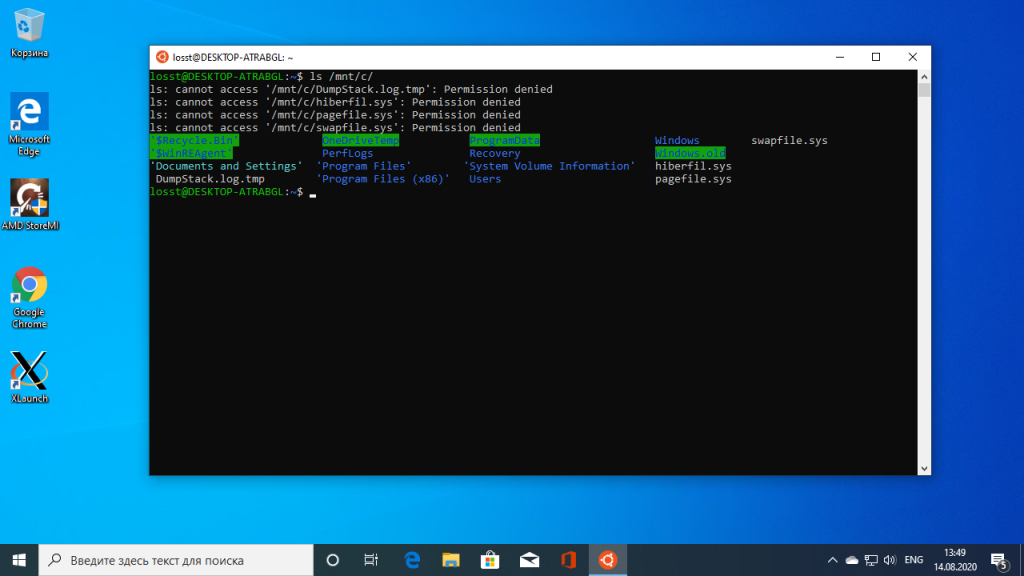
Диски Windows монтируются в /mnt в соответствии со своими буквами в нижнем регистре. Например диск D будет смонтирован в /mnt/d. Из Linux можно свободно читать и писать файлы Windows. Можно делать на них симлинки. Права у таких файлов всегда будут 0777, а владельцем будет root.
Сетевой стек у подсистемы общий с Windows. Сервер поднятый в Linux будет доступен на localhost в Windows и наоборот. Однако unix-domain-socket для Windows будет просто пустым файлом, работать с этим можно только внутри Linux. Выход во внешнюю сеть у Linux так же есть, в том числе можно слушать порты, если этого не запрещает фаервол.
ifconfig в Linux и ipconfig в Windows выдают одинаковую информацию о сетевых интерфейсах.
Из диспетчера задач Windows можно спокойно прибить процесс внутри подсистемы Linux. Однако Linux увидит только свои процессы.
Особенности, ограничения и подводные камни
Ядро Linux в WSL не настоящее. Это всего лишь прослойка-эмулятор, которая часть Linux-специфичных задач выполняет сама, а часть проксирует напрямую в ядро winNT. Большая часть api в нем реализована, но не все. Свое ядро собрать не получится, как и не получится подключить модули ядра (.ko, Kernel Object).
Init процесс у WSL тоже свой и заменить его, например, на system.d не выйдет. У меня давно есть желание написать менеджер демонов на go, который бы работал с файлами юнитов system.d и предоставлял бы схожий интерфейс, да все руки не доходят.
Нет поддержки openFUSE, соответственно примонтировать виртуальную или удаленную файловую систему не получится. Так же нельзя сделать mount из файла, mount вообще ничего кроме bind здесь, похоже, не умеет.
Так же нет никакой возможности разбить файловую систему Linux на несколько разделов/дисков.
Прямой доступ к железу практически отсутствует. Все таки мы находимся в песочнице Windows, а не в полноценном Linux. /dev и /sys заметно пустуют, в них лишь проц да виртуальные устройства. Доступ к GPU — только через X-сервер, напрямую — никак, так что нейросети обучать придется в Windows.
В JS разработке столкнулся с тем, что electron.js отказался запускаться в WSL, пришлось дублировать окружение node.js в Windows.
Итоги
Статья получилась довольно длинной, надеюсь, что она окажется еще и полезной.
WSL для меня лично оказался инструментом вполне юзабельным, решающим мои задачи fullstack backend разработчика. Виртуалка с Linux за полгода так и не понадобилась. По общим ощущениям Windows+WSL намного функциональнее, чем Linux+Wine.
Пока писал статью, обнаружил, что в Microsoft Store появилась сборка WSL с Debian 9.3, данный дистрибутив мне более симпатичен, чем Ubuntu, поэтому буду пробовать ставить.
Here’s how to set up and use the Linux shell on Windows – using the Windows Subsystem for Linux (WSL).
This tutorial is intended for up-to-date versions of Windows 10 from 2020 onwards. I’m not going to cover how to use WSL on older versions of Windows 10 or other methods for Windows 8/7/XP/3.1 because you shouldn’t be using outdated software. If you must use Windows, use a version that still receives security patches!
WSL is a great tool and allows you to pretty much run Linux software on windows as if you had never left Linux. Not everyone has the luxury of being able to install a Linux system due to relying on proprietary software released only for Windows.
Anyway, here’s how to get a Linux shell happening on Windows 10, courtesy of the Windows Subsystem for Linux.
Install Windows Subsystem for Linux
First, you will need to install support for the Windows Subsystem for Linux in Windows 10. on Windows 10 [Tutorial] 2")
This is done from the Settings app – so open it up and then click on Apps.
 on Windows 10 [Tutorial] 3")
Then click on Programs and Features in the sidebar to the right.
 on Windows 10 [Tutorial] 4")
Next, click Turn Windows features on or off in the sidebar to the left.
 on Windows 10 [Tutorial] 5")
Scroll down the list and check Windows Subsystem for Linux, then press OK
Confirm your selection, then allow your computer to restart to complete the installation.
Install Ubuntu From The Windows Store
First, make sure that your copy of Windows 10 is completely up-to-date. Older releases of Windows 10 from before 2020 do not support the Windows Subsystem for Linux. on Windows 10 [Tutorial] 6")
Next, open the Microsoft Store from the Start Menu, or search for ‘store.’
 on Windows 10 [Tutorial] 7")
Search for ‘Ubuntu’ from Canonical.
To install it, click ‘Get’ and wait for it to download.
This “App” contains a full copy of Ubuntu for the Windows Subsystem for Linux – including the Bash shell, and a full Ubuntu command line environment.
 on Windows 10 [Tutorial] 8")
Launch the downloaded Ubuntu App by clicking ‘Launch.’
 on Windows 10 [Tutorial] 9")
A shortcut to Ubuntu will also be added to your start menu.
 on Windows 10 [Tutorial] 10")
When you launch Ubuntu, you’ll be dropped right into a Linux Bash environment in Windows – cool!
Install the Windows Terminal (Optional)
The terminal which Ubuntu opens is a bit lacking, however. There’s a better Terminal App now available – The Windows Terminal!
Windows Terminal supports things like tabs and custom configurations. You can have a Powershell tab open next to a Bash Terminal; it’s really nice.
It’s in the Windows Store, so search for it and install it.
 on Windows 10 [Tutorial] 11")
 on Windows 10 [Tutorial] 12")
Conclusion
Windows is still the industry standard for many fields – including graphic design and CAD. Some software development tools are also only supported on Windows.
If you rely on software that can only be run on Windows, running and testing Linux software without having to rely on a cumbersome virtual machine saves both time and resources.