Установка Ubuntu Server 18.04 на виртуальную машину Hyper-V, установка PostgreSQL и средств управления
Включение роли Hyper-V
Для развертывания Ubuntu Server в виртуальной среде Microsoft Hyper-V убедитесь, что Ваше оборудование отвечает следующим требованиям:
Требования к операционной системе:
Роль Hyper-V можно включить в следующих версиях Windows 10:
- Windows 10 Корпоративная
- Windows 10 Pro
- Windows 10 для образовательных учреждений
Требования к оборудованию:
Хотя в этом документе не приводится полный список оборудования, совместимого с Hyper-V, укажем следующие обязательные требования:
- 64-разрядный процессор с поддержкой преобразования адресов второго уровня (SLAT).
- Поддержка расширения режима мониторинга виртуальной машины (технология VT-x на компьютерах с процессорами Intel).
- Не менее 4 ГБ оперативной памяти. Так как виртуальные машины и узел Hyper-V используют память совместно, необходимо обеспечить достаточный объем памяти для обработки предполагаемой рабочей нагрузки на виртуальной машине.
В BIOS системы необходимо включить следующие компоненты.
- Virtualization Technology (Технология виртуализации) — может иметь другое название (VTx, Vanderpool Technology, VT Technology, Virtualization) в зависимости от производителя системной платы;
- Hardware Enforced Data Execution Prevention (Принудительное аппаратное предотвращение выполнения данных) — может отсутствовать в настройках BIOS.
На следующем этапе включаем Hyper-V:
Hyper-V можно включить разными способами, в том числе используя панель управления Windows 10, PowerShell или с помощью средства обслуживания образов развертывания и управления ими (DISM).
Включение Hyper-V с помощью PowerShell:
1.Откройте консоль PowerShell от имени администратора.
2.Выполните следующую команду:
Enable-WindowsOptionalFeature -Online -FeatureName Microsoft-Hyper-V -All
По завершении установки выполните перезагрузку.
Включение Hyper-V с помощью CMD и DISM:
Система обслуживания образов развертывания и управления ими (DISM) позволяет настраивать ОС Windows и образы Windows. Помимо всего прочего, средство DISM может включать функции Windows во время выполнения операционной системы. Чтобы включить роль Hyper-V с помощью DISM, выполните указанные ниже действия.
1.Запустите PowerShell или сеанс CMD от имени администратора.
2.Введите следующую команду:
DISM /Online /Enable-Feature /All /FeatureName:Microsoft-Hyper-V

Включение роли Hyper-V с помощью раздела «Параметры»:
1.Щелкните правой кнопкой мыши кнопку Windows и выберите пункт «Приложения и возможности».
2.Выберите «Программы и компоненты» справа в разделе «Сопутствующие параметры» параметры.

3.Выберите пункт Включение или отключение компонентов Windows.
4.Выберите Hyper-V и нажмите кнопку ОК.

После установки компонентов перезагрузите компьютер.
Важно!
Обратите внимание, на состояние строки «Низкоуровневая оболочка Hyper-V», если она «некликабельна» (серая), еще раз убедитесь, что ваше оборудование поддерживает технологию виртуализации и она включена в BIOS машины.
Создание виртуальной машины в Hyper-V
Скопируйте к себе с сервера \\fsrv\DISTR\CentOS\ файл ubuntu-18.04.3-live-server-amd64.iso или скачайте с сайта https://releases.ubuntu.com/18.04/open in new window к себе на компьютер образ установочного диска для сервера:

В поле поиска в панели задач введите Hyper-V (или через Панель управления — Администрирование — Диспетчер Hyper-V) и запустите «Диспетчер Hyper-V»

В диспетчере Hyper-V слева выбираем имя своего компьютера, а в правом столбце «Действия» выбираем Создать — Виртуальная машина

В открывшемся окне задайте произвольное имя виртуальной машины, ее расположение и нажмите Далее

Выберите Поколение 2 и нажмите Далее

Укажите размер выделяемой памяти для виртуальной машины, исходя из возможностей Вашего оборудования, но не менее 512 Мб (минимальные требования Ubuntu Server) и нажмите Далее

В настройках сети выберите «Default Switсh» и нажмите Далее

Создайте виртуальный диск для Вашей новой машины задав имя, расположение и размер. При выборе расположения и размера виртуального диска исходите из конфигурации оборудования и задач, под которые создается сервер, но не менее 16 Гб и нажмите Далее

В следующем окне укажите путь к ранее загруженному файлу установочного образа и нажмите Далее

В следующем окне завершите работу мастера создания виртуальной машины, нажав Готово

После окончания работы мастера откройте Диспетчер Hyper-V, выберите свою виртуальную машину из списка:

кликнете правой кнопкой мыши и выберите «Параметры», в открывшемся окне перейдите на вкладку «Безопасность», уберите отметку в чекбоксе «Включить безопасную загрузку» и нажмите «ОК».

Виртуальная машина создана и готова к установке операционной системы.
Установка Ubuntu Server
В Диспетчере Hyper-V дважды кликните на Вашу виртуальную машину и в открывшемся окне нажмите «Пуск»

Дождитесь инициализация виртуальной машины и начала установки Ubuntu Server 18.04. (возможен вывод лога сообщений об ошибках или из-за кортокого таймаута перед началом установки Вы сразу увидите меню выбора языка установки)

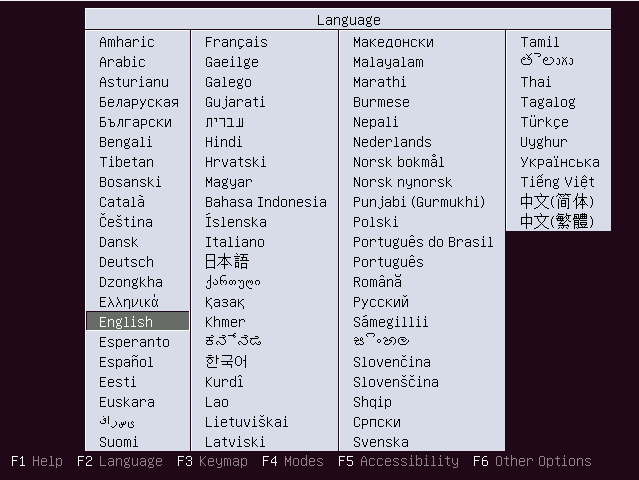
В открывшемся окне настройки установки в первым будет предложен выбор языка устанавливаемой ОС. Управление производится клавишами «Вверх», «Вниз» и «Enter». Выбираем «Русский».

В следующем окне будет предложено обновить дистрибутив установки, мы уже определились с устанавливаемой версией, выбираем «Continue without updating» и нажимаем «Enter»

В окне конфигурации клавиатуры выбираем «Русская» с вариантом «Русская» выбираем «Готово» и нажимаем «Enter»

В следующем окне выбираем сочетание клавиш для переключения раскладки клавиатуры, выбираем «ОК», «Готово» и нажимаем «Enter»

В открывшемся окне конфигурации сетевого соединения настраиваем динамический или статический IP адрес, в данном случае оставляем конфигурацию выбранного адаптера без изменений, выбираем «Готово» и нажимаем «Enter»

В следующем окне конфигурируем proxy, если Вы не используете proxy, оставляем поле «Proxy address» пустым, выбираем «Готово» и нажимаем «Enter»

Зеркало для загрузки пакетов тоже оставьте по умолчанию, выбираем «Готово» и нажимаем «Enter»

В окне «File system setup» настраиваем разметку разделов Linux, можно предоставить возможность инсталлятору сделать это по своему усмотрению (Use An Entire Disk) или настроить «Вручную». Рассмотрим вариант установки вручную. Выбираем «Вручную» и нажимаем «Enter»

В следующем разделе выбираем нужный диск в списке «Available Devices» и нажимаем «Enter»

В открывшемся контекстном меню выбираем «Add Partition» и нажимаем «Enter»

В следующем окне задаем размер раздела, формат и точку монтирования. Создам корневой раздел, оставляем точку монтирования в поле «Mount» в виде одного слэша » / «, или выбираем эту точку из списка. Формат файловой системы ext4. Все свободное место выделяем под корневой каталог, выбираем «Create» и нажимаем «Enter»

В разделе «File system summary» мы видим смонтированный нами корневой раздел с файловой системой ext4 и инсталлятор автоматически выделил место и смонтировал загрузочный раздел /boot/efi с файловой системой fat32:
Когда завершите создавать разделы, у вас должно получится два раздела. Выбираем «Готово» и нажимаем «Enter».

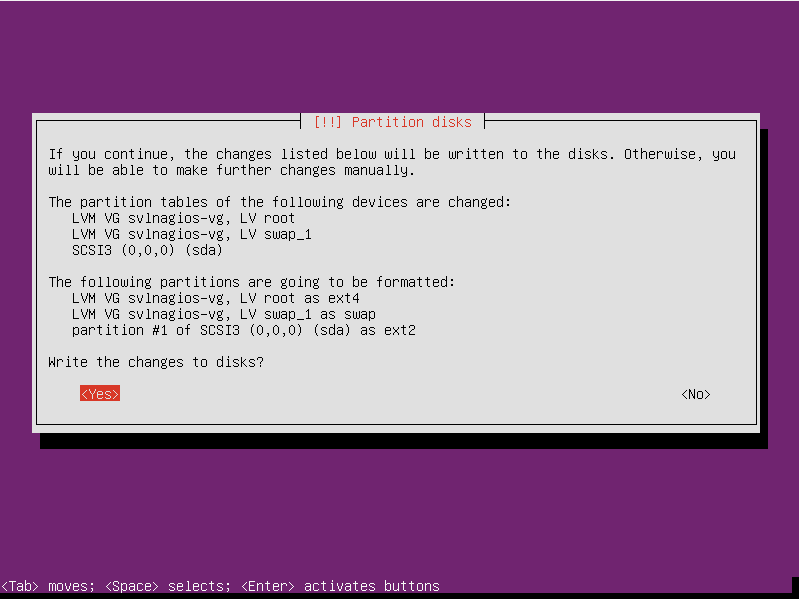
В следующем диалоге соглашаемся на начало инсталляции и внесение изменений в структуру разделов, выбираем «Продолжить» и нажимаем «Enter»

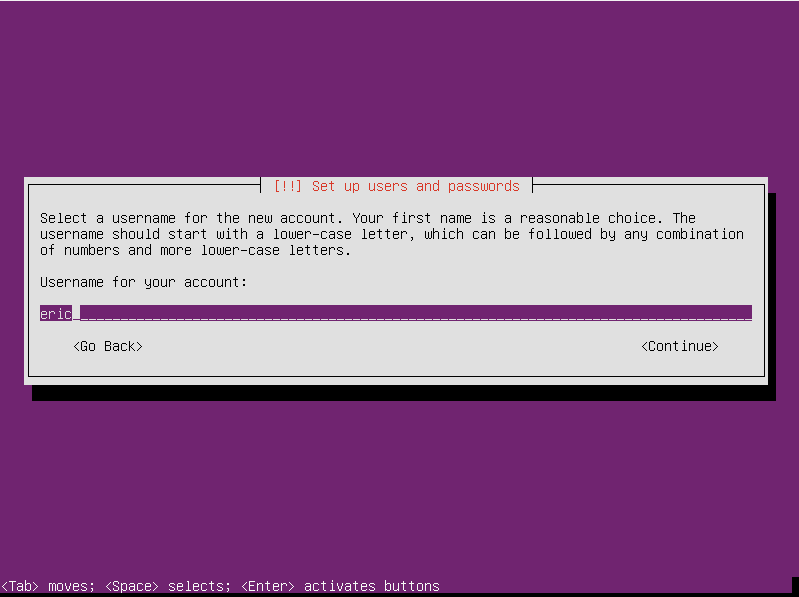
Следующий шаг — создание учетной записи пользователя и выбор имени сервера. Заполните такие поля:
- Ваше имя — просто имя, можно русскими буквами;
- Your server’s name — имя вашего сервера, только строчные латинские буквы;
- Имя пользователя — имя пользователя для входа в систему, только строчные латинские буквы;
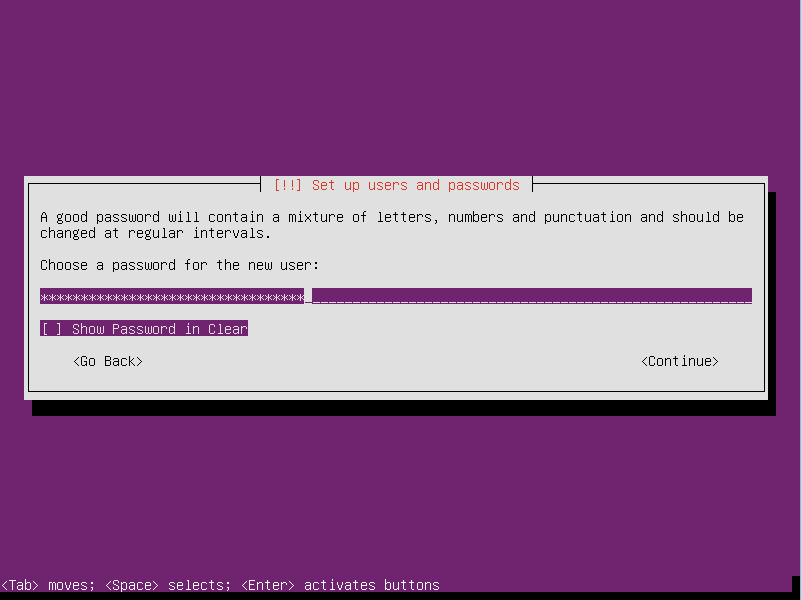
- Пароль — вводится два раза, используйте сложные пароли для серверов.

На следующем этапе выбираем «Install OpenSSH server», выбираем «Готово» и нажимаем «Enter»

Когда установка Ubuntu Server 18.04 lts завершится, дождитесь установки обновлений безопасности и нажмите кнопку Перезагрузить сейчас.

После перезагрузки введите логин и пароль, которые вы использовали во время установки:

Откроется окно с готовой к работе системой Ubuntu Server

Так как, в дальнейшем предстоит вводить много команд через терминал, а в гипервизоре корректно не работает вставка из буфера обмена, для подключения по ssh воспользуемся сторонним клиентом. Сначала узнаем IP адрес нашей виртуальной машины, для этого вводим sudo ifconfig в терминале гипервизора, подтверждаем команду паролем и получаем вывод терминала вида:

Запоминаем IP адрес интерфейса eth0.
Теперь установим ssh клиент, например, Snowflake. Для этого скачаем его с GitHub https://github.com/subhra74/snowflake/releasesopen in new window, выбираем инсталятор для Windows snowflake.msi:

Сохраняем и запускаем скачанный устанвщик snowflake.msi, в открывшемся после усановки окне программы, нажимаем «New connection», задаем произвольное имя сервера, в поле «Host» вводим IP адрес виртуальной машины, порт оставляем без изменений, заполняем поля с логином и паролем, которые Вы ввели при установке Ubuntu в виртуальную машину и нажимаем «Connect»:

Соглашаемся с добавлением RSA ключа:

Откроется терминал для управления установленной Ubuntu Server по ssh:

Далее все команды вводим здесь, копируя из инструкции.
Установка PostgreSQL 11 на Ubuntu Server 18.04
Обновление установленных пакетов
Обновляем текущие установленные пакеты для вновь установленного сервера, для этого последовательно вводим команды:
sudo apt update

sudo apt -y upgrade

После обновления пакетов, перезагрузите сервер
sudo reboot
На время перезагрузки будет разорвано соединение, выждите некоторое время и нажмите «Reconnect» в красном поле справа:

После перезагрузки системы установите vim и wget, если они еще не установлены.
sudo apt install -y wget vim

Добавление репозиториев PostgreSQL 11
Перед добавлением содержимого репозитория на Ваш Ubuntu Server вам необходимо импортировать ключ подписи репозитория:
wget --quiet -O - https://www.postgresql.org/media/keys/ACCC4CF8.asc | sudo apt-key add -
В выводе теминала будет «ОК»:

После импорта ключа GPG добавьте содержимое репозитория в вашу систему:
RELEASE=$(lsb_release -cs)
echo "deb http://apt.postgresql.org/pub/repos/apt/ ${RELEASE}"-pgdg main | sudo tee  /etc/apt/sources.list.d/pgdg.list

добавление прошло без ошибок, теперь проверим содержимое файла репозитория
cat /etc/apt/sources.list.d/pgdg.list
В выводе терминала отобразится строка содержимого:

Установите PostgreSQL 11 в Ubuntu Server, для этого введите следующие две команды:
sudo apt update
sudo apt -y install postgresql-11

Разрешить доступ к PostgreSQL с удаленных хостов
По умолчанию доступ к серверу базы данных PostgreSQL осуществляется только с localhost:

Чтобы разрешить доступ к сети, отредактируйте файл конфигурации, для этого введите:
sudo nano /etc/postgresql/11/main/postgresql.conf
Откроется редактор nano, переместите курсор в раздел CONNECTIONS AND AUTHENTICATION, добавьте строку:
listen_addresses = '*'

Для сохранения нажмите сочетание CTRL + X, для подтверждения введите «Y» и «Enter»
Не забудьте перезапустить службу postgresql после внесения изменений.
sudo systemctl restart postgresql
Убедитесь в адресе привязки для PostgreSQL:
sudo ss -tunelp | grep 5432

Если у вас активен брандмауэр UFW, разрешите порт 5432
sudo ufw allow 5432/tcp

Установка пароля администратора PostgreSQL
Установите пароль для администратора по умолчанию
sudo su - postgres
psql -c "alter user postgres with password 'ВашПароль'"

Вы также можете добавить других пользователей базы данных:
createuser dbuser1
Добавить тестовую базу данных:
createdb testdb -O dbuser1
Выполните тестовую операцию, войдя в систему как dbuser1 и работая с testdb:
psql -l | grep testdb

Установите пароль пользователя:
psql
alter user dbuser1 with password 'ПарольПользователя';

Создайте таблицу и добавьте какие-нибудь данные данные:
create table test_table ( id int,Имя text, Фамилия text );
insert into test_table (id,Имя,Фамилия) values (1,'Иван','Пупкин');

Просмотрите данные таблицы:
select * from test_table;

Удалите Вашу тестовую таблицу:
DROP TABLE test_table;
\q

Удалите тестовую базу данных:
dropdb testdb;
Выйдите из PostgreSQL
exit

Вы успешно установили и протестировали сервер базы данных PostgreSQL в Ubuntu 18.04.
Установка инструментов управления
Создание пользователя
Для последующей работы с Ubuntu, у вас должен быть обычный пользователь без полномочий root с привилегиями sudo, настроенными на вашем сервере. Кроме того, вам потребуется включить базовый брандмауэр, чтобы блокировать второстепенные порты.
В этом примере создается новый пользователь с именем ssh_user, но вы должны заменить его на имя пользователя, которое вам нравится:
sudo adduser ssh_user
Вам будет задано несколько вопросов, начиная с пароля учетной записи.
Введите надежный пароль и, при желании, введите любую дополнительную информацию. Это не обязательно, и вы можете просто нажать ENTER в любом поле, которое хотите пропустить.

Теперь у нас есть новая учетная запись пользователя с обычными привилегиями учетной записи. Однако иногда нам может потребоваться выполнение административных задач.
Чтобы избежать необходимости выходить из системы обычного пользователя и снова входить в систему как учетная запись root, мы можем настроить так называемые «суперпользовательские» или привилегии root для нашей обычной учетной записи. Это позволит нашему обычному пользователю запускать команды с административными привилегиями, помещая слово sudo перед каждой командой.
Чтобы добавить эти привилегии нашему новому пользователю, от имени пользователя root выполните эту команду, чтобы добавить нового пользователя в группу sudo:
sudo usermod -aG sudo ssh_user
Включение брандмауэра
Серверы Ubuntu 18.04 могут использовать брандмауэр UFW, чтобы убедиться, что разрешены только подключения к определенным службам. С помощью этого приложения мы можем очень легко настроить базовый брандмауэр.
Различные приложения могут зарегистрировать свои профили в UFW после установки. Эти профили позволяют UFW управлять этими приложениями по имени. У OpenSSH, сервиса, позволяющего нам теперь подключаться к нашему серверу, есть профиль, зарегистрированный в UFW.
Вы можете увидеть это, набрав:
sudo ufw app list

Нам нужно убедиться, что брандмауэр разрешает SSH-соединения, чтобы мы могли снова войти в систему в следующий раз. Мы можем разрешить эти подключения, набрав:
sudo ufw allow OpenSSH

После этого мы можем включить брандмауэр, набрав:
sudo ufw enable

Введите «y» и нажмите ENTER, чтобы продолжить. Вы можете видеть, что соединения SSH по-прежнему разрешены, набрав:
sudo ufw status

Как видим, разрешены только подключения через порт который мы добавили ранее для работы с PostgreSQL и подключения OpenSSH.
Установка pgAdmin
Установите открытый ключ для репозитория:
sudo curl https://www.pgadmin.org/static/packages_pgadmin_org.pub | sudo apt-key add

Создайте файл конфигурации репозитория:
sudo sh -c 'echo "deb https://ftp.postgresql.org/pub/pgadmin/pgadmin4/apt/$(lsb_release -cs) pgadmin4 main" > /etc/apt/sources.list.d/pgadmin4.list && apt update'

Установите pgAdmin как web сервер:
sudo apt install pgadmin4-web
Дождитесь окончания процесса:

Настройте веб-сервер:
sudo /usr/pgadmin4/bin/setup-web.sh
Для настройки укажите в качестве логина адрес электронной почты (можно любой) и пароль:

Затем согласитесь с настройкой Apache и дополнительных модулей, для чего введите «Y», также согласитесь с перезапуском службы Apache:

Разрешим доступ к Apache в файрволле:
sudo ufw allow 'Apache Full'

Теперь можно подключиться к pgAdmin
Доступ к pgAdmin
На локальном компьютере откройте веб-браузер и перейдите по IP-адресу вашего сервера:
http://IP_Вашего_сервера/pgadmin4
Вам будет представлен экран входа в систему:

Введите учетные данные, которые вы вводили ранее, и вы попадете на приветственный экран pgAdmin.

Теперь, когда вы убедились, что можете получить доступ к интерфейсу pgAdmin, осталось только подключить pgAdmin к вашей базе данных PostgreSQL.
Подключение pgAdmin к серверу
Откройте диалог добавления сервера, на первой вкладке введите имя сервера:

На вкладке «Соединение» введите имя сервера, порт. Базу данных и пользователя оставьте «postgres» (это пользователь с правами супервизора PostgreSQL по умолчанию) и пароль который Вы задали ранее:

На вкладке «SSL» выберите «допускается» (SSl еще не настроен, поэтому установив, например, «требуется» Вы не соединитесь с сервером):

И нажмите «Сохранить»
В левой части окна pgadmin появится обозреватель (browser) подключенных серверов:

Создание ролей
Создаем роли с правами админа db_owner (без права логина) и SA (обязательно в верхнем регистре), для этого в обозревателе нажимаем правой кнопкой мыши на вкладку «Роли входа/группы» и выбираем «создать роль входа/группы»:

В открывшемся окне на вкладке «Общие» задаем имя роли:

На вкладке «Определение» задаем пароль:

На вкладке права выставляем для db_owner права, как на скриншоте:

И нажимаем «Сохранить»
Повторяем действия для роли SA, с той разницей, что на вкладке «Права» разрешаем вход:

И нажимаем «Сохранить»
Проверить созданные роли можно также из командной строки PostgreSQL, не изменяя при этом сессии пользователя. Чтобы получить доступ к командной строке Postgres, запустите команду psql как пользователь postgres с правами sudo:
sudo -u postgres psql
Эта команда выполнит автоматический вход в PostgreSQL без промежуточной оболочки bash.

Затем введите:
\du
В выводе терминала Вы увидите список ролей с их правами:

Выйдите из командной строки PostgreSQL
exit
Создание табличного пространства и базы данных
Создайте табличное пространство (tablespace), для этого в web-интерфейсе pgAdmin, в обозревателе на вкладке «Табличные пространства» кликните правой кнопкой мыши и выберите «Создать табличное пространство». В открывшемся окне на вкладке «Общие» введите имя пространства и определите владельца dw_owner:

На вкладке «Определение» укажите расположение, как на скриншоте или задайте табличное пространство сообразно своей логики размещения файлов объектов базы данных в файловой системе:

И нажимаем «Сохранить»
Создайте базу данных, для этого в web-интерфейсе pgAdmin, в обозревателе на вкладке «Базы данных» кликните правой кнопкой мыши и выберите «Создать Базу данных». В открывшемся окне на вкладке «Общие» введите имя базы данных и определите владельца dw_owner:

На вкладке «Определение» выставите значения, как на скриншоте:

И нажимаем «Сохранить»
Выполнение скриптов
На созданной базе выполните скрипты, для этого выбираем созданную базу в списке, нажимаем правой кнопкой мыши и выбираем «Запросник» (Query tool):

В правой части окна pgadmin в открывшемся редакторе вводим:
CREATE EXTENSION "uuid-ossp";

И нажимаем F5, появится сообщение об успешном выполнении запроса.
Выполняем еще один скрипт:
CREATE EXTENSION "tablefunc";

Установка PGagent
Для устанвки пакета вернемся в ssh клиент и введем в терминале:
sudo apt-get install pgagent
Соглашаемся на установку:

Создаем скрипт автозапуска:
sudo nano /etc/init.d/pgagent
В открывшемся окне вставляем код:
#!/bin/sh
#
# start/stop pgagent daemon.

### BEGIN INIT INFO
# Provides:  pgagent
# Required-Start:$network $local_fs postgresql
# Required-Stop: $network $local_fs postgresql
# Default-Start: S 2 3 4 5
# Default-Stop:  0 1 6
### END INIT INFO

. /lib/lsb/init-functions

path2bin="/usr/bin/pgagent"

if ! test -f $path2bin; then
log_failure_msg "$path2bin not found"
exit 1
fi

RUN_AS=""
CONNECT_STRING=""
LOGLEVEL=0
LOGFILE="/var/log/pgagent.log"

if [ -f /etc/default/pgagent ]; then
  . /etc/default/pgagent
elif [ -f /etc/pgagent.conf ]; then
  . /etc/pgagent.conf
fi

if [ "$CONNECT_STRING" = "" ]; then
log_failure_msg "CONNECT_STRING not specified"
exit 1
fi

opts="--quiet --oknodo --exec $path2bin"

case "$1" in
start)
	log_begin_msg "Starting PgAgent daemon..."
	if pidof $path2bin > /dev/null; then
		log_begin_msg "Already running"
		log_end_msg 0
		exit 0
	fi
	if [ "$RUN_AS" != "" ]; then
		opts="-c $RUN_AS $opts"
		if [ ! -f "$LOGFILE" ]; then touch $LOGFILE; fi
		chown $RUN_AS $LOGFILE
	fi
	OPTIONS="-l $LOGLEVEL -s $LOGFILE $CONNECT_STRING"
	start-stop-daemon --start $opts -- $OPTIONS
	log_end_msg $?
	;;
stop)
	log_begin_msg "Stopping PgAgent daemon..."
	start-stop-daemon --stop $opts
	log_end_msg $?
	;;
force-reload)
	$0 restart
	;;
restart)
	$0 stop
	$0 start
	;;
status)
	if ! pidof $path2bin > /dev/null; then
		log_success_msg "PgAgent isn't running"
		exit 3
	fi
	log_success_msg "PgAgent running"
	exit 0
	;;
*)
	log_success_msg "Usage: /etc/init.d/pgagent {start|stop|force-reload|restart|status}"
	exit 1
	;;
esac

exit 0
Для выхода нажимаем «Ctrl + x», соглашаемся на сохранение изменений: вводим «Y» и «Enter».
Добавляем файл конфигурации:
sudo nano /etc/pgagent.conf
В открывшемся окне вставляем:
CONNECT_STRING="host=127.0.0.1 port=5432 user=postgres"
LOGLEVEL=2
RUN_AS=postgres:postgres

Выполнить:
sudo chmod 755 /etc/init.d/pgagent
sudo update-rc.d pgagent defaults
И запустить сервис:
sudo service pgagent start
Через web-интерфейс pgAdmin на базе postgres выполнить:
CREATE EXTENSION pgagent;

Настройка заданий
Перед настройкой заданий в pgagent в файл конфигурации в строку подключения добавим password=ВашПароль пользователя posgres:
sudo nano /etc/pgagent.conf

Настроить ежедневную задачу в pgagent с тремя запросами по шагам, для этого в левой части интерфейса pgAdmin переходим на «Задания paAgent» (если меню заданий pgAgent не отображается в браузере, нажмите правой кнопкой мыши на имя сервера и выберите в контестном меню «Обновить» (Refresh)), нажимаем правой кнопкой мыши и выбираем «Создать — Задание pgAgent»:

В открывшемся окне, на вкладке «Общие», задаем имя задания, выбираем класс задания «Routine Maintenance»:

На вкладке шаги для добавления в верхней правой части нажать «+», ввести имя:

Затем нажать на иконку изменения шага (слева от имени), в открывшемся окне на вкладке «Общие» свойств шага, выберите базу для которой создается задание:

На вкладке «Код» ввести vacuum analyze;

Добавить следующий шаг, нажать «+», на изменение выбрать базу и ввести код cluster;

Повторить дествия для третьего шага, выбрать базу и ввести код `reindex database <имя базы>;

На вкладке «Расписания» добавить расписание, присвоить имя, в разделе «Общие» задать дату и время начала и окончания выполнения задания:

В разделе «Повтор» выберите время выполнения задания:

Таким образом, было создано задание на ежедневное обслуживание базы данных с тремя шагами (Очистка всех таблиц, кластеризация всех таблиц и переиндексация.
Linux on Hyper-V is becoming more and more popular as Microsoft continues to increase their support for it. One of the nicest parts about it is the “It Just Works” aspect. For distributions that are less than a few years old, the Hyper-V Integration Components are built right in. There isn’t any time wasted fiddling with scouring the Internet to look for instructions on compiling or even scripting them in.
Oh, and if you’re curious if you need to purchase anything from Microsoft in order to run Ubuntu under Hyper-V, the answer is: no. There are paid services from Canonical that you might be interested in, but Microsoft isn’t asking for anything. No edition of Linux consumes a virtualization right from Microsoft.
Last updated September 9th, 2016: Xenial Xerus tools
Why Ubuntu?
I’m not a Linux expert by any stretch of the imagination. I’ve been using it off and on ever since I learned about it, but not enough to reach true proficiency. Traditionally, I’ve been a Red Hat person, but things got strange when Red Hat splintered out into RHEL, CentOS, and Fedora, and I started looking at my options. Over the last few years, I’ve switched over to Ubuntu. While I think that Red Hat still wins in the “polish” department, I found that Canonical had really nailed a lot of things in the ease-of-use and approachability departments with Ubuntu Desktop.
So, why Ubuntu specifically? Well, I wanted a major distribution backed by a commercial operation. That way, presumably, if you get really backed into a corner, you can get some paid assistance. Since I’ve never called or paid any of these companies, I guess I just took a leap of faith on the one that I chose (that would be Canonical). As to the exact distribution, I went through a few of them before settling on Ubuntu. Its installation still isn’t the best; I thought that CentOS pretty much crushed Ubuntu on that. However, once the server was up and running, I had an easier time getting things to work on Ubuntu without a lot of hard stops to go look things up on the Internet. There was guessing, and tinkering, and redoing, but really not much.
Why Ubuntu Server Instead of Desktop?
As I said, I was really impressed with Ubuntu Desktop. However, version 14 changed things (Ubuntu major versions are just the last two digits of the release year; minor versions are the month). The GUI requires 3D acceleration now. For hardware systems, that’s not a big deal. Even budget video chips have been doing basic 3D acceleration for a long time. Servers, though, not so much, and nearly nothing for standard Hyper-V guests. There are ways to make it better, but you just can’t get back to the interface speeds of 13 and earlier without hardware acceleration. In Hyper-V, that’s a deal-breaker for most people in my situation. There’s no way I’m setting up a RemoteFX system just to run Ubuntu Desktop when all I really need is server capabilities. But, with Server, all you’ve got is the plain-text command-line.
For a busy non-expert like me, that can seem daunting. But, let me put you at ease: if you have done as we’ve been begging you and gotten on board with PowerShell, even a little bit, or even if you’ve got some DOS in you, Linux is a whole lot easier than you think it is. You see, in Linux, pretty much everything is a file. In contrast, think about a Windows program. You have to install it, which creates two dozen files in eight directories and sixty to a hundred registry entries in every branch. Then you have to run one of its exe files. Or maybe a com file. Perhaps a cmd file that calls a com file. Hopefully there’s an lnk that calls at least one of them. There might an exe that attaches to six or thirty-six dll files, some of which might be in WinSxS, or maybe in System32, or maybe not. It might read some of those registry entries to get going. It might read app.config.xml. It might read an inf. It might have My.Settings. It’s probably got stuff in %APPDATA%, but maybe in %USERPROFILE%. Hopefully, its programmers learned to keep changeable things out of %PROGRAMFILES% or you’re going to have problems with User Account Control. It might have a developer that thought all of those things were stupid and went off grid doing something no one can predict. All this is if you’re lucky and don’t have to be concerned with whether or not it’s %PROGRAMFILES% because you’re on a 32-bit system or %PROGRAMFILES(X86)% because you’re on a 64-bit system — not to mention that only 64-bit files should live in SYSTEM32 now because someone still thinks that 16 bits ought to be enough for everybody. Got all that?
Now, back to that Linux program. It may have multiple executables, and that can be annoying. But, once you hit the right one, it will read a configuration file (which is almost always in plain text), and then it will start based on whatever it found. That, right there, describes about 99% of everything you’ll find in Linux. The hardest part is figuring out what to put into the configuration file. Any Internet search engine can get you through most of those. On top of that, as I look over my Nagios post, most of what we were doing involved typing in the terminal anyway. So, going with Server (which pretty just much means no GUI) is just not a big deal.
So, let’s get started.
Downloading Ubuntu Server
Acquiring Ubuntu is the easy part. Go to http://www.ubuntu.com. Click on Server in the top menu bar. Today, that takes you to http://www.ubuntu.com/server, and presumably will forever, but hey… links change. Click the Download button. Pick a distribution and get it. The current version is 16.04 “Xenial Xerus”, which is marked as “LTS”. That stands for “Long Term Support”. In Ubuntu’s case, that means that Canonical will provide direct support for this release for five years. By contrast, non-LTS releases are supported for a few months. Upgrades are generally painless in my experience so I don’t personally worry very much about it, but if your organization has tighter requirements, consider only using LTS releases. You can read about the differences on Canonical’s LTS wiki page.
With server, there is no longer a 32-bit option. If you are choosing an older or different distribution that still offers 32-bit, keep in mind that many of the Hyper-V integration components only work on 64-bit Linux guests.
The file that you download is an ISO. Put that in a place where your Hyper-V host can find it.
How to Build the Linux Hyper-V Virtual Machine
There’s no GUI and Ubuntu Server is a tiny little OS, so don’t create a large virtual machine. These are my guidelines:
- 2 vCPUs, no reservation. Utilization is going to be really minimal, but all modern operating systems work noticeably better when they can schedule two threads as opposed to one. If you’re strapped, you could limit these.
- Dynamic Memory on; 512MB startup memory, 256MB minimum memory, 1GB maximum memory. Ubuntu Server seems to have a sweet spot somewhere around 1GB. Of course, you can always adjust Dynamic Memory’s maximum upward, even when the VM is active. Start low.
- 40GB disk is probably much more than you’ll ever need. I use a dynamically expanding VHDX because there’s no reason not to. The published best practice is to create this with a forced 1 megabyte block size, which must be done in PowerShell. I didn’t do this on my first several Linux VMs and noticed that they do use several gigabytes more space, although still well under 10 apiece. I leave the choice to you.
- In my personal experience, Generation 1 just works better. I’ve noticed this for all virtual machines, but it’s especially true for Linux. The biggest issue with Gen 2 is that it has momentary network hiccups, which is not good for the things I envision using Linux for. Not everyone experiences these problems — your mileage may vary. If you choose to use Generation 2, remember to turn off Secure Boot because that’s not going to work for Linux until Hyper-V Server 2016.
The following is a sample script that you can modify to create a Linux virtual machine in Hyper-V:
$VMName = 'svlinux'
$VHDName = '{0}.vhdx' -f $VMName
$VMStoragePath = '\svstorevms'
$VHDStoragePath = Join-Path -Path '\svstorevmsVirtual Hard Disks' -ChildPath $VHDName
$UbuntuISOPath = '\svstoreisosubuntu-16.04-server-amd64.iso'

New-VM -Name $VMName -MemoryStartupBytes 512MB -SwitchName vSwitch -BootDevice CD -Path $VMStoragePath -Generation 1 -NoVHD
Set-VMMemory -VMName $VMName -DynamicMemoryEnabled $true -MinimumBytes 256MB -MaximumBytes 1GB
Set-VMProcessor -VMName $VMName -Count 2
New-VHD -Path $VHDStoragePath -SizeBytes 40GB -Dynamic -BlockSizeBytes 1MB
Add-VMHardDiskDrive -VMName $VMName -ControllerType IDE -ControllerNumber 0 -ControllerLocation 0 -Path $VHDStoragePath
Set-VMDvdDrive -VMName $VMName -ControllerNumber 1 -ControllerLocation 0 -Path $UbuntuISOPath
Add-ClusterVirtualMachineRole -VMName $VMName
Important: I’m going to give instructions at the very end of the article for using your new virtual machine as a clone basis. If you choose right now to name your VM and VHDX accordingly, you’ll have that much less work to do later.
From there, a simple Start-VM will get us going. Rev it up and get connected to the console using the method of your choice. Most of the rest of this portion will be the screenshots of what you’ll see.
- Choose your language:

Language Selection
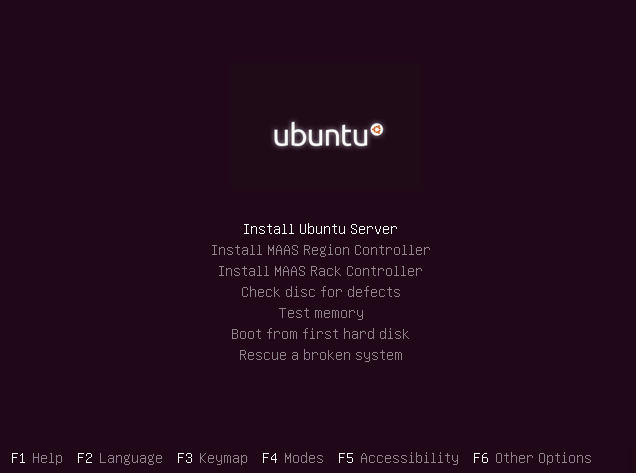
- Press Enter on Install Ubuntu Server:

Install Selection
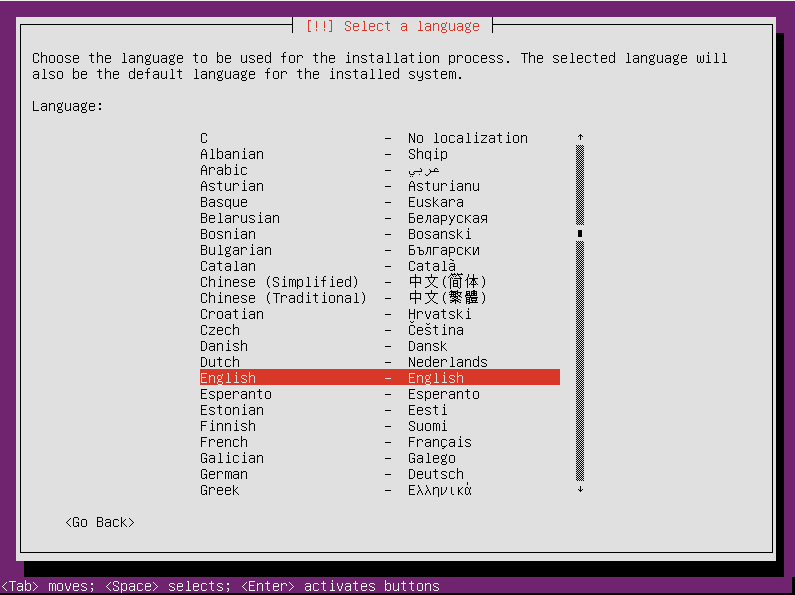
- Some text will roll by as it starts up the installer processes and then you get to pick the language again because reasons (I told you CentOS had a smoother installer).

Language Selection, the Sequel
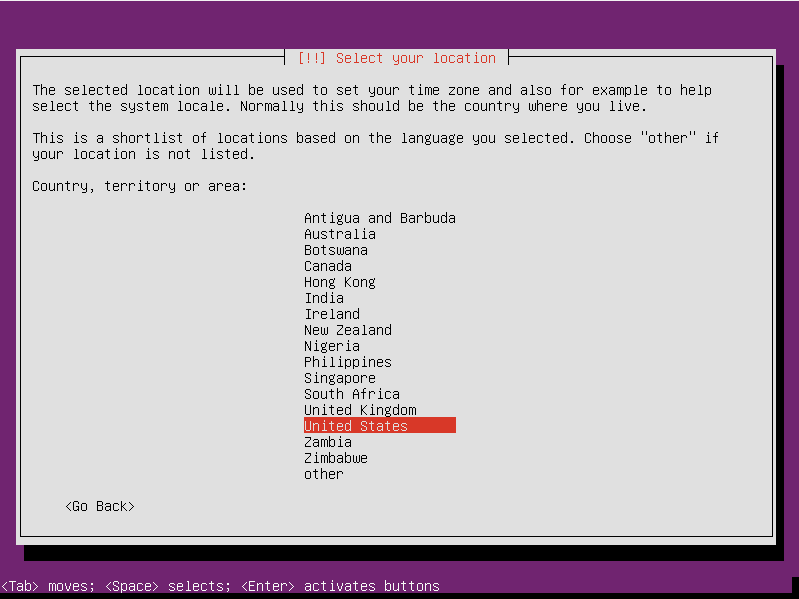
- Pick your locale:

Locale Selection
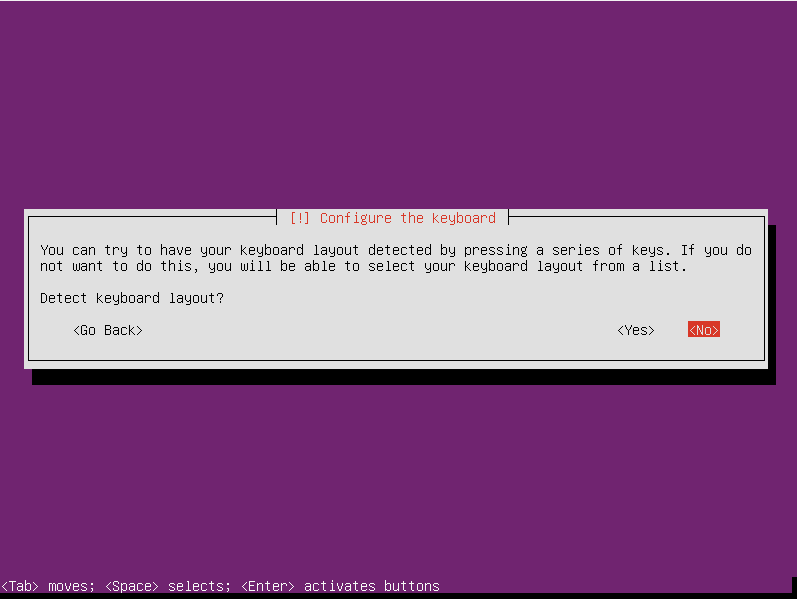
- You can go through a wizard to detect your keyboard type by pressing keys that it asks for, or you can pick from a list. The wizard works well enough in my limited testing but most uni-lingual keyboards can be pretty easily selected by going the route of the list. Only the initial option is shown:

Keyboard Selection
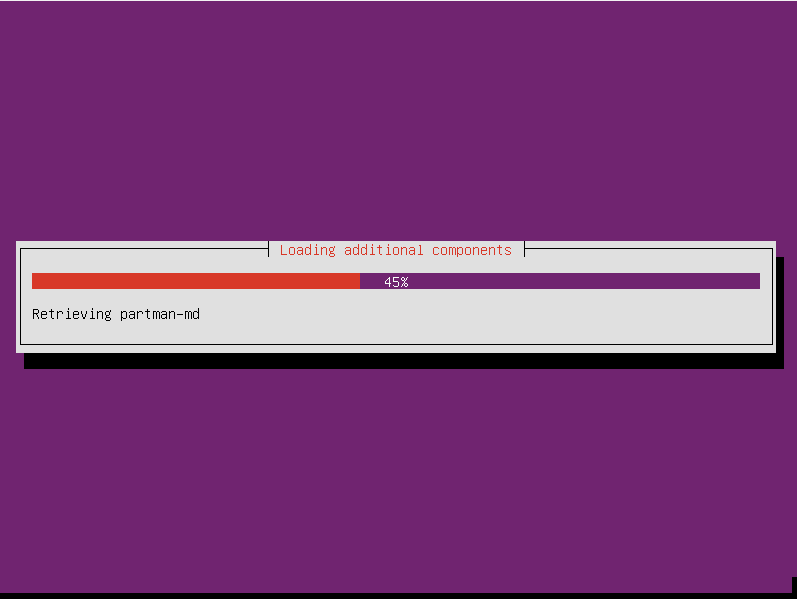
- Some components will load. This isn’t terribly long. Don’t go away because there’s more to enter:
Initial Component Load
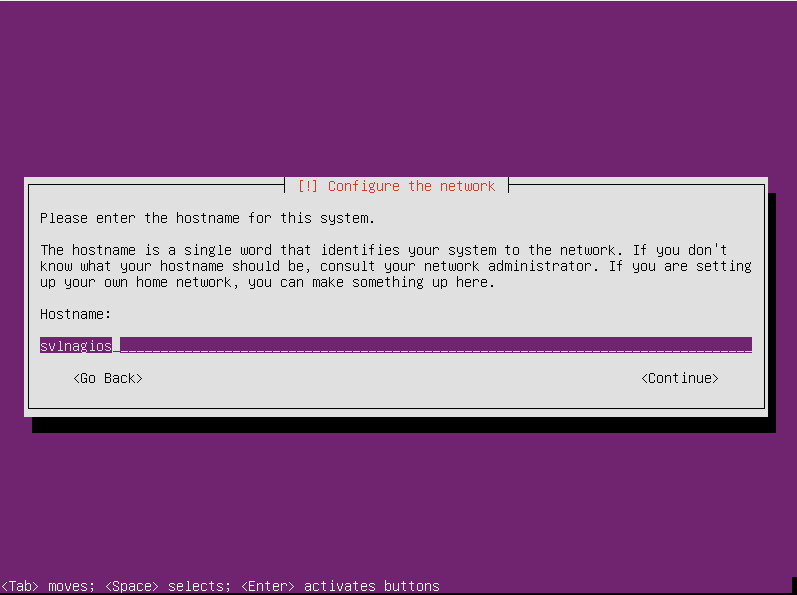
- Next is the computer name. If you’re going to template this VM, you can put in a generic name. Linux doesn’t have all the issues around computer renaming that Windows machines do, so I don’t invest a lot of effort here. As far as I know, you can enter a full domain name, but I never do.

Computer Name
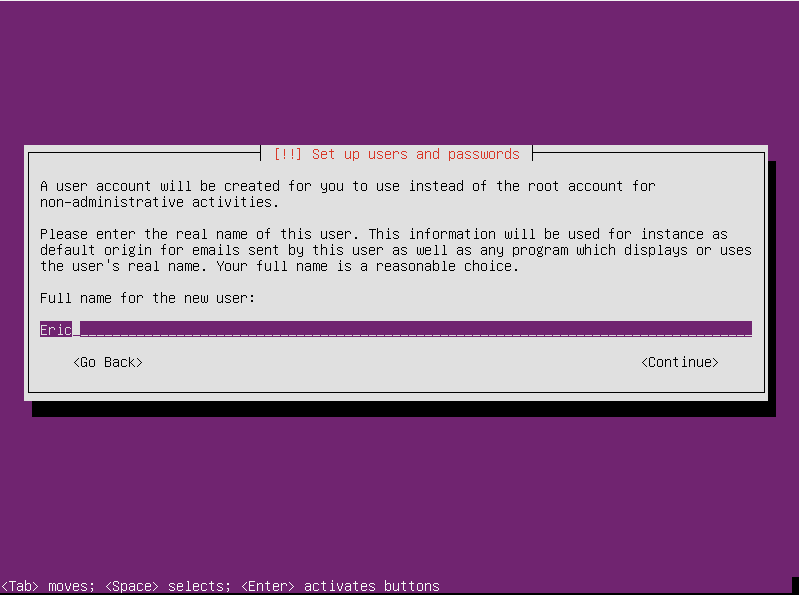
- Choose the display name for the primary user. I haven’t ever seen this show up again after entering it. I’m sure it’s in there somewhere.

Display Name
- Choose your login name. This is the one that you’ll have to type, so curb your creativity.

Choose Your Login Name
- Choose a password for the account you just created. It will have root powers, so you should choose something really hard to guess, like “password” (my lawyer would like me to remind you that any dumb things you do based on my advice are your fault). There will be another screen immediately after (not shown) asking you to confirm the password, so you should probably choose a password that you can remember.

Password Selection
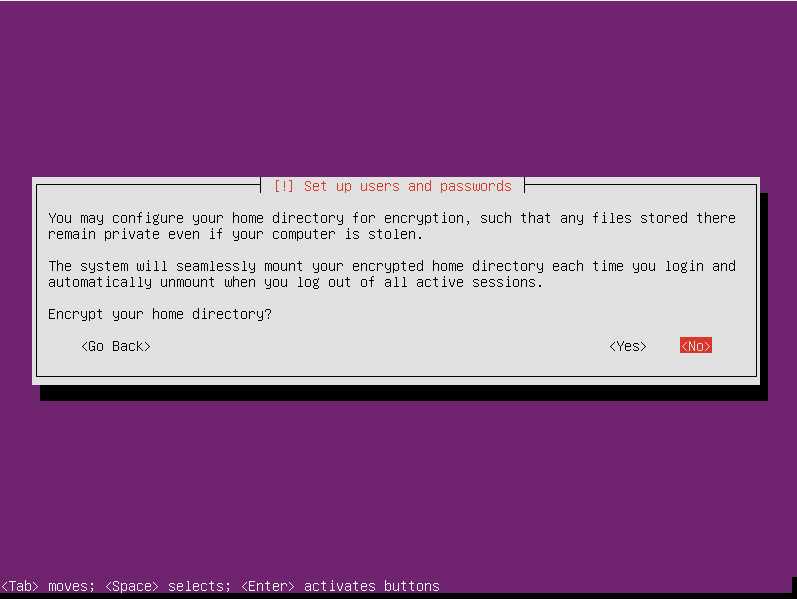
- The next question asks if you want to encrypt your home directory. I never do this because the only thing I store there are scripts and such that I’m probably going to publish online anyway. Do whatever you think is best.
Encrypt Home Folder
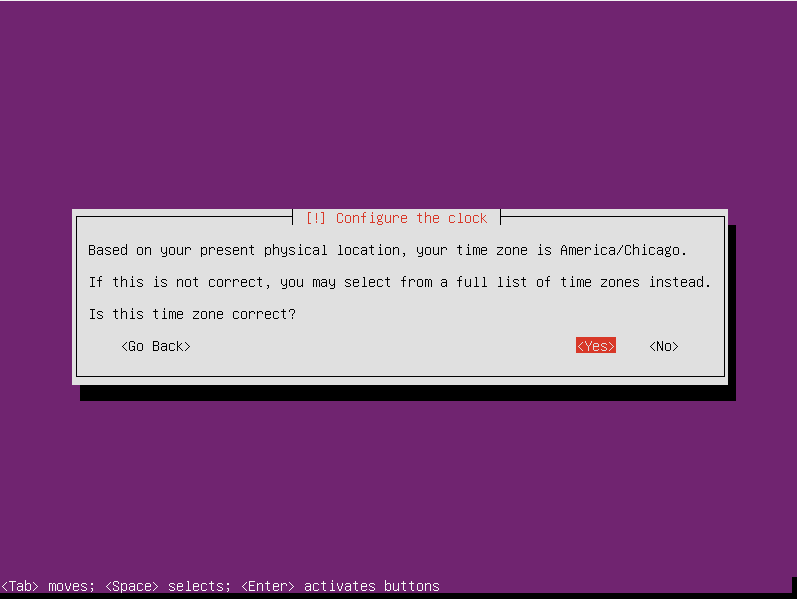
- There will be a brief moment while it checks the network for time purposes. I didn’t check to see what happens if there’s no access or if it can’t figure out whatever it wants to figure out, but I assume it would have you pick your time zone from the list that it’s offering here. It correctly guessed mine so I didn’t have to do that. Here’s my screen:
Choose Your Time Zone
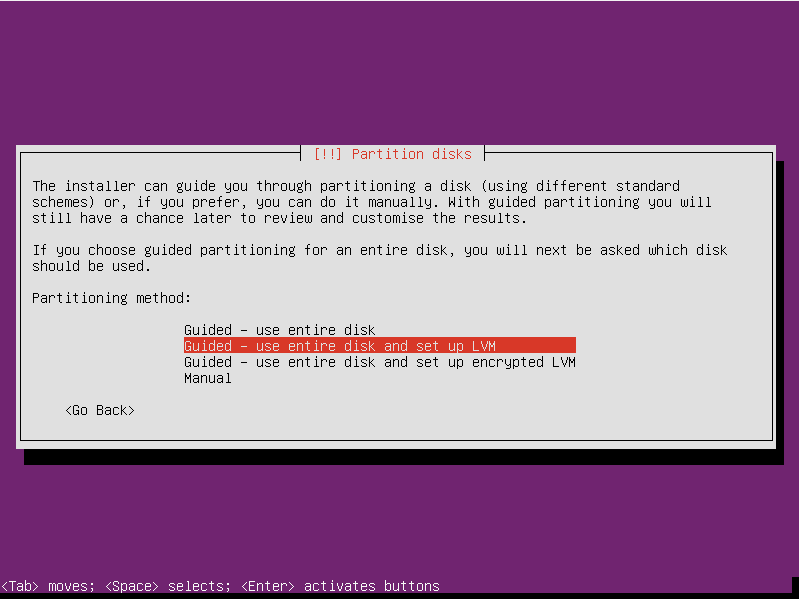
- Now, we move on to disk configuration. We are not doing anything fancy in these VMs so fancy disk configuration is really not helpful. Do what you like. I took the default of Guided – use entire disk and set up LVM. If you choose something else, you’ll have to skip a few screen shots and join up with us later.
Disk Config Mode
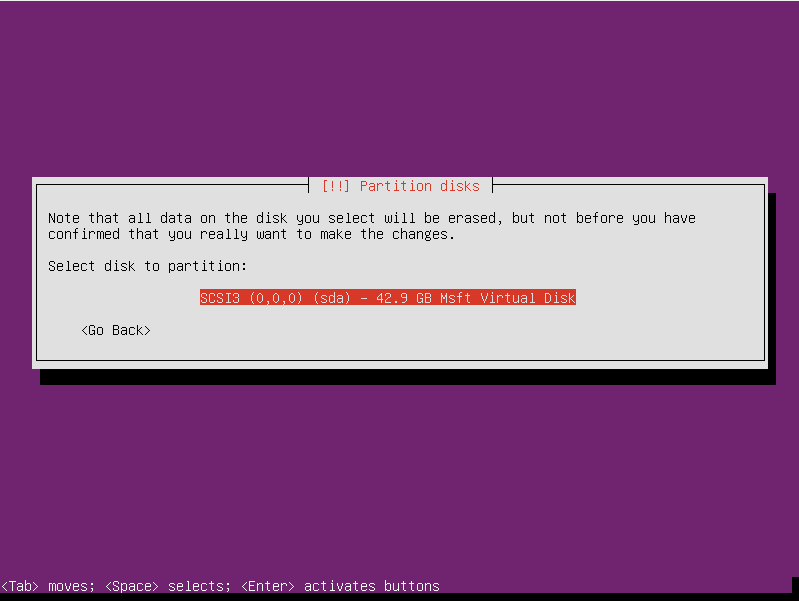
- Now it will want to know which “physical” disks to configure. I made one 40GB disk in my VM creation script, so I have one 40GB disk to work with (before rounding):

Disk Selection
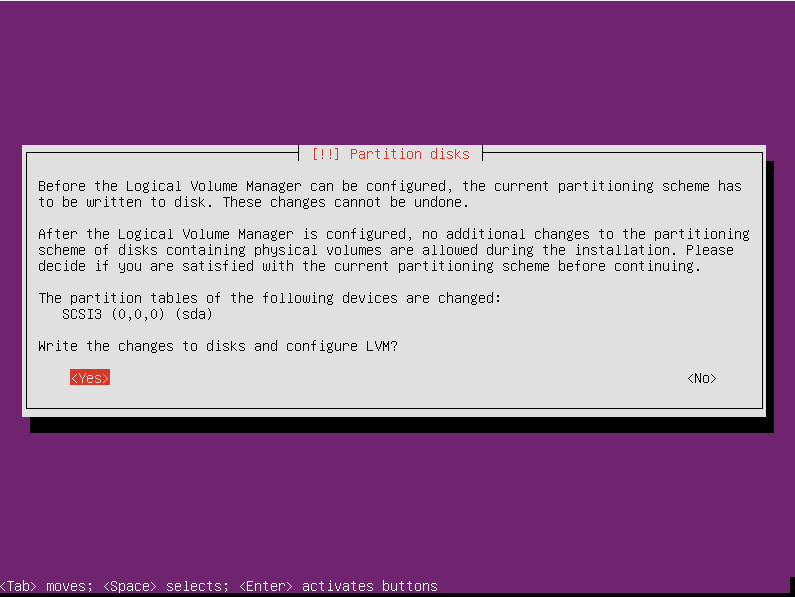
- The final disk selection screen is really just a confirmation. It defaults to No, so don’t forget to arrow left to Yes or you’ll be going in circles.

Confirm Disk
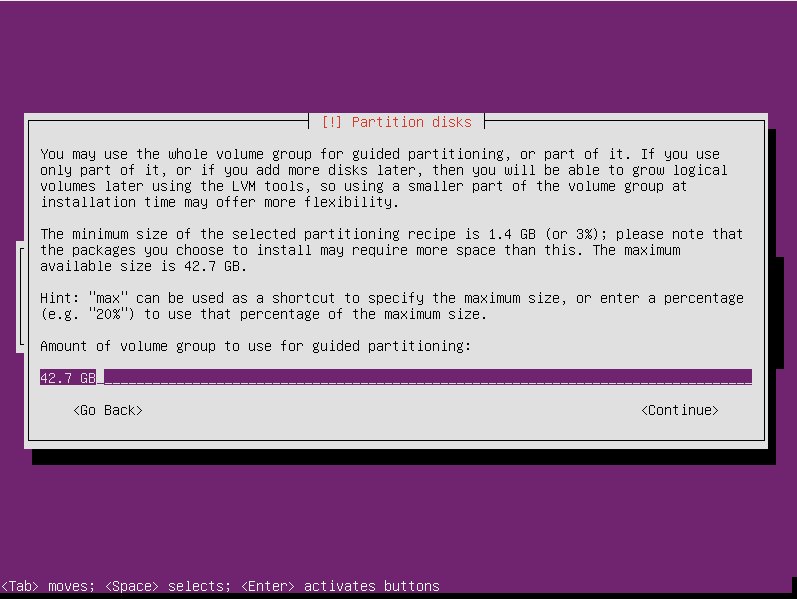
- With disk selection out of the way, we now move on to volume creation. You can do whatever you like, but again I just let the system have all available space to do what it likes. If you stumbled upon Microsoft’s best practices document, then rest assured that ext4 will be used for the data volume’s file system. I didn’t find any way to set the group size that they talk about, but I also don’t feel any performance problems in my Linux VMs — not that I’m one to get worked up over every last IOPS.
Volume Creation
- You are almost through with disk/volume configuration, but not quite! (Yes, the CentOS installer is smoother but this will be worth it) Make sure everything looks good, arrow left to Yes, and press [Enter].
The Final Disk/Volume Screen
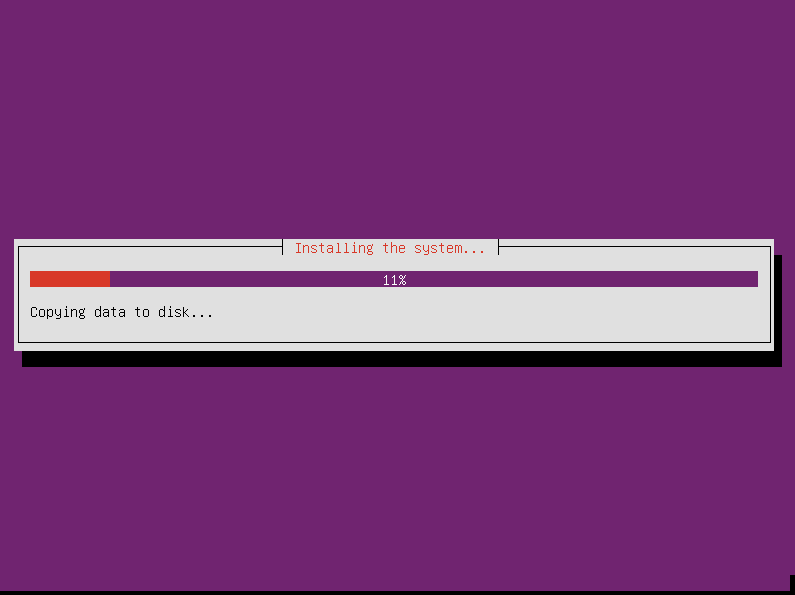
- You’ll see the formatting process, and then it will start the data copy. You’ll think you’re all done entering things, but, you’re not. This part is going to take a while, but don’t go far because it’s going to stop again.
Copying Files
- After it gets done copying, it will then go on to configuring apt which is part of the package management system in Ubuntu. It will stop and ask you for the proxy information. I don’t know why it didn’t determine that I didn’t need a proxy when it was doing all those other network checks, but there you are. I neglected to get a screenshot of this, but it’s just a blank line where you type in the proxy address.
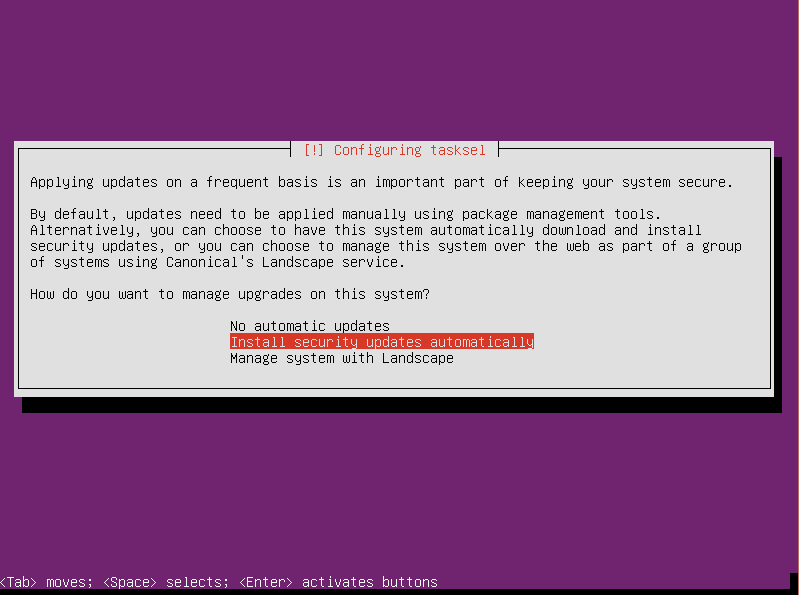
- After the proxy, you’ll get more installing and configuring. It will then stop and ask how you want to handle updates. You can do no automatic updating, install security updates automatically, or have Landscape manage it. Landscape is a service provided by Canonical. I don’t know anything about it. What I do is allow the system to perform security updates automatically and then I sometimes check for other updates manually.
Automatic Update Selection
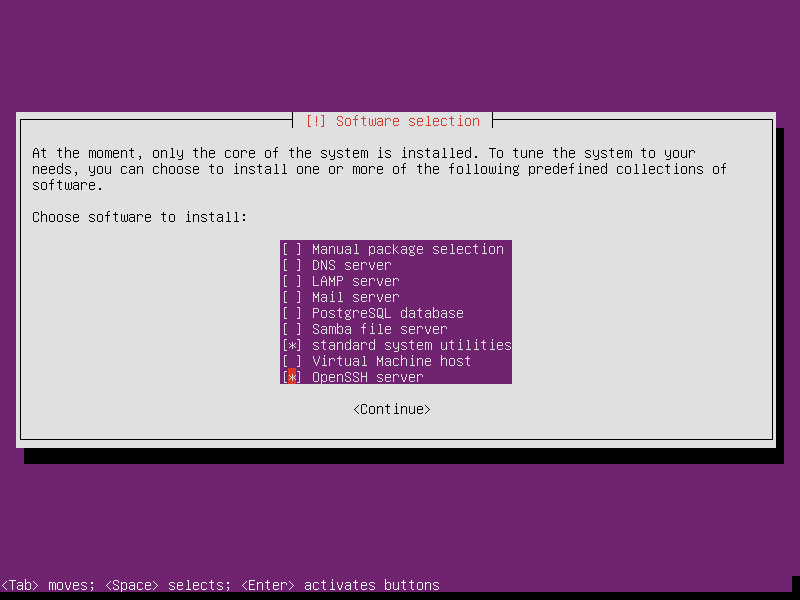
- There will be some more copying, and then you’ll be asked which packages you want to install. This screen has changed in 16.04, so make sure you pause if you’re used to earlier versions. It starts out with only standard system utilities selected. Move down to OpenSSH server and press the [Spacebar] so that an asterisk appears within its brackets. Other than that, I don’t select anything else here. If you know for a fact you’re building something that will need one of these and you don’t intend to use this VM as a base template, go ahead and select what you want.

Package Selection
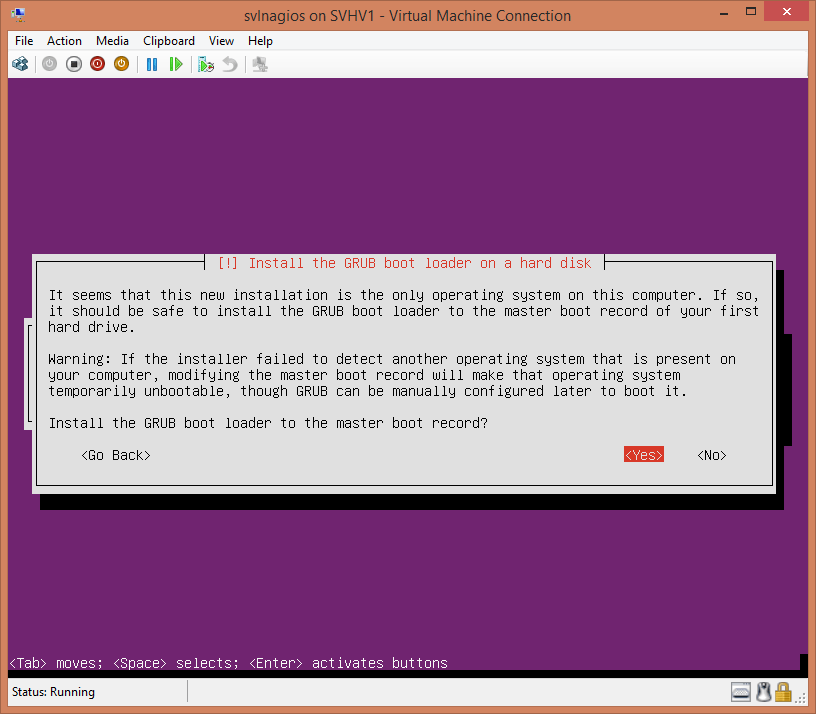
- There’ll be more copying and installing. This is the longest part yet. Once all of that completes, you’ll be asked if you want to install the GRUB loader. If you’re not familiar with this sort of thing, it’s what tells the computer how to proceed when it asks the hard drive how to boot. Since we’re just loading the one install of Linux here, it’s a really good idea to install GRUB.

Install GRUB
- There will be some more installing and configuring, although not nearly as much as the last time. Finally, your persistence is rewarded with the completion dialog. It will eject the boot media for you. Just push [Enter] to continue and the system will run a few more things and automatically restart. I didn’t screenshot that, either.
Getting Started with Ubuntu Linux: 10 Things You Need to Know
When it boots back up, we’re going to go through a few quick things about Linux that will help you survive.
1. Text Acts Funny
One thing that might trip you up immediately is the fact that Linux’s outputs and inputs are not synchronized very well. The way that this often manifests, sometimes right away on the first boot, is that the cursor location where you type your login name may reset itself to the beginning of the line such that you’re typing over Linux’s login text:
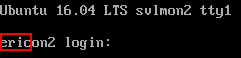
Odd Text Behavior
It’s totally OK. Just go with it. You’ll see this in some other places as well, although not nearly as often as here at the login prompt.
The other thing to be aware of is that the password entry is not echoed to the screen. Windows shows you black dots for password characters; Ubuntu shows you nothing. That’s OK, too.
2. Other Things Act Funny
“Funny” is probably not the best adverb to use here. People that use non-Windows operating systems consider all that I’m about to tell you as normal. But, if you’re one of those people, this post wasn’t meant for you anyway.
The directory separator (or “folder” separator, if that’s what you were taught) is the slash character: / . When it’s found at the end of a line, the backslash () character is the line continuation character in Ubuntu’s shell. When it’s found in a string, it escapes the character that comes right afterward. Basically, it works like the backtick (`) character in PowerShell.
Command parameters use a single or double hyphen, as opposed to the slash character in traditional DOS commands and command-line applications. PowerShell is more similar in this regard than DOS as it also uses the hyphen. As for the double hyphen in Linux parameters, I have no idea what that’s all about. My unofficial, unscientific observation is that the single hyphen usually goes with a single character parameter (like -r in shutdown) and the double hyphen usually accompanies a parameter that uses an entire word (like –help). I guess there’s probably something more to it, but I don’t know what it is. Reader John pointed out that the single-dash parameters can be entered all together after a single hyphen, just like you can do with netstat’s and attrib’s parameters in Windows/DOS. See the comments section for an example (and I bet more than a few of you just thought, “I can do what with netstat?”).
Remember how I said that everything in Linux is a file? Well, since everything in Linux is a file, everything in Linux is organized in a directory structure. / isn’t just a character, it’s a place. It’s the “root” of the entire system. Everything hangs off of it. There’s no drive letters, no registry, nothing like that. cd / takes you to the root.
PowerShell’s requirement that you run executable programs and scripts in the same directory by using .executablename mirrors Linux’s requirement that you do the same with ./executablename. If you’re not accustomed to the command line, the . character means “this directory” and the .. character sequence means “the parent of this directory” in both Windows and Linux. Three dots doesn’t mean anything. To point to the parent of the parent, you do this: ../...
Linux recognizes two types of files: executable and not executable. It doesn’t really do extensions. For example, when you name a file “runthis.bat” on a Windows system, if you attempt to run it using the command processor (which is a fancy way for saying “double-click on it in Explorer” or “type runthis.bat at a command prompt”), Windows will look at the extension and attempt to treat it as a batch file based on that. Linux doesn’t work that way. When you try to run a file through the command processor, Linux first looks to see if it’s marked as executable. If not, it stops right there. If it is, it looks at the file header. If the file is machine code, it executes it that way. If it’s marked with human-readable encoding, like UTF-8, then it tries to figure out what it is from the first bits of data that it encounters. So, you’ll see a great many scripts that start with something like #!/bin/sh. That tells the system to run the contents through the “sh” interpreter found in “/bin/”. You’ll find others that call on Perl, so on and so forth.
To mark a file as executable:
chmod +x ./thatscriptfileyouwanttouse
There are no drive letters. All devices, including drives, are found in — conveniently enough — /dev. Figuring out which is which can be tough, and this is a place where my non-expert status shines. /dev/sda# are my drives. For the machine that I built for this post, /dev/sda5 is the equivalent of the C: drive. It actually showed all this during the installation, if you were paying attention. Since we’re only using a single data volume in our Linux systems, I don’t know that I care enough to investigate further. One thing that’s nice to know is that you can find the contents of the CD drive in /dev/cdrom.
Linux is VErY cASe sensITiVe. I think this is largely due to tradition. Even as “recently” as an 8MHz 80286, case-insensitive processing was very expensive. Linux’s roots go back much further than that. Case-insensitivity is a fairly minor operation these days, but Linux has not changed. Everything must be typed exactly as the system expects it.
Tab completion exists, but it is different, and in many ways, less robust than it is in PowerShell or the Vista/2008+ command processor. Basically, you can navigate the directory structure with it, but you often need to seed it with the first few characters of what you’re looking for. It won’t work for most command parameters like it does in PowerShell.
It’s not dir , it’s ls. Use mkdir instead of md, rm instead of del.
3. Help is Available
Most commands and applications have a -h and/or a –help parameter that will give you some information on running them. –help is often more detailed than -h. You can sometimes type man commandname to get other help (“man” is short for “manual”). It’s not as consistent as PowerShell help, but then PowerShell’s designers got to work with the benefits of hindsight and rigidly controlled design and distribution.
4. You Can Go Home
You’ve got your own home folder, which is the rough equivalent of the “My Documents” folder in Windows. It’s at the universal alias ~. So, cd ~ takes you to your home folder. You can reference files in it with ~/filename.
5. You’re not the Boss, Except When You Are
You can’t log in directly as “root”, which is the equivalent of “Administrator” on Windows. But, the account you made is “root”. You just don’t have root powers until you specifically ask for them. It’s sort of like “Run as administrator” in Windows, but a lot easier. In fact, the intro text tells you a little bit about it:

Sudosplaining
So basically, if you’re going to do something that needs admin powers, you just type “sudo” before the command, just like it says. The first time, it will ask for a password. It will remember it for a while after that. However, 99% of what I do is administrative stuff, so I pop myself into a sudo session that persists until I exit, like this:
sudo -s
You’ll have to enter your password once, and then you’ll be in sudo mode. You can tell that you’re in sudo mode because the dollar sign will change to a hash sign:
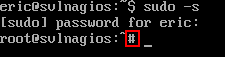
Sudo Up
As our reader John pointed out in the comments below, this is still a root-level account even when you’re not logged in as root. I do this on these systems because they’re servers and if I’m logged into them at all, I’m doing administrative work. Remember to respect the powers of this account; don’t share its password, don’t leave it logged on, don’t open an SSH session and walk away from your unlocked desktop, etc. If you’re going to make a Linux system your primary desktop, make a non-administrative account to use. You can use SUDO to switch to another account.
6. “Exit” Means Never Having to Say Goodbye
“logoff” in Windows is “logout” in Ubuntu Server, with a “but”. If you’ve escalated yourself with sudo -s , you have to “exit” first. “Exit” always works, so I’ve trained myself to use that. Just keep typing “exit” and you’ll eventually return to a login screen.
7. Single-Session is for Wimps
One of the really nifty things about Linux that I’d like to have in Windows is multiple concurrent sessions. See that “tty1” at the top? You’re in terminal 1. Press [Alt]-[Right Arrow]. Now you’re in tty2! Keep going. 6 wraps back around to 1.
8. Patches, Updates, and Installations, Oh My.
Pretty much all applications and OS components are “packages”. Aptitude (“apt”) and “dpkg” are your package managers. They’re a bit disjointed, but you can usually find what you need to know with a quick Internet search.
Have your system check to see if updates are available (more accurately, this checks the version data on download sources):
apt-get update
Install package patches and upgrades:
apt-get upgrade
Install system patches and upgrades:
apt-get dist-upgrade
List installed packages:
dpkg --get-selections
Find a particular package, in this case, “perl” (spelling/case counts!):
dpkg --get-selections | grep perl
See the locations and files that a package references (helps you trace down that executable or configuration file):
dpkg -L perl
Install something (in this case, the Apache web server):
apt-get install apache2
Just a note, “apt-get install” is pretty smart. It can often guess at what you mean. It won’t install anything unless it has a really good match, but it will make suggestions if you get close. In fact, if you type something at a command line and the shell can’t figure it out, it will try to suggest packages that contain something like what you typed. It can be annoying when it’s just a regular typo, but it can also be helpful.
9. System Control
Ubuntu’s equivalent to Task Manager is top. Type top at a command prompt and you’ll be taken right to it. Use the up and down arrows and page up and page down to move through the list. Type a question mark [?] to be taken to the help menu that will show you what else you can do.
10. OK, I’m Done Now
If you’ve used the shutdown command in Windows, then you’ll have little trouble transitioning to Linux. shutdown tells Linux to shut down gracefully with a 1 minute timer. All active sessions get a banner telling them what’s coming.
Immediate shutdown (my favorite):
shutdown now
Reboot immediately:
shutdown -r now
There’s an -H switch which, if I’m reading this right, does a hard power off. I don’t use that one.
Be aware that the shutdown command only stops the machine most of the time. Sometimes, you’ll have to use Hyper-V’s VM control tools to hard power off or reset the virtual machine. This behavior has gotten much better in recent versions — I haven’t noticed any problems for a long time.
Useful Tools for Ubuntu Linux
There are more things you need to do to finish up your install, but before we get there, we need to look at the tools you’re going to need.
Text Editors
The built-in text editing tool that I use is Nano. Just type nano at any prompt and press [Enter] and you’ll be in the nano screen. The toolbar at the bottom shows you what key presses are necessary to do things, ex: [CTRL]+[X] to exit.
The remote text editing tool that I use is Notepad++. It is a little flaky — I sometimes get Access Denied errors with it that I don’t get in any other remote tool (setting it to Active mode seems to help a little). But, the price is hard to beat. If I run into real problems, I run things through my home folder. To connect Notepad++ to your host:
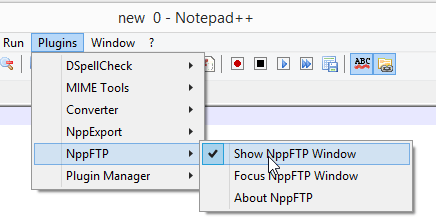
- In NPP, go to Plugins->NppFTP->Show NppFTP Window (only click if it’s not checked):

NPP FTP Window Selector
- The NppFTP window pane will appear at the far right. Click the icon that looks like a gear (which is, unfortunately, gray in color so it always looks disabled), then click Profile Settings:

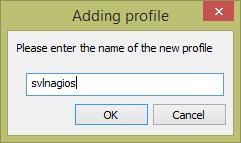
- In the Profile Settings window, click the Add New button. This will give you a small window where you can provide the name of the profile you’re creating. I normally use the name of the system.

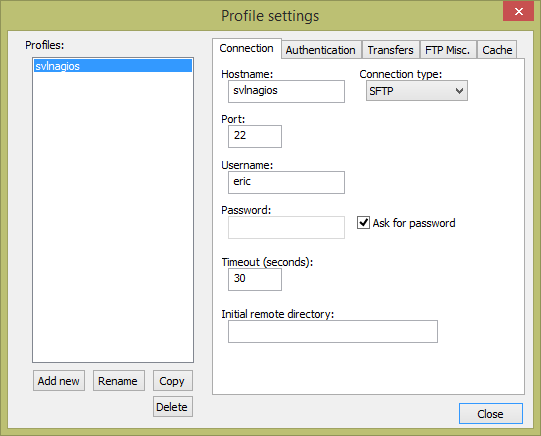
- All the controls will now be activated.
- In the Hostname field, enter the DNS name or the IP address of the system you’re connecting to (if you’re reading straight through, you might not know this yet).
- Change the Connection type to SFTP.
- If you want, save the user name and password. I don’t know how secure this is. I usually enter my name and check Ask for password. If you don’t check that and don’t enter a password, it will assume a blank password.

NPP FTP Profile
- You can continue adding others or changing anything you like (I suggest going to the Transferstab and setting the mode to Active). Click Close when ready.
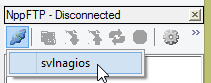
- To connect, click the Connect icon which will now be blue-ish. It will have a drop-down list where you can choose the profile to connect to.

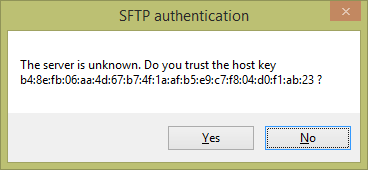
- On your first connection, you’ll have to accept the host’s key:

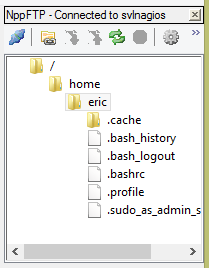
- If the connection is successful, you’ll attach to your home folder on the remote system. Double-clicking an item will attempt to load it. Using the save commands in NPP will save back to the Linux system directly.


Remember that NPP is a Windows app, and as a Windows app, it wants to save files in Windows format (I know, weird, right?). Windows expects that files encoded in human-readable formats will end lines using a carriage-return character and a linefeed character (CRLF, commonly seen escaped as rn). Linux only uses the linefeed character (LF, commonly seen escaped as n). Some things in Linux will choke if they encounter a carriage return. Any time you’re using NPP to edit a Linux file, go to Edit -> EOL Conversion -> UNIX/OSX Format.
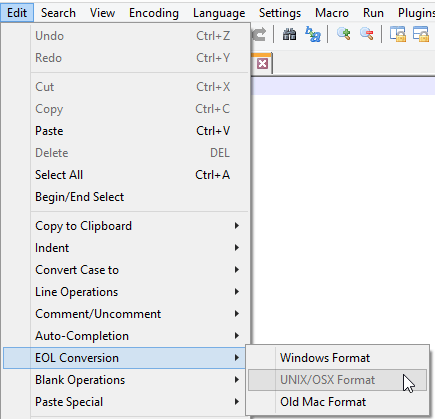
NPP EOL Conversion
WinSCP
WinSCP allows you to move files back and forth between your Windows machine and a Linux system. It doesn’t have the weird permissions barriers that Notepad++ struggles with, but it also doesn’t have its editing powers.
- Download and install WinSCP. I prefer the Commander view but do as you like.
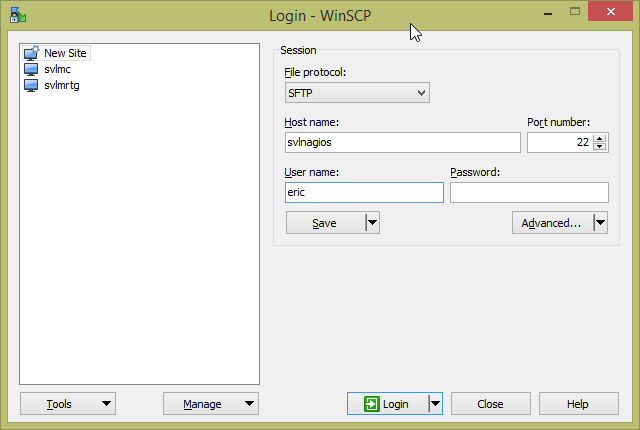
- In the Login dialog, highlight New Site and fill in the host’s information:

- Click Save to keep the profile. It will present a small dialog asking you to customize how it’s saved. You can change the name or create folders or whatever you like.
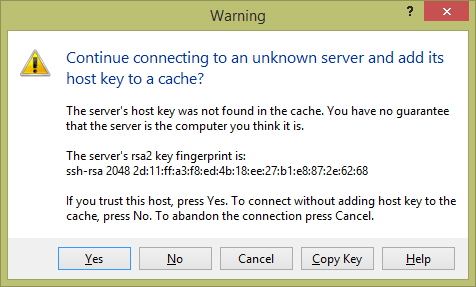
- With the host entry highlighted, click Login. You’ll be prompted with a key on first connect:

- Upon clicking Yes, you’ll be connected to the home folder. If you get a prompt that it’s listening on FTP, something went awry because the install process we followed does not include FTP. Check the information that you plugged in and try the connection again.
- WinSCP integrates with the taskbar for quick launching:

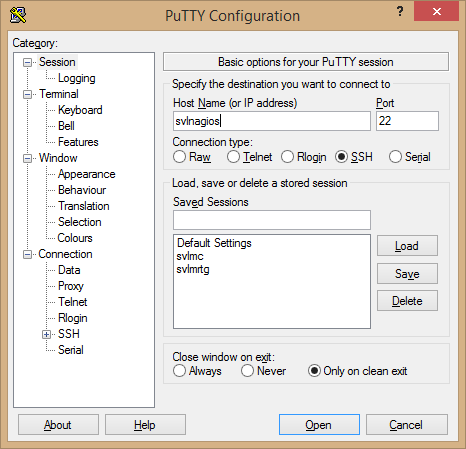
PuTTY
The biggest tool in your Linux-controlling arsenal will be PuTTY. This gem is an SSH client for Windows. SSH (secure shell) is how you remote control Linux systems. Use it instead of Hyper-V’s virtual machine connection. It’s really just a remote console. PuTTY, however, adds functionality on top of that. It can keep sessions and it gives you dead-simple copy/paste functionality. Highlight text, and it’s copied. Right-click the window, and it’s pasted at the cursor location.
- Download PuTTY. I use the installer package myself, but do as you like.
- Type in the host name or IP address in that field.

- PuTTY doesn’t let you save credentials. But, you can save the session. Type a name for it in the Saved Sessions field and then click Save to add it to the list. Clicking Load on an item, or double-clicking it, will populate the connection field with the saved details.
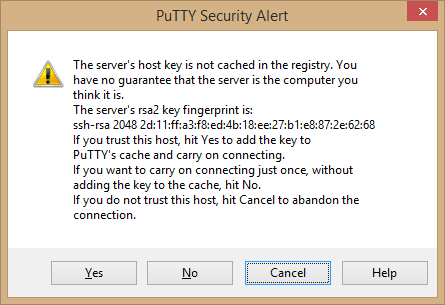
- Click Open when ready. On the first connection, you’ll have to accept the host key:

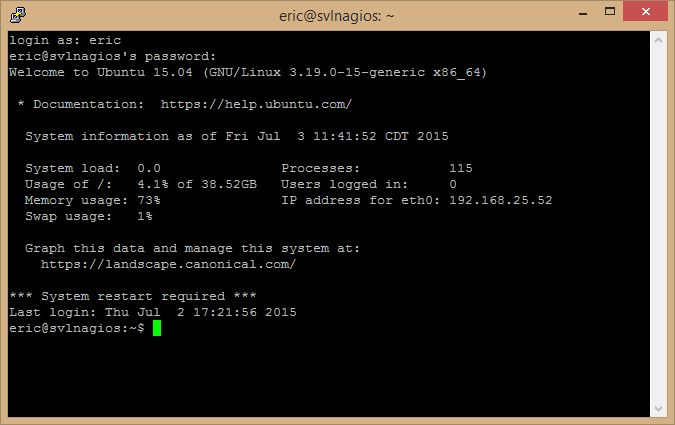
- You’ll then have to enter your login name and password. Then you’ll be brought to the same type of screen that you saw in the console:

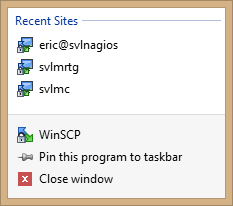
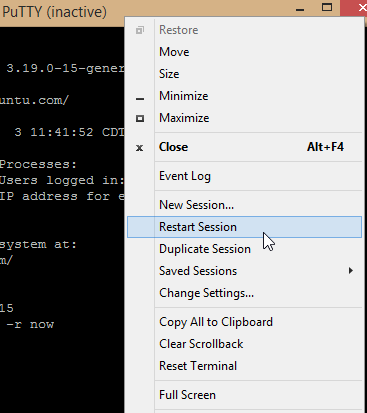
- Right-click the title bar of PuTTY for a powerful menu. The menu items change based on the session status. I have restarted the operating system for the screenshot below so that you can see the Restart Session item. This allows you to quickly reconnect to a system that you dropped from… say, because you restarted it.

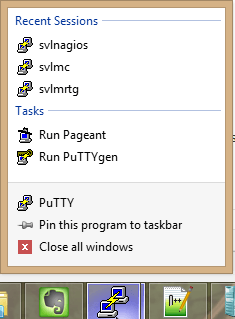
- PuTTY also has taskbar integration:

- When you’re all done, remember to use “exit” to end your session.
Hyper-V Specific Linux Post-Install Wrap-Up
With all the configuration that goes into the installation, there’s not a whole lot to do afterward. There are a few very important steps, though.
Hyper-V Tools for Linux
Out of the box, Ubuntu Server has everything you really need to make it work under Hyper-V. Tools are available to make it even better.
Let’s begin by loading a kernel set that allows us to rely on fewer drivers than the default kernel set.
If you are using a non-LTS version:
apt-get install linux-virtual
If you are using 16.04 LTS:
apt-get install --install-recommends linux-virtual-lts-xenial
With that done, we can now load the Hyper-V tools.
If you are using a non-LTS version:
apt-get install linux-tools-virtual linux-cloud-tools-virtual
If you are using 16.04 LTS:
apt-get install --install-recommends linux-tools-virtual-lts-xenial linux-cloud-tools-virtual-lts-xenial
Thanks to reader Matthew for pointing out the differences for the LTS versions. More information and commands for earlier LTS distributions can be found in the TechNet blog article that Matthew pointed out us.
These tools enable the following:
- VSS Snapshot daemon. Its intent is to allow Linux virtual machines to be backed up online. I haven’t used anything but Altaro for a while, but I already saw that it was backing up Linux VMs online without any special settings. What this gives Altaro customers is the two-way communication about the backup between the guest and the host. So, basically, Hyper-V Manager should now report that the guest is being backed up. I’m not sure if it grants anything else.
- KVP daemon. “KVP” means “key-value pair”. In Windows, this allows you to perform small data exchanges between the hypervisor and the guest by reading and setting special registry keys. Linux, of course, just uses the regular file system structure. You can read the details on using this feature on both Windows and Linux on this TechNet article.
- Host-to-Guest file copy. You have to enable Guest Services on the virtual machine and restart it. Then use Copy-VMFile:
Copy-VMFile -Name svlnagios -SourcePath 'C:tempdemofile.tar.gz' -DestinationPath '/home/eric' -FileSource Host
MAC Control
Linux really doesn’t like its adapters’ MAC addresses to change. On a standalone host, this might not ever be a problem. In a cluster, it will be a problem. Lock it in.
- After the virtual machine has booted at least once, shut it down.
- Change the VM’s properties so that it uses a static MAC address for the virtual adapter.
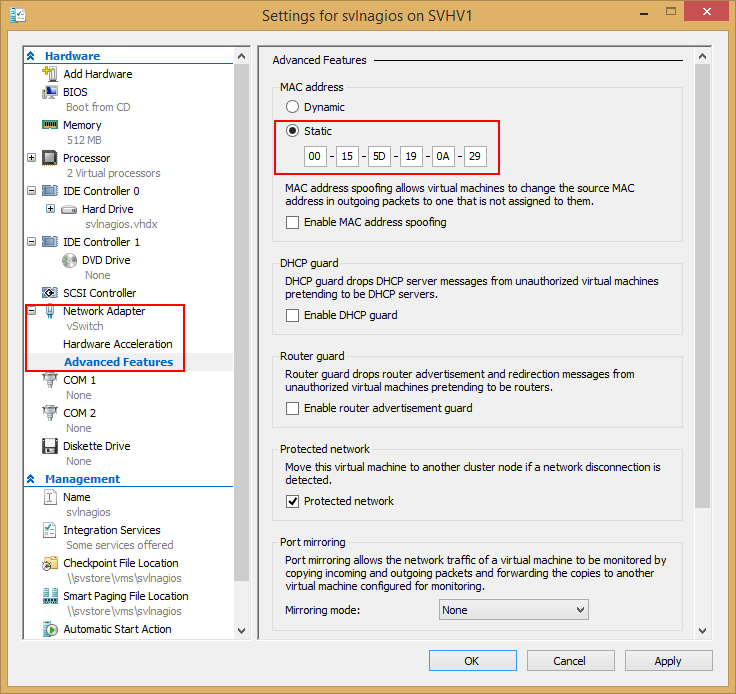
- GUI Method. In Hyper-V Manager, open the VM’s properties dialog. Click the + next to the virtual adapter in the left pane. Select the Advanced Features sub-tab. In the center pane, change the MAC setting to Static. You can override the address if you want to. (Note: if you have never turned the VM on, the suggested address will be all zeroes).

Static MAC
- Powershell Method.
- If you don’t want to manually specify an address, verify that it has one already:
Get-VMNetworkAdapter -VMName 'svlnagios' | select MacAddress
- If it’s got one, apply it statically:
Set-VMNetworkAdapter -VMName 'svlnagios' -StaticMacAddress (Get-VMNetworkAdapter -VMName 'svlnagios').MacAddress
Of course, you can always assign one of your own.
- If you don’t want to manually specify an address, verify that it has one already:
- GUI Method. In Hyper-V Manager, open the VM’s properties dialog. Click the + next to the virtual adapter in the left pane. Select the Advanced Features sub-tab. In the center pane, change the MAC setting to Static. You can override the address if you want to. (Note: if you have never turned the VM on, the suggested address will be all zeroes).
When complete, turn the VM back on.
NOOP
One of the very basic things that an operating system does is coordinate input and output operations. The Linux kernel has four I/O scheduling modes. For physical hardware, I’m sure that there is some gigantic debate raging out there on the Internet somewhere over which is “best”. It’s probably about as heated as the debates over whether a Star Destroyer’s turbolasers would actually make an asteroid explode. In terms of Hyper-V, that debate has about the same significance. Hyper-V does the actual I/O scheduling because it’s in charge of hardware. So, we want to tell our Linux machine to not get involved by setting its I/O scheduling mode to “NOOP”. These instructions are shown with sudo whenever that is necessary, but remember you can sudo -s and skip typing it on each command.
Edit the GRUB loader:
sudo nano /etc/default/grub
This will load the GRUB configuration file. Find the line that says:
GRUB_CMDLINE_LINUX_DEFAULT=""
Change it to:
GRUB_CMDLINE_LINUX_DEFAULT="elevator=noop"
Press [CTRL]+[X]. You’ll then need to press [Y] to save the changes, then [Enter] to indicate that you want to save the data back to the file you found it in. That will leave you back at the prompt.
And finally:
sudo update-grub2
sudo shutdown -r now
IP Addressing
I use DHCP reservations for all my Linux systems. I have to give them static MACs anyway, so why not integrate? I’ve also got my DHCP servers set to auto-update DNS for all systems whether they ask for it or not, so I can use name resolution right away without any magic.
The DHCP client in Ubuntu is “dhclient”. To see what its current status is (will also try to get an IP if it hasn’t got one):
dhclient -v
If it complains about “no broadcast interfaces found”, you can try to force it to renew:
dhclient eth0 -v
To release an address:
dhclient -r -v
If you prefer static addressing, I found a tutorial for you. Personally, I’d use nano instead of vi, but again, it’s all up to you.
Rename the System
This isn’t a necessary thing for everyone, but if you want to use this as a template then you’ll need to know how to rename its clones.
sudo hostname newhostname
Change the local name in the hosts file:
sudo nano /etc/hosts
Change the hostname file:
sudo nano /etc/hostname
Using this Installation to Clone Linux Guests
If this is your first installation of Linux on Hyper-V, you can use it as a basis to create others. Linux does not use GUIDs like Microsoft does so there’s no SID or anything like that to worry about. However, any SSL keys used in one system will be transferred to any clones. For what I’ve shown you here, the only keys that exist are for your SSH server. Security best practices dictate changing this key, although things will work even if you don’t.
To properly prepare the Linux installation that we created above for cloning:
- If necessary, rename the operating system using the steps in the previous section. Use something generic (I picked ‘xenialtemplate’).
- Shut down the guest. You now have two options:
- If you wish to keep all of the configuration, like CPU and memory, just export it to a safe location and be done with it. This option works well if you built it using a good name for the purpose. If you didn’t you can rename the virtual machine and its VHDX first. If you choose to export, you’re finished!
- You can copy out only the VHDX and continue using this virtual machine. To do that, continue reading these steps.
- Remove the virtual hard disk from the virtual machine (this is to clear the security descriptors).
- Copy the virtual hard disk to a safe location with a generic name (ex. ‘xenialtemplate.vhdx‘).
- Re-attach the source VHDX to the original virtual machine.
- Follow the below steps for clean-up.
To deploy a clone from your saved system:
- If you exported the template, use an import operation (copy!) to build your new deployment. If you saved only the VHDX, create a new VM without a virtual hard disk. Copy the source VHDX to the desired location, rename it in accordance with the new virtual machine’s name, and attach it.
- Boot the guest and login.
- Use the steps in the preceding section to rename the guest.
- Enter: rm /etc/ssh/ssh_host_*. This deletes the SSH server’s host keys.
- Enter: ssh-keygen -A. This rebuilds the SSH server’s host keys.
That’s it!
Next Steps
As I said before, this post is really just to get you going. I’m going to be back soon with some very compelling reasons for you to go through this (but really, it wasn’t that bad, admit it).
Make sure to get your system patched before moving on.
Hyper-V is a type 1 hypervisor developed by Microsoft that can be enabled on Windows machines or installed as a standalone operating system (Hyper-V Server 2016, for example). Hyper-V can run not only Windows but also Linux virtual machines. You can run an unlimited number of Linux VMs on your Hyper-V Server because the majority of Linux distributions are free and open source. Installing Linux on a Hyper-V VM has some features which compare to installing Windows.
Today’s blog post explores how to install Linux on Hyper-V using an example of Ubuntu Linux 18 LTS (Long Term Support).
Reasons to Run Linux on Hyper-V
The popularity of Linux is growing and this operating system is time-tested. Let’s have a look at the most common reasons that might force you to install Linux on Hyper-V:
- You need to test a particular Linux distribution in your Hyper-V virtual environment. For example, a new Linux version has recently been released and you want to test this version before installing on physical servers.
- You want to run containers. Linux has excellent container support which may be a reason to install Linux on Hyper-V as a virtual machine.
- Testing multi-platform software or software that provides similar functionality. This is a great option when developers make their applications able to run on multiple operating systems, such as Windows, Linux, and Solaris (for example, Oracle Database). You can install the appropriate software on Linux to test it. If the experiment is successful, you can install Linux and supported software in your production environment.
- Licensing. This point is related to the previous one. You have to pay for Windows while Linux is free. If you don’t have a Datacenter Edition license for your Windows Server, you must pay for each installed on a Hyper-V VM that exceeds the number of Windows licenses included in your edition of the host Windows system.
- Linux requires fewer hardware resources than Windows. Windows is a resource-intensive operating system whereas Linux is light-weight.
- Linux is secure. Users should be aware that Windows systems are vulnerable to a variety of harmful viruses while Linux users may feel safe, especially if their system is configured correctly. Even if you do download a virus, you need to go to great lengths to actually execute the virus on Linux. You need to configure file permissions, for example. Your privacy is respected if you use Linux.
- Linux shell such as bash is essential for automating tasks. You can use regular expressions, scripts and other tricks to manage Linux. You manage Linux, Linux doesn’t manage you. The community of developers is amazing – developers like Linux. If any vulnerabilities are found, they are always fixed quickly.
- You want to learn Linux and migrate from Windows to Linux.
If you want to convert your physical servers to Hyper-V VMs, use converters. Converting a physical Linux machine to a VM in the Hyper-V format can be performed in two steps. Use VMware vCenter Converter for converting a physical machine to a VMware VM, then use Microsoft Virtual Machine Converter for converting a VMware VM to a Hyper-V VM.
Before You Begin
Installing Ubuntu Linux is considered a focal point of today’s blog post. If you don’t need the GUI (graphical user interface), you can install Ubuntu Server. The installation principle is similar. The number of Linux distributions is high and you can select any distribution you like and install it by using the explained logics. One of the main differences between different Linux families is different package managers you’re required to use. Package managers are intended to install, configure, upgrade and delete programs on Linux systems.
Package managers help to resolve such tasks as:
- Downloading packages. The packages are automatically downloaded from the most suitable software repository when you enter the command to install a particular needed package or application. Packages include metadata such as version of software, architecture the package is built for, checksums, other needed packages to work properly etc.
- Resolving dependencies. When you install software, that software may require its own appropriate packages including libraries. Finding, downloading and installing all this manually consumes a lot of time and efforts. Package managers tell you that there are dependencies and suggest you to install automatically the needed depending packages.
- Quality control. Software packages that are stored in authorized software repositories are tested to provide high quality, stability and the absence of bugs.
- The standard of file locations is respected. Linux contains a high number of files and directories. Sometimes, different Linux distributions use different paths for storing files as well as using different configuration file names. Package managers allow you to follow the standards and store files in the required locations for each Linux distribution.
Before selecting a Linux distribution to install on Hyper-V, you can familiarize yourself with the information about Linux package managers. Some of the most popular Linux distributions and package managers are listed in the table below.
| Linux distributions | Package managers used |
| Debian, Ubuntu, Kubuntu, Xubuntu, Lubuntu, Mint | APT (Advanced Packaging Tool), DPKG (Debian Package Management System) |
| OpenSUSE, SLES (SUSE Linux Enterprise Server) | Zypper, YaST |
| Red Hat, CentOS, Fedora | RPM (Red Hat Package Manager), YUM (Yellowdog Updater Modified) |
| Gentoo | Portage |
As mentioned in the very beginning of this blog post, the installation of Linux on Hyper-V will be demonstrated using an example of Ubuntu Linux. Download the ISO image of Ubuntu 18 LTS from the official site.
Creating a New Hyper-V VM
First, make sure that the Hyper-V role (feature) is enabled on your Windows machine (go to Control Panel > Programs and Features > Turn Windows features on or off and verify whether the check box near the Hyper-V string is ticked). In order to create a new virtual machine, open Hyper-V Manager and click Action > New > Virtual Machine. The New Virtual Machine Wizard should appear.

Before You Begin. There is nothing to configure at this step.
Specify Name and Location. Enter your VM name, for example, Ubuntu18 and select a folder where you will store a new VM. Try to use volumes that are different from your system volume C:. In this case a directory on disk D: is used (D:\Virtual\Hyper-V). You can enter the path manually or select a location by clicking the Browse button.

Specify Generation. Choose the generation of this virtual machine – Generation 1 or Generation 2. Generation 1 is selected in this example due to better compatibility.

Assign Memory. Specify at least 1 GB of memory for your Ubuntu Linux machine with GUI. You can edit memory settings after VM creation. Tick the Use Dynamic Memory for this virtual machine checkbox to use your hardware memory resources more rationally.

Configure Networking. Select a virtual switch to which the virtual network adapter of your VM will be connected. The Default Switch is used in this case. Later you can create and configure other virtual switches and connect your VM to the appropriate networks.

Connect Virtual Hard Disk. Select the Create a virtual hard disk option. A dynamic VHDX virtual disk is created by default. Enter the virtual disk name (for example, Ubuntu18.vhdx), select the location and set the size of the virtual disk (at least 16 GB).

Installation options. Select the Install an operating system from a bootable CD/DVD-ROM. Select Image file (.iso) and browse the ISO installation image of Ubuntu18 that has been downloaded before.

Summary. Check your settings in the installation summary and click Finish to create a new virtual machine.
Set the Static MAC Address
Now your new empty VM has been created and you can edit the different VM settings, such as MAC address. It is better to use a static MAC address for Linux running on Hyper-V especially if your Linux VM needs to be migrated between Hyper-V hosts. Right click your VM name and click Settings. In the Settings window, select your network adapter, and expand the network adapter options by clicking the + icon. Click Advanced Features and in the right section of the window select a static MAC address. Click OK to save changes.

Installing Ubuntu Linux on the VM
In Hyper-V Manager, select your Ubuntu virtual machine, right click the VM name and in the context menu, select Connect to open VMConnect. As an alternative you can click Action > Connect in the menu bar of the Hyper-V Manager Window after selecting the VM.

In the VMConnect window, click the Start button to power on the VM. The virtual machine should be loaded from the ISO image. Then you can see the graphical user interface of the Ubuntu installer. The installer provides multiple configuration steps in the wizard mode.
Welcome. On this screen, select your desired language (English) and click Install Ubuntu.
Keyboard layout. Select your keyboard layout (for example, English US) and click Continue.
Updates and other software. You can choose between Normal installation and Minimal installation. Normal installation includes a wider set of installed applications.
Other options allow you to download updates while installing Ubuntu as well as installing third-party software for graphics, Wi-Fi hardware and additional media formats.

Installation type. Now you should prepare a disk for installing Ubuntu. You should create a new partition scheme and format the partitions.
Erase disk and install Ubuntu. This option can be used for partitioning disks automatically. If you are installing Ubuntu Linux for the first time, you can select this option.
Encrypt the new Ubuntu installation for security. This option will not be enabled in the current example.
Use LVM with the new Ubuntu installation. LVM is the Logical Volume Manager that allows you to use an abstraction layer and create a volume group by using two logical or physical disks (or two virtual disks in the case of running a Linux on Hyper-V as a VM). Moreover, if you have no free space available on your volume, you can add one more disk to the volume group and extend your volume group size. This approach adds much more flexibility that can be useful for file servers, database servers etc. LVM allows you to perform resizing of volume groups and the majority of other operations on the fly without powering off your Linux machine.
Something else. By selecting this option, you can manually create partitions of the necessary size and mount them to the appropriate directories. This option is widely utilized by skilled users.
In Linux, disk partitions are not named as disk letters such as C: or D: as they would be in Windows. In Linux, disks are named as /dev/sda, /dev/sdb, /dev/sdc etc. If the disk is named as /dev/sda and has three partitions, the names of partitions should be /dev/sda1, /dev/sda2 and /dev/sda3.
sda means SATA Disk. A long time ago when IDE (parallel ATA) disks were used, hard disk devices were named /dev/hda, /dev/hdb etc. and partitions were named /dev/hda1, /dev/hda2, /dev/hdb1 accordingly.
Disk partitions are mounted to directories that are called mount points in this case. The main directory of the Linux file system is the root directory that is named by the / symbol. The recommendations for creating the partitioning scheme manually for Linux are displayed in the table. You can use a similar partitions scheme when you install Linux on Hyper-V.
| Mount point | Disk partition | Recommended size | Comment |
| /boot | /dev/sda1 | 500 MB – 1 GB | Contains the boot loader such as GRUB |
| / | /dev/sda2 | at least 12-20 GB | The most important partition that is required |
| /home | /dev/sda3 | Is used to separate user files and system files | |
| swap | /dev/sda4 | 4-8 GB, depending on the amount of RAM | The swap partition is used for the same purpose as the Windows swap file |
| /var/log/ | /dev/sdb1 | Creating a separate partition for storing logs is not necessary, but is recommended for servers. If you have applications that intensively write log files, your disk may become full. The operating system and applications can crash as a result. |
Note that you can create only 4 partitions if the MBR (Master Boot Record) partitioning scheme is used. GPT (GUID Partition Table) allows you to create more than 4 partitions.
Click Install Now to continue.

Write the changes to disk? A warning message is displayed. Click Continue to apply a new disk partitioning scheme.
Where are you? Select your geographical location and time zone. Software repositories located in your region should be used for better availability and downloading speed.

Who are you? Enter your name, your computer’s name (a hostname for your VM in this case), pick a username and define the password. You can select the appropriate option to login automatically if needed. A password is required to log in by default – this is the most secure option, and the one that is recommended. Click Continue to start the installation process and copying files.
Wait until the installation process is complete. You can read useful tips and OS explanations while files are being copied.
Installation Complete. You need to restart the computer in order to use the new installation. Click Restart Now.
After restarting the Hyper-V Linux virtual machine, you can see the login screen. Select your user name and enter your password to log in. See the window that demonstrates new features of the new version of Ubuntu Linux you have already installed on Hyper-V.
Configuring Linux
You have installed Ubuntu on Hyper-V VM, but Ubuntu, as with any other Linux, must be configured for further comfortable usage. The majority of settings can be configured in the Linux console (Terminal). In order to open a Terminal, click the nine dots in the left bottom corner (Show Applications) and in the menu that appears, click the Terminal icon. Another way to open Terminal is to right click desktop and click Open Terminal in the context menu or pressing the Ctrl+Alt+T hotkey combination.
Now you see an exquisite terminal window of Ubuntu Linux. Be aware that commands and file names in Linux are case sensitive. ReadMe.txt and readme.txt are different file names in Linux while in Windows there is no difference between these file names.

Checking the network settings
Install the net-tools to become able to check network configuration by using the command:
sudo apt-get install net-tools
Where sudo allows you to execute the command as a root user (substitute user do).
Type ifconfig to check the network configuration of your Ubuntu running on a Hyper-V VM.

A default virtual DHCP server connected to the default virtual switch has distributed the IP configuration for the virtual network adapter of the current Ubuntu Linux VM running on Hyper-V. The name of the virtual Ethernet adapter in Linux is eth0. The obtained IP address is 172.25.151.20, netmask is 255.255.255.240 and the default gateway is 172.25.151.31 in this case.
Changing the network settings manually
Obtaining your IP address via DHCP is convenient, but if you are planning to use your Linux running on Hyper-V as a server, you should configure network settings manually. Sudo-iMoreover, if you wish to clone your Linux VM used as a server, changing the IP address and machine name is essential. You may also have to change IP addresses on your Linux VM after reconfiguring your Hyper-V virtual switch or after connecting a virtual network adapter to another virtual switch. Let’s find out how to configure network settings for your Linux VM manually.
Changing system settings such as network settings requires root privileges. Type sudo -i to have root rights in the console (you should enter your password) during the session (press Ctrl+D to exit the root mode when needed). You may notice that the $ character is changed to the # character in the command line prompt. Enter a new IP address, then reload the network interface:
ifconfig eth0 172.25.151.21 netmask 255.255.255.240
ifconfig eth0 down
ifconfig eth0 up
The settings are applied until you restart the machine.
For setting up the static IP address permanently, use the netplan configuration that is used to configure networks in Ubuntu Linux since the version 17 of Ubuntu. In earlier versions of Ubuntu and in some other Linux distributions you can edit your IP address configuration by editing the /etc/network/interfaces config file. Let’s edit the .yaml file with vim by using the command:
vim /etc/netplan/01-network-manager-all.yaml
The file contains the following configuration in this case:
version: 2
renderer: NetworkManager

You can change the IP address, net mask, gateway, and DNS servers by editing this file. You should preserve the file structure including the number of space characters.
Note: A network mask can be written as the number of bits.
255.255.255.0 is equal to 11111111.11111111.11111111.00000000 and is a 24bit mask (24 ones in the decimal format, as you can see).
255.255.255.240 is equal to 11111111.11111111.11111111.11110000 and is a 28bit mask (28 ones in the decimal format are present).
An IP address and net mask consist of 4 octets. Each octet (8bits) can be transformed to the decimal format (see the table below).
| 1 | 1 | 1 | 1 | 1 | 1 | 1 | 1 | 1+1+1+1+1+1+1+1=8 |
| 128 | 64 | 32 | 16 | 8 | 4 | 2 | 1 | 128+64+32+16+8+4+2+1=255 |
You can use the table below for converting network masks from one format to another for networks that can be classified as class C networks. The maximum number of hosts that can be connected to the network is shown in the right column.
| Bits | Net mask | Hosts |
| /30 | 255.255.255.252 | 2 |
| /29 | 255.255.255.248 | 6 |
| /28 | 255.255.255.240 | 14 |
| /27 | 255.255.255.224 | 30 |
| /26 | 255.255.255.192 | 62 |
| /25 | 255.255.255.128 | 126 |
| /24 | 255.255.255.0 | 254 |
By using the above explained logics, you can similarly transform any mask from one format to another format manually. If you want to calculate the maximum number of hosts that can be connected to a network, use the formula:
2(32-m) – 2
Where m is the number of bits used for a net mask. For example, you have a /29 network and the maximum number of hosts for this network is:
2(32-29) – 2 = 23 – 2 = 8 – 2 = 6
–2 shows that you must exclude the network address and the broadcast address. (For example, for 192.168.1.0/24 network you must exclude 192.168.1.0 and 192.168.1.255 addresses). Don’t forget that at least one IP address must be used as a default gateway to enable a connection to other networks. You can also divide your network into subnets, but for now, let’s turn back to configuring network for Ubuntu running on a Hyper-V VM.
Change the renderer from NetworkManager to networkd and edit your Ubuntu network configuration similarly as shown below. Be attentive when adding space characters to preserve the configuration format.
version: 2
renderer: networkd
ethernets:
eth0:
dhcp4: no
addresses: [172.25.151.21/24]
gateway4: 192.168.151.17
nameservers:
addresses: [192.168.151.17,8.8.8.8]
Press Esc to exit from the editing mode to the navigation mode in vim. Type :wq and press Enter to write changes and quit the text editor.

Note. If you have more than one network adapter (for example, eth0 and eth1) add the similar eth1: block to your network configuration .yaml file under the eth0: block.
Check whether your configuration file format is correct after editing with the command:
netplan try
If everything is correct, press Enter to keep these settings.

How to change a hostname in Ubuntu?
Let’s check the current hostname before changing it.
hostnamectl
As you can see, on the screenshot below, the current hostname of the Linux machine is Ubuntu-VM. Set the new VM-Ubuntu hostname:
hostnamectl set-hostname VM-Ubuntu

Make sure that the hostname is now changed in the /etc/hostmane file.
less /etc/hostname
You should also edit the hostname in the /etc/hosts file.
vim /etc/hosts
vim is a powerful console text editor that has no analogs in Windows PowerShell. By default, you are in the navigation mode. You can navigate by pressing h (left), L (right), j (down), k (up) or arrow keys. Press a to enter the editing mode to append any characters after a cursor. Press i if you want to insert a character instead of an existing character highlighted by a cursor. Change the Ubuntu-VM to VM-Ubuntu, press Esc to exit from an editing mode to a navigation mode.
Type :wq to write changes to the file and quit.
Use the init 6 command to restart your Linux machine in order to ensure that changes are applied.
Configuring the SSH server on Ubuntu Linux
For greater convenience, you should enable remote access via SSH. The SSH Server is used to access the Linux console remotely via encrypted SSH (secure shell) protocol. For doing this, you should install the SSH server on your Ubuntu VM running on Hyper-V and the SSH client on your Windows machine used as a Hyper-V host.
Open Terminal on your Ubuntu machine and run the command as the root user:
apt-get install -y openssh-server
The configuration of the SSH server is stored in the sshd_config file. Edit this file to enable the SSH connection with needed settings.
vim /etc/ssh/sshd_config
Uncomment this string (delete the # character)
PasswordAuthentication yes
Save the file and exit.
Restart the SSH server daemon (service).
/etc/init.d ssh stop
/etc/init.d ssh start
Download the SSH client (for example, PuTTY) for your Windows machine. Open PuTTY on your Windows machine, enter the IP address of your Ubuntu VM running on Hyper-V and click Open.

Enter your username and password. Now you get the Ubuntu console remotely.
Transferring files between Linux VM and Windows host machines
Unlike VMware, you cannot drag and drop files between the Windows host and Linux guest in Hyper-V. As you have configured the SSH server, you can transfer files from your Ubuntu VM to your Hyper-V host and do the inverse by using an SFTP (Secure File Transfer Protocol) client such as WinSCP. WinSCP uses SSH for secure connection and can also use SCP (Secure Copy Protocol) for file transferring.
Run WinSCP on your Windows machine. Select SFTP as a file protocol, enter your host name or IP address, user name and password.

When you have logged in, you can see a window with two panels – the first panel displays files on the Windows machine and the second panel displays files on the Linux machine. Go to the designated directories on source and destination machines, select files and directories. Drag and drop the selected objects between panels to copy them.

How to install Hyper-V Integration Services on Linux?
Hyper-V Linux Integration Services have been built in Ubuntu since version 12.04. If your Linux distribution doesn’t include Hyper-V Integration Services, you can download them from the Microsoft’s site.
You can check which Integration Services are enabled for your Ubuntu VM running on Hyper-V in PowerShell. Type the following command in PowerShell on the Hyper-V host:
get-vmintegrationservice -VMName “Ubuntu18”
You can also select the services you want Hyper-V to offer to this VM in GUI. Open Hyper-V Manager, right click your VM name, and click Settings. In the Settings window, select Integration Services in the left pane and tick the check boxes near the services that are needed (Guest services must be enabled in this example).

Click OK to save changes.
You can now re-check the enabled services in PowerShell (see the screenshot below).
get-vmintegrationservice -VMName “Ubuntu18”

Once Hyper-V Integration services are installed on your Ubuntu Linux, they must become activated. The /etc/initramfs-tools/modules file contains a list of modules that you want to be included in your initramfs.
The initramfs is the initial RAM file system intended to mount the root filesystem (/). As a result, the initial root file system and init daemon (that is the first process that must run in Linux) can reside in kernel memory cache (not on a ramdisk as for initrd filesystem that acts as a block device of a fixed size and consumes more memory for caching). initrd was replaced by initramfs after Linux kernel 2.6 due to its advantages such as flexibility, efficiency and simplicity. The initramfs is a complete set of directories that you can see on your root filesystem and is gzipped into a cpio archive.
Linux kernel can be monolithic and modular. In most cases the module kernel is used. Let’s enable loading of the necessary modules.
vim /etc/initramfs-tools/modules
Edit the file and add these strings to enable loading of the appropriate modules.
hv_storvsc
hv_blkvsc
hv_netvsc
Update initramfs:
update-initramfs -u
Restart your Hyper-V VM running Ubuntu:
init 6
Verify that Hyper-V related modules for your Linux kernel are loaded.
lsmod | grep hv
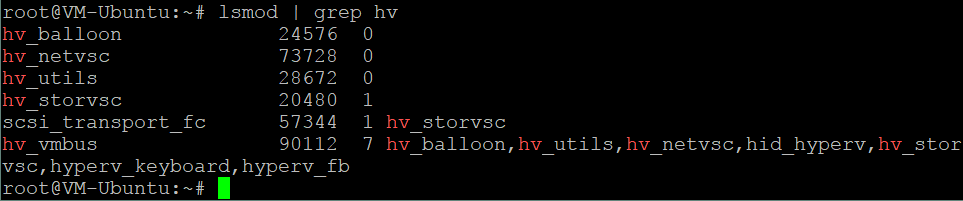
Tuning Linux Disk Optimizer
Linux has an I/O scheduler mode that helps to optimize disk I/O (input/output) by default that is especially useful for magnetic (spinning) hard disk drives. Hyper-V has its own mechanism for optimizing virtual disks I/O performance. Using two disk optimizers is not necessary and you can disable the built-in Linux disk optimizer. Linux kernel allows you to use different I/O schedulers, each of them using different algorithms. In this case, the NOOP scheduler must be used. NOOP is the simplest I/O scheduler that uses the First In First Out (FIFO) concept for the queue. This is what you need to run Ubuntu on Hyper-V.
In order to edit the I/O scheduler used by Linux kernel, edit the grub configuration file with the command:
vim /etc/default/grub
Find the GRUB_CMDLINE_LINUX_DEFAULT string. In this case this string has the following view:
GRUB_CMDLINE_LINUX_DEFAULT=”quiet splash”
Edit this string to get the following view:
GRUB_CMDLINE_LINUX_DEFAULT=”elevator=noop”
Save changes to this GRUB configuration file.
Update the GRUB bootloader configuration.
update-grub2
Reboot your Ubuntu Hyper-V VM.
init 6
Conclusion
If you have never used Linux, installing Ubuntu on Hyper-V can be the first step to opening the gate to the world of Linux. Creating a new virtual machine is straightforward, but some manual configurations should be made after installation is finished.
Running Linux VMs on Hyper-V hosts allows you to clone and migrate VMs easily. Two machines must not have the same host name and IP address, and for this reason, basic network configuration was explained. Hyper-V Linux Integration Services can improve the performance of VMs.
While the operating system is running on a VM, both Windows and Windows virtual machines should be backed up to protect precious data. NAKIVO Backup & Replication can back up your Hyper-V VMs in the best way possible.
Contents
-
Hyper-V
- What is Hyper-V?
- Why Hyper-V?
-
Enabling Hyper-V
- Windows Editions
- Hyper-V System Requirements
- Hyper-V Graphical Install
- Hyper-V PowerShell Install
- Hyper-V Admin Center (Windows 10 Server)
-
Installing Ubuntu on Hyper-V
- Using Quick Create
- Using an Ubuntu CD image (.ISO)
Hyper-V
What is Hyper-V?
Hyper-V is a native type 1 hypervisor developed by Microsoft for the Windows family of operating systems, similar to Xen or VMWare ESXi.
Hyper-V was first released for Windows Server 2008, and is available without additional charge since Windows Server 2012 and Windows 8.
For more information on the difference between type 1 and type 2 hypervisors, click here.
Why Hyper-V?
Hyper-V allows Ubuntu to be run in parallel or in isolation on Windows operating systems. There are several use-cases for running Ubuntu on Hyper-V:
- To introduce Ubuntu in a Windows-centric IT environment.
- To have access to a complete Ubuntu desktop environment without dual-booting a PC.
-
To use Linux software on Ubuntu that is not yet supported on the Windows Subsystem for Linux.
Enabling Hyper-V
Windows Editions
Ubuntu on Hyper-V can be enabled on the following Windows operating systems:
- Windows 10 Pro
- Windows 10 Enterprise
- Windows 10 Education
- Windows 10 Server
Hyper-V is not included in Windows 10 Home, which can be upgraded to Windows 10 Pro.
Hyper-V System Requirements
The following are additional system requirements for Hyper-V:
- A 64-bit processor with Second Level Address Translation (SLAT)
- CPU support for virtualization extensions and virtualization enabled in the system BIOS/EFI
- Minimum of 4 GB of memory, recommended 8 GB
- Minimum of 5 GB of disk space, recommended 15 GB
Hyper-V Graphical Install
-
Right click on the Windows Start button and select ‘Apps and Features’
-
Select ‘Programs and Features’ on the right under Related Settings
-
Select ‘Turn Windows Features on or off’
-
Select ‘Hyper-V’ and click OK
-
Restart when prompted
Hyper-V PowerShell Install
-
Open a PowerShell console as Administrator
-
Run the following command: Enable-WindowsOptionalFeature -Online -FeatureName Microsoft-Hyper-V -All
- Restart when prompted
Hyper-V Admin Center (Windows 10 Server)
See official Microsoft documentation.
Installing Ubuntu on Hyper-V
There are different methods for installing Ubuntu on Hyper-V depending on your use-case. Read each of the descriptions of the following methods and then determine the best for your needs
Using Quick Create
The recommended method for installing Ubuntu on Hyper-V is to use the curated Ubuntu image from the Hyper-V Quick Create Gallery. This method is ideal for desktop development on Ubuntu and for users interested in running a complete Ubuntu desktop environment. The Ubuntu image from the Quick Create Gallery includes pre-configured features, such as clipboard sharing, dynamic resolution display, and shared folders.
-
Enable Hyper-V as described above.
-
Open ‘Hyper-V Manager’ by:
- Click on the Windows Start button, expand the ‘Windows Administrative Tools’ folder, and click ‘Hyper-V Manager’, or
- Click the Windows key and type ‘Hyper-V’ and click ‘Hyper-V Manager’ or select with your keyboard arrow keys and press ‘Enter’
-
In the future, the Quick Create tool can be accessed directly using the above methods, but it is useful to know where Hyper-V Manager is because it is where you will come back to manage your Ubuntu VM.
-
On the ‘Actions’ pane click ‘Quick Create’ and the Quick Create tool will open.
-
Select a version of Ubuntu from the versions on the left. A build of the most recent LTS version of Ubuntu and the most recent interim release are provided. If you are developing for Ubuntu server or an enterprise environment, the LTS version is recommended. If you would like to use the latest versions of software in Ubuntu, the interim release is recommended.
-
Click ‘Create Virtual Machine’ and wait for the VM image to be downloaded.
-
Click ‘Connect’ to open a connection to your VM.
-
Click ‘Start’ to run your VM.
-
Complete the final stages of Ubuntu install, including selection of a username.
Using an Ubuntu CD image (.ISO)
It is also possible to install Ubuntu on Hyper-V using a CD image .ISO. This is useful if you are running Ubuntu Server and do not require an enhanced desktop experience. Note that the enhanced features of the Quick Create images are not enabled by default when you perform a manual install from an ISO.
-
Download an Ubuntu ISO from an official Ubuntu source.
-
Enable Hyper-V as described above.
-
Open ‘Hyper-V Manager’ by:
- Click on the Windows Start button, expand the ‘Windows Administrative Tools’ folder, and click ‘Hyper-V Manager’, or
-
Click the Windows key and type ‘Hyper-V’ and click ‘Hyper-V Manager’ or select with your keyboard arrow keys and press ‘Enter’
-
On the ‘Actions’ pane click ‘Quick Create’ and the Quick Create tool will open.
- Click ‘Change installation source’ and select the ISO file you downloaded before. If you want to give your virtual machine a more descriptive name, click the ‘More options’ down arrow on the bottom right and change ‘New Virtual Machine’ to something more useful, such as ‘Ubuntu Server 18.04 LTS’.
-
Click ‘Create Virtual Machine’ and wait for the virtual machine to be created.
-
Click ‘Connect’ to open a connection to your VM.
-
Click ‘File’ in the menu bar, chose ‘Settings’, click the ‘Security’ tab and under Secure Boot select ‘Microsoft UEFI Certificate Authority’, then ‘Apply’ and ‘OK’ to return to your VM.
-
Click ‘Start’ to run your VM.
-
Complete the manual installation of Ubuntu.
CategoryEnterprise
In this blog post, I will show you how to install and setup Ubuntu Server 2018.04 LTS in Hyper-V. Since Hyper V comes shipped with Windows OS (Except Home Edition), chances are that you already have Hyper V available in your system, ready to be used.
Please note that you can install only LTS version on Hyper-V. I tried to install non LTS version and it did not work.
Download Ubuntu Server
You can download Ubuntu Server from here. Download LTS version.
What is Hyper-V
Hyper V is a virtualization software from Microsoft which allows you to run multiple Operating system on your Windows Machine. Hyper V is exactly like VMware Workstation or Oracle VirtualBox, except that Hyper V is from Microsoft and is available for free for almost all the versions of Windows except Home version.
Which Windows Version Supports Hyper V and how to Enable it
Since Hyper V is a part of Windows OS, separate installation is not required. But Hyper-V is not enabled by default and to use it, it needs to be enabled. To enable Hyper V, the following requirements must be met.
- Windows 10 Enterprise, Professional, or Education
- 64-bit Processor with Second Level Address Translation (SLAT)
- CPU support for VM Monitor Mode Extension (VT-c on Intel CPU’s)
- Minimum of 4 GB memory.
- The Hyper-V role cannot be installed on Windows 10 Home.
For detailed discussion please go through my blog on how to enable Hyper V in Windows.
Enable Virtualization Technology either Intel VT-x or AMD-V
To enable Hyper V, system must have Virtualization Technology Enabled in BIOS. For AMD processors, Virtualization is enabled by default, but in the case of Intel, VT-x may not be enabled by default. So, there are steps to be followed to enabled Intel VT in BIOS or UEFI. Please follow my post on Step by step guide to enable Intel VT-x or AMD-V in BIOS or UEFI in Windows 10 and Windows 8.
Before you start installing Ubuntu Linux, we will have to create network connection switch first. Please follow the steps below
- Open Hyper-V Manager
- Click Virtual Switch Manager under action on the right pane in Hyper-V Manger screen

Hyper V- Virtual Switch Manager
- Select External and click on create virtual switch.

Hyper V Manager – Create New Virtual switch
- In the Virtual Switch properties dialog box, specify the name of your choice of the virtual switch and under Connection Type -> External Network, select your system Ethernet card and not your WiFi card. Click on OK to complete the process.

Hyper V Manger – Virtual Switch Properties
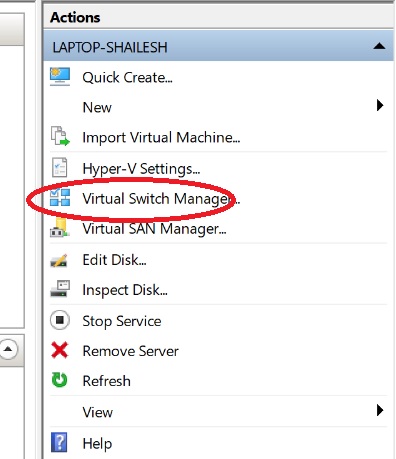
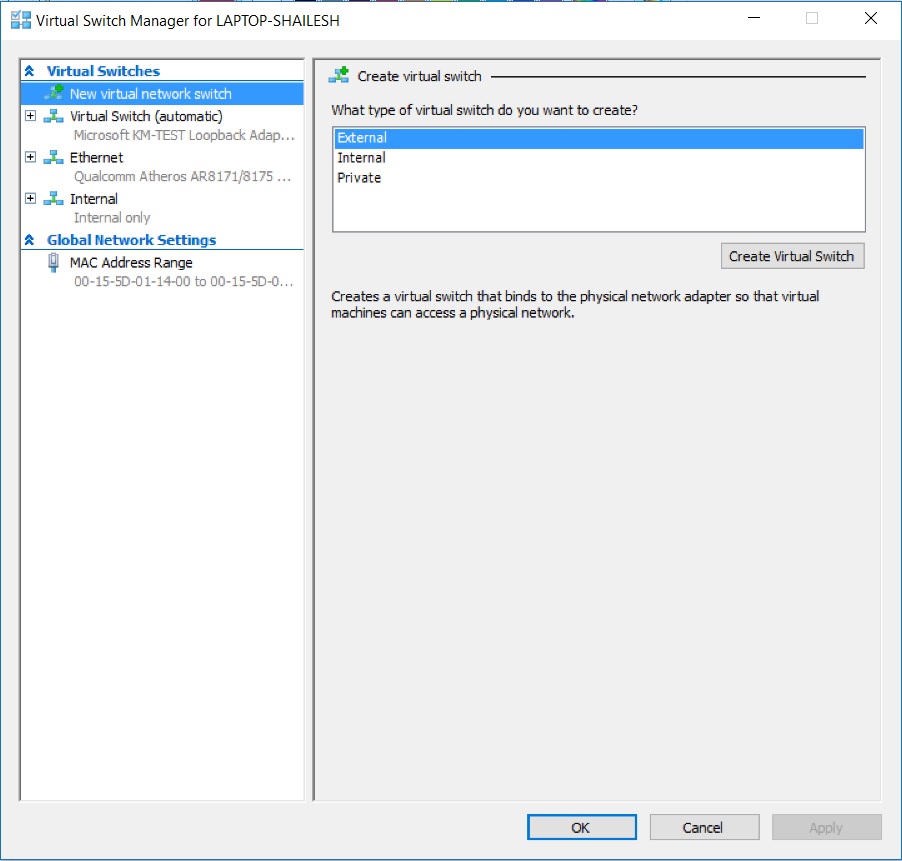
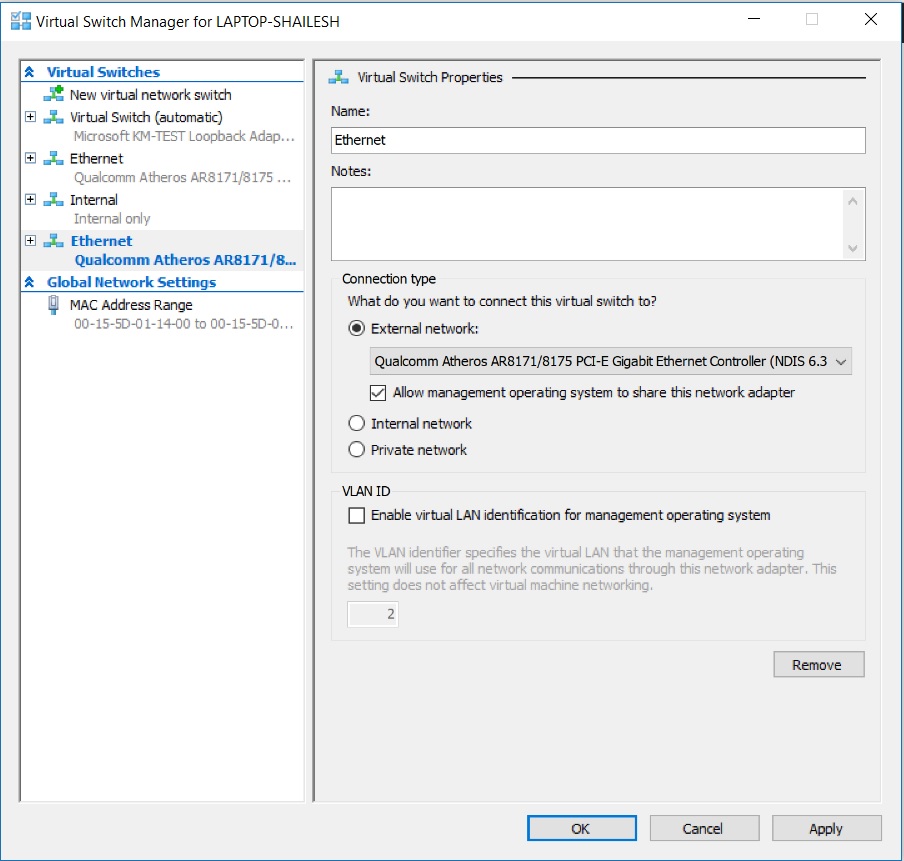
Once you have Hyper V setup successfully, Please follow the below steps to Install Ubuntu Server
Step 1 – Open Hyper V Manager
First step is to open Hyper V manager. If you have setup everything correctly, you can search for Hyper-V Manager in Taskbar or you can find the shortcut in Start Menu under Windows Administrative tools.
On the right hand side you will see New-> Virtual Machine. Click on Virtual Machine to launch New Virtual Machine Wizard and click Next.
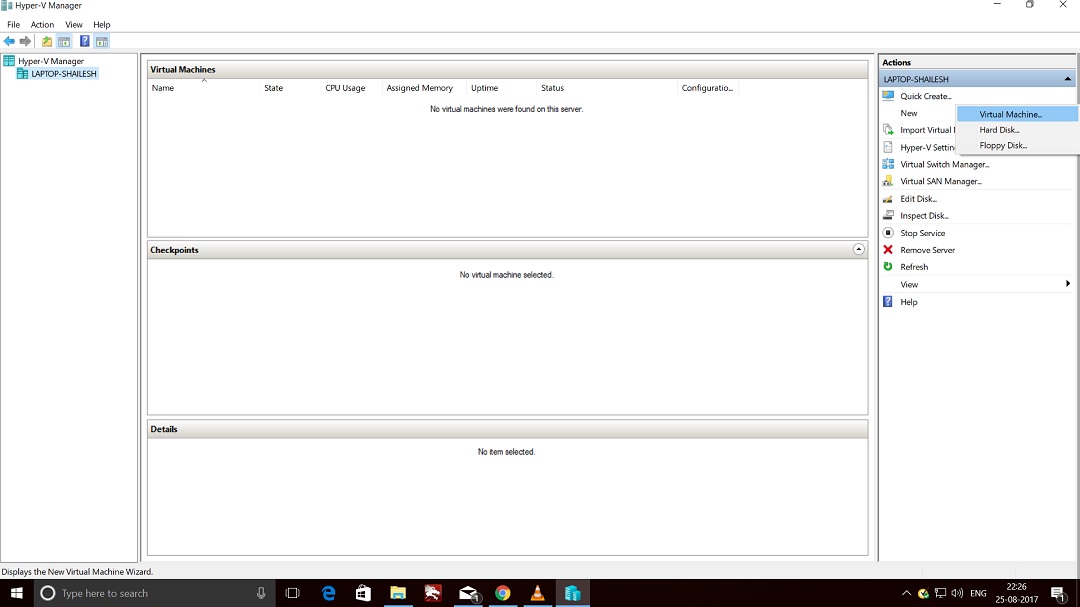
Hyper-V Manager Screenshot
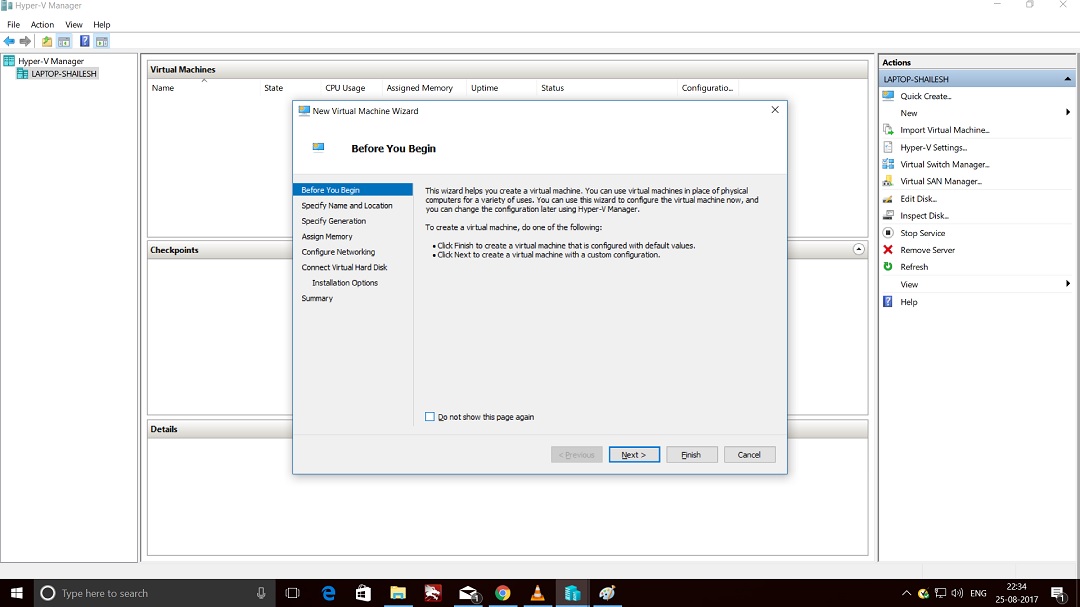
Hyper-V Manager – New Virtual Machine Wizard Screenshot
Step 2 – New Virtual Machine Wizard – Specify Name and Location
In this dialog box, please enter the name of the Virtual Machine. In Our case, we can name our Virtual machine as Ubuntu Server. But you can specify anything according to your preference. There is a checkbox to chnage the location where the Virtual Machine Files will be created. If you leave this unchecked, default location will be used. Else Check the box to change the location. I normally leave it as default. But if you have disk space constraints, it better to specify the location in a different disk drive.
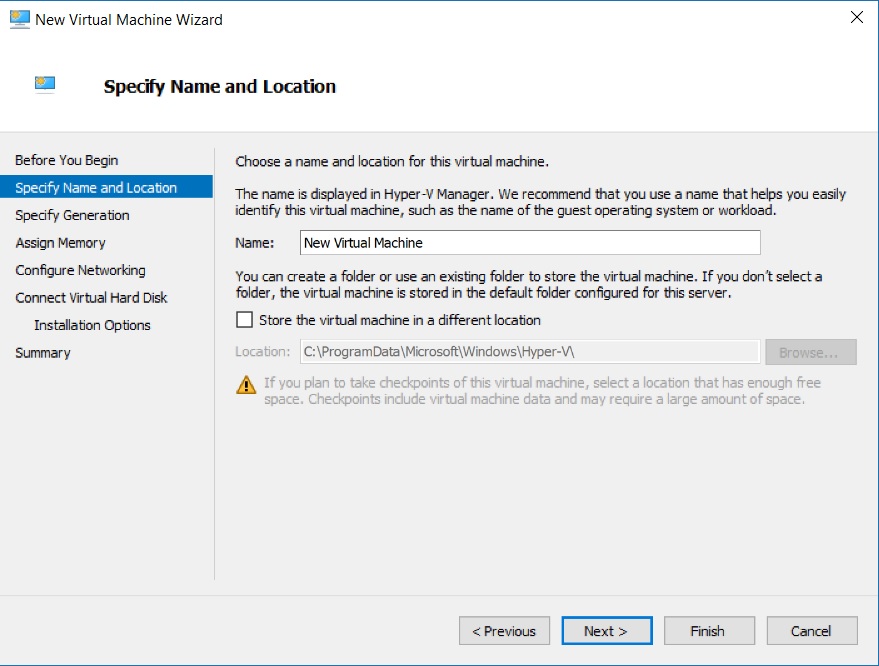
Hyper-V Manager – New Virtual Machine Wizard – Specify Name and Location Screenshot
Step 3 – New Virtual Machine Wizard – Specify Generation
These days you can create two versions(Generation) of Virtual Machines. The latest one is Generation 2. Before generation 2 type virtual machines came into existence, there was nothing like generation 1 virtual machines. All virtual machines were the same. But from generation 2 virtual machines, older virtual machines were called generation one virtual machines. Generation one virtual machines supports legacy hardware. Generation 2 Provides the following new functionality on a virtual machine:
- PXE boot by using a standard network adapter
- Boot from a SCSI virtual hard disk
- Boot from a SCSI virtual DVD
- Secure Boot (enabled by default)
- UEFI firmware support
But lets not complicate things for ourselves and choose Generation 1 and click next.
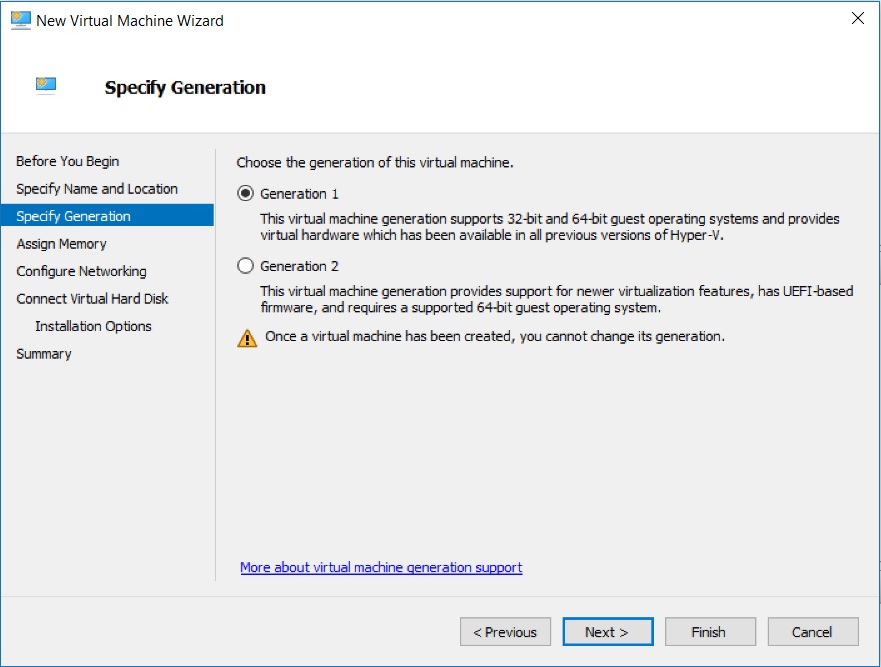
Hyper-V Manager – New Virtual Machine Wizard – Specify Generation dialog box Screenshot
Step 4 – New Virtual Machine Wizard – Assign Memory
In this dialog box you will have to specify the amount of RAM you want to allocate to the virtual machine once the virtual machine is turned on. By default it is 1GB(1024 MB), but I normally prefer 2GB(2048 MB). Also, check Use Dynamic Memory for this Virtual Machine. This will allow Hyper V to adjust RAM according to the requirement of the Virtual machine.
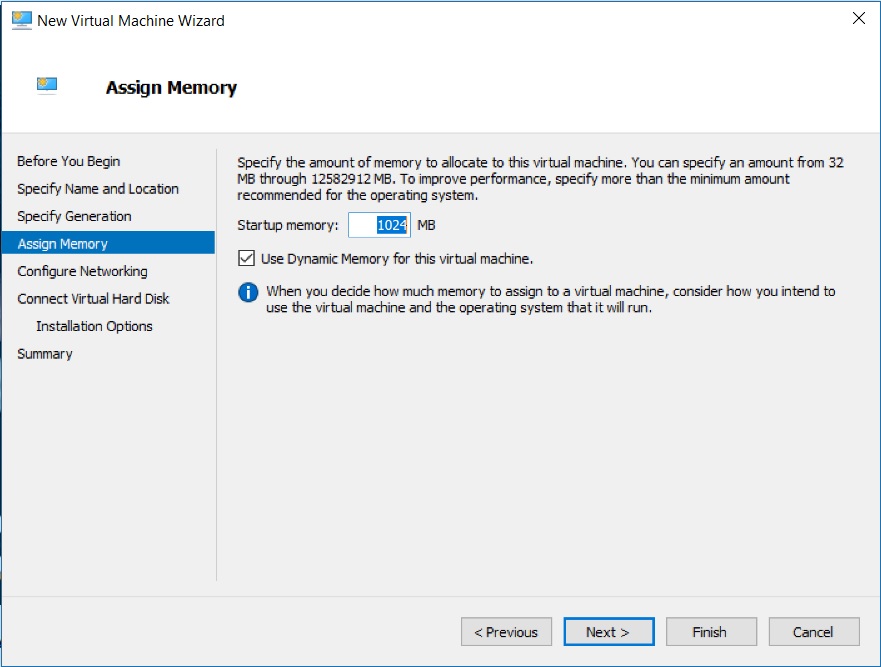
Hyper V Manager – New Virtual machine Wizard – Assign Memory dialog box screenshot
Step 5 – New Virtual Machine Wizard – Configure Network
For virtual machines to be be able to communicate with other virtual machines or internet, it should have a network adapter. In this dialog box you will have to specify the network adapter. Please choose connection(external virtual virtual switch) from the drop down menu and click on next.
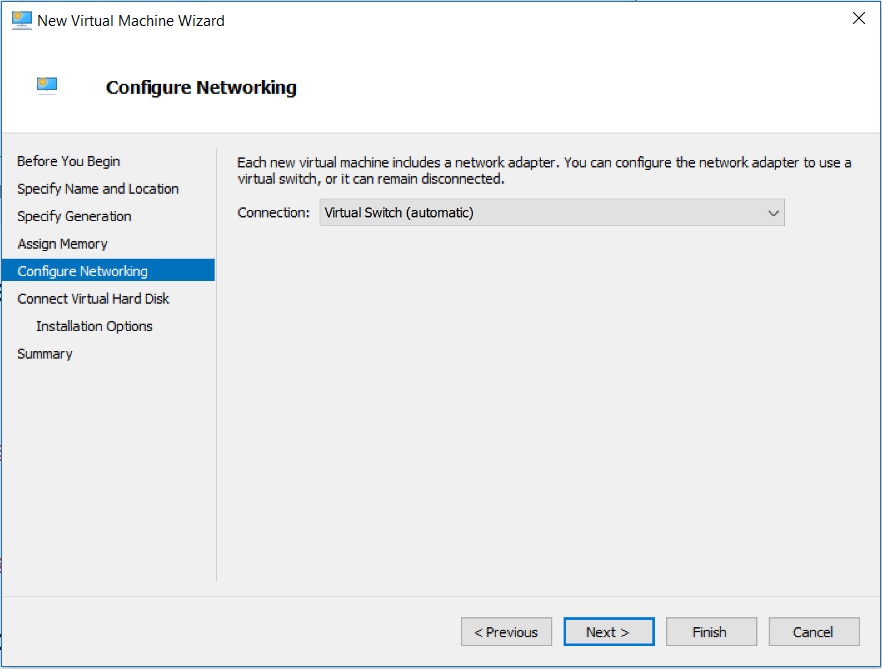
Hyper V Manager – New Virtual machine Wizard – Configure Network dialog box screenshot
Step 6 – New Virtual Machine Wizard – Connect Virtual Hard Disk
Virtual Machines require hard disk space. This is the place where you decide how much disk space you want to allocate to the virtual machine. For Ubuntu, its recommended to select around 60 GB of disk space. Give Virtual disk a name of your choice. Please note that, not all of the allocated disk space will be used during the installation process. It is dynamically created, that is it will expand as the usage grows with the maximum limit of what you specify as the virtual disk size. Give the name of the virtual hard disk, specify the disk space and click next.
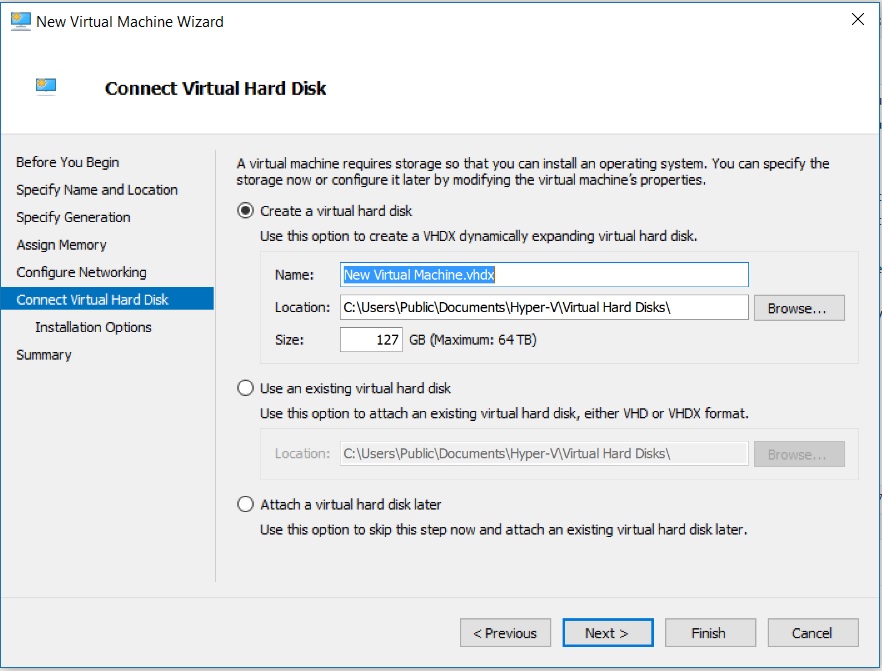
Hyper V Manager – New Virtual machine Wizard – Connect Virtual hard Disk dialog box screenshot
Step 7 – New Virtual Machine Wizard – Installation Option
In this dialog box you will be asked to specify the setup media. Check Install an operating system from bootable CD/DVD-ROM -> Image File. Browse to the downloaded ISO image file and click next.
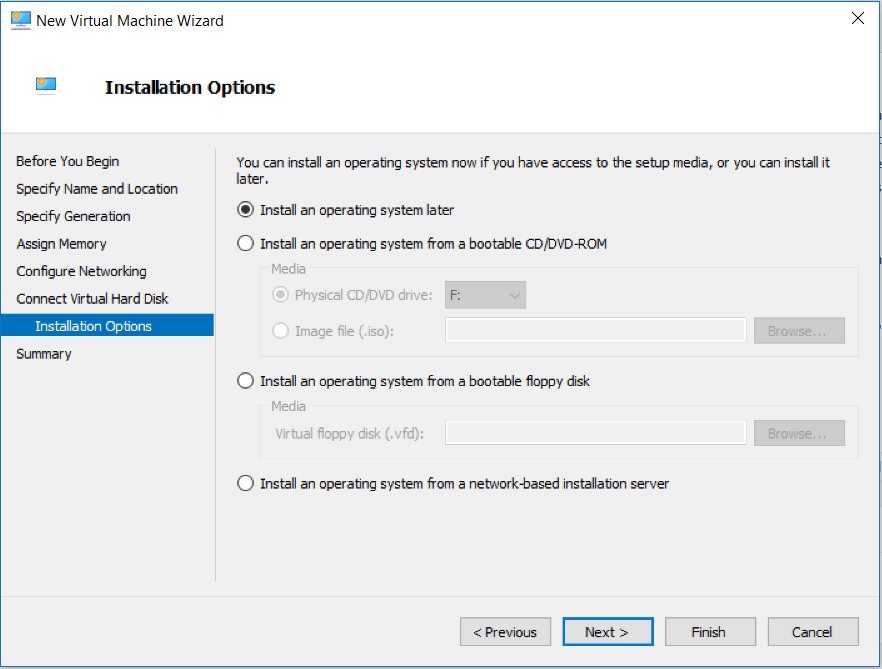
Hyper V Manager – New Virtual machine Wizard – Installation Options dialog box screenshot
Step 8 – New Virtual Machine Wizard – Completing the New Virtual Machine Wizard
This dialog box will show you the summary of the options you have selected. Click Finish to create the Virtual Machine. You will see the process for creating new virtual machine will begin. At the end end you will see Hyper-V Manager with the newly created virtual machine under Virtual Machine Box.
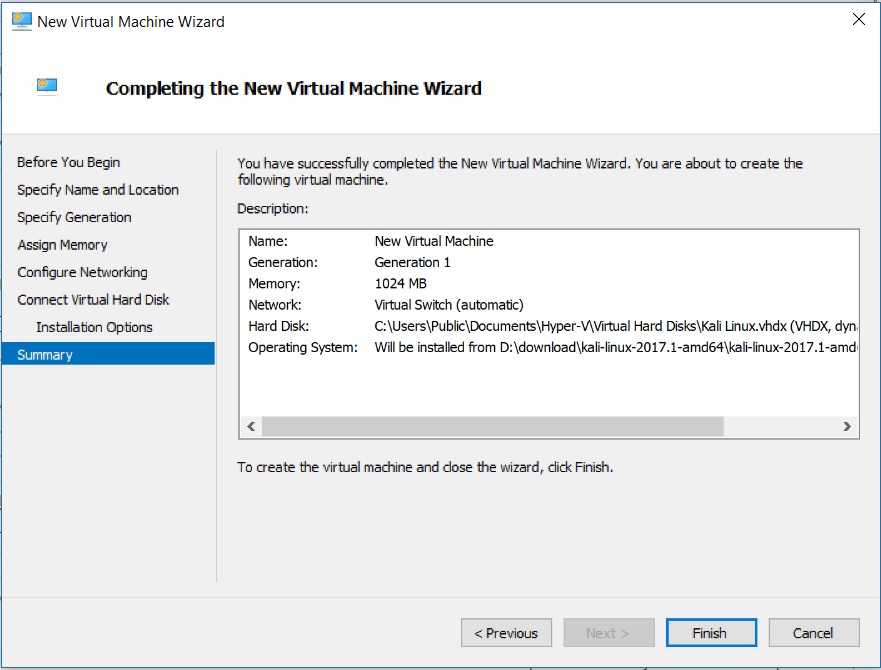
Hyper V Manager – New Virtual machine Wizard – Completing the New Virtual Machine Wizard dialog box screenshot
Step 9 – Hyper-V Manager- Virtual Machine Settings
After the virtual machine is created, you will see the name of the virtual machine listed under Virtual Machines.
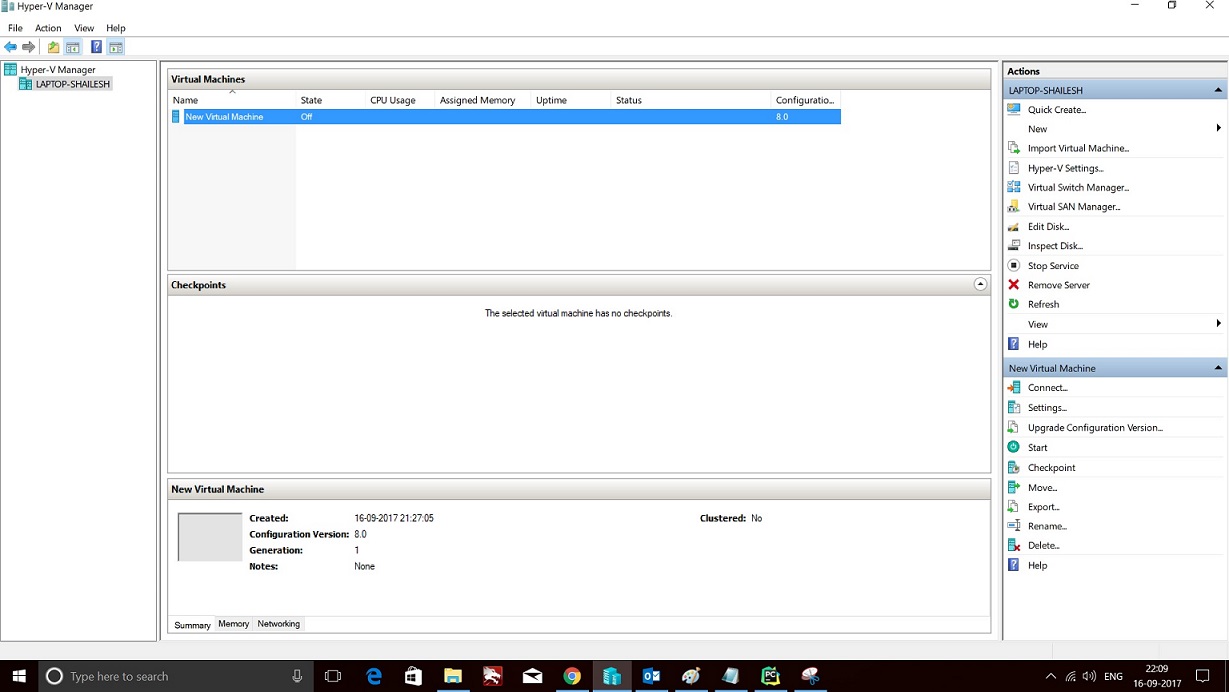
Hyper V manager
Right click on the name of the virtual manager and click on settings to change Virtual machine Options. You will also see settings option on the right hand side, as shown in the screenshot below.
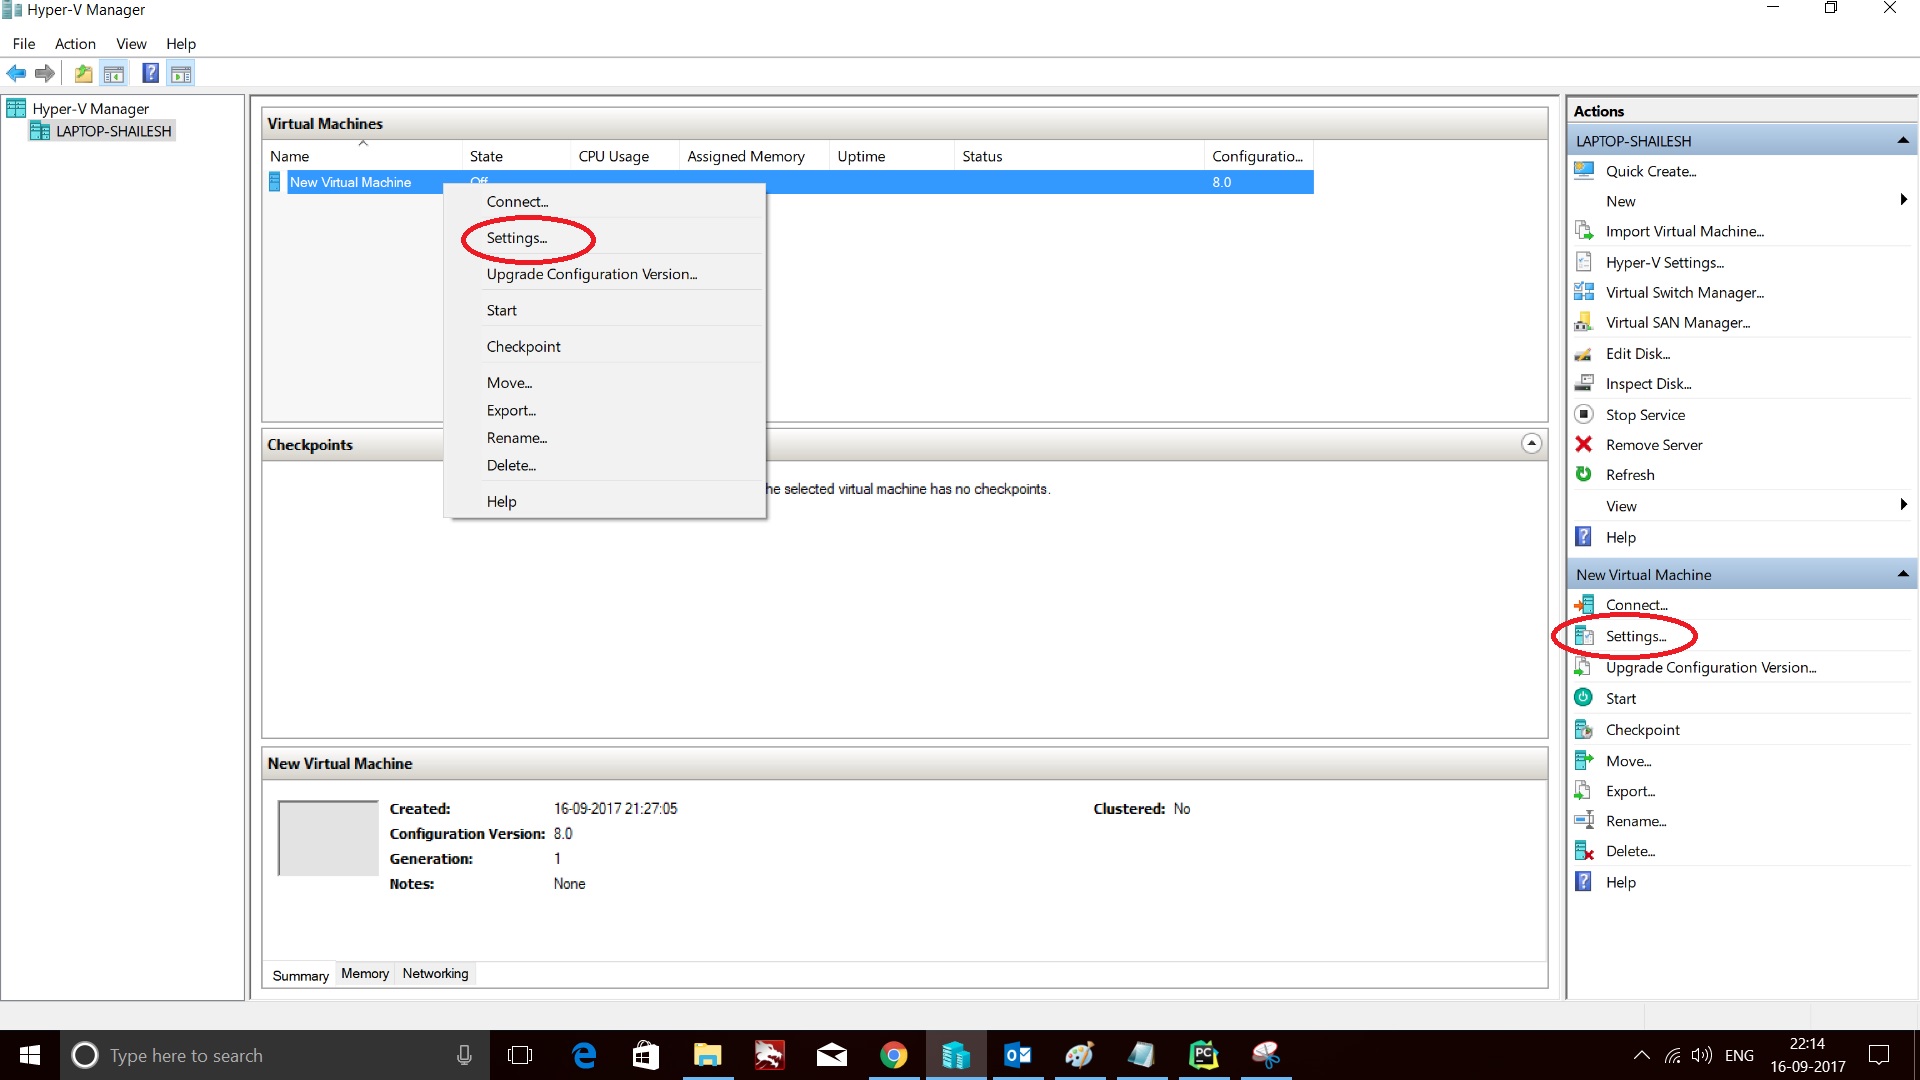
Hyper V_manager – Virtual Machine settings
You can change the following most common virtual machine startup settings such as memory, network, CPU and so on…
-
Change Allocated Memory
here you can specify the memory with which the Virtual machine will start or boot. I normally choose 2048 MB(2 GB) and always check Enable Dynamic Memory.

Hyper V – Virtual Machine – Memory Settings
-
Change the number of Virtual processor
Here you can specify the number of Virtual processors. Normally I set it to 2. It depends on the actual CPU your system has. Since I have i7 CPU (Which has 8 cores), I Normally allocate 2 core to the Virtual Machine.

Hyper V Manager – Specify Processors for Virtual machine
-
IDE Controller
Here you can create virtual Hard drives and DVD drives. By default, one Hard Disk and one DVD drive is created. If you want additional ones, you can create it here.

Hyper V Manager – Virtual Machine Settings – IDE Controller
-
Network Adapter
Here you can specify the network adapter to use for the Virtual machine.

Hyper V Manager – Virtual machine Network Adapter settings
-
Floppy Drive
Here you can specify the floppy drive. Floppy drives and things of the the past and almost extinct. You can leave it as default which is none.
Hyper V Manager – Virtual machine Floppy Drive settings
-
Enable RemoteFX 3D Video Adapter
Enabling RemoteFX 3D Video Adapter give you access to rich graphics such as enabling full screen mode. This step is optional, but recommended.
Go to settings and click on Add hardware. You will see RemoveFX 3D Video Adapter. Click on that and click Add.
Hyper-V Settings – Add hardware
Make your selection from the drop down boxes and click OK.

Hyper-V settings – RemoteFX 3D Video Adapter settings
-
Change Virtual machine name
If you wish to change the name of the virtual machine, you can do it here.
Hyper V manager – Virtual machine Name
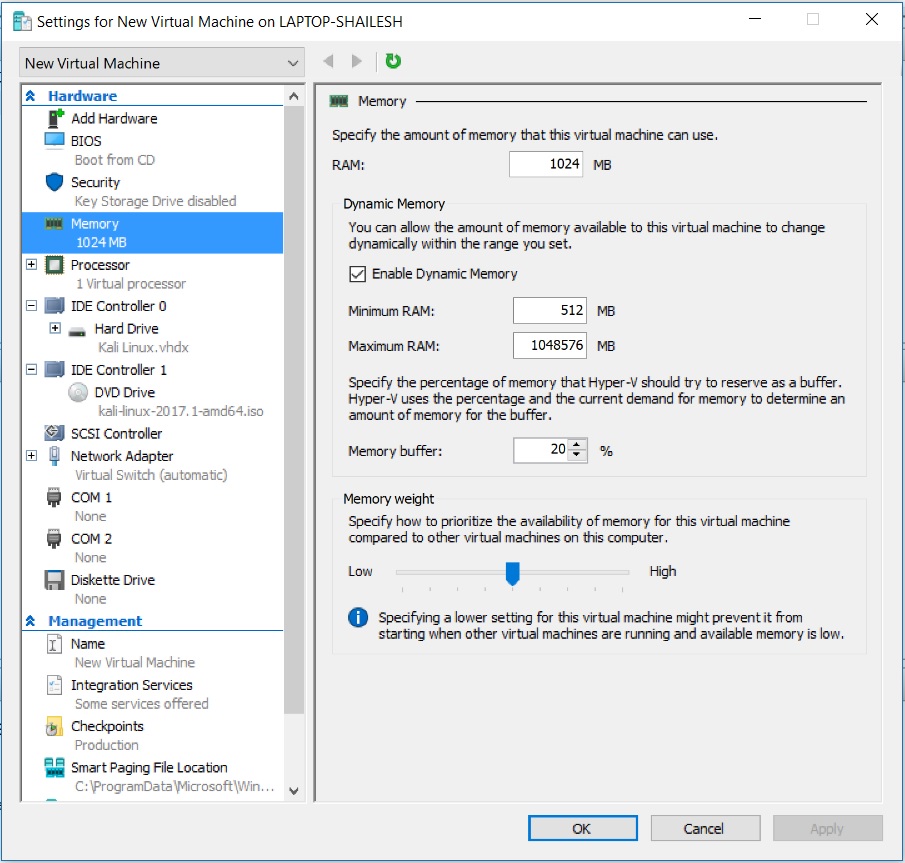
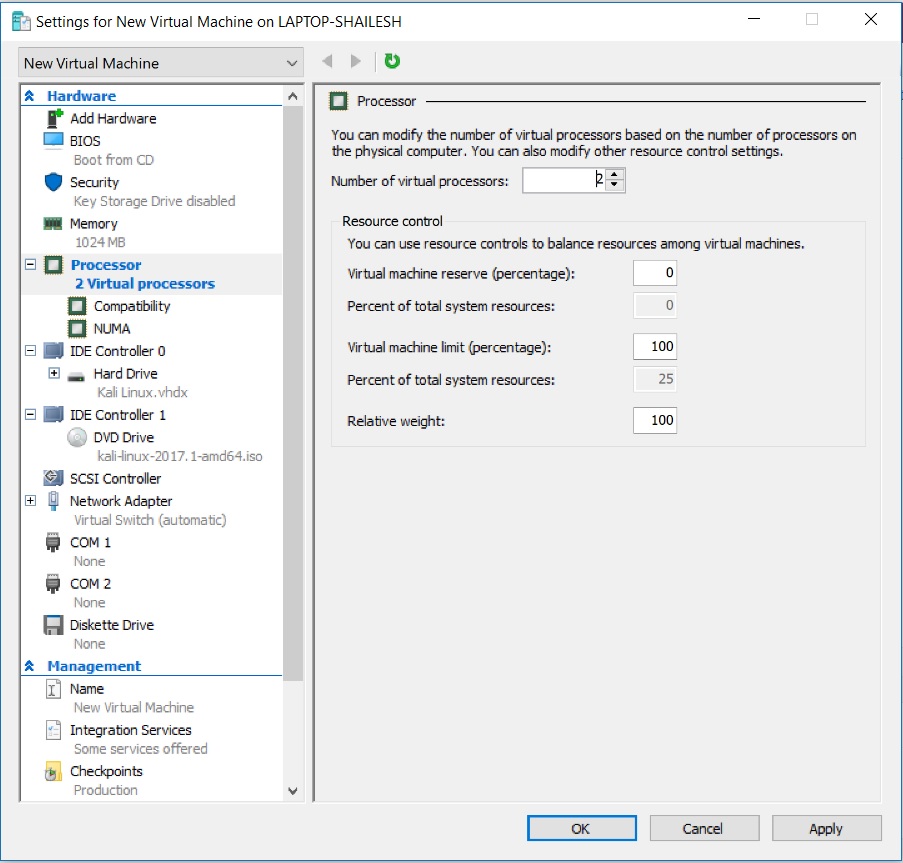
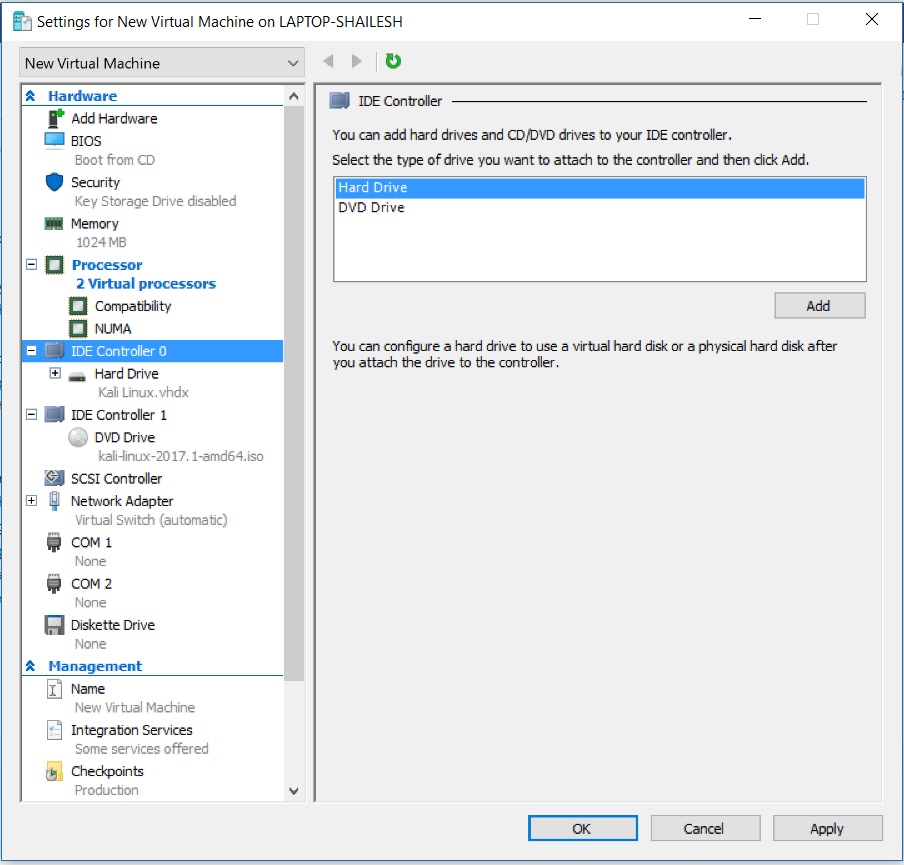
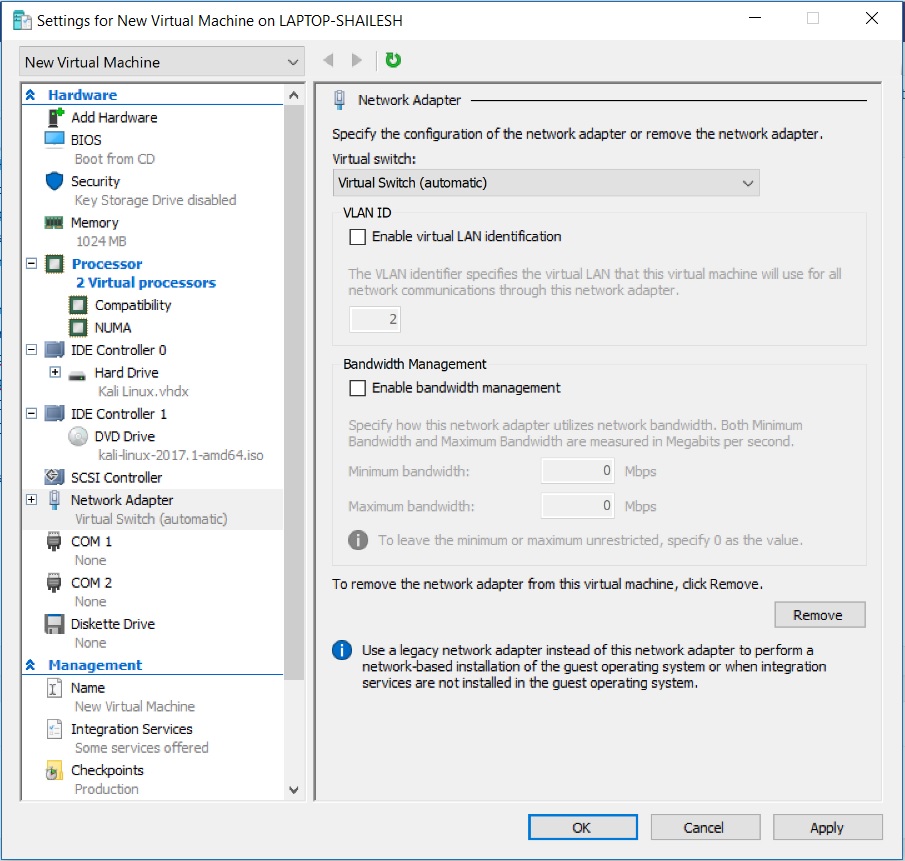
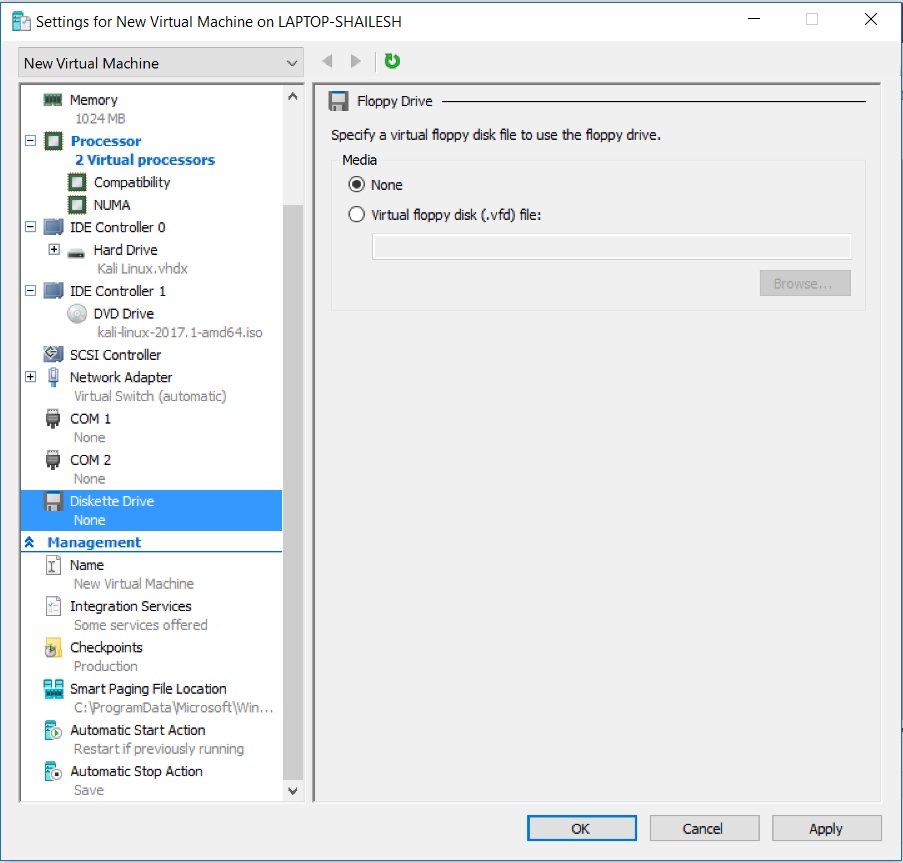
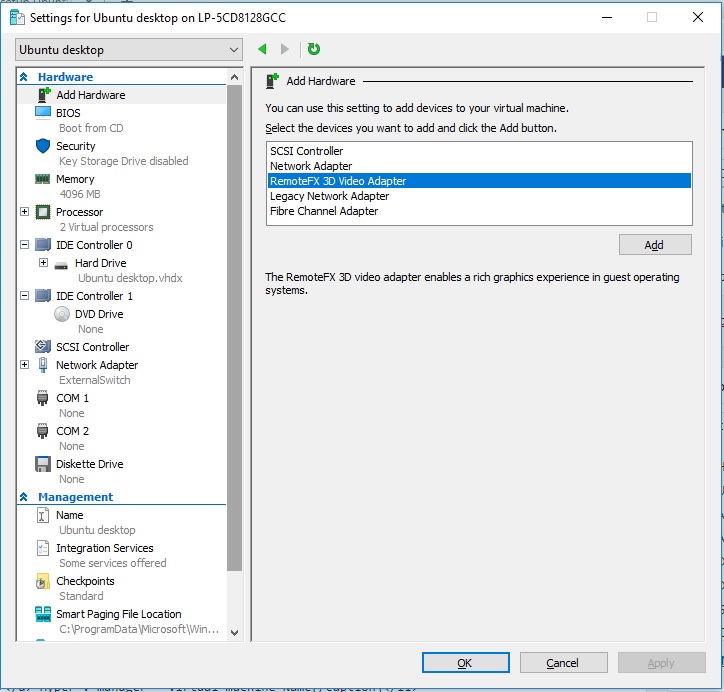
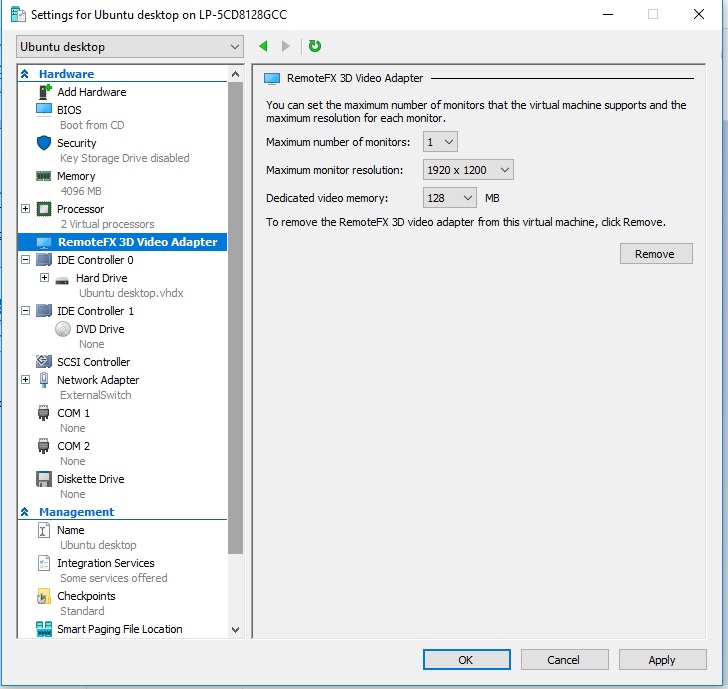
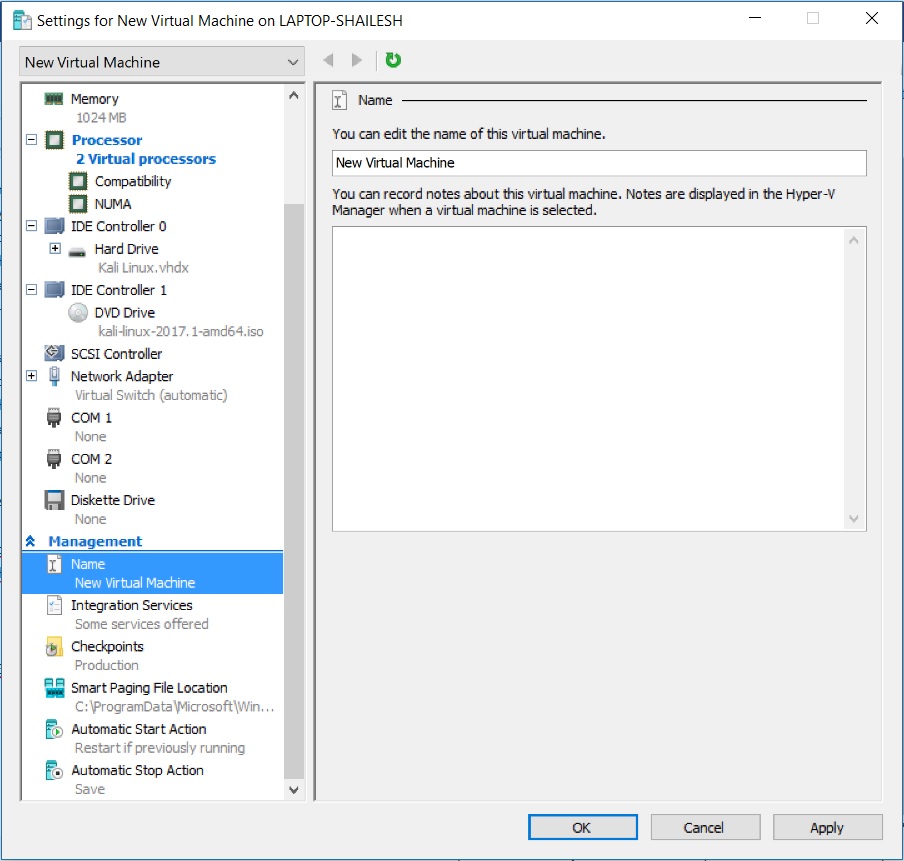
Step 10 – Connect to virtual machine
Now lets get started with the installation process. Click on the Virtual machine name you have created and click on start. This will start the Ubuntu VM. If you don’t see a new window popup, select click on connect. You will see the Virtual Machine window.
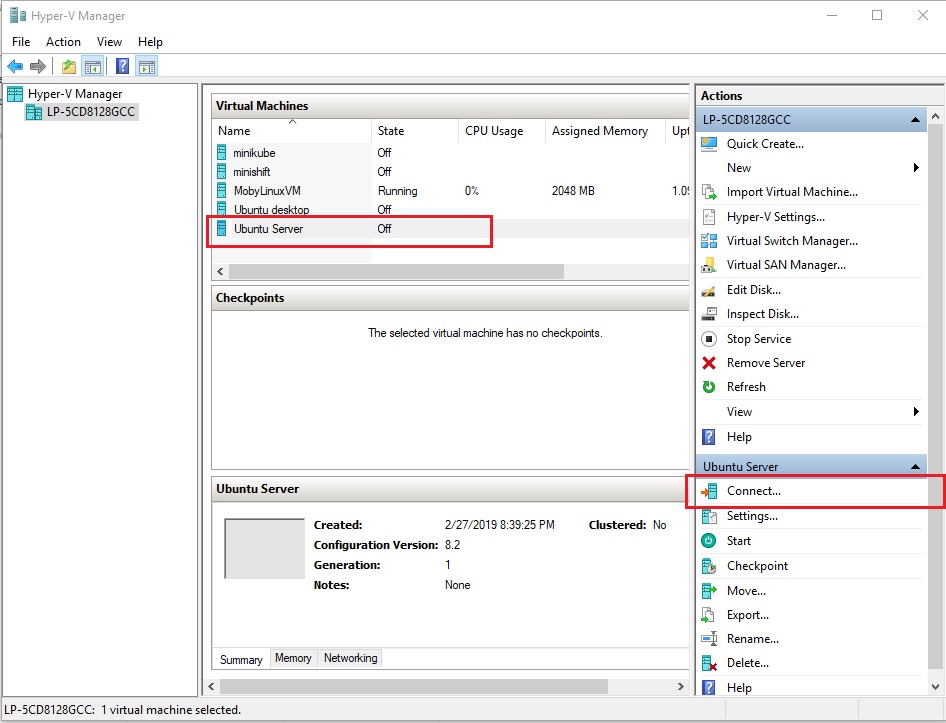
Hyper-V – Install Ubuntu Server
Step 11 – Start virtual machine
If you have clicked on Connect, you will see the screen below. You will have to click start to start the VM. If you have clicked start first, VM will start but you will not see the below window. In that case you will have to click on Connect.
Click on Start to start VM.
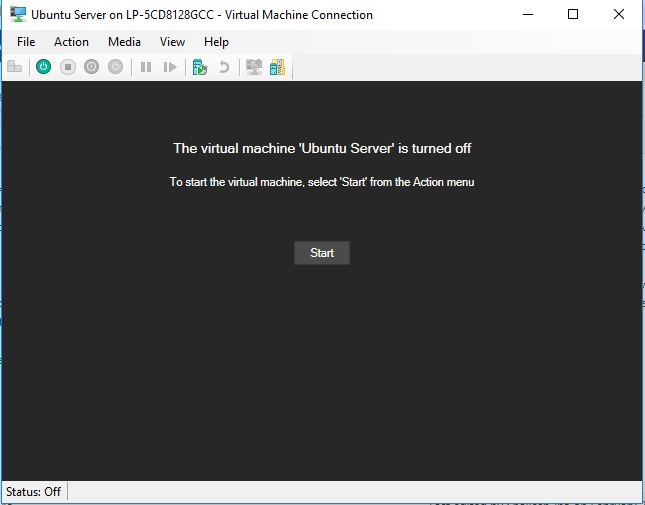
Hyper-V – Install Ubuntu Server – Start VM
Ubuntu installation process should start.
You will see a lot of activity such as the below screenshot before the Ubuntu Server Installer window shows up. Please be patient.
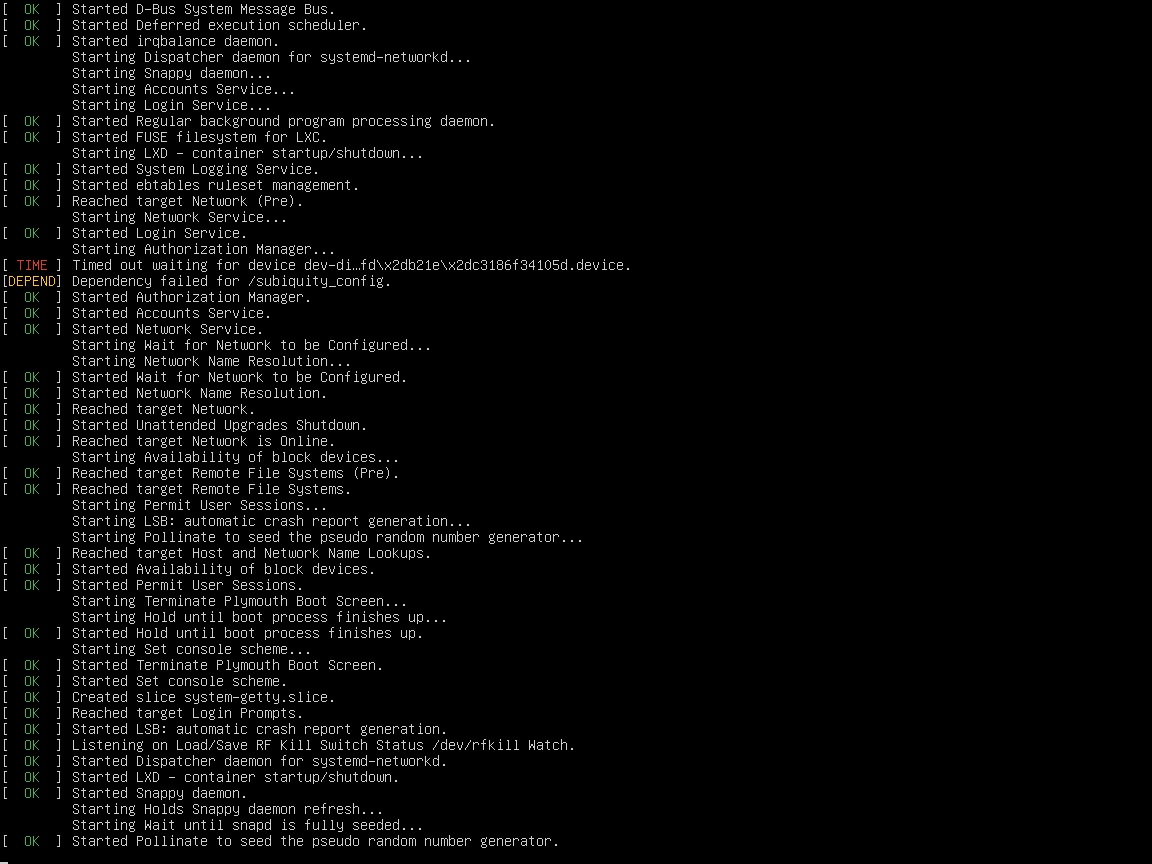
Hyper-V – Ubuntu Server starting up
Step 12 – Select Language preference
After sometime you will see a windows asking for your language preference. Make your choice by up and down arrow and press enter.
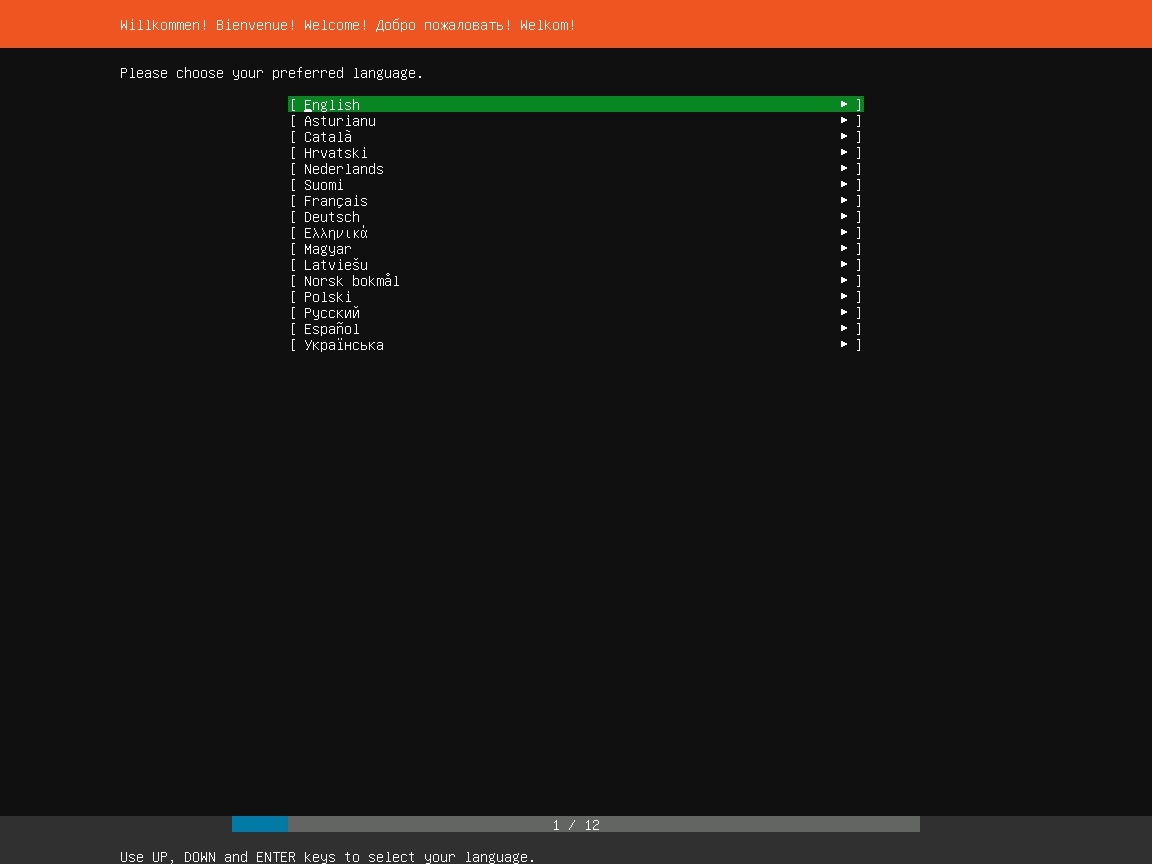
Ubuntu Server Installation – Language Selection
Step 13 – Select Keyboard preference
Here you will be asked to set your keyboard preference. I normally leave it as default. If you want to change it, use the up and down arrow key and press enter to see the list of available options. Once done press the enter key to select and use the up and down arrow key to go to done square box at the bottom of the screen and press enter.
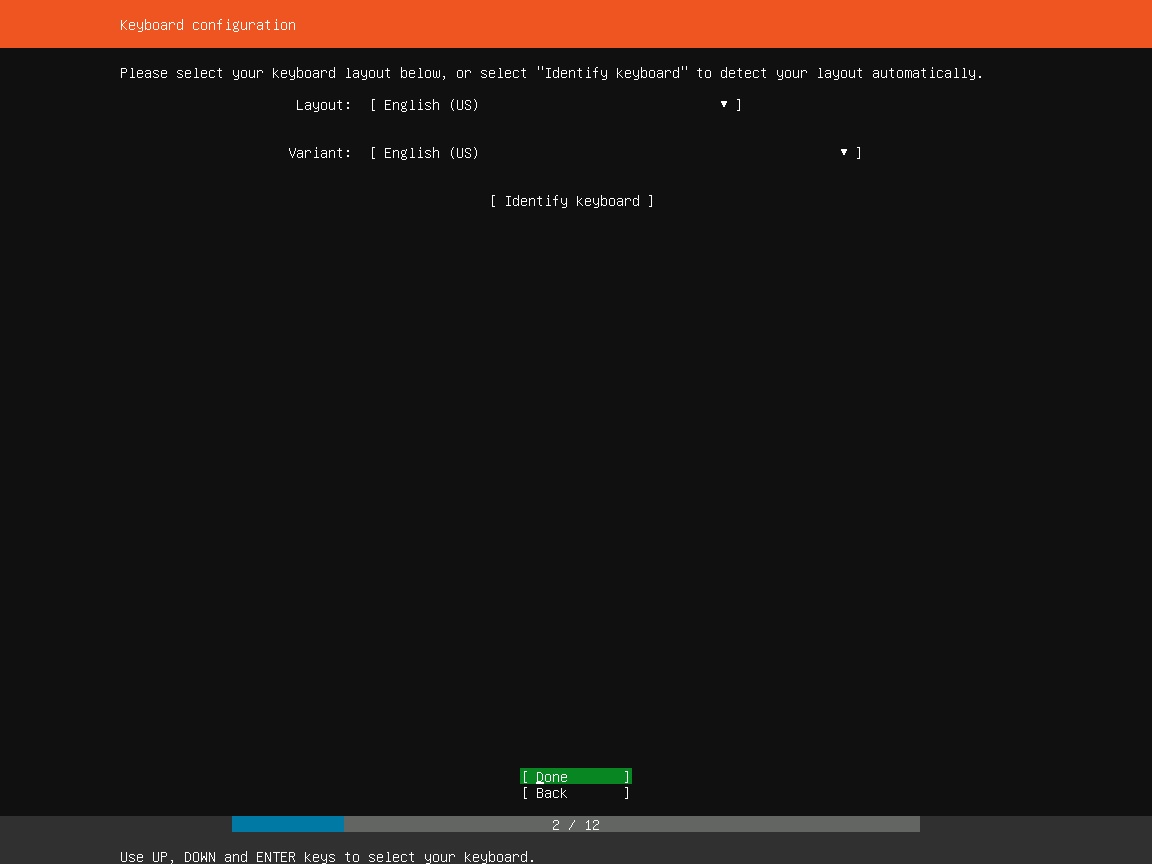
Ubuntu Server Installation – Set Keyboard preference
Step 14 – Select how you want to install Ubuntu Server
Here you will see the option to install Ubuntu using MAAS, which stands for Metal as a Service. Since we are installing Ubuntu Server on Hyper-V, We wont go into the details of it. If you are interested, please visit the official MAAS site.
Select the default option Install Ubuntu and hit enter.
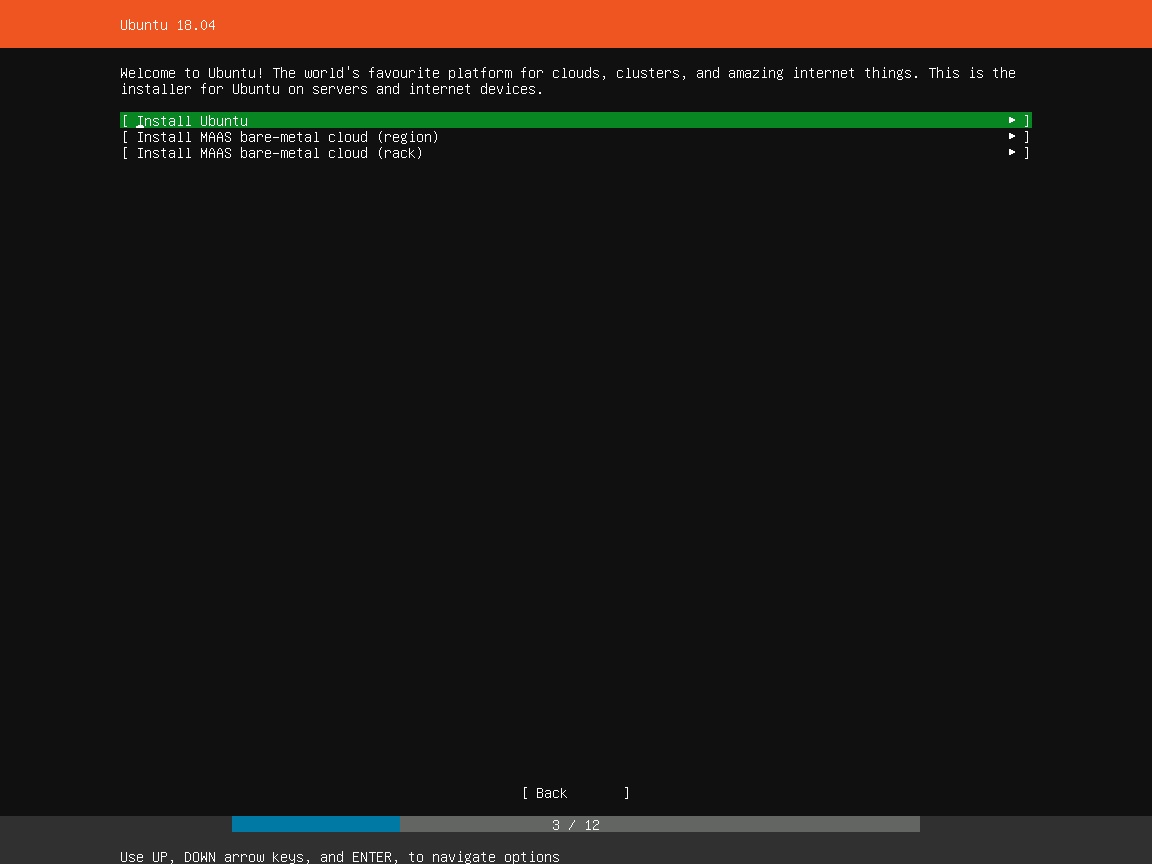
Ubuntu Server Installation
Step 15 – Select Network Connections
Here you will be asked to specify the network connection. You can use the arrow keys to move up and down and hit enter to change the configuration. Press ESC key to go back to the previous screen.
I normally leave these as the default. Use the arrow key to go to the Done at the bottom of the screen and hit enter.
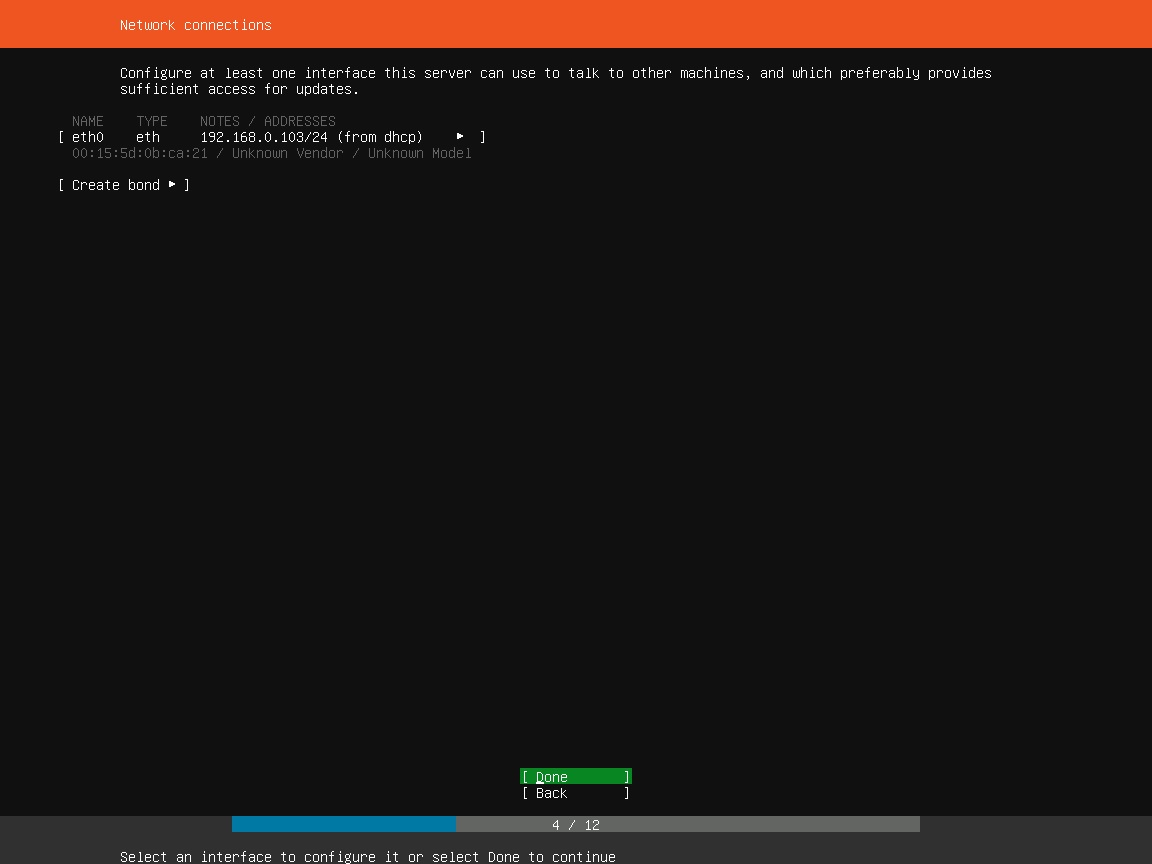
Ubuntu Server Installation – Network Connections
Step 16 – Configure Proxy
If you use Proxy to connect to the internet, you can provide the details here. This normally happens in restricted environments such as Office. I leave it as blank and go to Done at the bottom of the screen and hit enter.
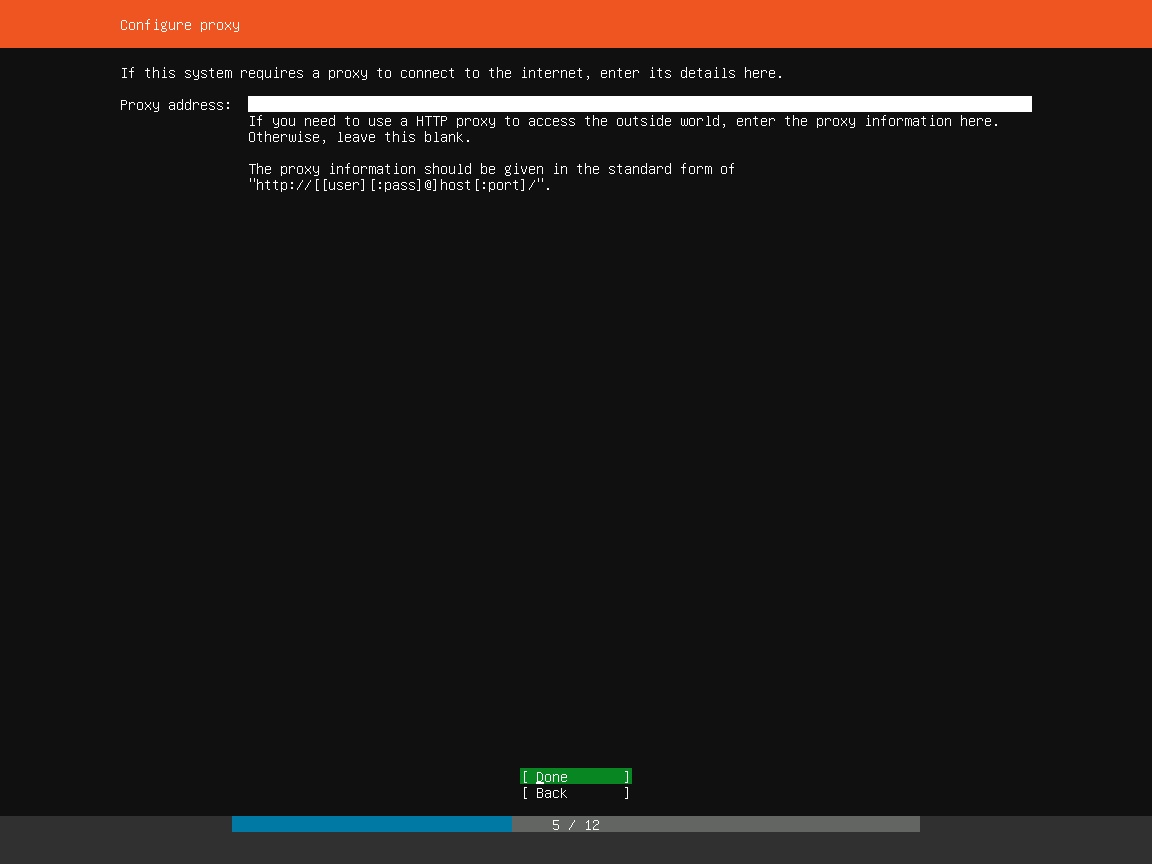
Ubuntu Server Installation – Configure Proxy
Step 17 – Configure Ubuntu Archive Mirror
Here you can enter the alternate Ubuntu Archive Mirror. I leave it as it is, that is the default Ubuntu Mirror.
Hit enter to continue.
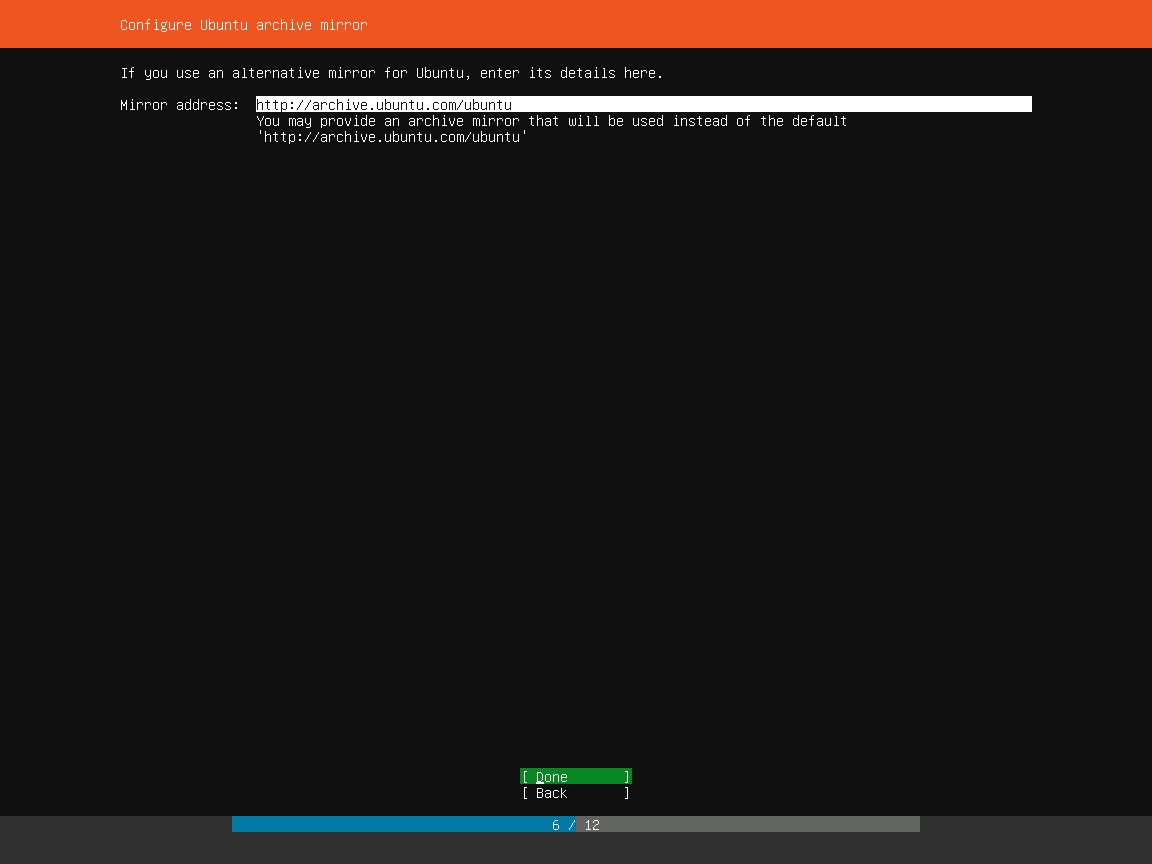
Ubuntu Installation – Configure Ubuntu Archive Mirror
Step 18 – File System setup
Here you will have to specify how the file system should be used. I use the default option which is Use the Entire disk. I suggest you should use this also. Hit enter to continue.
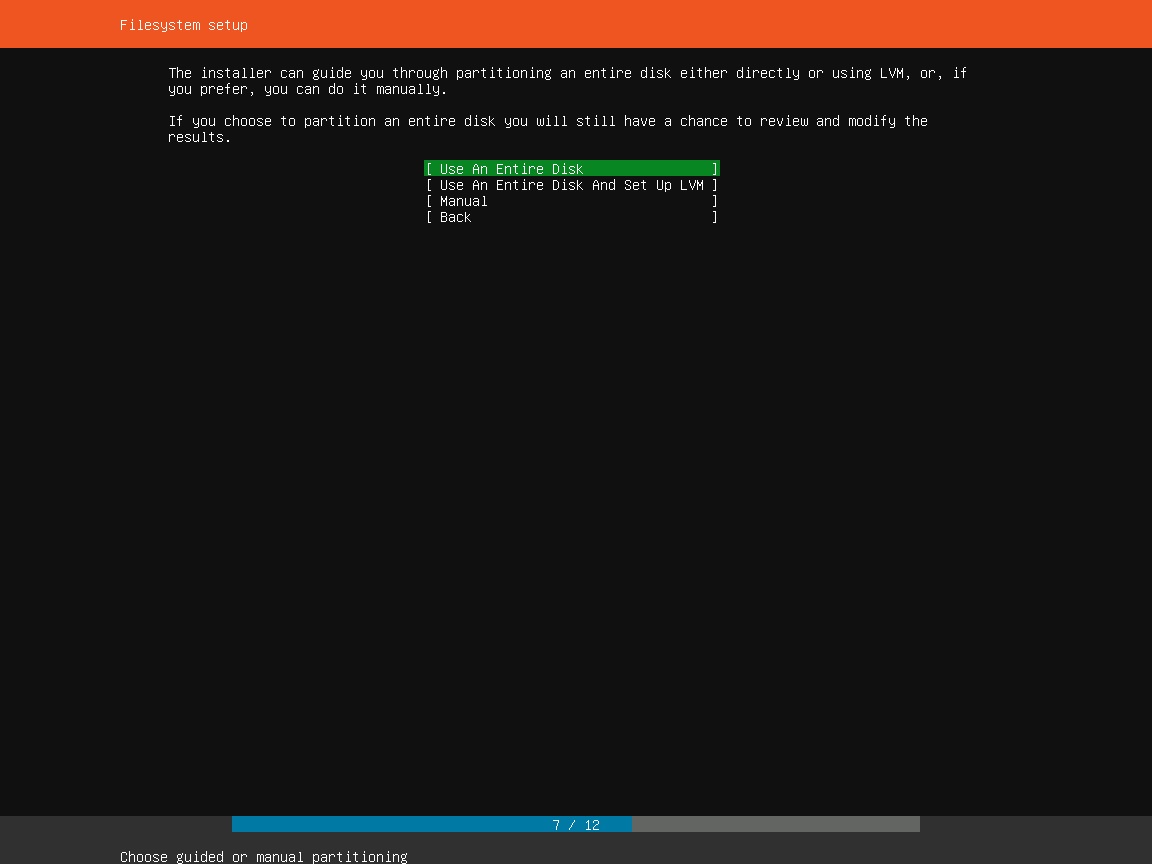
Ubuntu Server Installation – File System Setup
Step 19 – File System setup – Choose disk to install
Now you will be asked to choose the disk to install Ubuntu Server. Choose the default and hit enter.
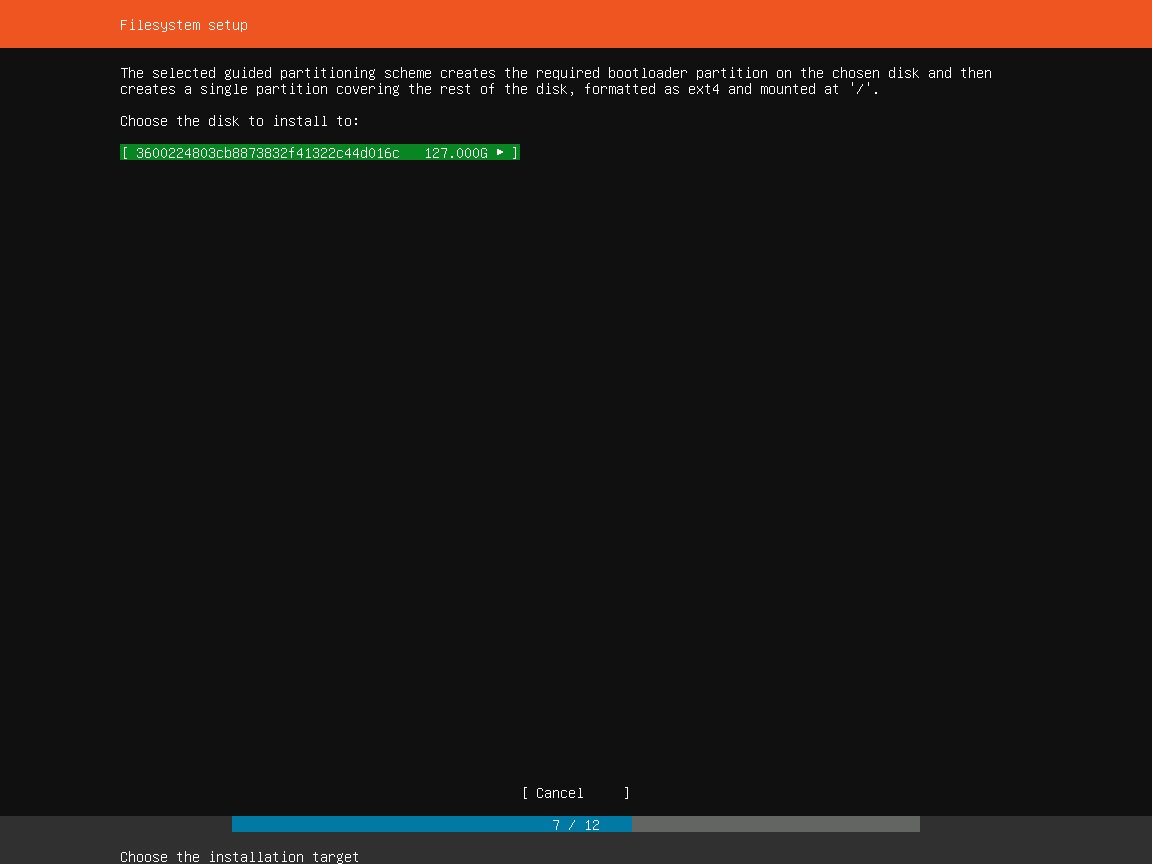
Ubuntu Server Installation – Filesystem setup – choose disk
Step 20 – File System setup – Verify File system information
Here you will see the summary of file system information that we can setup in previous steps. Leave it as it is and hit enter to continue.
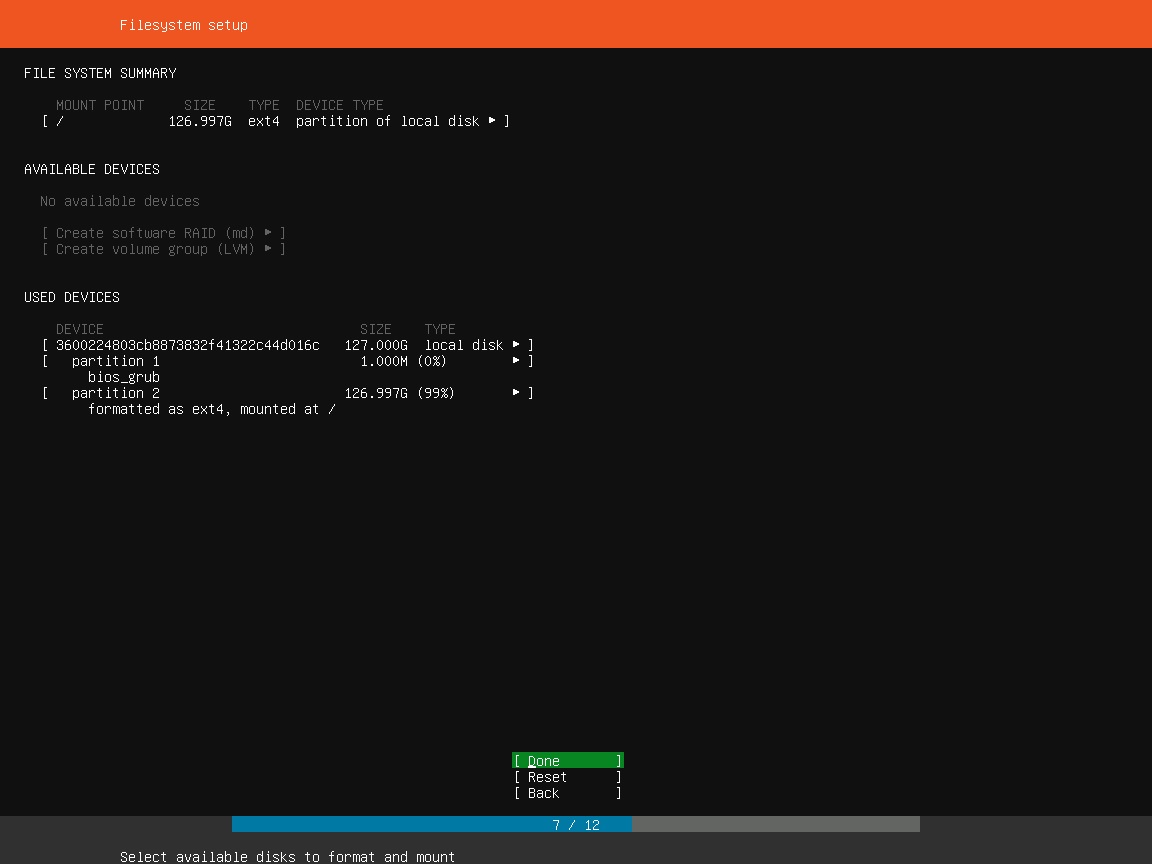
Ubuntu Server Installation – Filesystem installation summary
Step 21 – Confirm to continue with installation
Now you will see a warning, asked to confirm if you want to proceed with the installation. Use the arrow key to select confirm and hit enter to begin the installation process. Installation progress you can see at the bottom. Installation will progress from here but you will have to configure profiles etc. in the next steps. So lets continue.
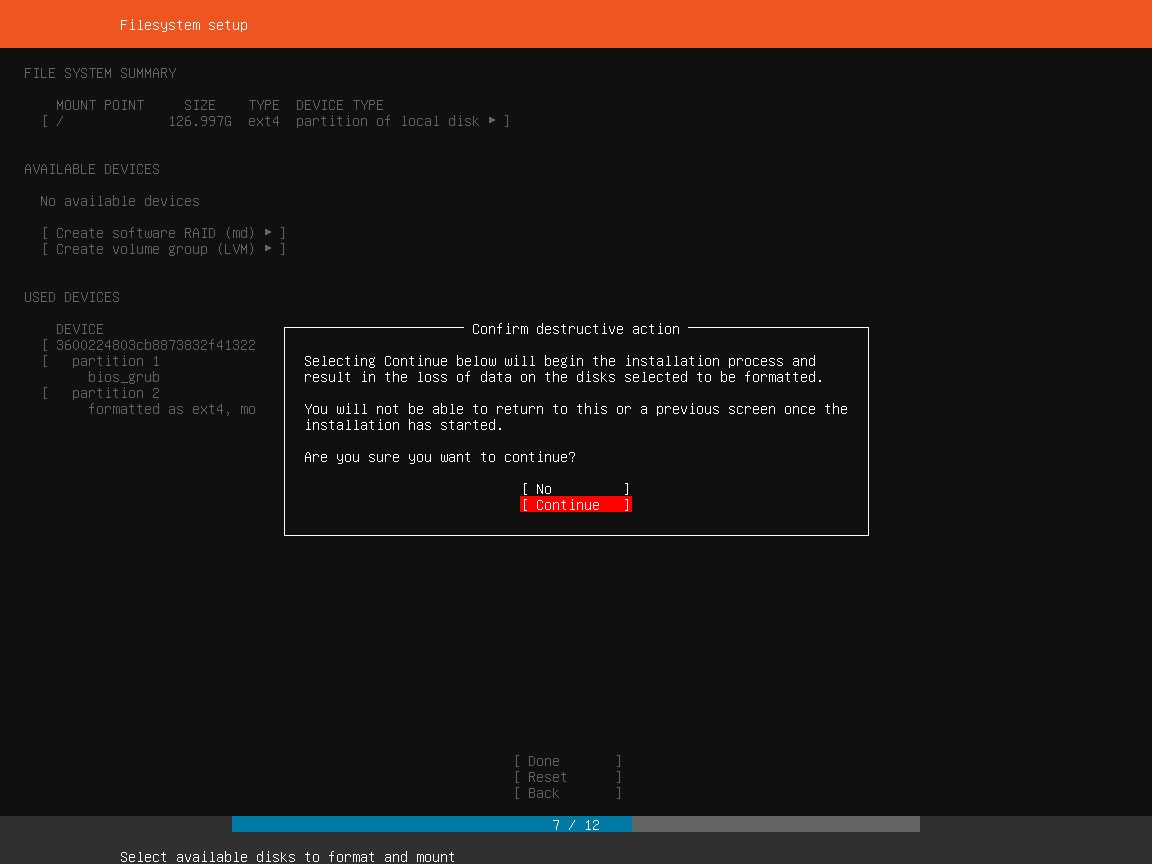
Ubuntu Server Installation – Confirm to start installation
Step 22 – Setup profile
Here you will be asked to enter your profile details such as password, username, server name and so on. Use the up and down arrow key to enter the values and hit enter.
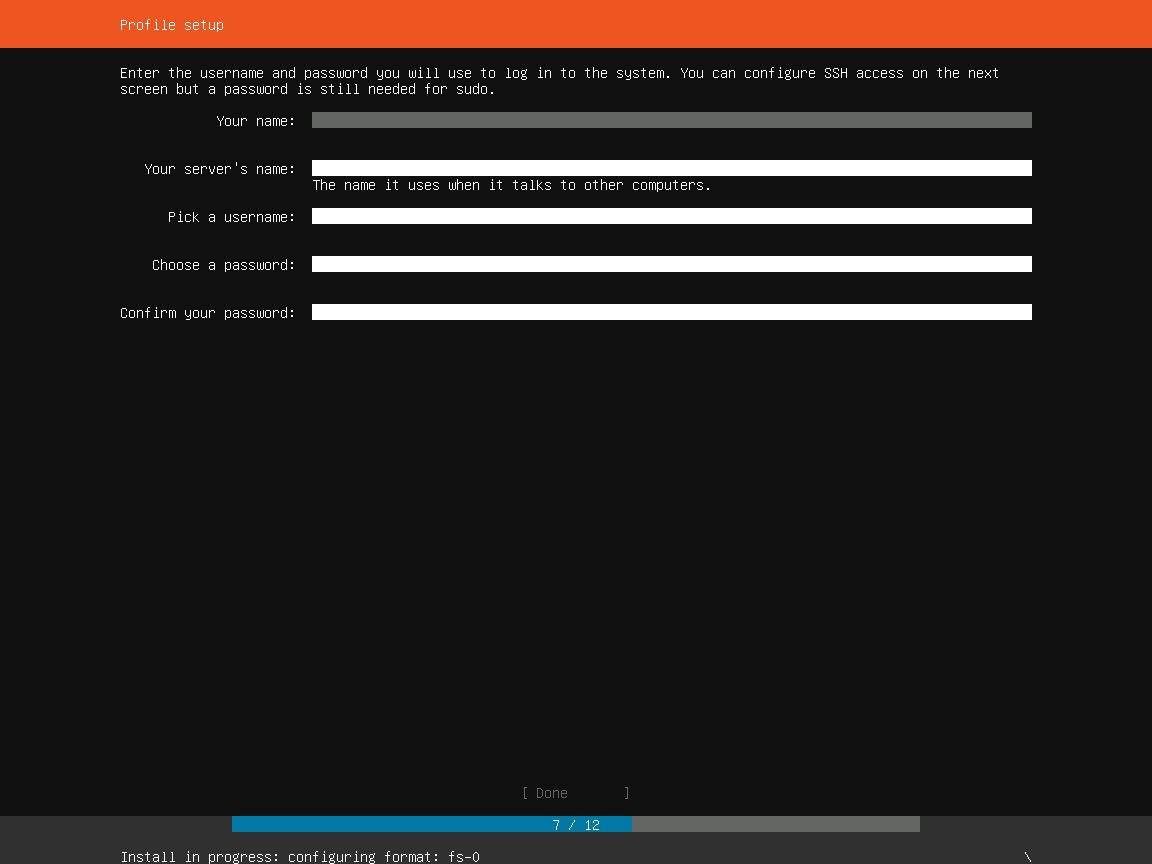
Ubuntu Server Installation – Profile setup
Step 23 – Setup OpenSSH server
Here you will be asked if you want to setup openSSH server. This will allow you to access your server from SSH client such as Putty. It is recommended that you install OpenSSH server. Hit enter to select install OpenSSH server. Import SSH identity, leave it as no and hit enter to continue.
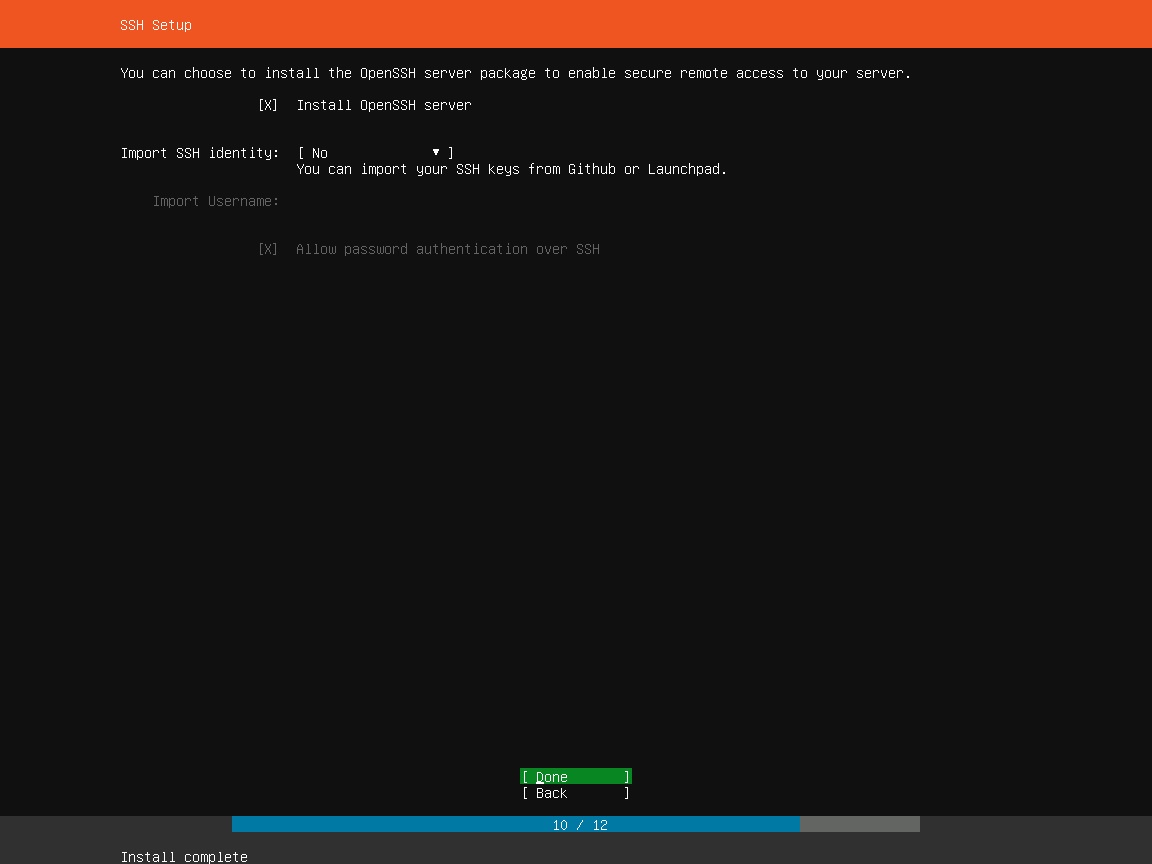
Ubuntu Server Installation – OpenSSH server setup
Step 24 – Feature and Server Snaps
here you will asked to select what server features or software you want to install. Hit spacebar to select/deselect and up and down arrow key to go up and down. Once done go to done at the bottom and hit enter to continue.
Make sure that you provide sufficient memory(at least 8 GB) if you wish to install Docker and Kubernetes. Else the performance will be too bad.
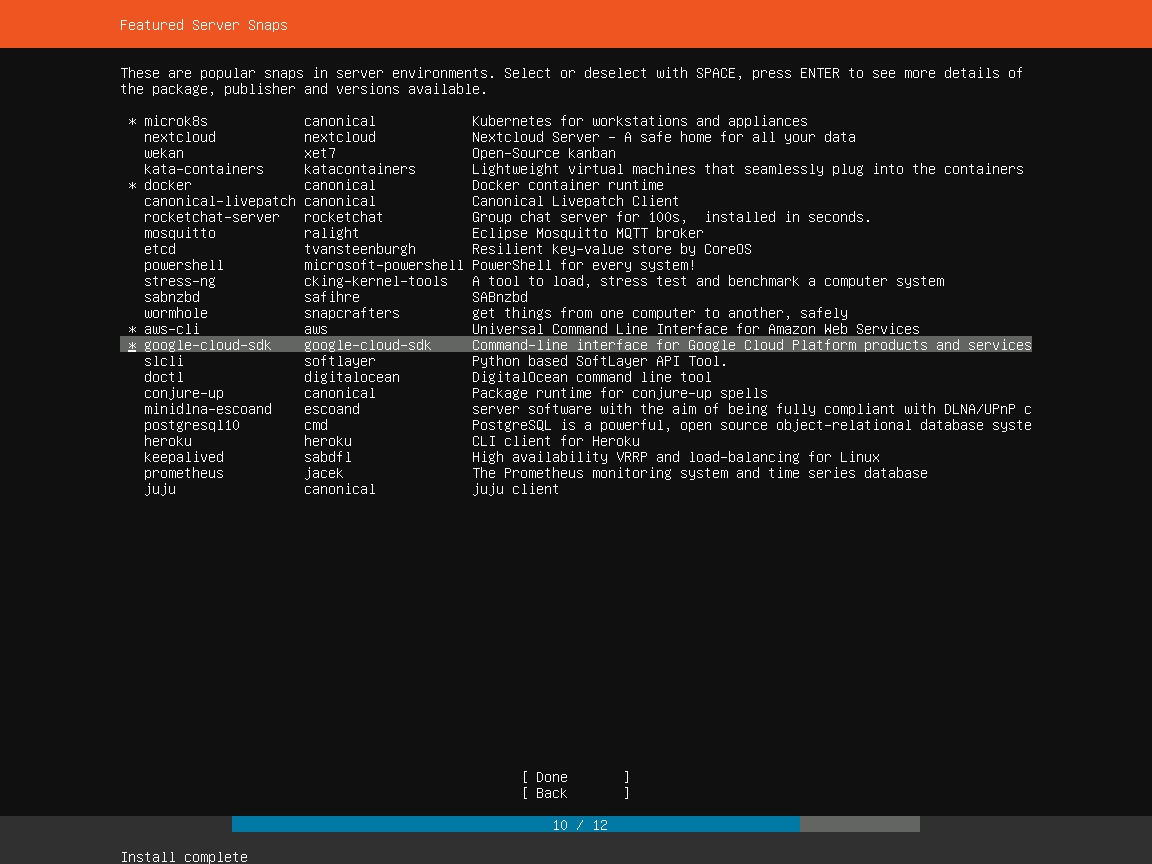
Ubuntu Server Installation – Featured Server snaps
Step 25 – Installation Complete
Installation will continue and you will see installation complete window. You are done.
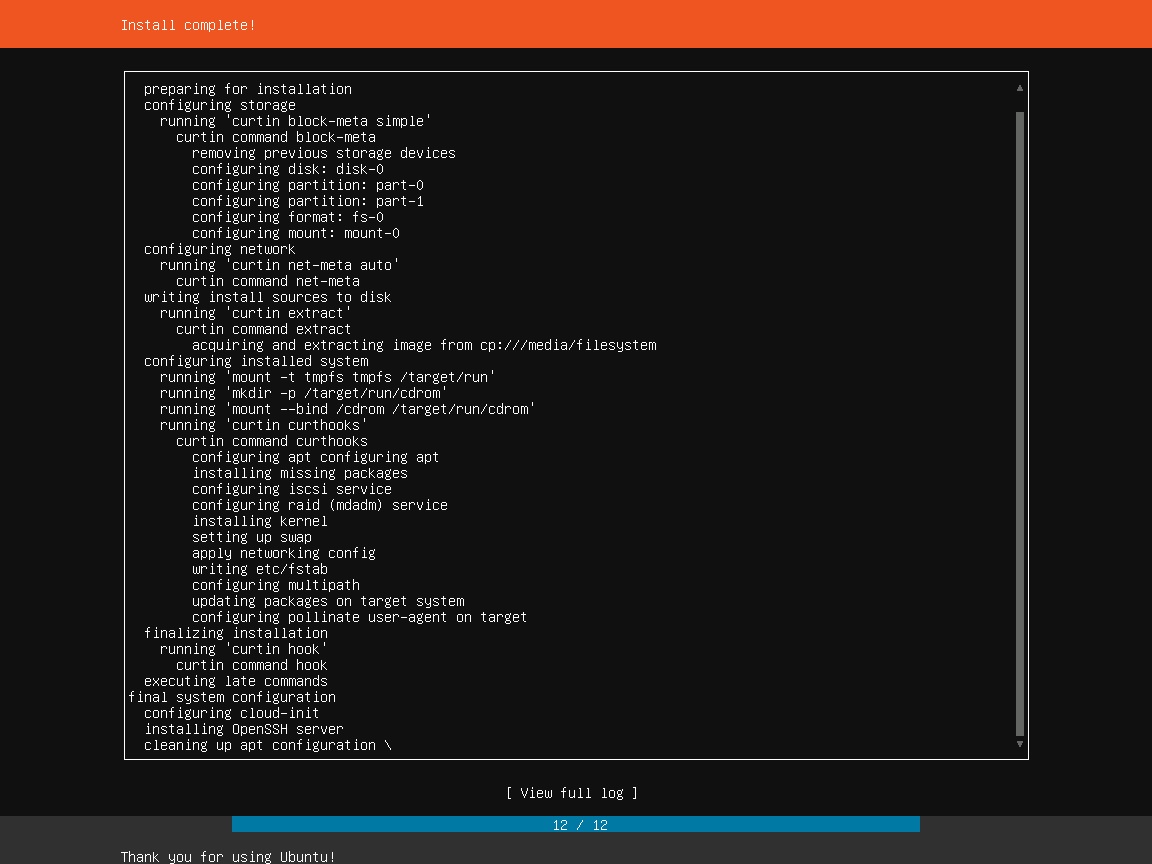
Ubuntu Server – Installation Complete
Scroll down using down arrow key and you will see Reboot now option. Select that and hit enter to complete the process.
The VM will restart and you will be asked to remove media. You can double check if there any installation ISO by going to Media->DVD drive.
In y case there was not media after reboot. Hit enter to continue.
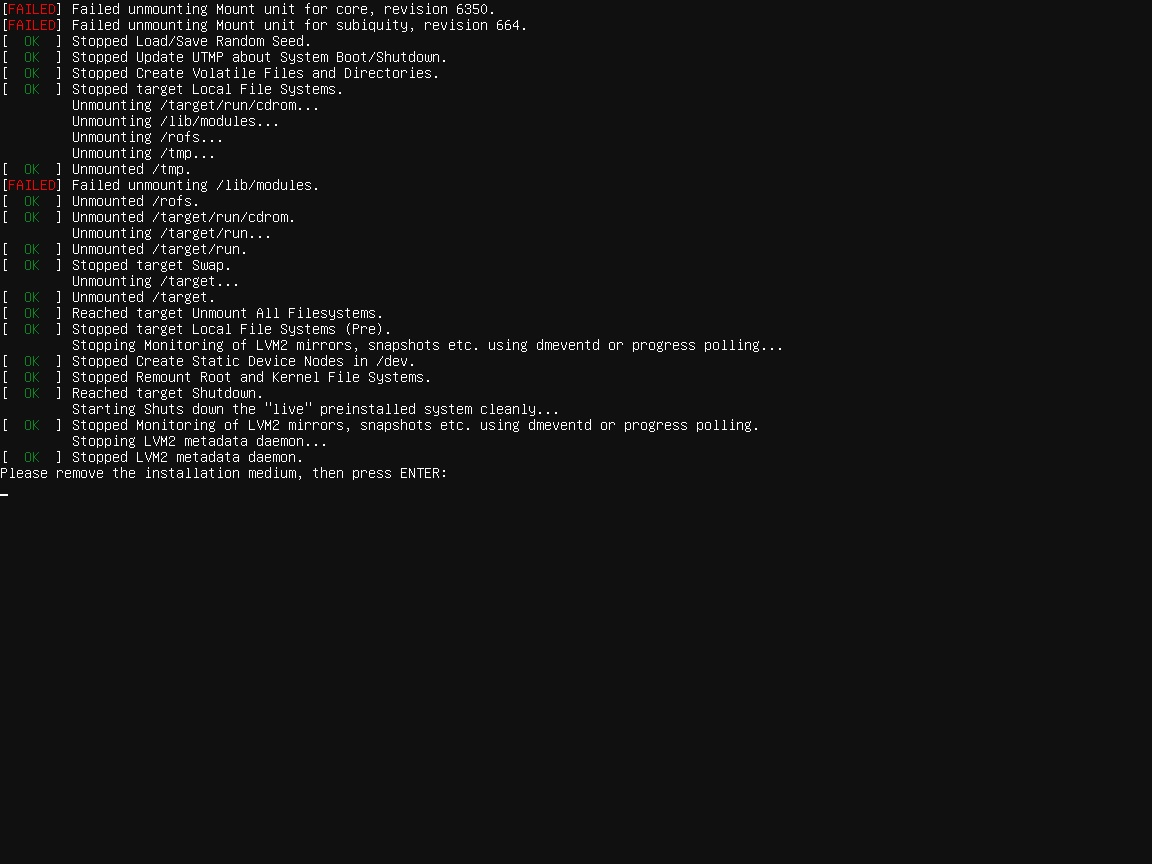
Ubuntu Server installation – Reboot – Remove installation media
Wait for VM to restart.
You will see login screen, enter username and password you setup during installation in the previous steps to login.

Ubuntu Server login screen
That’s it you are done.