Running the command:
file run.sh
Gives me:
run.sh: Bourne shell script text executable
in Linux. Is there an equivalent command in Windows?
![]()
Gaff
18.6k15 gold badges57 silver badges68 bronze badges
asked Apr 18, 2011 at 8:23
![]()
6
There probably isn’t one on your system by default. You could install the Cygwin tools suite (ports of GNU commands to the Win32 APIs). There used to also be the MKS Toolkit and another one whose name escapes me at the moment. MKS was commercial, Cygwin, of course was GNU/GPL, and the other won was eventually renamed (from OpenNT?) and later acquired by Microsoft and incorporated into some sort of MSDN suite for Win2K or Server 2003 or something like that.
For any of those you’d just run the ‘file’ command on your target files just as you would under UNIX. You might have to start them under the included UNIX-like shell (bash, for Cygwin, ksh or MKS Toolkit, and who knows what for the other one).
answered Apr 18, 2011 at 8:31
![]()
Jim DennisJim Dennis
4543 silver badges10 bronze badges
2
As others have said, there’s nothing built into Windows. If you’d like an alternative to the file ports, check out TrID. The developer also makes the analyzer available as both a Win32 DLL or a .NET Assembly.
answered Apr 18, 2011 at 15:11
![]()
afrazierafrazier
23k3 gold badges60 silver badges88 bronze badges
1
On Windows 10, you can now install Bash. Once that’s installed, you’ll have access to the same File command that Ubuntu uses. It might be a bit overkill to do all this just for the one command, but I find it quite useful.
answered Jan 15, 2017 at 19:08
![]()
GaryGary
7568 silver badges17 bronze badges
1
Not built-in; Windows uses file-extensions to determine file-type. I’m pretty sure that there’s a port of file in Cygwin, though.
answered Apr 18, 2011 at 8:31
2
Take a look at File.exe — a small program similar to the Unix / Linux file executable which can examine files, in this case it is designed to query an executable file and display the processor that the file was compiled to run on and any other details it can report on.
answered Apr 18, 2011 at 8:32
Try getting a copy of cmder.exe you can run without installing and it has nix commands built in. You can also add any additional commands you might want that will load into path on launch.
answered May 22, 2019 at 17:14
![]()
If you have WSL installed, you can simply use the file command on Windows file system folder /mnt/.
Example:
file /mnt/c/"Program Files"/Notepad++/notepad++.exe
The output will be something similar to:
/mnt/c/Program Files/Notepad++/notepad++.exe: PE32+ executable (GUI)
x86-64, for MS Windows
answered Mar 31, 2021 at 11:13
![]()
RainRain
1011 bronze badge
You must log in to answer this question.
Not the answer you’re looking for? Browse other questions tagged
.
Not the answer you’re looking for? Browse other questions tagged
.
Под GNU/Linux-дистрибутивы создано огромное количество полезных и удобных инструментов и приложений для обычных пользователей и разработчиков. Далеко не всё из этого доступно на Windows, но, к счастью, для ОС от Microsoft есть решения, исправляющие эту проблему.
WSL — официальная подсистема Linux внутри Windows
В Windows 10 существует крайне полезная вещь под названием Windows Subsystem for Linux (WSL). Она позволяет использовать GNU/Linux-среду прямо в Windows и запускать не только команды, но и, например, Bash-скрипты. Для использования WSL необходимо следовать инструкции ниже.
Шаг 1. Проверьте, подходит ли текущая версия Windows требованиям. Для этого нажмите сочетание клавиш Win+R, затем введите winver. Найдите строку «Сборка ОС» — она должна быть свежее версии 14316.
Шаг 2. Запустите стандартную утилиту PowerShell от имени администратора и введите в ней команду для включения WSL:
dism.exe /online /enable-feature /featurename:Microsoft-Windows-Subsystem-Linux /all /norestart
Шаг 3. Если версия Windows, определённая в первом пункте, свежее 18362, вы можете установить WSL 2, который в разы быстрее первой версии и обладает доработанным ядром. Введите команду ниже, если нужно установить WSL 2:
dism.exe /online /enable-feature /featurename:VirtualMachinePlatform /all /norestart
После этого скачайте и установите пакет обновления с официального сайта.
Шаг 4. Перезагрузите компьютер. Если была произведена установка WSL 2, введите в PowerShell от имени администратора следующую команду:
wsl —set-default-version 2
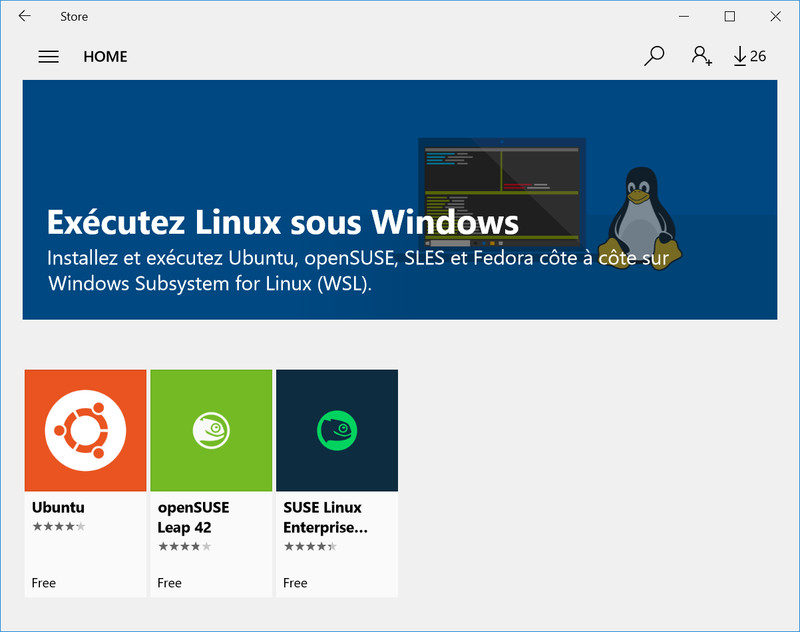
Шаг 5. После перезагрузки откройте фирменный магазин приложений Microsoft Store и найдите подходящий GNU/Linux-дистрибутив. Самым популярным является Ubuntu — вы можете установить любую версию из представленных в Microsoft Store.
Шаг 6. Как только установка завершится, найдите дистрибутив в меню «Пуск» и запустите его.
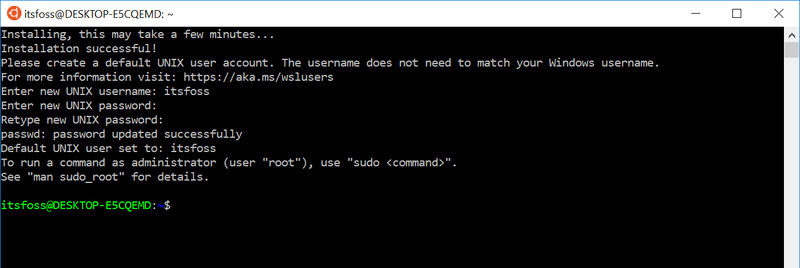
Шаг 7. Пройдите этап первоначальной настройки, введя имя нового пользователя и придумав пароль.
Шаг 8. Теперь различные GNU/Linux-команды можно выполнять, запустив дистрибутив, либо введя в командной строке wsl <команда>. Например, для просмотра всех файлов в текущей директории достаточно в командной строке выполнить wsl ls -a.
Обращу внимание на то, что путь к дискам в WSL отличается от такового в Windows. Вместо привычного C:/ используйте /mnt/c/. Также не забывайте про экранирование пробелов с помощью символа \ — это также пригодится при вводе путей к файлам.
Помимо выполнения базовых команд, с помощью WSL можно даже запускать приложения с графическим интерфейсом. Правда, рассчитывать на большое количество поддерживаемых подобных программ не стоит.
Шаг 1. Загрузите X-сервер и установите его.
Шаг 2. Запустите его с помощью ярлыка на рабочем столе. В открывшемся окне выберите вариант Multiple windows, затем Start no client. Завершите настройку кнопкой Finish.
Шаг 3. Откройте дистрибутив через меню Пуск и выполните команду export DISPLAY=:0
Шаг 4. Запустив приложение с графическим интерфейсом в WSL, вы увидите новое окно прямо в Windows.
CoreUtils — лёгкий инструмент для запуска базовых команд
Плюс данной утилиты — возможность запуска не только на Windows 10, но и на более старых версиях ОС. Кроме того, она легка и не занимает много места. Не обошлось без недостатков — программа скудна на функционал и не обновлялась очень давно. Она не только не умеет запускать скрипты и приложения с GUI, но и поддерживает лишь самые базовые GNU/Linux-команды. Установка CoreUtils весьма проста.
Шаг 1. Скачайте утилиту с официального сайта.
Шаг 2. Следуйте инструкциям установщика.
Шаг 3. Откройте «Панель управления», в разделе «Система и безопасность» выберите пункт «Система». На панели слева откройте «Дополнительные параметры системы». Нажмите кнопку «Переменные среды» и в открывшемся окне найдите область с заголовком «Системные переменные». В случае, когда там есть переменная Path, выберите её, нажмите «Изменить» и далее создайте новую строку. Содержимым этой строки должен быть путь к папке, который был указан при установке. Если вы ничего не меняли, то введите следующее:
C:\Program Files (x86)\GnuWin32\bin
Переменной Path нет? Тогда для начала создайте её кнопкой «Создать», затем в поле имени введите Path, а в поле значения — строку выше.
Шаг 4. Запустите командную строку и выполняйте команды прямо там.
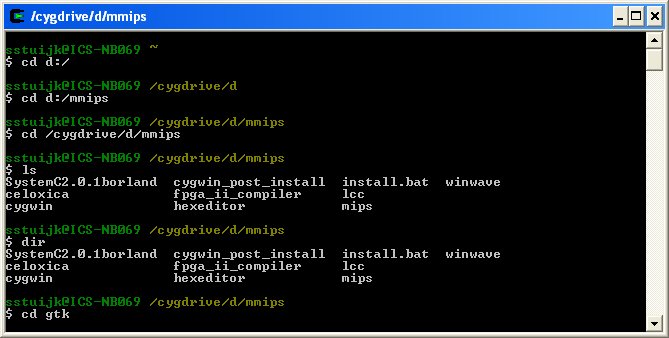
Cygwin — запуск команд и Bash-скриптов
Ещё одна утилита, схожая с CoreUtils, но обладающая более широким функционалом — в том числе и возможностью запуска скриптов. Из минусов — немалый вес и более сложная установка. Разумеется, не идёт ни в какое сравнение с максимально удобным WSL, но для базовых команд вполне подойдёт.
Шаг 1. Загрузите Cygwin и запустите установку.
Шаг 2. Выберите Install from Internet, укажите директории для установки и загрузки пакетов, а также любой подходящий сайт из списка для скачивания файлов.
Шаг 3. В процессе установки можете выбрать необходимые пакеты, либо сразу нажать «Далее», оставив базовый набор.
Шаг 4. Откройте «Панель управления», в разделе «Система и безопасность» выберите пункт «Система». На панели слева откройте «Дополнительные параметры системы». Нажмите кнопку «Переменные среды» и в открывшемся окне найдите область с заголовком «Системные переменные». В случае, когда там есть переменная Path, выберите её, нажмите «Изменить» и далее создайте новую строку. Содержимым этой строки должен быть путь к папке, который был указан при установке. Если вы ничего не меняли, то введите следующее:
C:\cygwin64\bin
Переменной Path нет? Тогда для начала создайте её кнопкой «Создать», затем в поле имени введите Path, а в поле значения — строку выше.
Шаг 5. Команды можно выполнять как через командную строку, так и через специальный терминал.
Шаг 6. Для удаления Cygwin достаточно удалить папку, в которую программа была установлена, а также (по желанию) значение из переменной Path по методу, обратному тому, что был описан в 4 шаге (не удаляйте саму переменную).
Время на прочтение
8 мин
Количество просмотров 15K
Типичный вопрос разработчиков под Windows: «Почему здесь до сих пор нет <ВСТАВЬТЕ ТУТ ЛЮБИМУЮ КОМАНДУ LINUX>?». Будь то мощное пролистывание less или привычные инструменты grep или sed, разработчики под Windows хотят получить лёгкий доступ к этим командам в повседневной работе.
Подсистема Windows для Linux (WSL) сделала огромный шаг вперёд в этом отношении. Она позволяет вызывать команды Linux из Windows, проксируя их через wsl.exe (например, wsl ls). Хотя это значительное улучшение, но такой вариант страдает от ряда недостатков.
- Повсеместное добавление
wslутомительно и неестественно. - Пути Windows в аргументах не всегда срабатывают, потому что обратные слэши интерпретируются как escape-символы, а не разделители каталогов.
- Пути Windows в аргументах не переводятся в соответствующую точку монтирования в WSL.
- Не учитываются параметры по умолчанию в профилях WSL с алиасами и переменными окружения.
- Не поддерживается завершение путей Linux.
- Не поддерживается завершение команд.
- Не поддерживается завершение аргументов.
В результате команды Linux воспринимаются под Windows как граждане второго сорта — и их сложнее использовать, чем родные команды. Чтобы уравнять их в правах, нужно решить перечисленные проблемы.
Оболочки функций PowerShell
C помощью оболочек функций PowerShell мы можем добавить автозавершение команд и устранить необходимость в префиксах wsl, транслируя пути Windows в пути WSL. Основные требования к оболочкам:
- Для каждой команды Linux должна быть одна оболочка функции с тем же именем.
- Оболочка должна распознавать пути Windows, переданные в качестве аргументов, и преобразовывать их в пути WSL.
- Оболочка должна вызывать
wslс соответствующей командой Linux на любой вход конвейера и передавая любые аргументы командной строки, переданные функции.
Поскольку этот шаблон может быть применён к любой команде, мы можем абстрагировать определение этих оболочек и динамически генерировать их из списка команд для импорта.
# The commands to import.
$commands = "awk", "emacs", "grep", "head", "less", "ls", "man", "sed", "seq", "ssh", "tail", "vim"

# Register a function for each command.
$commands | ForEach-Object { Invoke-Expression @"
Remove-Alias $_ -Force -ErrorAction Ignore
function global:$_() {
    for (`$i = 0; `$i -lt `$args.Count; `$i++) {
        # If a path is absolute with a qualifier (e.g. C:), run it through wslpath to map it to the appropriate mount point.
        if (Split-Path `$args[`$i] -IsAbsolute -ErrorAction Ignore) {
            `$args[`$i] = Format-WslArgument (wsl.exe wslpath (`$args[`$i] -replace "\\", "/"))
        # If a path is relative, the current working directory will be translated to an appropriate mount point, so just format it.
        } elseif (Test-Path `$args[`$i] -ErrorAction Ignore) {
            `$args[`$i] = Format-WslArgument (`$args[`$i] -replace "\\", "/")
        }
    }

    if (`$input.MoveNext()) {
        `$input.Reset()
        `$input | wsl.exe $_ (`$args -split ' ')
    } else {
        wsl.exe $_ (`$args -split ' ')
    }
}
"@
}
Список $command определяет команды для импорта. Затем мы динамически генерируем обёртку функции для каждой из них, используя команду Invoke-Expression (сначала удалив любые алиасы, которые будут конфликтовать с функцией).
Функция перебирает аргументы командной строки, определяет пути Windows с помощью команд Split-Path и Test-Path, а затем преобразует эти пути в пути WSL. Мы запускаем пути через вспомогательную функцию Format-WslArgument, которую определим позже. Она экранирует специальные символы, такие как пробелы и скобки, которые в противном случае были бы неверно истолкованы.
Наконец, передаём wsl входные данные конвейера и любые аргументы командной строки.
С помощью таких обёрток можно вызывать любимые команды Linux более естественным способом, не добавляя префикс wsl и не беспокоясь о том, как преобразуются пути:
man bashless -i $profile.CurrentUserAllHostsls -Al C:\Windows\ | lessgrep -Ein error *.logtail -f *.log
Здесь показан базовый набор команд, но вы можете создать оболочку для любой команды Linux, просто добавив её в список. Если вы добавите этот код в свой профиль PowerShell, эти команды будут доступны вам в каждом сеансе PowerShell, как и нативные команды!
Параметры по умолчанию
В Linux принято определять алиасы и/или переменные окружения в профилях (login profile), задавая параметры по умолчанию для часто используемых команд (например, alias ls=ls -AFh или export LESS=-i). Один из недостатков проксирования через неинтерактивную оболочку wsl.exe — то, что профили не загружаются, поэтому эти параметры по умолчанию недоступны (т. е. ls в WSL и wsl ls будут вести себя по-разному с алиасом, определённым выше).
PowerShell предоставляет $PSDefaultParameterValues, стандартный механизм для определения параметров по умолчанию, но только для командлетов и расширенных функций. Конечно, можно из наших оболочек сделать расширенные функции, но это вносит лишние осложнения (так, PowerShell соотносит частичные имена параметров (например, -a соотносится с -ArgumentList), которые будут конфликтовать с командами Linux, принимающими частичные имена в качестве аргументов), а синтаксис для определения значений по умолчанию будет не самым подходящим (для определения аргументов по умолчанию требуется имя параметра в ключе, а не только имя команды).
Однако с небольшим изменением наших оболочек мы можем внедрить модель, аналогичную $PSDefaultParameterValues, и включить параметры по умолчанию для команд Linux!
function global:$_() {
    …

    `$defaultArgs = ((`$WslDefaultParameterValues.$_ -split ' '), "")[`$WslDefaultParameterValues.Disabled -eq `$true]
    if (`$input.MoveNext()) {
        `$input.Reset()
        `$input | wsl.exe $_ `$defaultArgs (`$args -split ' ')
    } else {
        wsl.exe $_ `$defaultArgs (`$args -split ' ')
    }
}
Передавая $WslDefaultParameterValues в командную строку, мы отправляем параметры через wsl.exe. Ниже показано, как добавить инструкции в профиль PowerShell для настройки параметров по умолчанию. Теперь мы можем это сделать!
$WslDefaultParameterValues["grep"] = "-E"
$WslDefaultParameterValues["less"] = "-i"
$WslDefaultParameterValues["ls"] = "-AFh --group-directories-first"
Поскольку параметры моделируются после $PSDefaultParameterValues, вы можете легко их отключить на время, установив ключ "Disabled" в значение $true. Дополнительное преимущество отдельной хэш-таблицы в возможности отключить $WslDefaultParameterValues отдельно от $PSDefaultParameterValues.
Автозавершение аргументов
PowerShell позволяет регистрировать завершители аргументов с помощью команды Register-ArgumentCompleter. В Bash есть мощные программируемые средства для автозавершения. WSL позволяет вызывать bash из PowerShell. Если мы можем зарегистрировать завершители аргументов для наших оболочек функций PowerShell и вызвать bash для создания завершений, то получим полное автозавершение аргументов с той же точностью, что и в самом bash!
# Register an ArgumentCompleter that shims bash's programmable completion.
Register-ArgumentCompleter -CommandName $commands -ScriptBlock {
    param($wordToComplete, $commandAst, $cursorPosition)

    # Map the command to the appropriate bash completion function.
    $F = switch ($commandAst.CommandElements[0].Value) {
        {$_ -in "awk", "grep", "head", "less", "ls", "sed", "seq", "tail"} {
            "_longopt"
            break
        }

        "man" {
            "_man"
            break
        }

        "ssh" {
            "_ssh"
            break
        }

        Default {
            "_minimal"
            break
        }
    }

    # Populate bash programmable completion variables.
    $COMP_LINE = "`"$commandAst`""
    $COMP_WORDS = "('$($commandAst.CommandElements.Extent.Text -join "' '")')" -replace "''", "'"
    for ($i = 1; $i -lt $commandAst.CommandElements.Count; $i++) {
        $extent = $commandAst.CommandElements[$i].Extent
        if ($cursorPosition -lt $extent.EndColumnNumber) {
            # The cursor is in the middle of a word to complete.
            $previousWord = $commandAst.CommandElements[$i - 1].Extent.Text
            $COMP_CWORD = $i
            break
        } elseif ($cursorPosition -eq $extent.EndColumnNumber) {
            # The cursor is immediately after the current word.
            $previousWord = $extent.Text
            $COMP_CWORD = $i + 1
            break
        } elseif ($cursorPosition -lt $extent.StartColumnNumber) {
            # The cursor is within whitespace between the previous and current words.
            $previousWord = $commandAst.CommandElements[$i - 1].Extent.Text
            $COMP_CWORD = $i
            break
        } elseif ($i -eq $commandAst.CommandElements.Count - 1 -and $cursorPosition -gt $extent.EndColumnNumber) {
            # The cursor is within whitespace at the end of the line.
            $previousWord = $extent.Text
            $COMP_CWORD = $i + 1
            break
        }
    }

    # Repopulate bash programmable completion variables for scenarios like '/mnt/c/Program Files'/<TAB> where <TAB> should continue completing the quoted path.
    $currentExtent = $commandAst.CommandElements[$COMP_CWORD].Extent
    $previousExtent = $commandAst.CommandElements[$COMP_CWORD - 1].Extent
    if ($currentExtent.Text -like "/*" -and $currentExtent.StartColumnNumber -eq $previousExtent.EndColumnNumber) {
        $COMP_LINE = $COMP_LINE -replace "$($previousExtent.Text)$($currentExtent.Text)", $wordToComplete
        $COMP_WORDS = $COMP_WORDS -replace "$($previousExtent.Text) '$($currentExtent.Text)'", $wordToComplete
        $previousWord = $commandAst.CommandElements[$COMP_CWORD - 2].Extent.Text
        $COMP_CWORD -= 1
    }

    # Build the command to pass to WSL.
    $command = $commandAst.CommandElements[0].Value
    $bashCompletion = ". /usr/share/bash-completion/bash_completion 2> /dev/null"
    $commandCompletion = ". /usr/share/bash-completion/completions/$command 2> /dev/null"
    $COMPINPUT = "COMP_LINE=$COMP_LINE; COMP_WORDS=$COMP_WORDS; COMP_CWORD=$COMP_CWORD; COMP_POINT=$cursorPosition"
    $COMPGEN = "bind `"set completion-ignore-case on`" 2> /dev/null; $F `"$command`" `"$wordToComplete`" `"$previousWord`" 2> /dev/null"
    $COMPREPLY = "IFS=`$'\n'; echo `"`${COMPREPLY[*]}`""
    $commandLine = "$bashCompletion; $commandCompletion; $COMPINPUT; $COMPGEN; $COMPREPLY" -split ' '

    # Invoke bash completion and return CompletionResults.
    $previousCompletionText = ""
    (wsl.exe $commandLine) -split '\n' |
    Sort-Object -Unique -CaseSensitive |
    ForEach-Object {
        if ($wordToComplete -match "(.*=).*") {
            $completionText = Format-WslArgument ($Matches[1] + $_) $true
            $listItemText = $_
        } else {
            $completionText = Format-WslArgument $_ $true
            $listItemText = $completionText
        }

        if ($completionText -eq $previousCompletionText) {
            # Differentiate completions that differ only by case otherwise PowerShell will view them as duplicate.
            $listItemText += ' '
        }

        $previousCompletionText = $completionText
        [System.Management.Automation.CompletionResult]::new($completionText, $listItemText, 'ParameterName', $completionText)
    }
}

# Helper function to escape characters in arguments passed to WSL that would otherwise be misinterpreted.
function global:Format-WslArgument([string]$arg, [bool]$interactive) {
    if ($interactive -and $arg.Contains(" ")) {
        return "'$arg'"
    } else {
        return ($arg -replace " ", "\ ") -replace "([()|])", ('\$1', '`$1')[$interactive]
    }
}
Код немного плотный без понимания некоторых внутренних функций bash, но в основном мы делаем следующее:
- Регистрируем завершатель аргументов для всех наших обёрток функций, передавая список
$commandsв параметр-CommandNameдляRegister-ArgumentCompleter. - Сопоставляем каждую команду с функцией оболочки, которую использует bash для автозавершения (для определения спецификаций автозавершения в bash используется
$F, сокращение отcomplete -F <FUNCTION>). - Преобразуем аргументы PowerShell
$wordToComplete,$commandAstи$cursorPositionв формат, ожидаемый функциями автозавершения bash в соответствии со спецификациями программируемого автозавершения bash. - Составляем командную строку для передачи в
wsl.exe, который обеспечивает правильную настройку среды, вызывает соответствующую функцию автозавершения и выводит результаты с разбиением по строкам. - Затем вызываем
wslс командной строкой, разделяем выдачу разделителями строк и генерируем для каждойCompletionResults, сортируя их и экранируя символы, такие как пробелы и скобки, которые в противном случае были бы неверно истолкованы.
В итоге наши оболочки команд Linux будут использовать точно такое же автозавершение, как в bash! Например:
ssh -c <TAB> -J <TAB> -m <TAB> -O <TAB> -o <TAB> -Q <TAB> -w <TAB> -b <TAB>
Каждое автозавершение подоставляет значения, специфичные для предыдущего аргумента, считывая данные конфигурации, такие как известные хосты, из WSL!
<TAB> будет циклически перебирать параметры. <Ctrl + пробел> покажет все доступные опции.
Кроме того, поскольку теперь у нас работает автозавершение bash, вы можете автозавершать пути Linux непосредственно в PowerShell!
less /etc/<TAB>ls /usr/share/<TAB>vim ~/.bash<TAB>
В тех случаях, когда автозавершение bash не даёт никаких результатов, PowerShell возвращается к системе по умолчанию с путями Windows. Таким образом, вы на практике можете одновременно использовать и те, и другие пути на своё усмотрение.
Заключение
С помощью PowerShell и WSL мы можем интегрировать команды Linux в Windows как нативные приложения. Нет необходимости искать билды Win32 или утилиты Linux или прерывать рабочий процесс, переходя в Linux-шелл. Просто установите WSL, настройте профиль PowerShell и перечислите команды, которые хотите импортировать! Богатое автозавершение для параметров команд и путей к файлам Linux и Windows — это функциональность, которой сегодня нет даже в нативных командах Windows.
Полный исходный код, описанный выше, а также дополнительные рекомендации по его включению в рабочий процесс доступны здесь.
Какие команды Linux вы считаете наиболее полезными? Каких ещё привычных вещей не хватает при работе в Windows? Пишите в комментариях или на GitHub!
Don’t install a virtual machine just yet! Here’s how to run Linux commands on Windows using WSL 2.

The Windows Subsystem for Linux 2 is built upon the success of the original WSL, and the newer WSL 2 brings more power and reliability for users. It’s vital that you understand how to use Linux commands and utilities on the Windows Subsystem for Linux 2.
Read on as we discuss what WSL 2 is and how you can use Linux commands on Windows 10 and 11.
Is It Possible to Run Linux Commands on Windows 10 and 11 Without a Virtual Machine?
Yes, you can run Linux commands in Windows 10 and 11 without setting up a virtual machine, which is made possible through the incredible Windows Subsystem for Linux 2. You no longer need to configure a sophisticated virtual machine using Oracle VirtualBox or VMWare to use Linux. You can use a Linux kernel natively on Windows 10 or 11 with minimal installation.

You can choose from a list of Linux distributions that are supported by WSL 2(including Ubuntu and Kali Linux) or import any Linux distro to work with WSL 2 as a TAR file. With the Windows Subsystem for Linux 2, Windows users can directly use Linux command-line tools, applications, and utilities without extra installation steps. It’s to configure WSL 2 on Windows 10 and 11 with a basic Linux distribution such as Ubuntu.
How to Get Started With WSL 2
The Windows Subsystem for Linux 2 is available to users running Windows 10 (Build 19041 and higher) and Windows 11; if you’re running an older version of Windows 10, you’ll have to install WSL 2 manually. Fortunately, Microsoft makes it easy to install and set up a Linux distro in WSL 2. To install WSL 2 with Ubuntu:
- Launch the Start menu, search for Command Prompt, right-click the Best match, and select Run as administrator.
- Enter the following command and press Enter:
wsl - - install - The installation process will take some time, so you might need to wait around. If you want to install a different Linux distribution, you can do so via the following command:
wsl - - install -d <Distribution> - You can view the list of Linux distributions through:
wsl.exe -l -o
How to Use Linux Commands on WSL 2
To use Linux commands on Windows, you can use the Windows Subsystem for Linux–a Linux kernel that directly integrates with the Windows operating system. Here’s how you can begin using Linux commands and utilities on a WSL 2 running Ubuntu:
- Launch the Start menu, search for Ubuntu, and select the Best match.
- Alternatively, you can launch Ubuntu via the Desktop shortcut as well.
- Wait for the terminal console to load; once Ubuntu is ready, you should see the text “Welcome to Ubuntu” on the console.
- To confirm your installation is complete, enter the below command and press Enter:
lsb_release -a - You should now see details of the installed Ubuntu operating system.
Linux has a lot of commands and built-in utilities that can be accessed via the terminal. These commands help you manage the file system, install packages, run apps, edit files, and more. It’s no wonder, then, that regular people love using the Linux command line.
Read on for a list of commands that will help you use the Windows Subsystem for Linux:
- cd: The cd command is one of the most commonly used Linux commands, and for good reason; it helps you change directories easily. If you’re in the root folder with two subfolders, you can switch to a different folder by using the cd command as follows:
cd myFolderTo go back one level into the root folder, use the cd command as follows:
cd .. - ls: You can use the ls command to view the list of files and folders in the current directory.
- mkdir: Similarly, if you want to create a new folder, you should use the mkdir command:
mkdir folder_name - cat: To view the preview of a text file on the terminal, you can use the cat command as follows:
cat text_file.txt - grep: It helps you search for a specific string within multiple files and is highly flexible. You can use it to find matching patterns while clawing through system log files.
- touch: You can use the touch command to change the timestamps of a file, but you can also use it to create a new file by passing in the file name as a parameter:
touch newFile.txt - &&: This command helps you chain multiple commands together sequentially. For example, to navigate to a different folder and create a new file:
cd myFolder && touch newFile.txt - man: The Linux manual is the best place to refer to when you want to figure out how a command works or what parameters are applicable.
- clear: The terminal gets very cluttered, so you can use the clear command to clear the terminal screen.
- wget: The wget tool can be used to download content and files from web servers. It supports HTTP, HTTPS, and FTP. You can use wget in its simplest form as follows:
wget target_url
If you’re new to Linux, you must be overwhelmed by the many commands and utilities Linux has to offer, but don’t fret; over time, you’ll get the hang of it. Before long, you’ll be using Linux commands as if they were second nature to you, without needing to resort to virtual machines or performing a dual boot.
Use Linux Commands on Windows With Ease
Linux is a powerful operating system that requires you to get accustomed to its command line. You can manage every aspect of your WSL 2 through the Linux terminal. Learning the various Linux commands can be frustrating initially, but once you push yourself to use the command line, you’ll be more confident.
If you are learning Shell scripting probably as a part of your course curriculum, you need to use Linux commands to practice the commands and scripting.
Your school lab might have Linux installed but you don’t have a Linux laptop but a regular Windows computer like everyone else. Your homework needs to run Linux commands and you wonder how to run Bash commands and scripts on Windows.
You can install Linux alongside Windows in dual boot mode. This method allows you to choose either Linux or Windows when you start your computer. But taking all the trouble to mess with partitions for the sole purpose of running Linux commands may not be for everyone.
You can also use Linux terminals online but your work won’t be saved here.
The good news is that there are several ways you can run Linux commands inside Windows, like any regular application. Isn’t it cool?
Using Linux commands inside Windows
As an ardent Linux user and promoter, I would like to see more and more people using ‘real’ Linux but I understand that at times, that’s not the priority. If you are just looking to practice Linux to pass your exams, you can use one method to run Bash commands on Windows.
1. Use Linux Bash Shell on Windows 10 with WSL
Did you know that you can run a Linux distribution inside Windows 10? The Windows Subsystem for Linux (WSL) allows you to run Linux inside Windows. The upcoming version of WSL will be using the real Linux kernel inside Windows.
This WSL, also called Bash on Windows, gives you a Linux distribution in command-line mode running as a regular Windows application. Don’t be scared with the command line mode because your purpose is to run Linux commands. That’s all you need.
You can find some popular Linux distributions like Ubuntu, Kali Linux, openSUSE etc in Windows Store. You just have to download and install it like any other Windows application. Once installed, you can run all the Linux commands you want.
Please refer to this tutorial about installing Linux bash shell on Windows.
How to Install Linux Bash Shell on Windows [Step-by-Step Guide]
Step-by-step screenshot guide to show you how to install bash on Windows 11 and 10.
 It’s FOSSAbhishek Prakash

2. Use Git Bash to run Bash commands on Windows
You probably know what Git is. It’s a version control system developed by Linux creator Linus Torvalds.
Git for Windows is a set of tools that allows you to use Git in both command line and graphical interfaces. One of the tools included in Git for Windows is Git Bash.
Git Bash application provides and emulation layer for Git command line. Apart from Git commands, Git Bash also supports many Bash utilities such as ssh, scp, cat, find etc.
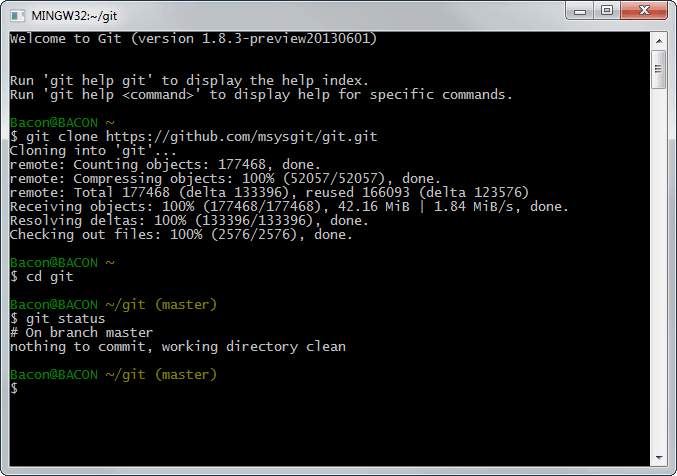
In other words, you can run many common Linux/Bash commands using the Git Bash application.
You can install Git Bash in Windows by downloading and installing the Git for Windows tool for free from its website.
3. Using Linux commands in Windows with Cygwin
If you want to run Linux commands in Windows, Cygwin is a recommended tool. Cygwin was created in 1995 to provide a POSIX-compatible environment that runs natively on Windows. Cygwin is a free and open source software maintained by Red Hat employees and many other volunteers.
For two decades, Windows users use Cygwin for running and practicing Linux/Bash commands. Even I used Cygwin to learn Linux commands more than a decade ago.
You can download Cygwin from its official website below. I also advise you to refer to this Cygwin cheat sheet to get started with it.
4. Use Linux in a virtual machine
Another way is to use virtualization software and install Linux in it. This way, you install a Linux distribution (with a graphical interface) inside Windows and run it like a regular Windows application.
This method requires that your system has a good amount of RAM, at least 4 GB but better if you have over 8 GB of RAM. The good thing here is that you get the real feel of using a desktop Linux. If you like the interface, you may later decide to switch to Linux completely.
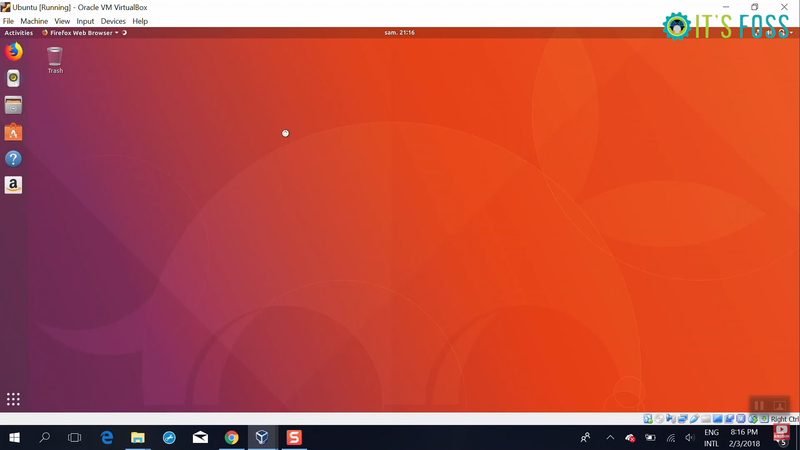
There are two popular tools for creating virtual machines on Windows, Oracle VirtualBox and VMware Workstation Player. You can use either of the two. Personally, I prefer VirtualBox.
You can follow this tutorial to learn how to install Linux in VirtualBox.
Install Linux Inside Windows Using VirtualBox [Step by Step Guide]
Brief: Using Linux in a virtual machine gives you the option to try Linux within Windows. This step-by-step guide shows you how to install Linux inside Windows using VirtualBox. There are several ways to install Linux. You can clean everything from your system and install Linux. You can dual bo…
It’s FOSSAbhishek Prakash
Conclusion
The best way to run Linux commands is to use Linux. When installing Linux is not an option, these tools allow you to run Linux commands on Windows. Give them a try and see which method is best suited for you.
About the author

Abhishek Prakash
Created It’s FOSS 11 years ago to share my Linux adventure. Have a Master’s degree in Engineering and years of IT industry experience. Huge fan of Agatha Christie and classic detective mysteries 🕵️♂️