Skip to content
How to create beautiful animated material user interface design using C# Winforms
This is our very first article where we take you step by step with an example of animated Material User Interface created with Bunifu UI Winforms. You will need it to use some of the controls and components mentioned.
Let’s dive into it!
First of all, please create a new Windows Forms Application and add a Bunifu Ellipse on the main form. It will look simple, without borders.
Now please add 2 panels on the form, the first one with dock to the top and the second one with dock to fill. Set the BackColor of the first panel (the top one) to 42, 88, 173 and you should get the following effect:

Now we’ll work on the panel on the bottom (the second one). First let’s add another panel inside this one and then above that new panel let’s add 3 labels named About, Photos and Posts (with the font Century Gothic) and above the first one let’s add a Bunifu Separator colored Blue with a Thickness of 3.
This should be the effect:

Now we move in the panel on the top, where we’ll add 2 picture boxes to maintain the profile picture and the edit picture. Also we’ll add some labels with the name, position and different statistics. This is an example of designing:

Now we’ll do something very interesting: we’ll make the form move when we drag the panel above (this one that contains the profile picture).
In order to do that, make sure that the name of your panel is Panel1 and type that code in the Form1 class:
[code lang=”csharp”]
Bunifu.Framework.UI.Drag drag = new Bunifu.Framework.UI.Drag();
public Form1()
{
InitializeComponent();
}
private void panel1_MouseDown(object sender, MouseEventArgs e)
{
drag.Grab(this);
}
private void panel1_MouseUp(object sender, MouseEventArgs e)
{
drag.Release();
}
private void panel1_MouseMove(object sender, MouseEventArgs e)
{
drag.MoveObject();
}
[/code]
Now you can easily move your entire form by just dragging the top panel!
Let’s move now the separator (that blue line below the About label) to each label, when we click on it.
We just need to implement the Click event on each label:
[code lang=”csharp”]
private void label1_Click(object sender, EventArgs e)
{
bunifuSeparator1.Width = label1.Width;
bunifuSeparator1.Left = label1.Left;
}
private void label3_Click(object sender, EventArgs e)
{
bunifuSeparator1.Width = label3.Width;
bunifuSeparator1.Left = label3.Left;
}
private void label2_Click(object sender, EventArgs e)
{
bunifuSeparator1.Width = label2.Width;
bunifuSeparator1.Left = label2.Left;
}
[/code]
You can simply test it and see it working:

Now we’ll complete each tab. We’ll create each tab as a new User Control component. So let’s work on the “About” tab. Add a new User Control and name it About. Then, place some labels and some pictures in it to fit the following layout:

This is a new user control (defined by you) so you can simply find it in the toolbox and you can basically drop it to the form (as you do with all the other controls).
Now let’s add the Photos User Control:

In order to animate the transition between the newly created controls (About, Photos, etc.), let’s add a Bunifu Transition Component and set it’s animation type to HorizSlide. Then add this code in the label1_click method:
[code lang=”csharp”]
about1.Visible = false;
about1.BringToFront();
bunifuTransition1.ShowSync(about1);
[/code]
You need to add a similar structure in the same label_click method that we implement. This way when we click on “Photos” we’ll get a horizontal transition of all the controls of the previous control.
The last control, Posts, can be easily done by adding another panel inside our user control and designing it like that (as an example):

It’s just a simple styling of labels and finding the right image. Just rebuild the solution and you’ll find the control in the toolbox. Add it on the form, complete the label3_click method to use the animation (as I mentioned above) and that’s it.
Finally, we created an amazing User Interface that we can use to interact with our backend. We can see again how much we can get from Bunifu UI Winforms.
You can watch a detailed video of the same below.
Please let us know in the comments what you think…More posts coming, stay tuned 🙂
Enjoy!
Share This Story, Choose Your Platform!

Related Posts
This site uses Akismet to reduce spam. Learn how your comment data is processed.
Page load link
Go to Top
Стиль Material Design в Windows Forms
admin
23.02.2019
Видеоуроки
Нет комментариев
В видеоуроке рассказывается, как заменить стандартную тему оформления Windows Forms на стиль Material Design от Google. Проект создается на языке программирования C#.
4/5 — (20 голосов)
c#, Windows Forms, Видео, Видеоурок, Урок
Поделиться в соц. сетях:
- ← Является ли число простым — Проверяем на языке Си
- Потоки в Visual C++ — Пример реализации и использования →
Добавить комментарий
Ваш адрес email не будет опубликован.
Комментарий
Имя
Сайт
Сохранить моё имя, email и адрес сайта в этом браузере для последующих моих комментариев.
Уведомить меня о новых комментариях по email.
Уведомлять меня о новых записях почтой.
- Download CustomWindowsForm.zip — 418.2 KB
- Download Office_Word_PP_Excel.zip
)


Introduction
I wanted to create Custom windows forms in C#. Before working on this code, I started to find any code that could help me to create custom windows forms in C# on the internet. But unfortunately, I couldn’t find any simple and useful code. I found some code but they all are complicated. When I started working on solving this problem, I thought to:
- Use Custom Panel/Panel as a border of a Frame for change the size of Form such as Width, Height etc and use Custom Buttons as a Control Box of a Frame.
- Use Custom Panel as a Top layered Title border of a frame and use label to display text of a frame.
- To display icon on a frame we will set background image to added panel.
- Applying Mouse Events to panels and change properties of Form.
And it works perfectly.
You require Visual Studio Professional 2013 or higher version and .NET framework 4.5 or higher to open the project.

Perform following all Steps correctly to create custom windows forms.
We can also create extended advanced forms using only panels.(see above images,image 1 & 2)
Download the source code to view code for those forms.
See above image for better understanding of resizing our customized form and BlackForm.cs in file.
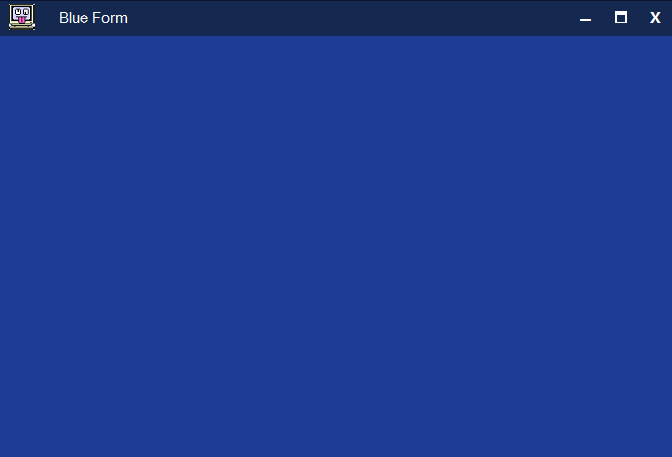
In this article we will create Blue colored resizable custom windows form, change colors of panels and buttons as you wish. You can use Custom Controls to design a form. Dont have Custom Controls?
- http://customcontrolsincs.blogspot.in/
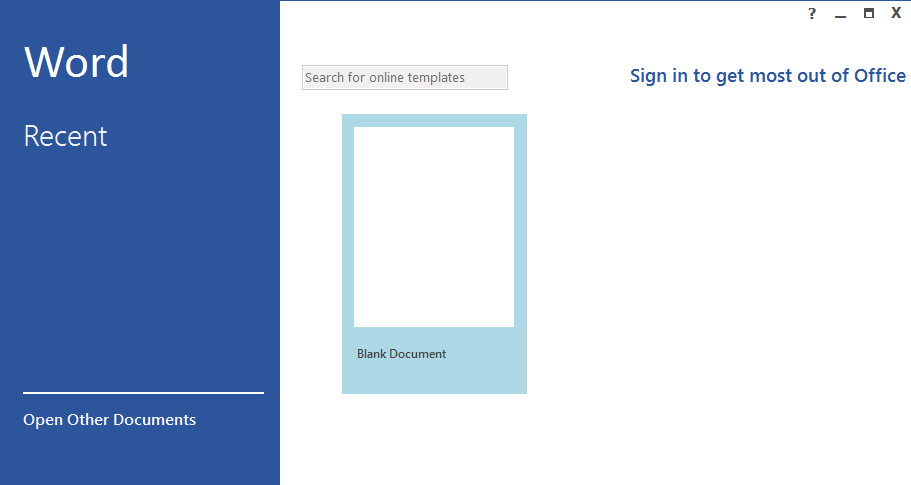
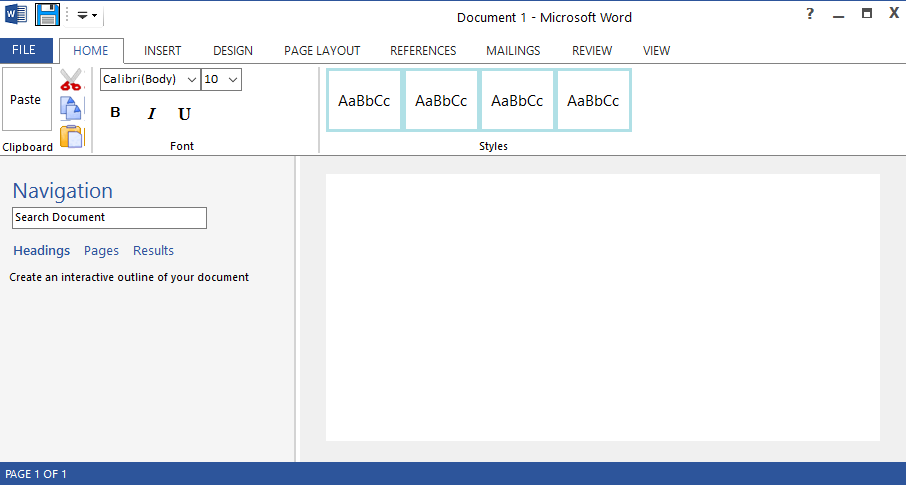
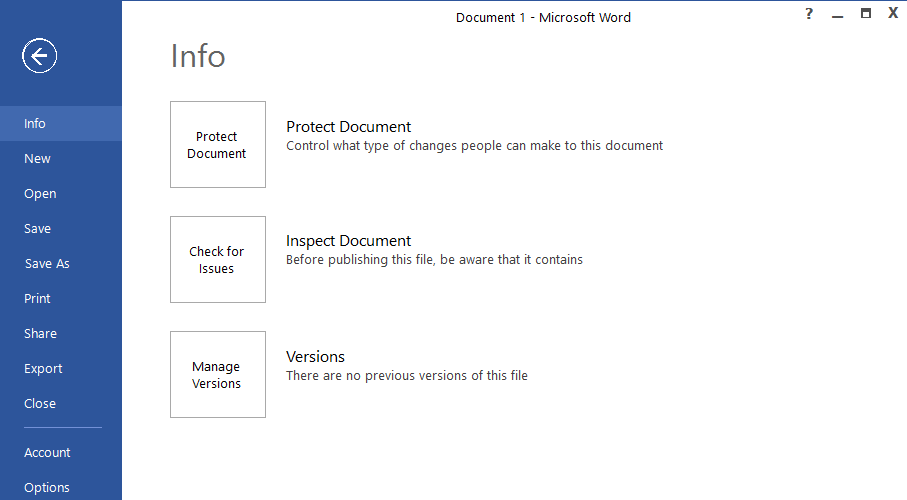
Using following procedure you can also design Microsoft Office 2013 UI for any of your winform application such as Word, PowerPoint, Excel etc. Like following word screenshots.
Download the Download Office_Word_PP_Excel.zip file to view the UI code for Word, PowerPoint, Excel, DarkWord.
Start
Step 1
- Start Visual Studio and Create new Windows Forms Application project in C#. I have created CustomWindowsForm project.
- Download the source code and view the code for BlueForm.cs.
- Now set following Properties to created Form (Form1).
| ControlBox | false |
| BackColor | 30,60,150 |
| FormBorderStyle | None |
| Size | 684,461 |
To Add icon you can add again a panel/picturebox/toolstrip and set background image to it used as a window icon.
Step 2
- Now, Go to Project -> Add Class
- Enter Name
ButtonZand click Add. - Now Copy and Paste following
ButtonZcode into your created classButtonZcode. This button code is our Close & Minimize buttons of the form.
using System;
using System.Collections.Generic;
using System.Text;
using System.Drawing;
using System.Data;
using System.Windows.Forms;
namespace CustomWindowsForm
{
    public class ButtonZ : System.Windows.Forms.Button
    {
        Color clr1;
        private Color color = Color.Teal;
        private Color m_hovercolor = Color.FromArgb(0, 0, 140);
        private Color clickcolor = Color.FromArgb(160, 180, 200);
        private int textX = 6;
        private int textY = -20;
        private String text = "_";

        public String DisplayText
        {
            get { return text; }
            set { text = value; Invalidate(); }
        }
        public Color BZBackColor
        {
            get { return color; }
            set { color = value; Invalidate(); }
        }

        public Color MouseHoverColor
        {
            get { return m_hovercolor; }
            set { m_hovercolor = value; Invalidate(); }
        }

        public Color MouseClickColor1
        {
            get { return clickcolor; }
            set { clickcolor = value; Invalidate(); }
        }


        public int TextLocation_X
        {
            get { return textX; }
            set { textX = value; Invalidate(); }
        }
        public int TextLocation_Y
        {
            get { return textY; }
            set { textY = value; Invalidate(); }
        }
        public ButtonZ()
        {
            this.Size = new System.Drawing.Size(31, 24);
            this.ForeColor = Color.White;
            this.FlatStyle = System.Windows.Forms.FlatStyle.Flat;
            this.Font = new System.Drawing.Font("Microsoft YaHei UI", 20.25F, System.Drawing.FontStyle.Bold, System.Drawing.GraphicsUnit.Point, ((byte)(0)));
            this.Text = "_";
            text = this.Text;
        }

        protected override void OnMouseEnter(EventArgs e)
        {
            base.OnMouseEnter(e);
            clr1 = color;
            color = m_hovercolor;
        }

        protected override void OnMouseLeave(EventArgs e)
        {
            base.OnMouseLeave(e);
            color = clr1;
        }

        protected override void OnMouseDown(MouseEventArgs mevent)
        {
            base.OnMouseDown(mevent);
            color = clickcolor;
        }

        protected override void OnMouseUp(MouseEventArgs mevent)
        {
            base.OnMouseUp(mevent);
            color = clr1;
        }

        protected override void OnPaint(PaintEventArgs pe)
        {
            base.OnPaint(pe);
            text = this.Text;
            if (textX == 100 && textY == 25)
            {
                textX = ((this.Width) / 3) + 10;
                textY = (this.Height / 2) - 1;
            }

            Point p = new Point(textX, textY);
            pe.Graphics.FillRectangle(new SolidBrush(color), ClientRectangle);
            pe.Graphics.DrawString(text, this.Font, new SolidBrush(this.ForeColor), p);
        }

    }
}
Step 3
- Now, Go to Project -> Add Class
- Enter Name
MinMaxButtonand click Add. - Now Copy and Paste following
MinMaxButtoncode into your created classMinMaxButtoncode.
This code is for to create our maximize & restore down button when form is maximized.
using System;
using System.Collections.Generic;
using System.Text;
using System.Drawing;
using System.Data;
using System.Windows.Forms;
namespace CustomWindowsForm
{
    public class MinMaxButton : System.Windows.Forms.Button
    {
        Color clr1;
        private Color color = Color.Gray;
        private Color m_hovercolor = Color.FromArgb(180, 200, 240);
        private Color clickcolor = Color.FromArgb(160, 180, 200);
        private int textX = 6;
        private int textY = -20;
        private String text = "_";

        public enum CustomFormState
        {
            Normal,
            Maximize
        }

        CustomFormState _customFormState;

        public CustomFormState CFormState
        {
            get { return _customFormState; }
            set { _customFormState = value; Invalidate(); }
        }


        public String DisplayText
        {
            get { return text; }
            set { text = value; Invalidate(); }
        }
        public Color BZBackColor
        {
            get { return color; }
            set { color = value; Invalidate(); }
        }

        public Color MouseHoverColor
        {
            get { return m_hovercolor; }
            set { m_hovercolor = value; Invalidate(); }
        }

        public Color MouseClickColor1
        {
            get { return clickcolor; }
            set { clickcolor = value; Invalidate(); }
        }


        public int TextLocation_X
        {
            get { return textX; }
            set { textX = value; Invalidate(); }
        }
        public int TextLocation_Y
        {
            get { return textY; }
            set { textY = value; Invalidate(); }
        }

        public MinMaxButton()
        {
            this.Size = new System.Drawing.Size(31, 24);
            this.ForeColor = Color.White;
            this.FlatStyle = System.Windows.Forms.FlatStyle.Flat;
            this.Text = "_";
            text = this.Text;
        }


        protected override void OnMouseEnter(EventArgs e)
        {
            base.OnMouseEnter(e);
            clr1 = color;
            color = m_hovercolor;
        }

        protected override void OnMouseLeave(EventArgs e)
        {
            base.OnMouseLeave(e);
            color = clr1;
        }

        protected override void OnMouseDown(MouseEventArgs mevent)
        {
            base.OnMouseDown(mevent);
            color = clickcolor;
        }

        protected override void OnMouseUp(MouseEventArgs mevent)
        {
            base.OnMouseUp(mevent);
            color = clr1;
        }


        protected override void OnPaint(PaintEventArgs pe)
        {
            base.OnPaint(pe);

            switch (_customFormState)
            {
                case CustomFormState.Normal:
                    pe.Graphics.FillRectangle(new SolidBrush(color), ClientRectangle);


                    for (int i = 0; i < 2; i++)
                    {
                        pe.Graphics.DrawRectangle(new Pen(this.ForeColor), textX + i + 1, textY, 10, 10);
                        pe.Graphics.FillRectangle(new SolidBrush(this.ForeColor), textX + 1, textY - 1, 12, 4);
                    }
                    break;

                case CustomFormState.Maximize:
                    pe.Graphics.FillRectangle(new SolidBrush(color), ClientRectangle);


                    for (int i = 0; i < 2; i++)
                    {
                        pe.Graphics.DrawRectangle(new Pen(this.ForeColor), textX + 5, textY, 8, 8);
                        pe.Graphics.FillRectangle(new SolidBrush(this.ForeColor), textX + 5, textY - 1, 9, 4);

                        pe.Graphics.DrawRectangle(new Pen(this.ForeColor), textX + 2, textY + 5, 8, 8);
                        pe.Graphics.FillRectangle(new SolidBrush(this.ForeColor), textX + 2, textY + 4, 9, 4);

                    }
                    break;
            }

        }


    }
}
Step 4
Run your Form and exit it. For to create controls of above code for drag & drop components.
Step 5
- Drag & Drop Panel onto your Form (
TopBorderPanel) - Set following Properties to dropped panel.
| Name | TopBorderPanel |
| BackColor | 10,20,50 |
| Cursor | SizeNS |
| Dock | Top |
| Size | 684,2 |
Step 6
- Drag & Drop Panel onto your Form (
TopPanel) - Set following Properties to dropped panel.
| Name | TopPanel |
| BackColor | 20,40,80 |
| Cursor | Default |
| Dock | Top |
| Size | 680,35 |
Step 7
- Drag & Drop Panel onto your Form (
LeftPanel) - Set following Properties to dropped panel.
| Name | LeftPanel |
| BackColor | 10,20,50 |
| Cursor | SizeWE |
| Dock | Left |
| Size | 2,459 |
Step 8
- Drag & Drop Panel onto your Form (
RightPanel) - Set following Properties to dropped panel.
| Name | RightPanel |
| BackColor | 10,20,50 |
| Cursor | SizeWE |
| Dock | Right |
| Size | 2,459 |
Step 9
- Drag & Drop Panel onto your Form (
BottomPanel) - Set following Properties to dropped panel.
| Name | BottomPanel |
| BackColor | 10,20,50 |
| Cursor | SizeNS |
| Dock | Bottom |
| Size | 680,2 |
Step 10
- Drag & Drop ToolTip onto your form
Step 11
- Drag & Drop
ButtonZontoTopPanel(_CloseButton) - Set following Properties to dropped button.
| Name | _CloseButton |
| Anchor | Top,Right |
| BZBackColor | 20,40,80 |
| DisplayText | X |
| Font | Microsoft YaHei UI, 11.25pt, style=Bold |
| ForeColor | White |
| Location | 639,3 |
| MouseClickColor1 | 150,0,0 |
| MouseHoverColor | 40,80,180 |
| Size | 35,25 |
| Text | X |
| TextLocation_X | 10 |
| TextLocation_Y | 4 |
| ToolTip on toolTip1 | Close |
Adjust button location as you wish.
Step 12
- Drag & Drop
ButtonZontoTopPanel(_MinButton) - Set following Properties to dropped button.
| Name | _MinButton |
| Anchor | Top,Right |
| BZBackColor | 20,40,80 |
| DisplayText | _ |
| Font | Microsoft YaHei UI, 18pt, style=Bold |
| ForeColor | White |
| Location | 569,3 |
| MouseClickColor1 | 10,20,60 |
| MouseHoverColor | 40,80,180 |
| Size | 35,25 |
| Text | _ |
| TextLocation_X | 8 |
| TextLocation_Y | -14 |
| ToolTip on toolTip1 | Minimize |
Step 13
- Drag & Drop
MinMaxButtonontoTopPanel(_MaxButton) - Set following Properties to dropped button.
| Name | _MaxButton |
| Anchor | Top,Right |
| BZBackColor | 20,40,80 |
| CFormState | Normal |
| ForeColor | White |
| Location | 604,3 |
| MouseClickColor1 | 10,20,60 |
| MouseHoverColor | 40,80,180 |
| Size | 35,25 |
| TextLocation_X | 11 |
| TextLocation_Y | 8 |
| ToolTip on toolTip1 | Maximize |
For text of our custom for, you can add Label and use it as a text of a form.
Step 14
Add following variables to code of Form1 globally:
bool isTopPanelDragged = false;
bool isLeftPanelDragged = false;
bool isRightPanelDragged = false;
bool isBottomPanelDragged = false;
bool isTopBorderPanelDragged = false;
bool isWindowMaximized = false;
Point offset;
Size _normalWindowSize;
Point _normalWindowLocation = Point.Empty;
isTopPanelDraggedis to check that mouse down event triggered by top panel or not. Same for Left, Right, Bottom, TopBorder panels.isWindowMaximizedis to check whether_MaxButtonclick event occured or not.- offset is temporary variable to store location of our form.
_normalWindowSizeis to hold normal window size after clicking on_MaxButtonfor go to normal window size Same as for_normalWindowLocationonly just to store form location.
Step 15
Now add Events to Panels and Buttons in Events Box. MouseDown, MouseMove & MouseUp events to Panels.
TopBorderPanel
TopBorderPanel_MouseDownTopBorderPanel_MouseMoveTopBorderPanel_MouseUp
TopPanel
TopPanel_MouseDownTopPanel_MouseMoveTopPanel_MouseUp
LeftPanel
LeftPanel_MouseDownLeftPanel_MouseMoveLeftPanel_MouseUp
RightPanel
RightPanel_MouseDownRightPanel_MouseMoveRightPanel_MouseUp
BottomPanel
BottomPanel_MouseDownBottomPanel_MouseMoveBottomPanel_MouseUp
_MinButton
_MinButton_Click
_MaxButton
_MaxButton_Click
_CloseButton
_CloseButton_Click
Step 16
Once you added all above events to all components then replace your Form1.cs code with following code. Just make changes in classes, namespaces etc. Download the source code for view simple blue colored custom form.
using System;
using System.Collections.Generic;
using System.ComponentModel;
using System.Data;
using System.Drawing;
using System.Linq;
using System.Text;
using System.Threading.Tasks;
using System.Windows.Forms;

namespace CustomWindowsForm
{
    public partial class Form1 : Form
    {
        public Form1()
        {
            InitializeComponent();
        }

        bool isTopPanelDragged = false;
        bool isLeftPanelDragged = false;
        bool isRightPanelDragged = false;
        bool isBottomPanelDragged = false;
        bool isTopBorderPanelDragged = false;
        bool isWindowMaximized = false;
        Point offset;
        Size _normalWindowSize;
        Point _normalWindowLocation = Point.Empty;


        private void TopBorderPanel_MouseDown(object sender, MouseEventArgs e)
        {
            if (e.Button == MouseButtons.Left)
            {
                isTopBorderPanelDragged = true;
            }
            else
            {
                isTopBorderPanelDragged = false;
            }
        }

        private void TopBorderPanel_MouseMove(object sender, MouseEventArgs e)
        {
            if (e.Y < this.Location.Y)
            {
                if (isTopBorderPanelDragged)
                {
                    if (this.Height < 50)
                    {
                        this.Height = 50;
                        isTopBorderPanelDragged = false;
                    }
                    else
                    {
                        this.Location = new Point(this.Location.X, this.Location.Y + e.Y);
                        this.Height = this.Height - e.Y;
                    }
                }
            }
        }

        private void TopBorderPanel_MouseUp(object sender, MouseEventArgs e)
        {
            isTopBorderPanelDragged = false;
        }


        private void TopPanel_MouseDown(object sender, MouseEventArgs e)
        {
            if (e.Button == MouseButtons.Left)
            {
                isTopPanelDragged = true;
                Point pointStartPosition = this.PointToScreen(new Point(e.X, e.Y));
                offset = new Point();
                offset.X = this.Location.X - pointStartPosition.X;
                offset.Y = this.Location.Y - pointStartPosition.Y;
            }
            else
            {
                isTopPanelDragged = false;
            }
            if (e.Clicks == 2)
            {
                isTopPanelDragged = false;
                _MaxButton_Click(sender, e);
            }
        }

        private void TopPanel_MouseMove(object sender, MouseEventArgs e)
        {
            if (isTopPanelDragged)
            {
                Point newPoint = TopPanel.PointToScreen(new Point(e.X, e.Y));
                newPoint.Offset(offset);
                this.Location = newPoint;

                if (this.Location.X > 2 || this.Location.Y > 2)
                {
                    if (this.WindowState == FormWindowState.Maximized)
                    {
                        this.Location = _normalWindowLocation;
                        this.Size = _normalWindowSize;
                        toolTip1.SetToolTip(_MaxButton, "Maximize");
                        _MaxButton.CFormState = MinMaxButton.CustomFormState.Normal;
                        isWindowMaximized = false;
                    }
                }
            }
        }

        private void TopPanel_MouseUp(object sender, MouseEventArgs e)
        {
            isTopPanelDragged = false;
            if (this.Location.Y <= 5)
            {
                if (!isWindowMaximized)
                {
                    _normalWindowSize = this.Size;
                    _normalWindowLocation = this.Location;

                    Rectangle rect = Screen.PrimaryScreen.WorkingArea;
                    this.Location = new Point(0, 0);
                    this.Size = new System.Drawing.Size(rect.Width, rect.Height);
                    toolTip1.SetToolTip(_MaxButton, "Restore Down");
                    _MaxButton.CFormState = MinMaxButton.CustomFormState.Maximize;
                    isWindowMaximized = true;
                }
            }
        }


        private void LeftPanel_MouseDown(object sender, MouseEventArgs e)
        {
            if (this.Location.X <= 0 || e.X < 0)
            {
                isLeftPanelDragged = false;
                this.Location = new Point(10, this.Location.Y);
            }
            else
            {
                if (e.Button == MouseButtons.Left)
                {
                    isLeftPanelDragged = true;
                }
                else
                {
                    isLeftPanelDragged = false;
                }
            }
        }

        private void LeftPanel_MouseMove(object sender, MouseEventArgs e)
        {
            if (e.X < this.Location.X)
            {
                if (isLeftPanelDragged)
                {
                    if (this.Width < 100)
                    {
                        this.Width = 100;
                        isLeftPanelDragged = false;
                    }
                    else
                    {
                        this.Location = new Point(this.Location.X + e.X, this.Location.Y);
                        this.Width = this.Width - e.X;
                    }
                }
            }
        }

        private void LeftPanel_MouseUp(object sender, MouseEventArgs e)
        {
            isLeftPanelDragged = false;
        }


        private void RightPanel_MouseDown(object sender, MouseEventArgs e)
        {
            if (e.Button == MouseButtons.Left)
            {
                isRightPanelDragged = true;
            }
            else
            {
                isRightPanelDragged = false;
            }
        }

        private void RightPanel_MouseMove(object sender, MouseEventArgs e)
        {
            if (isRightPanelDragged)
            {
                if (this.Width < 100)
                {
                    this.Width = 100;
                    isRightPanelDragged = false;
                }
                else
                {
                    this.Width = this.Width + e.X;
                }
            }
        }

        private void RightPanel_MouseUp(object sender, MouseEventArgs e)
        {
            isRightPanelDragged = false;
        }


        private void BottomPanel_MouseDown(object sender, MouseEventArgs e)
        {
            if (e.Button == MouseButtons.Left)
            {
                isBottomPanelDragged = true;
            }
            else
            {
                isBottomPanelDragged = false;
            }
        }

        private void BottomPanel_MouseMove(object sender, MouseEventArgs e)
        {
            if (isBottomPanelDragged)
            {
                if (this.Height < 50)
                {
                    this.Height = 50;
                    isBottomPanelDragged = false;
                }
                else
                {
                    this.Height = this.Height + e.Y;
                }
            }
        }

        private void BottomPanel_MouseUp(object sender, MouseEventArgs e)
        {
            isBottomPanelDragged = false;
        }


        private void _CloseButton_Click(object sender, EventArgs e)
        {
            this.Close();
        }

        private void _MaxButton_Click(object sender, EventArgs e)
        {
            if (isWindowMaximized)
            {
                this.Location = _normalWindowLocation;
                this.Size = _normalWindowSize;
                toolTip1.SetToolTip(_MaxButton, "Maximize");
                _MaxButton.CFormState = MinMaxButton.CustomFormState.Normal;
                isWindowMaximized = false;
            }
            else
            {
                _normalWindowSize = this.Size;
                _normalWindowLocation = this.Location;

                Rectangle rect = Screen.PrimaryScreen.WorkingArea;
                this.Location = new Point(0, 0);
                this.Size = new System.Drawing.Size(rect.Width, rect.Height);
                toolTip1.SetToolTip(_MaxButton, "Restore Down");
                _MaxButton.CFormState = MinMaxButton.CustomFormState.Maximize;
                isWindowMaximized = true;
            }
        }

        private void _MinButton_Click(object sender, EventArgs e)
        {
            this.WindowState = FormWindowState.Minimized;
        }
    }
}
Here is the output of above all procedures:
Well we have created a custom forms, so you directly cannot add some controls to a form like MenuStrip, SplitContainer etc. To add these controls first you need to add panels and add them onto that panel so that our customize form will not be changed.
Дизайн Windows Forms в C#: создание привлекательных пользовательских интерфейсов
Windows Forms — это фреймворк для разработки приложений на языке C# для операционной системы Windows. Он предоставляет программисту удобные средства для создания графического интерфейса приложения. В этой статье мы рассмотрим основные принципы дизайна Windows Forms и поделимся советами по созданию привлекательных пользовательских интерфейсов.
1. Использование элементов управления:
Основной элемент управления в Windows Forms — это форма (Form). Форма представляет главное окно приложения и может содержать другие элементы управления, такие как кнопки (Button), текстовые поле (TextBox), метки (Label) и т.д.
При разработке пользовательского интерфейса следует аккуратно размещать элементы управления на форме, чтобы обеспечить удобство использования. Для этого можно использовать контейнеры (контроллеры), такие как панель (Panel) или таблица (TableLayoutPanel), чтобы организовать элементы в логические группы.
2. Выбор цветовой схемы:
Цвета — это важный аспект дизайна Windows Forms. Вы должны выбрать цветовую схему, которая соответствует характеру вашего приложения и предпочтениям пользователей.
Можно использовать стандартные цвета из палитры Windows Forms или создать собственную цветовую схему. Кроме того, цвет может быть дополнен с использованием различных эффектов, таких как градиенты или текстуры.
3. Использование изображений и иконок:
Изображения и иконки могут сделать ваш пользовательский интерфейс более привлекательным и понятным. Вы можете добавить изображения на кнопки, панели инструментов, контекстное меню и другие элементы интерфейса. Кроме того, вы можете использовать иконки для обозначения определенных действий или состояний.
Windows Forms поддерживает различные форматы изображений, такие как BMP, JPEG, PNG и другие. Вы можете вставлять изображения напрямую в ресурсы приложения или использовать файлы изображений из внешних источников.
4. Выбор шрифтов:
Шрифты играют важную роль в визуальном дизайне интерфейса Windows Forms. Выбор правильного шрифта и его размера может существенно повлиять на читаемость текста и общий стиль вашего приложения.
Windows Forms предоставляет множество вариантов шрифтов для выбора. Вы можете использовать стандартные шрифты, такие как Arial или Times New Roman, или выбрать собственный шрифт из установленных на вашей системе.
5. Создание адаптивного интерфейса:
Адаптивный интерфейс — это интерфейс, который может приспосабливаться к различным размерам экрана и разрешениям. Вам следует учтить, что пользователи могут использовать ваше приложение на разных устройствах, таких как настольные компьютеры, ноутбуки, планшеты и смартфоны.
Для создания адаптивного интерфейса вам нужно использовать различные компоненты Windows Forms, такие как панели прокрутки (ScrollBars), элементы раскрывающегося списка (ComboBox) и динамически изменяющиеся размеры элементы управления.
6. Валидация пользовательского ввода:
Валидация пользовательского ввода — важная часть дизайна Windows Forms. Хорошо спроектированный интерфейс должен предполагать возможные ошибки или неправильное использование пользователем.
Вы можете использовать специальные элементы управления, такие как провайдер ввода (ErrorProvider) или текстовое поле с подсказкой (ToolTip), чтобы облегчить ввод данных и предупредить пользователя об ошибках.
7. Управление расположением элементов:
Расположение элементов на форме — еще один важный аспект дизайна Windows Forms. Вы должны тщательно продумать, какие элементы будут размещены на форме и как они будут отображаться.
Windows Forms предлагает различные способы управления расположением элементов. Вы можете использовать свойства макета (Layout) или таблицы (TableLayout), чтобы автоматически изменять размер и позицию элементов в зависимости от размера формы или свойств элементов.
8. Создание пользовательских элементов управления:
Windows Forms предоставляет широкий выбор стандартных элементов управления, но иногда вам может понадобиться создать собственные элементы управления, чтобы удовлетворить особые потребности вашего приложения.
Одним из способов создания собственных элементов управления является использование компонента пользовательского элемента управления (UserControl). Вы можете создать пользовательский элемент управления, состоящий из нескольких других элементов управления, и повторно использовать его в вашем приложении.
В заключение, дизайн Windows Forms — это важная часть процесса разработки приложений. Хорошо спроектированный пользовательский интерфейс может сделать ваше приложение более привлекательным и удобным в использовании для ваших пользователей. Следуйте рекомендациям, описанным в этой статье, и создавайте мощные и удобные пользовательские интерфейсы в своих приложениях на Windows Forms.