Для проверки целостности системных файлов и восстановления поврежденных файлов (библиотек) компонентов в Windows (Windows Server) можно использовать команды SFC и DISM. Эти две утилиты могут быть крайне полезными, если операционная система Windows работает нестабильно, появляются ошибки при запуске стандартных приложений или служб, после вирусного заражения и т.д.
В этой статье мы рассмотрим, как использовать команды
sfc /scannow
,
DISM /Online /Cleanup-Image /RestoreHealth
или
Repair-WindowsImage -Online -RestoreHealth
для восстановления образа и системных фалов в Windows 10/11 и Windows Server 2022/2019/2016.
Содержание:
- SFC /scannow: восстановление системных файлов Windows
- Проверка целостности хранилища компонентов Windows с помощью DISM
- Восстановление образа Windows с помощью DISM /RestoreHealth
- DISM /Source: восстановление образа Windows с установочного диска
- Восстановление образа Windows с помощью PowerShell
- DISM: восстановление поврежденного хранилища компонентов, если Windows не загружается
SFC /scannow: восстановление системных файлов Windows
Перед тем, как восстанавливать образ Windows с помощью DISM, рекомендуется сначала попробовать проверить целостность системных файлов с помощью утилиты SFC (System File Checker). Команда
sfc /scannow
позволяет проверить целостность системных файлов Windows. Если какие-то системные файлы отсутствуют или повреждены, утилита SFC попробует восстановить их оригинальные копии из хранилища системных компонентов Windows (каталог C:\Windows\WinSxS).
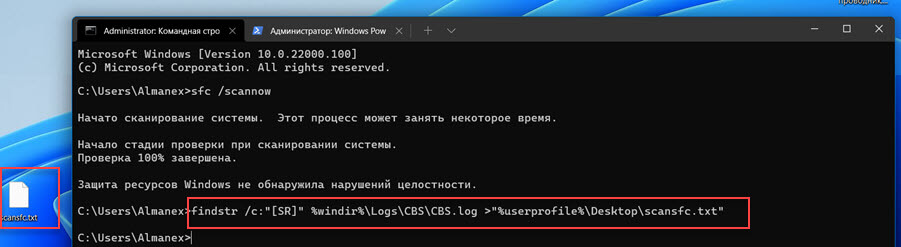
Утилита SFC записывает все свои действия в лог-файл
windir%\logs\cbs\cbs.log
. Для всех записей, оставленных SFC в файле CBS.log проставлен тег [SR]. Чтобы выбрать из лога только записи, относящиеся к SFC, выполните команду:
findstr /c:"[SR]" %windir%\Logs\CBS\CBS.log >"%userprofile%\Desktop\sfc.txt"
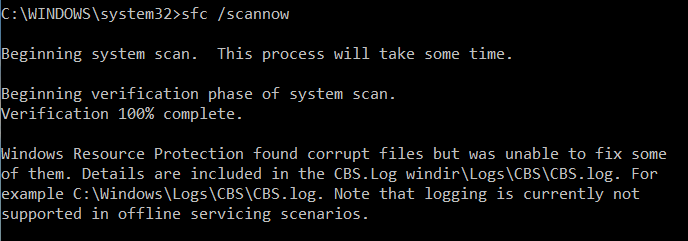
Если команда sfc /scannow возвращает ошибку “
Программа защиты ресурсов Windows обнаружила повреждённые файлы, но не может восстановить некоторые из них / Windows Resource Protection found corrupt files but was unable to fix some of them
”, скорее всего утилита не смогла получить необходимые файла из хранилища компонентов (образа) Windows.
В этом случае вам нужно попробовать восстановить хранилище компонентов вашего образа Windows с помощью DISM.
После восстановления образа вы можете повторно использовать утилиту SFC для восстановления системных файлов.
Проверка целостности хранилища компонентов Windows с помощью DISM
Утилита DISM (Deployment Image Servicing and Management) доступна во всех версиях Windows, начиная с Vista.
Для сканирования образа Windows на наличие ошибок и их исправления используется параметр DISM /Cleanup-image. Команды DISM нужно запускать из командной строки, с правами администратора.
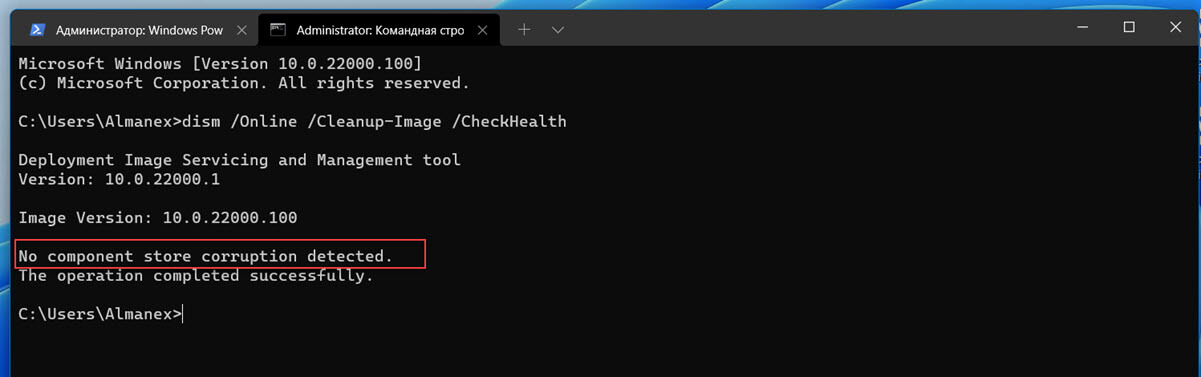
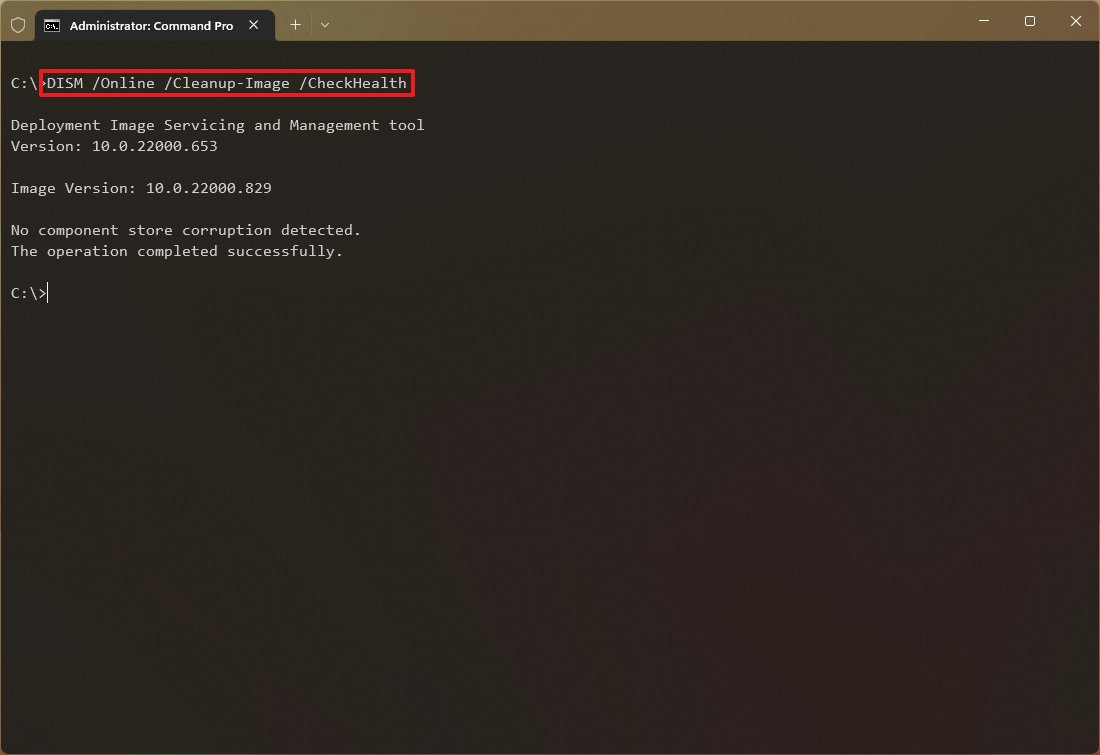
Чтобы проверить наличие признака повреждения хранилища компонентов в образе Windows (флаг CBS), выполните команду (не применимо к Windows 7/Server 2008R2):
DISM /Online /Cleanup-Image /CheckHealth
Эта команда не выполняет полное сканирование хранилища компонентов. Проверяются лишь записанные ранее маркеры повреждений и события в журнале Windows. Изменения в образ не вносятся. Команда проверит, не помечен ли ваш образ Windows как поврежденный и возможно ли исправить его.
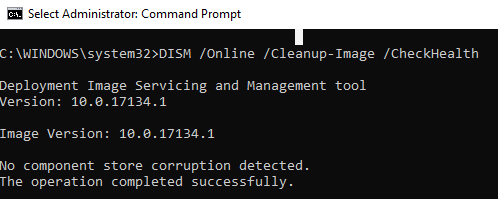
В этом примере команда вернула, что с образом все хорошо:
No component store corruption detected.
The operation completed successfully.
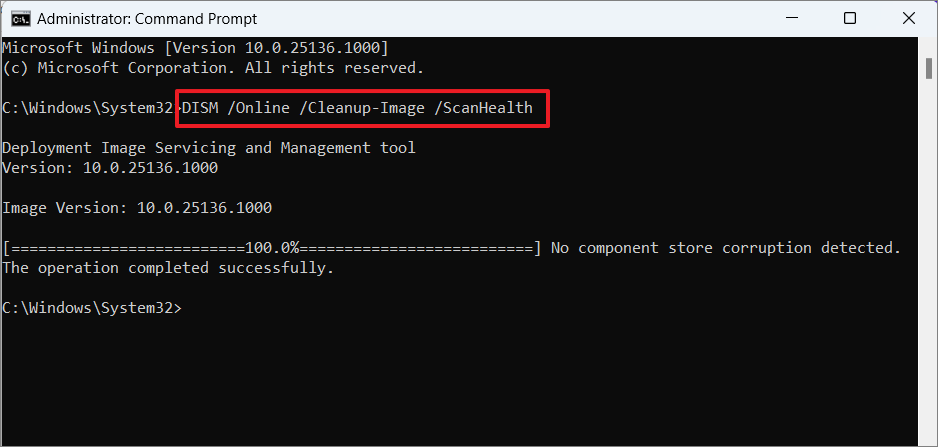
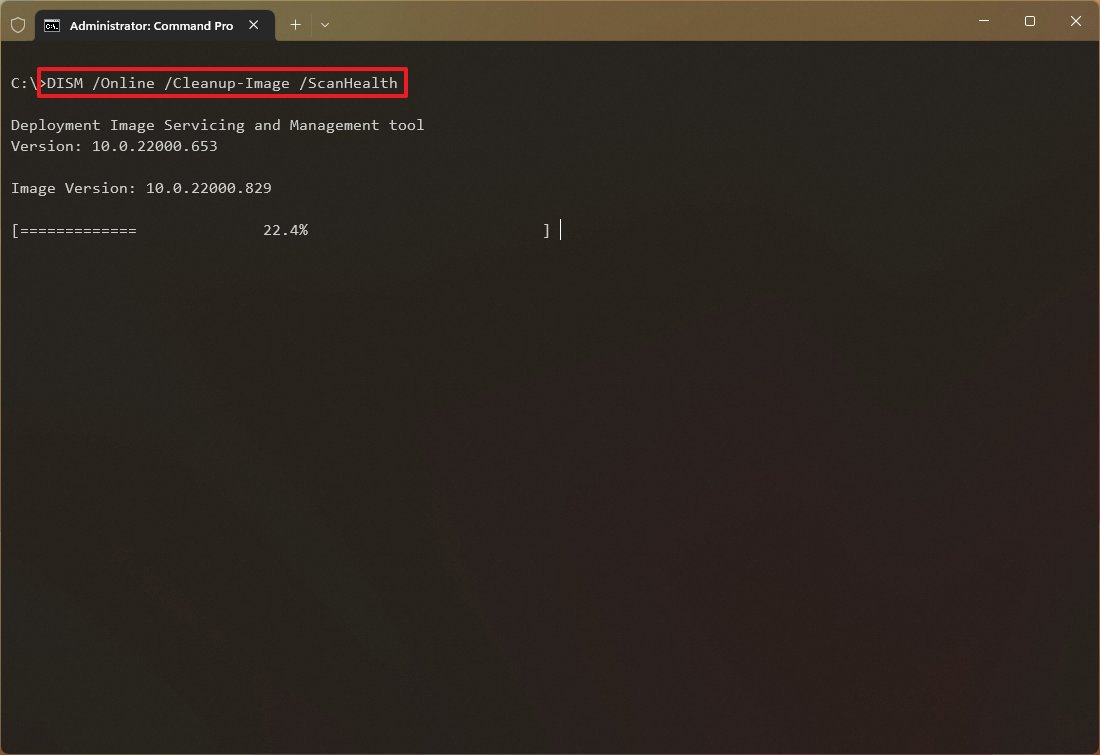
Чтобы выполнить полное сканирование хранилища компонентов на наличие повреждений в хранилище компонентов Windows, запустите команду:
DISM /Online /Cleanup-Image /ScanHealth
Команда проверки образа Windows может выполняться довольно долго (от 10 до 30 минут). И вернет один из трех результатов:
- No component store corruption detected – DISM не обнаружил повреждения в хранилище компонентов;
- The component store is repairable – DISM обнаружил ошибки в хранилище компонентов и может исправить их;
- The component store is not repairable – DISM не может исправить хранилище компонентов Windows (попробуйте использовать более новую версию DISM или вам придется восстанавливать образ Windows из резервной копии, сбрасывать или полностью переустанавливать вашу копию Windows.

В Windows 7 и Windows Server 2008 R2 для использования параметра DISM /ScanHealth нужно установить отдельное обновление KB2966583. Иначе при запуске DISM будет появляться “
Ошибка 87. Параметр ScanHealth не распознан в этом контексте
”.
Команда DISM /ScanHealth может вернуть ошибки:
- Ошибка: 1726. Сбой при удалённом вызове процедуры;
- Ошибка: 1910. Не найден указанный источник экспорта объекта.
Это однозначно говорит о том, что ваш образ Windows поврежден и его нужно восстановить.
Восстановление образа Windows с помощью DISM /RestoreHealth
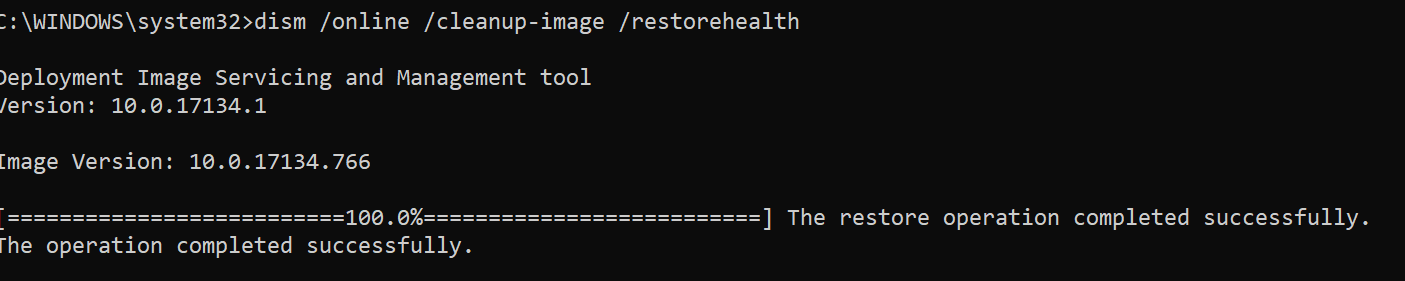
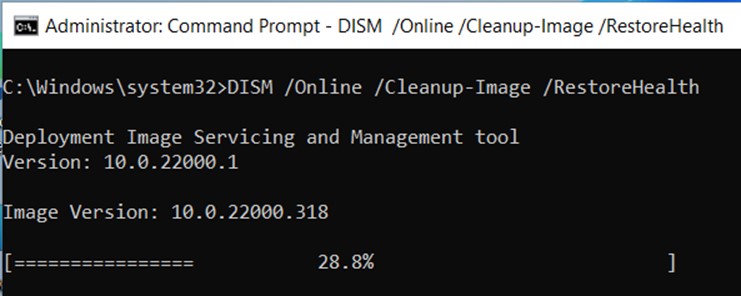
Чтобы исправить повреждения в хранилище компонентов образа Windows нужно использовать опцию RestoreHealth команды DISM. Эта опция позволит исправить найденные в образе ошибки, автоматически скачать и заменить файлы повреждённых или отсутствующих компонентов эталонными версиями файлов из центра обновлений Windows (на компьютере должен быть доступ в Интернет). Выполните команду:
DISM /Online /Cleanup-Image /RestoreHealth
В Windows 7/2008 R2 эта команда выглядит по другому:
DISM.exe /Online /Cleanup-Image /ScanHealth
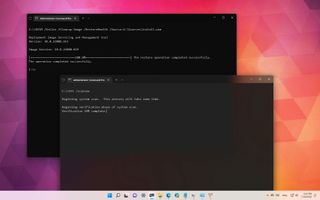
Процесс сканирования и восстановления компонентов может быть довольно длительным (30 минут или более). DISM автоматически загрузит недостающие или поврежденные файлы образа с серверов Windows Update.
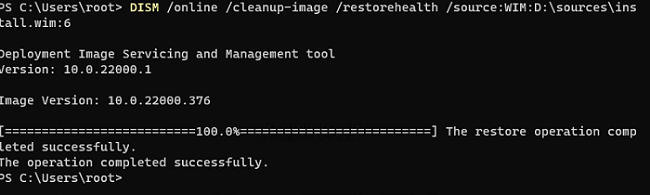
Восстановление выполнено успешно. Операция успешно завершена.
The restore operation completed successfully.
DISM /Source: восстановление образа Windows с установочного диска
Если на компьютере (сервере) отсутствует доступ в Интернет или отключена/повреждена служба Windows Update (как восстановить клиент Windows Update), то при восстановлении хранилища компонентов появятся ошибки:
- 0x800f0906 — Не удалось скачать исходные файлы. Укажите расположение файлов, необходимых для восстановления компонента, с помощью параметра Источник (0x800f0906 — The source files could not be downloaded. Use the source option to specify the location of the files that are required to restore the feature);
- Ошибка: 0x800f0950 — Сбой DISM. Операция не выполнена (0x800f0950 — DISM failed. No operation was performed);
- Ошибка:0x800F081F. Не удалось найти исходные файлы. Укажите расположение файлов, необходимых для восстановления компонента, с помощью параметра Источник (Error 0x800f081f, The source files could not be found. Use the «Source» option to specify the location of the files that are required to restore the feature).
 <
<
Во всех этих случаях вы можете использовать альтернативные средства получения оригинальных файлов хранилища компонентов. Это может быть:
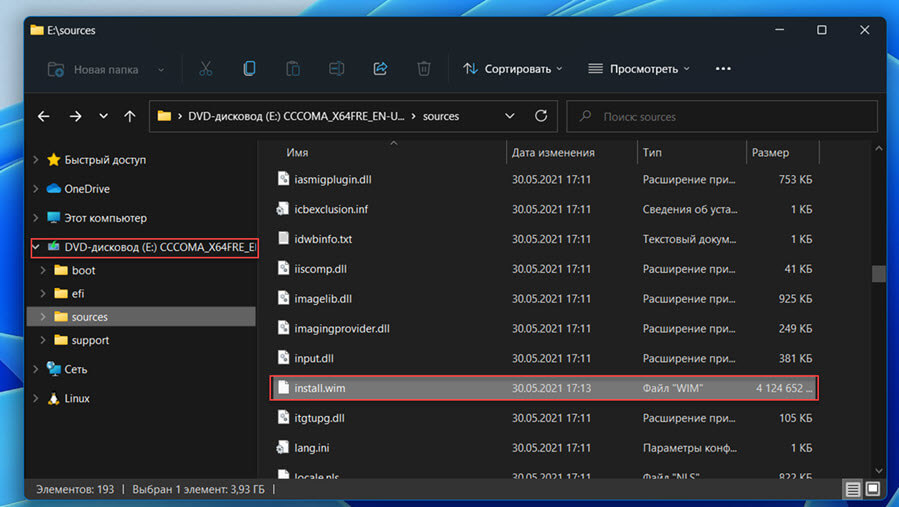
- Установочный диск/флешка/iso образ Windows
- Смонтированный файл wim
- Папка \sources\SxS с установочного диска
- Файл install.wim с установочным образом Windows
Вы можете указать WIM или ESD файл с оригинальным установочным образом Windows, который нужно использовать в качестве источника для восстановления файлов системы. Предположим, вы смонтировали установочный ISO образ Windows 11 в виртуальный привод D:.
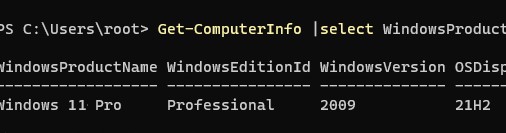
Примечание. Для восстановления поврежденных файлов в хранилище компонентов из локального источника версия и редакция Windows в образе должна полностью совпадать с вашей.
С помощью следующей PowerShell команды проверьте, какая версия Windows установлена на вашем компьютере:
Get-ComputerInfo |select WindowsProductName,WindowsEditionId,WindowsVersion, OSDisplayVersion
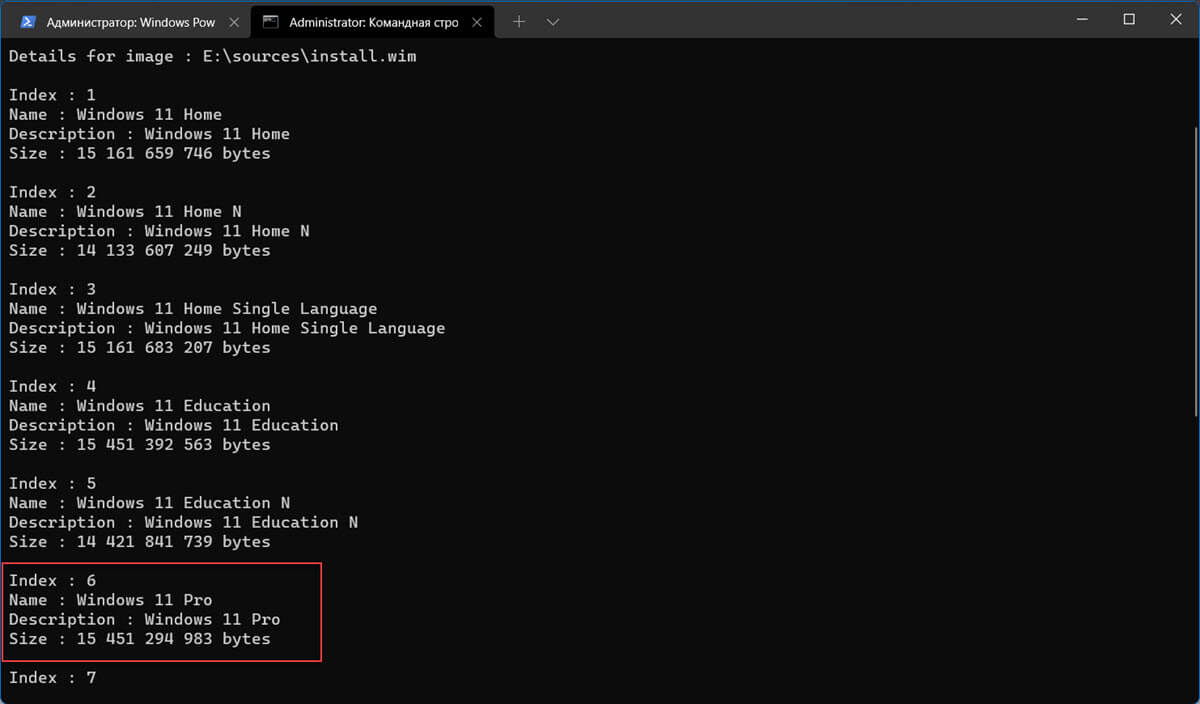
Выведите список доступных версий Windows в установочном образе:
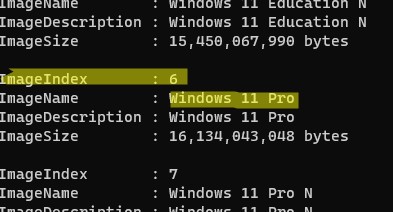
Get-WindowsImage -ImagePath "D:\sources\install.wim"
В нашем случае образ Windows 11 Pro в образе install.wim имеет
ImageIndex = 6
.
Для восстановления хранилища компонентов из локального WIM/ESD файла с блокированием доступа в интернет, выполните следующую команду (не забудьте указать ваш индекс версии Windows в файле):
DISM /online /cleanup-image /restorehealth /source:WIM:D:\sources\install.wim:6 /limitaccess
Или:
DISM /online /cleanup-image /restorehealth /source:ESD:D:\sources\install.esd:6 /limitaccess
Если при запуске появляется
- Ошибка Error: 50: DISM does not support servicing Windows PE with the /Online option, значит ваша DISM считает, что вы используете WinPE образWindows. Чтобы исправить это, удалите ветку реестра HKEY_LOCAL_MACHINE\SYSTEM\CurrentControlSet\Control\MiniNT.
Ошибка DISM Error 87: проверьте правильно написания команды, убедитесь что вы используете версию DISM для вашей версии Windows (обычно бывает при загрузке через WinPE/WinRE).
Утилита DISM пишет подробный журнал сканирования и восстановления системных файлов в файл
C:\Windows\Logs\DISM\dism.log
.
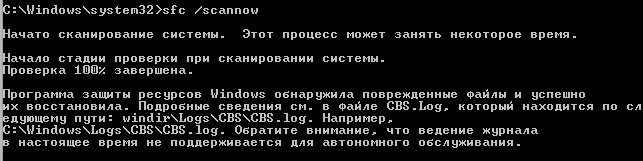
После восстановления хранилища компонентов вы можете запустить утилиту проверки системных файлов
sfc /scannow
. Скорее всего она успешно восстановит поврежденные файлы:
Программа защиты ресурсов Windows обнаружила поврежденные файлы и успешно их восстановила.
Windows Resource Protection found corrupt files and successfully repaired them.
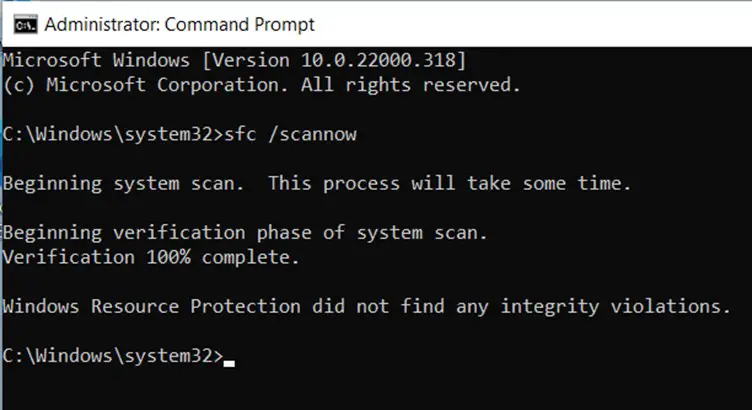
Если все системные файлы целы, появится сообщение:
Windows Resource Protection did not find any integrity violations
Восстановление образа Windows с помощью PowerShell
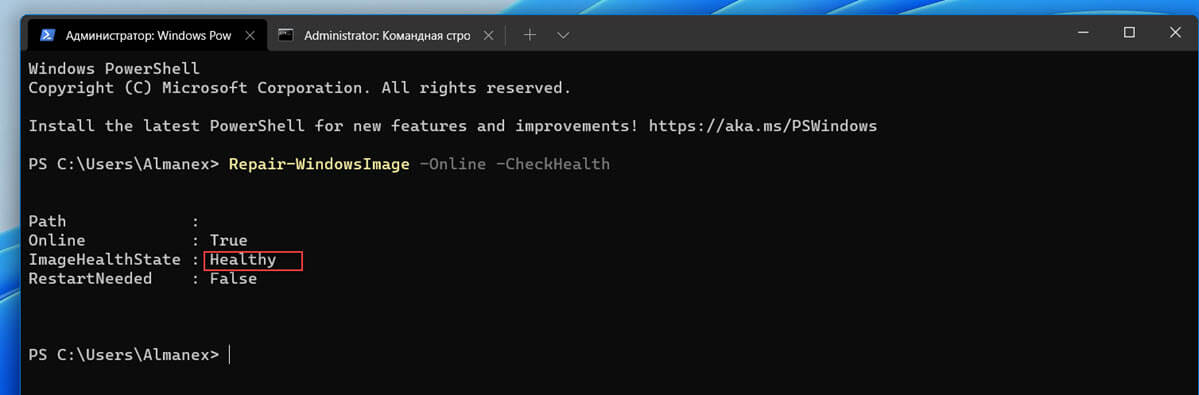
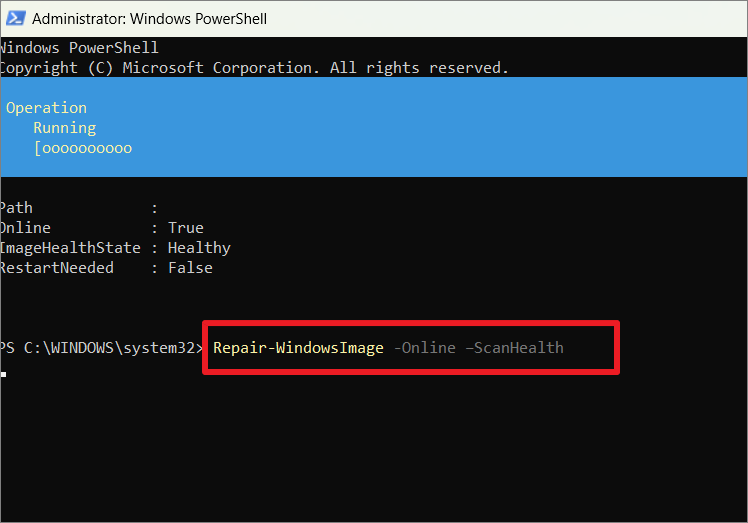
В версии PowerShell в Windows 10/11 и Windows Server 2022/2019 есть аналоги рассмотренных выше команд DISM. Для сканирования хранилища компонентов и поиска повреждений в образе выполните:
Repair-WindowsImage -Online –ScanHealth
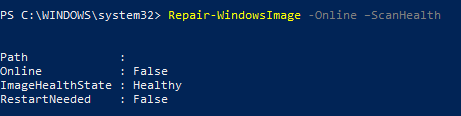
Если ошибок в хранилище компонентов не обнаружено, появится сообщение:
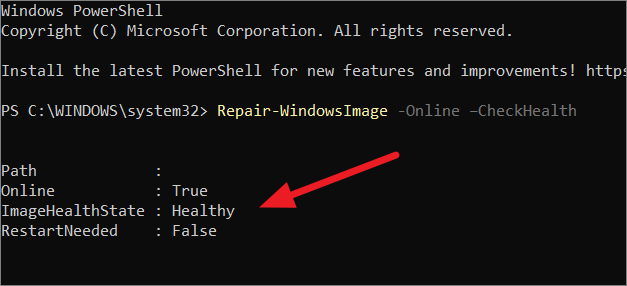
ImageHealth State: Healthy
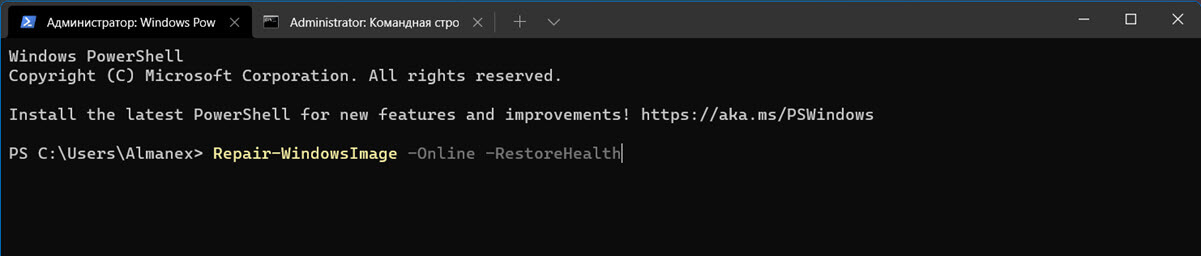
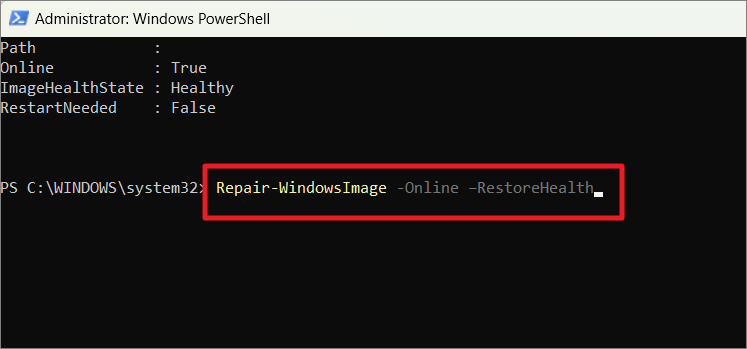
Для запуска восстановления системных компонентов и файлов наберите:
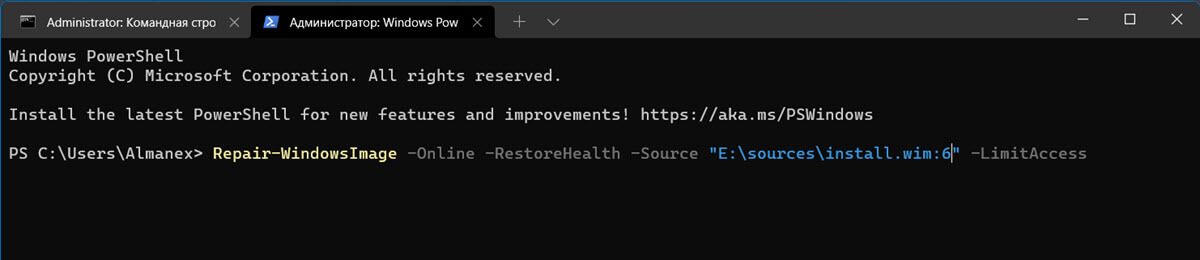
Repair-WindowsImage -Online -RestoreHealth
При отсутствии доступа к интернету эта команда может зависнуть в процессе восстановления образа. Вы можете восстановить системные компоненты из локальной копии образа Windows в виде WIM/ESD файла, скопированного с установочного ISO образа Windows 10 (здесь также нужно указать индекс версии Windows в wim файле в качестве источника восстановления):
Repair-WindowsImage -Online -RestoreHealth -Source D:\sources\install.wim:5 –LimitAccess
DISM: восстановление поврежденного хранилища компонентов, если Windows не загружается
Если Windows не загружается корректно, вы можете выполнить проверку и исправление системных файлов в оффлайн режиме.
- Для этого загрузите компьютер с установочного образа Windows (проще всего создать загрузочную USB флешку с Windows 10/11 с помощью Media Creation Tool) и на экране начала установки нажмите
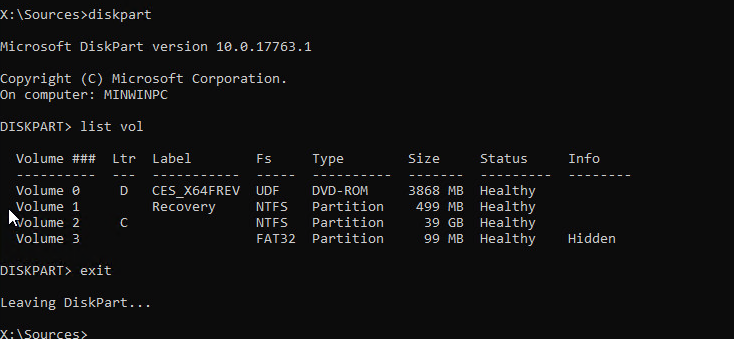
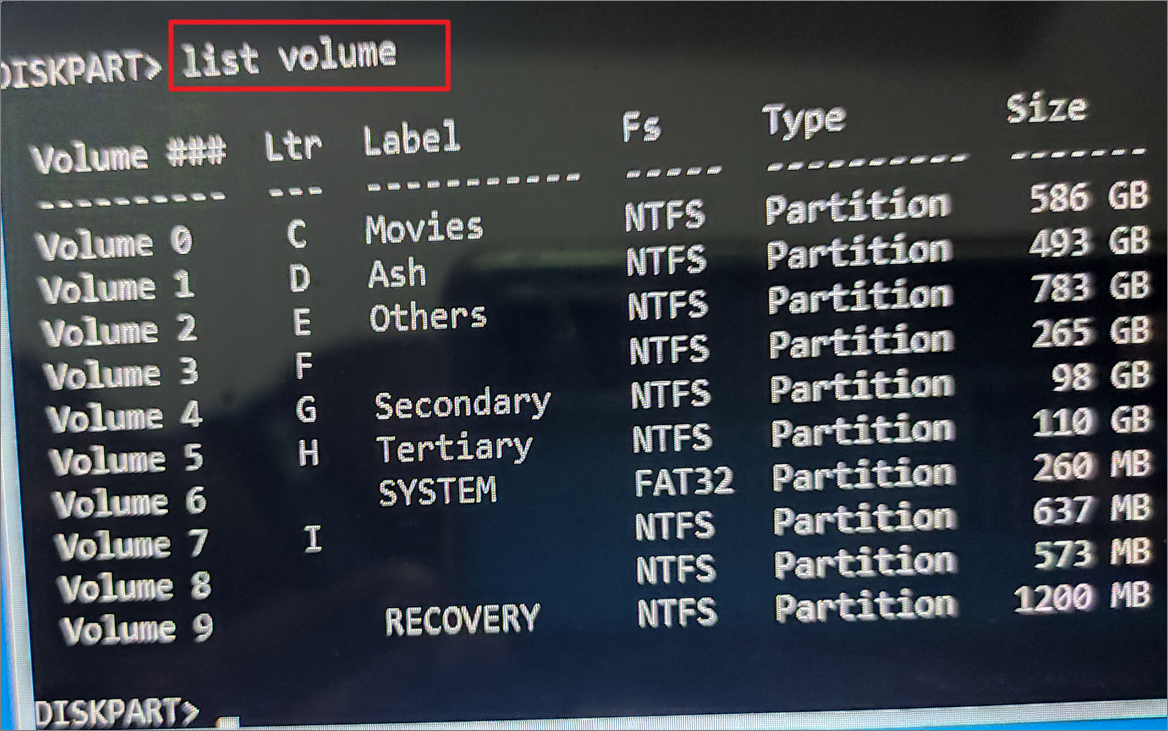
Shift + F10 - Чтобы разобраться с буквами дисков, назначенных в среде WinPE, выполните команду
diskpart
->
list vol
(в моем примере диску, на котором установлена Windows присвоена буква C:\, эту букву я буду использовать в следующих командах);
- Проверим системные файлы и исправим поврежденные файлы командой:
sfc /scannow /offbootdir=C:\ /offwindir=C:\Windows
- Для исправления хранилища компонентов используйте следующую команду (в качестве источника для восстановления компонентов мы используем WIM файл с установочным образом Windows 10, с которого мы загрузили компьютер):
Dism /image:C:\ /Cleanup-Image /RestoreHealth /Source:WIM:D:\sources\install.wim:6
- Если на целевом диске недостаточно места, то для извлечения временных файлов нам понадобится отдельный диск достаточного размера, например F:\, на котором нужно создать пустой каталог:
mkdir f:\scratch
и запустить восстановление хранилища компонентов командой:
Dism /image:C:\ /Cleanup-Image /RestoreHealth /Source:D:\sources\install.wim /ScratchDir:F:\scratch


Совет. Другие полезные команды DISM, которые должен знать администратор:
-
DISM /Add-Package
– установка MSU/CAB файлов обновлений, интеграция обновлений в образ Windows; -
DISM /Get-Drivers
– получение списка установленных драйверов; -
DISM /Add-Driver
– добавление драйверов в образ; -
DISM /Export-Driver
– экспорт установленных драйверов Windows; -
DISM /Add-Capability
– установка дополнительных компонентов Windows через Features on Demand (например, RSAT, сервер OpenSSH или ssh клиент Windows; -
DISM /Enable-Features
и
/Disable-Features
– включение и отключение компонентов Windows (например, протокола SMBv1), -
DISM /online /Cleanup-Image /StartComponentCleanup
– очистка хранилища компонентов и удаление старых версий компонентов (папки WinSxS); -
DISM /set-edition
– конвертирование ознакомительной редакции Windows на полную без переустановки.
Если определенные функции Windows 11 не работают или система завершает работу, для проверки системных файлов и сканирования Windows 11, используйте SFC или DISM, чтобы восстановить поврежденные системные файлы.
Несмотря на то, что приведенные ниже шаги могут показаться сложными, не спешите и просто выполните их по порядку.
Команда sfc /scannow проверит все защищенные системные файлы и заменит поврежденные файлы их кэшированной копией, расположенной в сжатой папке по адресу %WinDir%\System32\dllcache.
Инструмент DISM (Deployment Image Servicing and Management) — это доступный в Windows исполняемый файл командной строки уровня администратора, который можно использовать для восстановления образа Windows 11.
При запуске команда DISM обращается к Центру обновления Windows, чтобы получить файлы для устранения повреждений. Но если поврежден Центр обновления Windows, используйте работающий экземпляр Windows 11 в качестве источника восстановления либо ISO образ.
Windows 11 Запуск средства проверки системных файлов (SFC.exe)
В Windows 11, выполнить команду sfc /scannow вы можете из Windows Terminal, классической командной строки или PowerShell. В результате выполнения команды будет выполнено сканирование, а результат проверки записан в файл CBS.LOG.
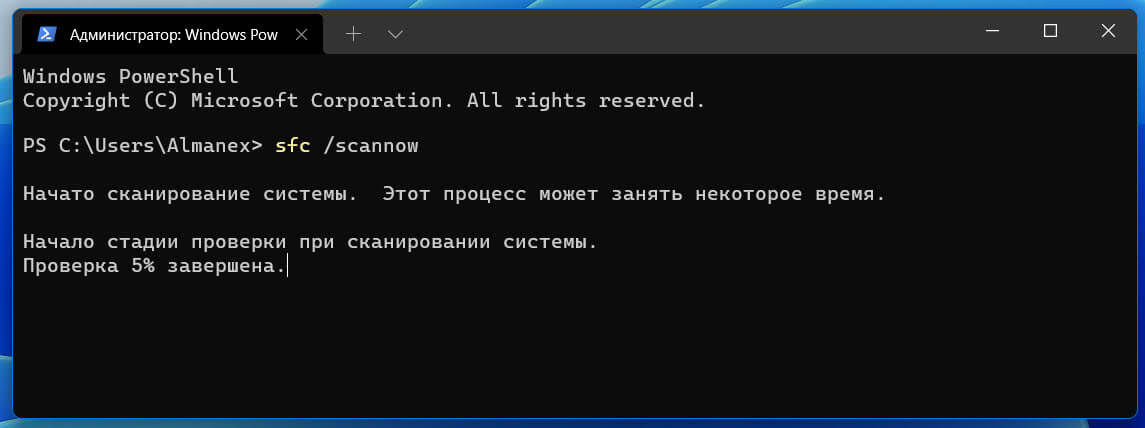
Как выполнить команду SFC / SCANNOW
- Запустите новое приложение Терминал Windows от имени администратора.
- Здесь используйте на выбор «PowerShell» (Откроется по умолчанию) или «Командную строку».
- Выполните команду:
sfc /scannow
SFC проверит целостность системных файлов
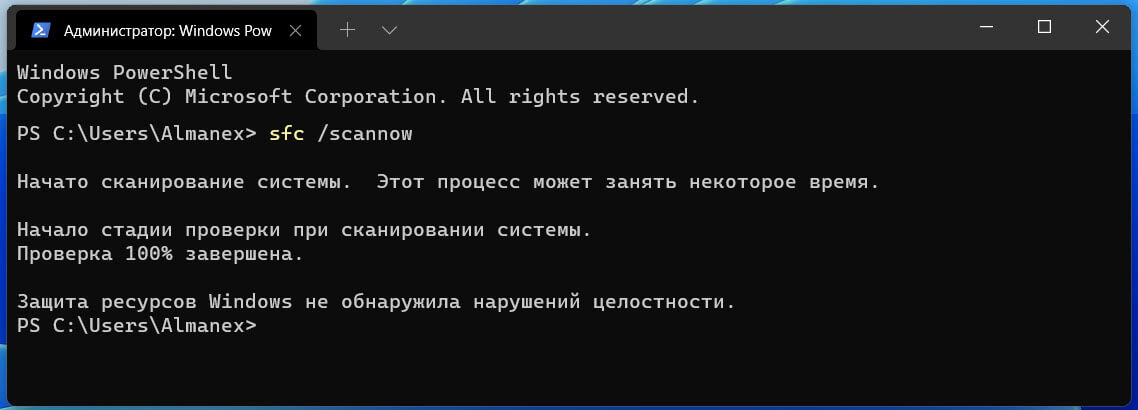
Возможные результаты:
- Windows защита ресурсов не обнаружила нарушений целостности.
- Windows защита ресурсов обнаружила поврежденные файлы и успешно выполнила их восстановление.
- Защита ресурсов Windows обнаружила поврежденные файлы, но не смогла исправить некоторые из них.
- Защите ресурсов Windows не удалось выполнить требуемую операцию.
- Если, Защита ресурсов Windows обнаружила поврежденные файлы, но не смогла исправить некоторые из них, перезагрузите компьютер и снова запустите команду. Как вариант, попробуйте отключить быстрый запуск, перезагрузите Windows 11 и начните проверку заново.
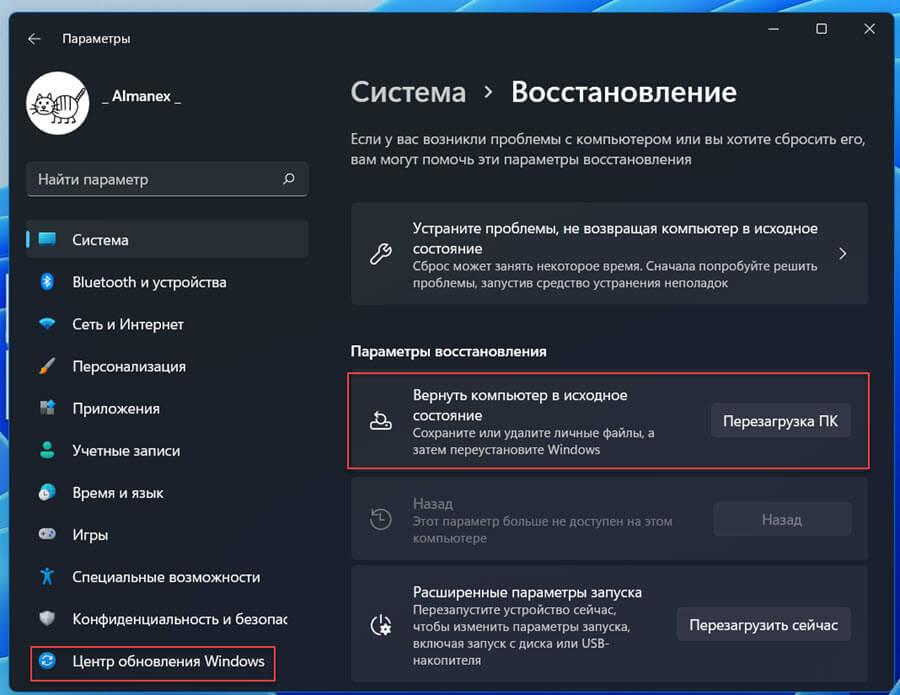
Если это не помогает, попробуйте вернуть компьютер с Windows 11 в исходное состояние с помощью приложения «Параметры» → «Центр обновления» → «Дополнительные параметры» → «Восстановление».
SFC просмотр результатов сканирования из файла CBS.LOG
После выполнения проверки системных файлов под Windows, инструмент SFC добавит информацию в файл каталога: C:\Windows\Logs\CBS\CBS.log. Открыв файл, вы сможете узнать, подробности последнего сканирования.
Чтобы быстро открыть CBS.LOG файл
- Откройте Терминал и выполните команду.
Командная строка:
findstr /c:"[SR]" %windir%\Logs\CBS\CBS.log >"%userprofile%\Desktop\scansfc.txt"
PowerShell:
(Select-String [SR] $env:windir\Logs\CBS\CBS.log -s).Line >"$env:userprofile\Desktop\scansfc.txt"

Все данные относящиеся к сканированию SFC будут добавлены в файл «scansfc.txt» на рабочем столе.
- Откройте его. Это поможет вам посмотреть все поврежденные и восстановленные файлы.
Примечание: В файл «scansfc.txt» содержит сведения о каждом запуске средства проверки системных файлов на вашем устройстве. Он также содержит информацию о файлах, которые не были исправлены средством проверки системных файлов. Проверьте дату и время записей, чтобы определить проблемные файлы, обнаруженные при последнем запуске средства проверки системных файлов.
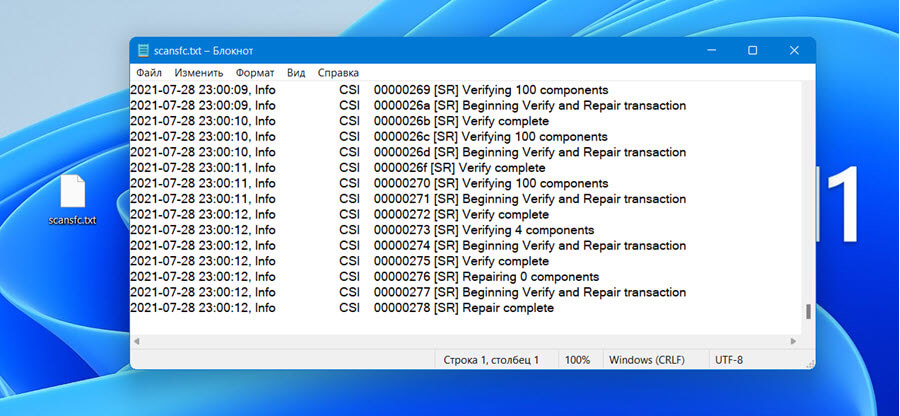
После определения, какой системный файл поврежден и не может быть восстановлен, с помощью подробных сведений в файле, выясните расположение поврежденного файла, затем можете вручную заменить поврежденный файл его гарантировано работоспособной копией.
Восстановление с помощью автономного сканирования SFC, если Windows 11 не загружается
- Откройте командную строку из среды восстановления Windows 11.
- Выполните команду и нажмите Enter:
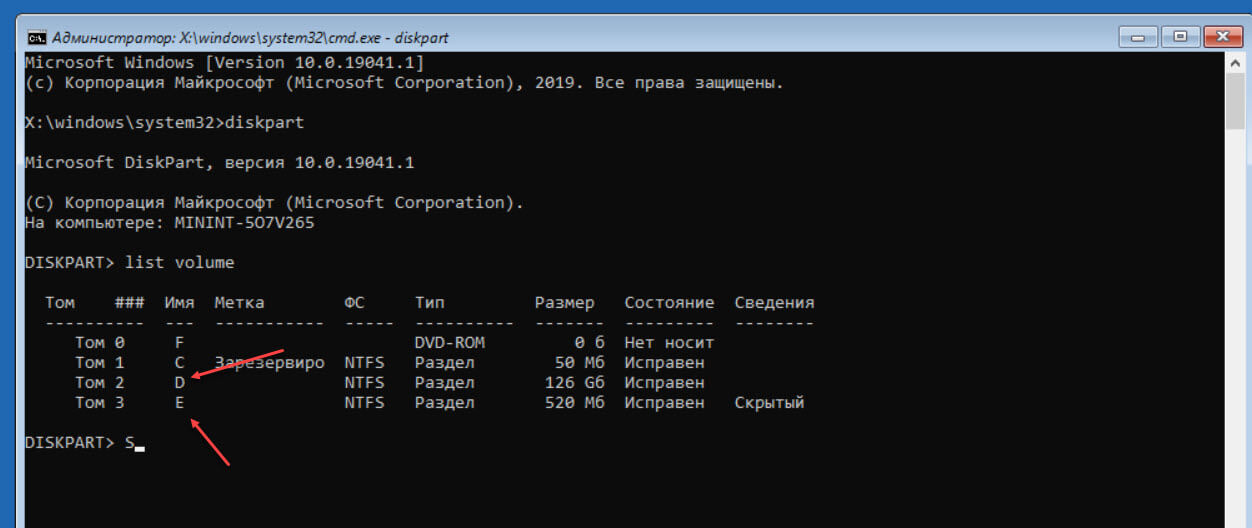
diskpart
- Введите еще одну команду:
list volume
В выводе определите букву диска который отмечен как раздел восстановления, см. скрин (диск 520 МБ размер вашем случае может отличатся) и букву системного диска с Windows 11. Обратите внимание на картинке диск «E:» — это раздел восстановления, а соответственно «D:» это системный раздел (Среда восстановления назначила диску с Windows 11 букву (F:) но если вы загрузитесь в операционную систему диск будет иметь букву «С:»).
- Введите команду ниже, чтобы выйти:
exit
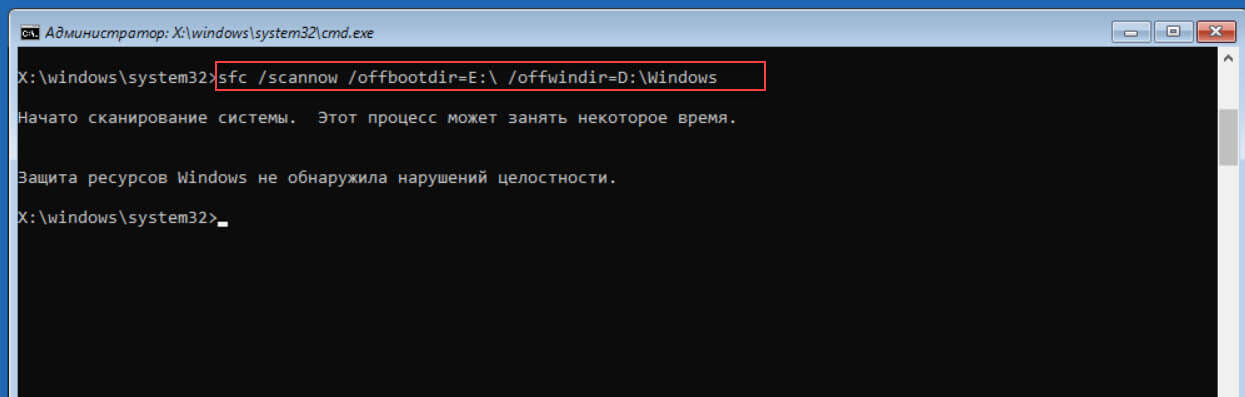
- Введите новую команду:
sfc /scannow /offbootdir=E:\ /offwindir=D:\Windows
Предварительно заменив буквы дисков на буквы, которые вы определили ранее. Программа защиты ресурсов выполнит сканирование и если обнаружит повреждённые файлы восстановит их.
- Перезагрузите компьютер и попробуйте войти в операционную систему.
Восстановление Windows 11 с помощью инструмента DISM
Если инструменту SFC не удается исправить серьезное повреждение ОС необходимо использовать DISM. Для получения актуальных версий файлов DISM использует Центр обновления Windows (необходимо подключение к интернету).
В дополнение этому, вы можете использовать локальный (автономный) файл install.wim или install.esd из имеющегося ISO образа системы или загрузочного диска с Windows 11. Перед этим, необходимо проверить целостность так называемого хранилища компонентов Windows.
Чтобы проверить целостность хранилища компонентов Windows с помощью DISM
- Откройте новое окно терминала Windows от имени администратора.
Для командной строки введите:
dism /Online /Cleanup-Image /CheckHealth
Если используете PowerShell и выполните команду:
Repair-WindowsImage -Online -CheckHealth
Три состояния хранилища компонентов Windows
- Healthy (Исправен)
- Repairable (Ремонтопригодный)
- Non-repairable (Не подлежит ремонту)
Вот как восстановить Windows 11 с помощью инструмента DISM
- Откройте Windows Терминал от имени администратора.
PowerShell, введите команду:
Repair-WindowsImage -Online -RestoreHealth
Командная строка введите и нажмите Enter:
dism /Online /Cleanup-Image /RestoreHealth

Процесс сканирования и восстановления компонентов может занять много времени, будьте терпеливы.
Как использовать DISM для Восстановления Windows 11 с помощью Install.wim или install.esd
- Кликните на ISO-файле Windows 11 правой кнопкой мыши и выберите в контекстном меню «Подключить» или присоедините загрузочный USB-диск к вашему устройству.
Запомните букву диска смонтированного образа или флешки.
- От имени администратора откройте новое окно терминала Windows и выполните команду, предварительно заменив букву диска на (букву смонтированного образа или загрузочной флешки).
Get-WindowsImage -ImagePath "E:\sources\install.wim"
Если ваш носитель содержит ESD файл вместо WIM:
Get-WindowsImage -ImagePath "E:\sources\install.esd"
- В результатах команды, найдите и запомните номер индекса для выпуска Windows 11, который совпадает с установленной у вас системой, в моем случае это редакция Windows11 Pro (индекс соответственно цифра «6»).
Если по умолчанию установлен PowerShell, выполните команду, заменив букву диска и номер индекса
Repair-WindowsImage -Online -RestoreHealth -Source "E:\sources\install.wim:<Index Number>" -LimitAccess
Если командная строка:
dism /Online /Cleanup-Image /RestoreHealth /Source:wim:E:\sources\install.wim:<Index Number> /limitaccess

Примечание: Если вы не укажете / Source для файлов восстановления, будет использоваться расположение по умолчанию, параметр «/LimitAccess» запрещает средству DISM использовать Центр обновления Windows в качестве источника восстановления или резервного источника восстановления.
Будьте терпеливы и дождитесь завершения процесса.
Все! Если вы ознакомились с данным руководством вы можете восстановить Windows 11 с помощью SFC и DISM.
Источник: https://docs.microsoft.com
DISM (Deployment Image Servicing and Management) is a command tool developed for administrators and experts to scan and repair Windows images including, Windows Recovery Environment, Windows Setup, and Windows PE (WinPE). It is a built-in tool in Windows 11 that can check and repair protected system files and component store of Windows images.
If your Windows 11 PC is not working properly, apps not opening, your files got corrupted, stuck on a blue screen, and others, you can run the DISM tool to fix these issues. In most cases, System File Checker (SFC scan) tool can fix various issues with your Windows installation by missing or corrupted system files. However, if the SFC tool can’t handle the issue, you can use DISM to repair images and system files on Windows 11.
Even if your system fails to boot, you can repair your system with a series of DISM commands from the Windows Recovery Environment. In this guide, we will show you how to use DISM Commands to various issues in Windows 11.
Run DISM Commands to Restore Corrupted Files
DISM first scans your computer for corrupted or missing files associated with different Windows services. After that, it will download the required images and files from the Microsoft server and replace the corrupt files. For this to work, you will need an active internet connection.
To run this tool, first, you need to launch Command Prompt with administrative privileges. Then, type the following commands one after the other and press Enter for each command:
ScanHealth: This switch scans your system’s component store for corrupted files and stores the record in the C:\Windows\Logs\CBS\CBS.log. But this command does not fix the issues. To scan for file corruption, enter the following command and press Enter:
DISM /Online /Cleanup-image /ScanhealthDISM is not case-sensitive, you can write it however you want it (DISM, dism, Dism, etc.).
CheckHealth: After the first command finishes the scan, enter this command. The CheckHealth argument verifies if any corruption has been detected in your system files by checking the existing error logs. This command will also let you know whether the image is healthy, repairable, or non-repairable: Enter the below command to check the image’s health:
DISM /Online /Cleanup-Image /CheckHealth
The checkup process will take 10-15 minutes to complete. Once it’s done, you will see one of the following messages:
- No component store corruption detected – It means the DISM scan hasn’t found any corruption or errors in the system files and no need to run the next command.
- The component store is repairable – It means some Component Store corruption has been detected and can be fixed with the /RestoreHealth argument.
- The component store is not repairable – If you get this, the following DISM command cannot fix the Windows Component Store corruption. You will have to try some other troubleshooting method to fix the error such as restoring Windows from a backup, resetting, or completely reinstalling your Windows.
RestoreHealth: This final argument repairs the corrupted files and stores the corruption records to C:\Windows\Logs\CBS\CBS.log. To restore the health of the system image, enter this command:
DISM /Online /Cleanup-Image /RestoreHealth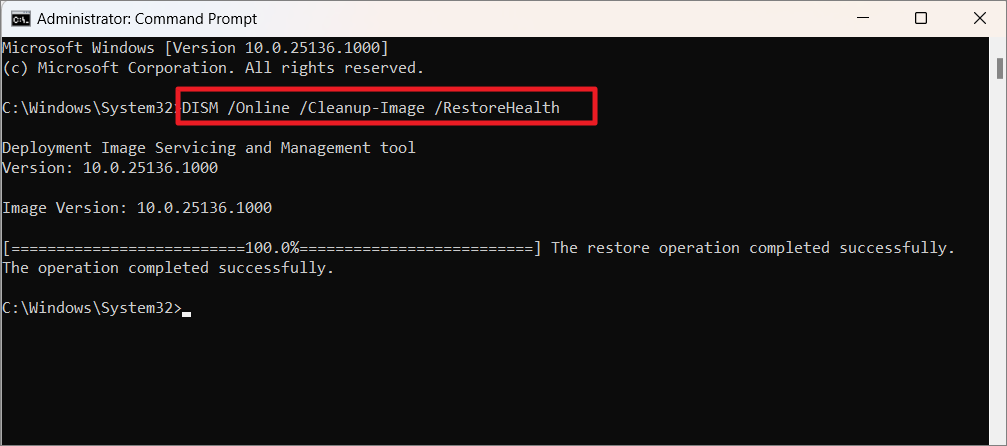
Then, wait for the process to finish which will take 10-15 minutes depending upon the corruption. If the corrupted files are repaired you will see the ‘The restore operation completed successfully.
Don’t interrupt the process until it is done. After the process is completed, restart your PC and see if the problem is resolved or not.
In case you want to check the log files to get a more detailed report of the DISM scan and repair, enter the following path in the File Explorer’s address bar and hit Enter:
C:\Windows\Logs\DISM\dism.logor
C:\Windows\Logs\CBS\CBS.log 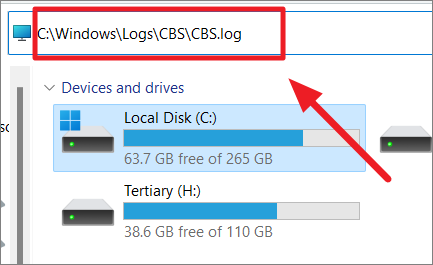
Or, you open the Run command and type one of the commands to open the log report:
%windir%/Logs/CBS/CBS.logor
%windir%\Logs\DISM\dism.logIf you see the “Windows Resource Protection detected corrupted files and successfully restored them.” message, it means DISM has found and fixed the corrupted files. You can then restart your PC and see if the problem is resolved.
Repair Windows Image with PowerShell
You can also use Windows PowerShell to repair Windows Component Store because the PowerShell version in Windows 11 and DISM commands has a similar cmdlet. To repair the Windows image with PowerShell, follow these steps:
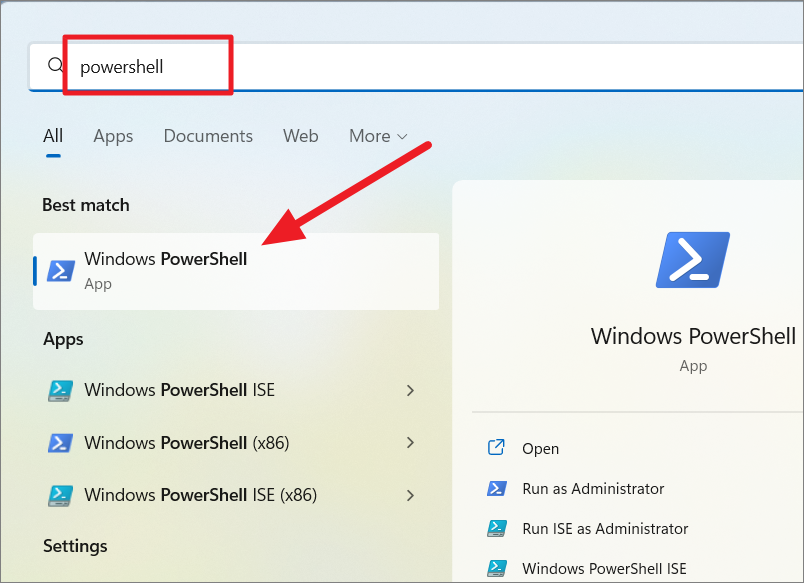
To start with launch PowerShell with administrative privileges. Search for ‘PowerShell’ in the Windows search and right-click the top result and select ‘Run as administrator’.
Check Windows Image:
Type the following command and hit Enter to check the Windows Component store for corruption:
Repair-WindowsImage -Online –CheckHealth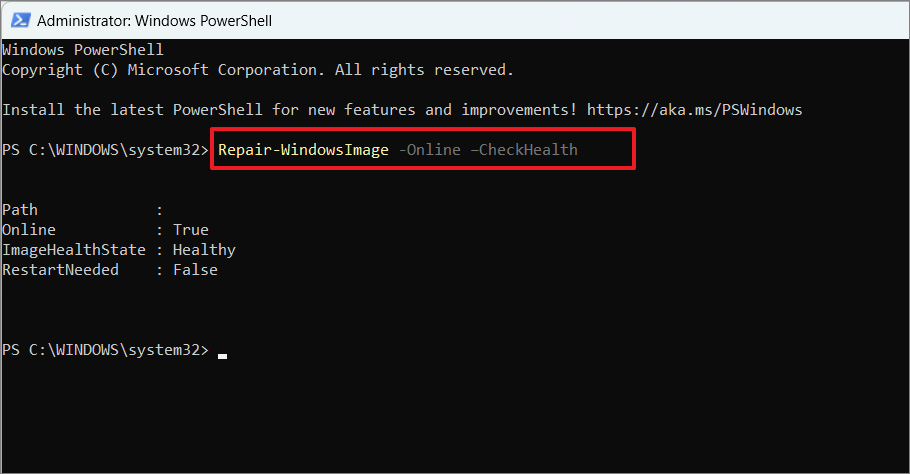
This command quickly checks if there’s any corruption that exists in your system image but it doesn’t fix anything.
If your see ‘ImageHealthState: Healthy’ on the scan report, it means no errors were found in the component store.
Scan Windows Image:
If you see the ‘ImageHealthState’ as ‘Repairable’, it means you need to run the below command to scan the image:
Repair-WindowsImage -Online –ScanHealthThe above command doesn’t fix anything, it only finds corruption and saves the details in the log file (C:\Windows\Logs\DISM\dism.log).
Repair Windows Image:
After the scan is finished, type the following command in the elevated PowerShell window and hit Enter:
Repair-WindowsImage -Online –RestoreHealthThis command checks for corruption and if it encounters any, it will automatically repair it.
If you don’t have internet, you can use the ‘Source’ option with ‘install.wim/install.esd’ to restore the system components. You can run the DISM command offline from the local Windows image file (install.wim/install.esd). To do that, execute the following command:
Repair-WindowsImage -Online -RestoreHealth -Source G:\sources\install.wim:6 -LimitAccessWhere you need to specify the Windows version index in the .esd/.wim file.

Repair Windows Image using install.esd/.wim Image Offline
If you don’t have internet access or DISM finds problems replacing the damaged files, you will need to provide another Windows image using bootable install media, or a Windows 11 ISO file. You can use the ‘install.wim’ or ‘install.esd’ file from bootable install media or mounted Windows 11 ISO file to run DISM offline.
Create Windows 11 Bootable USB Drive or Mount the Windows 11 ISO
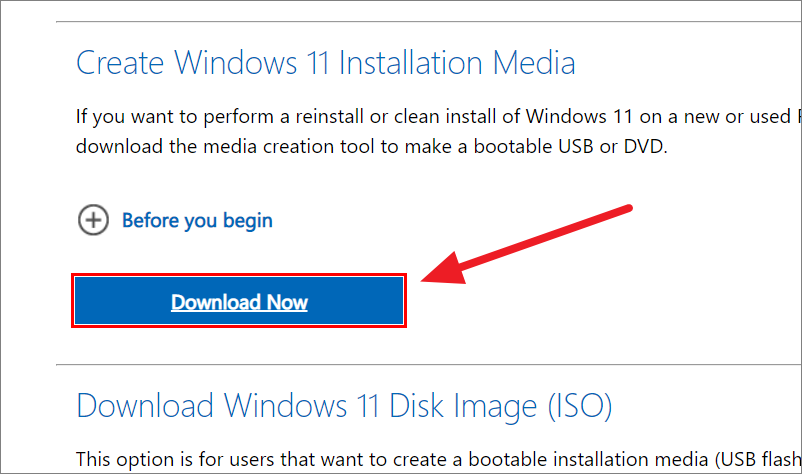
To start with, you need to download a fresh copy of Windows 11 using the Media Creation Tool. Here’s how you can create a bootable Windows USB drive:
Go to the official Windows 11 download page and click the ‘Download now’ button under the ‘Create Windows 11 Installation Media’ section.
Then, choose a destination folder and click ‘Save’.
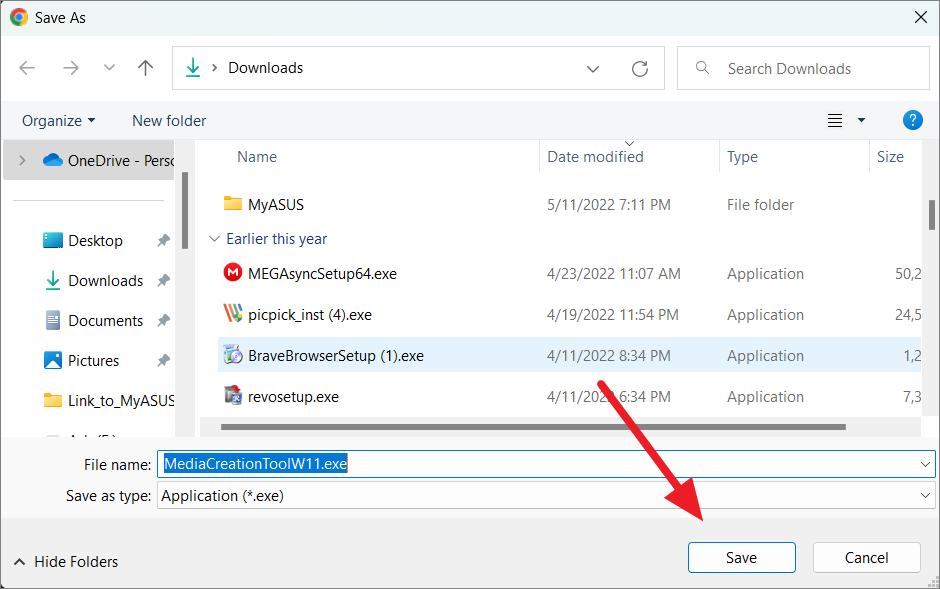
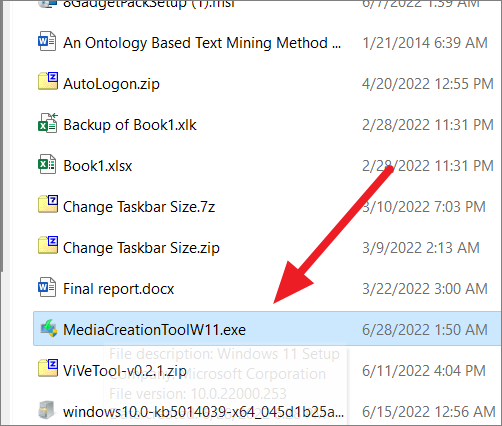
After that, double-click on the ‘MediaCreationToolW11.exe’ tool to run the setup. If you see the User Account Control prompt, click ‘Yes’.
After that, click the ‘Accept’ button to accept the license terms.
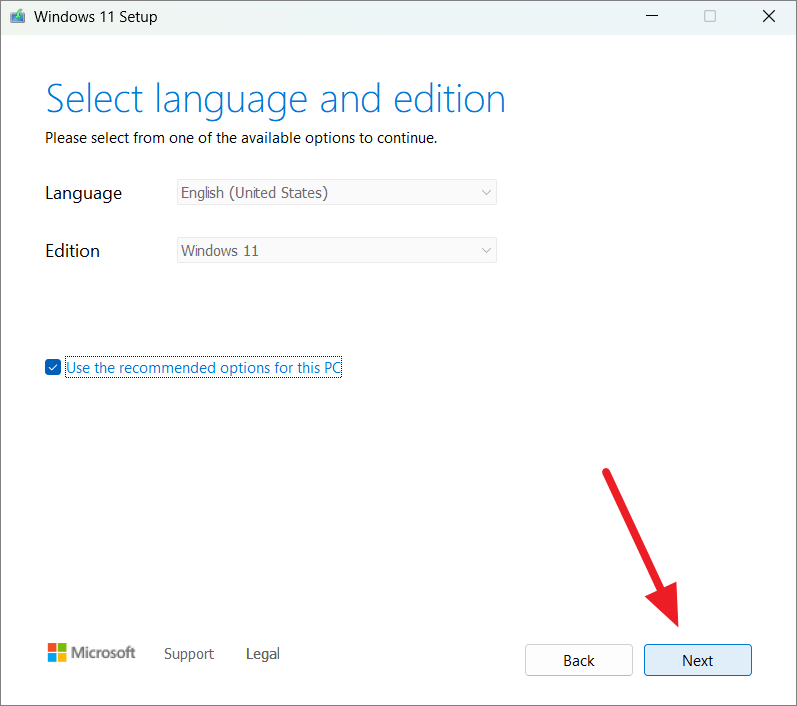
On the next window, click ‘Next’ if you want to continue with the default language (English (United States)) and edition. If you want to change the language and edition, uncheck the ‘Use the recommended options for this PC’ option and then select language and edition from the drop-down menus.
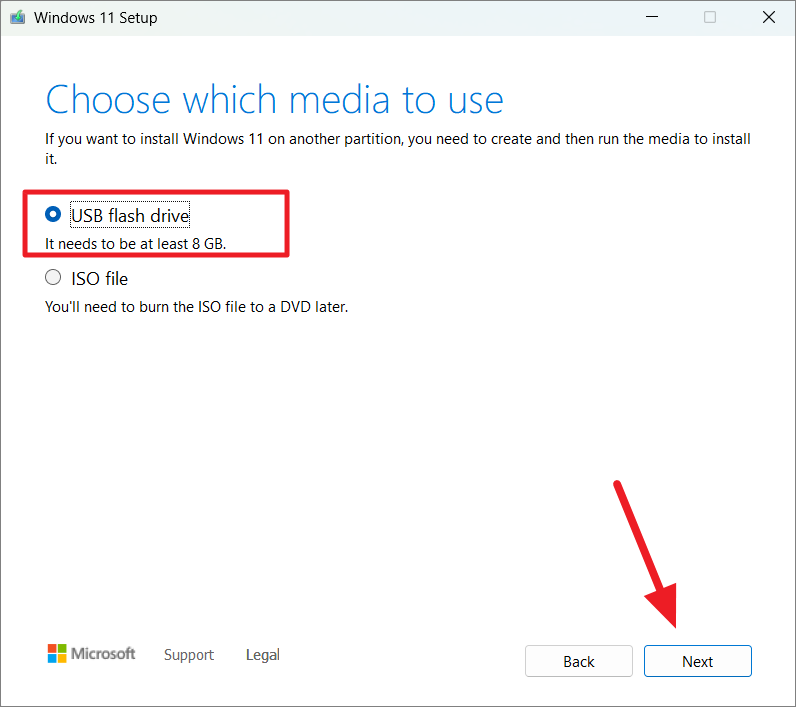
Next, choose ‘USB flash drive’ to create USB installation media. or, choose ‘ISO file’ if you want to burn the ISO to a DVD later or mount the image.
In case you choose the ‘ISO file’ as the media option, you can save the Windows 11 ISO file on your local drive. Then, double-click on the downloaded ISO file to mount the image.
Select the USB flash drive from the list of drives and click ‘Next’.
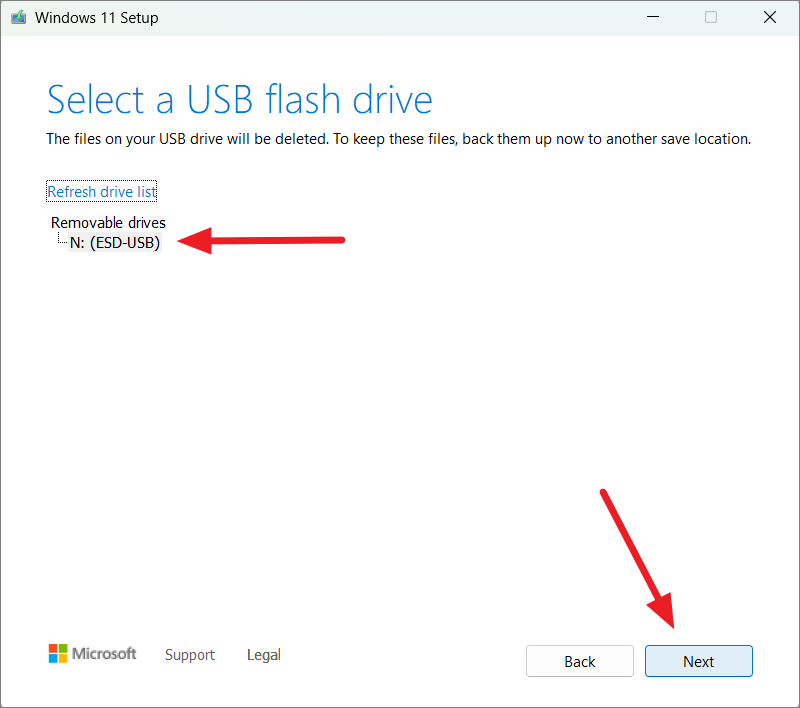
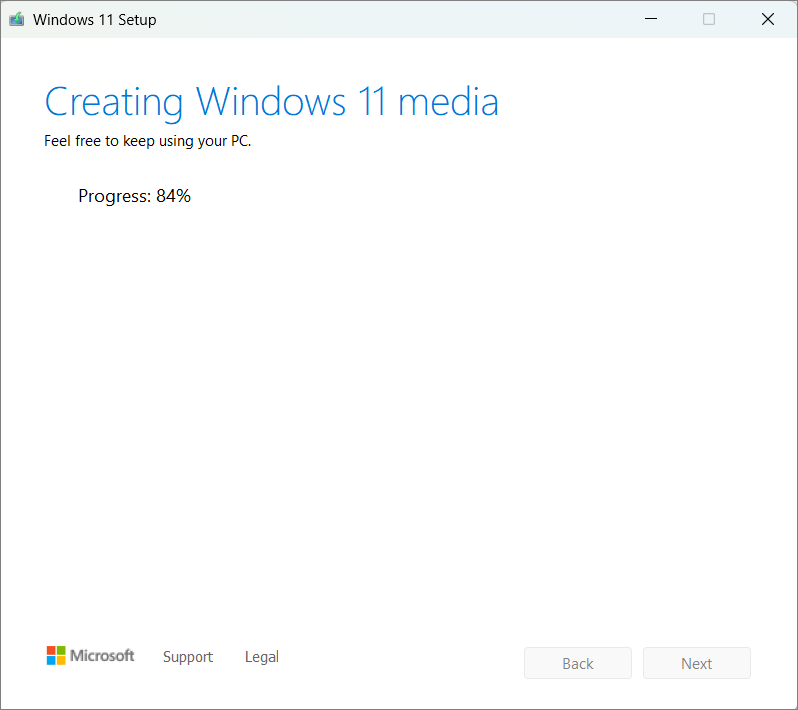
This will create a Windows installation media that you can use to run the DISM tool.
Repair Windows 11 Recovery Image using install.esd/wim
Now, you can run Deployment Image Servicing and Management tool (DISM) with the alternate source (install.esd/wim) image from the Installation media to repair the local image.
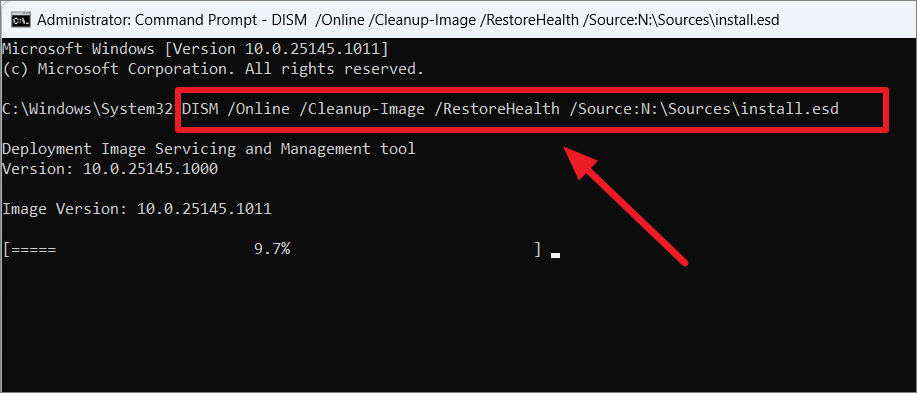
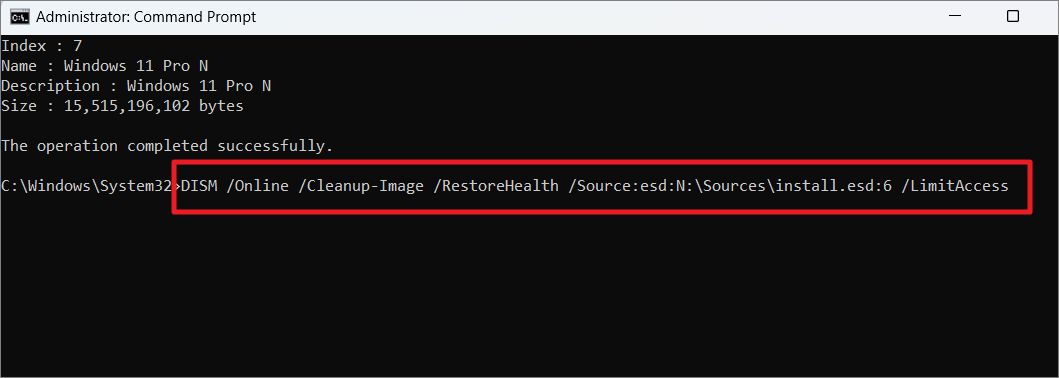
Open Command Prompt in elevated mode. Then, copy-paste the below command and press Enter to repair the Windows 11 image.
DISM /Online /Cleanup-Image /RestoreHealth /Source:N:\Sources\install.esdor
DISM /Online /Cleanup-Image /RestoreHealth /Source:N:\Sources\install.wimHere, replace the Source Drive letter (N: with the path to the location of the install.esd/install.wim file) with the ISO mount point or the bootable USB drive in File Explorer. If you have mounted image or bootable USB, you can just use their drive letter here.
To limit the use of Windows updates by DISM, follow these steps:
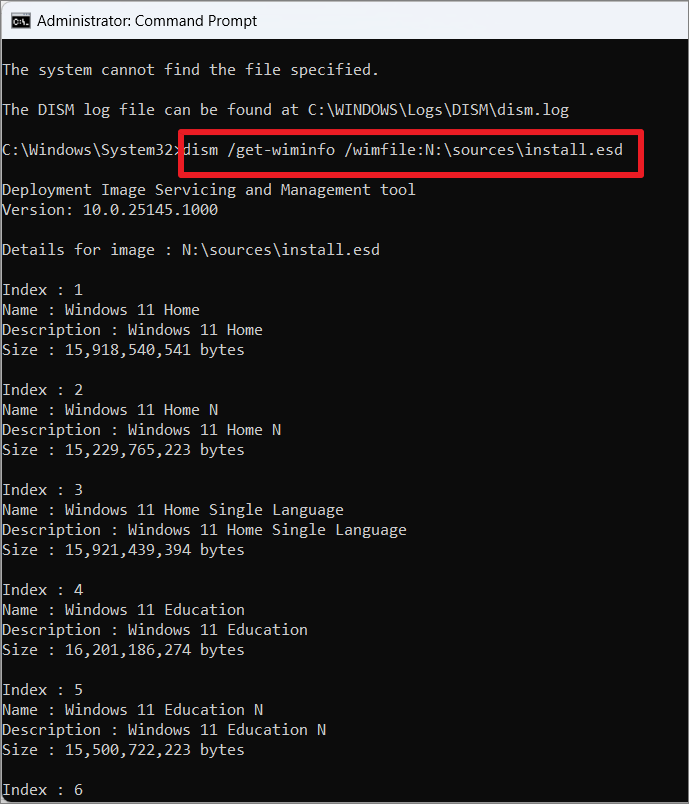
The install.esd/install.wim may contain multiple editions within the same image. So, first, you need to figure out the index number corresponding to the Windows 11 edition you have installed on your computer. To do that, enter the below command:
dism /get-wiminfo /wimfile:N:\sources\install.esdor
dism /get-wiminfo /wimfile:N:\sources\install.wimNow, note down the index number for the Windows edition you installed on your computer.
Now, execute the below command:
Syntax:
dism /Online /Cleanup-Image /RestoreHealth /Source:wim:<Drive Letter>:\sources\install.wim:<Index Number> /limitaccessHere, replace <Drive Letter> and <Index> with the appropriate values.
Example:
DISM /Online /Cleanup-Image /RestoreHealth /Source:esd:N:\Sources\install.esd:6 /LimitAccessor
DISM /Online /Cleanup-Image /RestoreHealth /Source:wim:N:\Sources\install.wim:6 /LimitAccessThe /LimitAccess argument here prevents DISM from contacting Windows Update.
You can also use this command to repair the Windows image offline:
Dism /Image:C:\ /Cleanup-Image /RestoreHealth /Source:N:\Sources\install.esdWhere change N:\Sources\install.esd with the path to the Windows 11 image and C: with the root directory or system directory of Window.
Using DISM to Install Windows Updates
Windows update service doesn’t always work properly, at times, it fails to start, disabled, or crashes on a particular update. Moreover, Windows update only installs the latest available updates, it doesn’t allow you to install a particular update on your system. In such cases, you can use the built-in DISM to manually install specific Windows 11 updates.
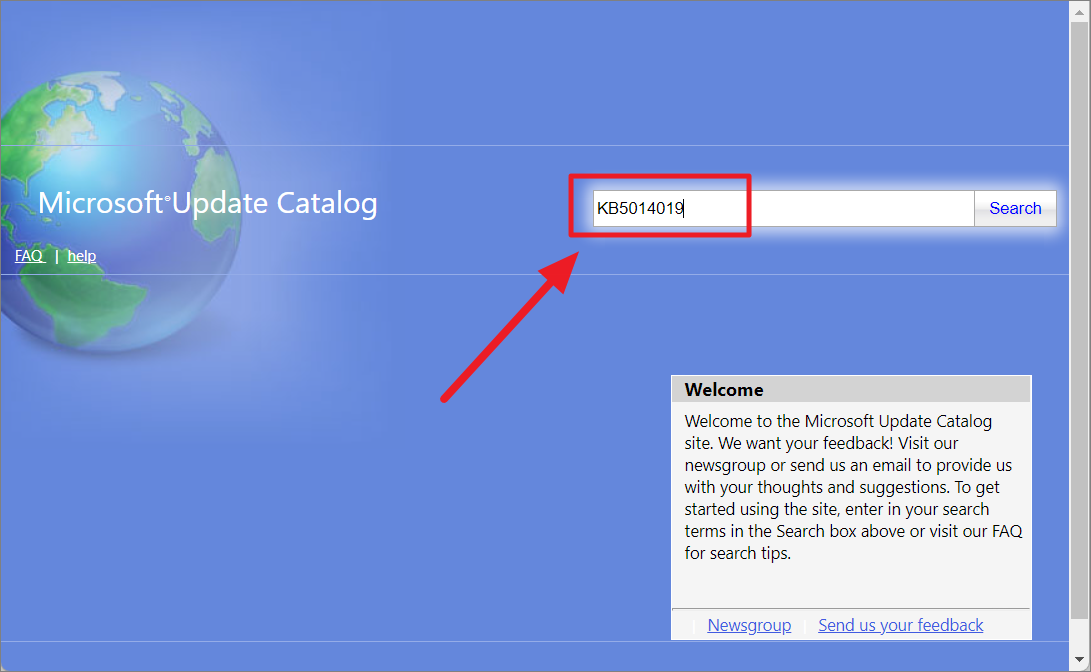
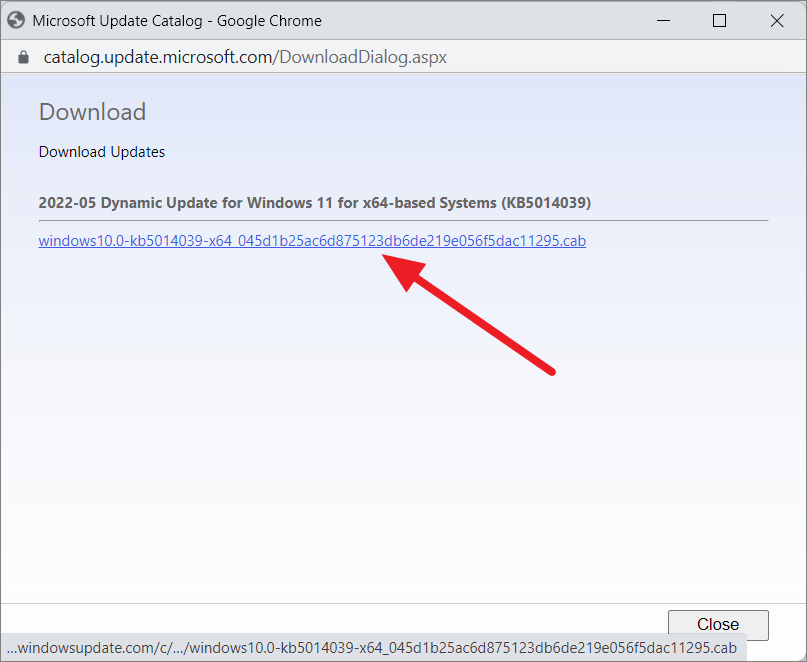
First, visit the Microsoft Update Catalog repository and download the required updates (Critical Updates, Security Updates, and updates) from the list. If you already know the Microsoft Knowledge Base ID number ( e.g. KB5014019) for the update you want, you search for it in the search field in the top left corner.
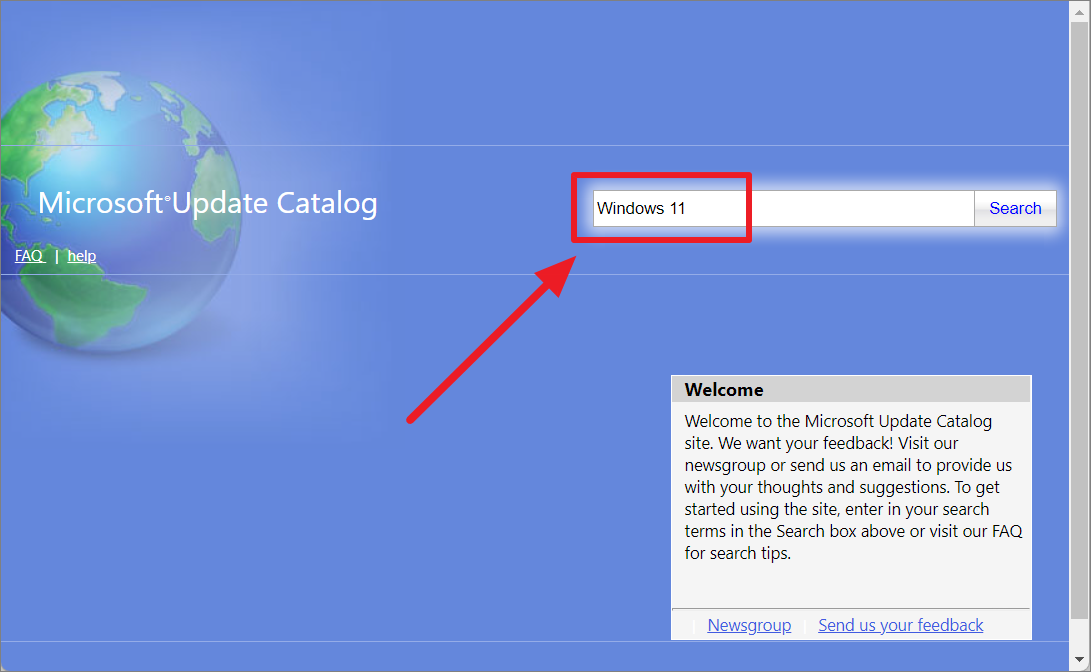
Alternatively, you can just search for ‘Windows 11’ in the search field to get the list of all the available updates that have been released to the stable build.
Locate the update you wish to download from the list and click the ‘Download’ button corresponding to it.
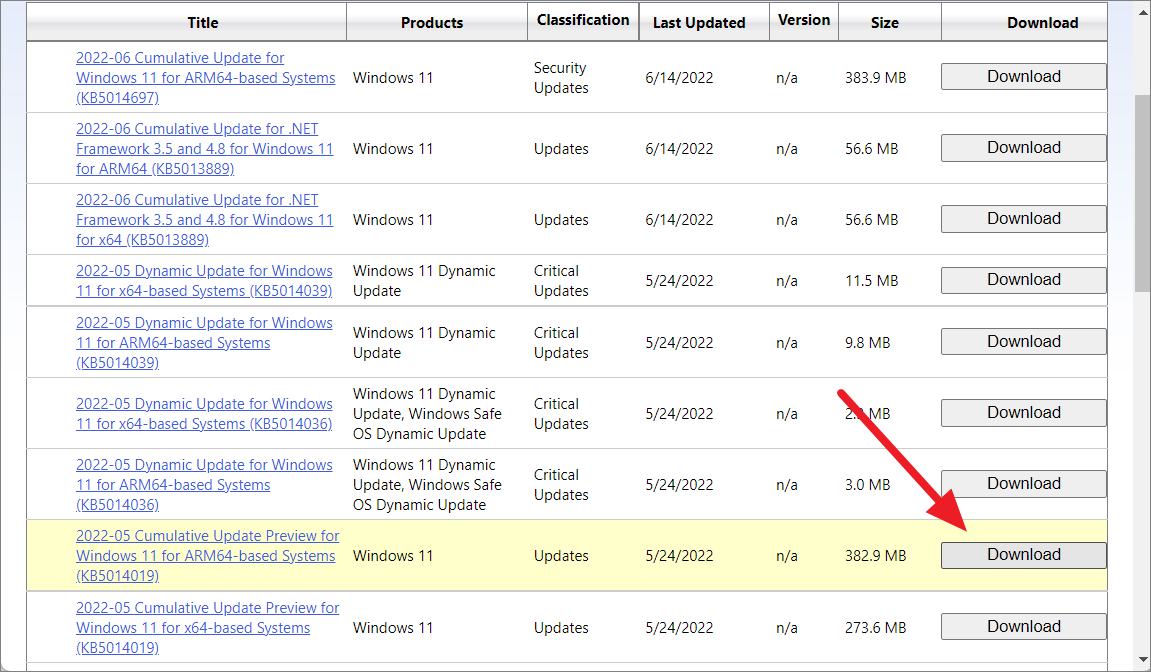
This will open the download page with download links on a new window. Simply, click the link and choose a location in your local drive to save the file. The file type would be either ‘.cab’ or ‘.msu’ depending upon the type of update.
Adding a Windows Update Package to an Image
In the DISM command, you can use the /Add-Package switch to add a Windows update to the Window image. The syntax of the command is as follows:
Dism /Add-Package /PackagePath:<path_to_cabfile> [/IgnoreCheck] [/PreventPending]Example:
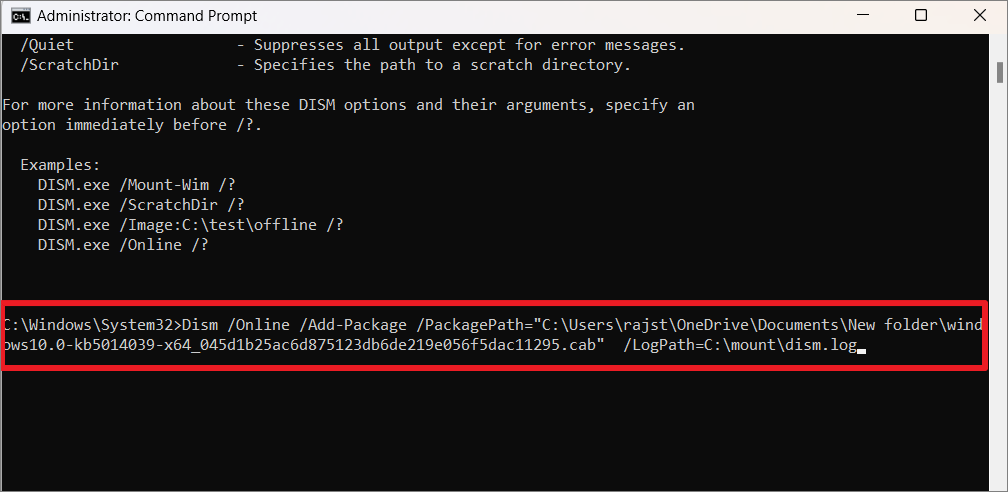
To add an update package to a running Windows installation, use the below command:
Dism /Online /Add-Package /PackagePath="C:\Users\rajst\OneDrive\Documents\New folder\windows10.0-kb5014039-x64_045d1b25ac6d875123db6de219e056f5dac11295.cab" /LogPath=C:\mount\dism.logIn the above command, replaceC:\Users\rajst\OneDrive\Documents\New folder\windows10.0-kb5014039-x64_045d1b25ac6d875123db6de219e056f5dac11295.cab with the downloaded update file name and its location.
To add multiple updates to the Windows Installation:
Dism /Online /Add-Package /PackagePath="C:\Users\rajst\OneDrive\Documents\New folder\windows10.0-kb5014039-x64_045d1b25ac6d875123db6de219e056f5dac11295.cab" /PackagePath="C:\Users\rajst\OneDrive\Documents\New folder\windows10.0-kb5013943-arm64_d5a0aeff704eefab25f8674d8c01e01d476ff0b9.msu" /PackagePath="C:\Users\rajst\OneDrive\Documents\New folder\windows10.0-kb5012678-x64_b6e01cb1801810d1581e29dede0e48f635521e44.cab"/LogPath=C:\mount\dism.logAfter installing the updates, you can check if the added packages appear in the list of packages in your system:
Dism /online /Get-Packages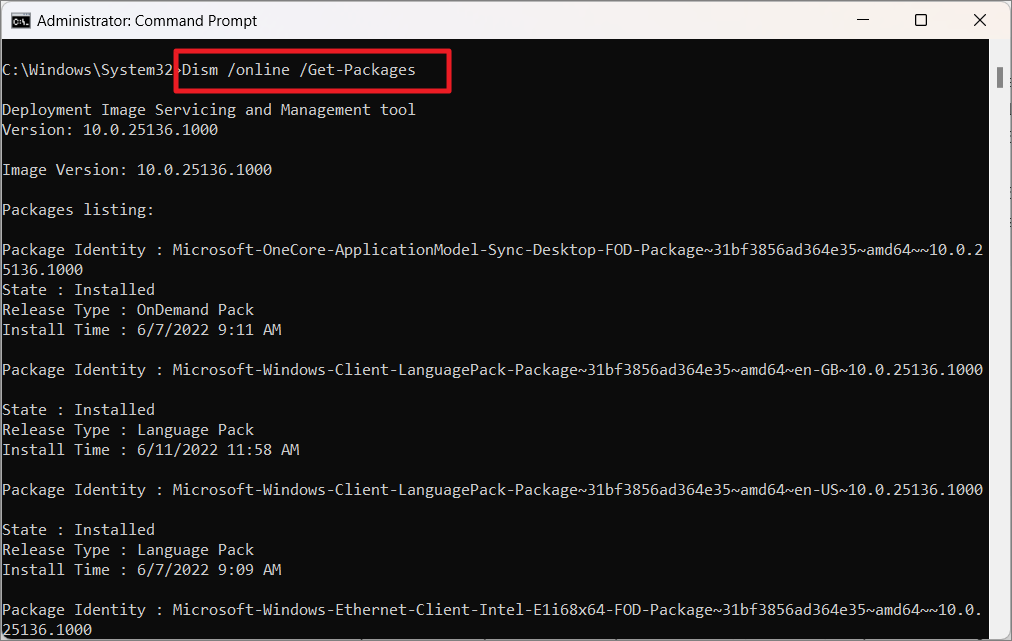
Remove Windows Updates using the DISM tool
You can also remove an installed Windows update using the DISM tool from either the Command Prompt or the Windows recovery environment. In case, you encounter an error or Windows fails to boot, you can use this method to remove the recently installed updates from Windows 11 PC.
Open Command Prompt with administrative privileges. Then, run the below command to view the list of all the recently installed packages and updates on your computer:
DISM /Online /get-packages /format:table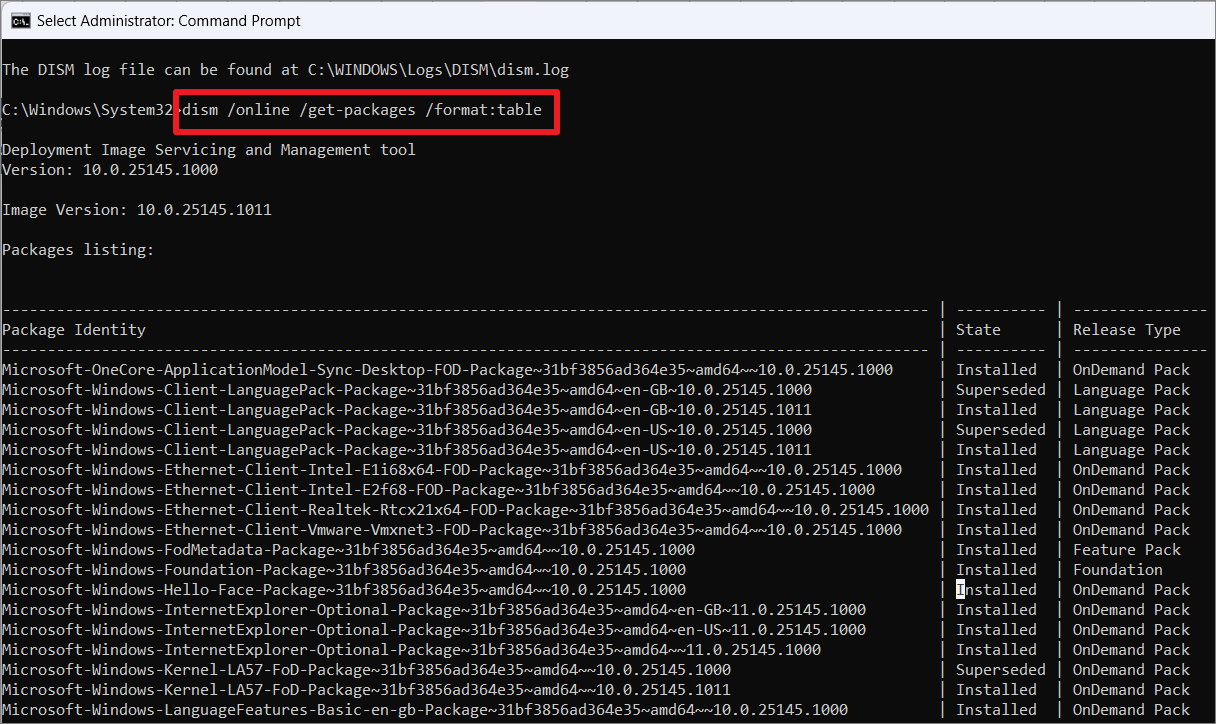
From the Package Identity column, look for the package name of the update that you want to uninstall. You can also confirm the package you want to remove with the install time and date.
To get more details about the particular package or update, try the below command:
DISM /online /get-packageinfo /packagename:PackageNameFor example:
DISM /online /get-packageinfo /packagename:Package_for_ServicingStack_1011~31bf3856ad364e35~amd64~~25145.1011.1.0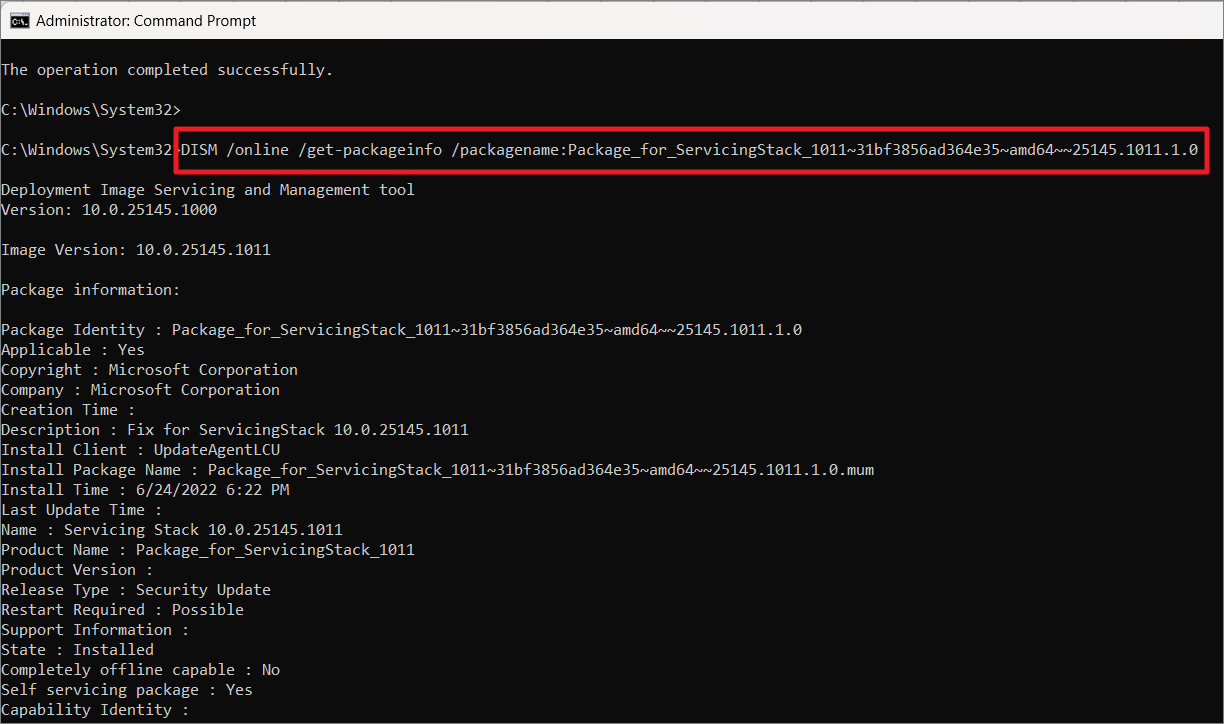
The syntax for removing the update package:
DISM /Online /Remove-Package /PackageName:PackageNameFor example, to uninstall the update name ‘Package_for_ServicingStack_1011~31bf3856ad364e35~amd64~~25145.1011.1.0’, run the below command:
DISM /Online /Remove-Package /PackageName:Package_for_ServicingStack_1011~31bf3856ad364e35~amd64~~25145.1011.1.0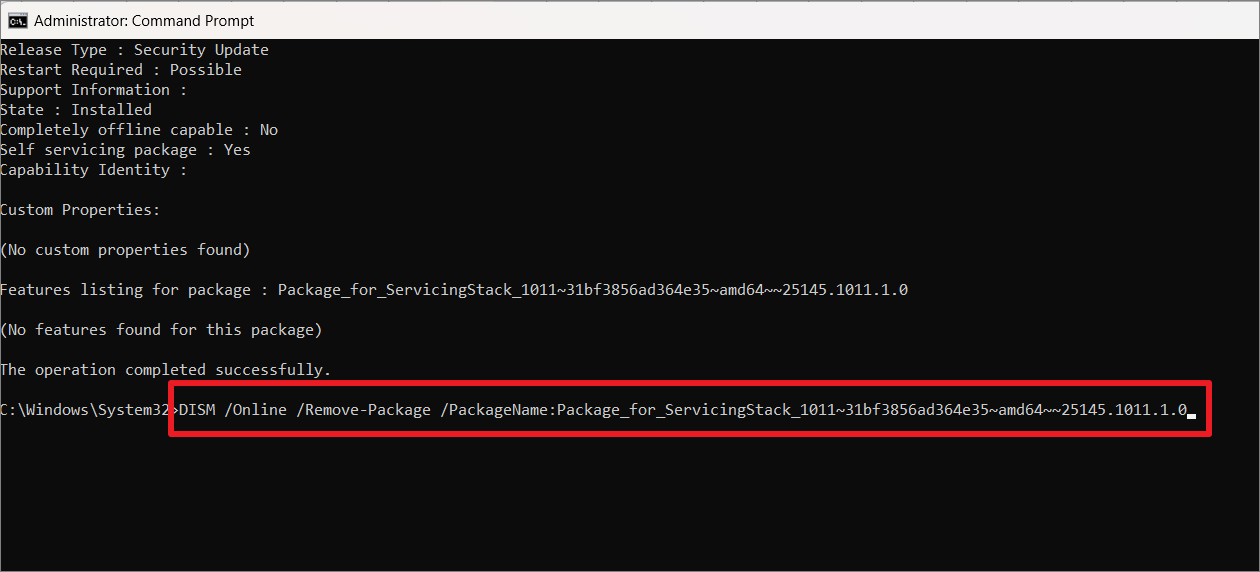
Enable or Disable Windows Features Using DISM
With DISM, you can also enable or disable Windows features offline on a .wim or .vhd file (mounted ISO), or online on a running operating system. Here’s how you can do that:
First, open Command Prompt with administrative privileges. Now, list all the available features in your Windows 11 with the following command:
DISM /online /Get-Features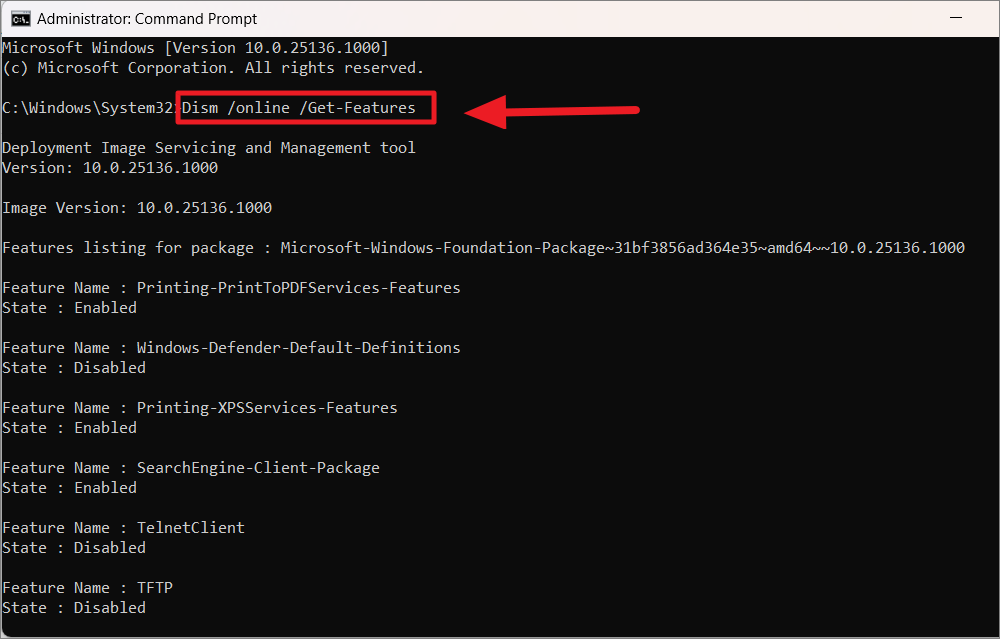
From the list of features locate the features you want to enable or diable.
Once you locate a particular feature, you can get more details about that feature with the /Get-FeatureInfo switch. For example:
DISM /online /Get-FeatureInfo /FeatureName:TelnetClient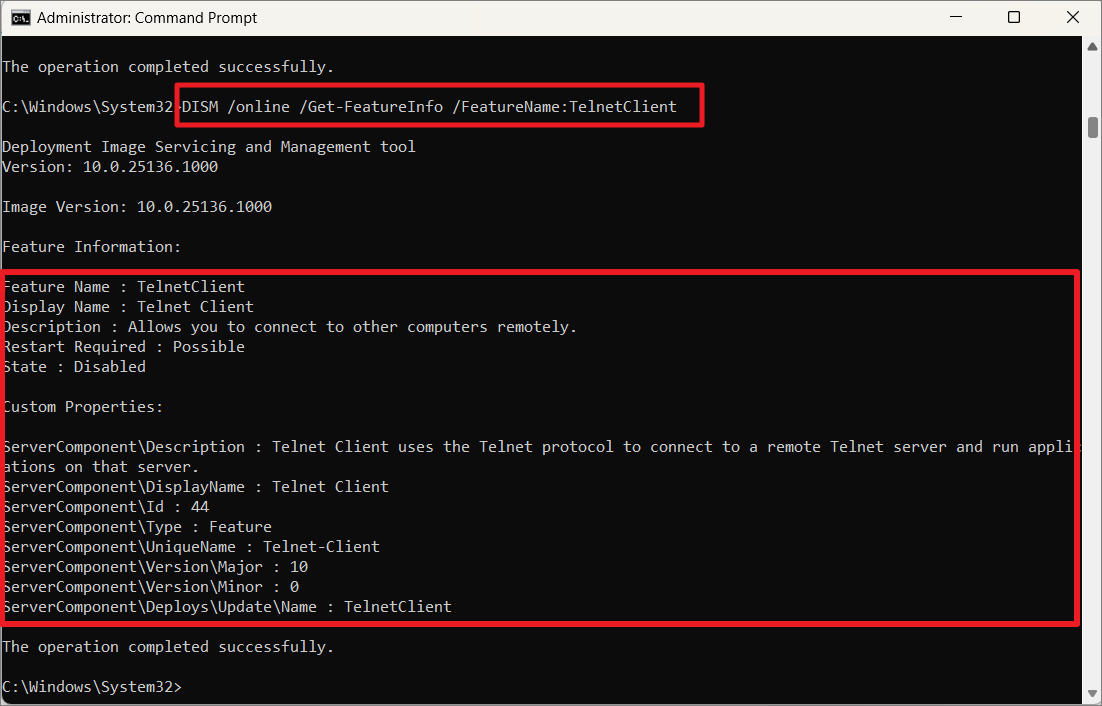
Enable Windows 11 features using DISM
If you want to enable a specific feature in Windows 11, you can use the Enable-Feature argument:
DISM /online /Enable-Feature /FeatureName:TelnetClient /All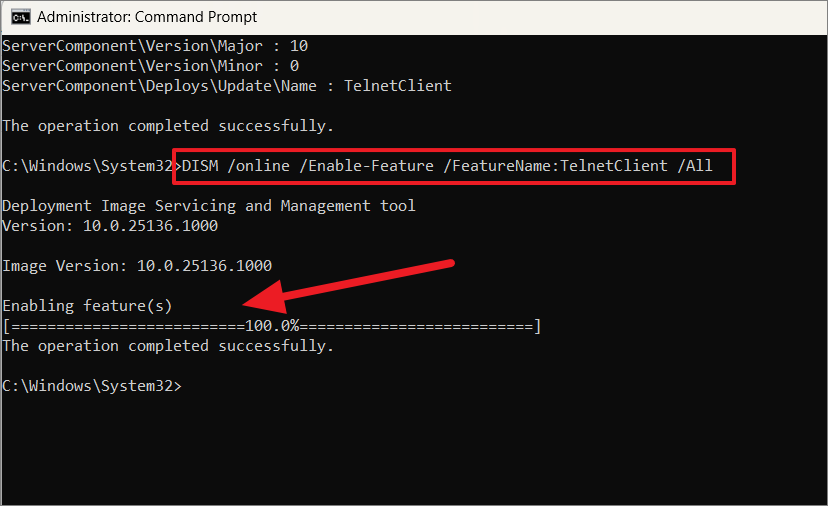
If you want to enable a feature in a mounted image offline, you need to specify the mounted directory using the /image argument.
DISM /Image:D:\Win11OS\offline /Enable-Feature /FeatureName:TelnetClient /AllIn the above example, replace D:\Win11OS\offline with the location of the mounted image.
After enabling the feature, you can use the ‘Get-FeatureInfo’ to find the status of the feature.
DISM /online /Get-FeatureInfo /FeatureName:TelnetClientIf you specify multiple /Source options, the DISM uses the files from the first source argument and the rest of the locations are ignored:
Dism /Online /Enable-Feature /FeatureName:TelnetClient /Source:N:\sources\SxS /Source:C:\test\mount\windows /LimitAccess Disable Windows 11 Features using DISM
In case you want to disable a particular feature from the operating system, use the following command:
DISM /online /Disable-Feature /FeatureName:TelnetClient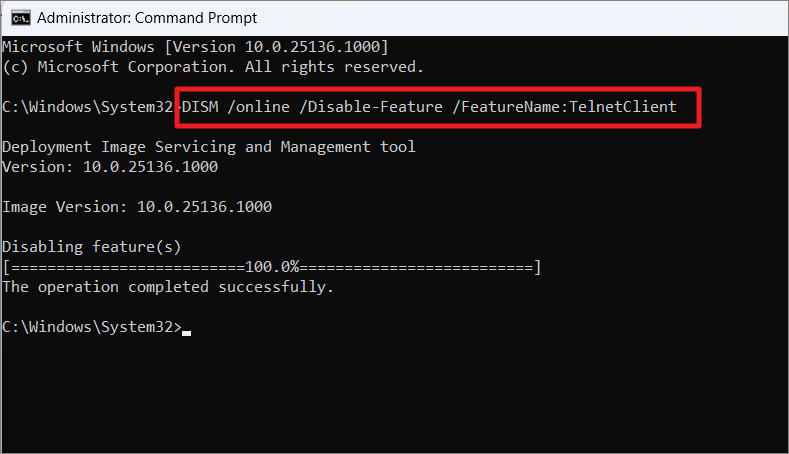
If you want to disable a feature in a mounted image offline, you need to specify the mounted directory using the /image argument.
DISM /Image:D:\Win11OS\offline /Disable-Feature /FeatureName:TelnetClientIn the above example, replace D:\Win11OS\offline with the location of the mounted image.
Remove Windows 11 features using DISM
If you want to remove the specific feature from the Windows installation without having to delete the feature from the image. To do this, enter the below command:
DISM /online /Disable-Feature /FeatureName:TelnetClient /RemoveIf you want to remove a feature in a mounted image offline, you need to specify the mounted directory using the /image argument:
DISM /Image:D:\Win11OS\offline /Disable-Feature /FeatureName:TelnetClient /RemoveDISM failed Error on Windows 11
When running the DISM command on Windows 11, you may face many problems. Here are some of the most common issues reported by the users:
- DISM failed no operation was performed – This is one of the most common errors you will get when using
/restorehealthargument. It can be fixed by ruining DISM with the Windows 11 ISO file. - DISM failed 0x8000ffff, 0x800f0954, 0x800f0950, 0x800f0906, 0x800f081f (The source files could not be found. Use the “Source” option to specify the location of the files that are required to restore the feature.) – This is another common error you will get from DISM operation which is usually caused by no direct Internet access or Windows Update service is disabled/failed. In that cases, use a bootable USB flash drive, ISO image, or install.wim (esd) file with the Windows installation image to perform the DISM scan.
- DISM failed while processing command cleanup-image, add-package – This issue can be fixed by cleaning up the system image components with
/StartComponentCleanupswitch or resetting the Windows update service. - DISM failure when attempting to copy boot files – This is a common DISM problem that can be fixed by cleaning up the system image component with
/StartComponentCleanupswitch. - Dism.exe failed validating command line, to load wim manager – If you are having this issue, it can be fixed by restarting the Windows update components.
- DISM failed to load the provider, to unload offline registry, to flush file buffers, to set the windows directory, mount the image – These issues can be fixed by checking your antivirus, cleaning up the system image component, resetting Windows Update Service, or copying and specifying the correct location of the Install.wim file.
DISM Commands Not Working on Windows 11?
There are several reasons for DISM not working and showing you the above list of errors on Windows 11. You can fix most of these issues using the following methods.
Clean up the Components Store
Most of the DISM issues are caused by the corruption in System Image Components and it can be fixed by analyzing and cleaning up the system component store. DISM has a set of commands to refresh the DISM tool.
First, you need to analyze the component store with /AnalyzeComponentStore argument in the DISM argument.
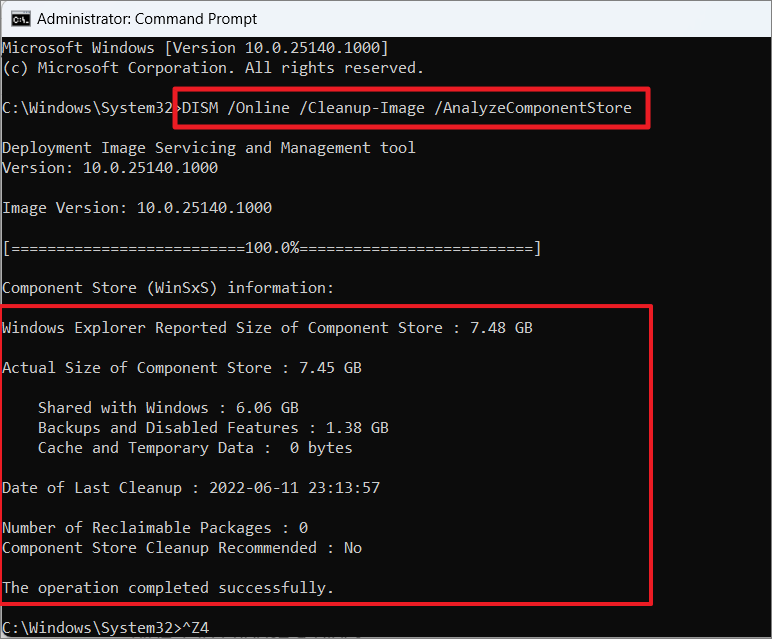
To analyze the component store run the following command:
DiSM /Online /Cleanup-Image /AnalyzeComponentStoreWait for the process to be over, then you will see something similar to the following information:
- Windows Explorer Reported Size of Component Store : 7.48 GB.
- Actual size of component : 7.45 GB
- Date of the Last Cleanup: 2022-06-12: 23:13:57.
- Number of Reclaimable Packages: 0.
- Component Store Cleanup Recommended: Yes or No.
If the ‘Component Store Cleanup Recommended’ is ‘Yes’, then you need to proceed with the cleanup operation.
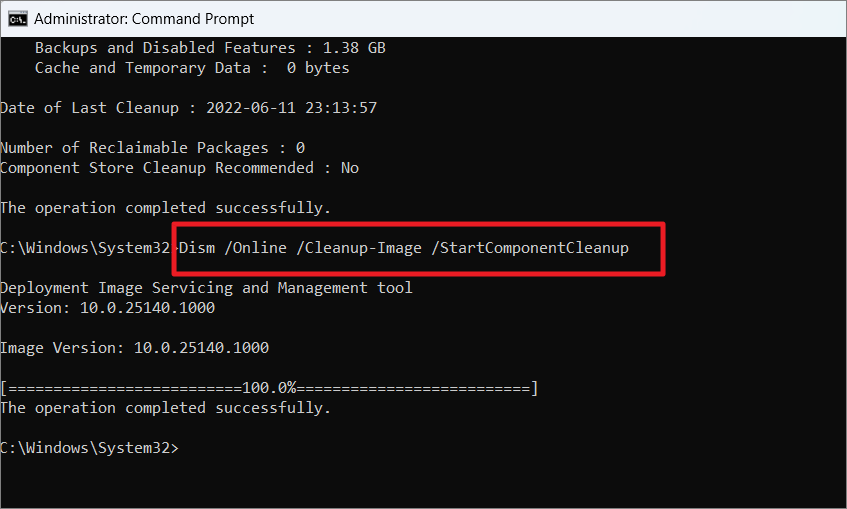
To run the component cleanup, enter the following command:
DISM /Online /Cleanup-Image /StartComponentCleanupThis command will remove all the outdated files or previous versions of the updated components from the components store.
If the above command doesn’t fix your issue, then use the /ResetBase argument to reset the component store size and reduce its size. To do that, use the below command:
DISM /Online /Cleanup-Image /StartComponentCleanup /ResetBase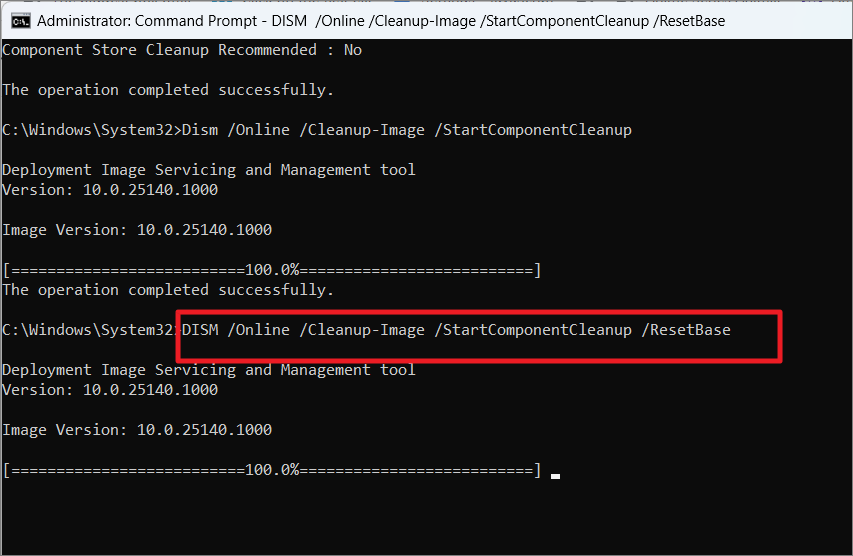
Alternatively, you use /Defer switch to post-pone or schedule the cleanup operations to the next automatic system maintenance.
DiISM /Online /Cleanup-Image /StartComponentCleanup /ResetBase /Defer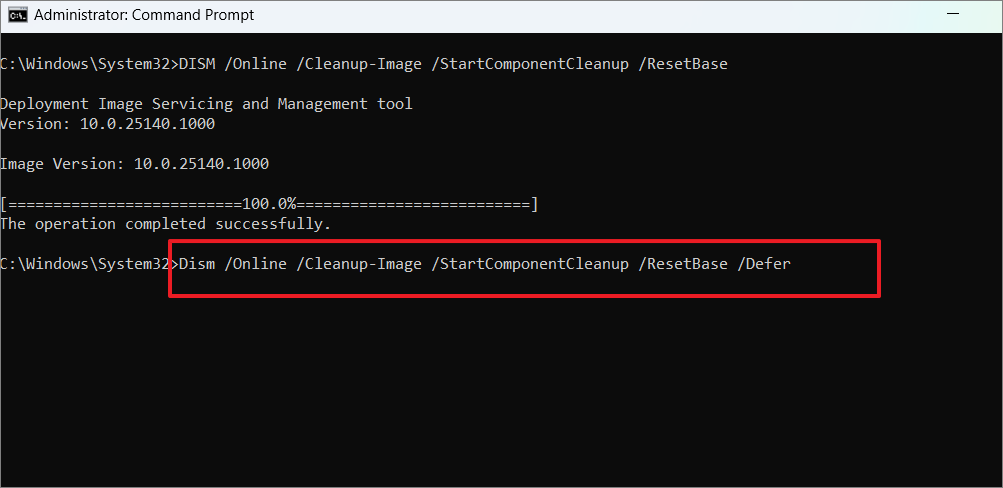
To revert all pending DISM tasks including Windows Updates, run the following command:
DISM.exe /image:C: /cleanup-image /revertpendingactionsRun CHKDSK
If you are having disk-related issues with the DISM, run the following command in the Command Prompt in administrator mode:
chkdsk /offlinescanandfixSince your system currently using the C drive, it will ask you whether to schedule the scan the next time the system restarts. Type ‘Y’ and press Enter.
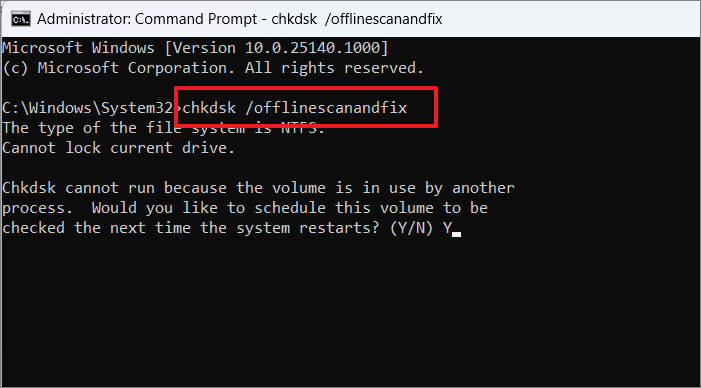
Then, restart your PC to run chkdsk scan.
Reset Windows Update Service
DISM uses Windows Update Service to download and repair or replace corrupted files in the Windows image. If the Windows Update service fails to start or not working properly, you can try resetting the Windows update service.
First, launch Command Prompt with administrative privileges. In the Command Prompt window, input the below command and hit Enter.
net stop wuauservWait for the process to complete and then enter the following commands one after the others:
cd %systemroot%SoftwareDistributionren Download Download.oldnet start wuauservnet stop bitsnet start bitsnet stop cryptsvccd %systemroot%system32ren catroot2 catroot2oldnet start cryptsvcAfter successfully completing the commands, the Windows Update service will be restarted and the DISM issue will be fixed.
Disable Proxy Service
If DISM fails to connect to the internet or run on your system, it might be due to proxy configuration on your PC. To resolve this issue, you need to disable the proxy on your device.
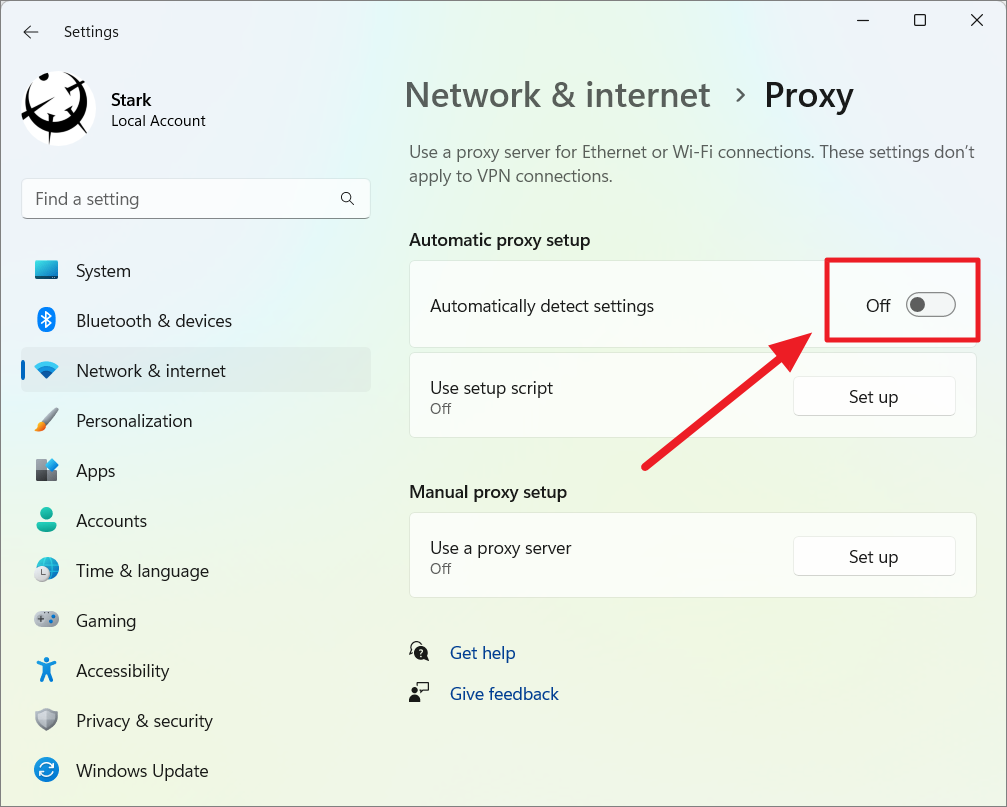
First, open Windows Settings by pressing Win+I shortcuts. In the Settings app, go to the ‘Network & internet’ section on the left and click on the ‘Proxy’ option on the right.
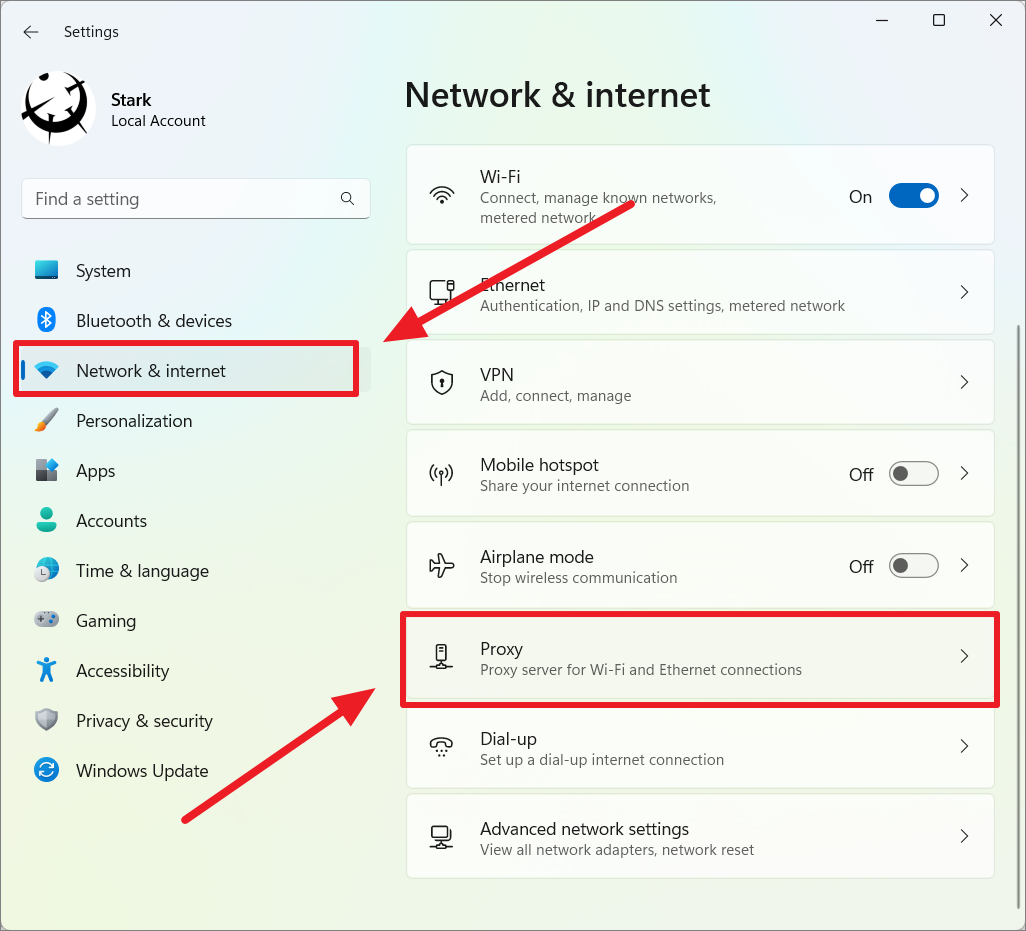
On the Proxy settings page, turn off all the settings under the ‘Automatic proxy setup’ and ‘Manual proxy setup’.
Changing the Startup Type of the Remote Procedure Call (RPC) service
If you see a DISM failed 1726 error, it is probably caused when the Remote Procedure Call (RPC) service is disabled or failed to start automatically.
Remote Procedure Call (RPC) is an interprocess communication protocol or technique that allows a program to request services from another program located in another computer on a network as if it is a local system. It is responsible for structuring distributed, client-server-based applications.
It is a Service Control Manager for Component Object Model (COM) and the Distributed Component Object Model (DCOM) servers. If this communication protocol is disabled, then all the services and applications that depend on the COM and DCOM (like DISM) will not work properly. Here’s how you can change the startup method for RPC and make sure it is running properly:
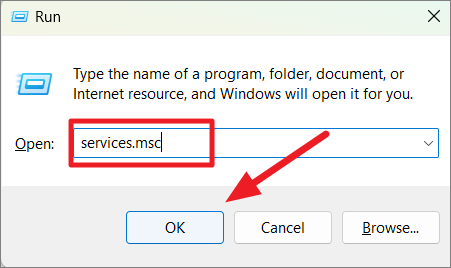
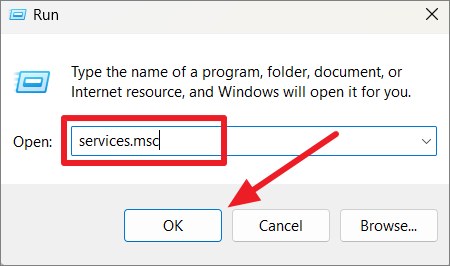
First, press Windows+R keys simultaneously to launch the Run dialogue box. Then, type ‘services.msc’ in the text field and hit Enter.
Alternatively, you can just search for ‘services’ in the Windows search and open the top result.

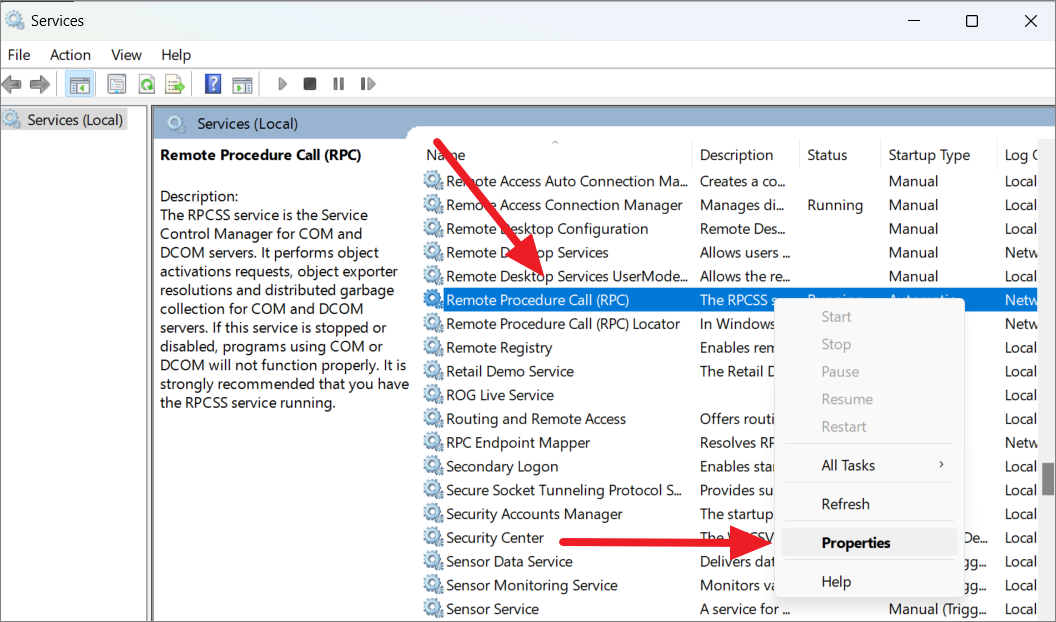
In the Services window, scroll down and locate the service named ‘Remote Procedure Call’. There will be two services named Remote Procedure Call – Remote Procedure Call (RPC) and Remote Procedure Call (RPC) Locator.
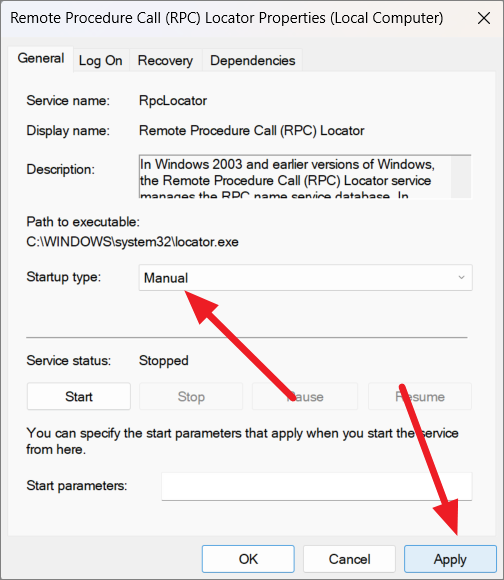
Now, right-click the ‘Remote Procedure Call (RPC)’ service and select ‘Properties’ or just double-click on it.
Under the General tab of the Properties window, click the drop-down menu next to ‘Startup’ type and change it to ‘Automatic’. Then, click ‘Apply and then ‘OK’.
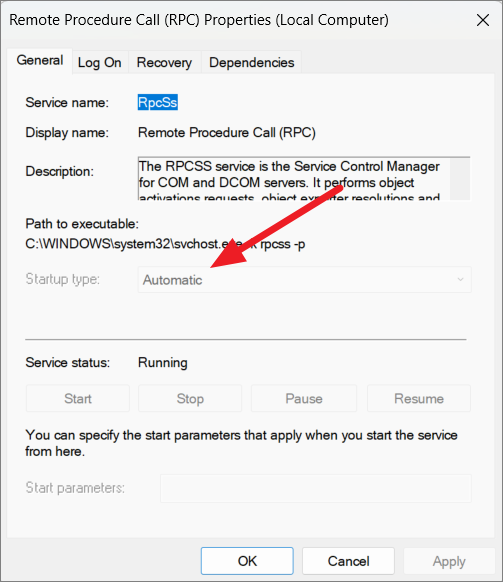
This will automatically start the RPC service when you start your system and fix the DISM 1726 error.
Also, double-click on the ‘Remote Procedure Call (RPC) Locater’ service and make sure its Startup type is set to ‘Manual’.
Then restart the computer to apply the changes. If you are still encountering the problem, try the next solution.
Modify the Value of the RpcSs Registry Key
If the DISM failed 1726 error is not resolved by the above method, you need to change the RpcSs registry value to fix the issue. Follow these instructions to edit the RpcSc registry key:
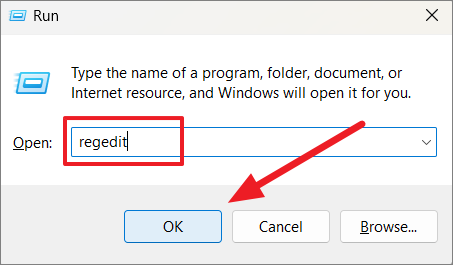
Open the Run command box by pressing Win+R simultaneously. Then, type ‘regedit’ and hit Enter. If you see the User Account Control (UAC) prompt box, click ‘Yes’.
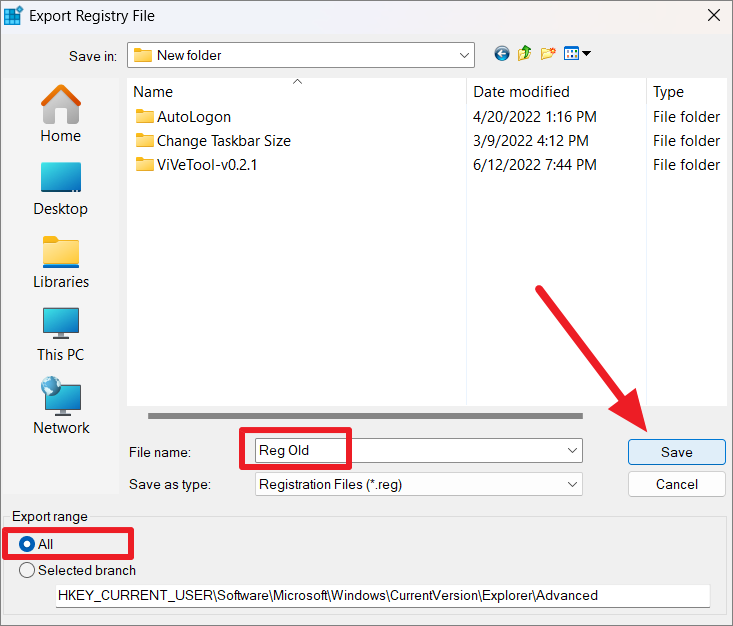
Before we modify the registry, it is safe to backup your registry, so you can revert the changes if something goes wrong. To do this, click the ‘File’ menu and select ‘Export’.

Then, give a name for the backup file, choose whether you want to back up the whole registry or the selected branch in the registry (under Export range), and then select the destination folder. After that, click the ‘Save’ button.
After backing up the registry, navigate the following location or copy-paste the below path in the address field:
HKEY_LOCAL_MACHINE\SYSTEM\CurrentControlSet\Services\RpcSs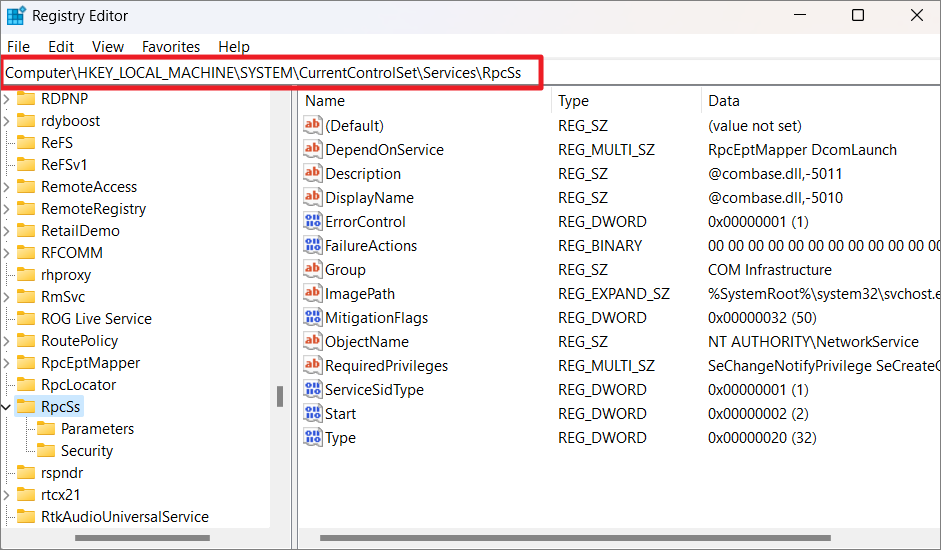
In the right-side panel of the ‘RpcSc’ key, double-click on the ‘Start’ DWORD to edit it.
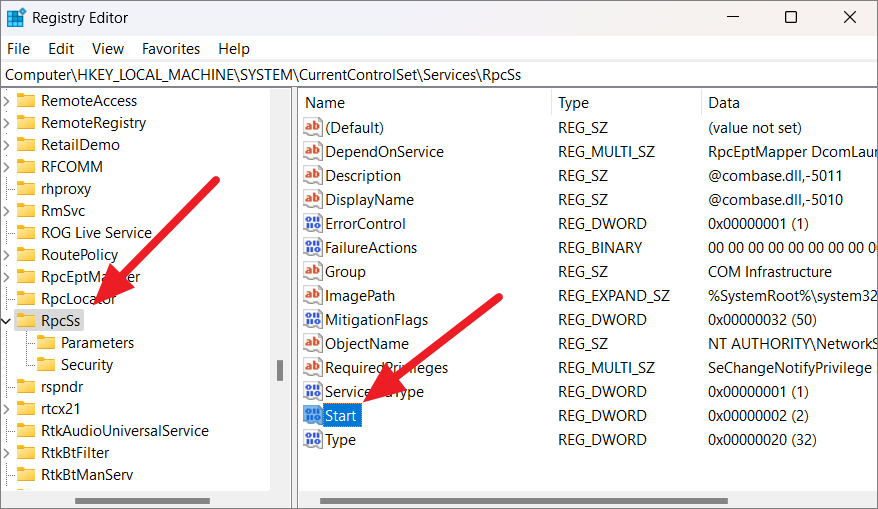
Now, set the ‘Value data’ of Start to 2 and press ‘OK’ to save the changes.

After that, close the registry editor and restart your PC to apply the changes.
Correct the Location of the Install.esd File
If you are encountering the “Cannot find source files” or “The system cannot find the path specified”, it means the location you specified for the Install.esd file in the Source option is incorrect.
Open elevated Command Prompt. Then enter the below command and hit Enter:
DISM /Online /Cleanup-Image /RestoreHealth /source:ESD:X:SourcesInstall.esd:2 /LimitAccessIn the above command make sure to replace X with the drive letter of the mounted ISO file or the drive letter of the bootable USB.
Temporarily Disable Windows Search Service
If you are encountering DISM Error 87 or the remote procedure call failed error, disabling the Windows Search service while running the DISM command can help resolve the issue. Windows Search service is a search service that allows you to search for files and apps within the system. Follow these instructions to disable the Windows search service:
Open the Run command box (press Windows+R), type ‘services.msc’, and hit Enter to open the Services window.
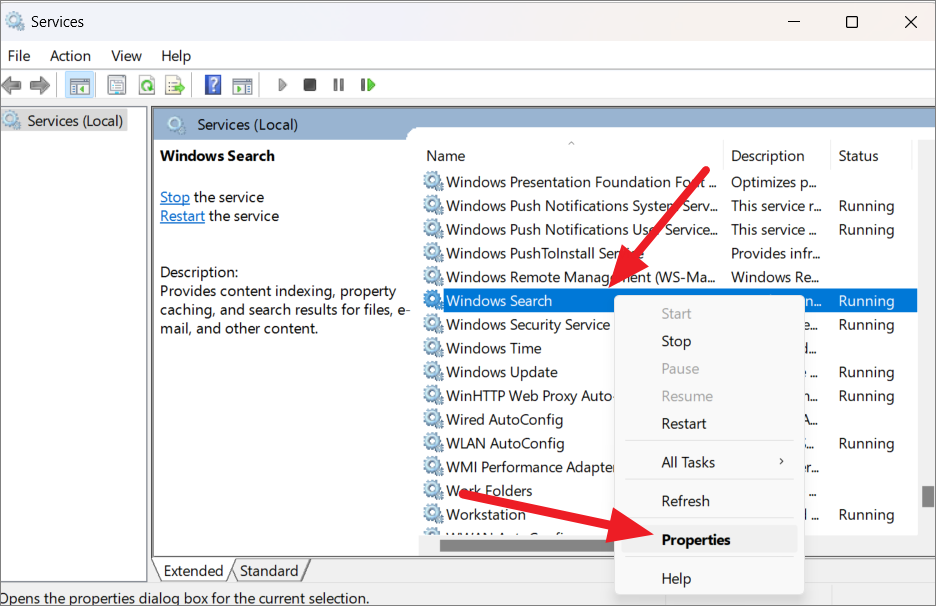
In the Services window, scroll down to the ‘Windows search’ service, right-click on it and select ‘Properties’. Or you can just right-click on it.
Then, under the General tab, change the ‘Startup type’ to ‘Disabled’.
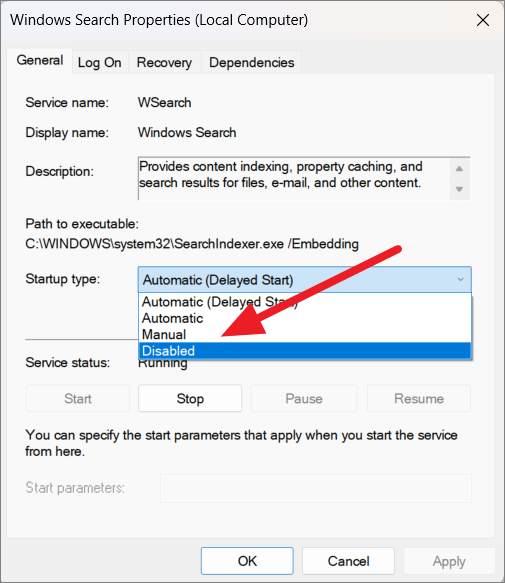
After that, click ‘Apply’ and then ‘OK’.

This will temporarily stop the Windows search services temporarily. You can disable the service whenever the error occurs, then re-enable it after the DISM commands are executed successfully.
Run DISM Command in Clean Boot Mode (Offline)
Sometimes DISM failure occurs due to conflicts of services that are running in the background. So, executing the DISM commands in a clean boot may prevent these problems. Here’s how you can run DISM commands in Clean boot mode:
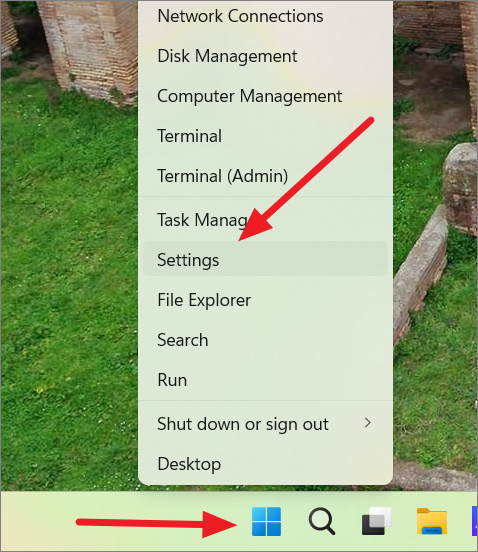
First, open Windows Settings by right-clicking the Start menu and selecting ‘Settings’.
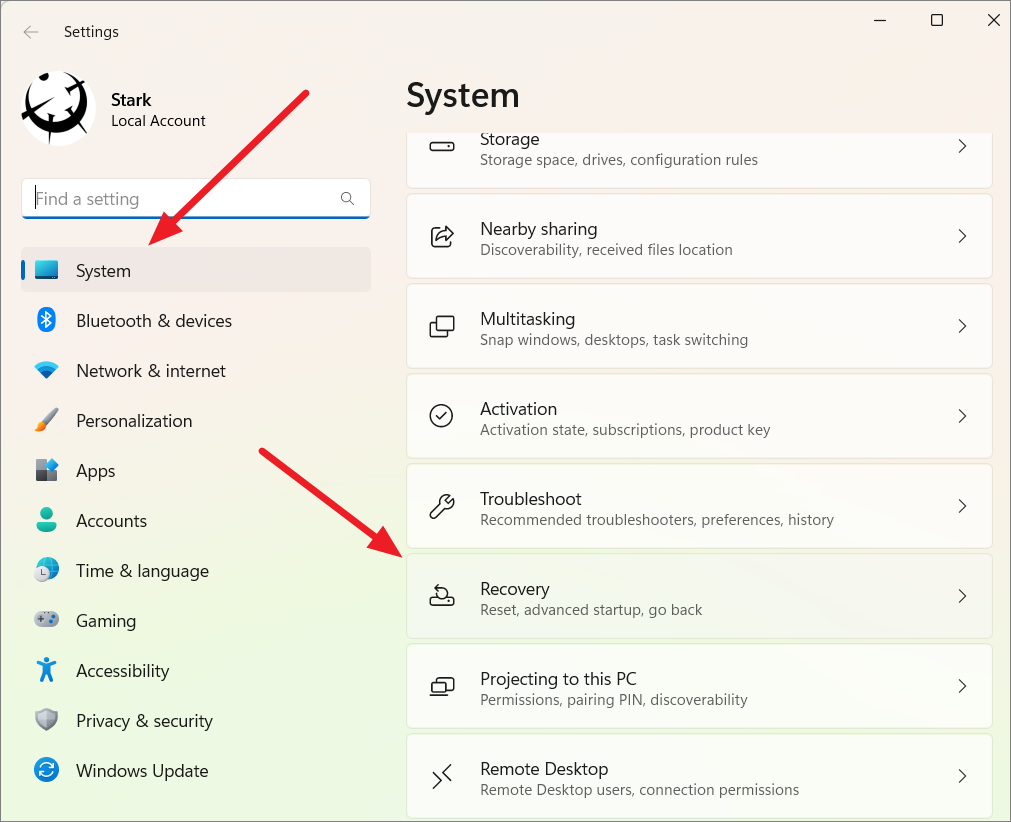
In the Settings app, go to the ‘System’ tab and click on the ‘Recovery’ option on the right pane.
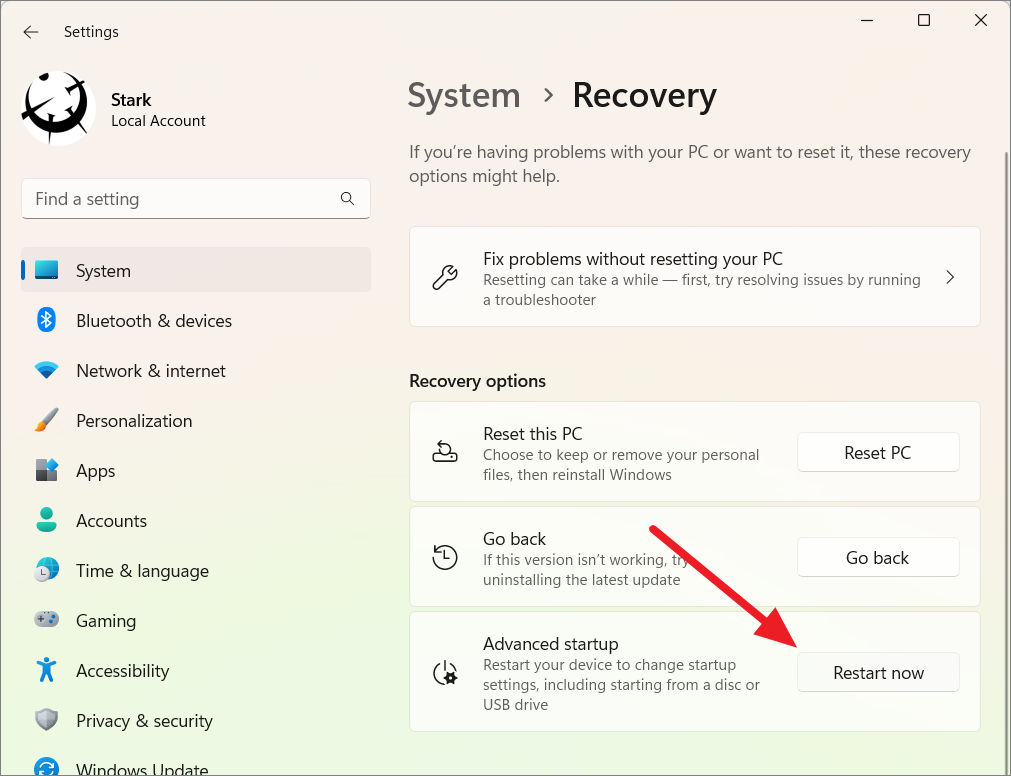
On the Recovery page, click the ‘Restart now’ button on the Advanced startup tile under Recovery.
Click the ‘Restart now’ button again to restart your PC.
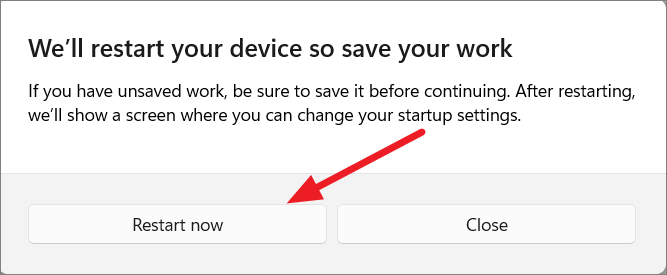
The windows will boot your system into Windows Recovery Environment.
If your computer is not booting properly for you access the above settings. You can use this alternative way to access the Windows Recovery Environment (WinRE).
Using Hard Reboot
First, shut down your PC or turn off your PC and then press the power button to turn on the system. And just when Windows starts loading, press and hold the power button to force shutdown your PC.
Repeat these steps two or three times and the fourth time let Windows load normally. It will automatically boot into Windows Recovery Environment (WinRE). When the automatic repair screen appears, click ‘Advanced Options’.
Then select the ‘Troubleshoot’ option in the Choose an option screen.
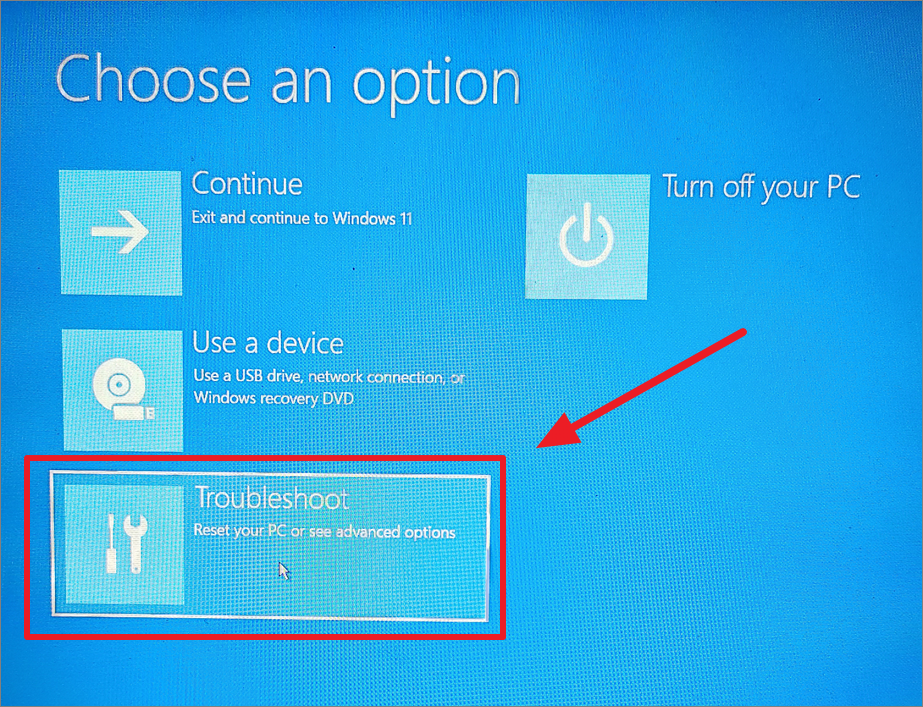
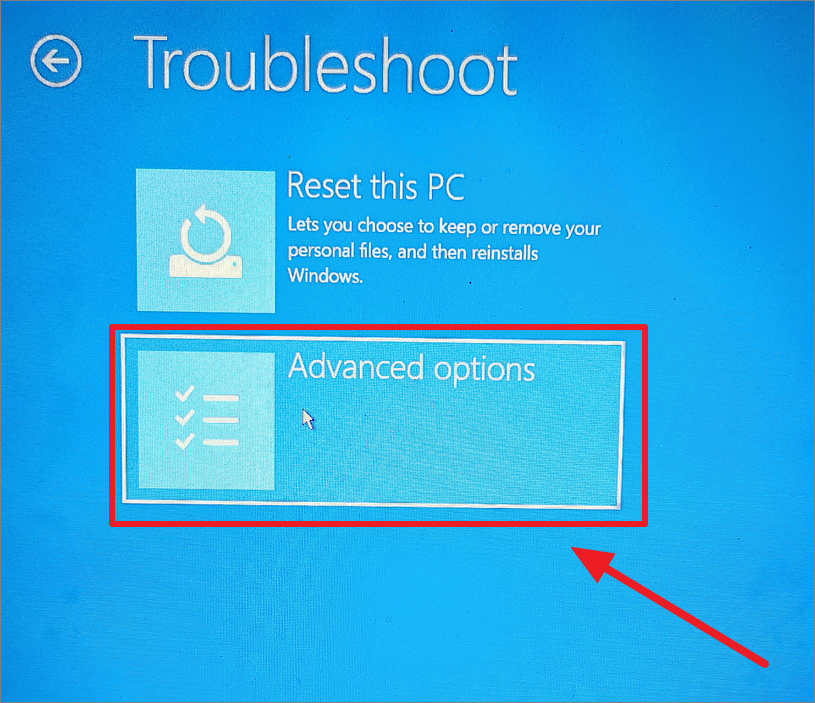
On the next screen, choose ‘Advanced options’.
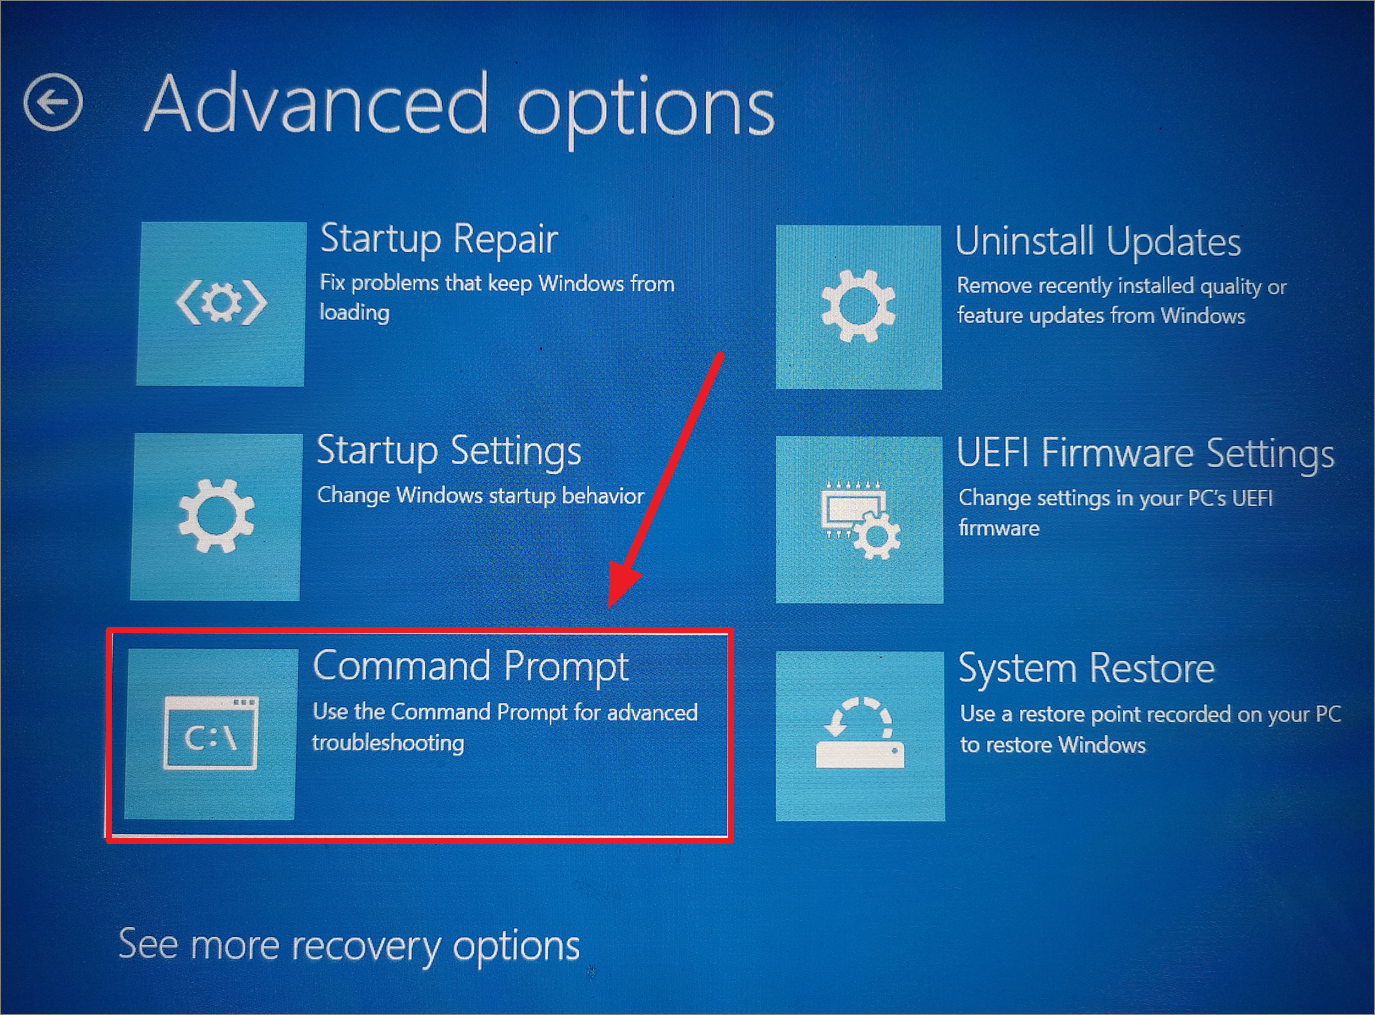
On the Advanced options screen, select the ‘Command Prompt’ option.
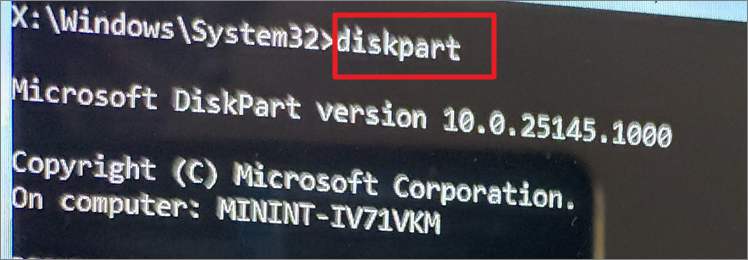
The Command Prompt will start with X:\Windows \System32 which is not Windows installation location. You need to find out where Windows is installed using diskpart command.
First, type diskpart to manage drives.
Next, enter list volume to get a list of all the volumes or drives connected to your system. Then, find the volume or drive in which Windows is installed. The Windows drive (which would have a different drive letter instead of C) will have no name or label. Also, you can locate the Windows drive by its size if you already know it. Note down the Windows drive letter from this list.
In the below screen, Volum 3 ‘F’ is the Windows drive. Now, note down the Windows drive letter that we are going to use to run DISM commands.
After that type exit to leave diskpart.
Then, enter the below command to run DISM scan in clean boot:
DISM /image:F:\ /cleanup-image /restorehealth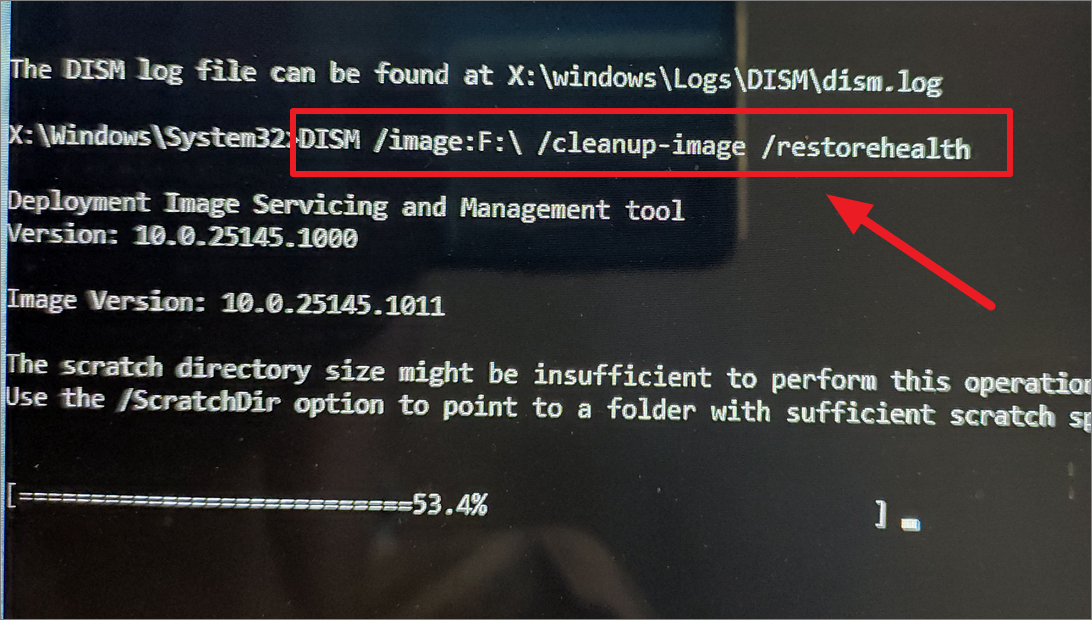
If you are booting from a Windows installation media or have a Windows 11 iso file connected to your computer on a bootable drive, you can use the following DISM command to repair the Windows image offline:
Dism /image:F:\ /Cleanup-Image /RestoreHealth /Source:N:\sources\install.esdor
Dism /image:F:\ /Cleanup-Image /RestoreHealth /Source:N:\sources\install.wimWhere F: is the Windows 11 drive and N: is where we have the Windows installation media.

In case you don’t have enough space on the selected drive, you will need to specify an empty directory on a separate drive to perform the repair operation. To do that follow these steps:
First, create a folder named ‘scratch’ on that separate drive. You can also use the mkdir G:\scratch to create the folder.
Then, enter the below command to repair the component store using the ScratchDir:
Dism /image:F:\ /Cleanup-Image /RestoreHealth /Source:N:\sources\install.esd /ScratchDir:G:\scratchHere, we specified the scratch directory location using the /ScratchDir switch. Wait for the repair operation to finish, then restart your PC.
Copy-Paste install.wim/esd (from the boot drive to the local C: drive)
If the DISM cannot access the install.wim/esd file from the Windows bootable drive or installation disc, you can copy install.wim/esd file from to the local C: drive.
First, insert the Windows 11 bootable drive or the installation disc into your PC. Alternatively, you can also mount the Windows ISO file and create a boot drive.
Then, find the install.esd/wim file from the installation files and copy it with Ctrl+C. It is probably located inside the Source directory of the installation files.
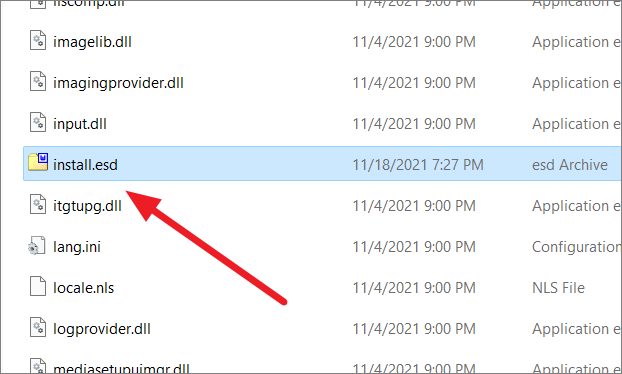
Next, paste the copied files inside the ‘local C:’ drive (system drive) by pressing Ctrl+V. You don’t have to paste the file in any particular folder just inside the C: drive.
After that open Command Prompt with administrative privileges.
Then, enter the below command in the command prompt to repair Windows:
DISM /Online /Cleanup-Image /RestoreHealth /source:WIM:C:\Install.wim:1 /LimitAccess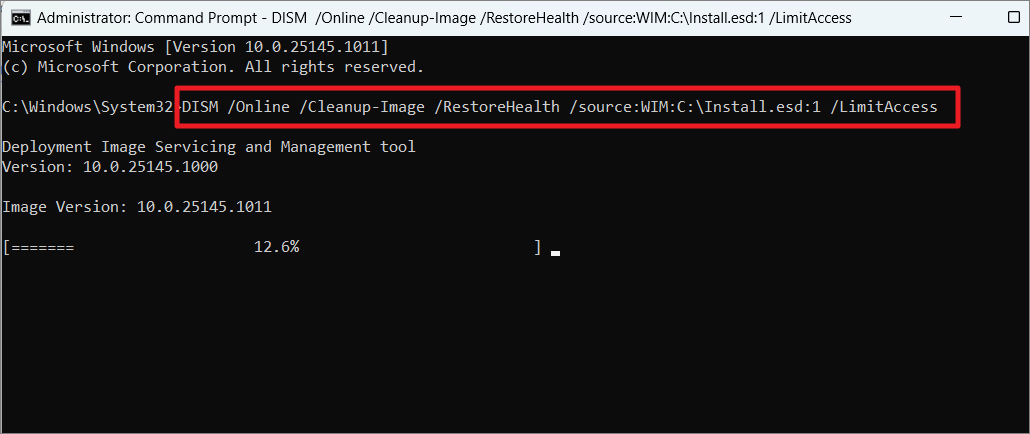
Disable Read-Only Option in Install.esd
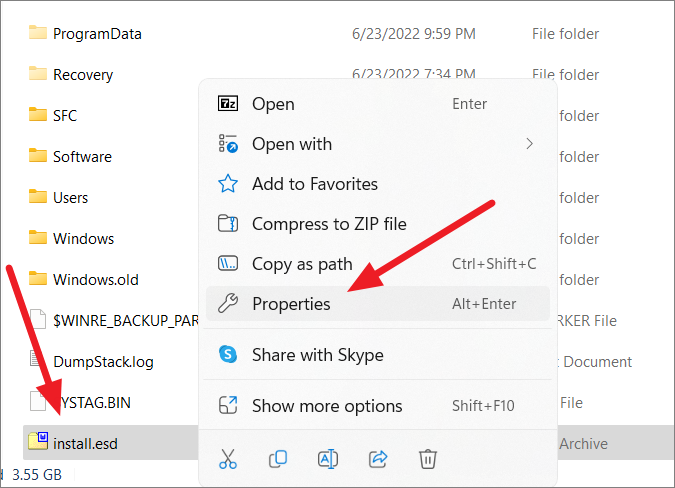
Sometimes, the Install.esd may not work, even after copying it to the local C drive. In such cases, make sure the Install.esd or Install.wim file is not in read-only mode. Here’s how you do this:
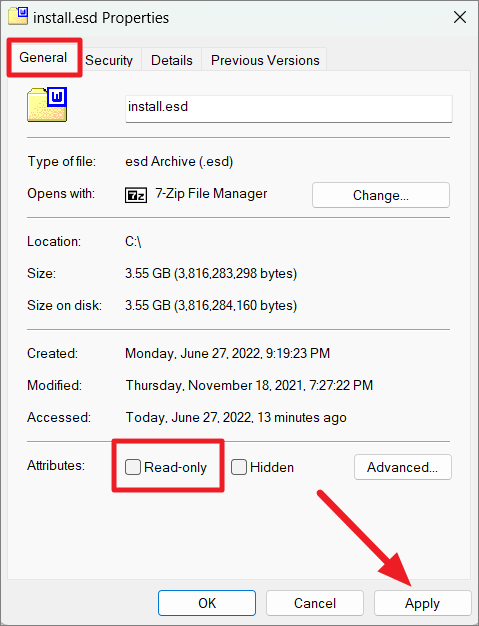
On the File Explorer, navigate to the Install.esd file on your system. Then, right-click on the file and select ‘Properties’.
Then, uncheck the ‘Read-only’ option next to Attributes, click ‘Apply’, and then ‘OK’.
Repair Windows Image Using Cleanup-MountPoints Argument
Sometimes, when altering the Windows image with DISM, the image can get corrupted. It can be easily fixed by cleaning up the mount points of your image.
Use the /Cleanup-MountPoints
Dism /Cleanup-Mountpoints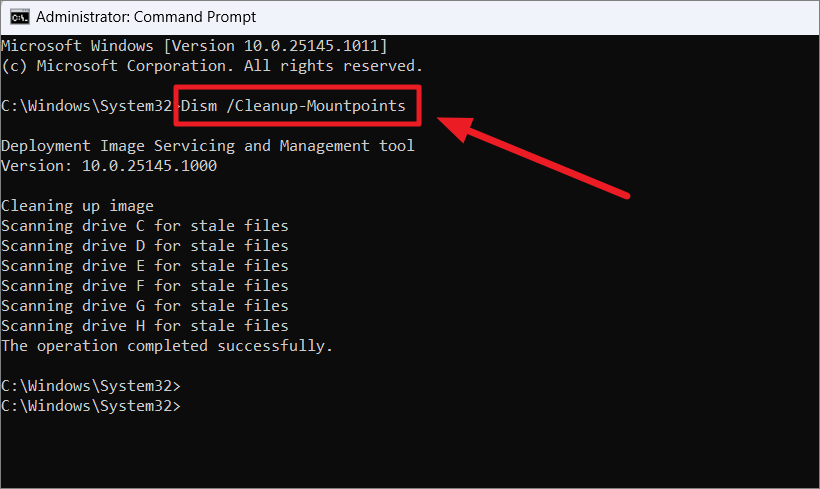
That’s it.
DISM (Deployment Image Servicing and Management) is a powerful command-line tool to repair Windows images and fix system issues. If you’re having fatal problems and unable to run apps or even use your system properly then in such terrifying situations, the DISM command in Windows comes off very handy.
This article covers a full guide about the DISM command, how to use it, when to use it, and things you need to be careful about when using this tool.
The DISM command is already built into Windows. You can run the command from either the Command Prompt or Windows Powershell.
When Should You Use It?
Although the DISM command is very useful, it’s not something you should just spam around. Keep it as a last resort when you have no other choice. If you’re facing problems such as:
- Getting Blue Screen of Death(BSOD)
- Application failures
- System crashing
- Windows features not working as they should
However, before running the DISM command, you should first try the SFC command. Don’t know about the SFC command? No worries. We’ll cover that as well.
What is the SFC Command
System File Checker (SFC) is another built-in tool for Windows to repair missing and corrupted system files. It’s used to scan Windows and restore those files. You can troubleshoot many defections using this command.
Repair System Files With the SFC Command
You can use many options with the SFC command depending on what you want to do with the file(s). For example
- /scannow → Scans and repairs all protected operating system files
- /verifyonly → Only scans files and doesn’t repair them
- /scanfile=file → Scans and repairs only a specific file
For this tutorial, we’ll use the /scannow option.
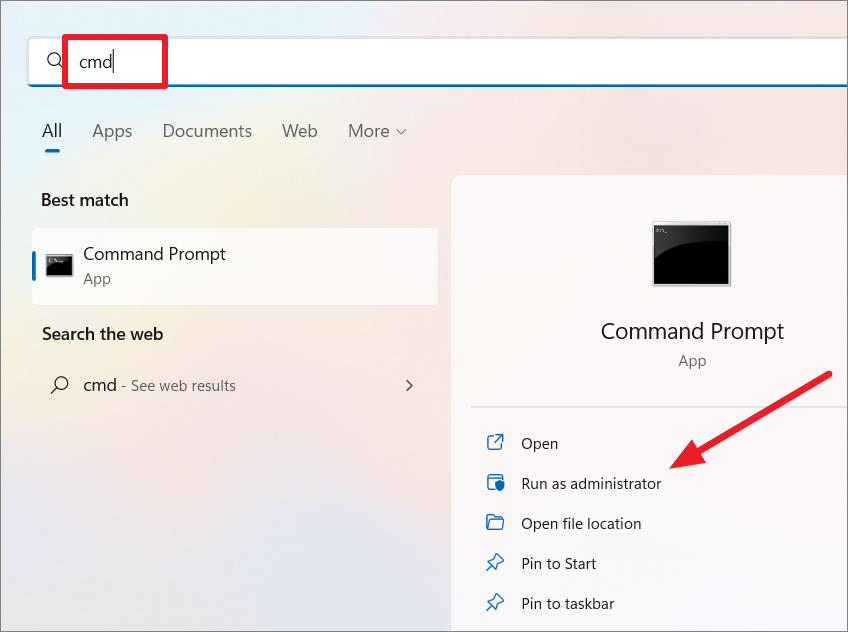
First, you need to open the Command Prompt with administrator privilege. Go to search and start typing Command Prompt. Right-click on it and choose Run as administrator. You will get a prompt. Just select Yes so the Command Prompt starts running
Now type in the following command
sfc /scannow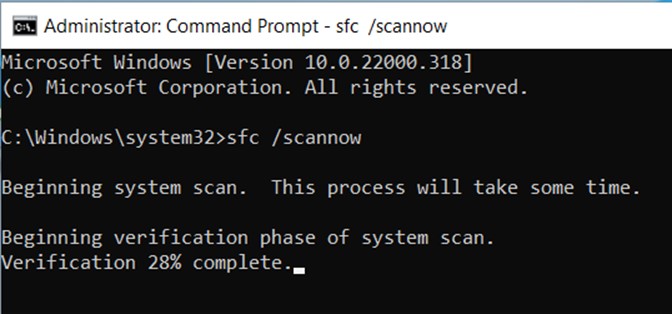
It will start scanning your PC for any corrupted files. Usually, it takes a couple of minutes to scan everything so wait a bit.
If everything goes smoothly and it doesn’t find anything fishy, you’ll get the message “Windows Resource Protection did not find any integrity violations.”
If you get a “Windows Resource Protection found corrupt files but was unable to fix some of them” message instead, try using the command in Safe Mode.
Once this command repairs the corrupted files using local images, you can find the log files here.
%windir%/Logs/CBS/CBS.log
Repair System Files With the DISM Command
If the SFC command failed to fix your issues, then it’s time to use the DISM command.
Just like the SFC command, the DISM command also has a few options. These are
- CheckHealth
- ScanHealth
- RestoreHealth
You need to use these options in this particular order. We’ll show you how to use each option with the DISM command and what they do.
In order to use the DISM command, you will need to use the Command Prompt again. So following the same steps we showed above, open the Command Prompt with administrative privileges.
CheckHealth Option With The DISM Command
The CheckHealth option helps you find any defect with the Windows image. It doesn’t do any repairs though.
Run the following command to check if you need to make any fixes to the corrupted data.
DISM /Online /Cleanup-Image /CheckHealth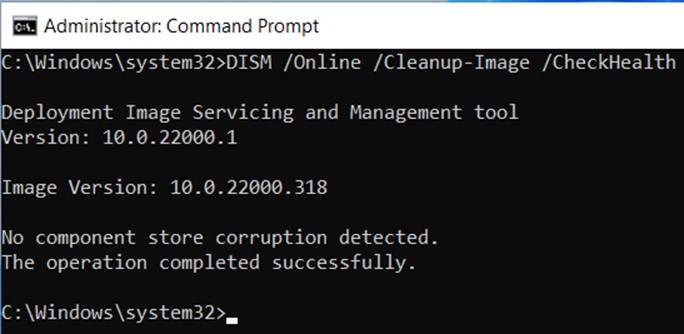
ScanHealth Option With The DISM Command
ScanHealth is a more advanced option. With ScanHealth, you can scan the Windows image for any corruption and check whether the image is repairable or not.
Run the following command in the Command Prompt.
DISM /Online /Cleanup-Image /ScanHealth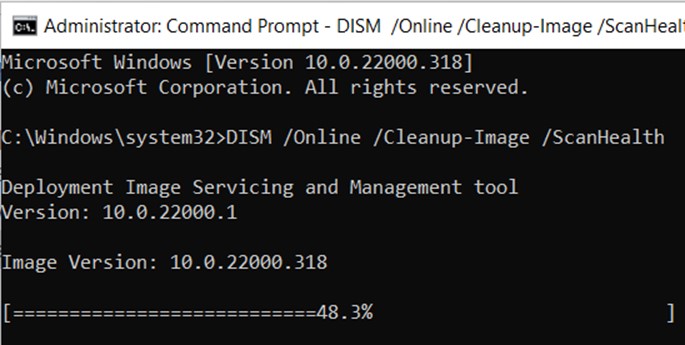
The full scanning will take some time. So wait for it to finish successfully.
DISM Command – RestoreHealth
Finally, you need to use the RestoreHealth option to repair any kinds of defects in the image. If you want to repair an online image using your own sources (Rather than Windows Update), run the following command
Dism /Online /Cleanup-Image /RestoreHealthHowever, if you want to fix an offline image with a mounted image as a repair source, try this command;
Dism /Image:C:\offline /Cleanup-Image /RestoreHealthIf you don’t add any source, the default location of Features on Demand gets used. You can also add LimitAccess to the command so that the Windows Update is not used as the repair source. This is a sample command if you add source and /LimitAccess;
Dism /Online /Cleanup-Image /RestoreHealth /Source:c:\test\mount\windows /LimitAccessIf you’re a beginner and don’t have much knowledge about all these, we recommend you use the first command among the three.
It may take longer than the previous scans. It may even get stuck at 20% or 40%. Don’t panic as this is normal.
After the process is finished successfully, you’ll get the “The restore operation completed successfully.” message.
You can find the log files here;
%windir%\Logs\DISM\dism.log
Common Problems After /RestoreHealth is used
After using the above command, you may face some problems. Here we highlight two common problems you may face. If you face any other problems, let us know in the comments.
“The source file could not be found” problem
If you get this message, here’s how you can fix it.
- Step-1: Run the Command Prompt as administrator.
- Step-2: Type the command DISM /Online /Cleanup-Image /StartComponentCleanup and press ENTER.
- Step-3: Now type DISM /Online /Cleanup-Image /RestoreHealth and press ENTER.
- Step-4: Type this command sfc /scannow and press ENTER.
- Step-5: Restart your PC to see if your problem is solved or not
Error: 4448 problem
This error is caused by a corrupted system file. You can fix this with an in-place system upgrade. You may also want to check for hard disk issues and whether your PC is able to boot successfully.
Error: 87 problem
This problem is mainly caused for two reasons.
- Not typing the command properly. For example, if someone forgets to add spaces and types DISM/Online/Cleanup-Image/RestoreHealth.
- If you forgot to run the Command Prompt as administrator.
What to do if DISM doesn’t work?
If your system problems still persist after running the SFC and DISM commands, there are a few ways you can go.
If you have created a restore point previously, then try a System Restore. Chances are that your PC was in good health when you created the restore point.
Alternatively, you can take a backup and try reinstalling Windows again. You won’t lose files such as pictures or documents. However, you will have to reinstall all the programs.
Why Use the DISM Command
Using the DISM command, you can
- Check for damaged Windows features and system files.
- Identify and fix many Windows Operating System related bugs and issues (BSOD, application crash, system functions not working).
- Repair files that System File Checker or Windows Resource Protection found but failed to repair.
- Restore the system image so you can repair the Windows installation.
FAQ
What is the DISM Command?
Deployment Image Servicing and Management (DISM) is a built-in command-line tool used for servicing and preparing Windows images.
You can use DISM to service a Windows image (.wim) or a virtual hard disk (.vhd or .vhdx).
How do I run the DISM command?
You can run through the Command Prompt or Windows Powershell. Here’s how you do it using the Command Prompt–
- Step-1: Go to search. You can use the Window Key + S keyboard shortcut.
- Step-2: Start typing Command Prompt in the search bar.
- Step-3: Rick-click on Command Prompt and press Run as administrator.
- Step-4: Type in the DISM command.
Should I run DISM or SFC first?
You should run SFC first. And then DISM if SFC fails to resolve the problem. SFC tool is used for checking missing system files and restoring them from the cache. On the other hand, the DISM command repairs Windows images by getting a replacement from the Windows servers.
What is a DISM cleanup image?
The /Cleanup-Image option is added with the DISM command when it’s run. This is used for fixing defects in Windows images. This is the syntax of how the /Cleanup-Image option is used:
Dism /Online /Cleanup-Image /RestoreHealthIn this tutorial, we’ve covered everything you need to know to use the DISM command so you can fix issues with your Windows PC. If we’ve missed any part or you’re facing any problem while fixing it, let us know in the comments.
On Windows 11, «Deployment Image Servicing and Management» (DISM) is an advanced built-in tool you can use through Command Prompt to prepare, modify, and repair system images. However, you can also use it alongside the System File Checker (SFC) to resolve system issues.
Usually, when troubleshooting a problem, such as performance issues, a specific error, or a boot problem, you can run the SFC tool to replace corrupted and missing system files. However, if those files are also damaged, the repair won’t work. If this is the case, you can use the DISM tool to bring the local image to a healthy state and then use the SFC command to fix the setup.
This guide will walk you through the steps to use command-line tools to fix most problems on Windows 11.
Important: This is a non-destructive process, but it’s still recommended to create a system backup before proceeding.
How to use DISM to fix image problems on Windows 11
The DISM command provides the «CheckHealth,» «ScanHealth,» and «RestoreHealth» options to scan and detect issues, and you want to use them in order. If the scans return errors in the image, you can use the «RestoreHealth» option to fix them.
Check health option
The DISM’s CheckHealth option helps to determine any corruptions inside the local image. However, the option does not perform any repairs.
To check the Windows 11 image for issues with the DISM command, use these steps:
- Open Start.
- Search for Command Prompt, right-click the top result, and select the Run as administrator option.
- Type the following command to perform a quick check and press Enter: DISM /Online /Cleanup-Image /CheckHealth
Once you complete the steps, the Deployment Image Servicing and Management tool will verify any data corruption that may require fixing.
Scan health option
The ScanHealth option performs an advanced scan to find issues with the image.
To check image problems with the ScanHealth option, use these steps:
- Open Start.
- Search for Command Prompt, right-click the top result, and select the Run as administrator option.
- Type the following command to perform an advanced DISM scan and press Enter: DISM /Online /Cleanup-Image /ScanHealth
After you complete the steps, the scan could take some time to check whether Windows 11 needs any repairs.
Restore health option
The DISM’s RestoreHealth option automatically scans and repairs common issues on Windows 11.
To repair system problems with the DISM commands, use these steps:
- Open Start.
- Search for Command Prompt, right-click the top result, and select the Run as administrator option.
- Type the following command to repair the Windows 11 image and press Enter: DISM /Online /Cleanup-Image /RestoreHealth

Once you complete the steps, DISM will download and replace damaged files from the Windows Update servers (as necessary).
If the command seems stuck, this is normal behavior. After a few minutes, the process will be complete without further action.
Install.wim image option
In the rare case that DISM has problems replacing the damaged files or the device doesn’t have an internet connection, you will need to provide another image using the Source option. In this scenario, you can use the Windows 11 ISO file to provide the necessary files. However, you have to make sure that the ISO file matches the version, edition, and language of the setup you are trying to repair.
Download Windows 11 ISO
To download the Windows 11 ISO file, use these steps:
- Open Microsoft Support website.
- Under the «Download Windows 11 Disk Image (ISO)» section, select the Windows 11 option.
- Click the Download button.
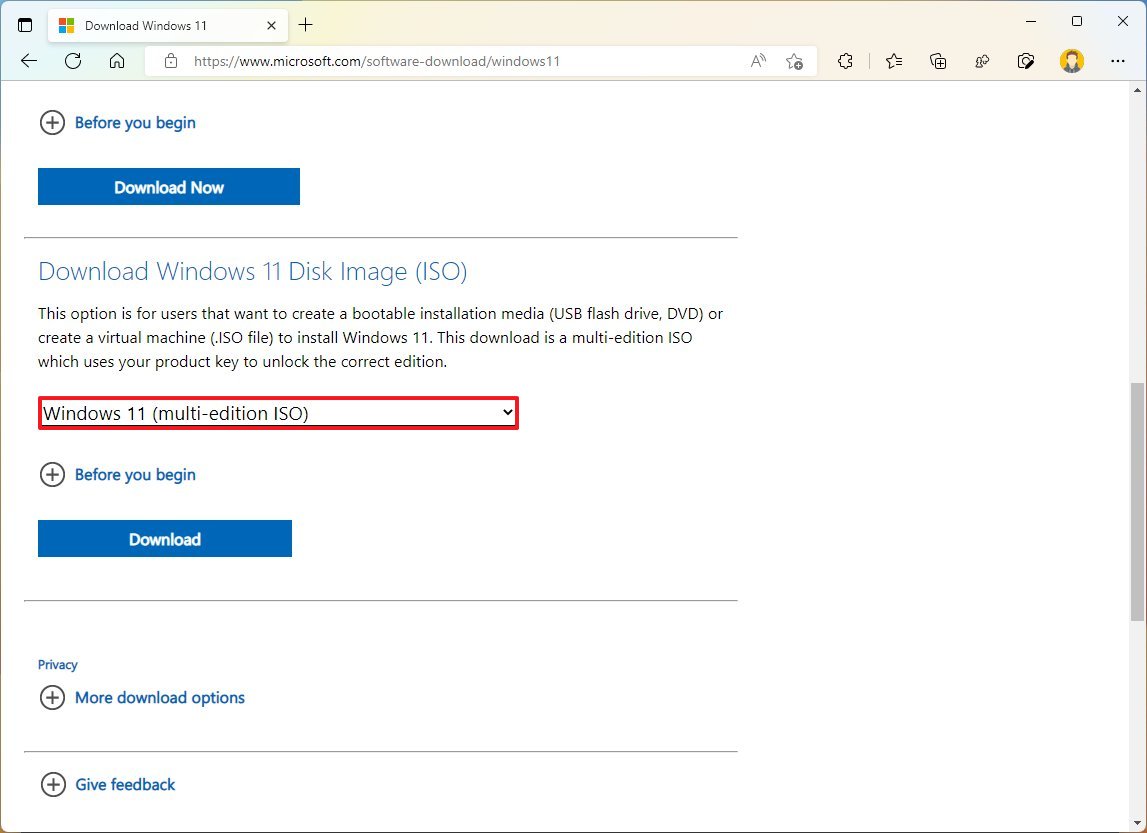
- Select the installation language.
- Click the Confirm button.
- Click the Download button to save the ISO file on the computer.
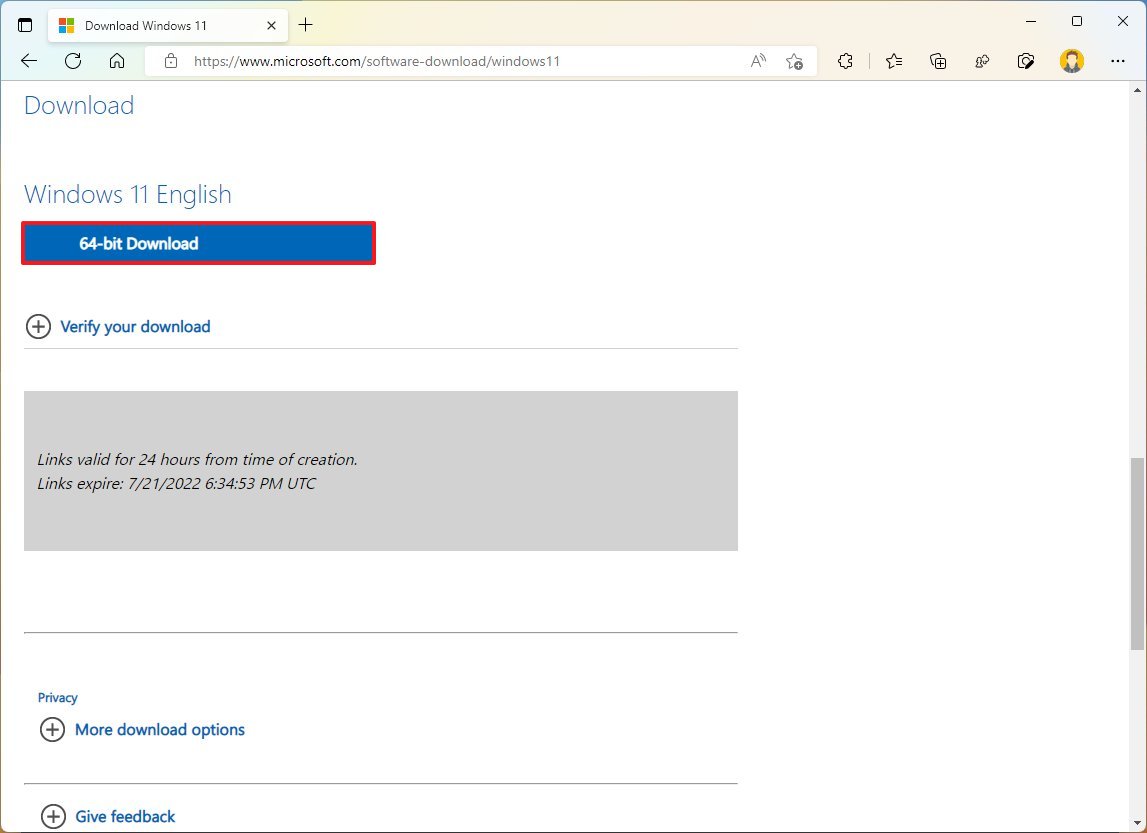
- Double-click the ISO file to mount it to File Explorer.
- Confirm the drive letter of the mount from the left navigation pane.
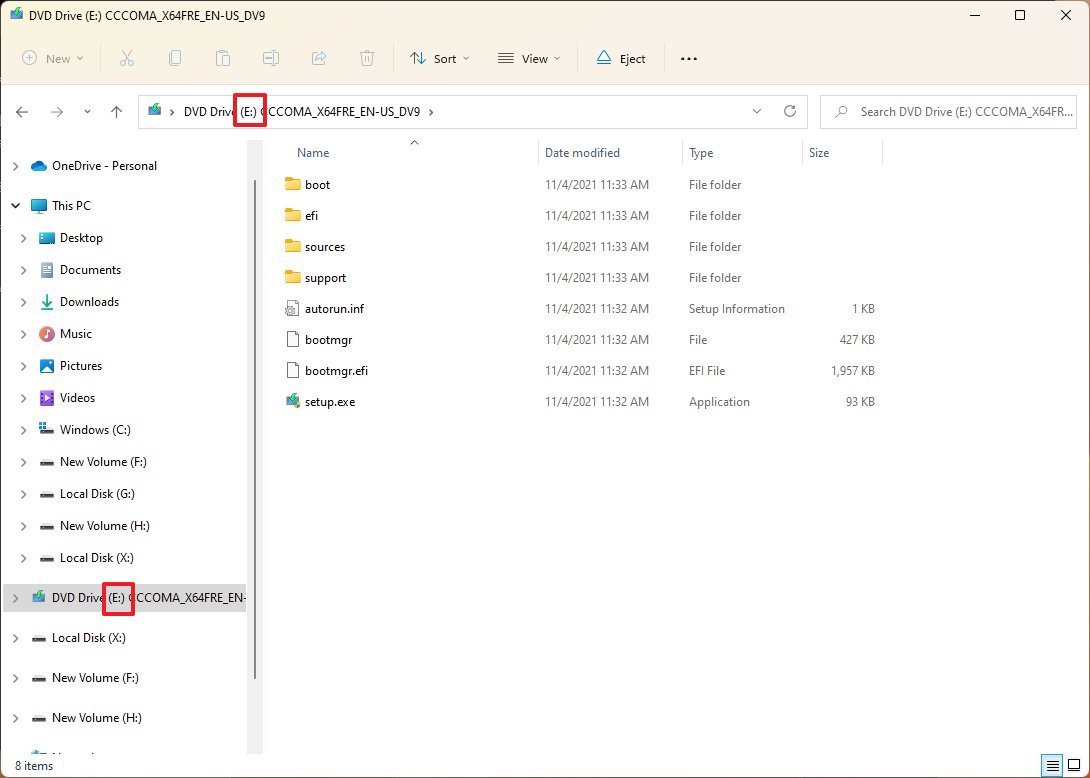
After you complete the steps, you can use the «Source» option to repair the local image.
Repair image with recovery image
To run DISM with the install.wim image to repair Windows 11, use these steps:
- Open Start.
- Search for Command Prompt, right-click the top result, and select the Run as administrator option.
- Type the following command to repair the local image and press Enter: DISM /Online /Cleanup-Image /RestoreHealth /Source:E:\Sources\install.wim
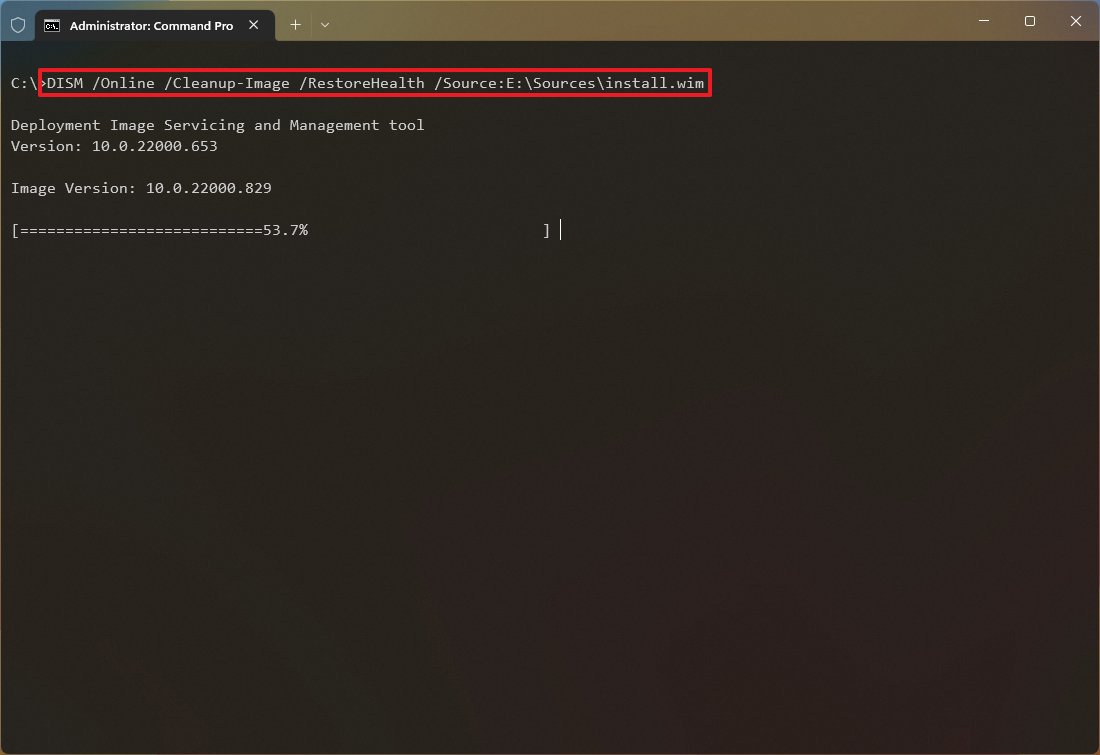
In the command, replace «E» with the ISO mount point drive letter in File Explorer.
- (Optional) Type the following command to limit the use of Windows Update and press Enter: DISM /Online /Cleanup-Image /RestoreHealth /Source:E\Sources\install.wim /LimitAccess
- (Optional) Type the following command variant to accomplish the same task and press Enter: DISM /Online /Cleanup-Image /RestoreHealth /Source:wim:E:\Sources\install.wim:1 /LimitAccess
In the command, change «E:\Sources,» for the path to the «install.wim» file location.
Once you complete the steps, the Deployment Image Servicing and Management command will scan and repair the problems using the «.wim» file.
How to use SFC to fix problems on Windows 11
The DISM commands will help to resolve issues with the system image, not the problems with the setup. Once the local image is restored to a healthy working state, you can use the System File Checker (SFC) command to repair the Windows 11 installation.
To use the SFC command tool to repair problems on Windows 11, use these steps:
- Open Start.
- Search for Command Prompt, right-click the top result, and select the Run as administrator option.
- Type the following command to repair the installation and press Enter: SFC /scannow
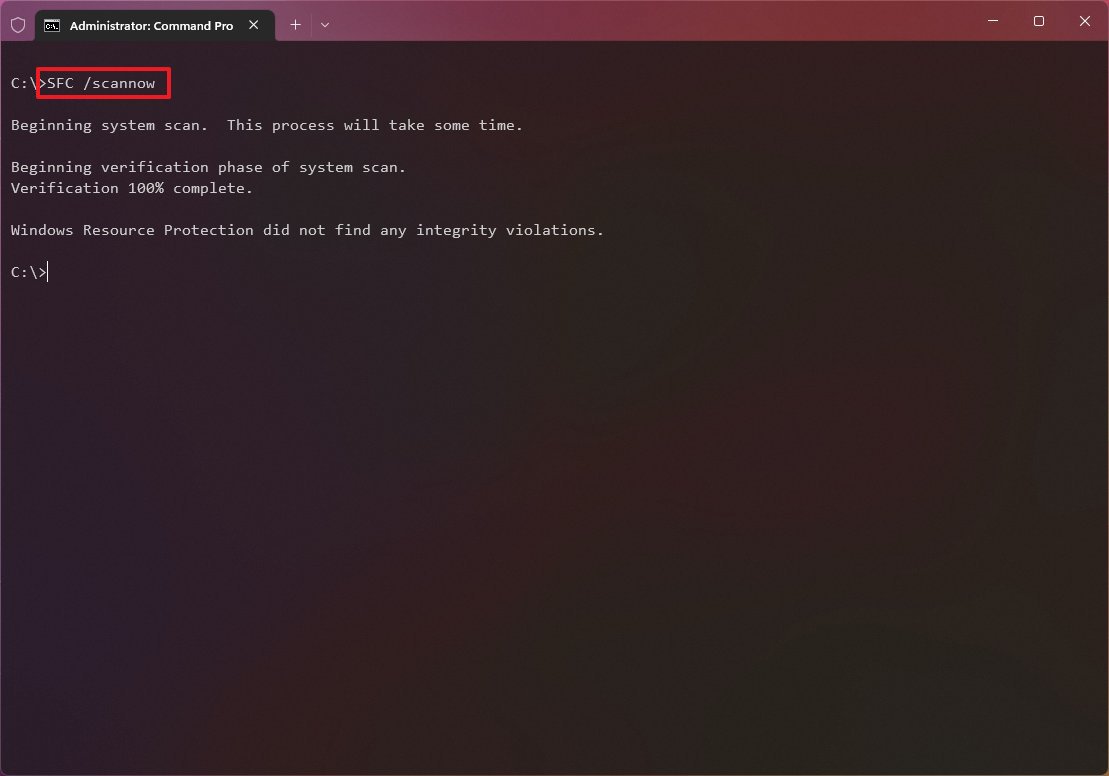
- Quick tip: If the tool determines that the system has errors, it’s recommended to run the command several times to ensure that everything was fixed correctly.
Once you complete the steps, the System File Checker tool will repair the system files using the local image files, and the log files will be created on «%windir%/Logs/CBS/CBS.log» and «%windir%\Logs\DISM\dism.log,» which you can review to get more details about the repair.
More resources
For more helpful articles, coverage, and answers to common questions about Windows 10 and Windows 11, visit the following resources:
- Windows 11 on Windows Central — All you need to know
- Windows 10 on Windows Central — All you need to know
All the latest news, reviews, and guides for Windows and Xbox diehards.
Mauro Huculak is technical writer for WindowsCentral.com. His primary focus is to write comprehensive how-tos to help users get the most out of Windows 10 and its many related technologies. He has an IT background with professional certifications from Microsoft, Cisco, and CompTIA, and he’s a recognized member of the Microsoft MVP community.