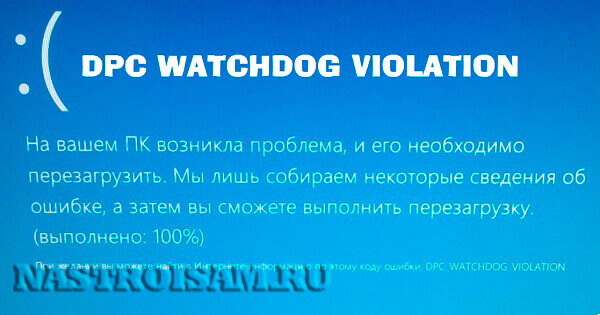
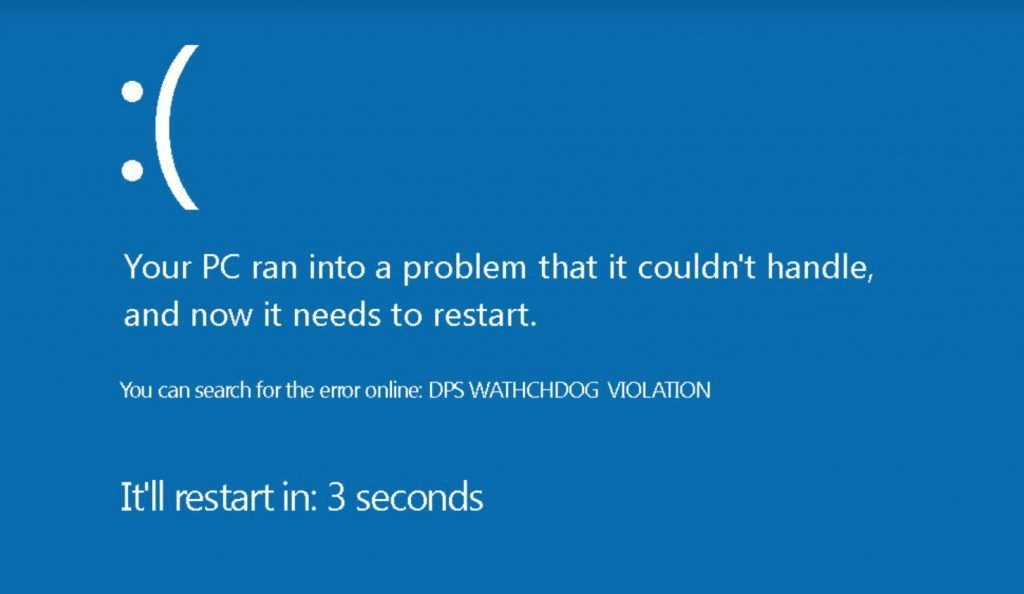
Синий экран смерти DPC WATCHDOG VIOLATION 0x00000133: причины и решения
Интересно то, что синий экран смерти с ошибкой 0x00000133 и кодом DPC_WATCHDOG_VIOLATION появляется преимущественно во время серфинга в интернете. Хотя также часто говорят о появлении BSOD в процессе загрузки компьютера или на экране входа. Суть проблемы в том, что оборудование или программное обеспечение несовместимо между собой. Подобный сбой могут вызывать другие причины, а это всего лишь производная их. Известно, что в Microsoft уже знают об ошибке и пытаются ее исправить. С другой стороны, подобные заявления мы видели уже десятки раз, а ошибка продолжает появляться. Предлагаем взять все в свои руки и попробовать исправить BSOD самостоятельно.
Почему появляется BSOD DPC_WATCHDOG_VIOLATION с кодом 0x00000133
Вам нужно знать, что DPC – это служба, отвечающая за отложенный вызов процедур. Watchdog является инструментом проверки ошибок. Его роль заключается в отслеживании приложений и подстройки под них компьютера. Таким образом данная ошибка может быть следствием:
- Повреждения системных файлов;
- Незавершенной установки обновлений или инсталляции апгрейдов с ошибками;
- Проблемы драйверов;
- Несовместимости ПО или устройств между собой;
- Поломка прошивки SSD.
Что нужно сделать?
Конечно, можем перейти сразу к исправлениям ошибки, но это будет просто ручной перебор возможных исправлений без понимания истинной причины. Лучше пойти по иному пути и разобраться, что же вызывает данную проблему. В этом нам помогут специальные логи операционной системы Windows.
Где можно посмотреть более подробные сведения об ошибке 0x00000133:
- Запускаем «Средство просмотра событий», за это отвечает файл eventvwr, который можно найти через поиск при условии активного индексирования.
- В разделе «Журналы Windows» выбираем папку «Система».
- Ищем одну из последних ошибок с красной отметкой.
- Открываем сведения событий и пробуем их исправить с помощью инструкции в этом же окне.
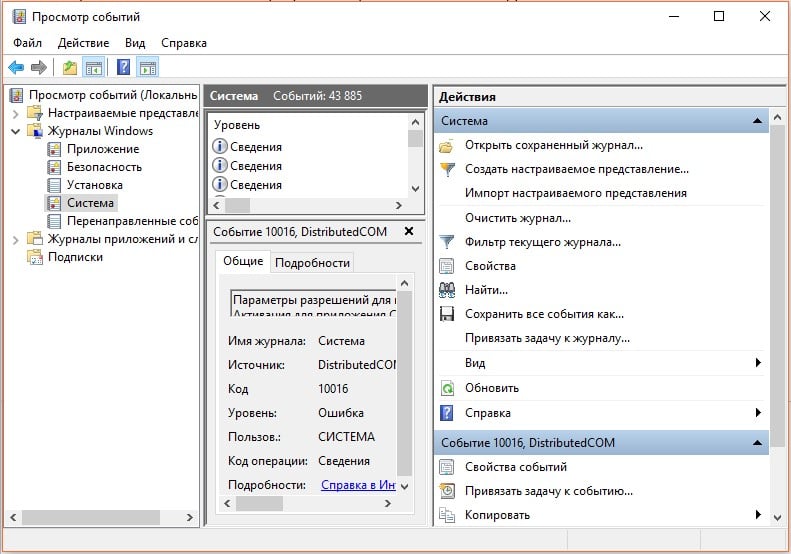
По крайней мере такой подход поможет сузить круг поиска неполадок или укажет на непосредственного виновника.
Проверить подключение кабелей
Чаще всего ошибки являются следствием какого-то банального сбоя. В данном случае – плохо подключенного оборудования. Его разъемы могут быть загрязнены, повреждены, наблюдаться плохой контакт или кабель уже пора менять. Большую часть из перечисленного можно обнаружить и устранить самостоятельно даже без похода в магазин.
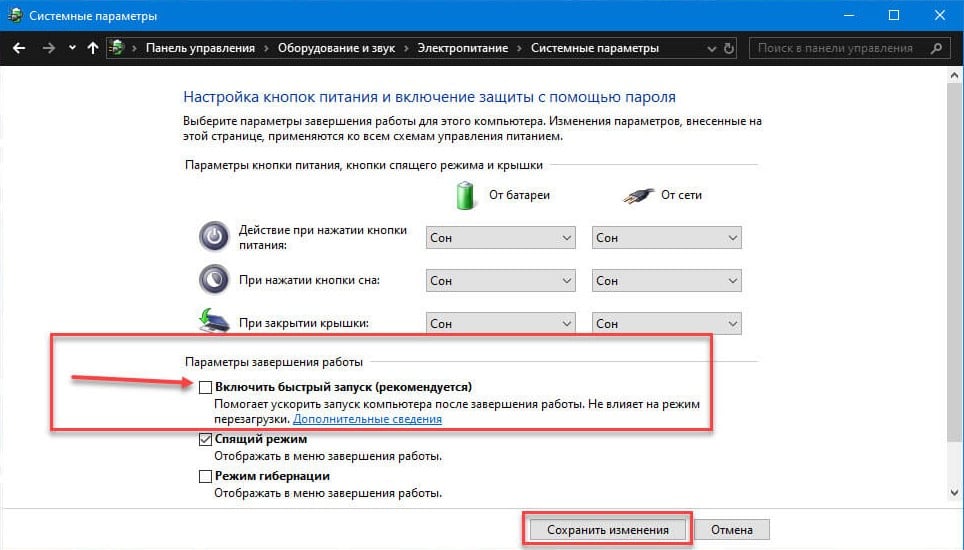
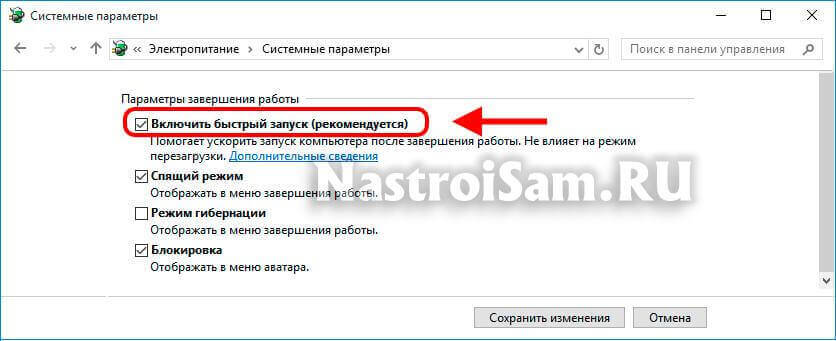
Выключить быструю загрузку
Быстрая загрузка нередко работает со сбоями. Порой лучше ее отключить и подождать немного дольше, чем сталкиваться с различными проблемами. Учитывая простоту реализации процедуры, ее точно стоит попробовать провести.
Инструкция:
- Нажимаем комбинацию клавиш Win + X и выбираем пункт «Управление электропитанием».
- Переходим в раздел «Действия кнопок питания».
- Жмем на кнопку «Изменение параметров, которые сейчас недоступны».
- Снимаем галочку с кнопки «Включить быстрый запуск (рекомендуется)».
Отключить все внешние устройства
Так как BSOD 0x00000133 DPC_WATCHDOG_VIOLATION преимущественно появляется из-за конфликта устройств, логичным решением будет сократить их численность. Самый простой путь – извлечь из разъемов все лишнее: принтеры, колонки, наушники, второй монитор и т. п. Это нужно для того, чтобы понять, дело действительно в дополнительных девайсах или нет.
Если компьютер заработает нормально, останется только провести процедуру повторного подключения устройств по одному. После того аппарата, когда начнет появляться синий экран смерти снова, мы узнаем истинного виновника проблемы. Обновление его драйверов должно сработать.
Если же изменений не последовало, скорее всего проблема не в периферии, а на порядок глубже. Стоит искать проблему с встроенным оборудованием компьютера или самой Windows. Именно этим мы сейчас и займемся.
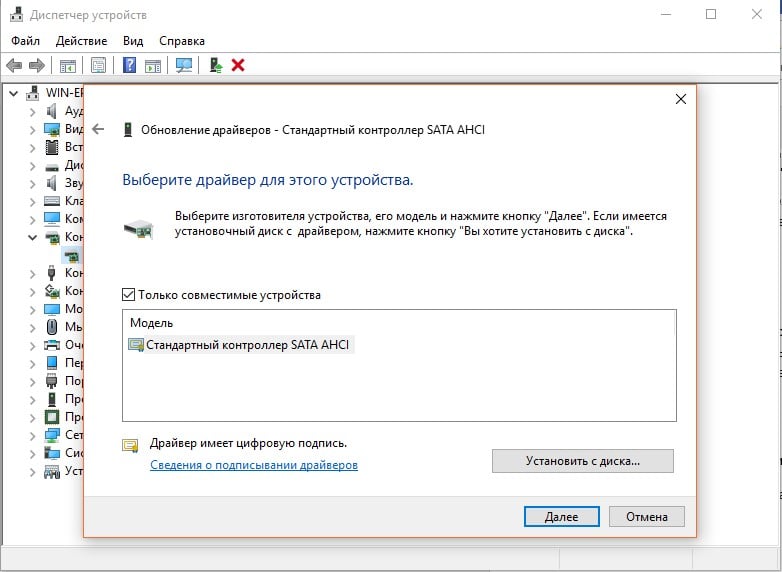
Установить новые драйверы контроллера IDE ATA / ATAPI
Существуют более интересные проблемы, которые связаны не с самим подключаемым оборудованием, а с контроллерами разъемов. Они тоже периодически нуждаются в обновлении драйверов.
Что нужно сделать:
- Зажимаем комбинацию клавиш Win + R, вводим devmgmt.msc и нажимаем Enter.
- Кликаем по списку с названием «IDE ATA / ATAPI».
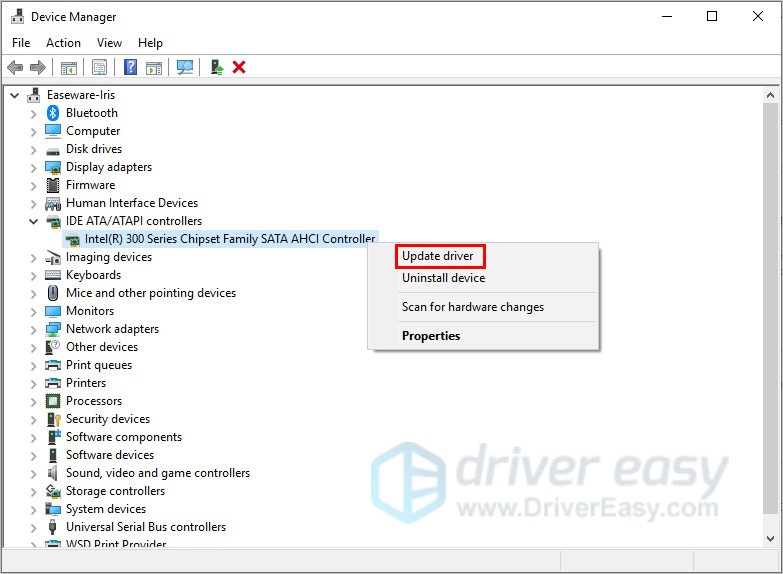
- Жмем по существующему контроллеру правой кнопкой мыши и выбираем «Обновить драйвер».
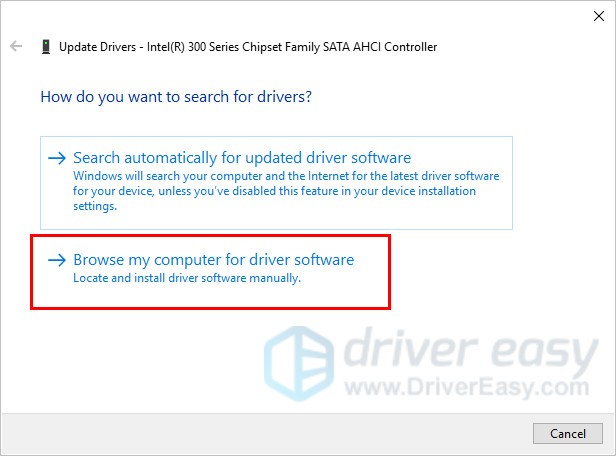
- Выбираем вариант «Выполнить поиск драйверов на этом компьютере».
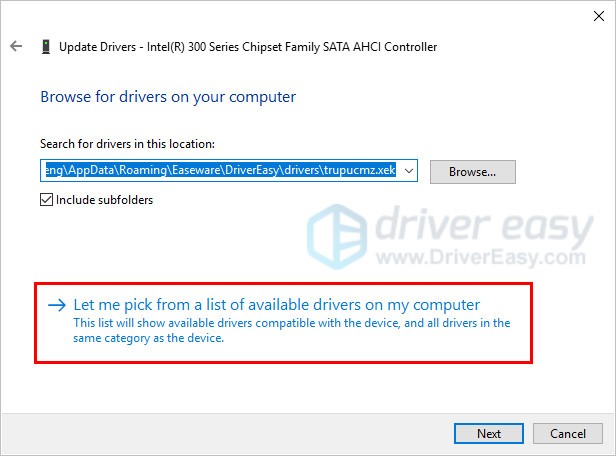
- Жмем на вариант «Выбрать драйвер из списка уже установленных драйверов».
- Нас интересует «Стандартный контроллер SATA AHCI», устанавливаем его. Даже если ваш контроллер отличается, стоит попробовать именно этот драйвер, по крайней мере сначала. Затем в любой момент можно вернуться к старому.
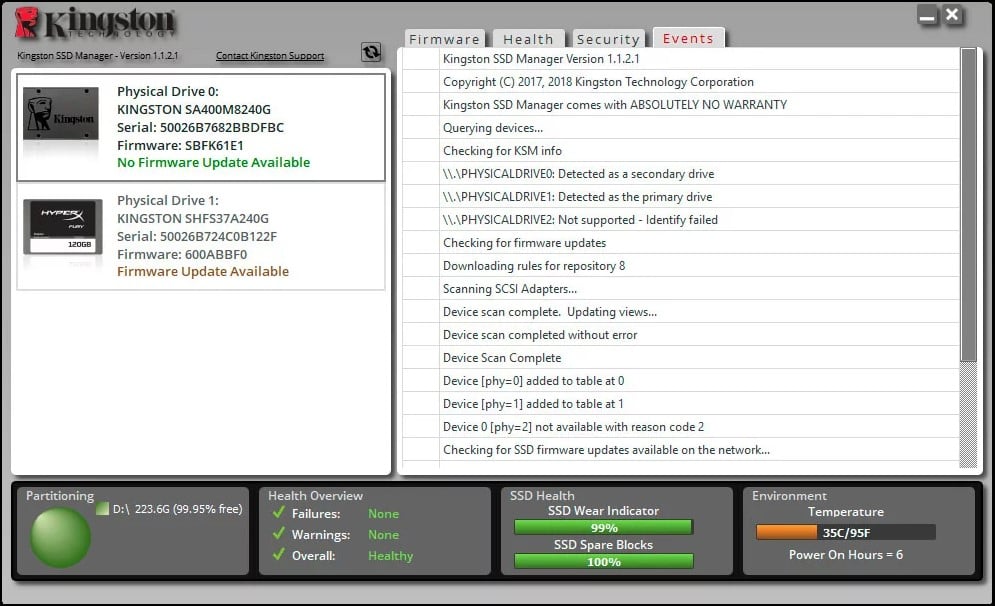
Обновить прошивку SSD
Устаревшие драйвера SSD тоже становятся причиной BSOD DPC Watchdog Violation и тому есть реальные подтверждения от пользователей на форумах. Нестабильность появляется вследствие того, что Windows не может нормально работать с оборудованием, так как не поддерживает его драйвера. Обновить программное обеспечение SSD – только часть работы, нужно также установить и свежую прошивку.
Пошаговая инструкция:
- Через клик правой кнопкой мыши выбираем Пуск, а затем – «Диспетчер устройств».
- Раскрываем список «Дисковые устройства» и жмем по основному накопителю правой кнопкой мыши, а затем переходим в «Свойства».
- На вкладке сведения находим модель устройства и забиваем его в поиск Google + драйвера.
- Устанавливаем свежие драйвера и скачиваем программу для обновления прошивки. У каждого производителя для этого есть специальный софт. К примеру, у меня Kingston и для него нужна KSM Firmware Update.
- Запускаем программу и ждем пока она обновит софт.
Проверка диска и системных файлов
Неполадка может заключаться и в повреждении системных файлов, файловой системы или наличии битых секторов на диске. Подобные сбои обычно удается исправить с помощью встроенных в Windows утилит.
Вот несколько команд, которые стоит использовать в командной строке:
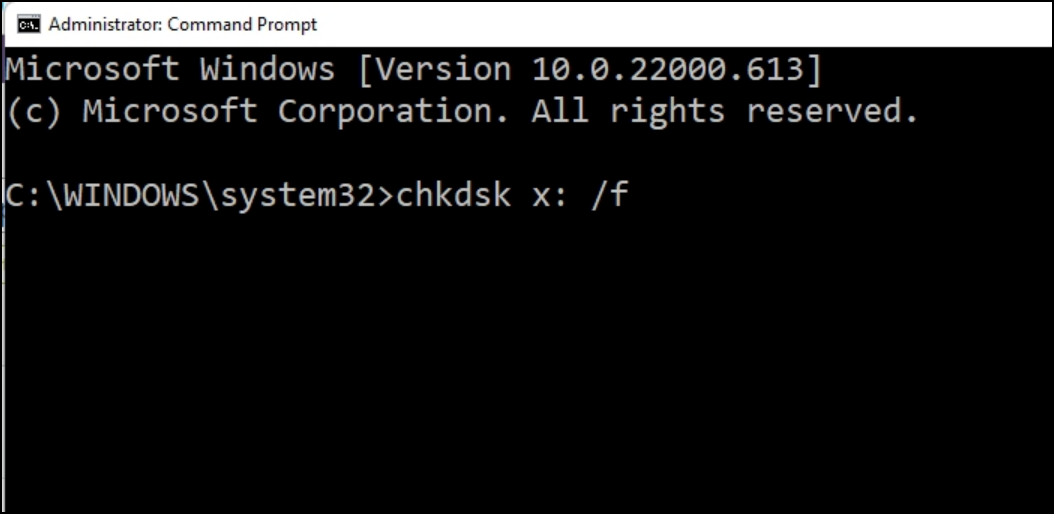
- chkdsk x: /f, где X – буква диска, который нужно сканировать. Поможет исправить большинство неполадок жесткого диска или SSD.
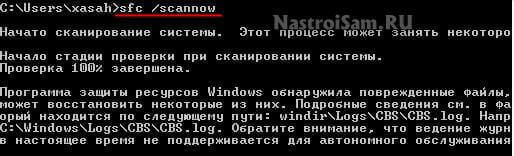
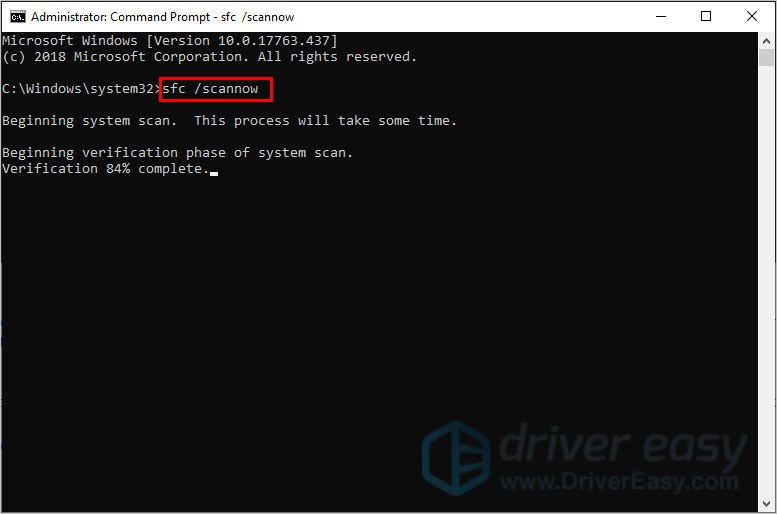
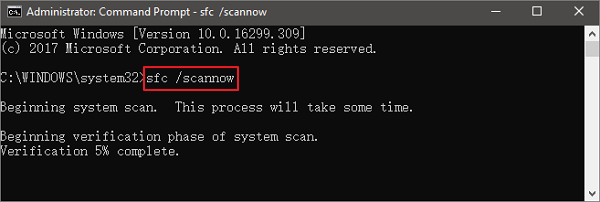
- sfc /scannow – инструмент сканирования и исправления поломок системных файлов Windows.
Не имея вводных данных о текущем состоянии компьютера, причинах BSOD 0x00000133 DPC Watchdog Violation непосредственно в вашей системе, мы не можем дать 100% гарантий, что какой-то конкретный способ сработает. Все, что нам остается – руководствуясь логикой и пользовательскими отчетами, перечислять то, что должно помочь. Многие из способов действительно хвалили люди на форумах. Надеемся, это сработает и у вас.
За последние пару месяцев ко мне несколько раз обращались пользователи Windows 10 из-за появления «синего экрана смерти» (BSOD) с ошибкой 0x00000133 или кодом «DPC Watchdog Violation». Причём в паре случаев проблема возникала на абсолютно новых ноутбуках HP и Lenovo с предустановленной десяткой. В остальных были совершенно разные компьютеры с совершенно разным софтом.
Согласно библиотеке MSDN Microsoft, этот код возникает когда отрабатывает специальный механизм отслеживания, реагирующий в случае обнаружения длительного отложенного вызова процедуры или превышен таймаут удержания системного прерывания IRQ. Анализ ситуации показал, что эта ошибка может вызвана совершенно различными сбоями и в зависимости от этого нужно подобрать правильный метод устранения. В этой инструкции я рассмотрю самые часто встречающиеся причины из-за которых может появится ошибка DPC Watchdog Violation и как их исправить в Windows 10. Статья будет актуальна и для предыдущих версий ОС Виндовс. Хотя, надо признать, что на той же «Восьмёрке» такое встречалось куда реже.
Причина 1. USB-устройства
Как оказалось, сбой в работе мыши, клавиатуры, веб-камеры или 3G/4G-модема, подключенного через USB порт может вызвать ошибку DPC с кодом 0x00000133. В одном из случаев виновником был некачественный провод-удлинитель. Попробуйте отключить все лишние периферийный устройства и запустить компьютер.
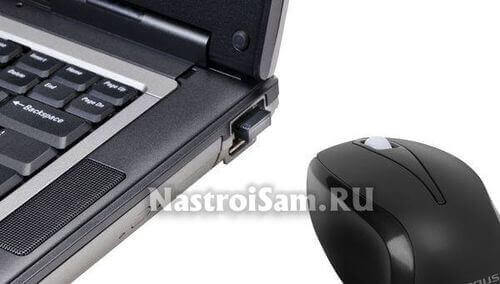
Так, к примеру, на ноутбуке ASUS глюканула беспроводная мышь. После переключения её радиоадаптера в соседний УСБ-разъём, система более в BSOD не сваливалась.
Причина 2. Драйверы устройств
Ошибка DPC Watchdog Violation может появится после обновления ОС до Виндовс 10, из-за конфликта драйвера и новой системы. Решением будет обновление проблемного драйвера. Чтобы его выявить — понаблюдайте после чего появляется синий экран:
— в играх — вероятнее всего видео-адаптер (обычно, Nvidia или ATI Radeon) или звуковая карта;
— во время работы в Интернете — сетевой Ethernet или WiFi-адаптер.
Если выявить виновника не получается — обновите драйвера для всех устройств,скачав их с официального сайта производителя, либо через онлайн-клиент от Drivers Pack Solution. Особое внимание уделите USB 3.0 и чипсету материнской платы.
Причина 3. Быстрая загрузка
Для ускорения загрузки Windows 10 частенько советуют включать функцию «Быстрый запуск». Он ускоряет старт операционной системы за счёт тех же механизмов, что работают в режиме гибернации, выгружая данные из оперативной системы на жесткий диск. В некоторых случаях после этого при выключении ПК появляется BSOD. Для его устранения надо просто снова зайти в дополнительные параметры схемы электропитания и и снять галочку «Включить быстрый запуск».
Причина 4. Повреждение системных файлов.
Если ошибка DPC Watchdog Violation в Windows 10 появляется произвольно в время работы или простоя системы, то это может свидетельствовать о повреждении системных файлов. Для устранения проблемы надо запустить командную строку с правами Администратора и выполнить следующие команды:
DISM.exe /Online /Cleanup-image /Restorehealth

Этим мы проверим целостность образа. Затем надо проверить системные файлы:
sfc /scannow
По завершению этой процедуры, желательно так же выполнить проверку дисков на наличие ошибок командой:
chkdsk /f
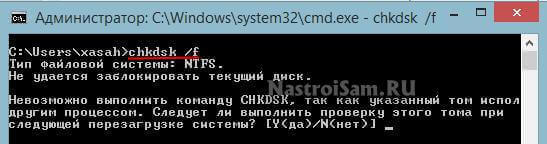
Если надо чтобы утилита проверила конкретный диск — надо указать его букву:
chkdsk C: /f.
При обнаружении ошибок они будут автоматически исправлены. В случае с системным разделом понадобится перезагрузка компьютера.
Примечание: Если ничего не помогает и Error code 0x00000133 всё равно продолжает сваливать Виндовс 10 в синий экран, то можно попробовать сделать восстановление системы. Для этого надо нажать кнопку Пуск и набрать слово «Восстановление». В результатах будет ярлычок мастера, позволяющего сделать откат Windows до сохранённых ранее точек состояния:
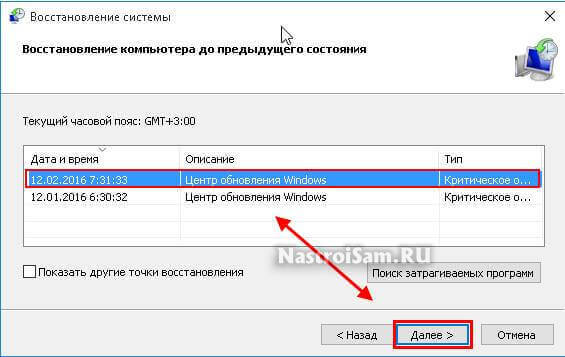
Для начала попробуйте сделать откат до самой поздней точки и понаблюдать. Не поможет — пробуйте более ранние точки.
Отдельно хочу скачать о появлении BSOD с кодом «DPC Watchdog Violation» на компьютерах или ноутбуках с SSD-дисками. В этом случае стоит попробовать обновить прошивку твердотельного накопителя.
When you are web-surfing, you may meet the 0x00000133 blue screen error. The 0x00000133 is also called DPC_WATCHDOG_VIOLATION bug check. In most of the cases, the error is caused by hardware problems and driver issues.
It’s a common error but no need for you to worry about, this error should be easy to fix. Read on to find how.
Back to normal system
The first thing to do when you meet the 0x00000133 error is to restart your computer and back to the normal Windows system.
How: Usually the system will restart automatically. But if your computer freezes, you can hold your Power button for about 5 seconds to restart it.
If you can’t reboot your computer into normal mode in this way, you can click here to know how to boot into safe mode. After that, restart your computer to see if the system has returned to normal.
6 fixes for 0x00000133 blue screen error:
- Change SATA AHCI controller driver
- Update your driver
- Rollback your driver
- Repair system files
- Repair hard disk errors
- Restore your system
- Reset or reinstall Windows
Method 1: Change SATA AHCI controller driver
Change your Family SATA AHCI Controller into Standard SATA AHCI Controller can help you solve this problem.
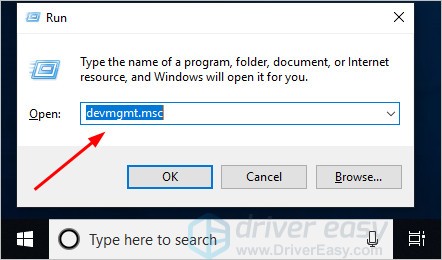
1) On your keyboard, press the Windows logo key and R at the same time, then type “devmgmt.msc” and press Enter.
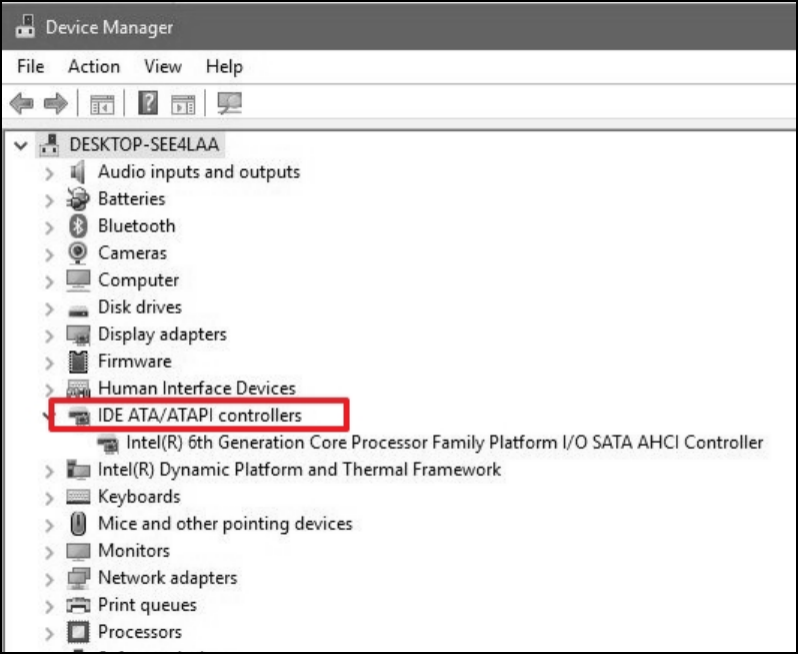
2) Expand IDE ATA/ATAPI Controllers. Right-click SATA AHCI controller and click Update driver.
3) Click Browse my computer for driver software.
4) Click Let me pick from a list of device drivers on my computer.
5) Click Standard SATA AHCI Controller, then click Next. Then follow the on-screen instructions to finish the process.

6) Restart your computer and then check whether the blue screen will appear or not.
Method 2: Update your driver
One reason for the 0x00000133 error is outdated drivers for your hardware devices. You should verify that your devices have the right and latest drivers, and update those that don’t.
Tip: You can recall under what circumstances a blue screen error appeared to find the most relevant driver.
E.g. Check the network drivers (found under the Network Adapters) in Device Manager if you face issues while surfing the internet.
There are two ways you can get the right drivers: manually or automatically.
Manual driver update – You can update your driver manually by going to the manufacturer’s website, and searching for the most recent correct driver. Be sure to choose only drivers that are compatible with your Windows version.
Automatic driver update – If you don’t have the time, patience or computer skills to update your driver manually, you can do it automatically with Driver Easy. Driver Easy will automatically recognize your system and find the correct driver for your device, and your Windows version, and it will download and install it correctly:
1) Download and install Driver Easy.
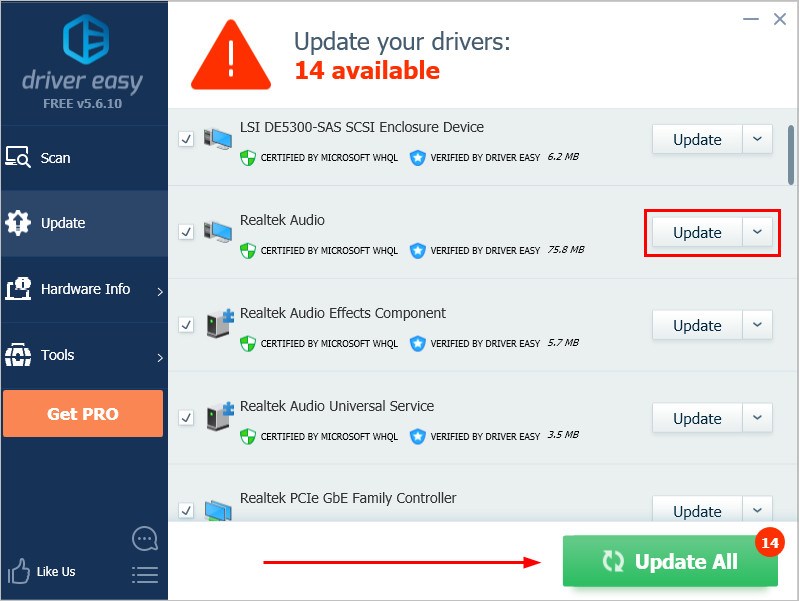
2) Run Driver Easy and click the Scan Now button. Driver Easy will then scan your computer and detect any problem drivers.
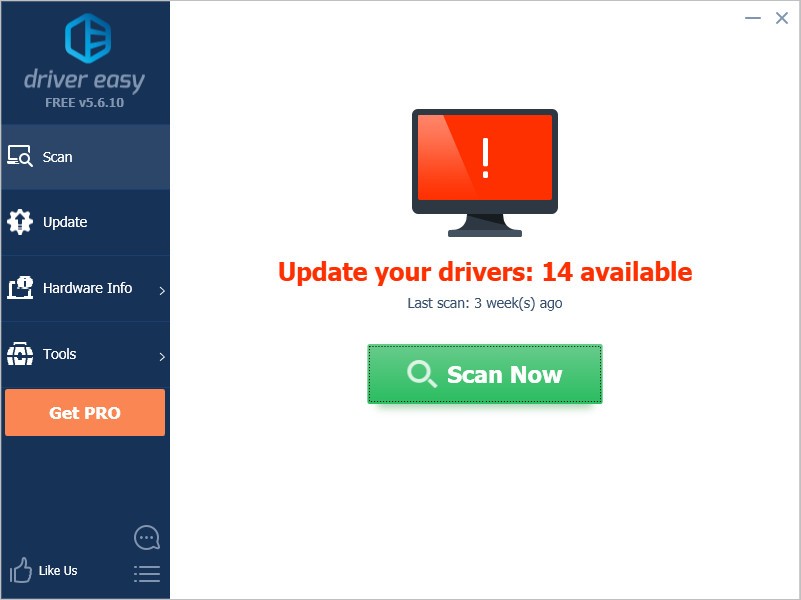
3) Click the Update button next to the selected driver to automatically download the correct version of that driver, then you can manually install it (you can do this with the FREE version).
Or click Update All to automatically download and install the correct version of all the drivers that are missing or out of date on your system. (This requires the Pro version which comes with full support and a 30-day money back guarantee. You’ll be prompted to upgrade when you click Update All.)
4) Restart your computer and check the blue screen problem is fixed or not.
Method 3: Rollback your driver
When you meet the blue screen error, you check your drivers and find they’ve already updated to the latest version. In this case, you have to make sure they are compatible with your system. It’s because sometimes the latest version of device driver doesn’t work properly on your system and start interfering with the computer’s normal start-up process.
So, roll back your driver to the previous version to solve the issue.
In the steps below, we use the graphics driver as an example to demonstrate. You can follow the steps to roll back the driver you think needs to be rolled back.
1) On your keyboard, press the Windows logo key and R together to invoke the Run box.
2) Type “devmgmt.msc” and click OK.
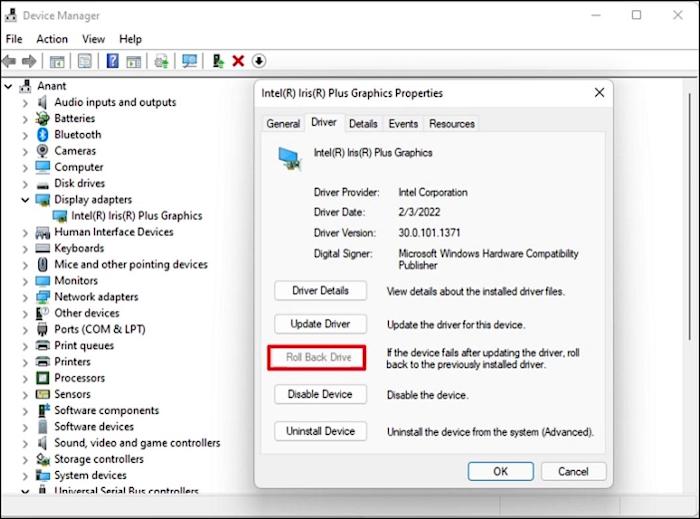
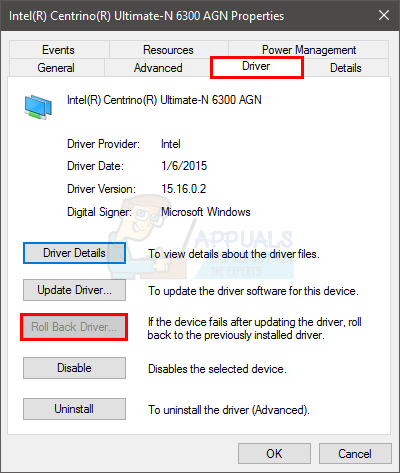
3) In the Device Manager, click the Display adapters, then right-click on your display device software and click Properties.

4) Under the Driver tab, click Roll Back Driver, then follow the on-screen instructions to finish the process.

Note: If the Roll Back Driver option grayed out, you can download a previous driver from the manufacturer’s website and install it on your PC.
5) Restart your computer, and see if the blue screen error is fixed or not.
Method 4: Repair system files
When your computer’s system file was broken or corrupted, it may cause the BSOD Error 0x00000133.
Here’s how to solve it:
- Option 1- Automatically (Recommended)
Use a repair tool to check various areas in your computer to determine the cause of Windows common issues. It will deal with issues related to system errors, critical system files and find the right fix for you. - Option 2 – Manually
System File Checker is a built-in tool to check for corrupt, damaged system files and manage to restore them if there’re any. However, this tool can only diagnose major system files, and won’t deal with damaged DLL, Windows Registry key, etc.
Option 1 – Automatically (Recommended)
Fortect is a computer repair software that can diagnose problems on your computer and fix them immediately.
It is tailored to your specific system and is working in a private and automatic way. It will first check hardware-related issues to identify problems, and then security issues, and finally it detects programs that crash, missing system files. Once complete, it will find a solution to your specific problem.
- Download and install Fortect.
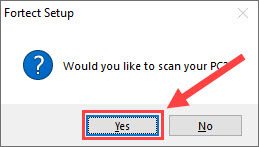
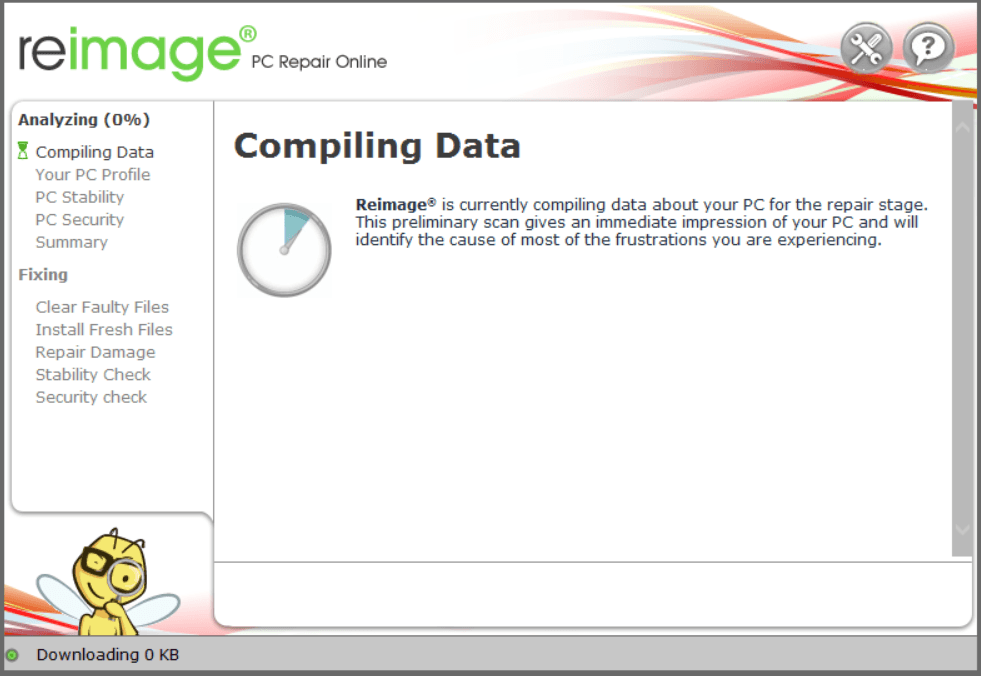
- Open Fortect and click Yes to run a free scan of your PC.

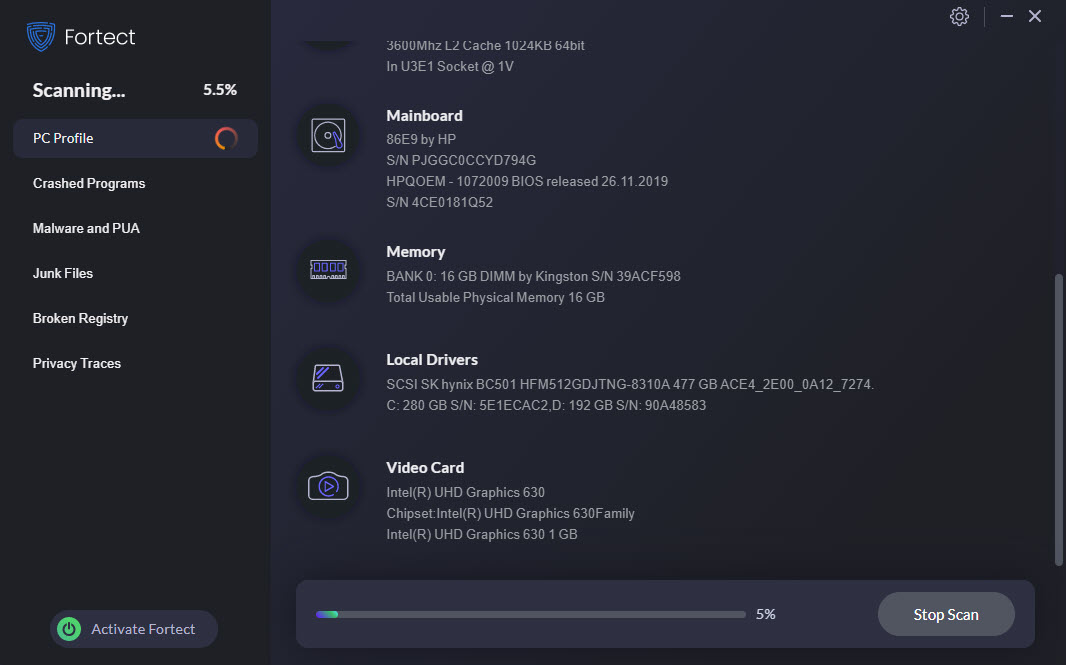
- Fortect will scan your computer thoroughly. This may take a few minutes.

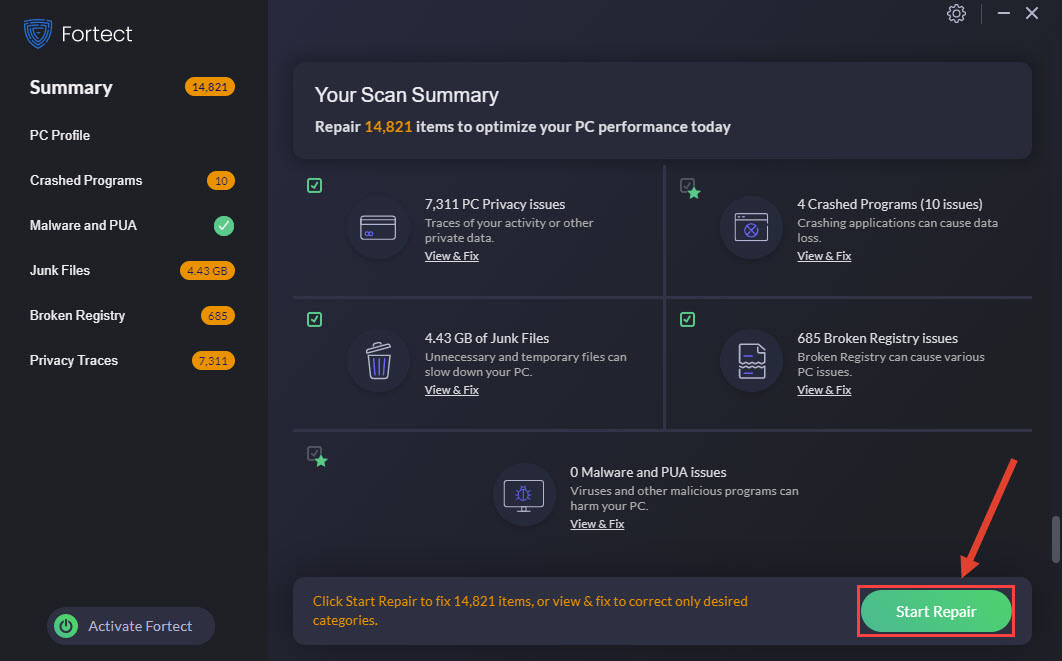
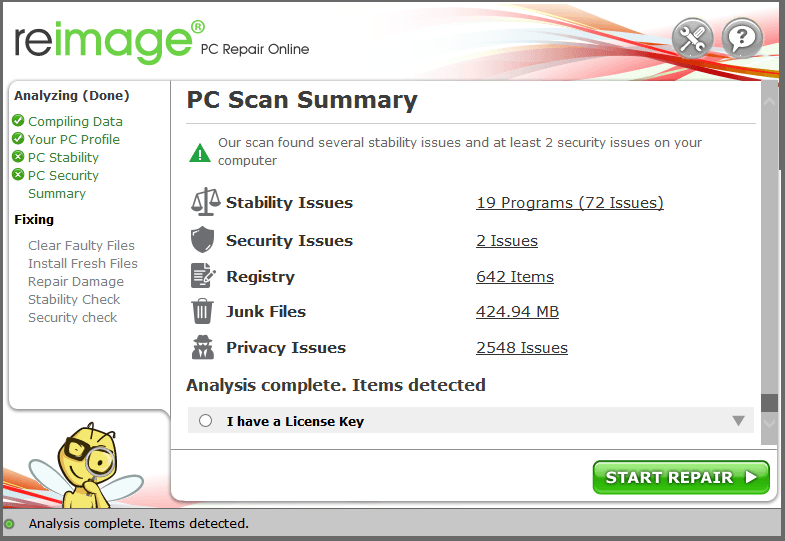
- Once done, you’ll see a detailed report of all the issues on your PC. To fix them automatically, click START REPAIR. This requires you to purchase the full version. But don’t worry. If Fortect doesn’t solve the issue, you can request a refund within 60 days.

The Pro version of Fortect comes with 24/7 technical support. If you need any assistance, please contact Fortect support:
Email: support@fortect.com
Option 2 – Manually
The System File Checker (SFC) is a useful command-line utility to scan and repair protected system files in Windows. Here’s how to run it:
1) On your keyboard, press the Windows logo key and the R key at the same time to invoke the Run box.
2) Type “cmd” and press Shift+Ctrl+Enter together to open Command Prompt in the administrator mode.
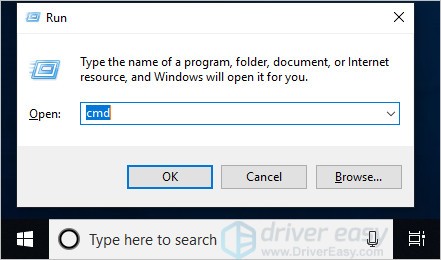
Note: Do NOT click OK or just press the Enter key as that won’t allow you to open Command Prompt in the administrator mode.
3) Type “sfc /scannow” in the window and press Enter. Then wait for the verification is 100% complete.
4) Restart your computer to check the blue screen error is fixed or not.
If the result indicates that there are broken files exist but SFC can’t fix it, you can turn to Deployment Image Servicing and Management (DISM) Tool for deeper examination and repair.
Click here for a tutorial on how to use the DISM Tool.
Method 5: Repair hard disk errors
In some cases, the 0x00000133 blue screen error could be attributed to hard drive corruption.
Check Disk Utility(chkdsk.exe) is a useful tool offered by Windows that can be used to check the hard drive for bad sectors and fix them if possible. Here’s how:
1) On your keyboard, press the Windows logo key and R key at the same time to invoke the Run box.
2) Type “cmd” and press Shift+Ctrl+Enter together to open Command Prompt in the administrator mode.
Note: Do NOT click OK or just press the Enter key as that won’t allow you to open Command Prompt in the administrator mode.
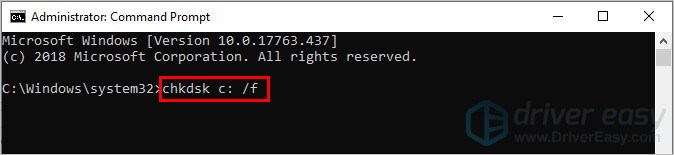
3) Type the following command line and press the Enter key on your keyboard.
Note: The letter “x” means the disk drive that you want to scan and repair for. If you want to scan and repair C disk, replace “x” with “c”.
chkdsk x: /f
4) After the scanning and repairing process is done, restart your PC and check to see if the blue screen error is resolved.
Method 6: Restore your system
If you can’t figure out which software or driver cause this blue screen error and your computer was fine a few days ago, you can restore your system back to a previous restore point.
This will roll back all the device drivers and software updates to the condition when you created the restore point.
Note: System restore will affect system files but won’t affect your personal files. Some of the files stored on your system may get overwritten by the previous files. So it is recommended to perform a backup before performing the system restore process.
Click here to learn how to backup files.
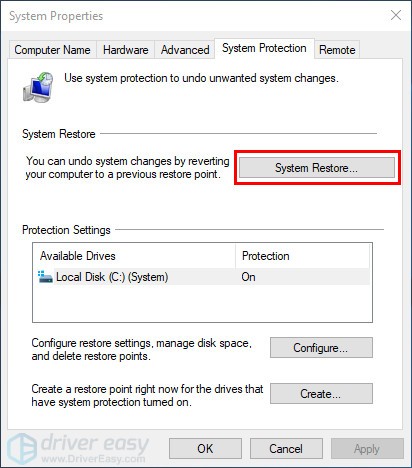
1) On your keyboard, press the Windows logo key + Pause together, then click System protection.

2) Click System Restore.
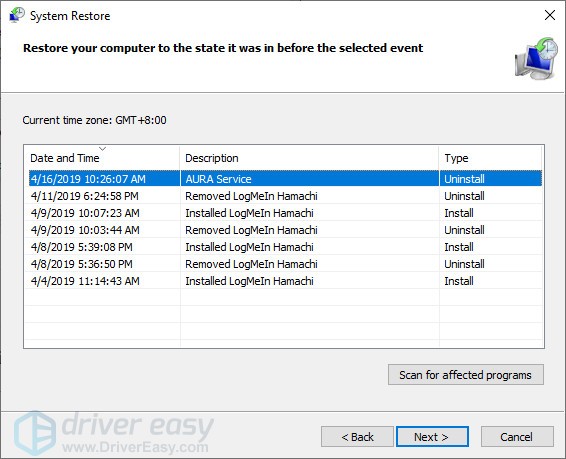
3) Click Next and it will open the below window.
Choose a restore point where the Windows didn’t show any errors. Then follow the on-screen instructions to finish the process.
4) Restart your computer to check the blue screen will appear or not.
Method 7: Reset or reinstall Windows
If all else fails, you may have to reset Windows, or maybe even reinstall it together. We all know reinstalling will delete all the data on your hard drive, you have to back up all your important files before doing it. But with Reimage, there’s no need for lengthy back-ups, support phone calls, or risk to your personal data. Reimage can reset Windows to the state exactly when it was just installed without affecting third-party software.
Here’s how to use it:
1) Download and install Reimage.
2) Open Reimage and run a free scan. This may take a few minutes.
3) You’ll see the summary of detected security issues on your PC. Pay for the repair plan and you’re able to repair corrupted profiles with one click. Click START REPAIR to start the repair process.
Note: Reimage comes with a 60-day Money-Back Guarantee.
But treat these options as a last resort, because they both take quite a long time.
We hope you find these techniques useful. You’re welcome to leave comments and questions below.
| Workable Solutions | Step-by-step Troubleshooting |
|---|---|
| Fix BSOD Error 0x00000133 |
Fix 1. Change SATA AHCI Controller Driver…Full steps Fix 2. Rollback Your Driver…Full steps Fix 3. Fix System Files with SFC…Full steps Fix 4. Perform a Disk Check/Repair…Full steps Fix 5. Restore Windows 10…Full steps |
| Restore Data from a PC | Create a bootable disk; Boot from the bootable USB; Recover data from a hard drive that won’t boot…Full steps |
Did you come across the BSOD Error 0x00000133 while booting the system? This particular BSOD or Blue Screen of Death error is the DPC_WATCHDOG_VIOLATION error. It is a recent bug that has been encountered in Windows. Here, DPC is an acronym for Deferred Procedure Call.
The BSOD Error 0x00000133 is a common problem reported by several users. That is why Microsoft is working actively towards resolving this particular error. Luckily, there are some fixes you can try to get rid of this error. However, it is vital to know the causes that might lead to this error before that.
For instance, a compatibility problem with the software or hardware can cause the BSOD Error 0x00000133. Besides, there can be issues within the CPU or the graphics card. Driver problems can also explain the emergence of this error. Here, we will discuss different ways you can fix the BSOD Error 0x00000133.
How to Fix BSOD Error 0x00000133 in Windows 10
The BSOD Error 0x00000133 is a prevalent error in Windows 10. Fortunately, the error is easy to fix, and one can leverage different methods to resolve the problem. Take a look at the different ways listed here.
IMPORTANT NOTE: Enter Safe Mode First
Windows can encounter different issues even with regular updates and a constant error-checking process. That is why entering the Safe Mode of the system is a great way to resolve problems that you are facing. Are you wondering what the Safe Mode is?
The Safe Mode is an in-built diagnostic mode designed by Windows. You will get an essential Windows state in this mode with a few drivers and files. Checking the problem in the Safe Mode will enable you to pinpoint the actual cause. Moreover, it also aids in resolving the issues with ease.
There are three distinct types of Safe Mode. You can opt for the one that suits your needs the best. Besides, it is essential to note that the occurrence of the system_service_exception error causes issues with booting. That is why entering Safe Mode to check and resolve the problem is necessary. You can adopt the fixes listed below in the Safe Mode.
Fixes list:
- 1. Change SATA AHCI Controller Driver
- 2. Rollback Your Driver
- 3. Fix System Files with SFC
- 4. Perform a Disk Check/Repair
- 5. Restore Windows 10
Fix 1. Change SATA AHCI Controller Driver
One of the primary causes of the DPC_WATCHDOG_VIOLATION bug error in Windows 10 may be the SATA AHCI drivers. In that case, changing the SATA AHCI controller driver may resolve the problem.
Take a look at the steps that you need to follow –
Step 1: Press the Windows + R keys simultaneously. It will open the Run dialog box. Type devmgmt.msc in the Run dialog box. Click on the OK button.
Step 2: It will open the Device Manager. Next, Expand the IDE ATA/ATAPI Controllers option. Click on SATA AHCI Controller.
Step 3: Now, press Update driver. It will lead to a dialog box. Here, you need to click on Search automatically for updated driver software. Alternatively, you can also select Browse my computer for driver software.
Step 4: Click on Let me pick from a list of device drivers on my computer. Select the Next button. Click on the Standard SATA AHCI Controller. Click on the Next button. Wait for some time and let the process be completed. Restart the system and see if the error is resolved.
Fix 2. Rollback Your Driver
Did you recently check if the drivers on your computer have been updated? If it is updated, you need to ensure that the latest version is compatible with your computer. You may receive a Blue Screen of Death error 0x00000133 if that is not the case.
What to do if the latest driver version doesn’t work with your current system? The only way to resolve the issue is to roll back the driver. Rolling back is getting the previous version of the driver. For that, you need to take a look at the steps listed below —
Step 1: Press the Windows + R keys simultaneously. It will open the Run dialog box. Enter devmgmt.msc in the Run dialog box. Click on the OK button to open the Device Manager.
Step 2: Now select Display adapters. Right-click on this option. Select Properties. Go to the Driver tab. Here, you need to select the Roll Back Driver option.
Step 3: After that, click on OK. Restart your computer and check if the error still occurs.
Fix 3. Fix System Files with SFC
You might not be aware bit faulty or corrupt system files can also lead to the blue screen error. You can run SFC (System File Checker). It is an excellent command-line utility that helps identify and repair corrupt or faulty files in the system. This utility command can resolve different problems present inside the operating system.
To run the SFC command, follow these steps –
Step 1: Press the Windows + R keys simultaneously to open the Run dialog box.. Enter cmd in the box. Press Shift+ Ctrl+ Enter at the same time to open Command Prompt as administrator.
Step 2: Type sfc /scannow in the command line window. Press Enter on the keyboard. Wait for the message – verification is 100% complete.
Step 3: After that, you can close the command window. Reboot the system and see if the error is resolved.
Fix 4. Perform a Disk Check/Repair
Sometimes, the BSOD Error 0x00000133 occurs due to corruption in the hard drive. In that case, you can use the Check Disk Utility or chkdsk.exe. It is an excellent Windows tool that checks out the hard drive for potential problems and resolves them.
These are the steps you can follow to perform a disk check or repair –
Step 1: Press the Windows + R keys simultaneously to open the Run dialog box. Enter cmd in the box. Press Shift+ Ctrl+ Enter at the same time to open Command Prompt as administrator.
Step 2: Enter chkdsk x: /f in the command-line window. Here, x refers to the drive that you want to scan. Press the Enter key.
Step 3: Next, enter Y. Wait for the scan to complete. After that, restart the system.
Note: Keep in mind that this scan and repair process is time-consuming. So, you need to schedule the task when you have spare time.
Fix 5. Restore Windows 10
Lastly, you can restore the system if nothing else resolves the BSOD Error 0x00000133. Keep in mind that restoring the system will lead to a rollback of the software and drivers. You will get the previous state of the OS, which may miss some of the latest updates and files. That is why it is advisable to have a backup of the personal files before opting for the Windows 10 restoration process.
The following steps will guide you through the process of restoring Windows 10 :
Step 1: Press the Windows + Pause keys at the same time. Select the «System Properties». Now, click on the «System Restore» button.
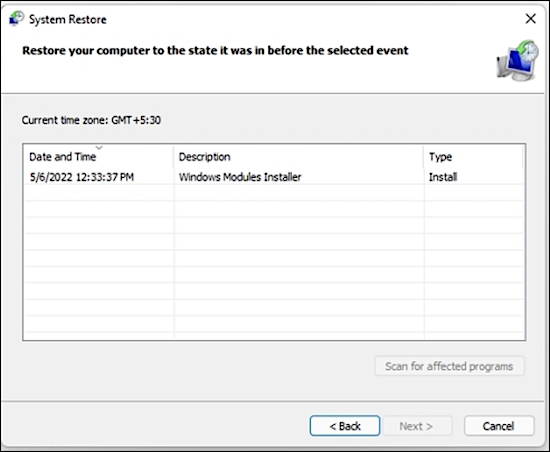
Step 2: Click on «Next». Choose a particular restore point. It means you have to select a specific date and time. Click on «Next».
Step 3: After that, follow the instructions given on the screen. Restart the system and verify if you still have the BSOD Error 0x00000133.
How to Restore Data from a Computer with a Booting Problem?
Have you had trouble gaining access to the data? Are you having issues accessing your computer? Have you lost important data due while opting for Windows restoration? All these problems have a straightforward solution.
If you have a booting problem and want to restore data, you can choose reliable data recovery software, such as EaseUS Data Recovery Wizard. It is an excellent choice for easily restoring deleted or lost data.
When the operating system encounters issues that lead to it crashing or failing to start, you can use EaseUS Data Recovery Wizard with Bootable Media. It is specifically used to recover data when you are having system crashes. With this app, you can gain access to lost files while the system is having issues launching.
Moreover, the software creates bootable media, which allows the operating system to run. That leads to the recovery of lost data with ease.
Another unique feature is that you can preview data (audio files, photos, etc.) before recovering them. See what you want to recover and then start the process.
Step 1. Create a bootable disk
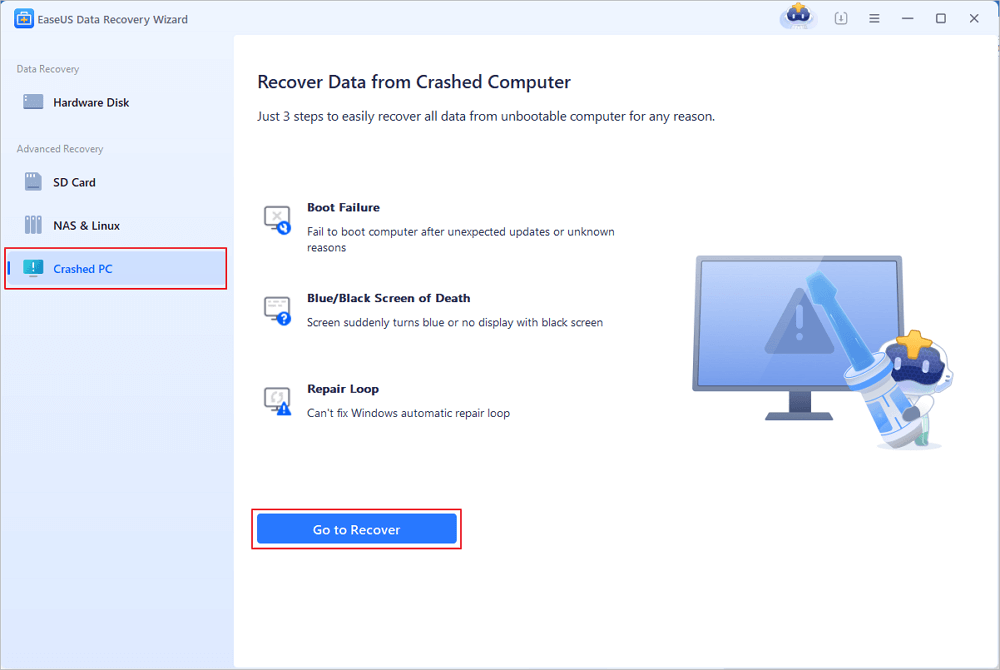
Launch EaseUS Data Recovery Wizard, choose «Crashed PC Recovery» and click «Go to Recover».
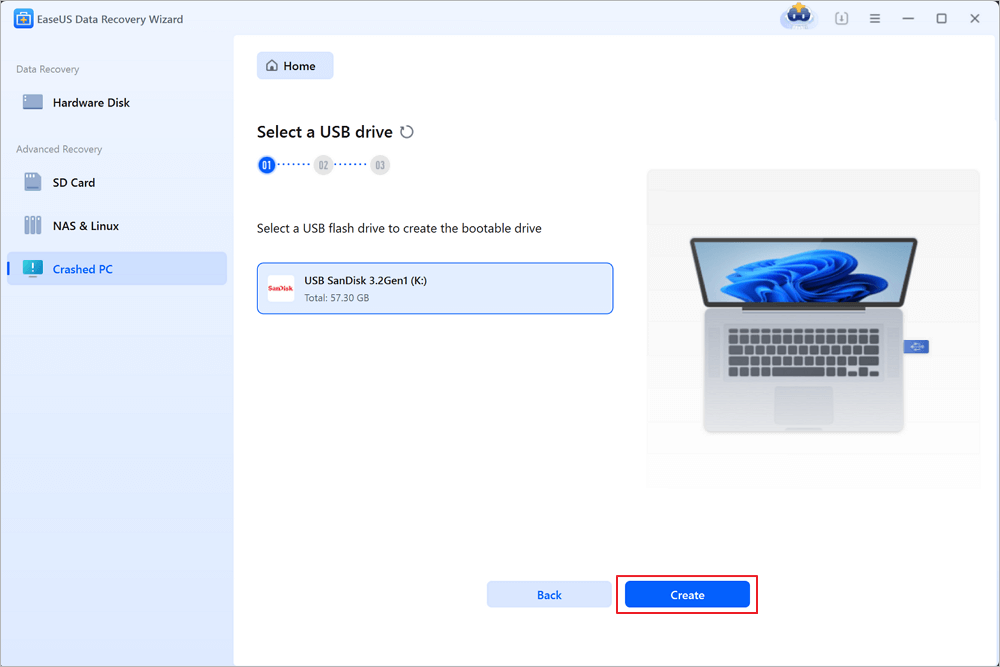
Select an empty USB to create the bootable drive and click «Create».
Warning: When you create a bootable disk, EaseUS Data Recovery Wizard will erase all data saved in the USB drive. Back up important data beforehand.
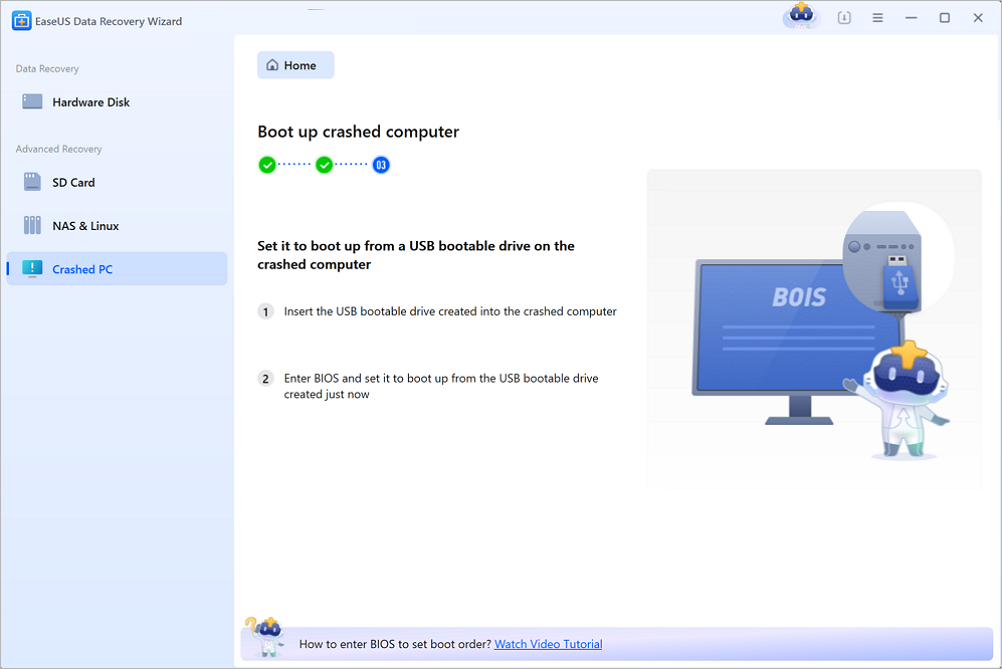
Step 2. Boot your computer from the bootable USB
Connect the bootable disk to the PC that won’t boot and change your computer boot sequence in BIOS. For most users, it works well when they restart their computer and press F2 simultaneously to enter BIOS.
Set to boot the PC from «Removable Devices» (bootable USB disk) beyond Hard Drive. Press «F10» to save and exit.
Step 3. Recover data from a crashed system/PC
After booting from EaseUS Data Recovery Wizard bootable disk, select the drive you want to scan to find all your lost files. Preview and recover the files you need to a safe location.

Conclusion
The BSOD Error 0x00000133 is a typical Windows 10 error. Compatibility issues between the software and drivers and the system can lead to this error. However, there are various solutions that you can adopt to fix the error. You can roll back the drivers or restore Windows.
What if the system doesn’t boot? In that case, the ideal solution is to use EaseUS Data Recovery Wizard. You can use the software by following the simple steps above. Besides, you can even preview photos and audio before opting for the recovery.
Ошибки 0x00000133 и 0x00000139 будут показаны вам с BSOD (синий экран смерти). Ошибки могут появляться во время веб-серфинга, интенсивной работы с GPU или даже когда ваша система находится в состоянии простоя.
В основном, BSODs вызваны ошибкой оборудования или драйверов. Время появления ошибки поможет вам легко определить причину проблемы. Если ошибка отображается во время веб-серфинга, то, скорее всего, она вызвана неисправным сетевым адаптером или драйверами. Итак, как только вы обнаружили проблему, то либо обновите драйверы (в некоторых случаях откатитесь назад из-за несовместимости), либо измените оборудование, чтобы решить проблему.
Получение файлов дампа для точного определения ошибки является немного техническим процессом. Поэтому сначала попробуйте метод 1, чтобы исключить все «наиболее вероятные» сценарии, которые могут вызвать синий экран смерти.
Метод 1: Решение проблем с драйверами
Примечание: Проверьте сетевые драйверы (находятся в разделе Сетевые адаптеры) в диспетчере устройств, если у вас возникают проблемы при работе в Интернете. Если вы видите ошибку при выполнении задач с интенсивной графикой, таких как игры или YouTube, проверьте графический привод (находится в разделе адаптеров дисплея).
Проверьте версии драйверов
Перейдите на сайт производителя и убедитесь, что у вас установлены последние версии драйверов. Вы можете проверить, установлены ли у вас последние версии драйверов, выполнив указанные ниже действия
- Нажмите кнопку Windows клавишу и нажмите R
- Введите devmgmt.msc и нажмите Введите
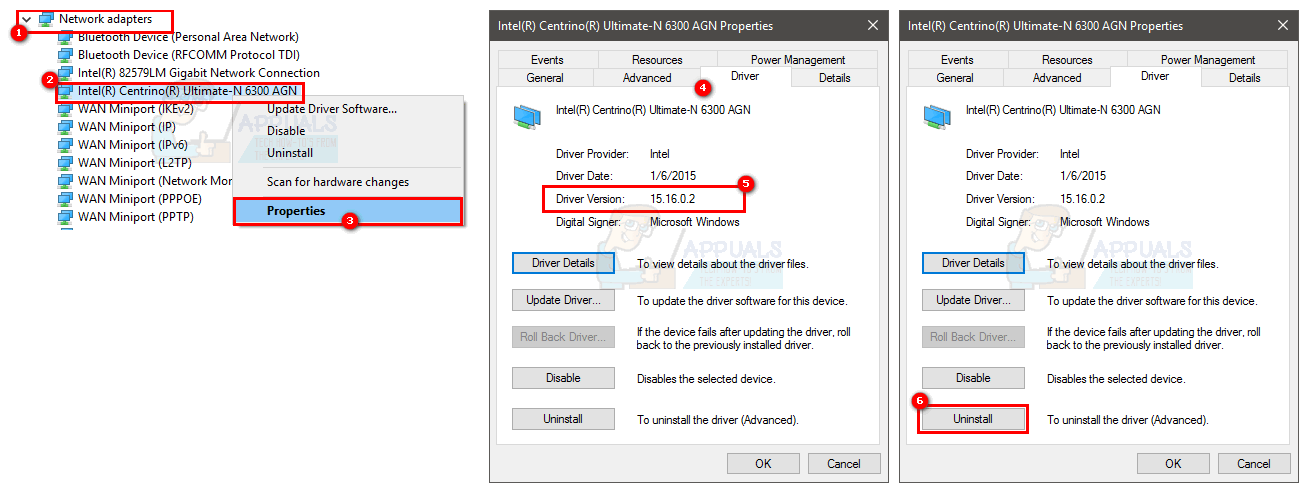
- Теперь найдите сетевую карту, дважды щелкнув Сетевые адаптеры
- Щелкните правой кнопкой мыши на новой сетевой карте и выберите Свойства
- Нажмите Драйвер вкладка
Теперь проверьте, совпадает ли указанная там версия драйвера с той, что указана на сайте производителя. Если цифры не совпадают, это означает, что у вас не установлены последние версии драйверов. Выполните следующие шаги для обновления драйверов
Деинсталляция драйвера
- Загрузите драйверы с веб-сайта производителя
- Теперь повторите шаги с 1-5, приведенные выше
- Нажмите Удалить и следуйте инструкциям на экране
Теперь ваши драйверы удалены. Теперь закройте все окна и выполните следующие действия для установки драйверов.
Установка последних версий драйверов
- Удерживайте Windows клавиша и нажмите R
- Введите devmgmt.msc и нажмите Введите
- Теперь найдите сетевую карту двойным щелчком мыши Сетевые адаптеры
- Щелкните правой кнопкой мыши новую сетевую карту и нажмите Обновить драйверы..
- Нажмите Просмотреть мой компьютер в поисках программного обеспечения для драйверов
- Нажмите Обзор
- Найдите драйверы, которые вы скачали с сайта производителя, и выберите их
- Нажмите Далее и следуйте инструкциям на экране.

После завершения перезагрузите компьютер и проверьте, установлены ли у вас последние версии.
Откатить драйвер
Если у вас установлены последние версии драйверов, убедитесь, что они совместимы с вашей версией Windows. Иногда драйверы несовместимы и вызывают проблемы, даже если производитель говорит вам обратное. Если вы недавно установили новую версию драйвера вашей сетевой карты, то проблема может заключаться в новых драйверах. Попробуйте откатить их обратно, выполнив следующие действия
- Удерживайте Windows клавишу и нажмите R
- Введите devmgmt.msc и нажмите Введите
- Теперь найдите свою сетевую карту, дважды щелкнув Сетевые адаптеры
- Щелкните правой кнопкой мыши на новой сетевой карте и выберите Свойства
- Нажмите Драйвер вкладка
- Нажмите Откатить драйвер
Примечание: Здесь опция Откатить драйвер отключена, но в вашем случае это не должно быть так.
Если это не решит проблему, попробуйте заменить сетевую карту или любое другое оборудование, которое вы недавно установили, потому что BSOD может быть вызван и аппаратным сбоем.
Метод 2: Данные об ошибке BSOD
Когда вы сталкиваетесь с синим экраном смерти, он показывает определенную ошибку перед перезагрузкой. Если система перезагрузится до того, как вы сможете проверить ошибку, выполните следующие действия, чтобы предотвратить перезагрузку компьютера.
- Держите Windows клавишу и нажмите Пауза/перерыв кнопка
- Нажмите Расширенные системные настройки
- Нажмите Расширенный вкладка
- Нажмите Настройки под Запуск и восстановление раздел
- Снимите флажок Автоматический перезапуск в разделе Системный сбой и нажмите Ok
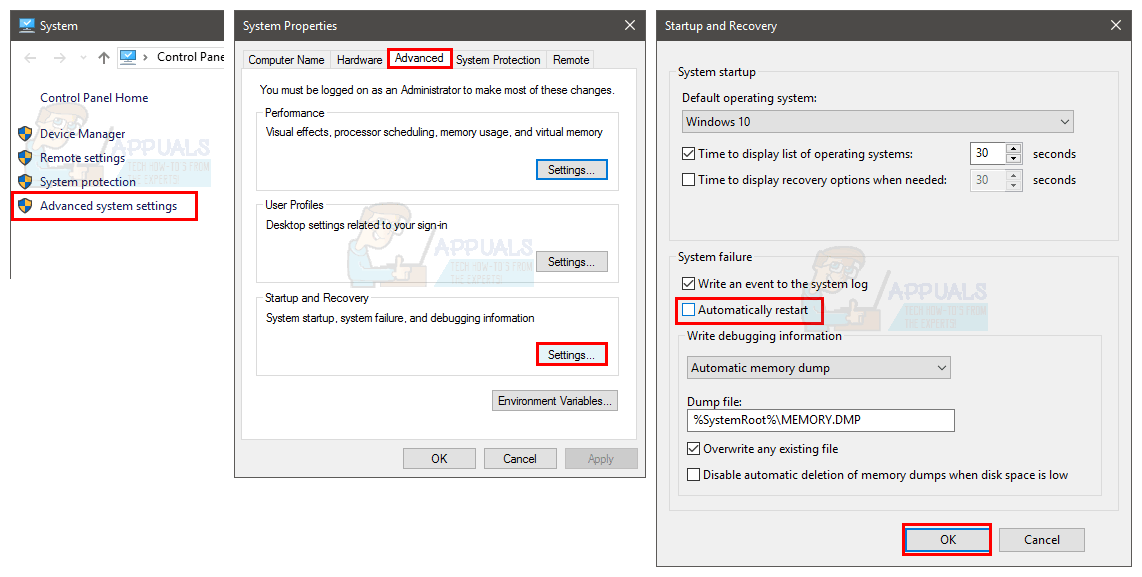
Теперь это предотвратит перезагрузку системы при появлении синего экрана, и вы сможете увидеть точную ошибку, которую он выдает
Вы можете увидеть код ошибки в разделе Техническая информация на синем экране или Windows предложит вам поискать конкретную ошибку в зависимости от версии Windows.
Если в ошибке говорится о чем-то, связанном с xxx.sys (где xxx может быть любым именем с .расширение sys), то это указывает на то, что это вызвано проблемой с драйвером. Вы можете набрать в Гугле название xxx.sys, чтобы увидеть, какой тип драйвера является i.e. если это драйвер сетевой карты или драйвер графического чипсета. Это поможет вам определить, что является причиной проблемы.
После определения проблемы с драйвером выполните способ 1, чтобы обновить или откатить драйвер.
Синий экран смерти может появиться из-за многих проблем, но в основном это происходит из-за проблем с драйверами или оборудованием. Таким образом, следование методу 1 должно решить вашу проблему. Однако, если вы видите совершенно другой код ошибки, вы можете погуглить и его, чтобы узнать, что может быть причиной этого.
Метод 3: Восстановление системы
Выполнение восстановления системы вернет ваш компьютер к более раннему времени. Другими словами, это отменит изменения в системе, которые вы сделали после времени, к которому вы восстанавливаетесь. Если ошибка появляется из-за чего-то, что вы установили на ПК, например, новых драйверов, то проблема должна исчезнуть. Перейдите по ссылке здесь для получения пошагового руководства по восстановлению системы.