In Visual Studio up to version 2010, Templates for Windows Forms projects are pre-installed, but not as of Visual Studio 2012. For these newer versions of Visual Studio you have to install an extension.
This tutorial is for Visual Studio 2022, but applies essentially the same to other versions of Visual Studio (2019, 2017, 2015 and earlier).
Installing the extension for Windows Forms projects with C++
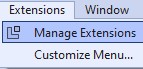
This extension is installed in Visual Studio 2022 under Extensions|Manage Extensions
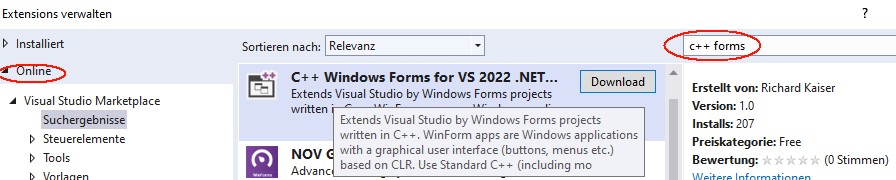
After clicking Download at “C++ Windows Forms for Visual Studio 2022 .NET Framework”
and closing Visual Studio you get the message
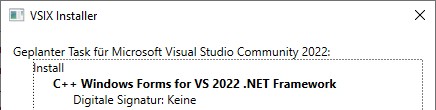

Click Modify to install the extension.
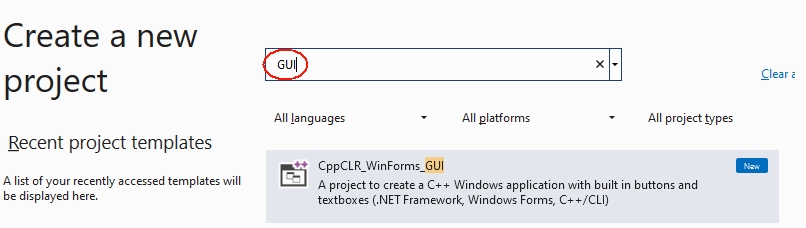
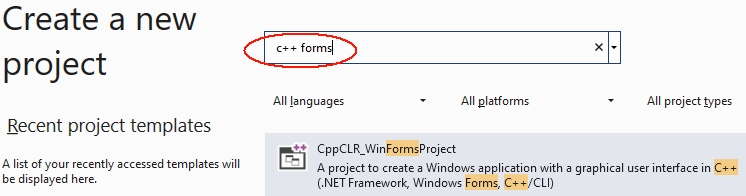
After the next start of Visual Studio under File|New|Project you will find the CppCLR_WinformsProject template:

With this template you can create Windows Forms projects written in C++. Such a project creates a Windows application with a graphical user interface (buttons, menus, etc.), for example:

Standard C++ (including almost all extensions of C++11, C++14, C++17) is used as programming language for the business logic. Only for accessing Windows controls C++/CLI is necessary. This is a simple C++ dialect for the .NET Framework.
The book „C++ mit Visual Studio 2019 und Windows Forms-Anwendungen“
The following is a brief excerpt from my book (in German)
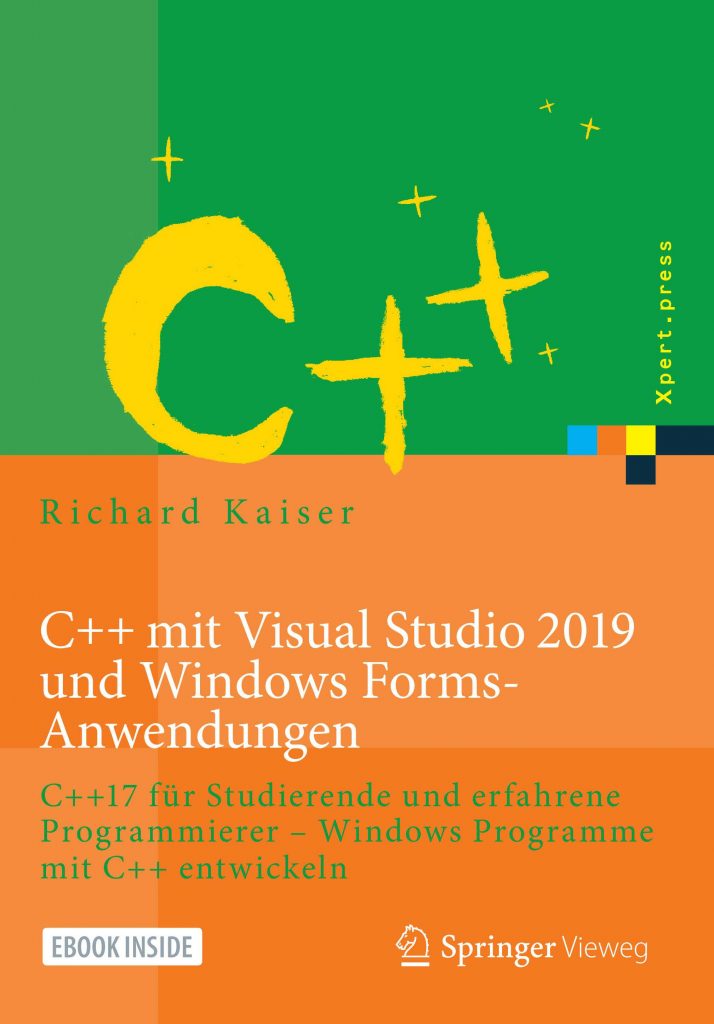
which is still up to date with Visual Studio 2022. All examples and projects can be created and compiled in Visual Studio 2022 as in Visual Studio 2019.
Installing Visual Studio for Windows Forms Projects
In order to create Windows Forms projects in Visual Studio, particular components must be installed during the installation of Visual Studio. If this was forgotten during the installation, start the Visual Studio Installer either under Windows|Start
or in Visual Studio under File|New|Project|Create new project (at the end of the project list)

In the installer, check .NET desktop development, desktop development with C++ and C++/CLI support:

Create a Windows Forms project
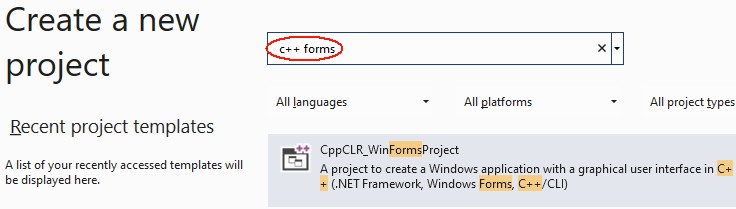
After restarting Visual Studio, Windows Forms projects are available under Create New Project or File|New|Project:
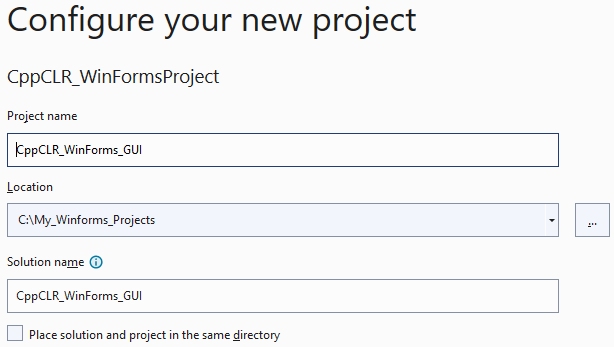
Click the Next button. Then you will be prompted to enter the name of the project and a directory:

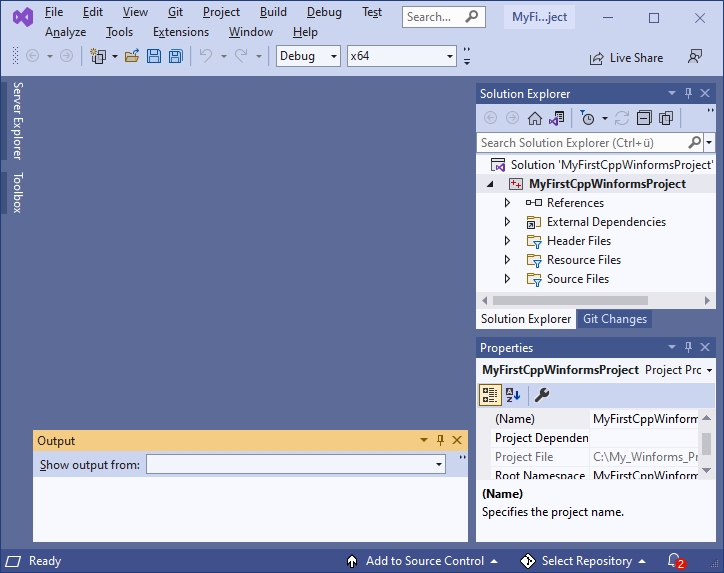
After clicking the Create button, Visual Studio looks something like this:
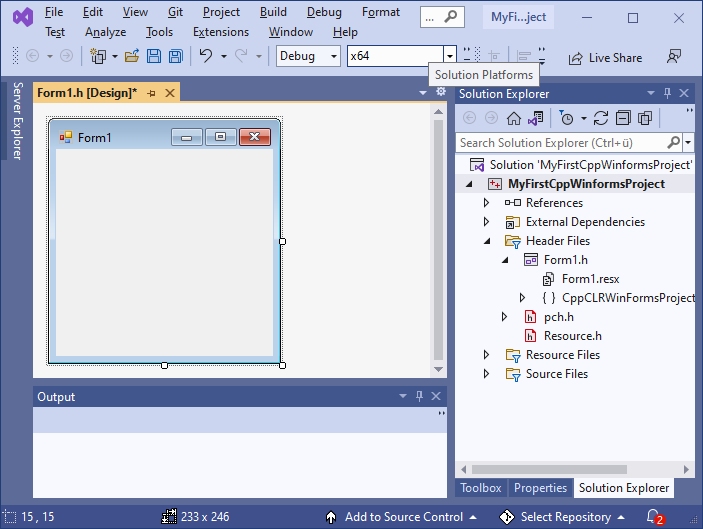
If you now click on Form1.h in the Solution Explorer, the form is displayed:
Normally, everything is done and you can continue with the next section. However, if you get something like this

you have clicked Form1.h too fast. Close this window

and click again on Form1.h in the Solution Explorer.
Visual Programming: A first small program
Now, before we get started with our first little program, let’s rearrange Visual Studio a bit to make it easier to use.
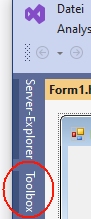
After installing Visual Studio, the Toolbox is offered at the left margin.
To prevent the toolbox from covering the form, drag the toolbox to the frame with the Solution Explorer (press the left mouse button on the title bar of the toolbox, then move to the title bar of the Solution Explorer with the mouse button pressed and release the mouse button).
Drag the properties window analogously to the Solution Explorer.
Since we initially only need the Toolbox, Solution Explorer and Properties window, you can close all other windows here (e.g. Git Explorer, etc.). Then the right frame looks something like this:
With the Windows Forms project from Section 1.4, Visual Studio then looks like this:
Next, we will now write a first small program.
The form (here Form1) is the starting point for all Windows Forms applications. It corresponds to the window that is displayed when the program is started:
![]()
Controls from the Toolbox can be placed on a form. The Toolbox contains essentially all the controls commonly used in Windows. They are located in various groups (e.g. General Controls, Containers, etc.), which can be expanded and collapsed. Most of these controls (such as a button) are displayed on the form while the program is running. If you stop with the mouse pointer briefly on a line of the toolbox, a small hint appears with a short description:
To place an element from the toolbox on the form, simply drag it from the toolbox onto the form. Or click on it in the toolbox first and then click on the position in the form where you want the upper left corner to be.
Example: After placing a Label (line seven in Common Controls, with the capital A), a TextBox (fourth line from the bottom, labelled ab) and a Button (second line labelled ab) on the form, it looks something like this:
By playing around like this, you have already created a real Windows program – not a particularly useful one, but still. You can start it as follows:
- with Debug|Start Debugging from the menu, or
- with F5 from any window in Visual Studio or
- by starting the exe file generated by the compiler.
This program already has many features that you would expect from a Windows program: You can move it with the mouse, resize and close it.
Do not forget to close your program before you continue editing it. As long as the program is still running, you cannot restart the compiler or modify the form.
This way of programming is called visual programming. While conventional programming means developing a program solely by writing instructions (text) in a programming language, visual programming means composing it wholly or in part from out-of-the-box graphical controls.
With Visual Studio, the user interface of a Windows Forms program can be designed visually. This allows you to see how the program will look later at runtime as soon as you design it. The instructions that are to take place as a response to user input (mouse clicks, etc.), on the other hand, are written conventionally in a programming language (e.g. C++).
The Properties Window
The control that was clicked last on a form (or in the pull-down menu of the Properties window) is called the currently selected control. You can identify it by the small squares on its edges, the so-called drag handles. You can drag them with the mouse to change to resize the control. A form becomes the currently selected control by clicking on a free position in the form.
Example: In the last example, button1 is the currently selected control.
In the Properties window (context menu of the control on the form, or View|Properties window – do not confuse with View|Property pages).
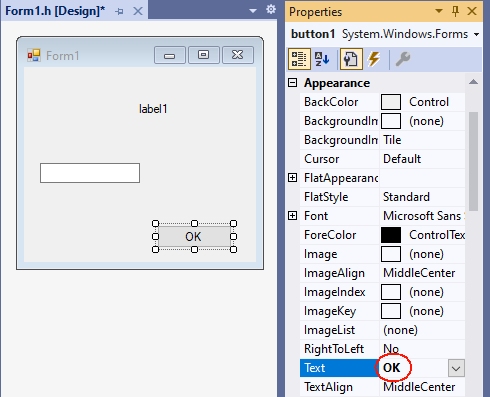
the properties of the currently selected control are displayed. The left column contains the names and the right column contains the values of the properties. With F1 you get a description of the property.
The value of a property can be changed via the right column. For some properties, you can type the new value using the keyboard. For others, after clicking on the right column, a small triangle is displayed for a pull-down menu, through which a value can be selected. Or an icon with three dots „…“ is displayed, which can be used to enter values.
Example:
- For the Text property, you can enter a text with the keyboard. For a button this text is the inscription on the button (e.g. „OK“), and for a form the title line (e.g. „My first C++ program“).
- For the BackColor property (e.g. from a button) you can select the background color via a pull-down menu.
- If you click the right column of the Font property and then the „…“ icon, you can select the font of the Text property.
A control on the form is not only adjusted to its properties in the Properties panel, but also vice versa: if you resize it by dragging the drag handles on the form, the values of the corresponding properties (Location and Size in the Layout section) in the Properties panel are automatically updated.
First steps in C++
Next, the program from Section 1.5 is to be extended so that instructions are executed in response to user input (e.g., a button click).
Windows programs can receive user input in the form of mouse clicks or keyboard input. All inputs are received centrally by Windows and passed on to the program. This triggers a so-called event in the program.
Such an event can be assigned a function that is called when the event occurs. This function is also called an event handler.
For the time being, our program should only react to the clicking of a button. The easiest way to get the function called for this event is to double-click on the button in the form. The cursor is then placed at the beginning of the function. This causes Visual Studio to generate the following function and display it in the editor:
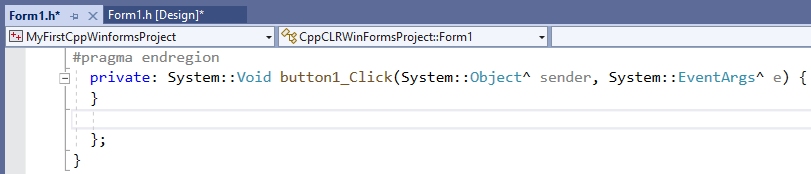
Between the curly brackets „{“ and „}“ you then write the statements to be executed when the Click event occurs.
Essentially all instructions of C++ are possible here. In the context of this simple tutorial, only some elementary instructions are to be introduced, which is necessary for the basic understanding of Visual Studio. If terms like „variables“ etc. are new to you, read on anyway – from the context you will surely get an intuitive idea which is sufficient for the time being.
A frequently used instruction in programming is the assignment (with the operator „=“), which is used to assign a value to a variable. Initially, only those properties of controls that are also displayed in the properties window are to be used as variables. These variables can then be assigned the values that are also offered in the properties window in the right column of the properties.
For the BackColor property, the allowed values are offered after the pull-down menu is expanded:
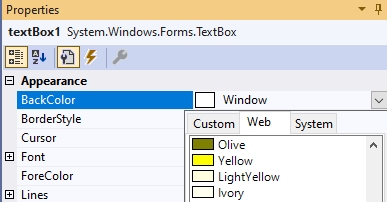
These values can be used in the program by specifying them after Color::. If you now write the statement
textBox1->BackColor = Color::Yellow;between the curly brackets
private: System::Void button1_Click(System::Object^  sender, System::EventArgs^  e)
{
 textBox1->BackColor = Color::Yellow;
}
the BackColor property of textBox1 gets the value Color::Yellow, which stands for the color yellow, when button1 is clicked during the execution of the program. If you now start the program with F5 and then click button1, the TextBox actually gets the background color yellow.
Even if this program is not yet much more useful than the first one, you have seen how Visual Studio is used to develop applications for Windows. This development process always consists of the following activities:
- You design the user interface by placing controls from the Toolbox on the form (drag and drop) and adjusting their properties in the Properties window or the layout with the mouse (visual programming).
- You write in C++ the instructions that should be done in response to user input (non-visual programming).
- You start the program and test whether it really behaves as it should.
The period of program development (activities 1. and 2.) is called design time. In contrast, the time during which a program runs is called the runtime of a program.
A simple Winforms application
Next, a simple Winforms application is to be created based on the previous explanations. It contains a button and TextBoxes for input and output:

However, you do not have to create this project yourself. If you install the Visual Studio extension

a project template with exactly this project is available in Visual Studio:
You can use this project as a basis for many applications by adding more controls and functions.
The main purpose of this project is to show how the application logic is separated from the user interface:
- The functions, classes, etc. of the application logic are written in standard C++ and are contained in a header file that is added to the project.
- The instructions for the user interface, on the other hand, are written primarily in C++/CLI and are often included in the form class in Form1..
- The functions of the header file are called when clicking a button.
The following is a simplified version of chapter 2.11 from my book „C++ mit Visual Studio 2019 und Windows Forms-Anwendungen“. There I recommend such a project for the solutions of the exercises. In the header file of such a project you can include the solutions of several exercises or distribute them to different header files. For each subtask you can put a button (or menu options) on the form. This way you don’t have to create a new project for each subtask.
Of course, outsourcing your own instructions to an extra file (as in 3.) and accessing the controls via function parameters is somewhat cumbersome: however, it leads to clearer programs than if all instructions are located in the form file within the Form1 class. This saves many programming errors that lead to obscure error messages, and makes it easier to search for errors.
1. Create the project
Create a new project with File|New|Project|CppCLR_WinformsProject (see section 1.1).
The following examples assume a project named CppCLR_Winforms_GUI.
2. Design the user interface (the form)
The form is then designed to contain all the controls needed to input and output information and start actions. This is done by dragging appropriate controls from the toolbox onto the form.
For many projects (e.g. the exercises from my book) the following controls are sufficient:
- A multiline TextBox (see Section 2.3.2 of my book) to display the results.
- A single-line TextBox for entering data
- One or more buttons (or menu options, etc.) to start the instructions
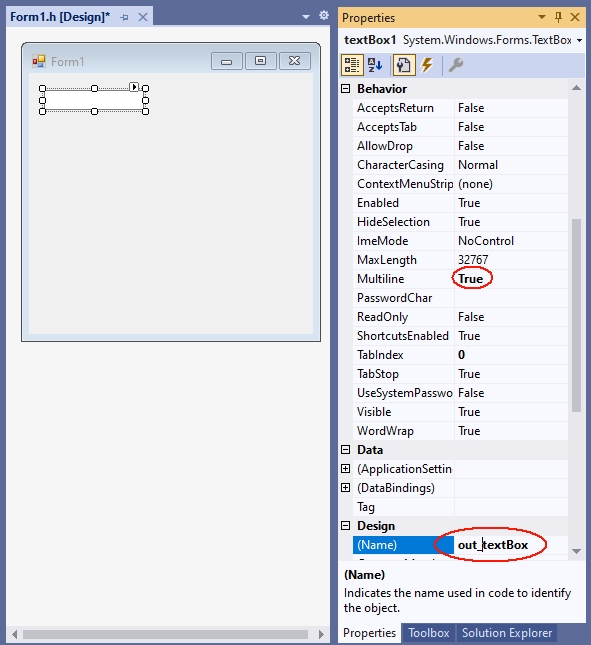
A TextBox becomes multiline TextBox by the value true of the MultiLine property. The TextBox for output is to be named out_textBox:
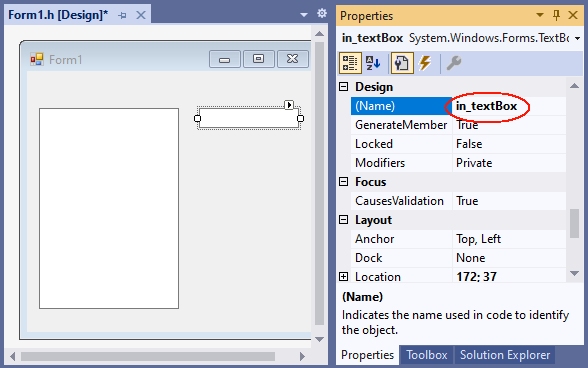
The TextBox for entering data will be named in_textBox:
Since the function plus_1 is called when the button is clicked, it is given the caption „plus 1“ and the name button_plus1:

The functions, declarations, classes etc. of the so-called application logic are placed in a separate header file, which is added to the project with Project|Add new element|Visual C++|Code as header file(.h) with the name Header1.h. In practice, however, you should group functions and classes that belong together conceptually in a header file, and then give the header file a more meaningful name than Header.h.
The application logic is then included in the header file. These are mostly functions, classes, etc. written in C++. In our first example, this should be a function with the name plus_1, which returns the value of the argument increased by 1:
In a C++ Windows Forms project, the application logic consists primarily of functions, classes, etc. written in C++, without C++/CLI language elements. In our first example, this should be a function named plus_1, which returns the value of the argument incremented by 1:
int plus_1(int x)
{
  return x + 1;
}
Diese Datei wird dann vor dem namespace des Projekts mit einer #include-Anweisung in die Formulardatei (z.B. Form1.h) aufgenommen:
This file is then included in the form file (e.g. Form1.h) before the namespace of the project with an #include statement:
#pragma once
#include "Header1.h" // <-- manuell einfügen. nach dem Eintippen von
                     // "#include " bietet Visual Studio die Datei an.
namespace CppCLRWinFormsProject {
  using namespace System;
    ...
}
4. Calling the functions
By double-clicking the button on the form, Visual Studio creates the function (the event handler) that will be called when the button is clicked when the program is running:
private: System::Void button_plus_1_Click(System::Object^ sender, System::EventArgs^ e)
{
}
In this event handler you then call the corresponding function. In this simple tutorial this is the function plus_1 from the file Header.h.
- If this function uses user input, you read it in via a TextBox. In this simple tutorial, it will be a number that is read from the in_TextBox.
- If a parameter of the called function does not have type String (the type of the property in_textBox->Text), the string must be converted to the type of the parameter. This is possible with one of the Convert:: functions.
- The results are to be displayed in the out_textBox. This can be done with the function out_textBox->AppendText. The string that AppendText expects can be created with String::Format. In the first argument (a string) you specify {0} for the first value after the string, {1} for the second and so on.
private: System::Void button_plus_1_Click(System::Object^ sender, System::EventArgs^ e)
{
int n = Convert::ToInt32(in_textBox->Text);
int result = plus_1(n);
out_textBox->AppendText(String::Format("plus_1({0})={1}\r\n",n,result));
}
If you enter a number in the input field after starting this program with F5 and then click on the button, the value incremented by 1 is displayed in the output text box:
For each further function whose result is to be displayed, a button is placed on the form and given a suitable name (Name property) and a suitable label (Text property). This function is then called in the associated event handler.
With this all relevant parts of the ??? CppCLR_Winforms_GUI are presented. You can enhance it as you like with additional controls (buttons, menus, etc.). See chapter 2 of my book for more information.
5. GUI and application logic not so strictly separated
In the version created under 1. to 4. the application logic is strictly separated from the user interface: The access to the user interface with C++/CLI is exclusively done in Form1.h. In Header1.h, however, only standard C++ is used. This has in particular the advantage that one can use this header also in other platforms (e.g. console applications, Qt, Mac).
However, in the early stages of a project, when there is still a lot of experimenting going on, it can be a bit cumbersome if you have to change the calls in another file every time you change a parameter list. And for applications that are not intended to be used for other platforms at all, this strict separation doesn’t help much. This often applies to exercise tasks as well.
This jumping back and forth between different files can be avoided by relaxing the strict separation between the application logic and the user interface by including access to the controls in the header file as well.
Accessing controls in a header file is enabled by inserting
using namespace System;
using namespace System::Windows::Forms;
into the header file at the beginning. Then you can also use the types of the controls in the header file (e.g. as parameters) and include the statements that were in the buttonClick function in Form1.h under 4.
This procedure is implemented in the Header2.h file:
#pragma once
using namespace System;
using namespace System::Windows::Forms;

int plus_2(int x)
{
  return x + 2;
}

void plus_2_Click(TextBox^ in_textBox, TextBox^ out_textBox)
{
int n = Convert::ToInt32(in_textBox->Text);
int result = plus_2(n);
out_textBox->AppendText(String::Format("plus_2({0})={1}\r\n", n, result));
}
Here you pass a parameter for the control to the function. Please note that you must specify a ^ after the name of a .NET type (e.g. TextBox, Button). In the function you then address the control under the name of the parameter.
This function can be called when a button is clicked:
private: System::Void button_plus_1_Click(System::Object^ sender, System::EventArgs^ e)
{
plus_2_Click(in_textBox, out_textBox);
}
6. Analogy to console applications
Comparing of this Windows Forms project with a corresponding console application shows the analogy of the two types of projects. This analogy shows how to convert a console application into a forms application: If you have a console program like
#include<iostream>
int main()
{
int n;
std::cin >> n;
int result = plus_2(n);
std::cout << "plus_2(" << n << ") = " << result << std::endl;
return 0;
}
you can port it to a form application with relatively little effort. You just need to replace the I/O statements and call the functions in response to a ButtonClick, etc:
private: System::Void button_plus_1_Click(System::Object^ sender, System::EventArgs^ e)
{
int n = Convert::ToInt32(in_textBox->Text);
int result = plus_1(n);
out_textBox->AppendText(String::Format("plus_1({0})={1}\r\n",n,result));
}
Excerpt from the preface to my book „C++ mit Visual Studio 2019 und Windows Forms-Anwendungen“
The preface to my book (in German)
teaches C++ with Windows Forms applications in more detail.
Preface
The starting point for this book was the desire for a C++ textbook in which programs for a graphical user interface (Windows) are developed from the beginning, and not console applications as is usually the case. Programs in which inputs and outputs are done via a console are like stone-aged DOS programs for many beginners and discourage them from wanting to deal with C++ at all.
Windows Forms applications are an ideal framework for C++ programs with an attractive user interface: access to Windows controls (Buttons, TextBoxes etc.) is easy. The difference to a standard C++ program is mostly only that inputs and outputs are done via a Windows control (mostly a TextBox)
textBox1->AppendText(„Hello World“);
while in standard C++ the console is used with cout:
cout << "Hello world" << endl;
But not only students can benefit from C++ with a graphical user interface. With Windows Forms projects, existing C or C++ programs can be enhanced with a graphical user interface without much effort. And those who know C or C++ and do not want to learn a new language for a GUI can make their existing programs more beautiful and easier to use with simple means.
C++ has developed rapidly in recent years: The innovations of C++11, C++14, C++17 and C++20 have brought many improvements and new possibilities. Much of what was good and recommended in 2010 can be made better and safer today.
As a book author and trainer who has accompanied this whole evolution, you notice this particularly clearly: many things that have been written in the past should be done differently today. True, it would still be compiled. But it is no longer modern C++, which corresponds to the current state of the art and uses all the advantages.
This book introduces C++ at the Visual Studio 2019 level in May 2020. This is the scope of C++17.
В данной статье будет рассмотрено как создать новый проект в виде классического приложения для работы в Windows. Также в студии есть возможность создавать универсальные приложения (UWP-приложение), но это уже тема другой статьи.
При выполнении примера создания нового проекта будет использована Visual Studio 2017 для объектно-ориентированного языка программирования C#. Если у Вас стоит другая версия, то она также подойдет, думаю разница должна быть не существенной, а может быть будет все также.
Создание нового проекта
Для создания нового проекта, нужно выполнить команду «Файл»-> «Создать»->»Проект» (Ctrl+Shift+N). В открывшемся окне нажать на вкладку Visual C# и далее там в предложенном списке вариантов выбрать «Классическое приложение Windows». После нажатия на этот пункт будут предложены различные варианты шаблонов приложений. Нам нужно выбрать «Приложение Windows Forms (.Net Framework)». Также в этом окне нужно задать желаемое имя, расположение, имя решения (может совпадать с именем проекта, а также выбрать платформу.
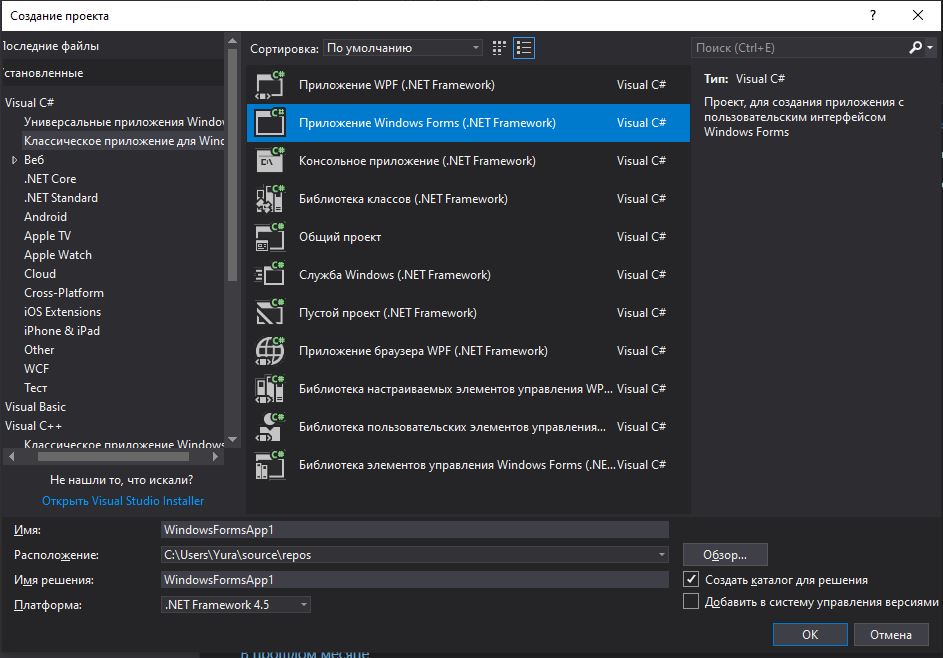
В качестве примера создадим приложение HelloWorld, как первое пробное приложение.
В поле «Имя» вводим «HelloWorld«
В поле «Расположение» — «C:\Obuch\HelloWorld\» (или любой другой путь)
Платформу оставил по умолчанию .Net Framework 4.5, но можно выбрать при желании другую версию из выпадающего списка.

Сразу после нажатия кнопки «OK» появится новая заготовка Windows-приложения.

В созданной заготовке содержится только название приложения — Form1 и пустая форма.
Теперь в этой форме создадим две кнопки: первую для вывода какого-либо сообщения пользователю, а другую для выхода из приложения. Для этого с панели элементов перетаскиваем на форму два элемента Button (по умолчанию находится с левой стороны интегрированной среды Visual Studio). Перенесенные кнопки на форму, будут иметь имя button1 и button2 соответственно. Хоть это и пример, и можно было бы имена оставить как есть, но это способствует плохой привычке. В итоге, если так делать, то при написании более большого приложения, будет намного сложнее понимать в последующем код, если будет куча таких дефолтных имен. Первую кнопку назовем btnMessage, а вторую — btnClose. Чтобы поменять имена кнопок, нужно в панели «Свойства» перейти в группу «Разработка» и там изменить дефолтный параметр Name. Также важно задать выводимый текст на кнопках, чтобы пользователю было понятно, что он нажимает. Для этого находим свойство Text и меняем для кнопки btnMessage — «Привет» и для кнопки btnClose — «Закрыть».
После того как мы разместили кнопки и дали им имена, нужно написать обработчики для выполнения необходимого функционала.
Зададим обработчик для кнопки btnMessage. Для этого выполняем двойной щелчок на кнопки. После этого среда создаст заготовку обработчика, а нам остается только вписать нужный код. Вводим в обработчик: MessageBox.Show(«Привет мир!»). В итоге обработчик будет выглядеть как в примере ниже.
private void btnMessage_Click(object sender, EventArgs e)
{
MessageBox.Show(«Привет мир!»);
}
Теперь осталось написать обработчик для второй кнопки. Проделываем тоже самое как и для первой кнопки и вводим метод закрытия приложения- Close().
private void btnClose_Click(object sender, EventArgs e)
{
Close();
}
На этом написание первой программы в Visual C# завершено. Она достаточно простая, так как имеет минимальный функционал. Чтобы запустить это приложение достаточно нажать F5 на клавиатуре.
В конце статьи дополнительно приложен архив с проектом, который можно загрузить на свой компьютер.
Встраивает в проект поддержку для классов в библиотеке активных шаблонов (ATL). Только для консольных приложений Win32.
Remarks
Создав классическое приложение Windows, можно добавить универсальные классы C++ с помощью мастера универсального кода. Можно добавить другие элементы, такие как файлы HTML, файлы заголовков, ресурсы или текстовые файлы.
Классы ATL добавить нельзя, а классы MFC можно добавить только в те типы классических приложений Windows, которые поддерживают MFC (см. предыдущую таблицу).
Источник
Для создания пакета для классического приложения в Visual Studio можно использовать Проект упаковки приложений Windows. Затем вы можете распространить пакет в Microsoft Store, в Интернете, на своем предприятии или с помощью любого другого механизма распространения.
Требуемая версия и рабочая нагрузка Visual Studio
Проект упаковки приложений Windows доступен в приведенных ниже версиях Visual Studio.
Чтобы шаблон проекта упаковки приложений Windows отобразился в меню «Добавление проекта», убедитесь, что у вас установлена хотя бы одна из следующих рабочих нагрузок Visual Studio:
Для оптимальной работы рекомендуем использовать последний выпуск Visual Studio.
Проект упаковки приложений Windows в Visual Studio поддерживается в Windows 10 версии 1607 и более поздних версиях. Его можно использовать только в проектах, предназначенных для юбилейного обновления Windows 10 (10.0; сборка 14393) или более поздней версии.
Ниже приведены некоторые другие действия, которые можно выполнить в проекте упаковки приложений Visual Studio.
✔️ Автоматическое создание визуальных ресурсов
✔️ Внесение изменений в манифест с помощью визуального конструктора
✔️ Создание пакета или набора с использованием мастера
✔️ (При публикации в Microsoft Store) Простое назначение приложению идентификатора на основе имени, уже зарезервированного в Центре партнеров.
Подготовьте свое приложение
Прежде чем приступить к созданию пакета для приложения, ознакомьтесь с этим руководством. Prepare to package a desktop application (Подготовка к упаковке классического приложения).
Установите Проект упаковки приложения Windows в свое решение.
Приведенные ниже снимки экрана относятся к Visual Studio 2019 16.10.
В Visual Studio откройте решение, содержащее проект вашего классического приложения.
Добавьте Проект упаковки приложения Windows в свое решение.
Вам не потребуется добавлять в него какой-либо код. Он используется только для создания пакета. Мы будем называть этот проект «проектом упаковки».

Задайте целевую версию проекта (любую), но для параметра Минимальная версия укажите значение Юбилейное обновление Windows 10 или более позднюю версию.


Выберите пакет классического приложения и нажмите кнопку ОК.

В пакет можно включить несколько классических приложений, однако, когда пользователи выбирают плитку с вашим приложением, запустить можно только одно из них. В узле Приложения щелкните правой кнопкой мыши приложение, которое пользователи должны запускать, выбирая плитку приложения, и выберите Задать как точку входа.

Соберите проект упаковки, чтобы убедиться, что ошибок нет. При возникновении ошибок откройте Диспетчер конфигурации и убедитесь, что проекты предназначены для той же платформы.

Дальнейшие действия
Упаковка классического приложения в Visual Studio
См. статью Package a desktop or UWP app in Visual Studio (Упаковка классического приложения или приложения UWP в Visual Studio)
Запуск, отладка и тестирование классических приложений
Дополнительные ресурсы
Видео
Call UWP APIs in desktop apps (Вызов API UWP в классических приложениях)
Улучшение классического приложения путем добавления проектов UWP и компоненты среды выполнения Windows
См. в статье Extend your desktop app with modern UWP components (Улучшение классических приложений с помощью современных компонентов UWP).
Распространение приложения
См. статью Distribute your packaged desktop app (Распространение упакованного классического приложения)
Источник
Публикация с помощью ClickOnce
В обозревателе решений щелкните проект правой кнопкой мыши и выберите пункт Опубликовать (или воспользуйтесь командой меню Сборка > Опубликовать).

Если ранее вы настроили какие-либо профили публикации, появится панель Публикация. Нажмите кнопку Создать.
В мастере публикации выберите Папка.

На странице Указанный целевой объект выберите ClickOnce.

Введите путь или выберите Обзор, чтобы выбрать расположение публикации.

На странице Расположение установки выберите место, куда пользователи будут устанавливать приложение.

На странице Параметры можно указать параметры, необходимые для ClickOnce.
Если выбрана установка из UNC-пути или с веб-сайта, на этой странице можно указать, будет ли приложение доступно в автономном режиме. Если этот параметр выбран, приложение будет указано в меню «Пуск» пользователей и будет автоматически обновляться при публикации новой версии. По умолчанию обновления доступны в папке установки. Другое расположение для обновлений можно указать с помощью ссылки «Параметры обновления». Если вы не хотите, чтобы приложение было доступно в автономном режиме, оно будет запускаться из папки установки.

Если выбрана установка с компакт-диска, DVD-диска или USB-накопителя, на этой странице также можно указать, поддерживает ли приложение автоматические обновления. Если выбрана поддержка обновлений, требуется указать расположение обновления, которое должно быть допустимым UNC-путем или веб-сайтом.

С помощью ссылок в верхней части страницы можно указать, какие файлы приложений следует включить в программу установки, какие пакеты необходимых компонентов нужно установить, а также выбрать другие параметры.
Кроме того, на этой странице можно задать версию публикации и будет ли она автоматически увеличиваться при каждой публикации.
Номер версии публикации уникален для каждого профиля ClickOnce. Этот момент следует иметь в виду, если планируется использовать несколько профилей.
На странице Подпись манифестов можно указать, следует ли подписывать манифесты и какой сертификат нужно использовать.

На странице Конфигурация можно выбрать нужную конфигурацию проекта.

Дополнительные сведения о выборе параметров см. в следующих статьях:
Щелкните Готово, чтобы сохранить новый профиль публикации ClickOnce.
На странице Сводка выберите Опубликовать, и Visual Studio создаст проект и опубликует его в указанную папку публикации. На этой странице также показана сводка профиля.

Для повторной публикации выберите Публиковать.
Источник
пошаговое руководство. создание традиционного Windows классического приложения (C++)
в этом пошаговом руководстве показано, как создать традиционное Windows классическое приложение в Visual Studio. в примере приложения, которое вы создадите, будет использоваться Windows API для вывода «Hello, Windows desktop!». «Hello, World!». Код, созданный в этом пошаговом руководстве, можно использовать в качестве шаблона для создания других классических приложений Windows.
Для краткости в тексте пропущены некоторые операторы кода. В разделе Построение кода в конце документа показан полный код.
Предварительные требования
Компьютер под управлением Microsoft Windows 7 или более поздних версий. Для обеспечения оптимальной среды разработки рекомендуется использовать Windows 10.

Базовые значения об использовании интегрированной среды разработки Visual Studio. Если вы уже использовали классические приложения для Windows, вы, вероятно, справитесь. Общие сведения см. в обзоре возможностей интегрированной среды разработки Visual Studio.
Основные навыки владения языком C++. Не волнуйтесь, мы не будем делать ничего сложного.
создание проекта Windows классических приложений
чтобы создать первый проект Windows desktop, выполните следующие действия. в процессе работы вы вводите код рабочего Windows приложения. Чтобы ознакомиться с документацией по предпочтительной версии Visual Studio, используйте селектор Версия. Он находится в верхней части оглавления на этой странице.
создание проекта Windows desktop в Visual Studio 2019
В главном меню выберите Файл > Создать > Проект, чтобы открыть диалоговое окно Создание проекта.
в верхней части диалогового окна задайте для параметра язык значение C++, задайте для параметра платформа значение Windows и задайте для параметра Project тип значение рабочий стол.
Нажмите кнопку Создать, чтобы создать проект.

В диалоговом окне Добавление нового элемента выберите Файл C++ (.cpp). В поле имя введите имя файла, например хелловиндовсдесктоп. cpp. Нажмите кнопку Добавить.
 Visual C и плюсом, а также параметр файла c плюсом/с выделенным.» title=»Добавить CPP файл в Десктопапп Project» data-linktype=»relative-path»>
Теперь проект создан и исходный файл открыт в редакторе. Чтобы продолжить, перейдите к созданию кода.
создание проекта Windows desktop в Visual Studio 2017
В меню Файл выберите команду Создать, а затем пункт Проект.
в левой области диалогового окна создание Project разверните узел установленные > Visual C++ и выберите пункт Windows рабочий стол. в средней области выберите мастер рабочего стола Windows.
В поле имя введите имя проекта, например десктопапп. Нажмите кнопку ОК.
 Visual C плюс плюс > Windows рабочего стола, выбранный параметр «мастер настольных систем Windows» и десктопапп введено в текстовом поле «имя».» title=»Назовите проект Десктопапп.» data-linktype=»relative-path»>
в диалоговом окне Windows рабочего стола Project в разделе тип приложения выберите Windows приложение (.exe). В поле Дополнительные параметры выберите Пустой проект. Убедитесь, что предварительно скомпилированный заголовок не выбран. Нажмите кнопку ОК, чтобы создать проект.
В диалоговом окне Добавление нового элемента выберите Файл C++ (.cpp). В поле имя введите имя файла, например хелловиндовсдесктоп. cpp. Нажмите кнопку Добавить.
Visual C и плюсом, а также параметр файла c плюсом/с выделенным.» title=»Добавить CPP файл в Десктопапп Project» data-linktype=»relative-path»>
Теперь проект создан и исходный файл открыт в редакторе. Чтобы продолжить, перейдите к созданию кода.
создание проекта Windows desktop в Visual Studio 2015
В меню Файл выберите команду Создать, а затем пункт Проект.
в левой области диалогового окна создание Project разверните узел установленные > шаблоны > Visual C++, а затем выберите пункт Win32. В средней области выберите шаблон Проект Win32.
В поле имя введите имя проекта, например десктопапп. Нажмите кнопку ОК.
 > Visual C плюс плюс > win32, выделенный параметр win32 Project и десктопапп, введенные в текстовом поле имя.» title=»Назовите проект Десктопапп.» data-linktype=»relative-path»>
На странице Обзор мастера приложений Win32 нажмите кнопку Далее.

на странице Параметры приложений в разделе тип приложения выберите Windows приложение. В разделе Дополнительные параметры снимите флажок предкомпилированный заголовок, а затем выберите пустой проект. Чтобы создать проект, нажмите кнопку Готово.
В Обозреватель решений щелкните правой кнопкой мыши проект десктопапп, выберите Добавить, а затем выберите новый элемент.

В диалоговом окне Добавление нового элемента выберите Файл C++ (.cpp). В поле имя введите имя файла, например хелловиндовсдесктоп. cpp. Нажмите кнопку Добавить.
 Visual C и плюсом, а также параметр файла c плюсом/с выделенным.» title=»Добавить CPP файл в Десктопапп Project» data-linktype=»relative-path»>
Теперь проект создан и исходный файл открыт в редакторе.
Создание кода
далее вы узнаете, как создать код для Windows классического приложения в Visual Studio.
Запуск классического приложения Windows
точно так же, как у каждого приложения C и C++ должна быть main функция в качестве начальной точки, каждое Windows классическое приложение должно иметь WinMain функцию. WinMain имеет следующий синтаксис:
Сведения о параметрах и возвращаемом значении этой функции см. в разделе WinMain Entry Point.
Дополнительные сведения см. в разделе Процедуры окна.
Добавление функциональных возможностей в функцию WinMain
Дополнительные сведения о полях приведенной выше структуры см. в разделе вндклассекс.
зарегистрируйте WNDCLASSEX Windows, чтобы он знал о вашем окне и способах отправки в него сообщений. Воспользуйтесь функцией RegisterClassEx и передайте структуру класса окна в качестве аргумента. Этот _T макрос используется, так как мы используем TCHAR тип.
на этом этапе окно было создано, но нам по-прежнему нужно сообщить Windows, чтобы сделать его видимым. Вот что делает этот код:
для обработки сообщений сначала нужно добавить цикл обработки сообщений для прослушивания сообщений, которые Windows отправляет. Когда приложение получает сообщение, этот цикл отправляет его в вашу WndProc функцию для обработки. Цикл обработки сообщений напоминает приведенный ниже код.
Дополнительные сведения о структурах и функциях, используемых в цикле обработки сообщений, см. в разделах, посвященных MSG, GetMessage, TranslateMessageи DispatchMessage.
На этом этапе функция WinMain должна напоминать приведенный ниже код.
Добавление функциональных возможностей в функцию WndProc
Одно важное сообщение для обработчика — WM_PAINT сообщение. Приложение получает сообщение, WM_PAINT когда часть его отображаемого окна необходимо обновить. Это событие может возникать, когда пользователь перемещает окно перед окном, а затем снова перемещает его. Приложение не знает, когда происходят эти события. только Windows знает, поэтому оно уведомляет ваше приложение с WM_PAINT сообщением. При первом отображении окна его все должно быть обновлено.
Для обработки сообщения WM_PAINT сначала вызовите метод BeginPaint, далее обработайте логику расположения текста, кнопок и других элементов управления в окне, а затем вызовите метод EndPaint. для приложения логика между начальным вызовом и завершающим вызовом отображает строку «Hello, Windows desktop!» «Hello, World!». В следующем коде функция Text используется для вывода строки.
HDC в коде — это обработчик контекста устройства, который используется для рисования в клиентской области окна. Используйте BeginPaint функции и EndPaint для подготовки и завершения рисования в клиентской области. BeginPaint Возвращает маркер контекста устройства отображения, используемый для рисования в клиентской области. EndPaint завершает запрос на рисование и освобождает контекст устройства.
Сборка кода
Как обещано, вот полный код для рабочего приложения.
Сборка примера
Удалите код, введенный в хелловиндовсдесктоп. cpp в редакторе. Скопируйте этот пример кода и вставьте его в хелловиндовсдесктоп. cpp:
В меню Построение выберите Построить решение. Результаты компиляции должны появиться в окне вывод в Visual Studio.

Чтобы запустить приложение, нажмите клавишу F5. окно, содержащее текст «Hello, Windows desktop!» должно отображаться в левом верхнем углу экрана.

Поздравляем! вы выполнили это пошаговое руководство и создали традиционное Windows классическое приложение.
Источник
Adblock
detector
In Visual Studio up to version 2010, Templates for Windows Forms projects are pre-installed, but not as of Visual Studio 2012. For these newer versions of Visual Studio you have to install an extension.
This tutorial is for Visual Studio 2022, but applies essentially the same to other versions of Visual Studio (2019, 2017, 2015 and earlier).
Installing the extension for Windows Forms projects with C++
This extension is installed in Visual Studio 2022 under Extensions|Manage Extensions
After clicking Download at “C++ Windows Forms for Visual Studio 2022 .NET Framework”
and closing Visual Studio you get the message
Click Modify to install the extension.
After the next start of Visual Studio under File|New|Project you will find the CppCLR_WinformsProject template:
With this template you can create Windows Forms projects written in C++. Such a project creates a Windows application with a graphical user interface (buttons, menus, etc.), for example:
Standard C++ (including almost all extensions of C++11, C++14, C++17) is used as programming language for the business logic. Only for accessing Windows controls C++/CLI is necessary. This is a simple C++ dialect for the .NET Framework.
The book „C++ mit Visual Studio 2019 und Windows Forms-Anwendungen“
The following is a brief excerpt from my book (in German)
which is still up to date with Visual Studio 2022. All examples and projects can be created and compiled in Visual Studio 2022 as in Visual Studio 2019.
Installing Visual Studio for Windows Forms Projects
In order to create Windows Forms projects in Visual Studio, particular components must be installed during the installation of Visual Studio. If this was forgotten during the installation, start the Visual Studio Installer either under Windows|Start
or in Visual Studio under File|New|Project|Create new project (at the end of the project list)
In the installer, check .NET desktop development, desktop development with C++ and C++/CLI support:
Create a Windows Forms project
After restarting Visual Studio, Windows Forms projects are available under Create New Project or File|New|Project:
Click the Next button. Then you will be prompted to enter the name of the project and a directory:
After clicking the Create button, Visual Studio looks something like this:
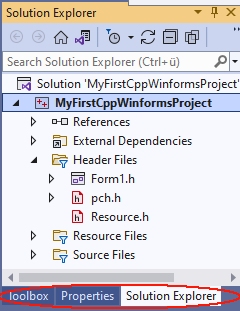
If you now click on Form1.h in the Solution Explorer, the form is displayed:
Normally, everything is done and you can continue with the next section. However, if you get something like this
you have clicked Form1.h too fast. Close this window
and click again on Form1.h in the Solution Explorer.
Visual Programming: A first small program
Now, before we get started with our first little program, let’s rearrange Visual Studio a bit to make it easier to use.
After installing Visual Studio, the Toolbox is offered at the left margin.
To prevent the toolbox from covering the form, drag the toolbox to the frame with the Solution Explorer (press the left mouse button on the title bar of the toolbox, then move to the title bar of the Solution Explorer with the mouse button pressed and release the mouse button).
Drag the properties window analogously to the Solution Explorer.
Since we initially only need the Toolbox, Solution Explorer and Properties window, you can close all other windows here (e.g. Git Explorer, etc.). Then the right frame looks something like this:
With the Windows Forms project from Section 1.4, Visual Studio then looks like this:
Next, we will now write a first small program.
The form (here Form1) is the starting point for all Windows Forms applications. It corresponds to the window that is displayed when the program is started:
![]()
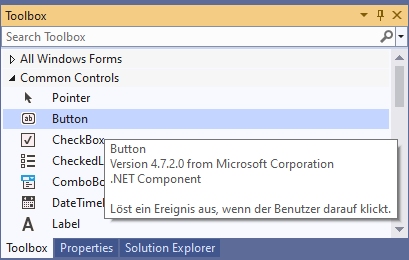
Controls from the Toolbox can be placed on a form. The Toolbox contains essentially all the controls commonly used in Windows. They are located in various groups (e.g. General Controls, Containers, etc.), which can be expanded and collapsed. Most of these controls (such as a button) are displayed on the form while the program is running. If you stop with the mouse pointer briefly on a line of the toolbox, a small hint appears with a short description:
To place an element from the toolbox on the form, simply drag it from the toolbox onto the form. Or click on it in the toolbox first and then click on the position in the form where you want the upper left corner to be.
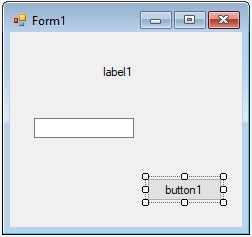
Example: After placing a Label (line seven in Common Controls, with the capital A), a TextBox (fourth line from the bottom, labelled ab) and a Button (second line labelled ab) on the form, it looks something like this:
By playing around like this, you have already created a real Windows program – not a particularly useful one, but still. You can start it as follows:
- with Debug|Start Debugging from the menu, or
- with F5 from any window in Visual Studio or
- by starting the exe file generated by the compiler.
This program already has many features that you would expect from a Windows program: You can move it with the mouse, resize and close it.
Do not forget to close your program before you continue editing it. As long as the program is still running, you cannot restart the compiler or modify the form.
This way of programming is called visual programming. While conventional programming means developing a program solely by writing instructions (text) in a programming language, visual programming means composing it wholly or in part from out-of-the-box graphical controls.
With Visual Studio, the user interface of a Windows Forms program can be designed visually. This allows you to see how the program will look later at runtime as soon as you design it. The instructions that are to take place as a response to user input (mouse clicks, etc.), on the other hand, are written conventionally in a programming language (e.g. C++).
The Properties Window
The control that was clicked last on a form (or in the pull-down menu of the Properties window) is called the currently selected control. You can identify it by the small squares on its edges, the so-called drag handles. You can drag them with the mouse to change to resize the control. A form becomes the currently selected control by clicking on a free position in the form.
Example: In the last example, button1 is the currently selected control.
In the Properties window (context menu of the control on the form, or View|Properties window – do not confuse with View|Property pages).
the properties of the currently selected control are displayed. The left column contains the names and the right column contains the values of the properties. With F1 you get a description of the property.
The value of a property can be changed via the right column. For some properties, you can type the new value using the keyboard. For others, after clicking on the right column, a small triangle is displayed for a pull-down menu, through which a value can be selected. Or an icon with three dots „…“ is displayed, which can be used to enter values.
Example:
- For the Text property, you can enter a text with the keyboard. For a button this text is the inscription on the button (e.g. „OK“), and for a form the title line (e.g. „My first C++ program“).
- For the BackColor property (e.g. from a button) you can select the background color via a pull-down menu.
- If you click the right column of the Font property and then the „…“ icon, you can select the font of the Text property.
A control on the form is not only adjusted to its properties in the Properties panel, but also vice versa: if you resize it by dragging the drag handles on the form, the values of the corresponding properties (Location and Size in the Layout section) in the Properties panel are automatically updated.
First steps in C++
Next, the program from Section 1.5 is to be extended so that instructions are executed in response to user input (e.g., a button click).
Windows programs can receive user input in the form of mouse clicks or keyboard input. All inputs are received centrally by Windows and passed on to the program. This triggers a so-called event in the program.
Such an event can be assigned a function that is called when the event occurs. This function is also called an event handler.
For the time being, our program should only react to the clicking of a button. The easiest way to get the function called for this event is to double-click on the button in the form. The cursor is then placed at the beginning of the function. This causes Visual Studio to generate the following function and display it in the editor:
Between the curly brackets „{“ and „}“ you then write the statements to be executed when the Click event occurs.
Essentially all instructions of C++ are possible here. In the context of this simple tutorial, only some elementary instructions are to be introduced, which is necessary for the basic understanding of Visual Studio. If terms like „variables“ etc. are new to you, read on anyway – from the context you will surely get an intuitive idea which is sufficient for the time being.
A frequently used instruction in programming is the assignment (with the operator „=“), which is used to assign a value to a variable. Initially, only those properties of controls that are also displayed in the properties window are to be used as variables. These variables can then be assigned the values that are also offered in the properties window in the right column of the properties.
For the BackColor property, the allowed values are offered after the pull-down menu is expanded:
These values can be used in the program by specifying them after Color::. If you now write the statement
textBox1->BackColor = Color::Yellow;between the curly brackets
private: System::Void button1_Click(System::Object^  sender, System::EventArgs^  e)
{
 textBox1->BackColor = Color::Yellow;
}
the BackColor property of textBox1 gets the value Color::Yellow, which stands for the color yellow, when button1 is clicked during the execution of the program. If you now start the program with F5 and then click button1, the TextBox actually gets the background color yellow.
Even if this program is not yet much more useful than the first one, you have seen how Visual Studio is used to develop applications for Windows. This development process always consists of the following activities:
- You design the user interface by placing controls from the Toolbox on the form (drag and drop) and adjusting their properties in the Properties window or the layout with the mouse (visual programming).
- You write in C++ the instructions that should be done in response to user input (non-visual programming).
- You start the program and test whether it really behaves as it should.
The period of program development (activities 1. and 2.) is called design time. In contrast, the time during which a program runs is called the runtime of a program.
A simple Winforms application
Next, a simple Winforms application is to be created based on the previous explanations. It contains a button and TextBoxes for input and output:
However, you do not have to create this project yourself. If you install the Visual Studio extension
a project template with exactly this project is available in Visual Studio:
You can use this project as a basis for many applications by adding more controls and functions.
The main purpose of this project is to show how the application logic is separated from the user interface:
- The functions, classes, etc. of the application logic are written in standard C++ and are contained in a header file that is added to the project.
- The instructions for the user interface, on the other hand, are written primarily in C++/CLI and are often included in the form class in Form1..
- The functions of the header file are called when clicking a button.
The following is a simplified version of chapter 2.11 from my book „C++ mit Visual Studio 2019 und Windows Forms-Anwendungen“. There I recommend such a project for the solutions of the exercises. In the header file of such a project you can include the solutions of several exercises or distribute them to different header files. For each subtask you can put a button (or menu options) on the form. This way you don’t have to create a new project for each subtask.
Of course, outsourcing your own instructions to an extra file (as in 3.) and accessing the controls via function parameters is somewhat cumbersome: however, it leads to clearer programs than if all instructions are located in the form file within the Form1 class. This saves many programming errors that lead to obscure error messages, and makes it easier to search for errors.
1. Create the project
Create a new project with File|New|Project|CppCLR_WinformsProject (see section 1.1).
The following examples assume a project named CppCLR_Winforms_GUI.
2. Design the user interface (the form)
The form is then designed to contain all the controls needed to input and output information and start actions. This is done by dragging appropriate controls from the toolbox onto the form.
For many projects (e.g. the exercises from my book) the following controls are sufficient:
- A multiline TextBox (see Section 2.3.2 of my book) to display the results.
- A single-line TextBox for entering data
- One or more buttons (or menu options, etc.) to start the instructions
A TextBox becomes multiline TextBox by the value true of the MultiLine property. The TextBox for output is to be named out_textBox:
The TextBox for entering data will be named in_textBox:
Since the function plus_1 is called when the button is clicked, it is given the caption „plus 1“ and the name button_plus1:
The functions, declarations, classes etc. of the so-called application logic are placed in a separate header file, which is added to the project with Project|Add new element|Visual C++|Code as header file(.h) with the name Header1.h. In practice, however, you should group functions and classes that belong together conceptually in a header file, and then give the header file a more meaningful name than Header.h.
The application logic is then included in the header file. These are mostly functions, classes, etc. written in C++. In our first example, this should be a function with the name plus_1, which returns the value of the argument increased by 1:
In a C++ Windows Forms project, the application logic consists primarily of functions, classes, etc. written in C++, without C++/CLI language elements. In our first example, this should be a function named plus_1, which returns the value of the argument incremented by 1:
int plus_1(int x)
{
  return x + 1;
}
Diese Datei wird dann vor dem namespace des Projekts mit einer #include-Anweisung in die Formulardatei (z.B. Form1.h) aufgenommen:
This file is then included in the form file (e.g. Form1.h) before the namespace of the project with an #include statement:
#pragma once
#include "Header1.h" // <-- manuell einfügen. nach dem Eintippen von
                     // "#include " bietet Visual Studio die Datei an.
namespace CppCLRWinFormsProject {
  using namespace System;
    ...
}
4. Calling the functions
By double-clicking the button on the form, Visual Studio creates the function (the event handler) that will be called when the button is clicked when the program is running:
private: System::Void button_plus_1_Click(System::Object^ sender, System::EventArgs^ e)
{
}
In this event handler you then call the corresponding function. In this simple tutorial this is the function plus_1 from the file Header.h.
- If this function uses user input, you read it in via a TextBox. In this simple tutorial, it will be a number that is read from the in_TextBox.
- If a parameter of the called function does not have type String (the type of the property in_textBox->Text), the string must be converted to the type of the parameter. This is possible with one of the Convert:: functions.
- The results are to be displayed in the out_textBox. This can be done with the function out_textBox->AppendText. The string that AppendText expects can be created with String::Format. In the first argument (a string) you specify {0} for the first value after the string, {1} for the second and so on.
private: System::Void button_plus_1_Click(System::Object^ sender, System::EventArgs^ e)
{
int n = Convert::ToInt32(in_textBox->Text);
int result = plus_1(n);
out_textBox->AppendText(String::Format("plus_1({0})={1}rn",n,result));
}
If you enter a number in the input field after starting this program with F5 and then click on the button, the value incremented by 1 is displayed in the output text box:
For each further function whose result is to be displayed, a button is placed on the form and given a suitable name (Name property) and a suitable label (Text property). This function is then called in the associated event handler.
With this all relevant parts of the ??? CppCLR_Winforms_GUI are presented. You can enhance it as you like with additional controls (buttons, menus, etc.). See chapter 2 of my book for more information.
5. GUI and application logic not so strictly separated
In the version created under 1. to 4. the application logic is strictly separated from the user interface: The access to the user interface with C++/CLI is exclusively done in Form1.h. In Header1.h, however, only standard C++ is used. This has in particular the advantage that one can use this header also in other platforms (e.g. console applications, Qt, Mac).
However, in the early stages of a project, when there is still a lot of experimenting going on, it can be a bit cumbersome if you have to change the calls in another file every time you change a parameter list. And for applications that are not intended to be used for other platforms at all, this strict separation doesn’t help much. This often applies to exercise tasks as well.
This jumping back and forth between different files can be avoided by relaxing the strict separation between the application logic and the user interface by including access to the controls in the header file as well.
Accessing controls in a header file is enabled by inserting
using namespace System;
using namespace System::Windows::Forms;
into the header file at the beginning. Then you can also use the types of the controls in the header file (e.g. as parameters) and include the statements that were in the buttonClick function in Form1.h under 4.
This procedure is implemented in the Header2.h file:
#pragma once
using namespace System;
using namespace System::Windows::Forms;

int plus_2(int x)
{
  return x + 2;
}

void plus_2_Click(TextBox^ in_textBox, TextBox^ out_textBox)
{
int n = Convert::ToInt32(in_textBox->Text);
int result = plus_2(n);
out_textBox->AppendText(String::Format("plus_2({0})={1}rn", n, result));
}
Here you pass a parameter for the control to the function. Please note that you must specify a ^ after the name of a .NET type (e.g. TextBox, Button). In the function you then address the control under the name of the parameter.
This function can be called when a button is clicked:
private: System::Void button_plus_1_Click(System::Object^ sender, System::EventArgs^ e)
{
plus_2_Click(in_textBox, out_textBox);
}
6. Analogy to console applications
Comparing of this Windows Forms project with a corresponding console application shows the analogy of the two types of projects. This analogy shows how to convert a console application into a forms application: If you have a console program like
#include<iostream>
int main()
{
int n;
std::cin >> n;
int result = plus_2(n);
std::cout << "plus_2(" << n << ") = " << result << std::endl;
return 0;
}
you can port it to a form application with relatively little effort. You just need to replace the I/O statements and call the functions in response to a ButtonClick, etc:
private: System::Void button_plus_1_Click(System::Object^ sender, System::EventArgs^ e)
{
int n = Convert::ToInt32(in_textBox->Text);
int result = plus_1(n);
out_textBox->AppendText(String::Format("plus_1({0})={1}rn",n,result));
}
Excerpt from the preface to my book „C++ mit Visual Studio 2019 und Windows Forms-Anwendungen“
The preface to my book (in German)
teaches C++ with Windows Forms applications in more detail.
Preface
The starting point for this book was the desire for a C++ textbook in which programs for a graphical user interface (Windows) are developed from the beginning, and not console applications as is usually the case. Programs in which inputs and outputs are done via a console are like stone-aged DOS programs for many beginners and discourage them from wanting to deal with C++ at all.
Windows Forms applications are an ideal framework for C++ programs with an attractive user interface: access to Windows controls (Buttons, TextBoxes etc.) is easy. The difference to a standard C++ program is mostly only that inputs and outputs are done via a Windows control (mostly a TextBox)
textBox1->AppendText(„Hello World“);
while in standard C++ the console is used with cout:
cout << "Hello world" << endl;
But not only students can benefit from C++ with a graphical user interface. With Windows Forms projects, existing C or C++ programs can be enhanced with a graphical user interface without much effort. And those who know C or C++ and do not want to learn a new language for a GUI can make their existing programs more beautiful and easier to use with simple means.
C++ has developed rapidly in recent years: The innovations of C++11, C++14, C++17 and C++20 have brought many improvements and new possibilities. Much of what was good and recommended in 2010 can be made better and safer today.
As a book author and trainer who has accompanied this whole evolution, you notice this particularly clearly: many things that have been written in the past should be done differently today. True, it would still be compiled. But it is no longer modern C++, which corresponds to the current state of the art and uses all the advantages.
This book introduces C++ at the Visual Studio 2019 level in May 2020. This is the scope of C++17.
На чтение 7 мин Просмотров 2.9к. Опубликовано 07.04.2022
Освойте Microsoft Visual Studio и разрабатывайте собственные приложения с помощью Windows Forms практически без написания кода.
Windows Forms — это платформа, доступная в Visual Studio, которая позволяет создавать настольные приложения с помощью графического пользовательского интерфейса. Это позволяет вам щелкать и перетаскивать виджеты, такие как кнопки или метки, прямо на холст и управлять свойствами каждого виджета, такими как размер шрифта, цвет или граница.
В этой статье простой конвертер градусов Цельсия в градусы Фаренгейта будет использоваться в качестве примера для изучения основ настройки приложения Windows Form. В этом руководстве используется Visual Studio 2019 Community Edition.
Содержание
- Как создать проект Windows Forms в Visual Studio
- Как добавить элементы на холст проекта
- Как обрабатывать события и писать код в коде программной части
- Как запускать и отлаживать программу Windows Forms
- Отладка программы Windows Forms
- Запуск программы с помощью исполняемого файла
- Добавление дополнительных элементов в форму Windows
Как создать проект Windows Forms в Visual Studio
Сначала создайте проект в Visual Studio.
- Откройте Visual Studio и выберите Создать новый проект.
- Visual Studio предоставит вам список шаблонов проектов, из которых вы можете выбрать.
- Чтобы создать приложение Windows Forms, найдите приложение Windows Formи выберите его из списка шаблонов. Как только это будет выбрано, нажмите » Далее».

- Добавьте имя и местоположение для проекта и нажмите » Далее». Расположение — это каталог, в котором будут храниться файлы кода.
- На следующем экране сохраните выбор по умолчанию.NET Core 3.1.
- Щелкните Создать.
- Когда Visual Studio завершит создание проекта, он откроется.


Как добавить элементы на холст проекта
Холст — это белая область, расположенная в верхнем левом углу экрана. Нажмите и перетащите точки в нижней, правой или нижней правой части холста, чтобы изменить его размер, если это необходимо.
Чтобы создать пользовательский интерфейс приложения, добавьте на холст такие виджеты, как кнопки или текстовые поля.
- Откройте вкладку «Вид» в верхней части окна и выберите » Панель инструментов «.

- Это добавит панель инструментов в левую часть приложения. Выберите значок булавкив правом верхнем углу панели инструментов, чтобы закрепить его там навсегда.
- Здесь вы можете перетащить любой виджет из панели инструментов на холст. Выделите кнопку на панели инструментов и перетащите ее на холст.

- Перетащите на холст еще два текстовых поля вместе с тремя метками (две метки для каждого текстового поля и одна метка для заголовка в верхней части приложения).

- Каждый виджет на холсте имеет связанные с ним свойства. Выделите виджет, чтобы отобразить окно свойствв правом нижнем углу Visual Studio, в котором перечислены все свойства этого виджета. Эти свойства могут включать текст, имя, размер шрифта, границу или выравнивание выделенного виджета.
- На данный момент текст этих виджетов по-прежнему говорит label1, label2или button1. Выберите виджет label1и отредактируйте свойство Text в окне свойств, указав «Цельсий в Фаренгейт». Измените размер шрифта на 22pt.

- Аналогичным образом отредактируйте свойства других виджетов на холсте, чтобы они были следующими:


|
Виджет |
Имущество |
Новое значение |
| метка2 | Текст | Цельсия |
| этикетка3 | Текст | по Фаренгейту |
| кнопка | Текст | Рассчитать |
| Текстовое поле Фаренгейта | Только для чтения | Истинный |
Как обрабатывать события и писать код в коде программной части
Виджеты на холсте можно привязывать к событиям. События могут включать в себя такие вещи, как нажатие кнопки, изменение текста внутри текстового поля или выбор определенного переключателя. Когда происходят эти события, это может привести к срабатыванию части кода в программном коде.
C# — это язык, используемый при создании Windows Forms. Если вы еще не использовали C#, есть много практических причин для изучения программирования на C#.
Для этого конкретного приложения добавьте событие к кнопке » Рассчитать «, чтобы инициировать выполнение части кода при нажатии этой кнопки.
1. Дважды щелкните кнопку » Рассчитать«, чтобы автоматически открыть Form1.cs с новым методом Event:
private void calculateButton_Click(object sender, EventArgs e)
2. Здесь вы добавите код, который будет выполнять расчет градусов Цельсия по Фаренгейту и отображать результат в текстовом поле Фаренгейта. Для этого вам нужно иметь возможность прочитать значение из текстового поля Цельсия и изменить текстовое поле Фаренгейта, чтобы отобразить результат.
3. Вернитесь на холст и повторно отредактируйте свойства, как показано ранее. На этот раз отредактируйте свойство Nameдля текстовых полей Цельсия и Фаренгейта. Эти имена можно использовать для ссылки на текстовые поля в коде.
| Виджет | Имущество | Новое значение |
| Текстовое поле Цельсия | Имя | ЦельсияTextBox |
| Текстовое поле Фаренгейта | Имя | по ФаренгейтуTextBox |
4. Вернитесь к функции calculateButton_Click в Form1.cs.
5. Теперь на текстовое поле Celsius можно ссылаться в коде, используя имя «celsiusTextBox». Введенное пользователем значение Цельсия сохраняется в его свойстве Text. Однако, поскольку это строка, разберите ее на двойную, чтобы включить ее в будущие расчеты по Фаренгейту.
private void calculateButton_Click(object sender, EventArgs e)
{
// Get the value that the user entered in the Celsius Text Box
double celsiusValue = Double.Parse(celsiusTextBox.Text);
}
6. Переменная celsiusValue теперь хранит значение, введенное пользователем в текстовом поле Celsius. Формула для преобразования градусов Цельсия в градусы Фаренгейта: (celsiusValue * 9 / 5) + 32.Таким образом, результат теперь можно рассчитать и сохранить в текстовом поле Фаренгейта.
private void calculateButton_Click(object sender, EventArgs e)
{
// Get the value that the user entered in the Celsius Text Box
double celsiusValue = Double.Parse(celsiusTextBox.Text);
// Apply the calculation
double result = (celsiusValue * 9 / 5) + 32;
// Store the result in the Fahrenheit Textbox
fahrenheitTextBox.Text = result.ToString();
}
Как запускать и отлаживать программу Windows Forms
Запуск программы Windows Forms в Visual Studio
Теперь, когда пользовательский интерфейс и логика кода настроены, запустите программу, чтобы увидеть, как она работает.
1. Чтобы запустить программу, выберите зеленую стрелку вверху панели инструментов в Visual Studio. 
2. После загрузки проекта добавьте значение в текстовое поле Цельсия и нажмите кнопку » Рассчитать». Это добавит результат в текстовое поле по Фаренгейту. 
3 Если программа размыта во время выполнения, вероятно, ваше приложение не поддерживает DPI. Это может вызвать проблемы с масштабированием и разрешением, поэтому его необходимо включить.
4. Щелкните правой кнопкой мыши проект TemperatureConverterв обозревателе решений. Выберите Добавить, затем выберите Новый элемент.
5. Найдите файл манифеста приложения и нажмите » Добавить «. 
6. Скопируйте следующий код в новый файл app.manifest как дочерний элемент тега сборки (если код уже сгенерирован, просто раскомментируйте его).
<application xmlns=»urn:schemas-microsoft-com:asm.v3″>
<windowsSettings>
<dpiAware xmlns=»http://schemas.microsoft.com/SMI/2005/WindowsSettings«>true</dpiAware>
<longPathAware xmlns=»http://schemas.microsoft.com/SMI/2016/WindowsSettings«>true</longPathAware>
</windowsSettings>
</application>
7. Чтобы это изменение вступило в силу, перезапустите программу. Нажмите красную кнопку остановки в верхней части панели инструментов, затем снова нажмите зеленую кнопку воспроизведения.
Отладка программы Windows Forms
Вы можете отладить программу, если логика вашего приложения Windows Forms не работает должным образом.
- Вернитесь к функции calculateButton_Click в Form1.cs и щелкните в любом месте серой полосы в крайнем левом углу экрана. Это добавит точку останова, которая обозначена красным кружком.
- Нажмите кнопку «Рассчитать» еще раз, чтобы запустить этот метод. Программа приостановится, когда достигнет точки останова, чтобы показать все значения, хранящиеся в переменных в этой точке.
- Чтобы продолжить работу программы, нажмите зеленую стрелку » Продолжить» в верхней части панели инструментов.

Запуск программы с помощью исполняемого файла
Если вы не хотите запускать свою программу через Visual Studio, используйте автономный исполняемый файл для программы. Это автоматически генерируется.
Перейдите к исполняемому файлу, который можно найти здесь:
<your-project-folder>/bin/Debug/netcoreapp3.1/TemperatureConverter.exe
Нажмите на исполняемый файл, чтобы запустить программу напрямую.
Добавление дополнительных элементов в форму Windows
Надеюсь, теперь у вас есть общее представление об основной структуре приложения Windows Form. Вы можете продолжить изучение дополнительных функций Windows Forms, поэкспериментировав с новыми виджетами и углубившись в другие различные события, которые можно обрабатывать.
Как только вы лучше познакомитесь с Windows Forms, вы сможете приступить к созданию более сложных приложений. Вы также можете изучить многие другие способы создания приложений на рабочем столе Windows.
В данной теме рассмотрены особенности создания приложения типа Windows Forms Application с поддержкой языка C++. Такой тип приложения поддерживает все преимущества технологии .NET Framework.
Выполнение
1. Загрузить Microsoft Visual Studio.
В результате будет создано окно с активной вкладкой Start Page (рисунок 1).
 Рисунок 1. Окно Microsoft Visual Studio
2. Создание приложения типа Windows Forms Application
Чтобы создать новый проект (решение) на языке C++, нужно выбрать последовательность команд (рис. 2):
File -> New Project...
Система Microsoft Visual Studio предлагает разные виды шаблонов приложения для программирования на языке C++ (рис. 2).
 Рисунок 2. Вызов команды создания нового проекта
В результате откроется окно «New Project» (рисунок 3), в котором нужно выбрать шаблон «Visual C++» и тип приложения Windows Forms Application.
В поле «Location:» надо задать путь к папке, в которой будет сохранен проект. В нашем случае задан следующий путь
C:ProgramsCPP
В поле Name задается имя приложения. В нашем случае это имя «MyApp01«.
Если включена опция «Create directory for solution» (создать директорию для решения), то проект будет сохранен в папке
C:ProgramsCPPMyApp01
В поле «Solution name:» задается имя решения. Решение (solution) может объединять в себе несколько проектов. В нашем случае имя решения остается таким как и имя проекта.
 Рисунок 3. Окно «New Project» создания нового проекта
3. Основные элементы оконного интерфейса для работы с программой
После выбора «ОК» в предыдущем окне «New Project«, система Microsoft Visual Studio создаст весь необходимый код для работы приложения типа Windows Forms Application.
В результате окно Microsoft Visual Studio примет вид как показано на рисунке 4.
В окне, в центре отображается основная форма приложения. На этой форме можно размещать компоненты. Компоненты размещаются на панели Toolbox (левая часть экрана).
Свойства формы или компонента отображаются в утилите Solution Explorer (правая часть экрана). Изменяя эти свойства, можно влиять на вид формы, поведение формы, реализовывать обработчики событий формы и прочее.
 Рисунок 4. Основные элементы окна приложения
4. Вызов режима ввода кода
На данный момент активным есть режим проектирования формы. Чтобы перейти в режим набора текста программы, нужно вызвать команду Code с меню View (рисунок 5):
View -> Code
 Рисунок 5. Команда перехода в режим набора текста программы
Другой вариант вызова команды перехода в режим набора текста, это клик на соответствующей кнопке в Solution Explorer (рисунок 6).
 Рисунок 6. Кнопка перехода в режим набора текста программы
В результате отобразится текст программы.
 Рисунок 7. Режим просмотра текста программы
5. Текст модуля «Form1.h«
При создании проекта, система Microsoft Visual Studio генерирует программный код, который сохраняется в различных файлах.
Главным файлом, в котором программист создает собственный код программы, есть файл «Form1.h«. Этот файл соответствует главной форме приложения. На главной форме размещаются различные компоненты. С помощью этих компонент реализуется решение конкретной задачи. При создании проекта создается пустая форма (рисунок 6). Кроме главной формы можно создавать другие формы и добавлять их к проекту.
Листинг файла «Form1.h» следующий.
#pragma once

namespace MyApp01 {
  using namespace System;
  using namespace System::ComponentModel;
  using namespace System::Collections;
  using namespace System::Windows::Forms;
  using namespace System::Data;
  using namespace System::Drawing;

  /// <summary>
  /// Summary for Form1
  /// </summary>

  public ref class Form1 : public System::Windows::Forms::Form
  {
  public:
    Form1(void)
    {
      InitializeComponent();
      //
      //TODO: Add the constructor code here
      //
    }

    protected:
      /// <summary>
      /// Clean up any resources being used.
      /// </summary>

      ~Form1()
      {
        if (components)
        {
          delete components;
        }
      }

    private:
      /// <summary>
      /// Required designer variable.
      /// </summary>

      System::ComponentModel::Container ^components;

#pragma region Windows Form Designer generated code
      /// <summary>
      /// Required method for Designer support - do not modify
      /// the contents of this method with the code editor.
      /// </summary>

      void InitializeComponent(void)
      {
        this->components = gcnew System::ComponentModel::Container();
        this->Size = System::Drawing::Size(300,300);
        this->Text = L"Form1";
        this->Padding = System::Windows::Forms::Padding(0);
        this->AutoScaleMode = System::Windows::Forms::AutoScaleMode::Font;
      }
#pragma endregion
    };
}
Объясним некоторые фрагменты кода в тексте программы.
В вышеприведенном тексте создается пространство имен MyApp01 с помощью оператора
namespace MyApp01 {
...
}
В этом пространстве имен подключаются другие пространства имен из библиотеки .NET Framework:
System
System::ComponentModel
System::Collections
System::Windows::Forms
System::Data
System::Drawing
В пространстве имен MyApp01 создается класс с именем Form1. Этот класс соответствует главной форме приложения Form1.
Класс содержит конструктор, который вызывает метод
InitializeComponent();
В методе InitializeComponent() создается компонента-форма (переменная components), которая есть контейнером. Это означает, что на форме могут размещаться другие компоненты (кнопки, метки, поля ввода и т.д.). Также в методе InitializeComponent() настраиваются параметры формы: название заголовка, размер (300 * 300 пикселей), шрифт по умолчанию.
Деструктор класса ~Form1() уничтожает форму (переменная components) с помощью оператора delete.
6. Файлы, которые создаются в проекте
После создания проекта типа Windows Forms Application система Microsoft Visual Studio создает несколько файлов.
 Рисунок 8. Файлы C++, которые создаются в проекте типа Windows Forms Application
Как было сказано раньше, главным файлом есть файл «Form1.h» (см. п. 5). Также, согласно правилам языка C++, создается файл реализации «MyApp01.cpp«. В этом файле есть главная функция main(). Этот файл содержит код отображающий главную форму.
Листинг файла «MyApp01.cpp» следующий:
// MyApp01.cpp : main project file.
#include "stdafx.h"
#include "Form1.h"

using namespace MyApp01;

[STAThreadAttribute]

int main(array<System::String ^> ^args)
{
  // Enabling Windows XP visual effects before any controls are created
  Application::EnableVisualStyles();
   Application::SetCompatibleTextRenderingDefault(false);

  // Create the main window and run it
  Application::Run(gcnew Form1());
  return 0;
}
Файл «MyApp01.vcxproj«. Это главный файл проектов на Visual C++, которые генерируются с использованием мастера приложений (Application Wizard). В нем содержится информация о версии Visual C++, в которой сгенерирован файл, информация о платформах, настройках и особенностях (характеристиках) проекта выбранных с помощью мастера приложений (Application Wizard).
Файл «MyApp01.vcxproj.filters«. Это есть файл фильтров для сгенерированных проектов на Visual C++ с использованием мастера приложений (Application Wizard). В нем содержится информация об ассоциации между файлами в вашем проекте и фильтрами. Эта ассоциация используется в интегрированной среде, чтобы показать группирование файлов с одинаковыми расширениями.
Файл «AssemblyInfo.cpp«. Содержит пользовательские атрибуты для модификации данных сборки.
Файли «StdAfx.h» и «StdAfx.cpp«. Они используются для создания файла скомпилированных заголовков (PCH) с именем «MyApp01.pch» и скомпилированных типов названных «StdAfx.obj«.
7. Запуск проекта на выполнение
Для запуска проекта на выполнение используется команда Start Debuggin из меню Debug (клавиши F5).
⇑
В данной статье будет рассмотрено как создать новый проект в виде классического приложения для работы в Windows. Также в студии есть возможность создавать универсальные приложения (UWP-приложение), но это уже тема другой статьи.
При выполнении примера создания нового проекта будет использована Visual Studio 2017 для объектно-ориентированного языка программирования C#. Если у Вас стоит другая версия, то она также подойдет, думаю разница должна быть не существенной, а может быть будет все также.
Создание нового проекта
Для создания нового проекта, нужно выполнить команду «Файл»-> «Создать»->»Проект» (Ctrl+Shift+N). В открывшемся окне нажать на вкладку Visual C# и далее там в предложенном списке вариантов выбрать «Классическое приложение Windows». После нажатия на этот пункт будут предложены различные варианты шаблонов приложений. Нам нужно выбрать «Приложение Windows Forms (.Net Framework)». Также в этом окне нужно задать желаемое имя, расположение, имя решения (может совпадать с именем проекта, а также выбрать платформу.
В качестве примера создадим приложение HelloWorld, как первое пробное приложение.
В поле «Имя» вводим «HelloWorld«
В поле «Расположение» — «C:ObuchHelloWorld» (или любой другой путь)
Платформу оставил по умолчанию .Net Framework 4.5, но можно выбрать при желании другую версию из выпадающего списка.
Сразу после нажатия кнопки «OK» появится новая заготовка Windows-приложения.
В созданной заготовке содержится только название приложения — Form1 и пустая форма.
Теперь в этой форме создадим две кнопки: первую для вывода какого-либо сообщения пользователю, а другую для выхода из приложения. Для этого с панели элементов перетаскиваем на форму два элемента Button (по умолчанию находится с левой стороны интегрированной среды Visual Studio). Перенесенные кнопки на форму, будут иметь имя button1 и button2 соответственно. Хоть это и пример, и можно было бы имена оставить как есть, но это способствует плохой привычке. В итоге, если так делать, то при написании более большого приложения, будет намного сложнее понимать в последующем код, если будет куча таких дефолтных имен. Первую кнопку назовем btnMessage, а вторую — btnClose. Чтобы поменять имена кнопок, нужно в панели «Свойства» перейти в группу «Разработка» и там изменить дефолтный параметр Name. Также важно задать выводимый текст на кнопках, чтобы пользователю было понятно, что он нажимает. Для этого находим свойство Text и меняем для кнопки btnMessage — «Привет» и для кнопки btnClose — «Закрыть».
После того как мы разместили кнопки и дали им имена, нужно написать обработчики для выполнения необходимого функционала.
Зададим обработчик для кнопки btnMessage. Для этого выполняем двойной щелчок на кнопки. После этого среда создаст заготовку обработчика, а нам остается только вписать нужный код. Вводим в обработчик: MessageBox.Show(«Привет мир!»). В итоге обработчик будет выглядеть как в примере ниже.
private void btnMessage_Click(object sender, EventArgs e)
{
MessageBox.Show(«Привет мир!»);
}
Теперь осталось написать обработчик для второй кнопки. Проделываем тоже самое как и для первой кнопки и вводим метод закрытия приложения- Close().
private void btnClose_Click(object sender, EventArgs e)
{
Close();
}
На этом написание первой программы в Visual C# завершено. Она достаточно простая, так как имеет минимальный функционал. Чтобы запустить это приложение достаточно нажать F5 на клавиатуре.
В конце статьи дополнительно приложен архив с проектом, который можно загрузить на свой компьютер.
Windows Forms Apps in C++ with Visual Studio 2022
Extend Visual Studio 2022 by Windows Forms projects written in C++. Applications created by such projects have a graphical user interface. They are based on .NET Framework. You can use all common Windows controls like Buttons, Menues, TextBoxes etc.
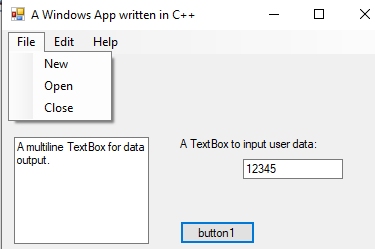
Click here for a tutorial for Windows Forms Projects in English.
Klicken Sie hier für eine Anleitung für Windows Forms Projekte in Deutsch.
Use Standard C++ (including most of C++11, C++14, C++17) for your business logic. To access GUI controls use C++/CLI (an easy to use C++ dialect). The main difference between a traditional C++ program is, that instead of using the console for user interaction
cout << "Hello world" << endl;
you can use Windows controls, e.g. a TextBox
textBox1->AppendText("Hello World");
C++ Windows forms projects are an easy way to create programs with a graphical user interface in C++.
- Use Windows Forms Projects to enhance your C++ programs with a graphical user interface. You can write serious C++ applications with Windows Forms projects.
- Windows Forms Projects are great for learning C++. I used them in my introductory C++ lectures for years. Since the programs are not restricted to the console for user interaction, they are more attractive, more flexible and much easier to use for the students.
Based on this extension I created another extension that is a very simple Windows Forms Project with a graphical user interace (GUI) written in C++. The form contains a button and textboxes for input and output, but you can easily extend it by adding more controls and functions.
My textbook (in German) teaches C++ from the scratch, using C++ Windows forms. It focuses on standard C++ at the C++17 level, not C++/CLI.
Среды разработки
Последнее обновление: 28.08.2017
Для создания программы на C++ нам нужны, как минимум, две вещи: текстовый редактор для набора кода и компилятор для превращения этого кода в приложение.
При этом для компиляции необходимо запускать консоль или терминал. Однако есть и более удобный способ — использование различных сред разработки или IDE.
Они, как правило, содержит встроенный текстовый редактор, компилятор и позволяют скомпилировать и запустить программу по одному клику мыши,
а также имеют еще множество разных вспомогательных возможностей.
Для программирования под Windows наиболее популярной средой разработки, если говорить о C++, является Visual Studio. Данную среду можно найти по ссылке
https://www.visualstudio.com/ru/vs/. Она доступна в ряде редакций. В частности,
можно использовать бесплатную и полнофункциональную версию Visual Studio 2017 Community.
После загрузки и запуска установщика Visual Studio в нем необходимо отметить пункт «Разработка классических приложений на C++»:
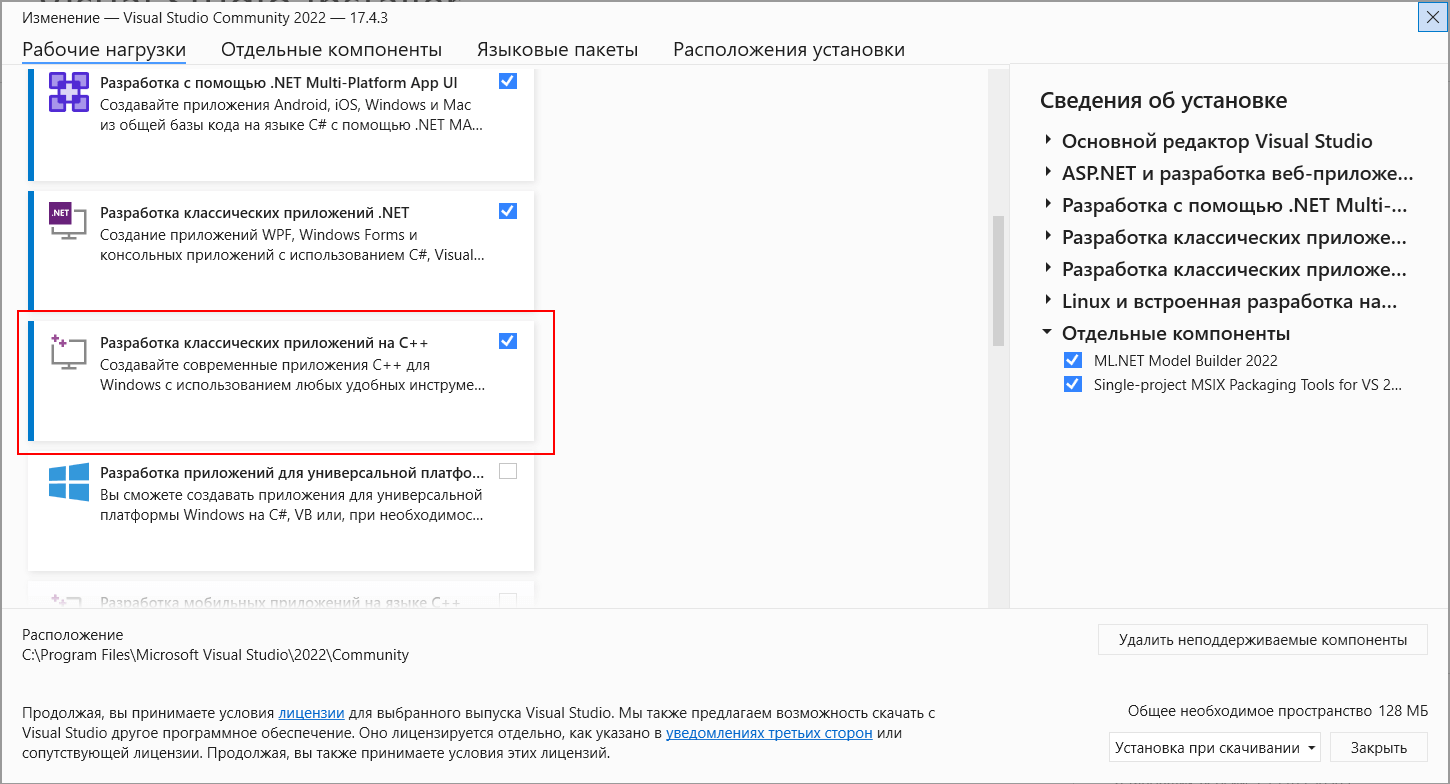
Выбрав все необходимые пункты, нажмем ОК для запуска установки. После установки Visual Studio создадим первый проект. Для этого перейдем в меню
File (Файл) -> New (Создать) -> Project… (Проект), и нам откроется окно создания нового проекта. В нем перейдем в левой части окна к
языку С++ и выберем его подсекцию General:
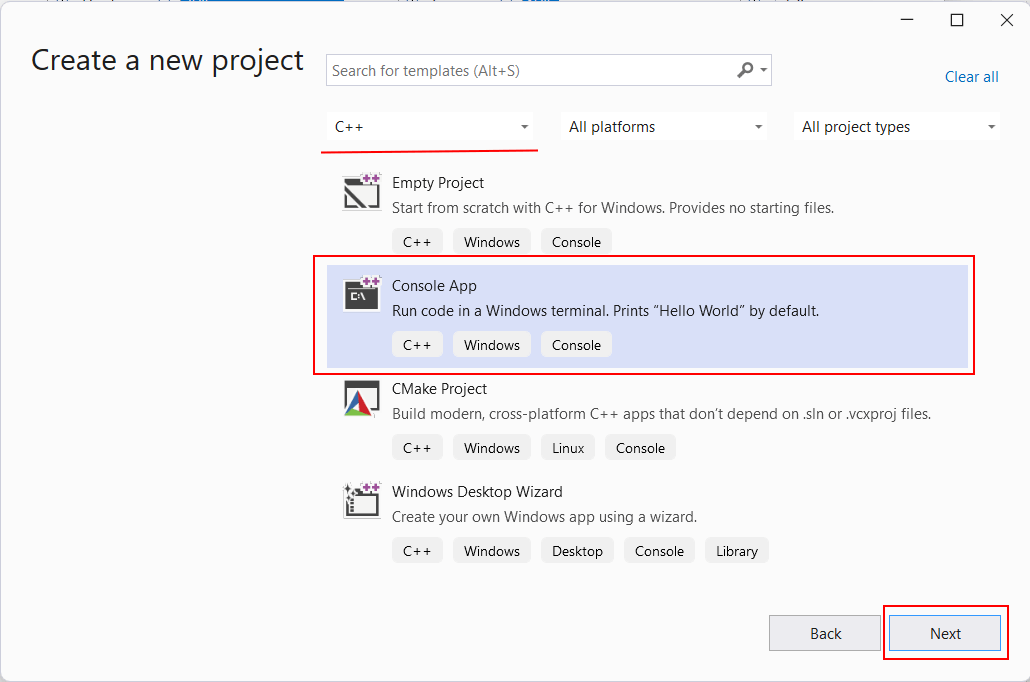
В центральной части окна в качестве типа проекта выберем Empty Project, а внизу окна в поле для имени проекта дадим проекту имя HelloApp и нажмем на ОК для создания проекта.
После этого Visual Studio создаст пустой проект. Добавим в него текстовый файл для набора исходного кода. Для этого в окне Solution Explorer (Обозреватель решений)
нажмем правой кнопкой мыши на узел Source Files и в контекстом меню выберем Add -> New Item…:

Затем нам откроется окно для добавления нового элемента:

Здесь нам надо выбрать пункт C++ File(.cpp), а внизу окна укажем для файла имя Hello.cpp. Как правило,
исходные файлы на C++ имеют расширение .сpp.
После добавления файла изменим опции проекта. Для этого перейдем к пункту меню Project -> Properties:

И в открывшемся окне свойств проекта в левой части перейдем к секции Linker ->System и далее для
поля SubSystem установим значение Console(/SUBSYSTEM:CONSOLE), выбрав нужный элемент в списке:

Тем самым мы указываем, что мы хотим создать консольное приложение. После установки этого значения нажмем на кнопку «Применить», чтобы новые настройки конфигурации вступили в силу.
После добавления файла проект будет иметь следующую структуру:

Вкратце пробежимся по этой структуре. Окно Solution Explorer содержит в решение. В данном случае оно называется HelloApp. Решение может содержать
несколько проектов. По умолчанию у нас один проект, который имеет то же имя — HelloApp. В проекте есть ряд узлов:
-
External Dependencies: отображает файлы, которые используются в файлах исходного кода, но не являются частью проекта
-
Header Files: предназначена для хранения заголовочных файлов с расширением .h
-
Resource Files: предназначена для хранения файлов ресурсов, например, изображений
-
Source Files: хранит файлы с исходным кодом
Теперь собственно создадим первую программу и определим в файле Hello.cpp простейший код, который будет выводить строку на консоль:
#include <iostream>        		// подключаем заголовочный файл iostream

int main()							// определяем функцию main
{									// начало функции
	std::cout << "Hello World!";	// выводим строку на консоль
	return 0;						// выходим из функции
}
Здесь использован весь тот код, который был рассмотрен в предыдущих темах про компиляцию с помощью g++.
Теперь запустим программу. Для этого в Visual Studio нажмем на сочетание клавиш Ctrl+F5 или выберем пункт меню Debug -> Start Without Debugging:

И в итоге Visual Studio передаст исходный код компилятору, который скомпилирует из кода исполняемый файл exe, который потом будет запущен на выполнение.
И мы увидим на запущенной консоли наше сообщение:

После этого на жестком диске в проекте в папке Debug можно увидеть скомпилированный файл exe, который мы можем запускать независимо от Visual Studio:
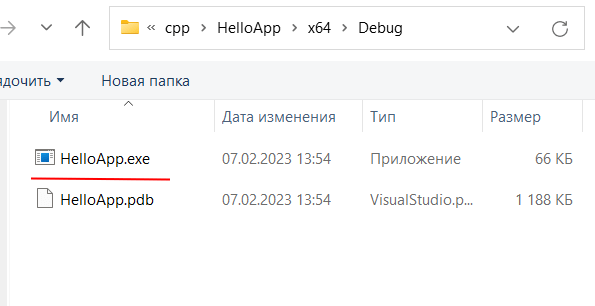
В данном случае файл HelloApp.exe как раз и представляет скомпилированный исполняемый файл.
И, кроме того, в той же папке автоматически генерируются два вспомогательных файла:
-
HelloApp.ilk: файл «incremental linker», который используется компоновщиком для ускорения компоновки
-
HelloApp.pdb: файл, который содержит отладочную информацию
26 декабря 2017
Время чтения: 3 минуты
Visual Studio — одна из замечательнейших IDE для написания C/C++ кода. В ней пишут многие программисты и многие учебные заведения используют её для обучения программированию, а потому будет полезно знать, как создавать в ней новый проект для разработки своей C/C++ программы.
- Для создания нового проекта запустите Visual Studio, выберете в верхнем меню
файл,Создать,Проект, после чего откроется окно с выбором типа проекта. - Найдите в левом меню окна пункт
Visual C++,Классическое приложение Windowsи выберете его, а в правом окне выберетеКонсольное приложение Windows. - В поле ввода «Имя» введите название вашего проекта и нажмите кнопку «OK».
- Visual Studio может подвиснуть на некоторое время, но вскоре появится окно для ввода кода программы на C/C++ с готовой функцией main
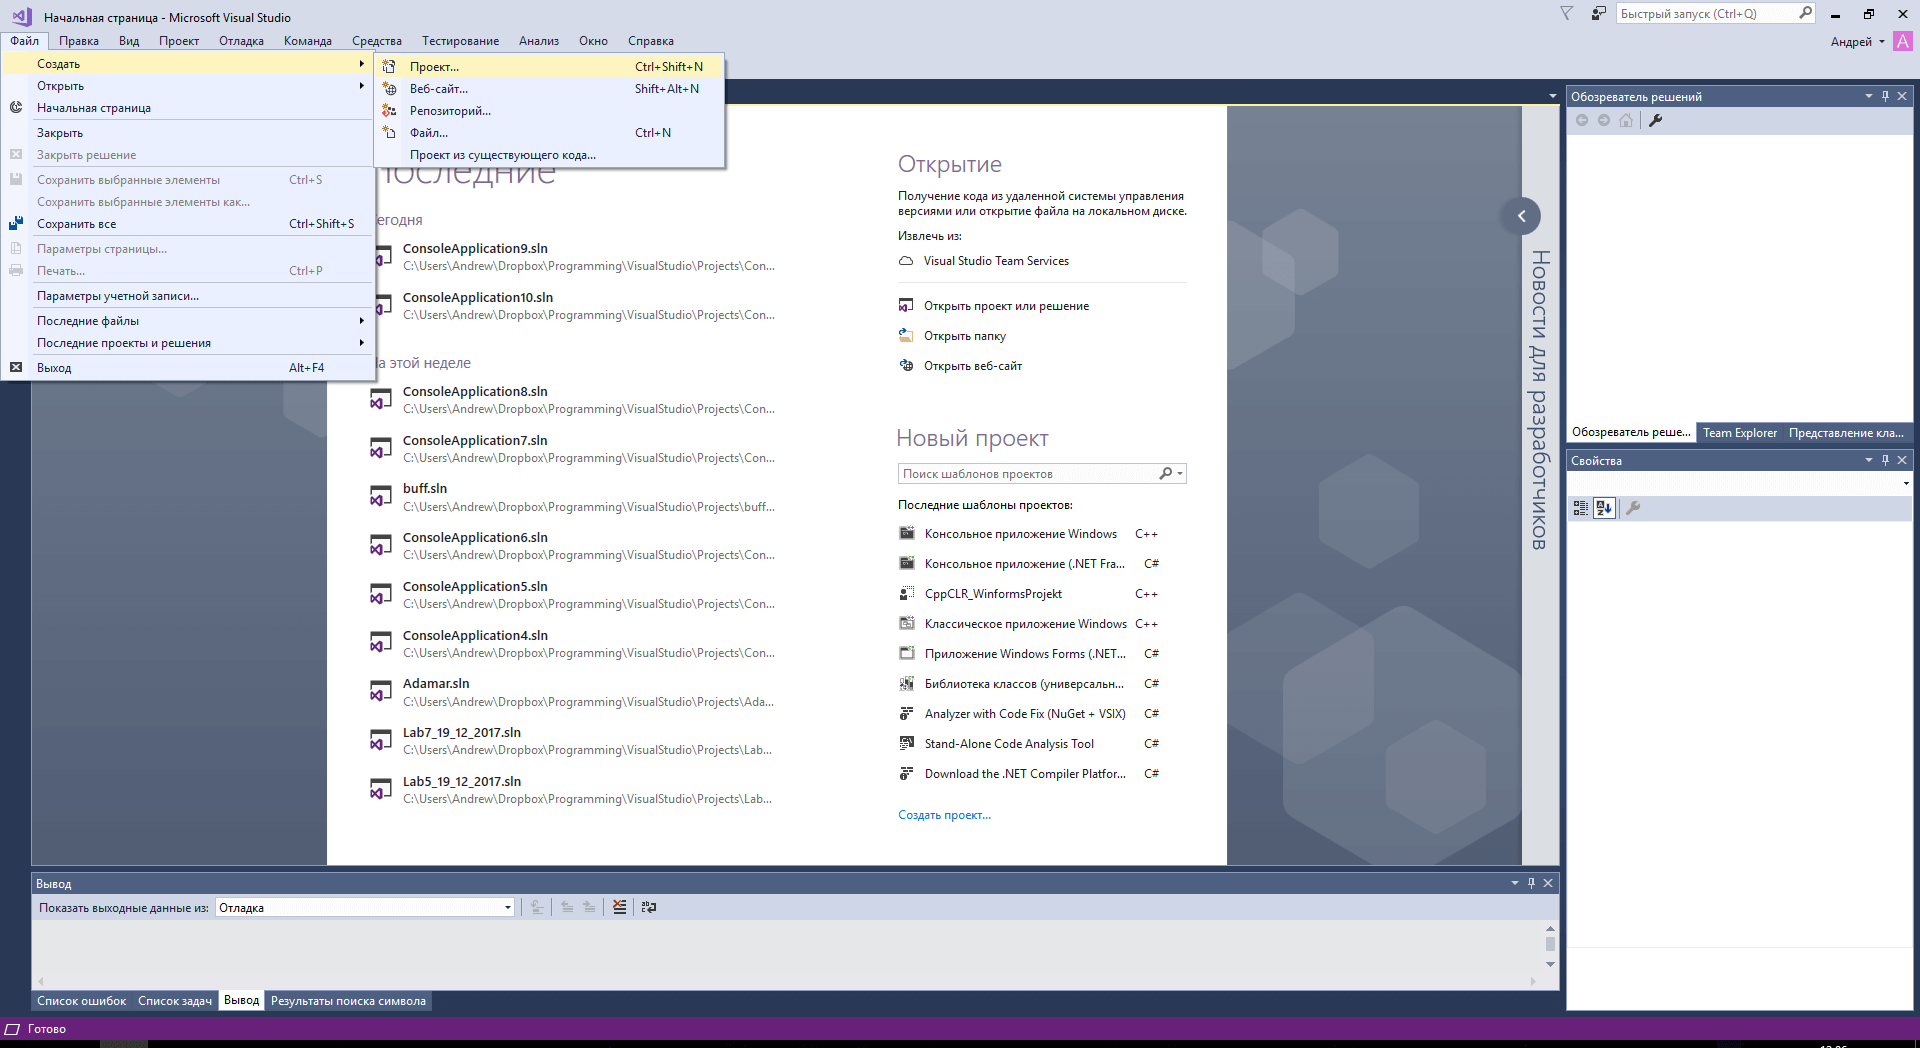
Создание проекта в VS
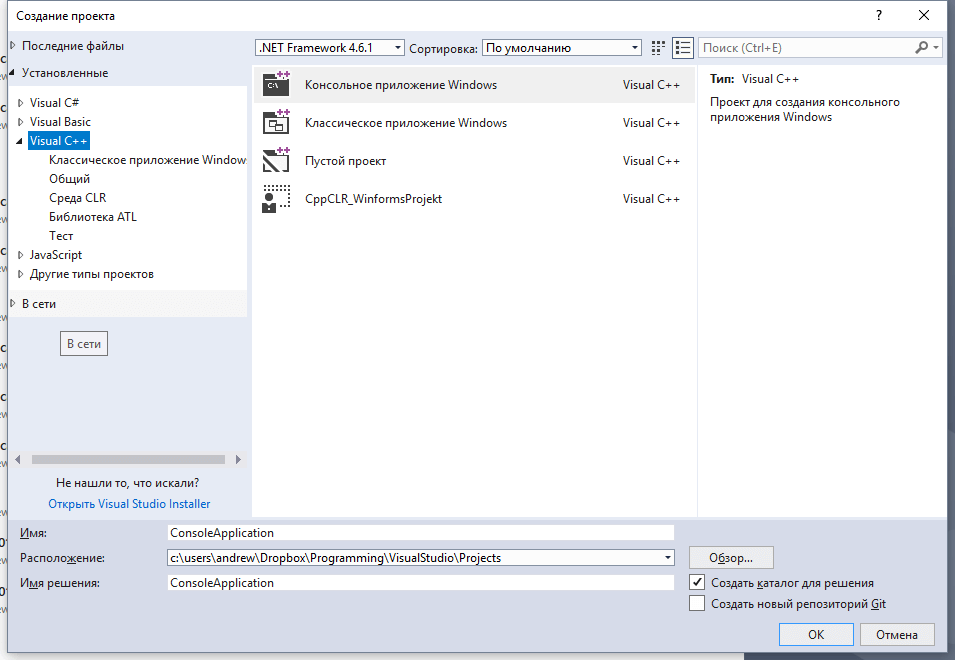
Ввод имени проекта и решения
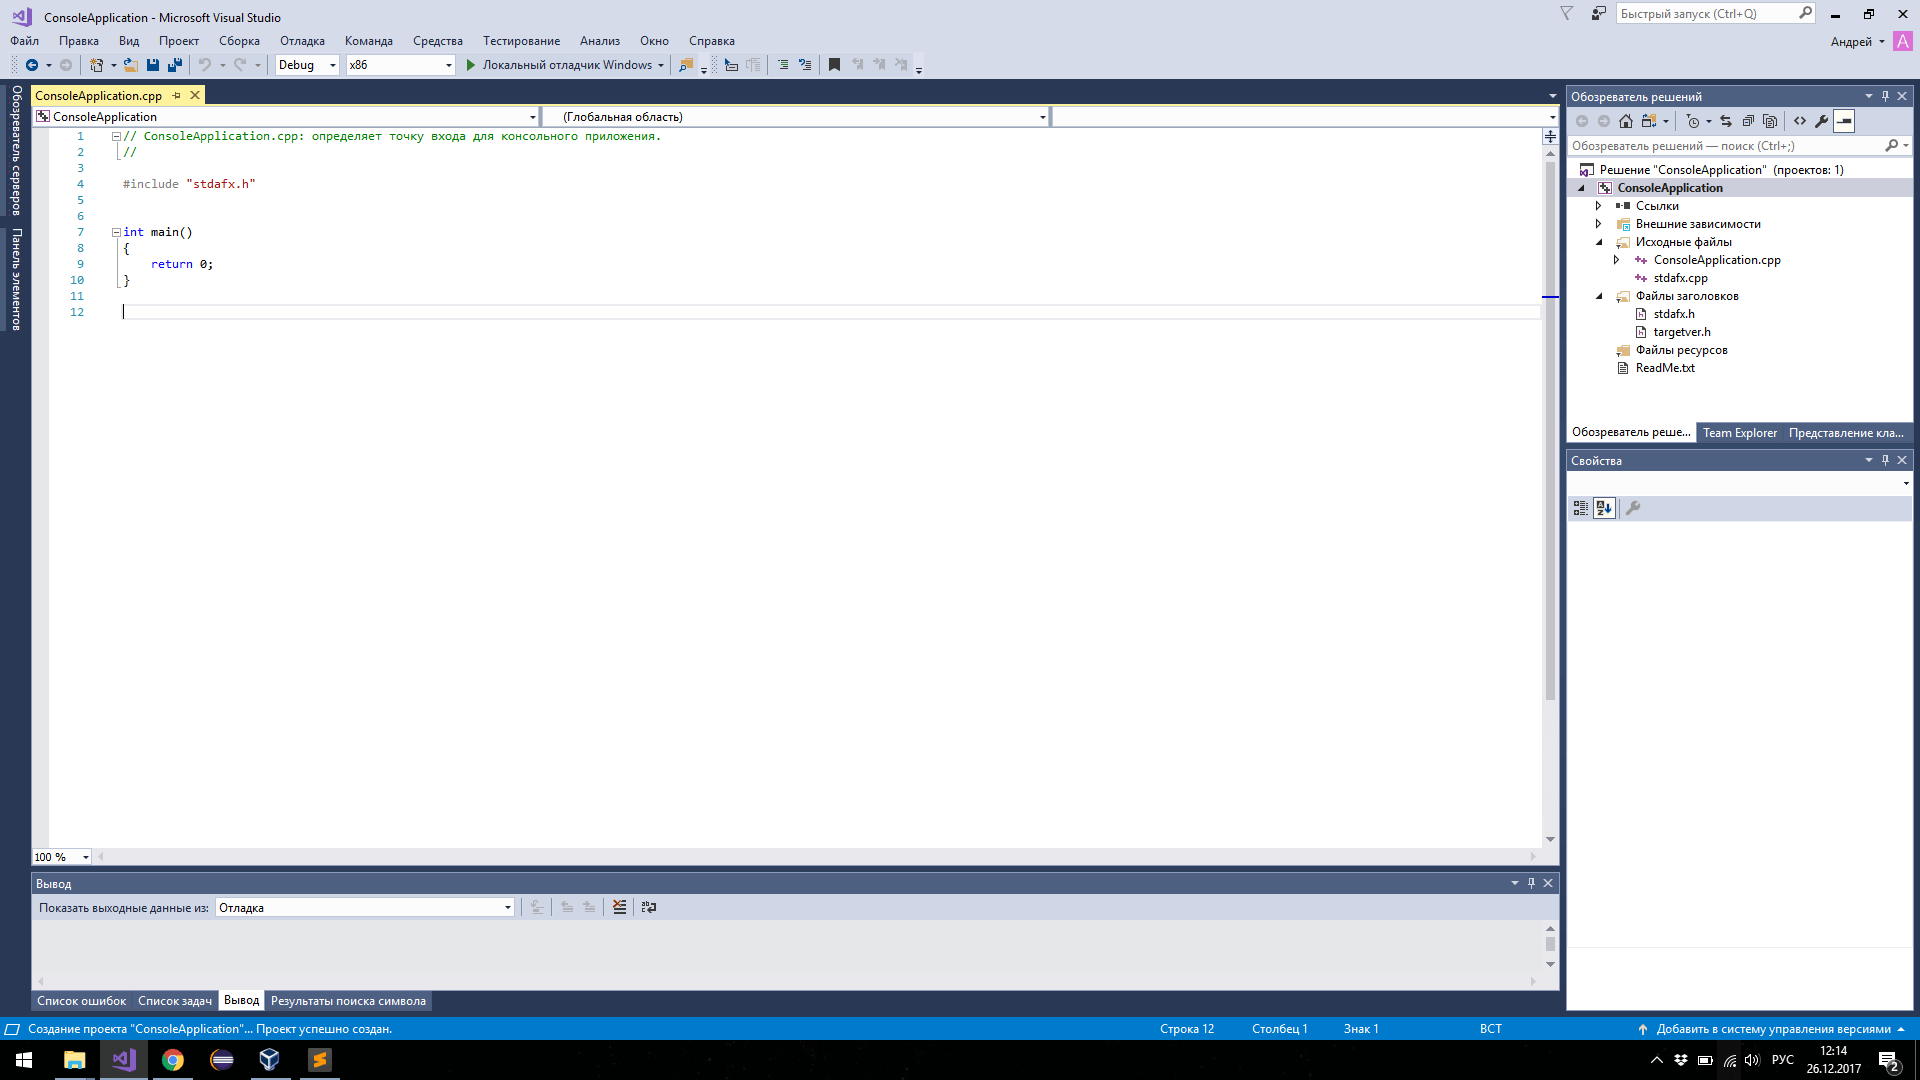
Окно с редактором кода
Вот таким простым способом вы можете создать проект в Visual Studio и начать писать код на C или C++!

Программист, сооснователь programforyou.ru, в постоянном поиске новых задач и алгоритмов
Языки программирования: Python, C, C++, Pascal, C#, Javascript
Выпускник МГУ им. М.В. Ломоносова
Windows Forms — это технология, которая позволяет создавать графические приложения для операционной системы Windows. Она является частью .NET Framework и позволяет разрабатывать приложения на различных языках программирования, в том числе на C++.
Microsoft Visual Studio 2022 — это интегрированная среда разработки (IDE), которая позволяет разрабатывать различные приложения для Windows, включая Windows Forms приложения на C++.
Шаг 1: Установка Microsoft Visual Studio 2022
Первым шагом для создания Windows Forms приложения на C++ является установка Microsoft Visual Studio 2022. Вы можете скачать ее с официального сайта Microsoft https://visualstudio.microsoft.com
Шаг 2: Создание нового проекта
После установки Microsoft Visual Studio 2022 мы можем создать новый проект. Для этого нужно выбрать пункт меню «Файл» -> «Создать» -> «Проект», в открывшемся окне выбрать «Windows Desktop» в категории «Типы проектов», а затем «С++/CLI» в категории «Языки». Затем выберите «Приложение Windows Forms (.NET Framework)» и нажмите «Создать».
Шаг 3: Работа с формой
После создания проекта мы можем начать работу с формой. По умолчанию в проекте уже создана форма «Form1». Мы можем добавлять элементы управления (кнопки, текстовые поля, таблицы и т.д.) на форму, перемещать их, изменять свойства.
Шаг 4: Написание кода
Для написания кода мы можем использовать язык C++. В Visual Studio 2022 есть встроенный редактор кода, который позволяет автодополнение, форматирование и отладку кода.
Пример кода:
#include "stdafx.h"
#include "Form1.h"

using namespace System;
using namespace System::Windows::Forms;

[STAThreadAttribute]
void main(cli::array<String^>^ args)
{
    Application::EnableVisualStyles();
    Application::SetCompatibleTextRenderingDefault(false);
    Form1^ form = gcnew Form1();
    Application::Run(form);
}
Шаг 5: Сборка и запуск приложения
После написания кода мы можем собрать и запустить приложение. Для этого нужно нажать кнопку «Сборка» в меню Visual Studio 2022, а затем нажать «Запуск без отладки» или «Отладка».
Вывод
Создание Windows Forms приложений на C++ в Microsoft Visual Studio 2022 может показаться сложным на первый взгляд, но со временем вы освоите эту технологию и сможете легко создавать графические приложения для операционной системы Windows.
Последнее обновление: 11.11.2022
Для создания графических приложений на C# можно использовать .NET CLI, но также можно
использовать бесплатную и полнофункциональную среду разработки — Visual Studio Community 2022, которая в ряде случаев облегчает проектирование
приложения. Так, загрузим установщик Visual Studio по адресу:
https://www.visualstudio.com/en-us/downloads.

Чтобы добавить в Visual Studio поддержку проектов для Windows Forms и C# и .NET 7, в программе установки среди рабочих нагрузок нужно
выбрать только пункт Разработка классических приложений .NET. Можно выбрать и больше опций или вообще все опции, однако стоит
учитывать свободный размер на жестком диске — чем больше опций будет выбрано, соответственно тем больше места на диске будет занято.
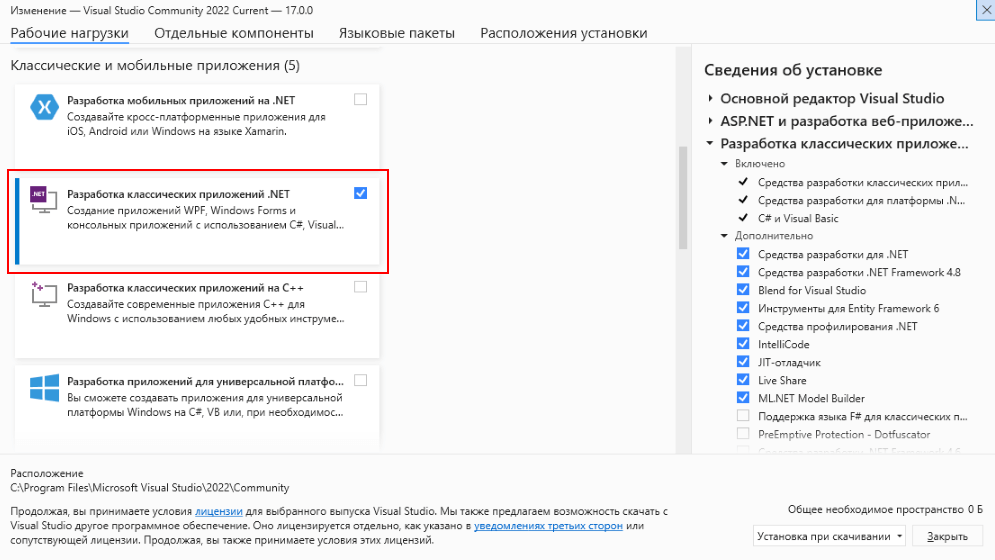
После установки среды и всех ее компонентов, запустим Visual Studio и создадим проект графического приложения.
На стартовом экране выберем Create a new project (Создать новый проект)
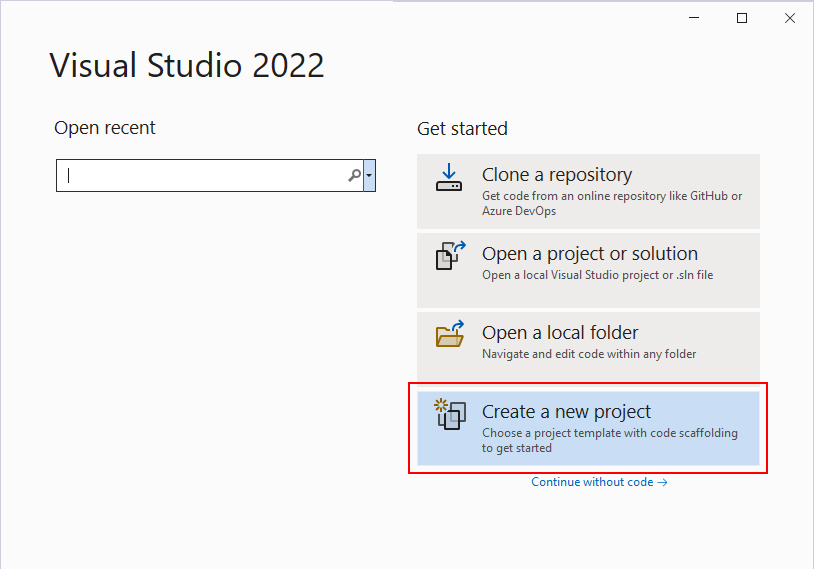
На следующем окне в качестве типа проекта выберем Windows Forms App:

Стоит отметить, что среди шаблонов можно увидеть еще тип Windows Forms App (.NET Framework) — его НЕ надо выбирать, необходим именно тип
Windows Forms App.
Далее на следующем этапе нам будет предложено указать имя проекта и каталог, где будет располагаться проект.
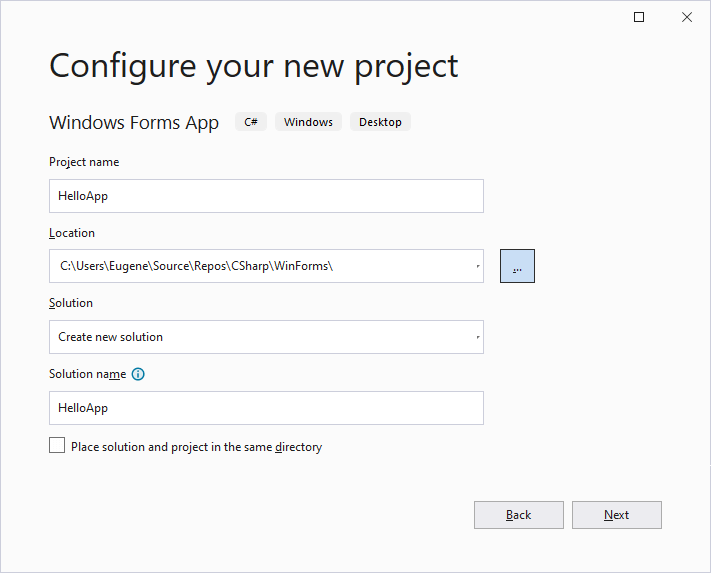
В поле Project Name дадим проекту какое-либо название. В моем случае это HelloApp.
На следующем окне Visual Studio предложит нам выбрать версию .NET, которая будет использоваться для проекта. Выберем последнюю на данный момент версию — .NET 7.0 и нажмен на кнопку Create (Создать) для создания проекта.
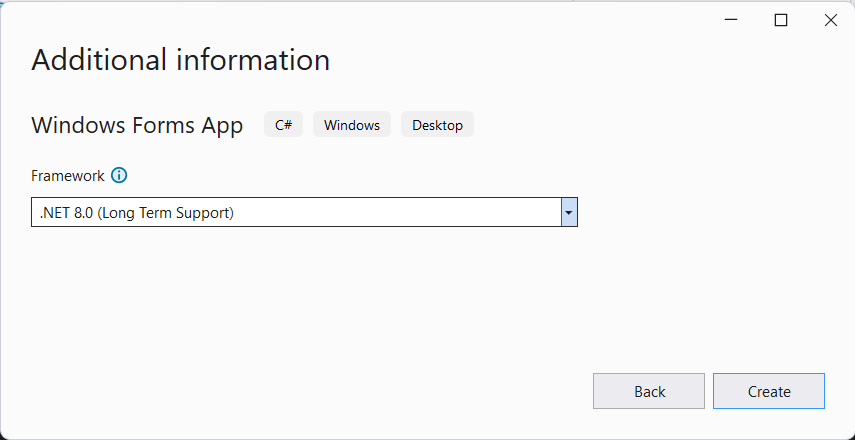
После этого Visual Studio откроет наш проект с созданными по умолчанию файлами:
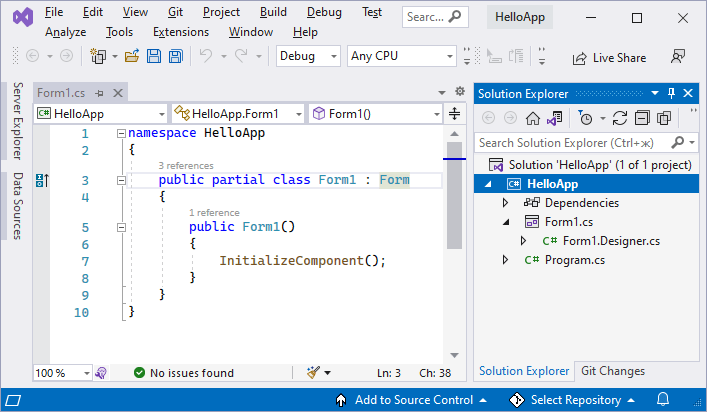
Справа находится окно Solution Explorer, в котором можно увидеть структуру нашего проекта. Практически этот тот же проект, который создается с
помощью .NET CLI:
-
Dependencies — это узел содержит сборки dll, которые добавлены в проект по умолчанию.
Эти сборки как раз содержат классы библиотеки .NET, которые будет использовать C# -
Form1.Designer.cs: он содержит определение компонентов формы, добавленных
на форму в графическом дизайнере -
Далее идет файл единственной в проекте формы — Form1.cs, который по умолчанию открыт в центральном окне.
-
Program.cs определяет точку входа в приложение
Запуск приложения
Чтобы запустить приложение в режиме отладки, нажмем на клавишу F5 или на зеленую стрелочку на панели Visual Studio.
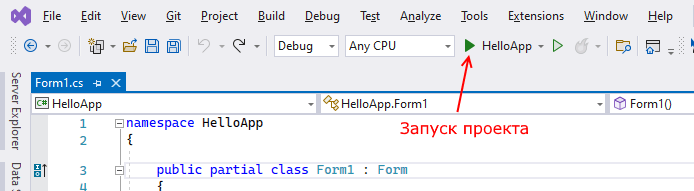
После этого запустится пустая форма Form1 по умолчанию.

После запуска приложения студия компилирует его в файл с расширением exe. Найти данный файл можно, зайдя в папку проекта и далее в каталог
\bin\Debug\net7.0-windows
Рассмотрев вкратце создание проекта графического приложения, мы можем перейти к обзору основных компонентов и начнем мы с форм.