Outlook для Microsoft 365 Outlook 2019 Outlook 2016 Outlook 2013 Outlook 2010 Outlook 2007 Еще…Меньше
Для синхронизации календарей между Outlook и apple iPhone или iPod touch требуется Apple iTunes. Вы можете выбрать, какие элементы нужно синхронизировать, во время начальной настройки.
После настройки при каждом подключении iPhone или iPod touch к вашему компьютеру изменения, внесенные на компьютере или устройстве, синхронизируются.
Примечание: Рекомендуем убедиться в том, что программное обеспечение на устройстве Apple и на компьютере обновлено. В качестве меры предосторожности вы можете создать резервную копию данных Outlook перед началом работы.
Синхронизация календаря Outlook с устройством iOS
-
Подключите iPhone или iPod touch к компьютеру с помощью кабеля, который прилагался к устройству, или поместите его в Apple Universal Dock.
При подключении к компьютеру автоматически открывается приложение iTunes.
-
В списке источников iTunes в разделе Устройства выберите iPhone или iPod touch.
-
Откройте вкладку Сведения.
-
В разделе Календари установите флажок Синхронизировать календари с и выберите Outlook.
-
Выполните одно из указанных ниже действий.
-
Чтобы синхронизировать все календари, установите переключатель Все календари.
-
Чтобы ограничить синхронизируемые календари, установите переключатель Выбранные календари и щелкните нужные календари.
Примечание: Чтобы выбрать несколько календарей, щелкните их имена, удерживая нажатой клавишу CTRL.
-
-
Нажмите Применить.
Поддержка синхронизации с Outlook для устройств iPhone и iPod touch, а также для приложения iTunes предоставлена службой поддержки Apple.
Создание резервной копии данных Outlook
При создании резервной копии данных Outlook вы создаете (экспортируете) файл данных Outlook (PST-файл), который используется для учетных записей протокол POP3 и IMAP.
-
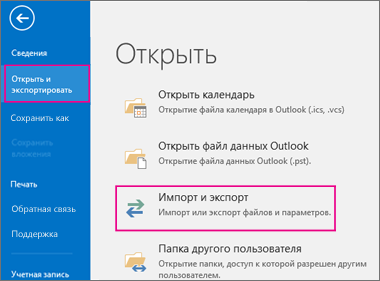
На вкладке Файл щелкните Открыть и экспортировать > Импорт и экспорт.

-
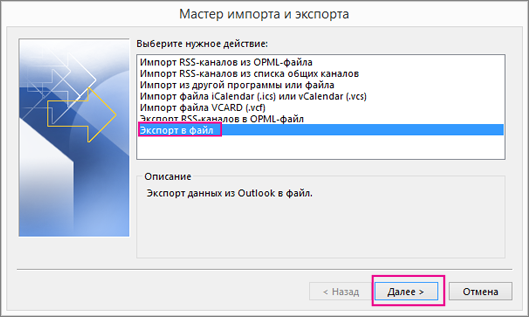
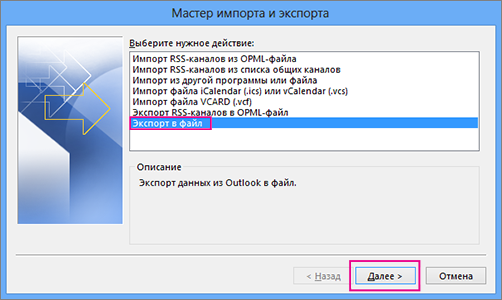
В мастере импорта и экспорта выберите Экспорт в файл и нажмите кнопку Далее.
-
В списке Создать файл следующего типа щелкните Файл данных Outlook (.pst) и нажмите кнопку Далее.
-
В разделе Экспортировать из папки выберите нужную папку. Будут экспортированы только данные, хранящиеся в ней.
-
Установите флажок Включить вложенные папки, чтобы экспортировать все данные учетной записи (календарь, контакты и почтовый ящик), а затем нажмите кнопку Далее.
-
В разделе Сохранить файл как нажмите кнопку Обзор и укажите, куда нужно сохранить Файл данных Outlook (PST). Введите имя файла и нажмите кнопку ОК, чтобы продолжить.
Примечание: Если вы уже использовали функцию экспорта, здесь будут указаны предыдущие папка и имя файла. Введите другое имя файла и нажмите кнопку OК.
-
Если вы экспортируете данные в уже существующий Файл данных Outlook (PST), в разделе Настройка укажите, что нужно делать, если экспортируемые элементы уже содержатся в этом файле.
-
Нажмите кнопку Готово.

В Outlook сразу начнется экспорт, если только не требуется создать новый Файл данных Outlook (PST) или экспорт не выполняется в файл, защищенный паролем.
-
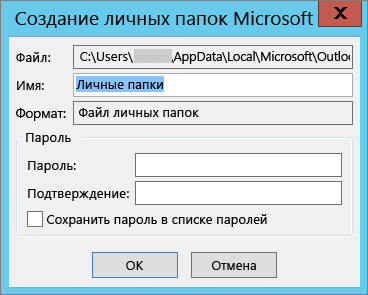
Создаваемый Файл данных Outlook (PST) можно защитить паролем. В диалоговом окне Создание файла данных Outlook введите пароль в поля Пароль и Подтверждение и нажмите кнопку ОК. В диалоговом окне Пароль к файлу данных Outlook введите пароль и нажмите кнопку ОК.
-
При экспорте в уже существующий Файл данных Outlook (PST), защищенный паролем, в диалоговом окне Пароль к файлу данных Outlook введите пароль и нажмите кнопку ОК.
Данные Outlook, сохраненные в PST-файле, можно перенести в другое место. Например, вы можете сохранить PST-файл в OneDrive или на USB-накопитель, а затем скачать его на другой компьютер или устройство. Дополнительные сведения см. в статье Импорт сообщений, контактов и календаря в Outlook.
-
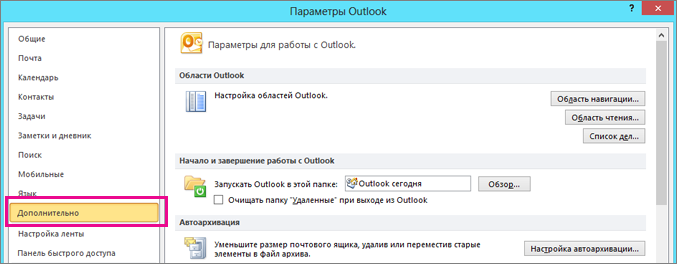
На вкладке Файл выберите Параметры > Дополнительно.
-
В разделе Экспорт выберите Экспорт.
-
Выберите Экспорт в файл и нажмите кнопку Далее.
-
Выберите Файл данных Outlook (.pst) и нажмите кнопку Далее.
-
В разделе Экспортировать из папки выберите нужную папку. Будут экспортированы только данные, хранящиеся в ней.
-
Установите флажок Включить вложенные папки, чтобы экспортировать все данные учетной записи (календарь, контакты и почтовый ящик), а затем нажмите кнопку Далее.
-
Нажмите кнопку Обзор, выберите расположение, в котором будет сохранен PST-файл, и укажите имя файла. Нажмите кнопку ОК, чтобы продолжить.
Примечание: Если вы уже использовали функцию экспорта, здесь будут указаны предыдущие папка и имя файла. Чтобы создать новый файл, а не использовать уже существующий, измените имя файла.
-
Если данные экспортируются в уже существующий PST-файл, в разделе Параметры укажите, что следует делать, если экспортируемые элементы уже содержатся в этом файле.
-
Нажмите кнопку Готово.

Экспорт начнется сразу же (за исключением ситуации, когда требуется создать новый PST-файл либо экспорт выполняется в уже существующий файл, защищенный паролем).
-
При создании нового PST-файла его можно защитить паролем. В диалоговом окне Создание файла данных Outlook введите пароль в поля Пароль и Подтверждение и нажмите кнопку ОК. В диалоговом окне Пароль к файлу данных Outlook введите пароль и нажмите кнопку ОК.
-
При экспорте в уже существующий PST-файл, защищенный паролем, в диалоговом окне Пароль к файлу данных Outlook введите пароль и нажмите кнопку ОК.
Данные Outlook, сохраненные в PST-файле, можно перенести в другое место. Например, вы можете сохранить PST-файл в OneDrive или на USB-накопитель, а затем скачать его на другой компьютер или устройство. Дополнительные сведения см. в статье Импорт сообщений, контактов и календаря в Outlook.
-
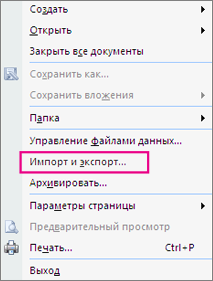
На вкладке Файл выберите Импорт и экспорт.
-
В разделе Выберите нужное действие щелкните Экспорт в файл и нажмите кнопку Далее.
-
Выберите Файл личных папок (.pst) и нажмите кнопку Далее.
-
Выберите нужную папку. Будут экспортированы только данные, хранящиеся в ней.
-
Установите флажок Включить вложенные папки, чтобы экспортировать все данные учетной записи (календарь, контакты и почтовый ящик), а затем нажмите кнопку Далее.
-
Нажмите кнопку Обзор, выберите расположение, в котором будет сохранен PST-файл, и укажите имя файла. Нажмите кнопку ОК, чтобы продолжить.
Примечание: Если вы уже использовали функцию экспорта, здесь будут указаны предыдущие папка и имя файла. Чтобы создать новый файл, а не использовать уже существующий, измените имя файла.
-
Если данные экспортируются в уже существующий PST-файл, в разделе Параметры укажите, что следует делать, если экспортируемые элементы уже содержатся в этом файле.
-
Нажмите кнопку Готово.
Экспорт начнется сразу же, за исключением ситуации, когда требуется создать новый PST-файл либо экспорт выполняется в уже существующий файл, защищенный паролем. В таких случаях откроется следующее диалоговое окно:
Нажмите кнопку ОК, если вы не хотите защищать файл паролем. В противном случае:
-
Если вы хотите защитить PST-файл паролем: введите пароль в поля «Пароль» и «Подтверждение» и нажмите кнопку ОК. В диалоговом окне «Пароль к файлу данных Outlook» введите пароль и нажмите кнопку ОК.
-
При экспорте в уже существующий PST-файл, защищенный паролем, в диалоговом окне Пароль к файлу данных Outlook введите пароль и нажмите кнопку ОК.
Нужна дополнительная помощь?
Нужны дополнительные параметры?
Изучите преимущества подписки, просмотрите учебные курсы, узнайте, как защитить свое устройство и т. д.
В сообществах можно задавать вопросы и отвечать на них, отправлять отзывы и консультироваться с экспертами разных профилей.
Найдите решения распространенных проблем или получите помощь от агента поддержки.
by Matthew Adams
Matthew is a freelancer who has produced a variety of articles on various topics related to technology. His main focus is the Windows OS and all the things… read more
Updated on
- If you’re wondering how to access Apple Calendar on Windows 10 PCs, there are a few ways you can do so.
- Sign in to Windows 10 with an iCloud account and you should be able to access Apple Calendar out of the box.
- You can get access to iCloud Calendar after downloading and installing the required software.
- If you can’t add iCloud account to Windows 10, this guide will help you find a couple of alternative ways to do that.

Apple Calendar is an invaluable app you can utilize via the iCloud service. As Calendar is an iCloud app, you can sync it with Microsoft apps.
You can access your Apple Calendar via the Calendar, Mail, and Outlook Windows 10 apps. This is how to access Apple Calendar on Windows 10.
How can I access Apple Calendar on Windows 10?
1. Sync Apple iCloud Calendar via Settings
- Press Windows 10’s Start button, and then click Settings on the menu.
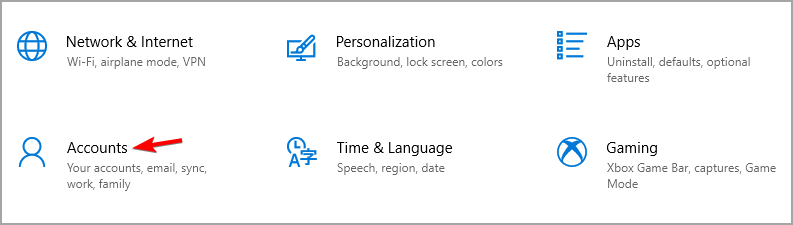
- Select Accounts in Settings.

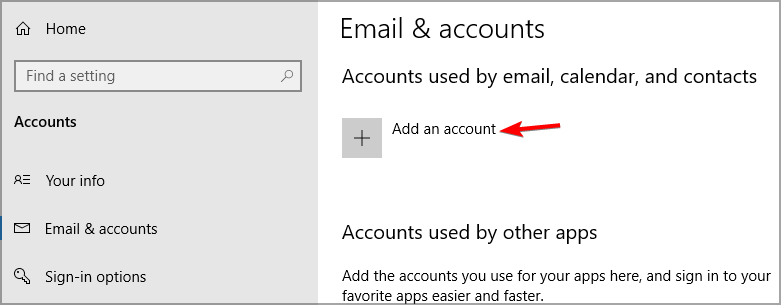
- Next, click the Email & accounts tab shown directly below.
- Press the Add an account button there.

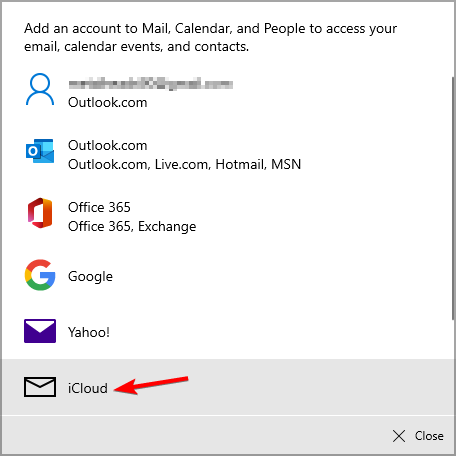
- Next, select iCloud on the window that opens.

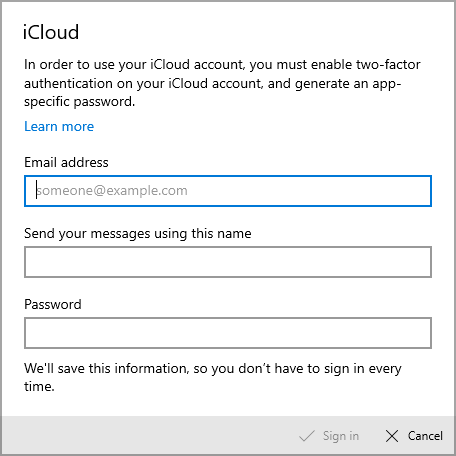
- Input your iCloud email address and login details within the required text boxes.
- Then click the Sign in option.
- Press the Done button to confirm
- Thereafter, click the Calendar app on your Start menu.
- Click Get started on the Calendar app window.
- Press the Ready to go button to continue.
- You should see an iCloud checkbox on the left of the window. Now you can view and update your Apple iCloud Calendar within the Calendar app.
If you want to access Apple calendar on Windows 10 PC, you can do that by signing it with your iCloud account and the calendar should be added automatically.
2. Install the iCloud software
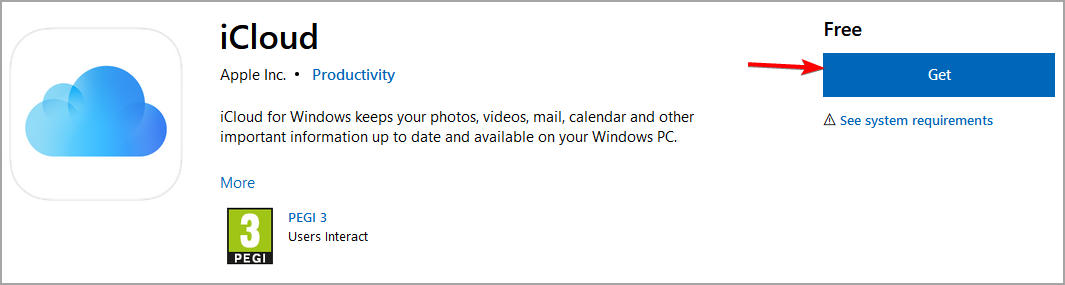
- Open the iCloud MS Store page (linked below) in a web browser.
- Press the Get button on that page.

- Click the Open Microsoft Store button in the prompt.
- Press the Get button within the MS Store app to download and install the app.
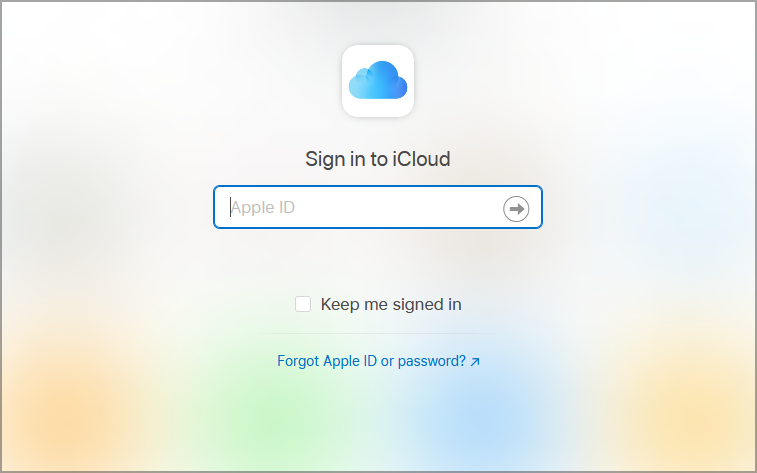
- Open the iCloud for Windows app.
- Then you’ll need to sign in to iCloud with your Apple ID & password.
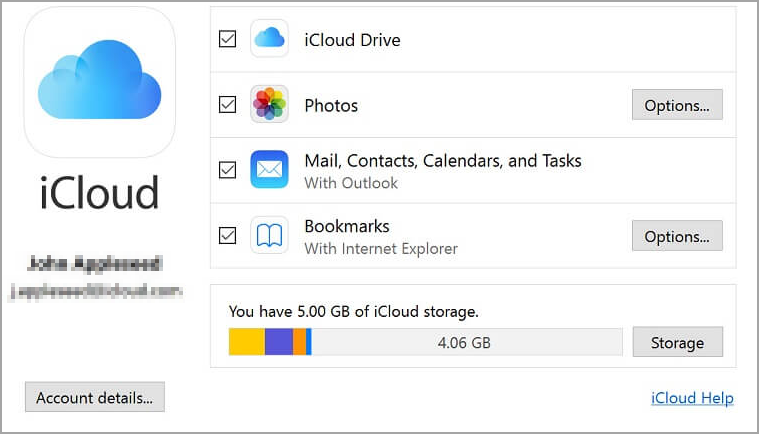
- Thereafter, select the Mail, Contacts, Calendars, and Tasks (with Outlook) checkbox within the iCloud window.

- Select the Apply option to sync the Apple Calendar.
- Next, open your Outlook software.
- Click the Calendar button in Outlook.
- You should be able to see an iCloud checkbox in Outlook. That checkbox must be checked for you to view your Apple Calendar in Outlook.
⇒ Get iCloud for Windows
3. Log in to iCloud web app
- Open the iCloud page in a browser, and sign in with your Apple credentials from there.

- Then you can click Calendar within iCloud to view and update it from your Windows 10 browser.
Alternatively, you can log in to the iCloud web app to access Apple Calendar in Windows 10 by following the instructions from above.
So, it’s pretty straightforward to sync and access your Apple Calendar on Windows 10. With the iCloud syncing, you can view and update your Apple Calendar across Windows, iOS, and Android mobile and PC devices.
Did you find this guide helpful? Let us know in the comments section below.
![]()
Apple and Microsoft OS were not friendly enough to synchronize iCloud calendars on Windows Operating system. Apple hesitates to break its echo system and limited real-time synchronization and other features in between MAC and iOS devices.
We mentioned a couple of workarounds to sync iCloud calendar with Windows Desktop Calendar client with CalDAV and other offline methods early in our articles. Apple released its application for Windows users to integrate iCloud features with Windows OS. Unfortunately, “iCloud for Windows” failed to give the same user experience that enjoyed by Mac users.
Editor’s Note: The solution required MS Office 365 or Outlook 2010 and above to work Please see more details at Apple’s Support Page.
Windows 10 made a dramatic change in desktop Calendar Application. The best of them that I can say, Windows 10 calendar app can sync and display multiple iCloud calendars in a single window. This new baked Windows Calendar app is giving an excellent UI experience like a MAC Calendar with iCloud Calendars. If you want to sync a Google calendar instead of iCloud calendar, please see our solution to Setup Google Calendar in New Windows 10 Calendar and Mail App
The setup procedure to sync iCloud calendars in Windows 10 is straightforward, basically a two steps procedure. Once you setup iCloud on Windows, you can create events in Windows or iOS devices and both will sync each other within seconds, work like a charm.
Set up iCloud on Windows Calendar
Let’s see how to easy to bring the iCloud calendar to your PC. First, open the calendar app on the Windows 10 operating system. Now click on the Settings icon (gear) on Windows calendar at the left sidebar.
Add iCloud on Windows
To add iCloud calendar follow Windows Calendar > Settings > Manage Accounts > Add account > Choose an account > iCloud.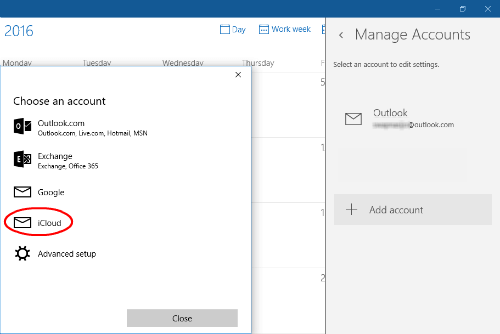
Now enter your iCloud email address ending with me.com. We found the calendar syncing with me.com rather than iCloud.com.
Enter iCloud Credentials
If you have an iCloud account with [email protected], you can give [email protected] and type the same password that you use to login to your iCloud account. Click on Sign-in button and click on Done button on next window.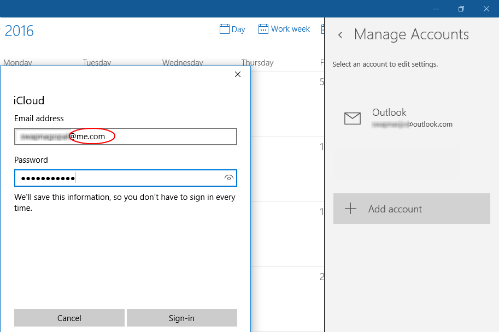
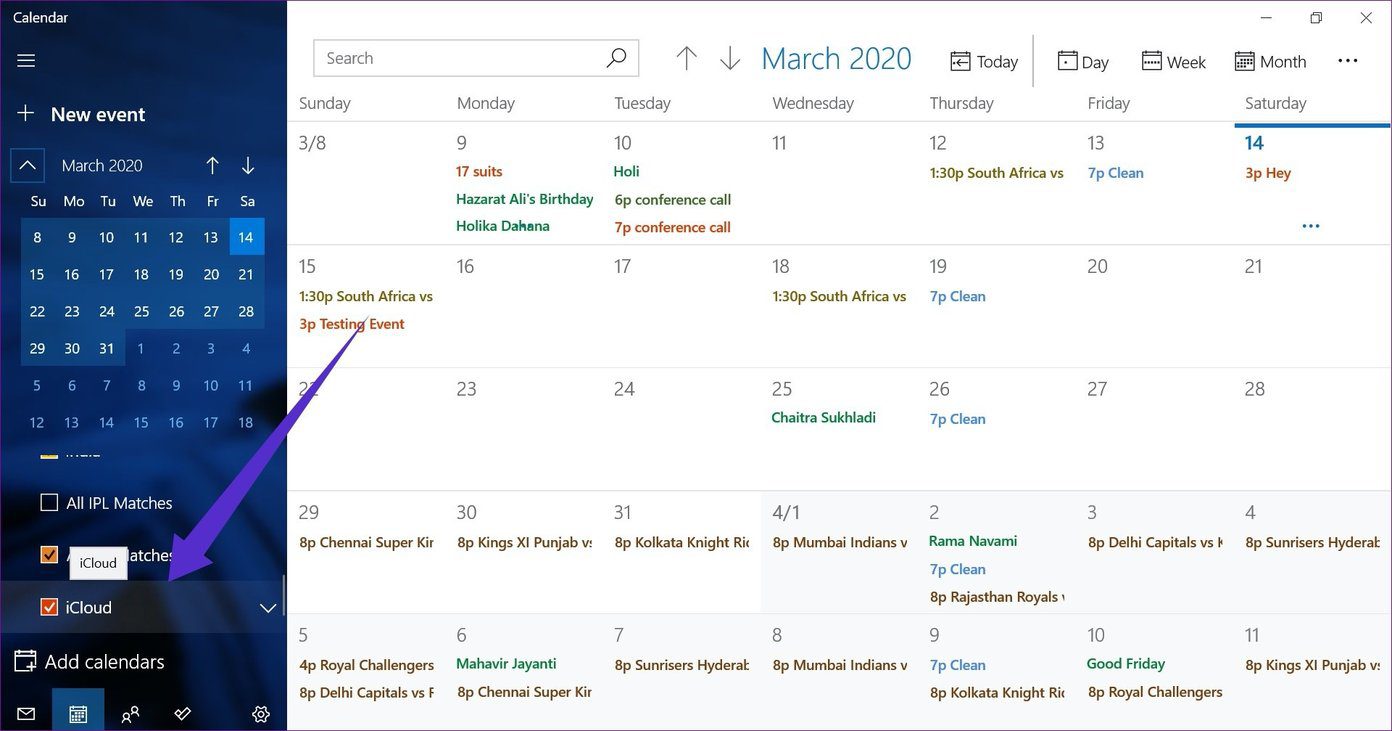
This will lead back you to the main Windows calendar screen. On the left sidebar you can see a new iCloud account that you added with all the primary and secondary iCloud calendars underneath it.
Add Secondary Calendars
These secondary iCloud calendars are not owned by the current user. Those are typically shared calendars from other users. Windows had the issue before for synching secondary iCloud calendars in early versions, but here everything was smooth like a breeze!
If you have multiple iCloud calendars, you can see all of them in one calendar tab, and you can turn off/on the calendars from Calendar sidebar.
Related: How to Setup iCloud email on Windows 10
Create iCloud Event on Windows Calendar
You can create new events on Windows Calendar by clicking left button on any date. You can fill out details here or click on more details to pop out as a new window.
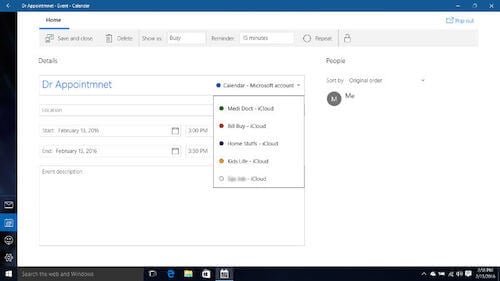 On the new event window, under details, you can provide the title of the calendar. On the same place right side of the Title bar, you can select one of the iCloud calendars that you want to create a new event. Please fill out the other details and date before Save and close the new calendar window.
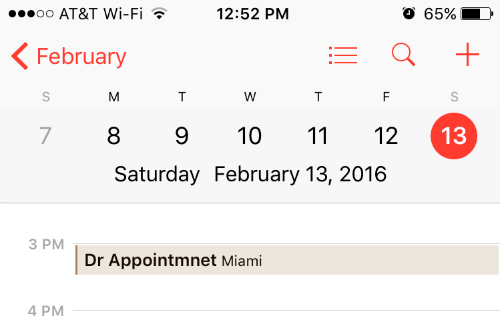
Once you click on the Save and close button, you can see the event created on the Calendar app. Now you can check the calendar app on your iPhone or iPad and see it synchronized the same event on your iDevice.
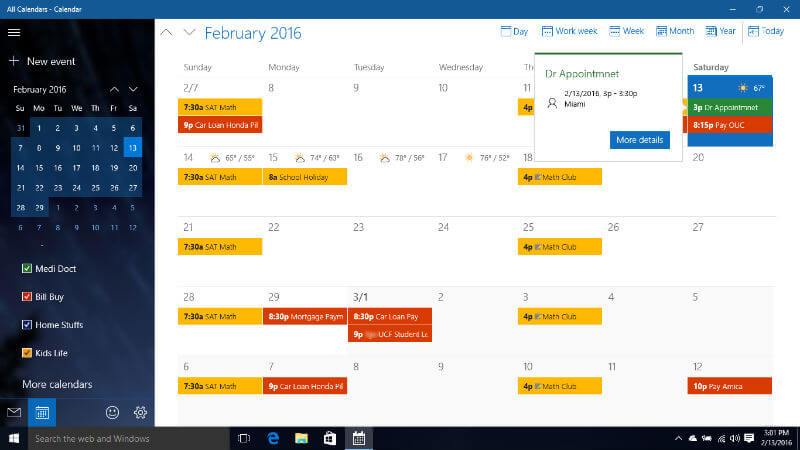
The final iCloud calendar will come with color-coded for each schedule, and the Windows Calendar app will look like above. This solution to synchronize iCloud calendar on Windows 10 is a pretty easy and smart decision from Microsoft. Those who like iPhone and Windows computer can sync their calendar in their system and iPhone in real-time.
Disclosure: Mashtips is supported by its audience. As an Amazon Associate I earn from qualifying purchases.
Download Windows Speedup Tool to fix errors and make PC run faster
Wondering how to get Apple Calendar on Windows PC is something that many device users struggle with. The fact is that Apple has policies that don’t give much freedom to integrate their apps with those of their competitors. However, there has been some leniency from Apple in recent years to allow Microsoft users to enjoy some applications on their Windows PC. Very few users know about this, which is why this article will dig deep into how to get Apple Calendar on Windows PC.

Windows users can now sync iCloud photos, Safari bookmarks, mail, and calendars, thanks to Apple’s iCloud app for Windows PC. The hard part, there is no conventional way to get Apple Calendar on Windows PC. The easy part, there are several ways you can hack this, and that’s what we’re about to get down to.
Accessing Apple Calendar on Windows PCs is not a straightforward method. However, once it’s done, you can access Apple Calendar through Windows apps like Mail, Outlook, and Calendar. Here is how to get Apple Calendar on a Windows PC:
- Download and Install the iCloud app for desktop
- Synchronize using Windows Settings
- Sign in on the iCloud web app
Let’s now look into each in detail.
1] Download and install the iCloud desktop app

iPhone users who want to use a Windows PC can use the iCloud Windows software to sync Mail, iCloud photos, Calendar, and much more. Follow the steps below to install the iCloud app for Windows.
- Head to the Microsoft Store and search for the iCloud app, then click on the Get button.
- Once you download the app, add all the required details.
- You will a prompt to sync Photos, Mail, Calendar, Bookmarks, and iCloud drive. Check the boxes next to all those options.
- Choose Apply to synchronize the Apple Calendar with Windows.
- Next, go to the Outlook app on your Windows PC. Head to the Calendar which is located at the bottom menu
- You will see a checkbox next to iCloud. Check the box to get Apple Calendar on Windows.
2] Synchronize using Windows settings

Windows has the option to add third-party accounts to your PC and sync them. You can do this to add your iCloud account on Windows in the Settings window. Your Calendar will be automatically added. Here’s how to use Windows Settings to sync your iCloud Calendar:
- Open Windows Settings by pressing Win + I, or by typing Settings in the search box, then select the first search results.
- Go to Accounts and hit on the Email & accounts option.
- On the left side, click on the Add an account tab.
- A new window will open. From the list, you will see iCloud at the bottom, click it.
- Fill in all the required credentials, and click Sign in.
- You will now click Done to confirm your details.
- Go to the Calendar app and choose to Get started.
- You will see a checkbox next to iCloud. Check it to start viewing iCloud Calendar on the Windows Calendar app.
Related: How to import Apple Contacts to Windows PC
3] Sign in on the iCloud web app

It’s possible to access your iCloud using Windows on your browser. To access iCloud Calendar on your Windows browser, follow the steps below.
- Go to the official iCloud website in your web browser. Fill in all the iCloud sign-in credentials and click Sign in.
- Within the window, choose Calendar to view it from your Windows PC. You can update it from there, as well.
Let us know if any of the above methods worked for you.
Read: How to get iMessage on Windows PC
How do I show my calendar on my laptop screen?
To show your calendar app on your Windows PC, you will need to create a shortcut. Enter the command shell:startup by pressing Win+R. This will open the startup folder. You can either copy and paste or drag and drop the calendar shortcut into the folder. That’s it; you are done.
Can I sync my iPhone Calendar with my PC Calendar?
To sync your iPhone Calendar with your PC calendar, download and install iCloud for Windows on your PC. Sign in with Apple ID credentials and click the checkboxes against all options to sync. To finish the process, click Apply. This will enable you to sync calendars across all your Apple gadgets signed in with the same details.
Robert holds a B.Tech. He has a knack for solving problems in people’s lives. With his background in technology, he is able to write complex topics in simple, understandable terms. He enjoys writing all matters Windows.
Apple iPhone users and reviewers often criticize the company for developing a closed ecosystem. Apple’s apps and services like iCloud, Photos, Mail, Calendar, etc. aren’t natively available on rival platforms. To make the situation worse, the company won’t let users change the default apps to other Microsoft and Google alternatives.

The situation is improving. Recently, Apple launched the iCloud web for mobile browsers. So, users can view and access Apple Reminders, Contacts, Calendar, Pages, etc. on Android devices. For Windows users, Apple has released the iCloud desktop app. With that, you can sync iCloud Photos, Mail, Calendar, and even Safari bookmarks to Windows apps.
As for Apple Calendar, there is no direct way to get it on PC. But there are easy workarounds to get things done. In this post, we are going to talk about the top four ways to access Apple Calendar on PC. Let’s get started.
Get Apple Calendar on iPhone
1. Use iCloud Web
Apple provides a robust iCloud web solution to access the major apps and services. Visit iCloud.com and sign in using Apple account credentials.

You can access Apple Notes, Reminders, Mail, Contacts, iWork suite, and of course, Apple Calendar. Tap on Apple Calendar and view the web version of it with events, calendars, and more.
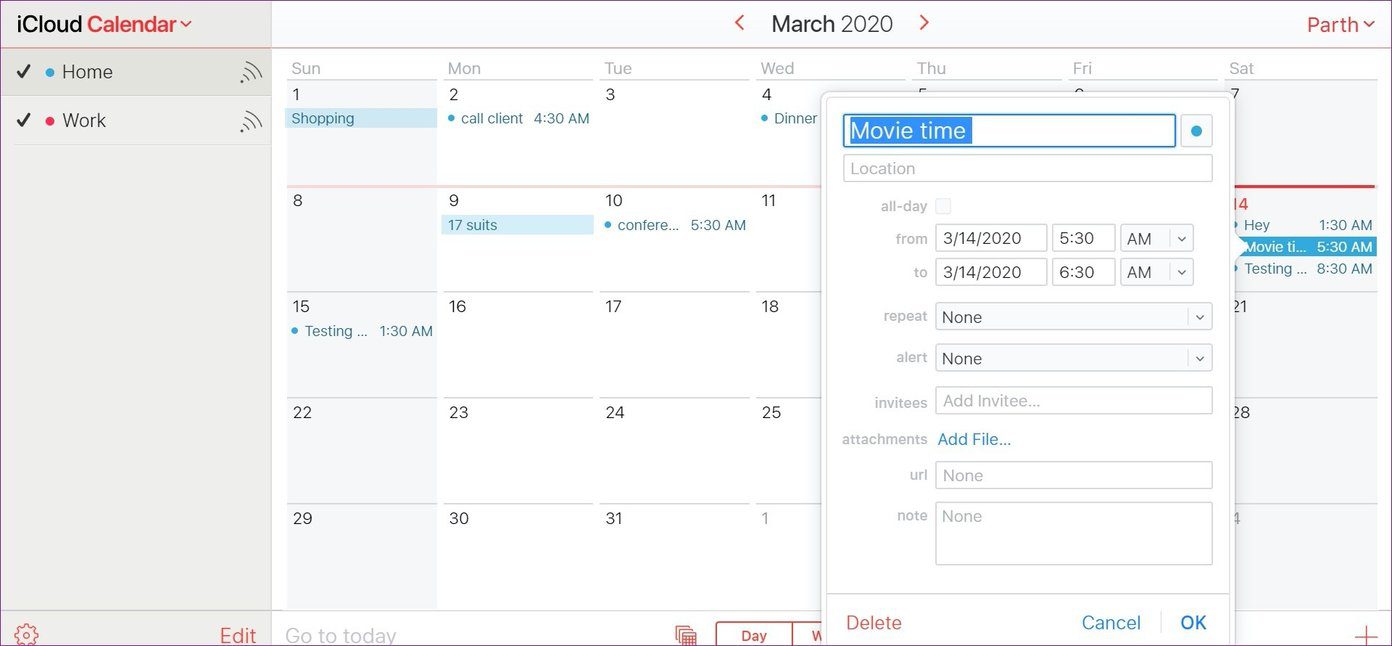
You can change the views to weekly or monthly. You can create new events and add every detail such as URL, Notes, Location, Time, and more. Using the iCloud Web, one can access Apple Calendar on Linux too.
2. Use the iCloud Windows App
Apple has released the iCloud desktop app for you to sync the iCloud Photos, Mail, Calendar, and more to the Windows computer. It’s a boon for iPhone users opting for Windows 10 on desktop.
First, download the iCloud app from the Microsoft Store. Add iCloud credentials to sync the data on Windows 10. It will ask you to sync iCloud, Bookmarks, Photos, Mail, and Calendar. The app will also display the remaining iCloud storage for your account.

Switch on the iCloud Mail and Calendar sync with Outlook and select Apply. Open the Outlook app on Windows and navigate to the Calendar option from the bottom menu.
Download iCloud for Windows 10
3. Copy iCloud Calendar from the Web to Outlook
This one is useful for those who don’t want to go through the iCloud app and expects a native experience on Windows. Users can manually add the iCloud Calendar in Outlook and access them from the Mail and Calendar app on Windows. Here is how to set it up.
Step 1: Open iCloud web on a browser and select the Calendar option.
Step 2: Decide which Calendar you want to export and select the share button beside it.

Step 3: Select Public sharing and copy the sharing link for the calendar.
Step 4: Navigate to the Outlook web and open the calendar menu in it.
Step 5: Select the add calendar under the monthly view in the Outlook calendar.
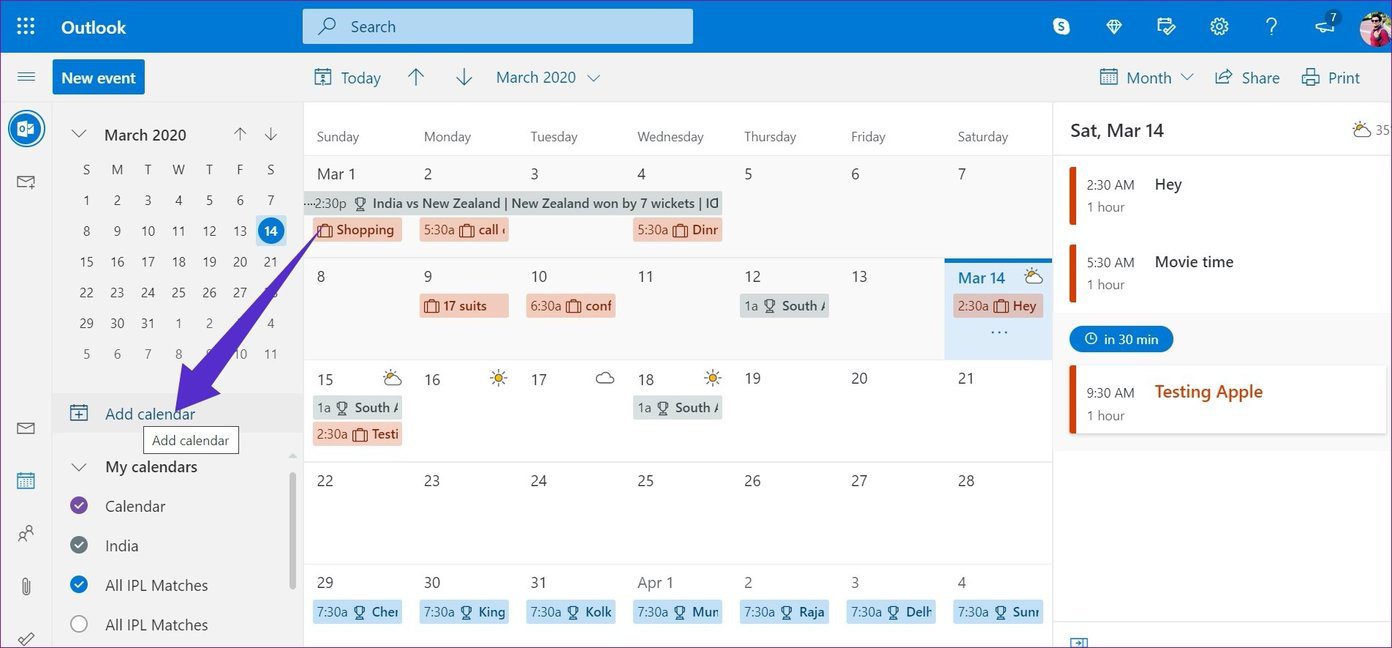
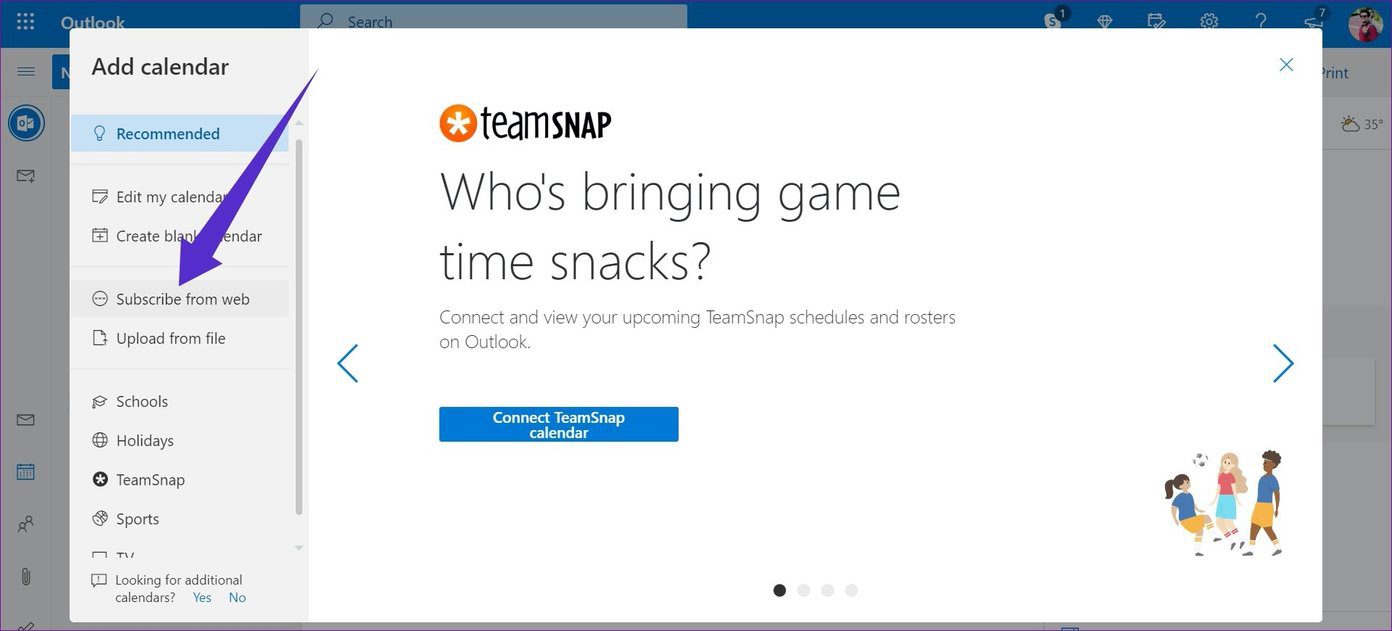
Step 6: From the following dialog, tap on the subscribe from the web option.
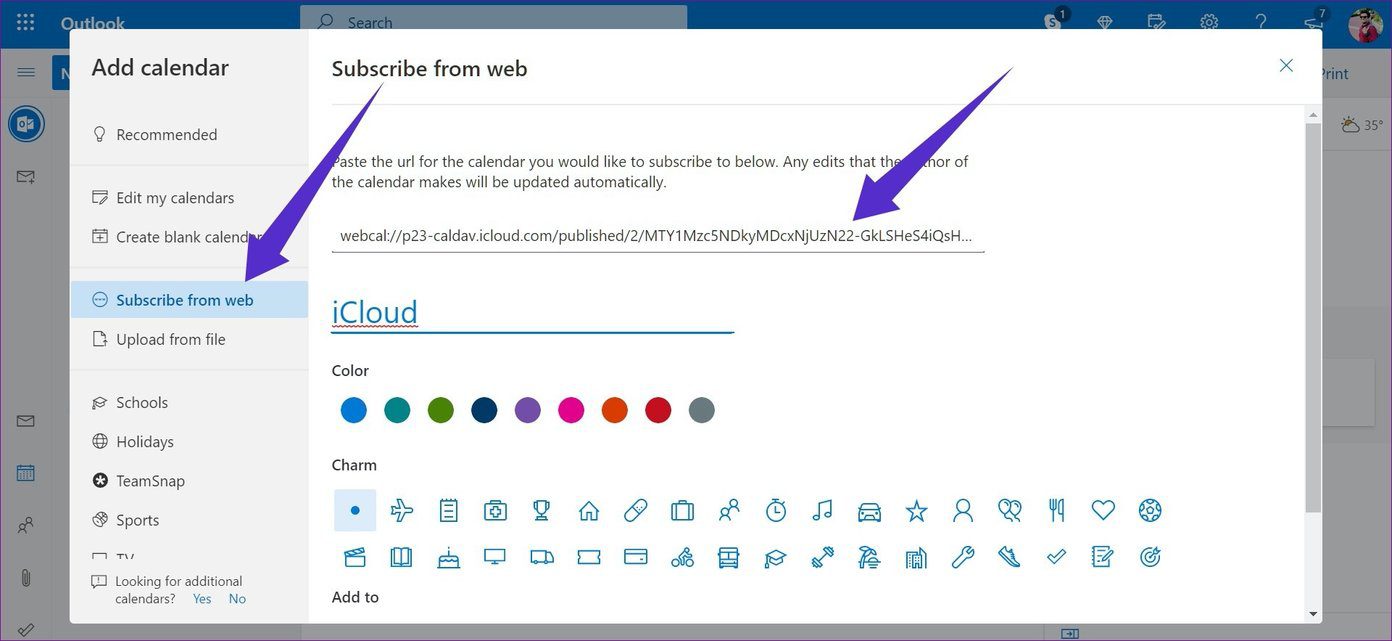
Step 7: Paste the calendar URL that you copied from the iCloud Calendar.
Step 8: Hit import, give it a name, icon, and color, and voila! You have successfully integrated iCloud Calendar in the Outlook.
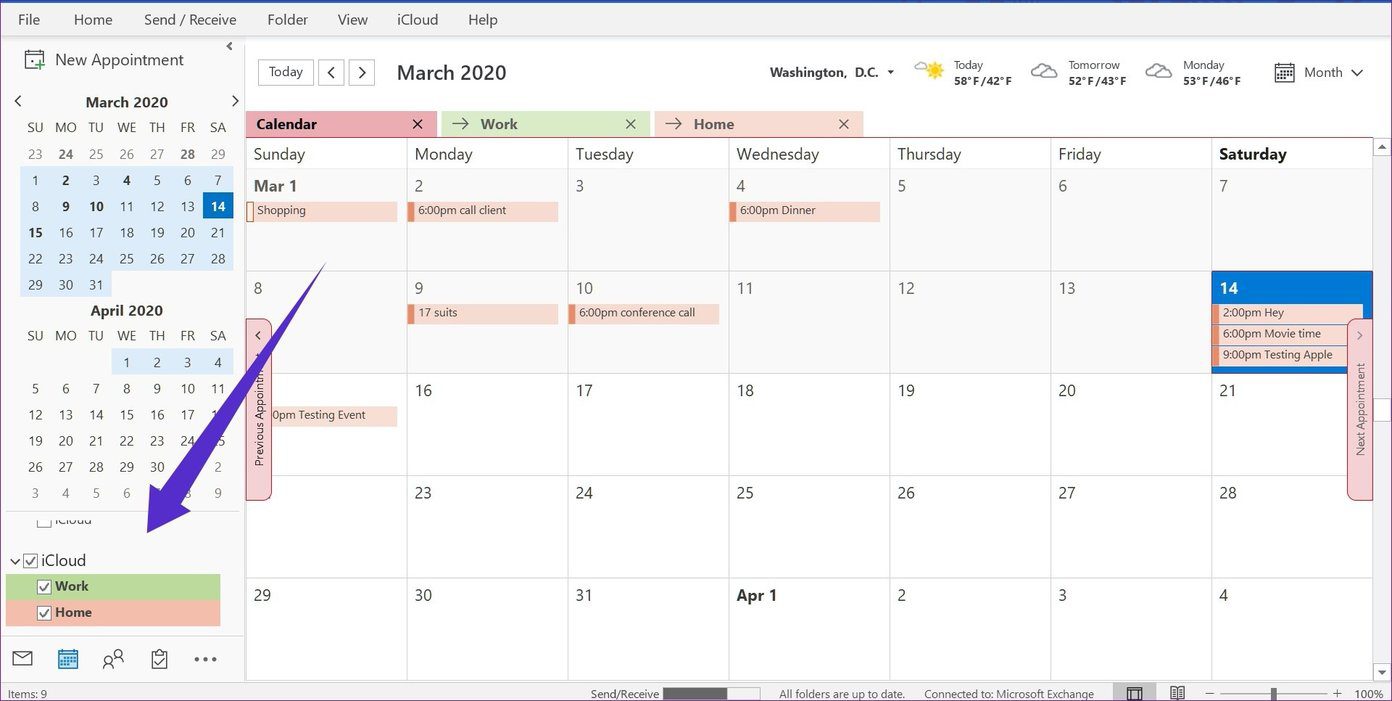
Now, you can open the Outlook app on PC, and you will find the iCloud Calendar under the subscribed Outlook calendars.
After that, whenever you add new events or make changes in the Apple Calendar app on the iPhone, it will get synced to the iCloud Calendar in Outlook on the Windows PC.
4. Change the Default Calendar on iPhone
By default, all the added events in the Apple Calendar gets saved in the iCloud platform. However, you can change that to Outlook. Here is how to do it.
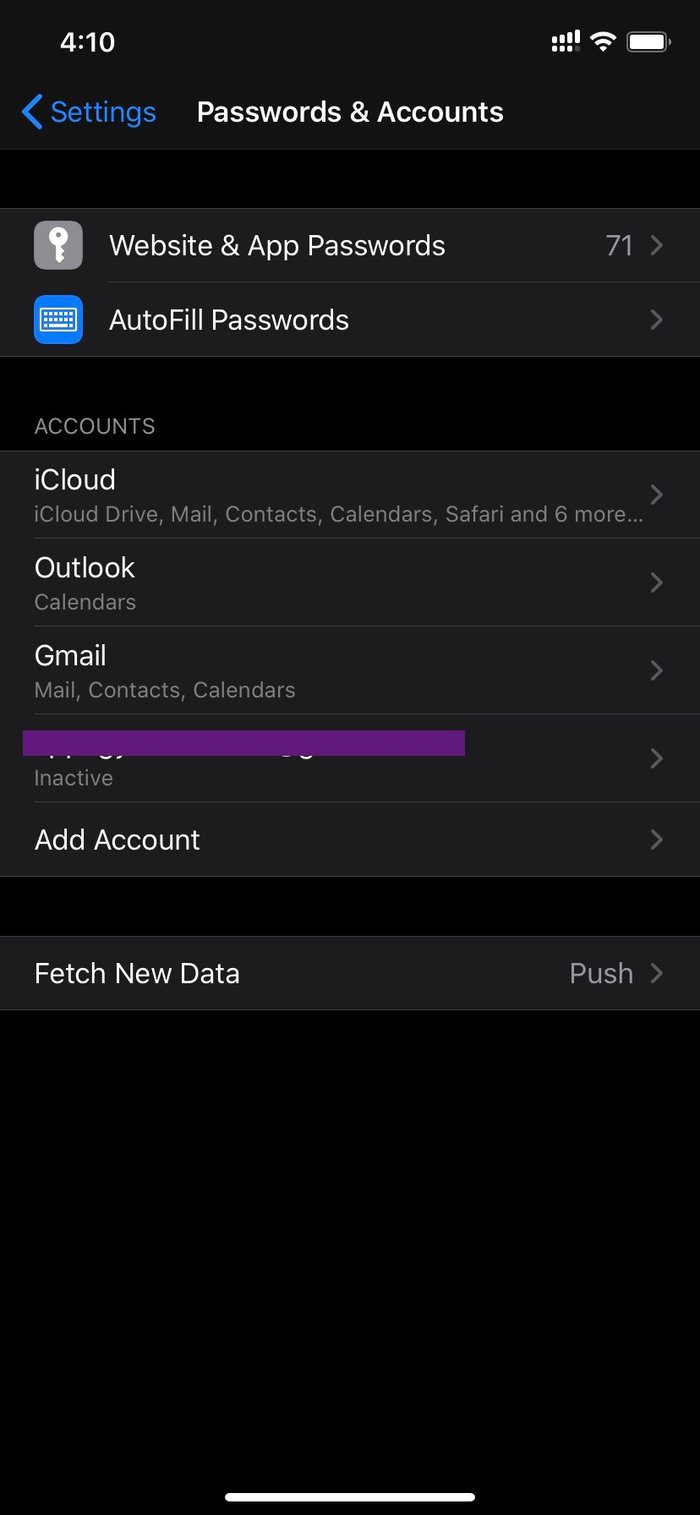
Step 1: Open the iPhone Settings app and go to Passwords and Account section.
Step 2: Select Add Account and tap on the Outlook option.
Step 3: Add login credentials to integrate Outlook on the iPhone.
Step 4: Go to Outlook accounts from the same menu and toggle on the Calendars option.

Step 5: Dive into Settings > Calendar, and here you will see all the settings options for the app.
Step 6: Open default calendar, and here you will see the Outlook calendars as well as iCloud ones.
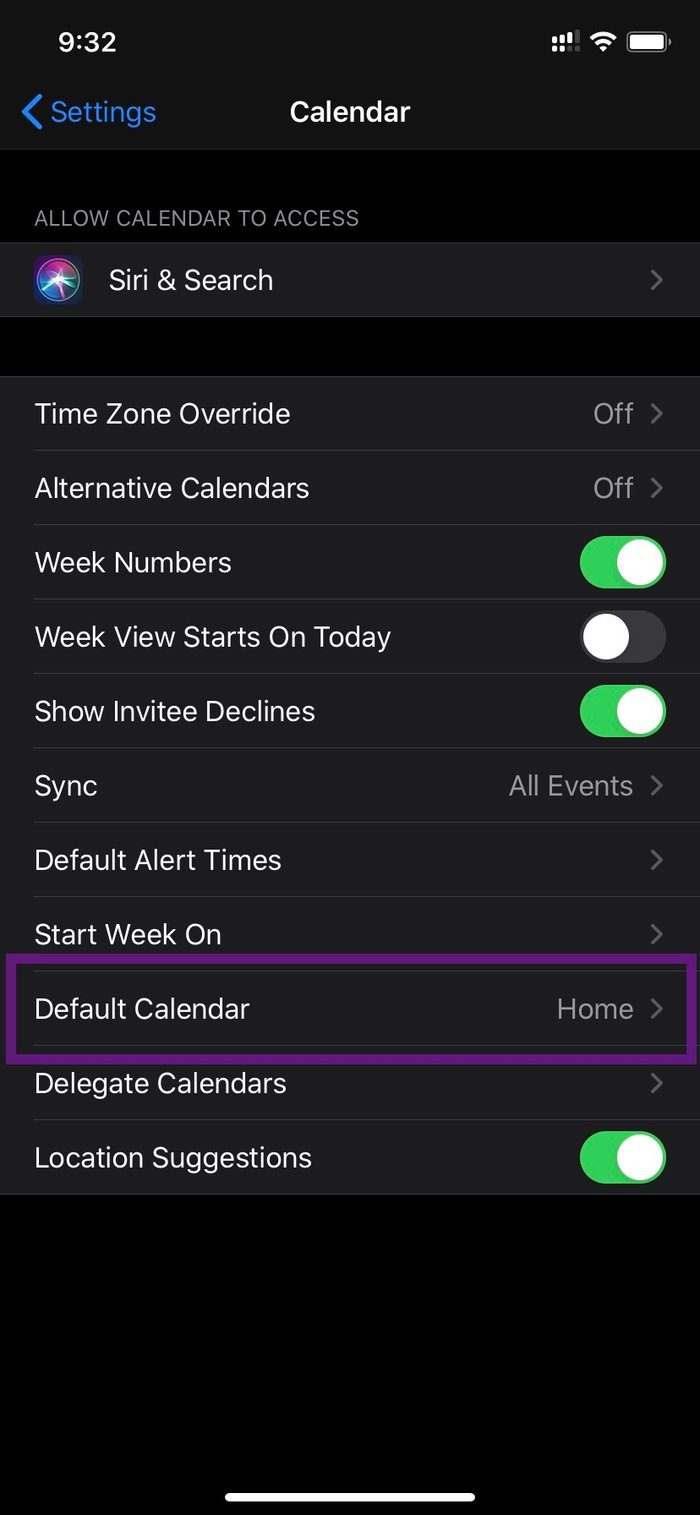
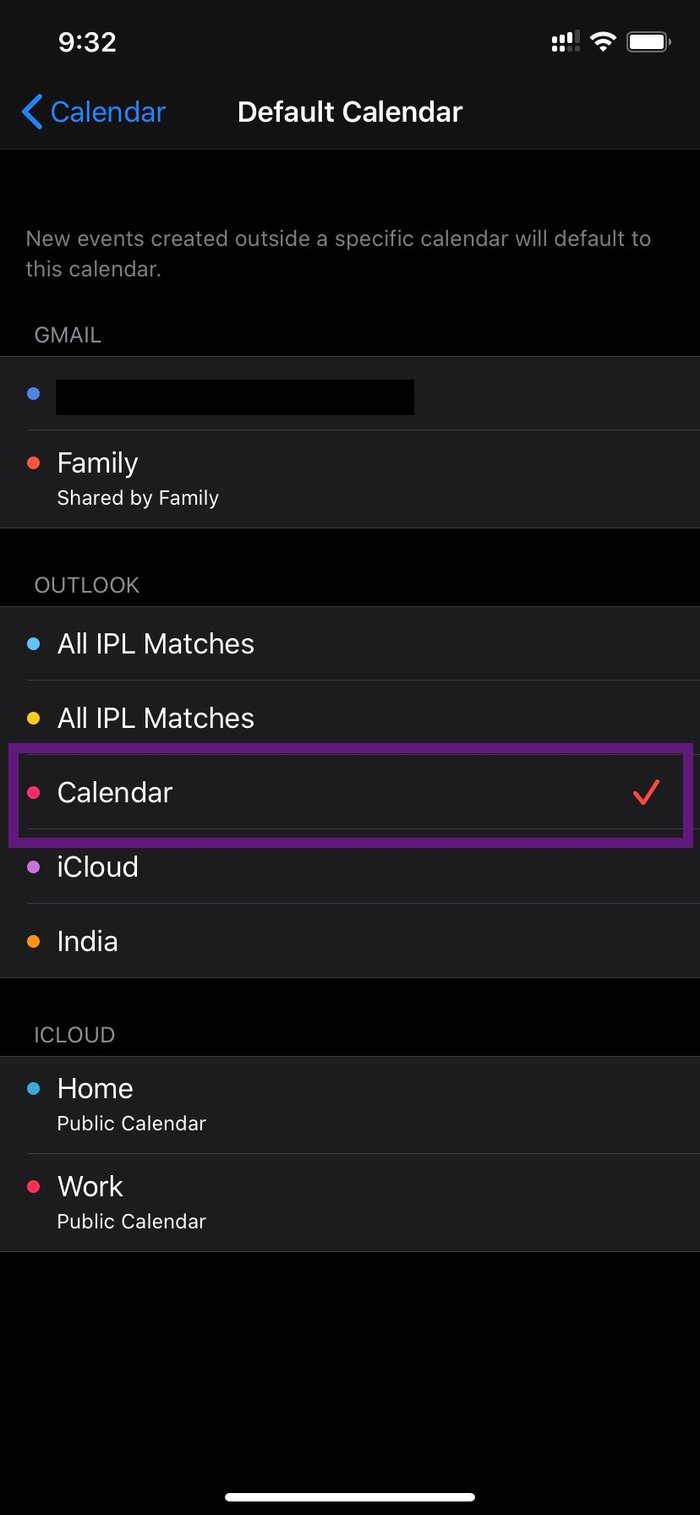
Step 7: By default, it will be set to iCloud Home, change it to your preferred Outlook account.
From now on, every newly added event in the Calendar app will get saved in the Outlook calendar account.
Head to your PC and open the Calendar app, which has the same Outlook ID as the iPhone. Here, you will see all the events that you added on the iPhone.
Use Apple Calendar Everywhere
As you can see from the list above, each option lets you access Outlook Calendar on PC. Use the iCloud web for a quick glance, use the iCloud desktop app for more Apple services integration, including Calendar and Photos. And the third and fourth option lets you get things done without using the iCloud platform.
Next up: Looking for an alternative for Apple Calendar? Read the post below to find the five best Apple Calendar alternatives on the iPhone.