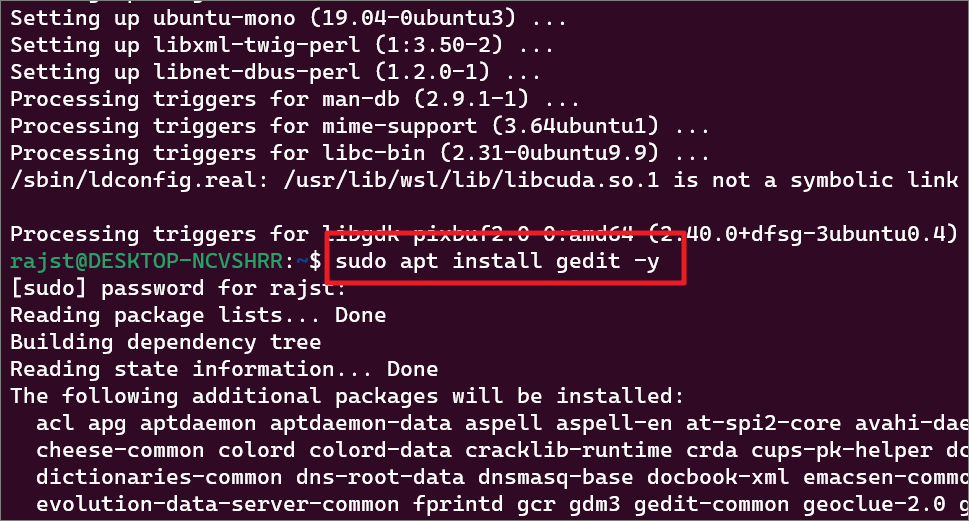
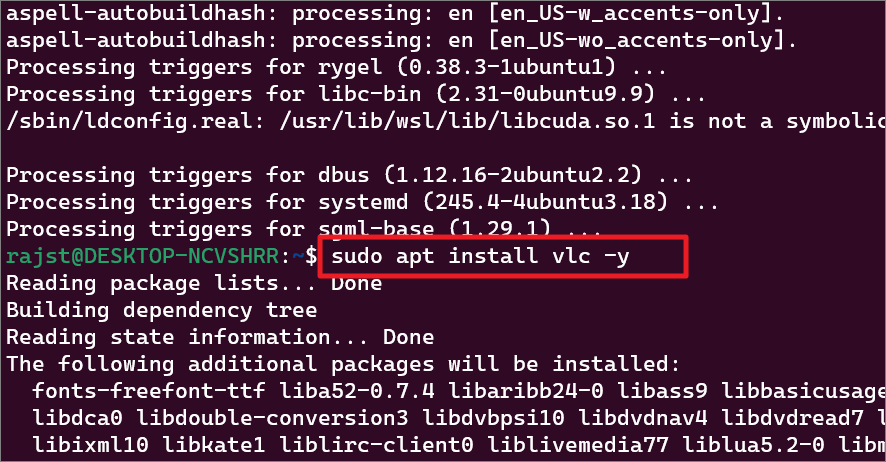
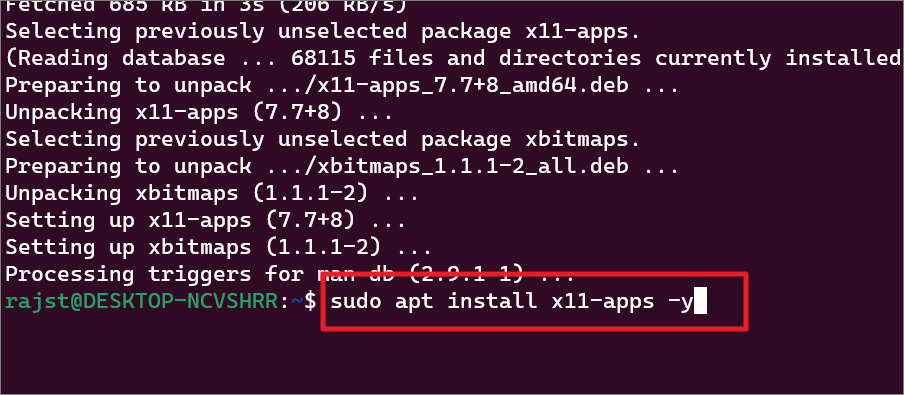
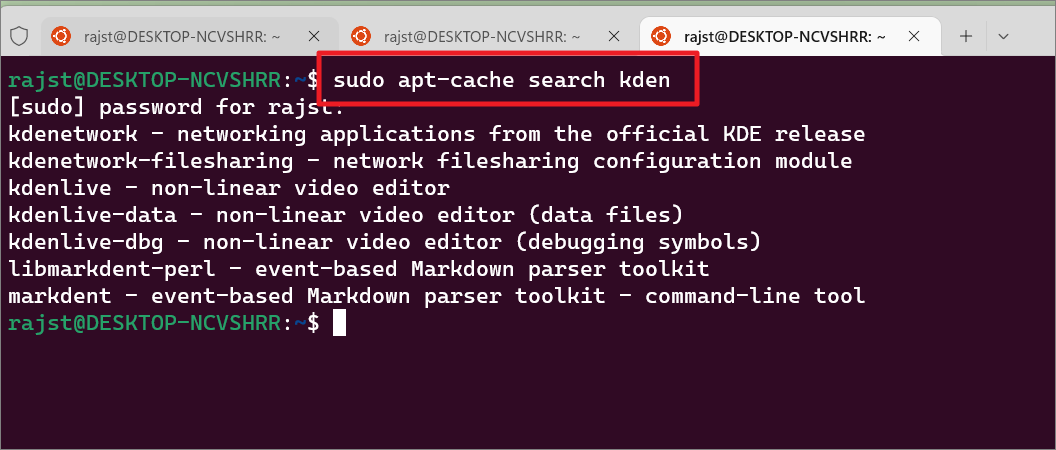
Под GNU/Linux-дистрибутивы создано огромное количество полезных и удобных инструментов и приложений для обычных пользователей и разработчиков. Далеко не всё из этого доступно на Windows, но, к счастью, для ОС от Microsoft есть решения, исправляющие эту проблему.
WSL — официальная подсистема Linux внутри Windows
В Windows 10 существует крайне полезная вещь под названием Windows Subsystem for Linux (WSL). Она позволяет использовать GNU/Linux-среду прямо в Windows и запускать не только команды, но и, например, Bash-скрипты. Для использования WSL необходимо следовать инструкции ниже.
Шаг 1. Проверьте, подходит ли текущая версия Windows требованиям. Для этого нажмите сочетание клавиш Win+R, затем введите winver. Найдите строку «Сборка ОС» — она должна быть свежее версии 14316.
Шаг 2. Запустите стандартную утилиту PowerShell от имени администратора и введите в ней команду для включения WSL:
dism.exe /online /enable-feature /featurename:Microsoft-Windows-Subsystem-Linux /all /norestart
Шаг 3. Если версия Windows, определённая в первом пункте, свежее 18362, вы можете установить WSL 2, который в разы быстрее первой версии и обладает доработанным ядром. Введите команду ниже, если нужно установить WSL 2:
dism.exe /online /enable-feature /featurename:VirtualMachinePlatform /all /norestart
После этого скачайте и установите пакет обновления с официального сайта.
Шаг 4. Перезагрузите компьютер. Если была произведена установка WSL 2, введите в PowerShell от имени администратора следующую команду:
wsl —set-default-version 2
Шаг 5. После перезагрузки откройте фирменный магазин приложений Microsoft Store и найдите подходящий GNU/Linux-дистрибутив. Самым популярным является Ubuntu — вы можете установить любую версию из представленных в Microsoft Store.
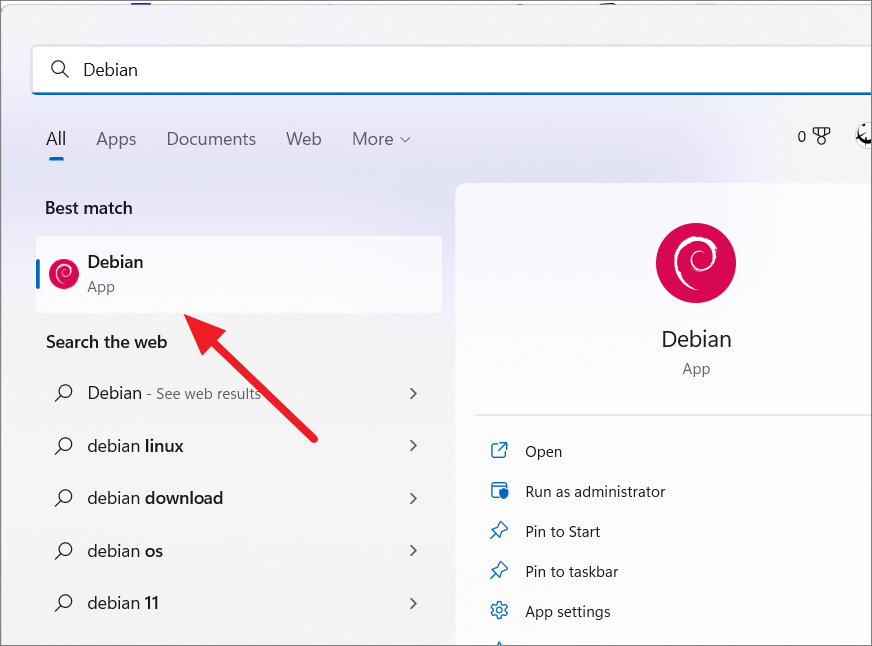
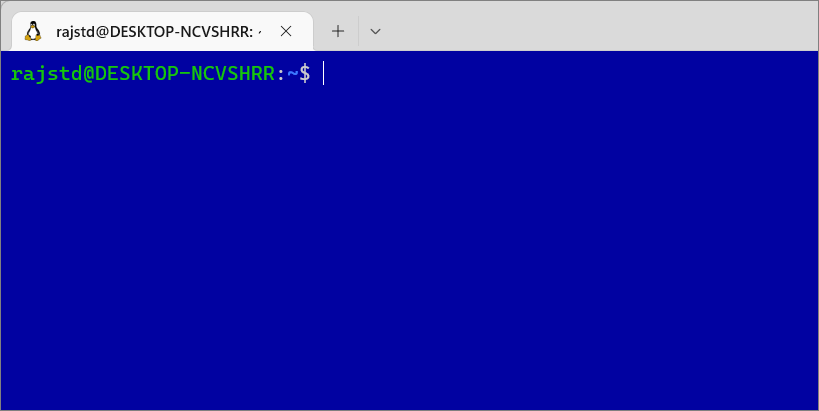
Шаг 6. Как только установка завершится, найдите дистрибутив в меню «Пуск» и запустите его.
Шаг 7. Пройдите этап первоначальной настройки, введя имя нового пользователя и придумав пароль.
Шаг 8. Теперь различные GNU/Linux-команды можно выполнять, запустив дистрибутив, либо введя в командной строке wsl <команда>. Например, для просмотра всех файлов в текущей директории достаточно в командной строке выполнить wsl ls -a.
Обращу внимание на то, что путь к дискам в WSL отличается от такового в Windows. Вместо привычного C:/ используйте /mnt/c/. Также не забывайте про экранирование пробелов с помощью символа \ — это также пригодится при вводе путей к файлам.
Помимо выполнения базовых команд, с помощью WSL можно даже запускать приложения с графическим интерфейсом. Правда, рассчитывать на большое количество поддерживаемых подобных программ не стоит.
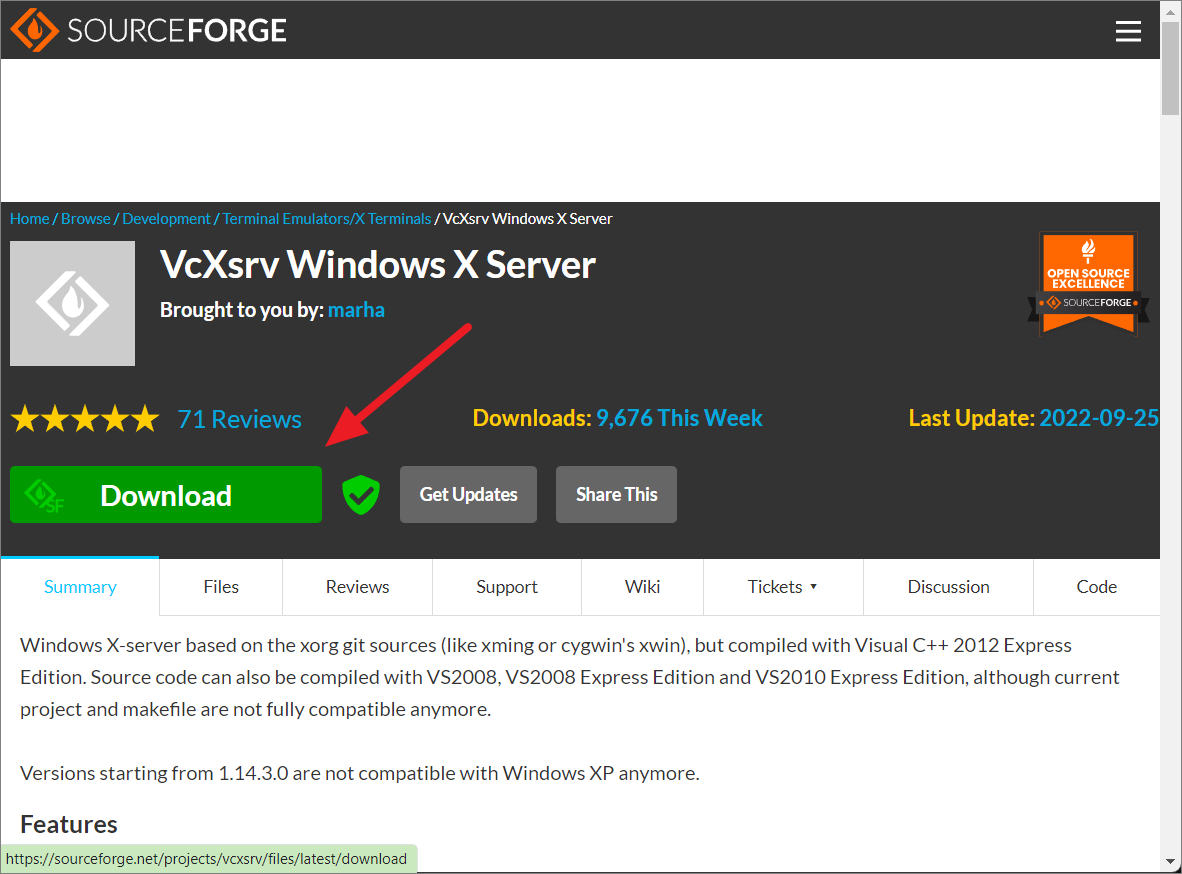
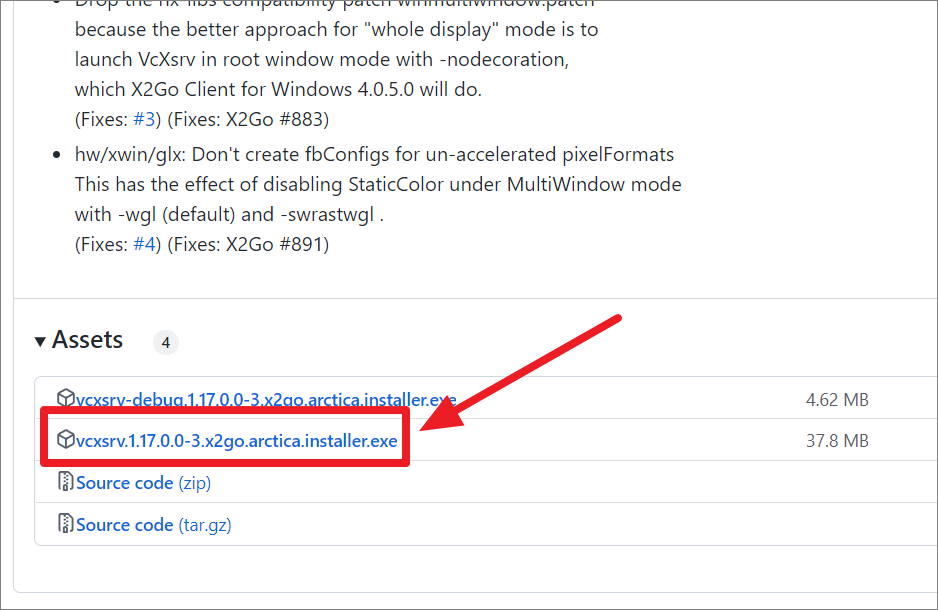
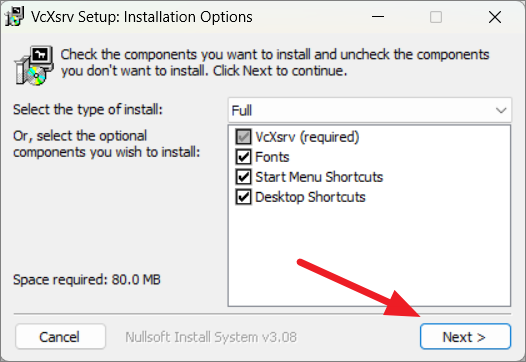
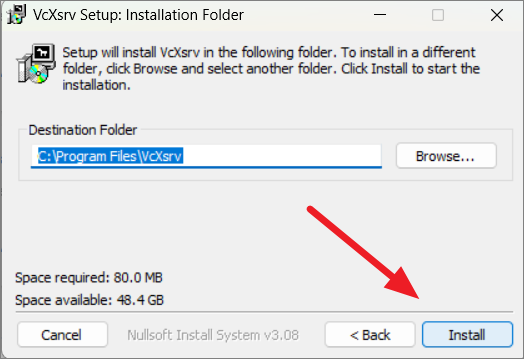
Шаг 1. Загрузите X-сервер и установите его.
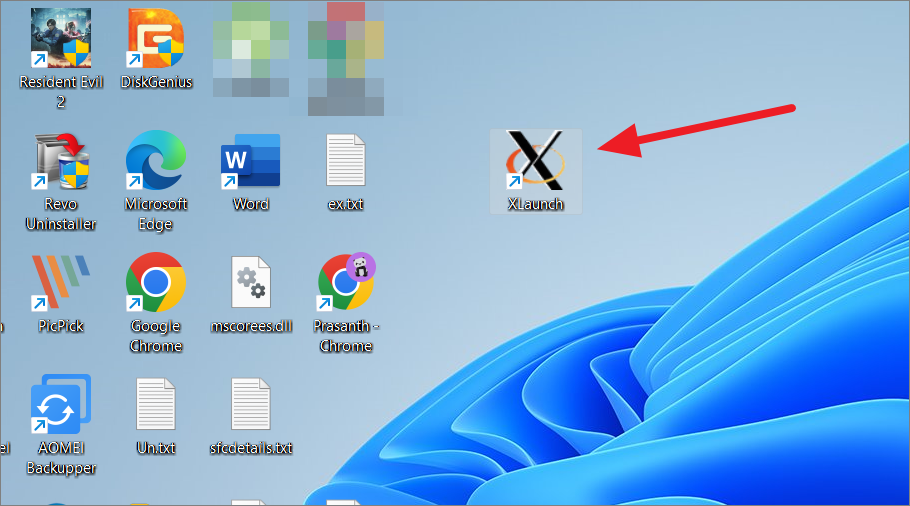
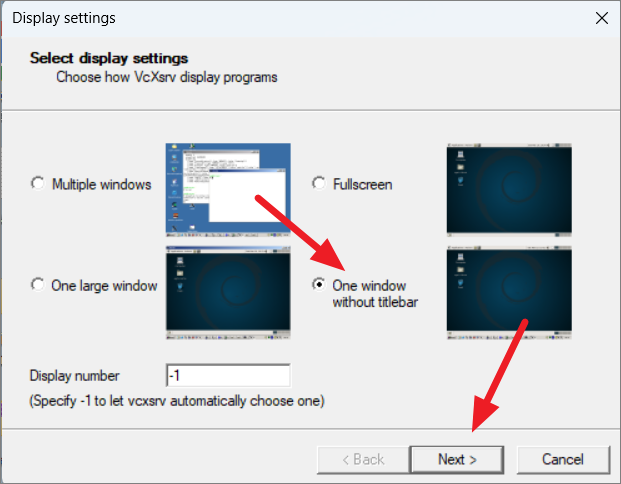
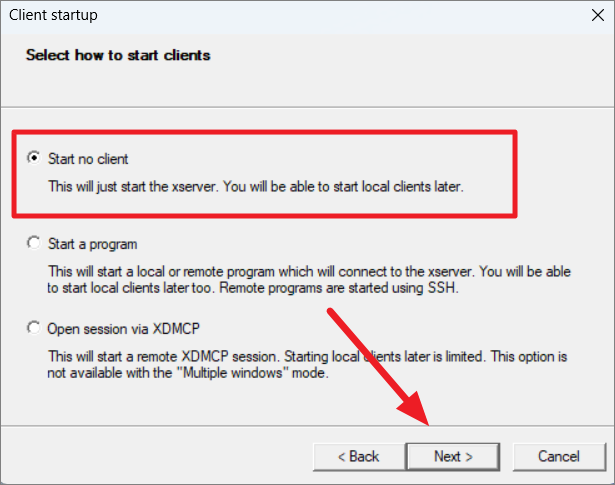
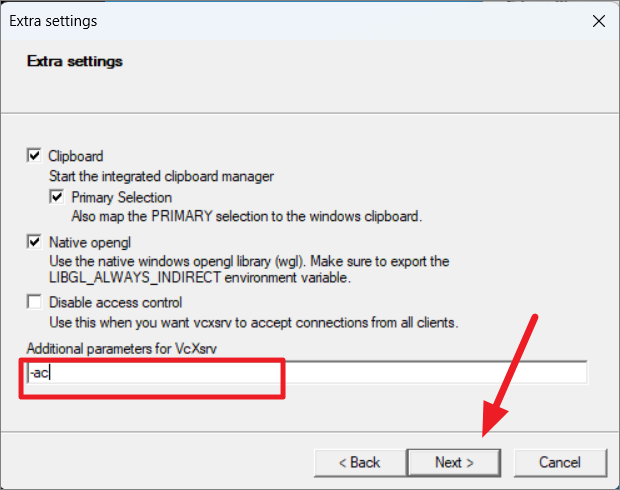
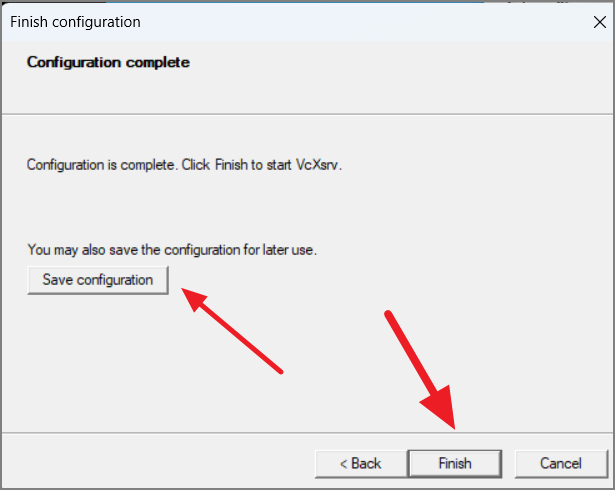
Шаг 2. Запустите его с помощью ярлыка на рабочем столе. В открывшемся окне выберите вариант Multiple windows, затем Start no client. Завершите настройку кнопкой Finish.
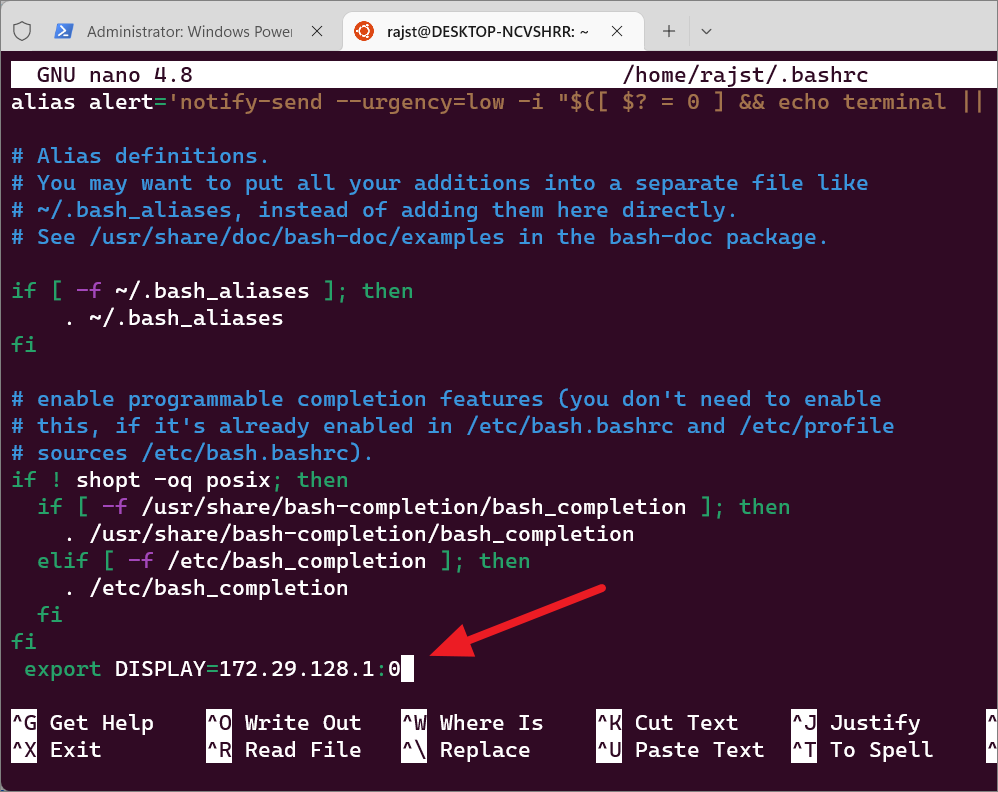
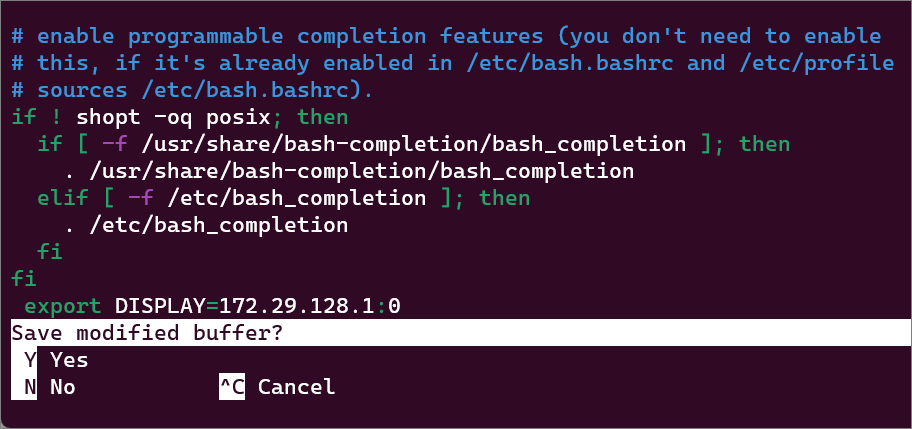
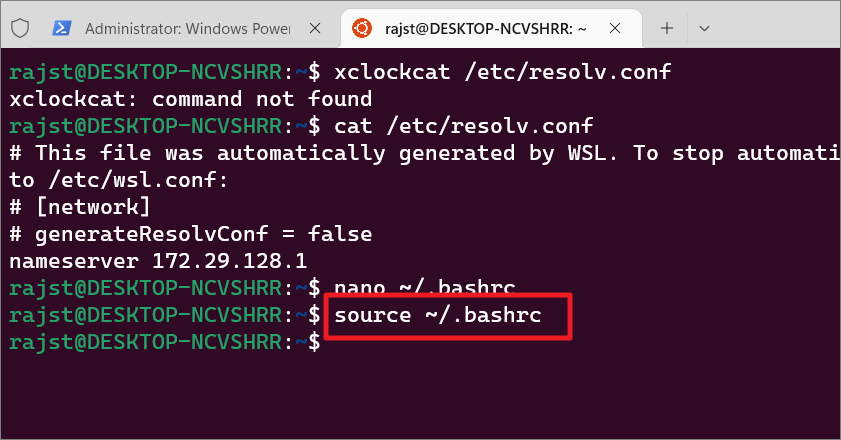
Шаг 3. Откройте дистрибутив через меню Пуск и выполните команду export DISPLAY=:0
Шаг 4. Запустив приложение с графическим интерфейсом в WSL, вы увидите новое окно прямо в Windows.
CoreUtils — лёгкий инструмент для запуска базовых команд
Плюс данной утилиты — возможность запуска не только на Windows 10, но и на более старых версиях ОС. Кроме того, она легка и не занимает много места. Не обошлось без недостатков — программа скудна на функционал и не обновлялась очень давно. Она не только не умеет запускать скрипты и приложения с GUI, но и поддерживает лишь самые базовые GNU/Linux-команды. Установка CoreUtils весьма проста.
Шаг 1. Скачайте утилиту с официального сайта.
Шаг 2. Следуйте инструкциям установщика.
Шаг 3. Откройте «Панель управления», в разделе «Система и безопасность» выберите пункт «Система». На панели слева откройте «Дополнительные параметры системы». Нажмите кнопку «Переменные среды» и в открывшемся окне найдите область с заголовком «Системные переменные». В случае, когда там есть переменная Path, выберите её, нажмите «Изменить» и далее создайте новую строку. Содержимым этой строки должен быть путь к папке, который был указан при установке. Если вы ничего не меняли, то введите следующее:
C:\Program Files (x86)\GnuWin32\bin
Переменной Path нет? Тогда для начала создайте её кнопкой «Создать», затем в поле имени введите Path, а в поле значения — строку выше.
Шаг 4. Запустите командную строку и выполняйте команды прямо там.
Cygwin — запуск команд и Bash-скриптов
Ещё одна утилита, схожая с CoreUtils, но обладающая более широким функционалом — в том числе и возможностью запуска скриптов. Из минусов — немалый вес и более сложная установка. Разумеется, не идёт ни в какое сравнение с максимально удобным WSL, но для базовых команд вполне подойдёт.
Шаг 1. Загрузите Cygwin и запустите установку.
Шаг 2. Выберите Install from Internet, укажите директории для установки и загрузки пакетов, а также любой подходящий сайт из списка для скачивания файлов.
Шаг 3. В процессе установки можете выбрать необходимые пакеты, либо сразу нажать «Далее», оставив базовый набор.
Шаг 4. Откройте «Панель управления», в разделе «Система и безопасность» выберите пункт «Система». На панели слева откройте «Дополнительные параметры системы». Нажмите кнопку «Переменные среды» и в открывшемся окне найдите область с заголовком «Системные переменные». В случае, когда там есть переменная Path, выберите её, нажмите «Изменить» и далее создайте новую строку. Содержимым этой строки должен быть путь к папке, который был указан при установке. Если вы ничего не меняли, то введите следующее:
C:\cygwin64\bin
Переменной Path нет? Тогда для начала создайте её кнопкой «Создать», затем в поле имени введите Path, а в поле значения — строку выше.
Шаг 5. Команды можно выполнять как через командную строку, так и через специальный терминал.
Шаг 6. Для удаления Cygwin достаточно удалить папку, в которую программа была установлена, а также (по желанию) значение из переменной Path по методу, обратному тому, что был описан в 4 шаге (не удаляйте саму переменную).
Нужно использовать терминал Linux на компьютере с Windows? Узнайте, как запустить Linux на Windows 10 с помощью Windows Subsystem for Linux.
Хотите получить быстрый и простой доступ к Linux на ПК с Windows? Лучший вариант – использовать подсистему Windows Subsystem for Linux.
Это даст вам оболочку Linux bash, окно терминала, запущенное в Windows. Этот процесс, по сути, устанавливает Linux на Windows 10 – вот что вам нужно знать.
Впервые появившись в обновлении Windows 10 Anniversary Update 2018 года и распространившись среди всех пользователей в обновлении Fall Creators Update, подсистема Windows для Linux позволяет запускать программное обеспечение Linux в Windows 10.
Это функция, которая была встроена в Windows. В отличие от установки Linux на виртуальной машине, Windows Subsystem for Linux может быть мгновенно вызвана из меню “Пуск”.
Однако для того, чтобы это работало, необходимо сначала включить эту функцию.
После установки подсистемы Windows для Linux в Windows 10 вы можете запускать Linux в режиме командной строки. Это дает вам почти полнофункциональный терминал Linux для Windows 10.
Linux Bash Shell: Только для 64-разрядных версий Windows 10
Прежде чем приступить к работе, убедитесь, что вы используете 64-разрядную версию Windows 10. К сожалению, подсистема Windows для Linux не будет работать на 32-битных системах. Проверьте, работает ли на вашем компьютере 32- или 64-разрядная версия Windows.
Чтобы проверить компьютер на 64-битную совместимость, нажмите WIN + I, чтобы открыть “Настройки”, затем “Система” > “О системе”. В разделе “Характеристики устройств” вы увидите список “Тип системы”; для Windows Subsystem for Linux у вас должно показать 64-битную операционную систему.
Если нет, вам нужно обновить систему Windows 10 с 32-разрядной до 64-разрядной. Однако это сработает только в том случае, если у вас 64-битное оборудование.
Как установить Linux Bash Shell на Windows 10
Прежде чем продолжить, учтите, что в некоторых системах не могут быть одновременно включены подсистема Windows для Linux и виртуальные машины (VM). Поэтому, если вы предпочитаете запускать Linux в виртуальной машине, вам нужно будет отключить Windows Subsystem for Linux, прежде чем снова использовать виртуальную машину.
Готовы установить Bash в Windows? Начните с нажатия кнопки Пуск и ввода “Включение или отключение компонентов Windows“. Должен появиться пункт Включение или отключение компонентов Windows, щелкните его, чтобы открыть. Подождите, пока список заполнится, затем прокрутите вниз до пункта Подсистема Windows для Linux.
Этот флажок должен быть отмечен. Если его нет, добавьте галочку и нажмите OK для подтверждения.
Вам будет предложено перезапустить Windows, поэтому следуйте этой инструкции. После перезагрузки откройте Пуск > Магазин Windows. С помощью инструмента поиска найдите записи, относящиеся к “Linux”, и выберите предпочтительную версию Linux для установки. От того, какую версию вы выберете, будет зависеть работа с Bash. Например, вы можете установить Ubuntu на Windows 10.
Установите операционную систему Linux, затем подождите. После завершения нажмите кнопку Запуск в Магазине Windows или откройте его из меню Пуск. При первом запуске вам будет предложено ввести имя пользователя и пароль для создания учетной записи.
Для запуска выбранной вами среды Linux доступны и другие способы. В меню “Пуск” вы можете ввести:
- bash
- wsl
Оба способа отобразятся как “Выполнить команду”, которую можно выбрать для мгновенного открытия оболочки Bash. Разница в использовании любого из этих методов заключается в том, что они открываются в каталоге /mnt/c/Windows/System32. Это означает, что вы можете просматривать подкаталог System32 в Windows 10.
Linux в Windows
Обратите внимание, что невозможно повредить Windows 10, используя среду Linux. Любые введенные вами команды повредят только подсистему Windows для Linux и выбранную операционную систему. Windows 10 останется безопасной и надежной.
Кроме того, для запуска Bash больше не нужно включать режим разработчика Windows 10 в Настройках.
Чем отличается терминал Bash Shell от Windows PowerShell?
Запустив терминал Linux для Windows 10, вы можете вводить различные команды командной строки.
Но чем это отличается от простого использования командной строки Windows или PowerShell?
Ну, естественно, обе системы совершенно разные. При использовании PowerShell или командной строки вы ограничены командами, характерными для Windows. Это означает, например, использование команды dir для просмотра содержимого каталога; в Linux эквивалентом является ls.
В принципе, различия между Windows и Linux – это то, что отличает эти две текстовые среды. Преимущество наличия оболочки Bash в Windows 10 заключается в том, что вы можете легко получить доступ к Linux в Windows. Это экономит время на настройку виртуальной машины или перезагрузку при установке Linux с двойной загрузкой.
Что можно делать с Bash в Windows 10?
Установив оболочку Bash в Windows 10, вы можете использовать ее так же, как и на ПК с Linux.
Стандартные команды, такие как help, покажут вам, как пользоваться предустановленными приложениями и инструментами. Например, apt help продемонстрирует использование менеджера пакетов. Вы можете использовать sudo apt update для получения последних пакетов, как и на ПК с Linux.
Использование справки в Linux на Windows
Аналогично, команда sudo apt upgrade обновляет Linux до последней версии ОС.
Между тем, доступны и другие стандартные команды. Вы можете проверить подключение к сети с помощью ifconfig, проверить текущий каталог с помощью pwd и перейти в другой каталог с помощью cd.
Вы также можете получить быстрый список последних 10 вводов с помощью команды history.
Одним словом, это все равно что использовать Linux в операционной системе Windows 10.
Windows 10 Bash приносит Linux на любой компьютер
Настроить подсистему Windows для Linux и получить доступ к оболочке Bash очень просто. Это гораздо быстрее, чем запуск виртуальной машины, и гораздо менее сложно, чем использование двойной загрузки.
Вкратце, все, что вам нужно сделать для запуска оболочки Linux Bash на Windows 10, это:
- Убедитесь, что вы используете 64-разрядную Windows 10.
- Включить подсистему Windows для Linux на экране Windows Features.
- Установите выбранную вами среду Linux из Магазина Windows.
- Запустите Linux из меню “Пуск”.
После этого вы можете использовать терминал Linux для Windows для стандартных задач командной строки. Или вы можете использовать подсистему Linux в Windows 10 для установки среды рабочего стола.
Между тем, почти все команды Linux можно использовать в оболочке Bash в Windows.
В следующей статье, мы рассмотрим как установить рабочее окружение lmde, xfce или kde в wls.
Как запустить рабочий стол Linux в Windows с помощью WSL
Есть люди, которые большинство рабочего времени проводят в консоли, есть те, кто пользуются терминалом при необходимости, запуская что-то по инструкциям. Но я думаю, что каждый айтишник, будь он разработчиком, сисадмином, сетевым инженером, или даже senior yaml developer`ом, пользуется command line interface. Далеко не все задумываются об улучшении рабочего окружения в CLI и повышении продуктивности работы в терминале. Мне хотелось бы поделиться своим опытом настройки окружения для работы с Linux из Windows.
Из статьи вы узнаете, какими средствами и каким терминалом актуально пользоваться в настоящее время для запуска Linux приложений в Windows 10. Речь пойдёт о WSL 2 и Windows Terminal, набирающим всё большую популярность у пользователей, которым для работы нужен Linux. Так как большинство use-case`ов у меня связаны с удалённым подключением через SSH, большая часть информации будет релевантно для случаев удалённых подключений, со всеми особенностями, связанными с этим (пробросом ssh ключей через ssh agent, пробросом X-сервера, управлением подключениями etс).
Внимание! Под катом много картинок и ужатого, но местами объёмного, gif`а, рекомендуется открывать статью при наличии соответствующего доступа к интернету. Заходите под кат, если вам актуален запуск Linux утилит под Windows, оптимизация работы в окружении CLI, или вы просто любите технические тексты и цветные терминалы. Текст я постарался скрасить скринкастами и скриншотами терминала, чтобы было не скучно.
Введение
Как на домашнем, так и на рабочем ноутбуке, единственная ОС сейчас у меня Windows 10, и в этом году я окончательно перешёл на использование только WSL вместо VM / dualboot / Cygwin / MinGW. Теперь мой терминал по умолчанию — это локальный шелл WSL, где я могу запускать практически любые задачи, как в нативном Linux. Кроме этого, в домашней сети работает мини-сервер Intel NUC, на котором развёрнут Proxmox с LXC контейнерами и KVM, в котором крутится Docker. На все VM хожу по SSH, с ключами из директории Windows. Очень много времени в профессиональной деятельности проходит в CLI, с домашним сервером и сетью тоже самое. Поэтому всегда возникает желание разобраться с инструментами для более комфортной работы в терминале, а в Windows всегда с этим были проблемы. Но сейчас всё меняется.
Эта и последующие статьи больше ориентированы на энтузиастов, которые ищут свежие решения и желают прокачать свой шелл. Но и новичкам должно быть что-то интересно, хотя статья получилась с достаточно глубоким погружением в тему и предполагает, что у читателя есть какие-то фундаментальные знания в Linux. Вся информация собрана на основе личного опыта использования WSL, терминала, а так же бесконечного листания Stack Overflow и Github issues в процессе постоянного усовершенствования конфигов и поиска удобных тулов для работы.
Windows Subsystem for Linux (WSL) 2
В интернете и на Хабре есть несколько нормальных статей про WSL (раз статья про установку/настройку WSL с X-сервером, два заметка про WSL 2, три статья про Python разработку в VSCode с WSL), описывающих установку и настройку системы. Однако не все действия по установке уже актуальны, так же как и ограничений с подводными камнями становится меньше. Я не буду подробно останавливаться на установке, инструкция по установке актуальной (второй) версии WSL есть на сайте Microsoft, также в интернете можно найти краткие туториалы.
Сейчас WSL ещё находится в стадии активной разработки и недавно (июнь 2019) вышла новая версия WSL 2, которая на данный момент доступна только для свежих версий Windows участникам Windows Insiders. При возможности советую сразу проапгрейдить WSL до версии 2, так как в ней улучшили работу системных вызовов, работу с сетью, ФС, и в целом она построена на другой архитектуре и по некоторым данным даёт 20-кратный прирост скорости по сравнению с первой версией.
Посмотреть версию Windows 10 и OS build можно в Start -> Settings ->System -> About, для установки WSL 2 требуется версия Windows 1903 и, как минимум, версия билда 18917. Если вы не участник Windows Insider Program, вероятнее всего, обновления не прилетят до выхода стабильного релиза. Так что если хочется обновиться до последней сборки, можно включить ранний доступ (Fast) в Start -> Settings -> Update & Security -> Windows Insider Program, обновиться и отключить дальнейшие обновления. Стоит учитывать, что устанавливаться будут ещё не оттестированные массово обновления, что может сказаться на стабильности.
Стоит иметь ввиду, что до билда версии 18995 WSL имеет баг при работе с файлами на примонтированных дисках Windows, выражающийся в Input/output error, помогает только перезагрузка WSL (wsl —shutdown в PowerShell). В целом сейчас пофиксено много багов, которые до сих пор присутствуют в WSL версии 1 (который ставится по дефолту) и не-preview дистрибутивах Windows. Если у вас обновления ОС регулируются корпоративными политиками, скорее всего самые свежие обновления прилетать не будут и нужно иметь это ввиду. На одном из ноутбуков у меня стоит билд 18956 и обновлений нет, не смотря на то, что выбрана опция Fast в настройках Insider Program. На другом ноутбуке была установлена чистая система несколько месяцев назад и обновления периодически прилетают и устанавливаются.
Установка WSL 2
Для работы WSL требуется включить Hyper-V, потому что дистрибутивы Linux запускаются в легковесных VM с помощью виртуализации Hyper-V.
Далее я приведу краткую инструкция установки из CLI PowerShell дистрибутива WSL на примере Kali Linux). При предпочтении Ubuntu или другого дистрибутива Linux из доступных, заменить ссылку и названия на соответствующие.
Проверить версию билда Windows:
Get-ItemProperty -Path "HKLM:\SOFTWARE\Microsoft\Windows NT\CurrentVersion" | Select CurrentBuild
Активировать компоненты VirtualMachinePlatform и Microsoft-Windows-Subsystem-Linux:
Enable-WindowsOptionalFeature -Online -FeatureName Microsoft-Windows-Subsystem-Linux

Enable-WindowsOptionalFeature -Online -FeatureName VirtualMachinePlatform
Перезагрузка.
Дальше либо установить дистрибутив из Microsoft Store (https://aka.ms/wslstore), либо дальше выполнить в PowerShell:
curl.exe -L -o kali.appx https://aka.ms/wsl-kali-linux-new

Add-AppxPackage .\kali.appx

rm .\kali.appx
Запустить консоль WSL (дистрибутив должен был появиться в меню Start, поиск по названию дистра), дождаться приглашения установить нового пользователя, закрыть консоль.
Теперь дистрибутив должен появится в списке, если выполнить в PowerShell:
wsl -l -v
При необходимости преобразовать дистрибутив в формат WSL версии 2:
wsl --set-version kali-linux 2

wsl --set-default-version 2
Сделать root пользователем по умолчанию (опционально):
kali config --default-user root
Если вы получили ошибку «A connection attempt failed because the connected party did not properly respond after a period of time, or established connection failed because connected host has failed to respond.», значит у вас стоит билд, в котором проявляется очередной (уже исправленный в последних релизах) баг. Как обычно, есть воркэраунд, либо использовать дистрибутив Ubuntu, с ним у меня не было проблем на той же не последней версии билда.
При необходимости, переместить виртуальный диск WSL на другой раздел (отличный от C:) можно по инструкции. Делать это лучше сразу, так как не всё может пройти гладко.
Disclaimer про безопасность. В WSL и на других Linux-серверах в домашней сети я не запускаю никаких критически важных систем, и других пользователей (кроме меня), в сети нет, поэтому я почти везде хожу под root, с ssh аутентификацией через ключи. Я знаю, что это не лучшая практика, однако речь про личное dev-окружение и я не вижу смысла создавать не-root пользователя. Вопросы безопасности в этой статье рассматриваться не будут, об этом я собираюсь когда-нибудь написать отдельно (про то, как в домашней сети без боли организовать взаимодействие сервисов через TLS с централизованным обновлением сертификатов; о синхронизации ~/.ssh/config между серверами, пробросе портов и ключей и т.д.).
Конфигурация WSL
Начиная с билда 17093, основной файл конфигурации WSL находится на ФС дистрибутива по адресу /etc/wsl.conf, в нём описываются настройки, которые будут применять при каждой загрузке дистрибутива:
- Automount — автомонтирование дисков Windows
- Network — генерировать файлы resolv.conf, hosts
- Interop — запуск процессов Windows и добавление Windows $PATH в Linux $PATH
Изначально WSL идёт без этого конфига, его нужно прописать вручную:
[automount]

enabled = true

root = /mnt

options = "metadata,umask=22,fmask=11"

mountFsTab = true
[network]
generateHosts = true
generateResolvConf = true
[interop]
enabled = true
appendWindowsPath = true
Некоторые настойки применяются со значением по умолчанию и с пустым /etc/wsl.conf , но для корректной работы с файлами нужно прописать как минимум параметр options, иначе файлы Windows будут с правами 777 и это нельзя будет изменить из Linux.
Сделать ребут дистрибутива можно из PowerShell командой:
wsl -t kali-linux
После этого можно обновить пакеты и заняться настройкой ОС под себя. Я пока не буду касаться настроек шелла и окружения в Linux, оставлю это для следующей статьи.
apt -y update && apt -y upgrade
Файловая система WSL 2 и производительность
Файлы внутри WSL версии 2 хранятся на виртуальном диске VHDX, в качестве файловой системы используется ext4. Получить доступ к rootfs WSL можно через путь такого формата:
\\wsl$\{DistroName}\
Либо, можно набрать «explorer.exe .» в CLI и откроется обозреватель Windows в текущей директории.
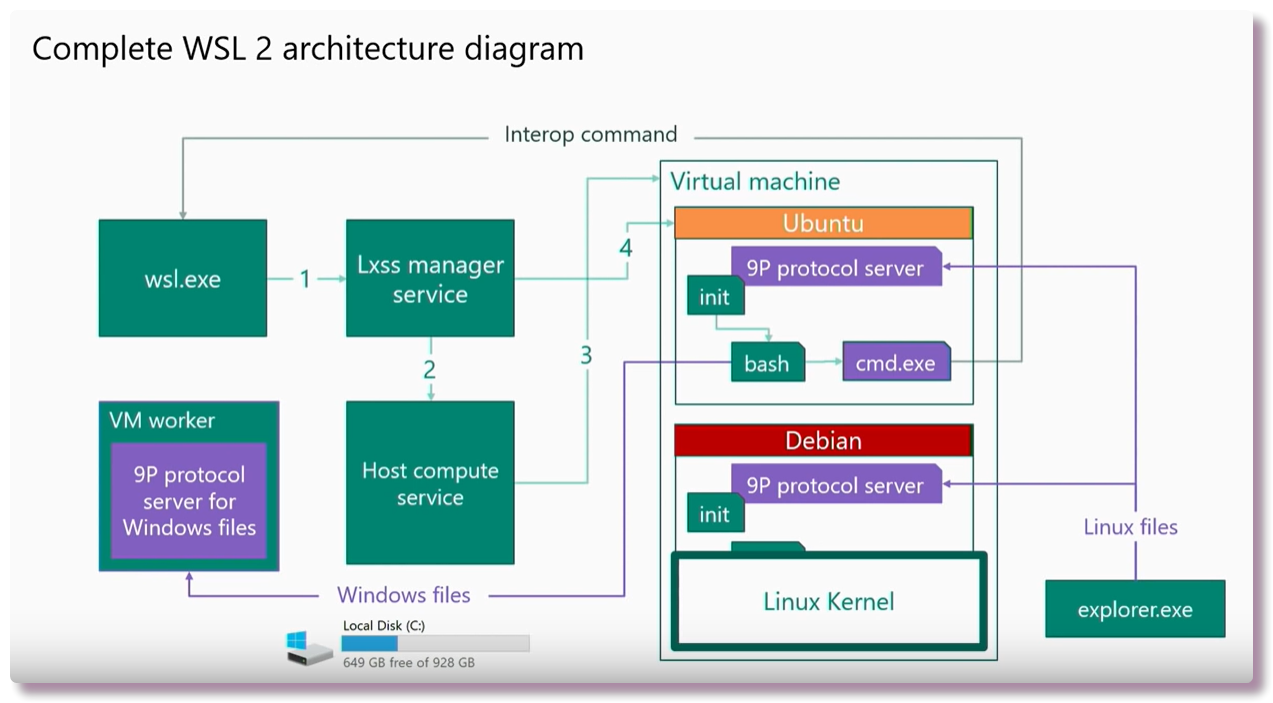
В WSL версии 1 не использовался VHDX и был простой доступ к директории, в которой находились файлы Linux, и Microsoft строго не рекомендовали изменять Linux файлы из Windows. В новой версии WSL доступ к ФС на виртуальном диске обеспечивается с помощью файлового сервера Plan 9 Filesystem Protocol.
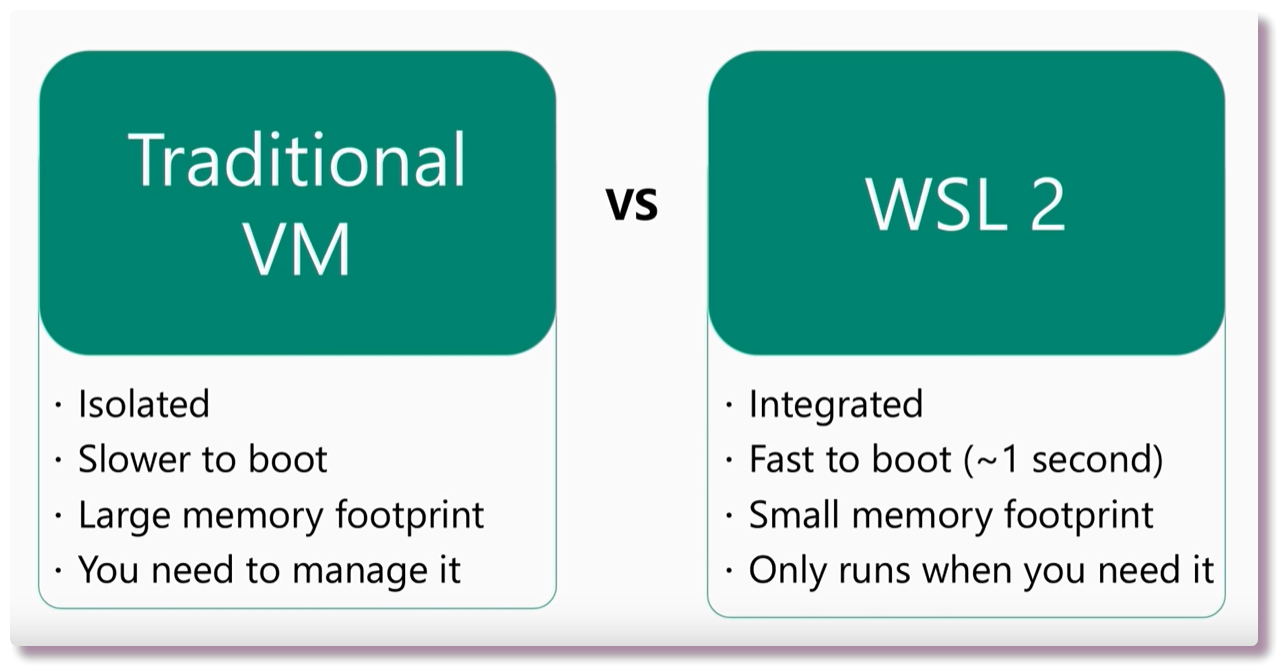
В предыдущих версиях WSL были проблемы с производительностью файловой системой, потому что системные вызовы эмулировались через API Windows, доступ к файлам был медленный и нестабильный. В концу 2019 года в WSL 2 архитектура поменялась и используется нативное ядро Linux. Судя по слайду из youtube-презентации The new Windows subsystem for Linux architecture: a deep dive, производительность дисковых операций выросла в 2-5 раз.
Максимальный объём диска ограничен 256GB, при превышении этого объёма необходимо будет делать ресайз, инструкция есть в документации.
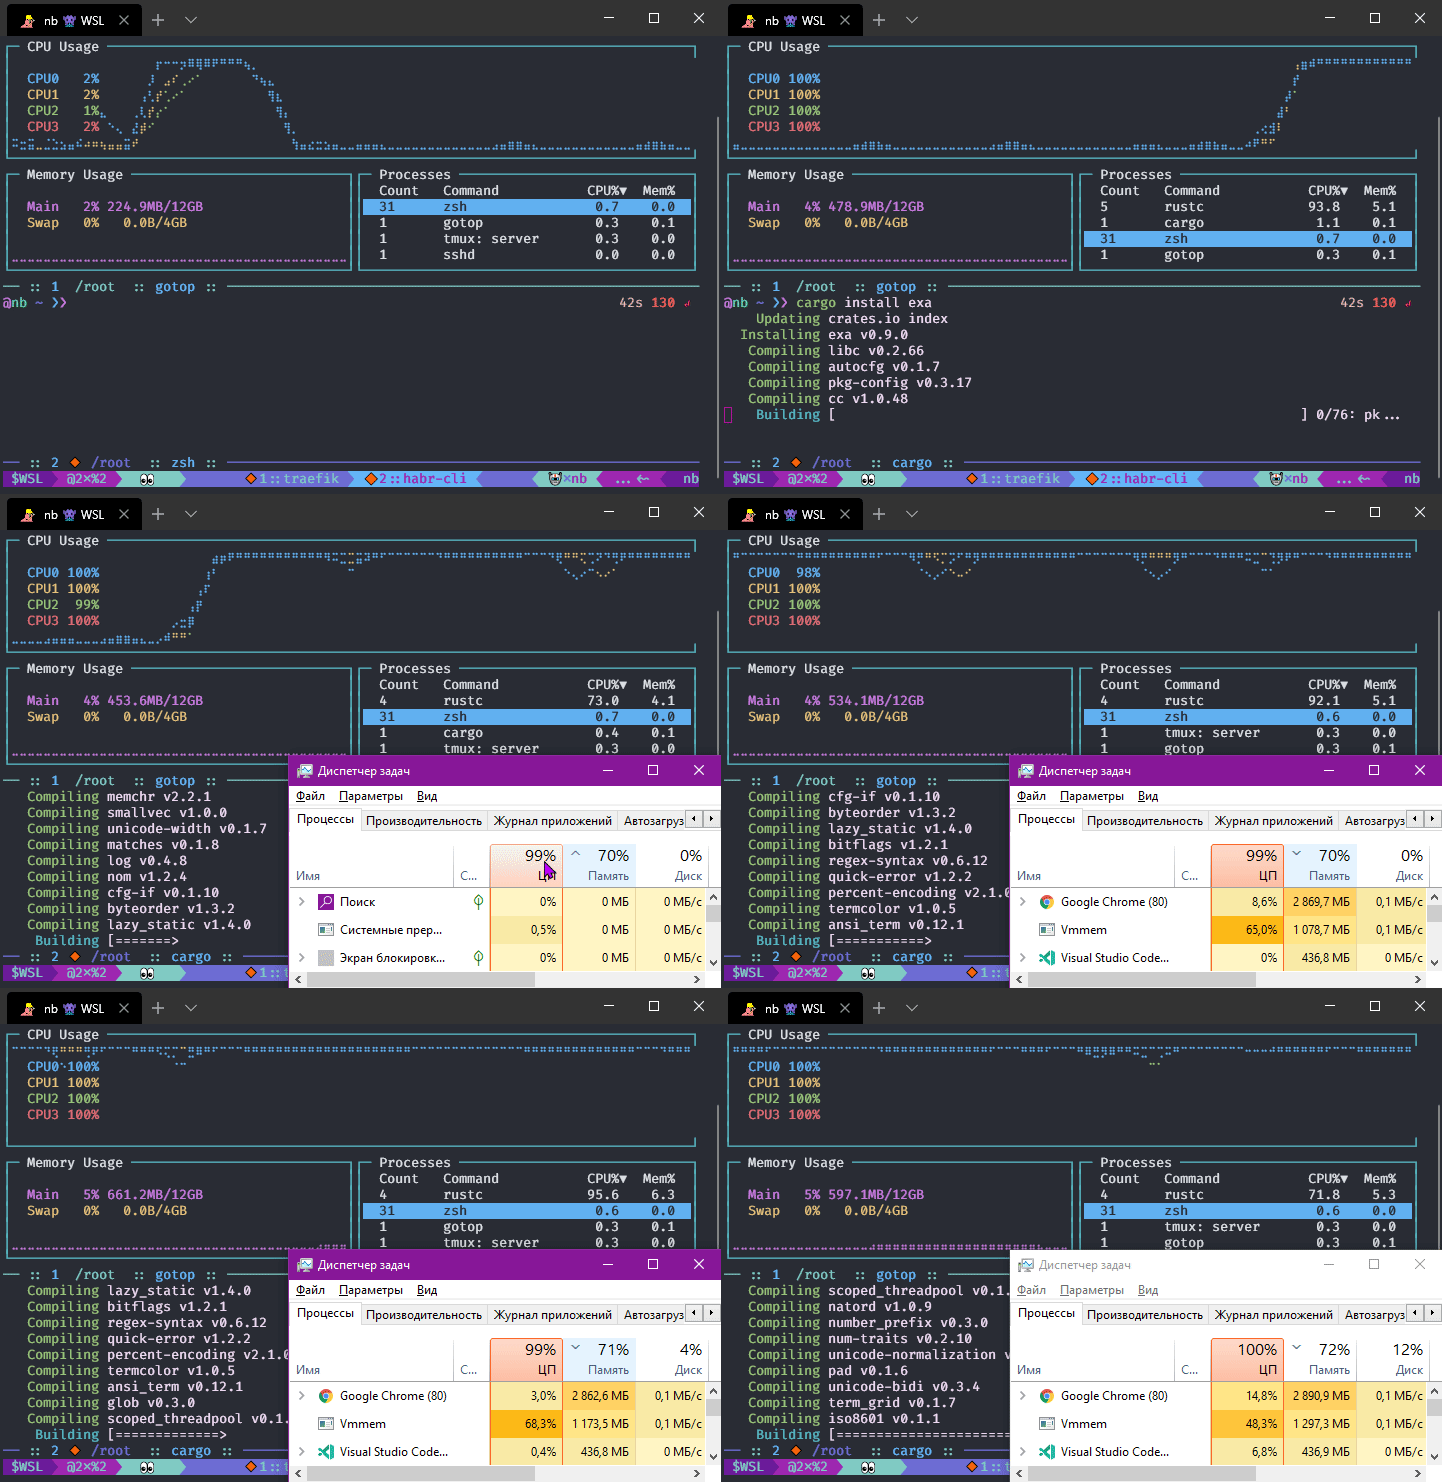
Изначально, у WSL были проблемы с тем, чтобы высвобождать ресурсы после использования RAM. В билде 19013 эту проблему решили. Если запускать ресурсоёмкие задачи (например, сборка rust приложения) можно заметить, что процесс Vmmem будет в топе Диспетчера задач, однако потребление памяти значительно снизилось в последних версиях WSL.
Сеть
Имя хоста (hostname) в Linux берётся из имени PC в Windows, независимо от того, что прописать в /etc/hostname или командой hostnamectl set-hostname.
В отличии от первой версии, в WSL 2 сеть работает через виртуальный Hyper-V свитч:
❯❯ ipconfig.exe | grep IPv4

   IPv4 Address. . . . . . . . . . . : 192.168.88.200

   IPv4 Address. . . . . . . . . . . : 172.31.160.1

   IPv4 Address. . . . . . . . . . . : 172.27.144.1
❯❯ ip -br -4 ad show dev eth0
eth0 UP 172.27.150.196/20
❯❯ ip ro list default
default via 172.27.144.1 dev eth0
В данном случае сеть 172.27.144.0/20 используется под WSL, её первый адрес (172.27.144.1) — это хостовая система Windows.
Из Linux обращаться по сети к хостовым сервисам (запущенным в Windows) можно, например, так:
❯❯ nmap -p 3389 $(cat /etc/resolv.conf | grep nameserver | awk '{print $2}')
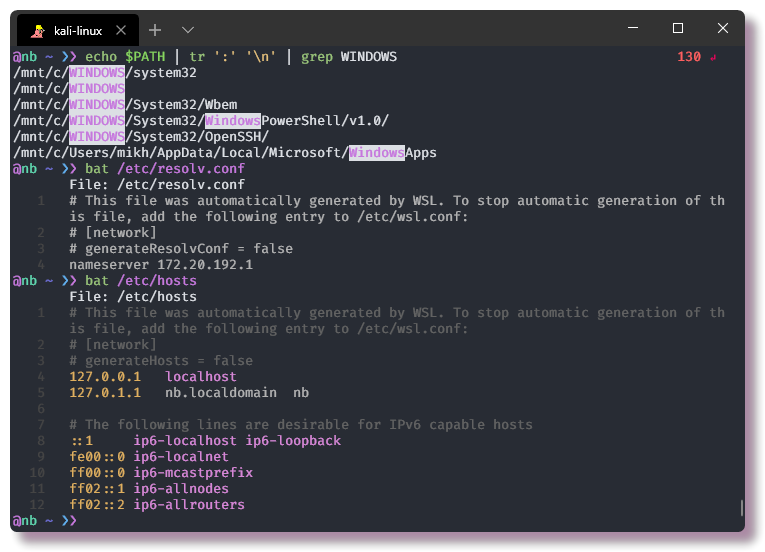
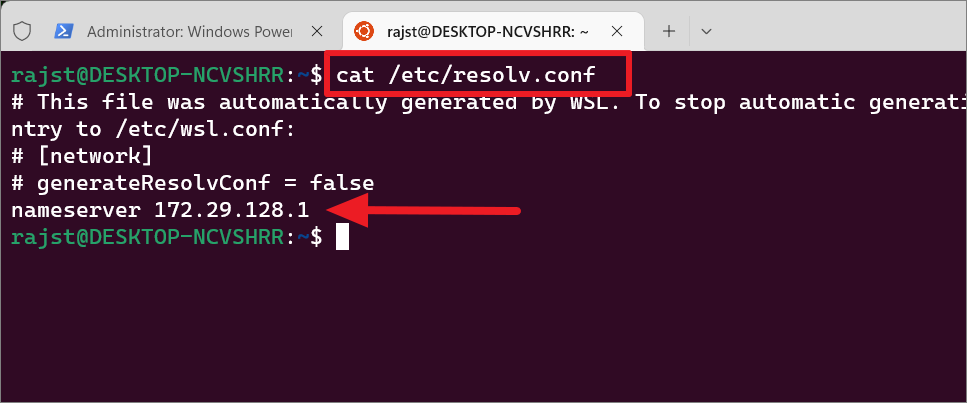
IP-адрес Windows тут берётся из /etc/resolv.conf, где он генерируется автоматически согласно настройкам wsl.conf.
Наоборот, если нужен коннект к Linux сокету из приложения Windows, необходимо обращаться к IP-адресу WSL. При этом есть нюанс — в Linux сервис необходимо запускать не на localhost (127.0.0.1), а на адресе 0.0.0.0. Например, чтобы быстро поднять SOCKS5 proxy до своего VPS, нужно запустить SSH с параметром dynamic port forwarding:
❯❯ ssh -D 0.0.0.0:2299 -N -f proxy.example.com
После этого в приложении Windows, например Chrome, в качестве адреса SOCKS5 прописать не localhost, а адрес WSL, в данном случае 172.27.150.196. Кстати, таким нехитрым способом туннелирования трафика через VPS в Хроме появляется возможность использовать доступ к сайтам через IPv6.
IP-адрес в Linux после перезагрузки будет каждый раз меняться, так что в сценариях, когда нужно иметь постоянно работающий и автоматически запускающийся port forwarding, нужно искать воркэраунд. Есть много способов решения этой проблемы, разной степени костыльности, почитать подробнее можно в этом issue на github. Я воспользовался утилитой go-wsl2-host, которая реализует Windows Service, добавляющий автоматически IP-адрес WSL в файл hosts Windows, таким образом на хостовой системе можно прописать хостнейм типа ubuntu.wsl и по нему обращаться к Linux. Однако всё это костыли и работает не очень хорошо, остаётся ждать, когда Microsoft пофиксят эти проблемы.
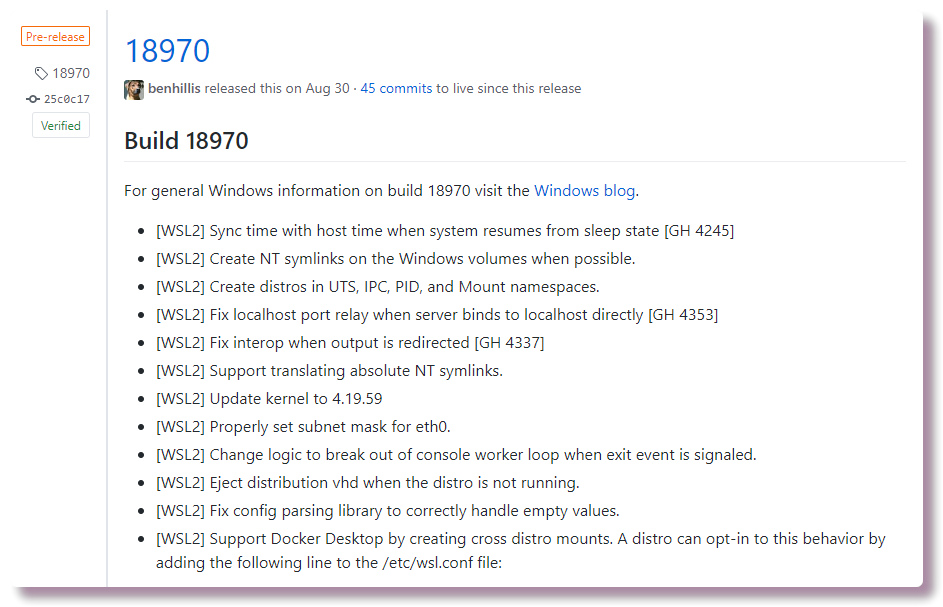
UPD. Пока я писал эту статью, обнаружил, что вышли обновления (билд 18945), в которых появилась возможность достучаться через localhost до сервисов, запущенных в WSL. Правда, оказалось, что есть баг, из-за которого всё равно это не работало у всех, фикс в августовском билде 18970. Так как не всем прилетают обновления, даже если быть участником программы Windows Insiders, я не стал корректировать информацию, может кому-то это поможет настроить сетевое взаимодействие.
OpenSSH в Windows и автозапуск сервисов
Windows 10, как и Windows Server 2019, комплектуется форком OpenSSH, включающем все знакомые утилиты ssh-keygen, ssh-add, scp и другие, а том числе ssh-agent и сам сервер sshd. И клиент, и сервер поставить можно через Apps > Apps and Features > Manage Optional Features, но версия клиента ssh будет не последняя. Я столкнулся с багом, не позволяющим коннектиться к хосту через jump-хост с опцией ProxyJump и оказалось, что эту проблему пофиксили, но нужно вручную обновить SSH клиента. Установить актуальную версию Win32 OpenSSH можно, скачав zip из раздела Releases на гитхабе, и распаковав, к примеру, в C:\Program Files\OpenSSH. Сторонним софтом ssh.exe (например, при использовании Remote Development режима в VSCode) вызывается из $PATH (%SYSTEMROOT%\System32\OpenSSH\), нужно изменить переменную среды. Environment variables изменяются через GUI в Start > Edit the system environment variables (Пуск > Изменение системных переменных среды), там необходимо новый путь поставить выше старой версии.
Так как в WSL не работает Systemd, есть проблема с автозапуском сервисов со стартом системы. Есть несколько способов настроить автостарт ssh сервера в WSL, самый простой — это создать задачу в Task Scheduler, где прописать команду старта сервера. В интернете можно найти разные инструкцииавтозапуска через скрипты vbs, ps1 или bat. Проблема почти всех способов в том, что триггером является запуск основной ОС Windows, то есть, если произойдёт сбой WSL и придётся перезапускать систему (wsl -t), то Linux запустится без запущенного сервиса. При старте Windows дистрибутив WSL запускается только в момент первого обращения к нему.
Я использую SSH-сервер на ноутбуке внутри WSL для того, чтобы удалённо можно было ходить с машины на машину. И, благодаря тому, что я использую техники ssh port forwarding и продуманно настроенный централизованный конфиг SSH клиентов, я могу прозрачно ходить по всем своим серверам, вводя хостнейм вместо адресов. То есть, если даже подключить какой-то из ноутбуков к мобильной сети, autossh демон подключится к jump-хосту и я всё равно смогу зайти на компьютер, никакой NAT не будет помехой. Поэтому мне важно, чтобы sshd всё время был в состоянии up.
Единственный рабочий способ попасть по SSH в WSL — это пробросить порт SSH. Это можно сделать с самого WSL с помощью RemoteForward, либо с другого сервера в домашней сети. Мало лишь кому это надо, да и это уже advanced level, так что просто приведу рабочую команду:
❯❯ ssh -R '*:2363:*:22' -N -f mt.example.com
Теперь при коннекте на адрес mt.example.com:2263 можно попасть прямо в WSL.
Если планируется поднимать SSH-сервер в WSL, нужно не забыть сконфигурировать необходимые параметры запуска сервера в /etc/ssh/sshd_config. Чтобы не было конфликта при бинде сервиса на порт 22, OpenSSH сервер в Windows следует отключить или вовсе удалить, если он установлен (Apps > Apps and Features > Manage Optional Features).
X forwarding
Приятным моментом оказалось, что в Windows 10 есть утилита clip.exe, позволяющая перенаправлять stdout напрямую в буфер обмена Windows. Это удобно использовать в таких программах как tmux, а благодаря пробросу X-сервера текст можно копировать и с удалённых хостов. Чтобы всё работало, необходимо иметь всегда запущенный X-сервер в Windows и правильно прописанную переменную $DISPLAY.
Немного скучной теории. На *nix системах с запущенным X имеются разные типы буферов обмена (primary, secondary, clipboard), в контексте этой статьи это не так важно, но важно для общего понимания механизма работы. Для работы с буферами обмена на Linux есть две утилиты (xclip и xsel). Обе утилиты имеют схожий функционал, в xsel его немного больше, но базовый функционал, необходимый для проброса содержимого буфера, одинаков. В X приложениях выделенный текст попадает в primary selection, вставляется при этом средней кнопкой мышки, в xclip и xsel используется по умолчанию primary selection.
Например, чтобы скопировать в буфер по умолчанию содержимое переменной, нужно передать stdout на stdin утилиты xclip, без дополнительных параметров:
❯❯ echo -n $DISPLAY | xclip
А чтобы вывести содержимое буфера по умолчанию, запустить xclip с ключом -o:
❯❯ xclip -o

172.20.160.1:0
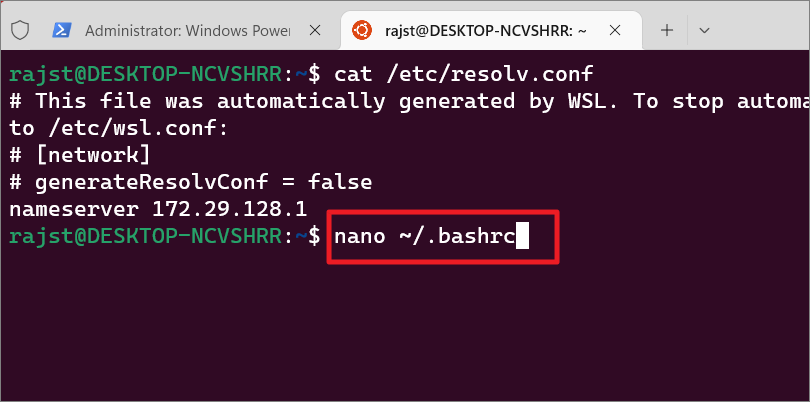
Чтобы буфер обмена перенаправлялся через X-сервер и графические приложения запускались на локальном сервере X, необходимо в переменную $DISPLAY прописать IP-адрес, являющийся default gateway для WSL. Пока что ничего лучше того, чтобы брать его из resolv.conf (который генерируется автоматически Windows), не придумали. Поэтому, самый простой способ — прописать экспорт переменной $DISPLAY в профайле шелла (например, ~/.zshrc для zsh).
❯❯ echo "export DISPLAY=$(cat /etc/resolv.conf | grep nameserver | awk '{print $2}'):0" >> ~/.zshrc
В качестве X-сервера я выбрал бесплатный VcXsrv, он умеет работать с буфером, имеет разные режимы отображения окон и запускается из командной строки с прописанными опциями. По ссылке на gist можно посмотреть все опции.
Создать задачу автозапуска X-сервера можно в Task Scheduler примерно таким образом:
Triggers: At startup

Actions: Start a program

____Program: "%ProgramFiles%\VcXsrv\vcxsrv.exe"

____Arguments: -wgl -dpi auto -ac -multiwindow
SSH ключи
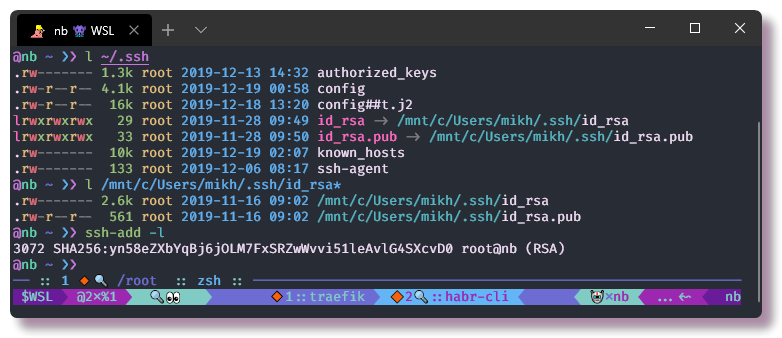
Чтобы программы из Windows могли использовать SSH ключи (например, редактор при работе с удалённым репозиторием GitHub), и в то же время не было второй копии ключей в WSL, лучше всего сгенерировать ключи в Windows %HOMEPATH%/.ssh и создать симлинки в домашней директории WSL.
ssh-keygen -f /mnt/c/Users/${WIN_USER}/.ssh/id_rsa -b 4096

ln -sf /mnt/c/Users/${WIN_USER}/.ssh/id_rsa ${HOME}/.ssh/id_rsa

ln -sf /mnt/c/Users/${WIN_USER}/.ssh/id_rsa.pub ${HOME}/.ssh/id_rsa.pub
Либо, в ~/.ssh/config можно прописать параметр IdentityFile, указав путь к ключам на диске Windows:
Host *

    IdentityFile /mnt/c/Users/${WIN_USER}/.ssh/id_rsa
Если ключи были скопированы откуда-то и права на файлы не выставлены правильно, поправить permissions:
chmod 600 /mnt/c/Users/${WIN_USER}/.ssh/id_rsa

chmod 644 /mnt/c/Users/${WIN_USER}/.ssh/id_rsa.pub

chmod 700 /mnt/c/Users/${WIN_USER}/.ssh
Таким образом, при дальнейшей настройке доступа по ключам SSH пользователь идентифицируется однозначно одним набором ключей в одном месте, как при использовании приложений Windows, так и Linux. Теперь можно добавить публичный ключ на сервера/сервисы, куда необходимо будет ходить с этого компьютера. Если в домашней сети есть другие устройства, на которые требуется доступ по SSH, то правильно будет скопировать свой публичный ключ на эти сервера (ssh-copy-id), но не надо копировать ключи одного сервера на другой. Так как при работе через SSH можно (и нужно) использовать ssh-agent, то при коннекте с одного сервера на другой, агент заботится, чтобы авторизация происходила по проброшенному ключу. Чтобы всё работало правильно и ожидаемо, нужно позаботиться о файле ~/.ssh/config, в котором надо прописать все необходимые опции.
Host *

    TCPKeepAlive                         yes

    ServerAliveInterval                  30

    ServerAliveCountMax                  3

    ForwardAgent                         yes

    AddKeysToAgent                       yes

    ForwardX11                           yes

    ForwardX11Trusted                    yes
Какой терминал выбрать для работы в Linux на Windows
Сначала хочется сделать небольшое ревью существующих терминальных оболочек под Windows, умеющих запускать WSL. Среди пользователей популярен функциональный комбайн MobaXterm, который умеет создавать различные сессии, в том числе графические (WSL, bash/zsh, Mosh, RDP, VNC и т.п.), позволяет делать макросы и запускать скрипты, имеет много настроек и функциональных возможностей, ssh agent, автозапускаемый ssh port forwarding, и даже имеет встроенный сервер ftp/tftp/http, но продукт closed source и, к тому же, платный. Hyper — другой, более современный эмулятор терминала, позволяющий запускать WSL shell, терминал построен на HTML/JS/CSS и расширяется с помощью плагинов в виде node.js модулей (awesome list). Есть и другие терминалы, позволяющие запускать WSL с разной степенью костыльности (ConEmu, его форк Cmder, WSLtty и др.), но их я оставлю без внимания.
Дальше в этой статье речь пойдёт про Windows Terminal, на который я перешёл с недавних пор, и пока что испытываю только положительные эмоции. Terminal пока что ещё в статусе бета, но работает достаточно стабильно. Из фич на данный момент реализован мультитаб, разделение панелей (splitting), настраиваемые профили терминальных подключений, цветовые схемы, ну и больше нечего перечислить. Но этого функционала вполне хватает, мне даже нравится, что софт не перегружен лишним — как будто бы разработчики придерживаются принципа KISS.
Terminal эволюционировал из проекта Windows Console (ConPTY), научившись поддерживать ANSI/VT последовательности, 24-bit RGB true color и UTF-8. По ссылкам (начало, продолжение) на Хабре замечательный перевод серии постов блога Windows Command-Line: Inside the Windows Console, где рассказывается про историю создания терминалов, связанные с этим стандарты передачи управляющих последовательностей, кодовые страницы, юникод, появление эмуляторов терминалов и в дальнейшем уже эволюцию командной строки Windows. Техногикам это может быть интересно. Инженерный состав, работающий над этим opensource проектом, ведёт девблог Windows Command Line, который более, чем полностью посвящён WSL и Windows Terminal. Никогда бы до этого момента не поверил бы, что буду с интересом наблюдать за развитием продуктов MS, но что они делают в рамках развития WSL, Terminal и VSCode, действительно заслуживает уважения. Как начиналось развитие WSL, описано в Microsoft Open Source Stories (перевод есть на Хабре). Кстати, Microsoft с 2016 года является платиновым участником Linux Foundation .
Установка и настройка Windows Terminal
Установить Windows Terminal можно из Windows Store, либо скачав бинарник из раздела Releases на гитхабе проекта, там же и вся актуальная информация, инструкции и FAQ. Терминал требует, как минимум, версию Windows 1903 и билд 18362. Предпочтительнее устанавливать через Windows Store, так как обновлять в этом случае проще, прямо из стора. Обновления выходят регулярно, на гитхабе выложен план развития (roadmap) первой версии терминала. На данный момент все фичи версии 1 уже реализованы (по плану до конца 2019 года реализовать все улучшения), дальше несколько месяцев работы над устранениями багов и в апреле 2020 планируется официальный релиз Terminal v1.0. Приятно, что MS теперь есть на гитхабе, их софт научился показывать логи, внятные ошибки и любые проблемы легко гуглятся.
Настроек в терминале пока не много, но их хватает для комфортной работы, продукт активно развивается, есть на github, где пользователи могут создать feature request или bug report. Разработчики принимают участие в обсуждении проблем с пользователями, зачастую предлагая воркэраунды, когда обнаруживается баг.
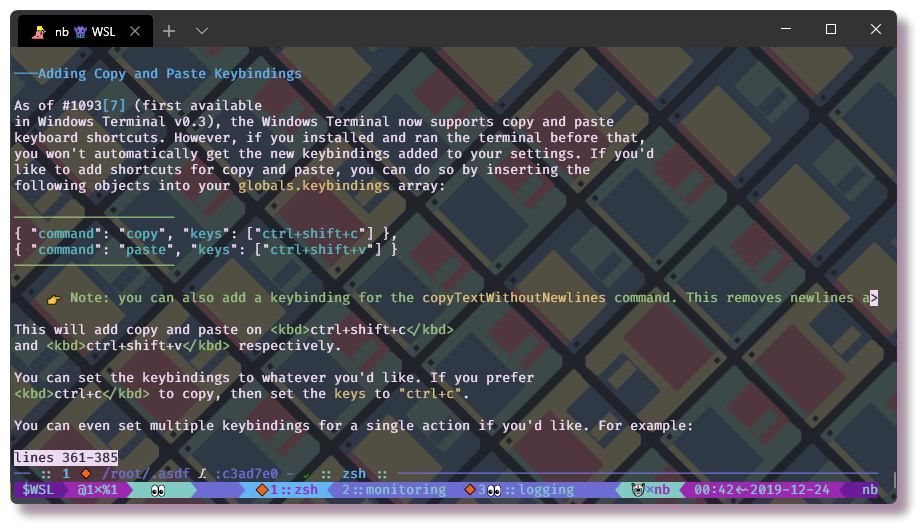
Конфиг хранится в json формате, после сохранения применяется сразу же. Это удобно хотя бы потому, что можно применять хорошие практики управлением конфигурациями рабочего окружения — все линуксовые конфиги я храню в git репозитории, на Windows из рабочего инструмента использую только VSCode, который умеет синхронизировать конфиг через github gist, а локальный конфиг воркспейса сохранять отдельно в dotfiles. Вот и Terminal движется в ту же сторону, используя те же хоткеи и формат конфига, как VSCode. Править конфиг, кстати, удобно через VSCode, особенно если уже пользуетесь этим отличным редактором от MS. Файл конфигурации терминала уже содержит многие дефолтные настройки, а правильный редактор позволяет посмотреть все опции с описанием key и вариантами value из schema (особенно это удобно, когда у проекта ещё нет полноценной документации). Плюсом доступны все фишечки IDE в виде автодополнения, intellisense, проверкой синтаксиса, форматированием и т.д.
Документация для разработчиков доступна тут, а здесь пока что небольшая страничка документации для пользователей. Отдельная страница посвящена настройкам, которые прописываются в json файле конфигурации. Оттуда можно узнать, что структурно настройки делятся на:
- Global (профиль по умолчанию, изначальный размер окна терминала, тема и т.д.)
- Key Bindings (настройки сочетаний клавиш)
- Profiles (настройки, специфичные для каждого терминала)
- Schemes (цветовые схемы)
Есть такое понятие, как динамические профили, они появляются в конфиге автоматически и имеют свойство source. Это касается дистрибутивов WSL и Azure Cloud Shell. Чтобы создать дубликат профиля одного и того же дистрибутива WSL (например, Ubuntu), необходимо сгенерировать GUID и прописать все желаемые настройки, кроме source, а в качестве commandline прописать wsl -d {DistroName}.
Шрифты
Чтобы терминал по-настоящему радовал пользователя, обязательно надо инсталлировать шрифты с поддержкой спец символов и лигатур. Выбрать можно из:
- Fira Code
- Hack
- любые другие патченые шрифты
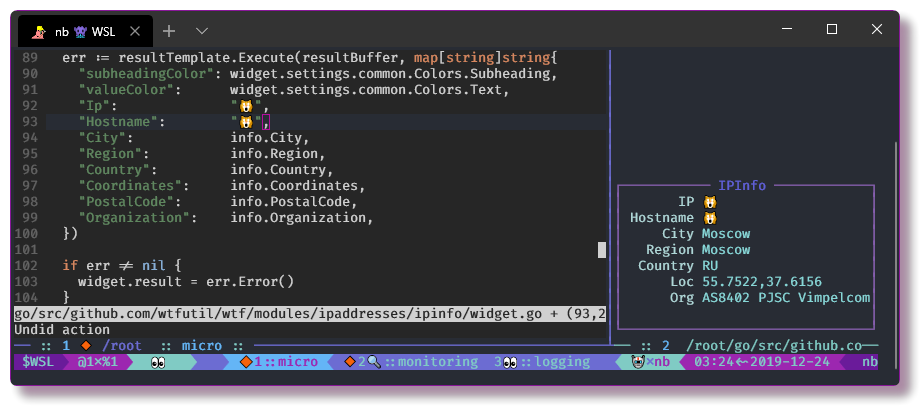
Я использую программерский шрифт Fira Code как в терминале, так и в редакторе. Им поддерживаются большинство символов, используемых в в оформлении CLI программ и консольных интерфейсов, лигатуры, а также нет никаких проблем с отображением эмодзи в терминале.
Устанавливается шрифт в Windows с помощью установщика шрифтов ОС. Для этого надо скачать последнюю версию понравившегося шрифта с github releases архивом и вручную установить шрифт в системе.
Посмотреть название шрифта (настройка терминала fontFace) можно при установке или после в приложении Character Map (Таблица Символов). Кроме этого, в Start -> Settings -> Personalization -> Fonts можно посмотреть, как шрифт рендерится в разных режимах, и заодно проверить, как рисуются лигатуры.
Заключение
Получилась очень объёмная статья, в одном месте собрана вся актуальная информация по установке, настройке и использованию Windows Terminal совместно с WSL. В дальнейшем я хочу так же оформить статьёй заметки о ZSH и tmux, и расписать свой опыт деплоя конфигураций на VM и синхронизации dotfiles между хостами. Всё в рамках автоматизации домашней сети, но это будет полезно и для разработчиков / девопсов / системных инженеров. Ещё из нераскрытых тем остался запуск Docker в WSL 2, но у меня нет необходимости запускать докер на персональном компьютере, так как для этого есть выделенный сервер.
Я надеюсь, что никто не пожалел, что дочитал статью и вынес для себя какие-то новые знания. Если кому-то есть, что добавить, давайте делиться мыслями в комментариях. Если есть какие-то замечания по тексту, пишите в ЛС, хочется поддерживать этот гайд в актуальности.
References
- Announcing WSL 2 (devblogs.microsoft.com)
- WSL 2 is now available in Windows Insiders (devblogs.microsoft.com)
- Memory Reclaim in the Windows Subsystem for Linux 2 (devblogs.microsoft.com)
- Automatically Configuring WSL (devblogs.microsoft.com)
- wsl2-tutorial (github.com)
- Terminal v1.0 Roadmap (github.com)
- Editing Windows Terminal JSON Settings (github.com)
Windows Subsystem for Linux (WSL) is a compatibility layer that allows you to run your favorite flavor of Linux distributions inside the Windows Operating System (Windows 10 and 11). You can run Linux on top of Windows 11 (or without the need for a dual boot, using VMWare/VirtualBox, or installing it as your main Operating System).
Unlike Windows 10, Windows 11 comes with WSL 2.0, an upgraded version of WSL, designed to run a full Linux kernel in a Hyper-V environment for improved compatibility. In addition to that, WSL 2 on Windows 11 now supports graphical user interfaces and audio natively which means you can run GUI Linux applications alongside Windows apps. And Windows update keeps the kernel updated.
WSL also allows you to access your Windows files from within the Linux kernel. It combines the best of both worlds by letting admins and developers develop and test cross-platform applications without leaving Windows or requiring additional devices.
In this tutorial, we will guide you through everything you need to know about installing and using Linux on Windows 11 via Windows Subsystem for Linux (WSL).
Prerequisites to Install Linux on Windows 11
One of the key requisites for running the WSL Linux on Windows 11 is virtualization support. Before you install Linux on Windows 11, you need to check whether the CPU virtualization support is enabled on the firmware. Without virtualization, you cannot emulate any different operating system on your PC.
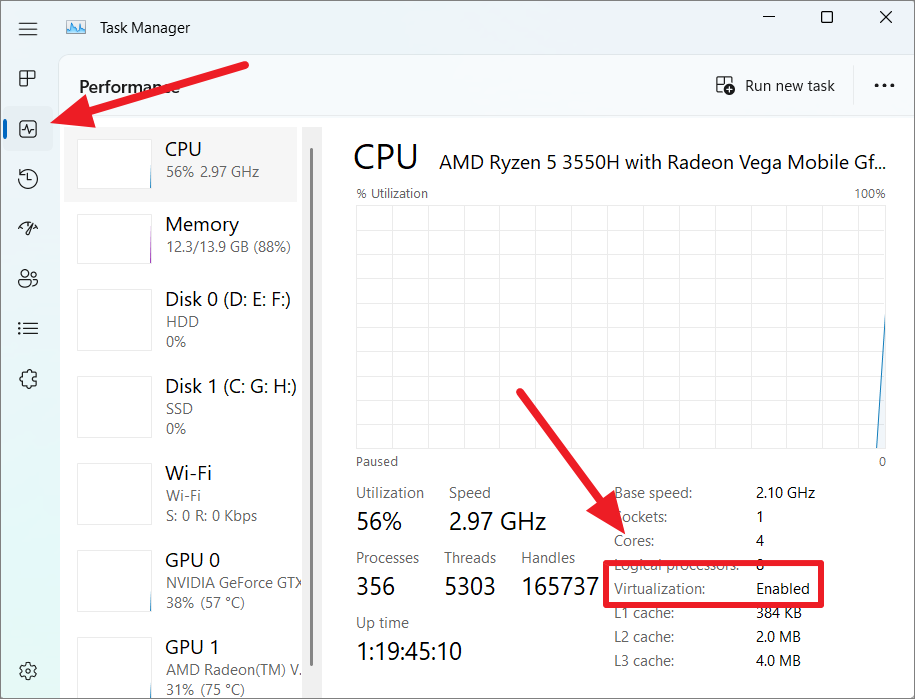
To do that, open Windows 11 Task manager (Ctrl + Shift + Esc) and go to the ‘Performance’ page on the left panel. Then ensure ‘Virtualization’ is ‘Enabled’ at the bottom of the right side page.
To do that, open the BIOS settings or UEFI on your device, and select the ‘Advanced Mode’ option. If you don’t know how to enter BIOS on your Windows 11 PC, follow the instructions in our dedicated guide for the same.
Under the Advanced mode, locate the option called ‘Intel(VMX) Virtualization Technology’ and set it to ‘Enabled’. For AMD processors, select the ‘SVM’ Mode option and change it to ‘Enabled’.
Then, save and exit the BIOS/ UEFI to reboot your system. Once the system restarts, you would be able to install WSL and Linux distributions.
Install Linux Distribution on Windows 11
Before you install your desired Linux distribution through Microsoft Store, you need to enable the Windows Subsystem for Linux feature in Windows features. Here’s how you can enable WSL in Windows 11.
Install Windows Subsystem for Linux using Windows Features
With Windows Subsystem for Linux installed, you would be able to run Linux applications and Bash commands natively on Windows. There are two different types of WSL versions: WSL 1 and WSL 2. While they both provide smooth and continuous integration of Linux within Windows, WSL 2 is the latest and fastest version with full Linux kernel support and system call compatibility.
WSL runs a compatibility layer that bridges the gap between the Linux kernel and Windows for running Linux binary executables natively on Windows. To run WSL 1, you’ll need at least Windows 10 version 1607 (or higher) and a 64-bit PC. For, WSL 2, you’ll need Windows 10 version 2004 (or higher) and a 64-bit PC. Since we are installing WSL on Windows 11, we don’t really need to worry about the requirements.
If your PC came preinstalled with Windows 11, you might have WSL already enabled.
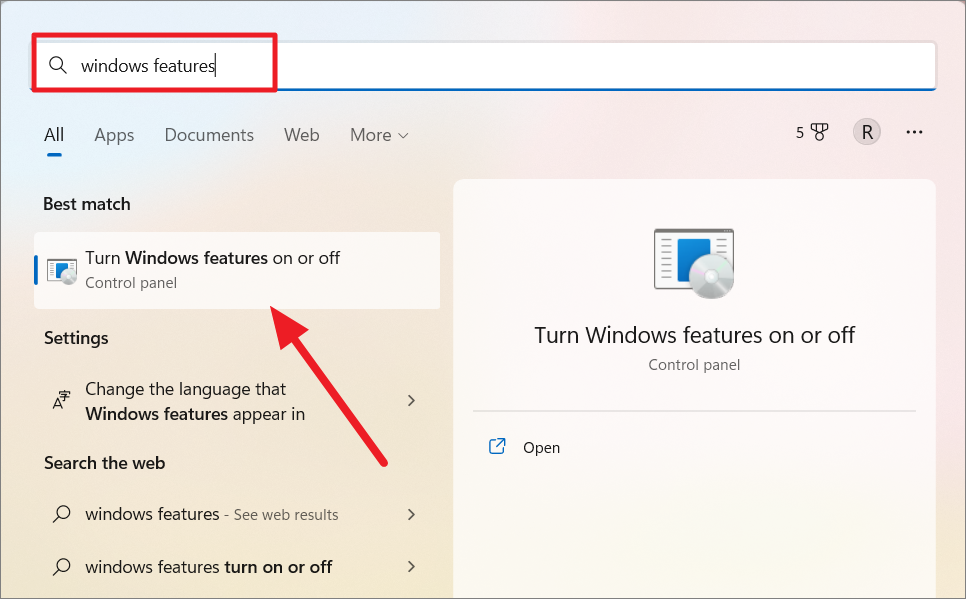
First, open the Start menu and search for ‘Windows features’. Then, select the ‘Turn Windows features on and off’ control panel option from the search result.
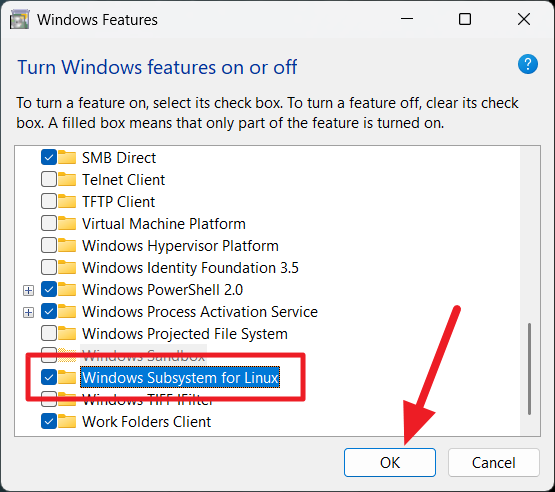
In the Windows Features dialog box, tick the ‘Windows Subsystem for Linux’ option and click ‘OK’
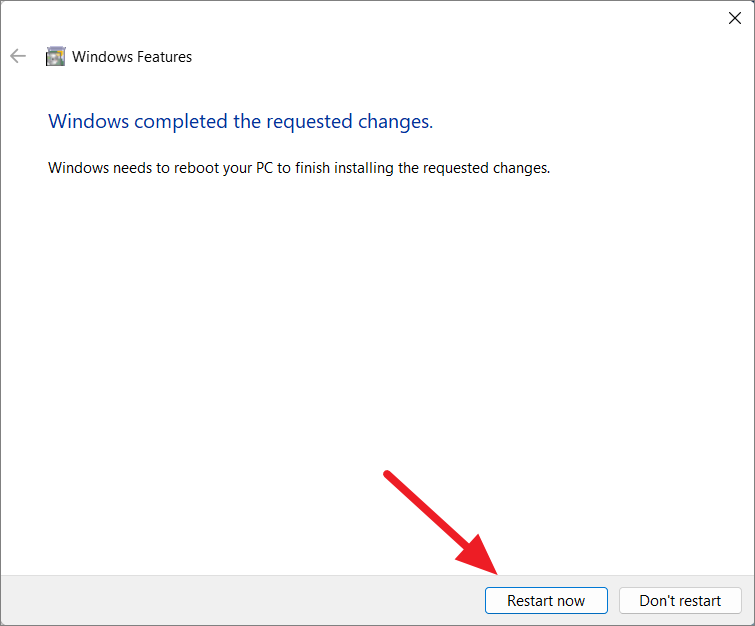
Once the changes are applied, click ‘Restart now’ to restart your computer.
If you want to only install WSL 1, you can now restart your computer and install your Linux distro.
Upgrade to WSL 2 on Windows
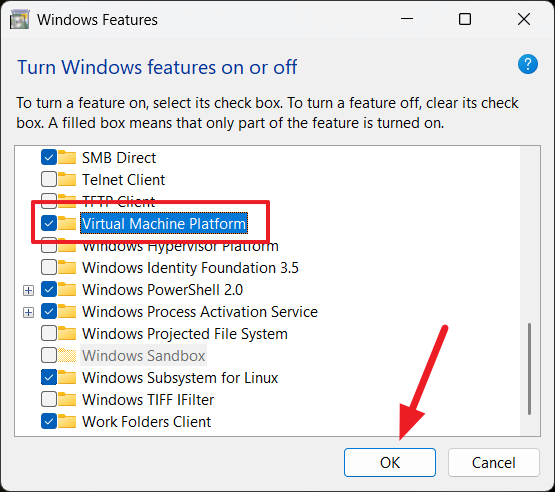
We recommend you upgrade your WSL to version 2 for faster performance speed, and to run a real Linux kernel directly on Windows 11. To do that, you need to enable the ‘Virtual Machine Platform’ feature in addition to the ‘Windows Subsystem for Linux’ feature on the Windows features control panel. Then, click ‘OK’ and reboot your PC. If you upgraded your PC from Windows 10 to Windows 11, you might have WSL already enabled but you’ll need to enable Virtual Machine Platform to upgrade to WSL 2.
Set WSL 2 as the Default Version for all Future Distros
Before setting up WSL 2 as your default version for all Linux distributions, download the WSL Linux kernel package update for x64 systems from this link.
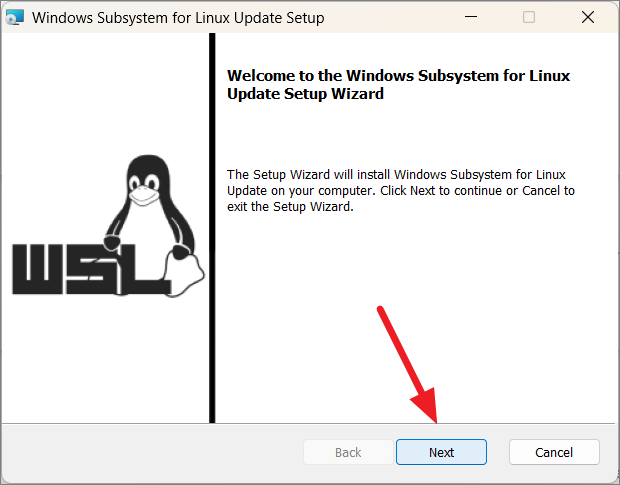
Then, run the ‘.msi’ installer you downloaded and install it. Click ‘Next’ in the wizard to continue.
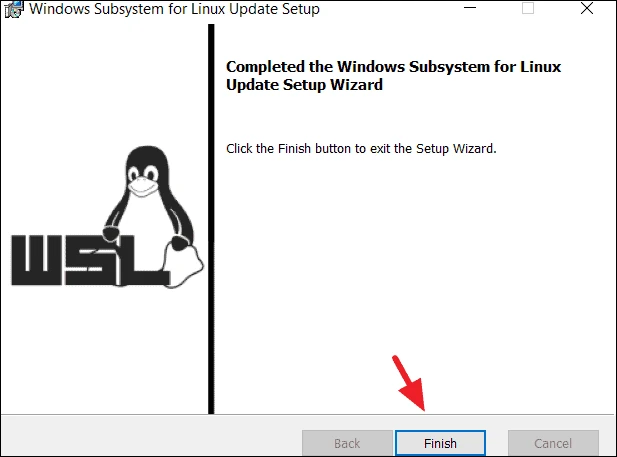
It will take only seconds. Then, click ‘Finish’ to exit the wizard.
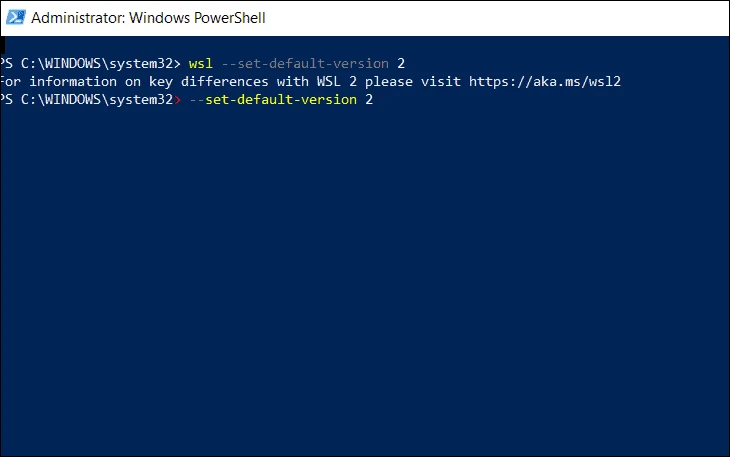
To set WSL 2 as your default version when installing a new Linux distribution, open PowerShell and run the following command:
wsl –set-default-version 2Then restart your system to switch the feature from WSL 1 to WSL 2.
Enable WSL 1 via PowerShell
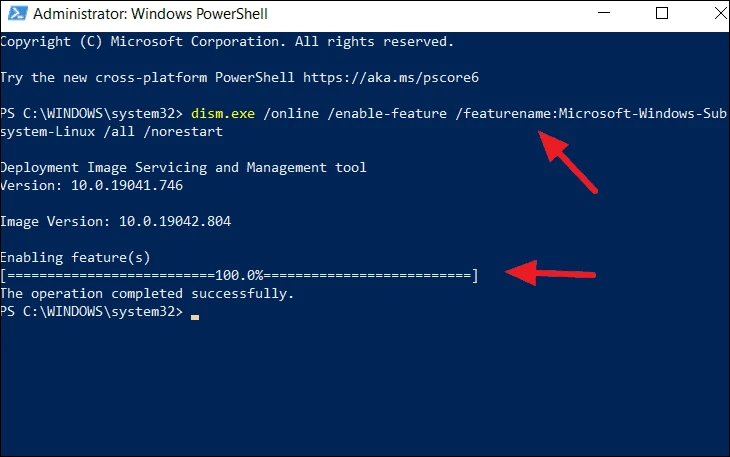
You can also enable WSL via the ‘PowerShell’ command-line tool. This does the same job as the Windows Features control panel. For that, open ‘PowerShell’ as an Administrator and run the below command.
dism.exe /online /enable-feature /featurename:Microsoft-Windows-Subsystem-Linux /all /norestartEnable WSL 2 via PowerShell
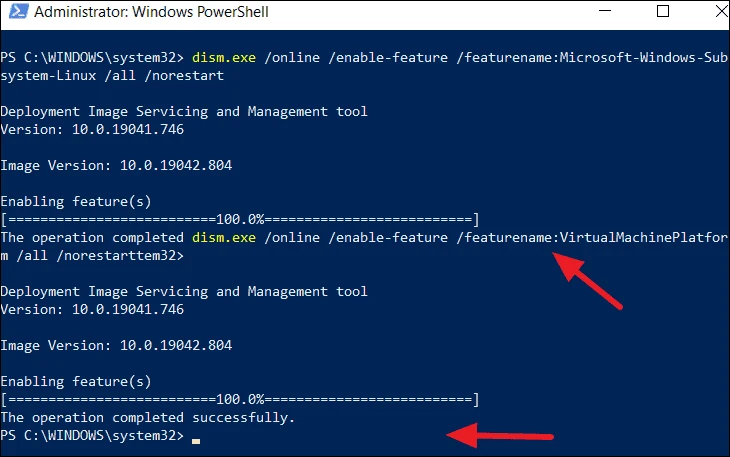
The first step to enabling WSL 2 is enabling the Virtual Machine Platform feature component on Windows. You can also enable WSL 2 via the ‘PowerShell’ command-line tool. To do that, open ‘PowerShell’ as an Administrator and run the following additional command with the WSL 1 command.
dism.exe /online /enable-feature /featurename:Microsoft-Windows-Subsystem-Linux /all /norestartdism.exe /online /enable-feature /featurename:VirtualMachinePlatform /all /norestartInstall WSL from Microsoft Store
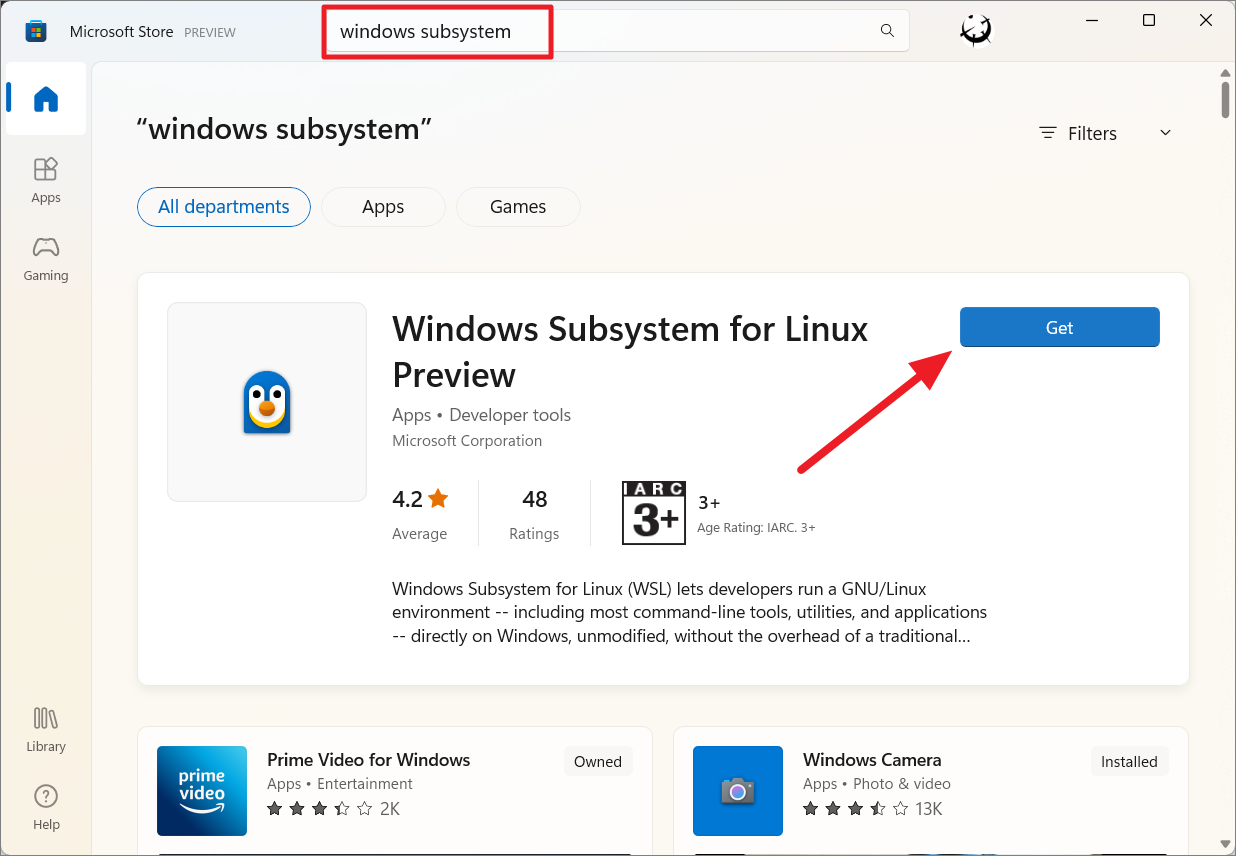
You can also download and install WSL from the Microsoft Store. Launch the Microsoft Store app and search for ‘Windows Subsystem for Linux’. Then, click the ‘Get’ button on Windows Subsystem for Linux Preview’
Microsoft Store will automatically download and install the required files.
Install your Desired Linux Distribution using Microsoft Store
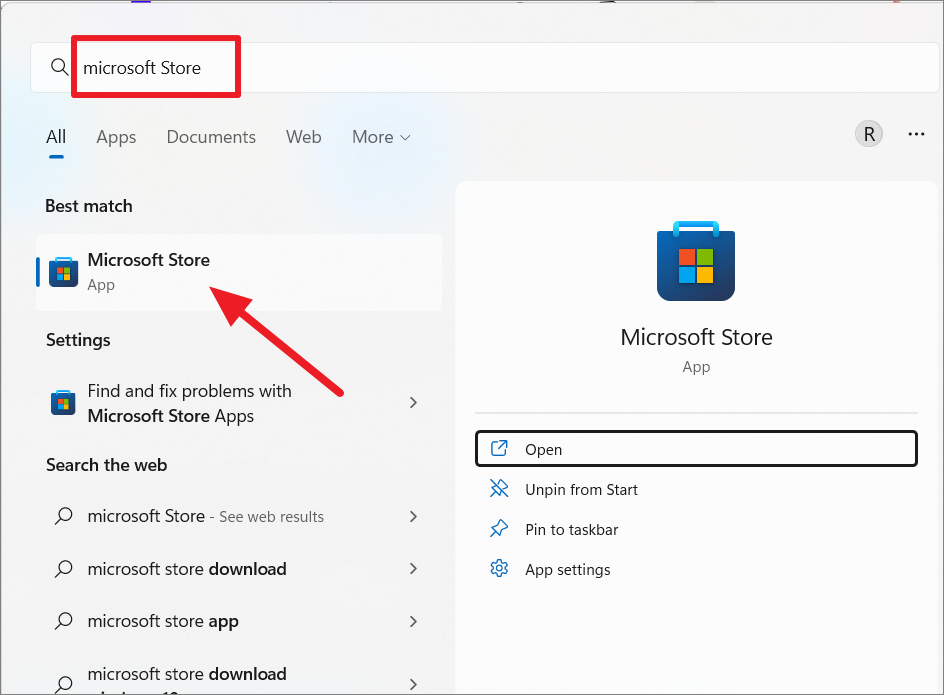
Once WSL is enabled, you can install a Linux distribution of your choice. Microsoft Store has a dozen of Linux distributions that you can download and install. Let us see how to download and install the Ubuntu distro from the Microsoft store. First, search for ‘Microsoft Store’ in the Start Menu search field. Then, open it from the search result.
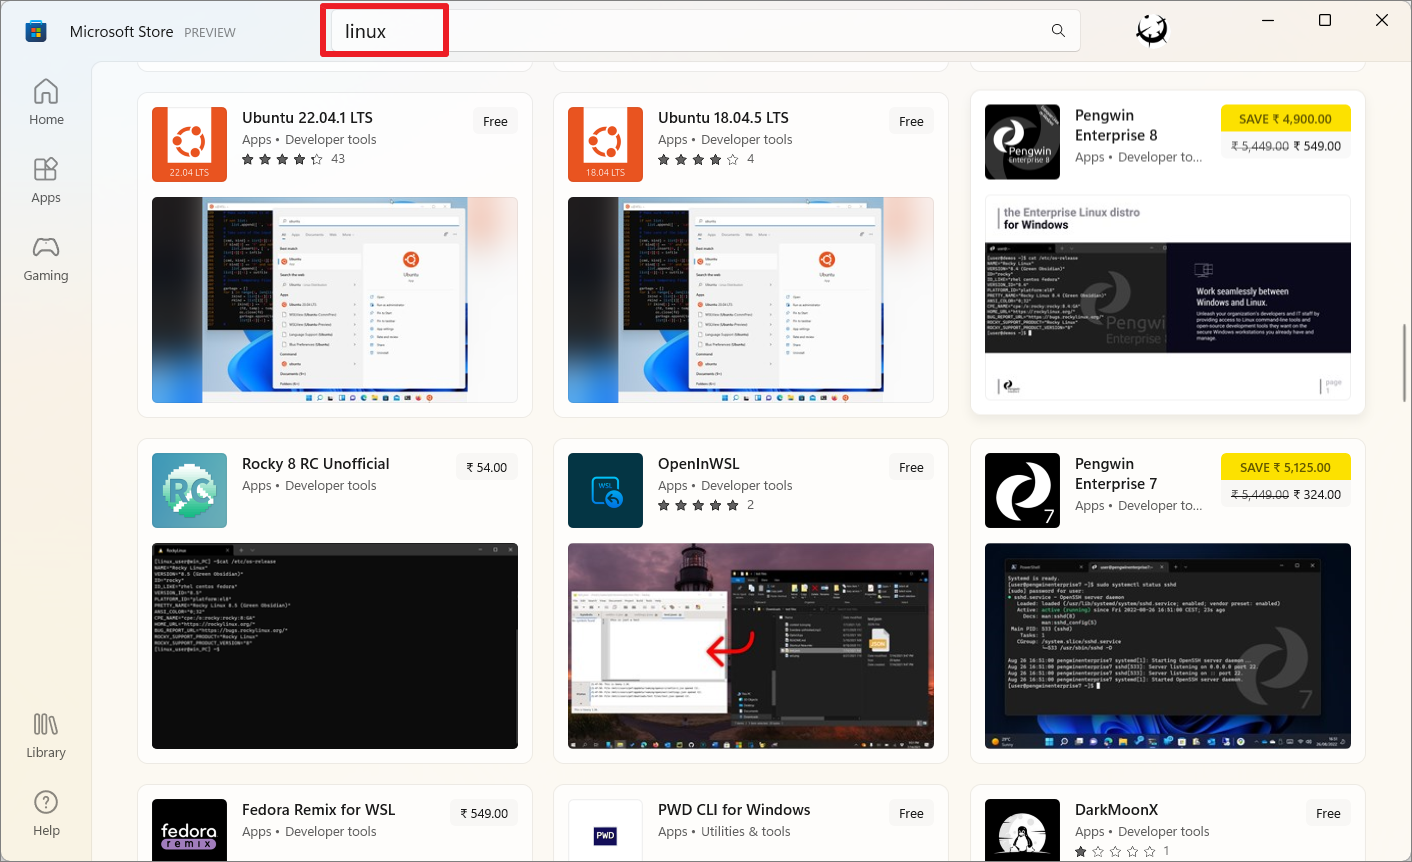
In the Microsoft Store, you can search ‘Linux’ to get the list of Linux distros available and select your desired distro.
Here’s a list of Linux distributions that are currently available in the Windows Store supported by WSL.
- Ubuntu 16.04 LTS
- Ubuntu 18.04 LTS
- Ubuntu 20.04 LTS
- openSUSE Leap 15.1
- SUSE Linux Enterprise Server 12 SP5
- SUSE Linux Enterprise Server 15 SP4
- SUSE Linux Enterprise Server 15 SP3
- Kali Linux
- Debian GNU/Linux
- Fedora Remix for WSL
- Oracle Linux 8.5
- Oracle Linux 8.6
- Oracle Linux 7.9
- Oracle Linux 9
- Pengwin
- Pengwin Enterprise 7
- Pengwin Enterprise 8
- Alpine WSL
- Raft WSL
All of these distributions are available on Microsoft Store for free.
Or, search for a specific Linux distribution. For example, here we are searching for ‘Ubuntu’. Then, choose the Ubuntu version that you want to install from the results.
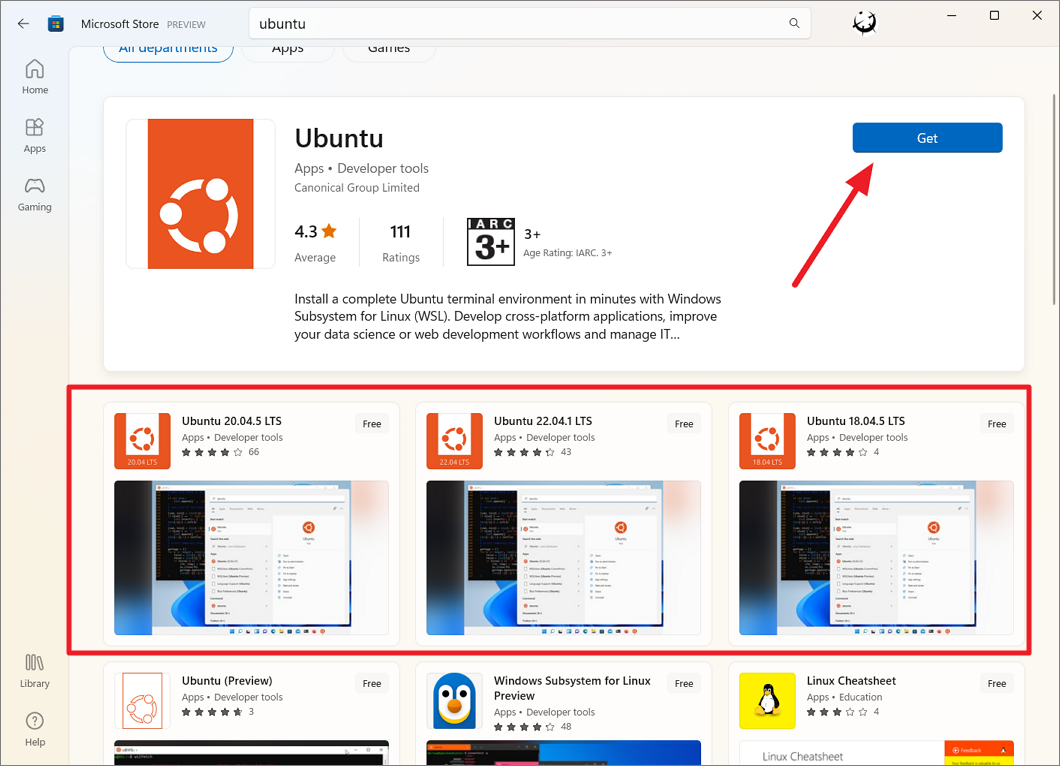
From the results, Ubuntu without a version number is the latest stable version. And Ubuntu with version numbers refers to the specific versions of the distro. You can choose a specific version if you want. In the below example, we are selecting ‘Ubuntu’ to get the latest version of the distro.
Ubuntu (Preview) refers to the daily build of the latest development version of the distro.
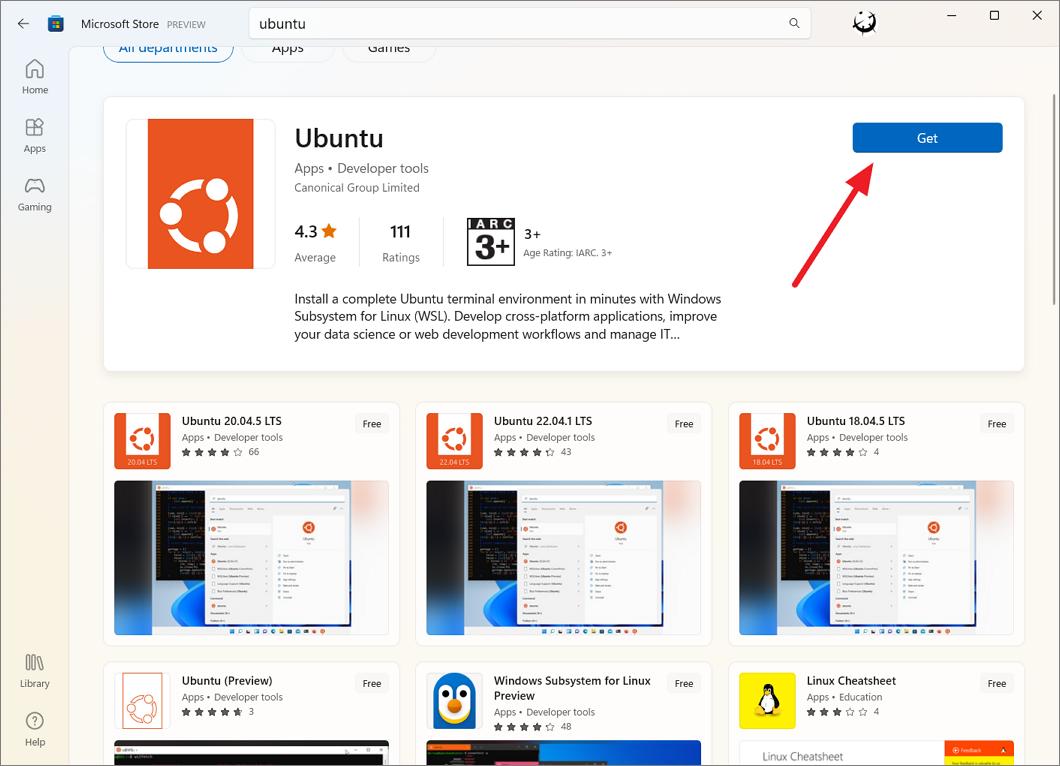
On the Ubuntu distribution’s page, click the ‘Get’ button.
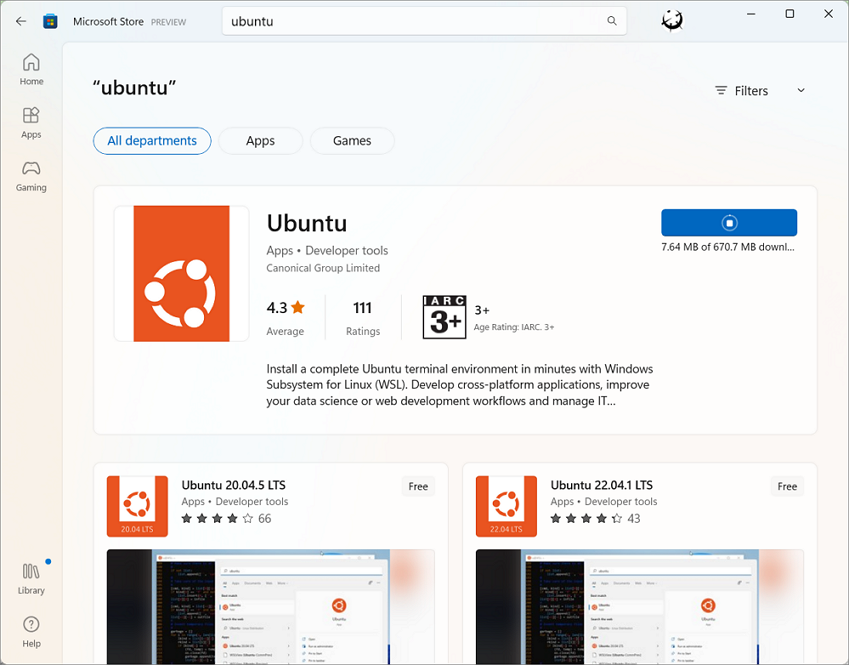
It will take some to finish downloading the complete Ubuntu terminal environment. Once it’s downloaded, it will be automatically installed on your device.
Install Ubuntu 22.04.1 LTS on Windows 11
Canonical Ubuntu’s parent company just released a new and improved version of Linux called Ubuntu 22.04.1 LTS (code name Jammy Jellyfish) in August 2022. This new version of Ubuntu Linux ships with the latest toolchains, including Python, Rust, Ruby, Go, PHP, and Perl. You can now install Ubuntu 22.04.1 LTS through Windows Store on Windows 11.
Before you install this distro, make sure Windows Subsystem for Linux feature and Virtualization technology are enabled on your device.
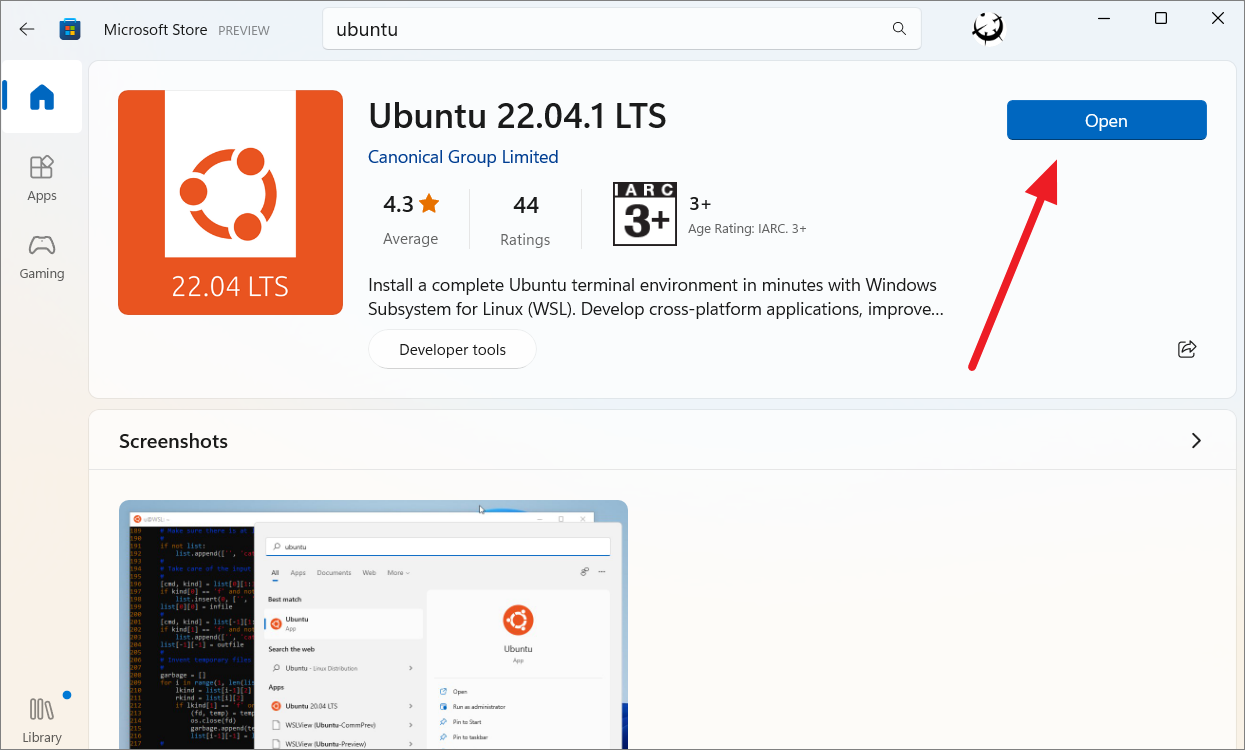
To install the latest Ubuntu version, search for ‘Ubuntu’ in Microsoft Store and select ‘Ubuntu 22.04.01 LTS’ from the search result. Then, click on ‘Get’ to download and install the Linux container.
After the installation is finished, click the ‘Open’ button to launch the Linux terminal. You can also launch the app from the Windows Start Menu.
After it’s downloaded, a Welcome to Ubuntu WSL window will appear. The installer will continue to unpack the distro and install it on your device.
After it’s done, click ‘OK’ on the ‘We are almost done’ prompt box.
Once you click ‘OK’, the main installer windows will appear where you need to configure a few more settings. The main installer window will either be a user interface window or a shell window. Either way, both installer windows have the same options.
First, select the language for the distribution you are installing in the UI window.
Or, select the language from the terminal window.
On the Profile Setup page, you can create a default UNIX user account. Enter your name, username, and password in the given fields. However, you cannot use the mouse in this installer; you can only use the keyboard arrow buttons to navigate the options. After entering details, move to the ‘Done’ button and press Enter.
In the next window, you can specify the mount point and mount options for the automount. You can also choose whether to enable ‘host’ and ‘resolv.conf’ regeneration at every start of the terminal.
In the below example, we are keeping the default WSL configuration options. Then, move to ‘Done’ and press Enter to save the changes.
After the setup is complete, move to the ‘Reboot now’ option to restart your device.
Install WSL and Linux using Windows Terminal (Cmd or PowerShell) in Windows 11
This is the easiest way to install Linux in Windows 11. You can enable the latest version of WSL and install Ubuntu with a single command. You can use these commands in Command Prompt or PowerShell to install Linux. Here’s how you can do this:
First open Windows Terminal by right-clicking the Start menu and selecting ‘Terminal (Admin).
Click ‘Yes’ in the User Account Control to continue.
When the Windows Terminal opens, type the following command and press Enter to install WSL:
wsl --installThe process can take some time to finish. The above command will download and install files, so make sure you have an active internet connection. As you can see from the screenshot, the above command not only enables WSL 2 but also installs the latest version of the Ubuntu Linux distribution automatically. This command installs Ubuntu as the default Linux distribution, but you can change that at any time.
When the installation is complete, you should see this message – “The requested operation is successful. After you see this message, restart your device to apply the changes.
If you get “WslRegisterDistribution failed with error 0x80370102” or “Installation failed with error 0x80070003” during this step, it means you need to enable ‘CPU Virtualization’ in your BIOS or Unified Extensible Firmware Interface (UEFI). Enable Virtualization in BIOS as explained in this guide before and re-execute the command.
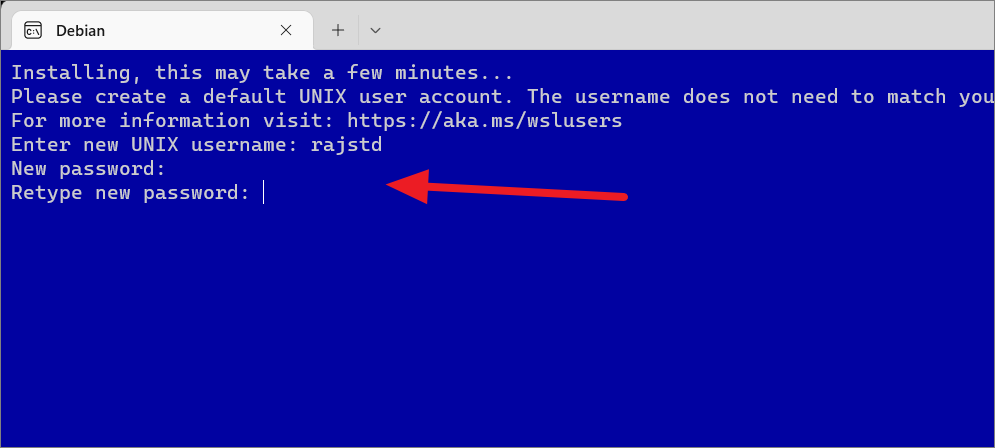
Then, enter the new username and password to complete the setup. This username doesn’t necessarily need to be the same as the Windows account.
After setting up the username and password, the Ubuntu terminal will launch in a separate terminal window as shown below.
Install Different Linux Distributions on Windows 11
If you prefer another flavor of Linux other than Ubuntu with WSL, you can install other versions of Linux on your device. You can install different distributions through Microsoft Store or via the Command line. Although you can install dozen different flavors of Linux through Microsoft Store, some of the Linux distros are not available via Powershell.
To install alternative Linux distributions through Microsoft Store, open the Store app and search ‘Linux’ to get the list of Linux distros available. Then, select your desired distro from the result.
After that, click the ‘Get’ button to download and install the distro.
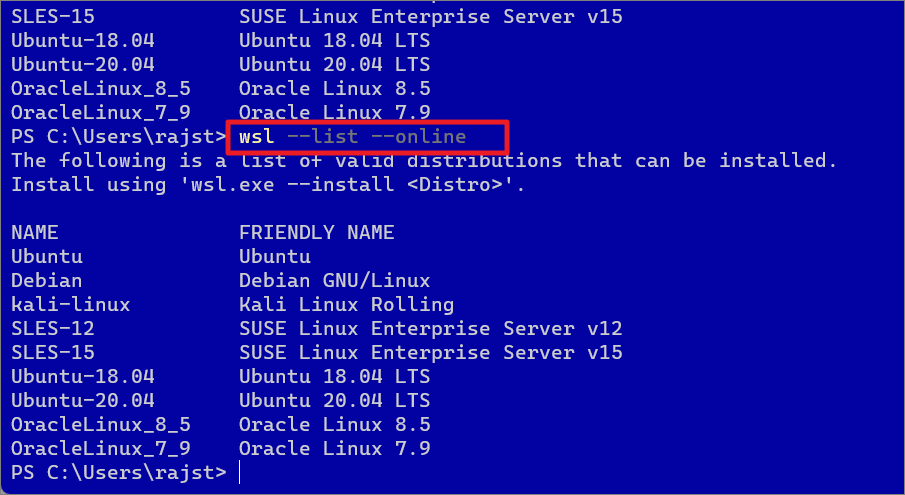
To get the list of other available distributions of Linux via the command line, type either of the following commands:
wsl --list --onlineor
wsl -l -oThis will get a list of supported Linux distributions.
To install a new distro, use the below command:
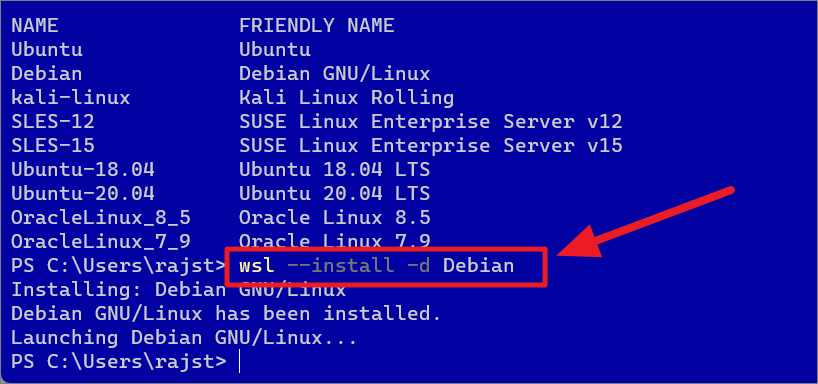
wsl --install -d <Distro>Where replace <Distro> with the name of the distribution you want to install. For example, the command below will install Debian.
wsl --install -d DebianAfter the installation is finished, the setup will continue in another terminal window where you will need to enter a new username and password for the default UNIX user account. This user account will be assigned to the Debian Linux environment alone.
After it’s finished, restart your PC for changes to take effect. Once your computer has restarted, you can launch the newly installed Linux distro from your Start menu or open Windows Terminal, click the down arrow button and select the Linux distro from the drop-down menu.
This will launch the newly installed distro in a Windows Terminal tab.
Launch Your Linux Distro and Use Bash Shell
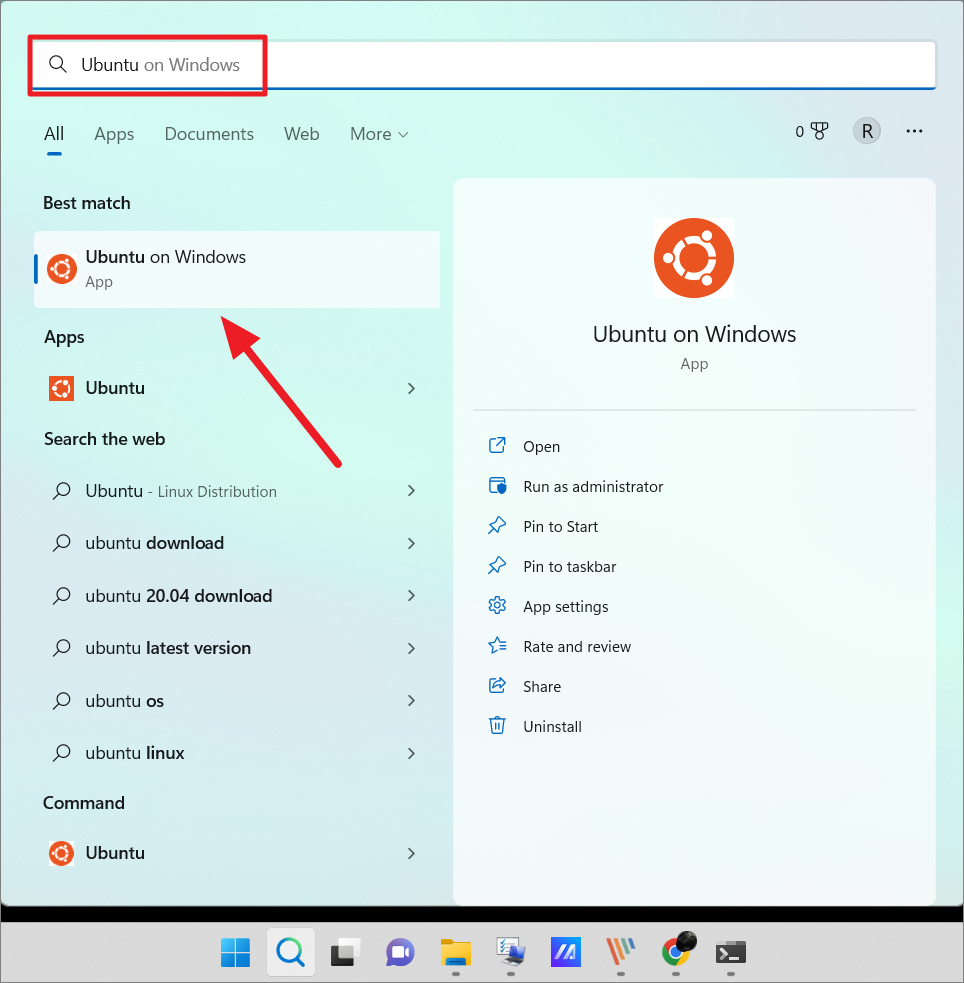
Once the Ubuntu or other Linux distribution is installed, you would be able to access the Linux terminal by searching for it in the Start menu. Open the Start menu, search for ‘Ubuntu’, and select the terminal from the result.
Alternatively, you can open Windows Terminal and click the down arrow button on the tab bar. Then, select the Linux distribution that you installed (Ubuntu) from the drop-down menu to launch the Linux shell.
This will launch the Linux shell environment in the Windows terminal. Now, you can use the Linux Bash Shell in Windows, just as if you were using a Linux PC.
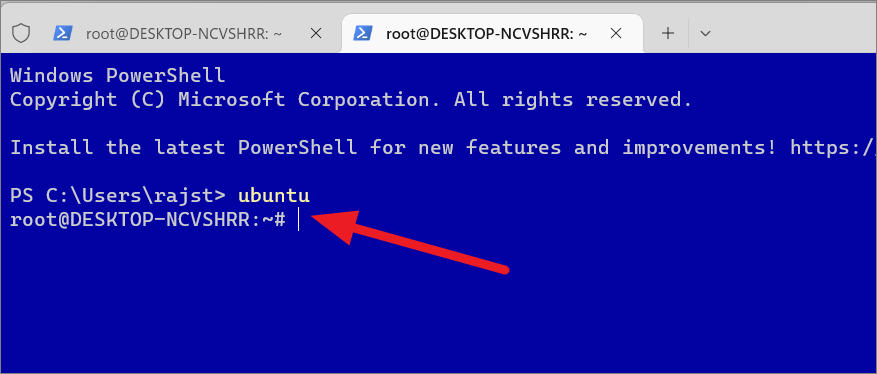
Alternatively, you can just type the distro name and press Enter to quickly launch your distro.
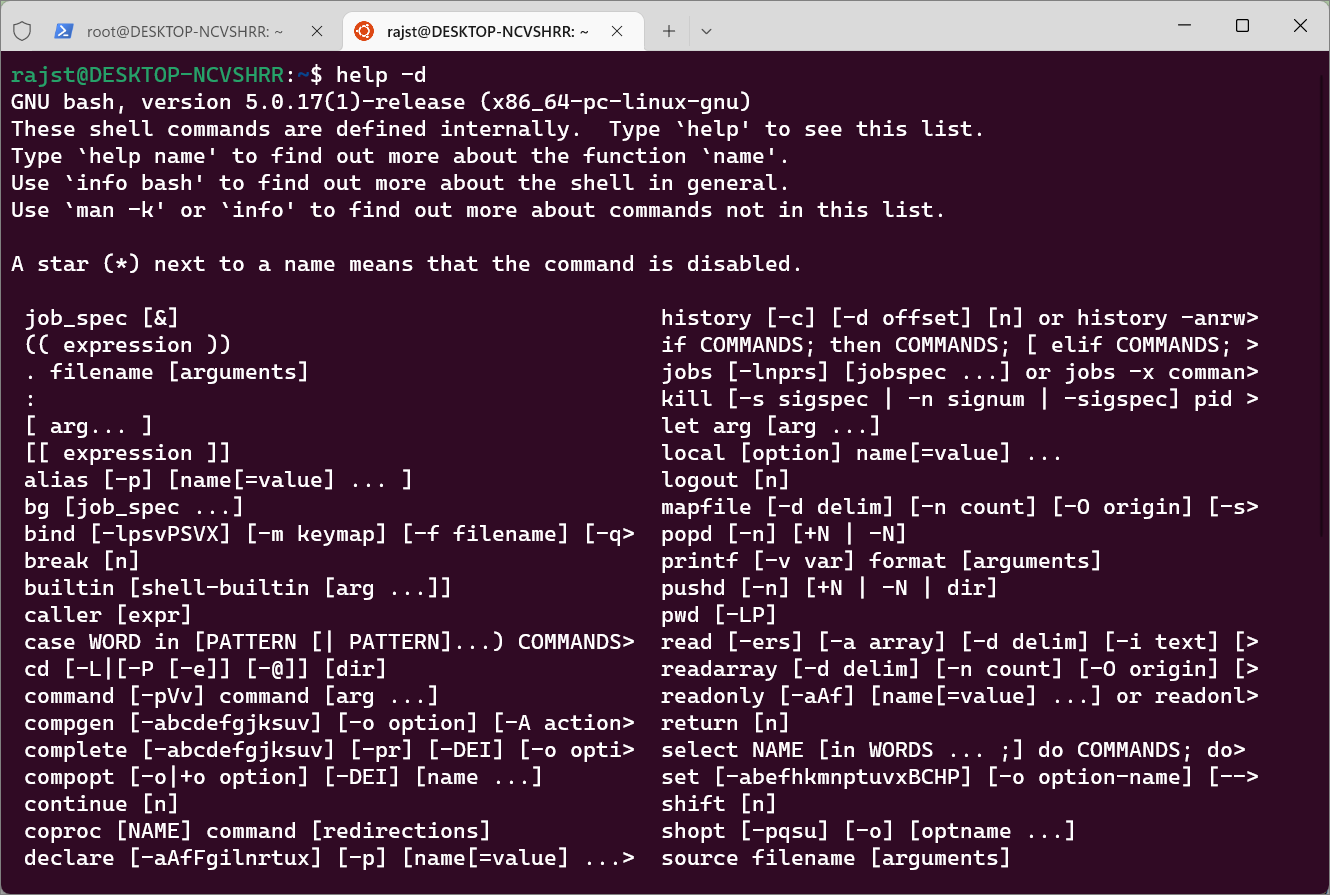
To view the list of all available Linux commands that you can use in Bash, type help-d and press Enter.
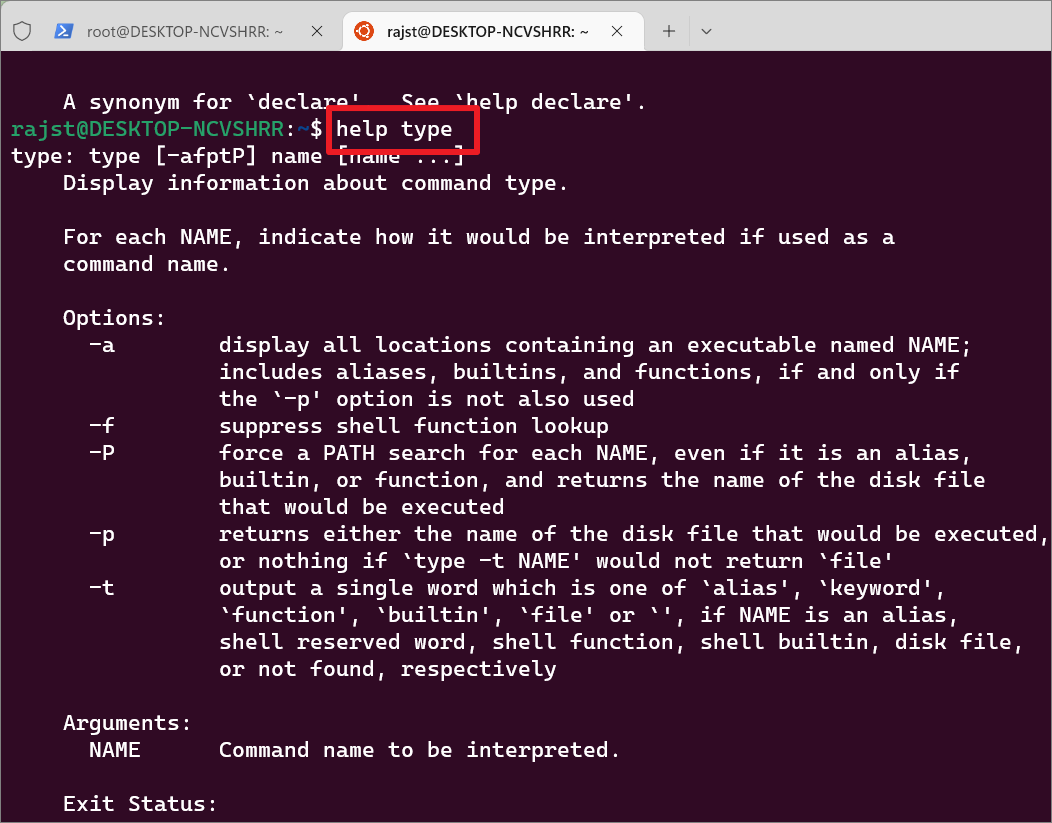
To get more details (such as options, arguments, usage, etc) about a specific command, type help followed by the command name as shown below (e.g. help type).
Another great thing about Linux is that Bash is the default shell included within Ubuntu and other Linux distros which means the same commands can be used on different distros to carry out the same functions. The following commands are mostly executed in Ubuntu Linux but they can be used in other distributions such as Kali Linux, OpenSUSE, Debian, etc.
Update Ubuntu in WSL
Once, the set up finished, it will take you to the bash command line. It’s better to update the software right away. In Ubuntu, you can search for, download, and install software updates, all from the apt command.
To run a command with administrative privileges, add sudo in front of the command.
Enter the below command to update the software:
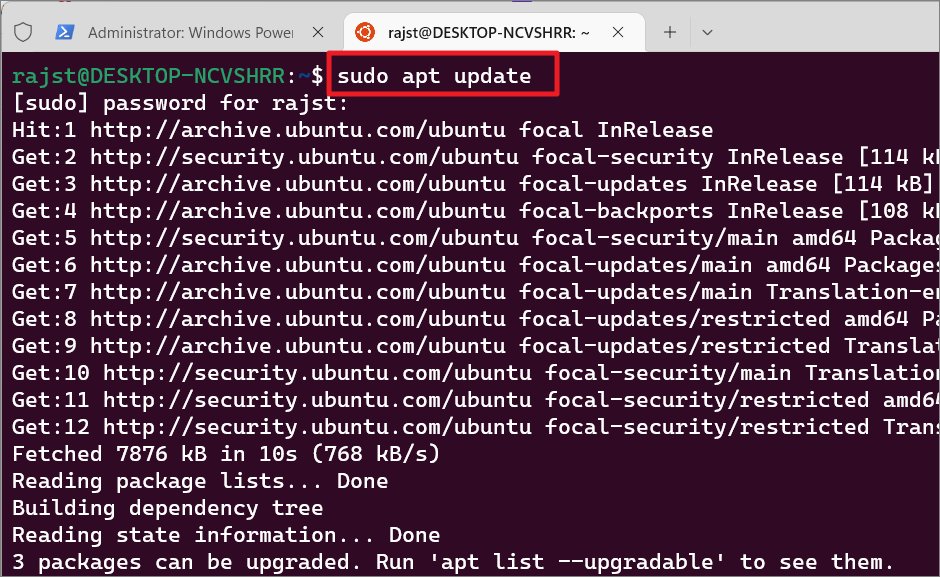
sudo apt updateAs you run the above command you’ll be prompted for the password. Type the UNIX password you created earlier to run the command as an administrator. When you type the password, it won’t be visible, so once you finish typing the password, hit Enter.
Once the password is verified, the above ‘update’ command will check for updates.
Ubuntu will get a series of package lists that can be upgraded in the Linux environment. As you can see below, the command shows that 26 packages can be upgraded.
But they are not upgraded yet. To see the list of available upgrades, use the below command :
sudo apt list --upgradable Then, your password and hit Enter.
This will list all the available updates along with their current version and upgradable version.
If you wish to update only a particular package, you can do so with the below command:
sudo apt --only-upgrade install package Here, replace package with the name of the package you want to upgrade.
For example, we want to update only the package named ‘curl’. To do that enter the below command:
sudo apt --only-upgrade install curlIf you are prompted for the password, type it and press Enter. Otherwise, enter ‘Y’ and press Enter to continue.
It will take a few seconds to install updates to the specified package.
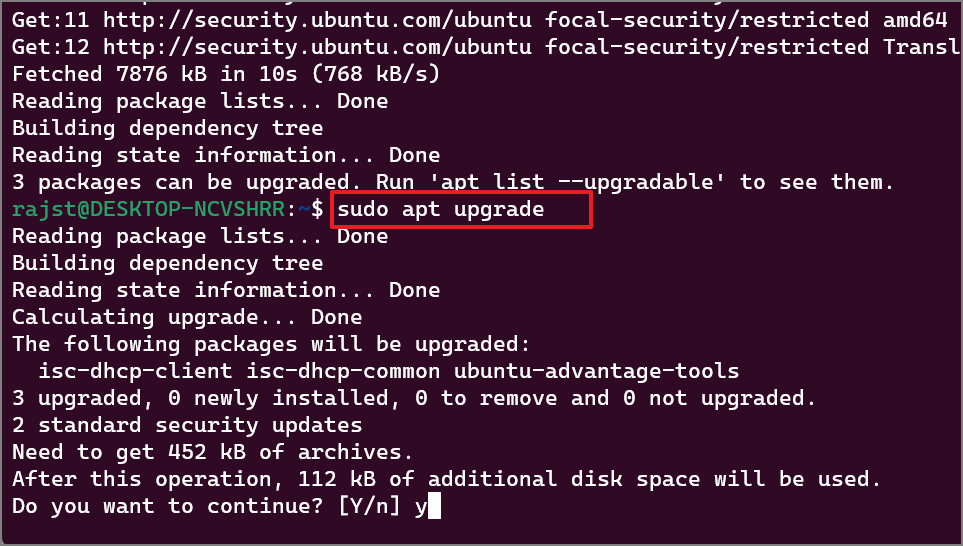
To upgrade all available packages, enter the below command:
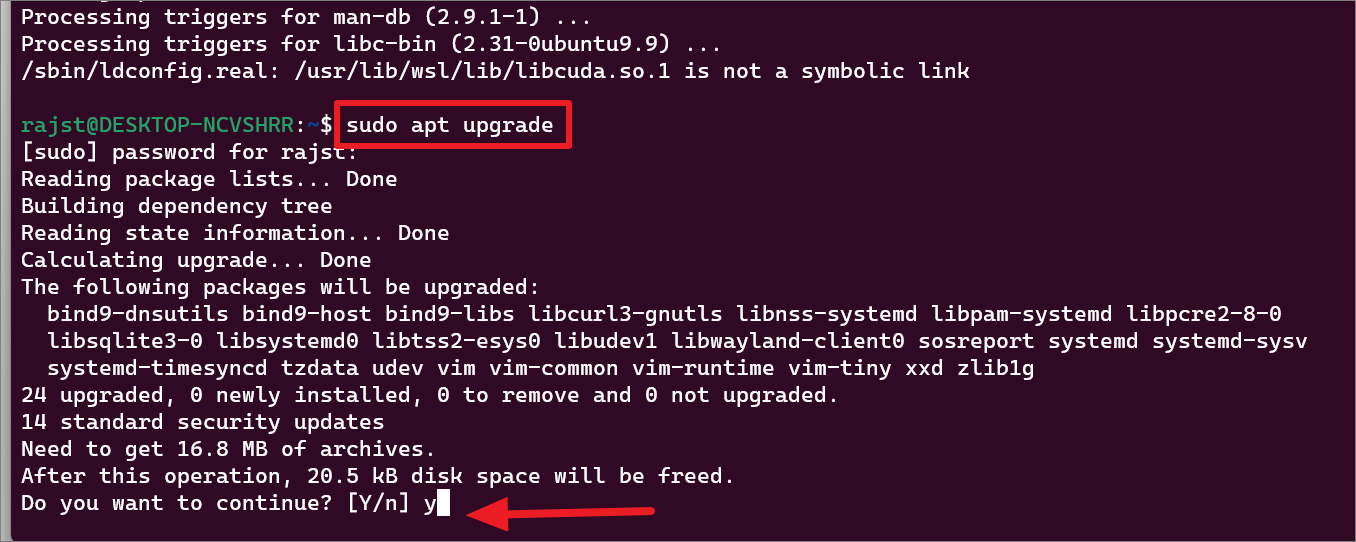
sudo apt upgradeThen, type Y at the prompt to continue the installation.
The above command upgrades packages to their latest versions.
Add a User to Linux Distro in Windows 11
When configuring the new Linux distribution, you will be asked to create a new account and that account will also be used as your default user account. In case you want to create a new user account for a specific distro, here’s how you do this:
To create a new user account, use the below command:
sudo adduser <username>Substitute <username> with the username for the new account.
Example:
sudo adduser rajallthingsEnter your current password when prompted. Then, type and retype the passwords for this new account and press Enter.
After that, enter a new value or leave it blank and press Enter for each value of user information for the new user account. The user information includes Full Name, Room Number, Work Phone, Home Phone, and Others. Finally, click ‘Y’ and hit Enter to confirm the details.
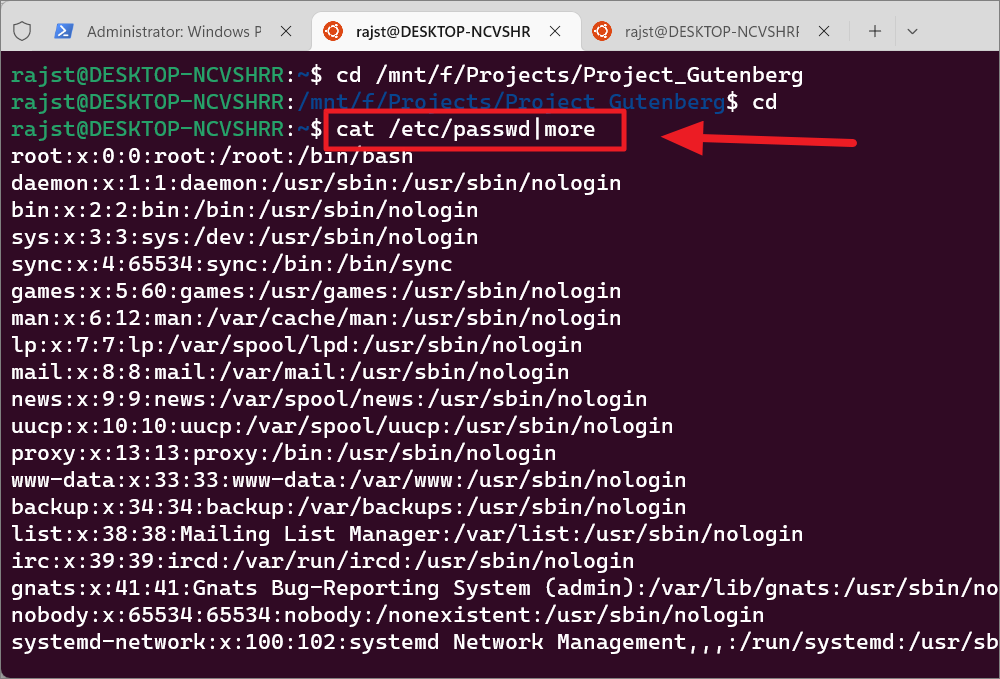
To get the list of user accounts on your Linux console, type the following command and press Enter.
cat /etc/passwd|moreThis will show you a list of special accounts used for daemons, apps, and system user accounts as shown below.
At the bottom of the screen, keep pressing Enter on ‘- -More- -’ to see everything related to user accounts.
You will see your user accounts at the end of the results.
Set Default User for WSL Linux Distro
The default account is the one that automatically signs in when you launch a distro. The one that you created during the initial setup of the distro will likely be the default account.
If you want to set another user account as the default UNIX user for WSL, run the following command:
<Distro> config --default-user <new_user_name>Substitute <Distro> with the name of the Linux distribution and <new_user_name> with the user name you want to set as the default for the distro.
Example:
ubuntu config --default-user rajallthingsIf you are using OpenSUSE, run the following command:
opensuse-42 config --default-user <new_user_name>If you are using SUSE Linux Enterprise Server, run the following command:
sles-12 config --default-user <new_user_name>If you are using Debian Linux, run the following command:
debian config --default-user <new_user_name>If you are using Kali Linux, run the following command:
kali config --default-user <new_user_name>Switch User in WSL Linux Distro in Windows 11
In Linux, ‘sudoers’ is a group of users who are allowed to run commands as root (i.e., elevated). In case you are using a user who is not a sudoer, you can quickly switch users to run elevated commands.
To switch users in the WSL Linux distro, run the following command:
su - <username>Or
su - <username>In the command, substitute the <username> with the actual user name. Example:
Su - rajstdRemove User from WSL Linux Distro in Windows 11
To remove a specific user account from the WSL Linux distro, enter the below command in the Linux terminal:
sudo deluser <username>Replace the <username> argument with the actual user you want to remove.
Example:
sudo deluser nightcircusChange Password in Linux Distro in Windows 11
Linux operates with root privileges, so it is vulnerable to misuse. In case your password is compromised or for some other reason you want to change your password, you can use the following command:
sudo passwd rootAfter entering the above command, you will be prompted for the current password. Type your current password and press Enter. Then, type your new password and then retype your new password.
And the password will be updated successfully for the current account.
Manage Windows Subsystem for Linux in Windows 11
Here’s how you can manage Windows Subsystem for Linux (WSL) and Linux distributions installed on Windows 11 through PowerShell.
List all Installed Linux distros on Windows 11
To list all the installed Linux distributions on your device, run the below command in PowerShell or Command Prompt:
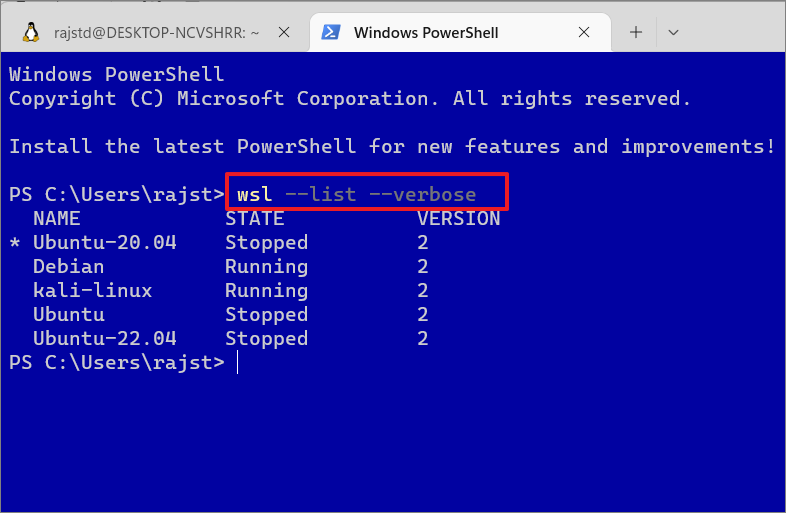
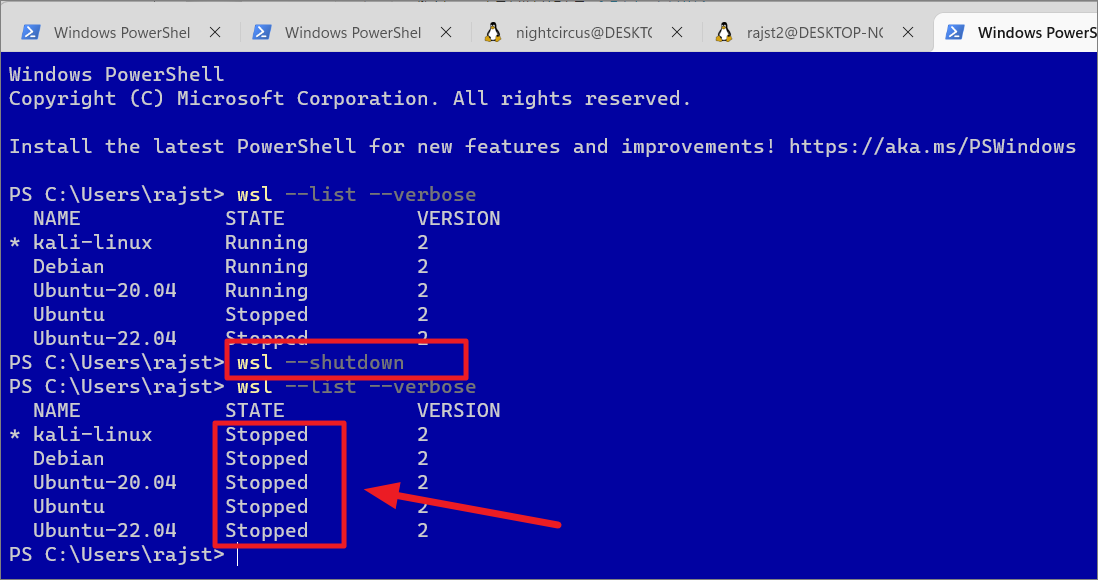
wsl --list --verboseor
wsl -l -vThis will show a list of all the Linux distros installed on your system along with their status and their WSL version.
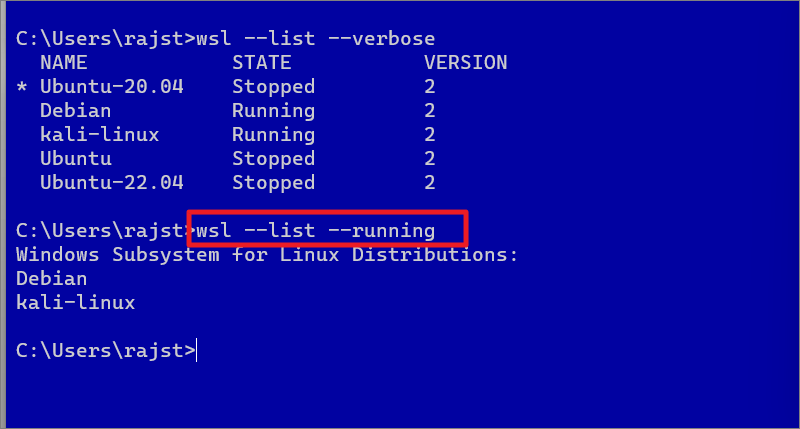
To list only the Linux distros that are currently running on the device, you can run the below command:
wsl --list --runningChange Default Linux Distribution on Windows 11
By default, the WSL command installs and sets Ubuntu as the default Linux distribution or the Linux distribution you first installed. The default Linux distribution will be marked with a small asterisk (*) symbol when you list all distros using the above command. As you can see in the above screenshot, there’s an asterisk (*) character next to the distro name Ubuntu-20.04.
To change the default distribution to something else (e.g. Debian), run the following command:
wsl --set-default debianYou can launch the default distro by simply running wsl in a command line without specifying the distribution.
Run a Specific Linux Distribution through PowerShell
In case you have only one Linux distribution installed on your device, you can run the following command from within PowerShell or Windows Command Prompt to launch it:
wslHowever, if you have multiple Linux distributions on your computer, you can use the following command from within PowerShell or Windows Command Prompt to start a specific Linux distro:
wsl -d <DistributionName>Replace <DistributionName> with the name of the distribution you want to use. Example:
wsl -d debianType the above command and press Enter. This will start the specified distro’s bash shell directly in the current PowerShell or CMD terminal.
If you wish to log in to a WSL distro with a specific user, type the below command:
wsl --distribution debian --user rajstdTo get back to the PowerShell shell, simply type exit and press Enter to exit bash.
Stop a WSL Linux Distro on Windows 11
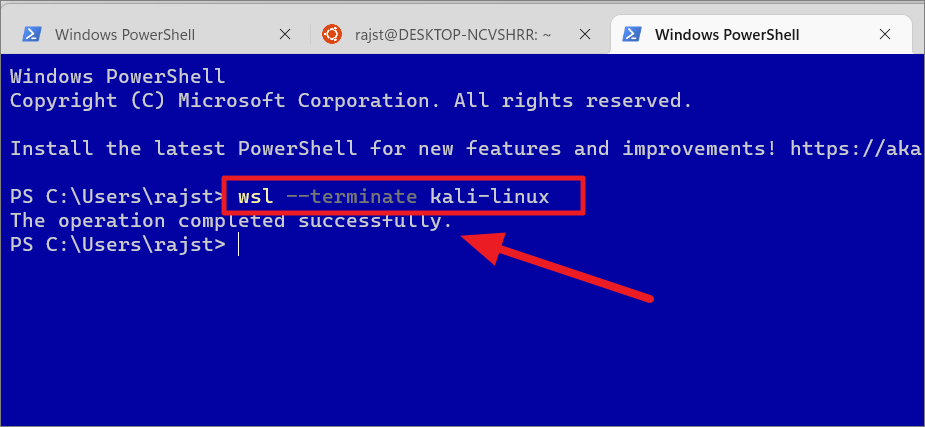
Once a WSL distro is started, it will continue to run in the background even after closing the Linux terminal window or the distro bash shell until you manually terminate the WSL instance. Here’s how you can stop a specific Linux distro or all of them.
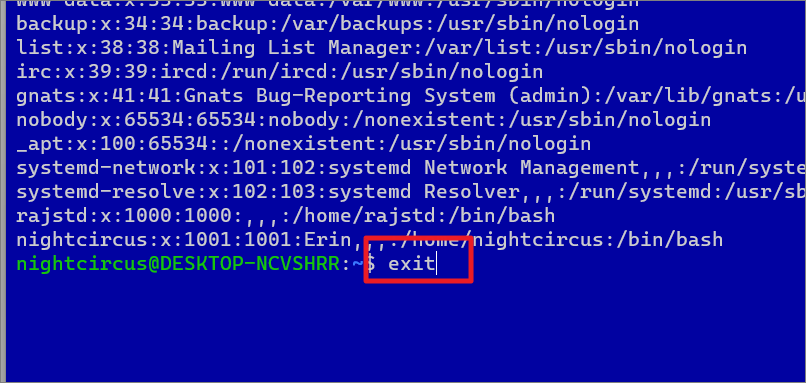
wsl --terminate kali-linuxHowever, if you are still on the Linux bash shell or terminal, you can just type exit and press Enter instead of closing the Linux terminal window to stop the WSL instance.
If your computer has multiple Linux Distro running in the background and you want to stop them all, use the below command:
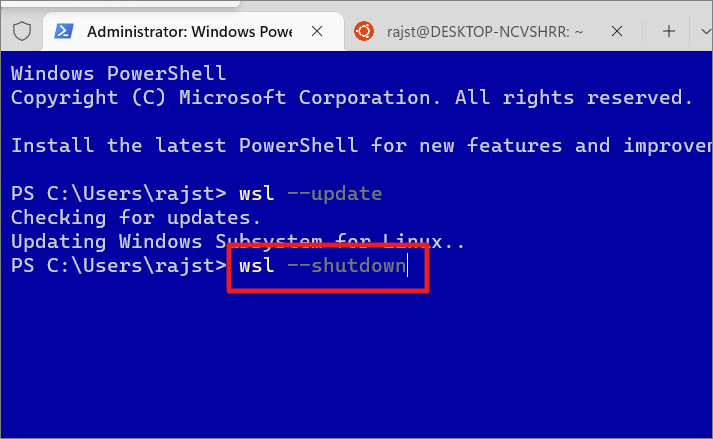
wsl --shutdownChange the WSL version for a Specific Distribution
WSL 2 is the newer version of Windows Subsystem for Linux that runs on a virtual machine to run a Linux kernel with full system call compatibility while WSL 1 works better when working across filesystems. When you enable Windows Subsystem for Linux feature through Windows Features, WSL 1 will be set as default. However, if you use wsl --install command to install new Linux distros, WSL 2 will be set as default.
You can use wsl --set-version command to change the version of WSL (upgrade or downgrade) for the previously installed Linux distributions. You can also change the WSL version globally for all future Linux installations.
If you wish to upgrade the existing WSL 1 version to WSL 2 for a specific distribution. Then, run the below command in PowerShell or command prompt:
wsl –set-default-version <Distro> <version number>Replace the <Distro> argument with the name of whichever distribution (Kali Linux in our case) you would like to use and <version number> with either 1 or 2. Make sure to specify the distribution name correctly.
Example:
wsl –set-default-version Kali Linux 1To change the WSL version globally ( for all future WSL instances), use the below command:
wsl --set-default-version 2Update the Window Subsystem for Linux (WSL) kernel
WSL feature is usually updated with Windows Updates however if you want to manually check and update the WSL feature, you can do that with the following commands:
wsl --statusFirst, use the above command to check the status of WSL, including the default distribution name and kernel version.
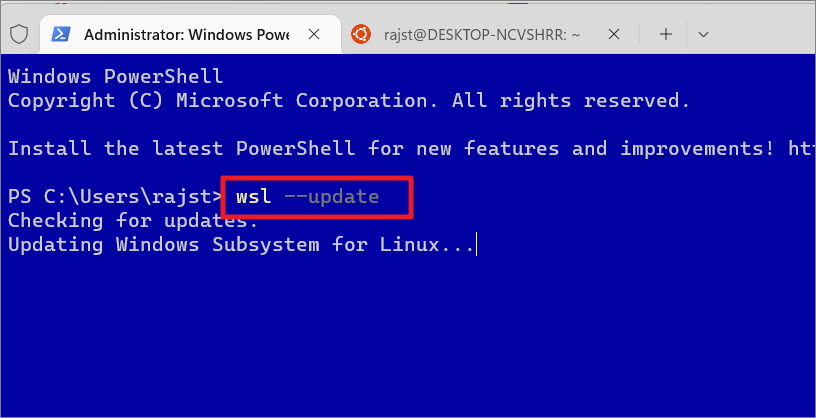
wsl --updateThis command will check and update the WSL kernel version if an update is available.
Remove or Unregister a Linux Distribution
If you no longer need a particular distro or you want to install a different distribution in its place or want to troubleshoot a distro, you can uninstall the Linux distribution easily. Unregistering will erase all data, settings, and programs associated with that distribution. Here’s how you can unregister a Linux distro in Windows 11.
To remove or uninstall a Linux distro from WSL, execute the following command:
wsl --unregister <DistributionName>Replace <DistributionName> with the actual name of the distro, you want to remove from WSL.
Once you run the above command, it will remove all the data, settings, and applications within that distro.
Mount a Disk to WSL Linux on Windows 11
Windows Subsystem for Linux now allows you to mount a physical disk formatted with a Linux file system (e.g. ext3, ext4) that is not supported by Windows and access its content. However, you can only use this feature in the Linux distro that is running on WSL 2 on Windows 11 (build 22000 or higher).
Windows Operating System recognizes drives and disks that are formatted with FAT16, FAT32, exFAT, NTFS, and a few other file systems, but it does not support the most commonly used Linux file systems such as EXT3, EXT4, XFS, etc.
For instance, if you are trying to access files copied from a Linux computer to a USB drive, Windows won’t recognize it and nothing will show up in File Explorer as the disk is formatted with a Linux file system (EXT3).
To access Linux disk format in the WSL distribution, you can mount hard drives, flash drives, and other removable disks using the wsl --mount command. Here’s how you can do that:
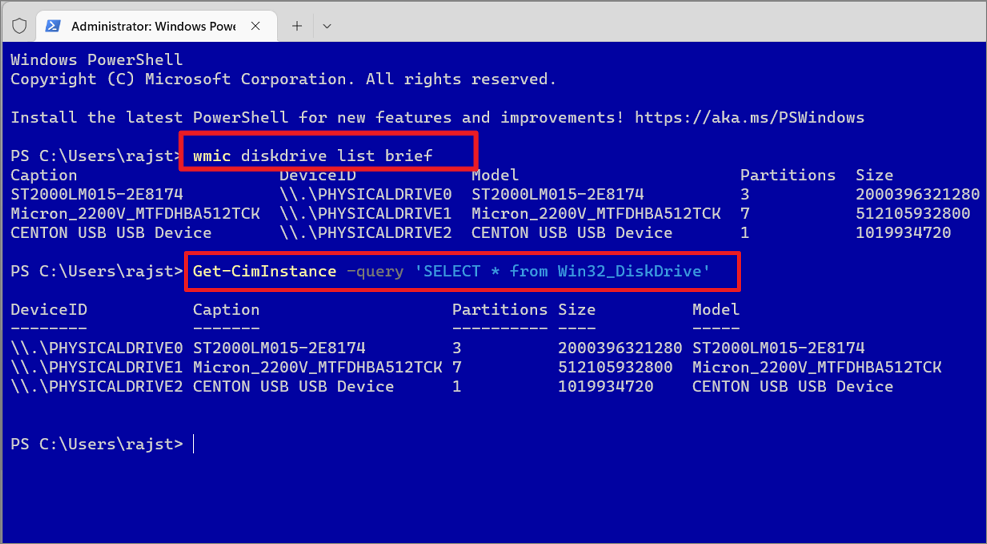
Before you mount a disk, you need to get a list of available drives and their deviceID. To do that, open PowerShell or Windows Terminal with administrative privileges and enter either of the following commands:
Get-CimInstance -query 'SELECT * from Win32_DiskDrive'or
wmic diskdrive list briefThe above command will list all the available physical disks connected to your computer Now note down the device ID of the disk you wish to mount in the WSL distro.
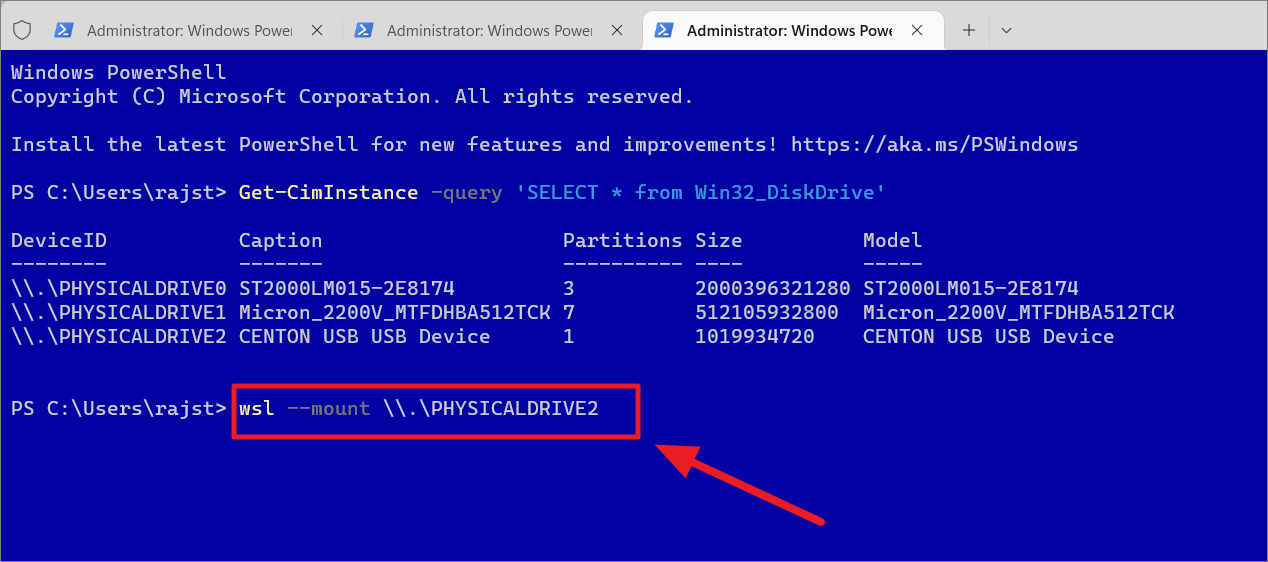
If you have a single partition or unpartitioned disk, use the below syntax command to mount that disk
wsl --mount <DiskPath>Example:
wslwsl --mount \\.\PHYSICALDRIVE2The above command mounts the given disk globally so that it is available to all the Linux distros in WSL.
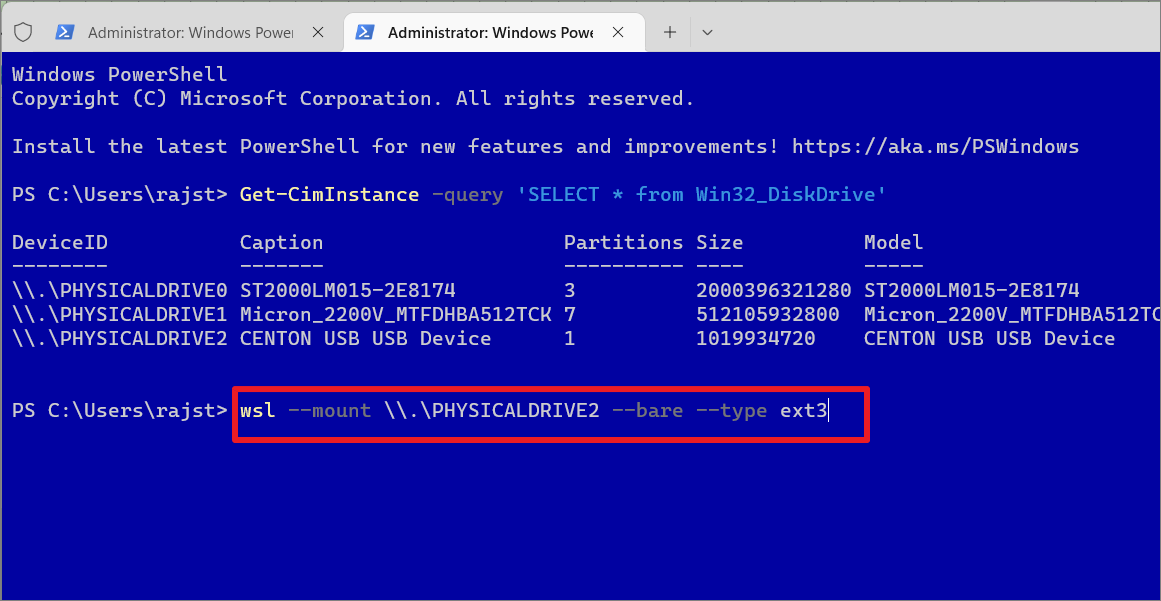
When you attempt to mount a disk to WSL, it will automatically assume it is an EXT4 file system. However, if your disk has a different file system, you will need to specify it using the --type or -t argument.
wsl --mount \\.\PHYSICALDRIVE2 --bare --type ext3or
wsl --mount \\.\PHYSICALDRIVE2 --bare -t ext3The -bare argument can be used with a command to make the specified disk available in WSL without mounting it to all distros. In the above command make sure to replace ‘ext3’ with the file format of the drive you are mounting.
If you wish to mount a particular partition with multiple partitions, you can use the following command syntax:
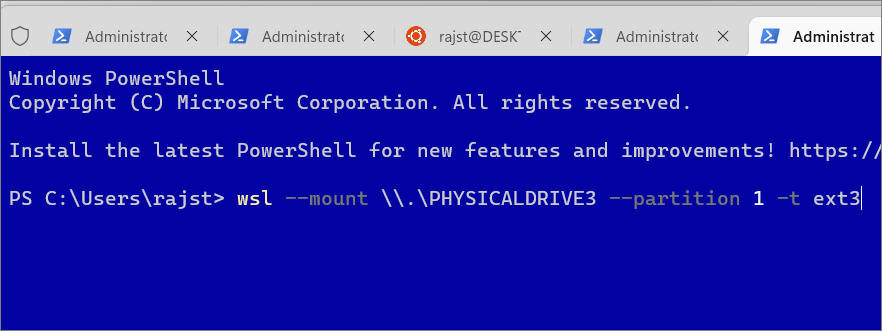
wsl --mount <DiskPath> --partition <PartitionNumber> --type <Filesystem>Example:
This command mounts the specified disk and makes it available to all the Linux distros in WSL. You can use the --bare parameter to make the disk available in WSL without mounting it to all distros. The --type parameter can be used to specify the file system for the disk. If you don’t know the file system, you can skip this parameter.
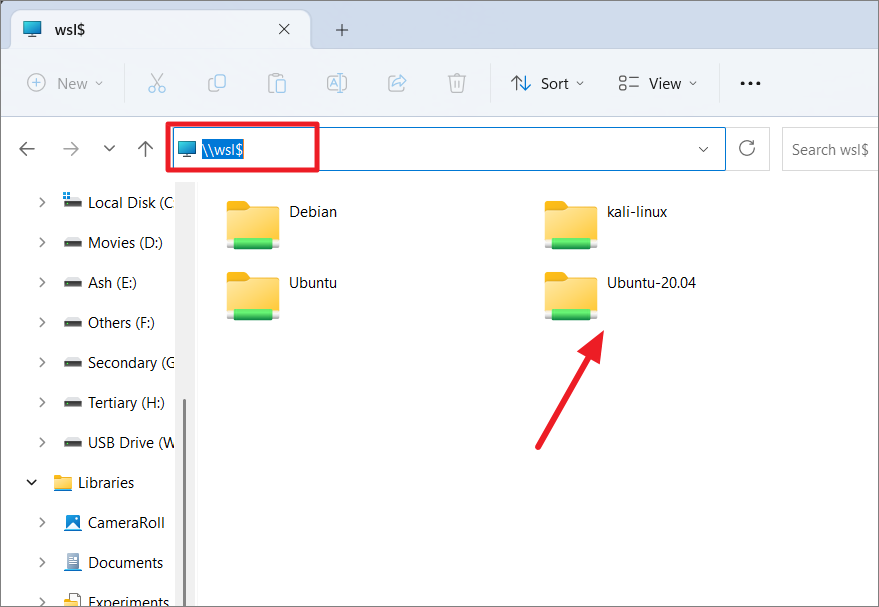
wsl --mount \.\PHYSICALDRIVE3 --partition 1 -t ext3To access the mounted Linux disk in File Explorer, open File Explorer and enter this in the address bar: \wsl$. Then, navigate to the desired distro.
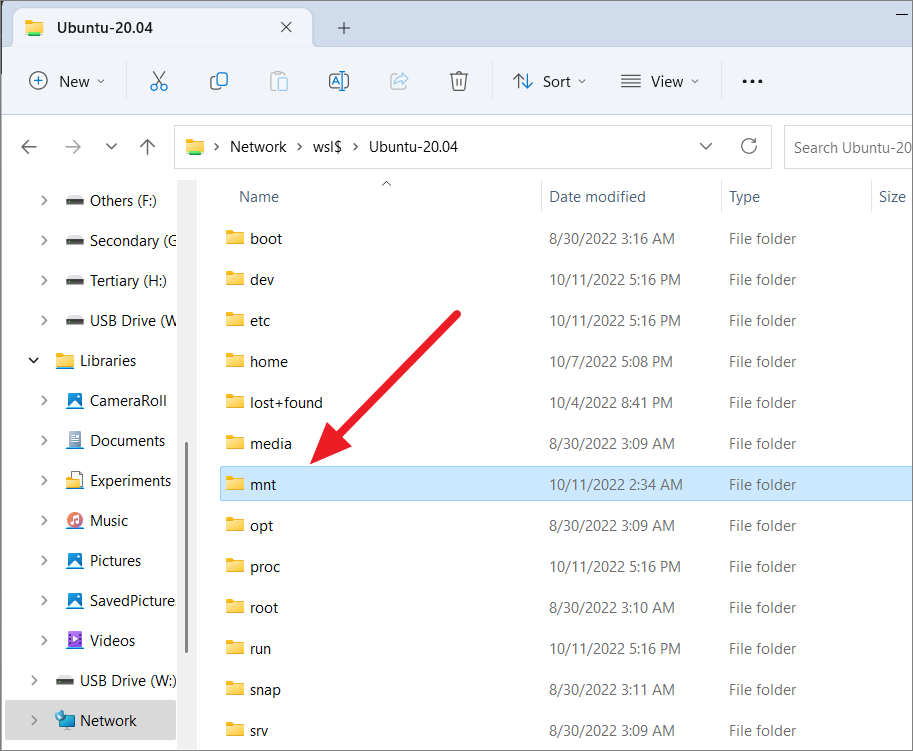
After that, go to the ‘mnt’ folder in the list where you can find all your mounted drives and their contents.
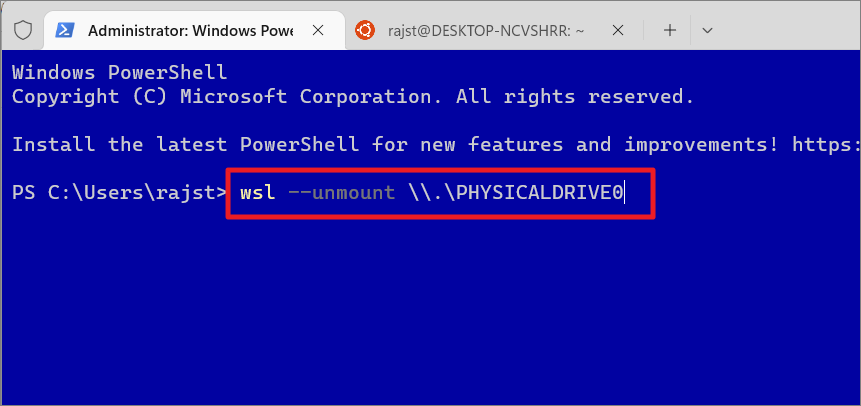
To unmount a disk after finishing accessing its content, execute the following command:
wsl --unmount <DiskPath>Example:
wsl --unmount \\.\PHYSICALDRIVE2Access Windows Drives from Windows Subsystem for Linux (WSL)
The above commands let you mount the Linux files system to WSL but the Windows Subsystem for Linux still automatically mounts fixed NTFS drives on your computer. However, secondary drives, removable drives, and external networks need to be mounted to access their content in WSL. Here’s how you can mount Windows drives in Windows Subsystem for Linux to access their files.
You can use the new mounting option – ‘DrvFs’ to mount external drives like hard drives, USB sticks, CDs, DVDs, and other removable disks. However, this mounting option can only work on NTFS, ReFS, or FAT file systems.
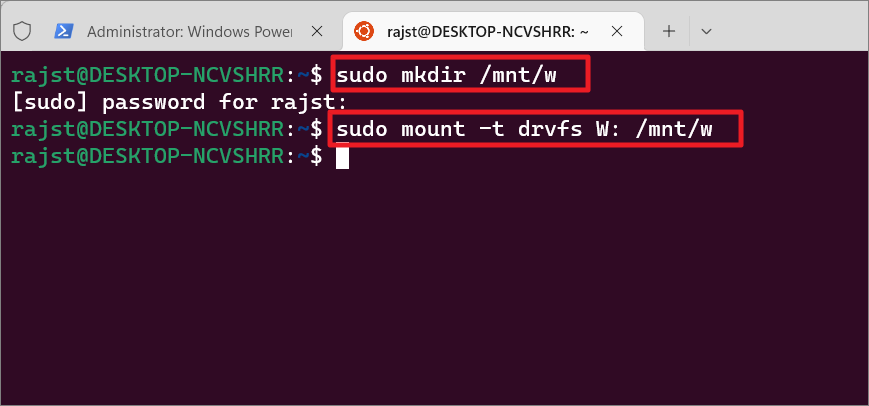
Let’s assume you have an external drive ‘W:’. To mount this drive, you can use the below commands:
sudo mkdir /mnt/wsudo mount -t drvfs W: /mnt/wReplace w in the commands with your desired drive letter or path. When navigating a drive from a Linux terminal, make sure to add /mnt/ before the path. After entering the first command, type your Unix password. Then, enter the second command.
Once a drive is mounted, it will remain accessible in the Linux environment and you can access the drive anytime you want as long as it is connected to the device.
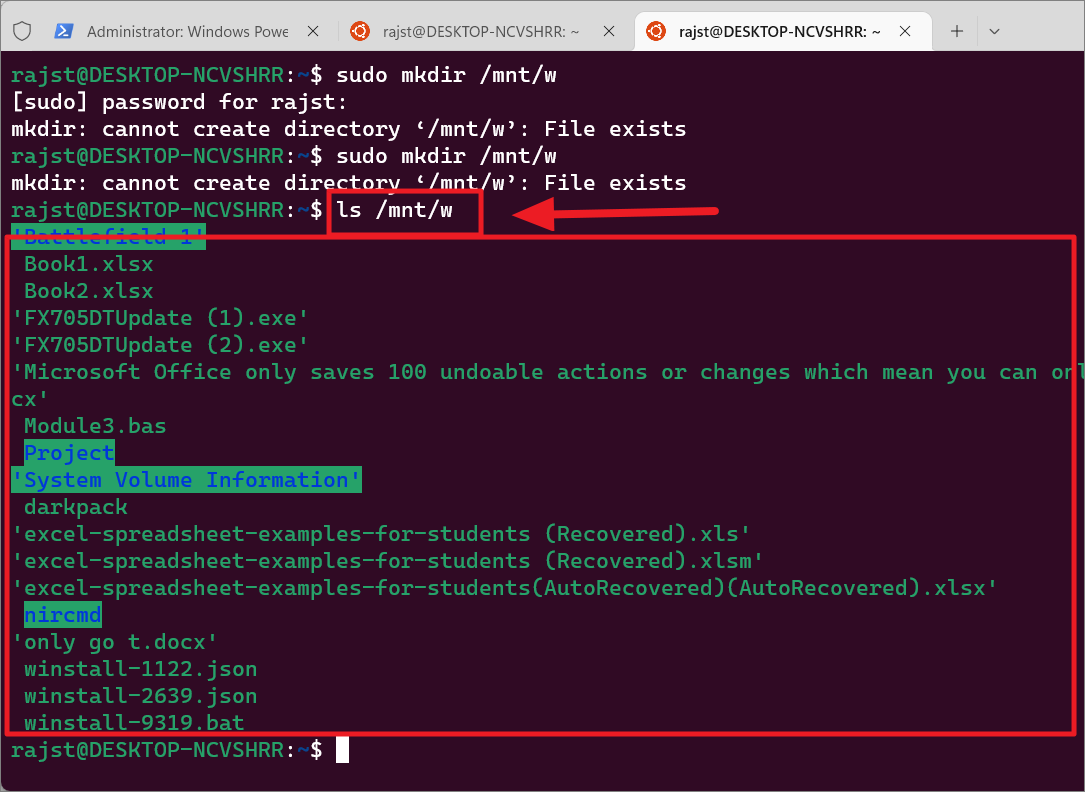
To access files in the mounted or the internal drive, use the below command:
ls /mnt/wHere, replace w with your desired drive path.
To unmount an external drive, run the following command:
sudo umount /mnt/w/Please remember there is no “n” between “u” and “mount” in the “umount” command.
When mounting a drive, a temporary folder will be created in the mnt directory where the mounted drives and locations will be located. You can also delete these temporary folders after unmounting the drive. You can remove the temporary folder using the ‘rmdir’ argument:
sudo rmdir /mnt/foldernameSubstitute foldername with the drive letter or path of the location.
Example:
sudo rmdir /mnt/wThe rmdir parameter can only remove the empty directories. So make sure the location is properly unmounted before executing the above command.
Mount Windows Network Location
You can also mount network locations directly from WSL whether or not the network location has been mapped to a specific drive letter in Windows. If your network is already mapped to a drive letter inside Windows, you can use that drive letter to mount it.
In case you have an unmapped network location, you can mount it directly using the below commands.
First, let’s create a folder for the location inside the /mnt/ folder using the below command:
sudo mkdir /mnt/folderThen, use the mount switch to connect the folder with the network location:
sudo mount -t '\\server\folder' /mnt/folderWhere replace \\server\folder with the path to your network location.
Clear the Terminal Screen
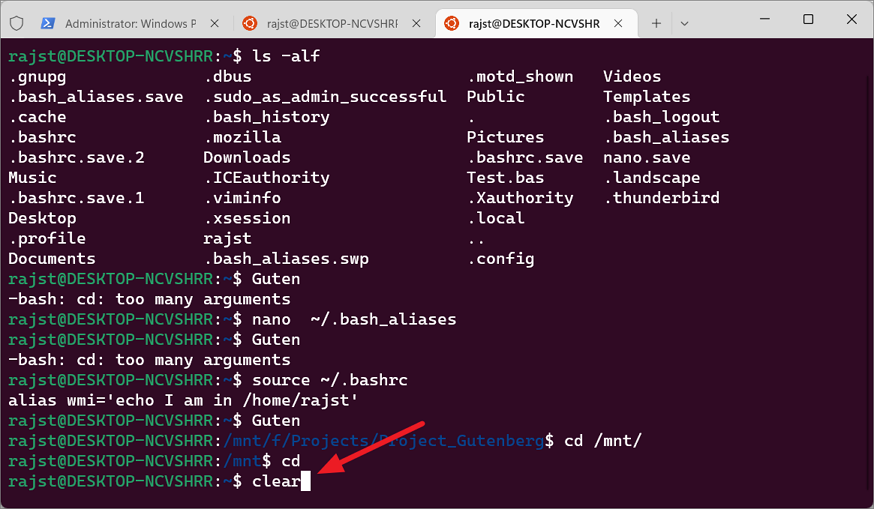
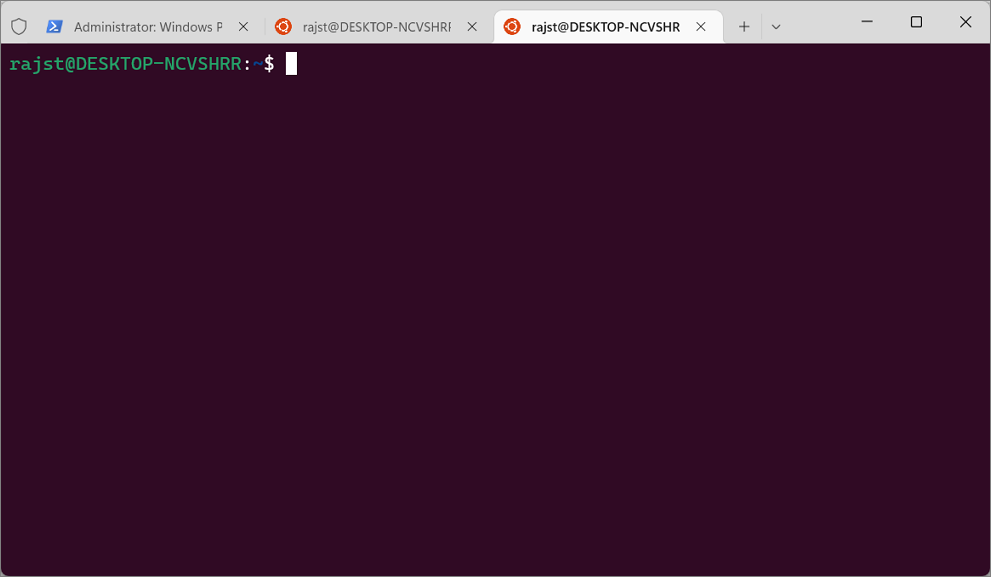
If you have been running commands for a while, the terminal window may get clustered. You can quickly clear your terminal screen to make it look like a new tab with this command:
clearResult:
Access Windows Files through WSL and Vice Versa
You can also access your Windows files in the Linux environment as well as create, copy/ move files, and delete files in the Windows file system. Microsoft WSL allows you to access your Windows files through the Linux kernel by navigating to the exact path. Here’s how you can do this:
Navigate and Access Windows File System in WSL
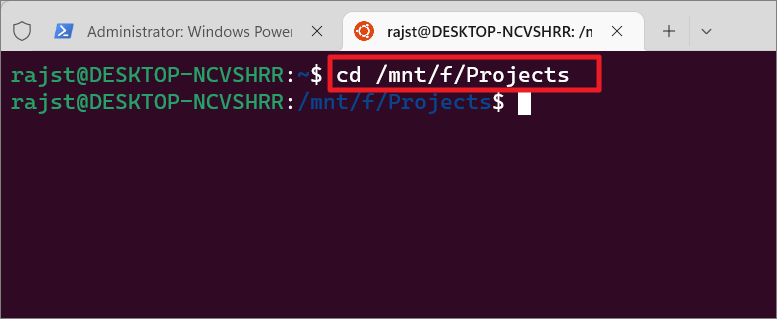
You can use the cd command to navigate the Windows File System.
cd/mnt/windows_pathReplace windows_path with the Windows path, you want to navigate to.
Example:
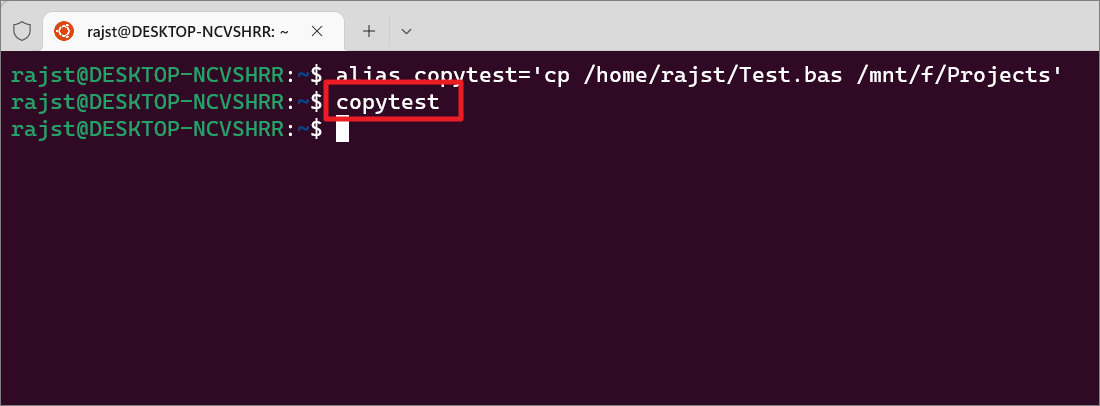
cd /mnt/f/ProjectsWhen navigating drives in Linux, always add /mnt/ before the path.
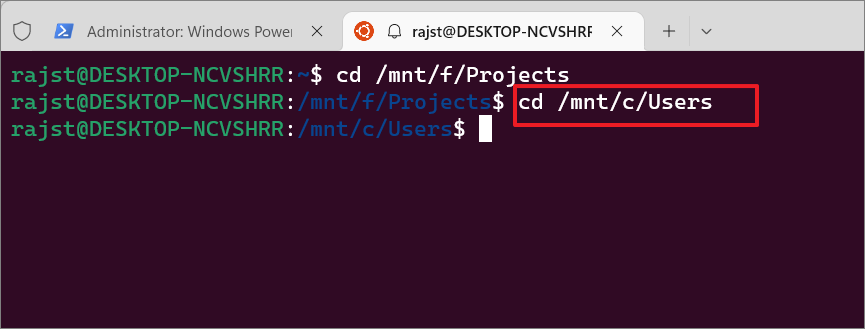
You can also access your User accounts with this:
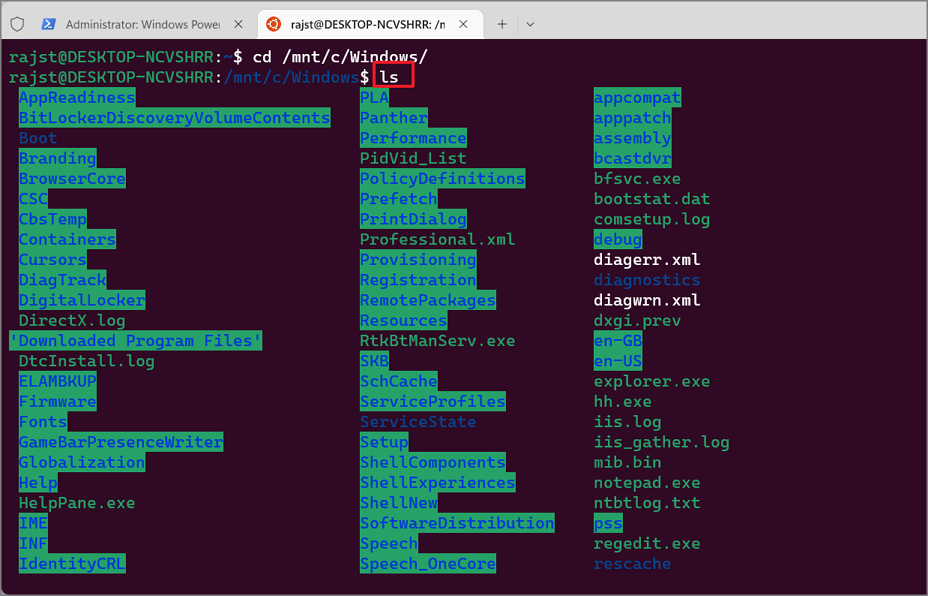
cd /mnt/c/UsersTo view the contents inside a directory or folder, use the ls command. Folders will be highlighted with a green background and blue text.
Copying/Moving files Between Linux and Windows File Systems through WSL
You can move or copy files between the two operating systems using the cp or mv commands.
To copy files from Windows to the Linux file system, run the following commands:
cp /mnt/f/Projects/Patch.zip /home/rajst/DocumentsHere, f/Projects/Patch.zip is the location and file you want to copy from Windows to Linux. /home/rajst/Documents is the destination for the copied file.
To Move files from Windows to the Linux file system, run the following commands:
mv /mnt/f/Projects/Patch.zip /home/rajst/DocumentsTo move the file, you have to use ‘mv’ instead of ‘cp’. In case there’s already a file with the same name that exists in the destination, type y and hit to replace it.
To move a file from Linux to the Windows file system, run the following commands:
mv /home/rajst/Documents/Patch.zip /mnt/f/ProjectsEdit Windows files through WSL
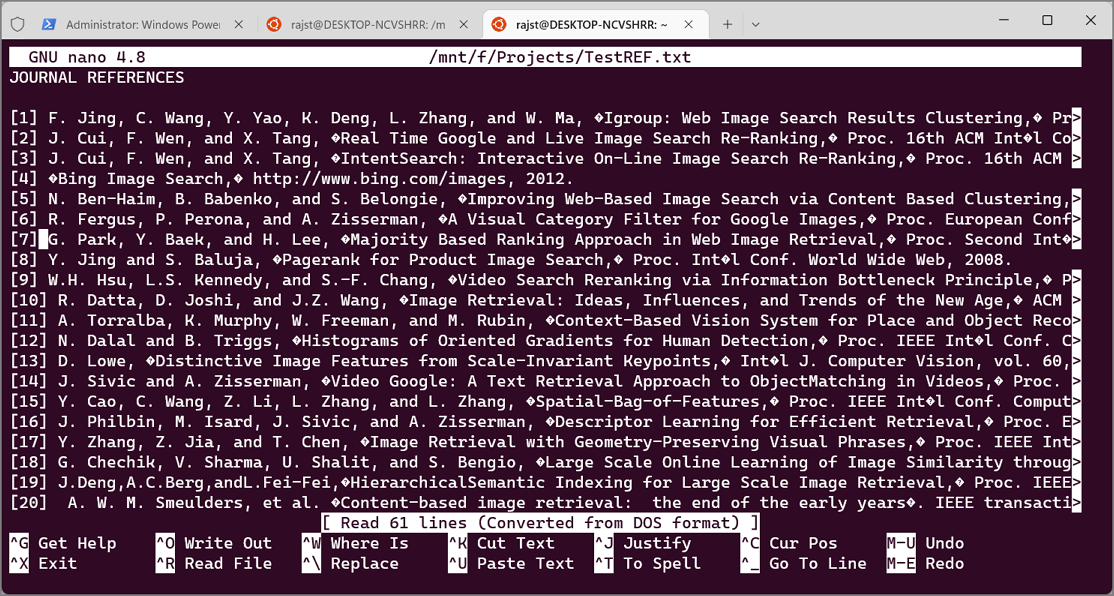
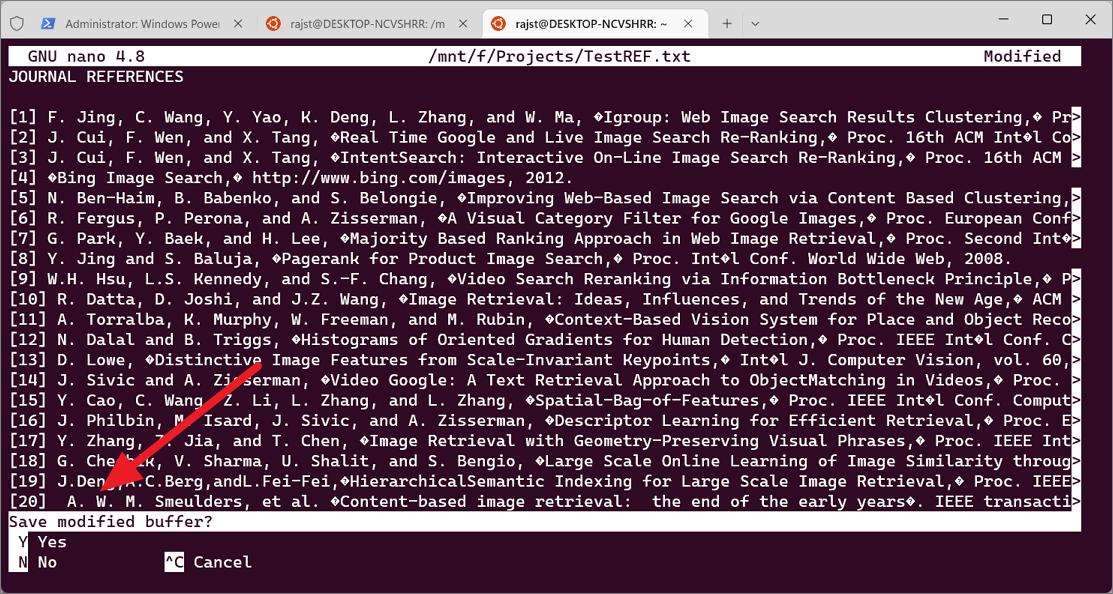
You can also edit your Windows files (e.g., text files) through the Linux terminal using WSL. To do that, you have to use a text editor that can run in a terminal like ‘nano’. Below is the command for the same:
sudo nano /mnt/f/Projects/TestREF.txtThe built-in nano text editor will open the files in the terminal. Now, you can make changes to the file.
To exit the editor, press Ctrl+X. If you have made any changes to the file, you’ll be prompted to save the changes before quitting the editor. To save and exit the file, type Y and then press Enter.
Create files in Windows through WSL.
You can also create any kind of file in a specific windows directory using the touch command.
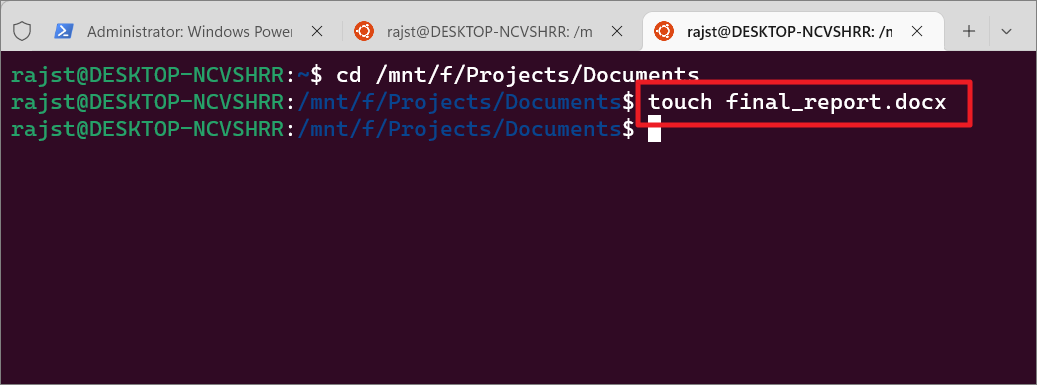
First, navigate to the directory where you want to create the file with the command like this:
cd /mnt/f/Projects/DocumentsThen, use the touch command followed by the filename and type to create the file:
touch final_report.docxSubstitute final_report.docx with the file name and file type your want to create. The file type can be anything you want (.txt, .xlsx, .mp4, etc.)
Delete Files from Windows File System through WSL
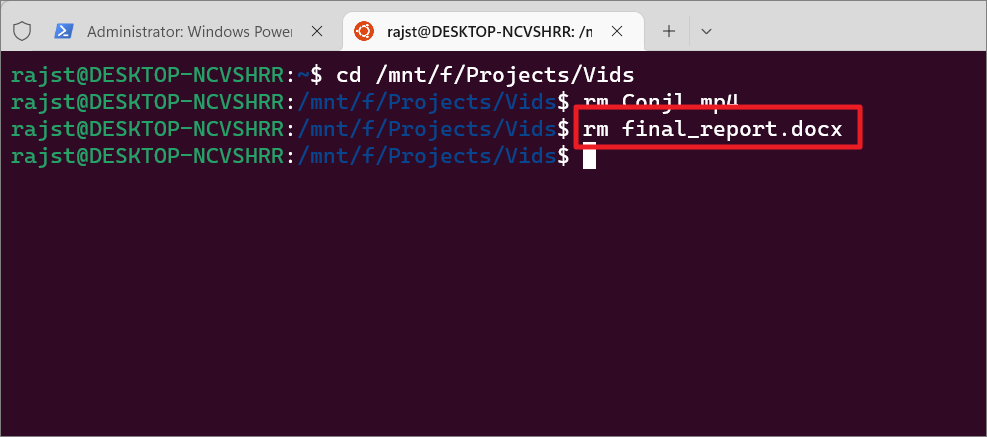
Deleting files is similar to creating files via WSL, you have to navigate the folder or directory first and then use the rm command to delete the files.
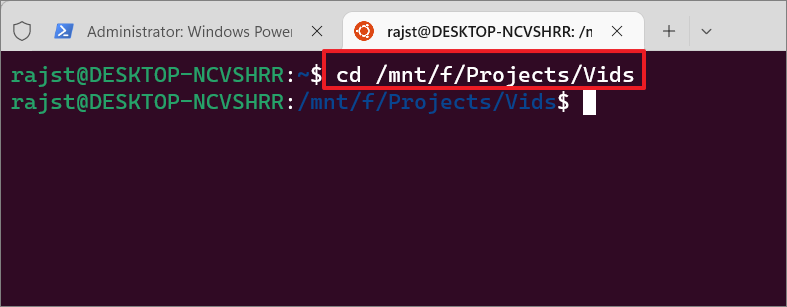
First, navigate the directory or location:
cd /mnt/f/Projects/VidsThen, use the rm command to remove the unwanted files:
rm final_report.docxAccess Linux Files through File Explorer
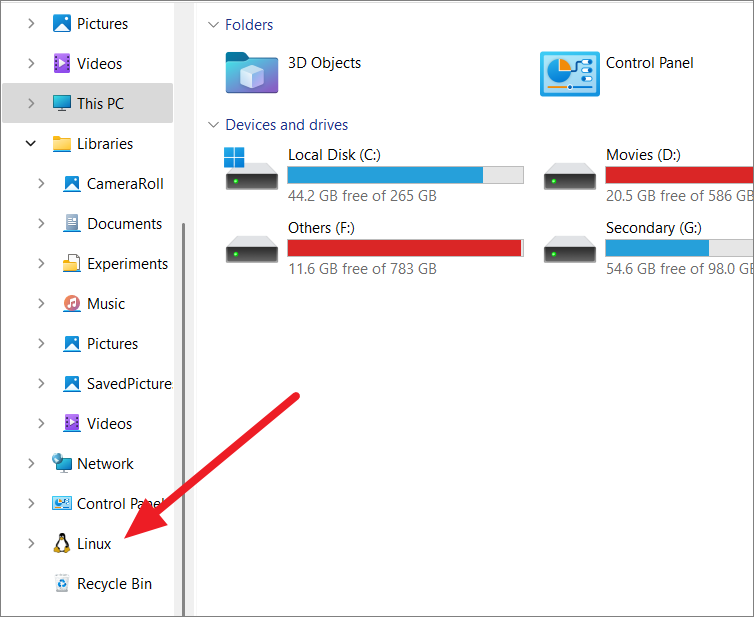
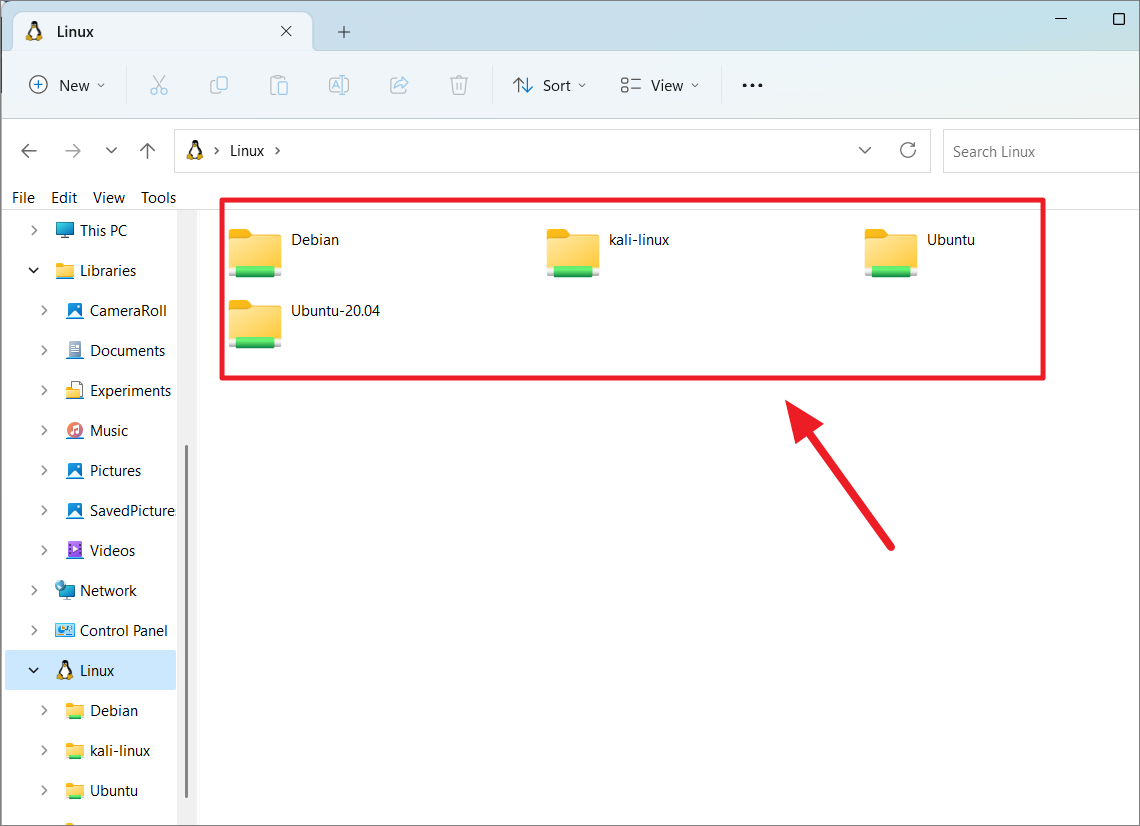
You can also access the Linux file system through File Explorer. To do that, open Windows File Explorer, scroll down to the left navigation panel and select the ‘Linux’ option.
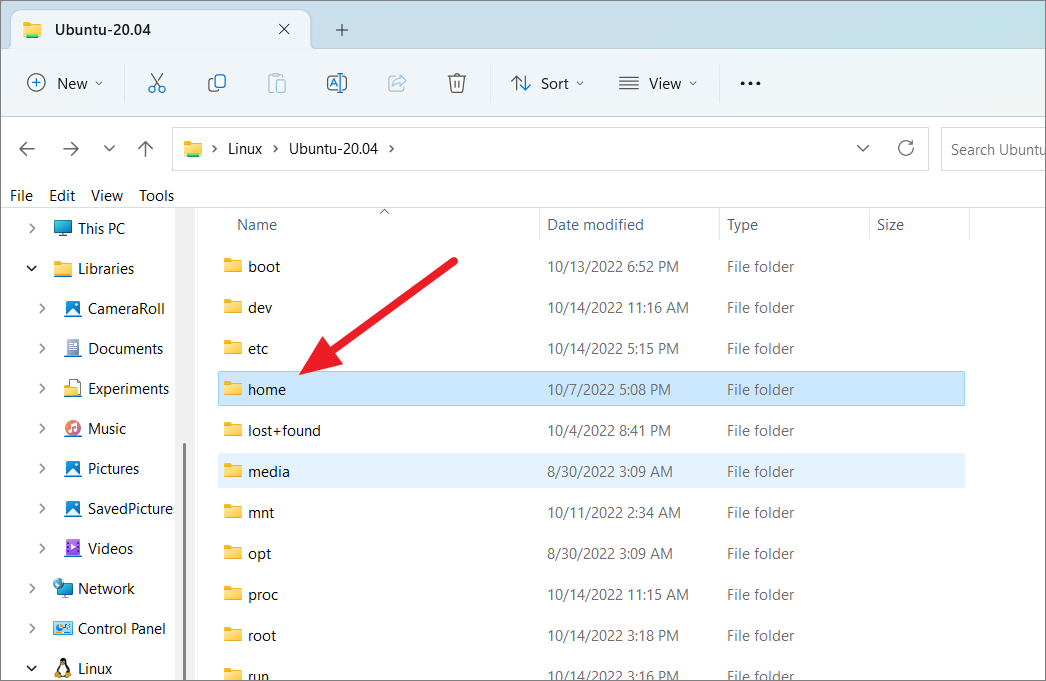
Here, you will see the list of all distro you have installed on your device. Select the desired distro folder to view its files.
Under the ‘Home’ folder, you can find user profiles and their files.
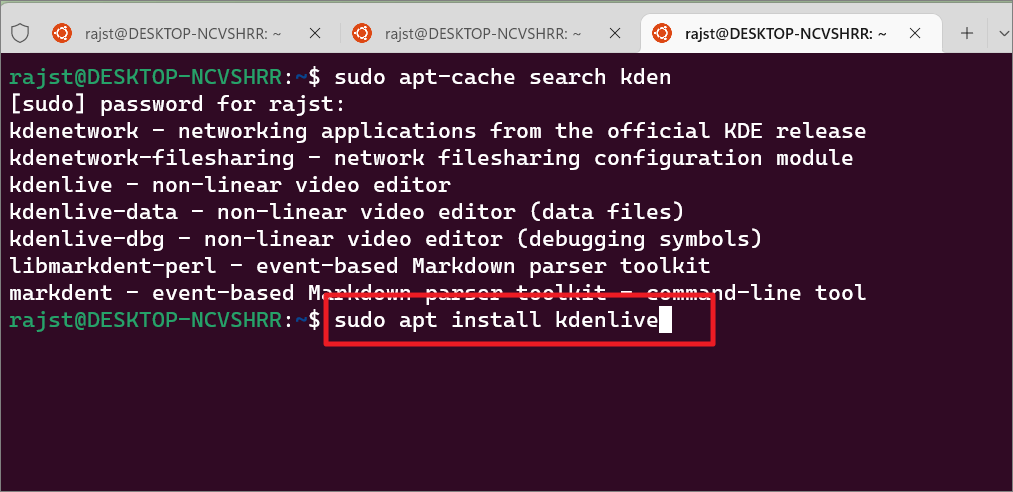
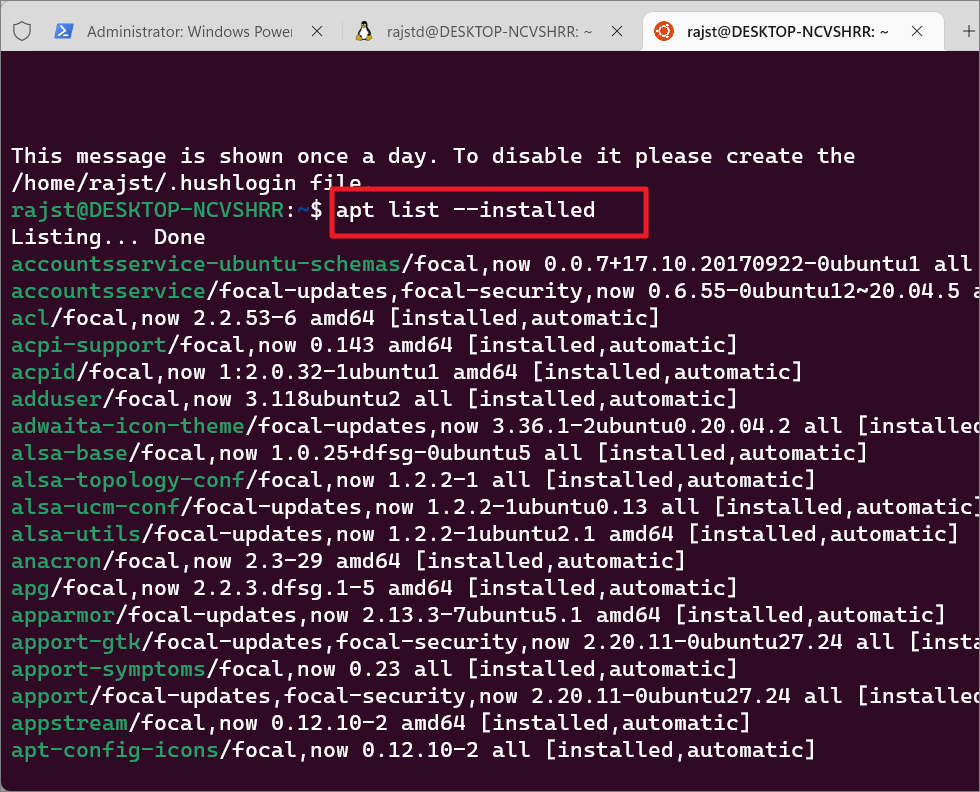
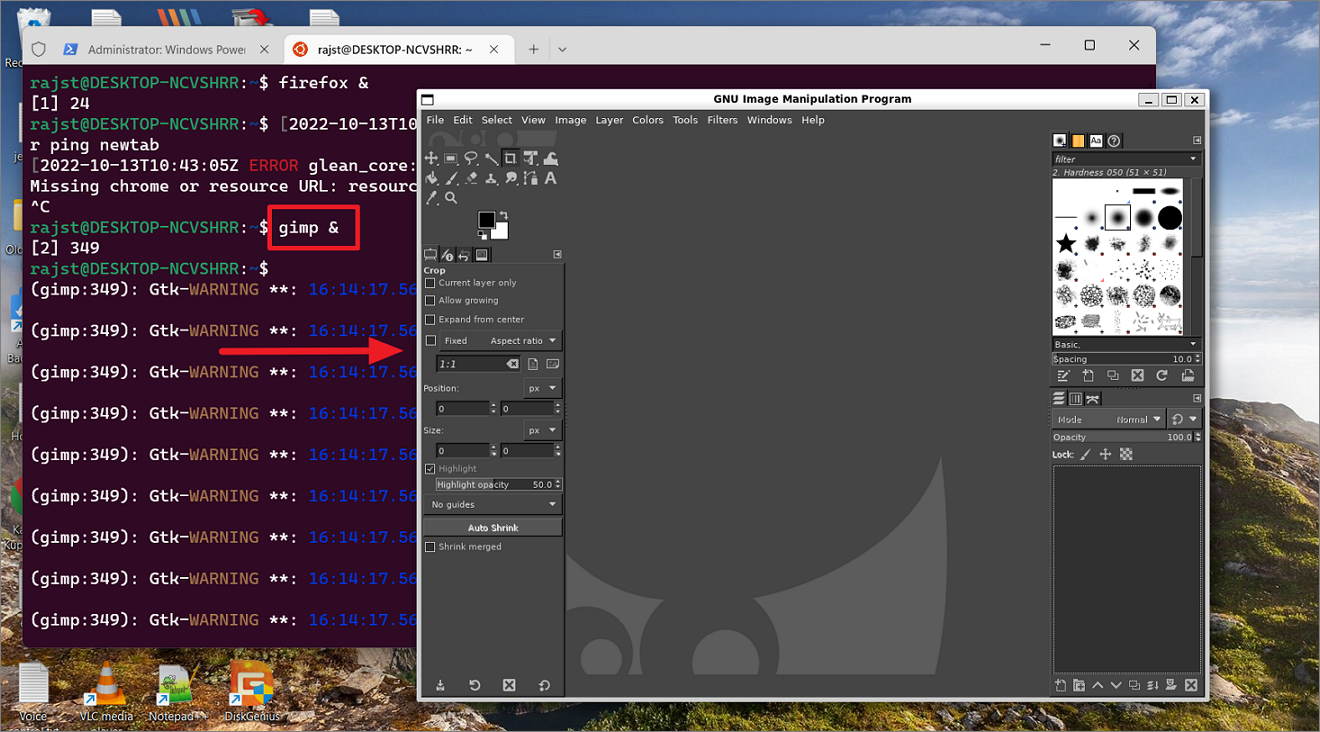
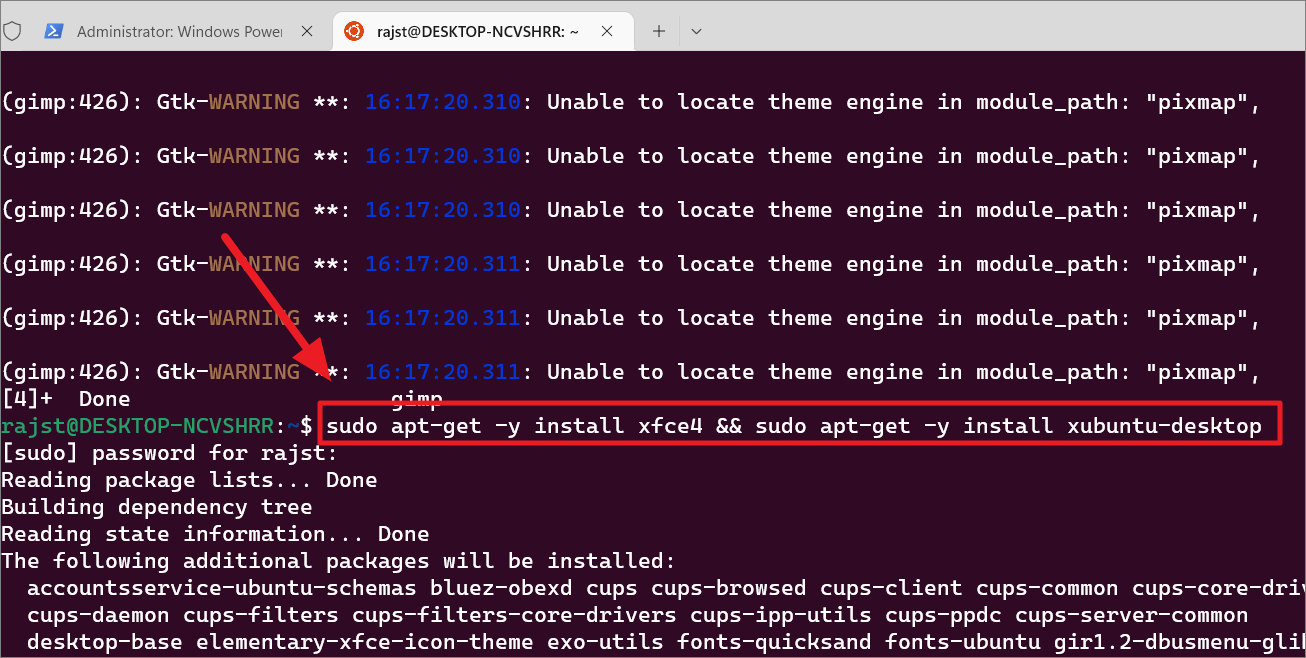
Running GUI Linux Apps using WSL
Windows 11 comes with ‘WSLg’, short for Windows Subsystem for Linux GUI, which is a new feature that allows you to run Linux Graphical apps on Windows in a fully integrated desktop experience. It is a great feature that helps users to run apps and tools that work well or are only available in Linux. Follow these instructions to install GUI apps in WSL.
Prerequisites:
You will need at least Windows 11 (build 22000 or later) or Windows 11 Insider Preview (builds 21362 or later). To run Linux GUI apps, you will need a system with virtual GPU (vGPU) enabled for WSL. You can download and install the below driver matching your system to enable virtual GPU (vGPU) to achieve hardware-accelerated rendering.
- Intel GPU driver for WSL
- AMD GPU driver for WSL
- NVIDIA GPU driver for WS
Update WSL and package list:
Next, you need to update the Windows Subsystem for Linux. To do that, open PowerShell or Command Prompt in elevated mode and enter the below command:
wsl --updateThen restart the WSL for the changes to take effect with this command:
wsl --shutdownUpdate the packages in your distribution:
Then update your packages in the Linux distribution using the following commands:
sudo apt updatesudo apt upgradeInstall Linux GUI apps
Now you can download and install the Linux applications you want to use via the bash shell. In Linux distros, you can use various package managers to install your desired applications. Here’s a list of commands to install some of the most popular software in Linux.
To install apps in WSL, use the below command syntax:
sudo apt-get install APP-NAME -yHere, replace App-Name with the actual app name.
Install GIMP
GIMP is a free and open-source image editor available for GNU-Linux, macOS, and Windows. It is used for image editing, photo retouching, image manipulation, and image authoring. To install GIMP software, open the Linux terminal and type this command:
sudo apt install gimp -yor
sudo apt install gimp In the install command, you can add -y at the end to skip confirmation and get right to the installation.
Install Gedit app
To install GNOME’s default text editor, use the below command:
sudo apt install gedit -yInstall VLC Media Player
sudo apt install vlc -yInstall X11 apps
X11 is a Linux Windowing system that provides a miscellaneous assortment of X applications such as the xclock, xcalc calculator, clipboard, etc.
sudo apt install x11-apps -yInstall Firefox
apt install firefox -ySearch for Apps in the Software Repository
If you don’t know the specific name of the app you want to install, you can search for it using the apt-cache command. Run the following command to find the name of a specific application:
sudo apt-cache search [application name or type]Example:
sudo apt-cache search kdenThe apt-cache command will show the results related to the search word ‘kden’ in the repository.
Now, you can use the name of the app from the search to install it.
Once you finish installing your desired application on the WSL distro, restart your PC and launch the app via the bash command line.
List All Installed Packages and Programs in Linux Distro
To list all the packages that you have installed using on your distro, run the below command:
apt list --installedThis will list all the packages installed on your Linux distro.
Launch Linux GUI Apps
To launch the install apps in WSL, simply type the name of the app and hit Enter to run it.
For example:
gimpor
gimp &As you can see below in the screenshot, the above command launches the GIMP (GNU Image Manipulation Program) application. Now, you can use your mouse and keyboard to use the app just like any of your Windows apps.
Access Linux Apps from Windows 11 Start Menu
Once you install an app in Linux, you can also access that Linux app directly from your Windows Start menu, just like you do a Windows app. You can tell the difference between Windows and Linux apps with the app name. You can just open the Start menu and access the app from the Recent list.
Or, you can search for the app in Windows Search. As you can see below, the Linux app will have the Linux Distribution name as part of the label. Also, the Linux penguin logo will be visible at the corner of the app icon.
Installing a Desktop Environment
Unlike Windows, Linux offers several customizable desktop environments that you can install on the same Linux distro. A desktop environment is a bundle of programs that runs on top of the operating system to provide default graphical user interface elements such as menus, windows, icons, toolbars, wallpapers, etc.
Some Linux distros come with their own desktop environments while in others you can manually install and customize them as you see fit. In Windows 11, you can not only install Linux terminals and apps but also install Linux desktop environments and use Linux graphically as you do any other operating systems like Windows and macOS. Let us see how to install Linux desktop environments in Windows 11.
Xfce is a lightweight and easy-to-use desktop environment that provides a feature-rich user experience. And it is one of the most commonly used desktop environments on WSL.
Start by updating and upgrading Ubuntu:
sudo apt update
sudo apt upgrade
To download and install Xfce on the WSL distro, run the following command in the Linux terminal:
sudo apt-get -y install xfce4 && sudo apt-get -y install xubuntu-desktopThen, enter your password to execute the command. It will take a while to complete the installation process.
In the middle of the installation, you will be asked to choose a Desktop Manager – ‘GDM3’ or ‘LightDM’.
Install X server for Windows
Once it’s finished installation, we need to install an X server for Windows, such as VcXsrv. To run a Linux desktop environment inside Windows, we will need an X server. To install and set up an X server, follow these steps:
First, go to the download page of VcXscr X Windows Server and click the ‘Download’ button to download the software.
Alternatively, you can also go to the GitHub page of VcXsrv server and download the latest version of the app.
After the software is downloaded, run the setup. Then choose ‘Full’ from the ‘Select the type of install’ drop-down menu and click ‘Next’.
Then, click ‘Install’ on the next window to install the program and its components.
Once the installation is finished, you will have a shortcut named ‘Xlaunch’ on the desktop. Don’t open it yet.
Now go back to the Linux terminal and enter the below command to see if the ‘resolv.conf file auto-generated:
cat /etc/resolv.confIf the server is running, you will get an IP address. Now, note down the IP address you got from this command. (e.g., 172.29.128.1)
Next, type the below command to edit the .bashrc script file which contains a series of configurations for the terminal session:
nano ~/.bashrcIn case you see this prompt message on the screen, simply press Y.
This will show a series of scripts on the screen. Now, go to the bottom of the script and add this new entry:
export DISPLAY=172.29.128.1:0Now, type that IP address (172.29.128.1) you got earlier in the code, and make sure to add a colon (:) and zero (0) at the end.
If you have a problem restarting your Xfce server running on Ubuntu or launching the desktop environment, type this entry instead:
export DISPLAY=$(cat /etc/resolv.conf | grep nameserver | awk '{print $2}'):0 Then, press Ctrl+X and then Y to save the script. After that, hit Enter to exit the script.
After that, reload the service with this command.
source ~/.bashrcLaunch Desktop Environment:
Next, go back to the desktop and launch the ‘XLaunch’ app (VcXsrv) that you installed earlier.
Then, choose a display option in the Display settings window and click ‘Next’. Here, we are selecting the ‘One window without titlebar’ option.
Under Client startup, select the ‘Start no client’ option and click ‘Next’ to start only the server.
On the next screen, add all the additional parameters needed by you for the X server in the field below and click ‘Next’. In the example, we are adding -ac.
Finally, click on ‘Finish’. You can also save these configurations for later use or backup by clicking the ‘Save configuration’ option.
If you see the Windows Security Alert prompt, make sure to select both options and click ‘Allow access’.
Once you do that, you may just see a black screen. It is normal, ignore it and go back to the terminal.
Then, launch the new desktop environment by entering the following:
startxfce4If you have a problem running the above command, run the following command instead:
sudo -u rajst startxfce4Here, replace rajst with your username.
This will launch the Xfce desktop environment. Now, go back to the VcXsrv server program in the taskbar and you will have a Linux desktop as shown below.
You can use the new desktop as if it were a normal Windows desktop. You can access the file manager by clicking the ‘Home’ button.
To open applications, click the search button (Application Finder) at the bottom of the Xfce desktop. Then, find and click on the application from the Application Finder menu to launch the app.
Install Desktop Environment for Kali Linux:
If you are using the Kali Linux distro, you can install Win-KeX desktop which is a Kali Desktop Experience for Windows Subsystem for Linux (WSL 2).
To do this, first launch the Kali Linux and update the packages using the below commands:
sudo apt update
sudo apt upgrade
Then, execute the following command to install the Win-Kex desktop environment and press Enter:
sudo apt install -y kali-win-kexRun Bash Scripts on Windows 11
So far we have seen how to run commands one by one in an interactive way but there’s another way you can execute commands in Linux – batch mode. You can run commands in batches. You can create a bash script that contains all of the commands you would like Linux to execute in order. Then, run that bash script (batch file) to execute the task one by one automatically without having to manually run individual commands. Here’s how you can do this:
Open your favorite text editor like Notepad and create a new text file. The first line of the script must be “#!” followed by the path of your Linux bash. To find the path of your Linux bash, open the Ubuntu terminal and run which bash. This will show you the Bash path. Note down or copy it.
Now, open your new text file and include that first line at the top. For example:
"#!"/usr/bin/bashNext, type the commands you want Linux to run in sequential order. Each line should have a single command.
For example:
Line 2: Use theecho command to show a welcome text to the user.
Line 3: Use echo with the date command to show today’s date, time, time zone, and more.
Line 3: A combination of USER and echo commands is used to return the current user name.
Line 4: Once again, the echo command is used to display the message ‘End of My Script’.
As you can see there are three sequential commands set to execute in this script file.
After typing all the commands you want, save the text file with a .sh extension. When saving the file, select ‘All files (*.*)’ as the Save as type. Be sure to remember where you saved it because you need the file path to run the script.
Next, open PowerShell or Bash shell (Linux terminal) and use the cd command to navigate to the path where you have saved the Bash script file.
Then, run the script with the following command:
bash <name of script>Replace <name of script> with the name of the bash file you created.
bash Sample.shThis simple example shows you how you can create bash scripts to execute more complex script programs.
Create Aliases in Windows Subsystem for Linux
Alias in Linux is a custom shortcut used to execute more complex and lengthy commands. Aliases make Linux commands easy to remember and use. For example, if you need to execute this long command – mysqldump -u root -p --all-databases > /home/server/Desktop/backupfile.sql which is hard to type and prone to mistakes, you can instead create an alias like mysqlback and use it to execute that command.
There are two ways you can create to create aliases in Linux – per session or permanently.
Create Per Session Aliases
To create a temporary alias for your current session of bash (which will expire once you close the terminal), use the below command:
alias <alias name>='<command>'Example: Creating an alias for cp /home/rajst/Test.bas /mnt/f/Projects command:
alias copytest='cp /home/rajst/Test.bas /mnt/f/Projects'Now, you can use the alias copytest to execute that command quickly. However, this alias will only be available for your current terminal session.
Create Permanent Aliases
To create permanent aliases between sessions, you will need to edit and save your aliases inside a configuration file called .bash_aliases or .bashrc
First, check if the .bash_aliases file exists in your system using the below commands:
cd ~
ls -a
If you can’t find it, then run the following command:
touch .bash_aliasesTo edit the .bash_aliases file, use the below command:
nano ~/.bash_aliasesThen, add your permanent aliases to the file. For example:
alias c='clear'
alias ll="ls -alF"
echo alias wmi=\'echo I am in $PWD\'
alias Guten='cd /mnt/f/Projects/Project Gutenberg'
You can also leave a comment before your aliases (like #My Custom Aliases) for organization purposes.
You can also add your aliases in the .bashrc file.
Press Ctrl+X and then type Y to save the file. Then press Enter to exit the editor.
The new aliases in the file will be automatically loaded in your next session. But if you want to use them in your current session, you can ‘source’ your .bash_aliases file using this command:
source ~/.bashrcNow, you can use your alias shortcuts to execute your frequent commands quickly.
Essential WSL Commands for PowerShell
Here’s a list of essential Windows Subsystem for Linux commands that you can use in Windows PowerShell.
| Use | Command |
|---|---|
| Update WSL | wsl –update |
| Install WSL | wsl –install |
| Install a specific Linux Distribution | wsl –install –distribution <Distribution Name> or wsl –install -d <Distribution Name> |
| List all available Distribution | wsl –list –online |
| List all installed Distributions | wsl –list –verbose |
| Set the WSL version from 1 to 2 | wsl –set-version <distribution name> <versionNumber> |
| Set default WSL version | wsl –set-default-version <Version> |
| Set default Linux distribution | wsl –set-default <Distribution Name> |
| Change directory to home | wsl ~ |
| Run a specific Linux distribution from PowerShell or CMD | wsl –distribution <Distribution Name> –user <User Name> |
| Check WSL status | wsl –status |
| List of options and commands available with WSL | wsl –help |
| Run as a specific user | wsl -u <Username>`, `wsl –user <Username> |
| Change the default user for a distribution | <DistributionName> config –default-user <Username> |
| To shutdown WSL | wsl –shutdown |
| To terminate or stop a specific distribution from running | wsl –terminate <Distribution Name> |
| Export a distribution to a TAR file | wsl –export <Distribution Name> <FileName> |
| Import a new distribution | wsl –import <Distribution Name> <InstallLocation> <FileName> |
| Unregister or uninstall a Linux distribution | wsl –unregister <DistributionName> |
| Mount a disk or device | wsl –mount <DiskPath> |
That’s it. Using this guide, you’ll become a pro in using Linux on your Windows 11 PC in no time.
1. Overview
Windows Subsystem for Linux (WSL) allows you to install a complete Ubuntu terminal environment in minutes on your Windows machine, allowing you to develop cross-platform applications without leaving Windows.
In this tutorial, we’ll show you how to get up and running with Ubuntu on WSL. These instructions will work on both Windows 10 or Windows 11.
Whilst WSL is a powerful tool for all users, some features, such as the ability to run graphical Linux applications, are only available on Windows 11. Please check out our Windows 11 tutorial for more information.
2. Install WSL
Installing WSL is now easier than ever. Search for Windows PowerShell in your Windows search bar, then select Run as administrator.
At the command prompt type:
wsl --install
And wait for the process to complete.
For WSL to be properly activated, you will now need to restart your computer.
3. Download Ubuntu
WSL supports a variety of Linux distributions, including the latest Ubuntu release, Ubuntu 20.04 LTS and Ubuntu 18.04 LTS. You can find them by opening the Microsoft store app and searching for Ubuntu.
Choose the distribution you prefer and then click on Get as shown in the following screenshot:
Ubuntu will then install on your machine.
The one line install!
There is a single command that will install both WSL and Ubuntu at the same time.
When opening PowerShell for the first time, simply modify the initial instruction to:
wsl --install -d ubuntu
This will install both WSL and Ubuntu! Don’t forget to restart your machine before continuing.
Once installed, you can either launch the application directly from the store or search for Ubuntu in your Windows search bar.
4. Configure Ubuntu
Congratulations, you now have an Ubuntu terminal running on your Windows machine!
If Ubuntu returns an error during this initial installation, then the most common issue is that virtualisation is disabled in your device’s BIOS menu. You will need to turn this on during your device’s boot sequence. The location of this option varies by manufacturer, so you will need to refer to their documentation to find it.
Once Ubuntu has finished its initial setup you will need to create a username and password (this does not need to match your Windows user credentials).
Finally, it’s always good practice to install the latest updates with the following commands, entering your password when prompted.
sudo apt update
Then
sudo apt upgrade
Press Y when prompted.
5. Install your first package
Installing packages on Ubuntu is as easy as using a single command. Below, you will see how to install bpython, a simple python interpreter for trying out ideas, featuring some nice usability features like expected parameters and autocompletion.
To check that you have the latest package lists, type:
sudo apt update
Then install bpython:
sudo apt install bpython
To run the application type:
bpython
And you’re ready to go!
6. Customising your Terminal with Windows Terminal Preview
Since you’re likely to be using your Ubuntu terminal a fair bit, it’s always nice to do some customisation. We recommend installing Windows Terminal Preview to get the most user-friendly setup. You can find it in the Microsoft Store.
Windows Terminal allows you to open multiple Terminal instances as tabs, so you can have PowerShell running alongside Ubuntu. It also includes a number of customisation options. In the below screenshot, we’ve changed the tab name and colour, and configured the terminal appearance to use the Tango Dark theme and the Ubuntu font!
These customisations can be applied universally using the Appearance menu in Settings or to individual profiles which each have their own Appearance menu. Try it yourself to find something you feel comfortable with!
7. Enjoy Ubuntu on WSL!
That’s it! In this tutorial, you’ve seen how to install WSL and Ubuntu, set up your profile, and install your first package. You also got some tips on how to customise your experience.
We hope you enjoy working with Ubuntu inside WSL. Don’t forget to check out our blog for the latest news on all things Ubuntu.
Further Reading
- Install Ubuntu on WSL2 on Windows 11 with GUI Support
- Working with Visual Studio Code on Ubuntu on WSL2
- Enabling GPU acceleration on Ubuntu on WSL2 with the NVIDIA CUDA Platform
- Setting up WSL for Data Science
- WSL on Ubuntu Wiki
- Ask Ubuntu
Was this tutorial useful?
Thank you for your feedback.


