Рассмотрим установку Docker Desktop for Windows — это Community-версия Docker для систем Microsoft Windows.
Системные требования
- Windows 10 64-bit: Pro, Enterprise, Education (Build 16299 или выше).
Для успешного запуска Client Hyper-V в Windows 10 требуются следующие предварительные требования к оборудованию:
- 64 bit процессор c поддержкой Second Level Address Translation (SLAT).
- 4GB системной памяти.
- Поддержка аппаратной виртуализации на уровне BIOS должна быть включена в настройках BIOS.
Подготовка
Включаем функции Hyper-V Containers Window. Для этого переходим в панель управления — установка и удаление программ — включение или отключение компонентов Windows. Активируем пункт Hyper-V, который включает Hyper-V Managment Tools, Hyper-V Platform.
Также это можно выполнить через powershell или dism (все команды необходимо выполнять с правами администратора).
Powershell:
Enable-WindowsOptionalFeature -Online -FeatureName Microsoft-Hyper-V -All
DISM:
DISM /Online /Enable-Feature /All /FeatureName:Microsoft-Hyper-V
Установка
Скачиваем установщик Docker (Docker Desktop Installer) с Docker Hub.
Установка Docker Desktop включает Docker Engine, Docker CLI client, Docker Compose, Notary, Kubernetes и Credential Helper. Контейнеры и образы, созданные с помощью Docker Desktop, используются всеми учетными записями пользователей на компьютерах, на которых он установлен. Это связано с тем, что все учетные записи Windows используют одну и ту же виртуальную машину для создания и запуска контейнеров. При использовании Docker Desktop WSL 2 невозможно обмениваться контейнерами и образами между учетными записями пользователей.
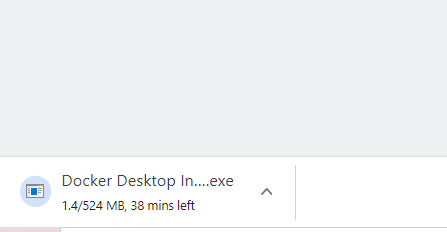
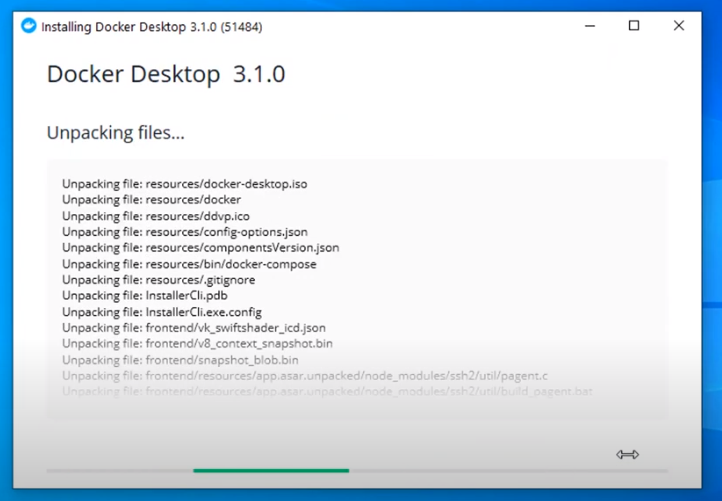
Запускаем установщик Docker Desktop Installer.exe и ожидаем пока он скачает все необходимые компоненты.
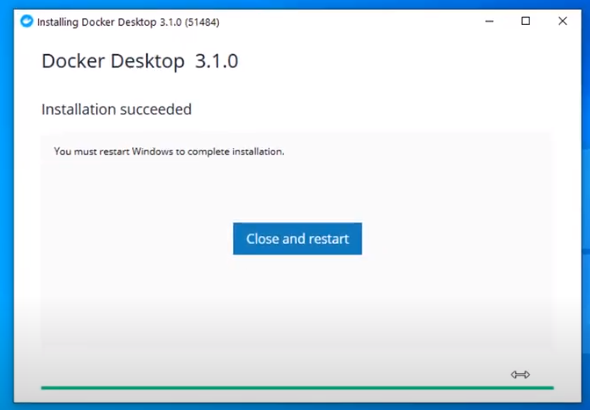
После установки система потребует перезагрузки. Перезагружаемся и входим в систему.
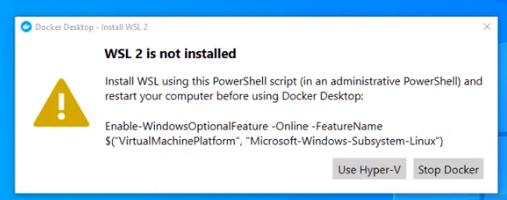
После входа может возникнут запрос на установку дополнительного компонента WSL2. Переходим по ссылке и скачиваем необходимый пакет с официального сайта Microsoft.
После скачивания выполняем установку WSL2, после которой снова потребуется перезагрузка.
Настройка и запуск приложения
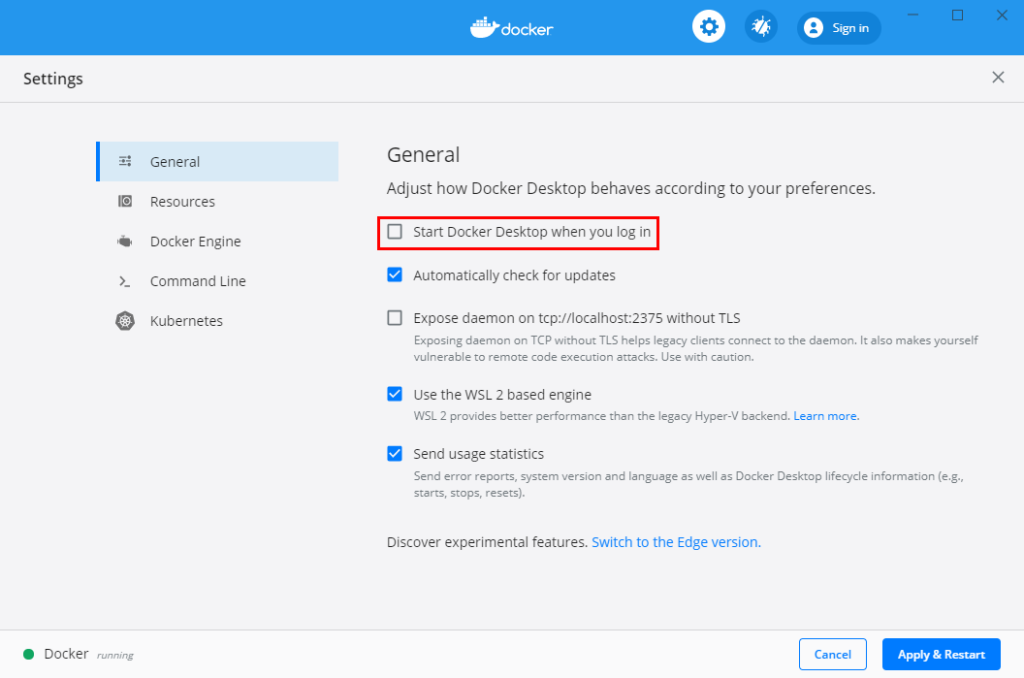
Входим в систему и ждем запуска всех служб Docker. Когда все службы будут запущены, мы увидим в трее классический значок Docker — это значит что служба установлена и запущена. Далее можно запустить приложение Docker desktop. Далее можно изменить настройки Docker при необходимости:

Рисунок 1 — Изменение параметров Docker desktop
Далее управление Docker выполняется через Powershell. Проверяем версию и выполняем тестовый запуск контейнера:

Рисунок 2 — Проверка версии Docker
После выполнения всех этих действий, Docker готов к использованию.
Нужна помощь? Настройки docker/docker swarm/docker compose мы осуществляем в рамках услуги DevOps-аутсорсинг.
В этой заметке я расскажу как поставить Докер на Windows 10, но сначала я опишу установку Windows Subsystem for Linux. Работу с самим Докером я описывать не буду, сделаю это позже.
Установка WSL2 на Windows 10
Установка элементарная, главное проверьте чтобы ваш компьютер и Windows 10 отвечали минимальным требованиям.
UPD.
Для Windows 11 и Windows 10 (сборка 19041 и выше) для установки WSL достаточно одной команды (PowerShell с правами администратора):
wsl --installЭта команда включит все необходимые компоненты и установит дистрибутив Linux (по умолчанию Ubuntu), вам нужно будет только перезагрузить компьютер.
Подробный процесс установки описан на сайте Microsoft https://docs.microsoft.com/ru-ru/windows/wsl/install-win10 там же указаны минимальные требования.
Если коротко, то установка WSL2 на Windows 10 сводится к следующим шагам:
1) Запускаем PowerShell с правами администратора и включаем компонент «Подсистема Windows для Linux», для этого вводим команду:
dism.exe /online /enable-feature /featurename:VirtualMachinePlatform /all /norestart
2) Далее необходимо включить необязательный компонент «Платформа виртуальных машин», для этого в PowerShell с правами администратора выполняем команду:
dism.exe /online /enable-feature /featurename:VirtualMachinePlatform /all /norestart
Перезапускаем компьютер.
3) Скачиваем и устанавливаем пакет обновления ядра Linux https://wslstorestorage.blob.core.windows.net/wslblob/wsl_update_x64.msi
4) Выбираем WSL 2 в качестве версии по умолчанию, если этого не сделать новые дистрибутивы Linux будут установлены в WSL 1. Вновь запускаем PowerShell с правами администратора и добавляем команду:
wsl --set-default-version 2
Готово.
Далее нужно выбрать в магазине Microsoft Store нужный нам дистрибутив Linux и установить его, как обычное приложение из магазина. Я установил Ubuntu 18.04 (https://www.microsoft.com/store/apps/9N9TNGVNDL3Q)
После я запускаю установленную Убунту и задаю логин и пароль.
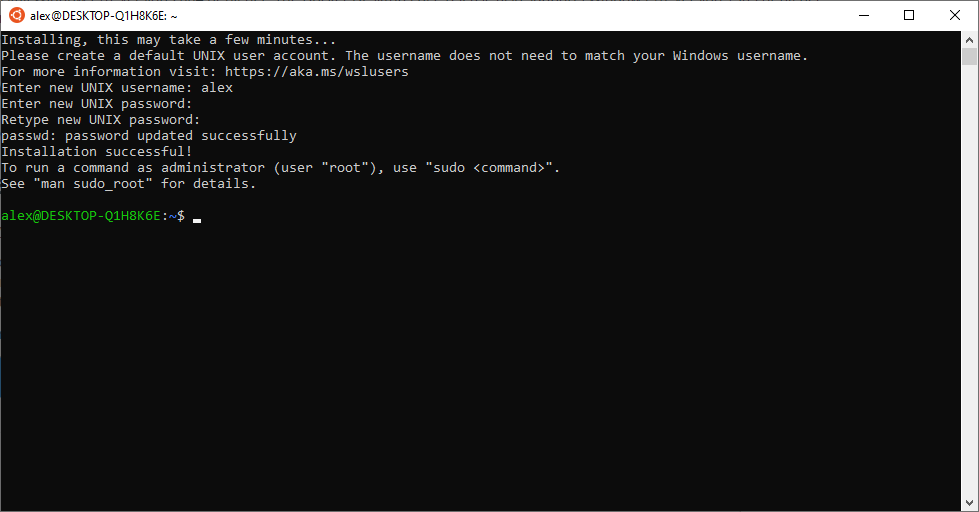
Все, Убунту можно закрыть.
Установка Docker на Windows 10
Теперь установим Docker Desktop WSL 2 backend, идем по ссылке https://hub.docker.com/editions/community/docker-ce-desktop-windows/ Скачиваем и устанавливаем Docker Desktop for Windows (stable).
Запускаем скачанный файл и производим обычную установку приложения Windows.
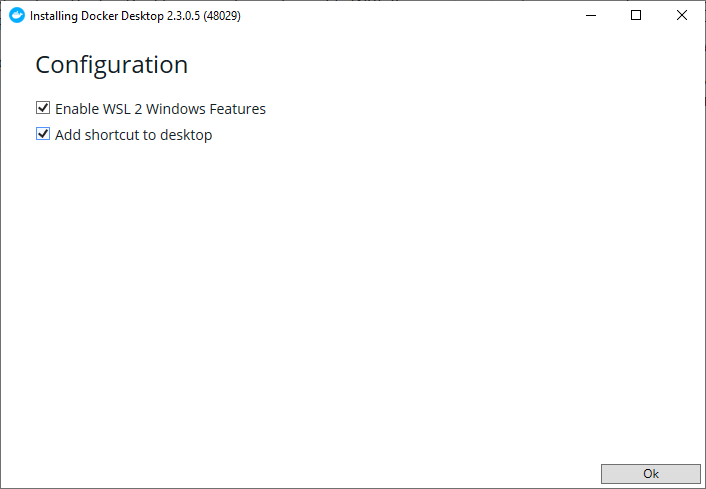
При установке убедитесь что установлена галочка на Enable WSL 2 Windows Features.
После установки следуйте инструкциям и перелогиньтесь в Windows, Докер запуститься при следующем входе в Windows, иногда в первый раз может понадобится довольно длительное время.
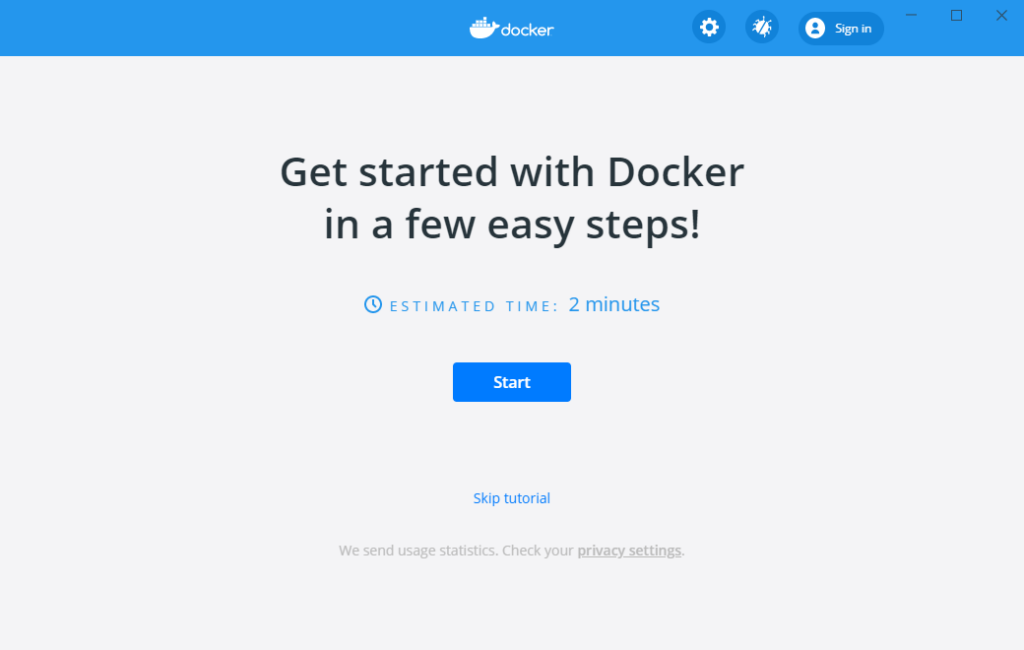
Когда он запустится, рекомендую в окне приветствия нажать Start и пройти небольшое обучение.
После обучающего урока у вас будет запущен ваш первый Docker контейнер.
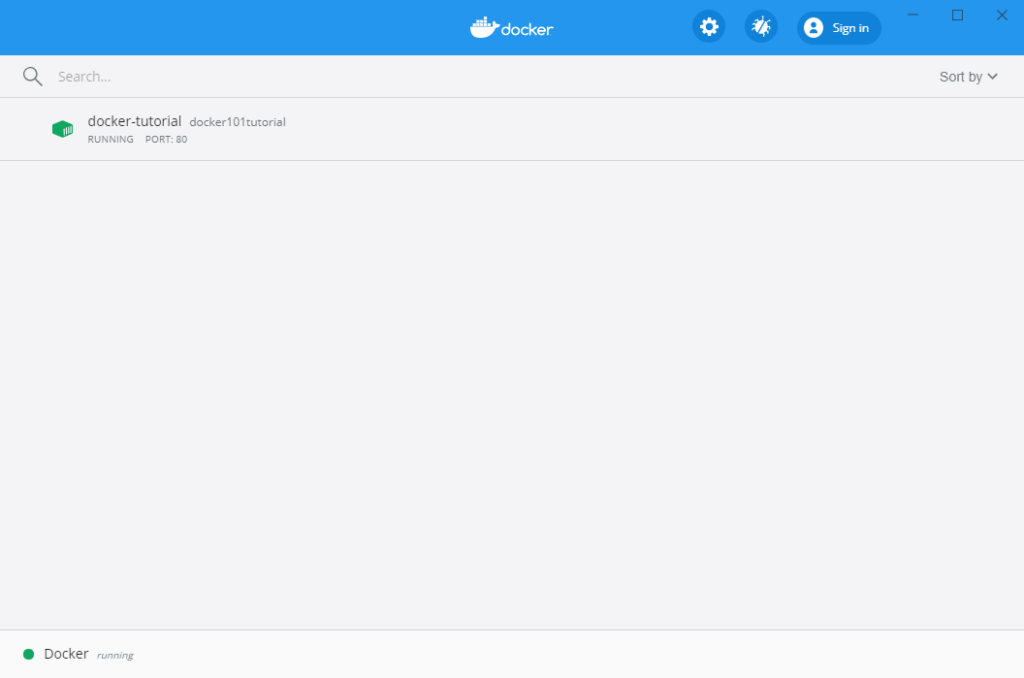
И теперь по адресу http://localhost/tutorial/ вы можете увидеть инструкцию по дальнейшей работе.
Теперь вы можете заниматься разработкой в Windows 10 использую Docker.
Кстати, я не хочу чтобы Докер запускался каждый раз при включении компьютера, поэтому в настройках я убрал галочку Start Docker Desktop when you log in.
dockerwsl
Эта статья даст вам полное представление о Docker Desktop для пользователей Windows и MAC. Мы изучим установку Docker Desktop на компьютерах с Windows и Mac. После установки мы также попытаемся выполнить некоторые операции Docker.
Docker Desktop — это собственное настольное приложение, разработанное Docker для пользователей Windows и MAC. Это самый простой способ запуска, сборки, отладки и тестирования приложений Dockerized.
Docker Desktop предлагает важные и наиболее полезные функции, такие как быстрые циклы редактирования, уведомления об изменениях файлов, встроенная поддержка корпоративной сети и гибкость для работы с собственным выбором прокси и VPN.
Docker Desktop состоит из инструментов для разработчика, приложения Docker, Kubernetes и синхронизации версий. Он позволяет вам создавать сертифицированные образы и шаблоны языков и инструментов.
Скорость, безопасность и выбор — все, что вам нужно для разработки и доставки контейнерных приложений, доступных на вашем рабочем столе, будет представлено вам.
Прежде чем перейти к процессу установки, давайте разберемся с его версиями.
Версии Docker
Docker в основном поставляется в двух версиях, в Community и ENterprise.
Community версия поставляется с бесплатным набором продуктов Docker. ENterprise корпоративная версия представляет собой сертифицированную контейнерную платформу, которая предоставляет коммерческим пользователям дополнительные функции, такие как безопасность образов, управление образами, оркестровка и управление средой выполнения контейнеров, но по разумной цене.
Мы начнем наше обучение с Community Edition. Контейнеры Docker, работающие в конкретной операционной системе, совместно используют ядро ОС. Это означает, что мы не можем использовать ядро Windows (хост) для запуска контейнеров Linux или наоборот. Чтобы проделать это, у нас есть Docker Desktop для Windows и MAC.
Выпуски Docker Desktop
Docker Desktop выпускается в двух вариантах.
- Stable: как видно из названия, стабильный выпуск тщательно протестирован и может быть использован при разработке более надежных приложений. Его версии полностью синхронизированы с версиями Docker Engine.
- Edge: эти версии состоят из всех новых и экспериментальных функций Docker Engine. Есть больше шансов ошибок, сбоев и проблем, которые могут возникнуть. Тем не менее, пользователи получат возможность ознакомиться с предстоящими функциями.
Docker на Windows
Есть два варианта Docker на Windows.
1. Использование Docker Toolbox
Docker Toolbox предоставляет набор легких инструментов.
- Oracle virtual box
- Docker Engine
- Docker Machine
- Docker compose
- Kitematic GUI
Вышеуказанные инструменты устраняют необходимость развертывания отдельной виртуальной машины для запуска Docker. Просто установите исполняемый файл панели инструментов Docker непосредственно в Windows и начните разработку приложений. Требуется 64-битная ОС и Windows 7 или выше с включенным режимом виртуализации.
Но опять же, панель инструментов Docker — это оригинальная поддержка, предоставляемая в Windows для запуска Docker и его устаревшего решения для всех ОС Windows, которые не соответствуют требуемой конфигурации.
2. Использование Docker Desktop
Docker Desktop — это новейшая технология, используемая для Docker в Windows. Он заменяет виртуальную машину Oracle собственной технологией виртуализации, доступной в Windows, то есть Microsoft Hyper-V.
Он по-прежнему будет запускать Docker на Linux-машине, созданной под ним. Но на этот раз вместо виртуальной машины Oracle мы использовали нативный Microsoft Hyper-V.
Установка Docker на Windows
Вы можете скачать репозиторий Docker Desktop из Docker Hub.
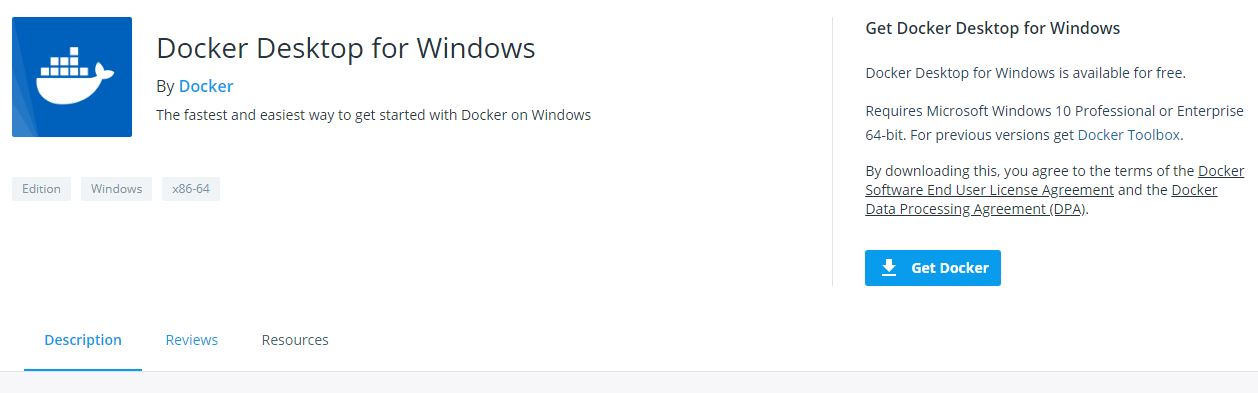
истемные требования:
- Windows 10 или Windows Server 2016 Professional или Enterprise Edition
- Поддержка Hyper-V.
Чтобы запустить Hyper-V, оборудование должно соответствовать следующим требованиям:
- 64-битный процессор
- > = 4 ГБ ОЗУ
- Поддержка виртуализации оборудования на уровне BIOS
Следовательно, программная и аппаратная зависимость заключается в запуске Docker Desktop на Windows.
Установка Docker на macOS
Вы можете скачать репозиторий Docker Desktop из Docker Hub.
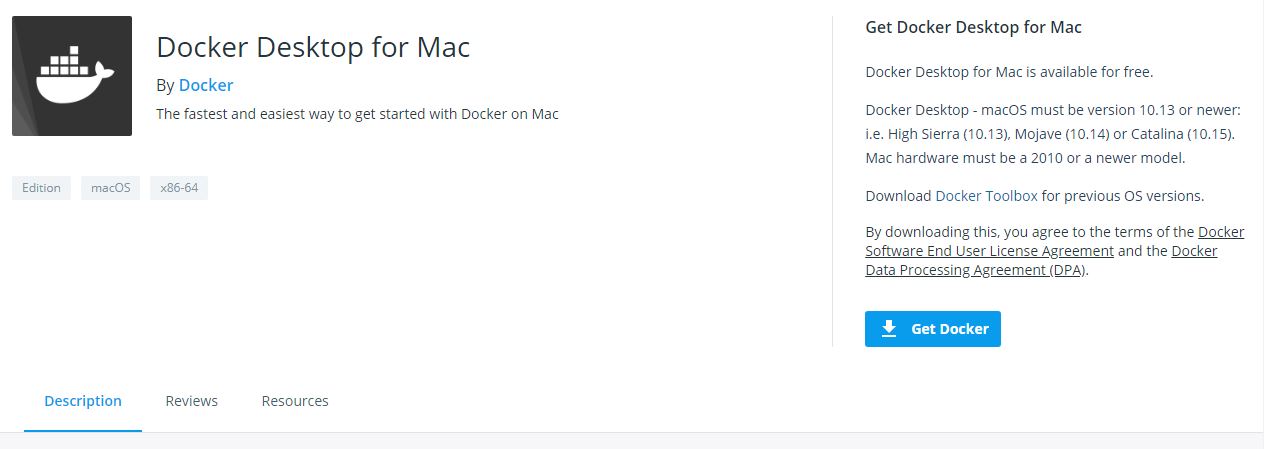
Системные требования:
- MAC Hardware 2010 или новее с аппаратной поддержкой управления памятью и неограниченным режимом. Выполните команду kern.hv_support, чтобы проверить, поддерживает ли оборудование MAC инфраструктуру гипервизора.
- MAC OS версии 10.13 или новее.
- > = 4 ГБ ОЗУ
- Virtual-Box до версии 4.3.30
Работа с образами
После установки проверьте версию установленного Docker Engine.
docker --versionDocker работает с доставкой и запуском контейнерных приложений. Вам либо нужно создать свое собственное контейнерное приложение, либо Docker поддерживает контейнерные образы в Docker Hub, и его можно легко загрузить с помощью простой команды docker run.
Здесь мы будем тянуть образ Redis.
docker pull redis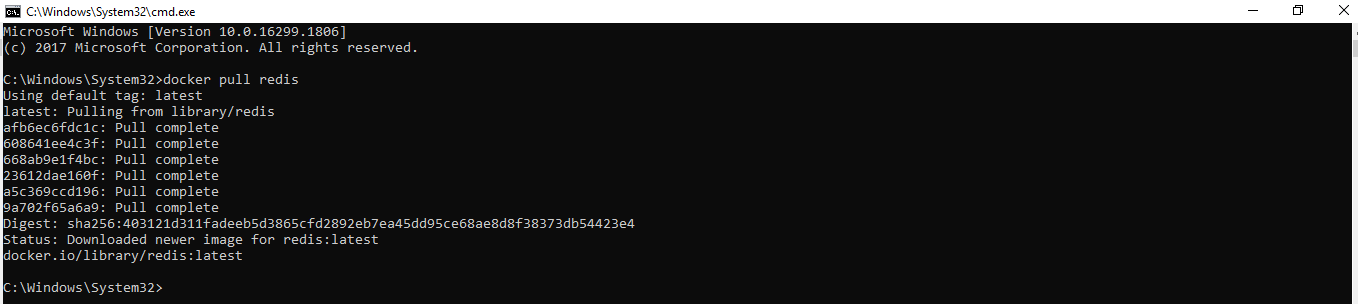
С помощью простой команды run образы можно скачивать и загружать на GitHub или Docker Hub, и любой пользователь во всем мире может получить к нему доступ и начать работать с ним.
Docker Container запускает образ Docker. Следующим шагом является запуск контейнера.
docker run -p 6379 Redis
Будет создан зашифрованный идентификатор контейнера. Вы можете быстро проверить состояние работающего экземпляра в Docker, нажав на Dashboard option.

Обязательно остановите контейнер, прежде чем удалять его из Docker Engine.

Возможности Docker Desktop
Существует множество преимуществ:
- Поддерживает широкий спектр инструментов разработки.
- Обеспечьте быстрый и оптимизированный способ создания и публикации контейнерного образа на любой облачной платформе.
- Простота установки и настройки полной среды Docker
- Повышение производительности благодаря встроенной виртуализации Hyper-V для Windows и HyperKit для MAC.
- Возможность работать в Linux через WSL 2 на компьютерах с Windows.
- Легкий доступ к работающим контейнерам в локальной сети.
- Возможность поделиться любым приложением на облачной платформе, на разных языках и в разных средах.
- Для обеспечения безопасности и актуальности выполняются автоматические обновления.
- Включены последние версии Kubernetes.
- Возможность переключения между Linux и Windows сервером на Windows.
Docker Desktop — это нативное приложение, разработанное на Windows и MAC OS для запуска, сборки и доставки контейнерных приложений или сервисов.
Однако
Docker Desktop предназначен не для производственной среды, а для рабочего стола и среды разработки.
Также рекомендуем прочитать:
- Docker для начинающих — технология контейнеров
- В чем разница между Docker и Kubernetes?
- Введение в Docker Hub и все, что вы должны знать о нем
- Как установить Docker на Ubuntu, Windows, Debian и CentOS?
- Kubernetes — Введение для начинающих
- Docker посмотреть запущенные контейнеры, запустить или остановить контейнеры
Pre-requisites: Windows OS, Docker
Before understanding the concept of Docker, let’s first discuss the concept of Hypervisors. So in an IT Company, or any cooperate, there is a development team, a testing team, and an operation team for developing the application, testing it, and deploying it. Now suppose the developers are working on a different OS, for example, let’s say macOS, and they used some dependencies or libraries as per the language they are using, so they just won’t hand the software to the testing team, but also the libraries, but now, the application didn’t run o the tester’s machine, but it worked on the developer’s machine, maybe because the tester’s machine has different OS features than the developer’s one, so now, devs have to send the OS, but that is not practically possible, as one can’t just copy the C drive and hand it over, that’s where the concept of Hypervisors comes into the picture, think of this as a virtual machine or Wim-ware, so you have the physical hardware, you host an OS on it, and the OS can now host another OS also called Guest OS, and this guest OS can be packed and send to the testing team.
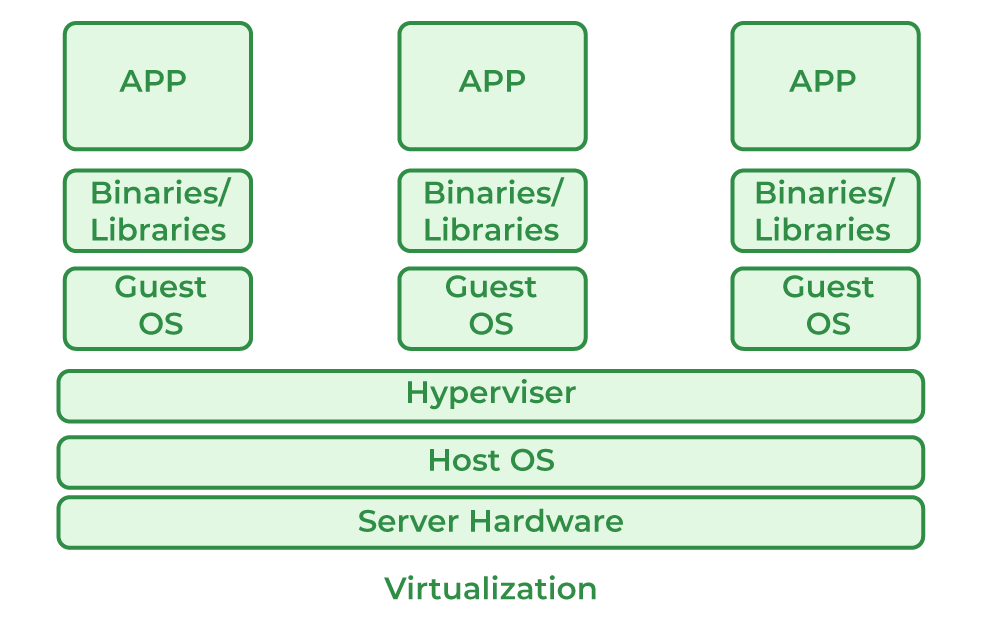
But the problem here is, for every application, one needs a different OS, this will result in a waste of resources as multiple OSs will be running. So for this problem, we have the concept of Containers, the difference between Hypervisors and containers is that we don’t need multiple OS for every application, multiple applications can share the same OS kernel, great isn’t it? So instead of installing HYPERVISOR, we will be installing Docker.

What is Docker?
Docker is an open-source platform where we run our applications in the form of containers. Docker containers are very light in weight and contain all the dependencies and configurations so we can run them across different computing environments. Developers can package all the dependencies of the application in the form of images it can be portable easily or shared easily with other developers without worrying about the underlying OS.
Requirements
- Windows 11 64-bit: Home or Pro version 21H2 or higher, or Enterprise or Education version 21H2.
- Windows 10 64-bit: Home or Pro version 21H2 or higher, or Enterprise or Education version 21H2.
- 4GB RAM or Higher.
- Hyper V feature must be enabled in Windows.
Specifications
- RAM: The minimal amount of Memory needed to run containers smoothly is 4GB, however, if a program has more complicated functions, it will need more than 6 GB RAM.
- Storage: For running the containers and installation of docker the minimum space required is 25GB. If you want to store the container images and data then we need at least more than 35 GB to 40 GB.
- Network: To download, push and pull the images we need active internet then only we can maintain the container images with the help of docker.
- CPU: At least a 64-bit processor is required for docker.
Docker can be run on a laptop with 4 GB of Memory, a 64-bit processor, and 25 GB of storage. It might change based on our use cases.
Step-By-Step Docker Installation On Windows
Follow the below steps to install and configure Docker on Windows:
Step 1: For installation of Docker, go to your favorite browser(chrome will be used here, but it can be done by using any browser). In the search bar, type Docker download. And click on the first link that appears.

Step 2: After clicking the link, choose your OS, be it Windows, MAC, or Linux for installation.
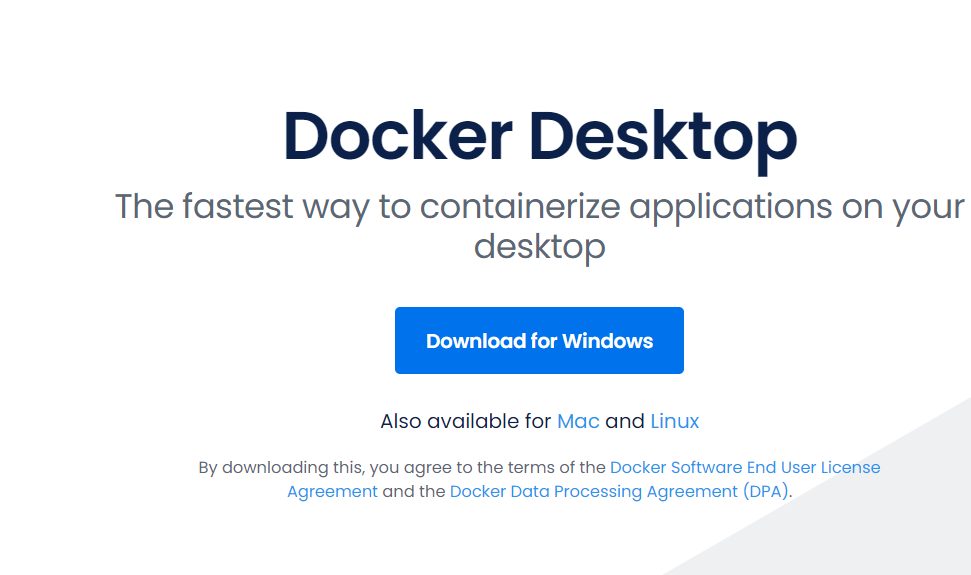
Step 3: The download will start, and based on your internet speed, it will take some time to do so. To know more about docker desktop installation visit Docker Desktop.
Start Docker Desktop Tool
Step 1: After installation, it will look something like this in Windows:
- Open the Docker Desktop.
- Accept the Docker Subscription Service Agreement window. and click On continue. Docker Desktop will start after we accept the terms and conditions.
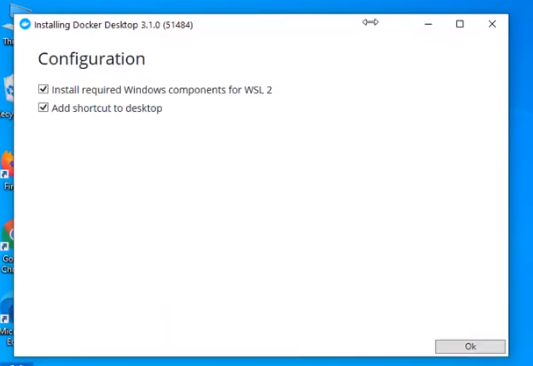
Step 2: After clicking Ok the installation will start.
Step 3: After installation, it will show something like the below:
Step 3: After installation, we need to restart our PC and install WSL 2, which stands for Windows Setup for LINUX. It is a compatibility layer for running Linux binary executables natively on Windows 10. Please follow the next few instructions carefully. After restarting, the following dialog box will appear, then click on the Stop Docker button there.
Step 4: After clicking, we need to enable the Hyper-V, for that we will restart the PC and go to BIOS setup, Settings>Update and Security>Recovery>Advanced Setup>Device Configuration. After that, if the option Enable Turbo Boost on DC. is unmarked, mark it, after it, save, and exit.

Step 5: Afterward, in the last step, go to Control Panel> Turn Windows Features on and off. Then for activating Hyper-V, mark the Hyper-V and Windows Hypervisor Platform.
At this point, you have successfully installed and configured Docker on your Windows machine.
How To Install From The Command Line?
To install the Docker desktop, follow the procedures listed below.
Step 1: Run the following command in the Command prompt.
start /w "" "Docker Desktop Installer.exe" install
Step 2: Add user account into docker user groups.
net localgroup docker-users <users>/add
Verification
Verify the docker installation and versions,
1. Run the following command in the command prompt to check the docker version.
docker --version
2. After that we will receive a Beta invitation email When you start docker for the first time.
How To Install Docker On Windows 10?
You must perform the following steps in order to install Docker on Windows 10:
Step 1: In this step, we must assure that our Windows can support Docker the minimum requirement is Docker requires 64-bit Windows 10 Pro.
Step 2: You can download the docker by using this link “https://www.docker.com/products/docker-desktop”.
Step 3: Once the installation is finished go to the start menu and open Docker Desktop. Enable Hyper-V and Windows Subsystem for Linux features after enabling Docker Desktop will automatically restart. After restarting you can open the Docker Desktop and start using it.
Step 4: To test whether the Docker Desktop is installed or not open the command prompt or PowerShell window and run try to pull the sample image for example Nginx if the image is pulled then the Docker installation in Windows was completed successfully completed.
How To Install Docker On Windows 11?
First, make sure that your Windows matches Docker’s requirement Docker requires 64-bit Windows 11 Pro, and the rest all the steps are the same as Windows 10.
How To Update The Docker In Windows?
By following the steps mentioned below we can update our Docker:
Step 1: Open the Docker Desktop from the start menu.
Step 2: Click on the settings and click on the “resource” tab there we can find an option called “Check for Updates.”Docker Desktop will check for any available updates.
Step 3: If any update is available Docker will show us like “Download and Install” Directly click on it Docker Desktop will automatically download it after completion of installation you can the Docker version by using the following command in the command prompt or PowerShell window.
docker version
Advantages of Docker In Windows
- Docker for Windows allows developers to their applications easily on any Windows.
- Docker can be installed very easily on Windows.
- Docker containers can be moved in between Windows and Linux without changing the Source code.
- The application is isolated from the underlying OS which makes it more secure.
Uninstall Docker Desktop Tool
To uninstall the Docker Desktop follow the steps mentioned below.
- Find “Add or Remove Programs” in the start menu and choose it.
- Click Docker Desktop when you see Docker in the list of installed programs.
- When you click on uninstall in Docker Desktop, be sure to follow the steps that appear.
- After the uninstallation is complete, restart the computer.
How To Install And Enable WSL 2 On Windows
Before installing docker by using WSL 2 make sure your Windows is supported for that and then install and enable WSL2 on your laptop.
Step 1:Enter the following command as an administrator to enable the Windows Subsystem for Linux feature.
dism.exe /online /enable-feature /featurename
:Microsoft-Windows-Subsystem-Linux /all /norestart
Step 2: In this step, you need to enable the virtual machine platform feature to enable it to run the following command in Powershell as an administrator
dism.exe /online /enable-feature /featurename
:VirtualMachinePlatform /all /norestart
Step 3: After running the above command you need to restart your computer by this the virtual machine platform feature will be enabled.
Step 4: Know download and install WSL 2 Linux kernel updated package from the official website of Microsoft
Step 5: Make WSL 2 the standard version. Run the following command when logged in as an administrator in Windows PowerShell.Install a Linux distribution by using the Microsoft Store. You can pick from a variety of Linux distributions, including Kali Linux, Debian, and Ubuntu.
wsl --set-default-version 2
After completing the above steps we can use execute Linux commands on your windows using WSL 2.
How To Install Docker With WSL 2 Backend On Windows?
Utilizing dynamic memory allocation will help the WSL 2 backend consume resources more efficiently. which enables us to launch Docker very quickly and improve Docker’s speed. To make this happen please follow the steps mentioned below.
Step 1: Install and enable WSL 2 on Windows by following the steps outlined in the previous answers. And install Docker Desktop as mentioned above for Windows.
Step 2: Once the Docker Desktop installation is completed open the setting in Docker Desktop click on the resources tab and click on WSL 2 integration. Click “Apply & Restart” to apply the changes.
Step 3: Open a terminal in your WSL 2 distribution and use the following command to confirm that Docker is operational after Docker Desktop has restarted.
docker pull ubuntu
If the image is successfully retrieved, WSL 2 has likely been deployed as a backend for Docker. The WSL 2 backend now allows you to use Docker to construct and manage containers on your Windows computer.
Note: The Docker CLI interacts with the Docker daemon running in the Windows Docker Desktop application when you issue Docker commands in your WSL 2 terminal.
Conclusion
In this article, we covered a step-by-step procedure to install docker in Windows 11 and Windows 10. We also covered how to install docker in Windows 10 and 11 with the help of the Command line. Refer to Install in Mac and Ubuntu to know more about installation in different OSs.
For many developers, Docker is the platform for creating and deploying applications in self-sufficient containers. It is an OS-level virtualization platform that helps users build and manage applications without worrying about dependencies and underlying OS.
In this guide, we will see how to install Docker desktop on Windows 10 or Windows 11. We’ll also mention the benefits of Docker on Windows and how you can uninstall it from the Windows environment.
Let’s start with the benefits of Docker on Windows.
Table Of Content
- What are the Benefits of Working with Docker on Windows?
- Install Docker on Windows 10 & 11
- Prerequisites
- Install Docker Desktop on Windows 11
- Start Docker Desktop Tool
- How To Install Docker on Windows 10?
- How to Install Docker From the Command Prompt
- Uninstall the Docker Desktop Tool
- Conclusion
What are the Benefits of Working with Docker on Windows?
Docker on Windows brings a range of benefits to the development process and application deployment, including:
- The simple user interface allows you to view and monitor all Docker containers from one location.
- Docker takes care of allocating the required resources and memory space for the containers.
- Supports HTTP proxy settings
- Docker allows developers to create containerized applications that can run in a Windows environment. This makes it easy to build and test applications on Windows and then deploy them to other platforms without compatibility issues.
- Docker images can be easily moved between development, testing, and production environments, which makes it easier to maintain consistency and reduce the risk of errors or bugs caused by differences between environments
Like all environments, you need the following elements to run Docker containers in a Windows environment:
- Docker Engine: This runs on the host machine to build and run containers.
- Docker Client: This receives the commands from the users, translates them into REST API, and delivers them to the Docker Daemon.
- Docker Daemon: This manages Docker containers
- Docker Compose: This runs multiple container applications.
Now that you know what you need, we’ll explain the installation process of Docker on the Windows operating system.
Before we discuss the installation process, we should go into the details of prerequisites and related information so that you have a solid foundation on installing Docker on Windows 10 & 11, especially if using it with a dedicated server.
Prerequisites
- Windows 10 64-bit or Windows 11 64-bit (version 2004 or higher for Pro edition; version 1909 or higher for Enterprise and Education editions)
- The target machine should have a 64-bit processor with support for Second Level Address Translation (SLAT).
Minimum 4 GB RAM. - BIOS settings and hardware virtualization support must be enabled.
- Support for Windows Hyper-V enabled.
- Support for Older Windows versions
Install Docker Desktop on Windows 11
Let’s start with the process of installing Docker Desktop on Windows 11. The process involves several steps that are detailed below.
- Visit the Docker Desktop For Windows download page and download the Docker Desktop installation file.
Note: The target machine should have a 64-bit processor and 4GB system RAM to run Docker successfully on Windows 10.
- Run the installer and remember to enable the Hyper-V Windows feature on the Configuration page.
- Complete the installation process and restart the computer once the process finishes.
Start Docker Desktop Tool
After completing the installation, you’ll need to start the Docker tool manually. For this, locate or search for “Docker Desktop” in the desktop search bar.
Before you can get started with Docker, you’ll need to go through the onboarding tutorial. This will help you learn how to build a Docker image and run a container.
Once you’ve completed the tutorial, you’ll be up and running with Docker Desktop on Windows. To verify if everything is working correctly, go to the Docker CLI and run the “docker version” command. This will tell you the Docker version installed on your system.
At this point, Docker has been installed on your Windows 11 machine and is ready for running containers and Docker images.
How To Install Docker on Windows 10?
The process of installing Docker on Windows 10 is similar to installing Docker on Windows 11. Let’s see the major steps of the process.
Start by downloading the installer from the official Docker for Windows page.
Once the download finishes, locate the downloaded file and run it.
On the setup page, you must choose the options, such as the Hyper-V and WSL 2 features. Then, click “OK” and follow the instructions of the wizard. Close the wizard when it finishes.
When using Docker, it’s important to know that the administrator account and Docker user accounts are often the same. If you don’t have a Docker user group, you will need to create one and add your user account to it.
Initially, run the admin panel as computer management.
You can add new users to the Docker group by going to the Local Users and Groups and, from there, find Docker user groups.
After you’ve completed all these steps, restart your computer to update and start Docker Desktop on Windows 10.
Once the system comes back online, start Docker Desktop.
It will prompt you to review and accept the Subscription Services Agreement for Docker Desktop. Once you accept and agree to the terms and conditions, the Docker Desktop window will appear, and you’re ready to work!
Remember to go through the Quick Start guide included with Docker Desktop for a better experience.
Resolving the WSL Kernel Version Error
Some Windows 10 systems can show the following error about Docker Desktop requiring a newer version of the WSL kernel.
To resolve this error, launch the Command Prompt and run the following command:
wsl --update
How to Install Docker From the Command Prompt
If you wish, you can install Docker Desktop from the Command Prompt. This is a simple process where you enter a simple command to initiate the installation process. But first, you need to download the Docker Desktop installer from the official site.
Here are the commands you’ll need to run:
If you’re in a terminal window, run the following command:
"Docker Desktop Installer.exe" install
If you’re in the PowerShell, run the following command:
Start-Process '.\win\build\Docker Desktop Installer.exe' -Wait install
Finally, if you’re at the Command Prompt, run the following command:
start /w "" "Docker Desktop Installer.exe" install
When the process finishes, don’t forget to add your user account to the Docker user group, especially if your admin account and user account are not the same. To do that, run this command:
net localgroup docker-users <users>/add
How do I Know if Docker is Installed on my Windows 10/ Windows 11 Machine?
After the installation finishes, it is always a good idea to verify if everything is working as intended. For this, you can try the following ideas:
- If you’re using a Windows terminal, you can use the following command line to launch Docker:
docker-run
- From Powershell, you can verify the Docker version and installation by entering the following command:
docker --version
- You can also check the latest version of the Docker desktop from the Docker option.
- Alternatively, you can check for a web server by running the Docker desktop.
Uninstall the Docker Desktop Tool
There are times when you might want to remove Docker from the Windows machine. Like the installation process, the uninstallation process is straightforward.
1. Go to the Windows Start menu.
2. Choose Settings > Apps > Apps & features.
3. Docker Desktop should be present in the Apps & features list.
4. Click Uninstall.
Conclusion
Docker on Windows is a quick and easy way to run applications in containers on Windows operating systems. Developers can build, package, and deploy applications more efficiently and consistently across different environments using containers. This improved productivity and reduced complexity help organizations save time and money.
Docker on Windows is the perfect way to utilize the features of both Windows and Linux-based containers. However, it is important to note that Docker on Windows does have some limitations and requirements, such as minimum hardware specifications and the use of Windows 10 Professional or Enterprise editions with the Hyper-V feature enabled.