Часть этой главы основана на учебных пособиях Geek Girls Carrots (https://github.com/ggcarrots/django-carrots).
Отдельные части этой главы основаны на учебном пособии django-marcador , лицензированном под Creative Commons Attribution-ShareAlike 4.0 International License. Руководство django-marcador защищено авторским правом Markus Zapke-Gründemann et al.
Мы собираемся создать простой блог!
Первый шаг — создать новый проект Django. В сущности, это значит, что мы запустим несколько стандартных скриптов из поставки Django, которые создадут для нас скелет проекта. Это просто куча каталогов и файлов, которые мы используем позже.
Названия этих каталогов и файлов очень важны для Django. Ты не должна переименовывать их. Перемещать их в другое место тоже не самая удачная идея. Django необходима определенная структура, чтобы иметь возможность найти важные вещи.
Не забудь: ты должна запускать все команды в virtualenv. Если ты не видишь в командной строке префикса
(myvenv), то необходимо активировать virtualenv. Мы объясняли, как это сделать, в разделе Работаем с virtualenv главы Установка Django. Для этого нужно набратьmyvenv\Scripts\activateв Windows илиsource myvenv/bin/activateв Mac OS / Linux.
OS X или Linux
В консоли Mac OS или Linux нужно запустить следующую команду (не забудь добавить точку . в конце):
command-line
(myvenv) ~/djangogirls$ django-admin startproject mysite .
Точка
.крайне важна, потому что говорит скрипту установить Django в вашем текущем каталоге (который и обозначается сокращённо точкой.)Примечание: при вводе приведённой команды помни, что тебе нужно набирать только часть, начинающуюся с
django-admin.(myvenv) ~/djangogirls$— это просто пример строки-приглашения терминала.
Windows
В Windows запусти следующую команду (не забудь добавить точку . в конце):
command-line
(myvenv) C:\Users\Name\djangogirls> django-admin.exe startproject mysite .
Точка
.крайне важна, потому что говорит скрипту установить Django в вашем текущем каталоге (который и обозначается сокращённо точкой.)Примечание: при вводе приведённой команды помни, что тебе нужно набирать только часть, начинающуюся с
django-admin.exe.(myvenv) C:\Users\Name\djangogirls>— это просто пример приглашения командной строки.
django-admin.py — это скрипт, который создаст необходимую структуру директорий и файлы для нас. Теперь у твоего проекта должна быть следующая структура:
djangogirls
├───manage.py
├───mysite
│        settings.py
│        urls.py
│        wsgi.py
│        __init__.py
└───requirements.txt
Примечание: в своей структуре директорий ты также увидишь ранее созданную нами директорию с виртуальным окружением.
manage.py — это другой скрипт, который помогает с управлением сайтом. С помощью него мы, помимо прочего, сможем запустить веб-сервер на твоем компьютере без установки дополнительных программ.
Файл settings.py содержит настройки для твоего веб-сайта.
Помнишь нашу аналогию с почтальоном? Файл urls.py содержит список шаблонов, по которым ориентируется urlresolver.
Давай пока забудем про остальные файлы — мы не будем их изменять. Только не удали их случайно!
Изменяем настройки
Давай внесём изменения в mysite/settings.py. Открой файл в текстовом редакторе, который ты выбрала ранее.
Примечание: помни, что settings.py — самый обычный файл. Ты можешь открыть его из своего редактора кода, используя меню «Файл -> Открыть». При этом ты увидишь обычное окно, в котором ты можешь перейти к своему файлу settings.py и выбрать его. Либо ты можешь открыть этот файл, перейдя в директорию проекта djangogirls на твоём рабочем столе и щёлкнув по нему правой кнопкой мыши; затем выбери свой редактор кода из предложенного списка. Важно выбрать именно редактор, поскольку у тебя могут быть установлены программы, которые откроют наш файл, но не позволят его изменить.
Было бы неплохо установить корректный часовой пояс на нашем сайте. Перейди к списку часовых поясов википедии и скопируй название своего часового пояса (TZ) (например, Europe/Moscow).
В файле settings.py найди строку, содержащую TIME_ZONE, и измени её в соответствии со своим часовым поясом:
mysite/settings.py
TIME_ZONE = 'Europe/Moscow'
Код языка состоит из сокращённого названия языка, например en для английского или ru для русского, и кода страны, например, ru для России или ch для Швейцарии. Тебе понадобится эта настройка, если ты хочешь, чтобы все встроенные кнопки и уведомления от Django были на твоём языке. Таким образом, надпись на кнопке «Cancel» будет переведена на заданный тобой язык. Django поставляется с большим набором готовых переводов.
Измени язык, отредактировав следующую строку:
mysite/settings.py
LANGUAGE_CODE = 'ru-ru'
Нам также необходимо добавить в настройки информацию о расположении статических файлов (мы познакомимся со статическими файлами и CSS в следующих главах). Спустись в конец файла и после переменной STATIC_URL добавь новую — STATIC_ROOT:
mysite/settings.py
STATIC_URL = '/static/'
STATIC_ROOT = BASE_DIR / 'static'
Когда наcтройка DEBUG имеет значение True, а настройка ALLOWED_HOSTS пуста, имя хост твоего веб-сайта сверяется со списком ['localhost', '127.0.0.1', '[::1]'].
Ни одно из значений не будет соответствовать имени хоста на PythonAnywhere при публикации нашего приложения, поэтому нам необходимо изменить следующую настройку:
mysite/settings.py
ALLOWED_HOSTS = ['127.0.0.1', '.pythonanywhere.com']
Примечание: В случае если вы используете Chromebook, добавьте следующую строку в конец файла settings.py:
MESSAGE_STORAGE = 'django.contrib.messages.storage.session.SessionStorage'
Настройка базы данных
Существует множество различных баз данных, которые могут хранить данные для твоего сайта. Мы будем использовать стандартную — sqlite3.
Она уже выбрана по умолчанию в файле mysite/settings.py:
mysite/settings.py
DATABASES = {
    'default': {
        'ENGINE': 'django.db.backends.sqlite3',
        'NAME': BASE_DIR / 'db.sqlite3',
    }
}
Чтобы создать базу данных для нашего блога, набери в командной строке следующее: python manage.py migrate (мы должны быть в директории djangogirls, где расположен файл manage.py). Если всё прошло успешно, то ты увидишь следующий результат:
command-line
(myvenv) ~/djangogirls$ python manage.py migrate
Operations to perform:
  Apply all migrations: auth, admin, contenttypes, sessions
Running migrations:
  Rendering model states... DONE
  Applying contenttypes.0001_initial... OK
  Applying auth.0001_initial... OK
  Applying admin.0001_initial... OK
  Applying admin.0002_logentry_remove_auto_add... OK
  Applying contenttypes.0002_remove_content_type_name... OK
  Applying auth.0002_alter_permission_name_max_length... OK
  Applying auth.0003_alter_user_email_max_length... OK
  Applying auth.0004_alter_user_username_opts... OK
  Applying auth.0005_alter_user_last_login_null... OK
  Applying auth.0006_require_contenttypes_0002... OK
  Applying auth.0007_alter_validators_add_error_messages... OK
  Applying sessions.0001_initial... OK
Вот и всё! Пришло время запустить веб-сервер и посмотреть, работает ли наш веб-сайт!
Запуск веб-сервера
Ты должна быть в директории, где расположен файл manage.py (в нашем случае — djangogirls). Запустим веб-сервер из командной строки: python manage.py runserver:
command-line
(myvenv) ~/djangogirls$ python manage.py runserver
Если ты работаешь в Windows, и команда падает с ошибкой UnicodeDecodeError, используй вместо неё другую:
command-line
(myvenv) ~/djangogirls$ python manage.py runserver 0:8000
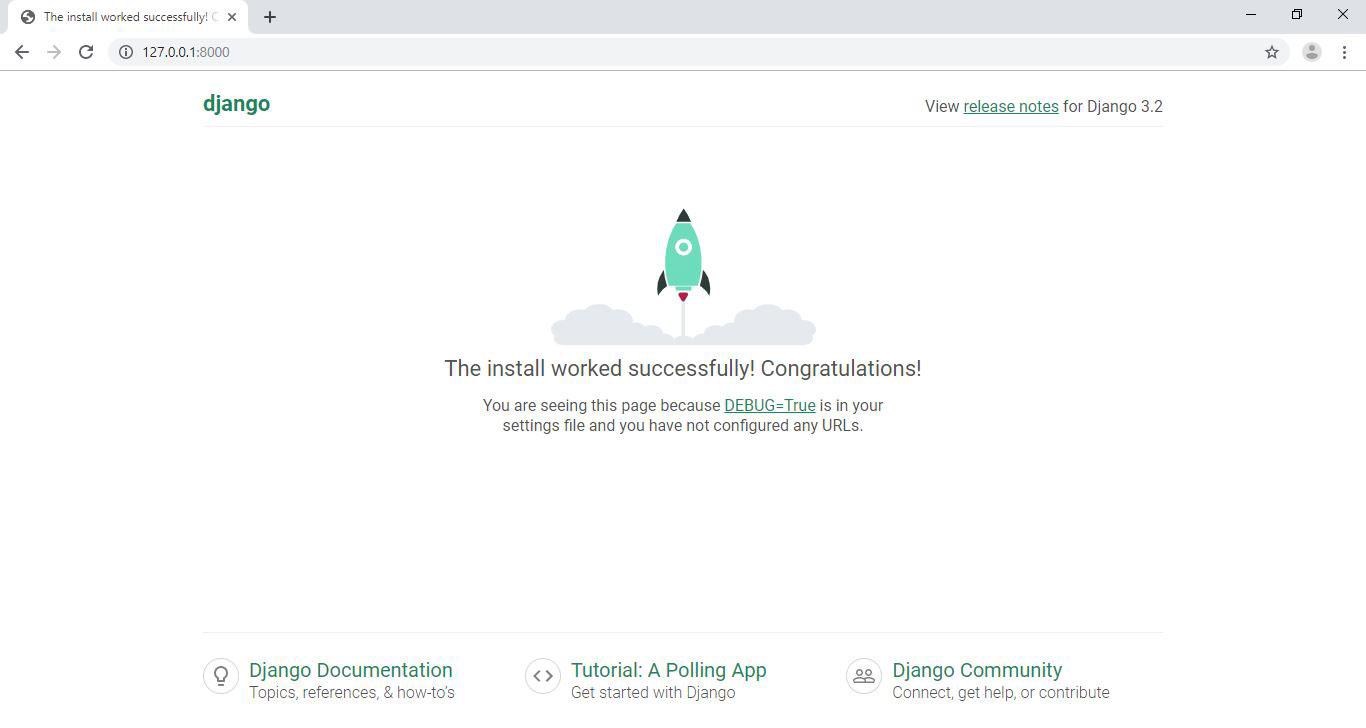
Теперь тебе нужно проверить, работает ли веб-сайт — открой браузер (Firefox, Chrome, Safari, Internet Explorer или любой другой) и набери следующий адрес:
browser
http://127.0.0.1:8000/
Если ты используешь Chromebook или Cloud9, вместо этого нажми на ссылку во всплывающем окне, которая должна появиться в правом верхнем углу командного окна, в котором запущен веб сервер. Ссылка может выглядеть так:
browser
https://<странные буквы и цифры>.vfs.cloud9.us-west-2.amazonaws.com
Поздравляем! Ты только что создала свой первый веб-сайт и запустила его на веб-сервере! Ну не круто ли?
Пока работает веб-сервер, в терминале не будет приглашения для ввода команд. Ты всё ещё сможешь ввести текст, но не сможешь выполнить никакую другую команду. Это происходит потому, что сервер продолжает работу, «слушая» входящие запросы.
Мы рассматривали, как работают веб-сервера, в главе Как работает интернет.
Веб-сервер займёт командную строку, пока ты его не остановишь. Чтобы и дальше иметь возможность набирать команды, открой ещё одно окно терминала и активируй в нём виртуальное окружение. Чтобы остановить веб-сервер, перейди обратно в окно, в котором он работает, и нажми CTRL + C — кнопки Control и C вместе (в Windows может потребоваться нажать клавиши Ctrl + Break).
Готова к следующему шагу? Пришло время создать содержимое для нашего блога!
How to install Django on Windows
This document will guide you through installing Python 3.8 and Django on
Windows. It also provides instructions for setting up a virtual environment,
which makes it easier to work on Python projects. This is meant as a beginner’s
guide for users working on Django projects and does not reflect how Django
should be installed when developing patches for Django itself.
The steps in this guide have been tested with Windows 10. In other
versions, the steps would be similar. You will need to be familiar with using
the Windows command prompt.
Install Python
Django is a Python web framework, thus requiring Python to be installed on your
machine. At the time of writing, Python 3.8 is the latest version.
To install Python on your machine go to https://www.python.org/downloads/. The
website should offer you a download button for the latest Python version.
Download the executable installer and run it. Check the boxes next to “Install
launcher for all users (recommended)” then click “Install Now”.
After installation, open the command prompt and check that the Python version
matches the version you installed by executing:
About pip
pip is a package manager for Python and is included by default with the
Python installer. It helps to install and uninstall Python packages
(such as Django!). For the rest of the installation, we’ll use pip to
install Python packages from the command line.
Setting up a virtual environment
It is best practice to provide a dedicated environment for each Django project
you create. There are many options to manage environments and packages within
the Python ecosystem, some of which are recommended in the Python
documentation.
Python itself comes with venv for managing
environments which we will use for this guide.
To create a virtual environment for your project, open a new command prompt,
navigate to the folder where you want to create your project and then enter the
following:
...\> py -m venv project-name
This will create a folder called ‘project-name’ if it does not already exist
and set up the virtual environment. To activate the environment, run:
...\> project-name\Scripts\activate.bat
The virtual environment will be activated and you’ll see “(project-name)” next
to the command prompt to designate that. Each time you start a new command
prompt, you’ll need to activate the environment again.
Install Django
Django can be installed easily using pip within your virtual environment.
In the command prompt, ensure your virtual environment is active, and execute
the following command:
...\> py -m pip install Django
This will download and install the latest Django release.
After the installation has completed, you can verify your Django installation
by executing django-admin --version in the command prompt.
See Get your database running for information on database installation
with Django.
Colored terminal output
A quality-of-life feature adds colored (rather than monochrome) output to the
terminal. In modern terminals this should work for both CMD and PowerShell. If
for some reason this needs to be disabled, set the environmental variable
DJANGO_COLORS to nocolor.
On older Windows versions, or legacy terminals, colorama must be
installed to enable syntax coloring:
...\> py -m pip install colorama
See Syntax coloring for more information on color settings.
Common pitfalls
-
If
django-adminonly displays the help text no matter what arguments
it is given, there is probably a problem with the file association in
Windows. Check if there is more than one environment variable set for
running Python scripts inPATH. This usually occurs when there is more
than one Python version installed. -
If you are connecting to the internet behind a proxy, there might be problems
in running the commandpy -m pip install Django. Set the environment
variables for proxy configuration in the command prompt as follows:...\> set http_proxy=http://username:password@proxyserver:proxyport ...\> set https_proxy=https://username:password@proxyserver:proxyport
-
In general, Django assumes that
UTF-8encoding is used for I/O. This may
cause problems if your system is set to use a different encoding. Recent
versions of Python allow setting thePYTHONUTF8environment
variable in order to force aUTF-8encoding. Windows 10 also provides a
system-wide setting by checkingUse Unicode UTF-8 for worldwide languagein Language ‣ Administrative Language Settings
support
‣ Change system locale in system settings.
Время на прочтение
4 мин
Количество просмотров 24K
В данной статье будет представлена подробная инструкция по установке и настройке программ Apache, Python и PostgreSQL для обеспечения работы Django проекта в ОС MS Windows. Django уже включает в себя упрощенный сервер разработки для локального тестирования кода, но для задач, связанных с продакшен, требуется более безопасный и мощный веб-сервер. Мы настроим mod_wsgi для взаимодействия с нашим проектом и настроим Apache в качестве шлюза в внешний мир.
Стоит отметить, что установка и настройка будет производиться в ОС MS Windows 10 с 32 разрядностью. Также 32 битная реакция будет универсальна и будет работать на 64 битной архитектуре. Если вам нужна 64 битная установка повторите те же действия для 64 битных дистрибутивов программ, последовательность действий будет идентична.
В качестве Django проекта будем использовать программу Severcart. Она предназначена для управления перемещениями картриджей, учёта печатающего оборудования и договоров поставки и обслуживания. Установка всех программ и модулей будет производиться в каталог C:\severcart. Местоположение не принципиально.
Python
Первым шагом является загрузка и установка Python с веб-сайта Python. Выбираем Windows в качестве операционной системы и 32-битную версию. На момент написания статьи текущей версией является 3.9.0rc2.
Загрузив файл установки, щелкните правой кнопкой мыши файл установки и выберите «Запуск от имени администратора». Вы должны увидеть экран ниже
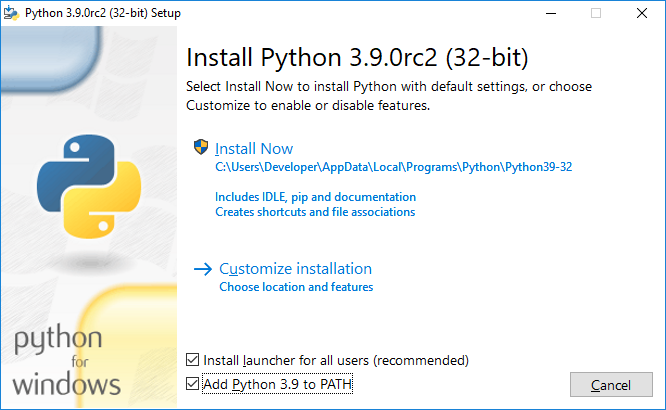
Устанавливаем галочки напротив чекбоксов «Install launcher for add user (recomended)» и «Add Python 3.9 to PATH» и нажимаем на «Customize installation».

Устанавливаем галочки на против «pip», «py launcher», «for all users (requires elevation)» и нажимаем «Next».
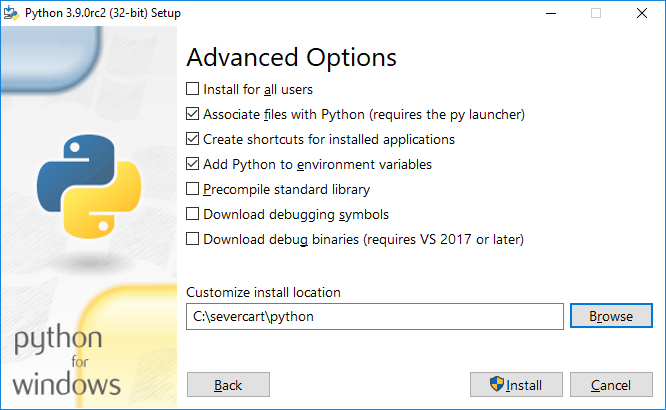
Выбираем все поля ввода как на картинке выше и нажимаем на «Install».
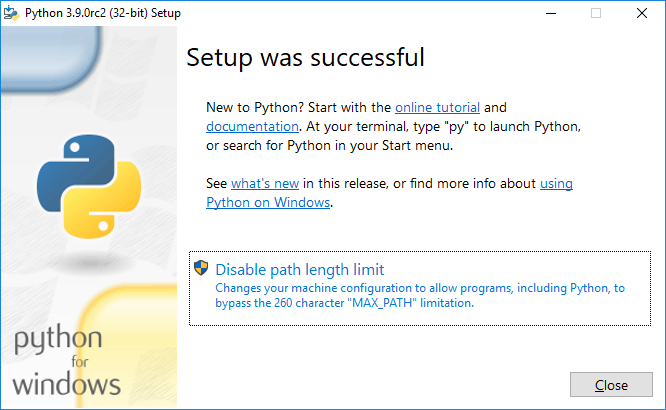
Чтобы убедиться, что установка прошла успешно, откройте cmd и введите python. Если установка прошла успешно, вы должны увидеть приглашение, подобный приведенному ниже

Устанавливаем mod_wsgi
Скачиваем скомпилированный пакет с mod_wsgi c сайта
www.lfd.uci.edu/~gohlke/pythonlibs. Модуль выполняет функции посредника межу сервером Apache и Django проектом. Самый свежий пакет будет с именем mod_wsgi-4.7.1-cp39-cp39-win32.whl. Обратите внимание, что пакет скомпилирован для 32 битной Windows CPython версии 3.9. Также стоит отметить, что очевидная установка модуля pip install mod_wsgi скорее всего завершится ошибкой, т.к. в процессе установки потребуется компилятор Visual Studio C++. Ставить компилятор целиком ради одного Python пакета в Windows считаем нецелесообразным.
Устанавливаем модуль с помощью стандартного пакетного менеджера pip в cmd или powershell:
pip install -U mod_wsgi-4.7.1-cp39-cp39-win32.whl

Apache
Скачиваем дистрибутив с сайта https://www.apachelounge.com/download/.
Самая свежая версия Web-сервера является Apache 2.4.46 win32 VS16. Также для работы программы понадобиться заранее установленный пакет «Visual C++ Redistributable for Visual Studio 2019 x86».
Распаковываем дистрибутив Apache в каталог C:\severcart\Apache24, далее меняем строку с номером 37 на свою
Define SRVROOT "C:/severcart/Apache24"
Проверяем работу Apache, выполнив в командной строке
C:/severcart/Apache24/bin> httpd.exe
В результате должны увидеть в браузере по адресу 127.0.0.1 строку «It works!».

Устанавливаем службу Apache, для этого выполним в командной строке от имени Администратора инструкцию:
C:\severcart\Apache24\bin>httpd.exe -k install -n "Apache24"
Далее подключим модуль mod_wsgi к Apache. Для этого выполним в командной строке инструкцию
C:\Windows\system32>mod_wsgi-express module-config
В результате в стандартный вывод будет распечатаны строки:
LoadFile "c:/severcart/python/python39.dll"
LoadModule wsgi_module "c:/severcart/python/lib/site-packages/mod_wsgi/server/mod_wsgi.cp39-win32.pyd"
WSGIPythonHome "c:/severcart/python"
Создаем файл C:\severcart\Apache24\conf\extra\httpd-wsgi.conf и копипастим туда распечатанные строки выше.
Подключаем новую конфигурацию к основному файлу httpd.conf
Include conf/extra/httpd-wsgi.conf
Сохраняем изменения, перезагружаем службы Apache
Net stop Apache24
Net start Apache24
PostgreSQL
Устанавливаем PostgreSQL взятый с сайта https://postgrespro.ru/windows. Текущая версия программного продукта – 12. Преимущества Российского дистрибутива от канонического представлены на том же сайте.


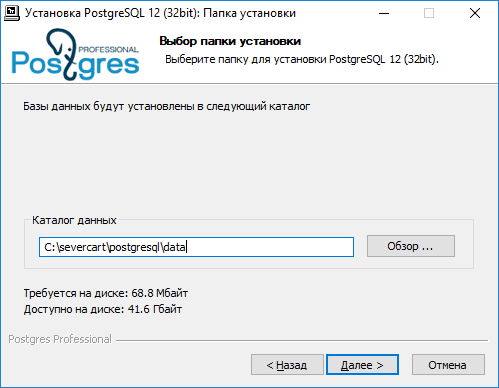

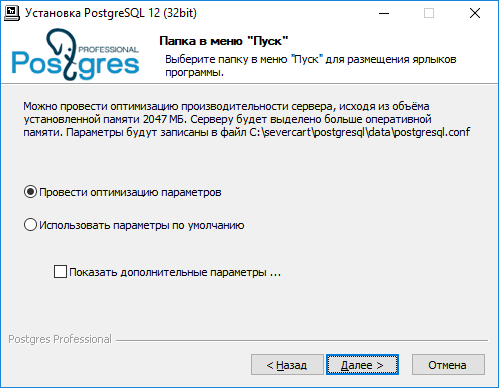
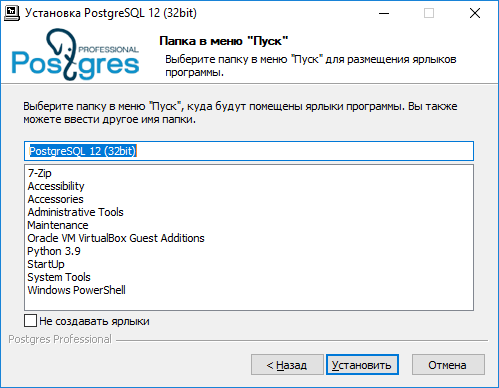
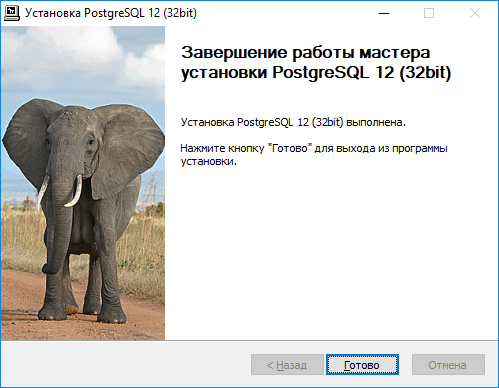
Действия по установке представлены выше и комментариях не нуждаются. Установка крайне проста.
Создаем БД в postgres, где потом будут храниться структуры данных Django проекта
C:\severcart\postgresql\bin>psql -h 127.0.0.1 -U postgres -W

CREATE DATABASE severcart WITH ENCODING='UTF8' OWNER=postgres CONNECTION LIMIT=-1 template=template0;

БД создана. Теперь разворачиваем Django проект.
Устанавливаем web приложение
Для этого скачиваем zip архив с сайта https://www.severcart.ru/downloads/ и распаковываем в каталог C:\severcart\app\

Вносим изменения в главный конфигурационный файл C:\severcart\app\conf\settings_prod.py для указания реквизитов подключения к БД
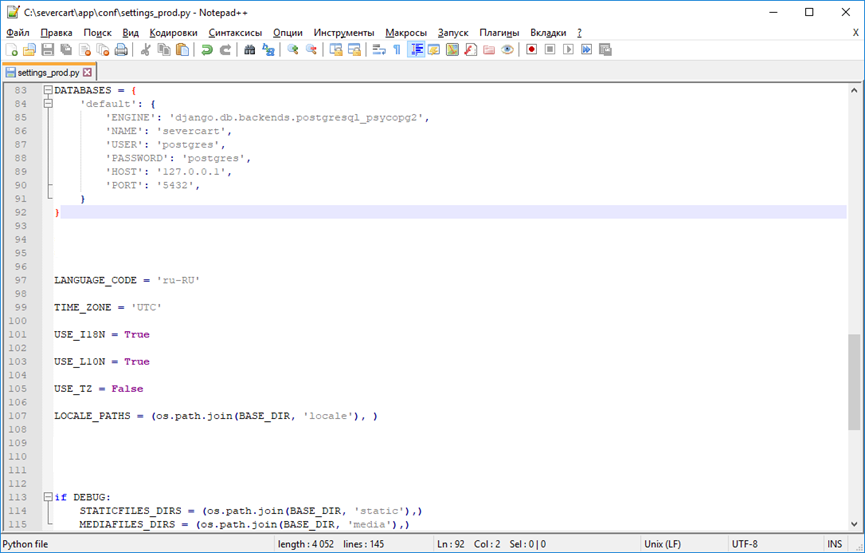
Python словарь DATABASES содержит в себе реквизиты подключения к БД. Подробности по настройке читайте здесь https://docs.djangoproject.com/en/3.1/ref/databases/#connecting-to-the-database
Устанавливаем Python пакеты значимостей для работы приложений внутри Django проекта
C:\severcart\app\tkinstaller>python install.py

В процессе работы скрипта будет произведена инициализация БД таблицами, констрейтами, индексами и прочим, а будет предложено создать пользователя, от имени которого будет производиться работа в программе.
Подключаем Django приложение к серверу Apache для этого дополняем конфигурационный файл
httpd-wsgi.conf следующим текстом
Alias /static "c:/severcart/app/static"

Alias /media "c:/severcart/app/media"

<Directory "c:/severcart/app/static">
    # for Apache 2.4
    Options Indexes FollowSymLinks
    AllowOverride None
    Require all granted
</Directory>

<Directory "c:/severcart/app/media">
    # for Apache 2.4
    Options Indexes FollowSymLinks
    AllowOverride None
    Require all granted
</Directory>


WSGIScriptAlias / "c:/severcart/app/conf/wsgi_prod.py"
WSGIPythonPath "c:/severcart/python/"

<Directory "c:/severcart/app/conf/">
<Files wsgi_prod.py>
    Require all granted
</Files>
</Directory>
Перезагружаем службу Apache и проверяем работу приложения
На этом все. Спасибо что дочитали.
В следующей статье будем создавать установочный самораспаковывающийся архив в InnoSetup для быстрого развертывания Django проекта на компьютере заказчика. Для тех кто хочет повторить все действия на Яндекс.Диск загружены все используемые дистрибутивы.
Choose a different version or distribution
Introduction
Before we begin talking about how to install Django on Windows, let’s briefly understand — What is Django?
Django is a powerful framework useful for writing Python web applications. It is full of features that allow getting your applications as well as sites up. It’s a framework that lets you focus on the unique portions of the application even let the tools do the heavy lifting.
In this tutorial, you will install Django on Windows. We will also address a few FAQs on how to install Django on Windows.
Advantages of Django
- Rapid development: Django’s built-in features and utilities allow for faster development of secure and scalable web applications.
- Pythonic simplicity: Django’s intuitive design and clean syntax make it easier to write and maintain code, resulting in increased productivity.
- Batteries included: Django comes with numerous ready-to-use components and plug-ins, reducing the need for third-party libraries and saving development time.
- Excellent documentation: Django provides thorough and well-organized documentation, making it easier for developers to learn and implement the framework.
- Robust security: Django includes various security features, such as user authentication and protection against common web vulnerabilities, ensuring the safety of web applications.
Prerequisites
- Make sure you have Python installed on your system.
- Powershell
💡
The commands mentioned in this article are tested on Powershell. Most of them will work on Windows Command Prompt (CMD) as well with a few exceptions but for a smooth experience, we would recommend using Powershell.
Step 1 — Open Powershell
1) Firstly, you need to open Powershell. There are two ways in which you can do that. Either search for Powershell in the Windows search box or open the Run dialog box with (WIN+R). Once the dialog box is open, type Powershell and click OK.
Once the Powershell window is open, you will verify Python installation in the next section.
Step 2 — Verify Python Installation
Before installing Django, you need to make sure that Python is installed on your system.
Type the following command to verify the installation:
python -V
You will get the below output:
Output

PS C:\Users\Username> python -V
Python 3.9.7
At the time of writing this article, I have Python version 3.9.7 and yours may be different, but the output will confirm if you have Python installed or not.
Step 3 — Upgrade Pip
Pip comes by default with Python but generally with an old version. Use the following command to upgrade pip:
python -m pip install --upgrade pip
Step 4 — Create Project Directory
Now, create a project directory in which you will keep the Django repository. Name the project based on your choice.
1) cd into your Desktop directory:
cd Desktop
2) Use the following command to create a directory:
mkdir demo_project
3) Now, enter the newly-created directory using the below command:
cd demo_project
Step 5 — Create a Virtual Environment
1) In this step, you will create a virtual environment for you project. With the help of a virtual environment, you can create an isolated environment that won’t affect other Python projects.
If you are not using a virtual environment, all your projects will be using the same Django version installed globally. It can lead your projects to fail when there is an update in Django with breaking changes.
Use the following command to create a virtual environment:
python -m venv venv
The above command will create a directory called venv inside your project directory.
Confirm if the venv directory has been created using the below command:
ls
Step 6 — Activate the Virtual Environment
1) Now, you will activate the virtual environment in your directory.
Run the following command:
venv\Scripts\activate
Once, it is activated you will see venv at the beginning:
(venv) PS C:\Users\Stanley\Desktop\django_project>
Step 7 — Install Django on Windows
1) You will be installing Django using pip, execute the following command:
pip install django
The above command will install the latest version of Django.
2) In case you want to install a different Django version, mention the version as follows:
pip install django==3.1
3) Now, verify if the installation has been done successfully:
django-admin --version
4) You will get an output like below:
Output

PS C:\users\stanley\Desktop\django_project> django-admin --version
3.9.7
Step 8 — Create a Django Project
1) You can create your first Django project using the following command:
django-admin startproject test_project
2) Move to the test_prohect:
cd test_project
3) Type the following command to see the contents of the project directory:
ls test_project
Step 9 — Run the Development Server
1) Once the project is created, start the Django development server:
python manage.py runserver
2) Now, you can access your project at http://127.0.0.1:8000/.
3) If you want to stop the server, press CTRL+C and to deactivate the virtual environment type deactivate.
FAQs to Install Django on Windows
Is it necessary to create a virtual environment for Django?
Although not mandatory, it is recommended to create a virtual environment to isolate your Django project’s dependencies and avoid version conflicts with other projects.
How do I create a virtual environment on Windows?
Open the command prompt, navigate to your project’s directory, and run python -m venv env to create a virtual environment named «env».
How do I activate the virtual environment on Windows?
In the command prompt, navigate to your project’s directory and run .\env\Scripts\activate to activate the virtual environment.
Can I install Django inside a virtual environment?
Yes, activate the virtual environment, then use pip install django to install Django specifically within that environment.
How do I start a new Django project on Windows?
Navigate to your desired project directory, activate the virtual environment, and run django-admin startproject projectname to create a new Django project.
How do I run the Django development server on Windows?
Navigate to the project directory where the ‘manage.py’ file is located. Activate the virtual environment and run python manage.py runserver to start the development server.
How can I verify if Django is correctly installed on Windows?
Open the command prompt, navigate to your project directory, activate the virtual environment, and run python -m django --version. It will display the installed Django version if it is installed correctly.
Conclusion
We hope this detailed guide helped you to install Django on Windows.
If you have any queries, please leave a comment below, and we’ll be happy to respond to them for sure.
Introduction
The Python ecosystem has a lot of web frameworks. One that has consistently been popular is the Django framework. It’s popular for being robust, secure, and allows developers to develop projects fast and meet their deadlines. It is free and open-source, and it works on both Windows and *nix systems.
In this tutorial, you will learn how to install Django on Windows using pip. After that, you will verify the installation, create a project, and start a Django development server.
Prerequisites
Before you install Django, you must make sure that Python is installed on your system. You can check out this guide — how to install python on windows to learn how to do it.
The commands that you will run in this tutorial were tested on the PowerShell shell, but most commands should work on Windows Command Prompt(CMD) with a few exceptions. For a smooth experience, I would suggest you use PowerShell for this tutorial.
Step 1 — Opening PowerShell
First, you need to open PowerShell on your computer. You can do that by searching for PowerShell in the Windows search box or you can open the Run dialog box by holding the Windows logo key and R(WIN+R). Once the dialog is open, type powershell, and then click OK.
You should now have the PowerShell window opened.
Now that you have opened PowerShell on your computer, you’ll verify the installation of Python in the next section.
Step 2 — Verifying Python Installation
Before you install Django, first, you need to make sure that you installed Python on your system.
To do that, type the following command in PowerShell prompt to verify the installation:
- python -V
-V option logs the Python version installed on your system.
After running the command, you should see output like this:
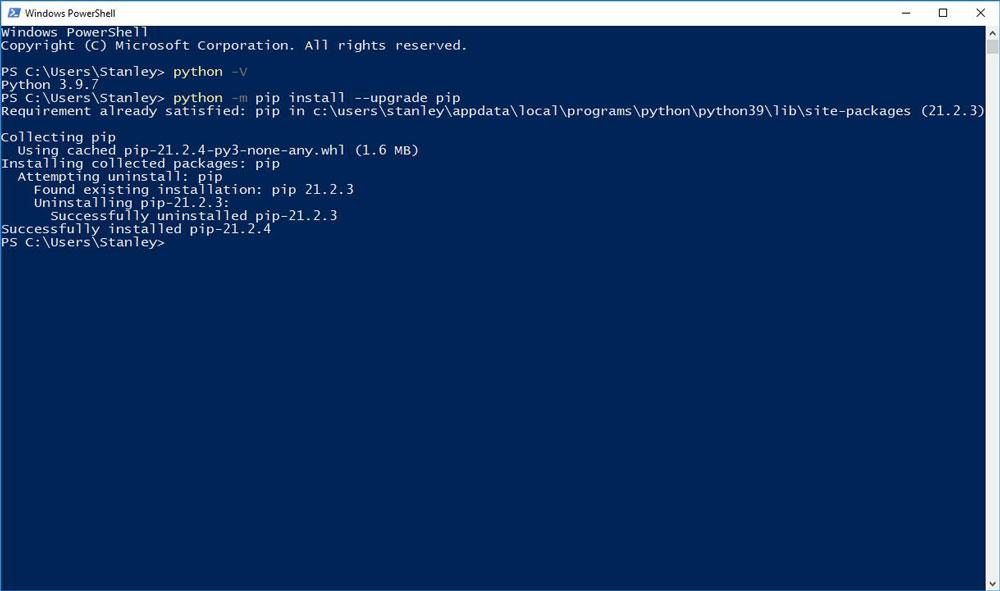
PS C:\Users\Username> python -V
Python 3.9.7
At the time of writing, it is Python 3.9.7. You might have a different version from mine, and that’s fine. As long as you see the Python version logged, Python is installed on your system.
Now that you’ve confirmed Python is installed on your system, you will upgrade pip.
Step 3 — Upgrading Pip
Python comes with pip by default. But most of the time, it comes with an old version. it’s always a good practice to upgrade pip to the latest version.
Enter the following command to upgrade pip on your system:
- python -m pip install --upgrade pip
You’ll get output identical to the following screenshot showing you that the upgrade was a success:
Now you’ve upgraded pip, you’ll create the project directory where you’ll install Django.
Step 4 — Creating a Project Directory
In this section, you will create a directory that will contain your Django application. We will name it django_project since this tutorial is a demo. But in a real project, you can give the directory a suitable name, such as forum, blog, etc.
Change into your Desktop directory with the cd command:
- cd Desktop
Create the directory using the mkdir command:
- mkdir django_project
Move into the django_project directory using the cd command:
- cd django_project
Your prompt should now show you that you’re in the django_project directory as shown in the following output:
- PS C:\Users\Stanley\Desktop\django_project>
Now that you’ve created the working directory for your project, you’ll create a virtual environment where you’ll install Django.
Step 5 — Creating the Virtual Environment
In this step, you’ll create a virtual environment for your project. A virtual environment is an isolated environment in Python where you can install the project dependencies without affecting other Python projects. This lets you create different projects that use different versions of Django.
If you don’t use a virtual environment, your projects in your system will use the same Django version installed globally. This might look like a good thing until the latest version of Django comes out with breaking changes causing your projects to fail altogether.
You can learn more about the virtual environment by following Python Virtual Environments: A Primer.
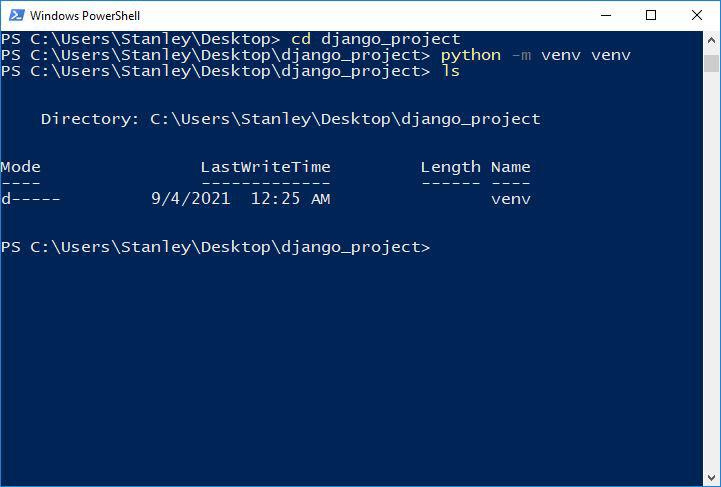
To create a virtual environment, type the following command and wait for a few seconds:
- python -m venv venv
The command will create a directory called venv inside your project directory.
Next, confirm the venv directory has been created by listing the directory contents using the ls command:
- ls
You should see the directory venv in the output as shown in the following screenshot:
Now you’ve created the virtual environment directory, you’ll activate the environment.
Step 6 — Activating the Virtual Environment
In this section, you’ll activate the virtual environment in your directory.
Run the following command to activate the virtual environment:
- venv\Scripts\activate
After you run the command, you will see
a (venv) at the beginning of the prompt. This shows that the virtual environment is activated:
(venv) PS C:\Users\Stanley\Desktop\django_project>
If you run into the error shown in the following screenshot on PowerShell when activating the virtual environment, for the sake of brevity, I described the reason and the solution in another post. Follow Solution to «Running Scripts Is Disabled On This System» Error on PowerShell and don’t close your PowerShell:

Now that you’ve activated the virtual environment for your project, the moment you’ve been waiting for is here. It’s time to install Django!
Step 7 — Installing Django
In this section, you will install Django on your system using pip.
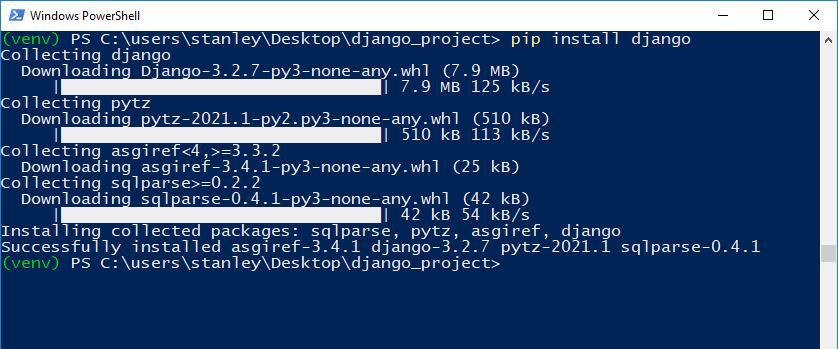
Run the following command to install Django using pip install:
- pip install django
The command will install the latest version of Django. You should see Django being downloaded as shown in the following screenshot:
If you want to install a different Django version, you can specify the version as follows:
- pip install django==3.1
Once the installation finishes, you need to verify that Django has been installed. To do that, type the following command:
- django-admin --version
You will get output showing you the Django version installed on your system:
(venv) PS C:\users\stanley\Desktop\django_project> django-admin --version
3.2.7
At the time of writing, the latest Django version is 3.2.7, and that’s why my output shows that.
You’ve now installed Django on your system, great job! You’ll begin to create a Django project.
Step 8 — Creating the Django Project
Now it’s time to create a project. A project has a different meaning from what you may be used to. The Django documentation defines it as:
A Python package – i.e. a directory of code – that contains all the settings for an instance of Django. This would include database configuration, Django-specific options and application-specific settings.
You create a project by using the command-line utility django-admin that comes with Django. The command generates files where you can configure the settings for your database, add third-party packages for your project to mention a few.
Create the project using the django-admin startproject command:
- django-admin startproject test_project
Change into the test_project directory:
- cd test_project
Type the following command to see the contents in the project directory:
- ls test_project
You will get output similar to this:
Output
(venv) PS C:\users\stanley\Desktop\django_project\test_project> ls
Directory: C:\users\stanley\Desktop\django_project\test_project
Mode LastWriteTime Length Name
---- ------------- ------ ----
d----- 9/4/2021 1:25 AM test_project
-a---- 9/4/2021 1:25 AM 690 manage.py
The directory test_project contains Django configuration files. The manage.py file comes in handy when starting a development server, and that’s what you will do in the next step.
Step 9 — Running the Development Server
Now that the project has been created, we will start the Django development server.
Start the development server using the manage.py runserver command:
- python manage.py runserver
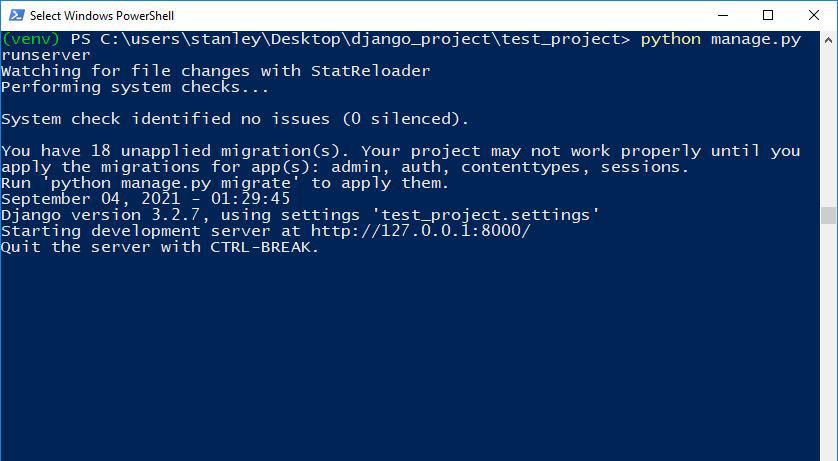
Next, visit http://127.0.0.1:8000/ in your web browser. You should see a page similar to the following screenshot:
Tip You can stop the server by holding CTRL+C. To deactivate the virtual environment, you can type deactivate on the prompt.
Now, you are ready to start developing your project.
Conclusion
You have come to the end of this tutorial, you learned how to install Django on Windows, verifying the installation and you also learned how to create a Django project, and start a development server. You can visit Django’s official tutorial to learn how to build an application, see Writing your first Django app, part 1.
Thank you for reading and don’t forget to follow me on Twitter for more tips.